Week 5: 3D Scanning and Printing
3D Scanning and Printing
Assignment activities:
Group assignment: Test the design rules for your 3D printer(s) Individual assignment:- 1. Design and 3D print an object (small, few cm3, limited by printer time)
that could not be made subtractively
- 2. 3D scan an object (and optionally print it)
I. Group Assignment
If you want to explore the group Assignment Click Here In thi group Assignment we Test the design rules for your 3D printer(s): Before using a 3D printer, it's important to perform some tests to ensure that the printer is in good working condition and that it can produce high-quality prints. Here are some tests that you can perform on a 3D printer:- 1. Extrusion Speed : Extrude a small amount of filament to make sure that the printer is properly loaded and that the filament is flowing smoothly.
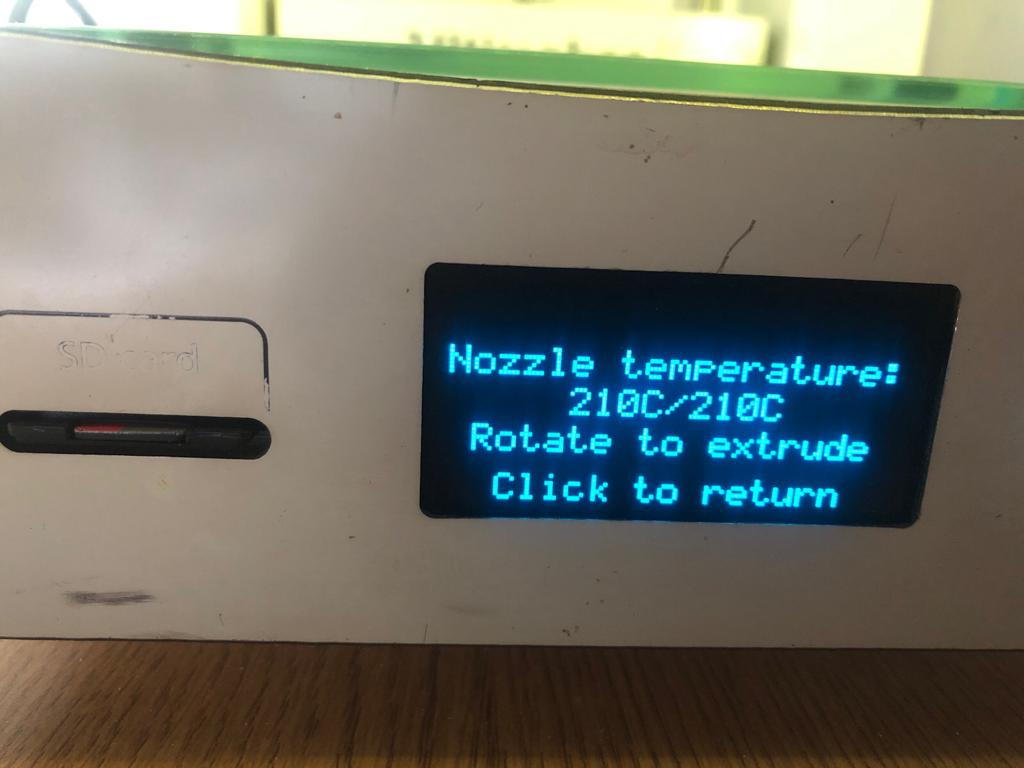
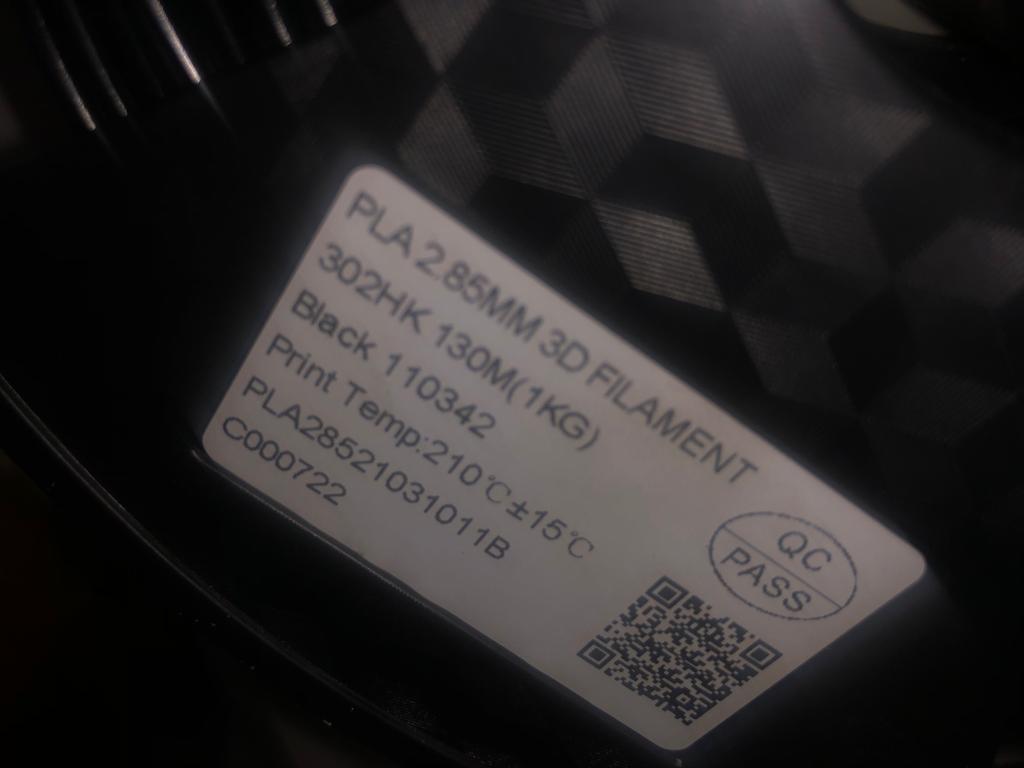
- 2. Nozzle Temperature control: Set the nozzle and bed temperatures to the recommended settings for the filament you are using and monitor the temperature to make sure it is consistent.
- 3. Bed Temperature:bed temperature, it's also important to ensure that the build plate is clean and free from debris, to help prevent issues such as uneven adhesion or warping
- 4. Build Speed: Print a small calibration cube or another test model at different speeds to find the optimal speed for your printer and filament.
- 4. Infill:
 Extrusion Speed
In general, a good extrusion speed for the Ultimaker 2+ is between 20-60 mm/s, depending on the factors mentioned above. Slower speeds are recommended for more intricate or detailed prints or when using materials that require more precise temperature control, such as ABS. On the other hand, faster speeds can be used for simpler designs and when using materials that have a wider temperature range, such as PLA.
Extrusion Speed
In general, a good extrusion speed for the Ultimaker 2+ is between 20-60 mm/s, depending on the factors mentioned above. Slower speeds are recommended for more intricate or detailed prints or when using materials that require more precise temperature control, such as ABS. On the other hand, faster speeds can be used for simpler designs and when using materials that have a wider temperature range, such as PLA.
 2. Nozzle Temperature control
The optimal nozzle temperature for the Ultimaker 2+ depends on the type of filament being used. Here are some general guidelines:
2. Nozzle Temperature control
The optimal nozzle temperature for the Ultimaker 2+ depends on the type of filament being used. Here are some general guidelines:
- 1. PLA: : 190-220°C
- 2. ABS: 230-260°C
- 3. Nylon: 240-260°C
- 4. PETG: 220-250°C
 3.Bed Temperature:
The optimal bed temperature for the Ultimaker 2+ depends on the type of filament being used. Here are some general guidelines:
3.Bed Temperature:
The optimal bed temperature for the Ultimaker 2+ depends on the type of filament being used. Here are some general guidelines:
- 1. PLA: : 60-70°C
- 2. ABS: 90-100°C
- 3. Nylon: 70-80°C
- 4. PETG: 70-80°C
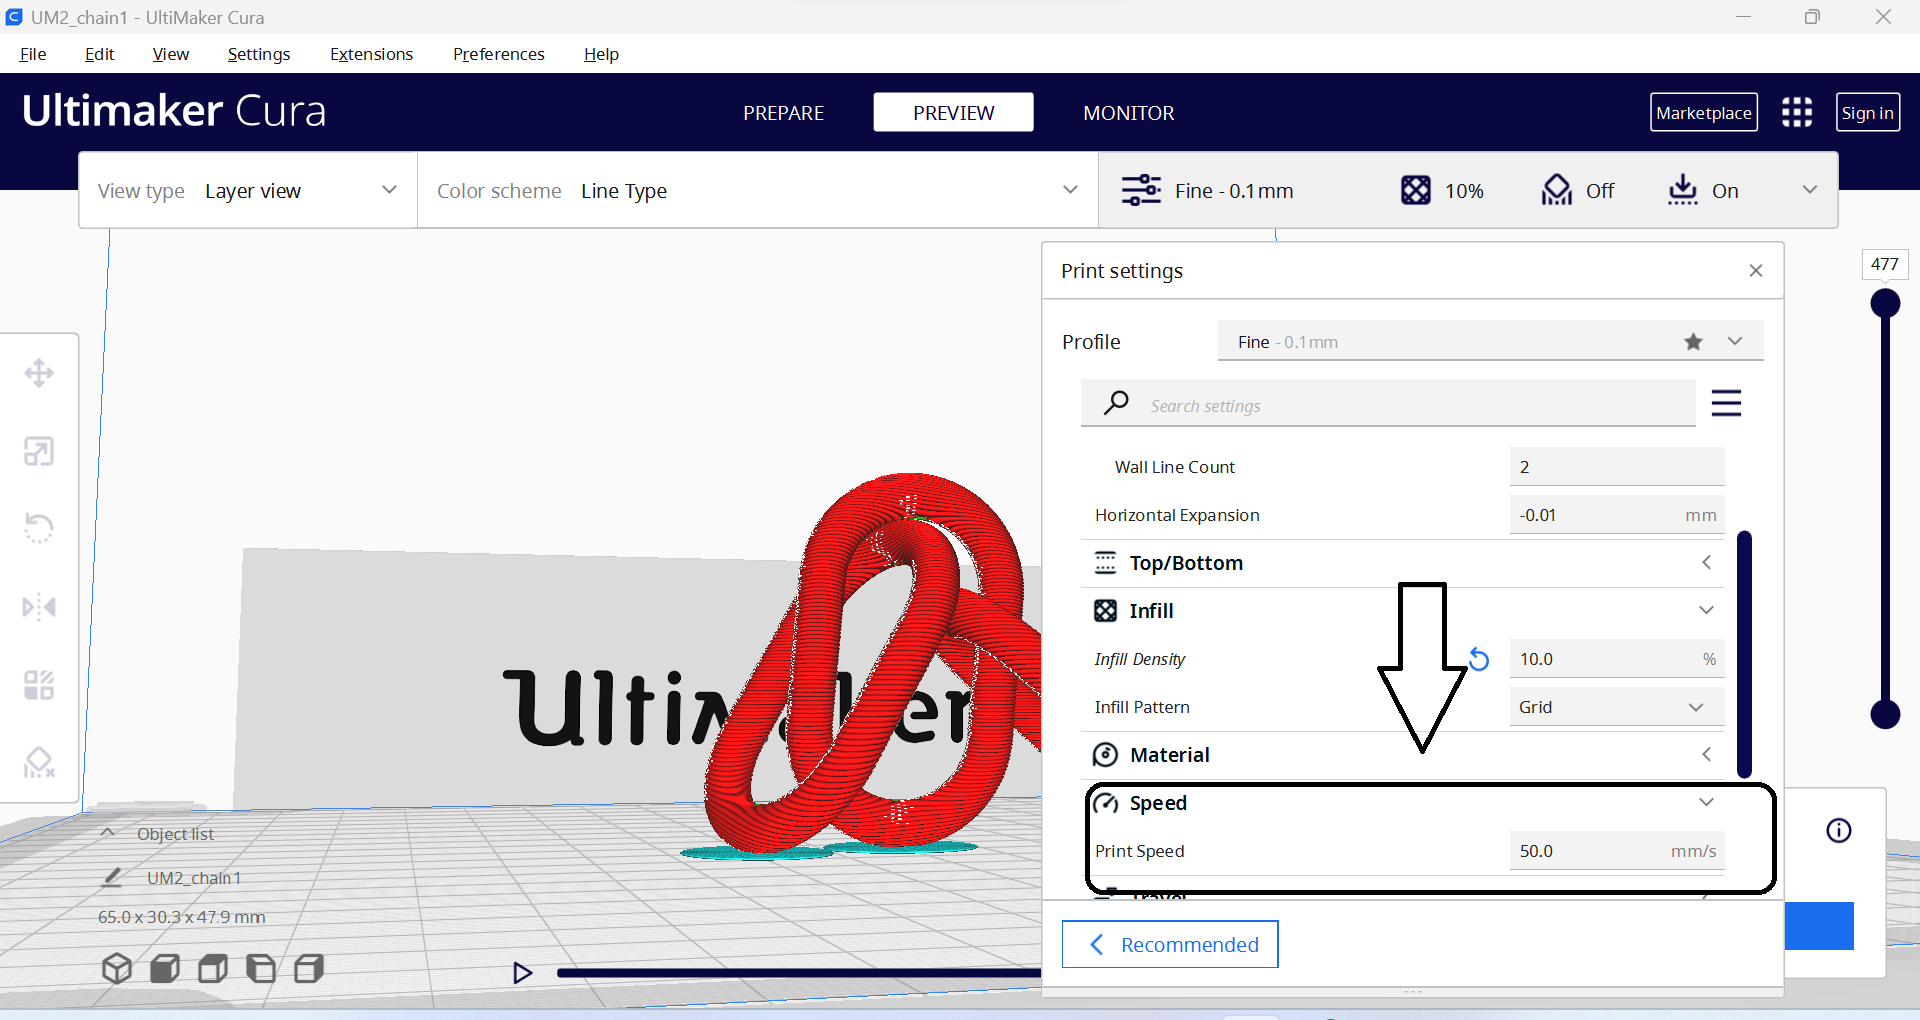
 4.Printing Speed
In General a good printing speed for the Ultimaker 2+ is between 30-60 mm/s, depending on the factors mentioned above. Slower speeds are recommended for more intricate or detailed prints or when using materials that require more precise temperature control, such as ABS. On the other hand, faster speeds can be used for simpler designs and when using materials that have a wider temperature range, such as PLA.
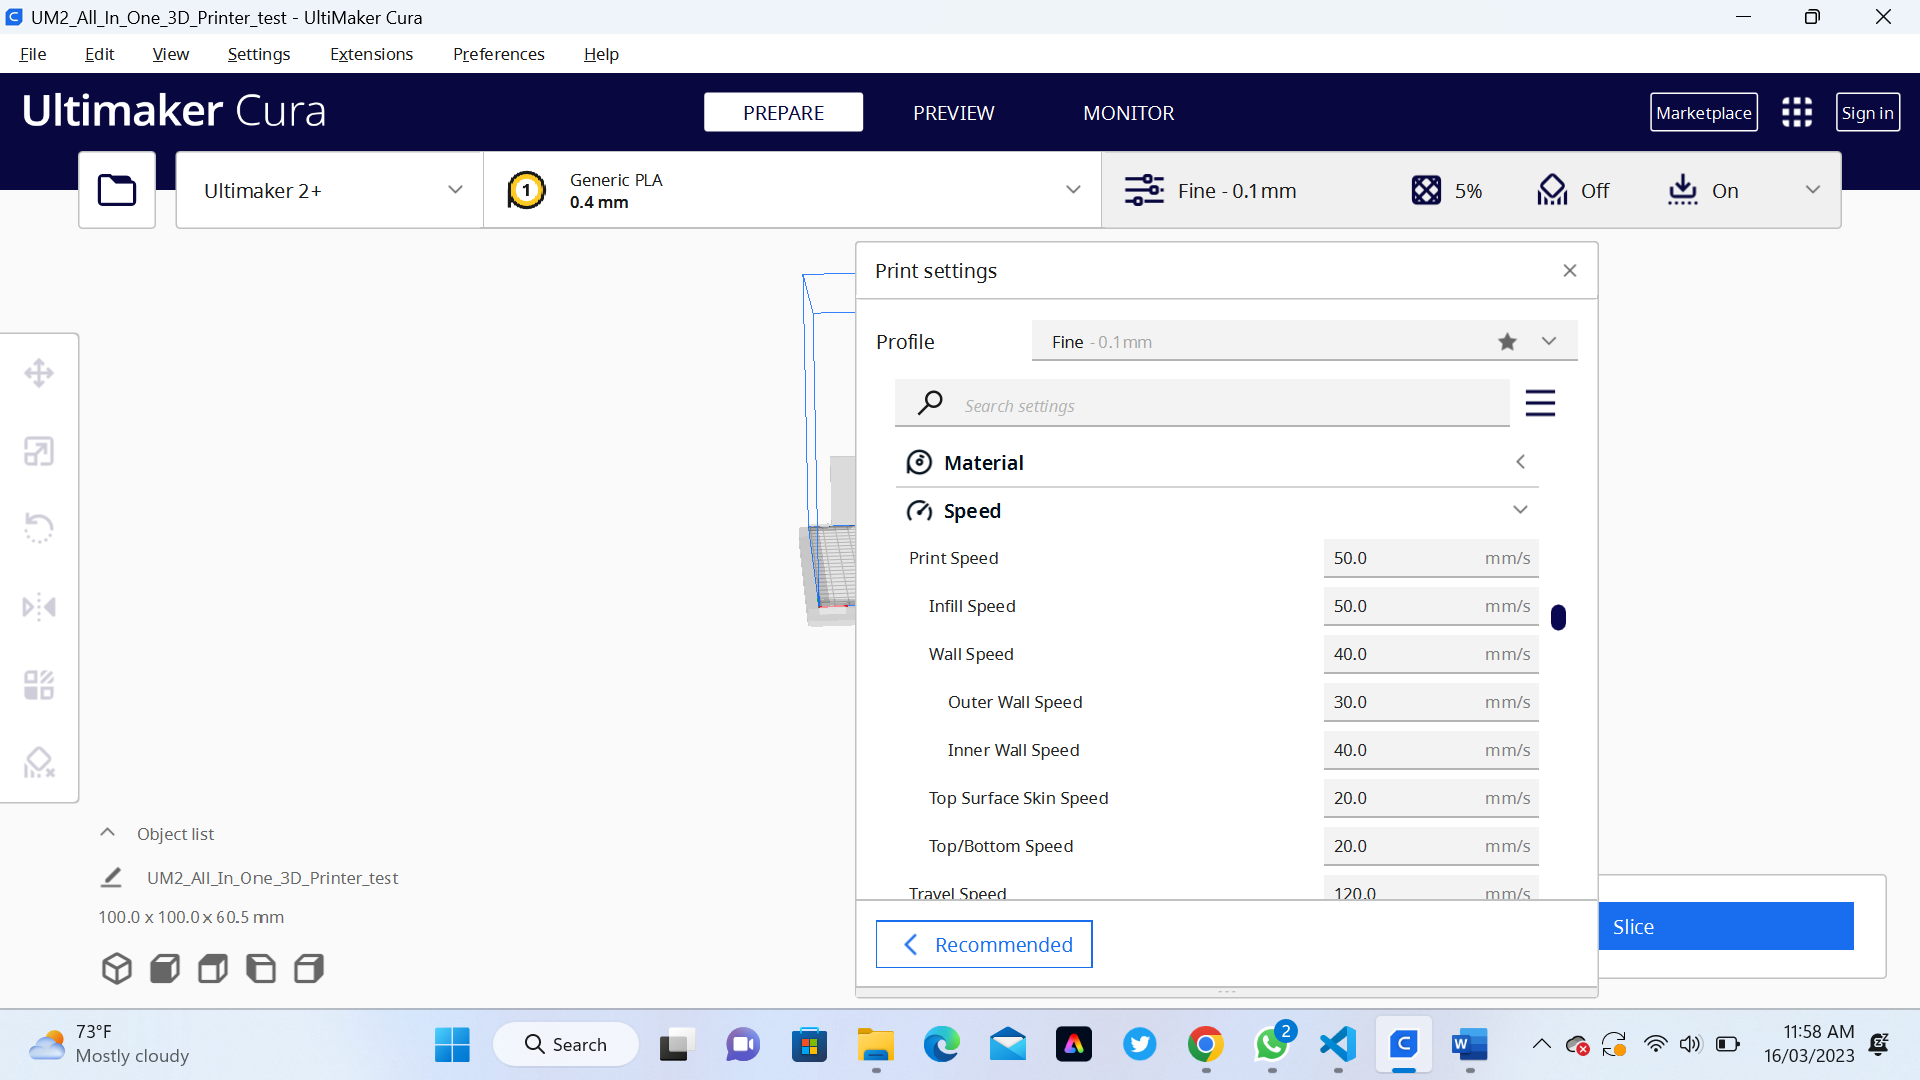
In our Assignment we use Printing Speed of 50mm/s
It's important to note that different brands and types of filaments may have slightly different temperature requirements, so it's a good idea to check the manufacturer's recommendations before printing.
4.Printing Speed
In General a good printing speed for the Ultimaker 2+ is between 30-60 mm/s, depending on the factors mentioned above. Slower speeds are recommended for more intricate or detailed prints or when using materials that require more precise temperature control, such as ABS. On the other hand, faster speeds can be used for simpler designs and when using materials that have a wider temperature range, such as PLA.
In our Assignment we use Printing Speed of 50mm/s
It's important to note that different brands and types of filaments may have slightly different temperature requirements, so it's a good idea to check the manufacturer's recommendations before printing.
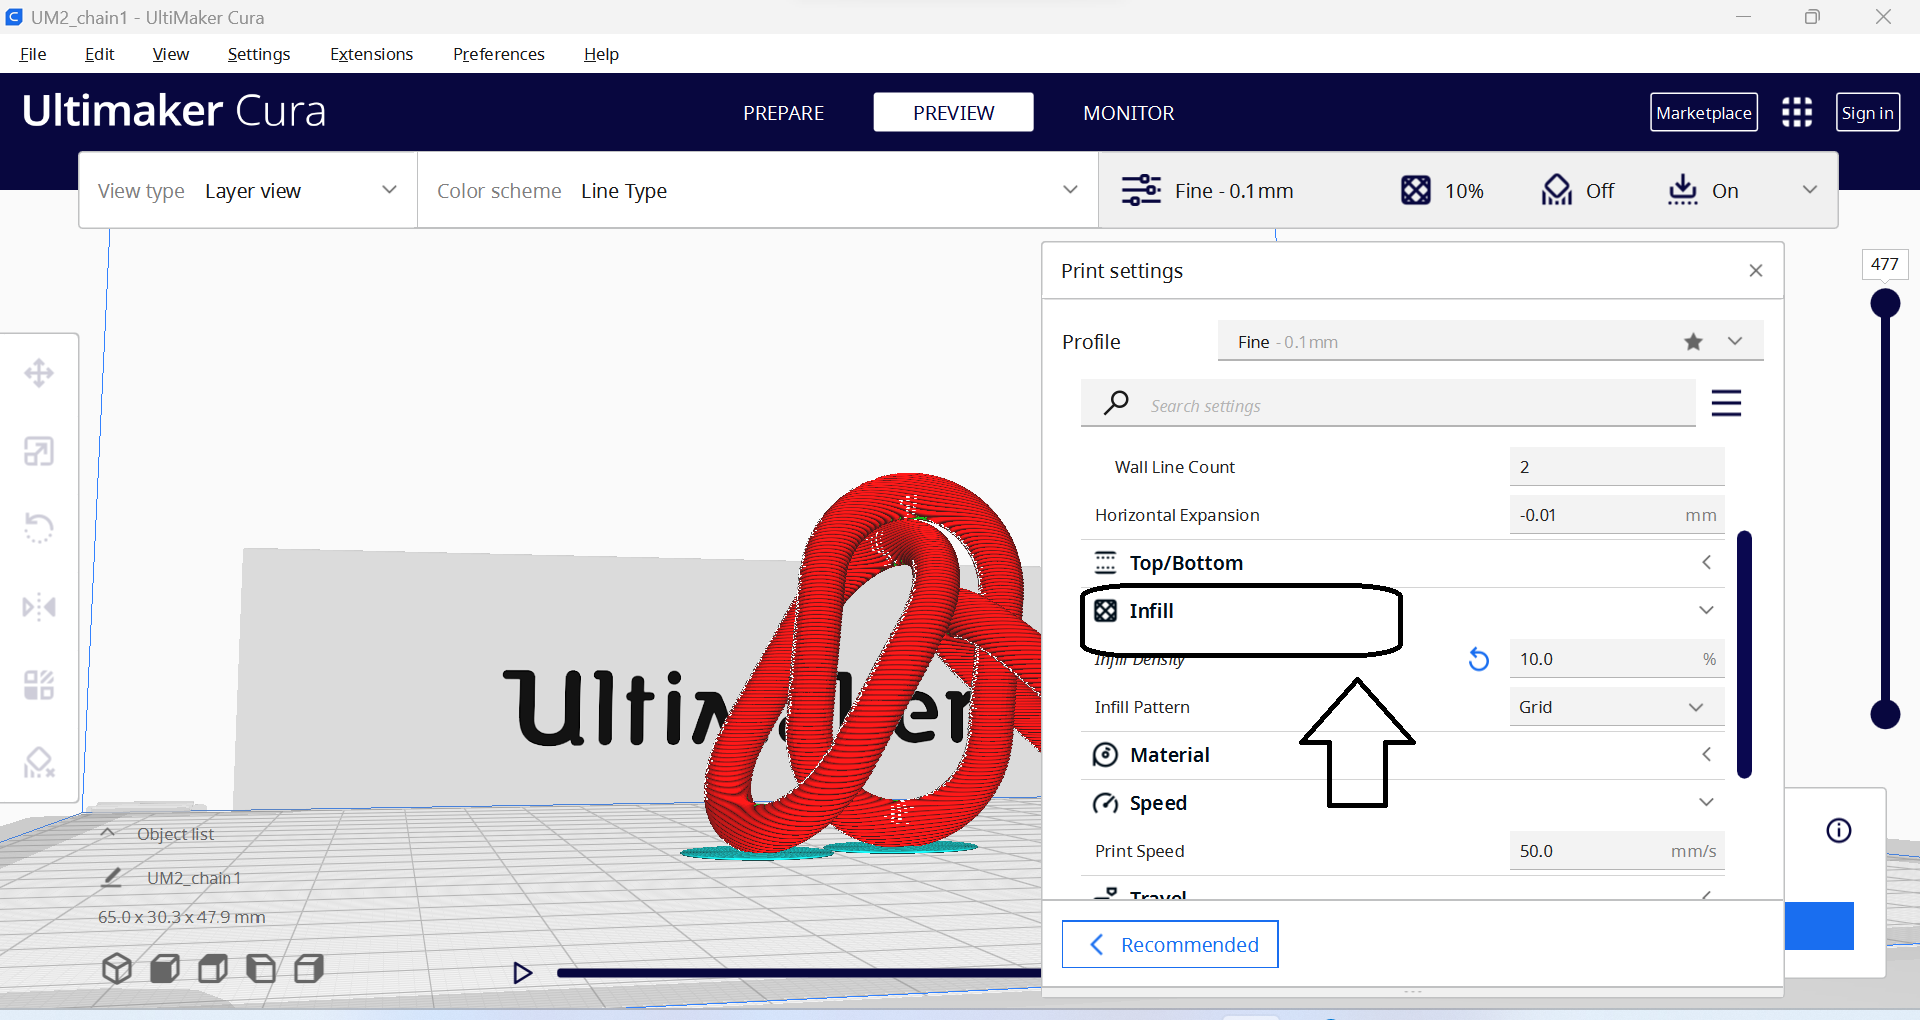
 5.Infill density
The best infill density for Ultimaker 2+ depends on the specific application and the desired properties of the printed object. In general, higher infill densities result in stronger and more durable prints, but they also take longer to print and require more material.
For functional parts that require strength and durability, an infill density of 50% to 100% may be suitable. However, for objects that do not need to support weight or stress, lower infill densities of 20% to 30% may be sufficient, which will also help to reduce the print time and material usage.
In our Assignment we use Printing Infill density of 20%
5.Infill density
The best infill density for Ultimaker 2+ depends on the specific application and the desired properties of the printed object. In general, higher infill densities result in stronger and more durable prints, but they also take longer to print and require more material.
For functional parts that require strength and durability, an infill density of 50% to 100% may be suitable. However, for objects that do not need to support weight or stress, lower infill densities of 20% to 30% may be sufficient, which will also help to reduce the print time and material usage.
In our Assignment we use Printing Infill density of 20%
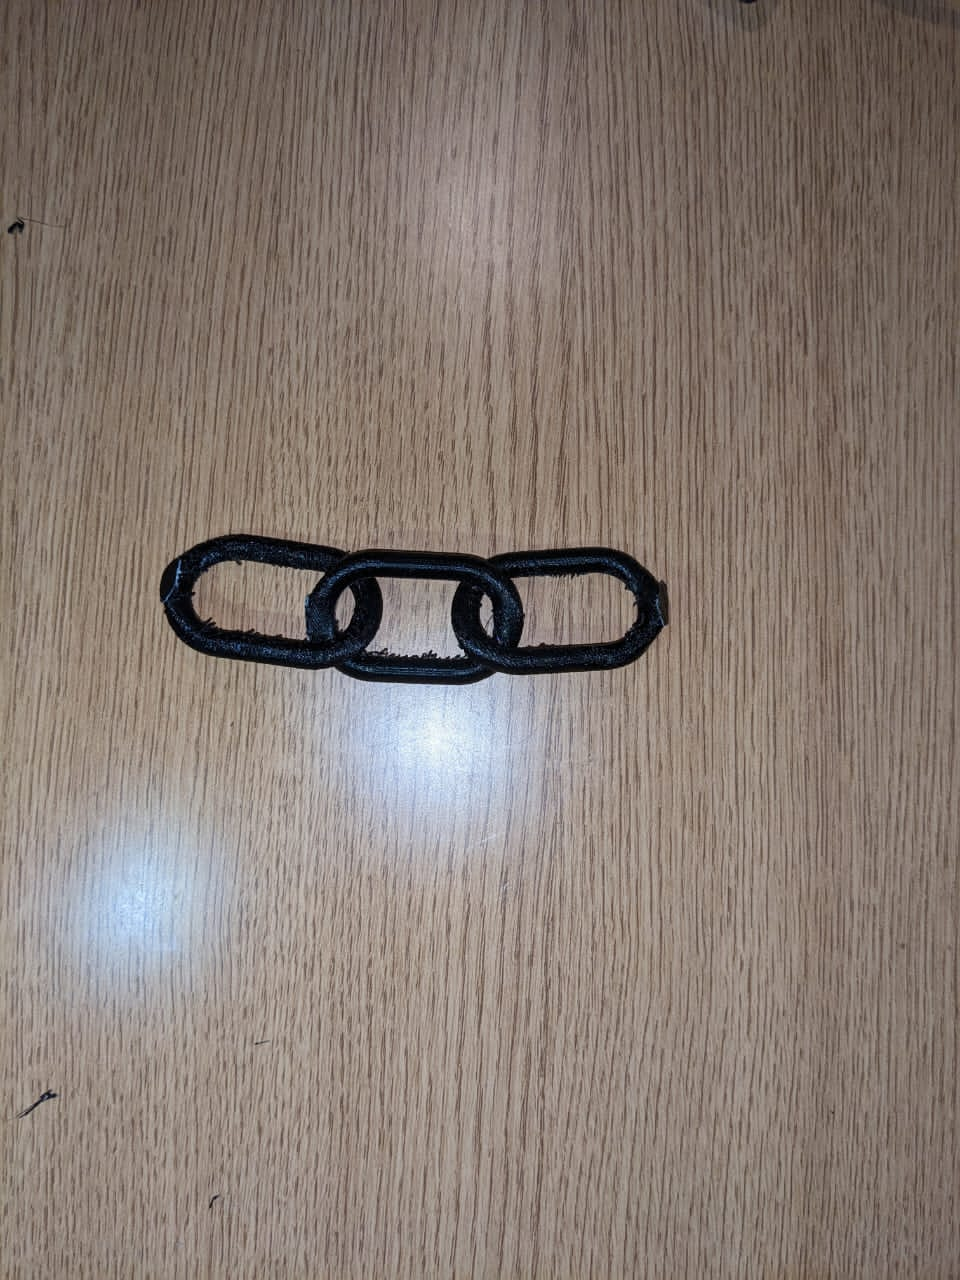
 After Printing we get the below Object
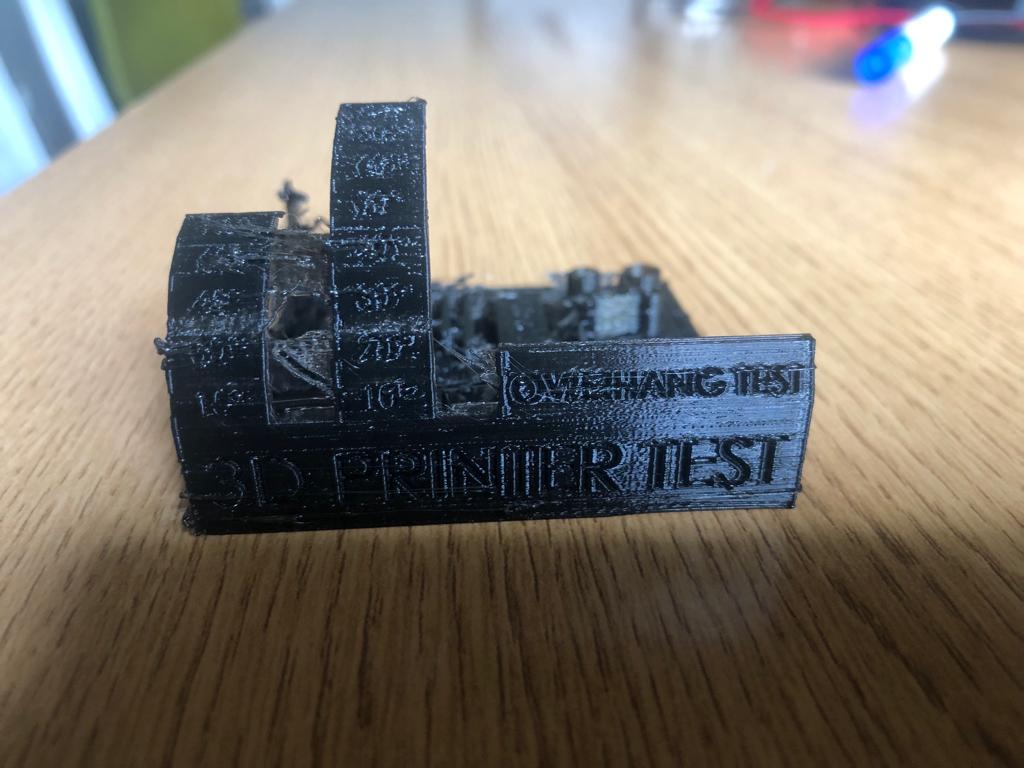 Analysing the Results found after printing
- 1. PLayer heights- Resolution vs Time: Layer heights- Resolution vs Time. Thickness of the layer height determines the resolution of the surface.
- 2. nozzle size: Lower nozzle size = higher precision.
- 3. resolution: Higher resolution = more printing time.
- 4. Thickness: Thickness of the casing must be a multiple of the diameter of the nozzle to prevent gaps from forming.
- 5. Infill density: 20% infill density can be used as a standard for most printers.
- 6. Orientation: Pay attention to the orientation: strength is more in the XY direction vs. Z direction.
- 7. Print speed and temperature:Print speed and temperature: You have to be careful with print speed and temperature when it comes to overhangs and bridges.
- 8. Temperature: If the temperature is too high it takes longer for the filament to cool down and solidify, and therefore once again giving it more change for it to fall.
II.Individual assignment
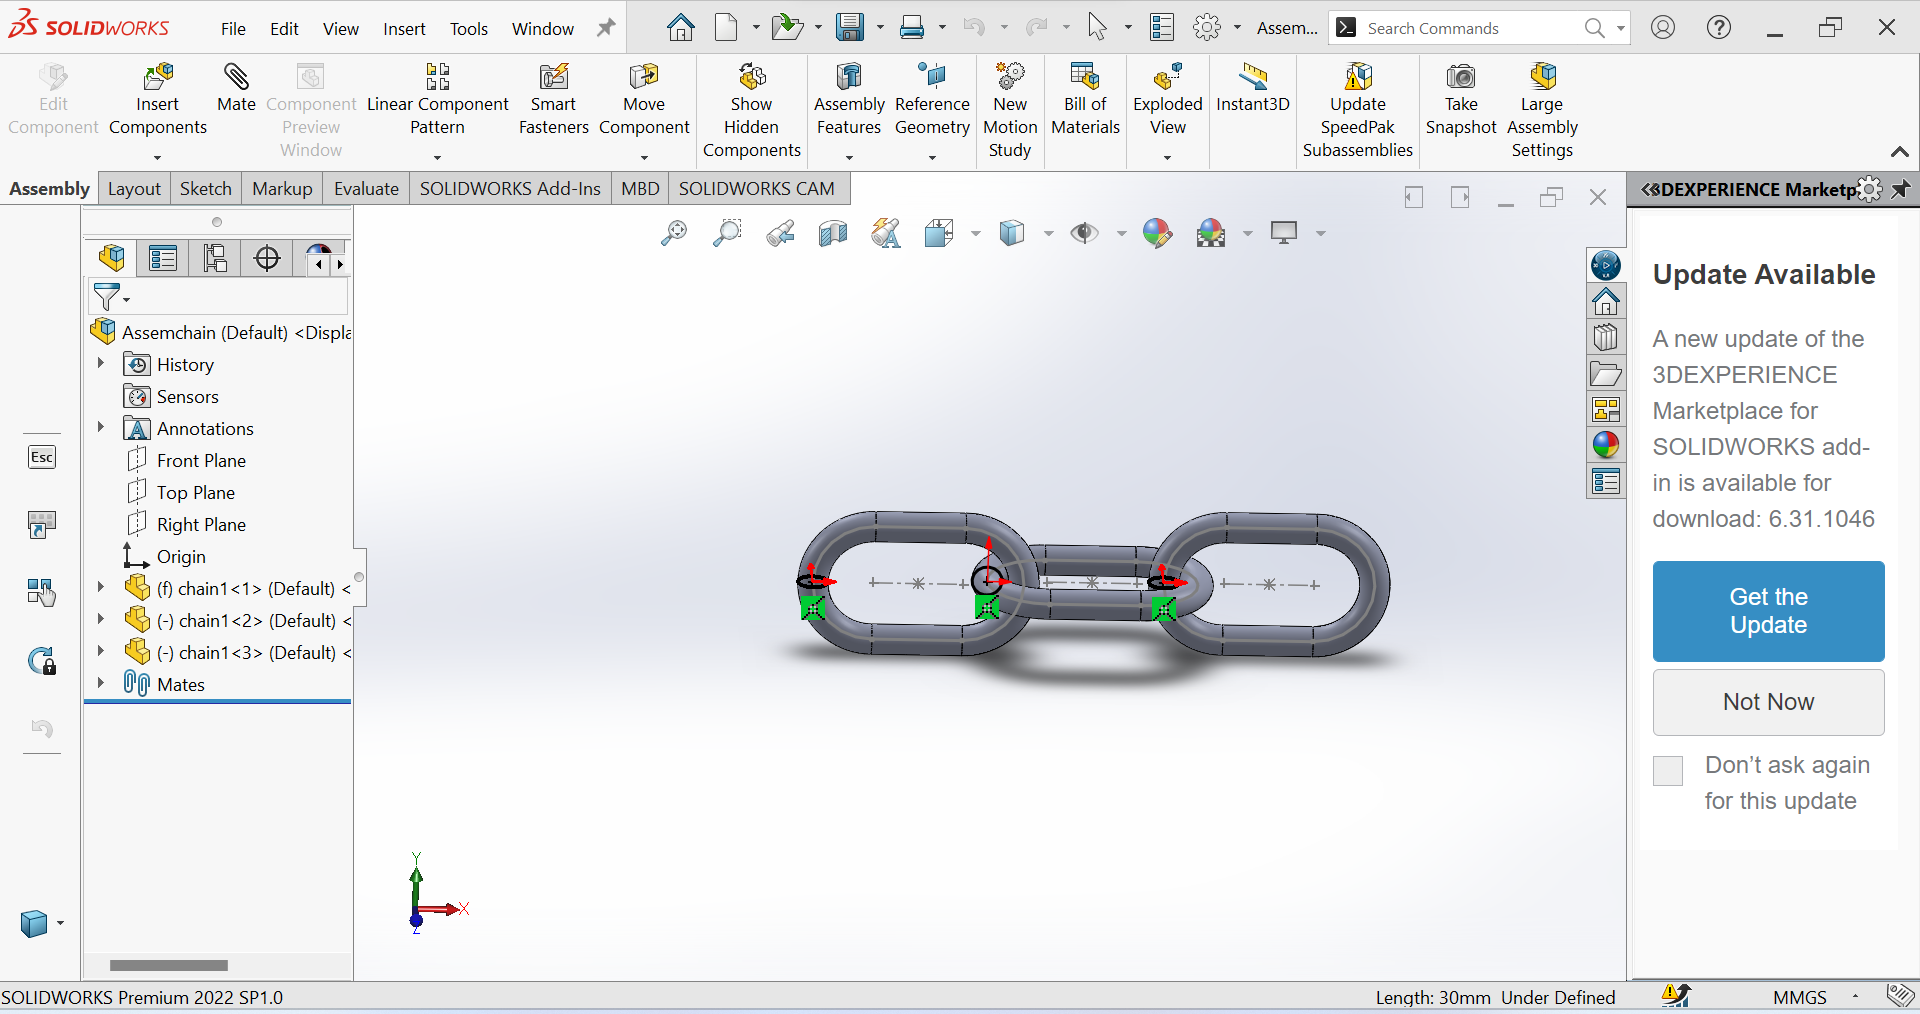
II.Individual assignment1. 3D Design using Soldworks
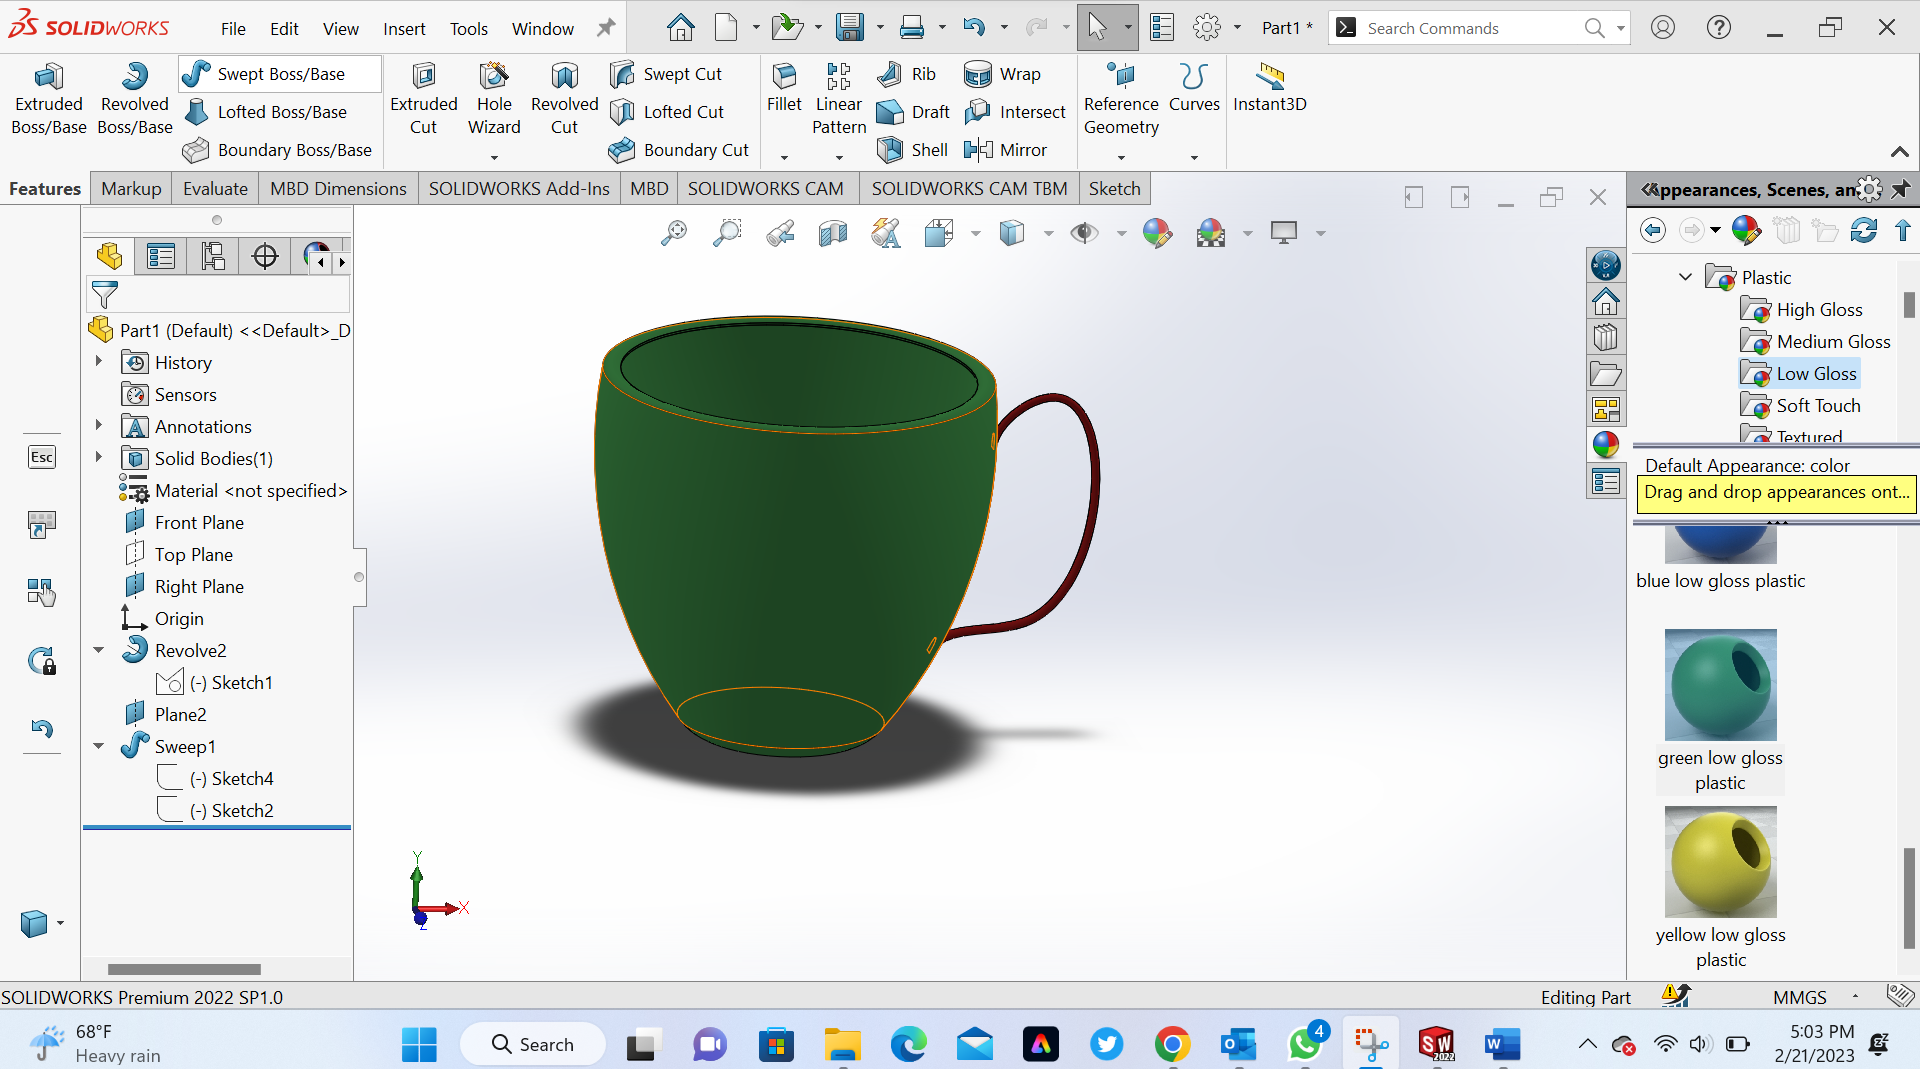
A.In this assignement I choosed to make a tea cup design. In designing this tea cup I used SolidWorks software for modeling, I have referenced from a Youtube on the design I made.
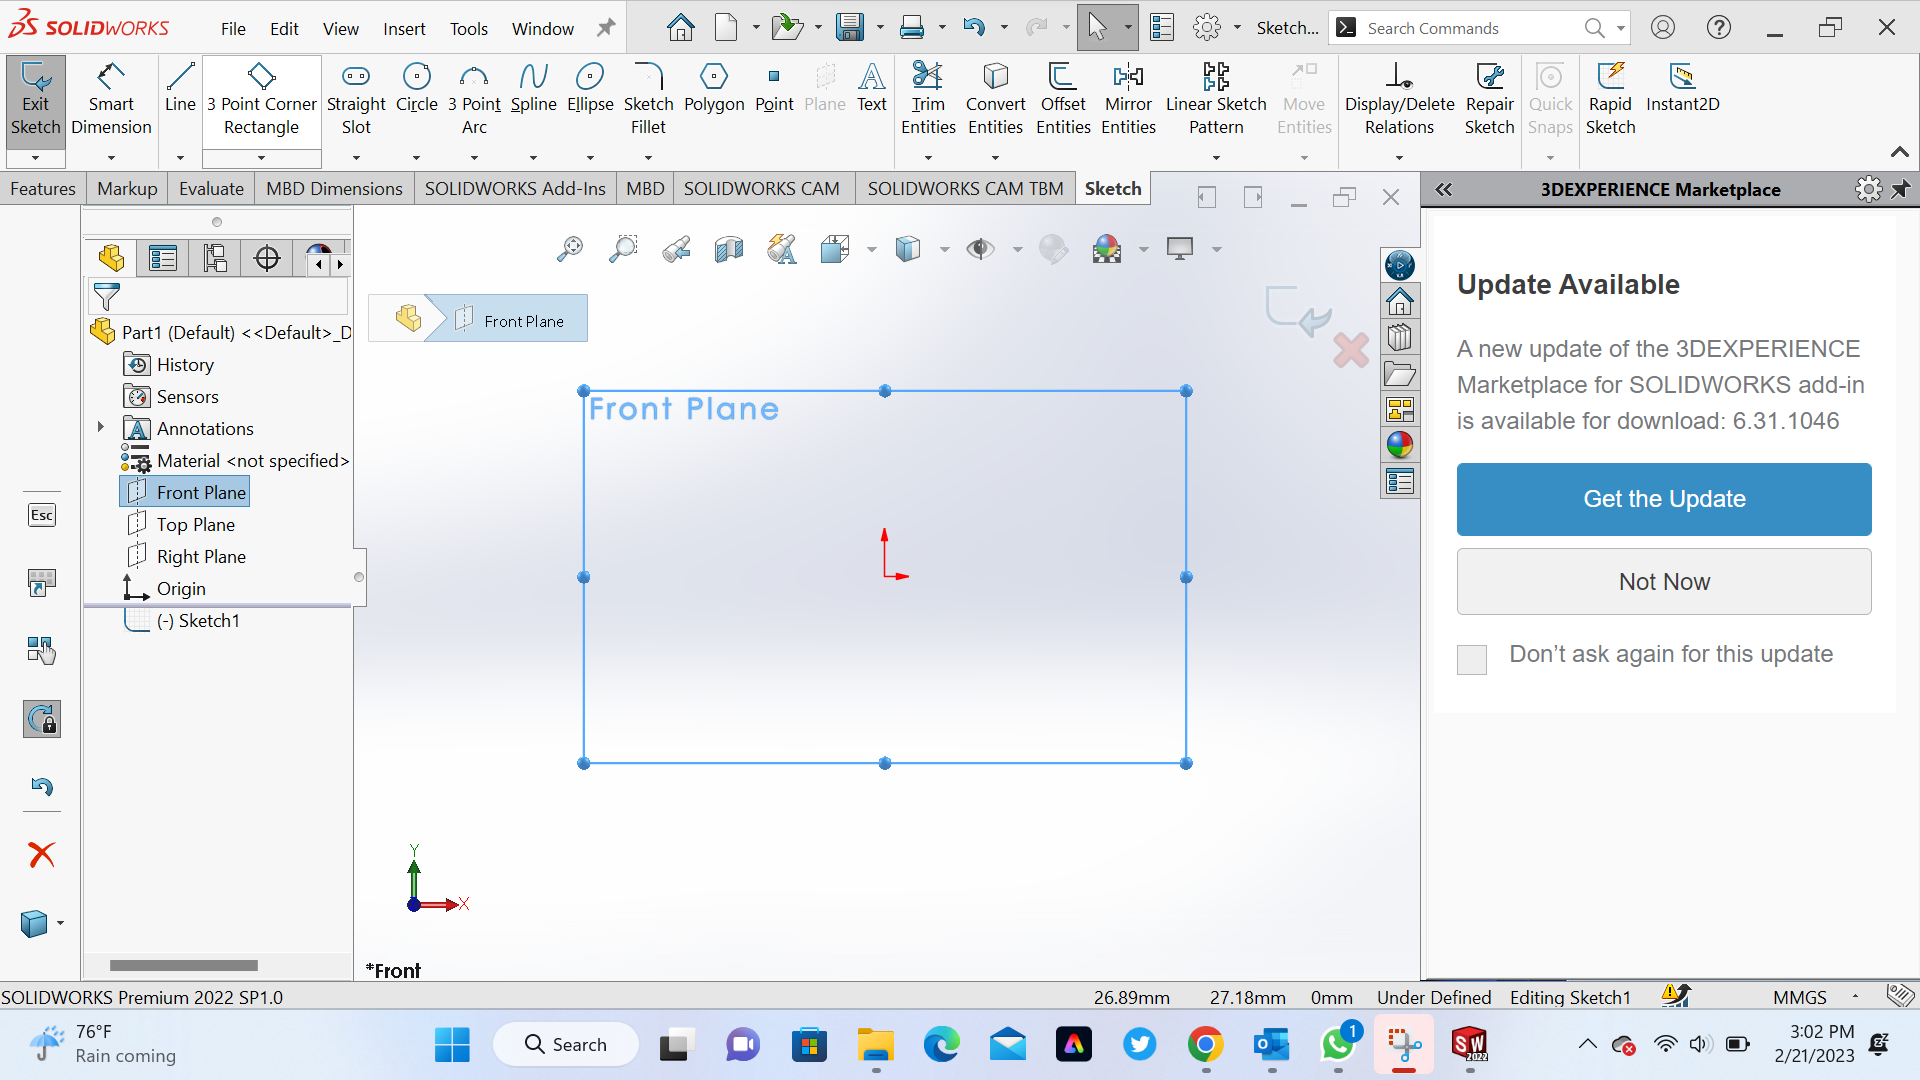
1 st Step Openning working area and choose front plane
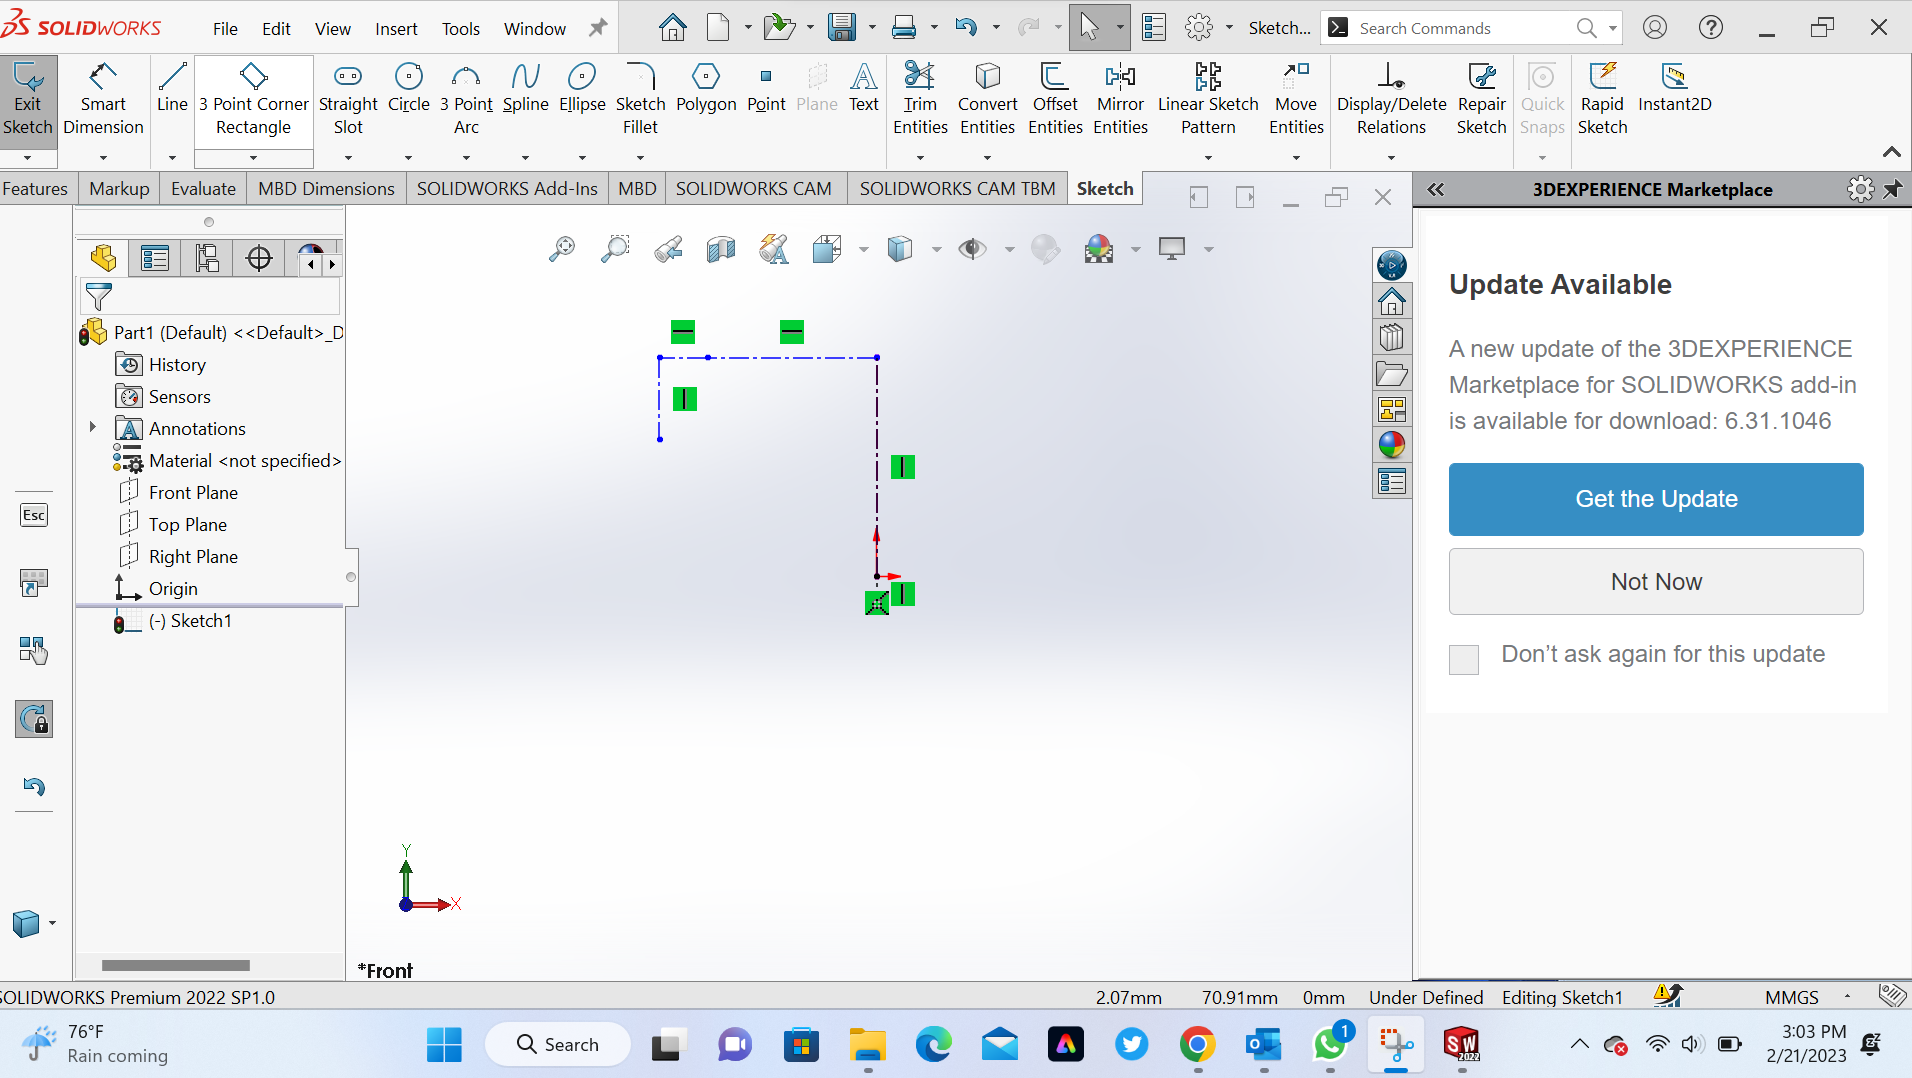
2nd Step Draw the centerline as follow
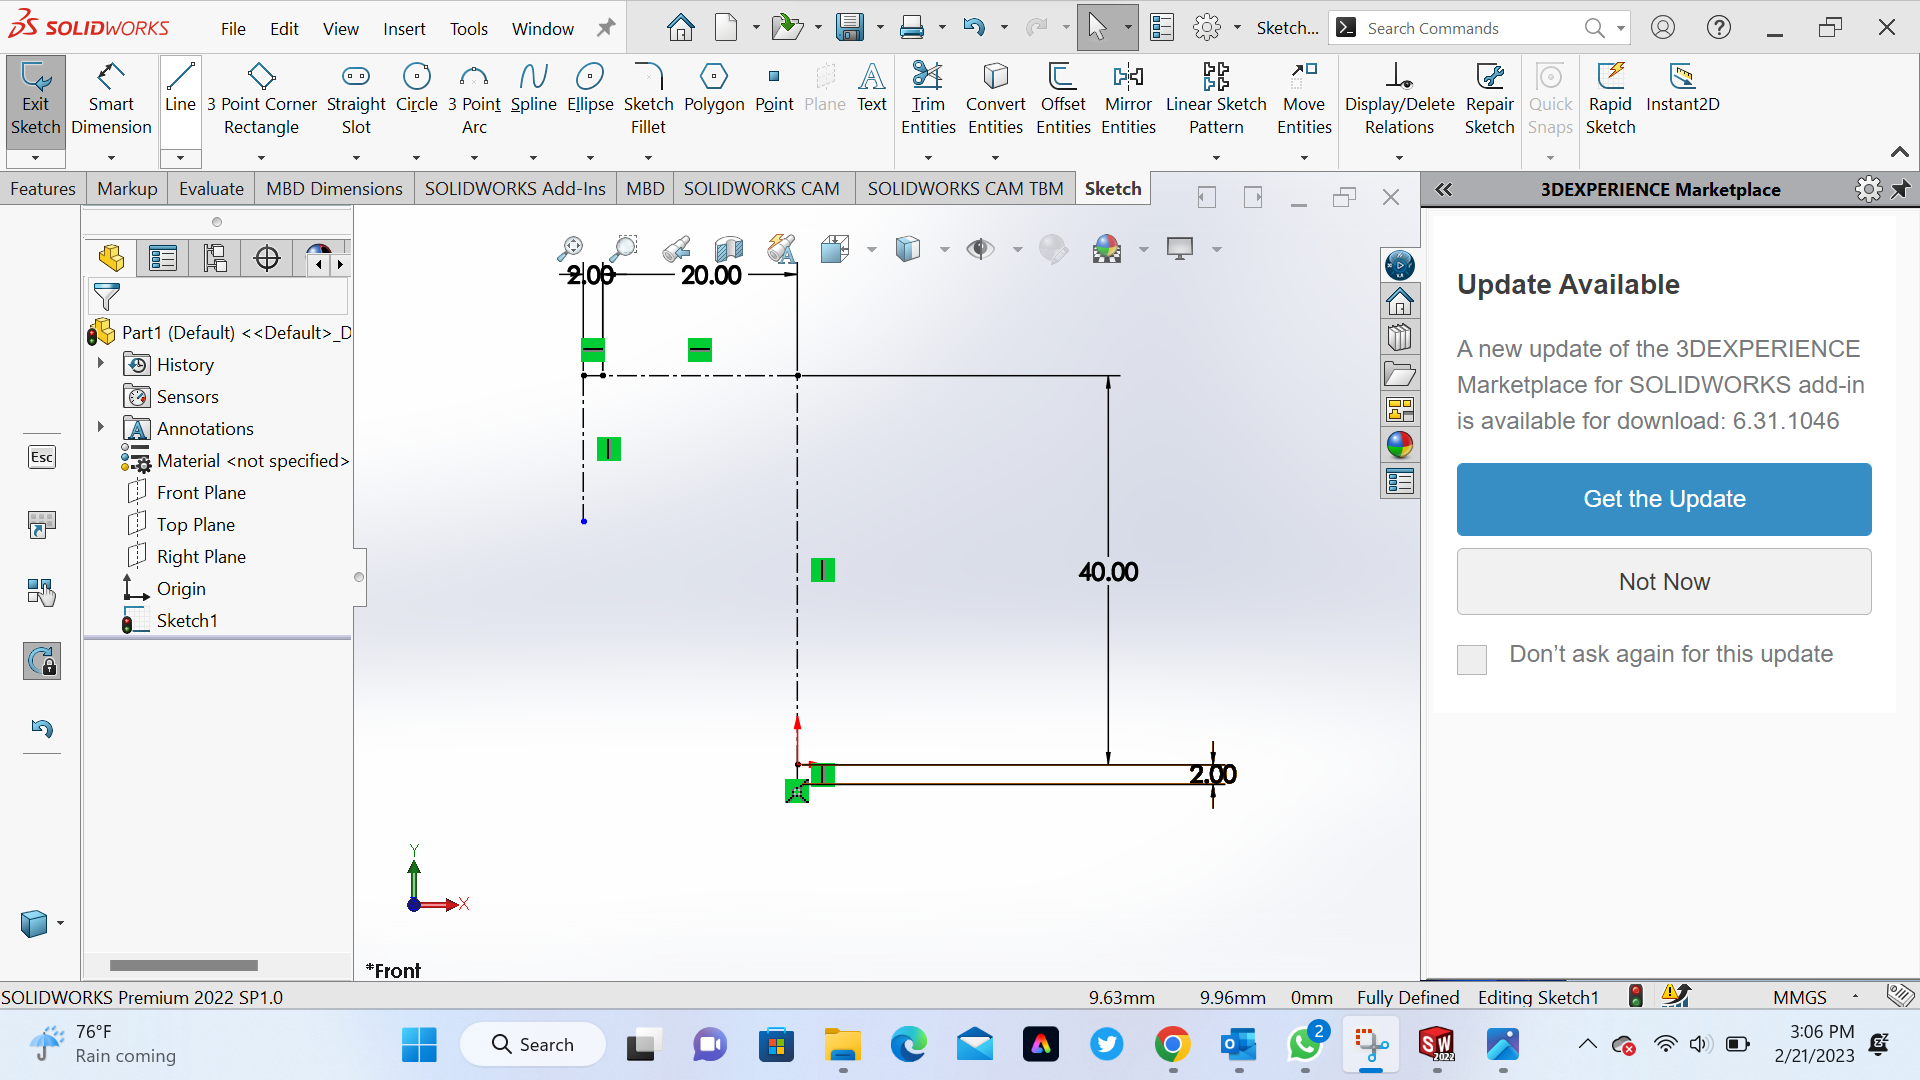
3rd Step Take dimension of each line by using smart dimension
4th Step Add curve line by using 3 point arc
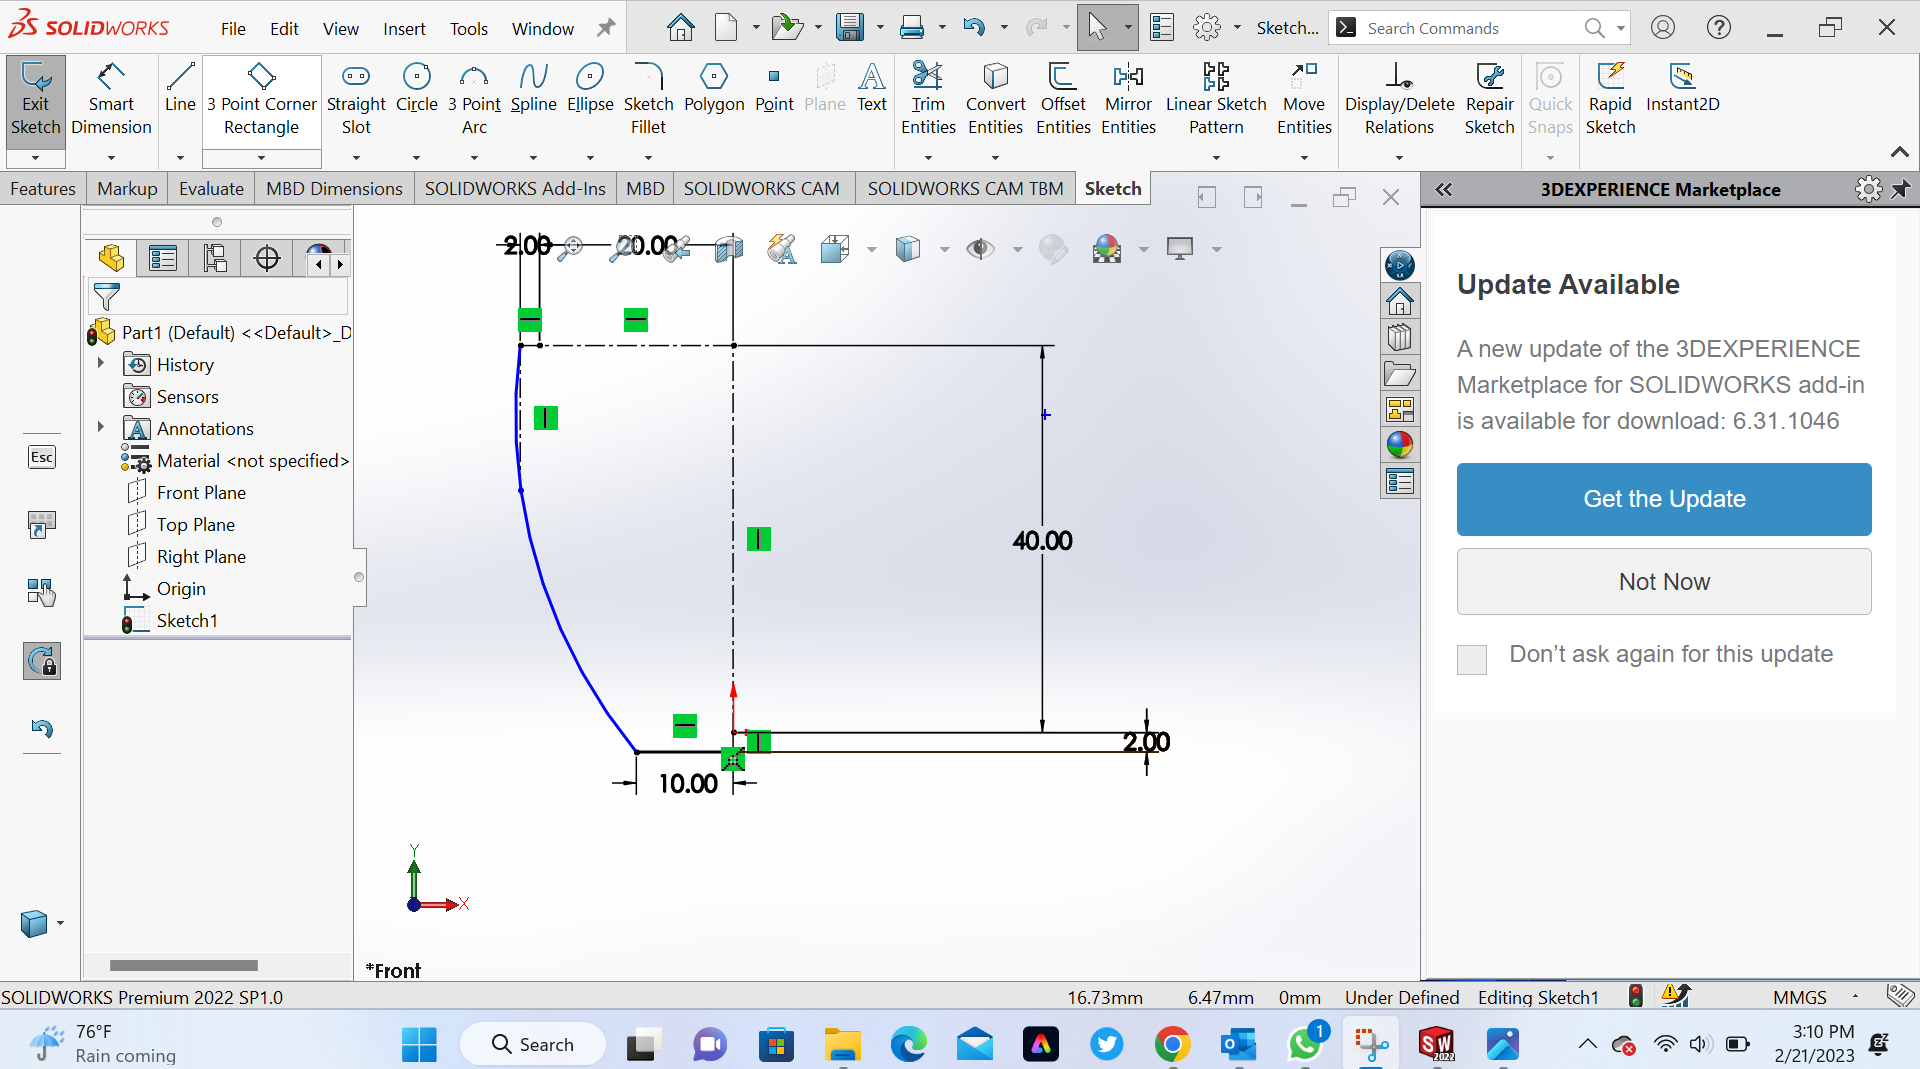
5th Step Make offset on curve side

6th Step Make extruded revolved boss/base
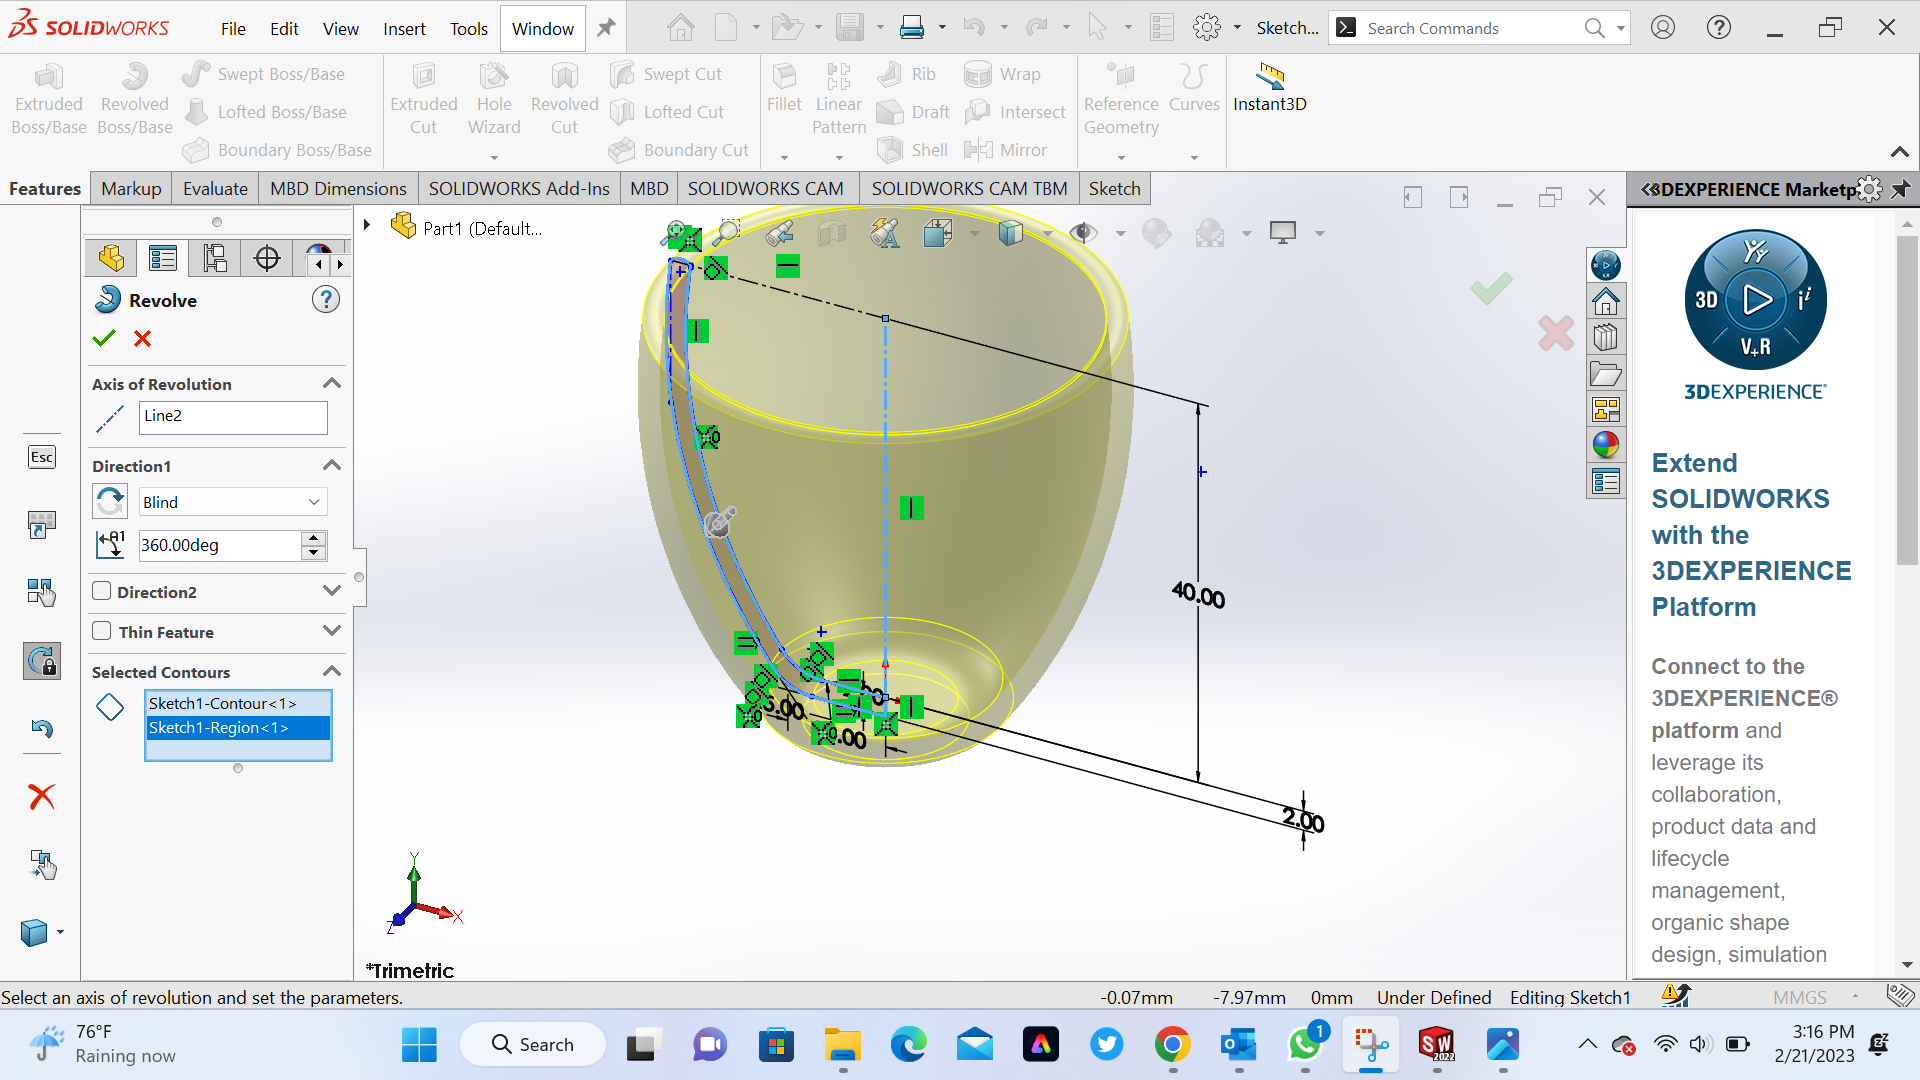
Final Step Step puting all necessary parts on my tea cup

After realized what what had disigned that could be made subtractively and after watching video tutoril on Youtube I changed idea and starting disign new object as shown in the following steps
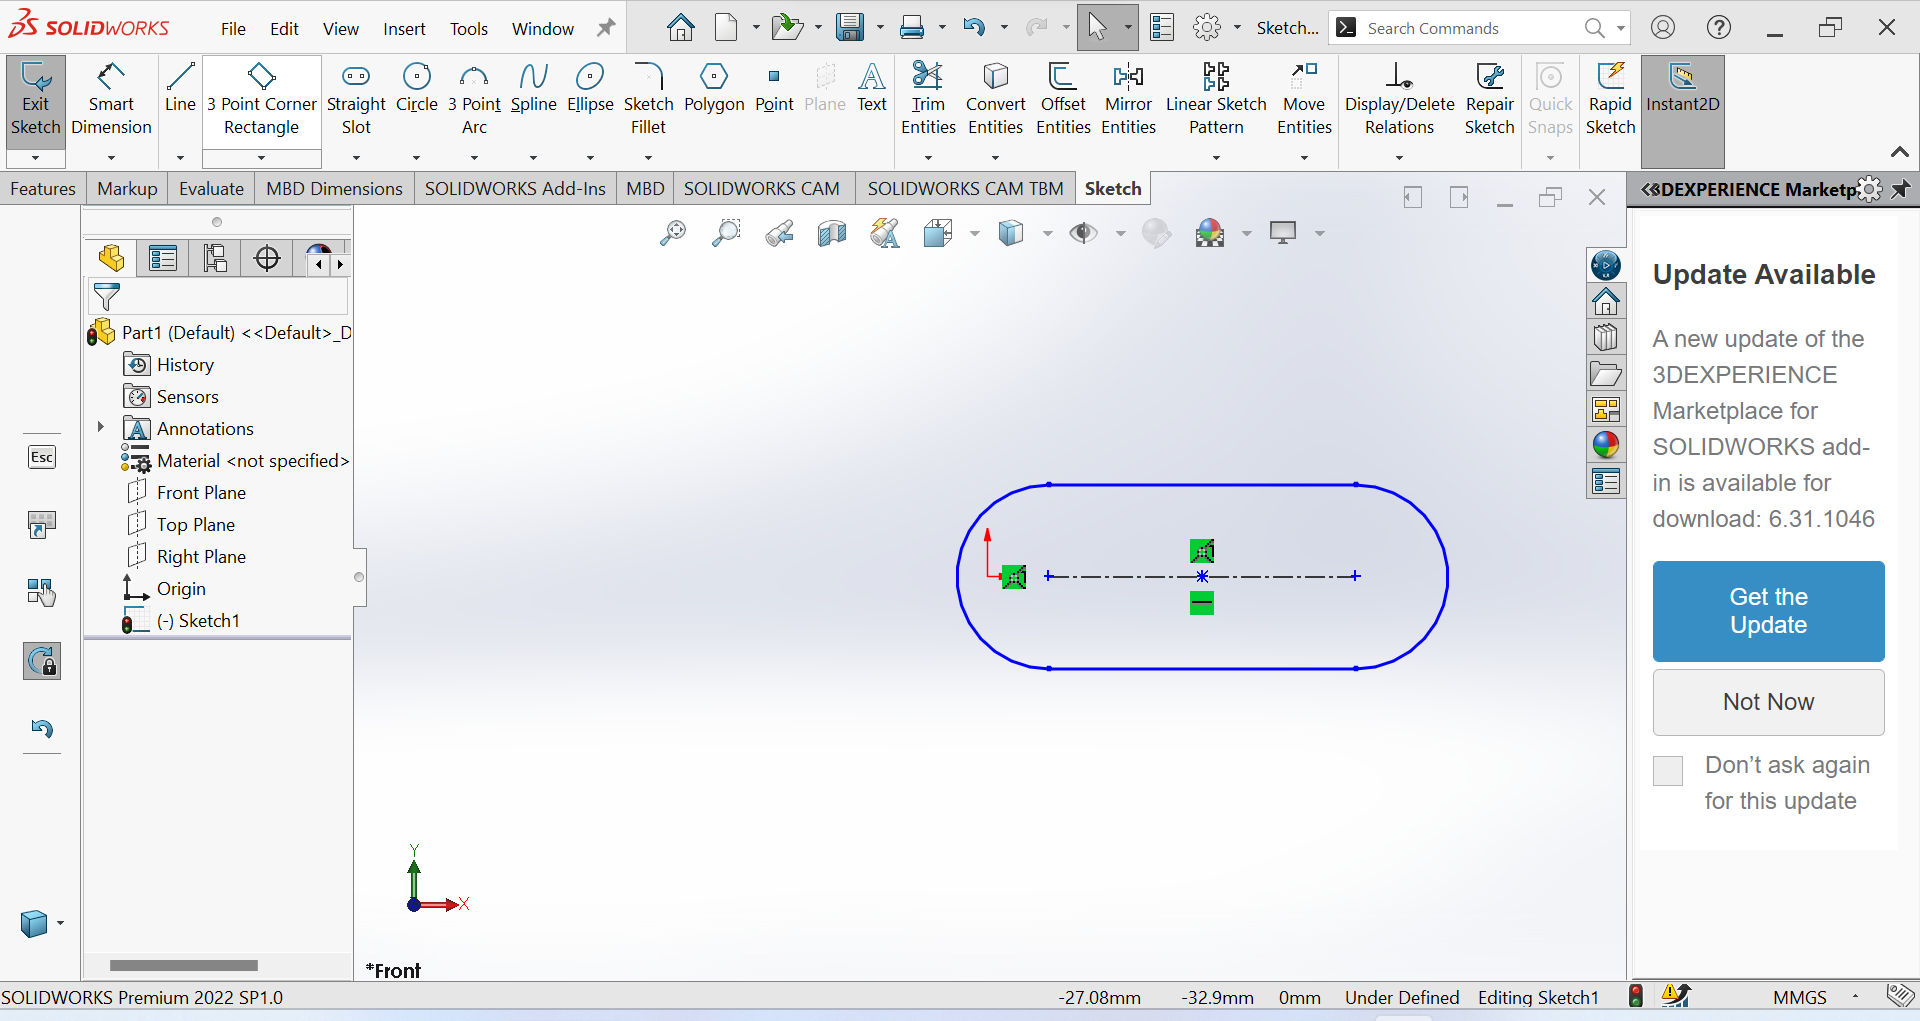
1 st Step Openning working area and choose front plane
2nd Step Use the straight slot for creating precise and detailed 2D sketches
3rd Step Use Smart Dimension tool for ensuring the accuracy and precision of our models

4th Step Use isometric for 3D projection that allows us to view a three-dimensional object from multiple angles simultaneously and select top plan
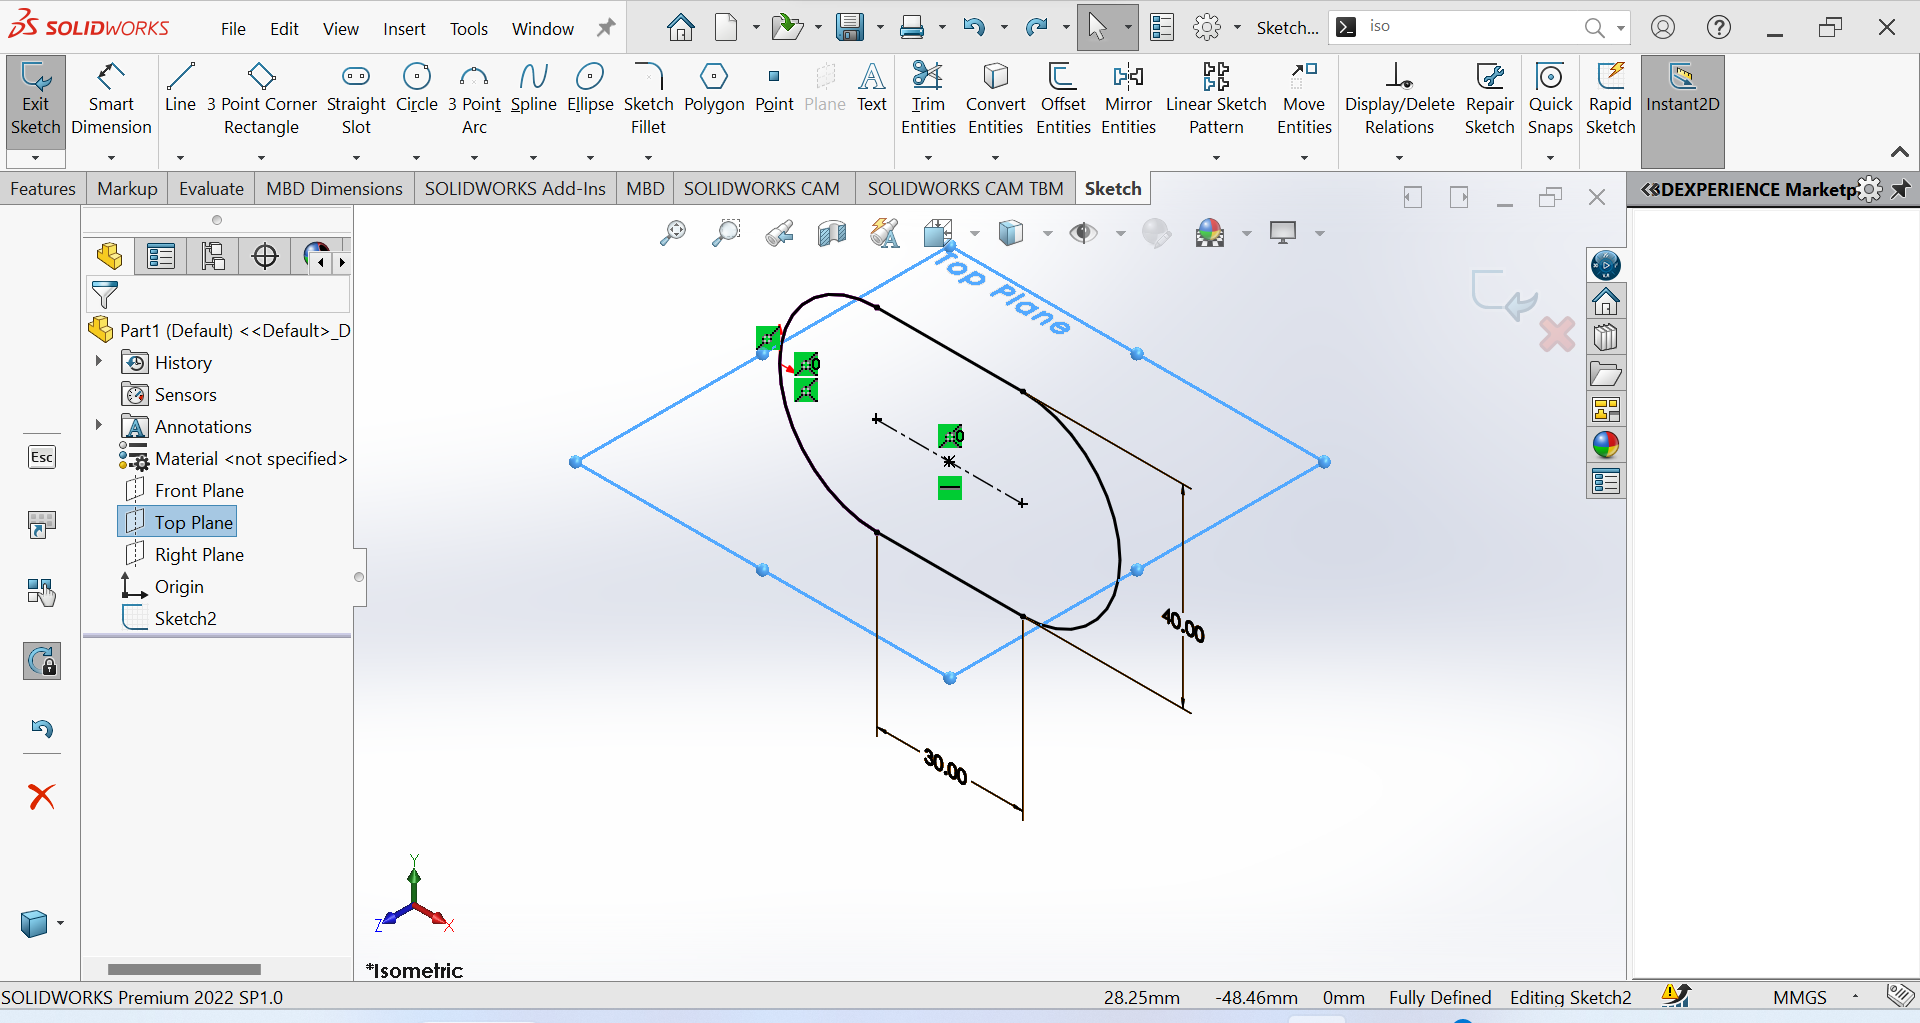
5th Step Select top plan view that shows us an object as if it were viewed from above
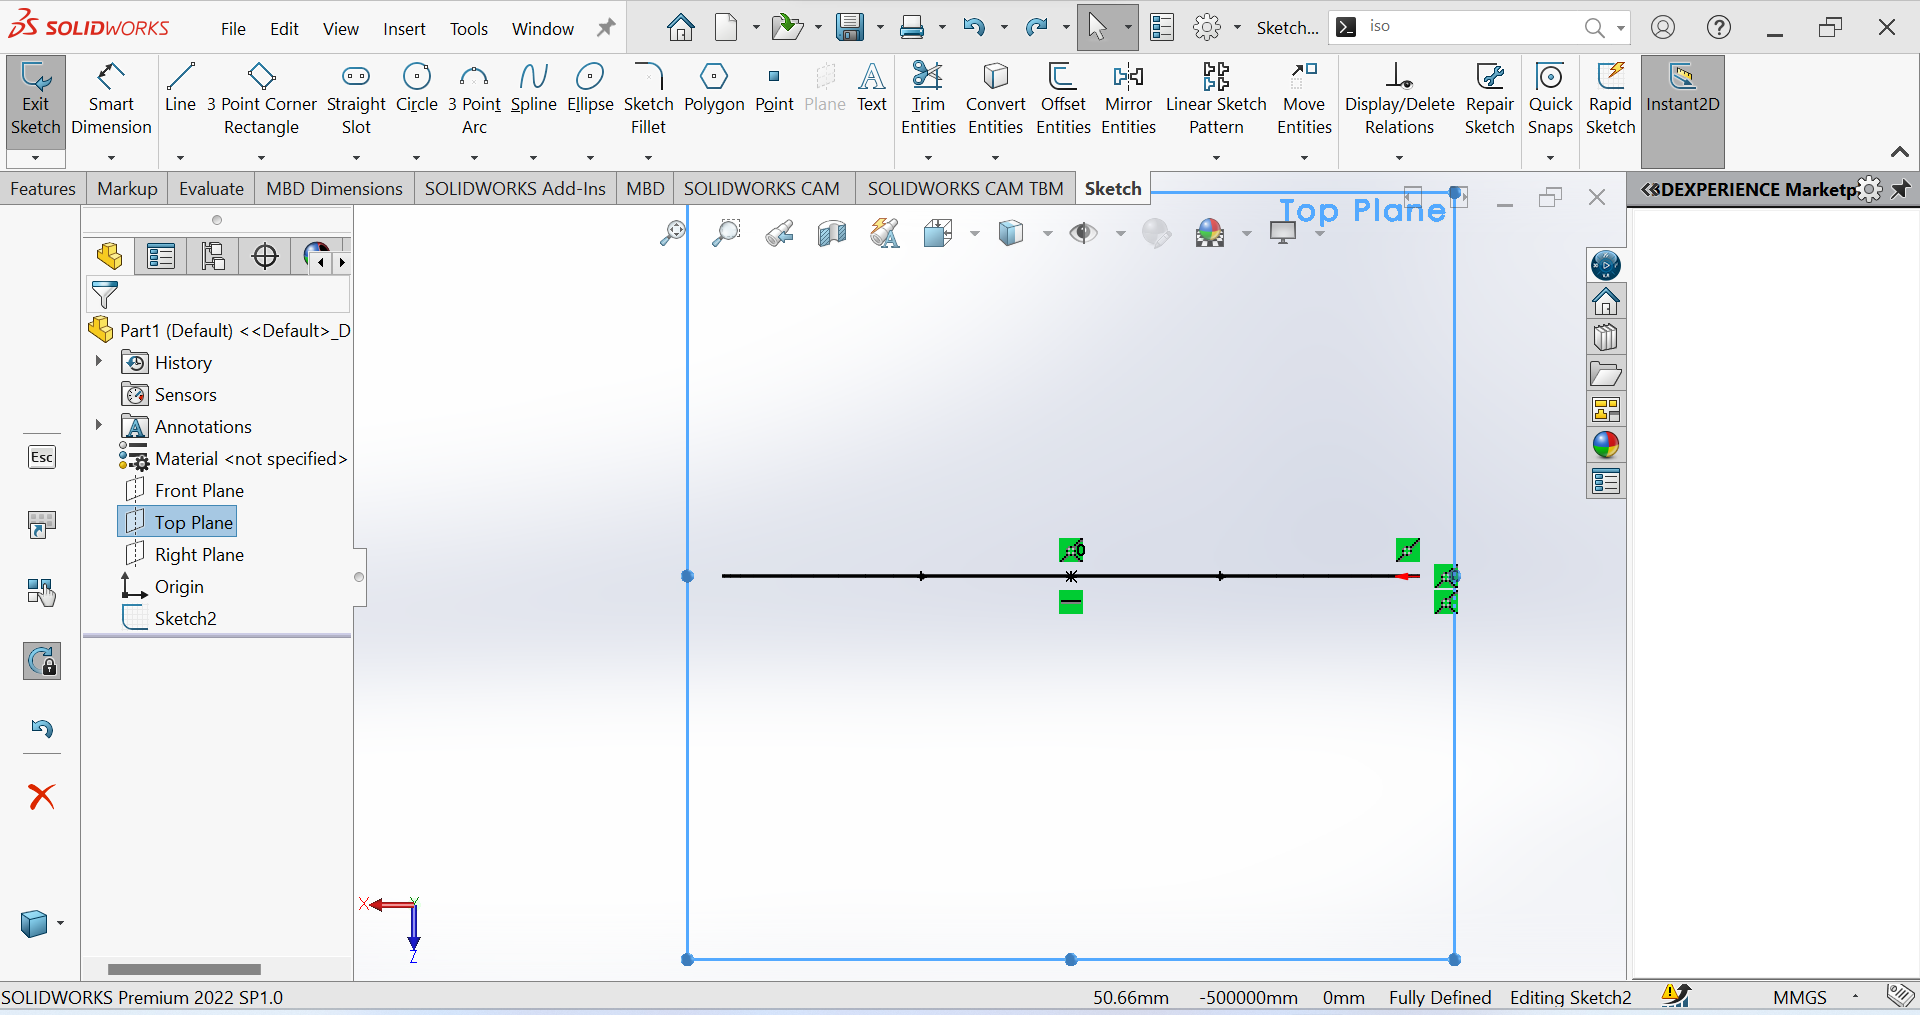
6th Step Create the thickness of an
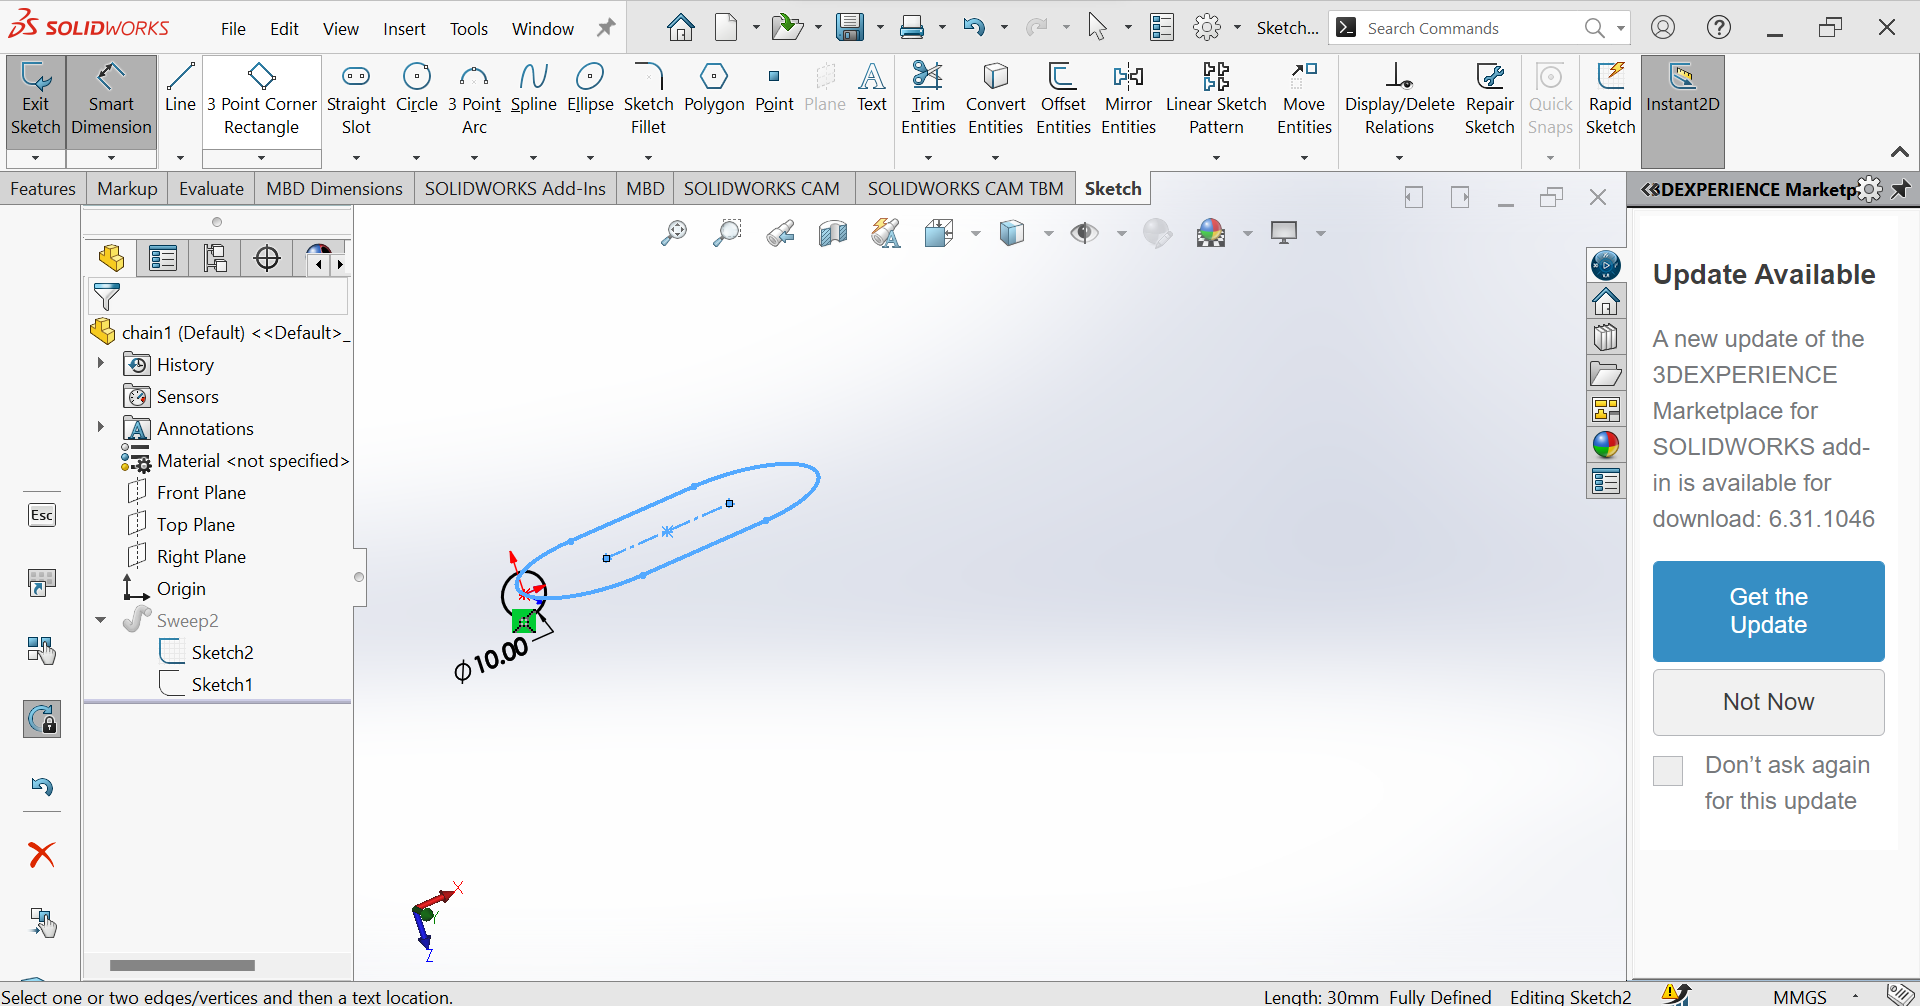
7th Step Using Sweep to create a shape or surface by sweeping a profile along a path.
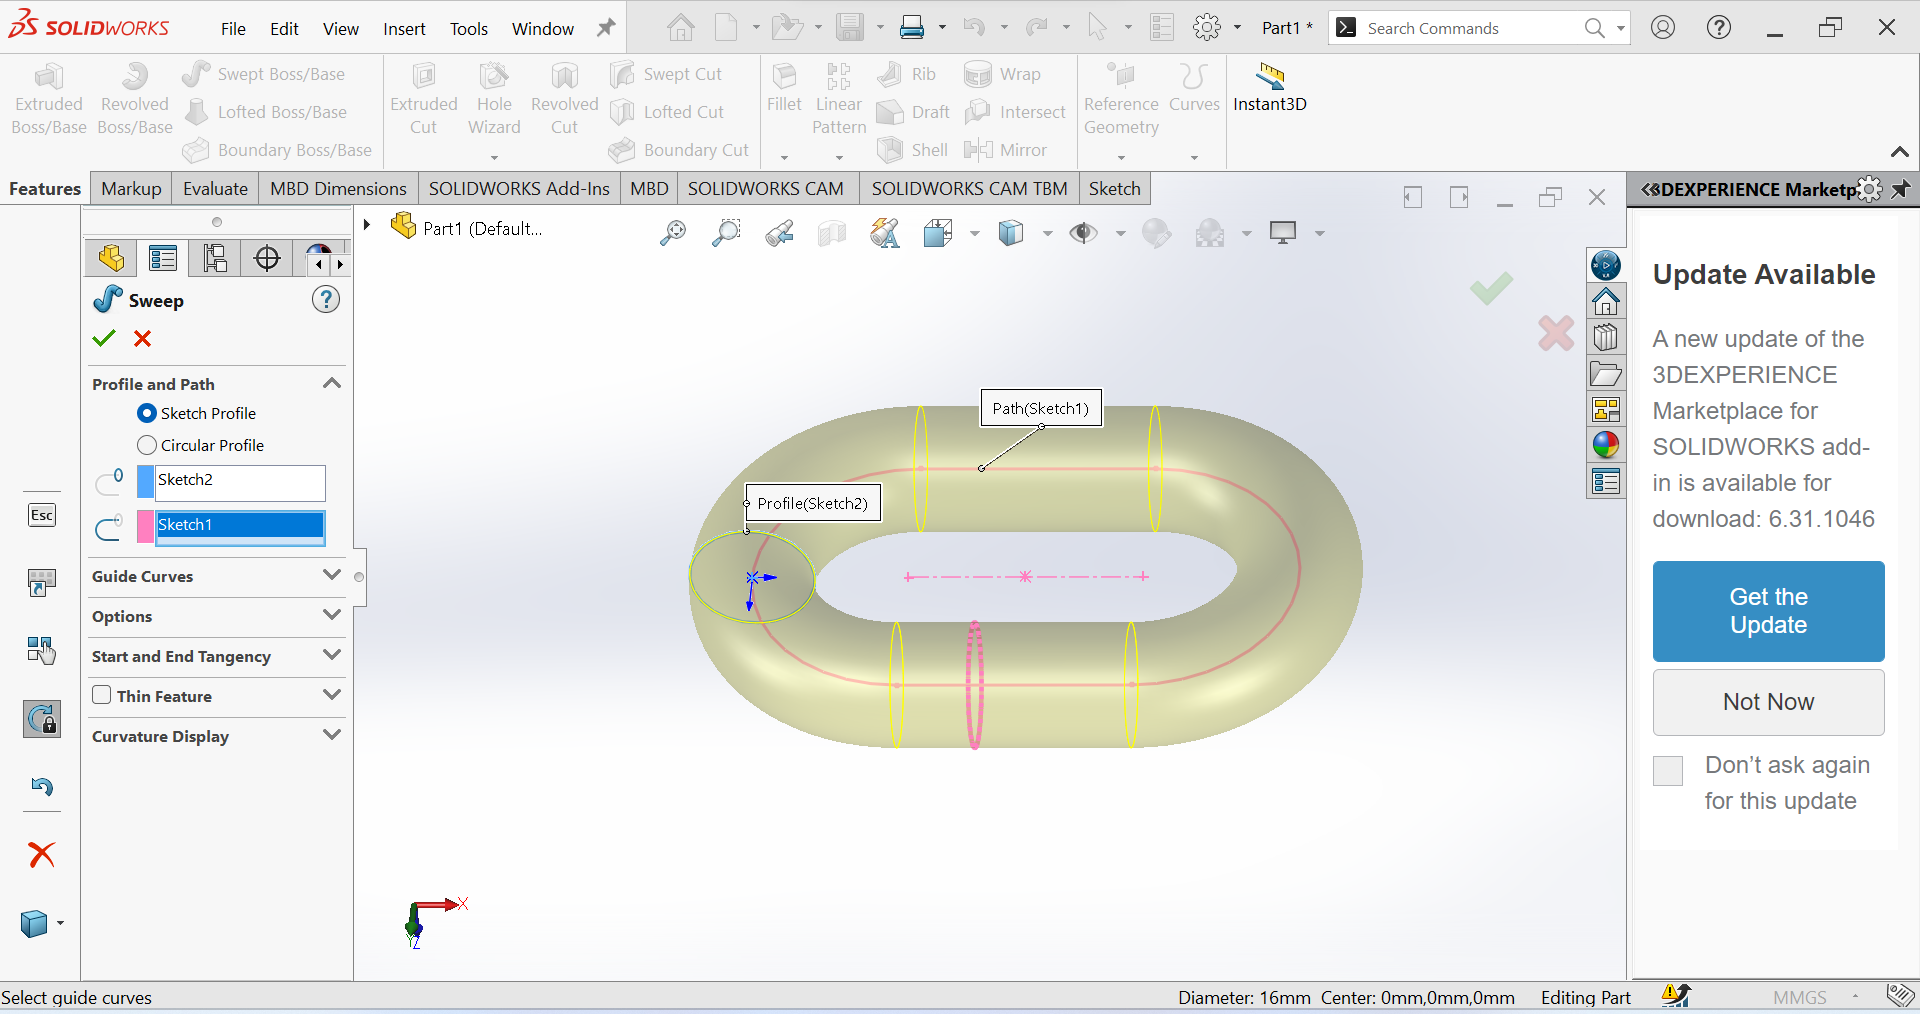
8th Step out put of our disign in 3D
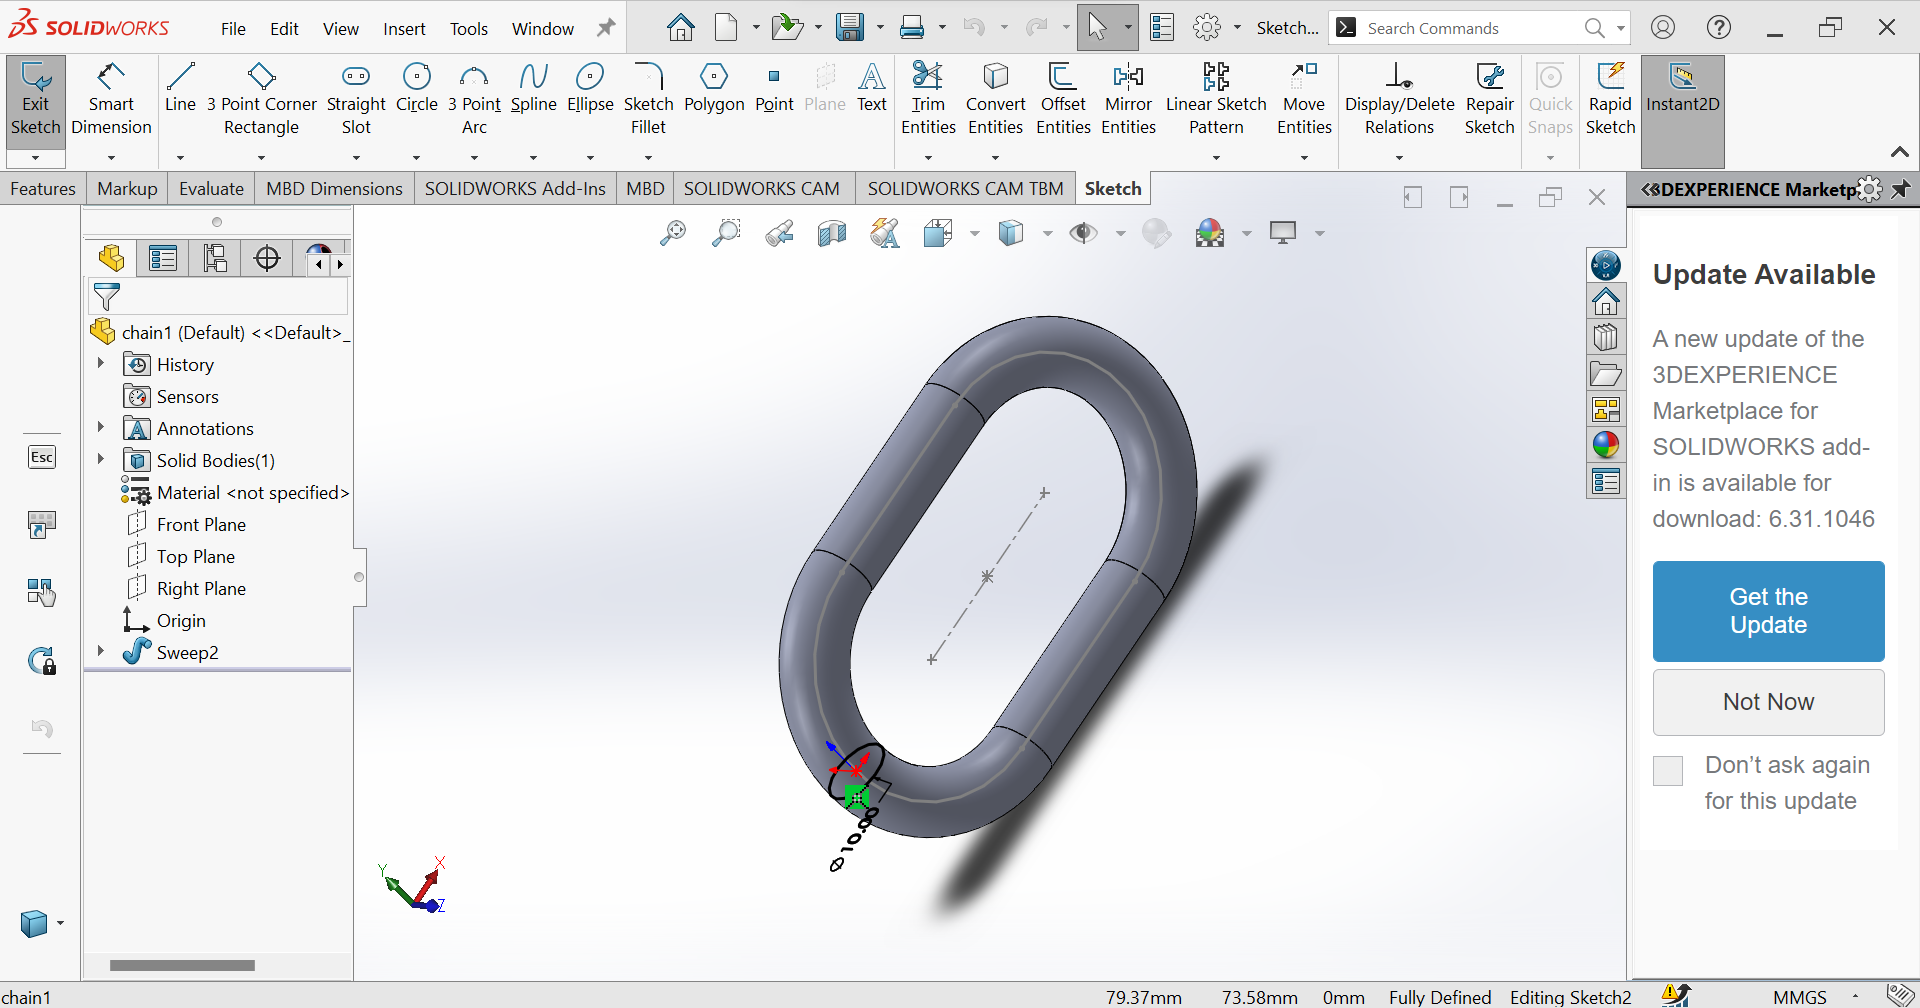
Final Step Assembling
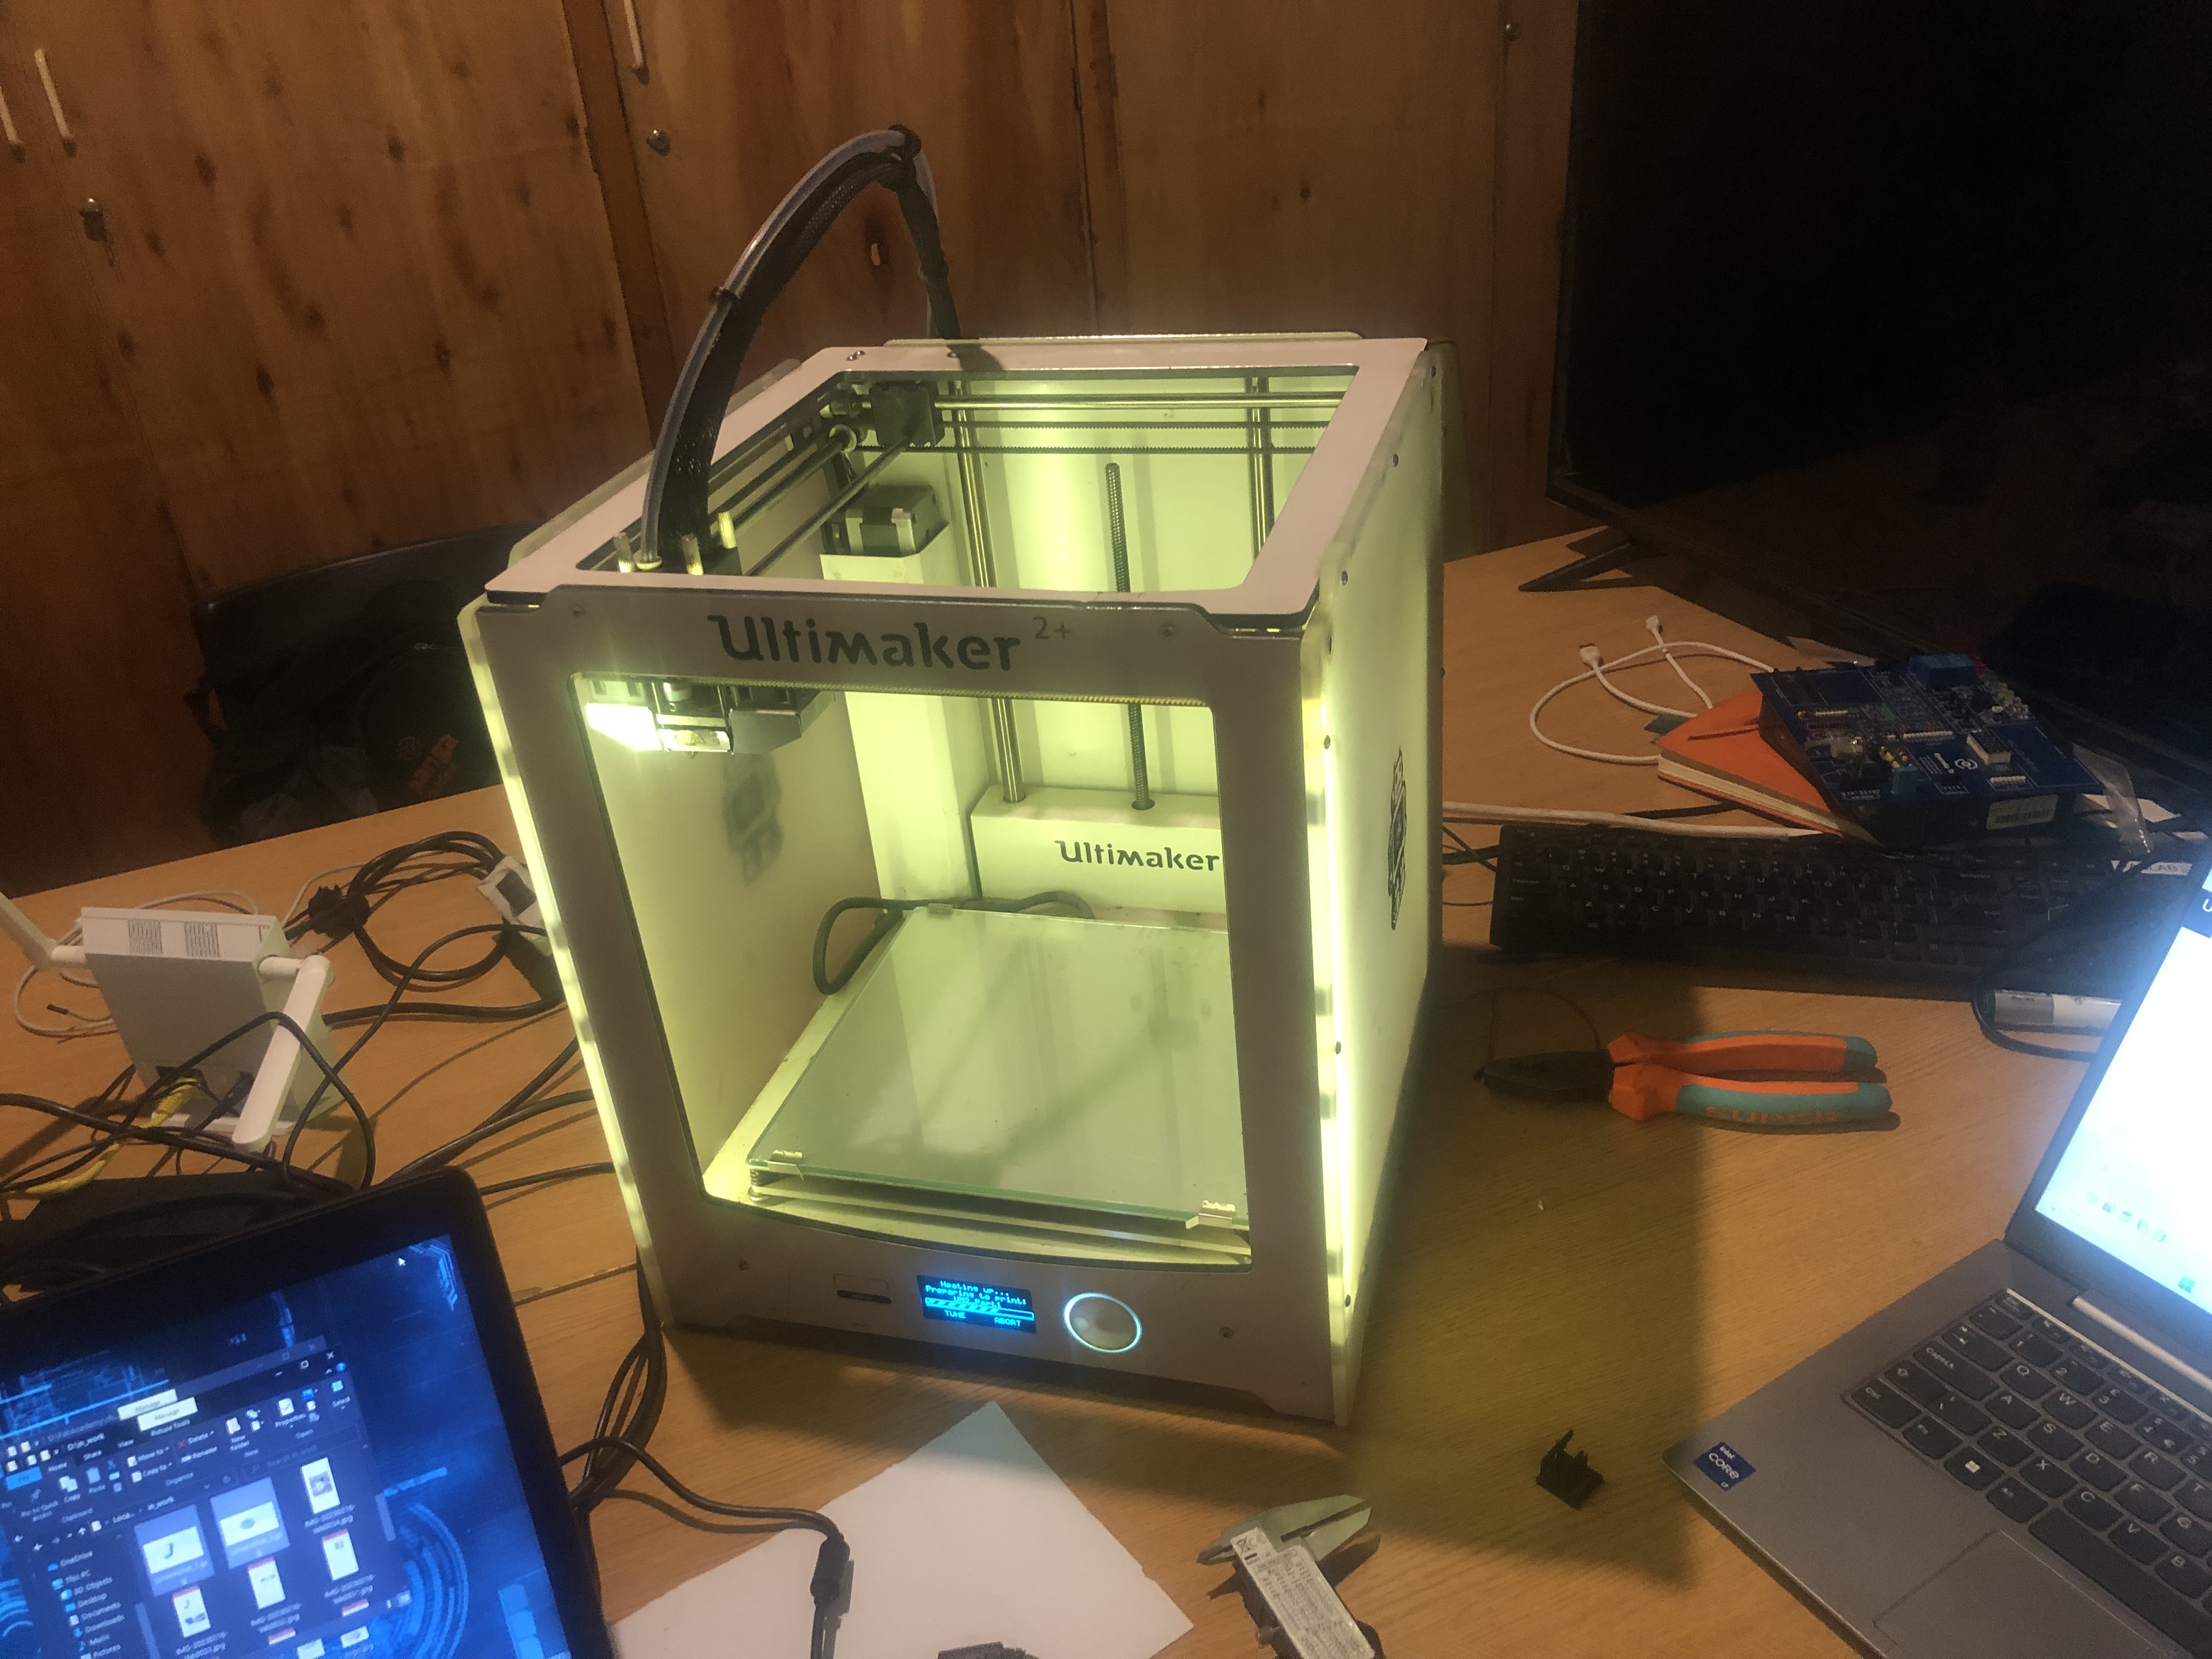
B.In this assignement I will print my 3D disign by using 3D printer, here in our class we use Ultimaker 2+
3D Printer (Ultimaker)
A 3D printer is a type of manufacturing technology that creates three-dimensional objects by layering materials, typically plastic or resin, until the desired shape is formed. The printer reads a 3D digital model created in a computer-aided design (CAD) software and translates it into a series of cross-sectional slices that it then prints layer by layer, adding material as it goes.
For setting 3D printing parameter we use a sotware called Ultimaker-Cure : Ultimaker Cura is a free and open-source software program used for 3D printing preparation and slicing. It is developed and maintained by Ultimaker, a Dutch manufacturer of 3D printers. Cura software takes the 3D model created in a computer-aided design (CAD) software and prepares it for printing. This involves adjusting parameters such as layer height, infill density, and printing speed, as well as adding support structures and generating the instructions for the 3D printer to follow.
Here are some common Ultimaker Cura parameters that can be set before 3D printing:
- 1. Layer height: This refers to the thickness of each printed layer and can affect the overall quality and speed of the print.
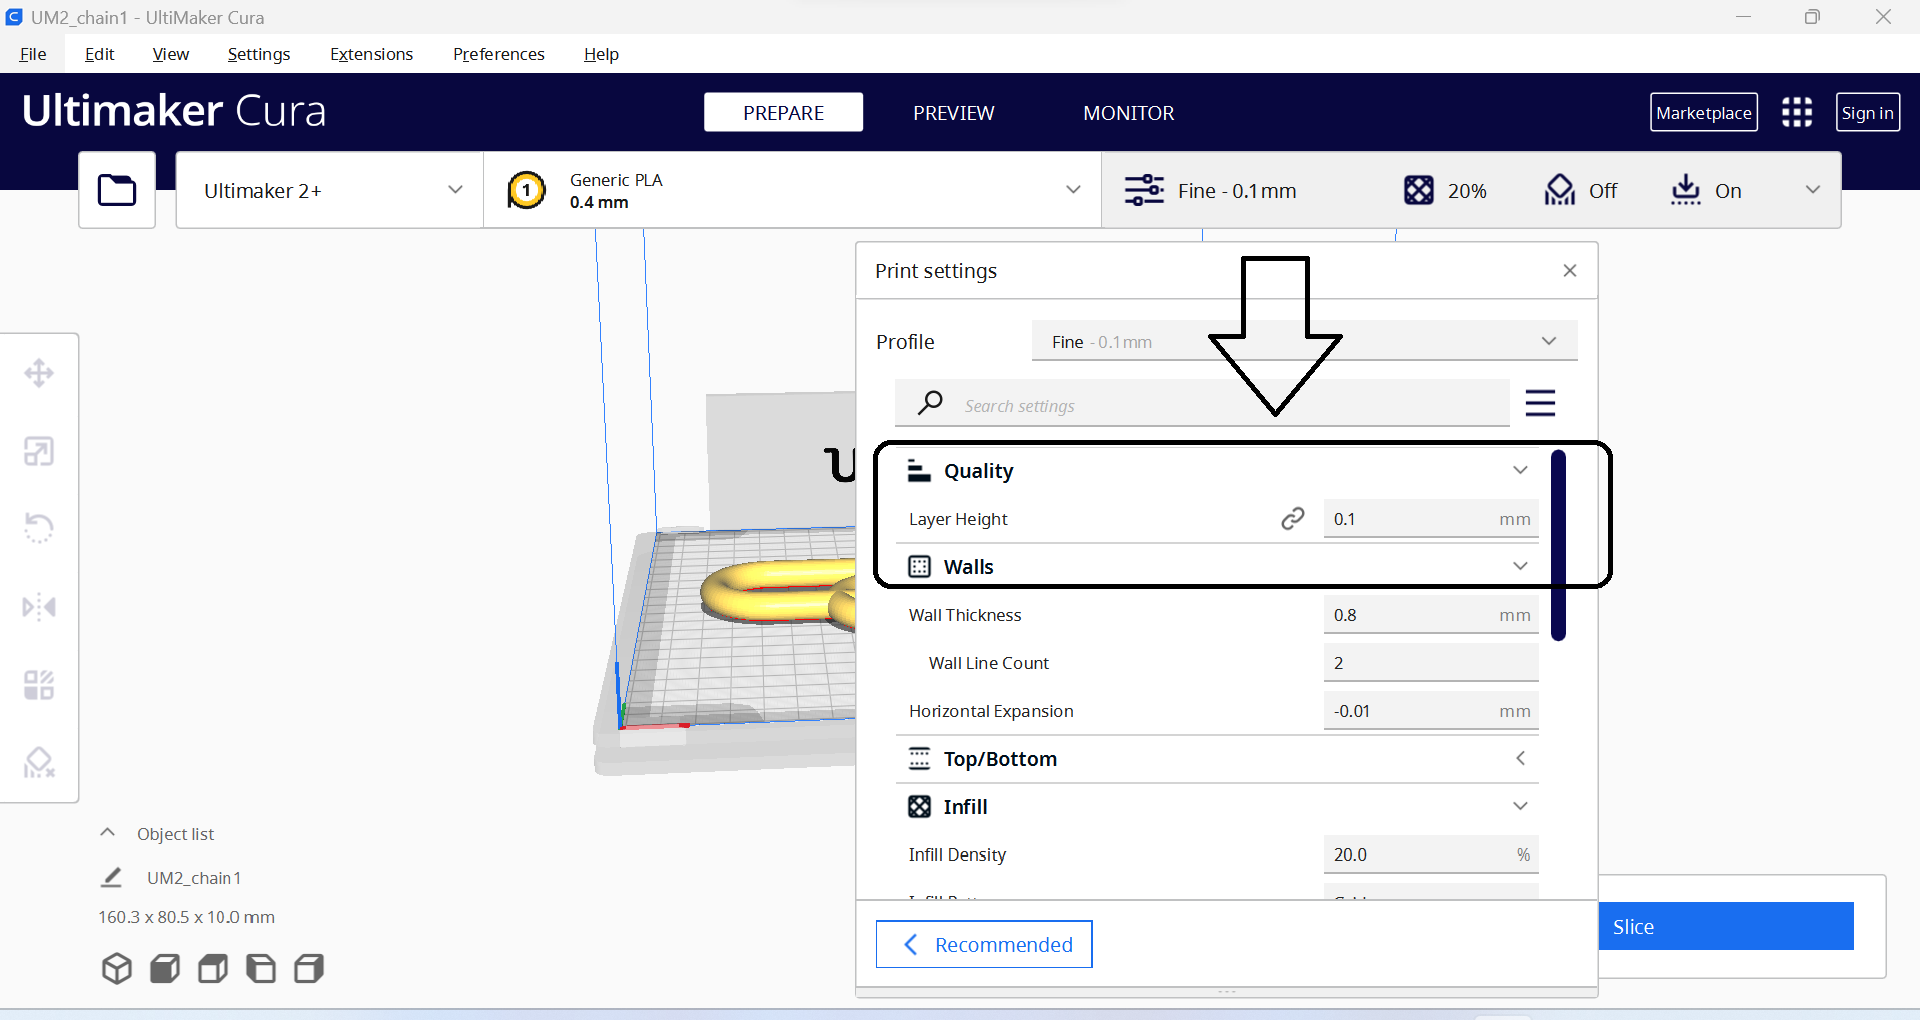
- 2. Infill density: This is the amount of material used to fill in the interior of the print, which can affect the strength and weight of the finished part.
- 3. Print speed: This is the speed at which the printer moves when printing, which can affect the overall time it takes to print as well as the quality of the finished part.
- 4. Printing temperature: This is the temperature at which the filament is melted and extruded, which can affect the adhesion and quality of the print.
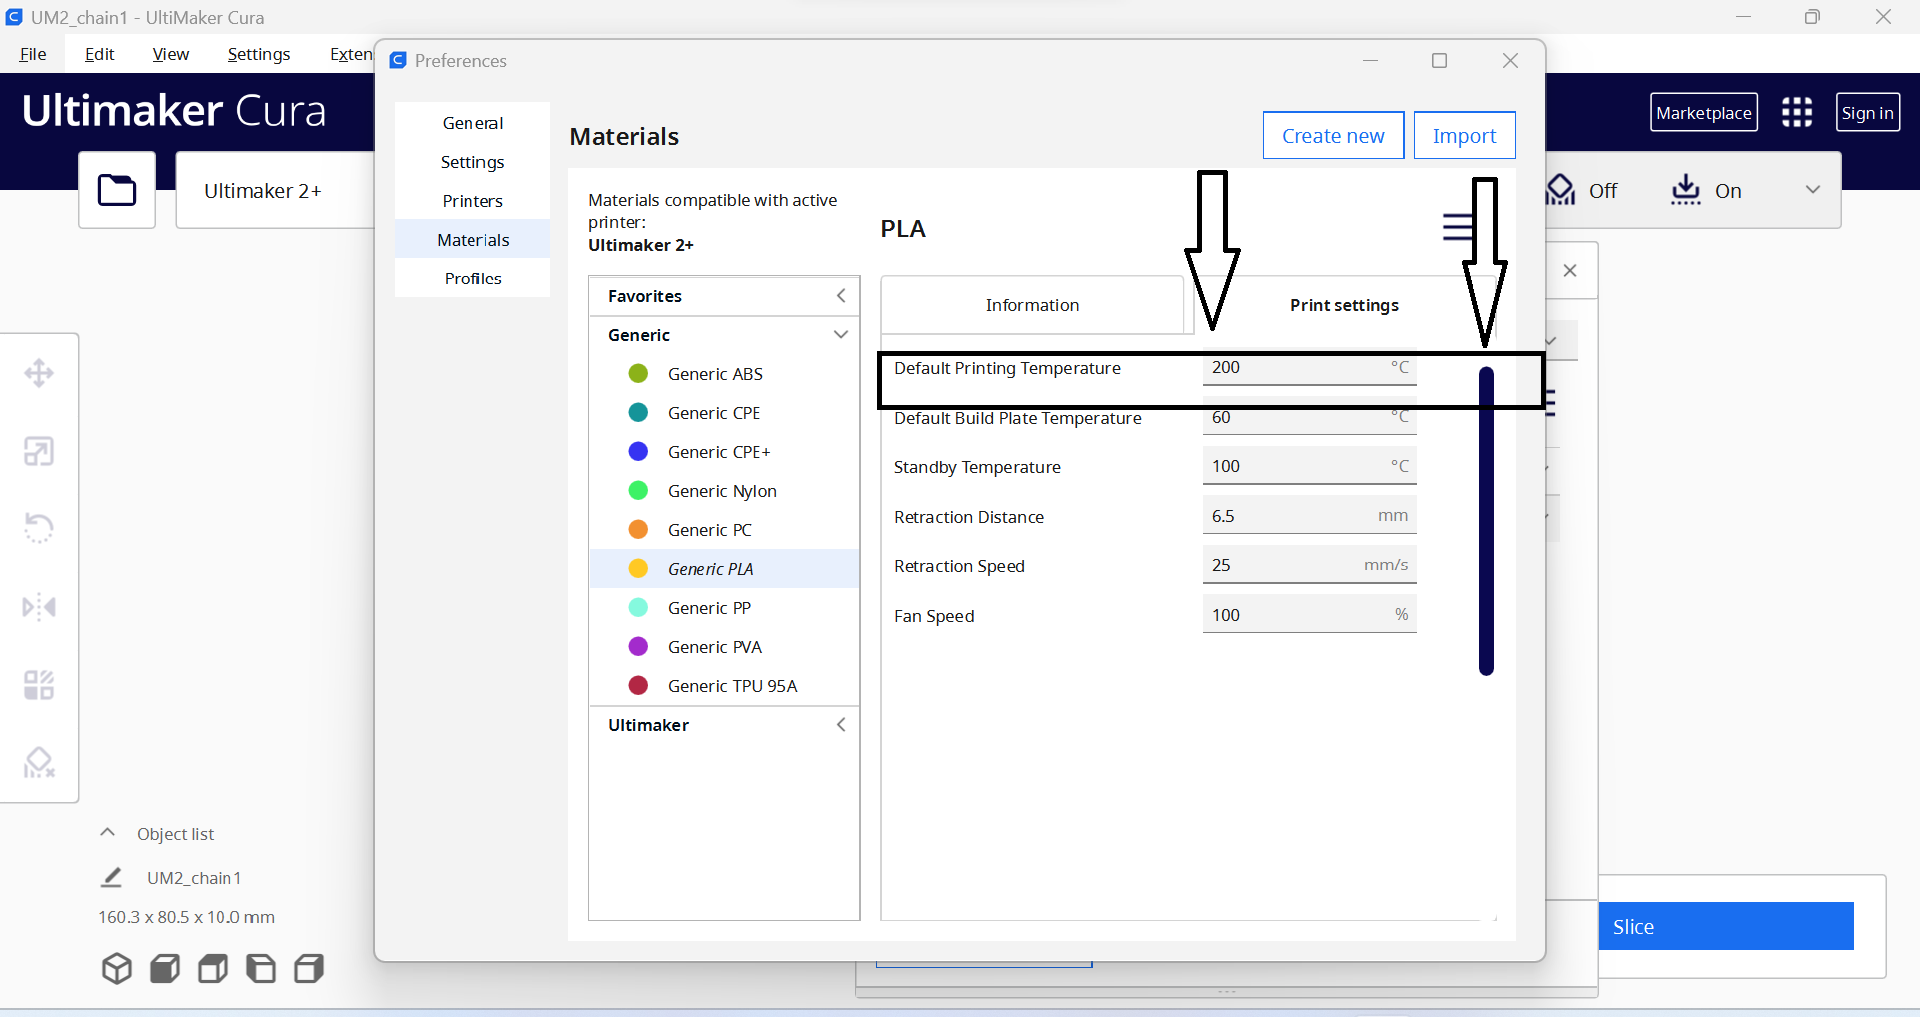
- 5. Build plate temperature: This is the temperature of the build plate, which can affect the adhesion of the first layer and prevent warping or lifting of the print during printing.
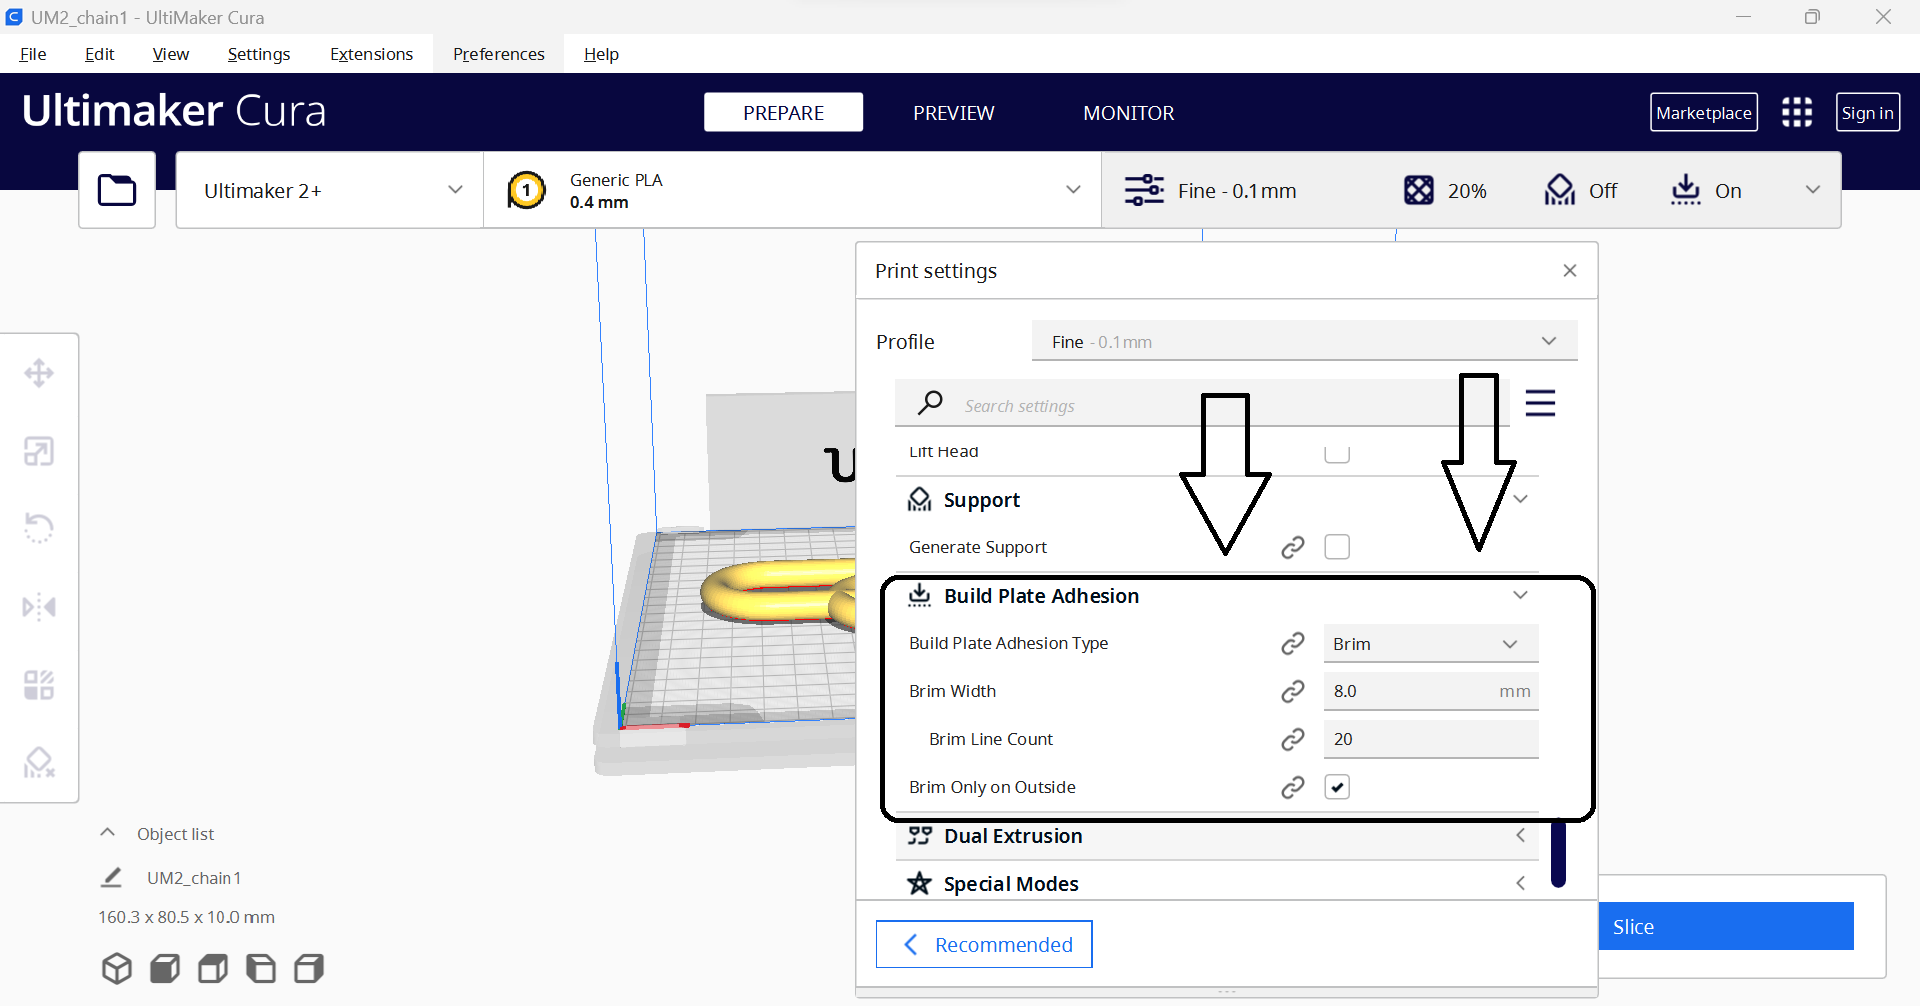
- 6. Support structure: This refers to the placement and design of support structures that are printed along with the part to prevent overhangs and ensure the part is printed successfully.
- 7. Retraction: pThis is the amount of filament that is pulled back into the printer between moves to prevent stringing or oozing of the filament.
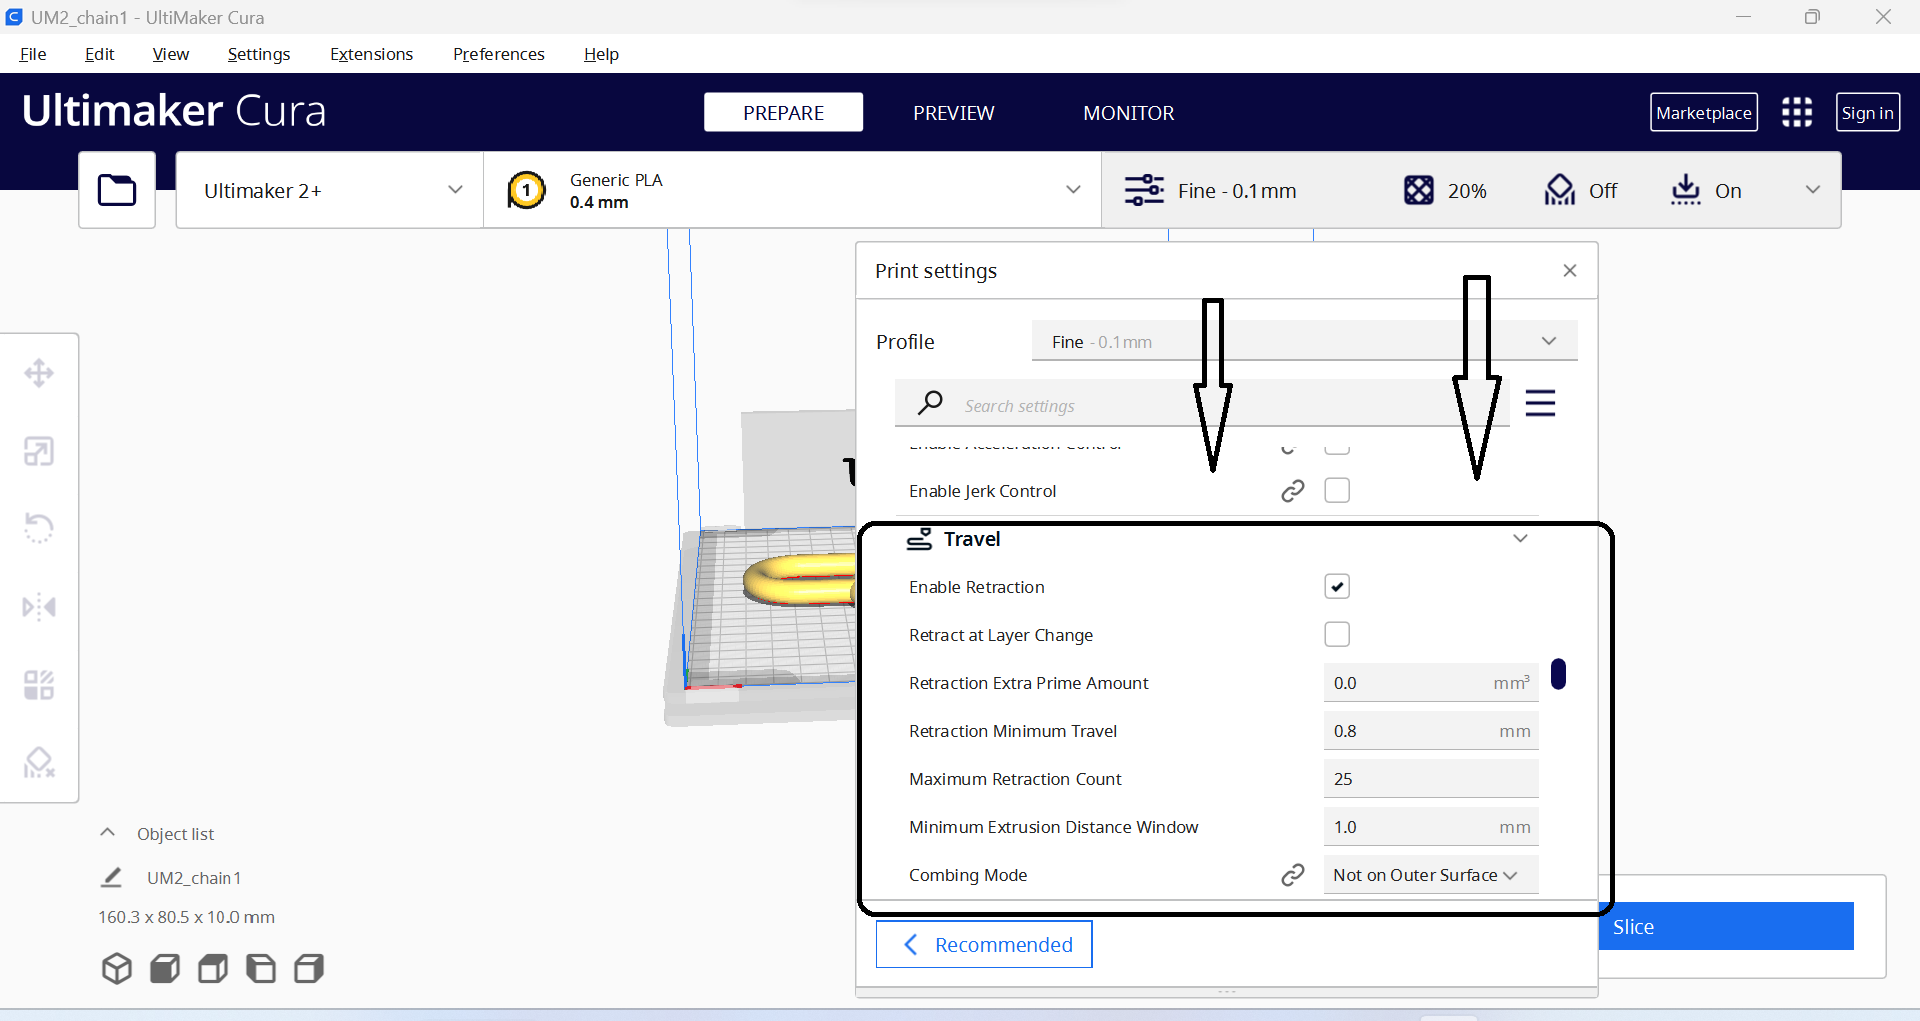
- 8. Cooling: This refers to the use of fans or other cooling methods to prevent overheating and improve the quality of the finished part.

- 8. Cooling: This refers to the use of fans or other cooling methods to prevent overheating and improve the quality of the finished part.
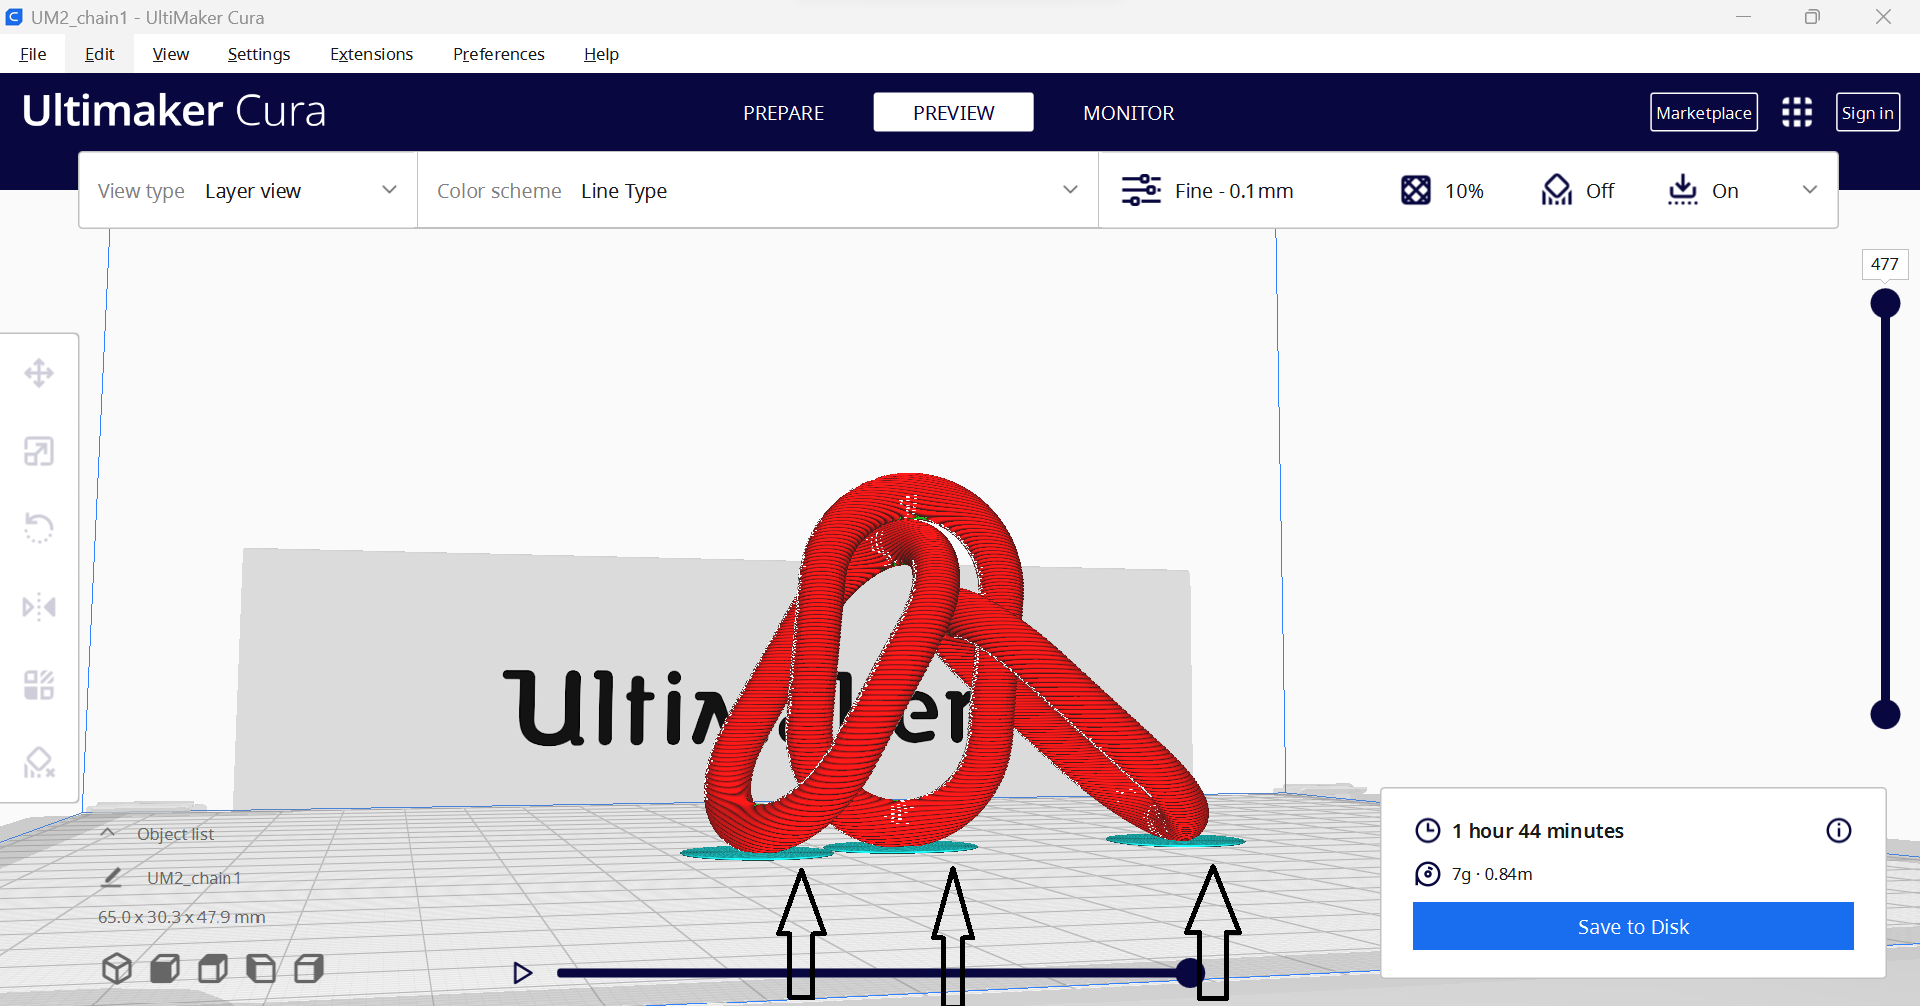
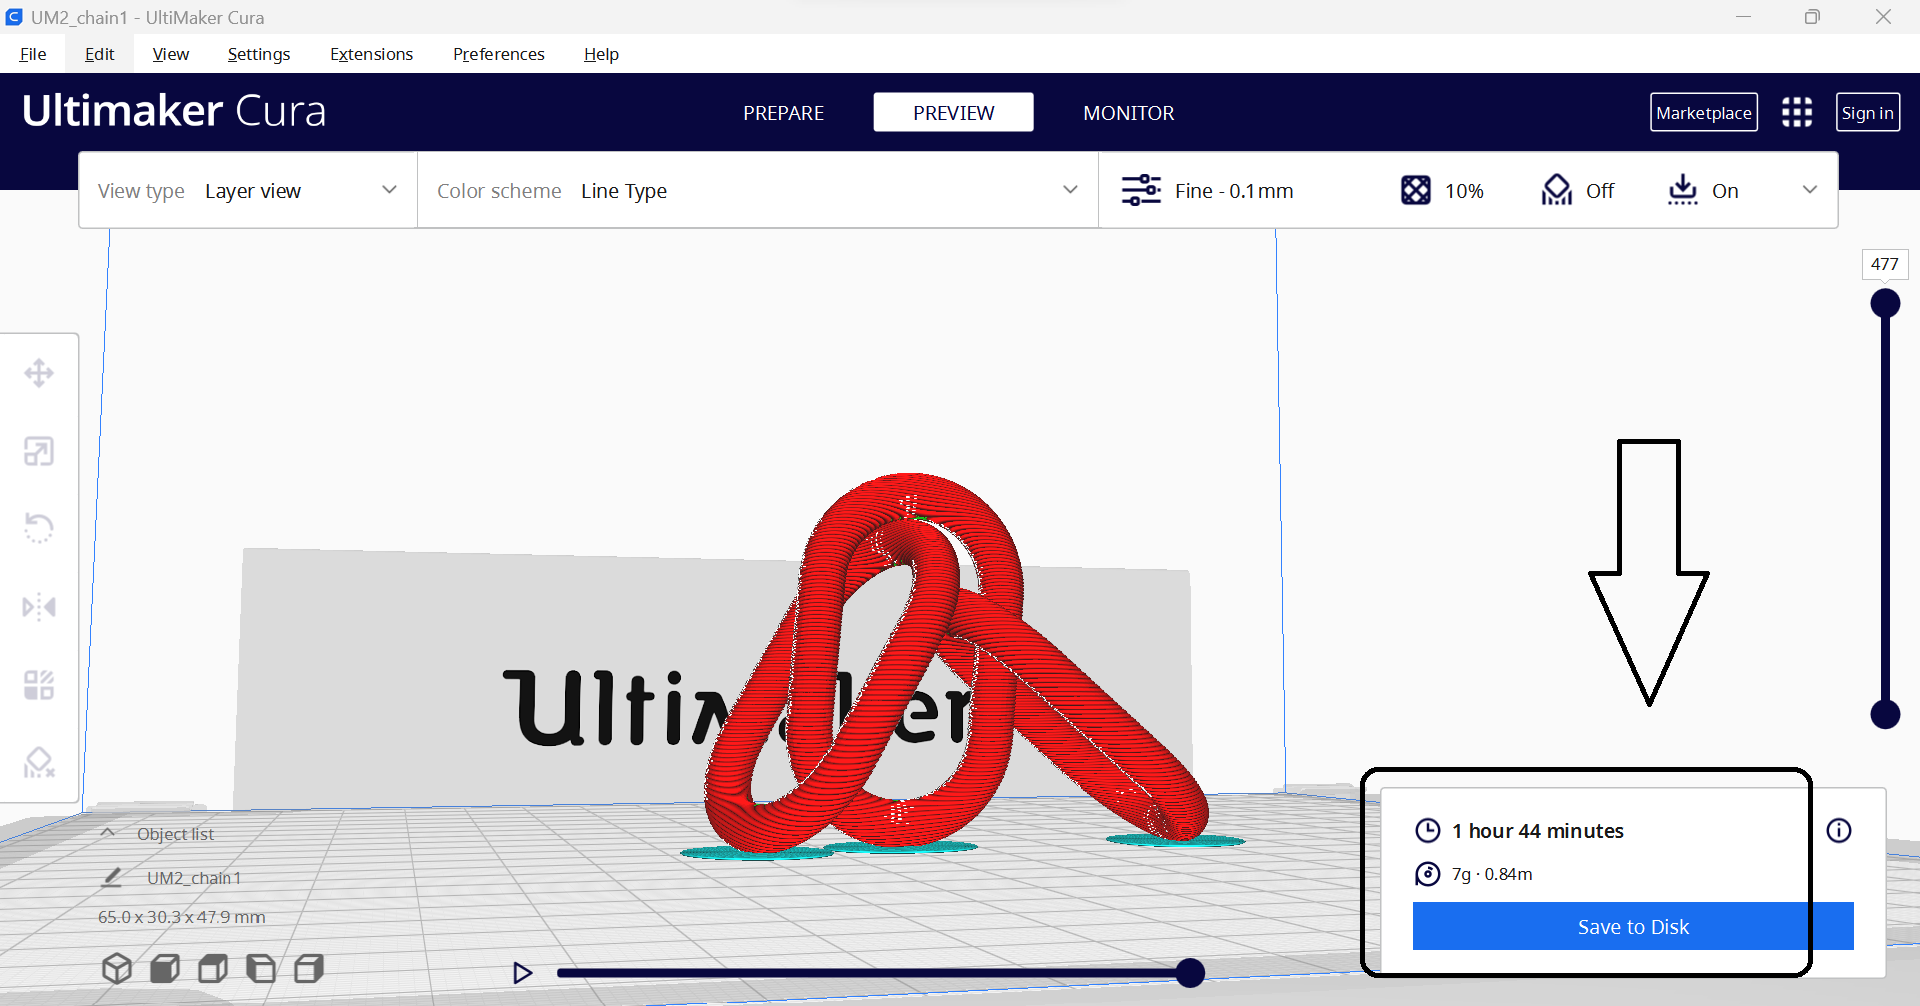
After setting those paremeters we started printing as show in below Video
After taking a time of one hour and 44 minute we have our results as shown in below image and video
2. 3D scan an object (and optionally print it)
Scanner Sense: Scanner Sense is a 3D scanning software that works with a variety of 3D scanners. For more about Scanner Sense Click here
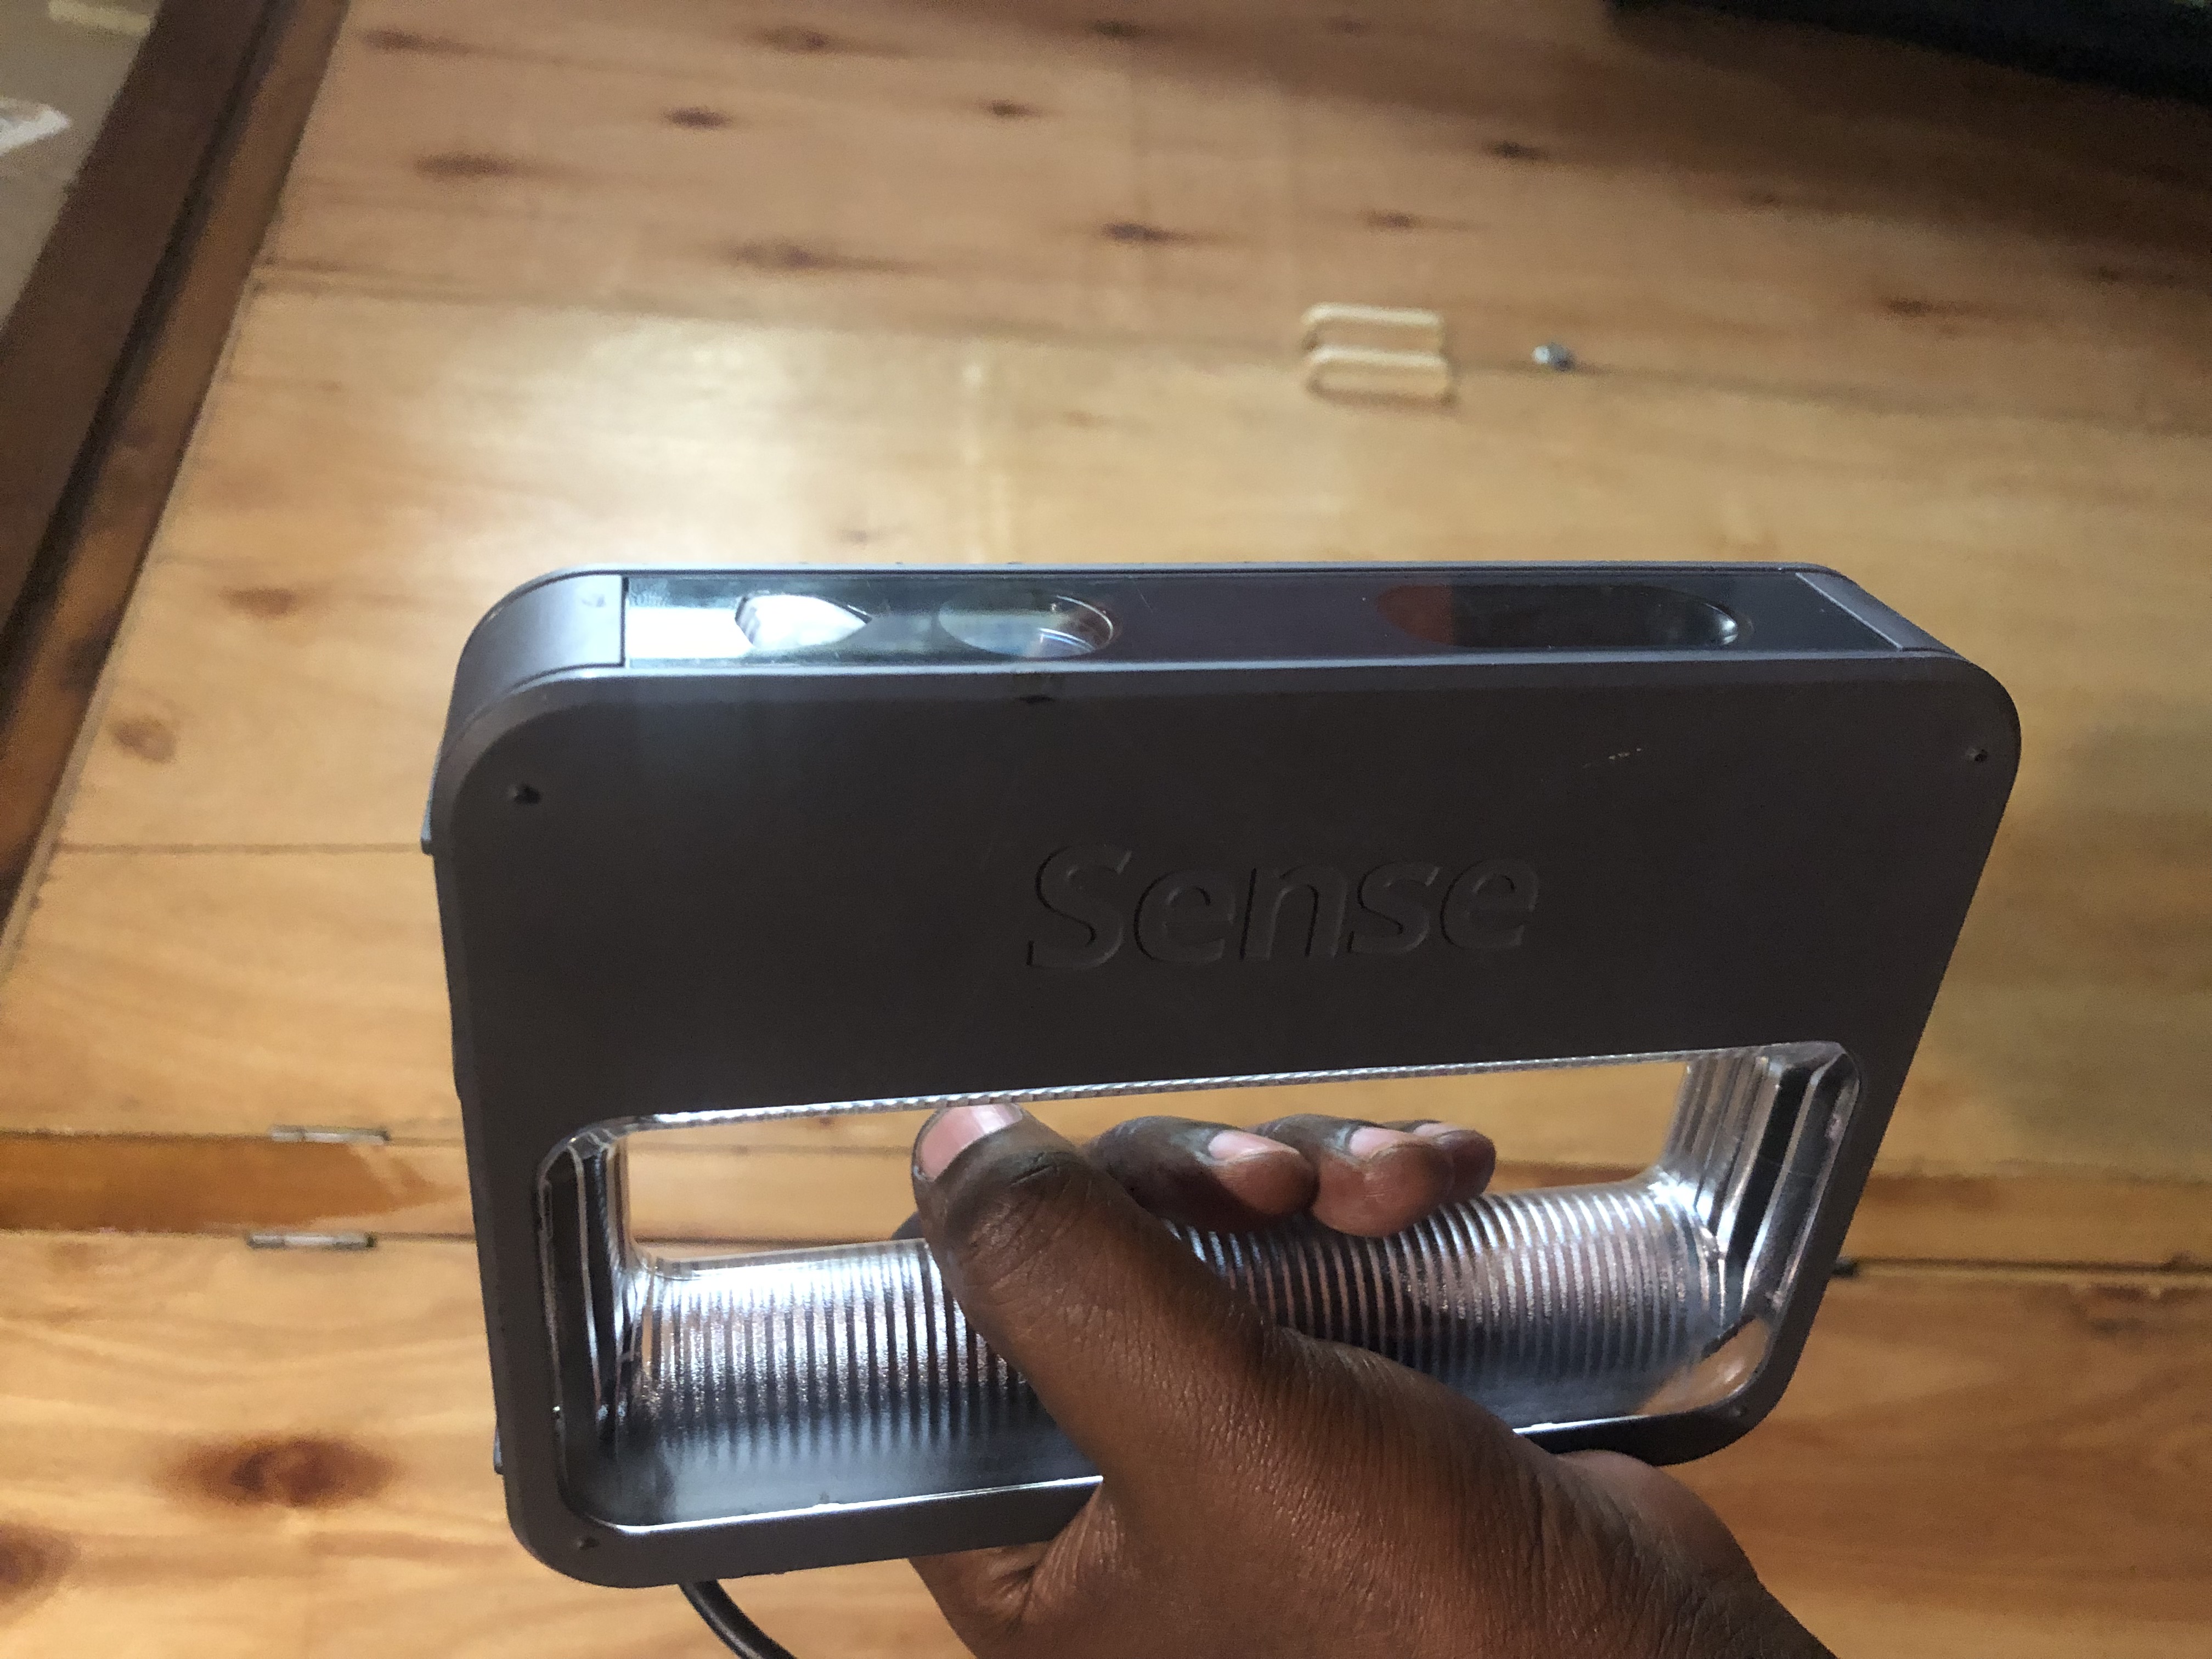
1.Install and set up the softwareFirst, we install the Sense software on our computer and connect the scanner to the computer using the USB cable provided. Follow the instructions provided to set up the scanner found here to Scanner Sense


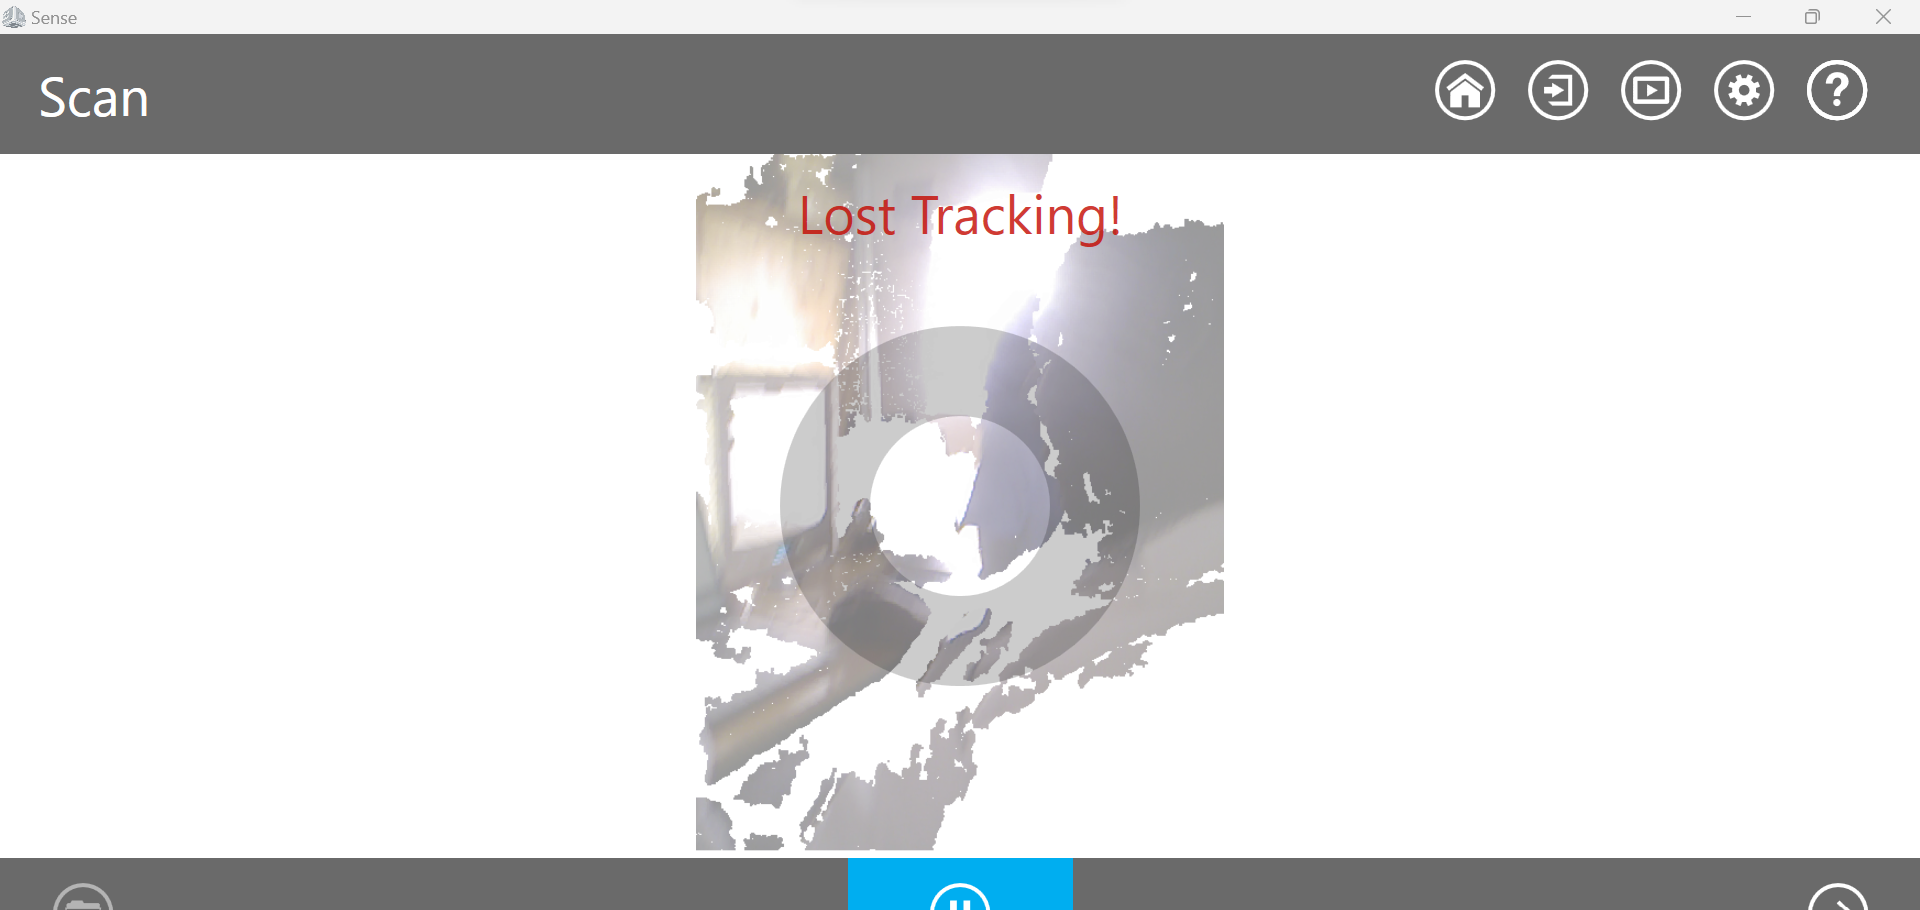
2.Prepare the object: Second we prepare the object to be scanned, here we scann my head


During scanning we have facing challange of losting truck many time
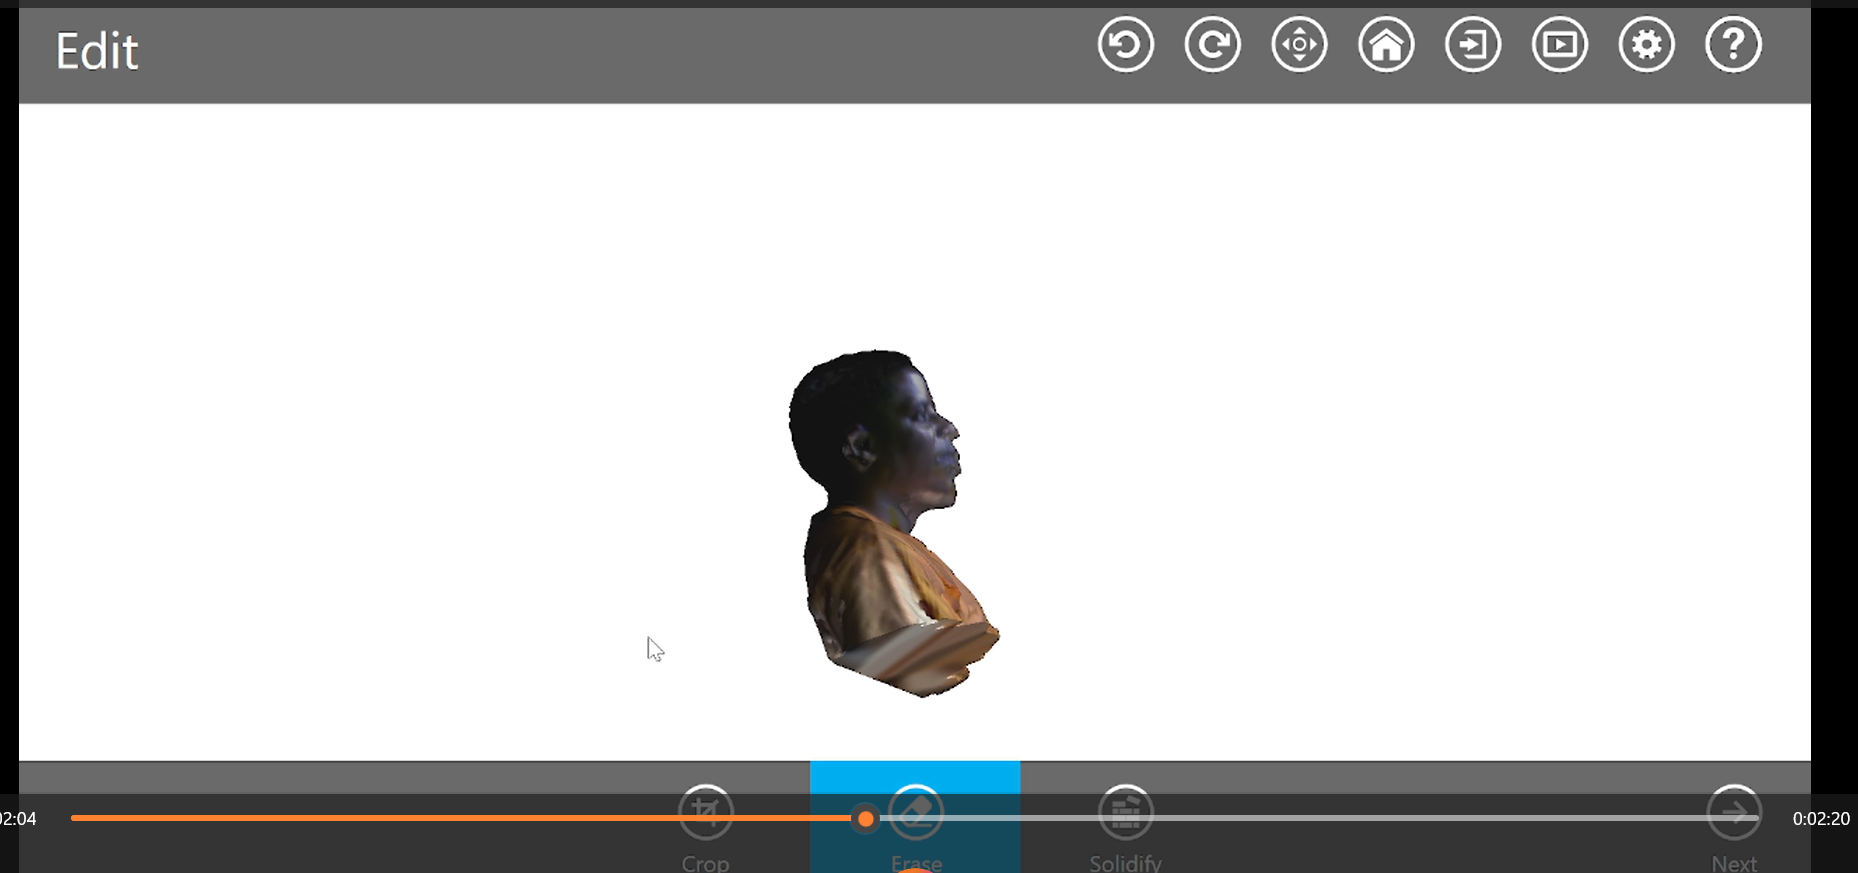
You can see how we scan and edit my results on the below video
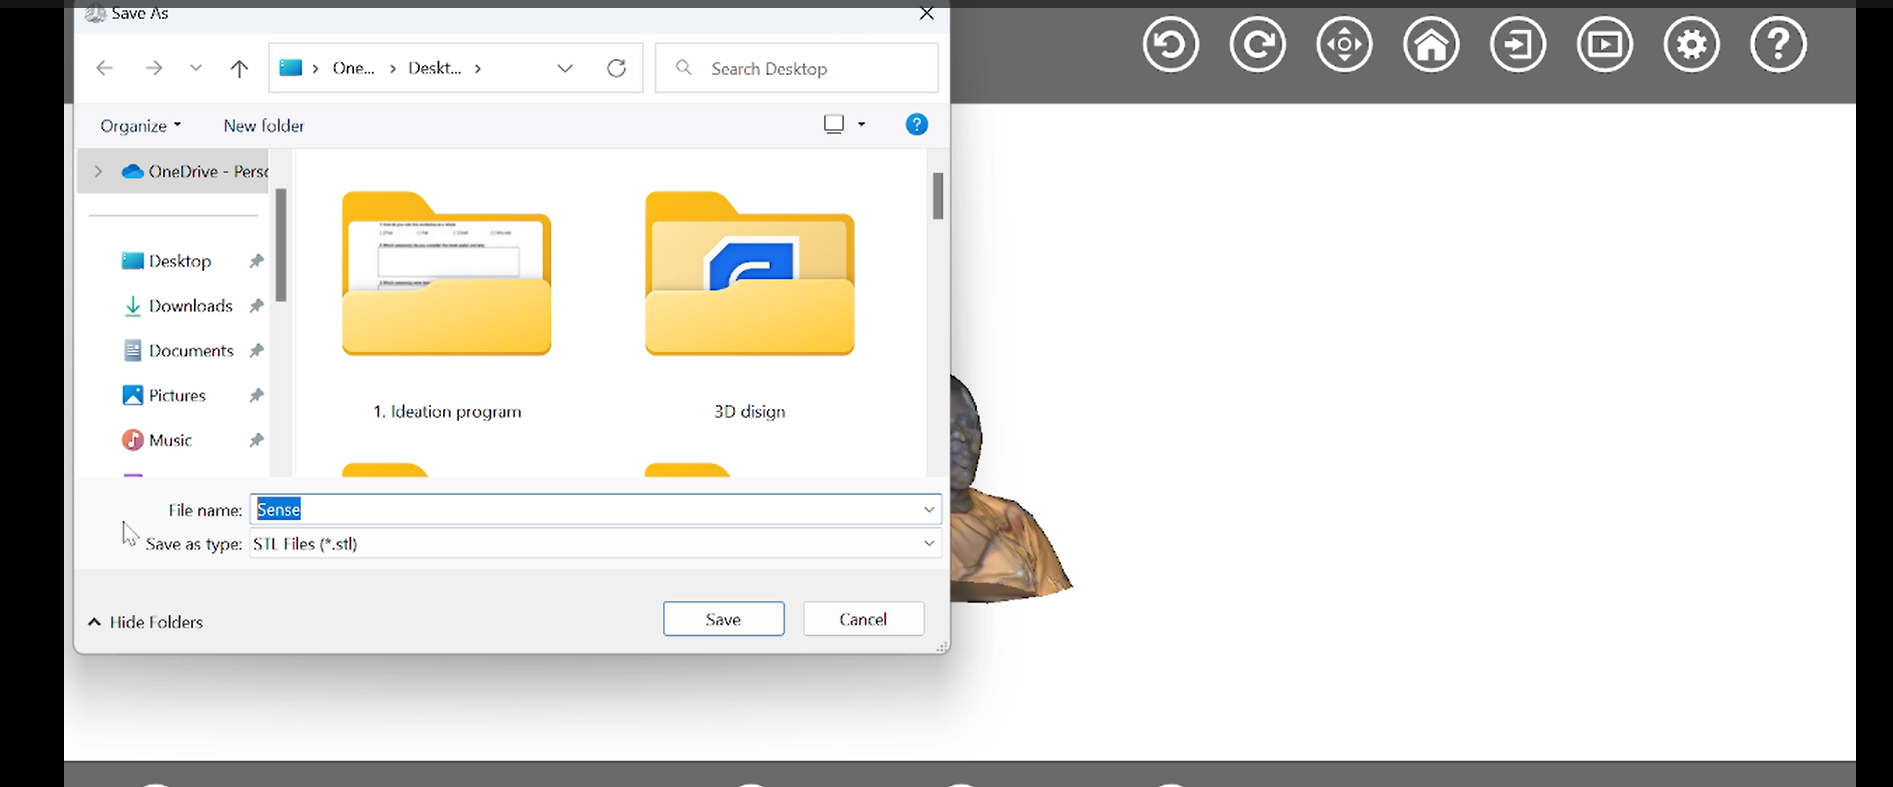
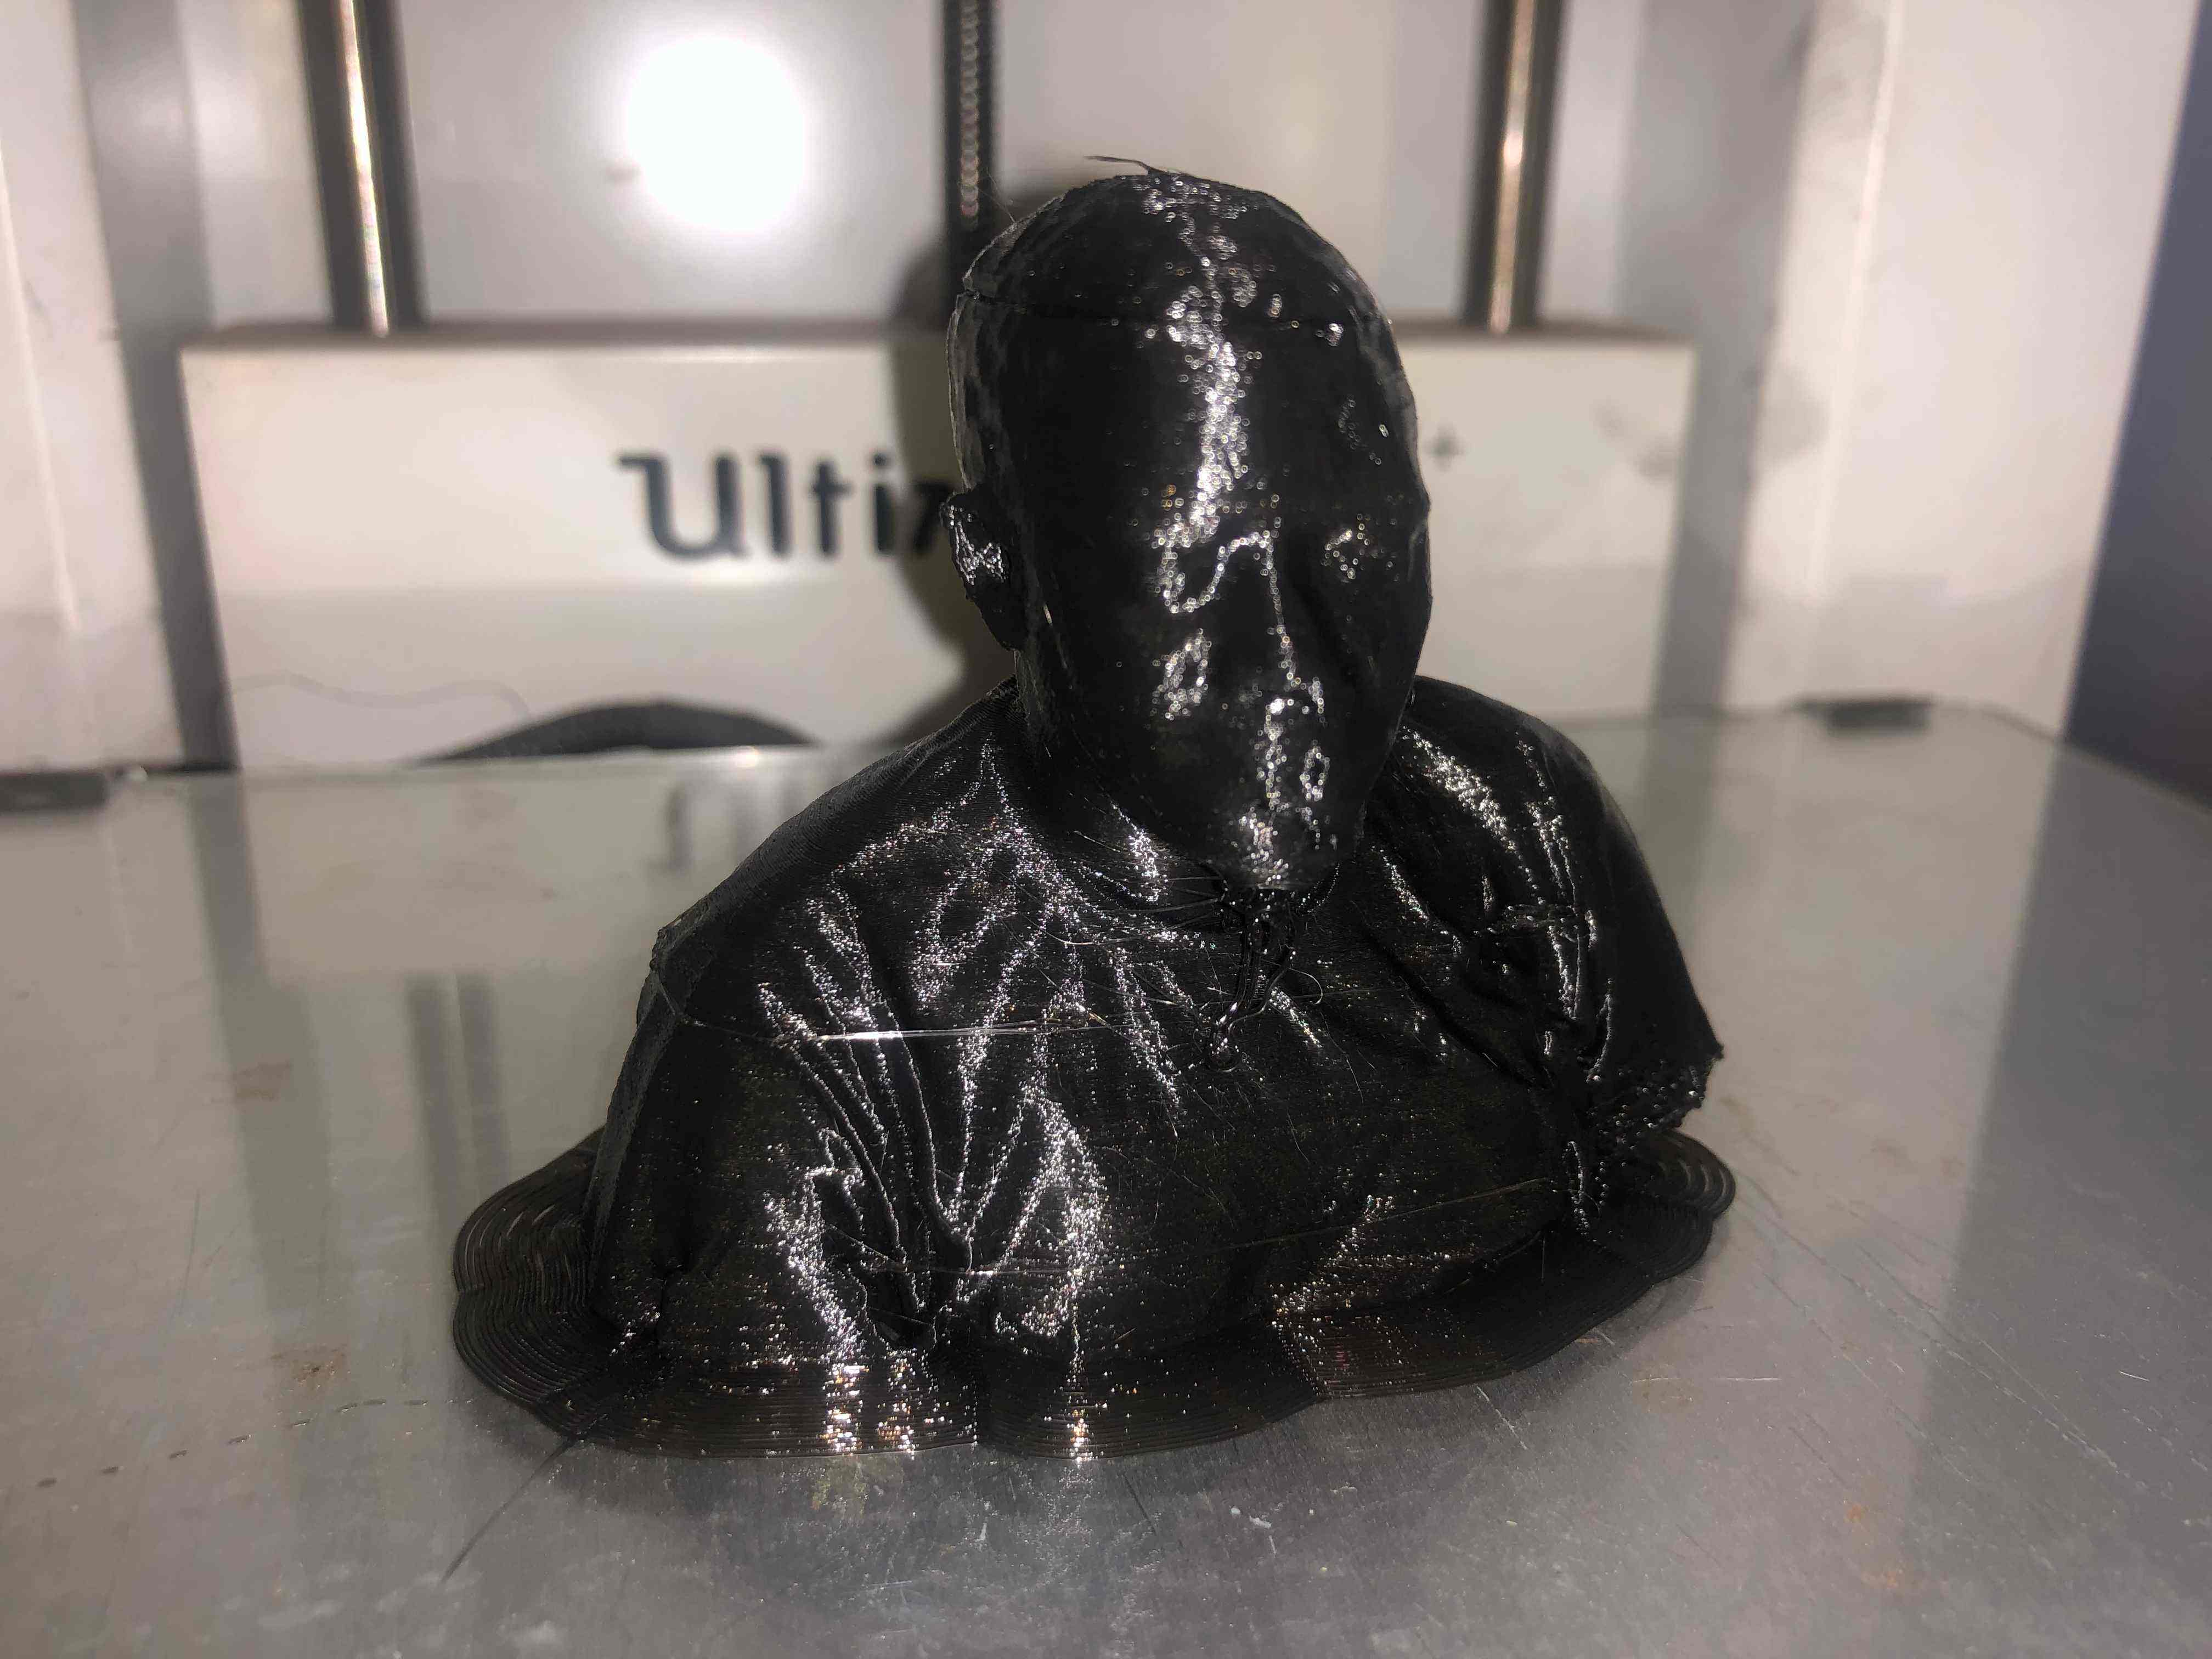
After my Scanning we get the following resultats.
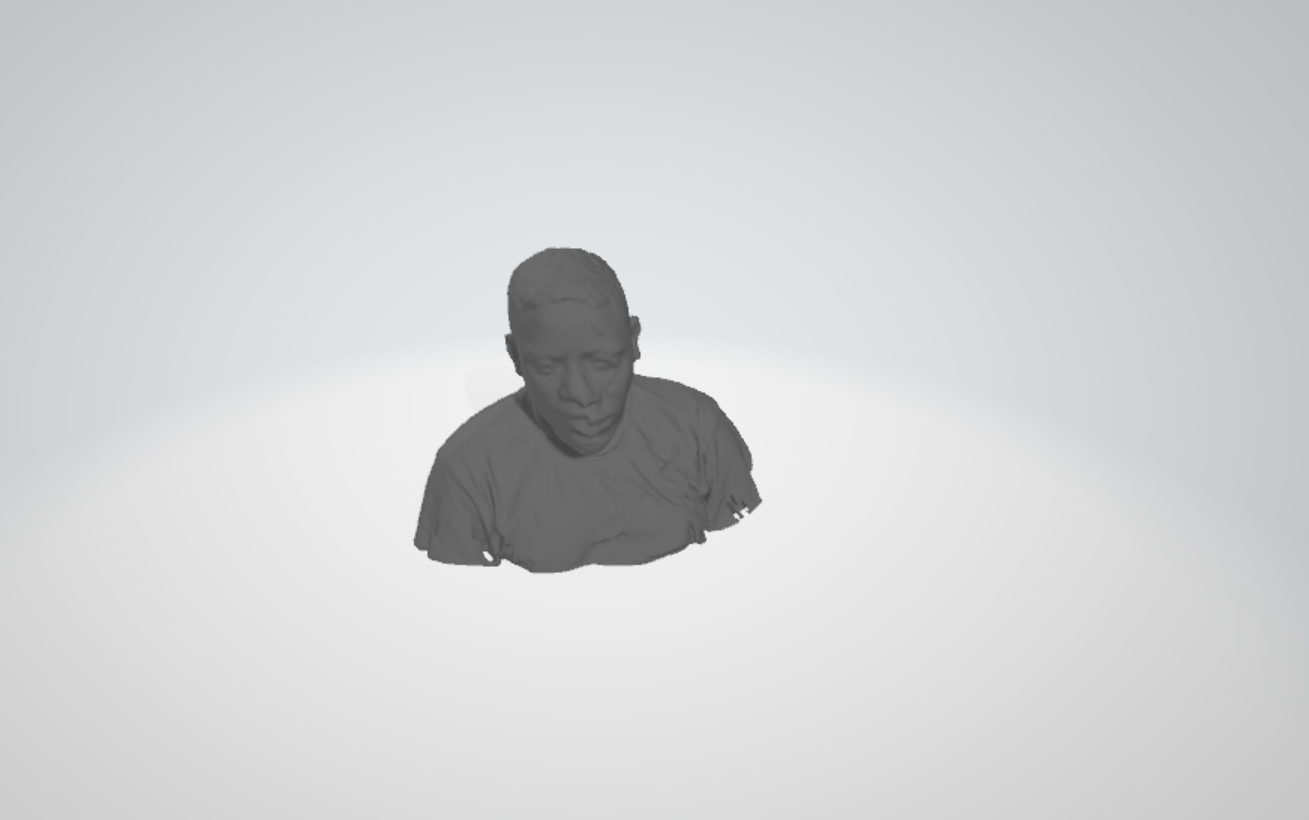
The following Video shows how I printed my 3D scanned Face
The below Image is my printed product
If you want to learn about my designers, kindly click here for downloading my files