this week assignment input devices
Group assignment input devicesin this week assignment i have focused on ultrasonic sensor that can sense the obstacles
refer to this link for more about the ultrasonic HERE
what is ultrasound
Ultrasound is sound with frequencies greater than 20 kilohertz. This frequency is the approximate upper audible limit of human hearing in healthy young adults. The physical principles of acoustic waves apply to any frequency range, including ultrasound. Ultrasonic devices operate with frequencies from 20 kHz up to several gigahertz. Ultrasound is used in many different fields. Ultrasonic devices are used to detect objects and measure distances.Ultrasound imaging or sonography is often used in medicine. In the nondestructive testing of products and structures,
ultrasound is used to detect invisible flaws. Industrially, ultrasound is used for cleaning, mixing, and accelerating chemical
processes. Animals such as bats and porpoises use ultrasound for locating prey and obstacles. reference LINK HERE
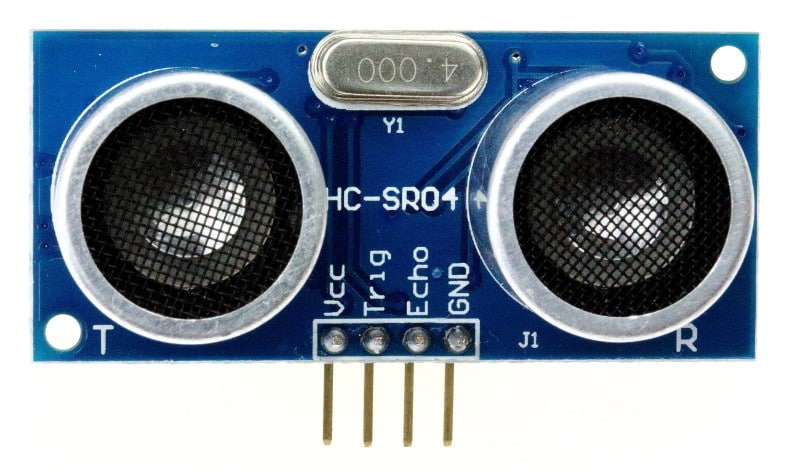
what is ultrasonic sensor
An ultrasonic sensor is an instrument that measures the distance to an object using ultrasonic sound waves.An ultrasonic sensor uses a transducer to send and receive ultrasonic pulses that relay back information about an object’s proximity.
how does ultrasonic sensor works
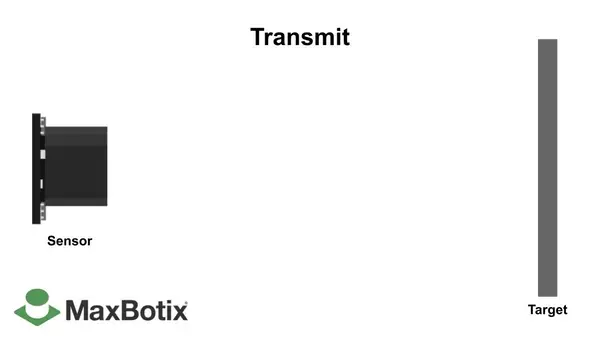
Ultrasonic sensors work by sending out a sound wave at a frequency above the range of human hearing.The transducer of the sensor acts as a microphone to receive and send the ultrasonic sound. Our ultrasonic
sensors, like many others, use a single transducer to send a pulse and to receive the echo.
The sensor determines the distance to a target by measuring time lapses between the sending and receiving of the ultrasonic pulse.

how sensor works and their phenomen visit link HERE for reference
how to measure the distance there's a formula used, which is distance = speed of sound*period/2
so the distance is equal to speed of sound multiplied with time which is similar to speed of sound refer to link HERE about ultrasonic speed,
so we divide it by 2 because it hits the target and comeback which means it travels double distance
to implement this formula using programming and hardware, the technics used here are, we send pulse every after 10 milliseconds and we measures
how long it took the wave to travel from sensor to the target and comeback so here we get the period
normaly the speed of sound is 343 m/s more link for reference
so the formula is distance = 343m/s * period/2
link HERE for downloading ultrasonic datasheet
video in this link https://www.youtube.com/watch?v=z4uxC7ISd-cexplains more deep on ultrasonic
how i firstly hoocked it up with arduino microcontroller for testing the ultrasonic
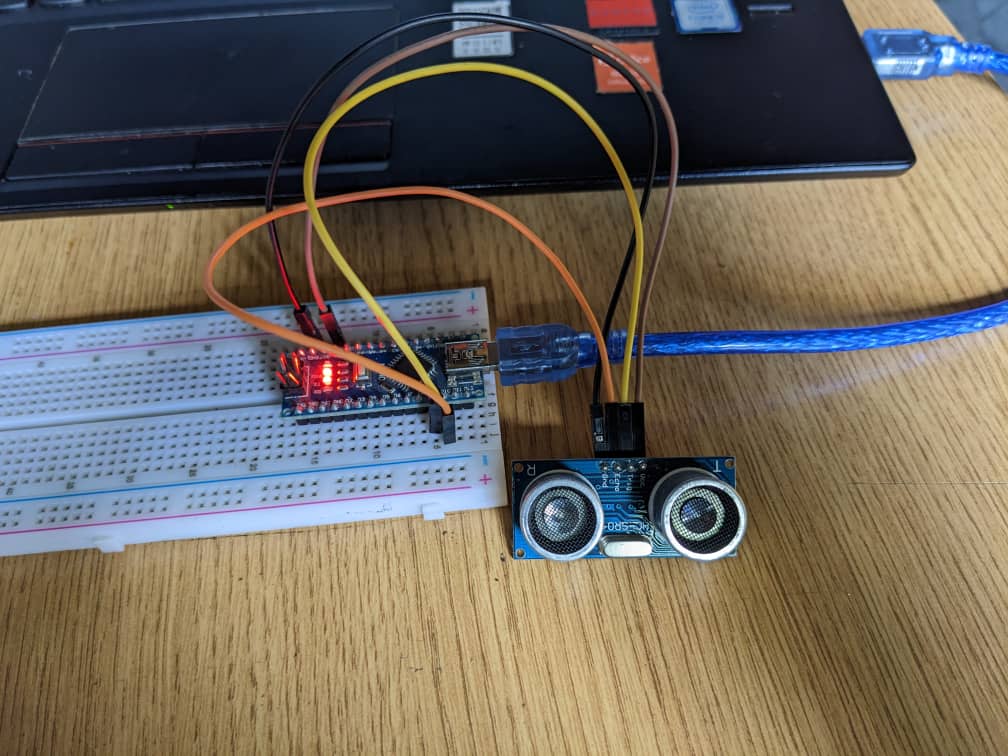
so i have opened arduino IDE and i sketched the following codes
const int trigPin = 9;
const int echoPin = 10;
long duration;
int distance;
void setup() {
  pinMode(trigPin, OUTPUT);
  pinMode(echoPin, INPUT);
  Serial.begin(9600);
}
void loop() {
  // Clears the trigPin
  digitalWrite(trigPin, LOW);
  delayMicroseconds(2);
  digitalWrite(trigPin, HIGH);
  delayMicroseconds(10);
  digitalWrite(trigPin, LOW);
  duration = pulseIn(echoPin, HIGH);
  distance = duration * 0.034 / 2;
  distance = distance + 1;
  Serial.print("Distance: ");
  Serial.print(distance);
  Serial.println("cm");
}


so here is the final results it was accurately done
.png)
how this programming works
this section is for declaring variables as pins for input and output hence the echo and trigger
echo receives the waves echos and the trigger transmitts pulse waves
      const int trigPin = 9;
      const int echoPin = 10;
      long duration;
      int distance;
the following is setup function this section is to set the pinmode of the pins whether it is input or output
      void setup() {
        pinMode(trigPin, OUTPUT);
        pinMode(echoPin, INPUT);
        Serial.begin(9600);
      }
this section is loop function where i implemented the formula i mentioned above and process the outputso i have started the trigger to clear LOW and also i set the trigger HIGH for 10ms and pull it LOW it will pulse at certain delay
and then echo receives it
      void loop() {
        digitalWrite(trigPin, LOW);
        delayMicroseconds(2);
        digitalWrite(trigPin, HIGH);
        delayMicroseconds(10);
        digitalWrite(trigPin, LOW);
        duration = pulseIn(echoPin, HIGH);
        distance = duration * 0.034 / 2;
        distance = distance + 1;
        Serial.print("Distance: ");
        Serial.print(distance);
        Serial.println("cm");
      }
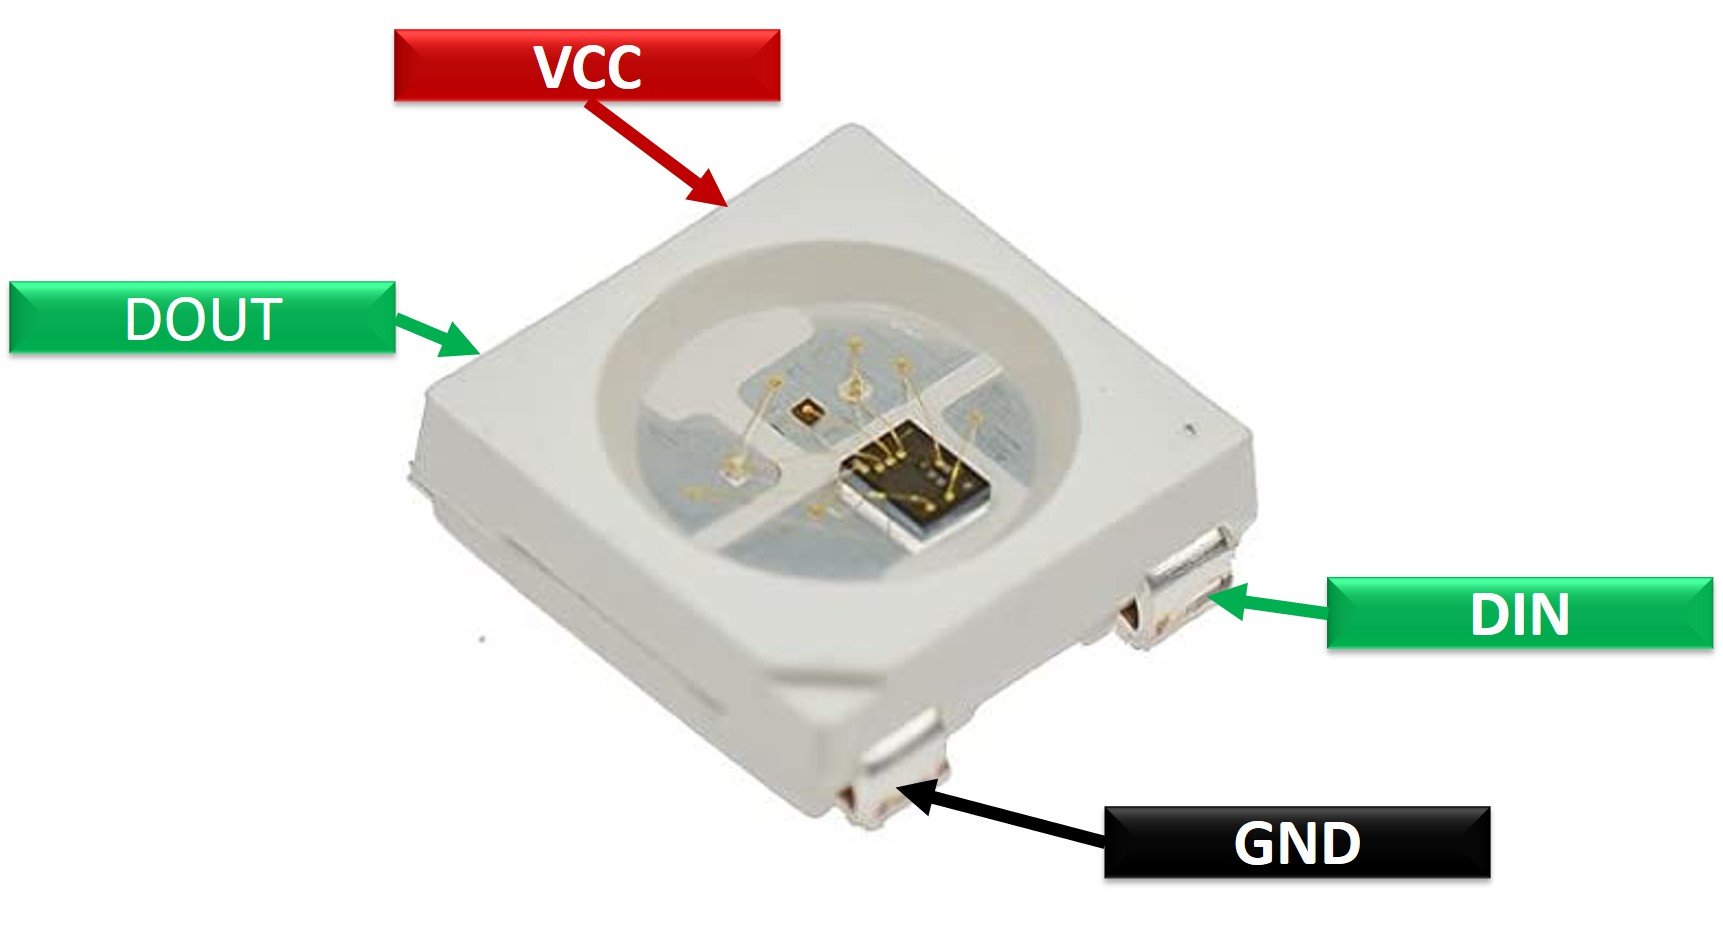
so for this input device i have integrated it with leds to make it more applicablehere's how they works i have four leds rgb neopixels, each led has three different colours red, blue, green
i have set it that when an obctacle exceeds the color shift to another color if also all three colours are done it jumps to anothe led
the image below shows the led i have used also known as neopixel or addressable leds
https://components101.com/displays/neopixel-led-strip for all about these leds

with the help of the board i have designed from electronics production week i have used it to integrate with
ultrasonic sensor, the board is ESP32 dev board with the programmer CH340 visit the webpage on this link dev board and programmer HERE


here is the schematic diagram used to integrate with schematic

to make program and light this leds, so to intergrate it with arduino i installed the library of "adafruit neo pixel" with library manager
through this link download the library and install it https://github.com/adafruit/Adafruit_NeoPixel in ase library manager doesn't work
open arduino IDE and then include the library open sketch>> include library>> manage libraries and the search for "adafruit neo pixels"
.png)
search for "Adafruit_NeoPixel"nd click install to download and install automatically a
.png)
then after installing the library the following codes shows how i actually implemented it
#include
  #ifdef __AVR__
   #include  // Required for 16 MHz Adafruit Trinket
  #endif
  const int trigPin = 32;
  const int echoPin = 35;
  #define PIN       33
  #define NUMPIXELS 4 // Popular NeoPixel ring size

  Adafruit_NeoPixel pixels(NUMPIXELS, PIN, NEO_GRB + NEO_KHZ800);

  #define DELAYVAL 500

  long duration;
  int distance;
  int i0 = 0;
  int i1 = 1;
  int i2 = 2;
  int i3 = 3;

  void setup() {

  #if defined(__AVR_ATtiny85__) && (F_CPU == 16000000)
    clock_prescale_set(clock_div_1);
  #endif
    Serial.begin(9600);
    pixels.begin();
     pinMode(trigPin, OUTPUT);
    pinMode(echoPin, INPUT);
  }

  void loop() {
  //  Serial.println(distance);
  //  delay(600);
    digitalWrite(trigPin, LOW);
    delayMicroseconds(2);
    digitalWrite(trigPin, HIGH);
    delayMicroseconds(10);
    digitalWrite(trigPin, LOW);
    duration = pulseIn(echoPin, HIGH);
    distance = duration * 0.034 / 2;
    distance = distance + 1;
    pixels.clear();

   if (distance <= 2){
      pixels.setPixelColor(i0, pixels.Color(0, 200, 0));
      pixels.show();
  }
   if (distance > 2 && distance <=4){
      pixels.setPixelColor(i0, pixels.Color(0,0, 200));
      pixels.show();

  }

   if (distance > 4 && distance <=6){
      pixels.setPixelColor(i0, pixels.Color(200,0, 0));
      pixels.show();

  }

   if (distance > 6 && distance <=8){
      pixels.setPixelColor(i1, pixels.Color(0, 200, 0));
      pixels.show();
  }
   if (distance > 8 && distance <=10){
      pixels.setPixelColor(i1, pixels.Color(0,0, 200));
      pixels.show();
  }

   if (distance > 10 && distance <=12){
      pixels.setPixelColor(i1, pixels.Color(200,0, 0));
      pixels.show();
  }


   if (distance > 12 && distance <=14){
      pixels.setPixelColor(i2, pixels.Color(0, 200, 0));
      pixels.show();
  }
   if (distance > 14 && distance <=16){
      pixels.setPixelColor(i2, pixels.Color(0,0, 200));
      pixels.show();
  }

   if (distance > 16 && distance <=18){
      pixels.setPixelColor(i2, pixels.Color(200,0, 0));
      pixels.show();
  }

   if (distance > 18 && distance <=20){
      pixels.setPixelColor(i3, pixels.Color(0, 200, 0));
      pixels.show();
  }
   if (distance > 20 && distance <=22){
      pixels.setPixelColor(i3, pixels.Color(0,0, 200));
      pixels.show();
  }

   if (distance > 22 && distance <=25){
      pixels.setPixelColor(i3, pixels.Color(200,0, 0));
      pixels.show();
  }
  }
these codes i made works as i mentioned above where leds shifts and change colors acording to the distance measured by ultrasonic sensorso the following videoshot shows how it working
therefore since i have been using ultrasonic sensor i learnt how sensors behaviours are integrated in embedded programming mostly ultrasonic sensor, i have also learnt to work with formulas
in programming where i have integrated formula to calculate the distance between the sensor and the obastacle, though i have an understanding of
how radar system works refer HERE hence the ultrasonic sensor