3d scanning and printing
this week assignment focus on 3d scanning and 3d printing where i scan any 3d device, i set up the device this process using 3d scanner device and software managerand also making 3d objects i used 3d printer and slicing software to prepare the the printing i will go through all these process all about the assignment
group assignment link here https://fabacademy.org/2023/labs/rwanda/Group_Assignment/3D_Scanning_and_Printing.html
3D printing
3D printing or additive manufacturing is a process of making three dimensional solid objects from a digital file.The creation of a 3D printed object is achieved using additive processes. In an additive process an object is created by laying down successive layers of material
until the object is created. Each of these layers can be seen as a thinly sliced cross-section of the object.
3D printing is the opposite of subtractive manufacturing which is cutting out / hollowing out a piece of metal or plastic with for instance a milling machine.
3D printing enables you to produce complex shapes using less material than traditional manufacturing methods. refer to the link https://3dprinting.com/what-is-3d-printing/
the printer i use
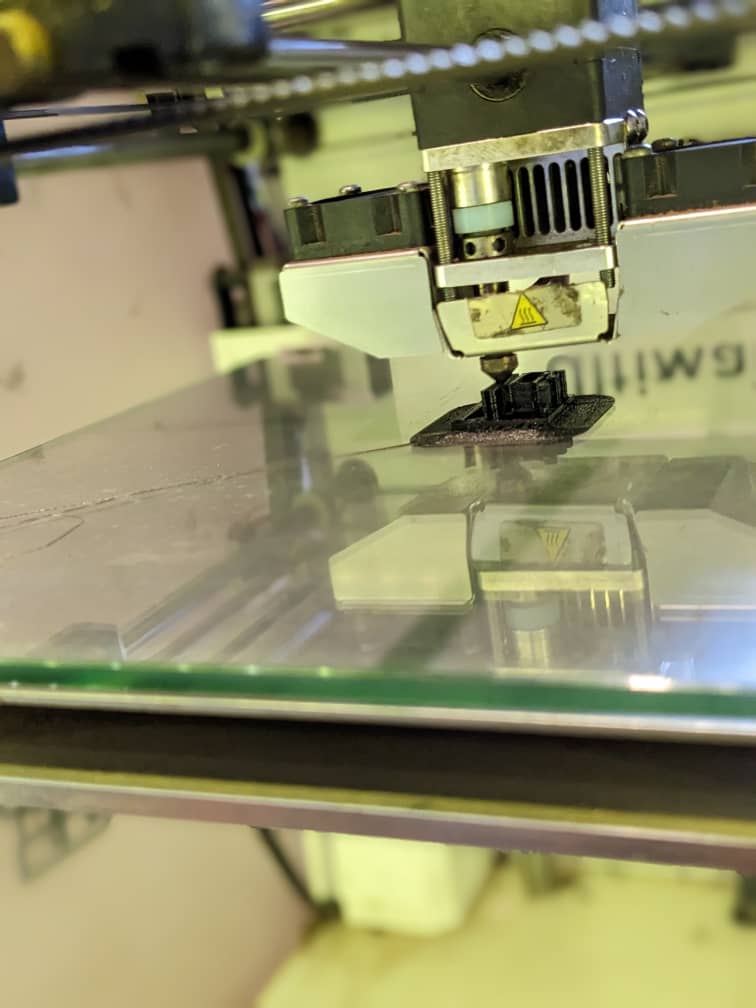
in our lab we have ultimaker 2+ 3D printer it has body volume size of
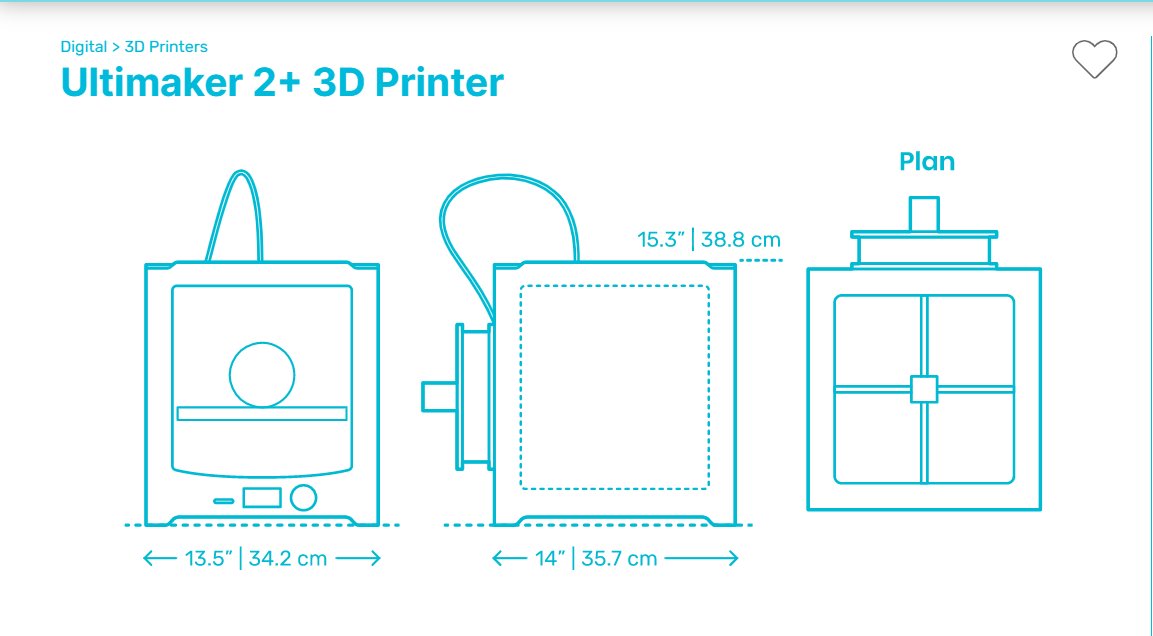
more information of ultimaker 2+ visit https://www.dimensions.com/element/ultimaker-2-plus-3d-printer

How Does 3D Printing Work?
printing starts with a 3D model. the 3D model is loaded from 3D designing software such as solidworks, fusion360 and freeCad, etc...
for my case i have used solidworks cad software to make an object to be printed.
when finnished making design i have to prepare for printing
preparing for printing i need slicing software, slicing means separating or separating an objects into many layers
for this slicer software i have used CURA we can find it here download freely https://ultimaker.com/software/ultimaker-cura
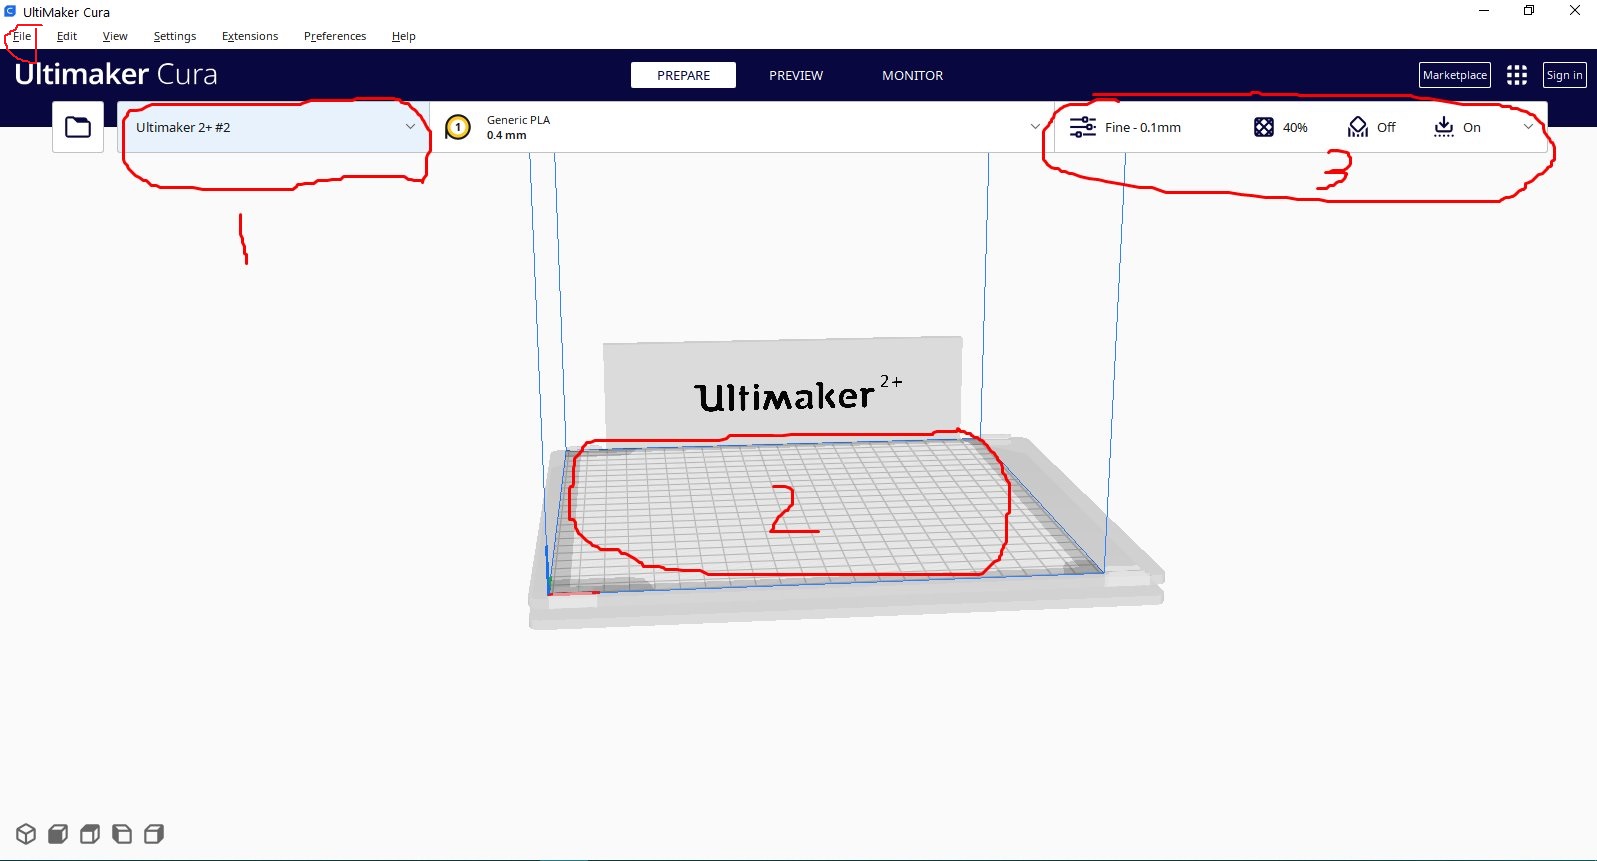
the following image shows the layout of the CURA software after opening. there are 3 main labeled parts section that i need to prepare the printing
the labeled as 1 it is where we choose type of printer being used for my case i chose ultimaker 2+ which wwe have in our lab it is first thing to do before doing any other action then after choosing the printer
i import the the designed object i mentioned before. we can either drug and drop or locate to file>>open file
after importing the object we locate to the 3rd part which is setting we need to optmize to make our print work successful


group assignment
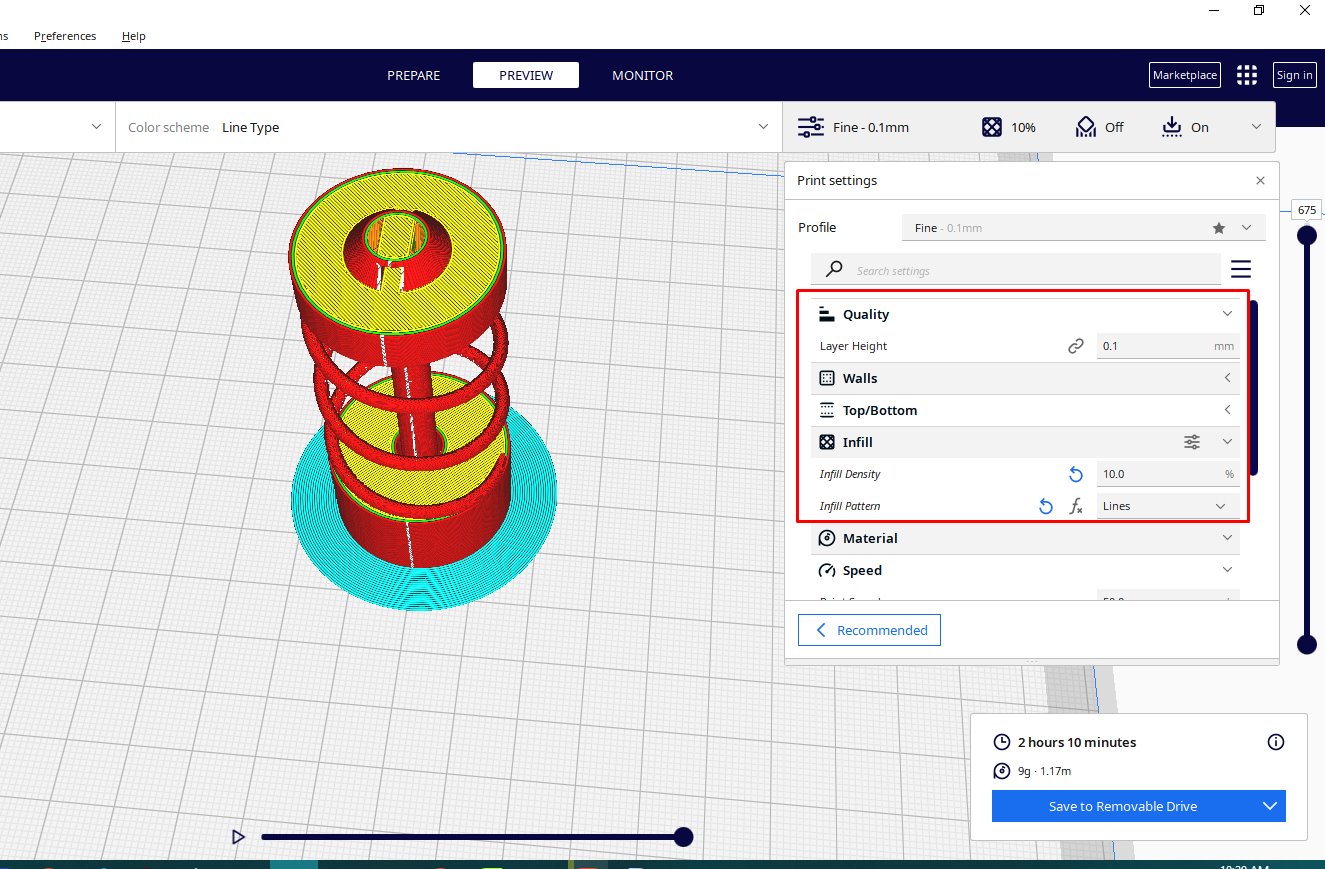
to test printer parameters as followsfor the 3rd part we have assigned as setting, we set the quality, walls, infill
i have designed an object that will help me to test the minimum wall thickness, and the maximum overhead of printing
i have set the infill of 50% and grids of triangle, left wall thickness as default to 1.0mm and wall line count as 2 after setting the parameters i click to clice button and shown results of 20min of printing

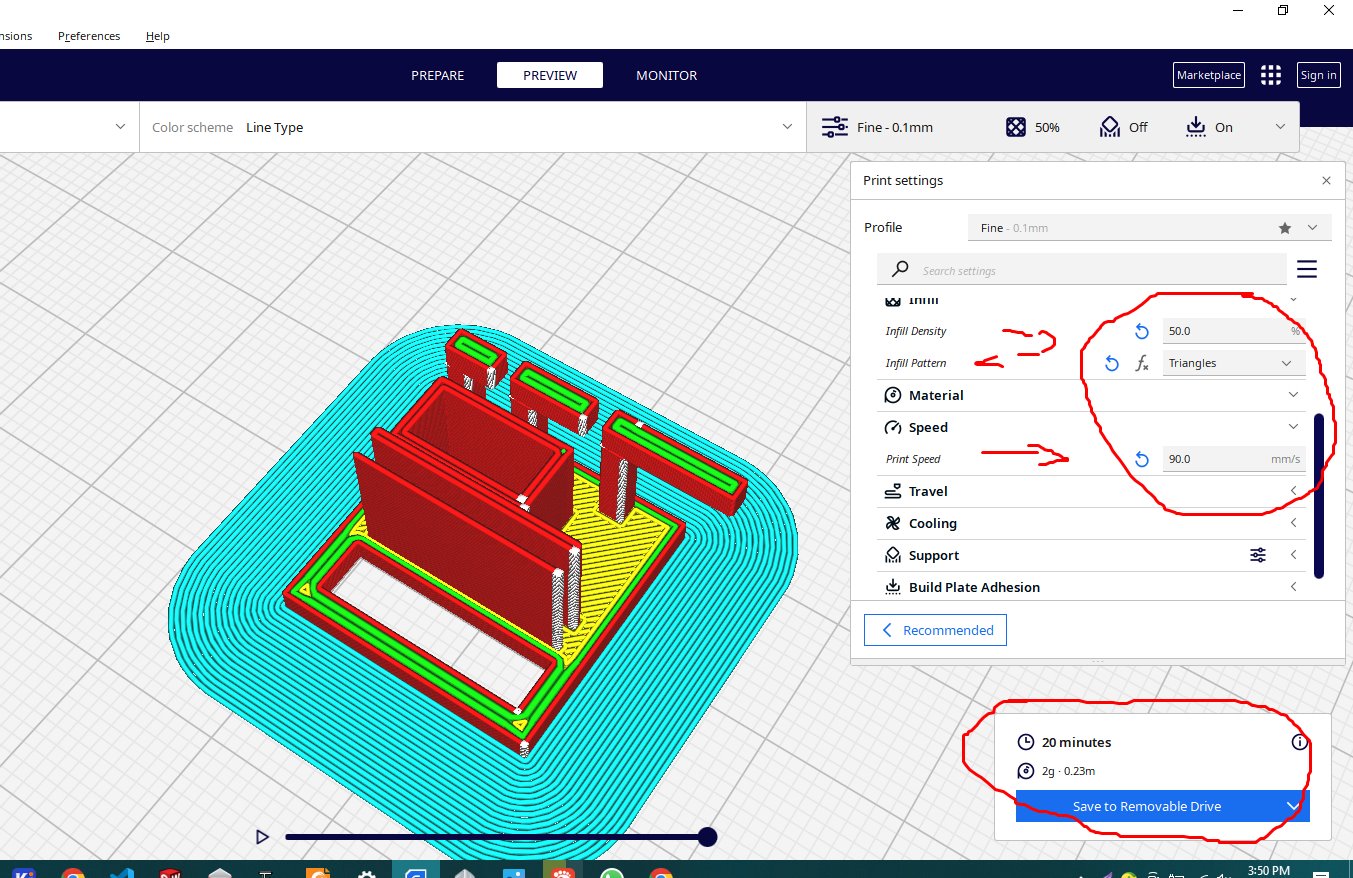
i made 3 stands that would help to test the over hang of printing the 1st has 2mm of over hang the 2nd has 4mm the 3rd has 6mm overhag as well.
and also built two walls one has thickness of 1mm and another one with 2mm of thickness
after 20min of printig here is the results and testing


as it is show in the picture above the object printed has low resolution because the settigs i set in i slicer to prepare the printing process
the overhang test did survived 2mm long and likely 4mm but when it comes to 4mm somehow it failed the hanging
the wall thickness successful printed as well as the the nosel of the printer has the diameter of 0.4mm hole size
starting my assignment my idea was to make something like shock obsorber as an assignment implies is to make something that is not easy,
to be cut with laser or cnc, so i started designing in solidworks and sketching my tool
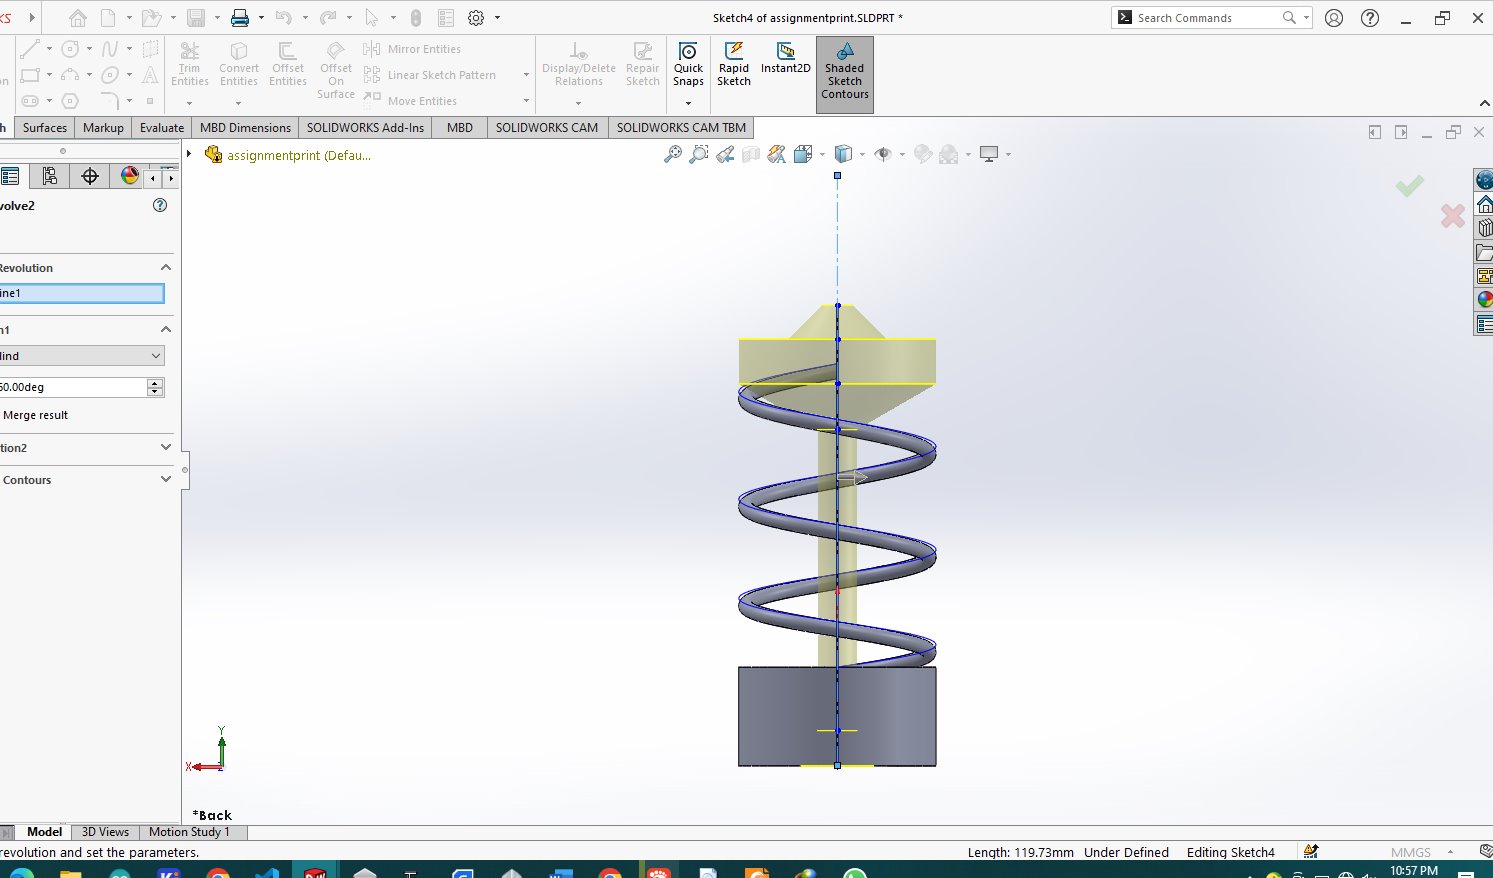
then i make the revolve feature tool to make cylindrical objects which look like in the picture below

on the top of this cylender thing i built a spring object that is likely on shock obsorber
so i have used a builtin feature in solidworks for making spring object

to make this works i made another part of on the top of the spring that has a shaft goes through into the bottom cylinder
though the shaft has small lock that can not let the shaft to come out when we push it back out or you pull it from the top
after designing i saved the file as STL extension and impoted it in CURA slicer
for the parameters except from in fill i have changed to 10% the rest required i chose to make it as default
due to issues i met above for first printing so i stayed with default parameters
i sliced the object and then saved it to the sd card and ready for ptinting and then i started printing
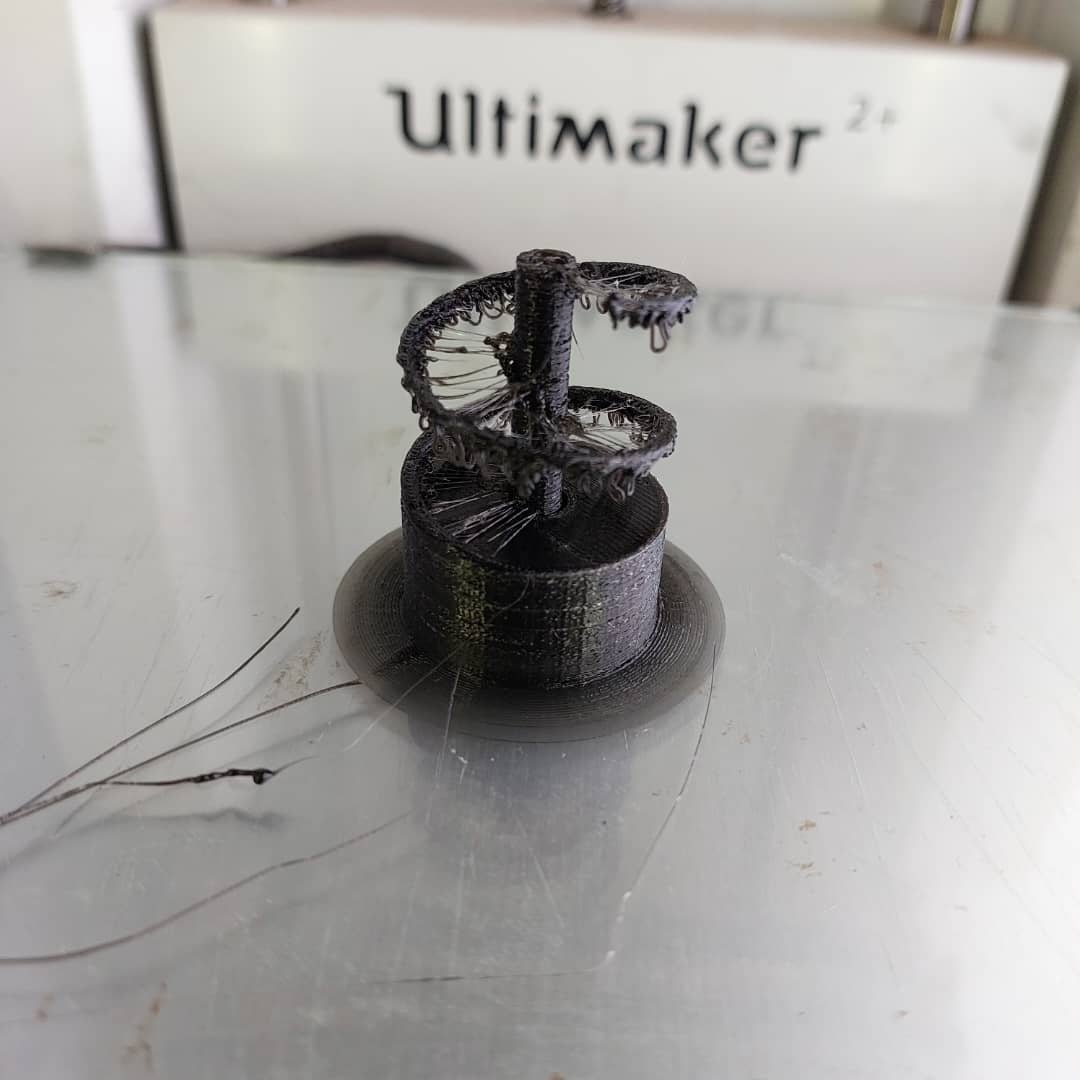
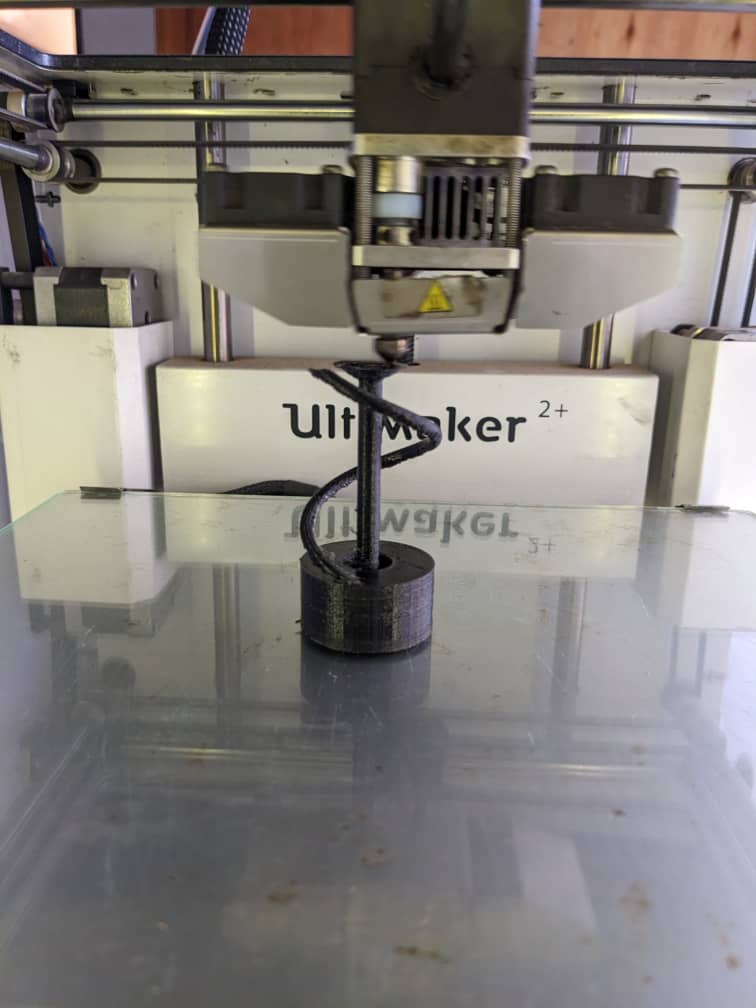
during printing i realised that my printing process is failing, due to angle of spring it was like it is printing in air
printing on nothing then the extruder started throwing filament on nothing it was like spaghetti or thread
the printed object was ruined and the diameter of the spring is smaller by the loosing of falen filament

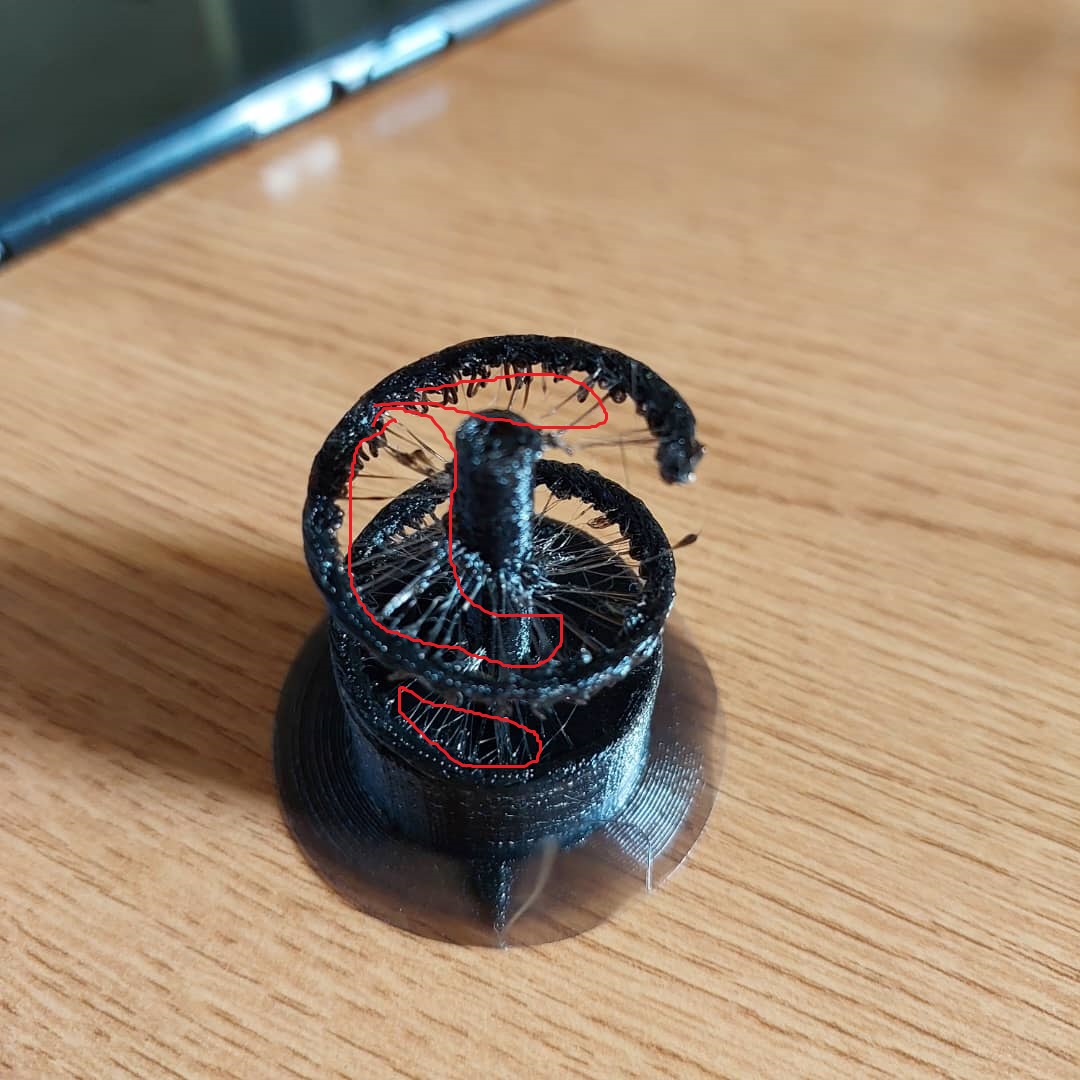
when i found that the printig process is destroyed i quickly aborted the print to save filament some time
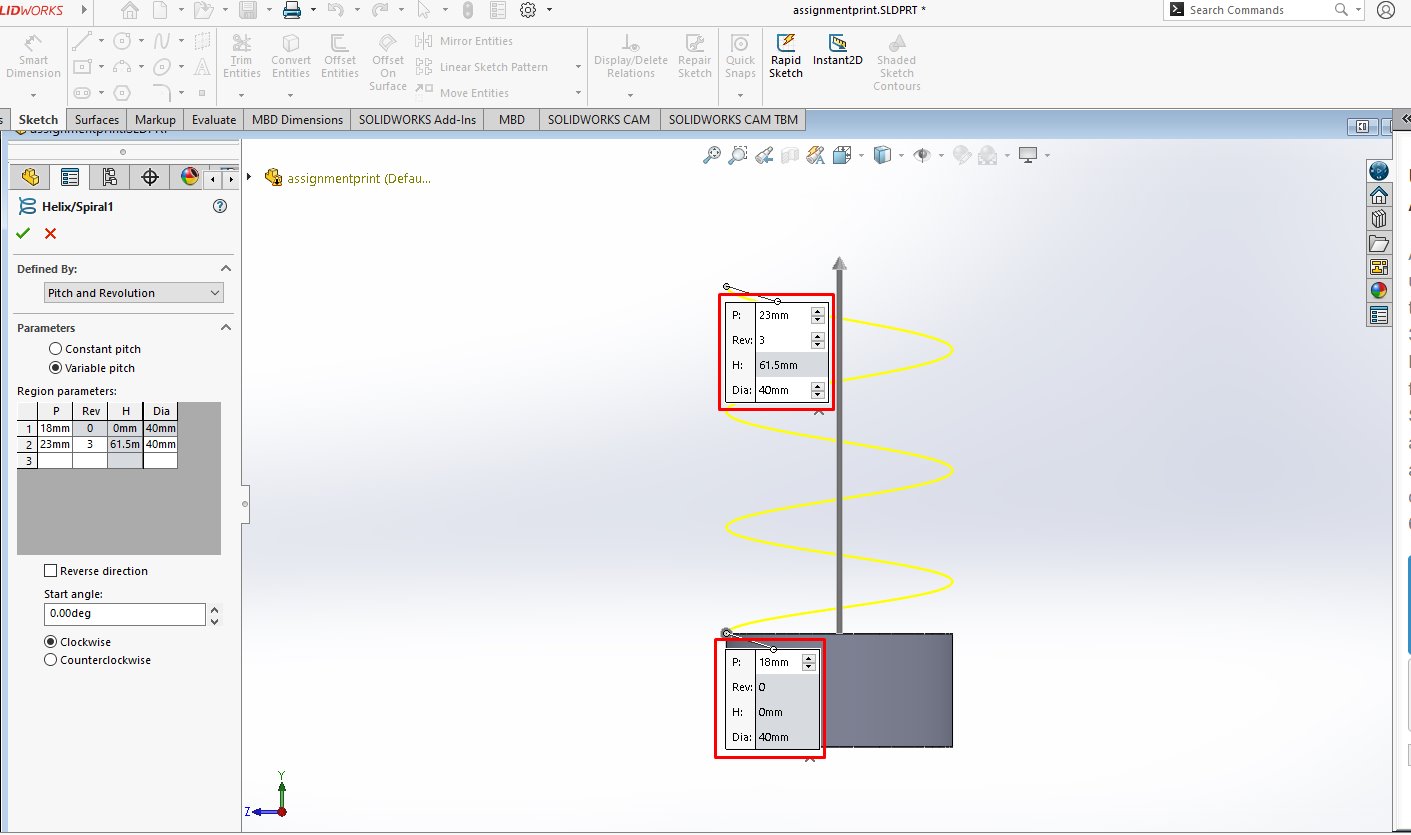
then i headed back to solidworks to fix all those issues i changed some parameters such as reducing the number of revolution
i to make the spring i ave used the helix and spiral feature tool from features tab, in order to make sweep boss/base
by first design i have used this parameters
these parameters i mentioned from the above resulted this output

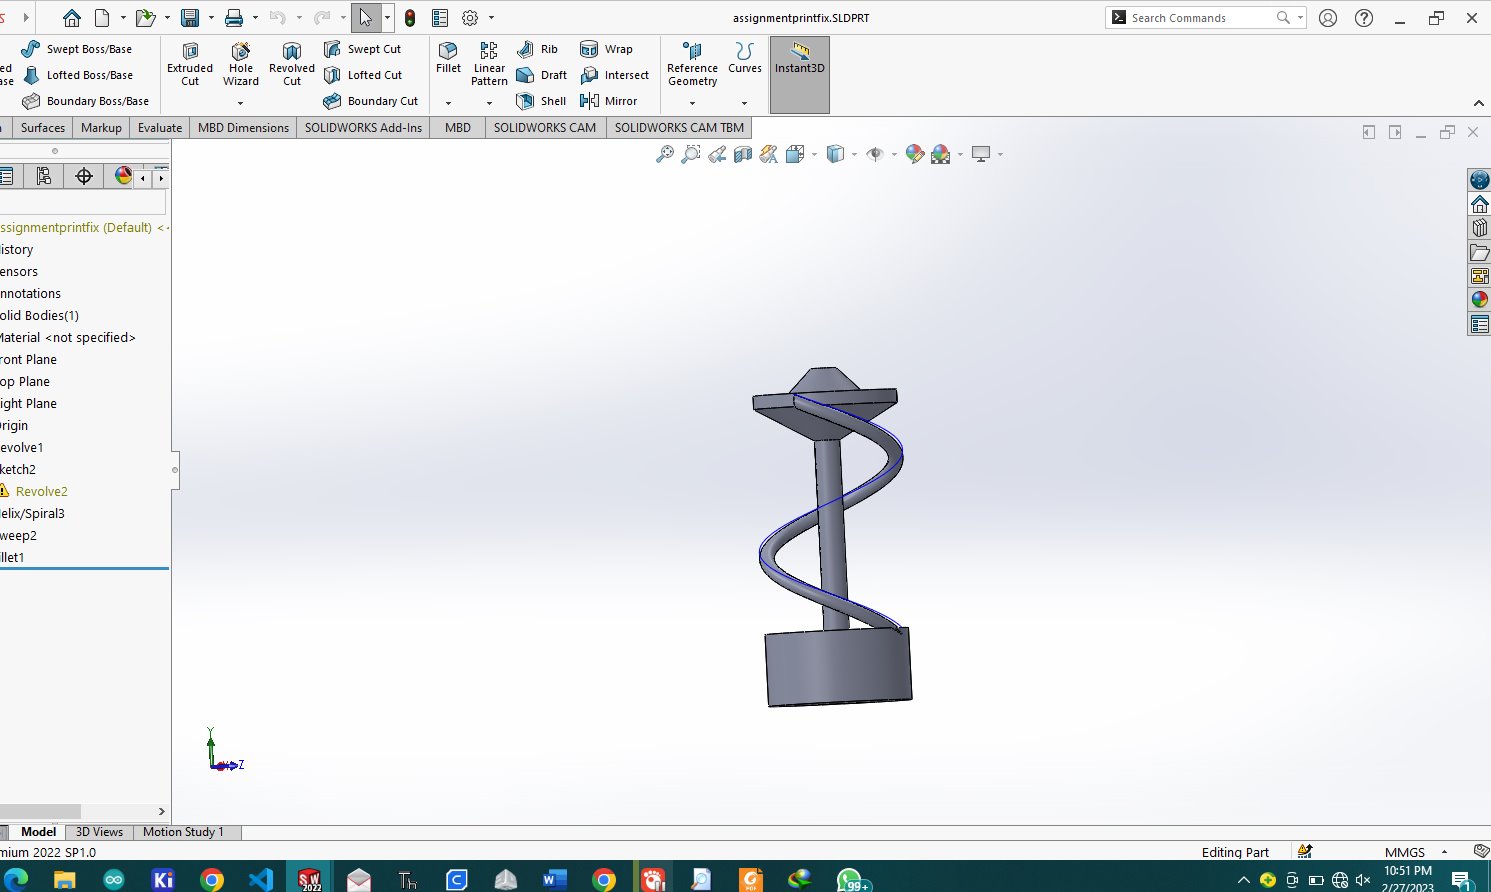
then in solidworks i have changed the parameters in the image following to overcome the issue i was facing

the model changed to this
back to CURA slicer then sliced the 3D model after changing the parameters
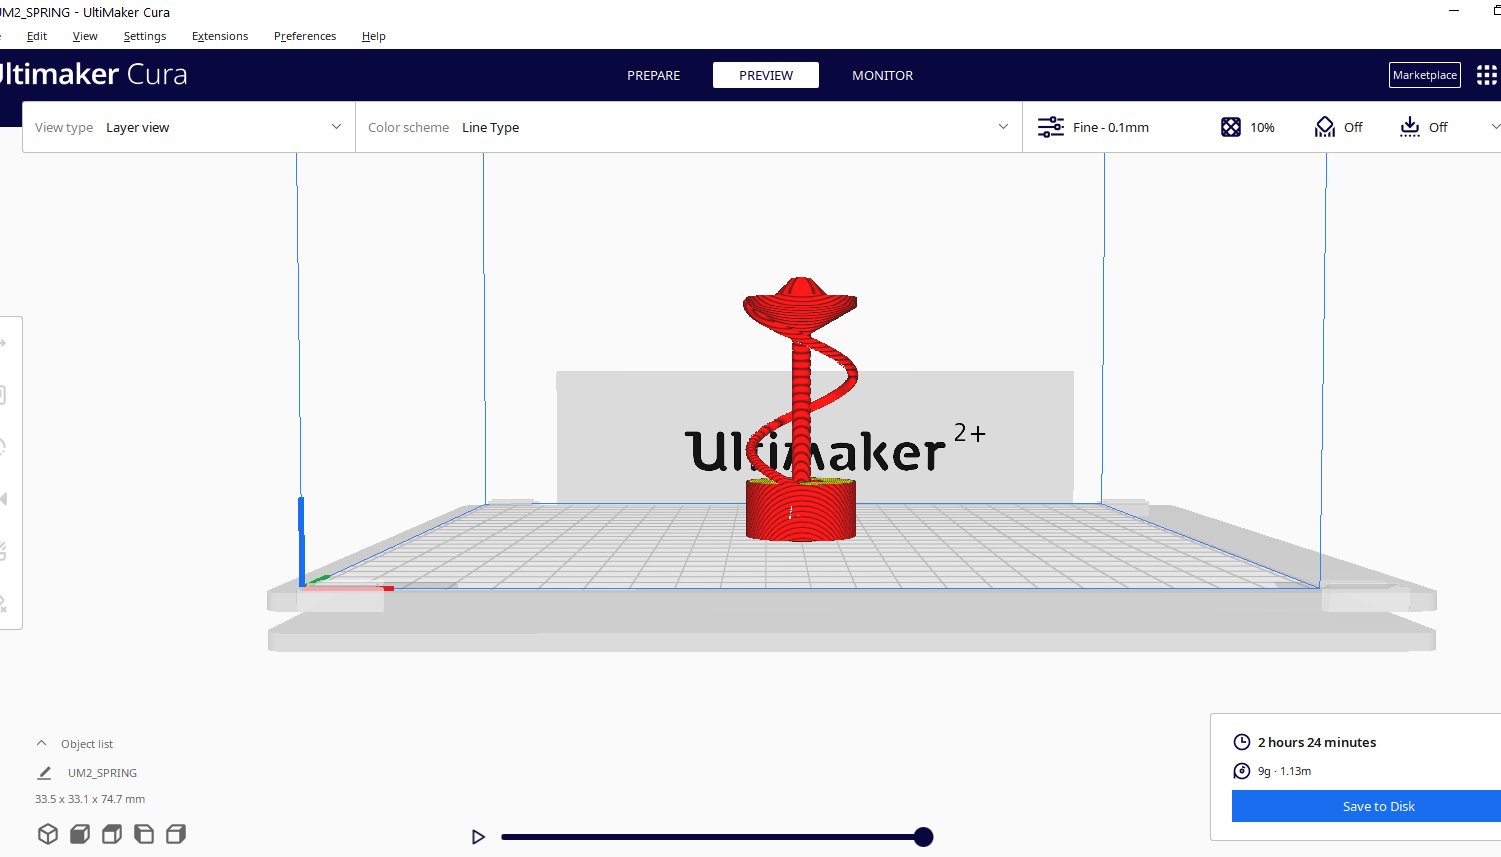
and then i set the printer and started printing process
in the middle of printing
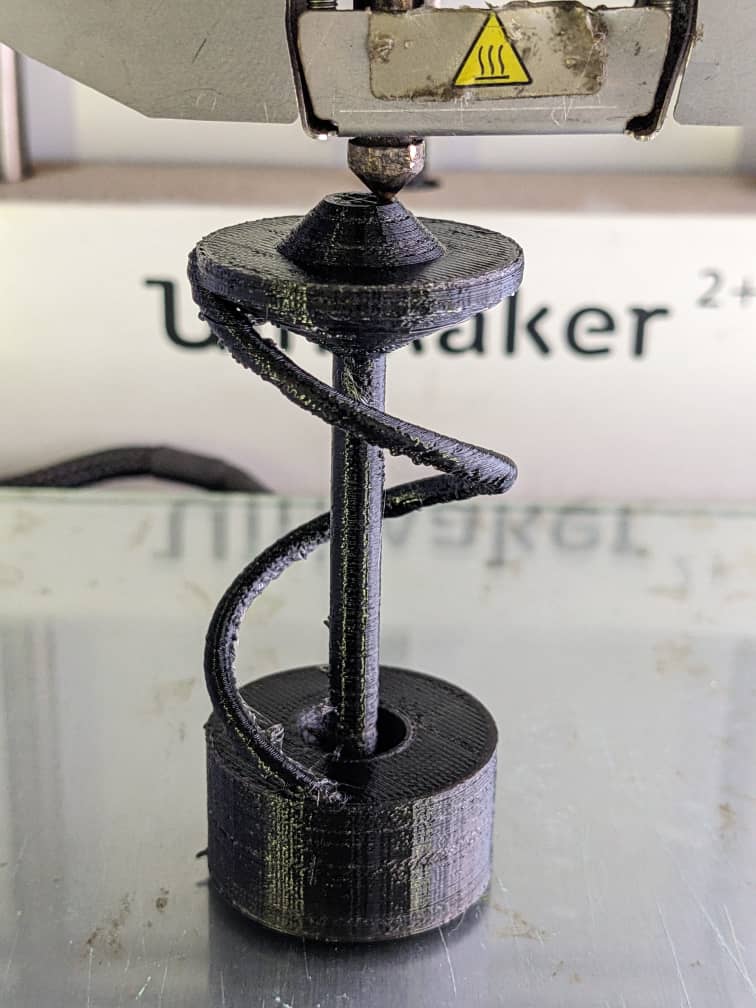
output after printing, in my experience i tried to fix it

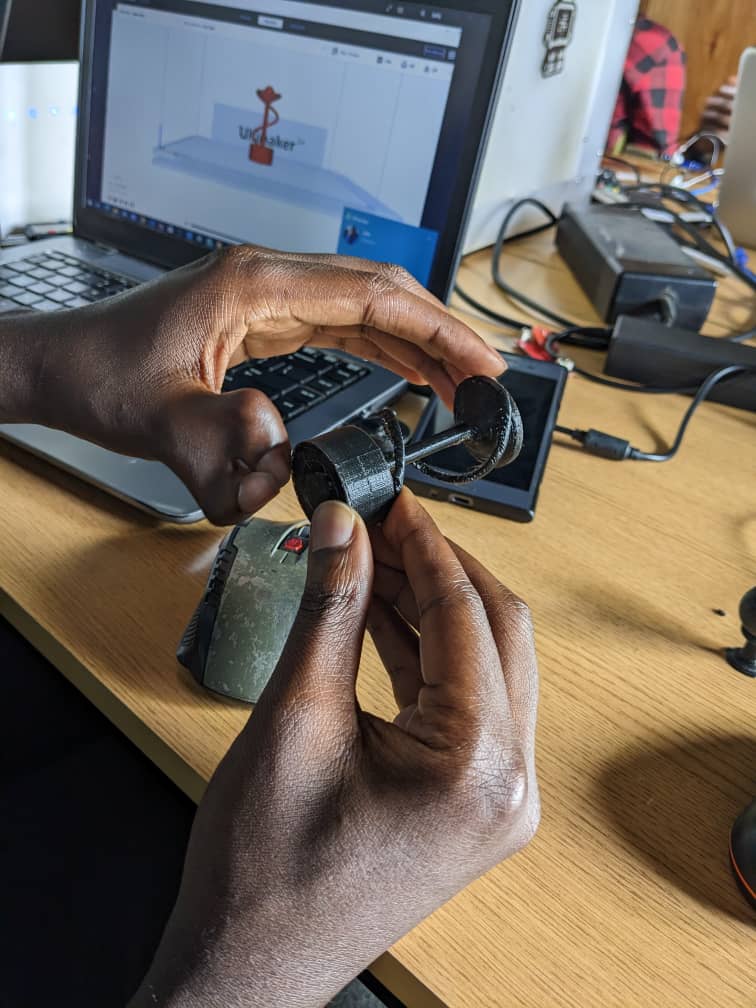
the assignment done is similar to shock obsorber the model has a spring and shaft,, to operate as a shock obsorber
it has a mechanism that moves in a linear movement though this mechanism is not easy to be made from laser and cnc.
3D scanning
3D scanning is a process of analyzing an object from the real world, to collect all the data in order to recreate its shape and appearance,digitally. Thanks to this process, the object can become a 3D model, which could help you as a base for the 3D project you are about to develop,
but it can also be useful to reconstruct, analyze, or simulate ideas. click on the link for more about 3d scanning https://www.sculpteo.com/en/3d-learning-hub/basics-of-3d-printing/what-is-3d-scanning/
process of 3D scanning
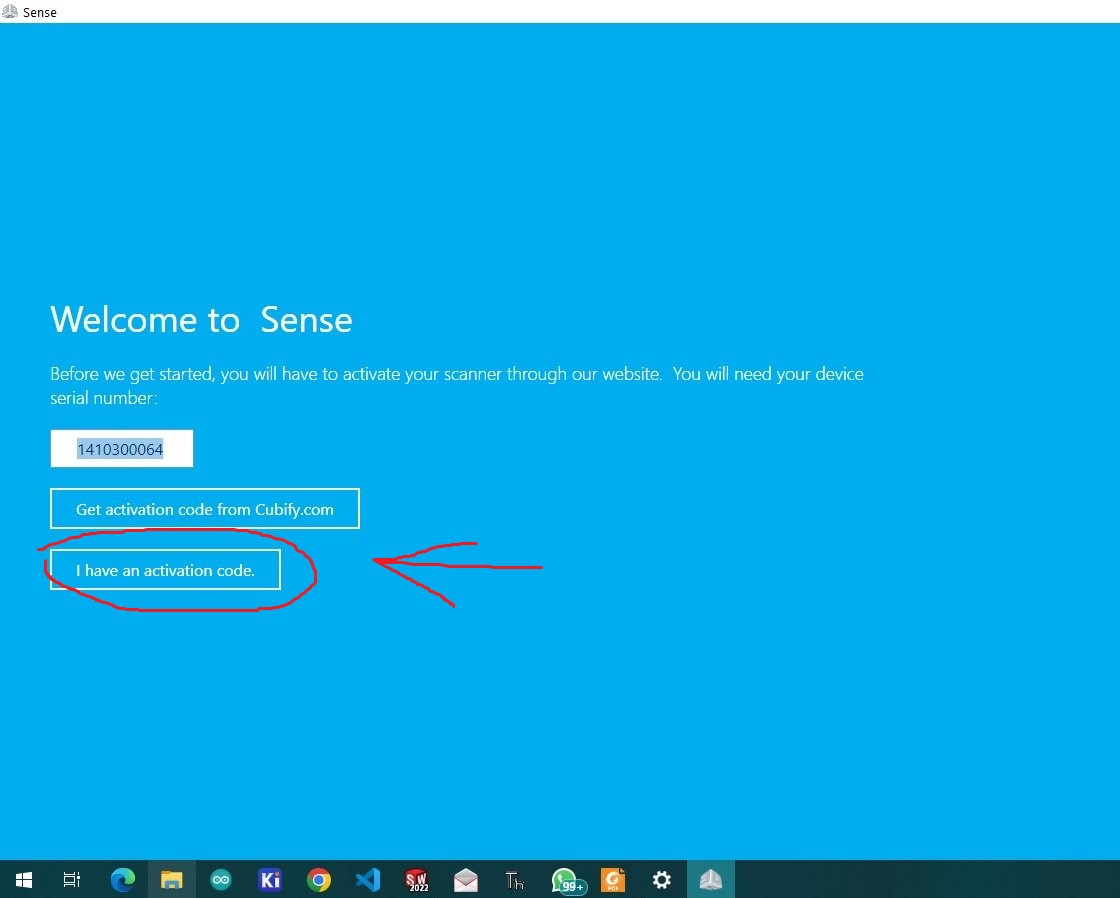
if we need to print an existing project we make a copy of it, how does it works then?. there's a device used to scan the object, in our lab we use sense-scanner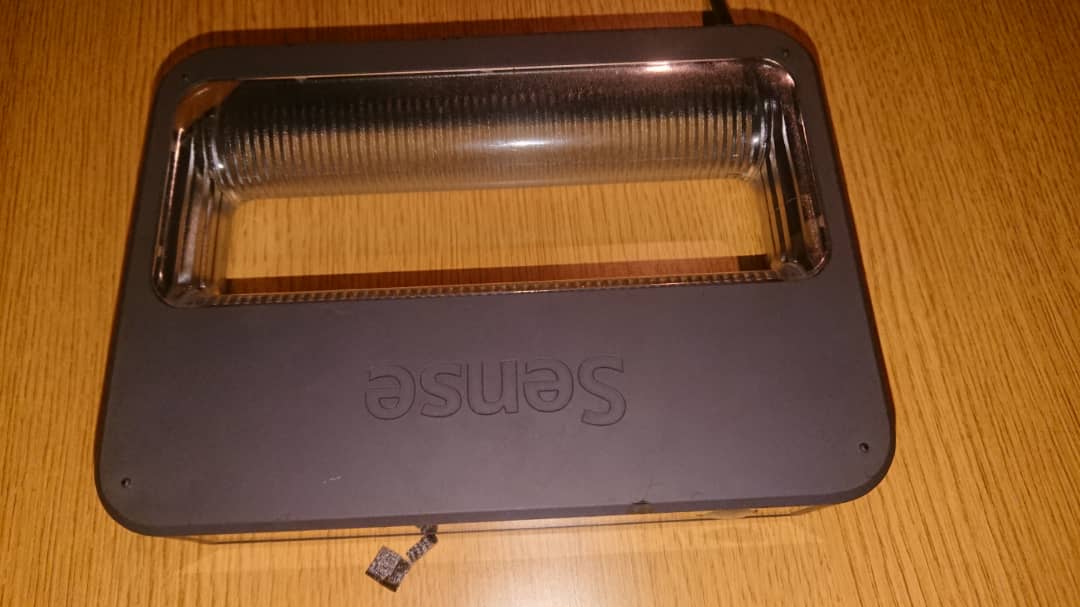

this device convert real view object into 3D model object. when done scanning you can modify the scanned object
to make the scan it has to be connected to the computer using the software we get user interfaace that shows scanning process
the software i have used is sense-scanner which can be downloaded this site https://support.3dsystems.com/s/article/Sense-Scanner?language=en_US
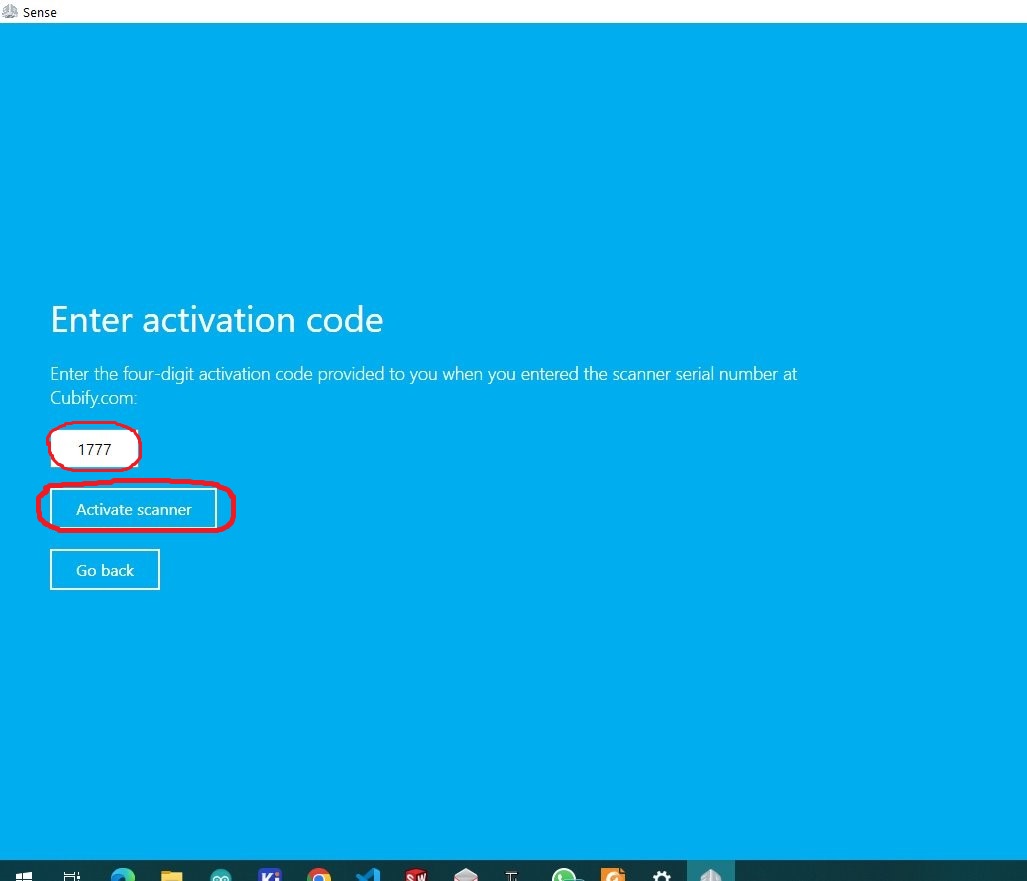
i went through the process of downloading the softwere i got from the given link above, then install it, i was asked to enter the activation code, selected to "i have an activation code"
then new page opened with the code box i have entered "1777" >then activate scanner
for starting the process of using scanner i plug the device into the computer and open the softwware "sense"
because i was going to take scan of my self, so i chose "person" in the to of selection

and also i chose part of my body as a head the selected it

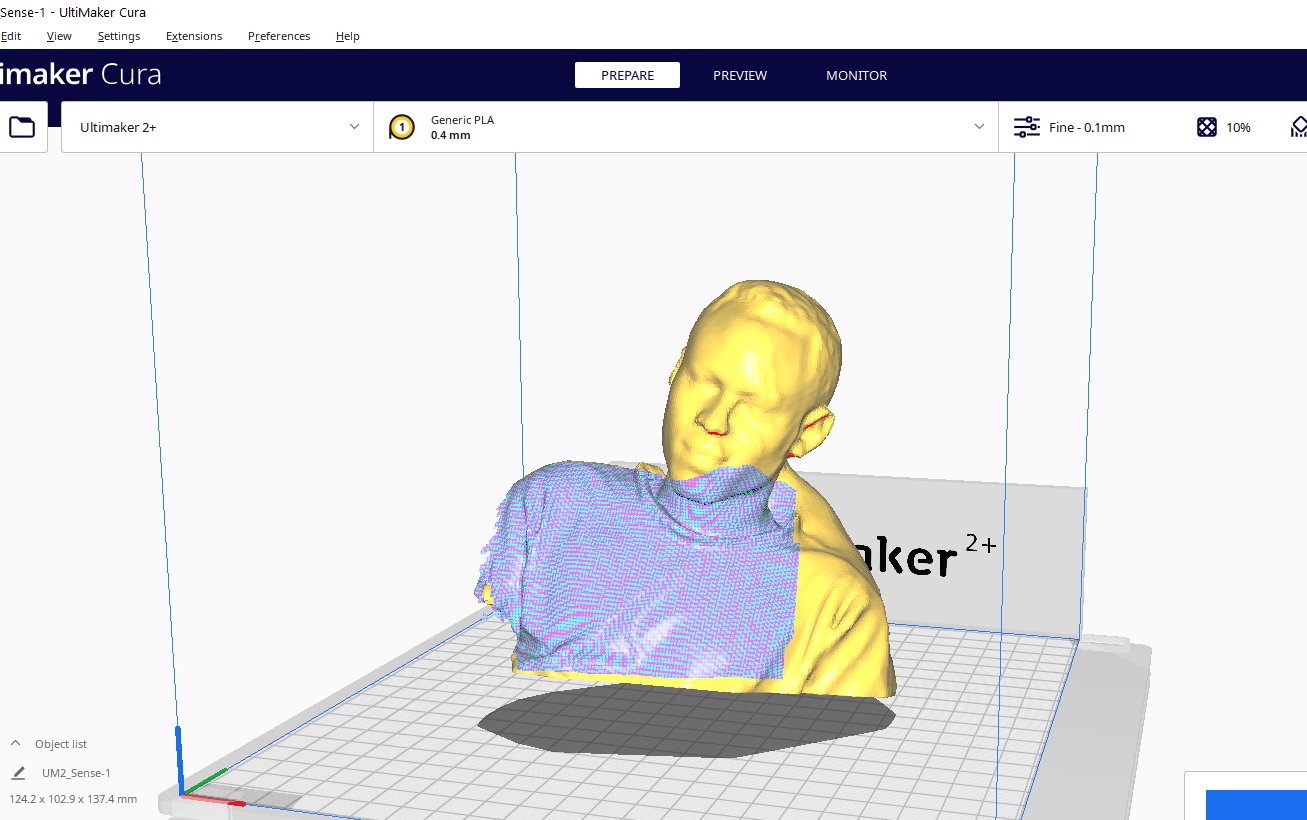
with the help of my friend he scanned me and then we saved the file as an obj extention or stl file can be exported the output is shown below

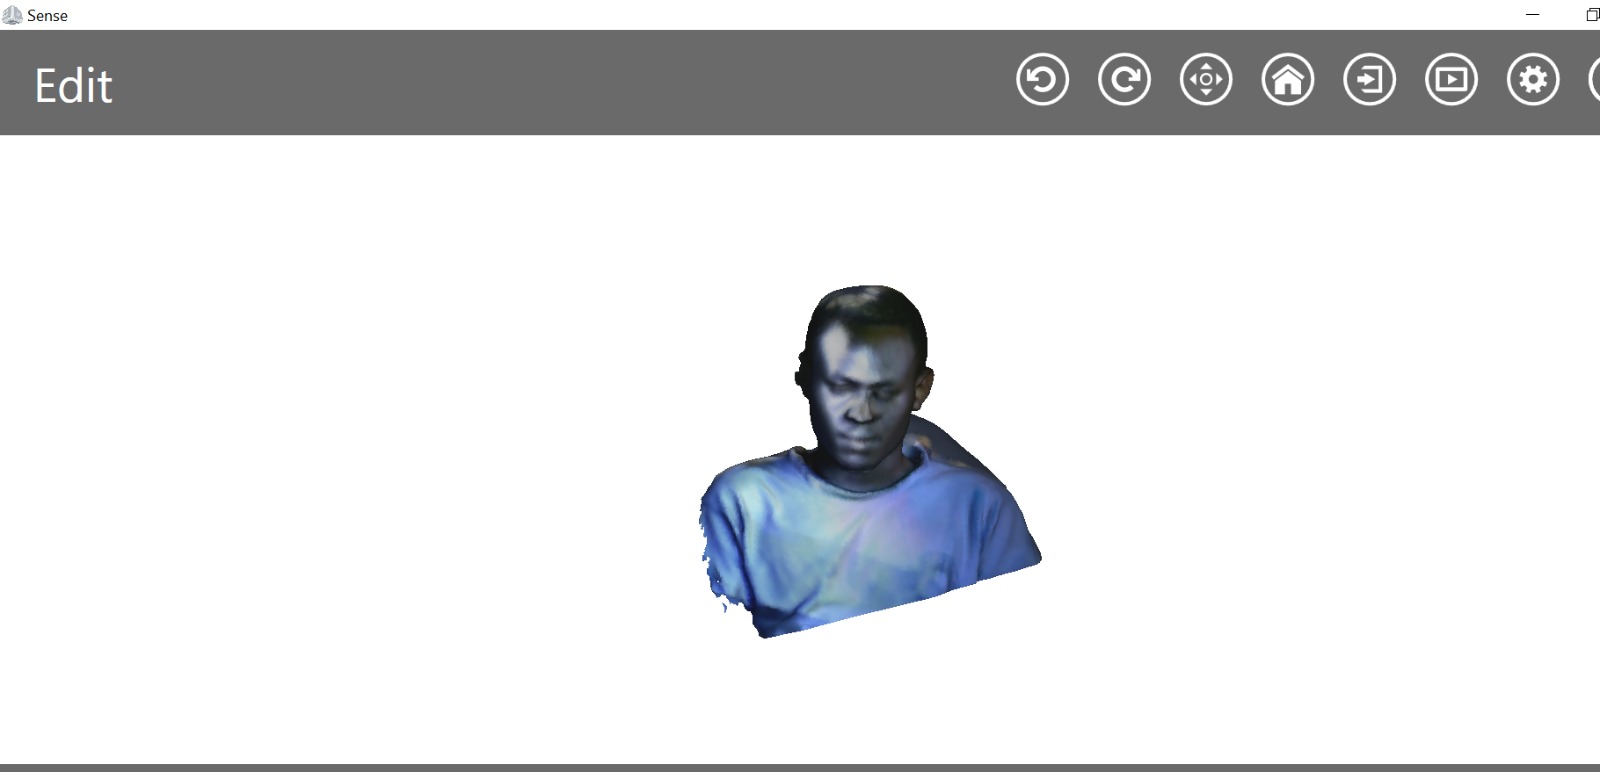
the image shown above actually shows me in 3D model, which really looks like me, and then the exported 3D model is shown below
the 3D model looks noisy which is the little issue came during scanning where we had to be stable when sacnning it