The serial binary information is sent only by the serial data line SDA – Serial DATA.
| Master |
|---|
| Start communication – S |
| Send 7 address bits – ADDR |
| Send 8 bit memory address |
| Transmit 8 data bits |
| Confirm data reception – ACK – ACKnowledged |
| Generate non-receipt confirmation, NACK – No-ACKnowledged |
| end communication |
This element supplies the information of interest to the MASTER. It can act in two ways: slave-transmitter or slave-receiver.
| Slave |
|---|
| Send information in 8-bit packets. |
| Send acknowledgments, ACK calls |
This element supplies the information of interest to the MASTER. It can act in two ways: slave-transmitter or slave-receiver.
| Wire.begin() | //Start streaming |
|---|---|
| Wire.beginTransmission(address); | //Start transmission |
| Wire. requestFrom(address,nBytes); | // request a number of bytes from the slave at address |
| Wire.available(); | // Detect if there is data pending to be read |
| Wire. write(); | // Send a byte |
| Wire. read(); | // Receive a byte |
| Wire.onReceive(handler); | // Register a callback function when receiving data |
| Wire. onRequest(handler); | // Register a callback function when requesting a data |
I2C
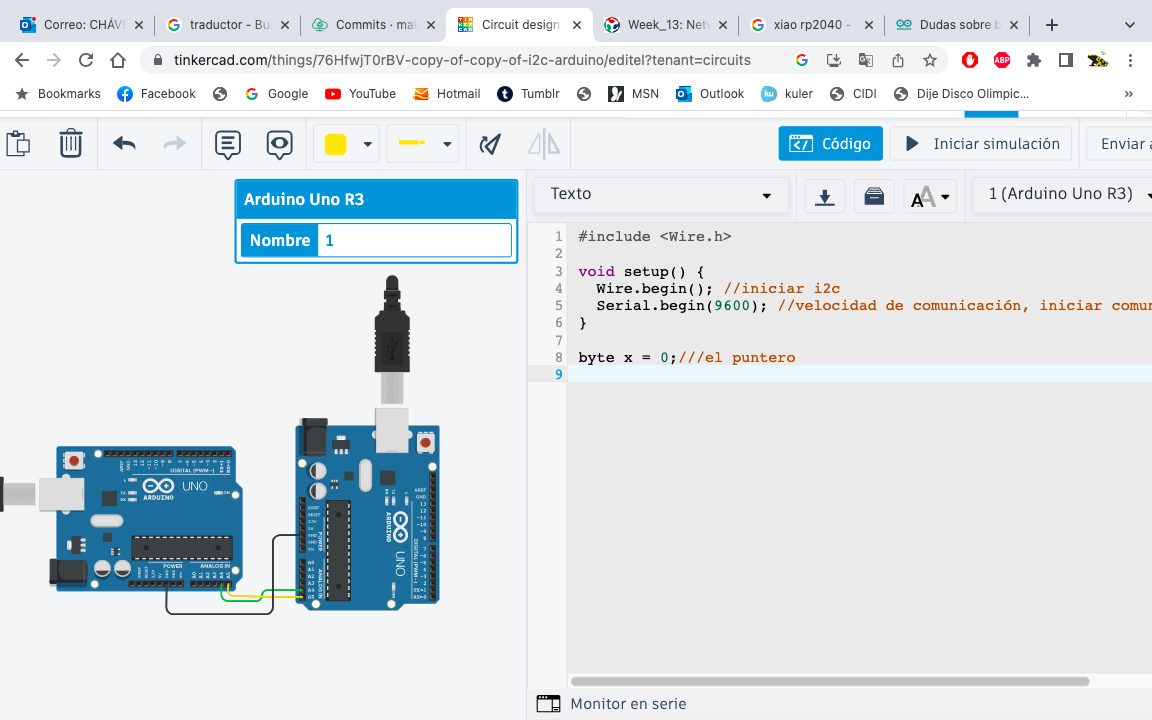
For this assignment I decided to connect my 2 XIAOS, but first I had to check on Tinkercard if the code I would use would be correct.
Step 1, Connect SDA-SDA and SCL-SCL, for this exercise I will use 2 Arduino UNO (its pins are A4-SDA and A5-SCL).
Step 2, connect GND to GND.

The device called "master" will use SCL and SDA to communicate with the so called "slaves".
The i2C master is in charge of controlling the SCL clock wire and also the initial communication.
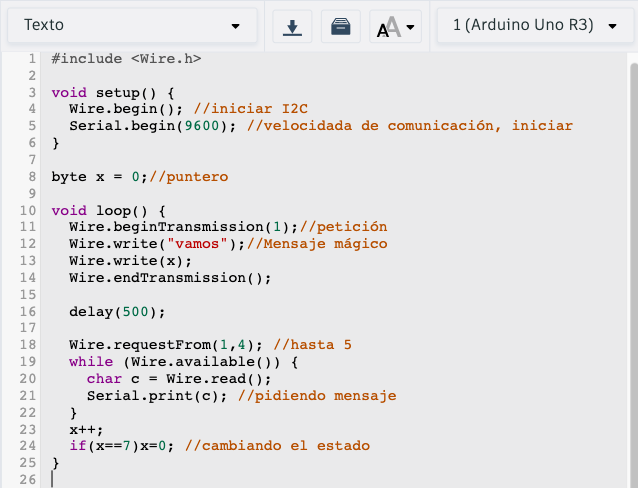
Step 3, put the Wire.h library in your code.
Step 4, put "Wire.begin" to initialize I2C and "Serial.begin(9600) to initialize serial.
Step 5, set a variable for the "byte" pointer.
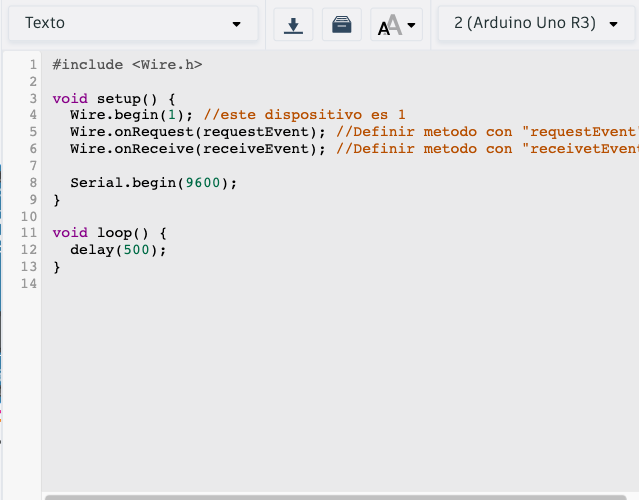
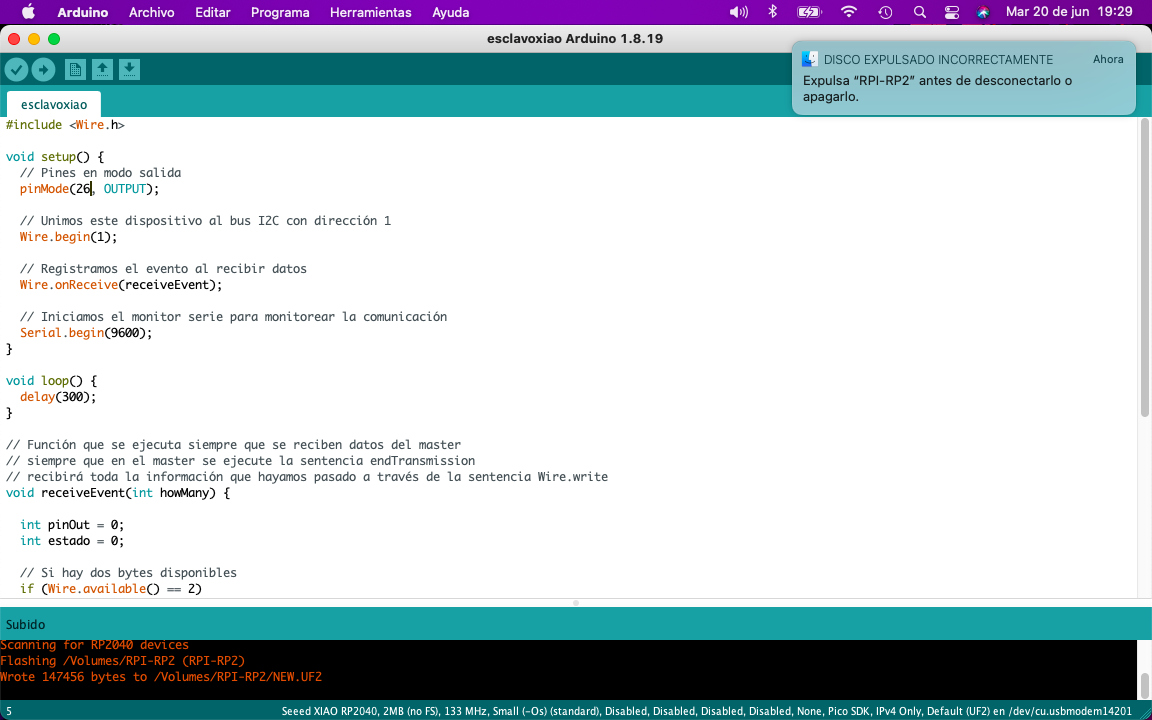
This is device 1, and the "slave".
Step 6, put the Wire.h library in your code.
Step 7, Set the device you mention to "master". You will also have to define two methods the "requestEvent" and the "receiveEvent".
Step 8, In the "receiveEvent" method, when it receives the instruction from the master, it will receive the magic message and play it as many times as indicated.
Step 9, In the "requestEvent" method, when it receives the instruction from the master, it will send the response "si".
Video
XIAO & XIAO
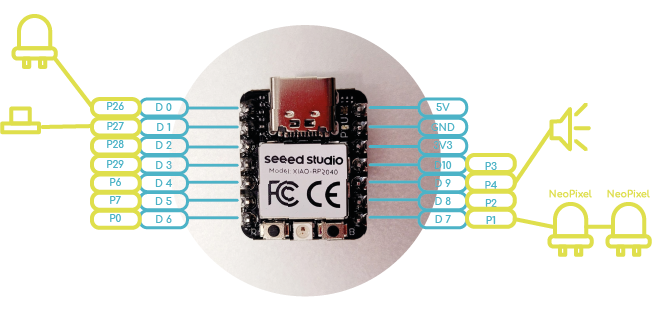
Step 1, First you must connect the ground wires between the XIAOs.
Step 2, Then connect the two SDA pins (P6), on a breadboard also connect to this SDA group, the 5v pin of your Xiao (don't forget to put a 4.7kΩ resistor).
Step 3, Also connect the two SCL pins (P7), in a breadboard also connect in this SCL group, the 5v pin of your Xiao (don't forget to put a 4.7kΩ resistor).

"Master"
                #include Wire.h> //add the <> symbols

                void setup() {
                  Wire.begin(); //iniciar I2C
                  Serial.begin(9600); //velocidada de comunicación, iniciar
                }

                byte x = 0;//

                void loop() {
                  Wire.beginTransmission(1);//petición
                  Wire.write("vamos");//Mensaje mágico
                  Wire.write(x);
                  Wire.endTransmission();

                  delay(500);

                  Wire.requestFrom(1,4); //hasta 5
                  while (Wire.available()) {
                    char c = Wire.read();
                    Serial.print(c); //pidiendo mensaje
                  }
                  x++;
                  if(x==7)x=0; //cambiando el estado
                }
"Slave"
                    #include Wire.h> //add the <> symbols

                    void setup() {
                      Wire.begin(1); //este dispositivo es 1
                      Wire.onRequest(requestEvent); //Definir metodo con "requestEvent"
                      Wire.onReceive(receiveEvent); //Definir metodo con "receivetEvent"

                      Serial.begin(9600);
                    }

                    void loop() {
                      delay(500);
                    }

                    void receiveEvent(int howMany) { //se ejecuta cuando reibe la instrucción
                      while (Wire.available()>1) {
                        char ch = Wire.read();
                        Serial.print(ch);
                      }
                      int x = Wire.read();
                      Serial.println(x);
                    }
                    void requestEvent() { //
                      Wire.write("si!\n");
                    }
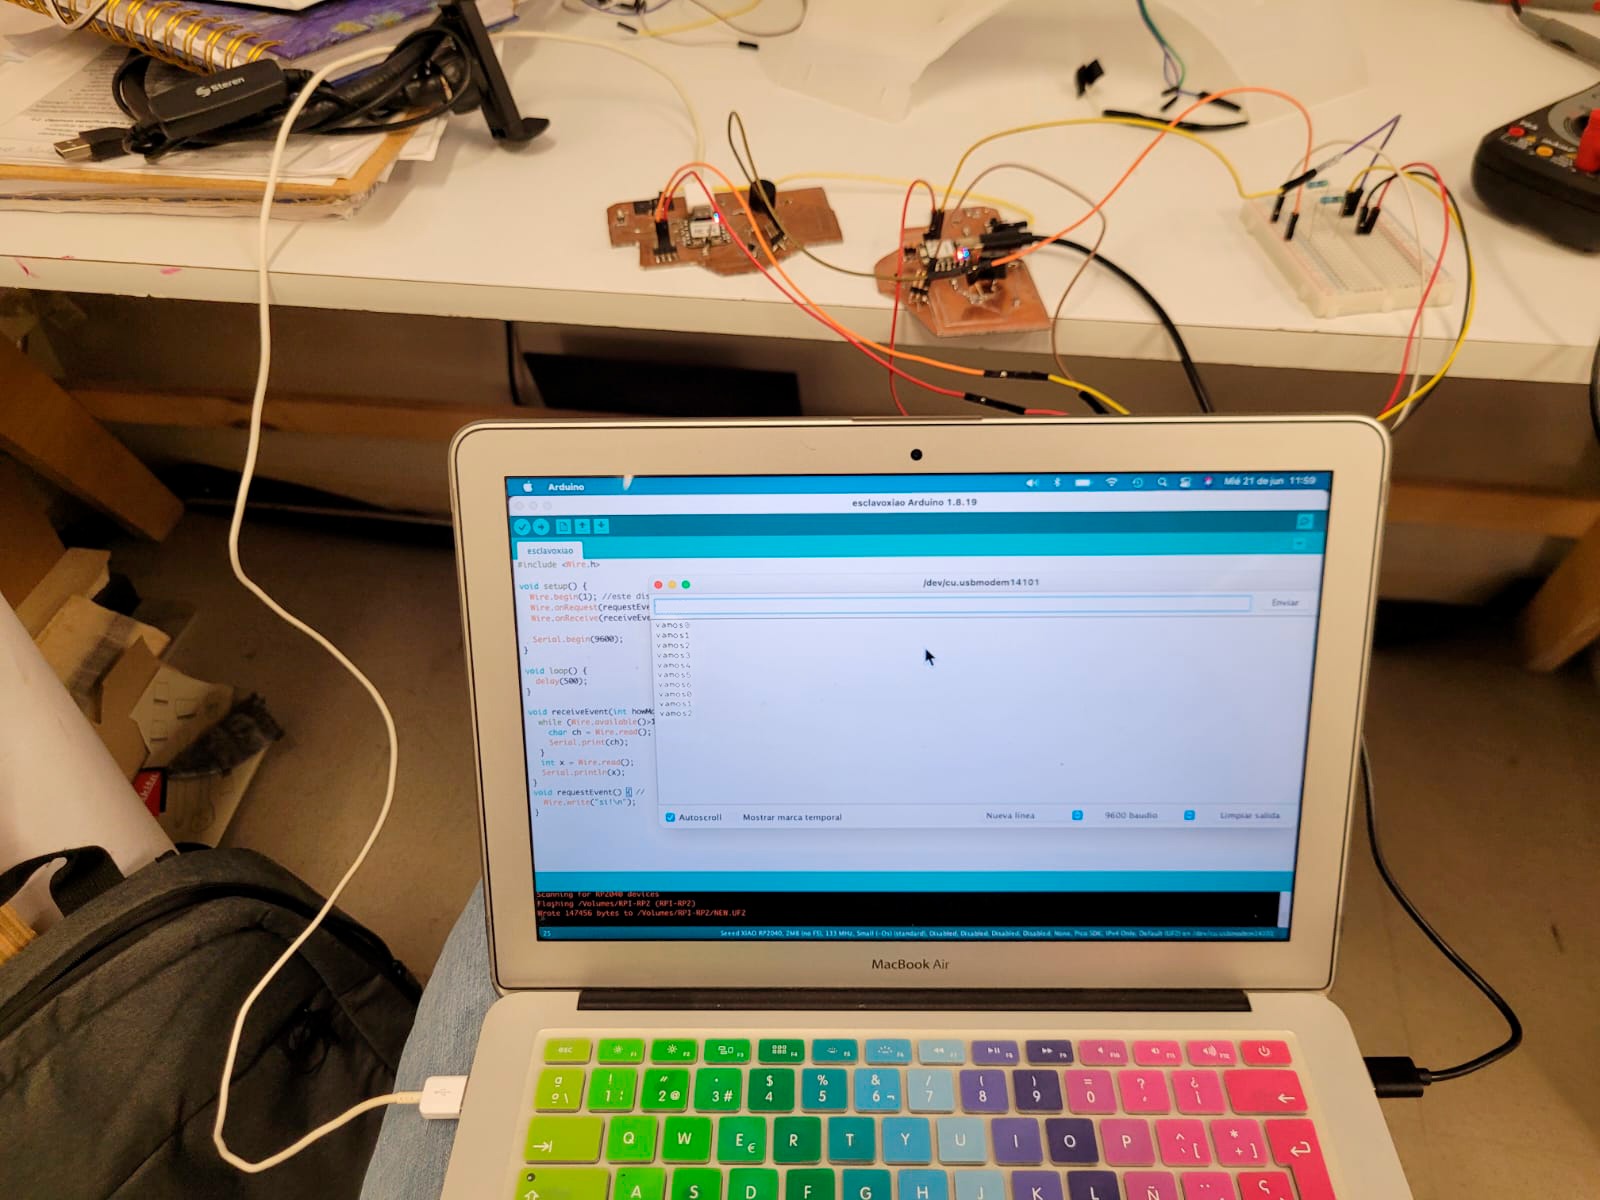
You can download the programs for "master" and "slave", then you must connect the Xiao board correctly with its library and depending on your computer, the port. I had problems connecting my XIAOS, it didn't recognize my port and I did it board by board.
You upload the programs and open the "serial monitor" to see the magic words of this connection.

Downloads
XIAO + ARDUINO UNO + ARDUINO UNO
Now I will connect my XIAO rp2040 as "master" and (2) Arduino UNO, as "slave1" and "slave2", the arduinos have the advantage that they do not need resistance to connect between them. Another advantage is that they have 2 pins for SDA (A4 and SDA) and SCL (A5 and SCL).
In this i2C connection example, my XIAO will send the instruction so that the two Arduinos turn on and off one led each (one red led and one blue led).
"Master"
        #include Wire.h> //add the <> symbols

          void setup() {
            Wire.begin();
          }

          byte x = 0;

          void loop() {
            Wire.beginTransmission(8);
            Wire.write("x es ");
            Wire.write(x);
            Wire.endTransmission();


            Wire.beginTransmission(10);
            Wire.write("x es ");
            Wire.write(x*10);
            Wire.endTransmission();

            x++;

            if (x>20){
              x=0;
            }
            delay(500);
          }
"Slave 1" (Wire.beginTransmission(8) in Master)
          #include Wire.h> //add the <> symbols

            void setup() {
              Wire.begin(8);
              Wire.onReceive(receiveEvent);
              Serial.begin(9600);
              pinMode(5, OUTPUT);
            }

            void loop() {
              delay(100);
            }

            void receiveEvent(int howMany) {
              while (1 < Wire.available()) {
                char c = Wire.read();
                Serial.print(c);
              }
              int x = Wire.read();

              if (x>10){
                digitalWrite(5, HIGH);
              }else{
                digitalWrite(5, LOW);
              }
              Serial.println(x);
            }
"Slave 2" (Wire.beginTransmission(10) in master)
        #include Wire.h> //add the <> symbols

          void setup() {
            Wire.begin(10);
            Wire.onReceive(receiveEvent);
            Serial.begin(9600);
            pinMode(5, OUTPUT);
          }

          void loop() {
            delay(100);
          }

          void receiveEvent(int howMany) {
            while (1 < Wire.available()) {
              char c = Wire.read();
              Serial.print(c);
            }
            int x = Wire.read();

            if (x>10){
              digitalWrite(5, HIGH);
            }else{
              digitalWrite(5, LOW);
            }
            Serial.println(x);
          }
Video
Group Assignment
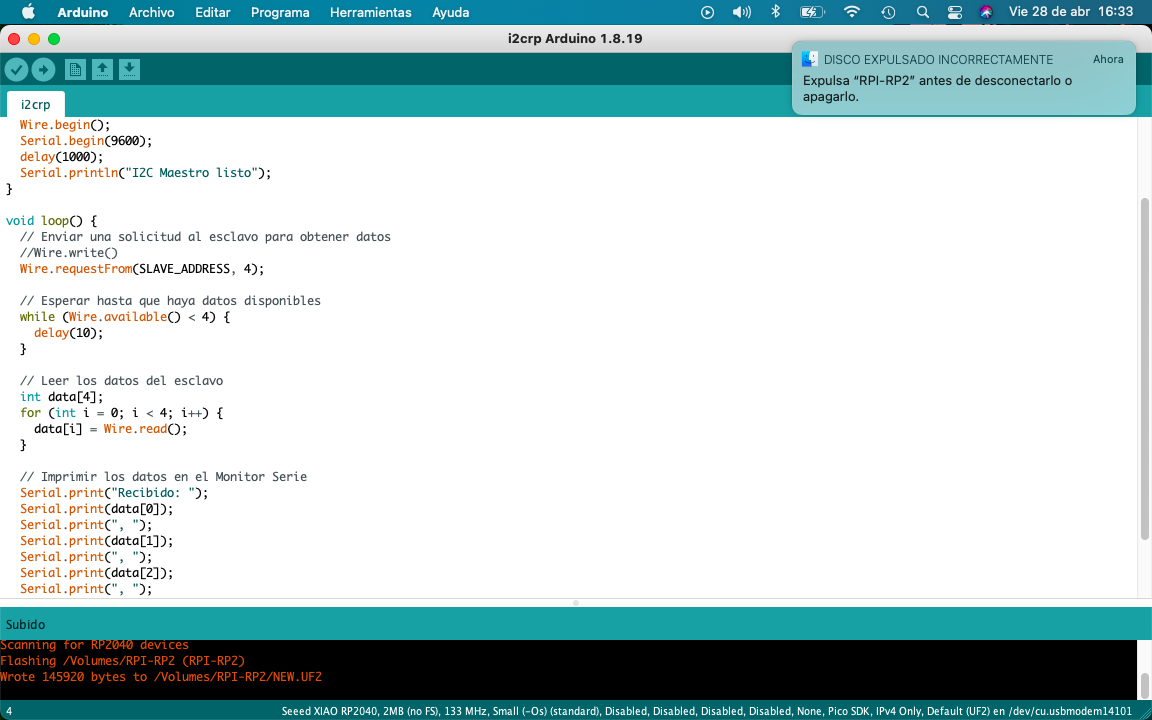
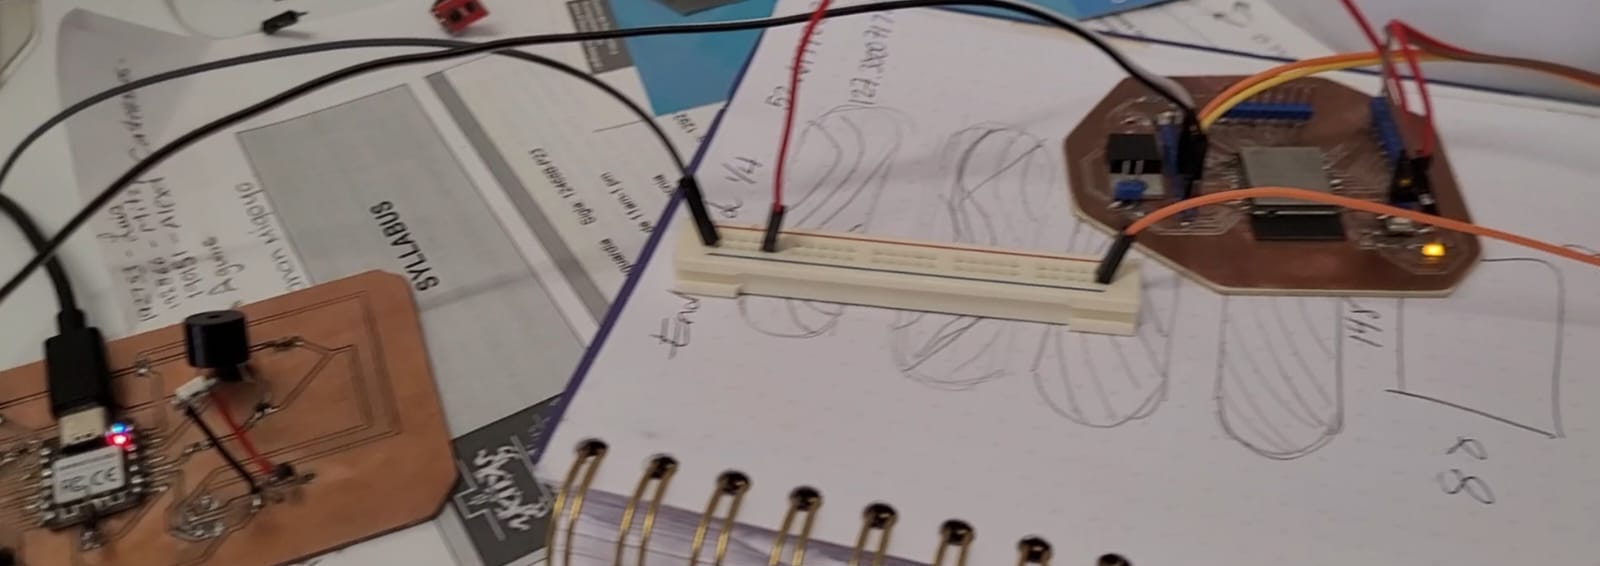
The group assignment is to send a info between two projects. I will use my PCB and connect it to Beto's Board using I2C connection: Ghinwa's board will be the "slave" and my Board will be the "master".
For our codes it was necessary for us both to include the "wire.h" library and it is included in the code as follows: #include
NOTE: It is important that both are connected to the same GND.

"master"
"slave"
"Master"
              #include Wire.h> //add the <> symbols

                void setup() {
                  // Unimos este dispositivo al bus I2C
                  Wire.begin();
                }

                byte pin[] = {26};
                byte estado = 0;

                void loop() {
                  for (int i = 0; i < 5; i++)
                  {
                    // Comenzamos la transmisión al dispositivo 1
                    Wire.beginTransmission(1);

                    // Enviamos un byte, será el pin a encender
                    Wire.write(pin[i]);

                    // Enviamos un byte, L pondrá en estado bajo y H en estado alto
                    Wire.write(estado);

                    // Paramos la transmisión
                    Wire.endTransmission();

                    // Esperamos 1 segundo
                    delay(1000);
                  }

                  // Cambiamos el estado
                  if (estado == 0)
                  {
                    estado = 1;
                  }
                  else
                  {
                    estado = 0;
                  }
                }
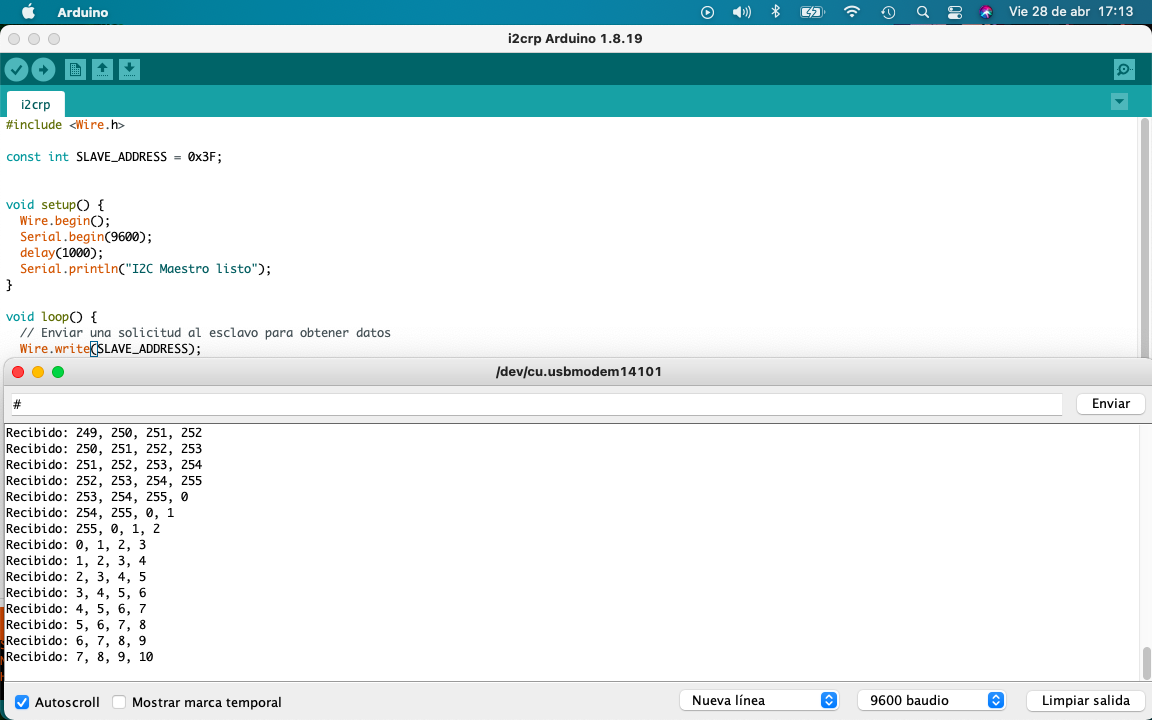
In my arduino you can see the numbers requested by my XIAO.

Video