1. Project management
This week I worked on defining my Final project idea and started to getting used to the documentation process.
Go to:
Git and repository
Our very first local lecture started with familiarizing us with Git. I had never heard of version control, but when the lecture progressed I think I understood the basic idea and the use of it.
So every time you commit, Git takes a snapshot of your file and stores a reference to that. Data is like a stream of these snapshots. And as many operations need only your local files and resources, you have your entire history of the project in your local disk and this makes things faster. If you want to see your project history, just look it up. Because you have your local copy of everything, you can also do your work offline and just upload it later to database when you have network connection.This having all your history stored means that you can always go back in history and pick up a version of a file that worked (if you messed up something). When you add data to Git database, it is also safe there and difficult to loose especially if you regularly push your database to Fabcloud repository. As I experienced already first hand, it is possible though to lose changes you haven't committed yet. I used the web interface on Fabcloud, typed my changes and tried to commit only to notice a network failure. I lost my changes. This was a good learning experience. Now, even if I commit the changes in the web interface, I originally write it in notepad.
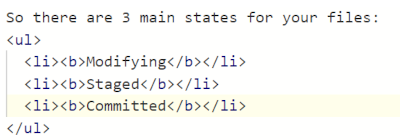
So there are 3 main states for your files:
- Modifying
- Staged
- Committed
The files in the working area are pulled out of the database in Git and placed on your disk for you to modify. The staging area is a temporary storage to store files that are going to be included in a commit. And then the repo is the place of storage for your object database.
In Fab Academy our files are stored at our individual project repository at Fabcloud.
We were given permissions to use the repository by the time Fab Academy 2023 started. In our first global lecture Neil showed us around the repo. In our first local lecture, our local instructor showed us the first steps to be done to use the repository. At the very beginnig we of course had to download Git.
When downloading Git there came three different applications: Git bash, Git CMD and Git GUI. As this all was very new to me, I had to first check out what these meant. Bash is a Unix shell and is the default shell on Linux and OS X. Git Bash is an application for Microsoft Windows environments which provides an emulation layer for a Git command line experience. Git GUI has a graphical interface, and Git CMD is the command-line interpreter on Windows and this is the one we were using for setting up.
We used Git Bash and Git CMD to run spesific git commands.
First I set my user name and adress by typing a command:
git config --global user.name "Username"
git config --global user.email "my email"

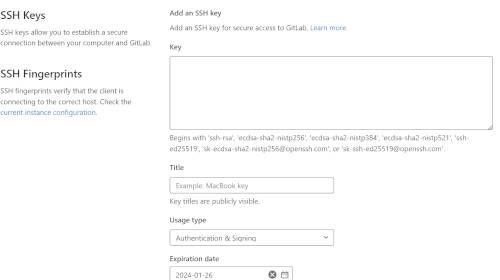
Then we had to generate a public/private key to connect securely with remote repository using SSH protocol.
The command was: ssh-keygen -t rsa -C "email"

Then the public key was copied and added to the Gitlab account in user settings - SSH keys.
You add it in the box, press 'add key', and it shows now on the bottom of that page.
The next step was to create a local copy to my computer of the Fabcloud repository. At my project page, there is a clone button which gave me the address to be cloned in Git CMD with git clone-command.
It didn't first work out, so my instructor had to show me how to get to the proper folder.
Everytime I now start with Git CMD, I have to type in
cd k and cd petra-rutanen to be in the right directory.

In global lecture Neil told us that one important thing this week is also to sign the student agreement by pushing it to our repo. So I copied the student agreement to a file and then committed it to my repo.
So after setting up, what are the main commands you need when working with the project?
| Command | What does it do |
|---|---|
| cd k:/petra-rutanen: | Go to my local folder |
| git pull: | Pull files from the remote repository |
| git status: | Check modified files |
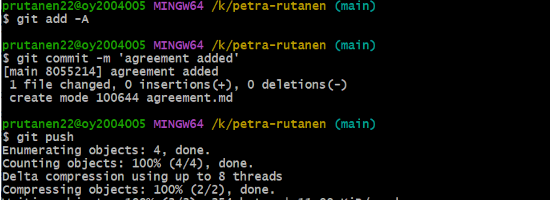
| git add -A: | Add all changed files |
| git commit -m 'comment': | Commit your changes and write a comment so you know later what you did here. |
| git push: | Push the committed files back to the remote repository. |
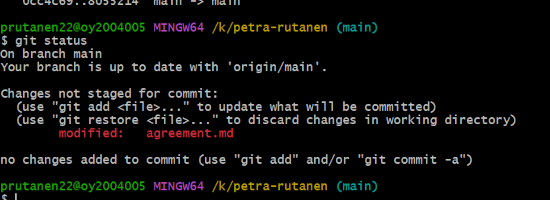
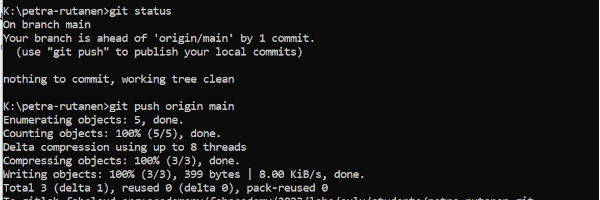
Here is an example of using git status and git commit (an modified file called readme)
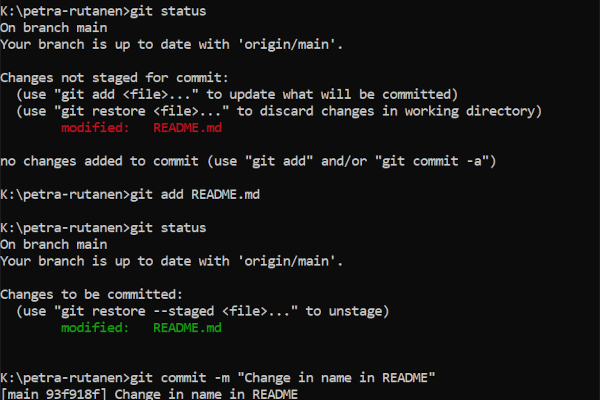
..and then pushing it to the repository.
In our project page there were few files ready and waiting for us and this text:
This project's static Pages are built by [GitLab CI][ci], following the steps
defined in .gitlab-ci.yml:
The current example below expects to put all your HTML files in the public/directory.
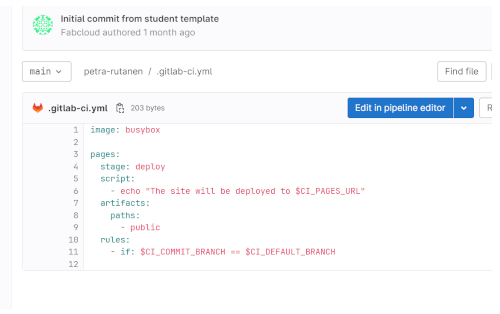
So HTML files go under public/directory. But what is this gitlab-ci.yml? It is a a file called .gitlab-ci.yml in the root of the repository, which contains the CI/CD configuration. It is needed for for publishing the static html site. In the file you can define for exmple:
Source: GitLab Docs.
When you add a .gitlab-ci.yml file to your repository, GitLab detects it and an application called GitLab Runner runs the scripts defined in the jobs.
This is how the file looks in in my project.
The website
Now the repository was ready to be used, and we had the template for our project page that Fab Academy had created.My website address is: https://fabacademy.org/2023/labs/oulu/students/petra-rutanen/.
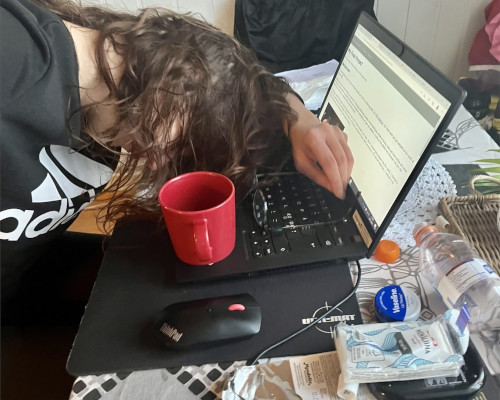
The website is the place for our documentation during Fab Academy. This is when I realized that setting everything up had already felt a bit hard as the information was new to me, but now I was facing the actual start and didn't really know what to do. Building a website and HTML are new to me, so I was a bit overwhelmed. I understood that is ok to use for example templates and edit them, or static site generators.
The vastness of options and little knowledge lead me to think this will be hard. Our instructor recommended that if you don't know HTML, it could be sensible to use for example Mkdocs for building HTML files from Markdown files. MkDocs is a fast, simple and good static site generator that's geared towards building project documentation. As I looked a bit into that, I think I could give it a try. But since I am using my work laptop for this Fab Academy experience, I need to first ask for admin rights to load up the needed programs (in this case the Mkdocs). I already asked for them from the ICT unit, and now I just have to wait for them to grant me the rights.
*Update from week3. I have now rights to download programs. We used markdown in week 3 group assignment, and I actually thought html feels more interesting. I know my webpages are a bit raw, but I would like to continue on my path editing the template html and learning little by little.
So at this point when the first week is going on and the assignments have to be done soon, the best solution for me was to just edit the template we were given and try to document everything needed so I don't fall behind. With my extreme lack of knowledge about HTML, the site looks as it does but I trust it will get better on the way.
When you open your code in Fabclouds 'Open in Web IDE', you get to type in the changes, then create a commit and push it to the main branch. This is how the interface looks like:
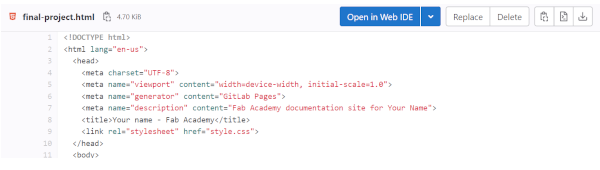
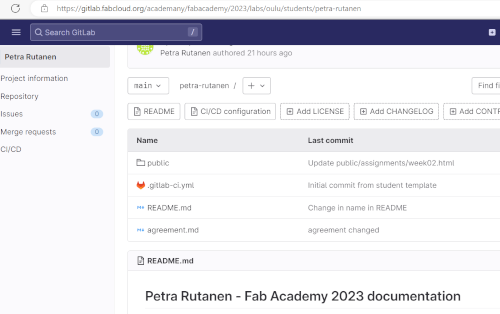
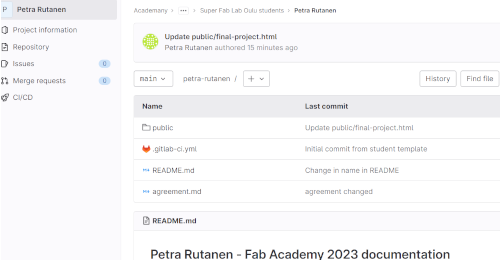
This is how my project front page looks like on gitlab. Everything I do in the documentation goes under puclic directory. In the template there was already some things in the directory; for example index.html, about.html and style.css. In html I can change the code concerning a spesicig page, and in style.css the overall style. CSS stands for Cascading Style Sheets and it describes how HTML elements are to be displayed on screen. It can control the layout of multiple web pages all at once.
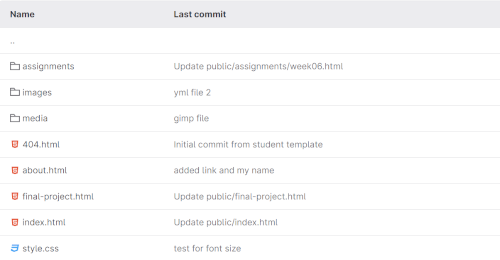
I have also added myself some directories; the assignment, media and images. In assignments there are the html pages for each weeks. In images I started to uploading images I need in documentation. I added there pictures for 3 weeks, when I noticed that they were building up. That's not good, because it would be really hard to find a certain picture now. At that point I started adding folders for each week. In media there are the original design files I need to represent during the weeks assignments. I make a link to them each week so they can be downloaded at the bottom section of each task.
I just use notepad to write the code and then copy paste it to web IDE. When I'm unsure of something, I use the W3Schools online code editor. With the editor, you can edit HTML, CSS and JavaScript code, and view the result in your browser.
It has been fun to try to undestand the code in the template given to us, and make minor changes to it. It is a relief that if I really mess something up, there's always the file history in repo that I can go back to.I have used the web interface to modify index.hmtl, about.html, final-project.html, assignments and images. With images I also started to use GIMP so that the photos will be resized and not too big.
I added some text to pages, small modifications on style, photos, links and lists.
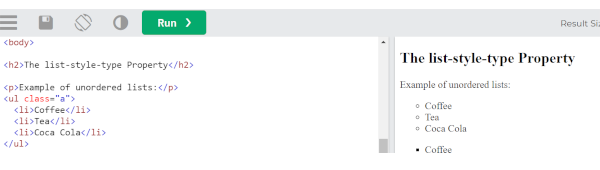
For example, here's how you make links and unordered lists (letters are in bold).

And here's one thing I just had to learn; how to get caption on photos and also make the the text a bit smaller.
Elements are 'figure', 'figurecaption' and 'small'.

As a help I used a few times the w3schools tutorials for HTML and CSS.
Here is an example of a 'try it yourself' property. You can change the code on the window to the left, and the result is immediately seen on the windown to right.
As I first started doing these small changes, I committed the changes a thousand times for every small thing. For example, if I noticed typos on my text. Also, I didn't name my commits because the changes were minor. But now that I am getting more comfortable with html (what??), I am starting to make more reasonable changes and naming my commits.
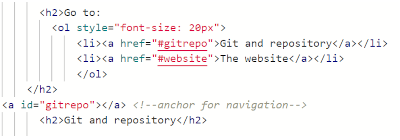
While writing this documentary, I noticed my text is getting longer and longer..So I really wanted to have links to headers at the top of the page, so the reader at least can jump into sections.
And how did I manage that? Well I searched the webpages of a former Fab Academy student, now a local instructor, Gleb. He had these kind of links in his pages, so I looked up the code and ruthlessly copied the code. Thank you so much, Gleb! 😊 So I gave the headers an id and then made a link to them.
For fun I tried also to do a table which I then used to present the git commands.
I searched for an example HTML table on W3Schools, and then changed properties and values in that.
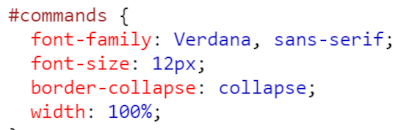
For example I changed columns, colors, font, and font size. Then I gave an id to my table ('commands'), and the style changes referred to that id.
Here I defined my font and font size, and also collapsed the boarders of different elements on the table. Also after taking this screenshot I also changed the width of my table to 60% so it looks nicer.
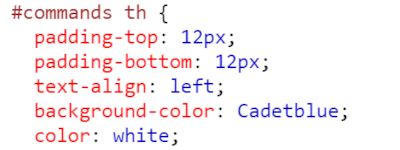
Here I chose the colors and padding on an element, in this case the labels of the table.
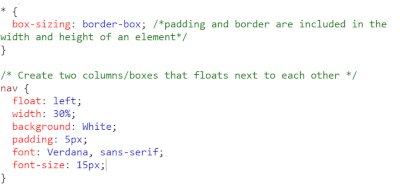
Aaand..at the very last minute I finally got some structure to the index page, which I had been craving for. In W3Schools I read about floats. You can use float to create a page with a header, footer, left content and main content. Being a positioning property, the CSS float property is used to push an element to the left or right. It allows the other elements to wrap around it.
I modified my original code in the mentioned Tryit editor. I made two columns that float next to each other. I created a navigation column (nav) and the main article column (article). I defined the columns width, height, padding and background color in style section.
I put the existing weekly assignment links to nav and my main text to article.
Here you can see the creating of columns. There's also the box-sizing and border-box which make the box (column) element to have padding and border included in its height and width.