1. Project management
Individual assignment for this week:
- Plan and sketch a potential final project
- Work through a git tutorial
- Build a personal website describing you and your final project
This week's topics, version control and creating own website, were completely unknown to me until Wednesday and Thursday last week. Well, I had heard of the topics, but I had never used version control or git, nor had I ever made a website.
So after Thursday, when our local lesson was over, I was pretty tired. At first I thought I was keeping up well and understanding something about the topics. But once we got down to business and got into Git, I was a bit confused about what was supposed to happen.
Luckily, at the end of the working day my colleagues cheered me up by refreshing me on a few of the most important things and I could sigh, "Maybe it'll be okay!”. Over the weekend I spend my time reading the Git Book, watching parts of the Aalto Fab Lab's Youtube videos, (thanks for those, Kris!) and also checking out the HTML and the CSS tutorials on the w3schools website.
I was pleased to find that on Sunday I was excited to edit HTML, even though I had only learned the basics. Okay, the biggest flow was probably when I chose the colors, and I would like to learn more about how to design visual elements for website or use static site generators. However, I think it was a good idea to start by editing the website template that had been made for us. I already understand a lot more than I did at the beginning, so from difficulty to victory!
Git
What is Git and Gitlab? A small summary of them from the Git Book website:
Git is Distributed Version Control System, that thinks of its data like a stream of snapshots. With Git, every time you commit, or save the state of your project, Git basically takes a picture of what all your files look like at that moment and stores a reference to that snapshot. To be efficient, if files have not changed, Git doesn’t store the file again, just a link to the previous identical file it has already stored.
In Distributed Version Control Systems clients don’t just check out the latest snapshot of the files; rather, they fully mirror the repository, including its full history. Thus, if any server dies, and these systems were collaborating via that server, any of the client repositories can be copied back up to the server to restore it. Every clone is really a full backup of all the data. Git also allows you to collaborate with different groups of people in different ways at the same time within the same project.
Git has three main states that your files can reside in: modified, staged, and committed:
- Modified means that you have changed the file but have not committed it to your database yet.
- Staged means that you have marked a modified file in its current version to go into your next commit snapshot.
- Committed means that the data is safely stored in your local database.
GitLab is a database-backed web application. A GitLab group is a collection of projects, along with data about how users can access those projects. Our projects are found here in Fabcloud. A GitLab project roughly corresponds to a single Git repository. Every project belongs to a single namespace, either a user or a group. If the project belongs to a user, the owner of the project has direct control over who has access to the project; if the project belongs to a group, the group’s user-level permissions will take effect.
GitLab CI/CD is a tool for software development using the continuous methodologies. It catch bugs and errors early in the development cycle. To use GitLab CI/CD, we had beforehand created a file called .gitlab-ci.yml in the root of our repository, which contains the CI/CD configuration. This .gitlab-ci.yml file defines the structure and order of jobs that the runner should execute and the decisions the runner should make when specific conditions are encountered.
This kind of .gitlab-ci.yml file was created for us beforehand:
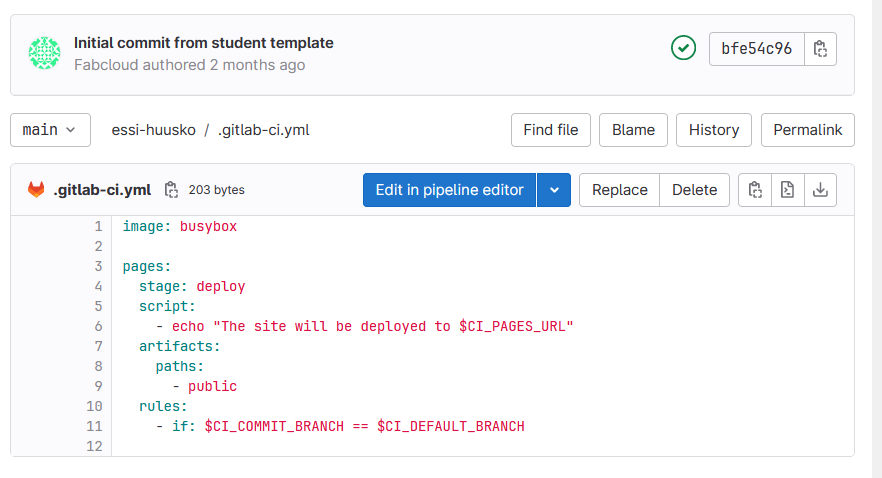
Descriptions for the keywords of the file can be found here.
How I started using Git:
I downloaded the 64-bit Git for Windows Portable the 64-bit Git for Windows Portable as I don’t yet have the admin rights for my work laptop. I should get them but before it I can also use other laptop for programs that need to be download. Then I started to use Git CMD.
First step was set up the identity by commands:

Next step is to generate public/private key pair. SSH keys allow you to establish a secure connection between your computer and GitLab.

The public key had to be saved in the GitLab account user settings under SSH keys. You can copy public key (id_rsa.pub) from the folder where you saved the keys. Open the file with text editor and copy and add it to Gitlab.

The final step before you can establish a connection between your computer and GitLab is to create a local copy of the Fabcloud repository. First select the folder where you want to create a local copy and copy the path of the folder. Then in Git CMD you can go to folder with command cd and paste the path of the folder:

It is easy to copy the url from your own project page...

...and then use the command git clone and paste the url:

Now you have Git repository on your local machine and you can make changes also offline. Every time you want to record the updated project into your repository you can commit snapshots of those changes.
Command I have become familiar with:
- cd (and the path of the folder): go to the specific folder
- cd..: go to the previous folder in the path
- git status: check the status of your files
- git pull: pull files from the remote repository to your local repository
- git add (the path of the file): track a new file or stage modified file
- git add --all: add all files
- git commit -m "message": Commit your changes
- git push: push the committed files to remote repository
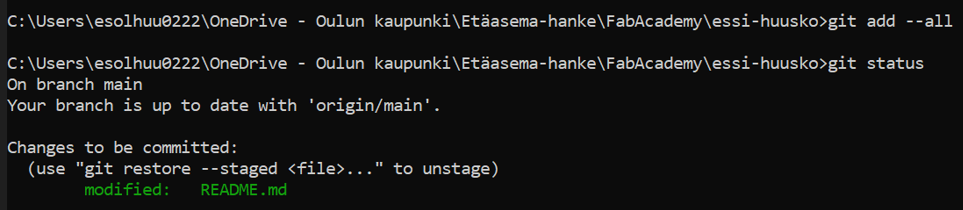
The first oops I made was that I tried to add README.md file with no changes. So you should make changes to the file before you try to add it... This was one of those moments of confusion:

The text means you have a clean working directory, so your tracked files are not modified.
With the help of our instructor, I figured out what to do. I made the changes to README.md file and try add it again:
Yippee, it worked!
Then I committed changes and wrote the message. And finally pushed the committed file to remote repository:
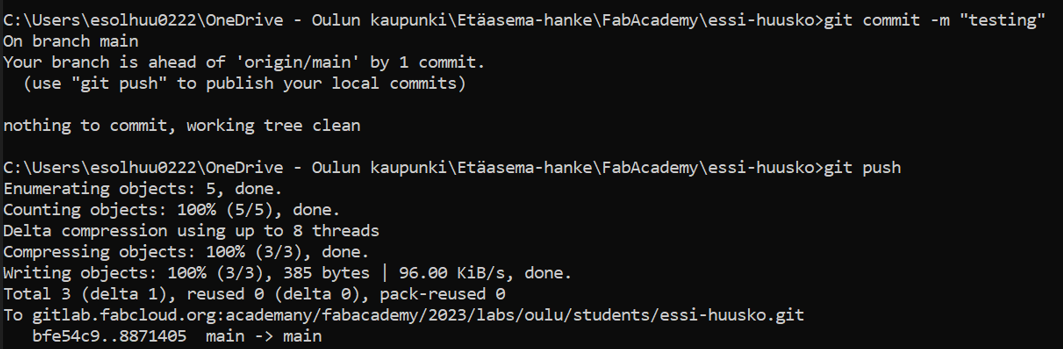
So the most important commands to remember are git add, git commit -m "message" and git push. And git status for checking the status of your files.
With these lessons, I dared to start learning how to edit HTML and CSS and make changes to the website files.
Website
First of all, I should say that I did all the HTML editing in Notepad on my work laptop. It went surprisingly well, although of course I had to be careful as there were no colour-coded sections. I could have used another computer and downloaded something like Notepad++, which our instructor recommended for beginners. Or use the the web interface on Fabcloud, but it felt safer to make edits locally. However, I was more excited to start editing right away and decided to do this week's edits on my work computer. It was also quite easy to get started with the HTML code, as we had a ready-made template from which we could copy the code.
We had a ready-made "public" directory with folders and files under it for editing the website:
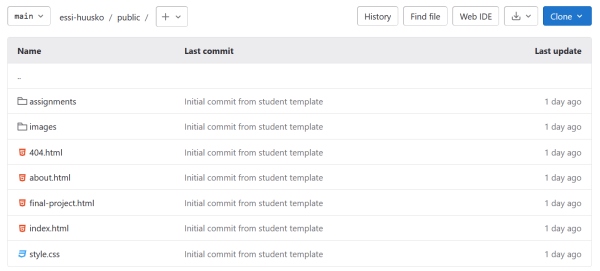
Later, I have made "download_files" folder under the public directory for the original design files. Inside the "images" folder, I have made new folders for each week, so that the pictures are easier to find and the folder is not so chaotic.
I started by editing the about.html file. First I wanted to choose picture of me from my phone's gallery. when I sent it from my phone, I was able to resize the picture before sending. It's important to check the size of your pictures so that the storage space doesn't become too large. I copied the picture to the images folder in my local repository so that i could add it to the website. I wrote the following HTML code to add a picture of me. When I was adding the picture to the website, I could still change the width and height of the image by typing "240" for width and "320" for height:

In later weeks, I learned from one of our instructors that this way of reducing the size of pictures is not good, because the screens are different sizes and these fixed-size pictures will not work well on all screens.
I had actually already changed my style of adding pictures from week 2 onwards, so the width of the pictures on this page is now set to 50% to make them similar to other weeks. These 50% sized pictures may be small on some screens, but the style will match those weeks when I have placed two pictures side by side in the width of the screen. I will tell about that next. But first, the HTML code I'm currently using for the pictures:

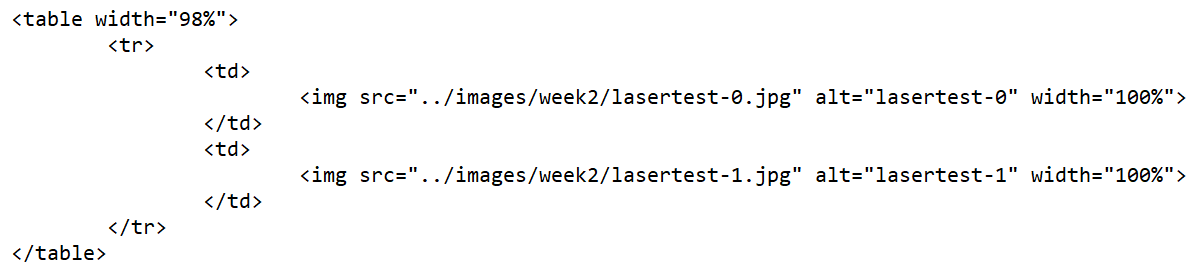
I learned here in FabAcademy Tutorials how to place two pictures side by side on a page using tables. I liked this style, so I decided to start using it in my documentation. A good tip mentioned in the tutorial is that the pictures must be the same size in pixels if you want to get perfect 50/50 alignment. HTML code for adding pictures side by side:
I edit the text and learned that with <br>
I get the line break. And with the <i> I can change font style to italic
or also with <b> bold it:

I added a link to the text with the code below. I learned from the w3schools website that with the target="_blank" attribute I can specify that the link opens in a new tab.

At the local lecture, I learned that I can test website style changes in Web Developer Tools, which can be found in Mozilla Firefox (and also in quite the same place in Google Chrome) in the top right corner: Open application menu -> More tools -> Web Developer Tools. Also the key combination CTRL + SHIFT + I works.
It was fun to test things like page colours, font style and font size there. The changes were not permanent, they had to be permanently edited in the style.css file. I found a list of colors from the w3schools website and tested them on my website.
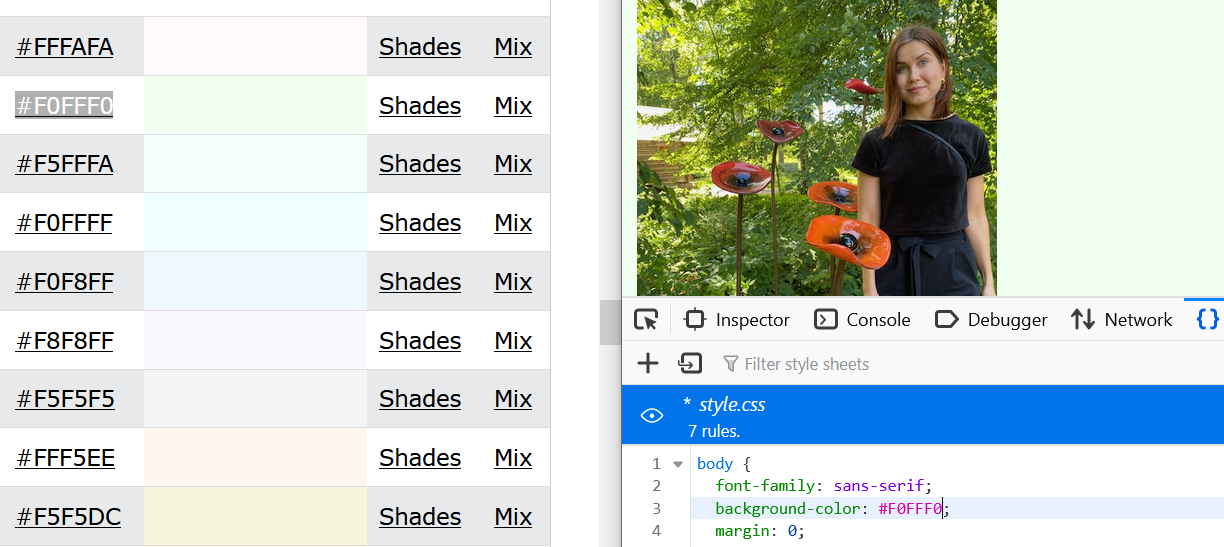
I changed for example the background color of the body and the fontfamily:

Student agreement
I saw the student agreement in our Fab Lab wiki and downloaded the file from there. I noticed that it wasn’t the latest one and the 2023 version had edited sections, so I edited the one I downloaded and pushed the updated version into my repository.