7. Computer controlled machining
It's an exiciting week. We're making something big.
1.1 Assignments of the Week
- Group assignment:
- Complete your lab's safety training.
- Test runout, alignment, fixturing, speeds, feeds, materials and toolpaths for your machine.
- Document your work to the group work page and reflect on your individual page what you learned.
-
Individual assignments:
- Make (design+mill+assemble) something big.
1.2 Group Assignment
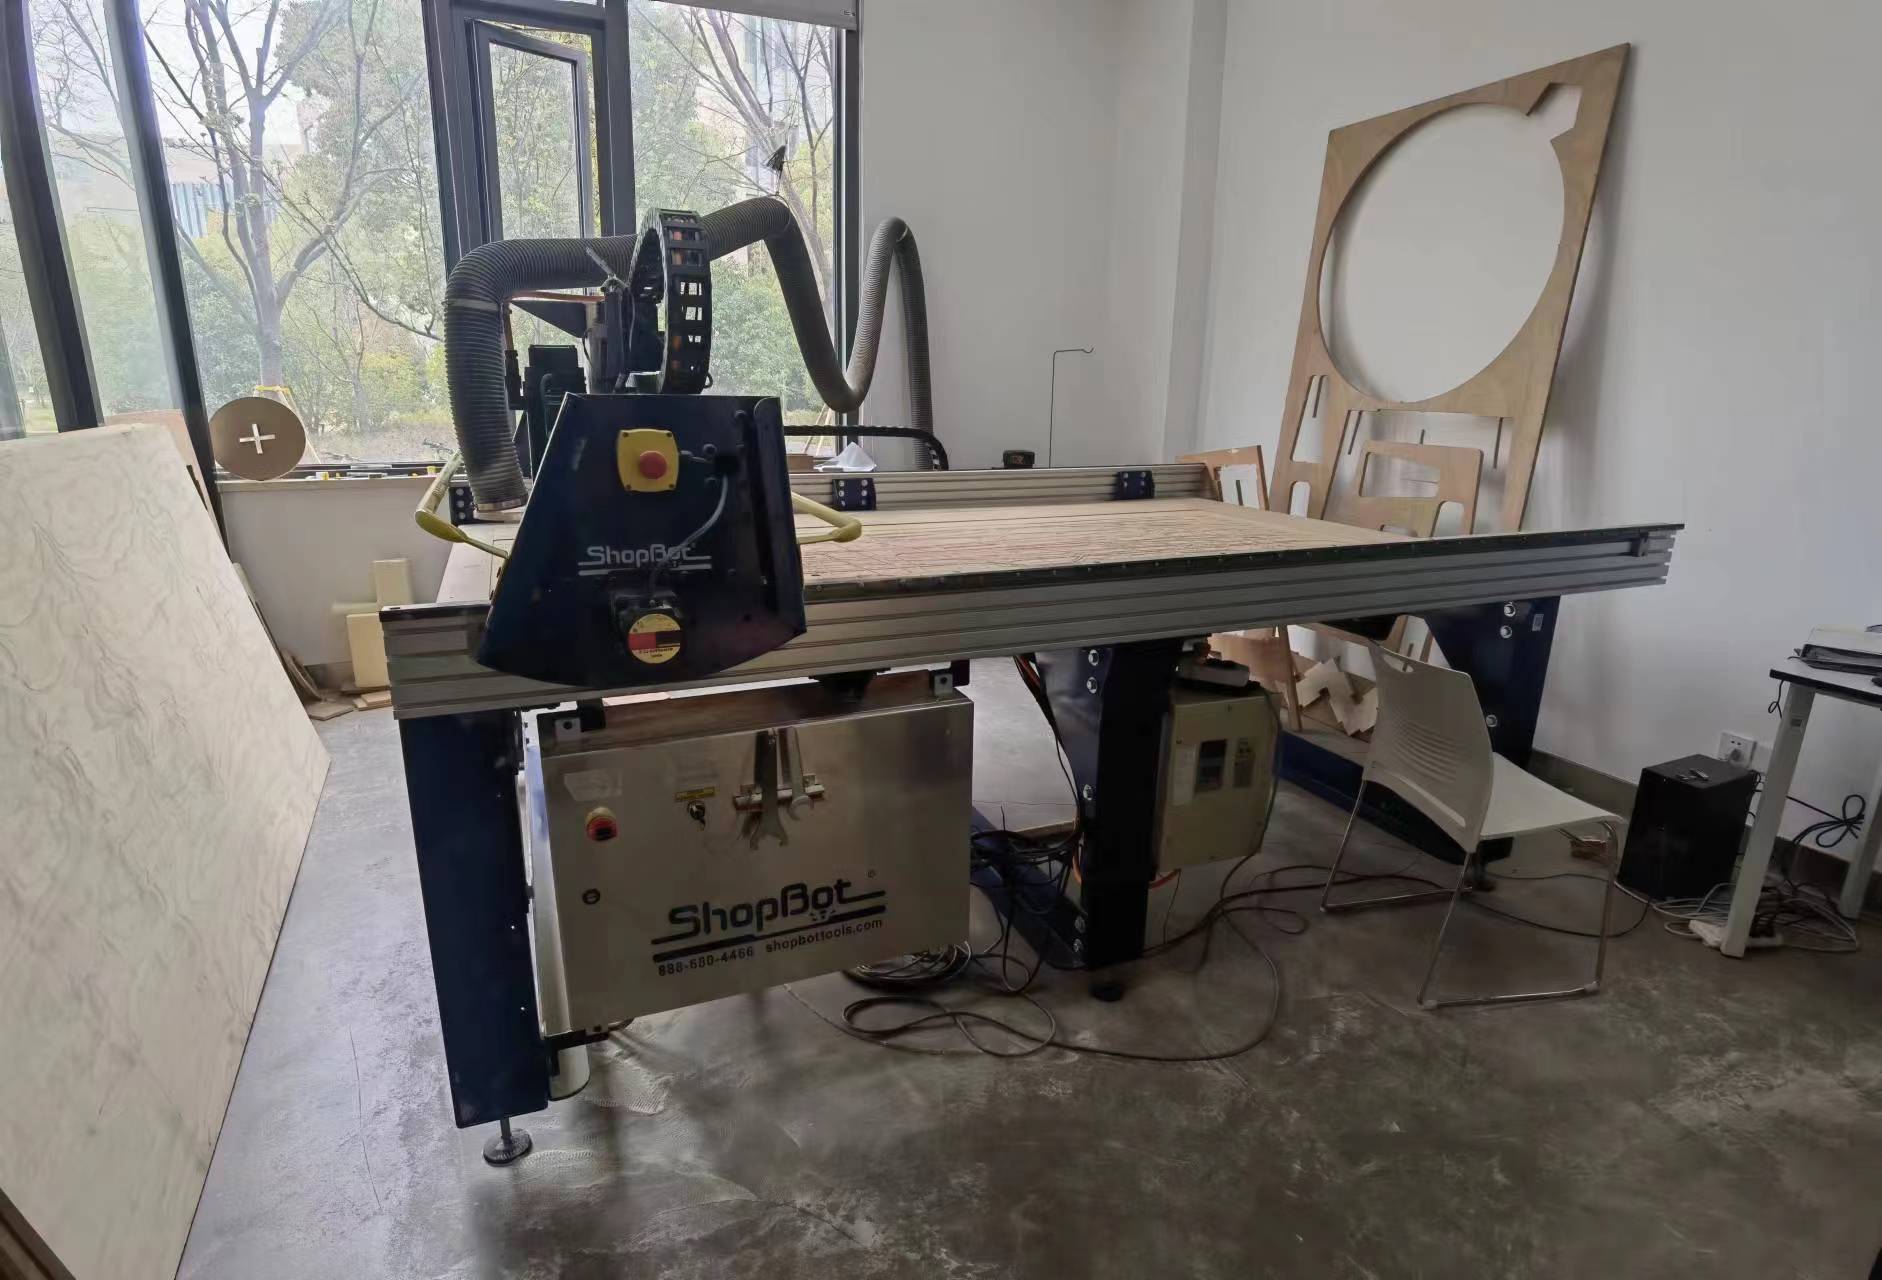
The machine we used for this week is Shopbot.
Safety First
- No one other than the operator can enter while the machine is in operation.
- Do not enter within 1M while the machine is in operation.
- Wear earmuffs, a dust mask, and goggles.
- Persons who have not received instruction on how to use the machine should not operate it without the supervision of staff.
- Know the position of the emergency stop switch.
- Wear appropriate work clothes, sneakers or safety shoes. No sandals, high-heeled shoes or jewelry.
- Please be aware that rotating tools generate friction and heat and can be a fire hazard.
 Watch outside the room.
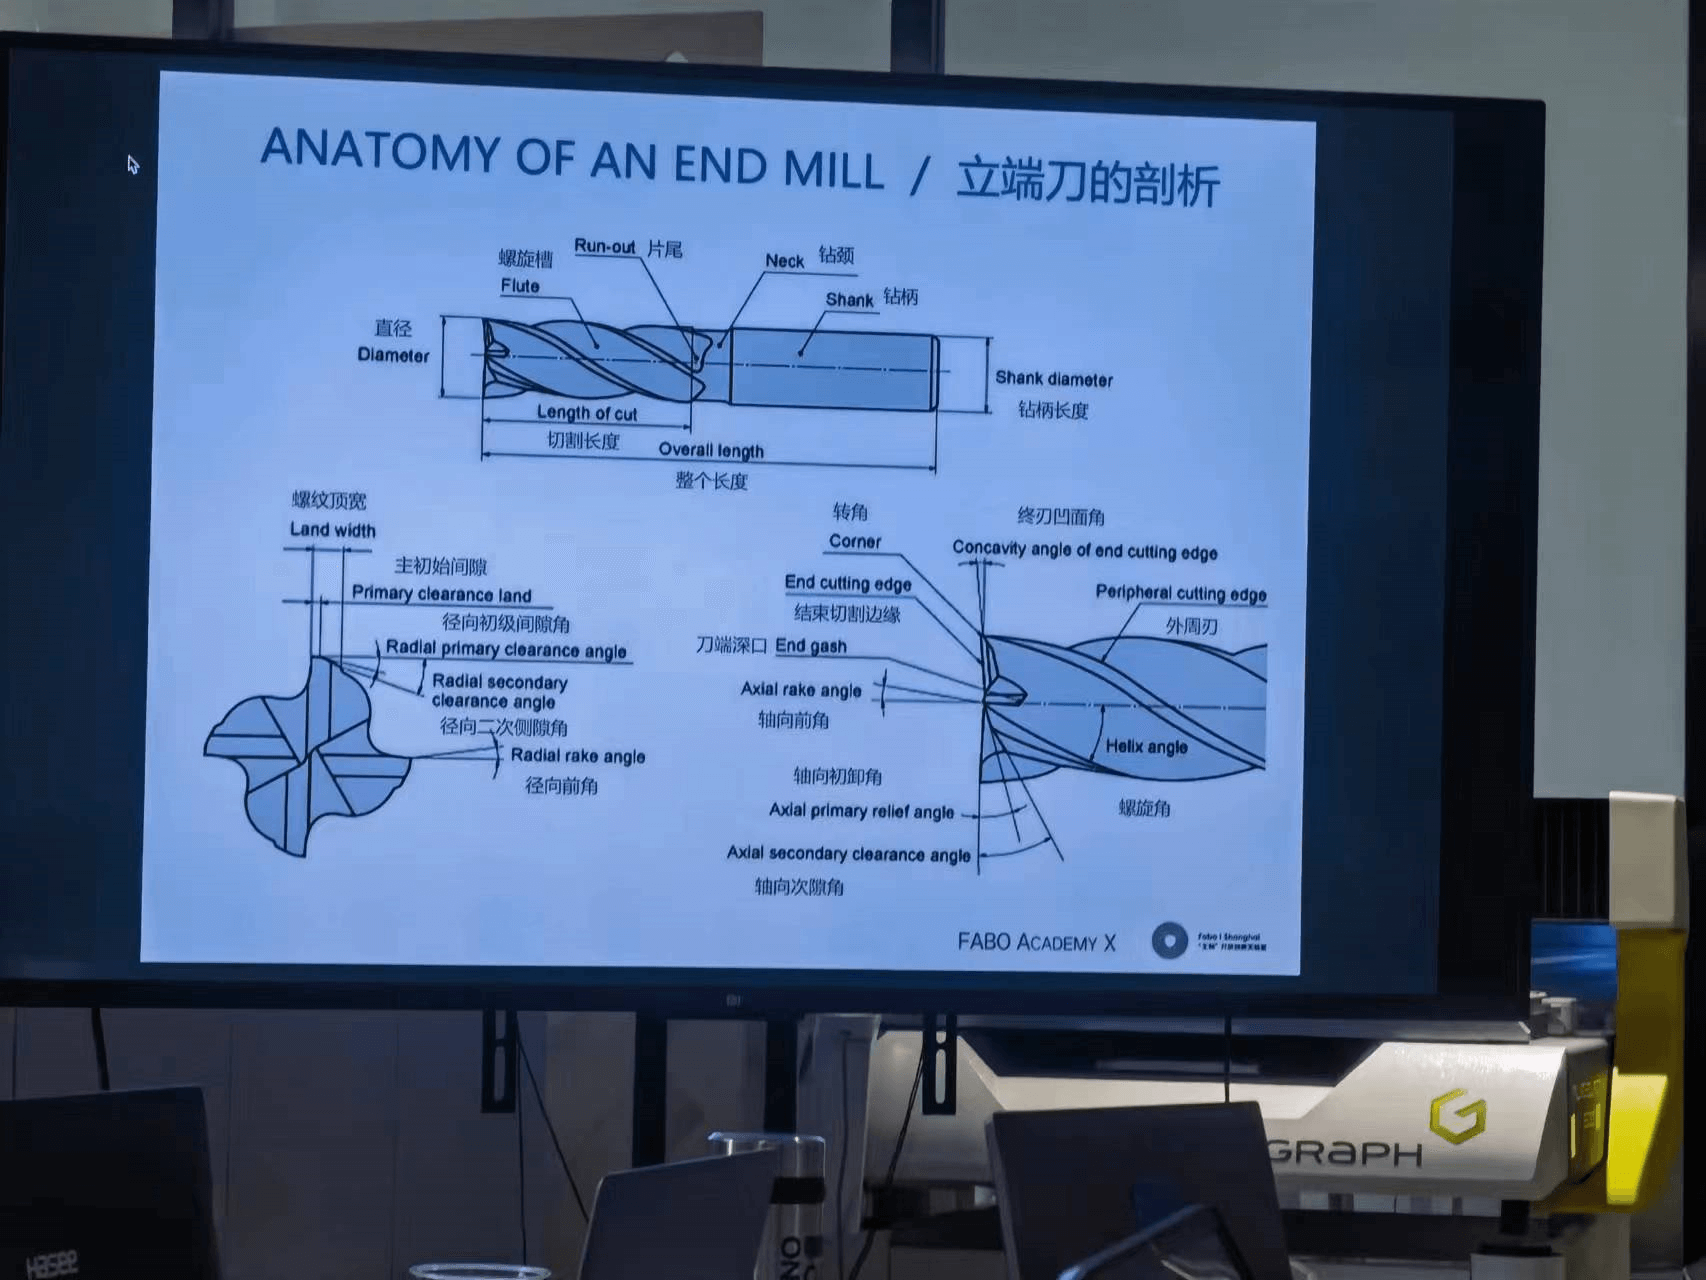
Concepts
There are some important concepts of this CNC machine:
- Drill Bit: Drill down only without cutting on the side
- End Mill: Both sides and head can cut (this is the one we used)
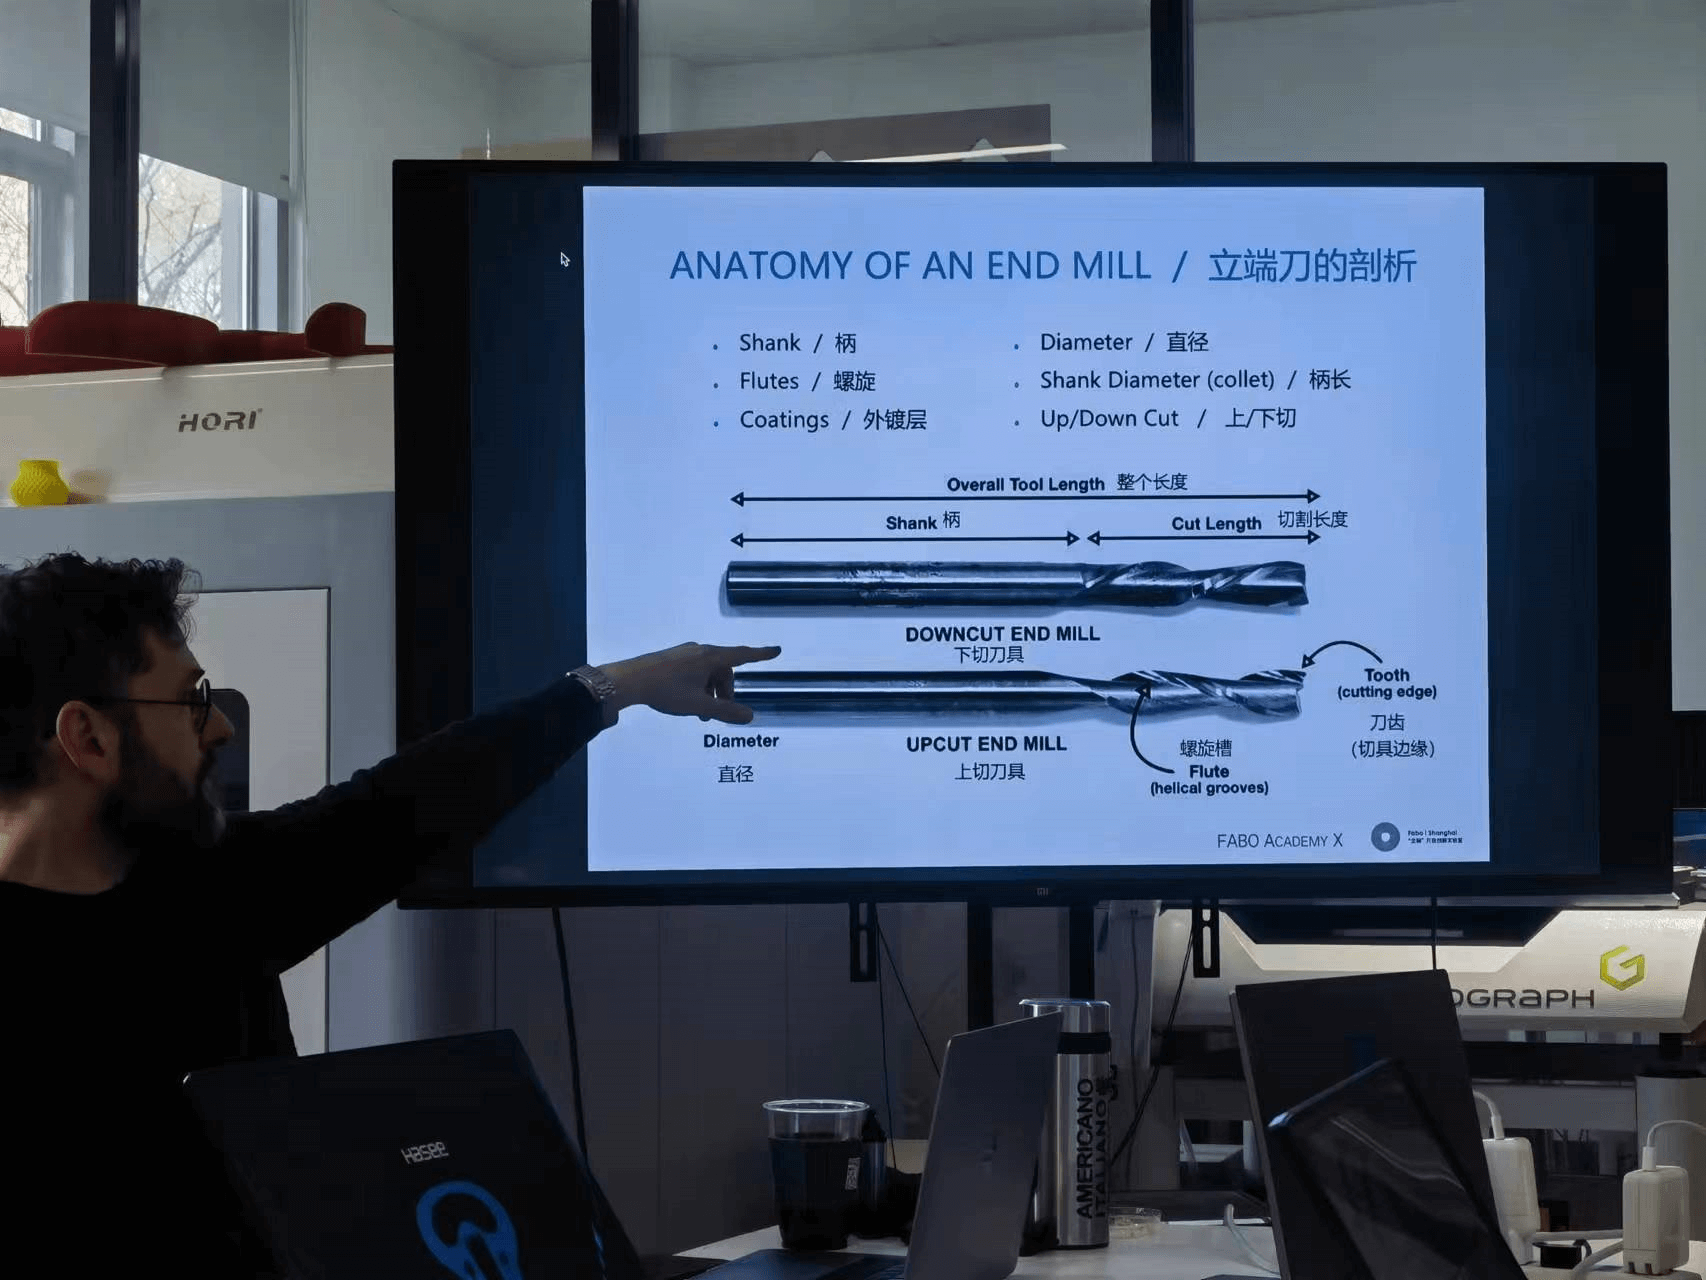
- Shank and cut length can be different size of diameter
- The spindle will only turn clockwise, so the directions of the spiral grooves of downcuts and upcuts are different
- Flute: We use end mill with less flutes to cut wood, more flutes to cut metal and other hard material. Because end mill with less flutes allows wood chips to come out faster, otherwise there may be a fire risk.
- Shapes of end mill: Flat, ball, V-shape
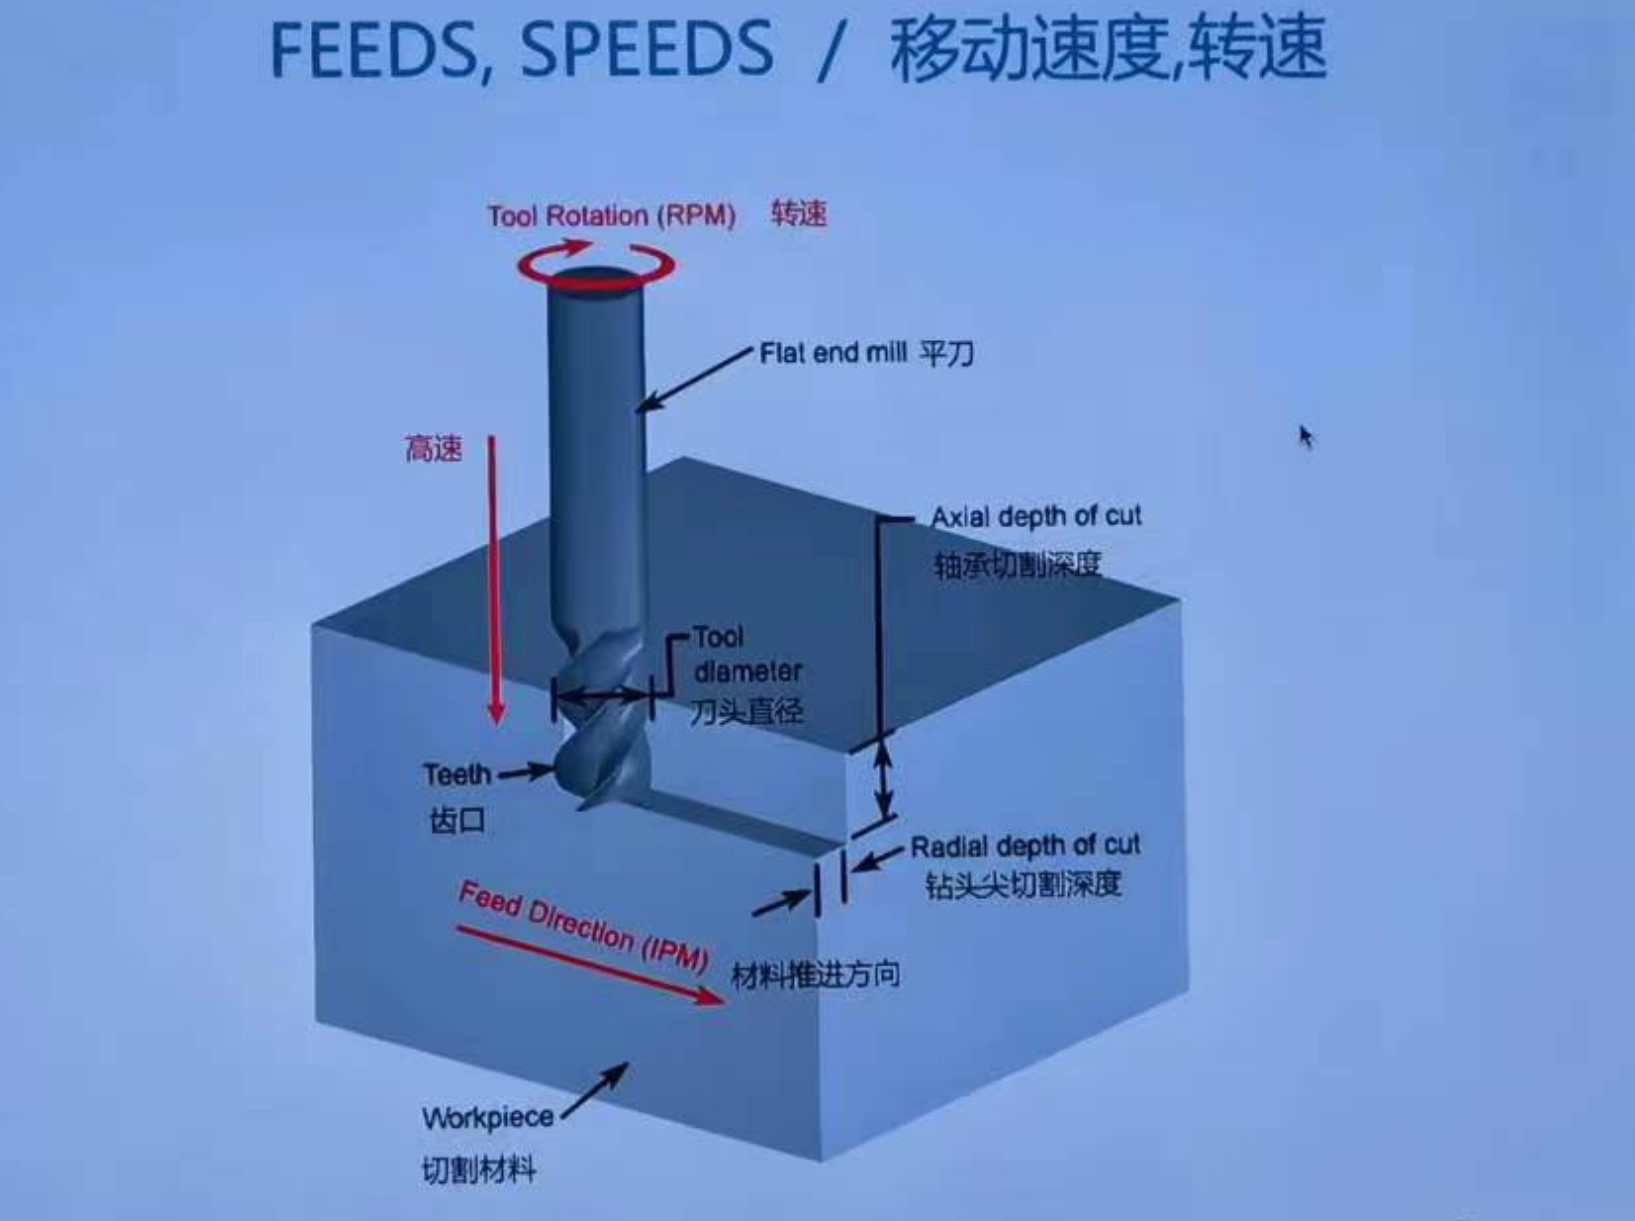
- Feeds and Speeds
- Chip load: The chip load is a measurement of the thickness of material removed by each cutting edge during a cut. This is a valuable piece of information which can then be used to calculate new set ups.
chip load = feed rate(inches per minute)/(rpm*number of flutes)
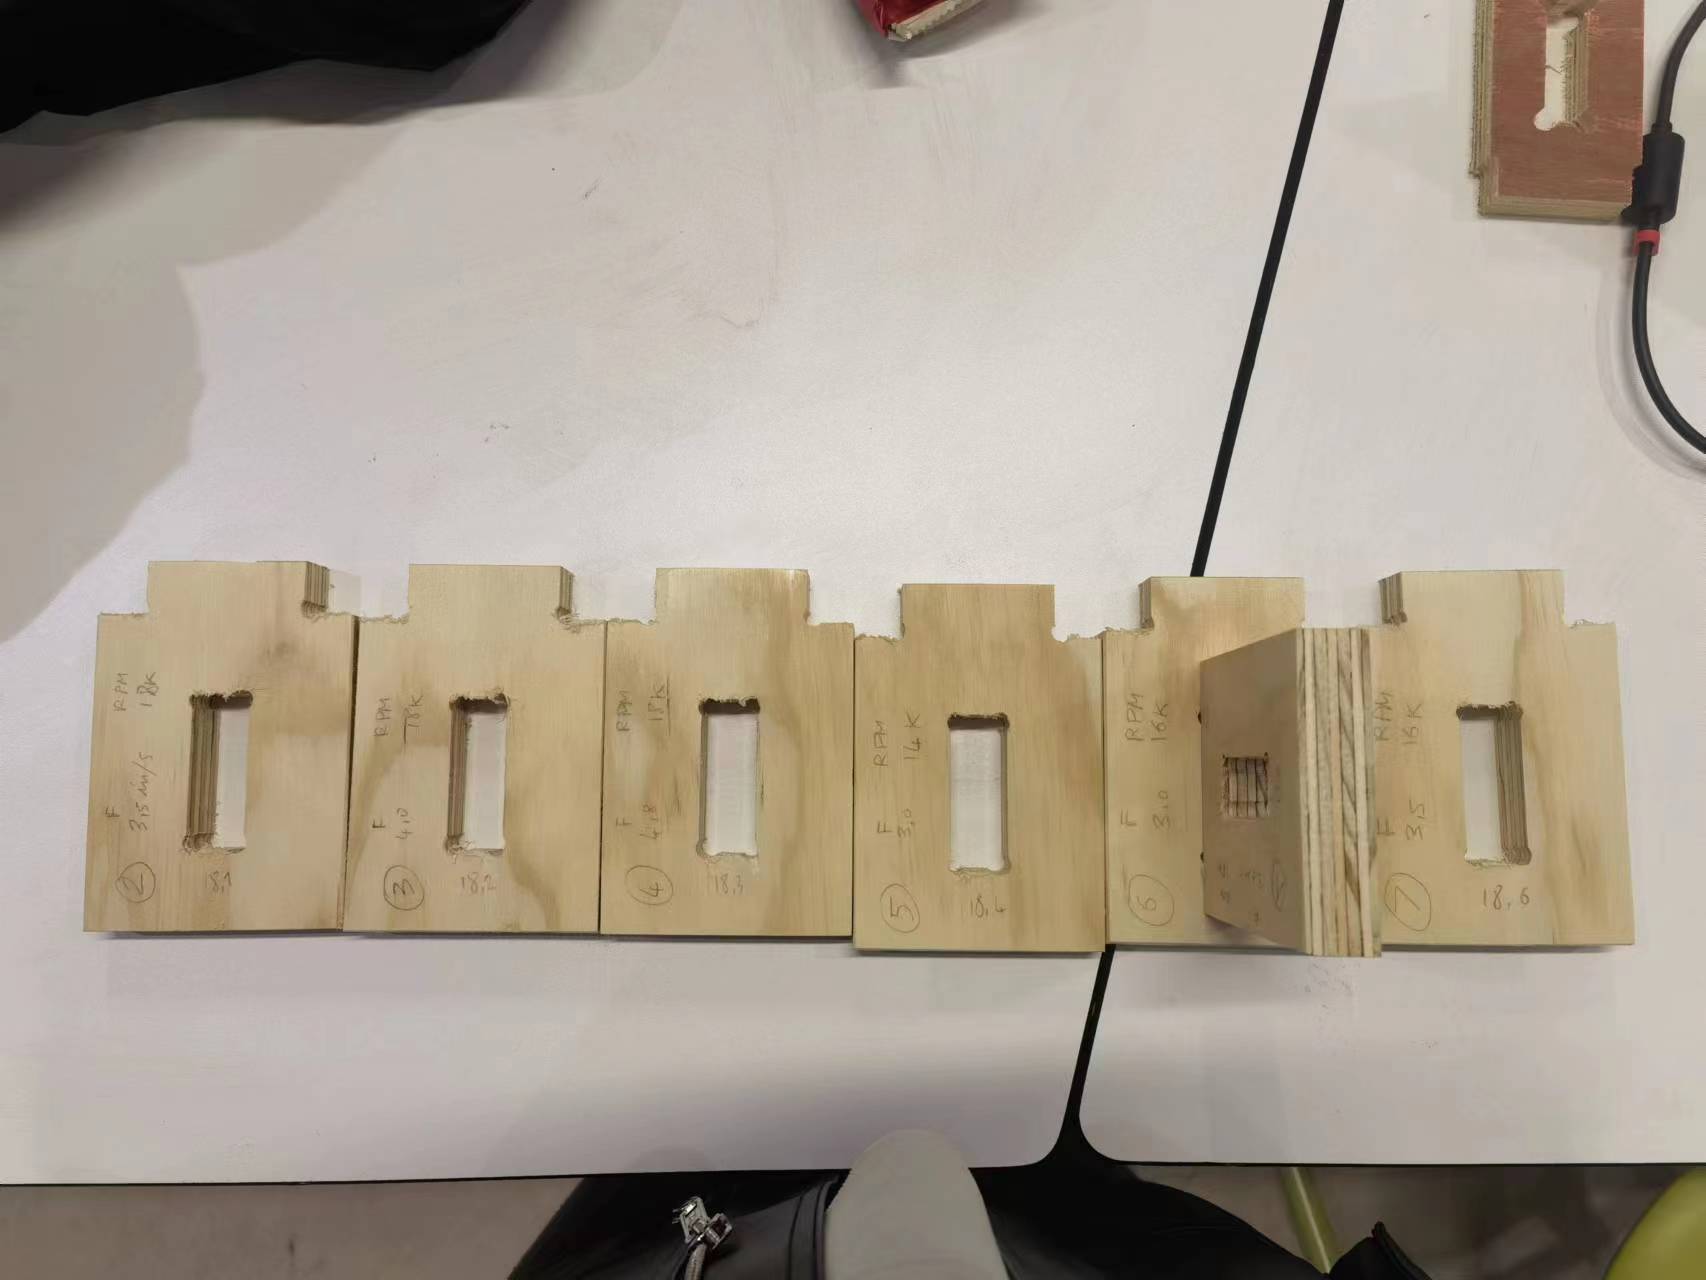
Test the Machine
We tested the performance of the machine under different feed, spindle speed and cut depth. Also to test the joint.
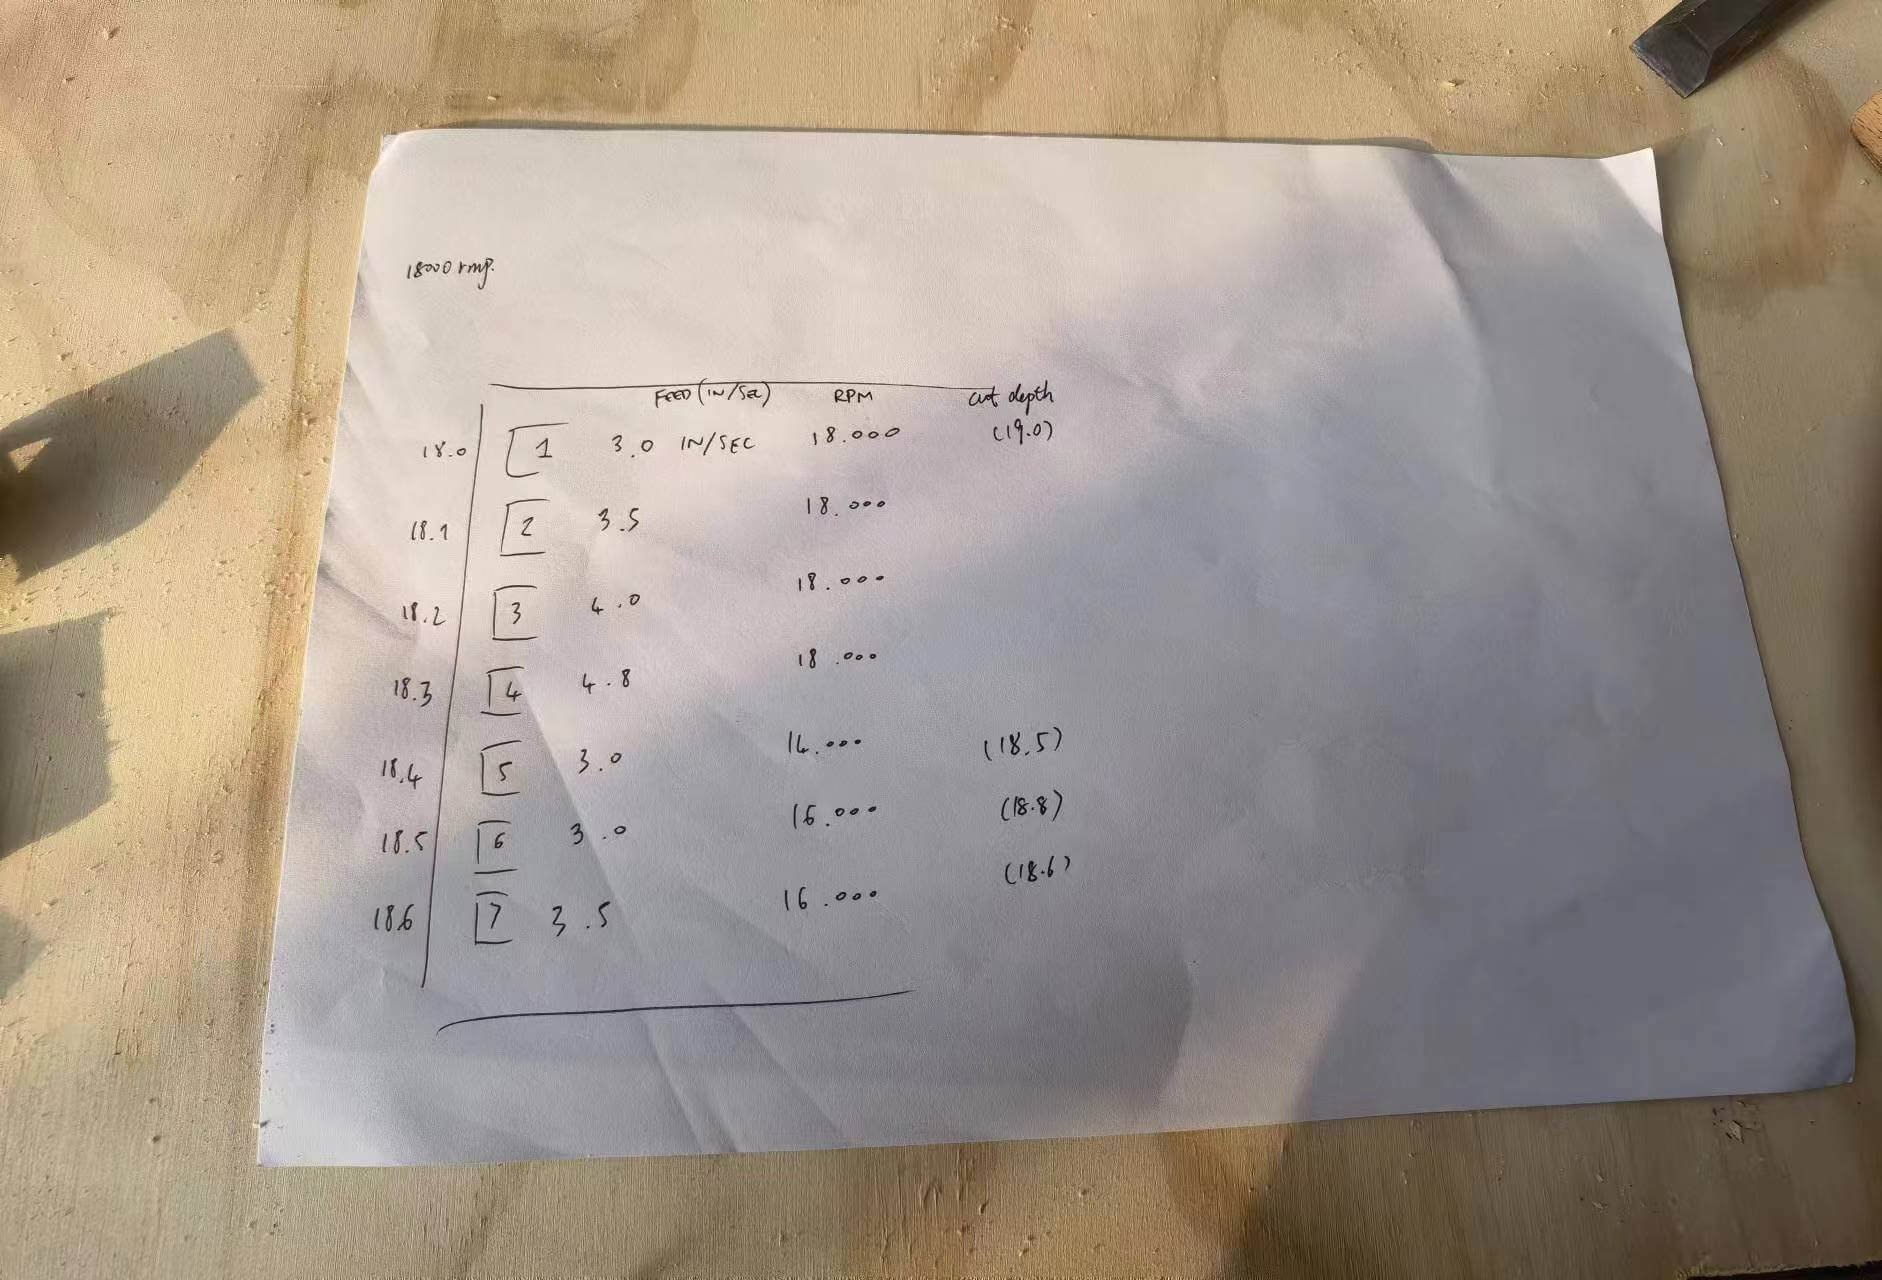
From the chipload point of view, there is not much difference. 16k RMP with 3.5 in/sec is slightly better.
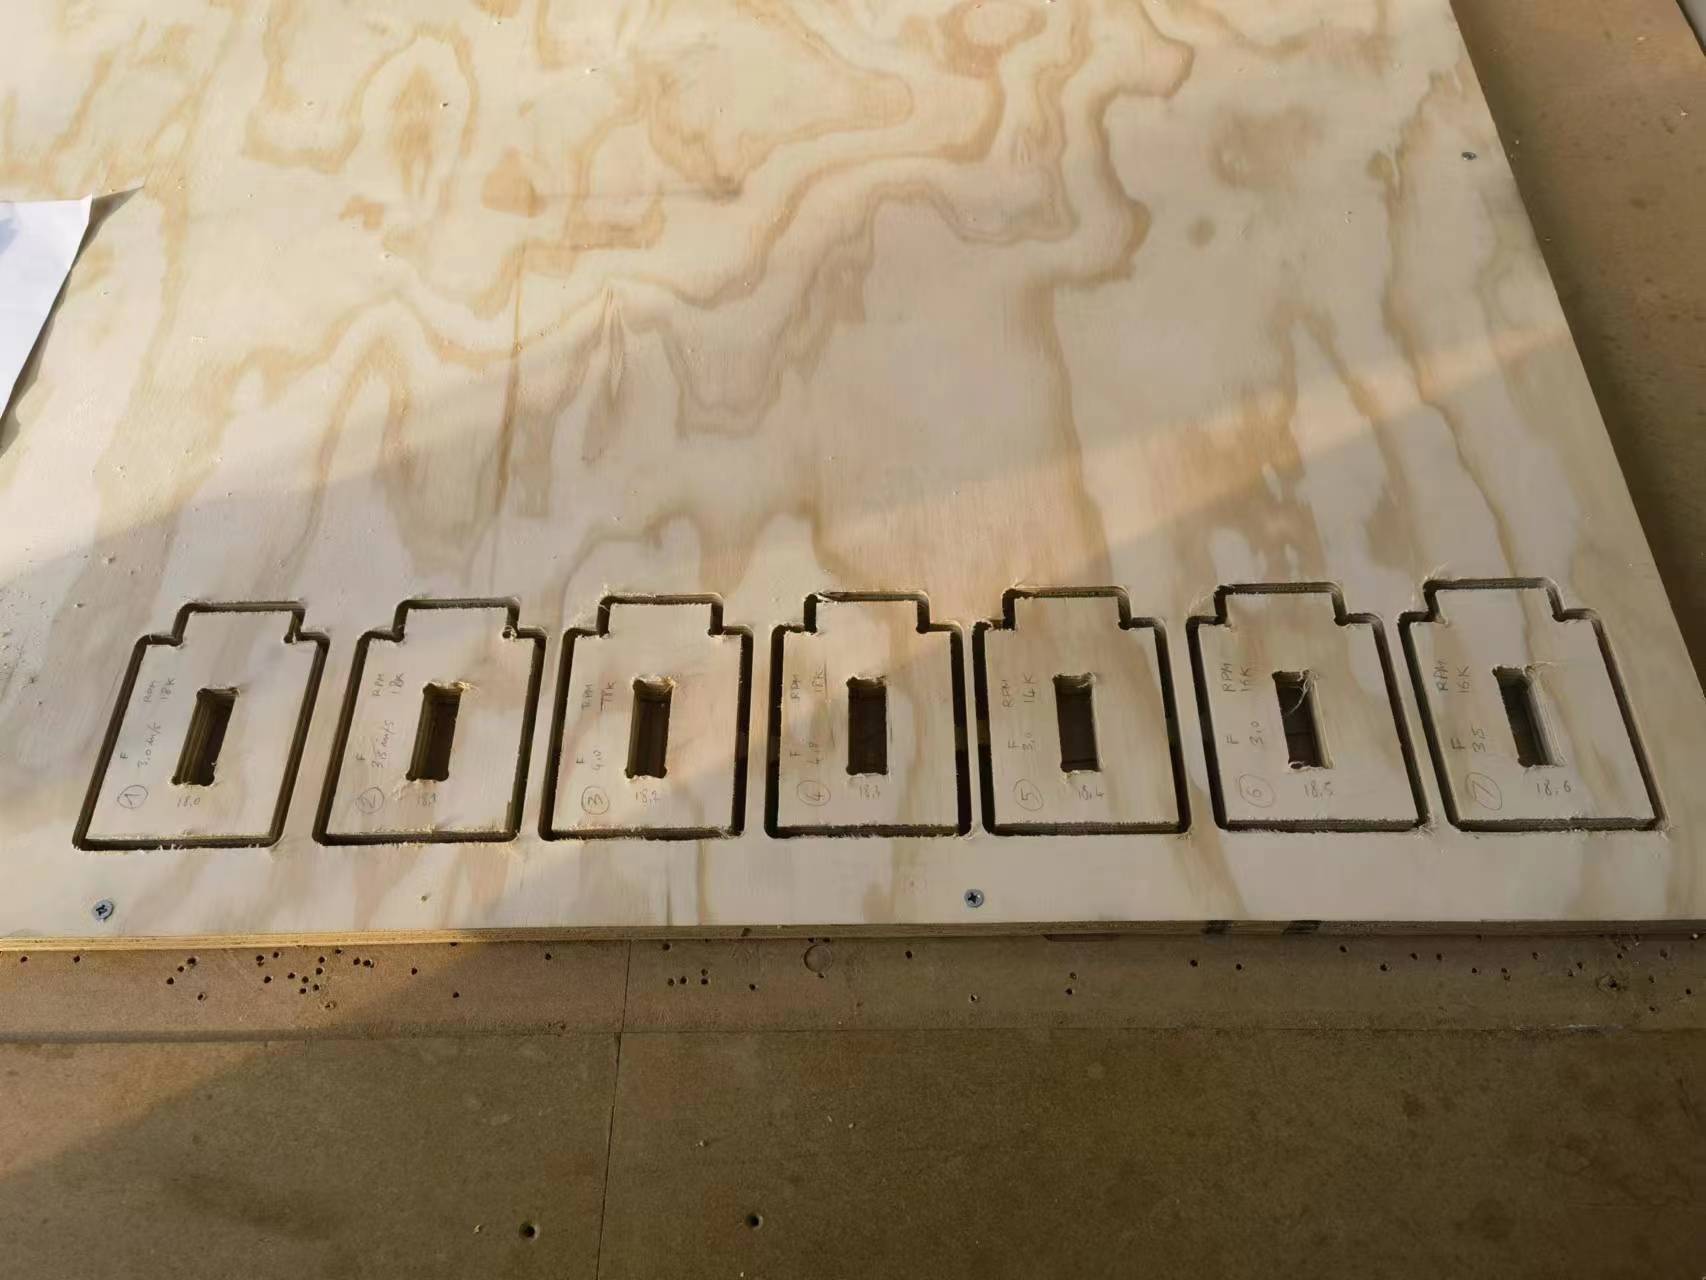
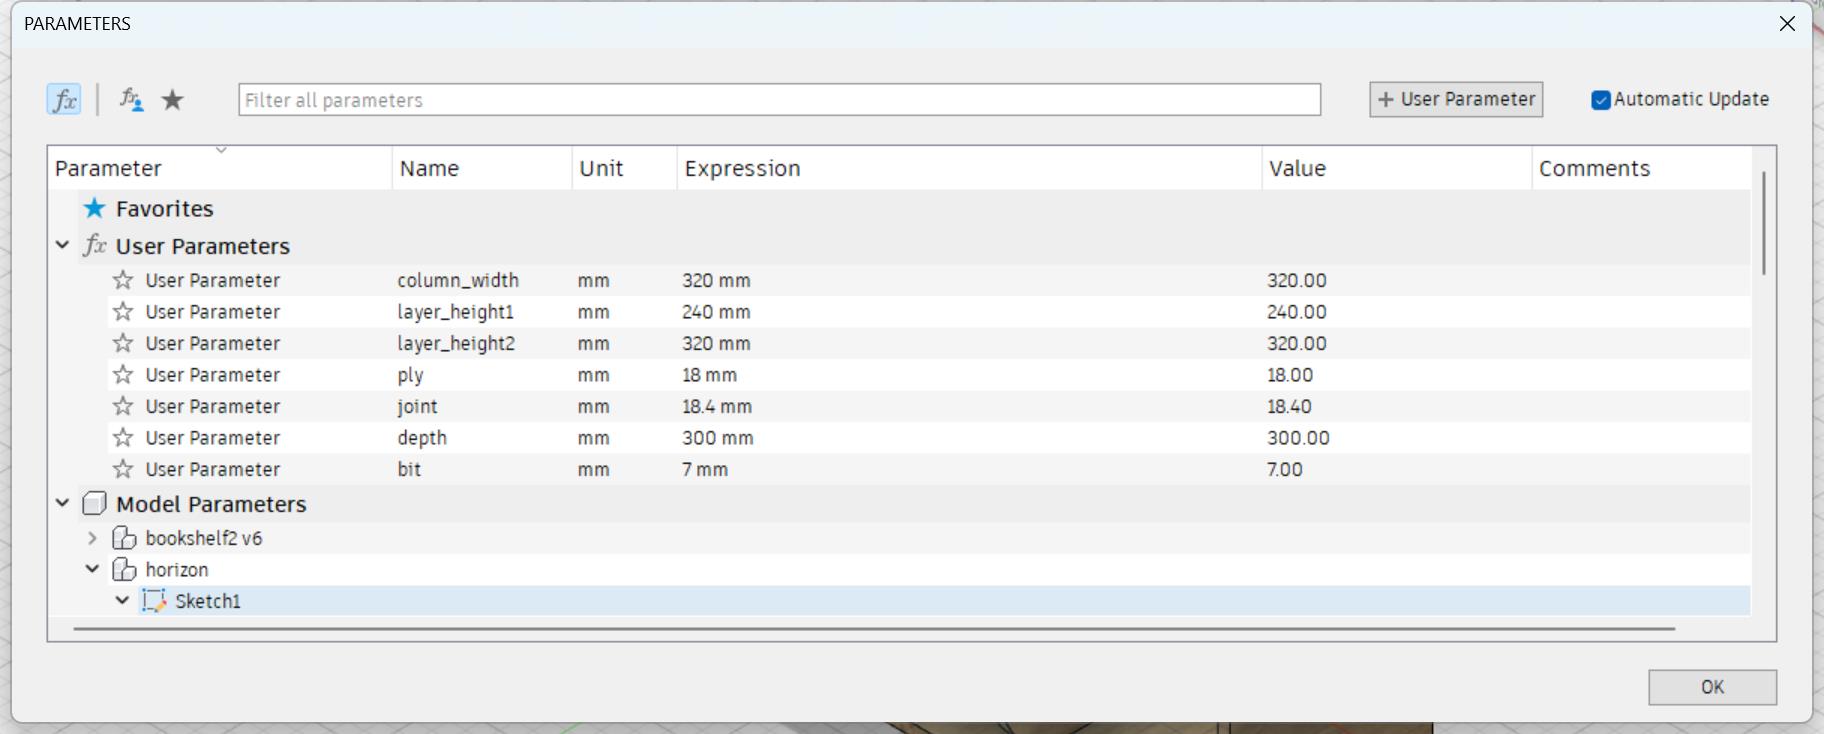
The joint for 18mm plywood board is 18.5mm.
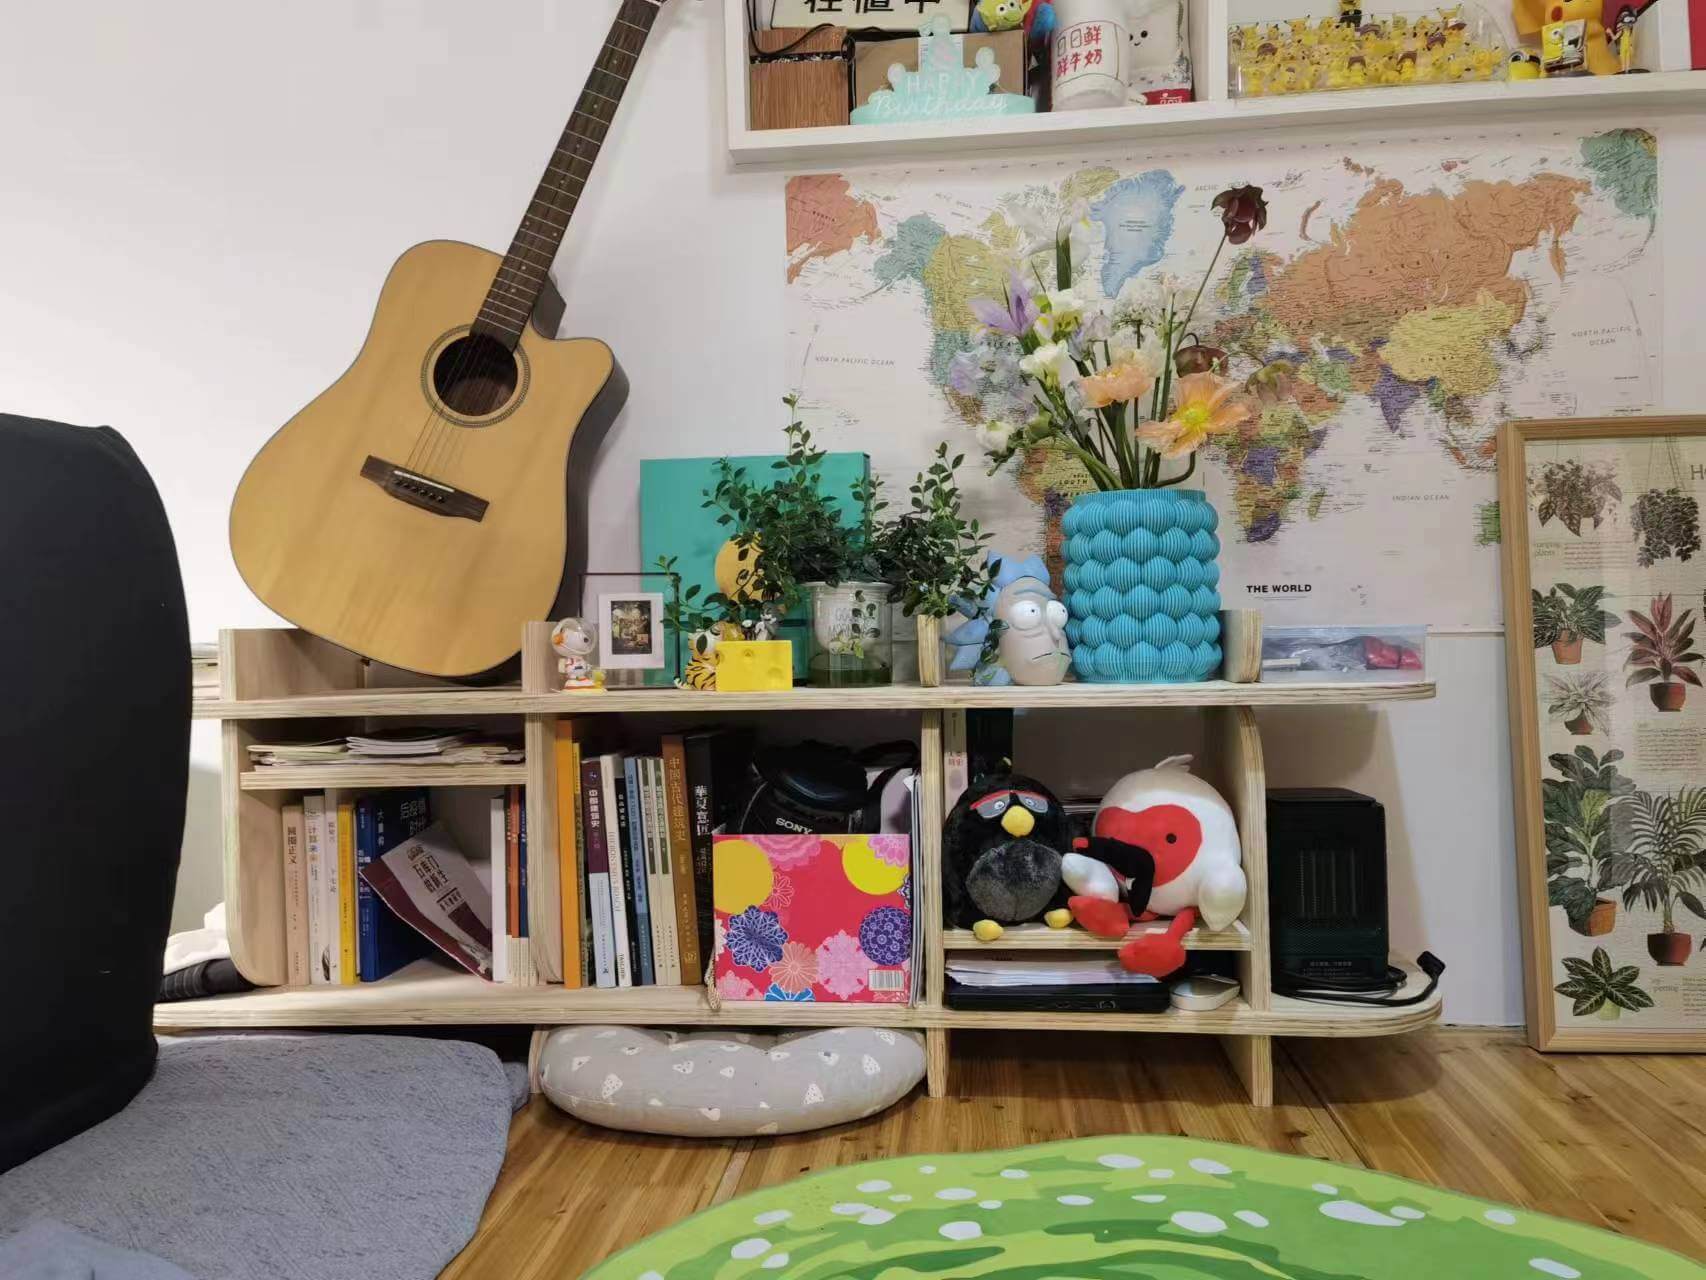
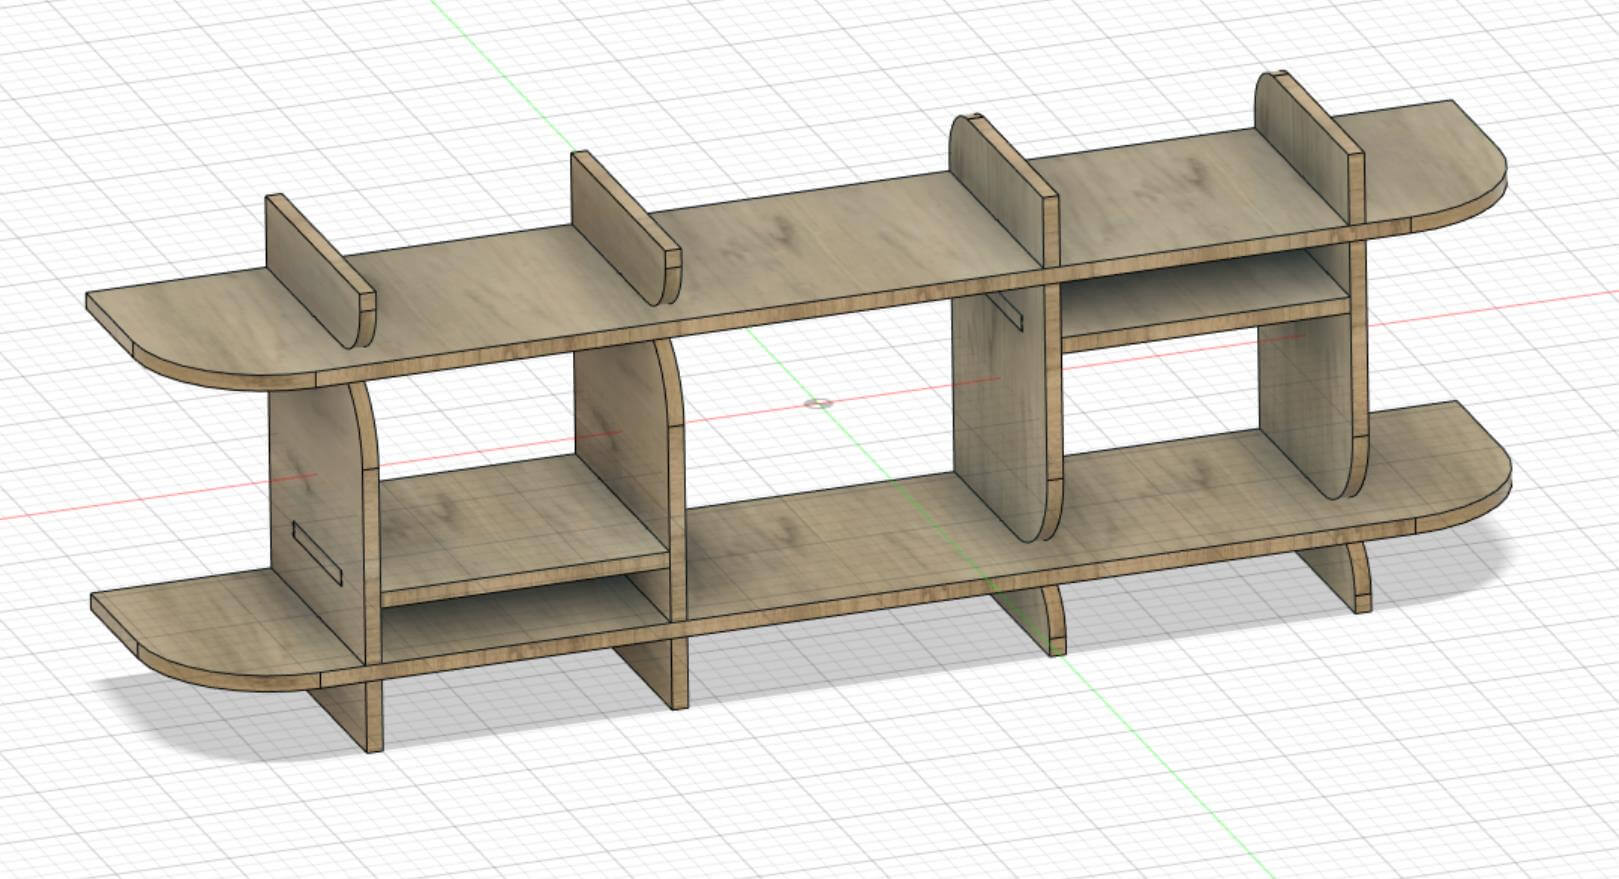
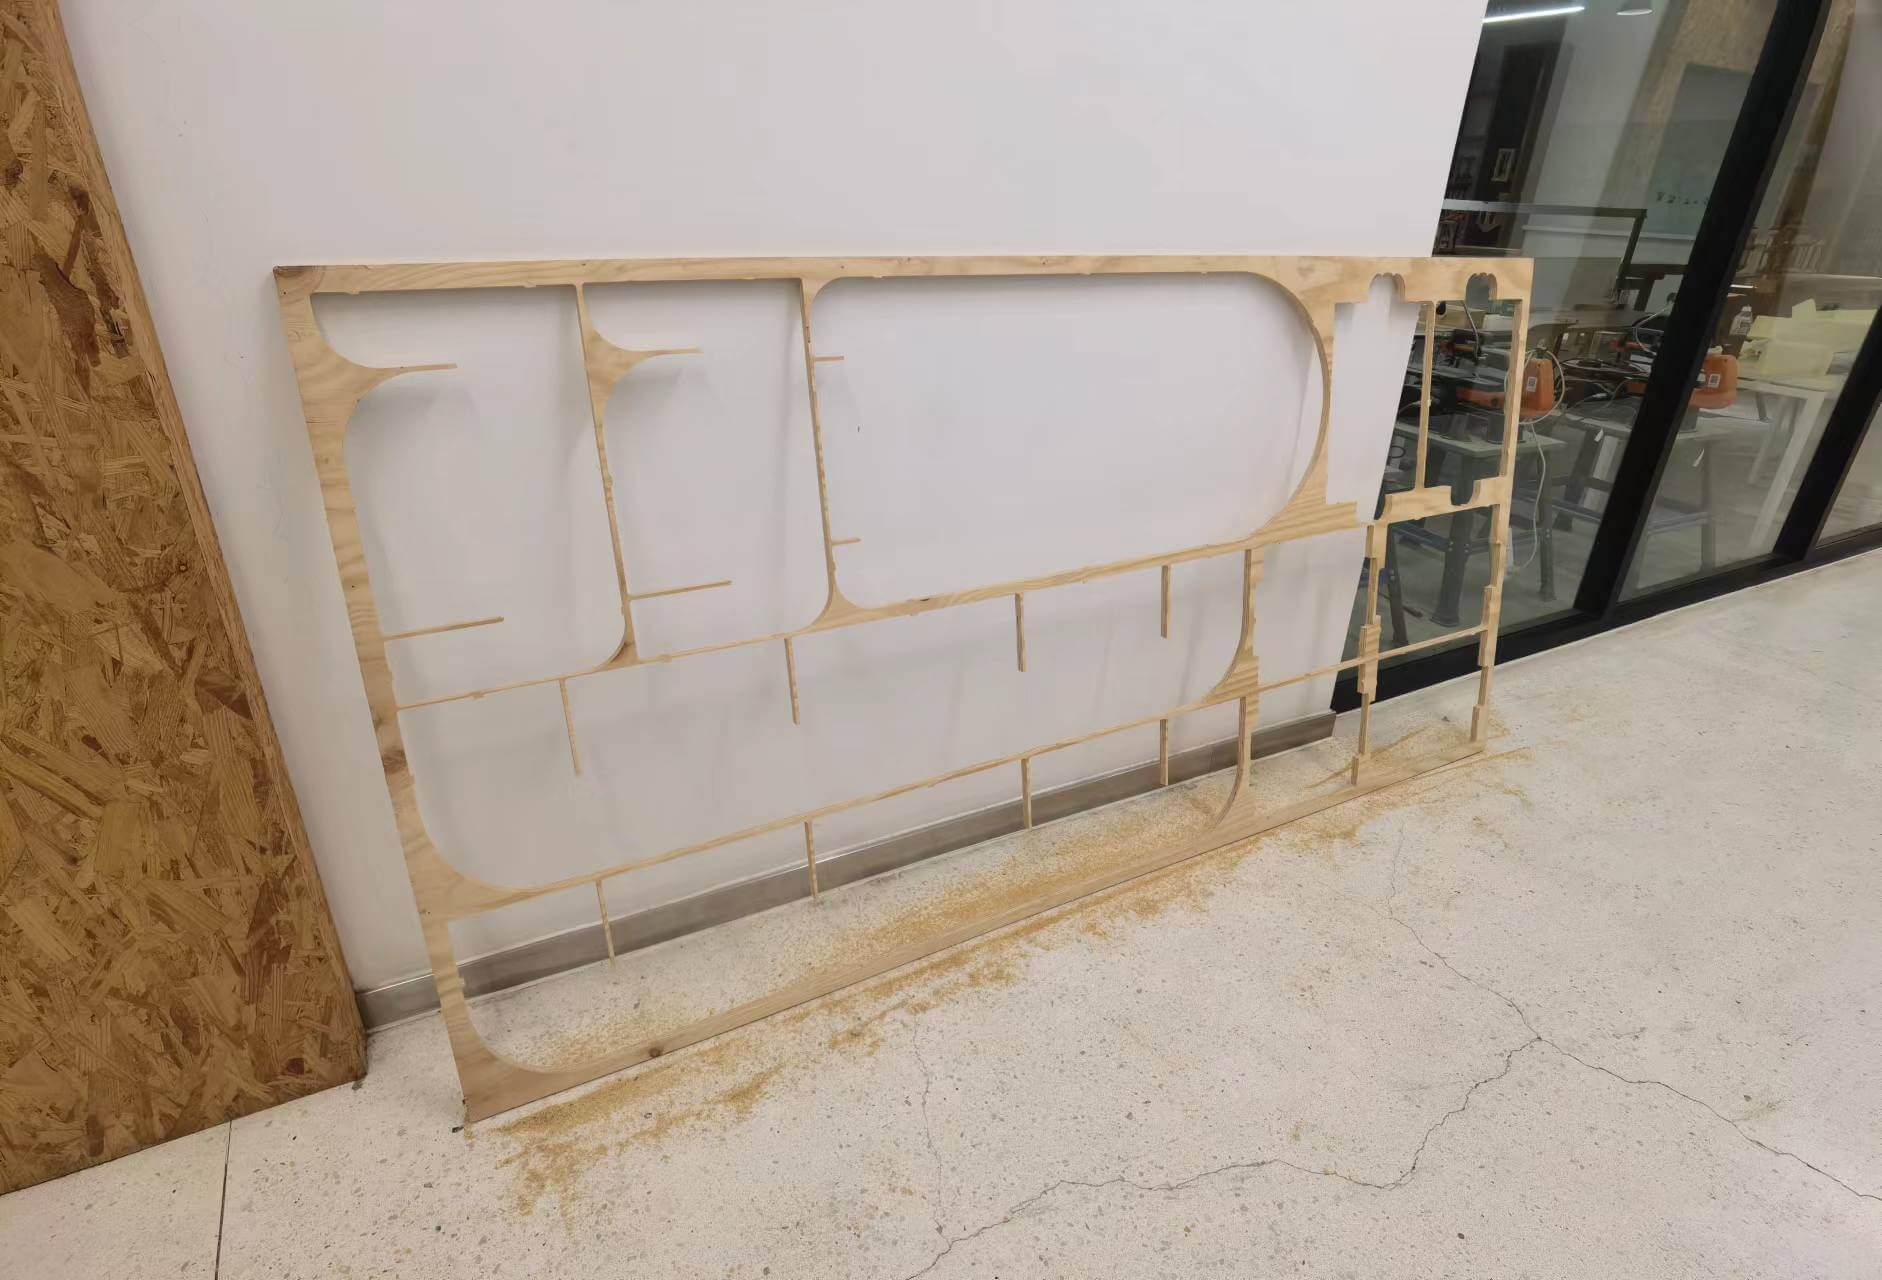
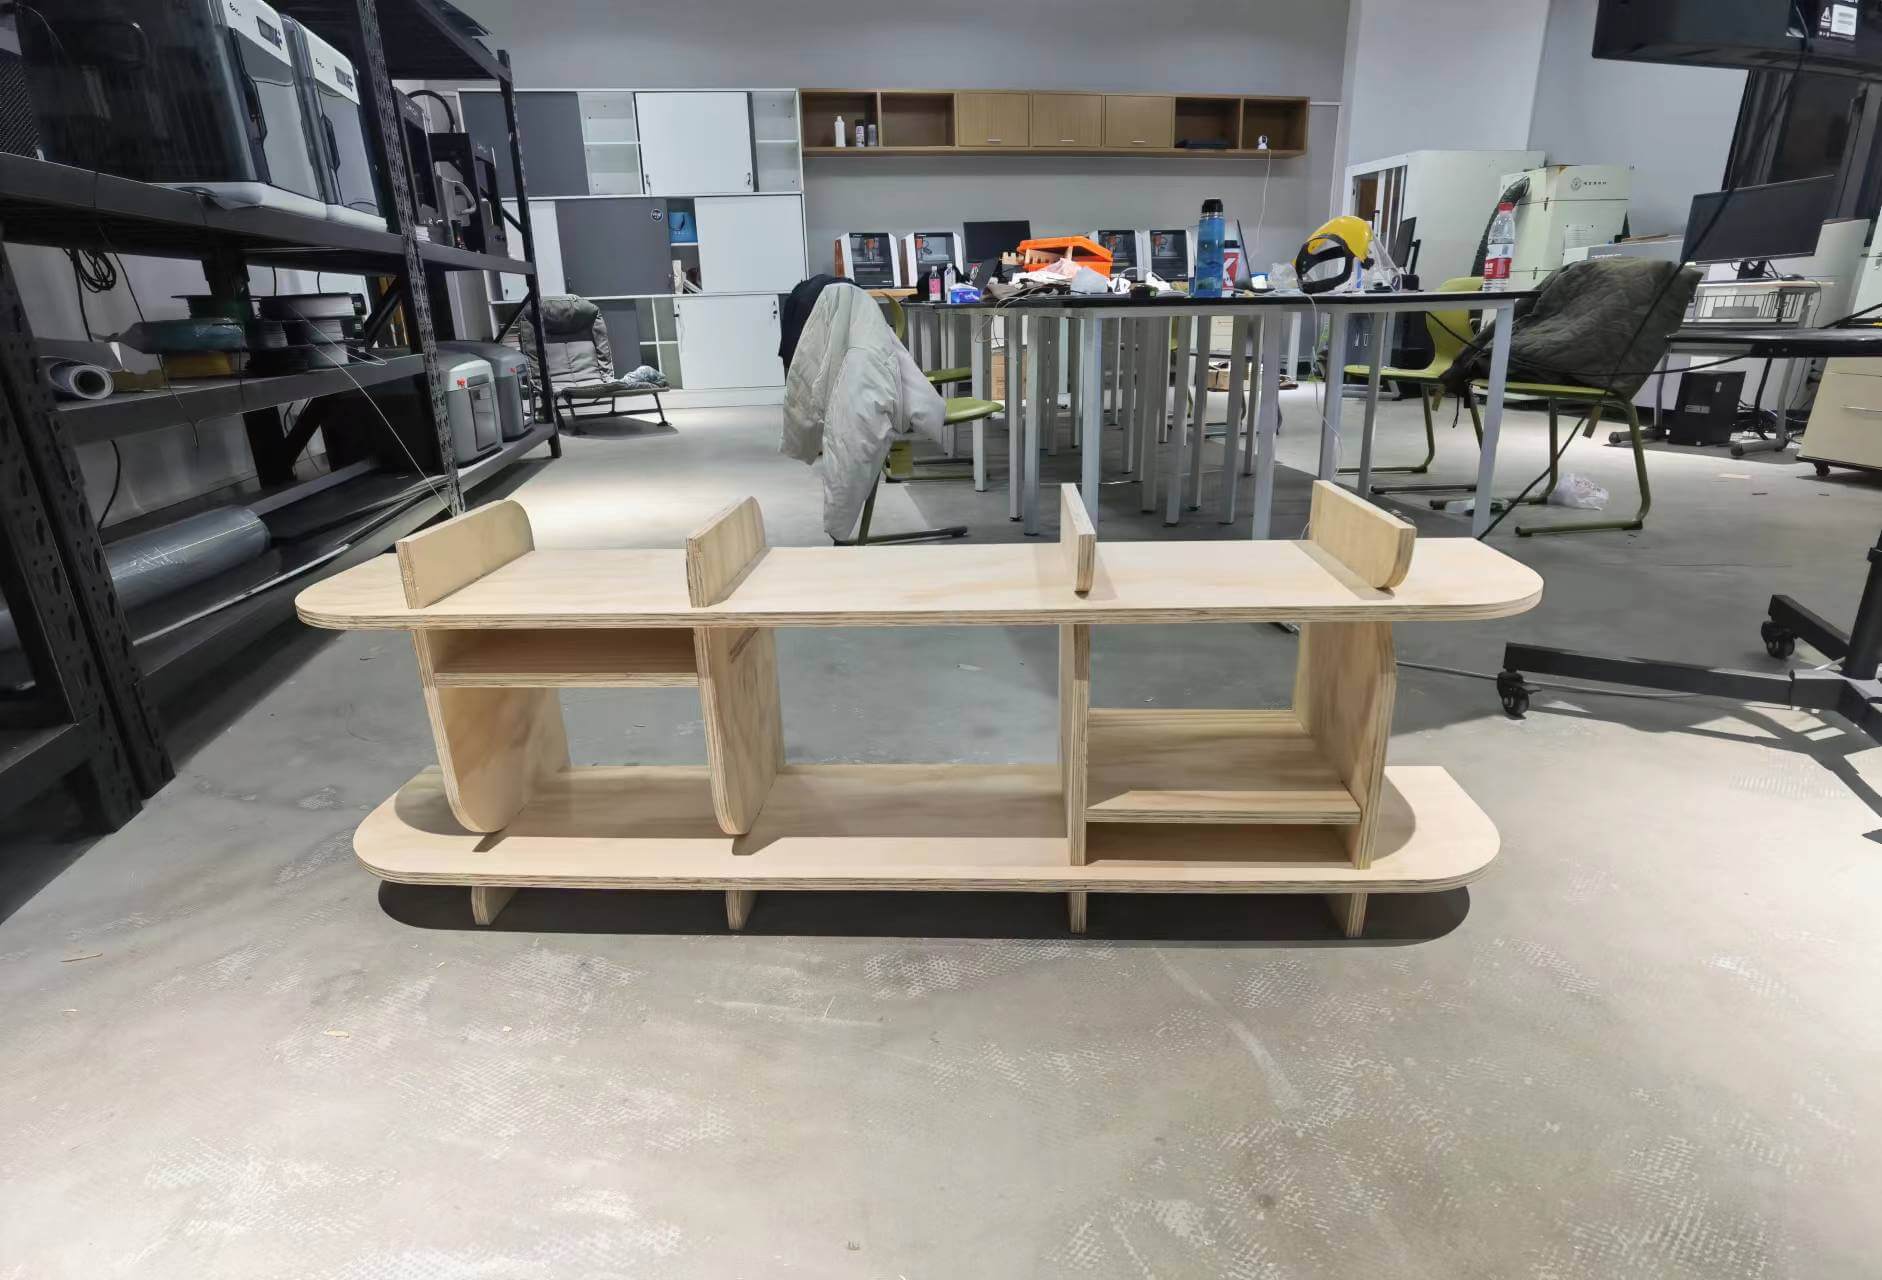
1.3 Shelf Design
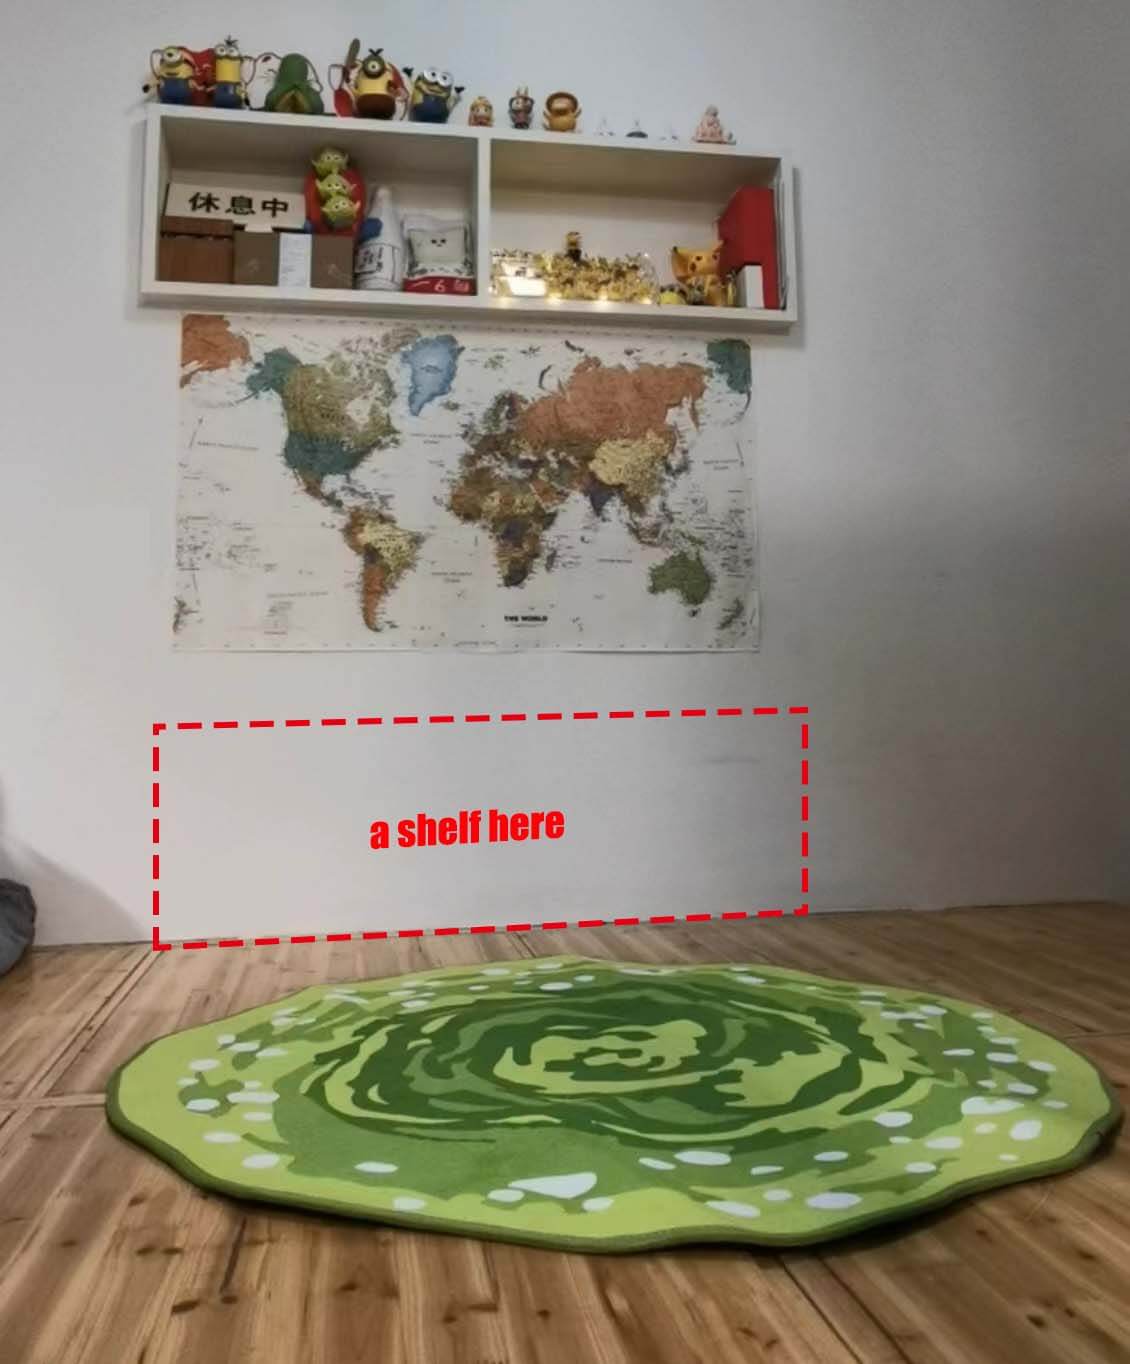
I need a shelf on my tatami where I work at home.
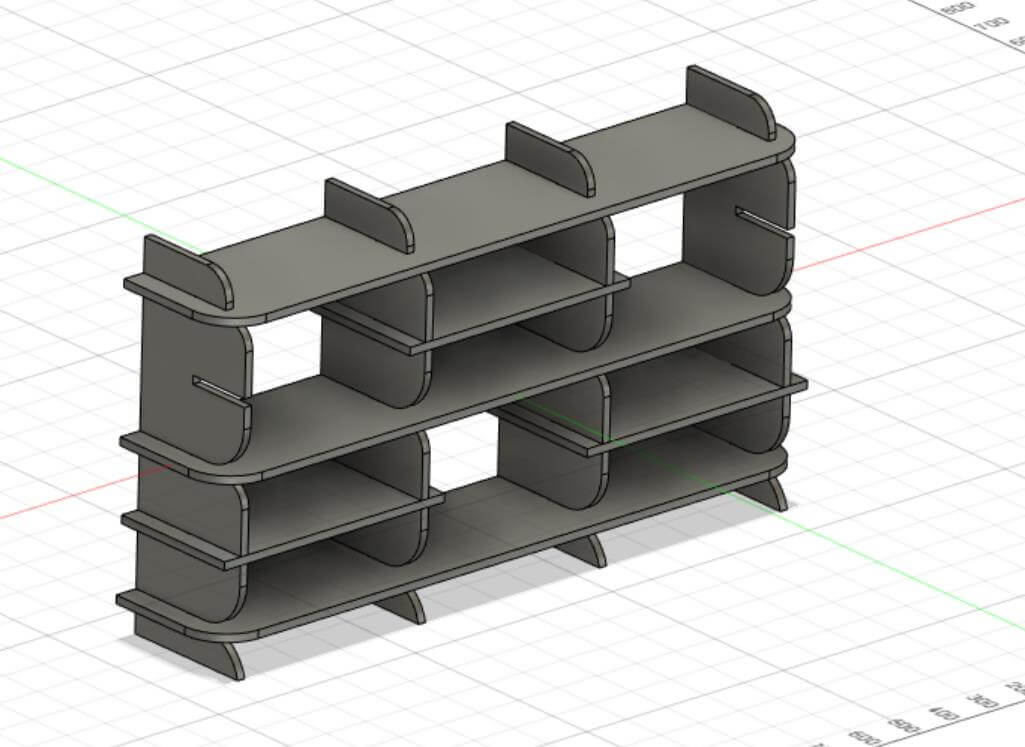
Version 1.0 Two-Layer Shelf
It's too big, I want to make something simpler as a starter using Shopbot.
Version 2.0 Single-Layer Shelf
Actually I don't need a too big shelf. Just to put some books in use while working, some plants, and some small ornaments. So a single-layer shelf is enough.
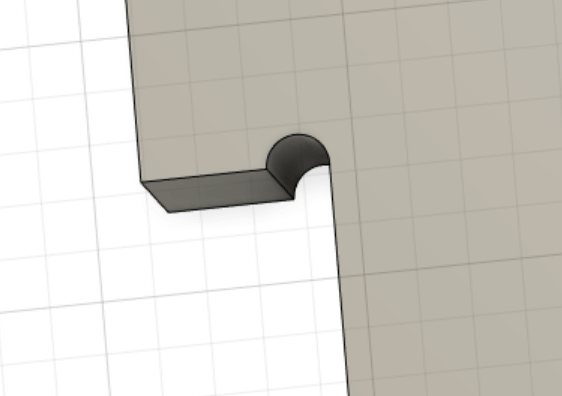
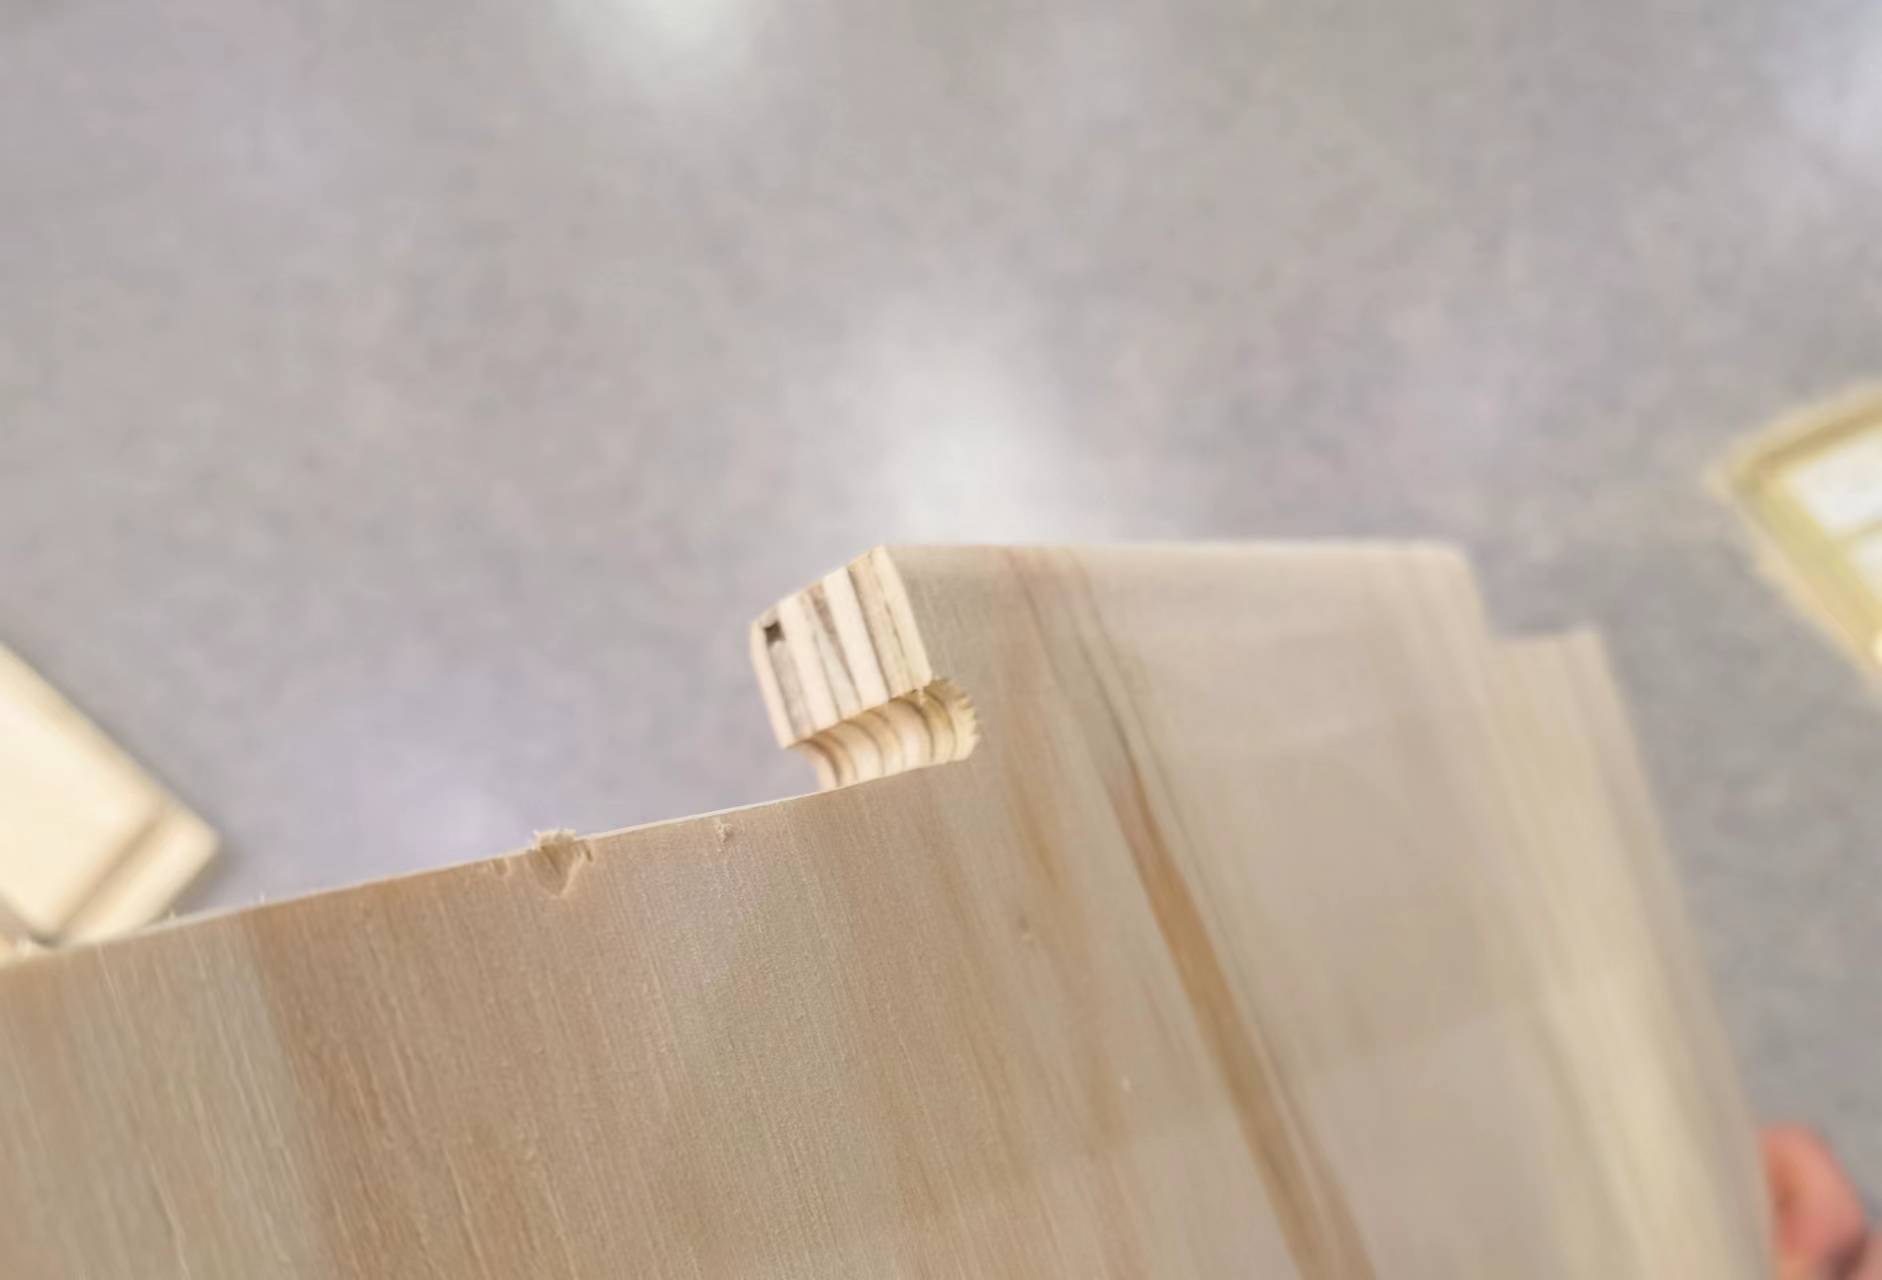
Dogbones
There is a dogbone Add-In that can help make dogbones easily. There's a YouTube Video explain how to use it. (Dogbone Add-In Download)
With this Add-In, it is as easy as makeing a fillet.
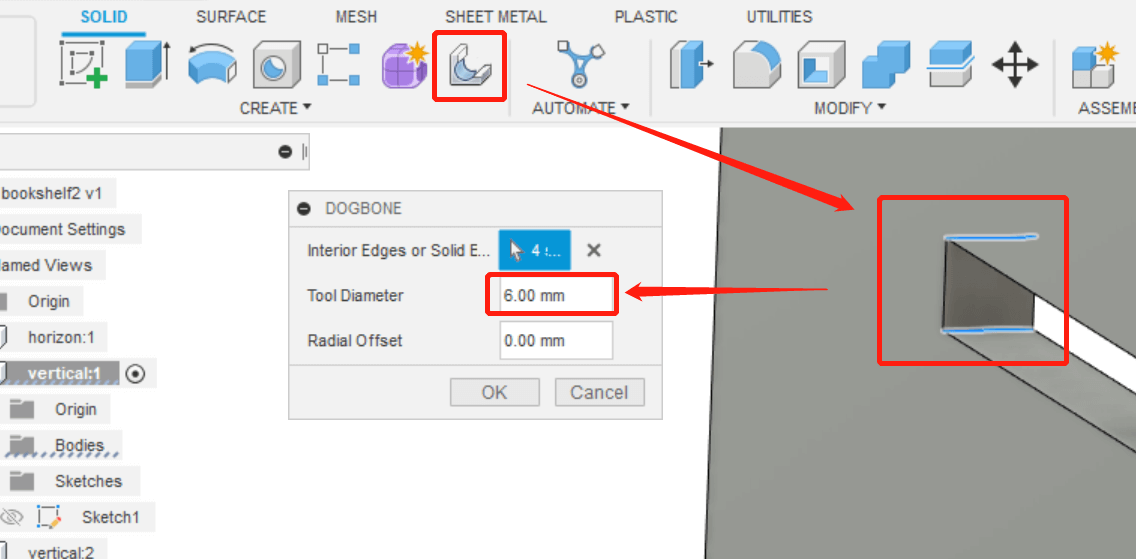
 The tool diameter was later changed to 7mm as it needed to be slightly larger than the diameter of the end mill.
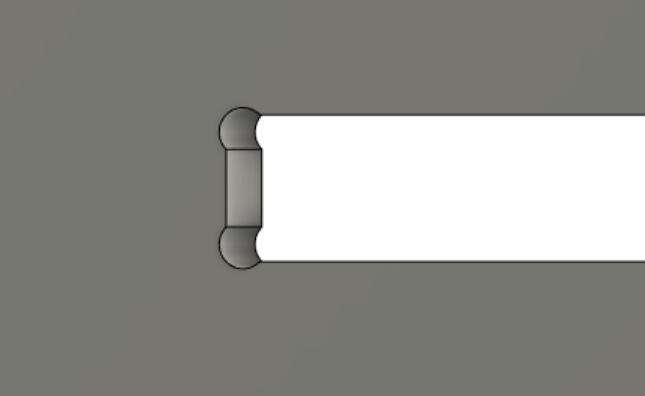
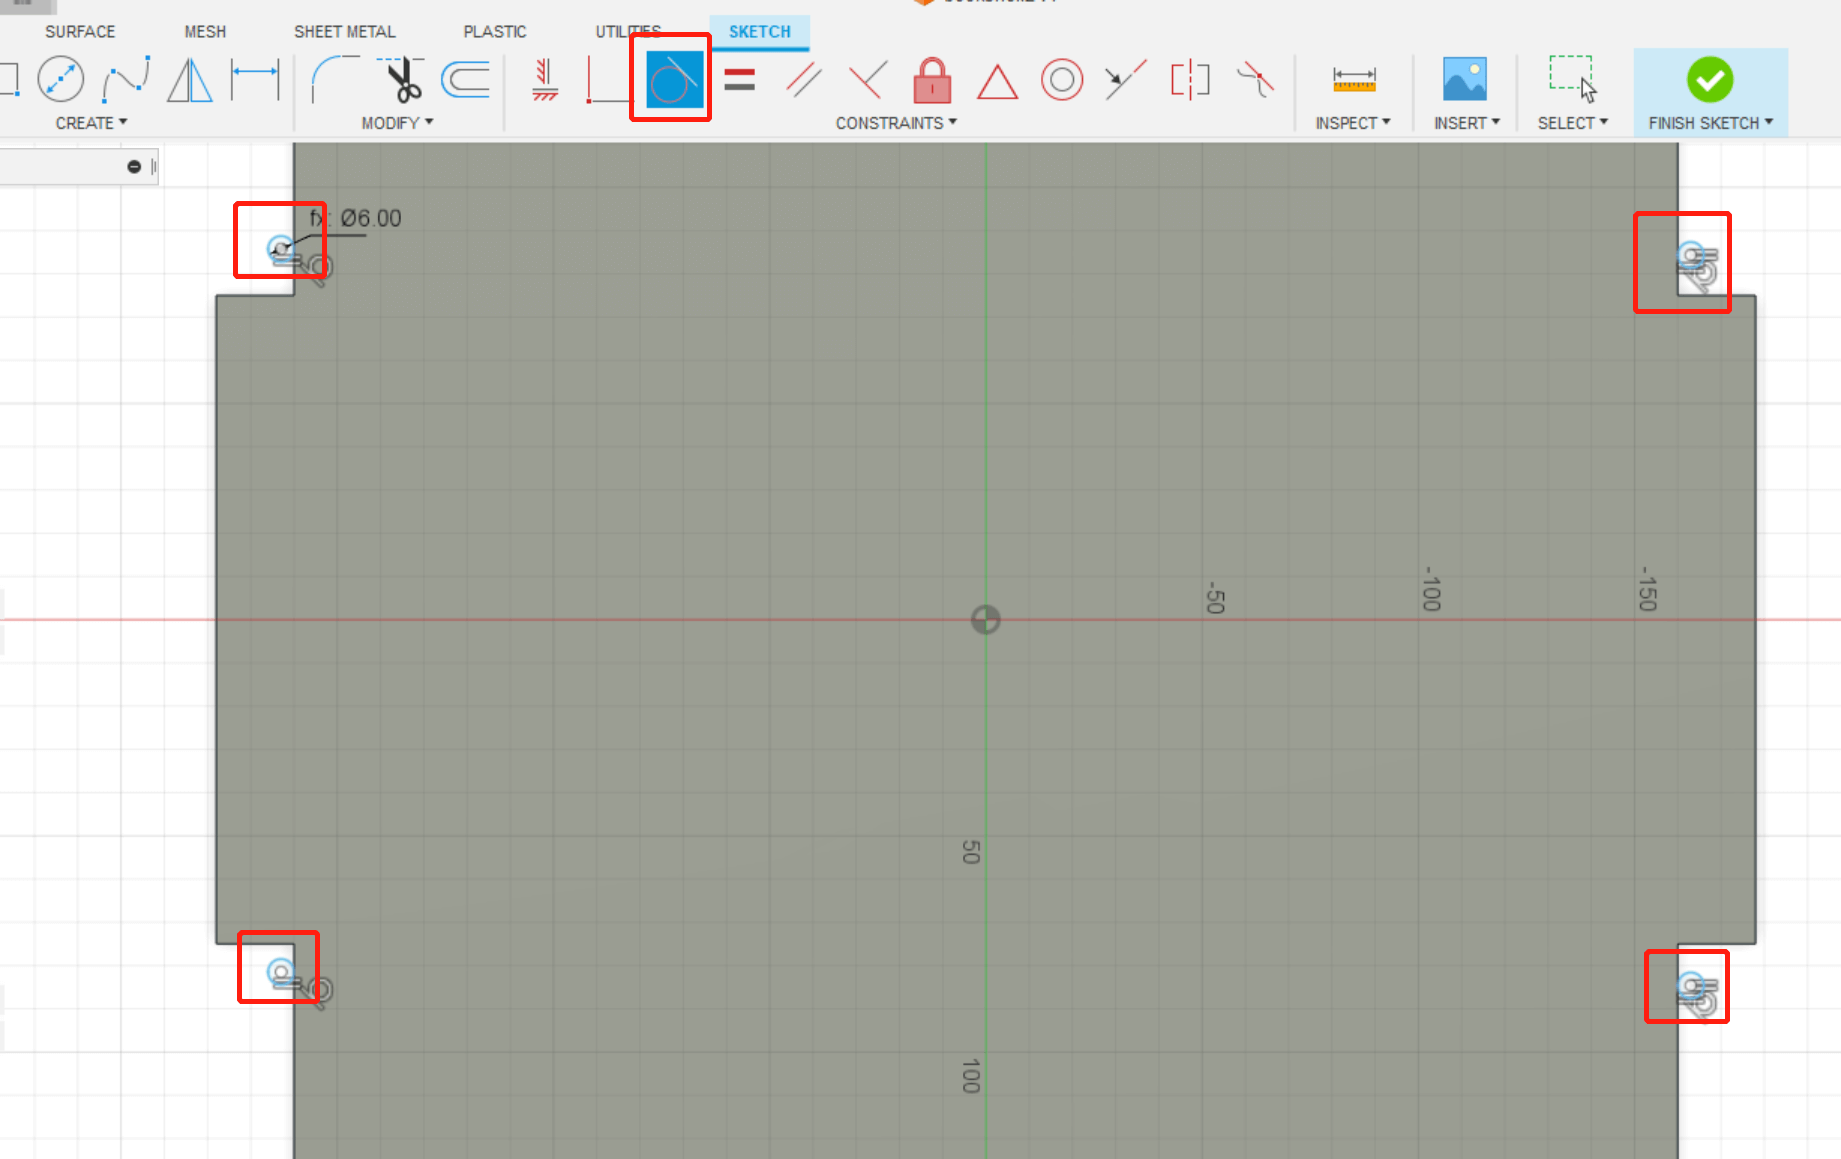
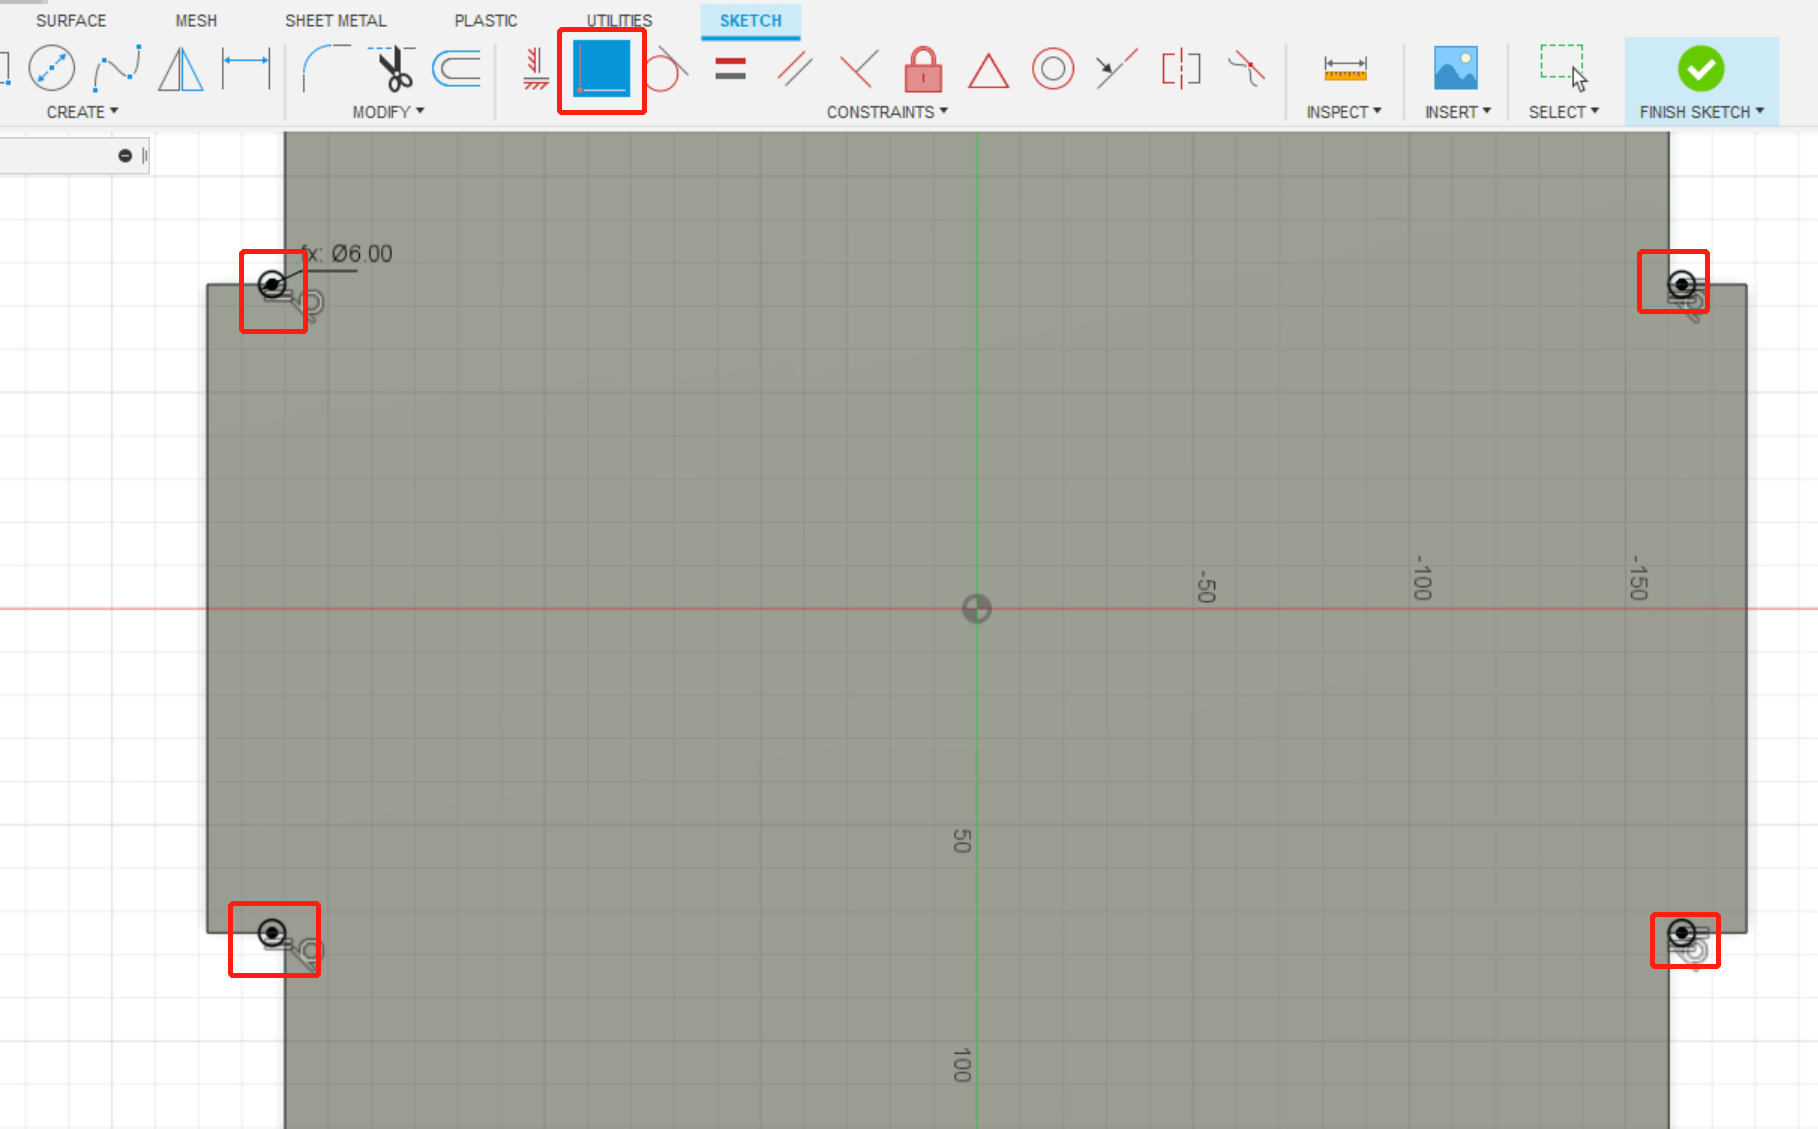
Manually Draw T-bones
Another choice is to draw T-bones manually. First draw a circle with a diameter of 6mm. Make the circle tangent to one of the sides of the corner for constraints. Then make the center of the circle coincide with the other side for constraints. Use extrude command and cut the target body you'll get the T-bone.
1.4 VCarve Setups
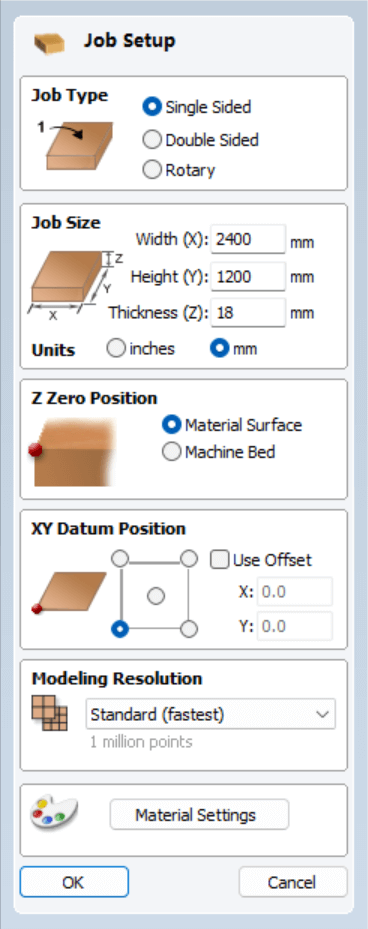
Step 1 New Job Setup: enter the right parameters of the size of the plywood.
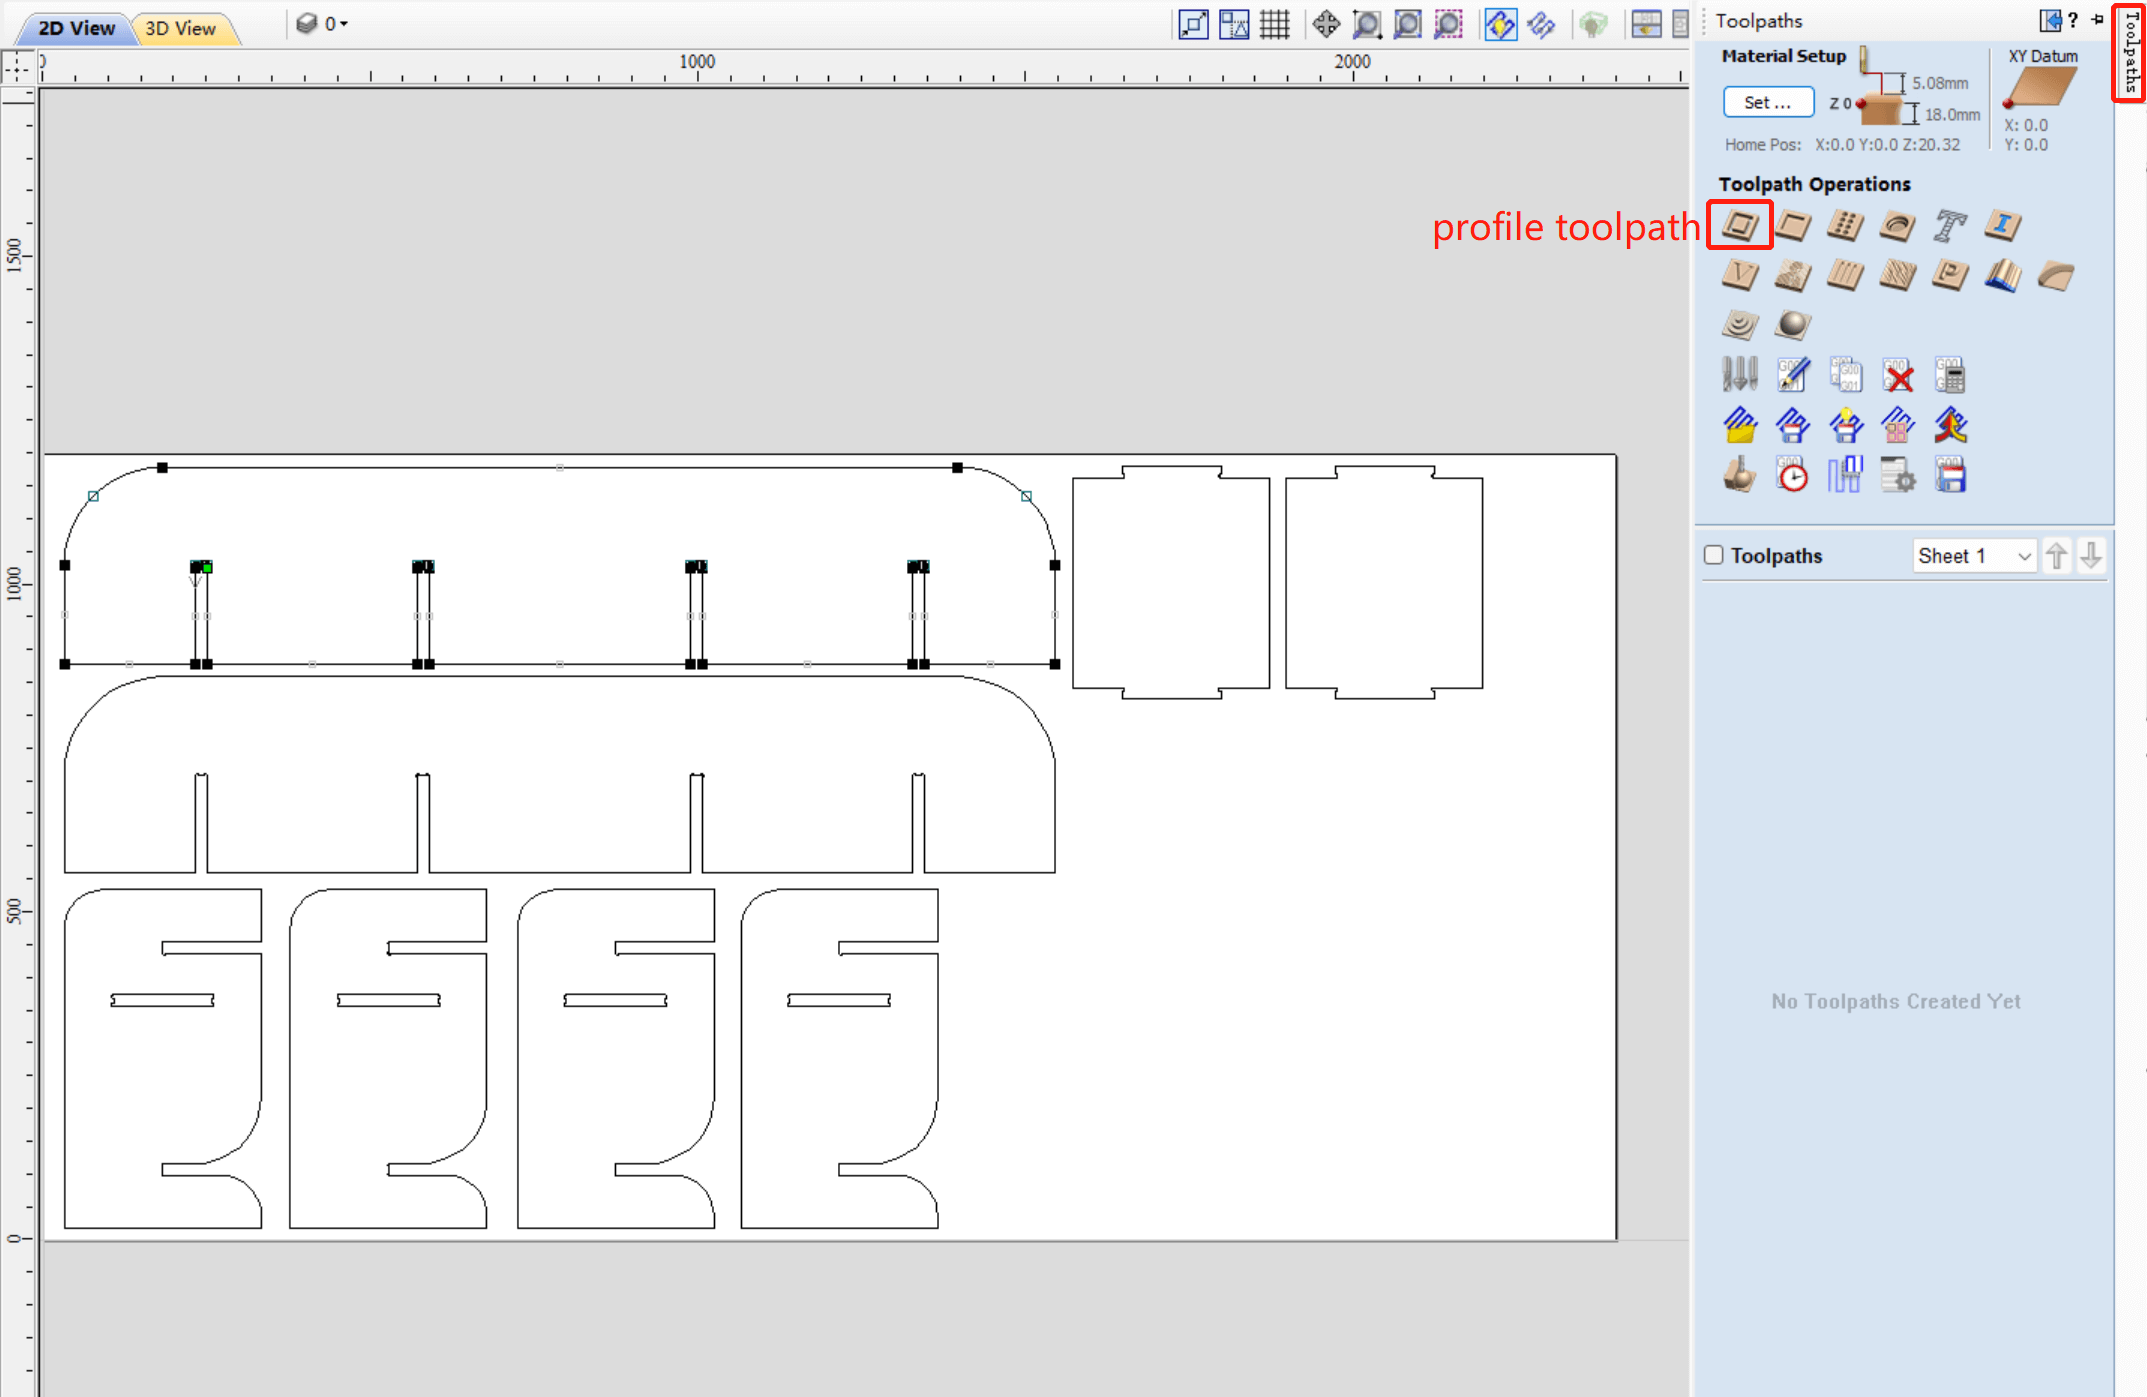
Step 2 Import the DXF File and Edit Generate Toolpaths: choose profile toolpath.
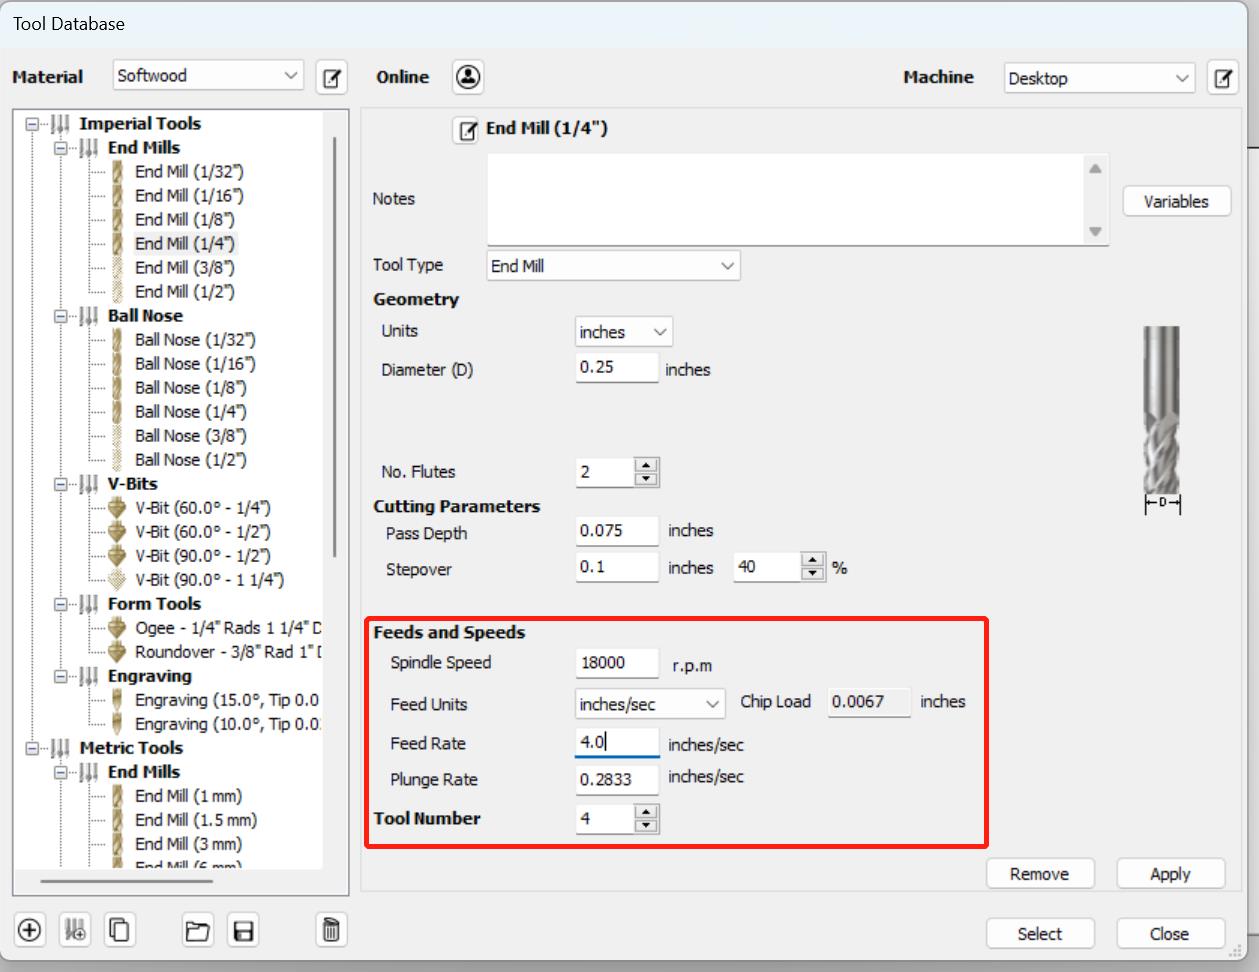
Step 3 Select Tool: click "select" in tool tab, choose 1/4" end mill with spindle speed at 16k RMP and Feed Rate at 3.5 in/sec.
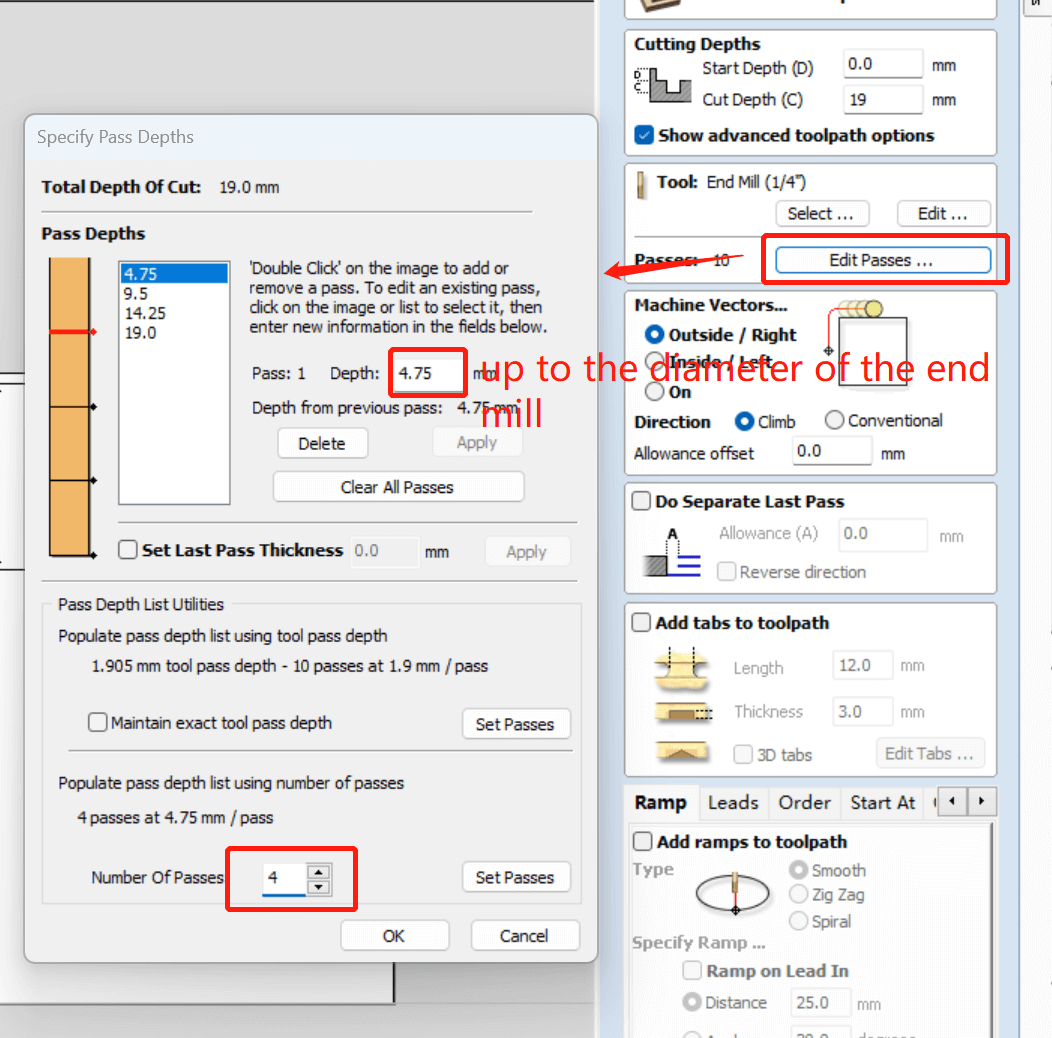
Step 4 Edit Passes: click "edit passes" in the botton of the tool tab, 4 passes with 4.75mm per pass depth.
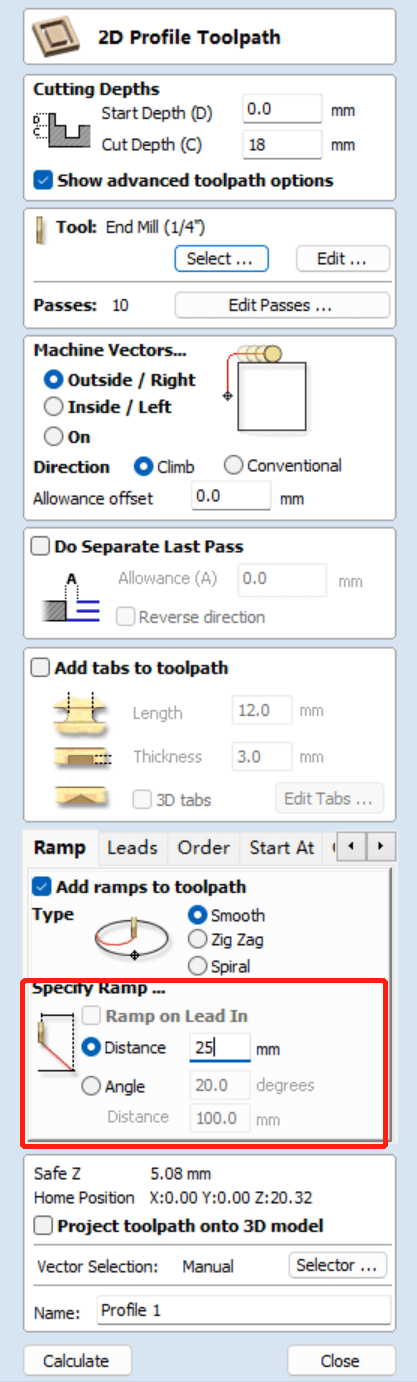
Step 5 Specify Ramp: choose smooth ramp and with distance of 25mm.
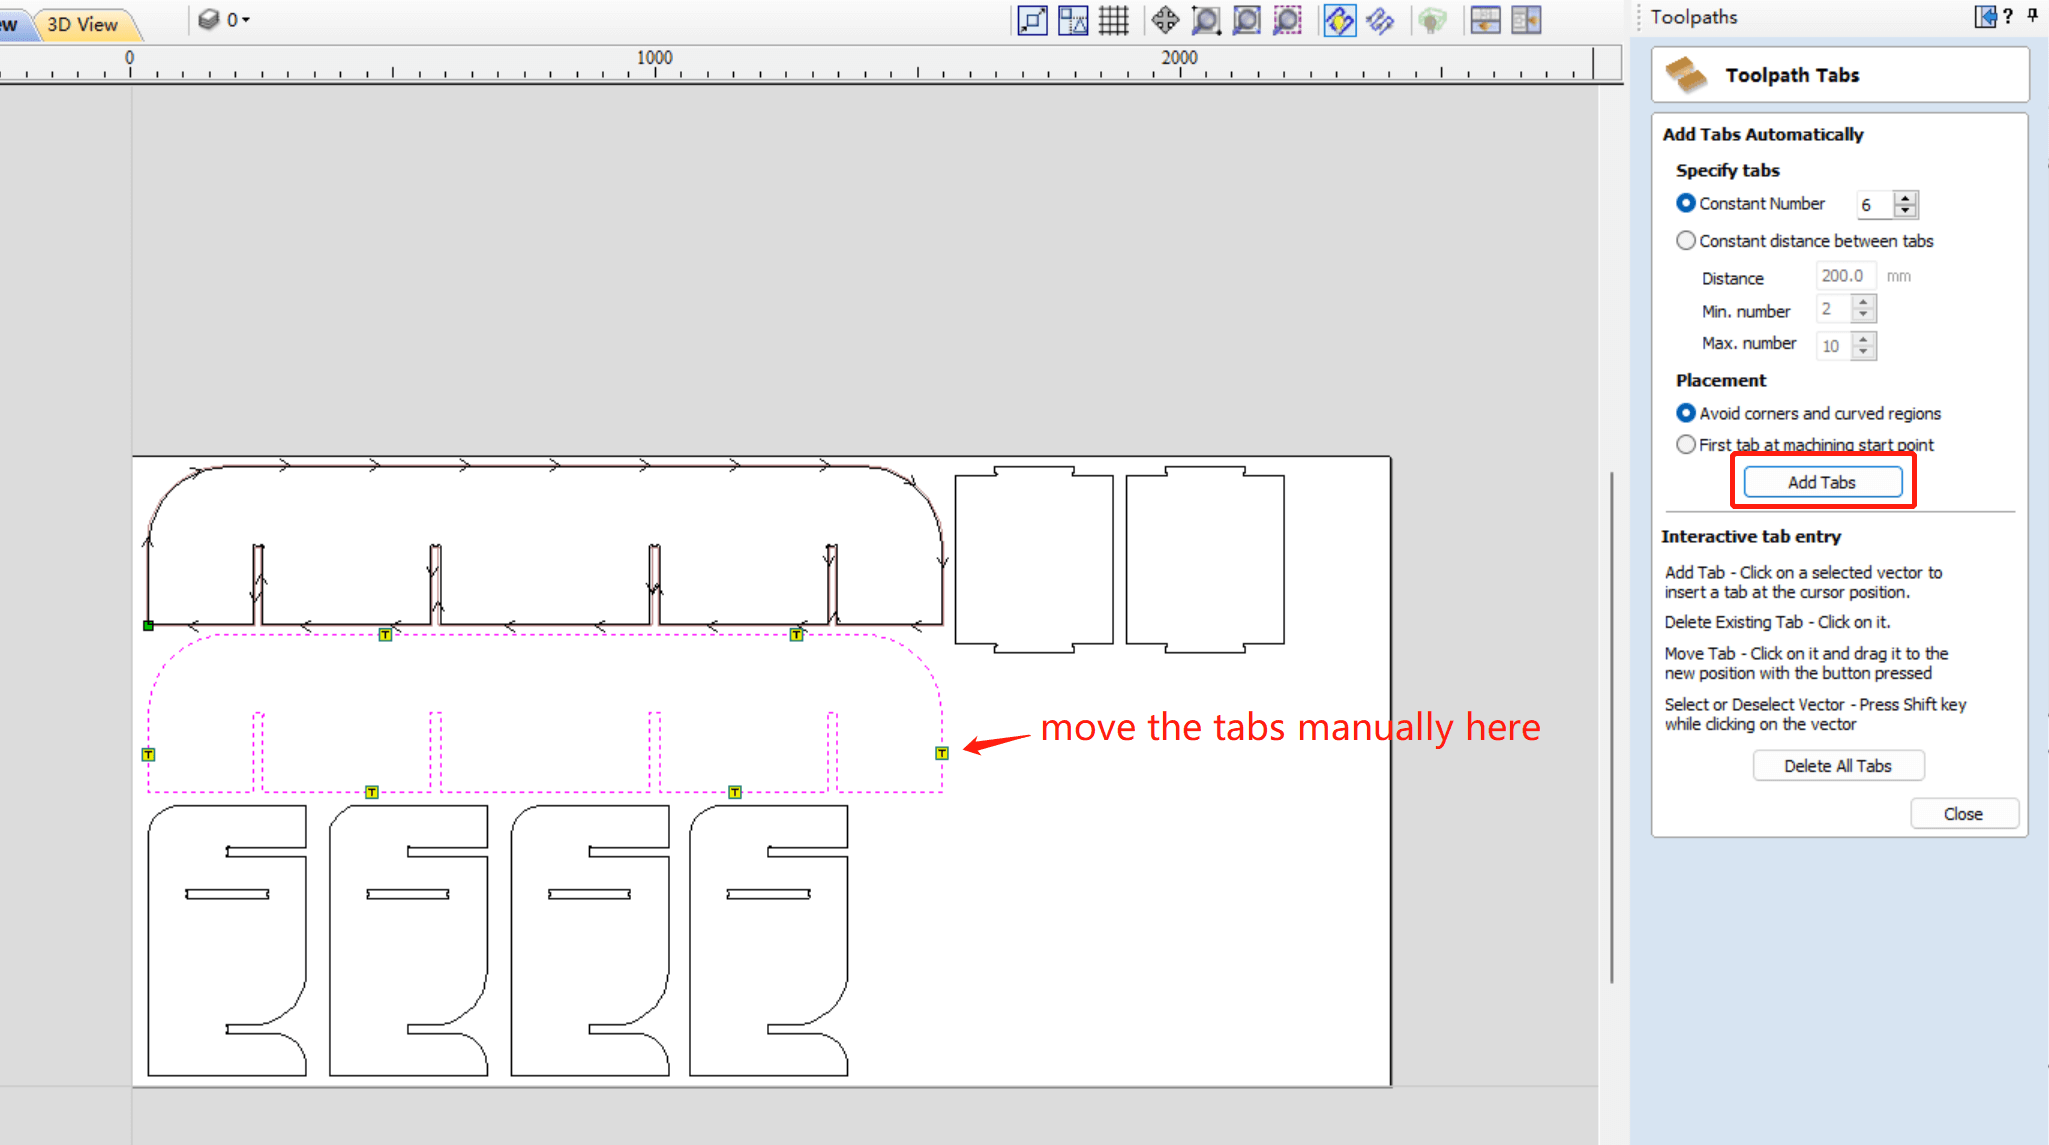
Step 6 Add Tabs: click "add tabs to toolpath" and click "edit tab", and manually add tabs on the path.
Step 7 Calculate and Save toolpath
 ➡️
➡️
 ➡️
➡️
 ➡️
➡️ ➡️
➡️
 ➡️
➡️
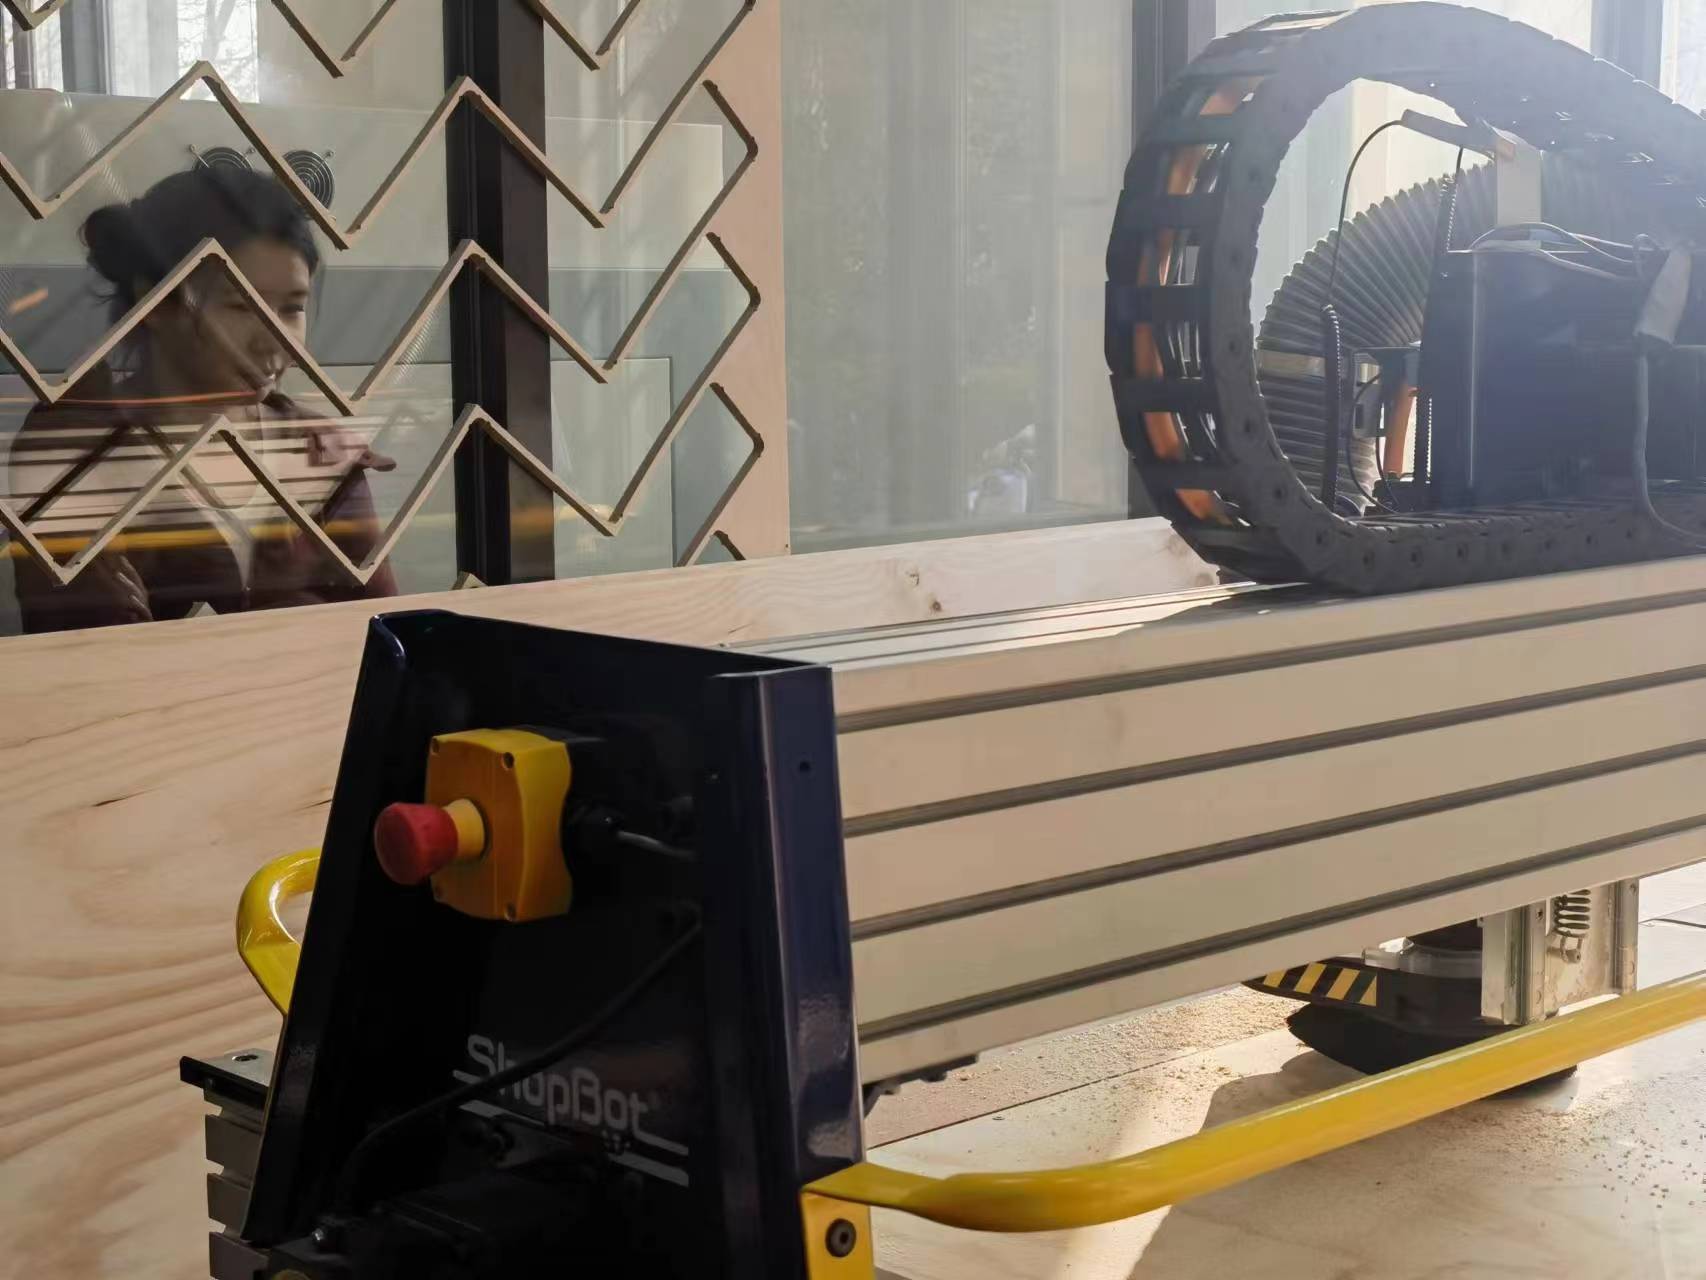
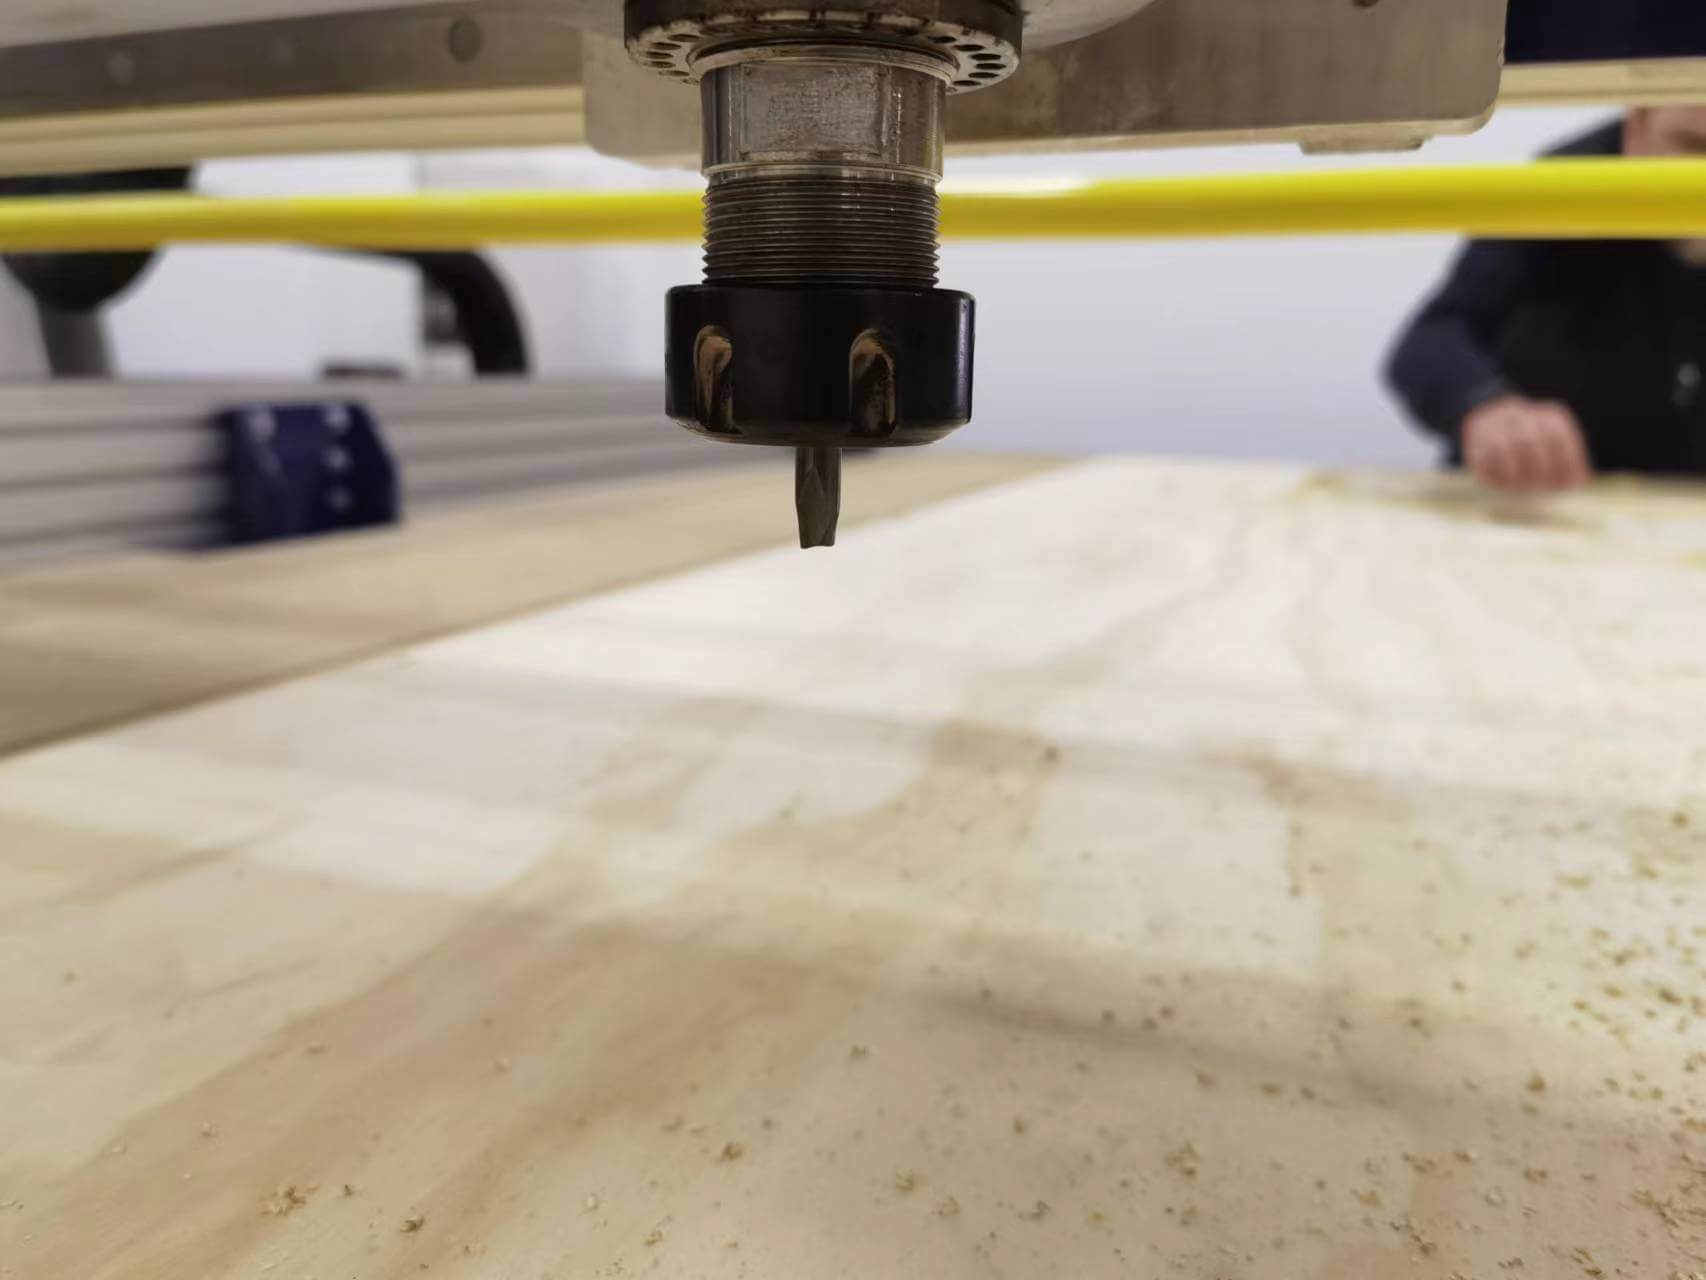
1.5 Machining
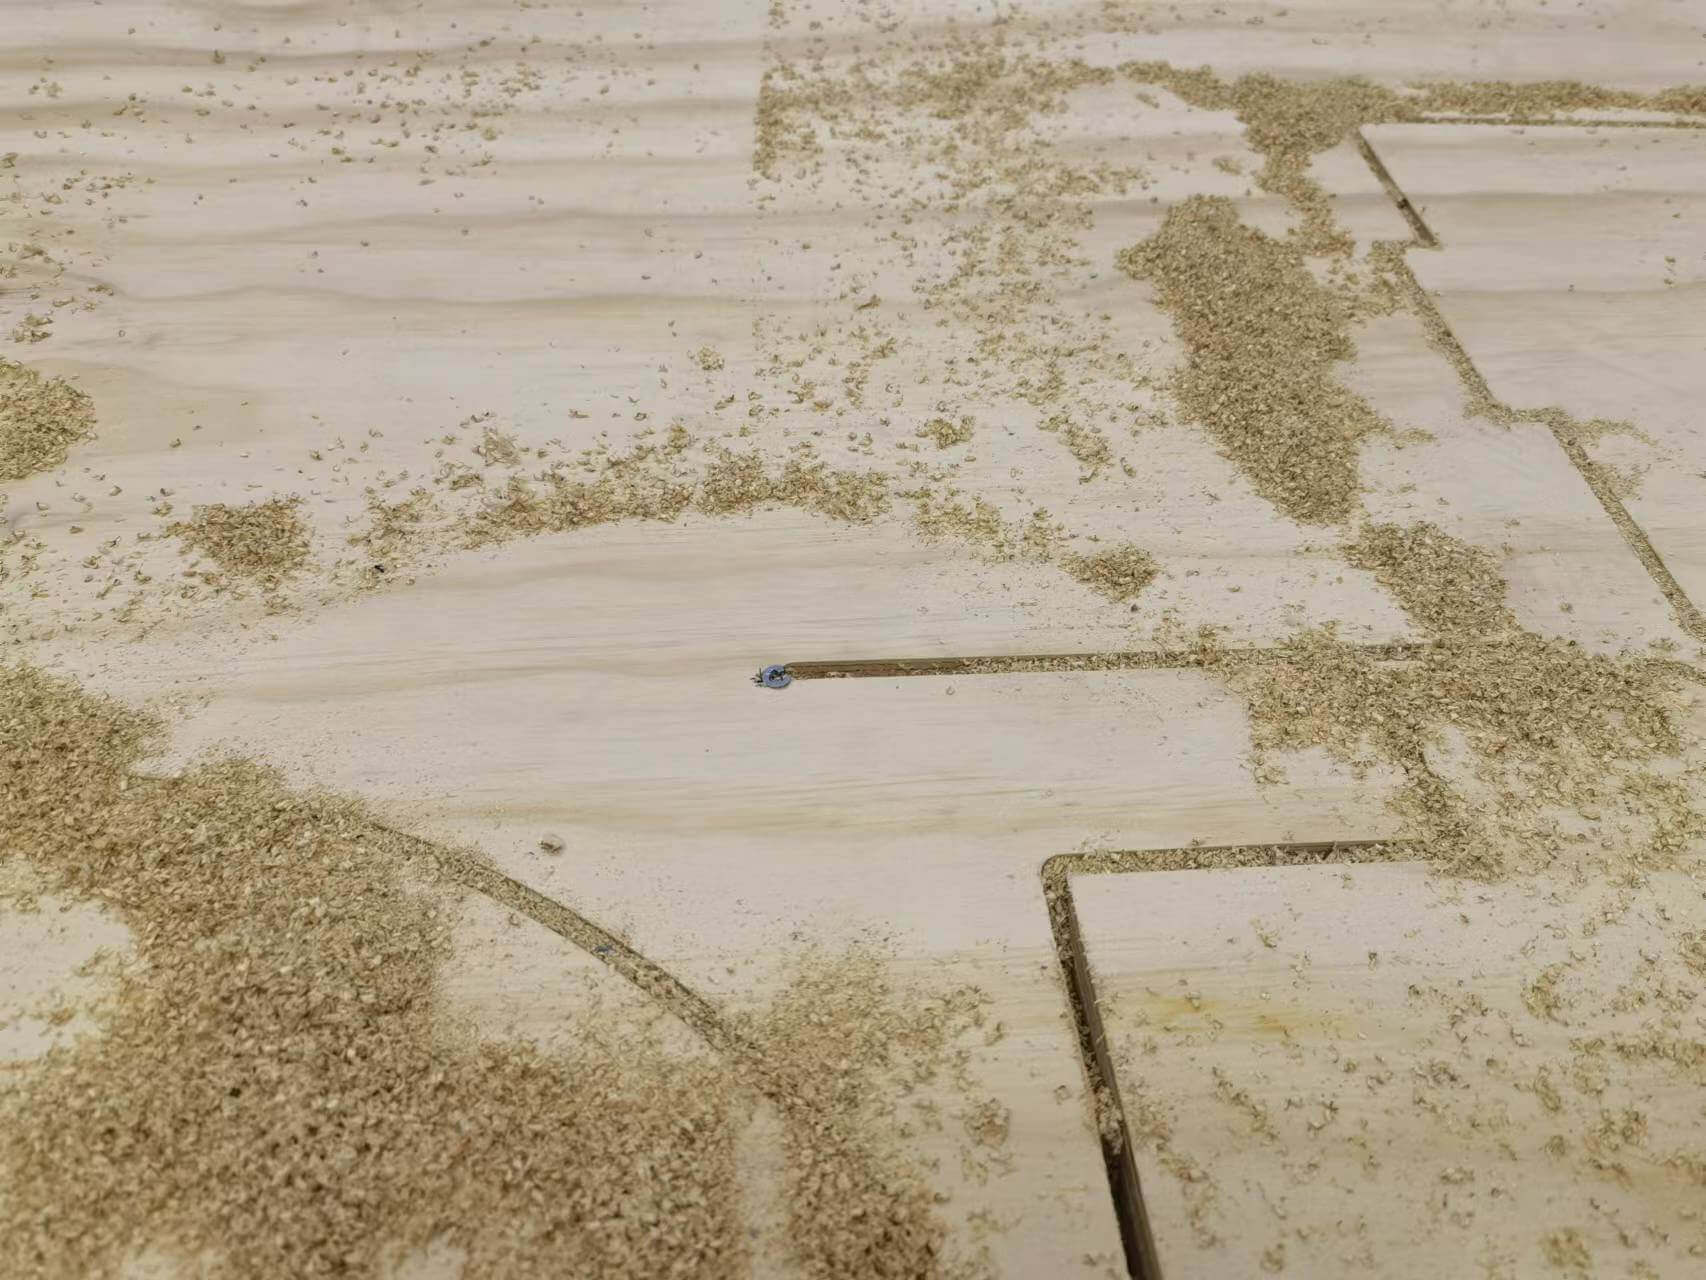
Screw the plywood board to the bed and we were ready to go. Everything worked fine at first.
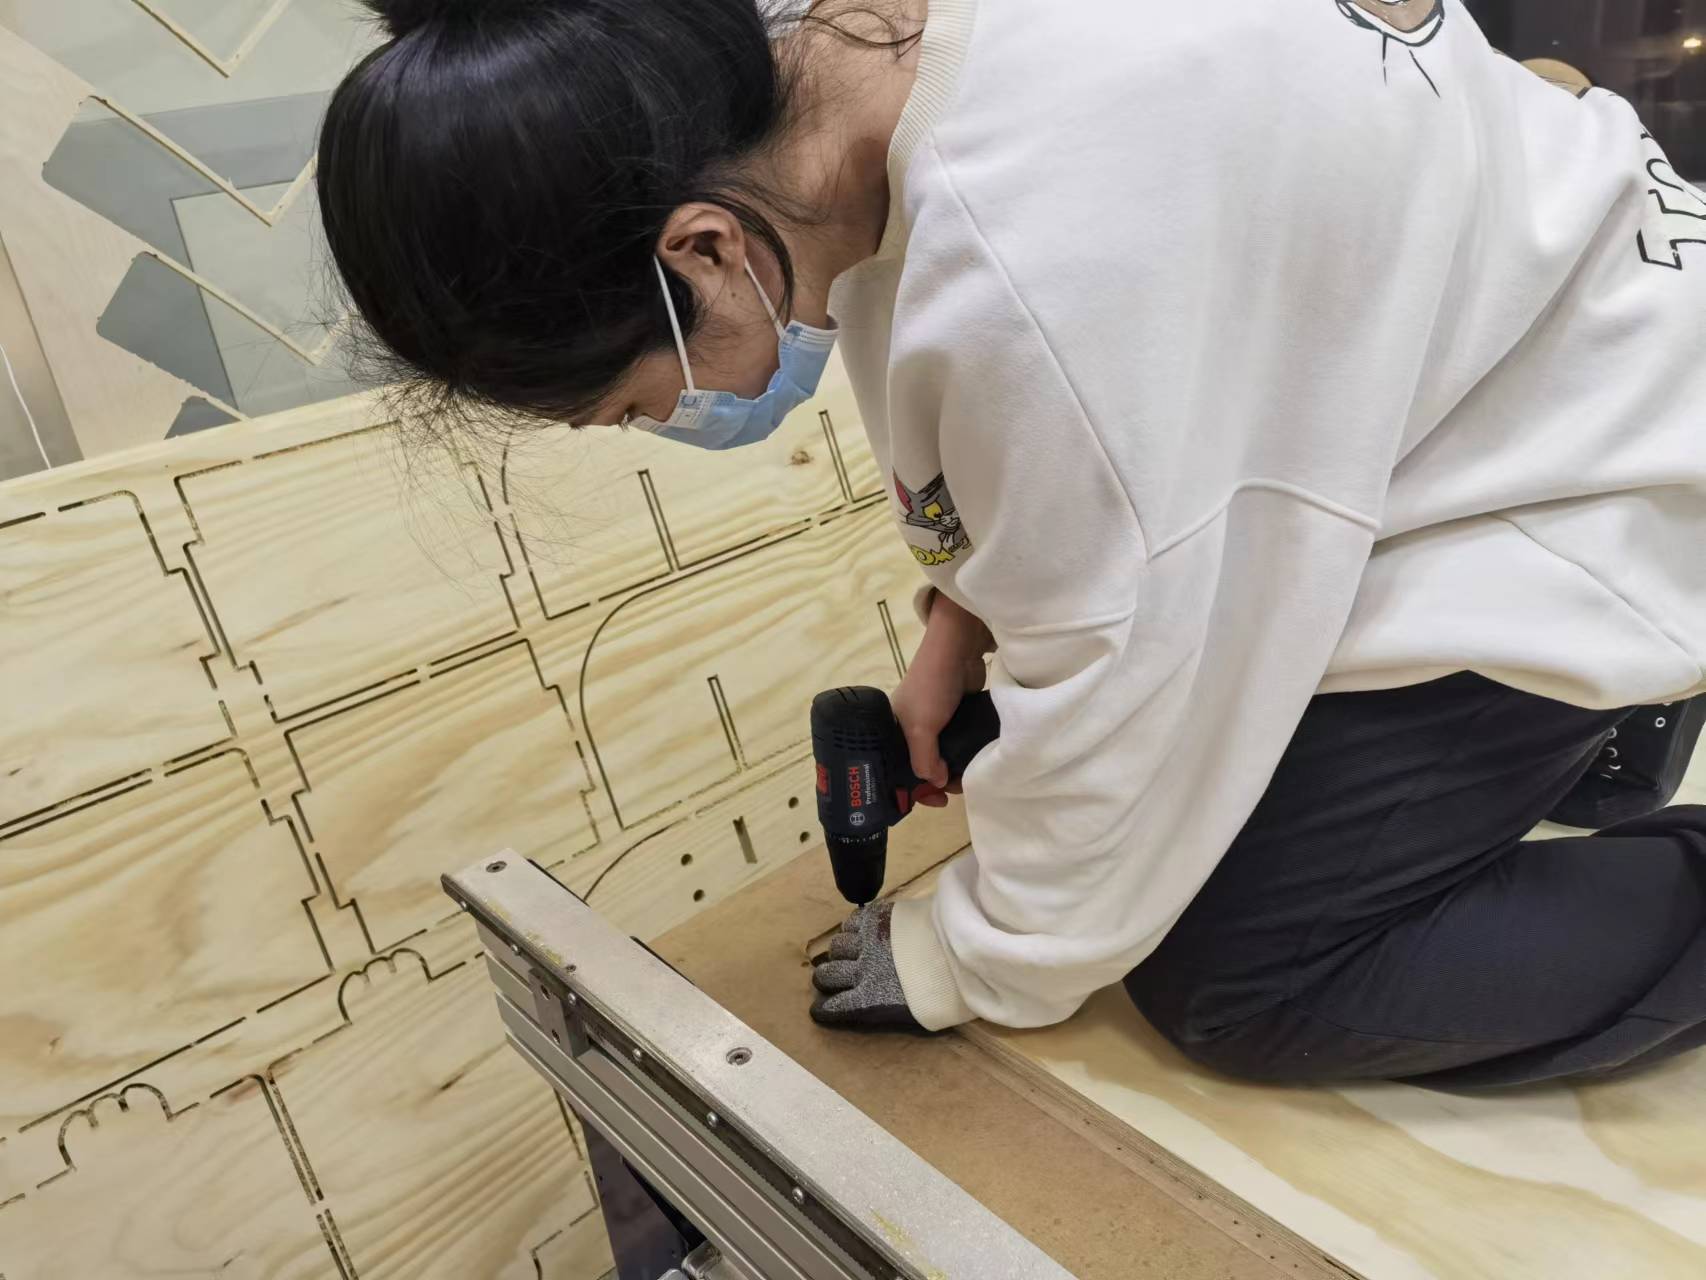
But there was a little accident in the process. Since the plywood is uneven, we need to add a screw in the middle in addition to nailing the four sides. We needed to place the screw in the open space between several toolpaths. So we measure the location in the Vcarve. But there was a measurement error, the spindle hit the screw directly, and the end mill broke. We had to emergency stop the machine, re-screw it to the right position and continue working. We followed the safety regulations and no one stayed in the room where the shopbot working. The end mill was broken into two part, with the scream of the machine, which is very dangerous if someone was in the room. Thus we had a deep understanding of the importance of using machines safely.

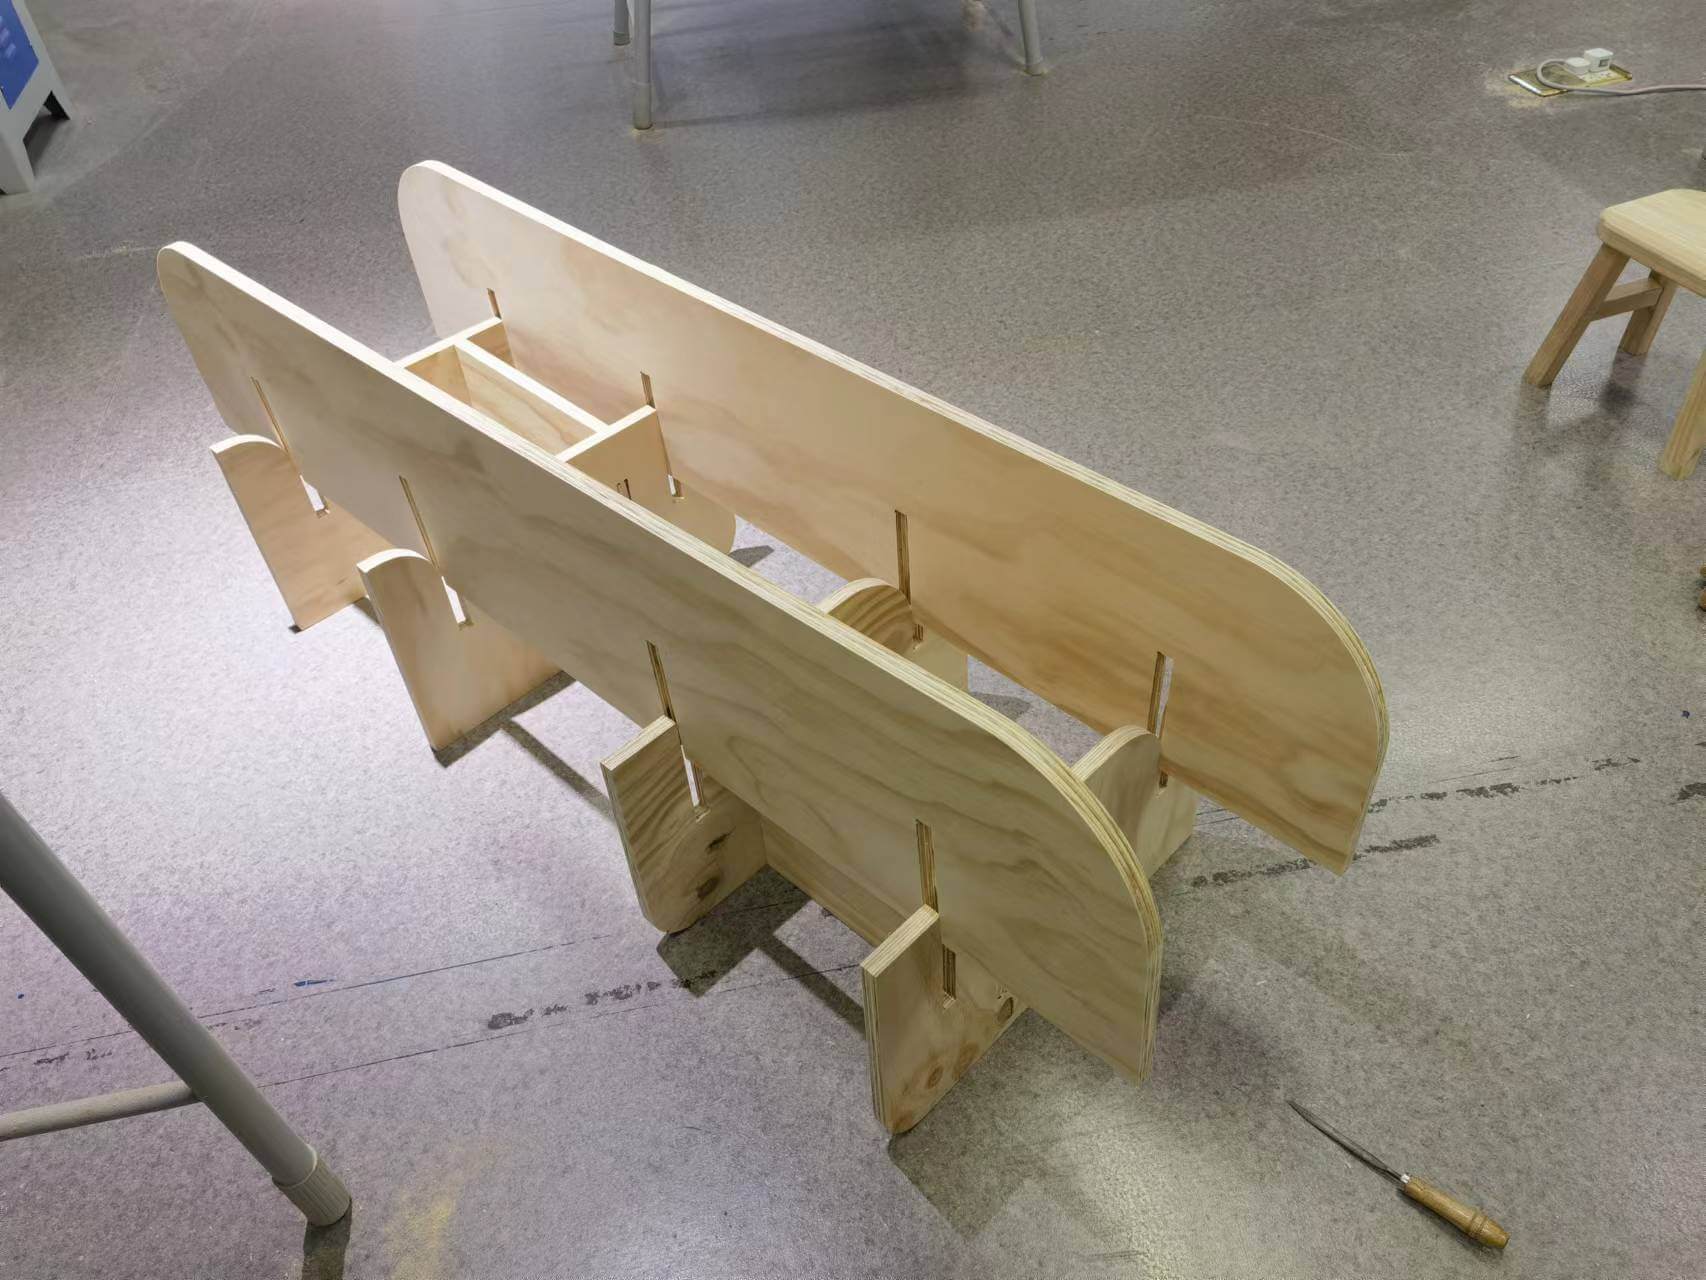
After machining, I broke tabs, and got all the parts needed for the shelf.

1.6 Post-processing and Assembling
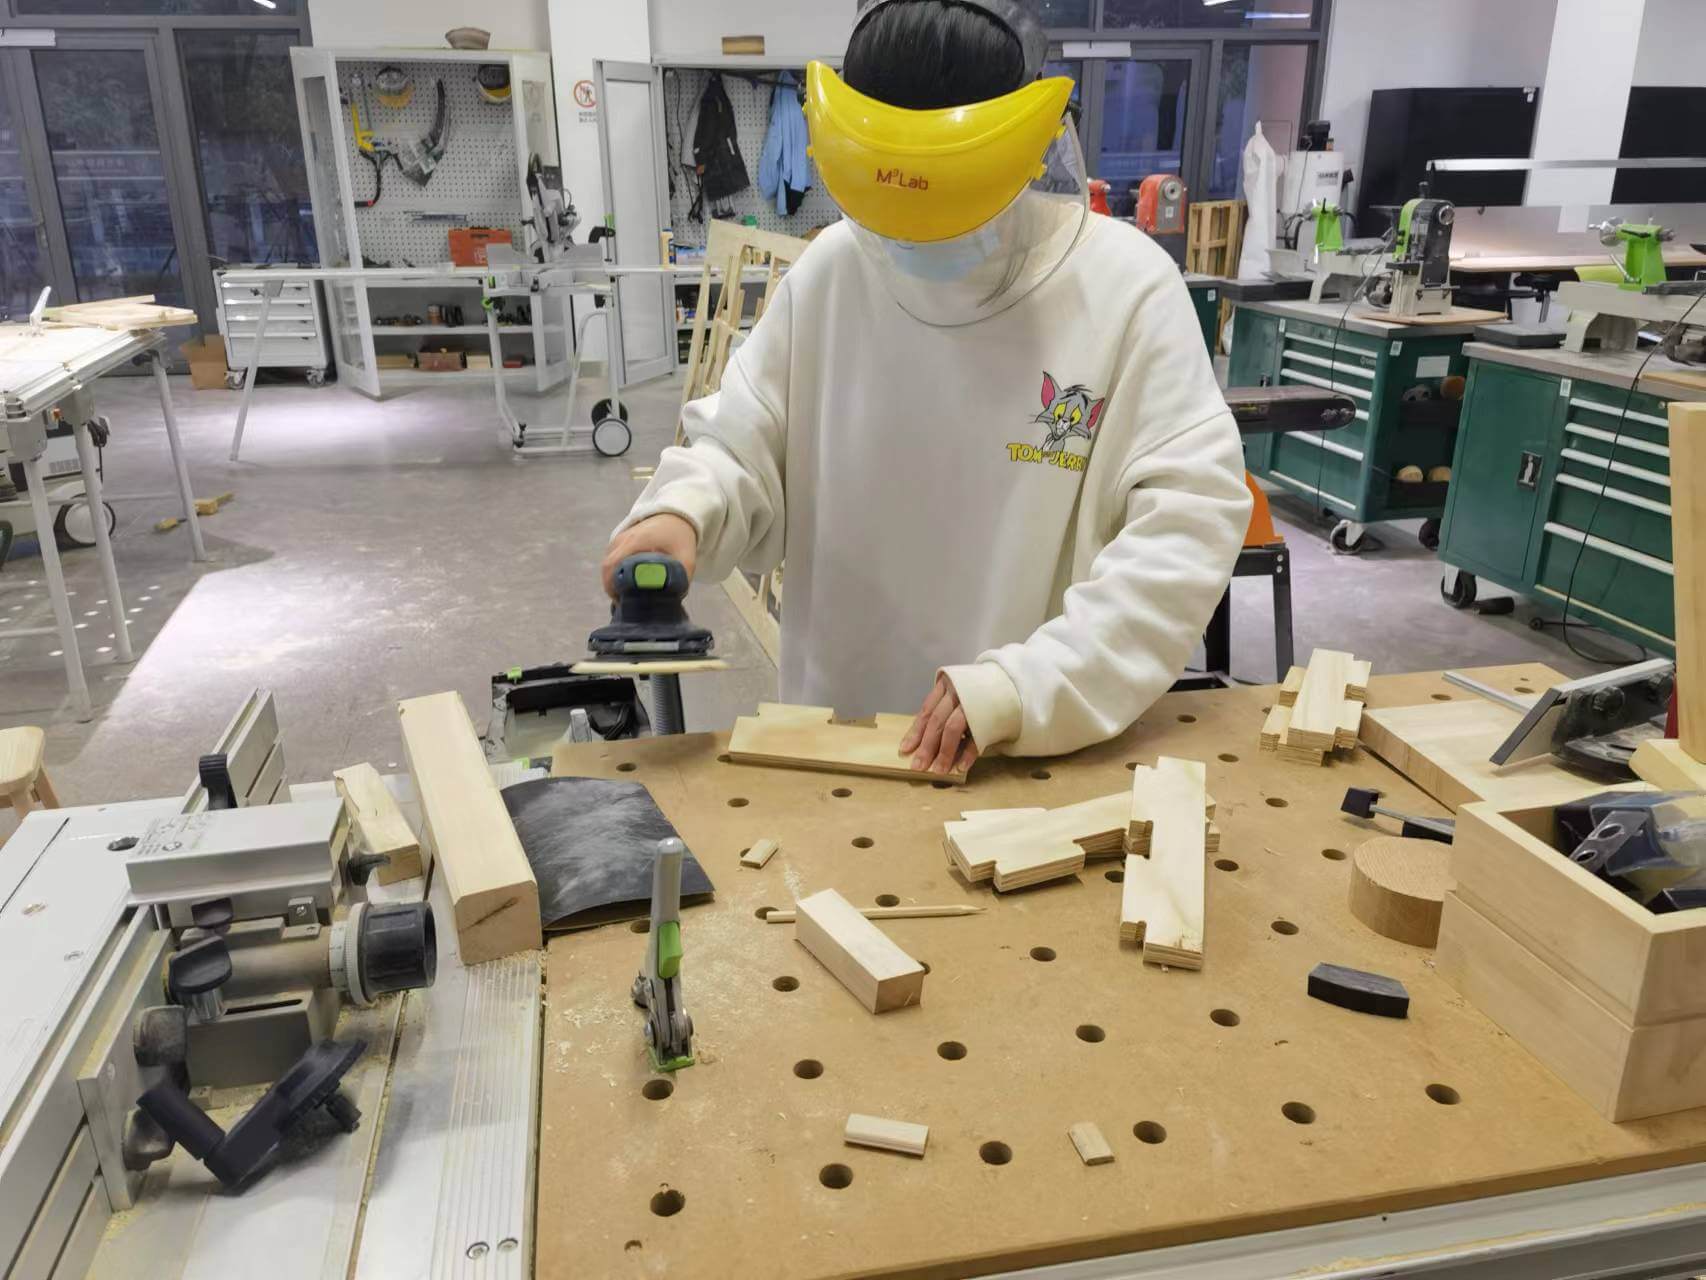
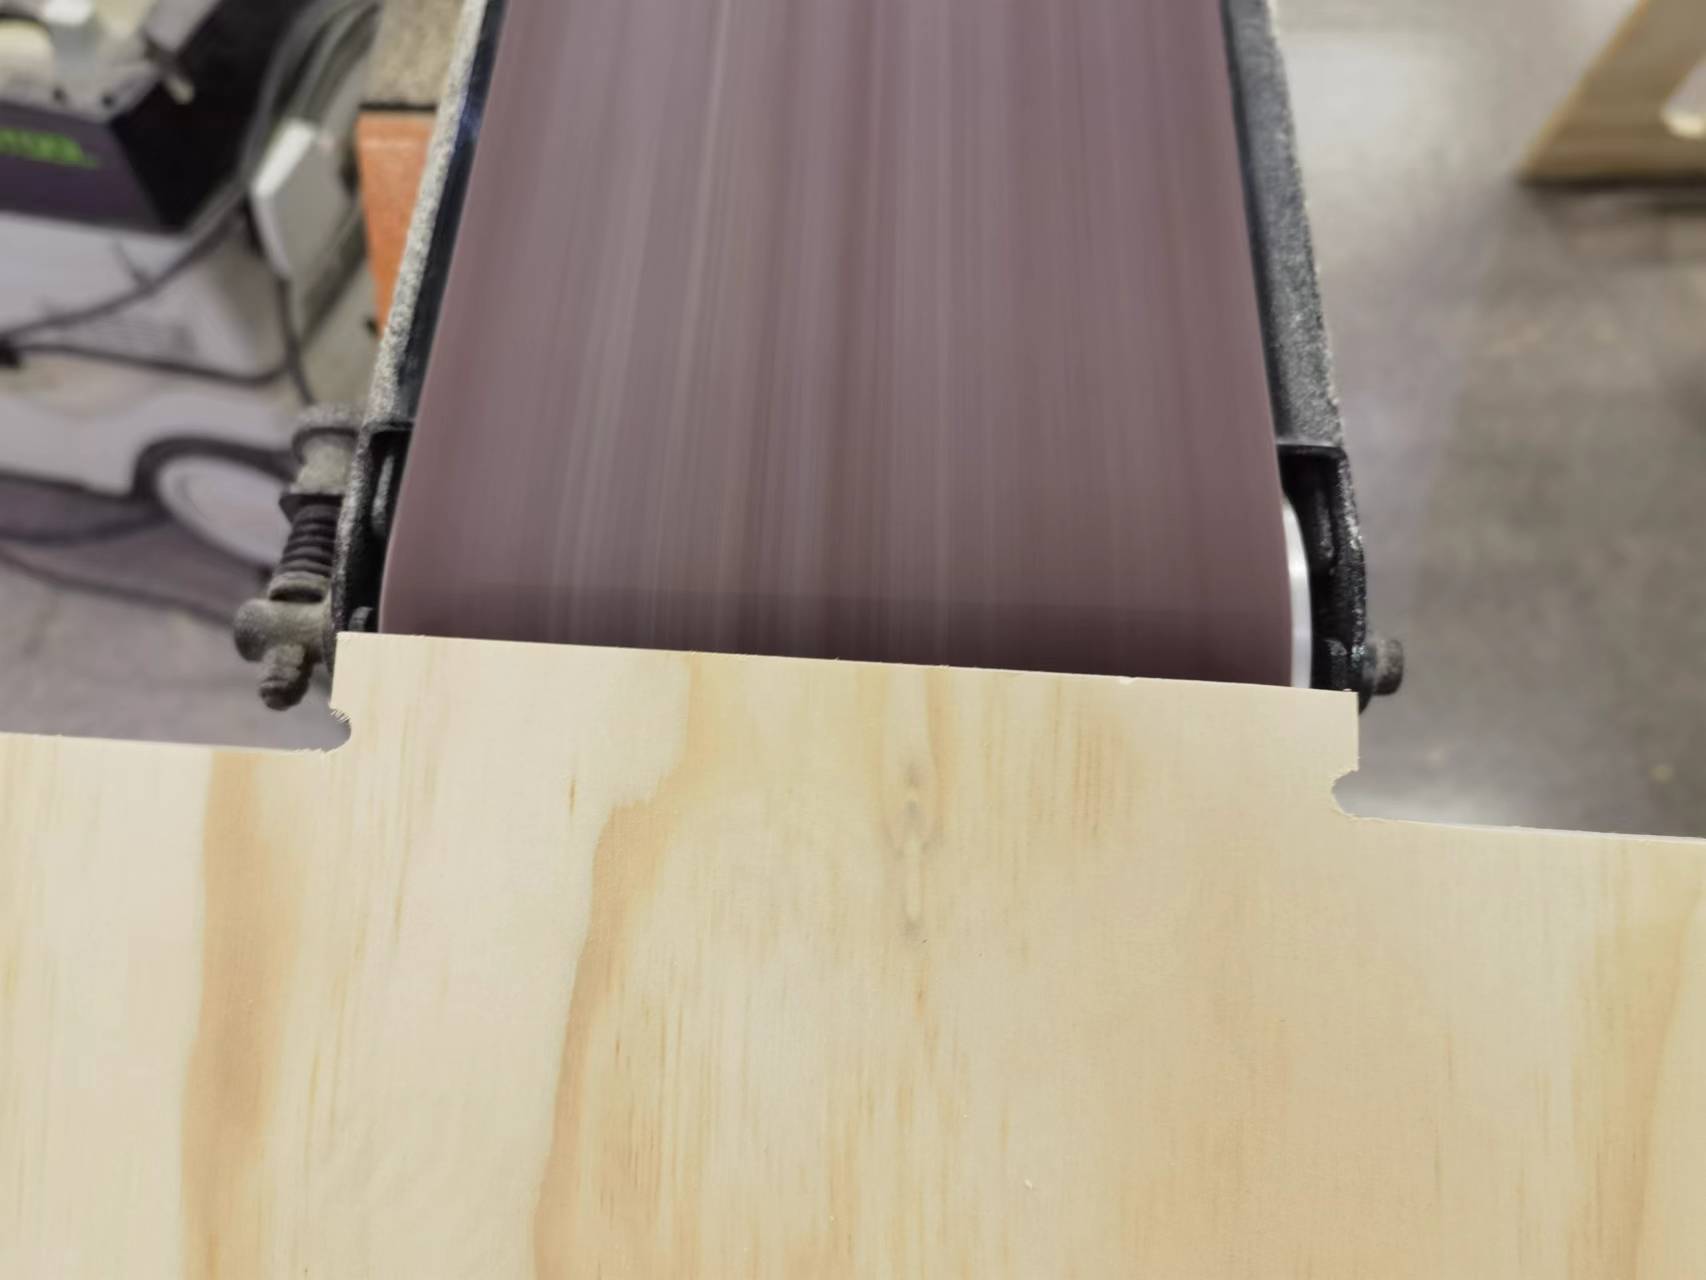
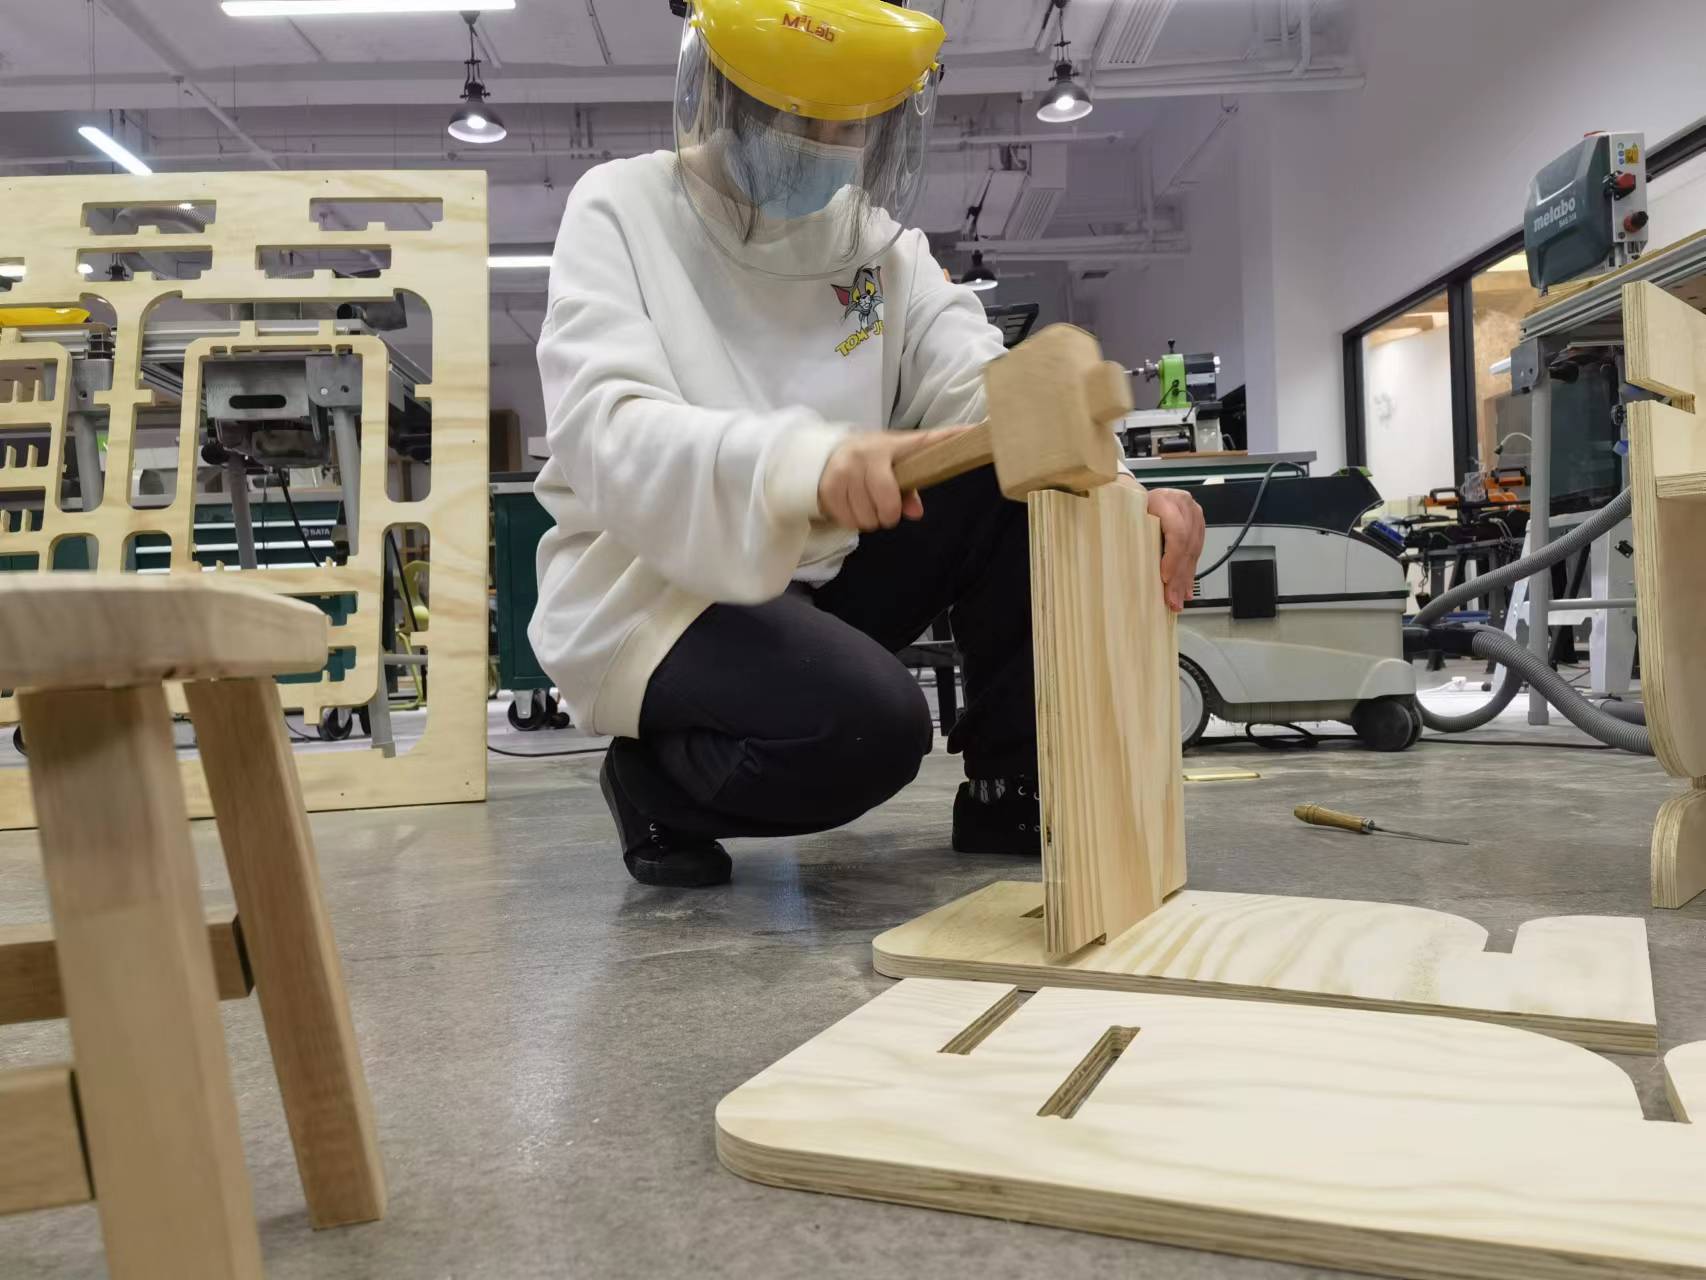
Sanding: Sand smooth to avoid wood chips sticking to hands. Remember to wear a face shield and goggles to keep debris from getting in your eyes.
Assembling:
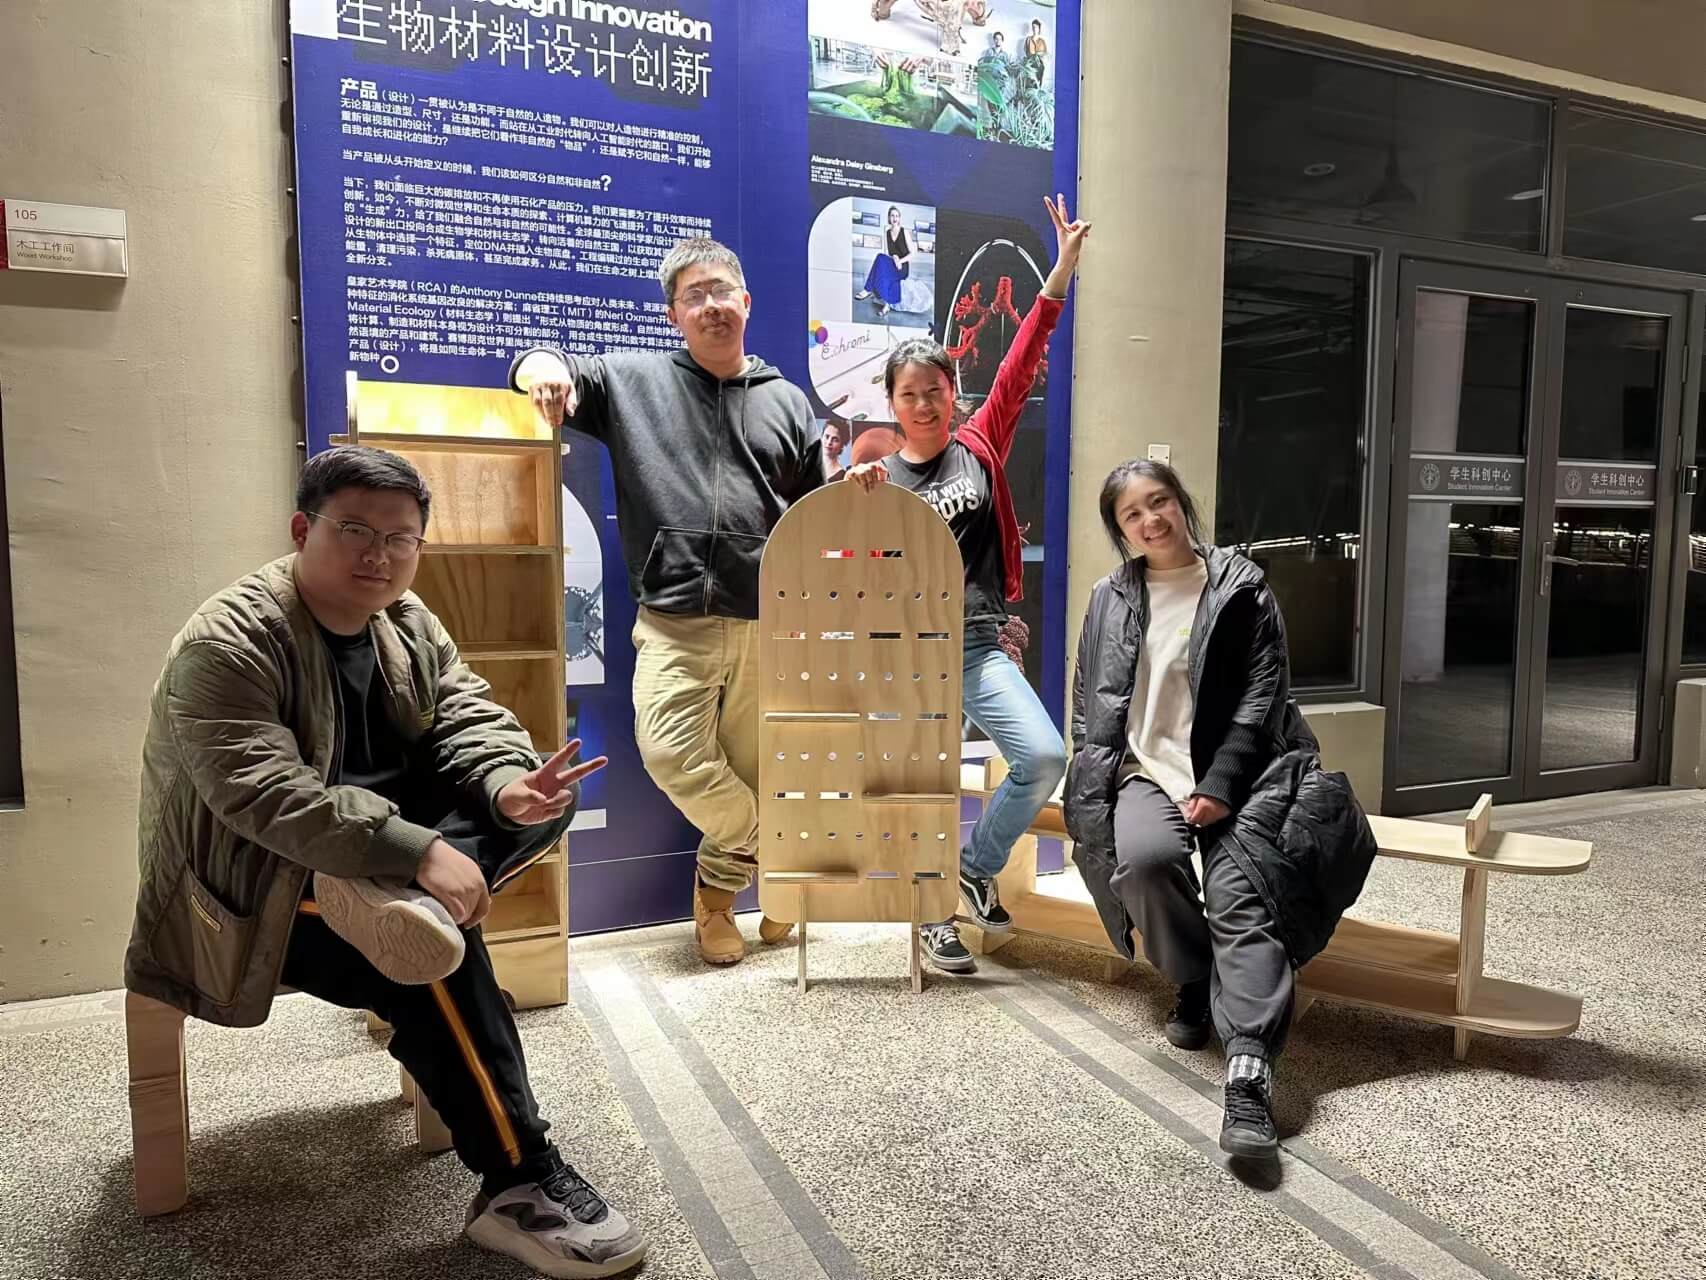
There is also a small episode here. The joint we tested is 18.5mm, but I finally adopted 18.4mm in order to make the boards more tightly clamped (I wished the structure to be stronger). The result is that with my own strength, the last two horizontal planks couldn't fit in. Luckily, with the help of my strong teammates, the boards finally fit in. Lesson learned: Trust the test data and don't change it easily.

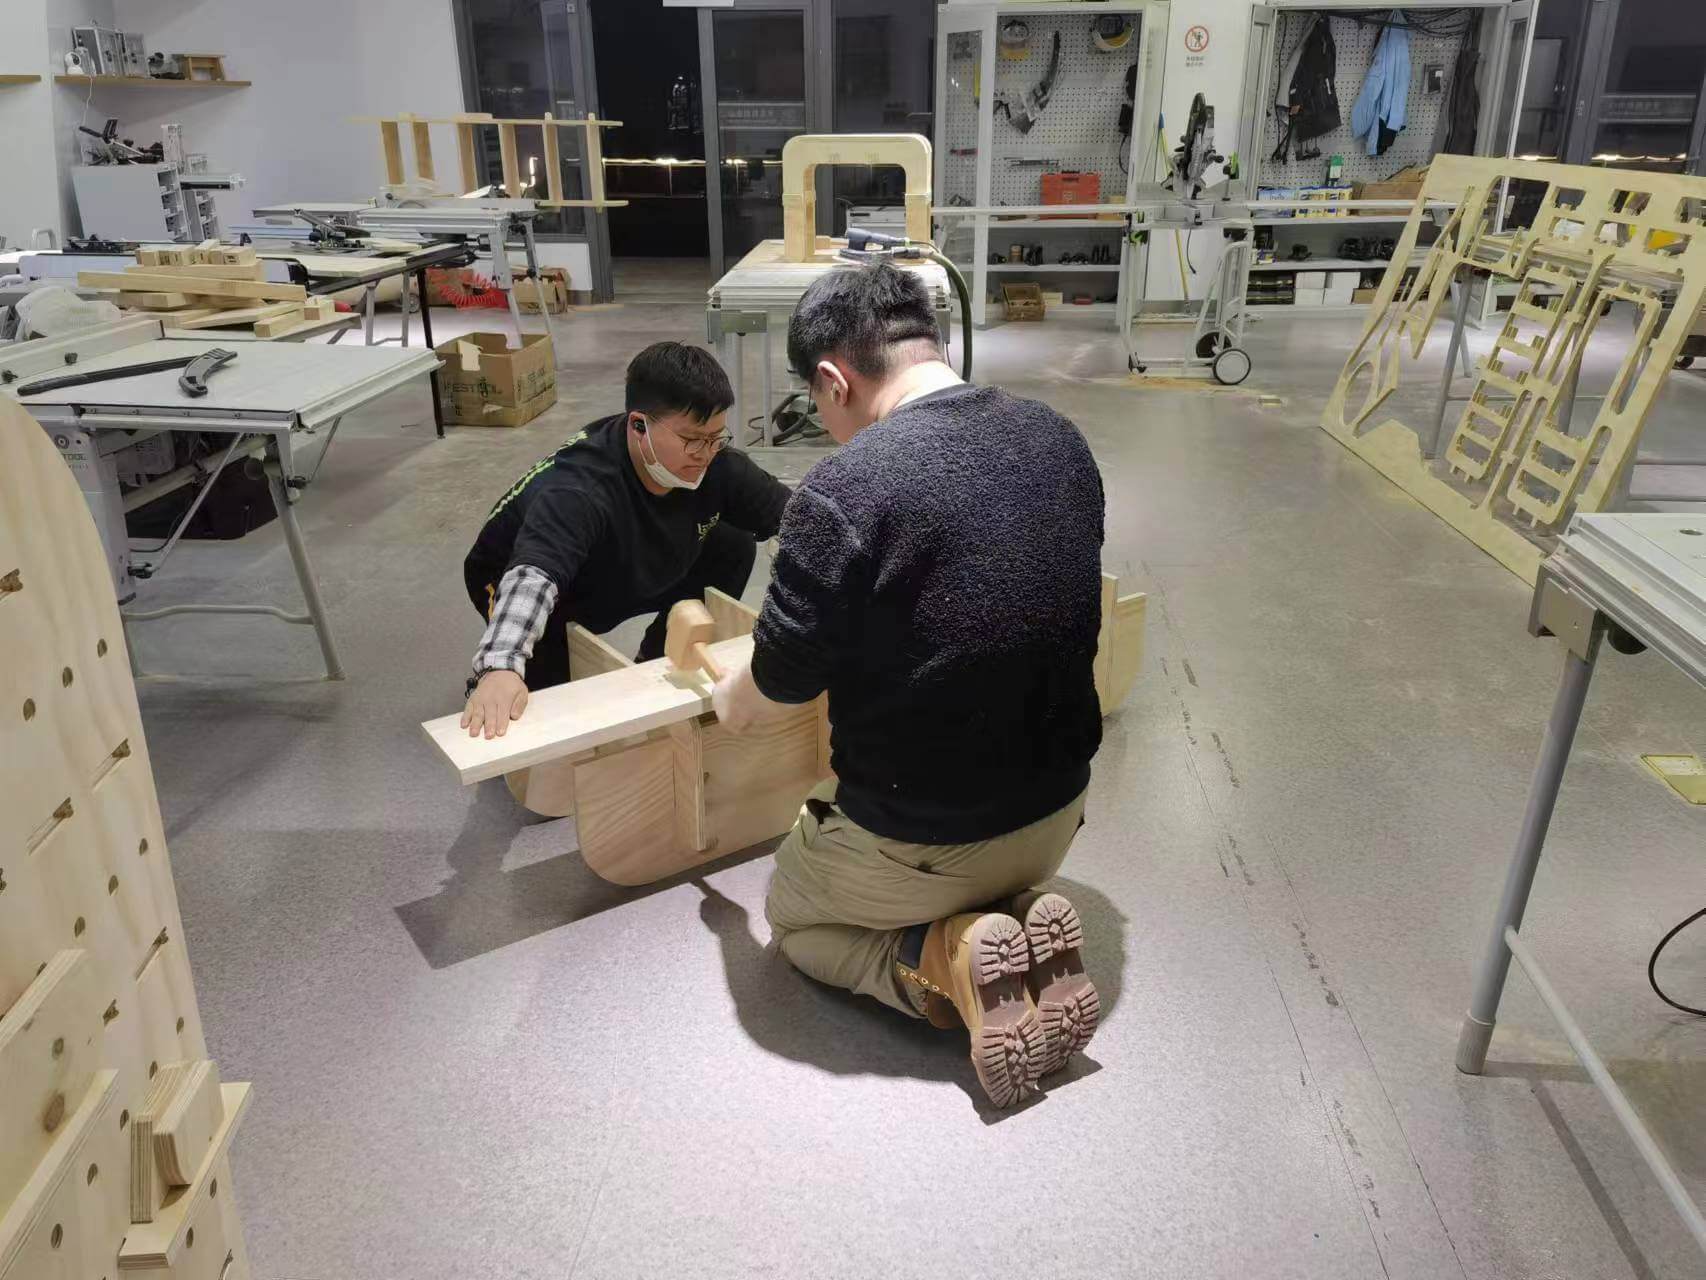 Special thanks to Haoran Shen and Qingzhu Meng
To make this shelf, I stayed up until 3:00AM with Nancy and my teammates. We were exhausted but fulfilled. Let's take a look at its final use in my apartment.