3. Computer-Controlled Cutting
This is the first week that we got to know and use machines. I learned to use the laser cutter and the vinyl cutter in our fablab. The laser cutter is really a handy and quick fabrication machine that can be used to create really interesting shapes. At the same time, I continue learning the different functions of Fusion 360 and mastered constraints modeling and parameter modeling functions.
1.1 Assignments of the Week
- Group assignment:
- Characterize your laser cutter's focus, power, speed, rate, kerf, and joint clearance.
- document your work to the group work page and reflect on your individual page what you learned.
-
Individual assignments:
- Design, lasercut, and document a parametric press-fit construction kit, which can be assembled in multiple ways.
- Cut something on the vinyl cutter.
1.2 Laser Cutter Test (Group Work)
(1) Laser Cutter
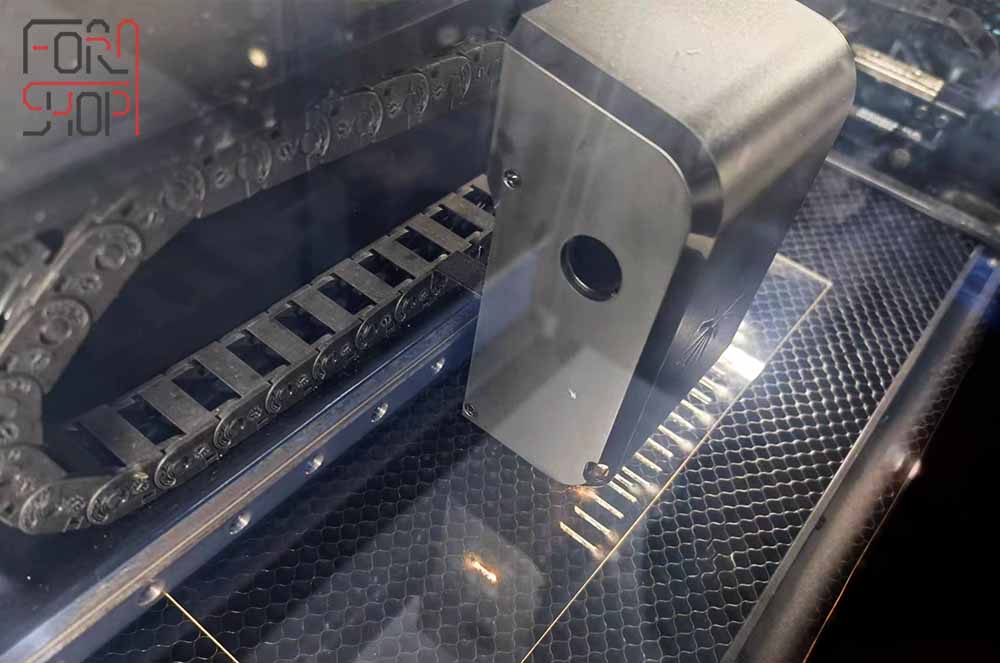
The laser cutter in our lab is Laserbox by Laserblock. There are the specifications below.
| Laser tube type and power | CO₂ laser 40W |
| Working area | 500 × 300 mm |
| Z-axis height | 25mm |
| Maximum cutting depth | 15mm (Paulownia) |
| Autofocus | Material Recognition Autofocus, Material Set-up Autofocus, Visual Autofocus |
| File formats | JPG, PNG, BMP, TIF, DXF, SVG, CR2, and etc. |
| Material capability | Paper, corrugated paper, wood, acrylic, cloth, leather, base plate, ABS-based color board, PET, rubber, glass fiber, plastic, corian and other dozens of materials |
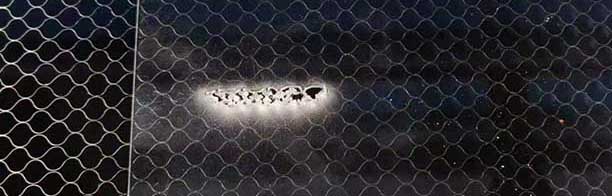
(2) The Best Power-Speed Test
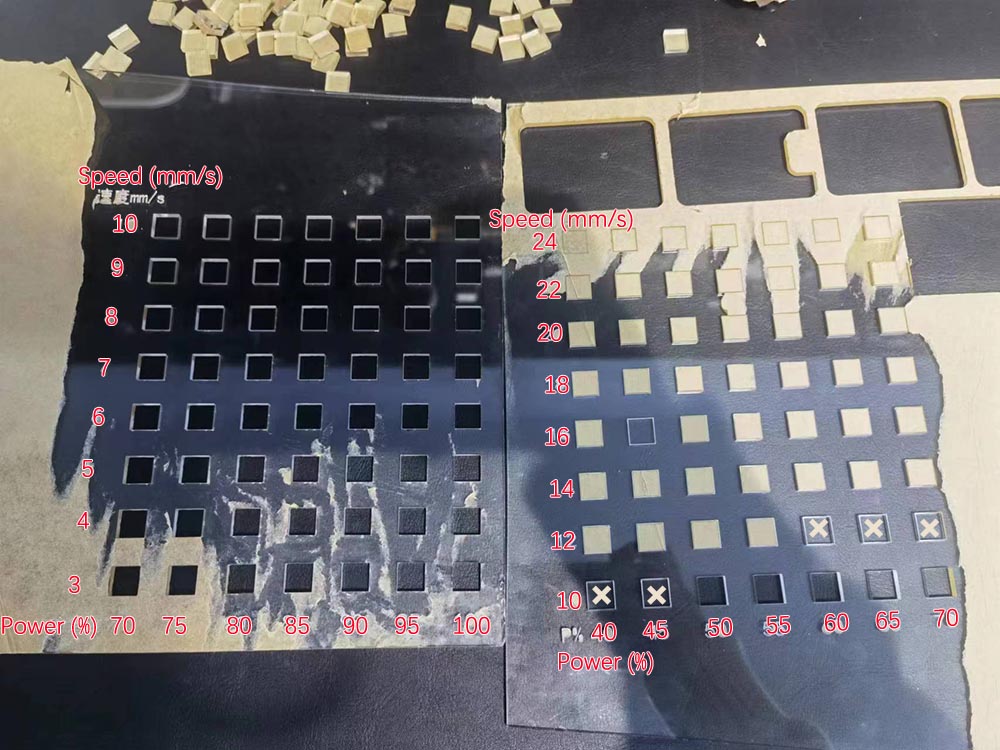
The laser cutter in our lab has auto focus function and gives the suggested power and speed settings depending on the materials, but they are quite imprecise. The picture below is when we use the suggested settings.
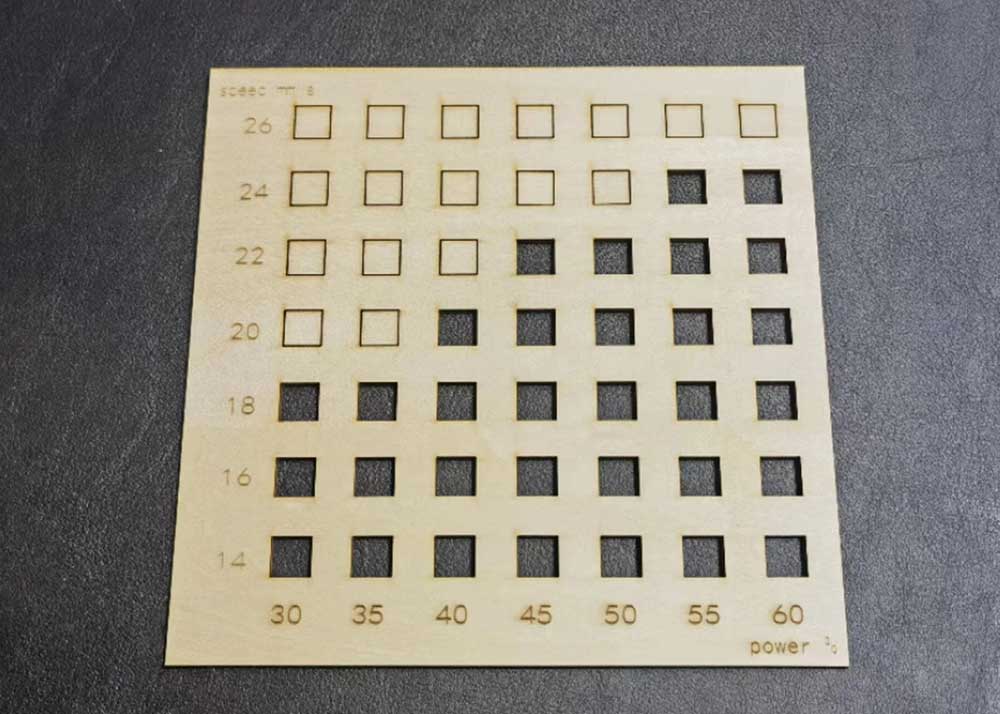
So we still need to test the best power and speed for cutting different materials. We drew some 1*1cm squares in the software of the laser cutter, set different cutting power and speed for each square, and then checked what combination of power and speed is the most economical and efficient.
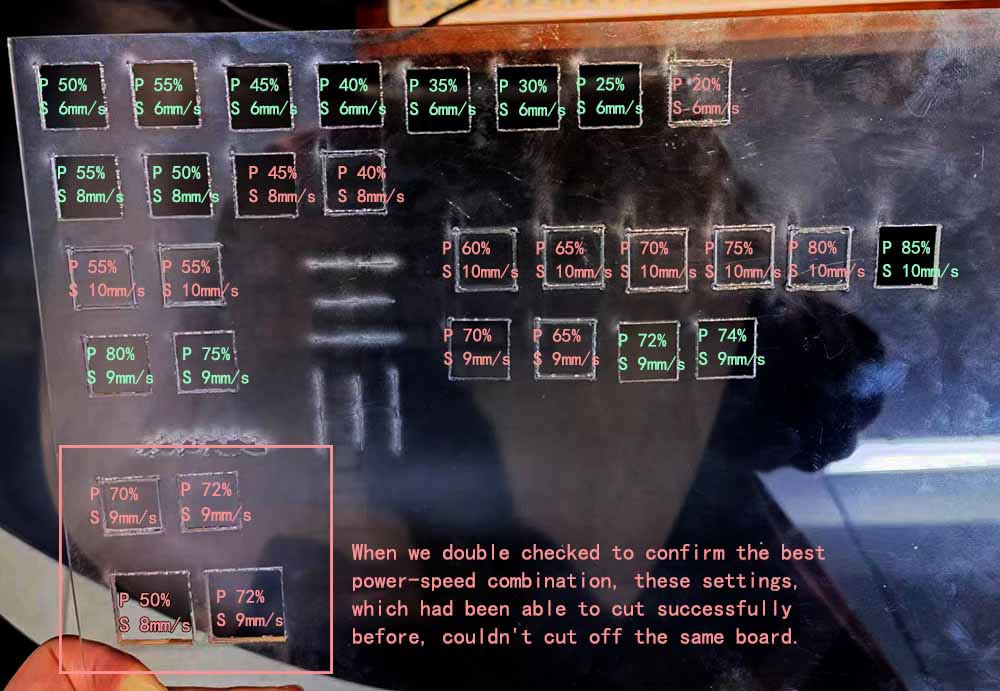
When we double checked to confirm the best power-speed combination, these settings, which had been able to cut successfully before, couldn't cut off the same board. We guessed that the lenses were dirty or the autofocus was not accurate enough for transparent materials, so we decided to do another test after wiping the lenses.
Finally, we have the result for the 3mm thick basswood,
As for the 2mm acrylic, the test result is still confusing. The material melts easily. We think it might be fake acrylic. So we are buying a new one and will test it again.
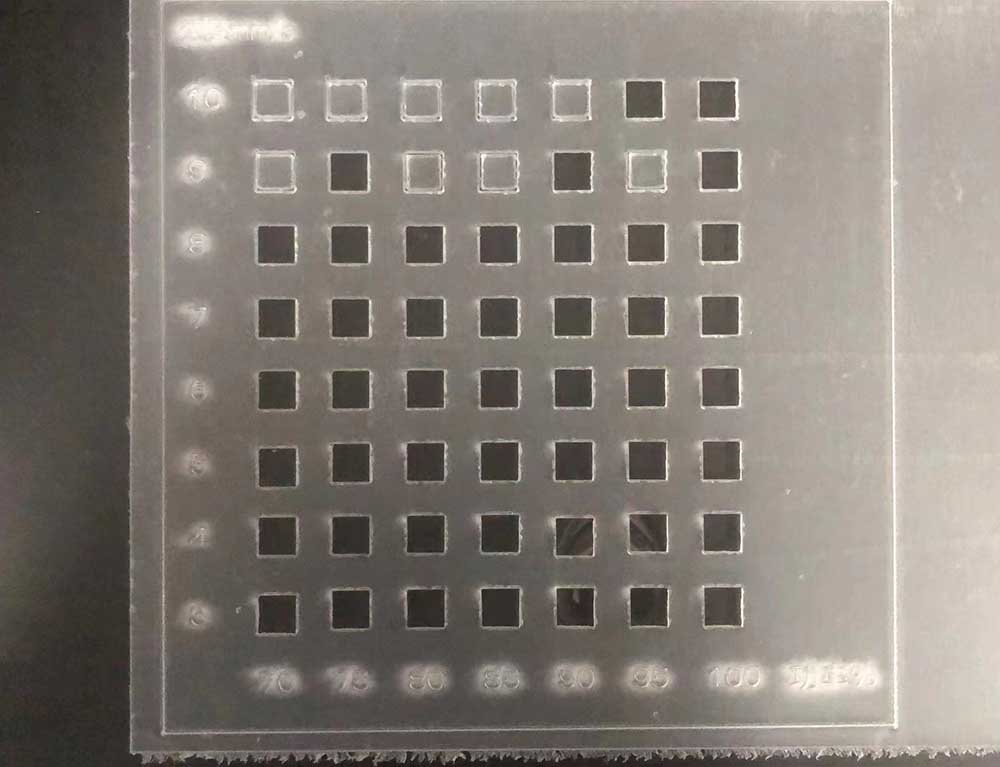
A few days later, we tried on new acrylic. It turns out to be the real acrylic. When laser cutting, it produces less odor and cuts with smoother edges.
Here is the test result for the 3mm thick acrylic:
Conlcusion:
| material | power(%) | speed(mm/s) |
|---|---|---|
| 3mm basswood | 30 | 18 |
| 3mm acrylic | 55 | 10 |
(3) Kerf Test
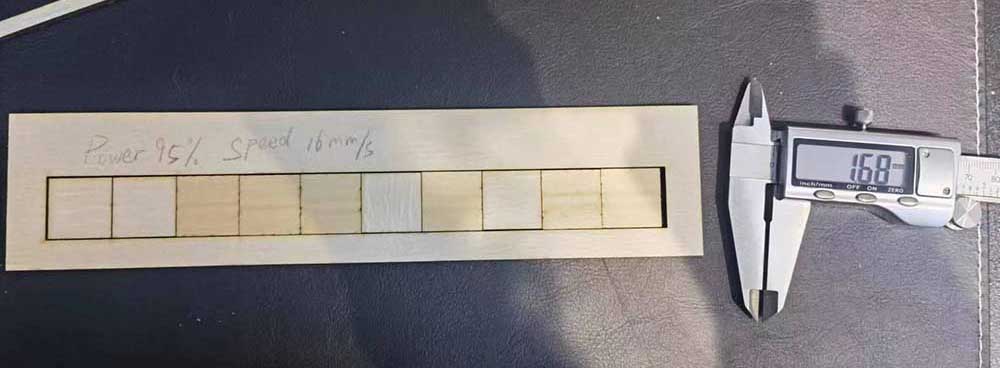
We laser cut 10 side-by-side squares on the basswood board, arranged the cut squares tightly in the gap, then measured the remaining gap with a vernier caliper, which is the sum of 11 kerfs.
Conclusion:
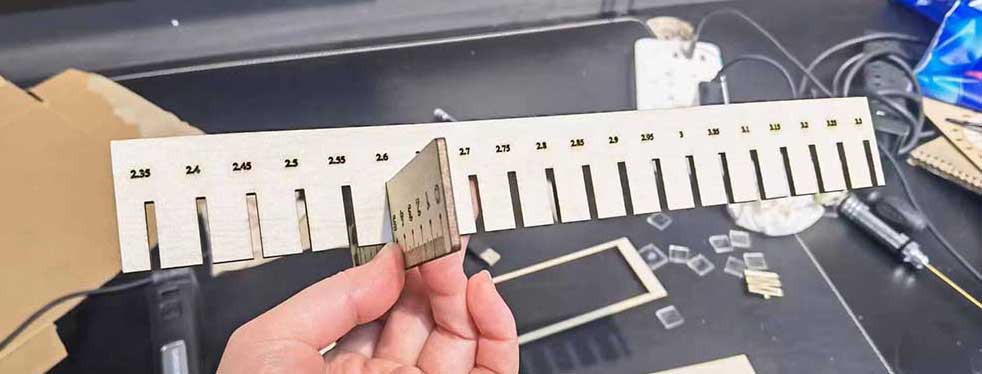
(4) Joint Clearance Test
For the 3mm thick basswood board, we laser cut a comb-shaped joint test board. The width of each joint is reduced by 0.05mm. Then we tested with another 3mm basswood board to find out which joint fits best.
Conclusion:
(On the day we did the joint test, the best joint is 2.6mm. But when I did my press-fit construction kit, I found that due to the uneven thickness of the wood boards, the use of 2.6 joints will occasionally cause loose joints, so we adjusted it to 2.5mm.)
Conclusion:
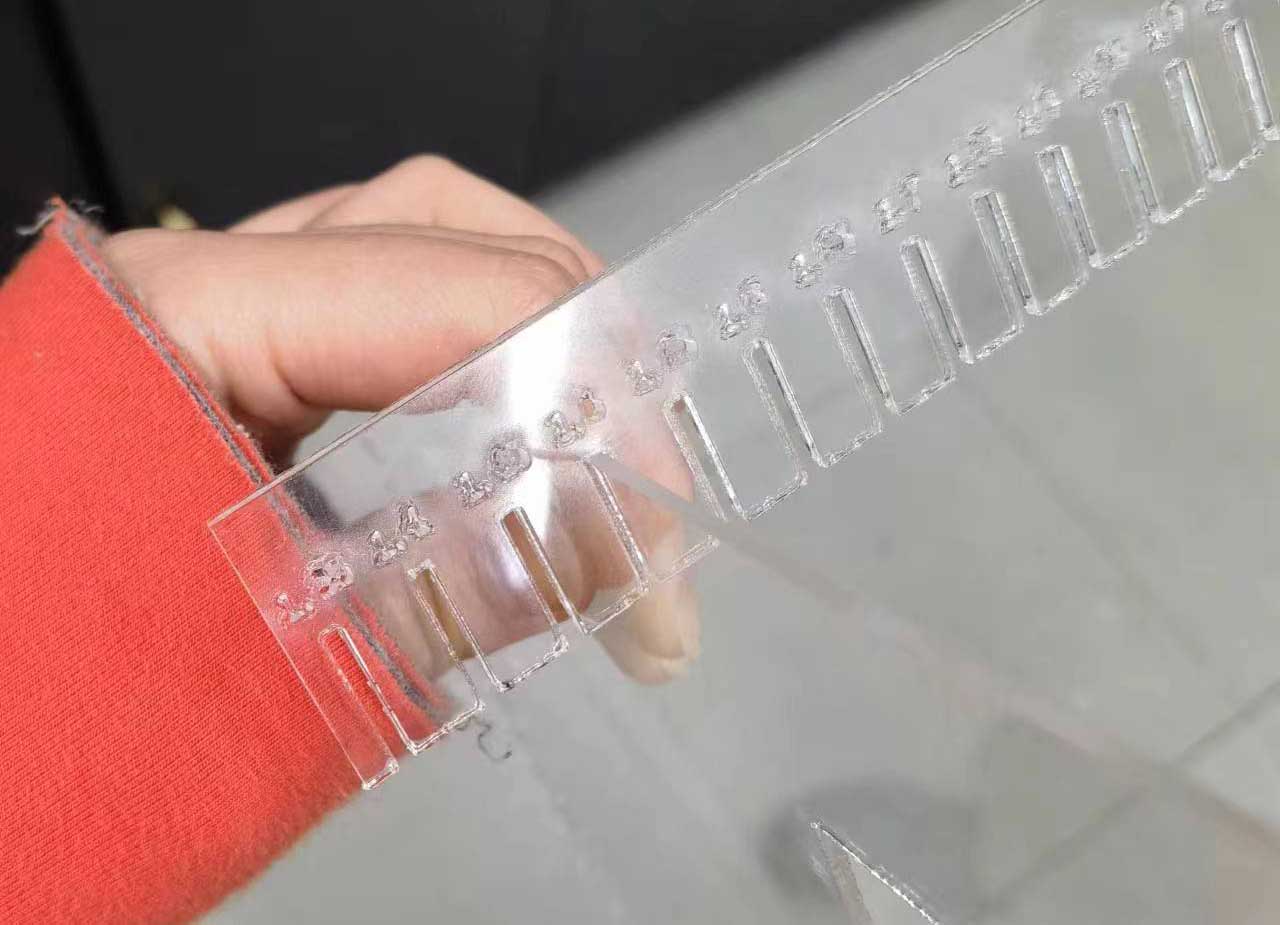
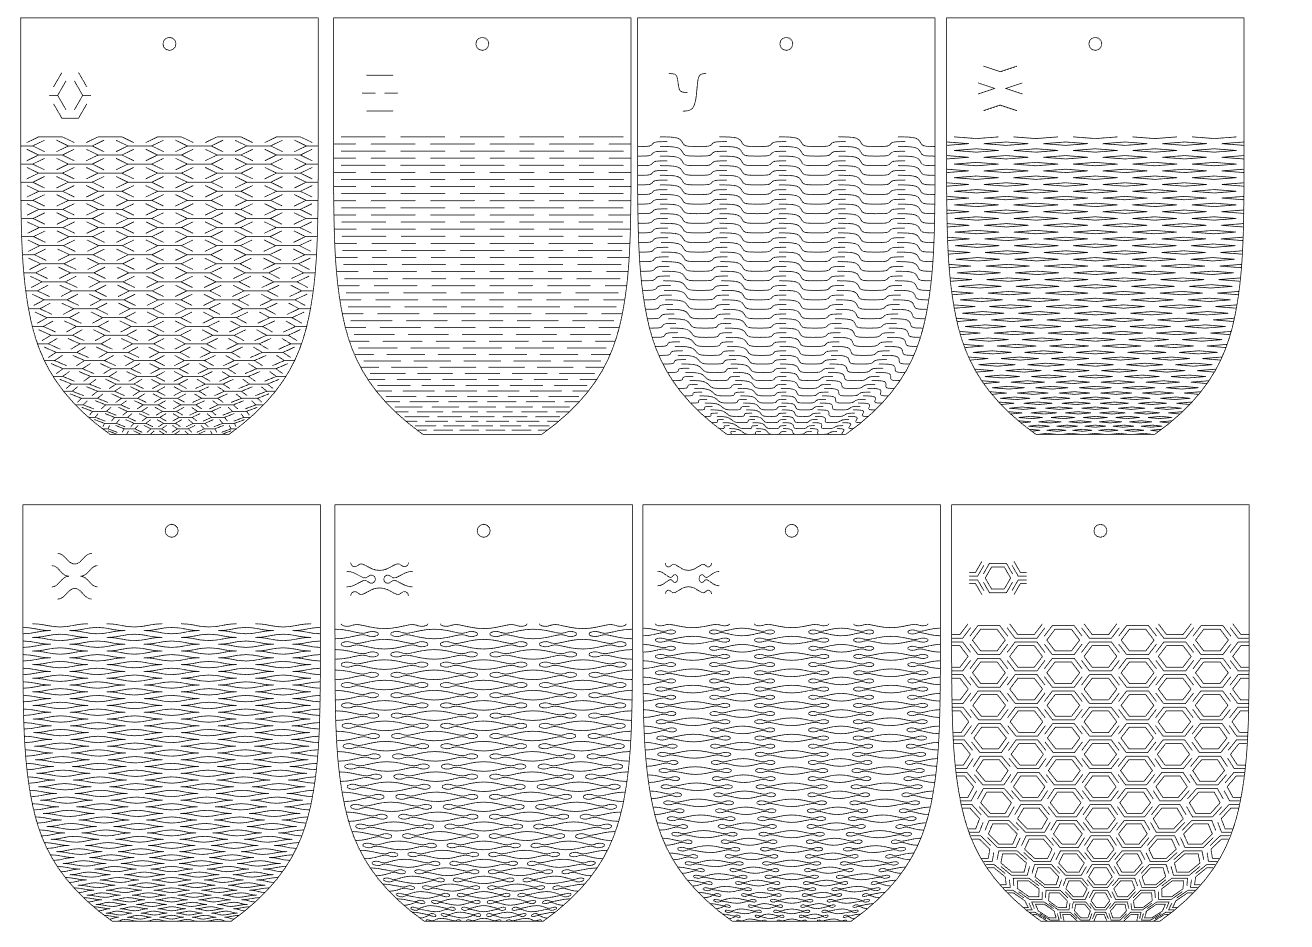
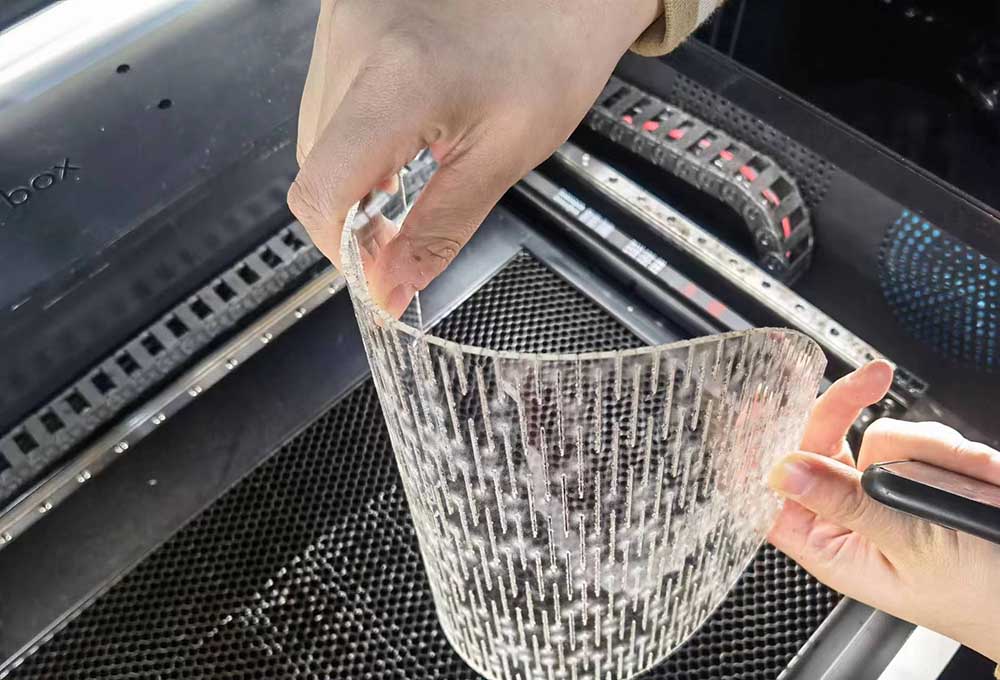
(5) Bend Test
Acrylic board can be bent by cutting off different textures.
(6) Test Files
1.3 Press-fit Construction Kit (Individual)
(1) Modeling in Fusion 360
This week I managed to figure out how to use constraints and parameters in modeling.
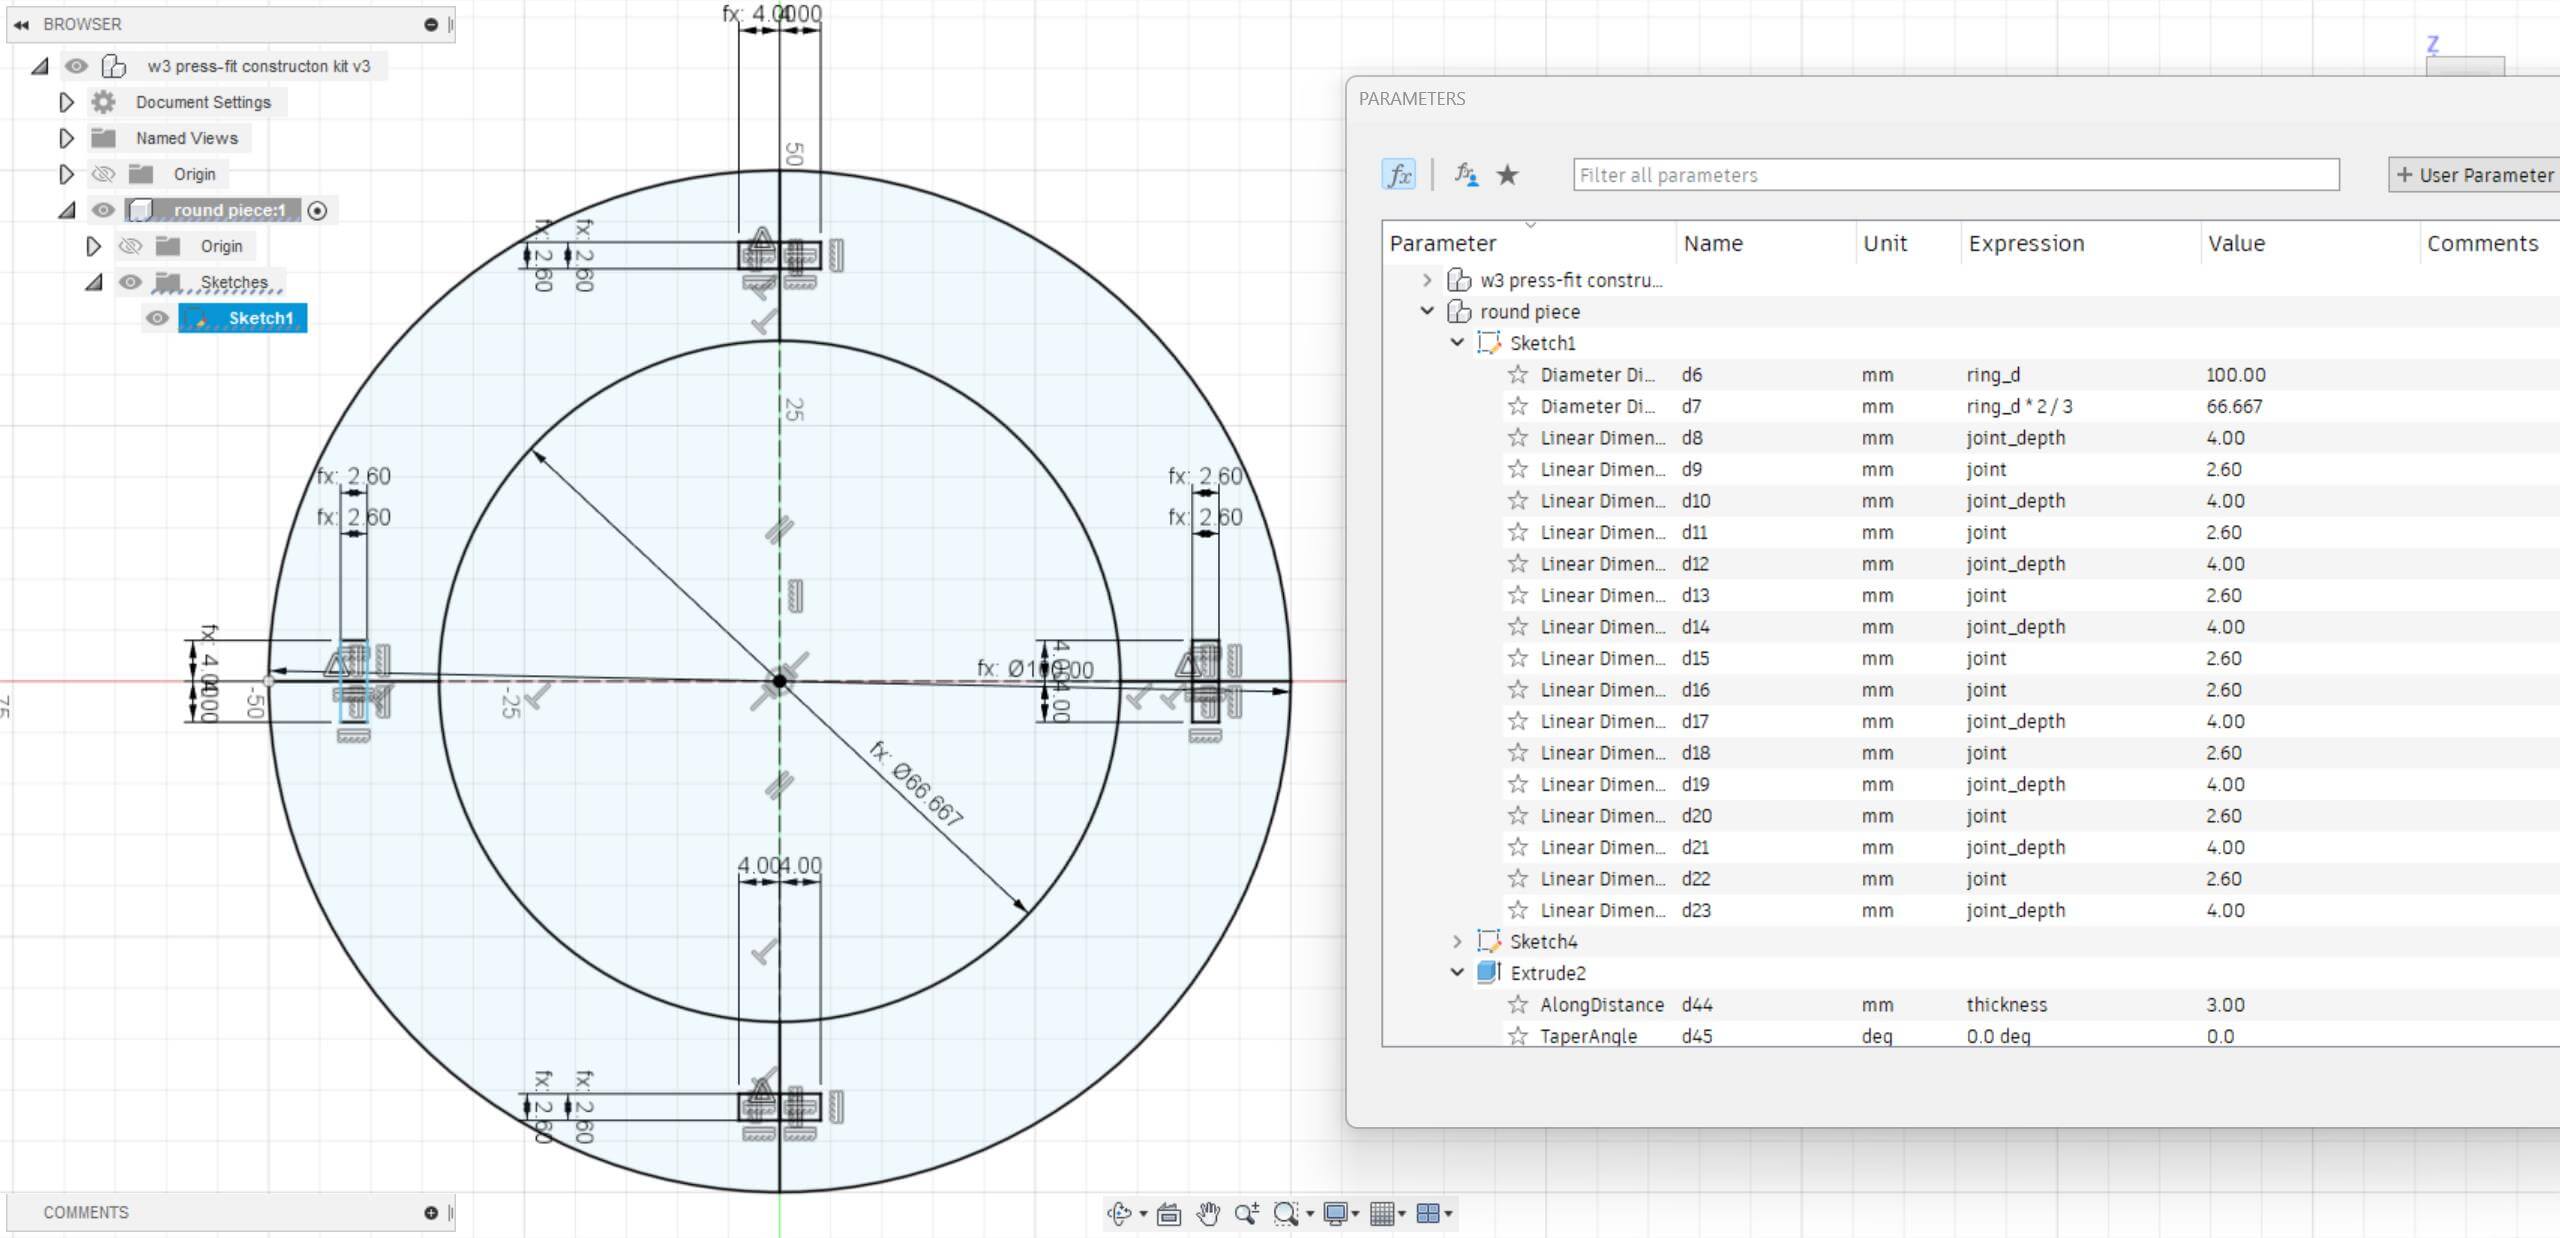
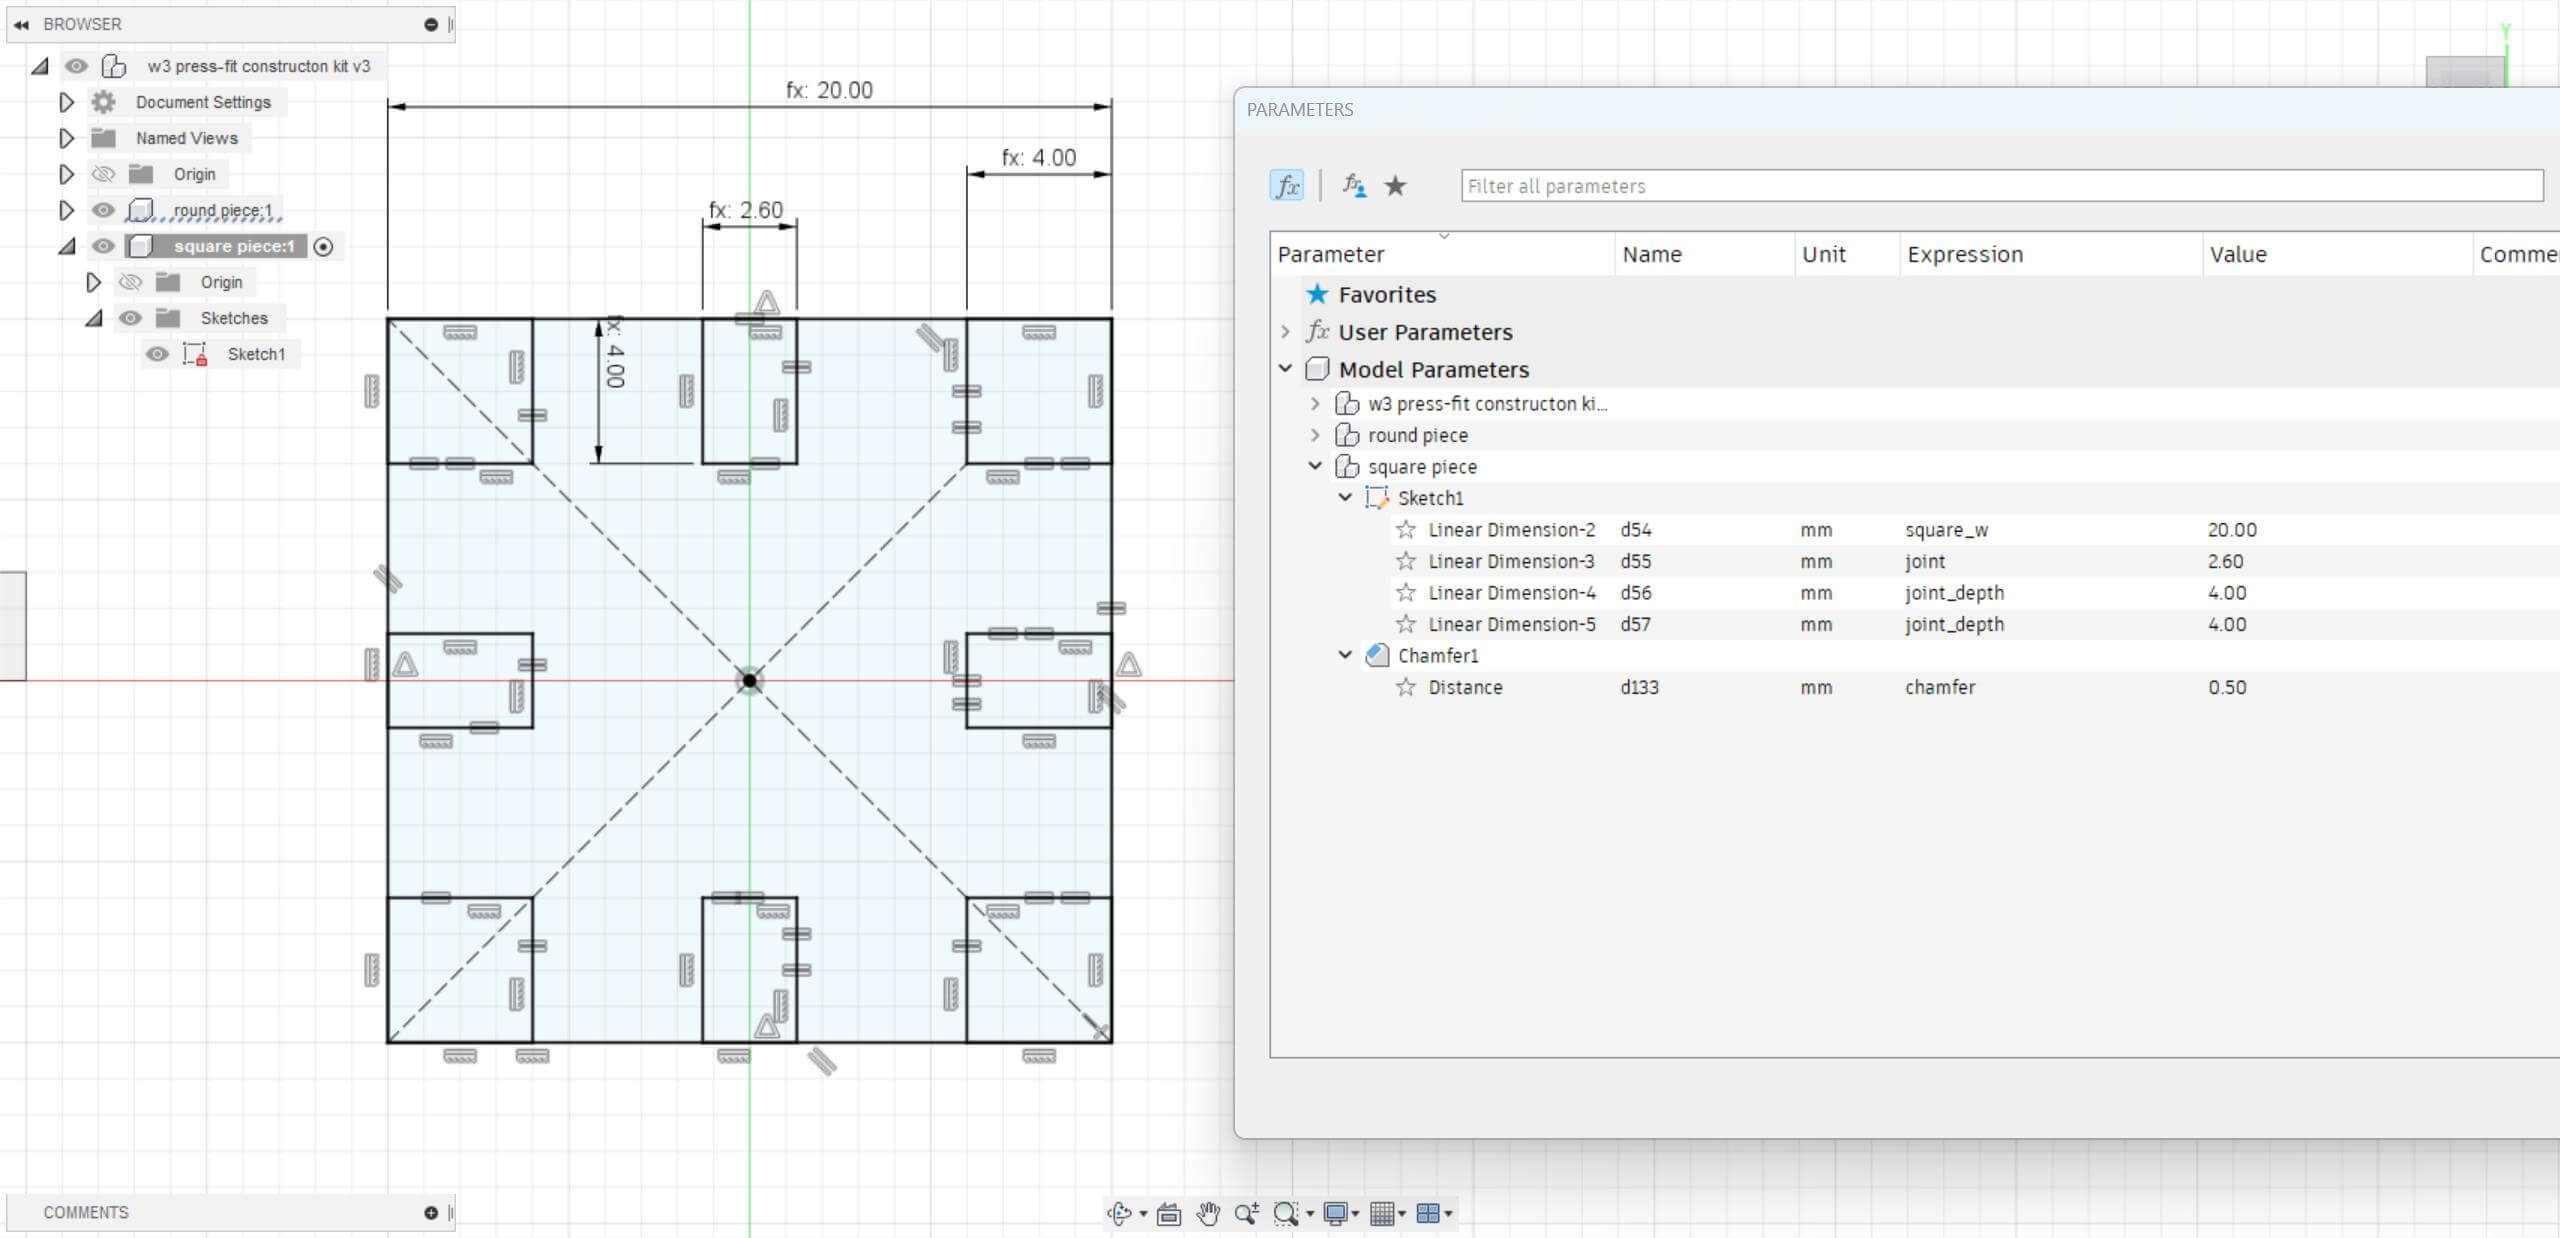
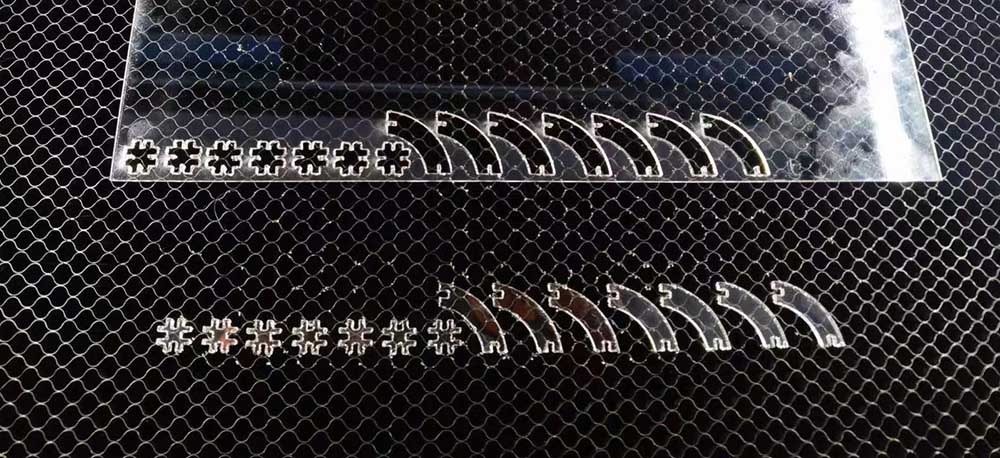
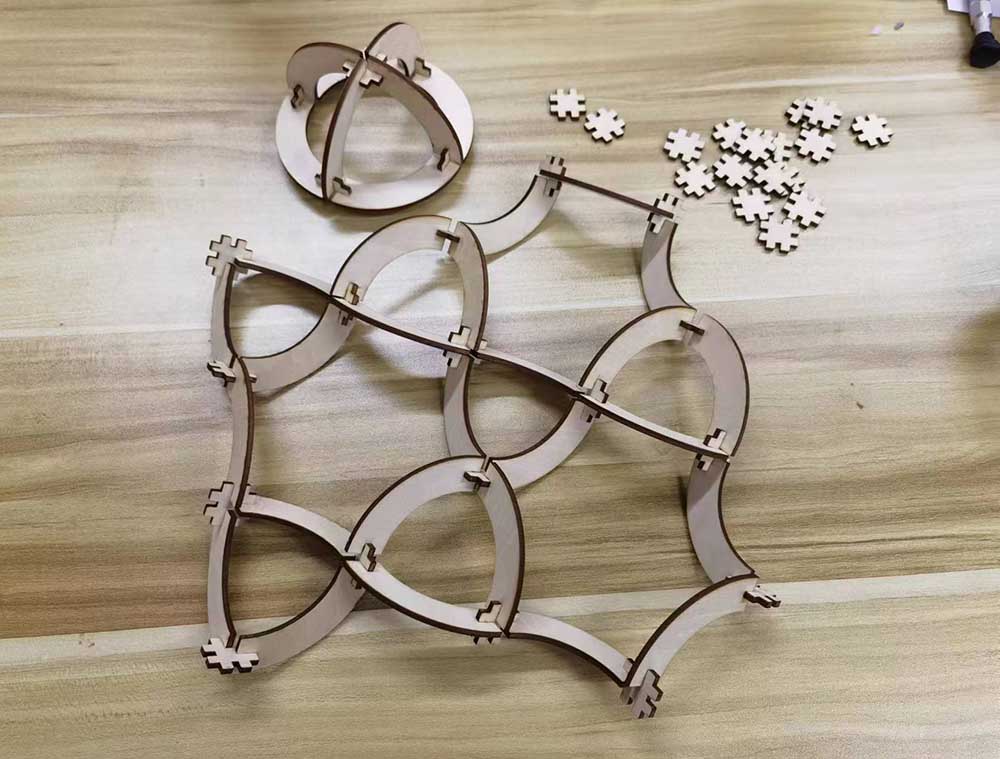
My press-fit construction kit has two different pieces, one circular shaped and the other one square shaped. They can form spherical and curved network structures. With different sizes of pieces, there will be more room for creativity. That's why I need parametric design in Fusion 360.
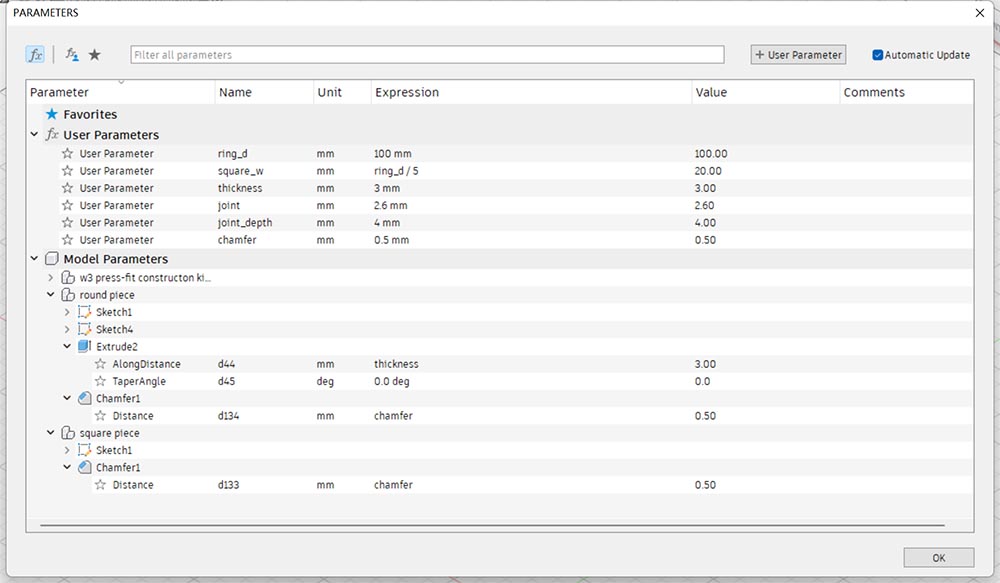
Here are my parametrics. I can change the size of the pieces and also the joint depending on the materials I would like to use.
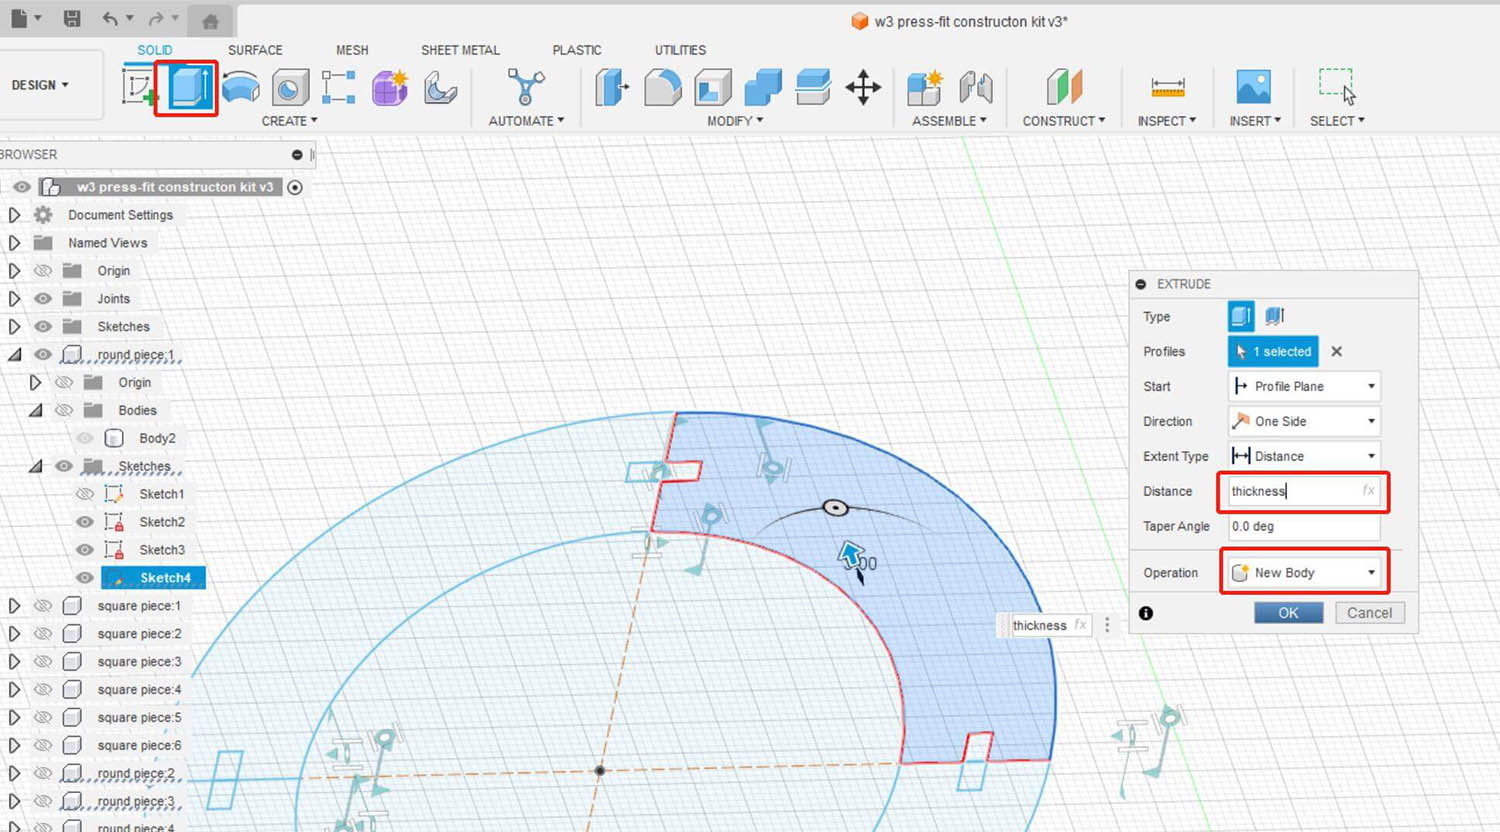
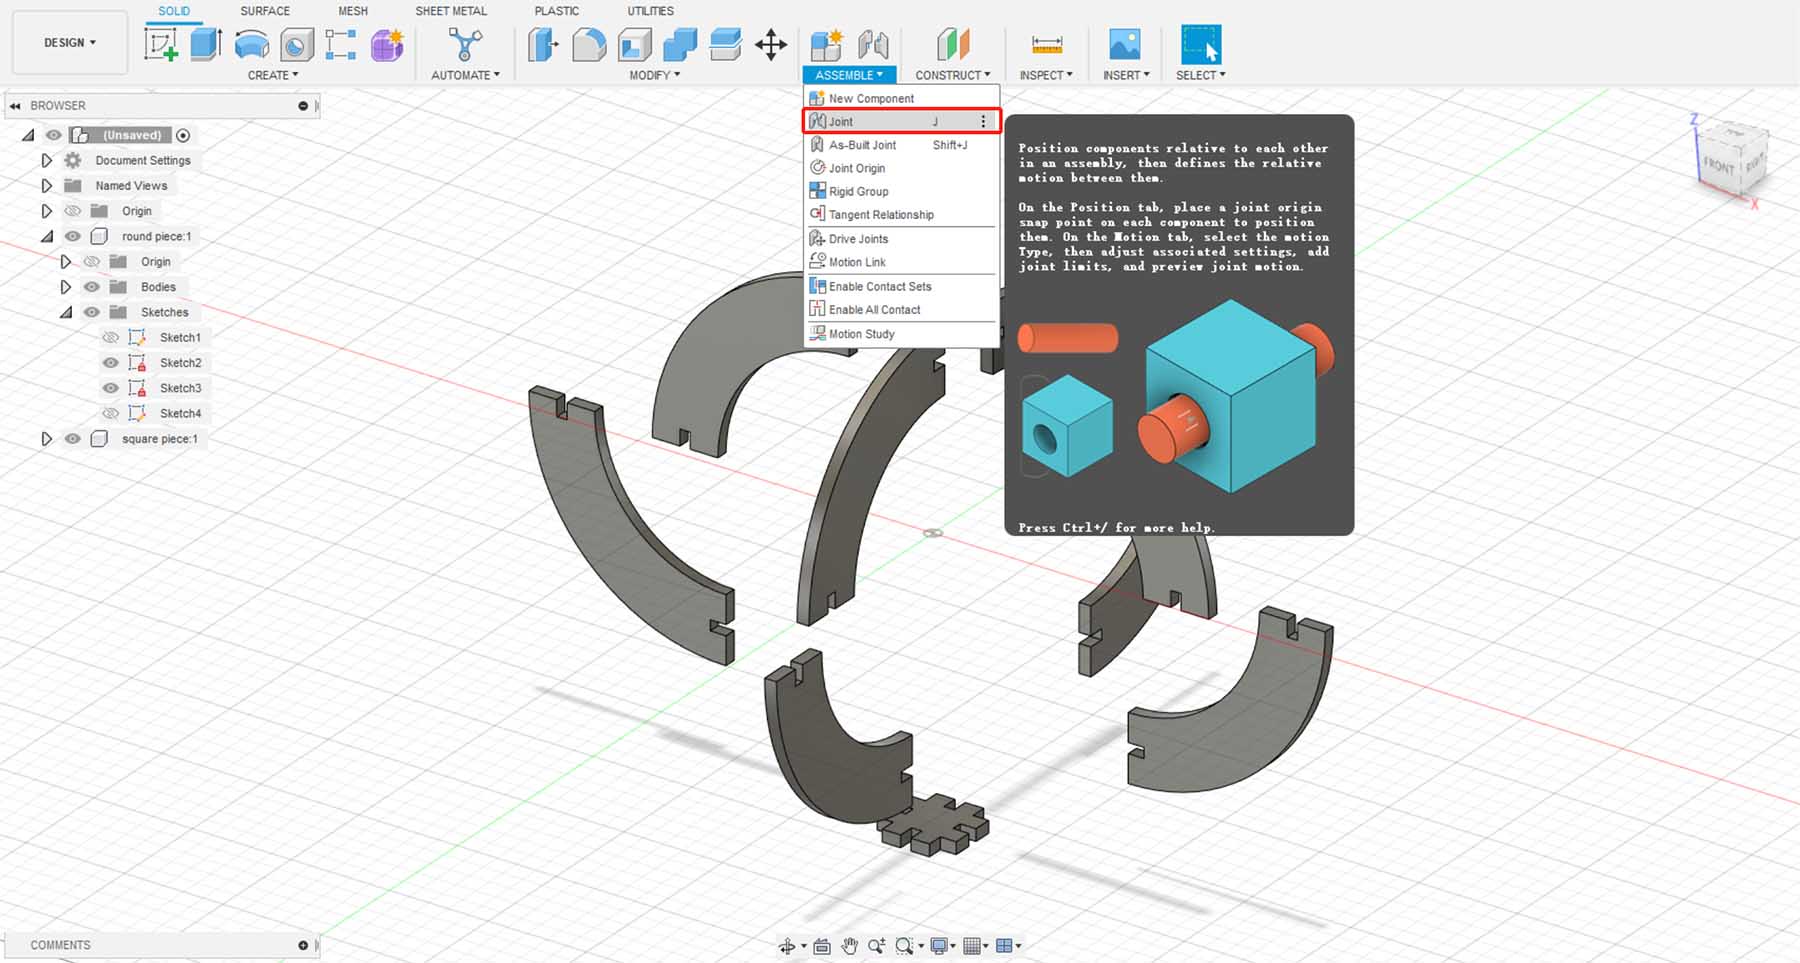
When modeling, I encountered a problem about joint. I created models of pieces and wanted to use the function of "joint" to assemble them together. But I forgot to put each pieces in different components, I couldn't assemble each pieces at will.
"Joint" function ⬇
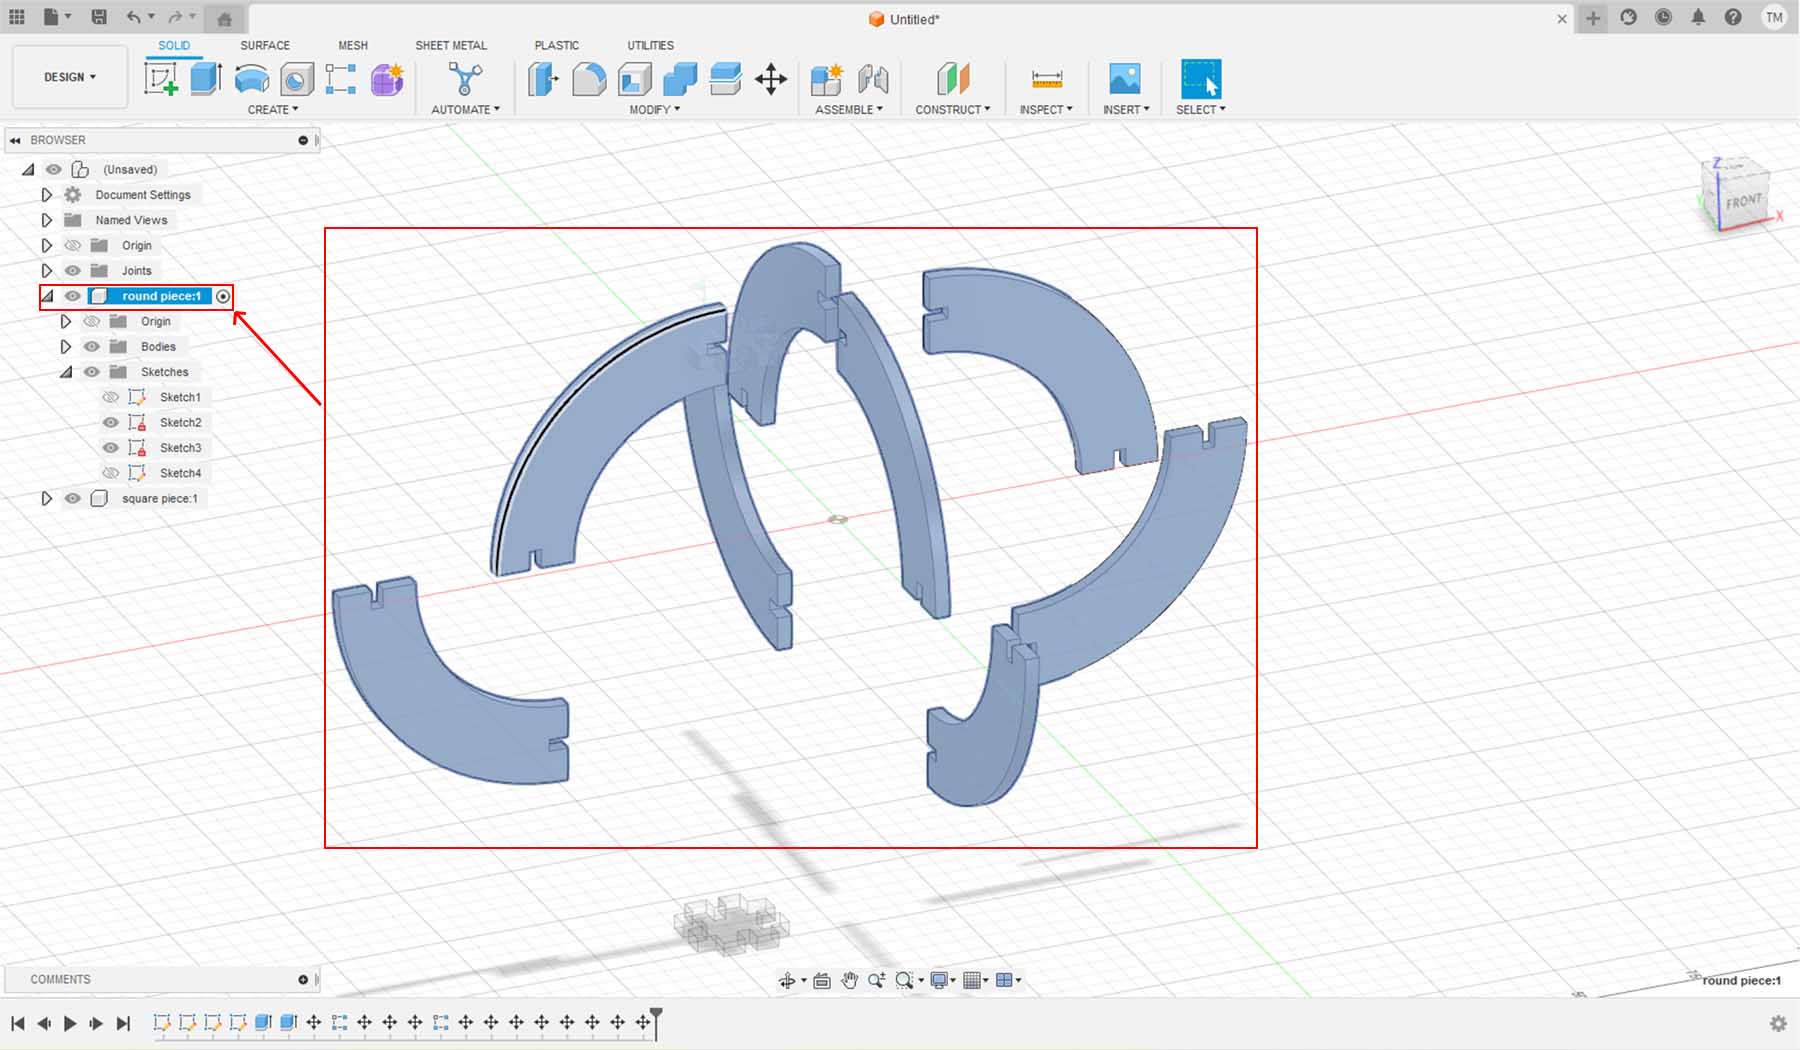
I put all the circular pieces in one component.⬇
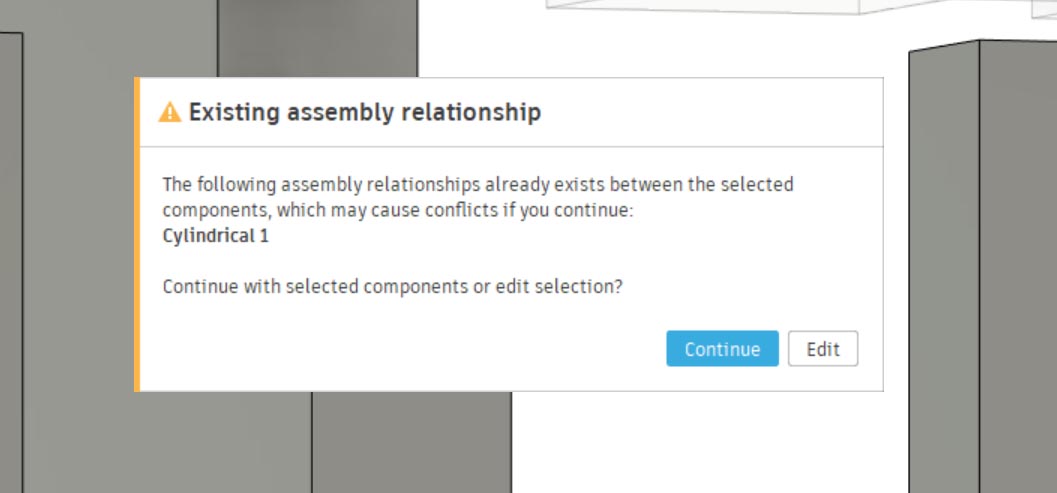
When I wanted to joint the second circular pieces to the square piece, I got this warning.⬇
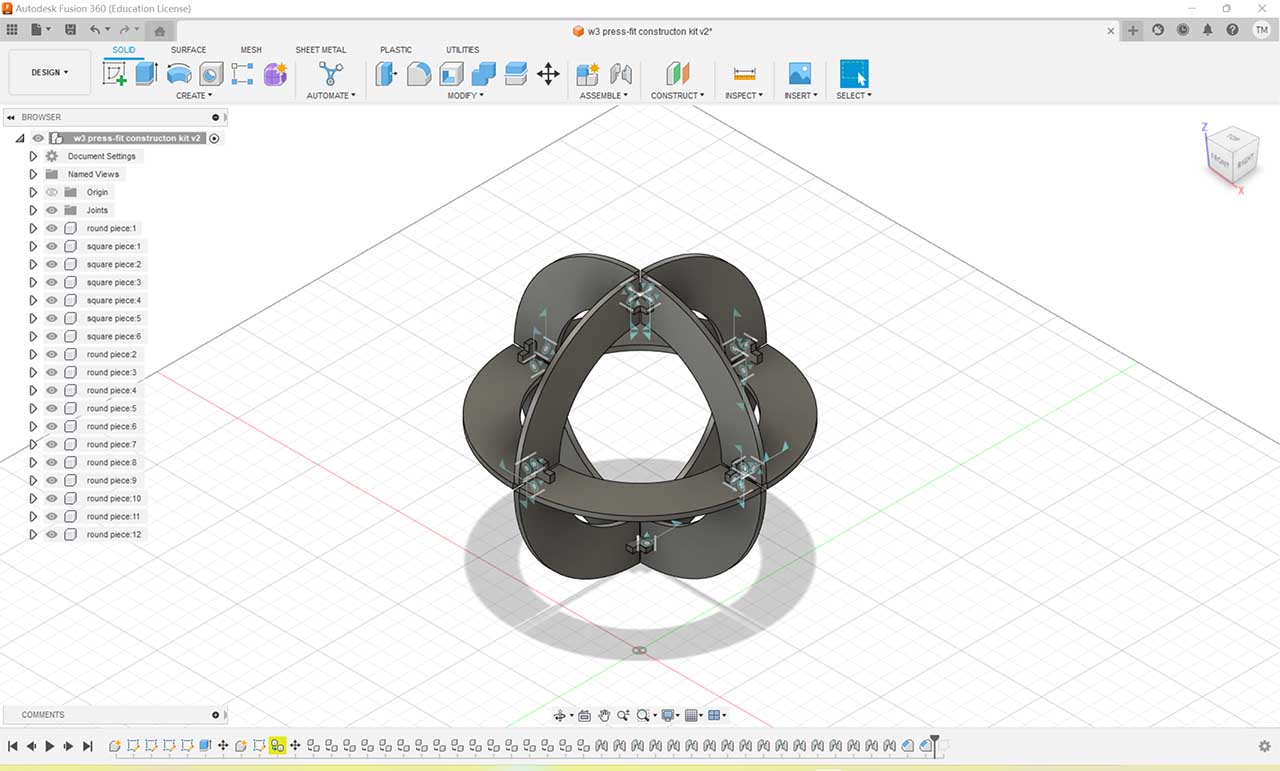
Then I created seperated components for each bodies.⬇

I could assemble all the pieces freely. Da da! Here is my model of press-fit sphere.⬇
(2) Laser cut
I tired two materials of different sizes: the small one with acrylic and the big one withbasswood.
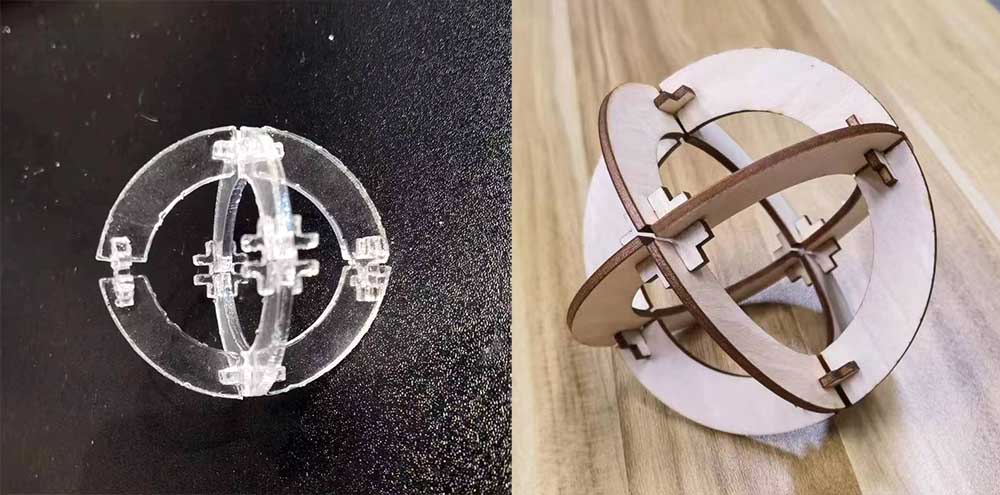
Although the acrylic sphere looks fancier, acrylic material lacks elasticity, so it is difficult to assemble. I chose basswood as the final material.
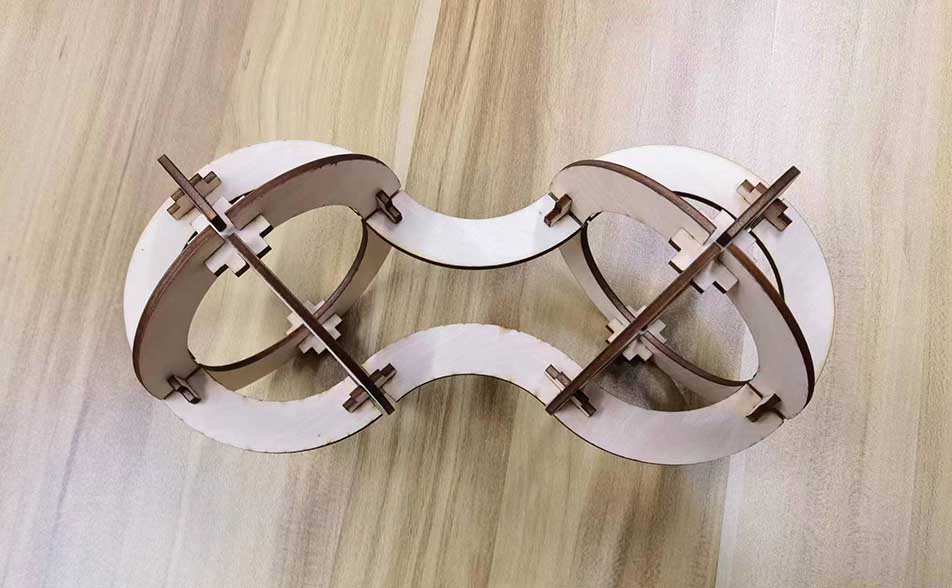
(3) Other Assembled Options
(4) Files
Laser_cut_press_fit_sphere_fusion360
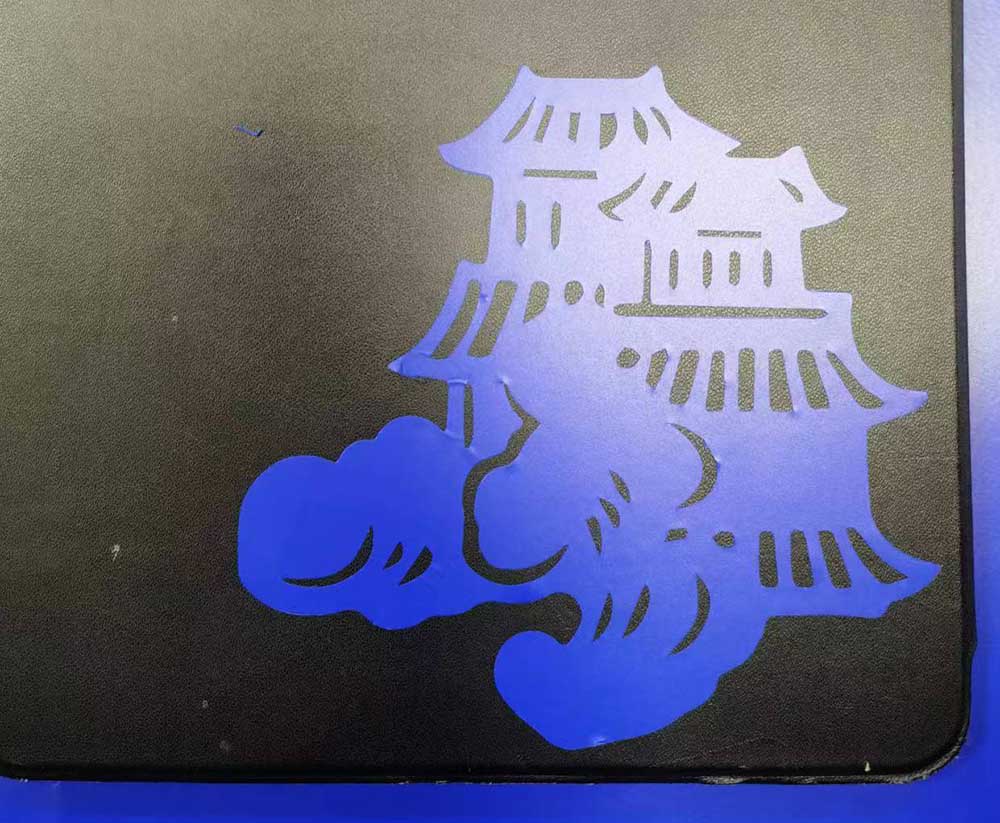
1.3 Vinyl Cut (Individual)
I want to cut a Chinese paper-cut style pattern with vinyl cutter.
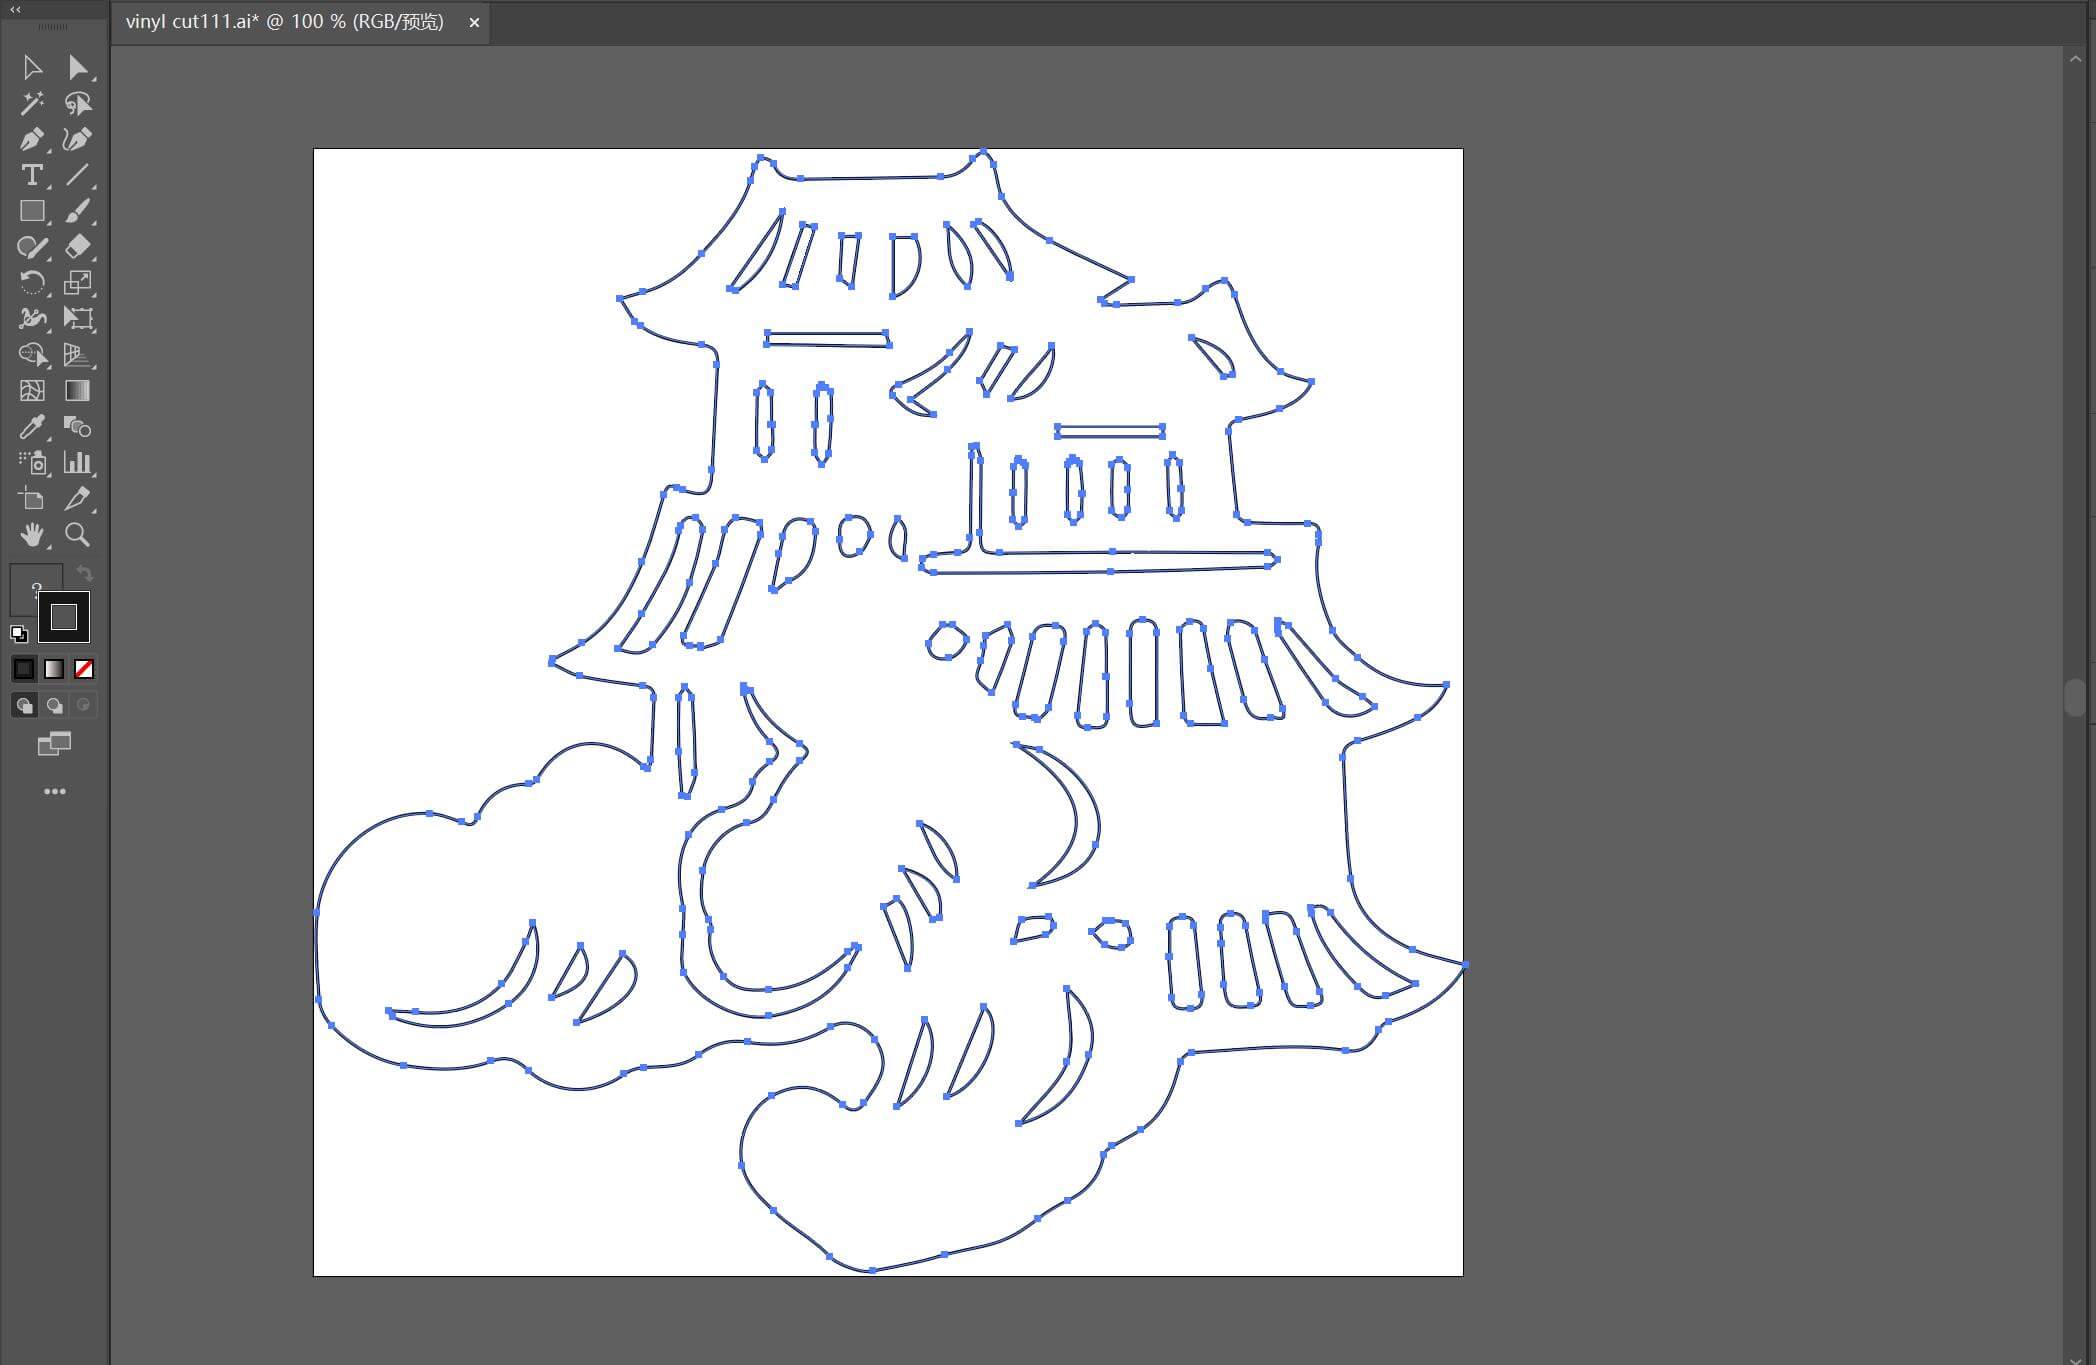
Put a raster image into Adobe Illustrator and choose Object > Image Trace > Make to convert it into a vector image.

I made some adjustment with the path. Small pieces are hard to remove from the vinyl sticker, so I made them bigger.
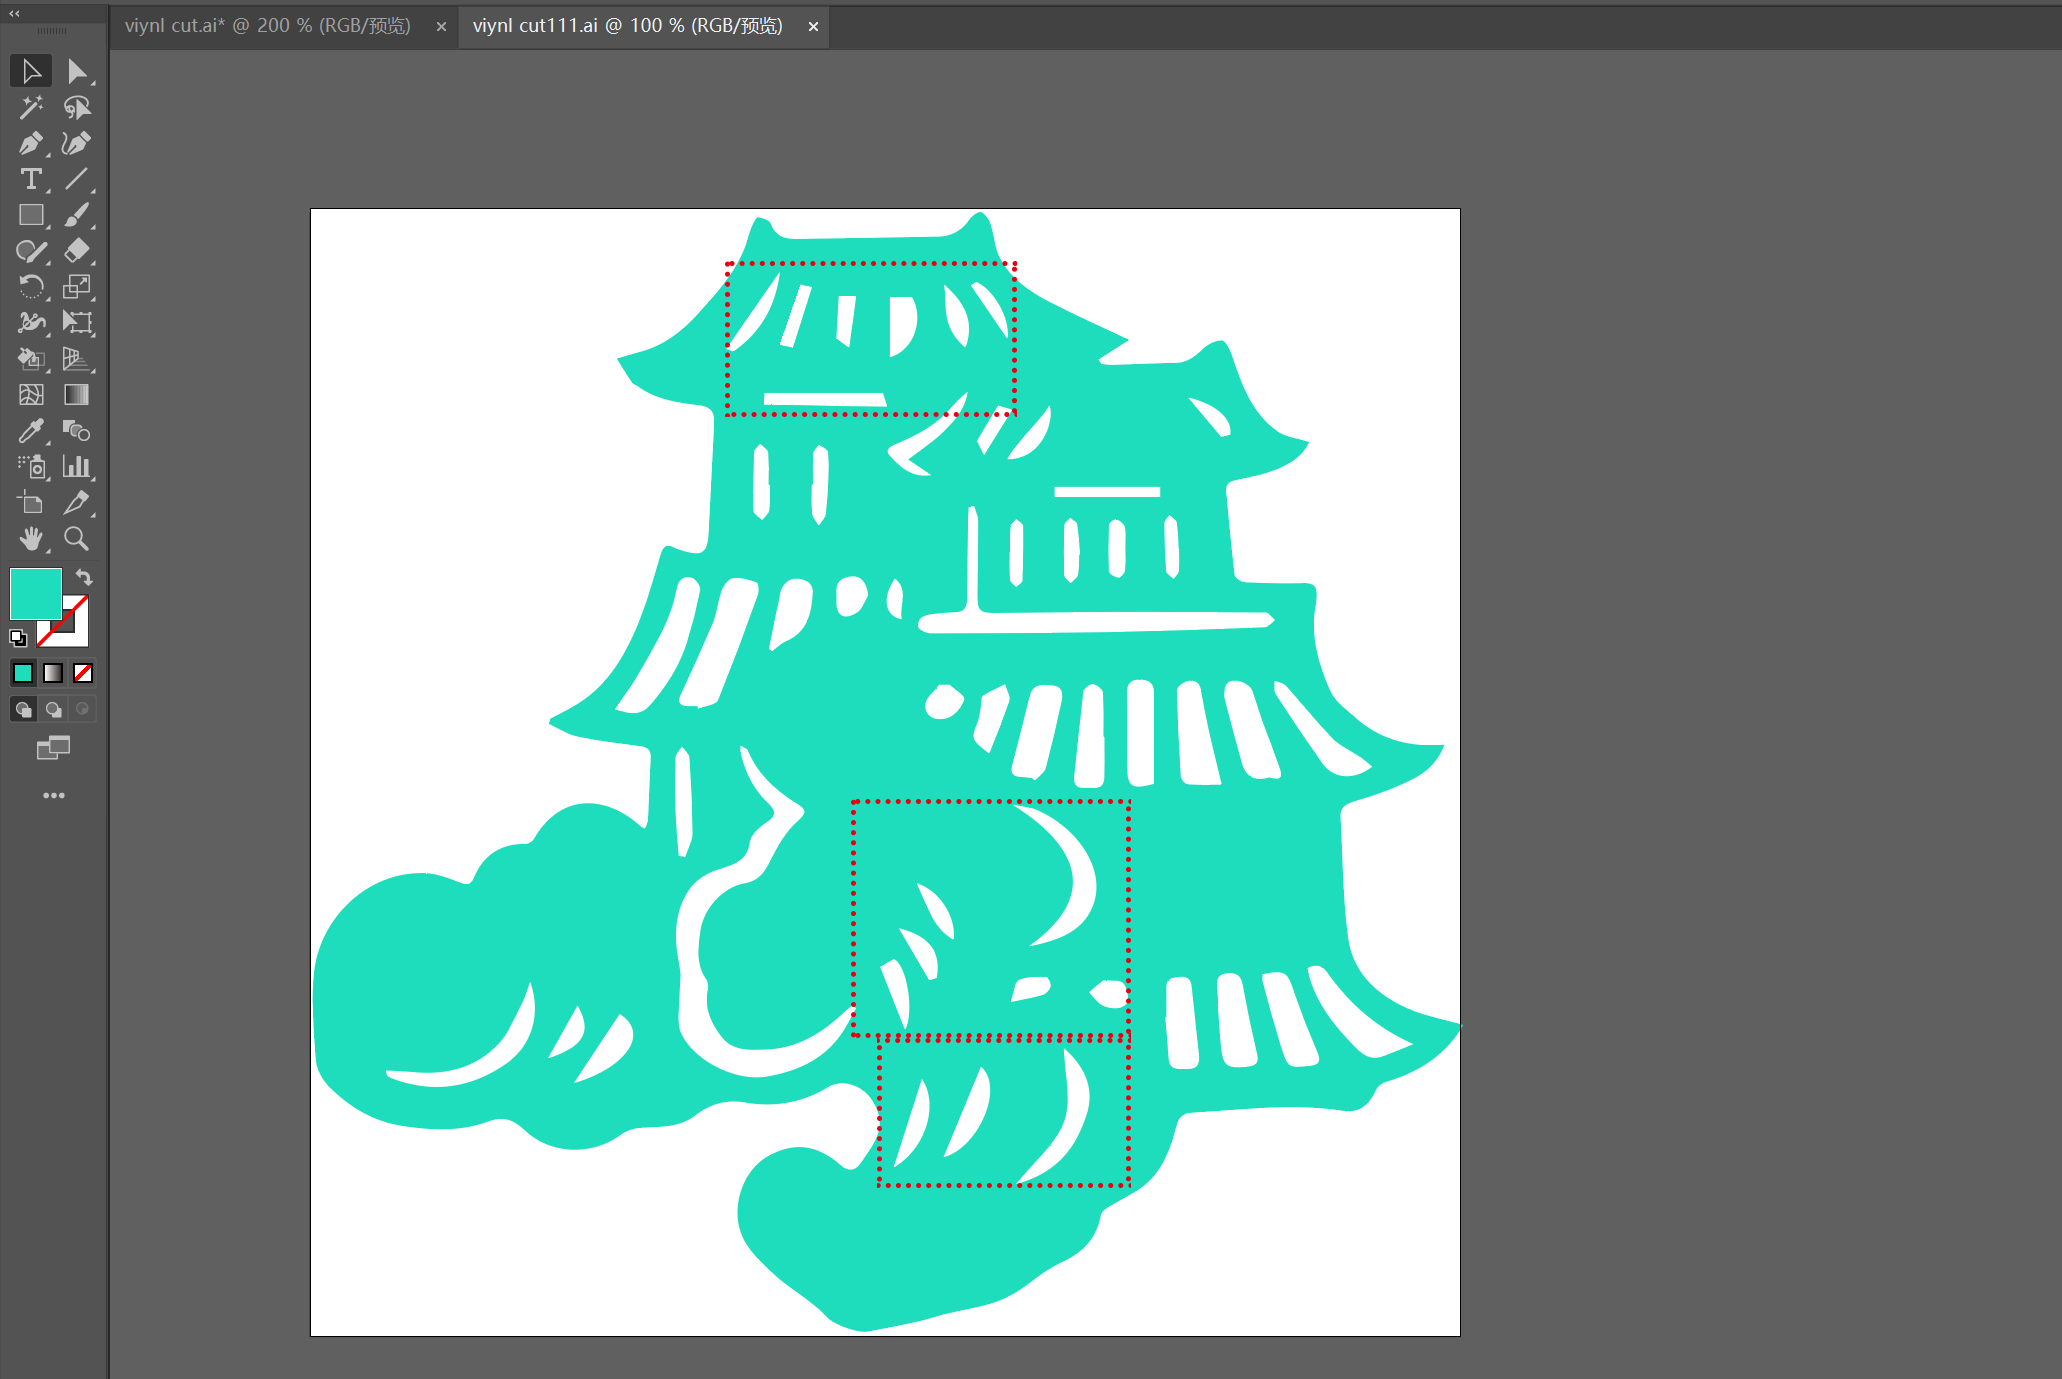
All we need for vinvl cutter is the path. Color doesn't matter.
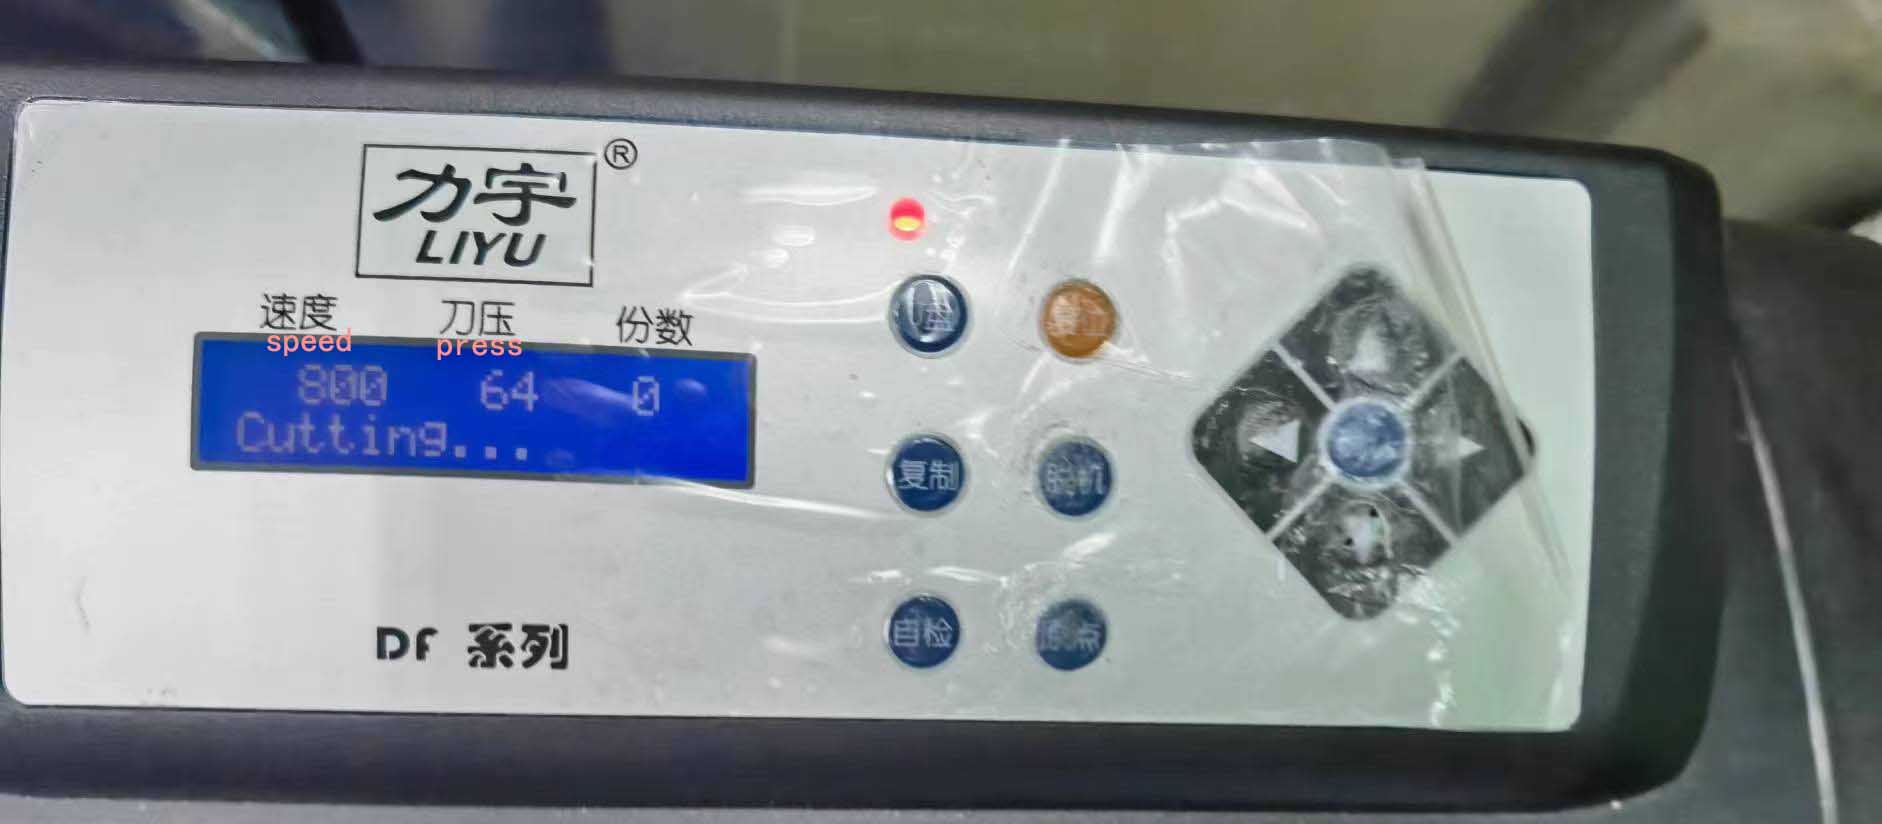
For the vinyl cutter, the main settings are press and speed. After testing, we found that press 64 and speed 800 is the best setting for the blue paper.
With the help of a piece of transfer paper, I applied the vinyl sticker to the surface of my ipad.