7. Computer controlled machining
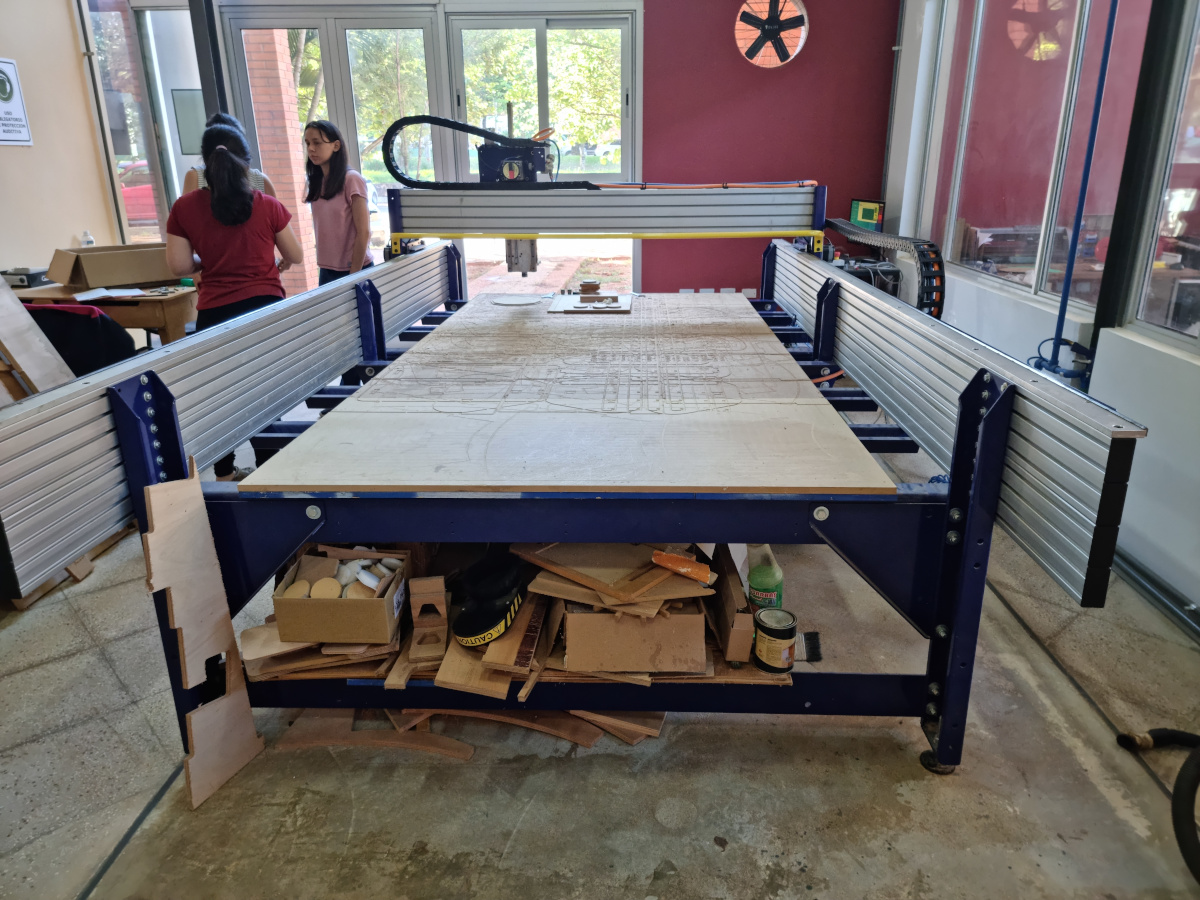
Shopbot...da machine.
7th week....learned to operate the "big machine", the shopbot.
This machine can make a final product from a 2d/3D digital model by means of cutting or carving material.
First we learned safety rules to operate it without any risk for ourselves or damage the machine, also learned the safety gear we must use.
Now we are ready to roll....or to carve and machining
In our group assignment we did a lot of cutting and engraving tests, so we might be prepared for the next step, make our own designs
The controls in the shopbot are really user friendly
After we learned to zeroing the machine axis, the feed rate, the mills and other stuff, we started to cut some MDF, Plywood and Nylon.
Ok, let´s begin with tortuous journey.
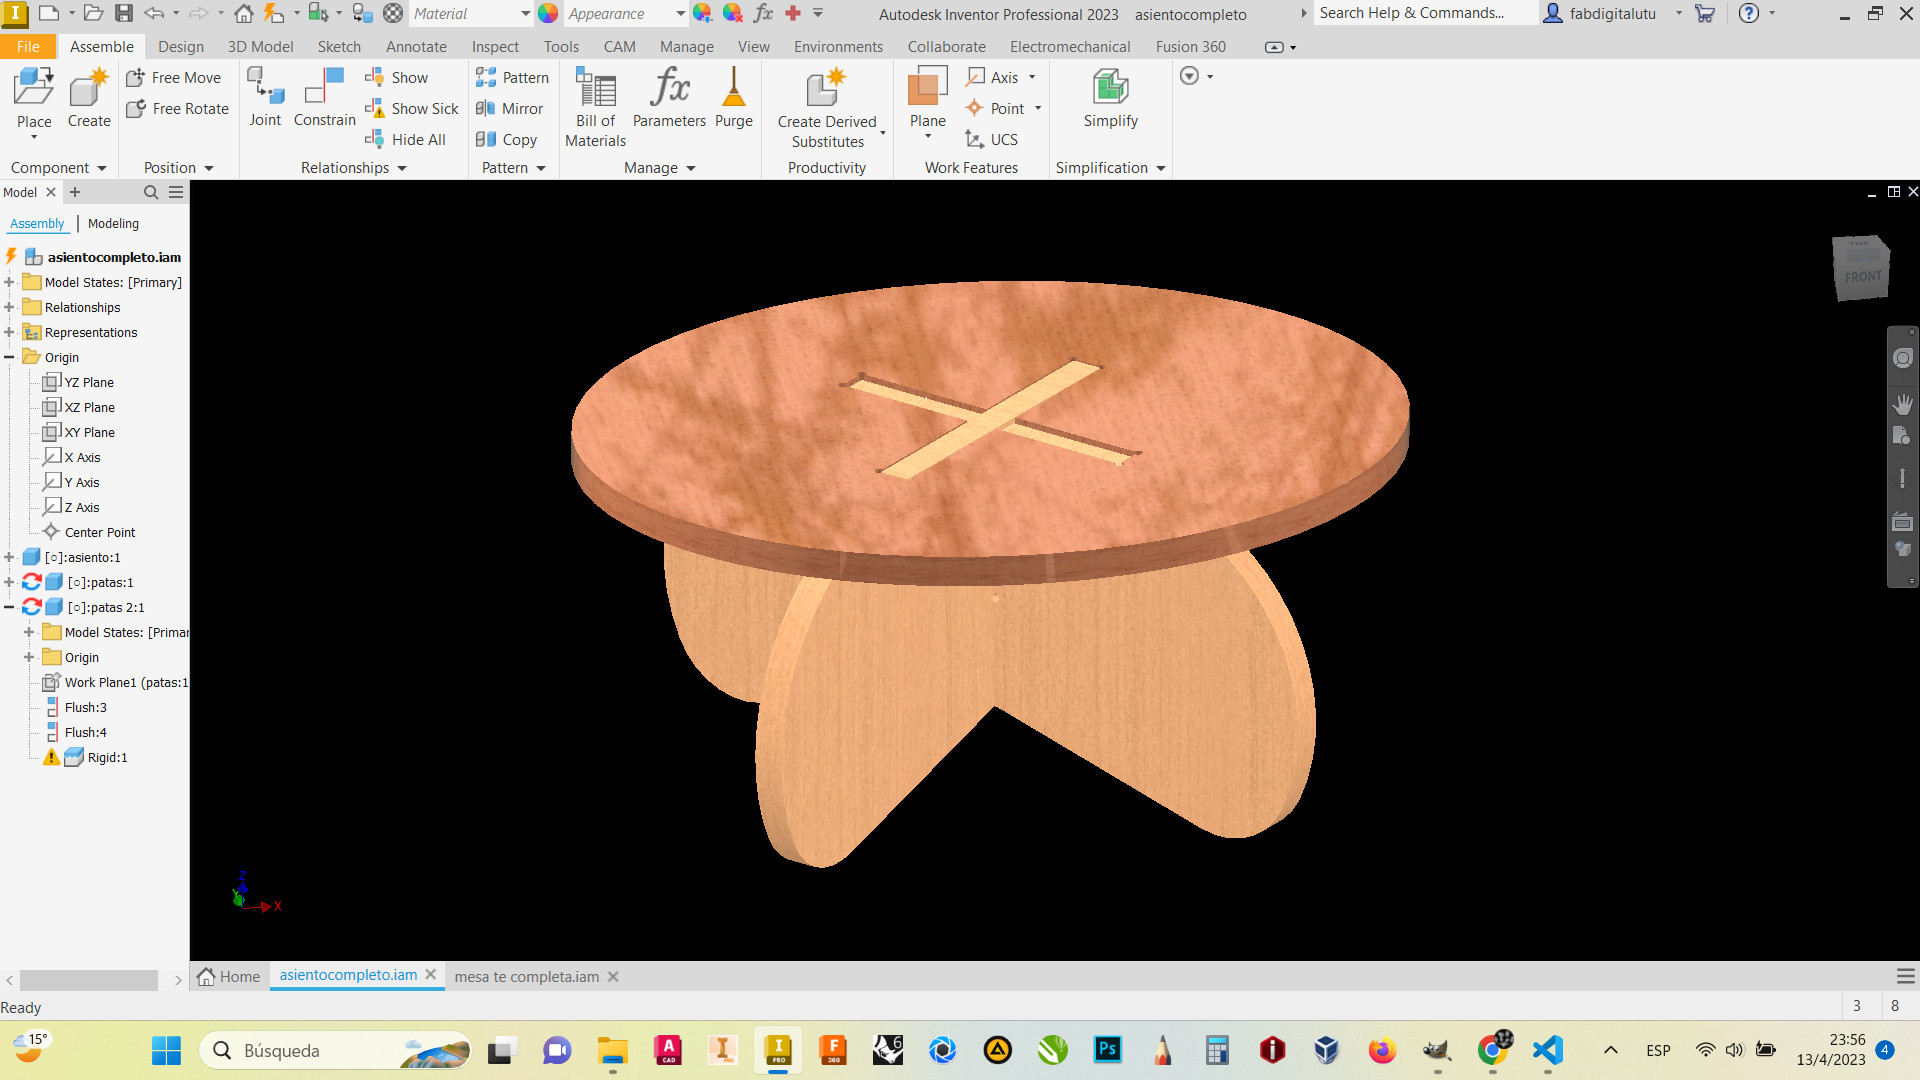
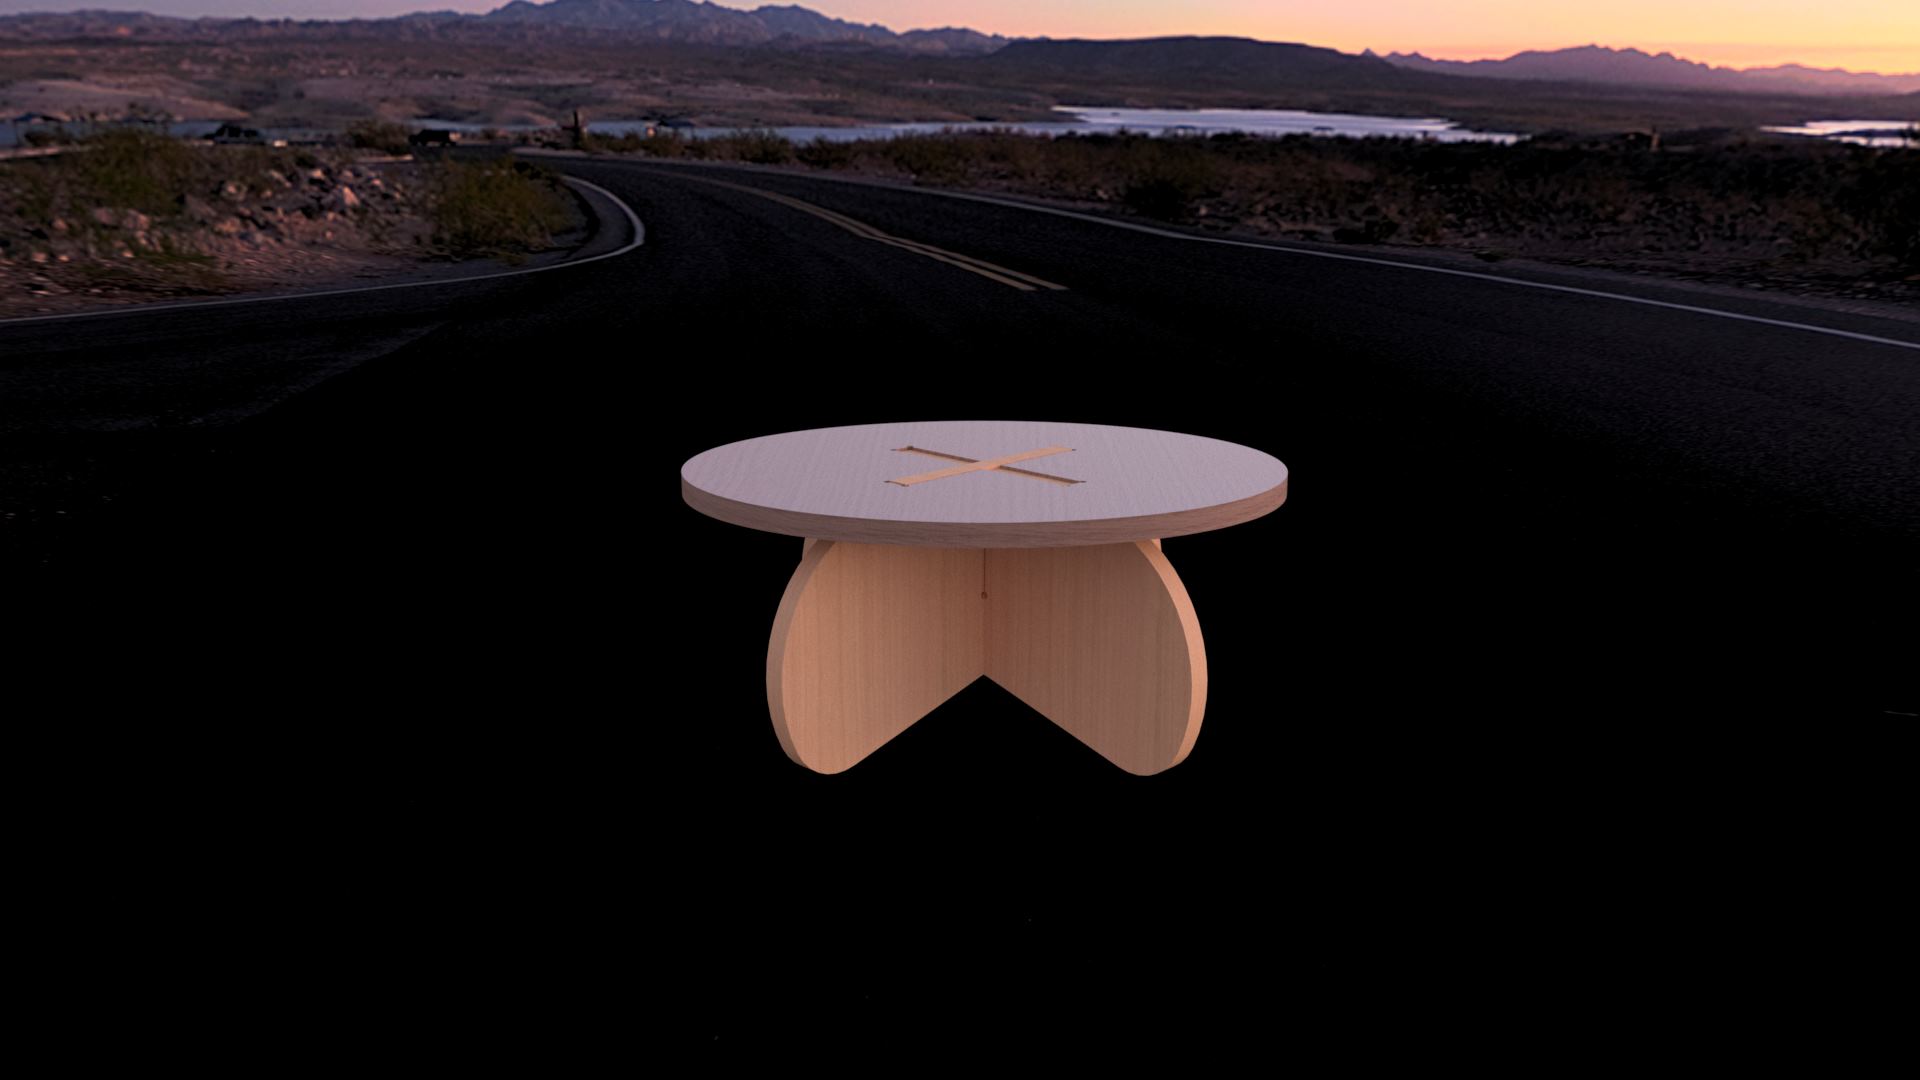
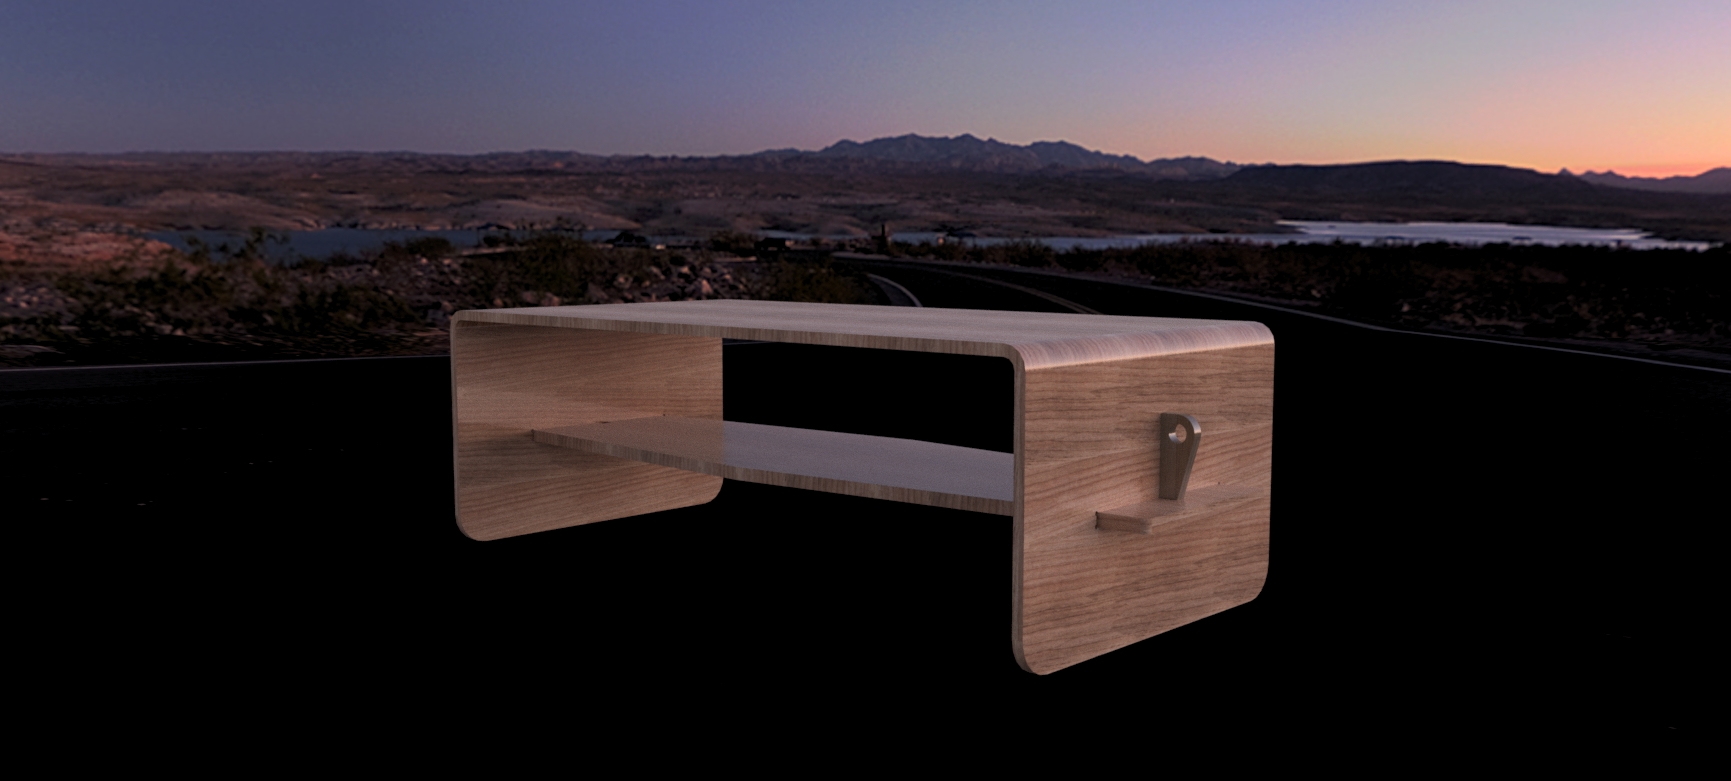
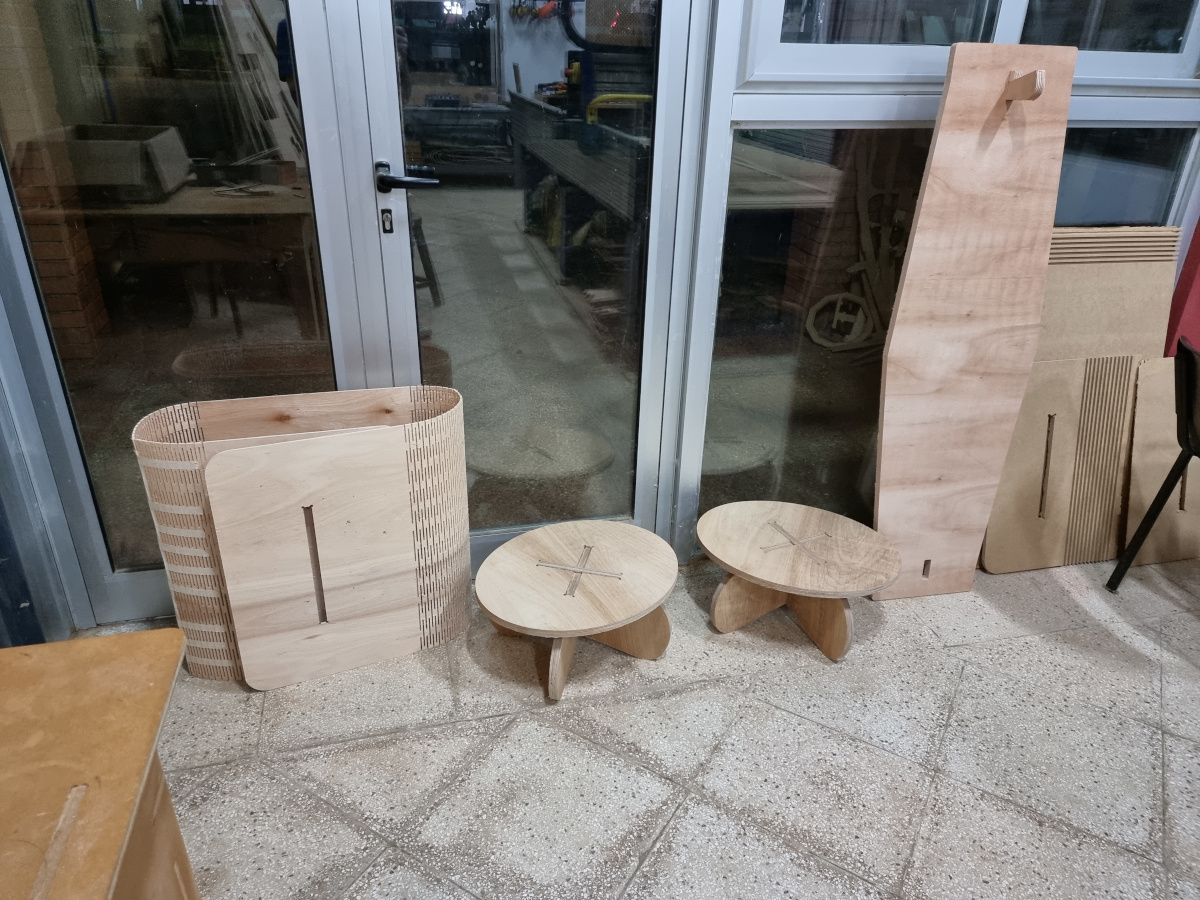
I decided to make a tea ceremony table and stools...why? Because i love it.
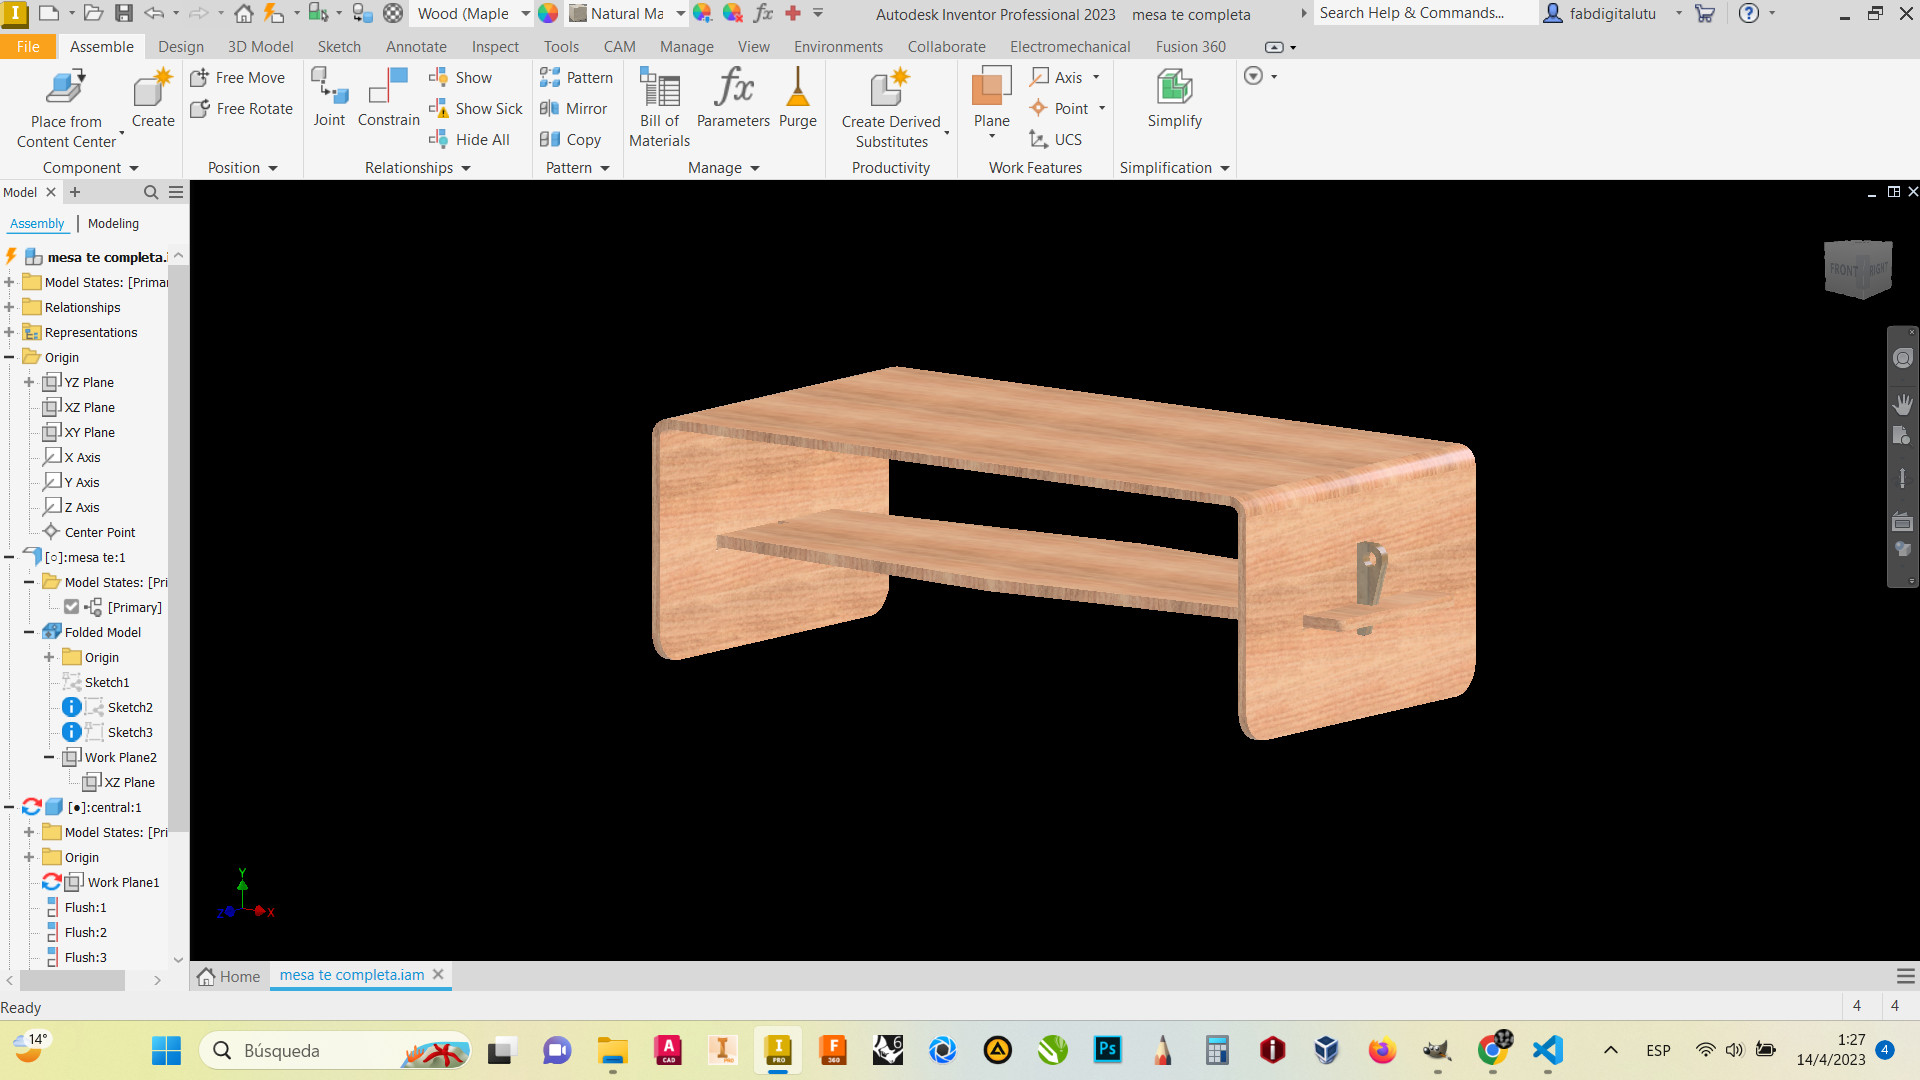
Made them in Inventor, because i wanted it to be parametric.
Well, i made the 3d models, got the DXFs....and used Vcarve to machined the parts, also a user friendly software.
The setup for this kind of job is divided in parts, because you need to started from the tiniest job to the greatest.
First you need to do the pockets, basically a substraction of material till you generate almost a box.
You have to measure precislly the height of your stock, to setup the depth of your cuts.
If you want a profile or a drill, maybe you will cut through the material, but if you want a pocket, you should need some material in the bottom.
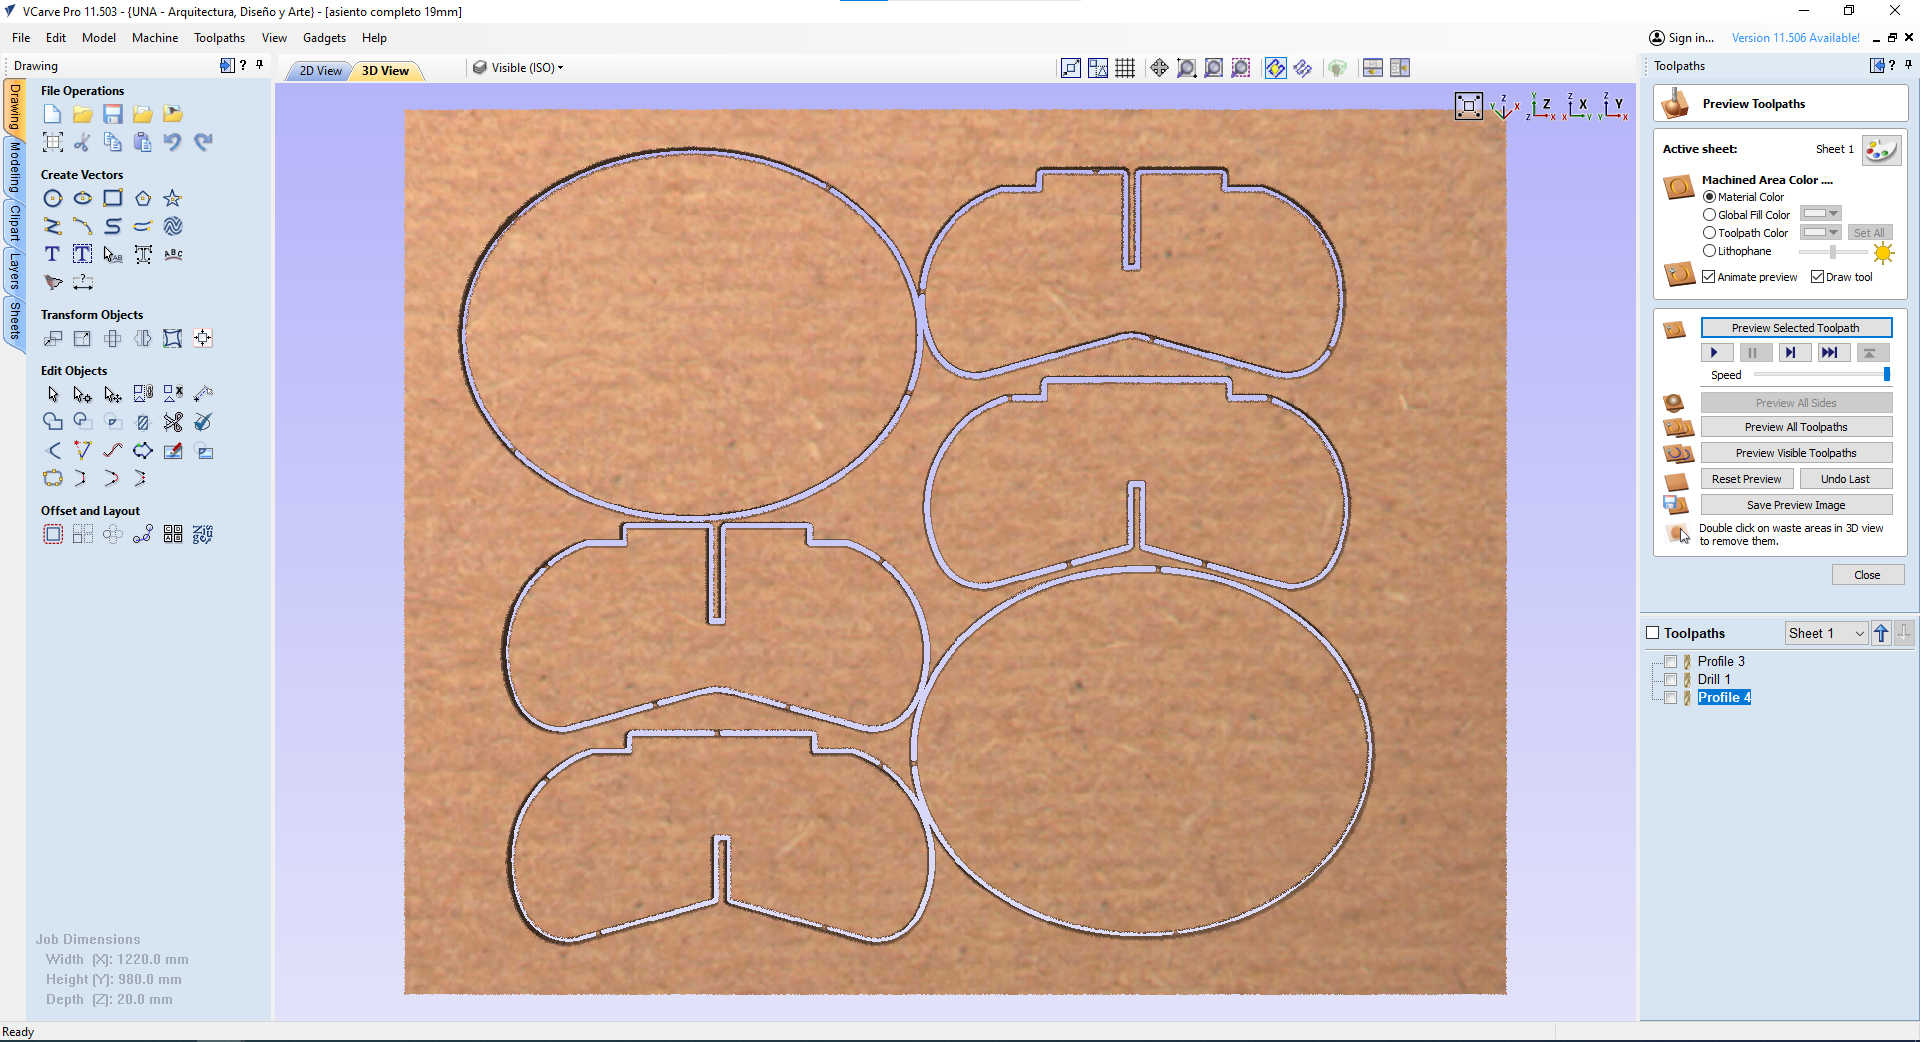
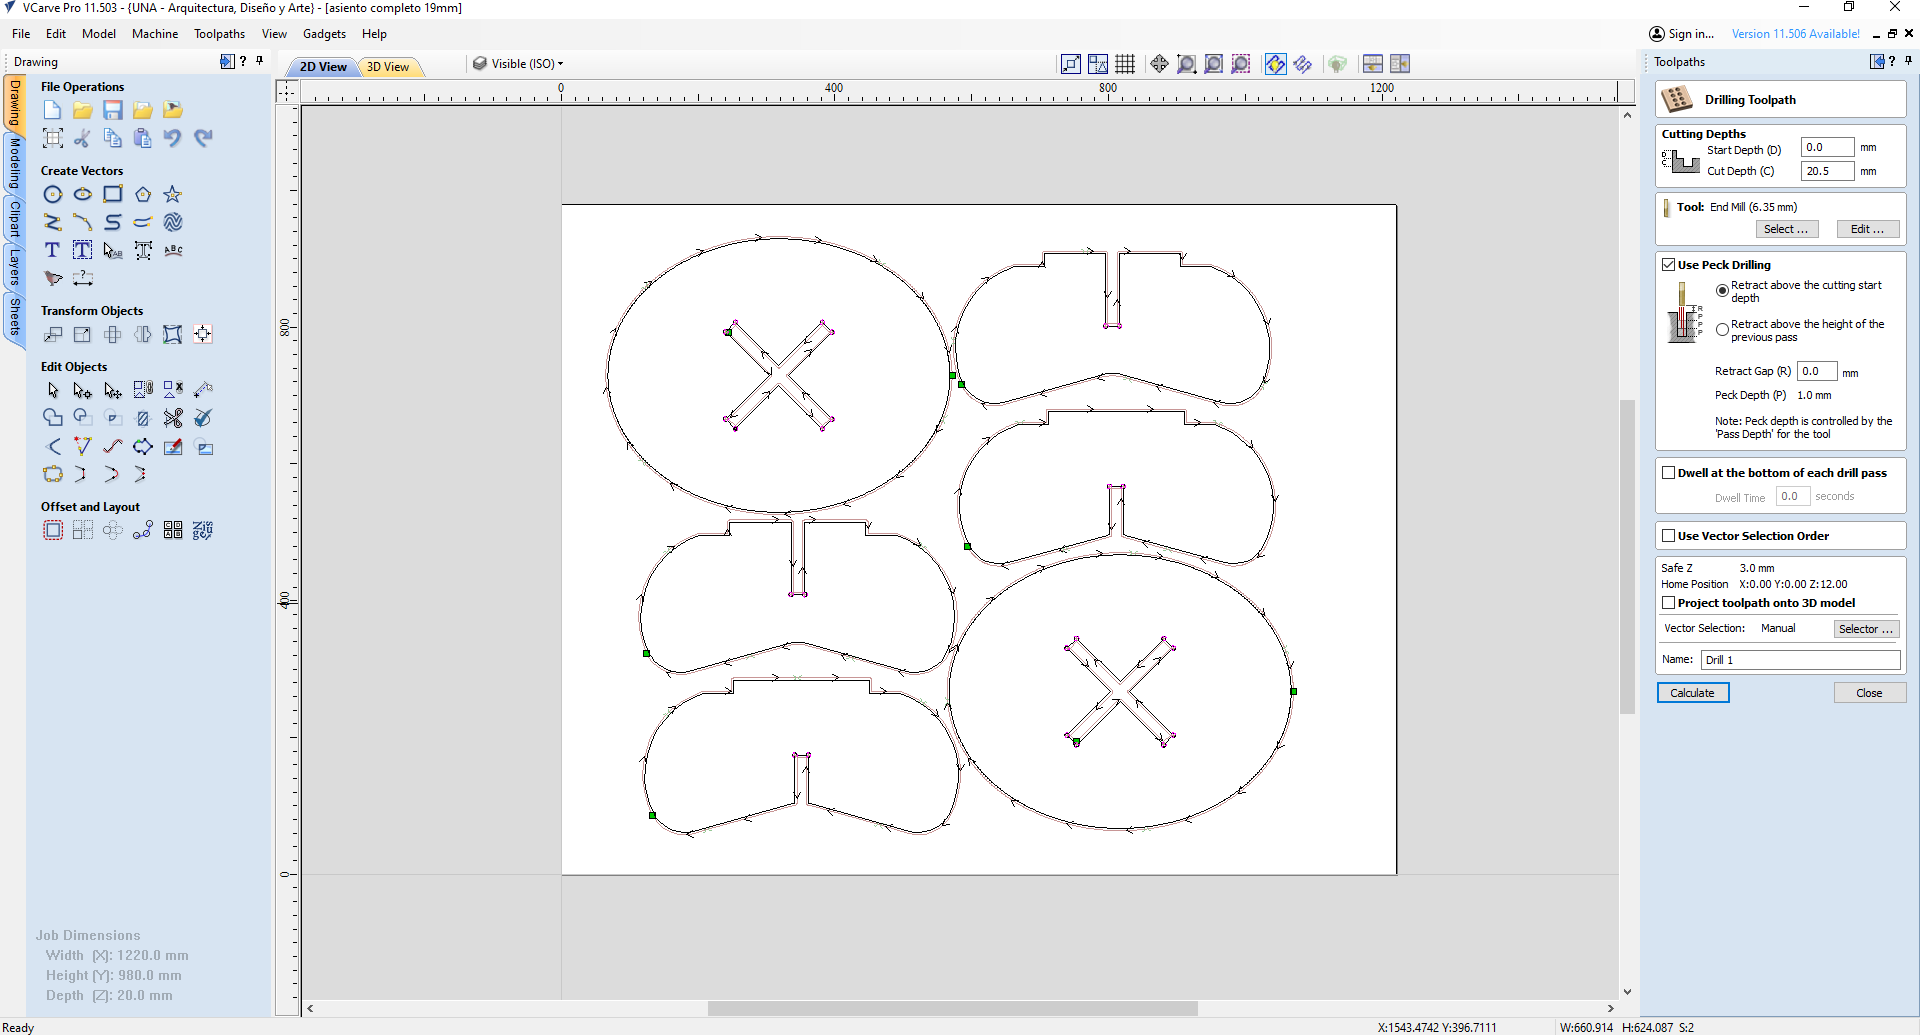
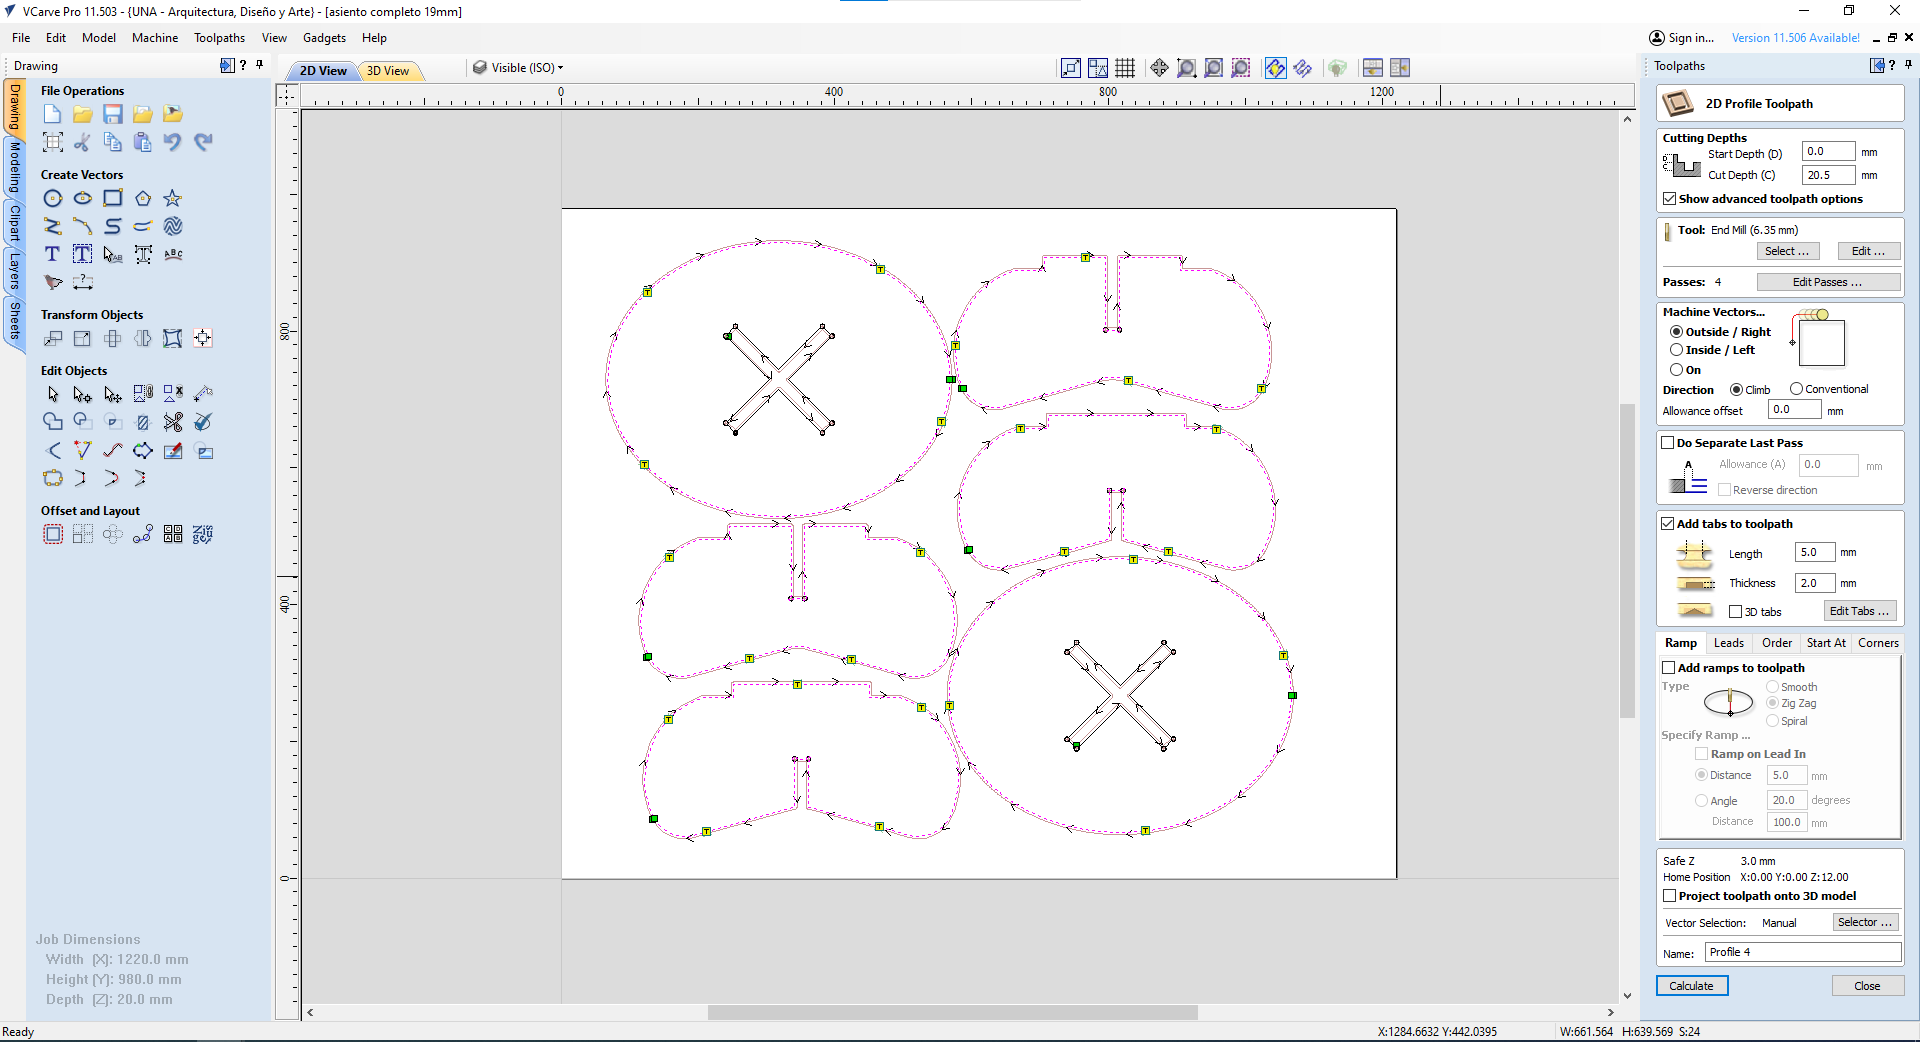
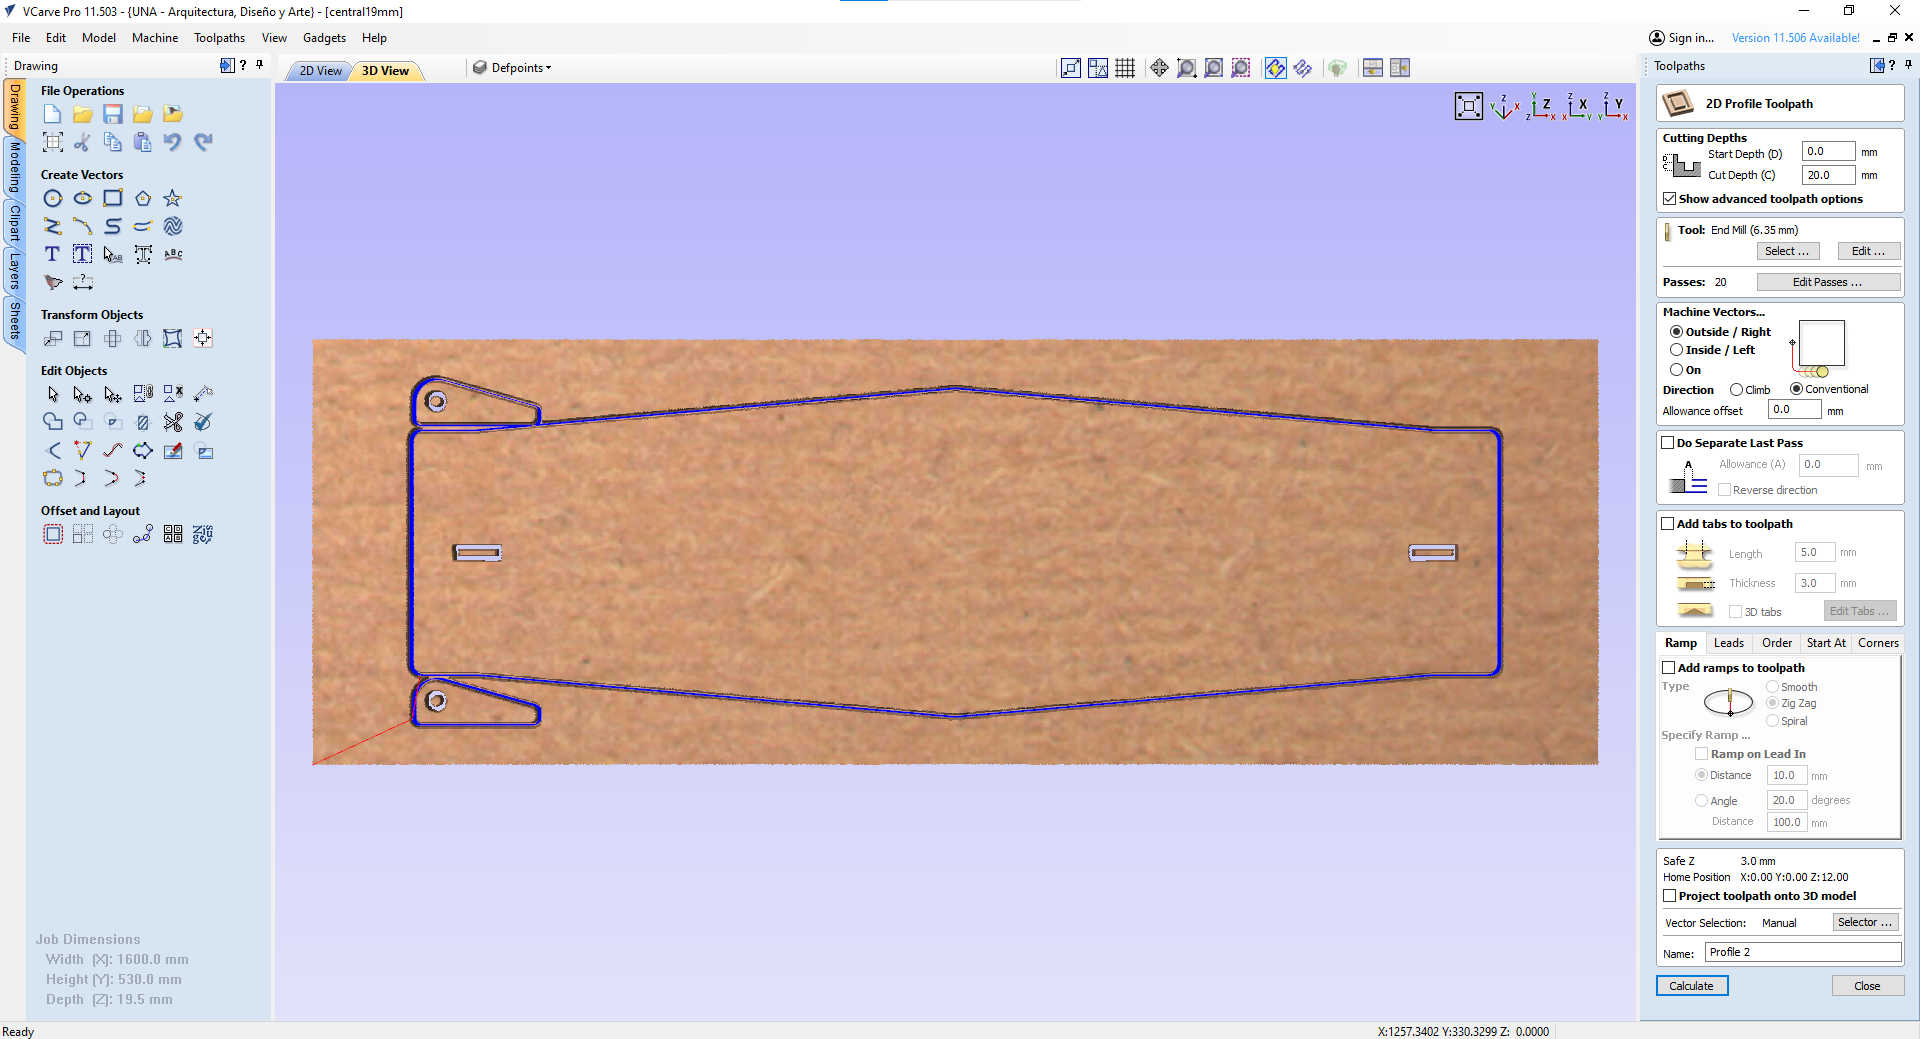
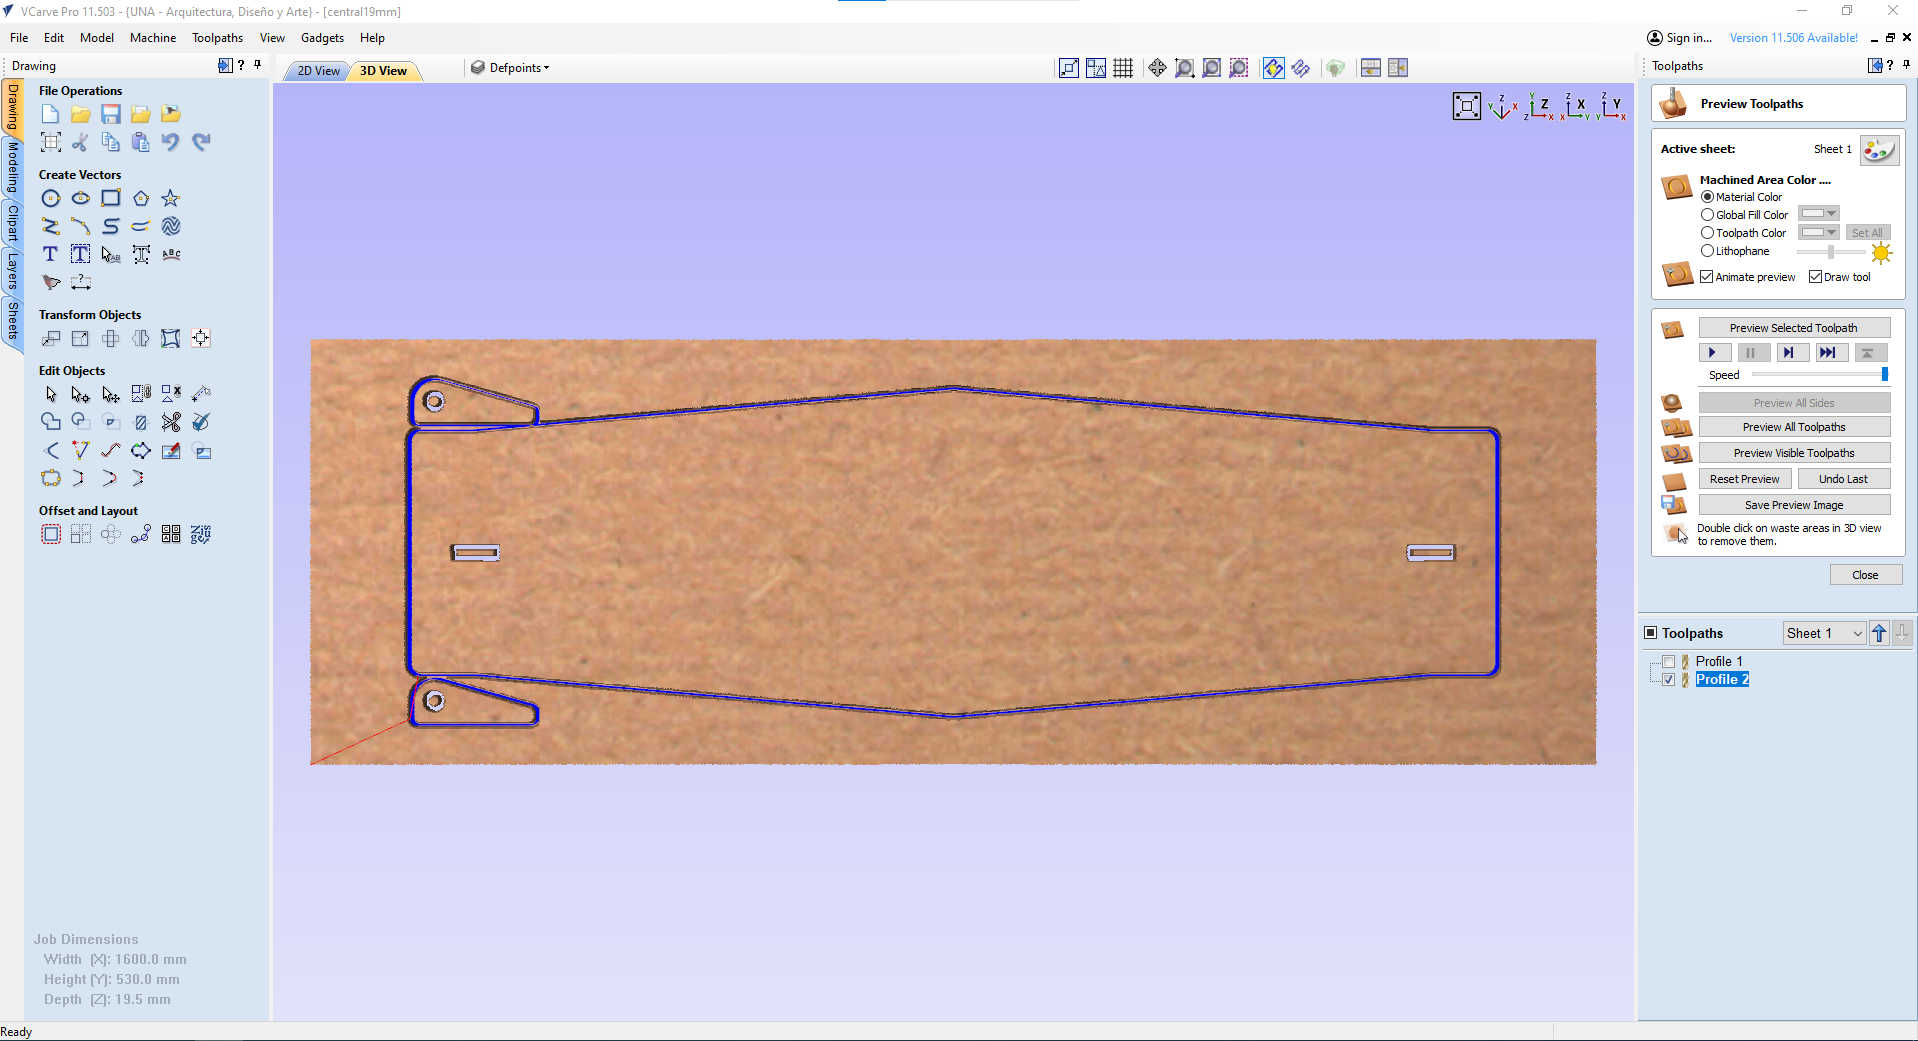
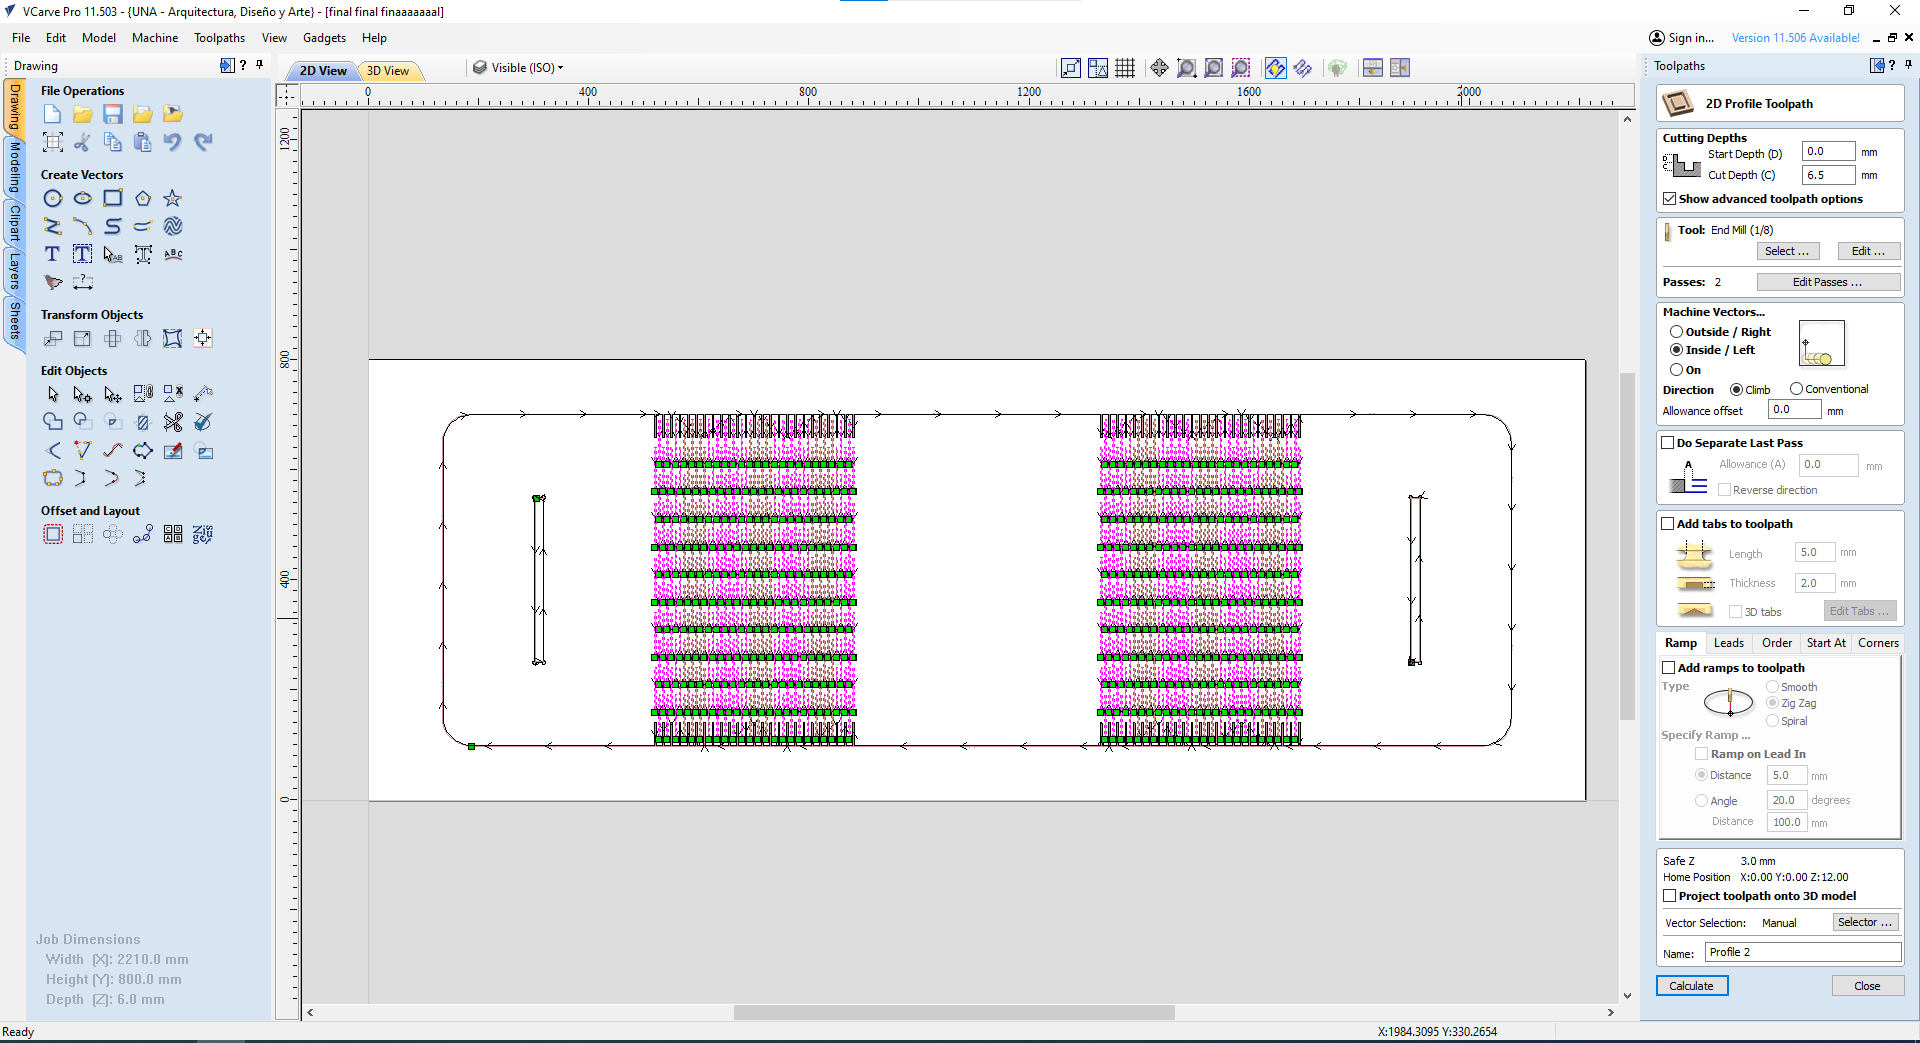
Vcarve
Some simulation of the profiles, internals and externals
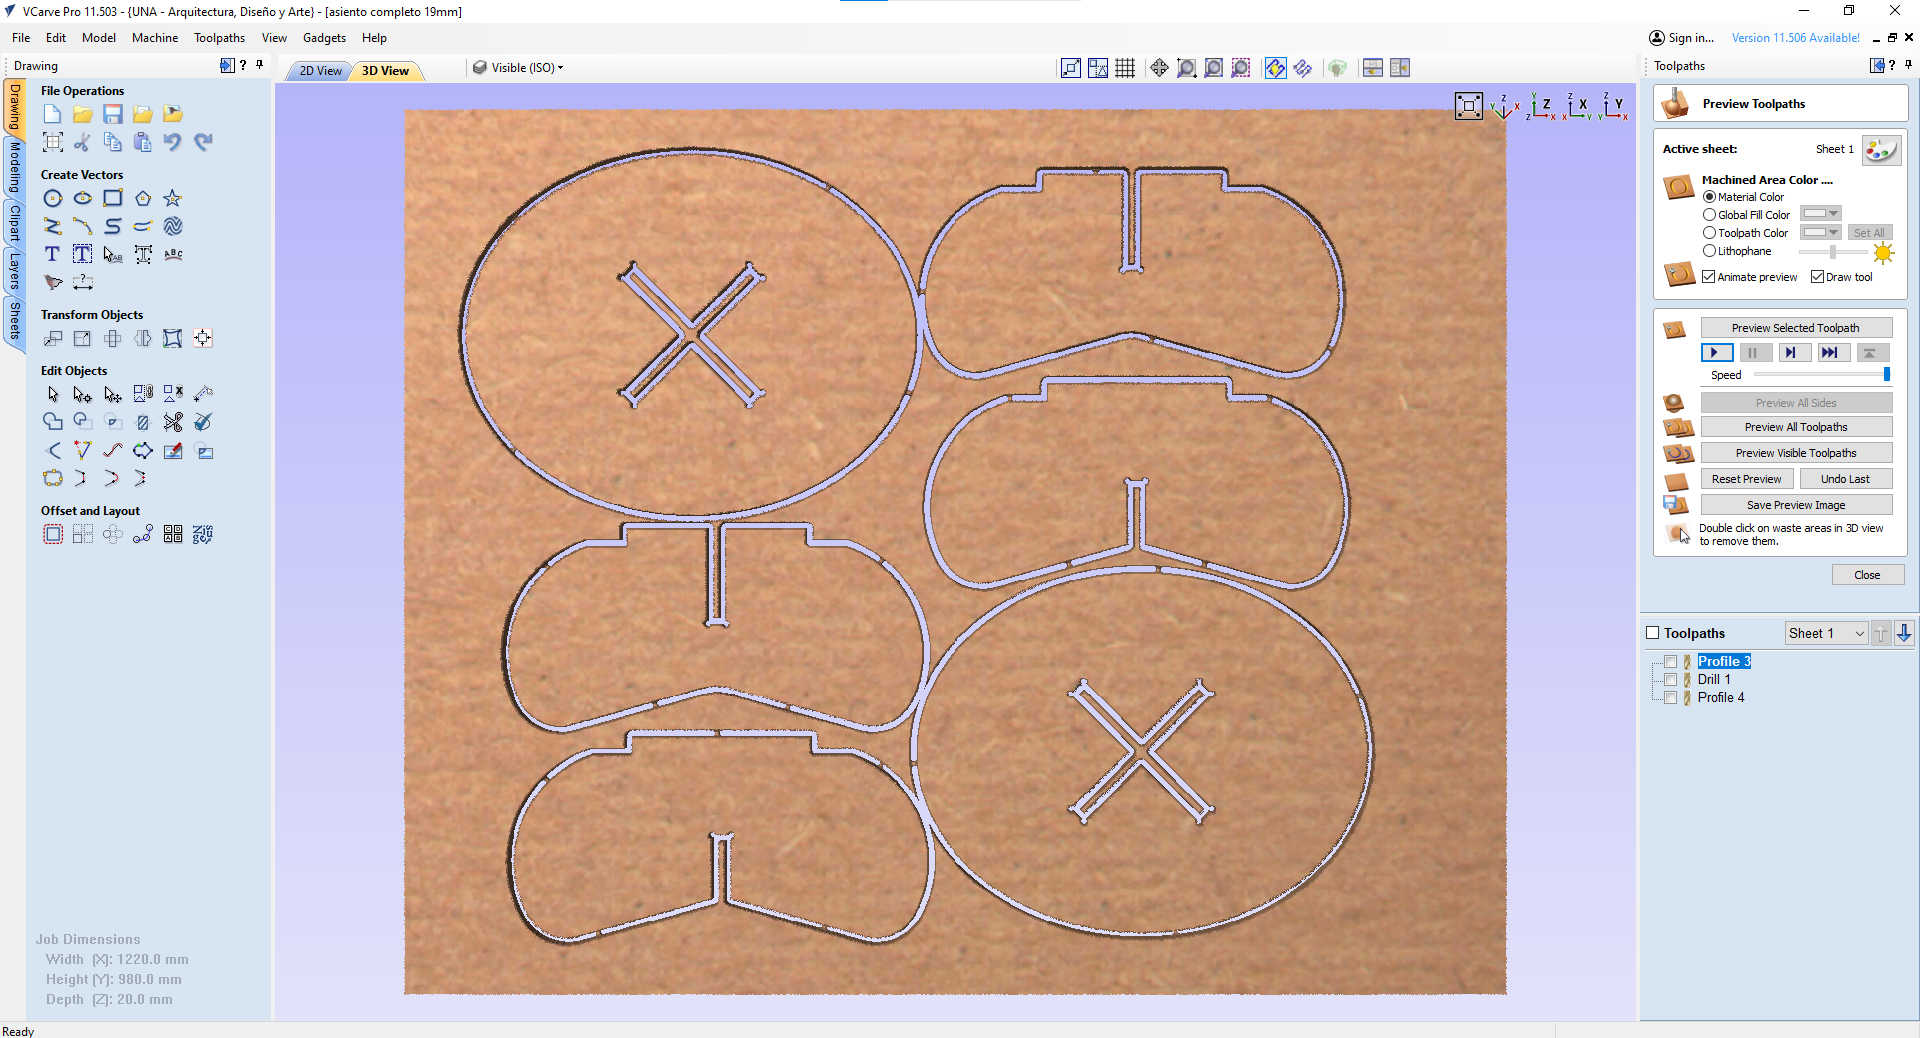
Profiles, internals, inside cut, 20.5mm depth, 10000rpm, 4 passes, with no tabs to hold the inner pieces.
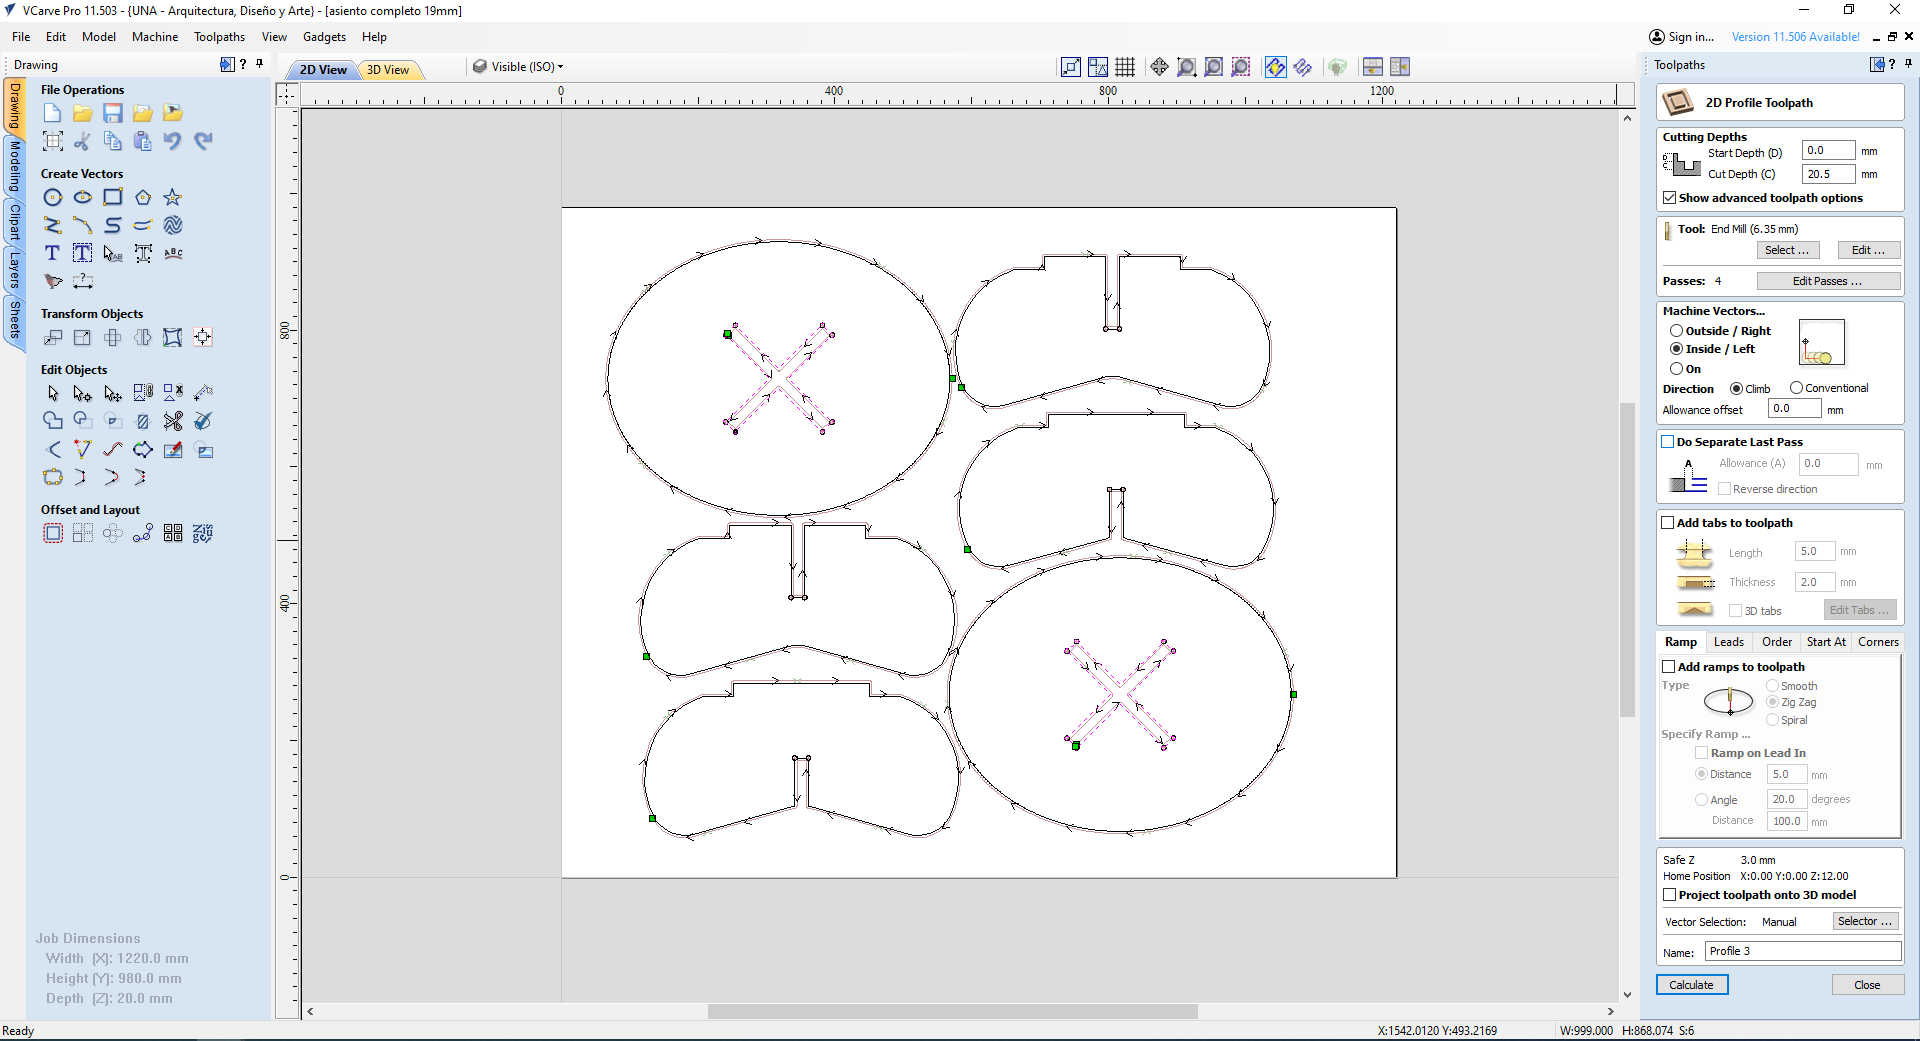
Drills to make dogbones, because i was using a 6.35mm mill and the diameter of the dogbones were the same..if they were bigger, i could have use the tool for dogbones and make it with same profile cutting.
This profile is an outside cut, same depth of 20.5mm, 10000rpm, 4 passes and this time i created tabs to hold the pieces, because i didn't want them to move away.
First, the stools.

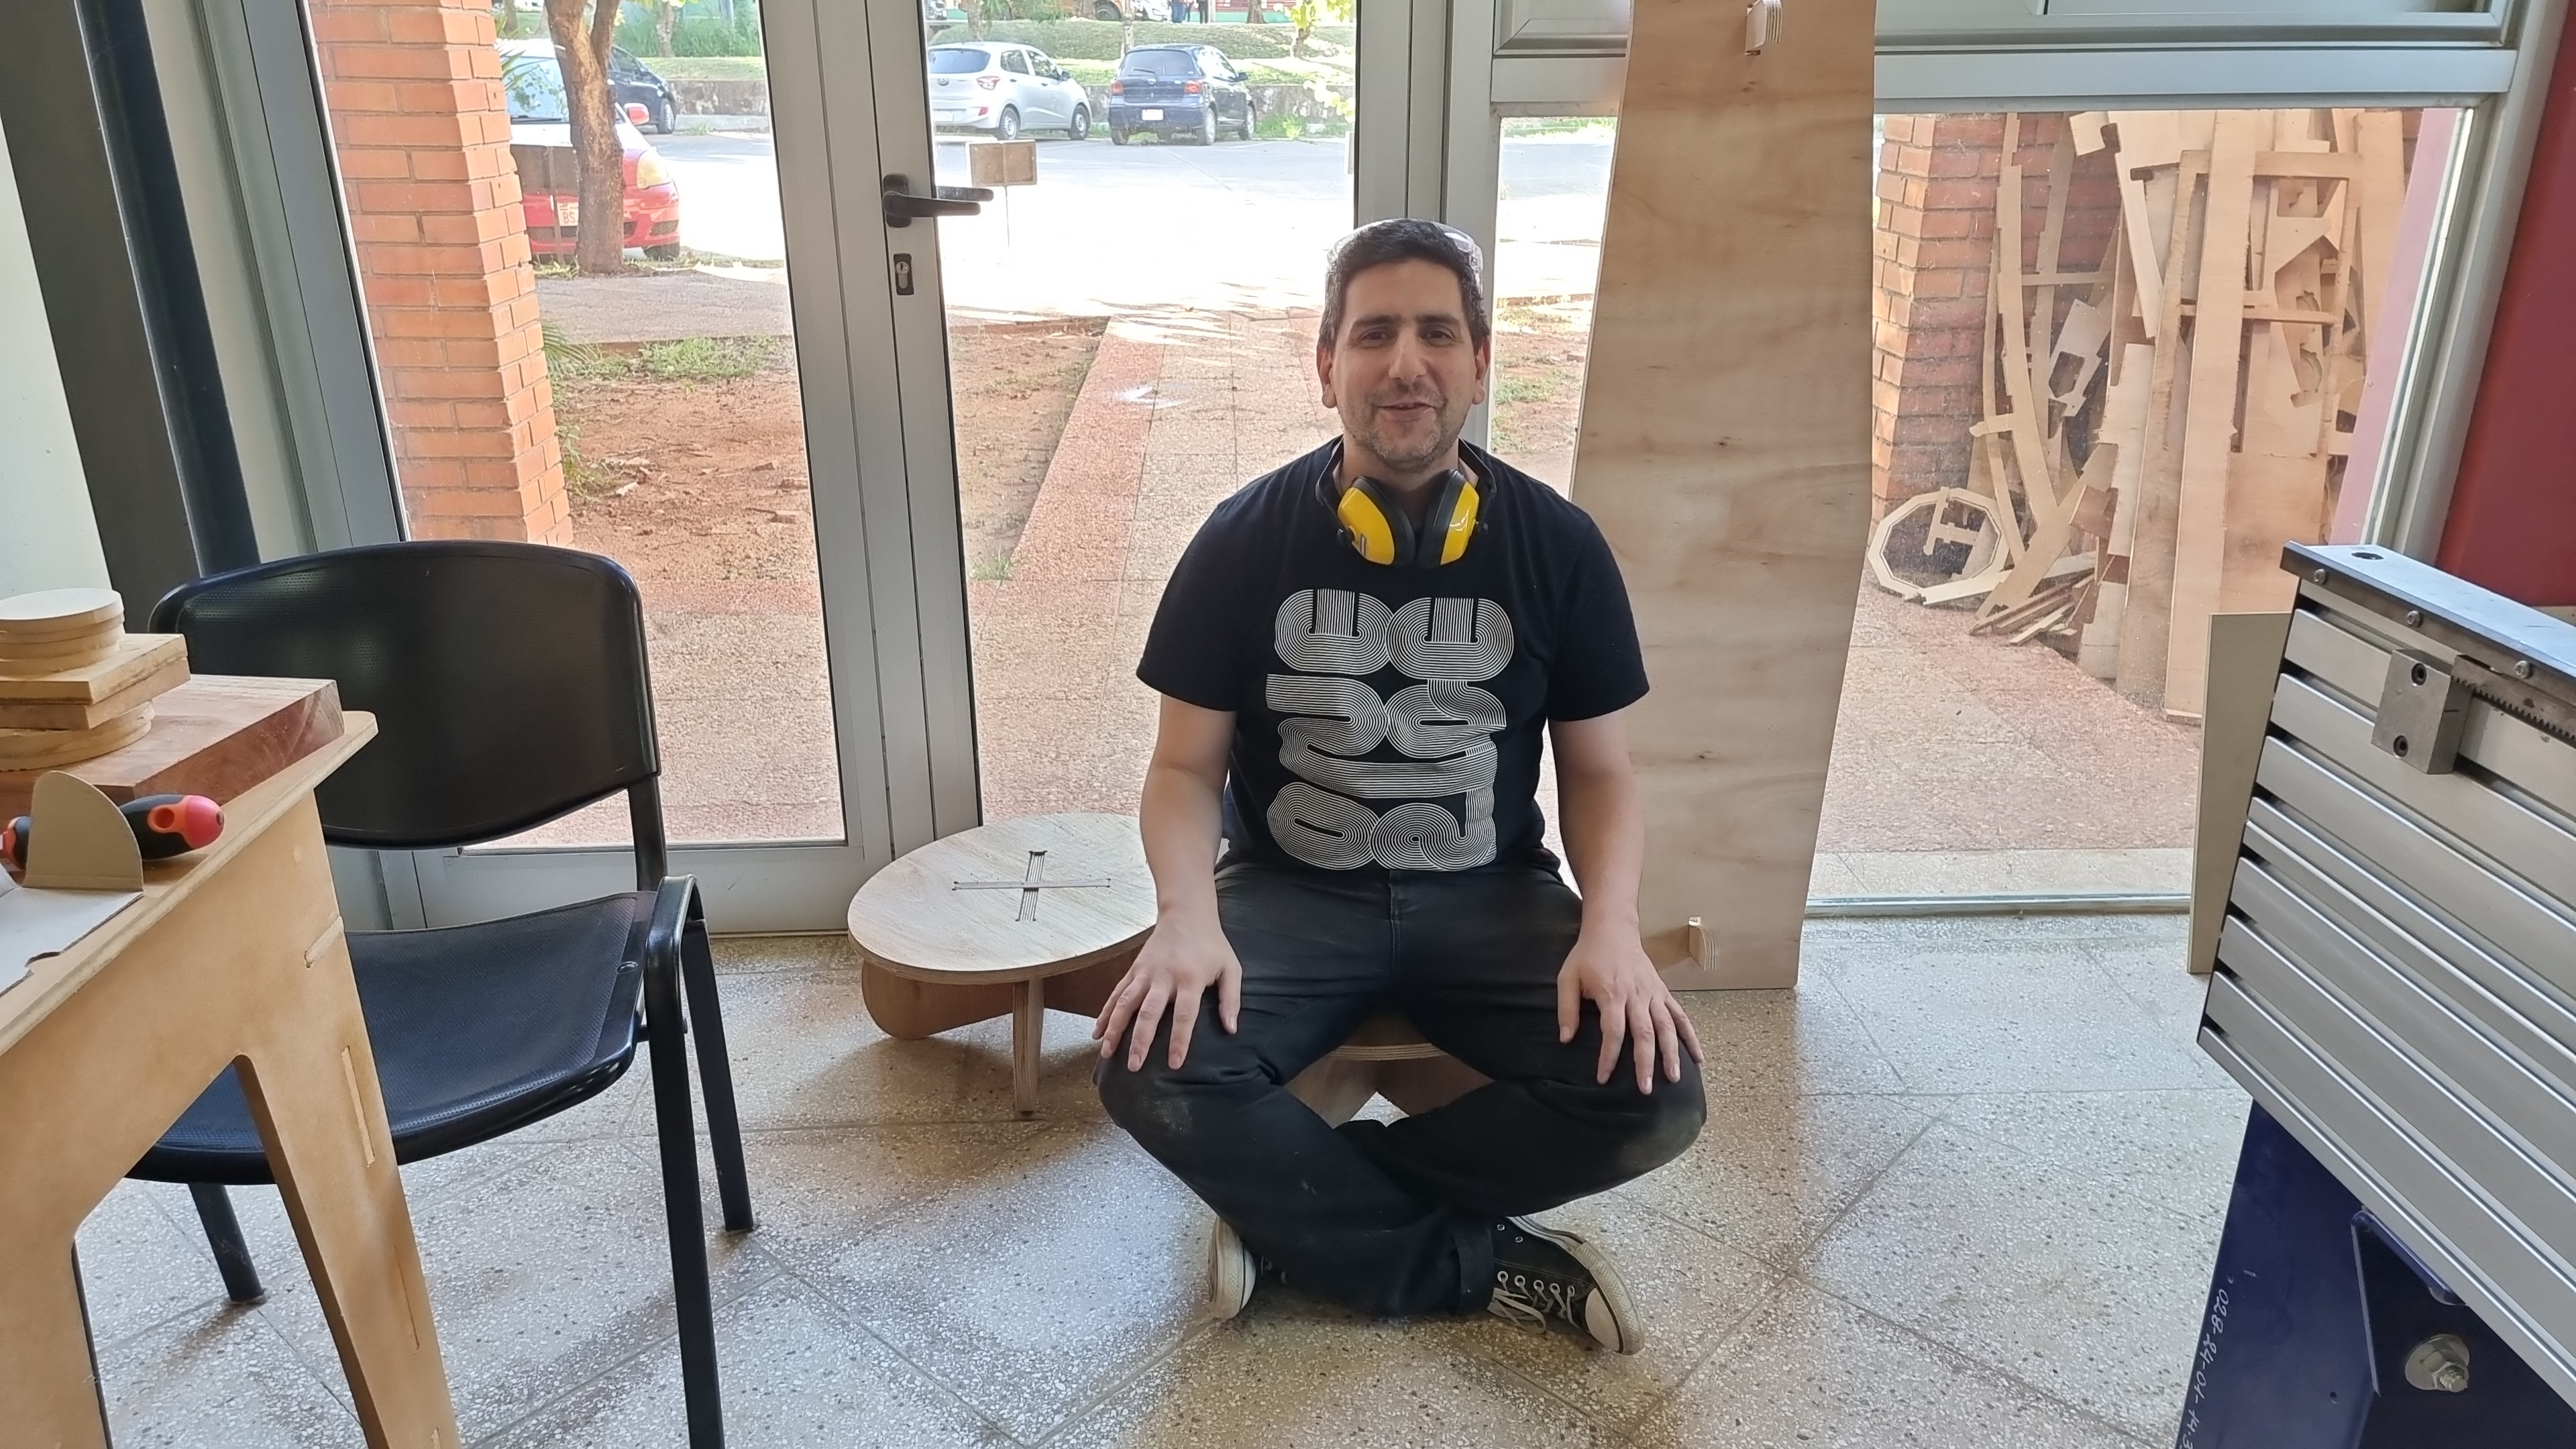
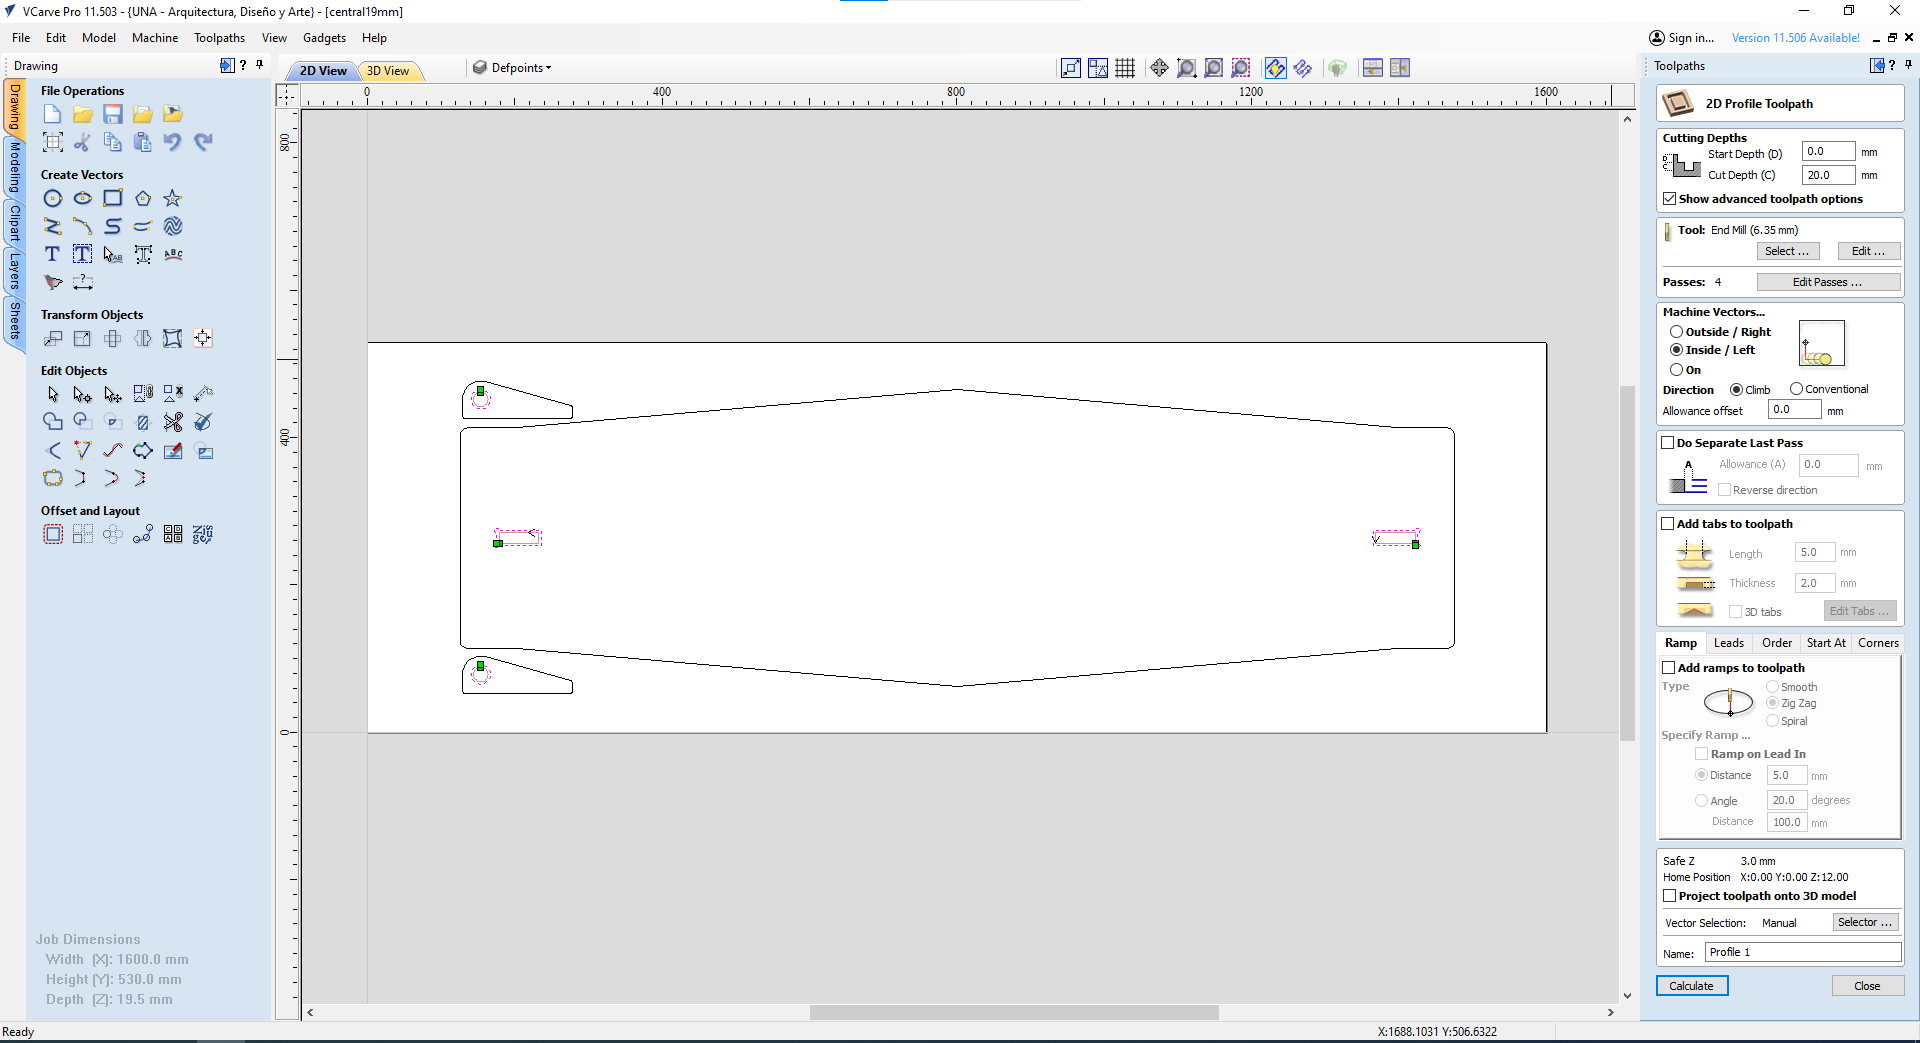
The table
Then, i made the cross member to hold the table structure with plywood 19mm thick, same material of the stools...but because i hadn't got enough plywood, i tried MDF 12mm....and the problems started.
The crossmember didn't have problems, same procedure to the stools, first inner profiles and then the outsides.
The test went wrong, some got close enough....but results were awful...and my instructors told me:"give it a chance, try again, do more test"
So....i did more test....found some remains of 18mm plywood....and i did it.
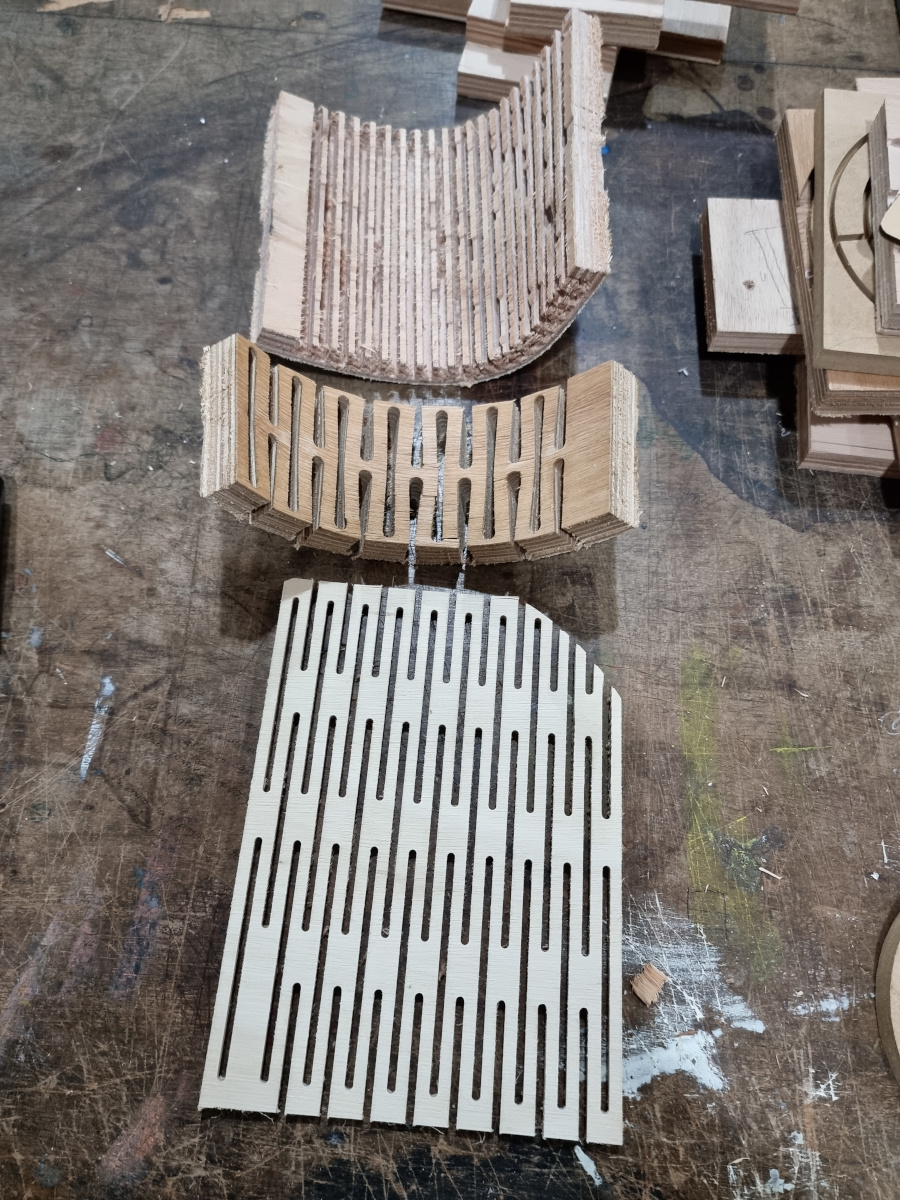
Use some patterns and cut them with the 1/4 mill, twice the diameter used for the separation of the passes.
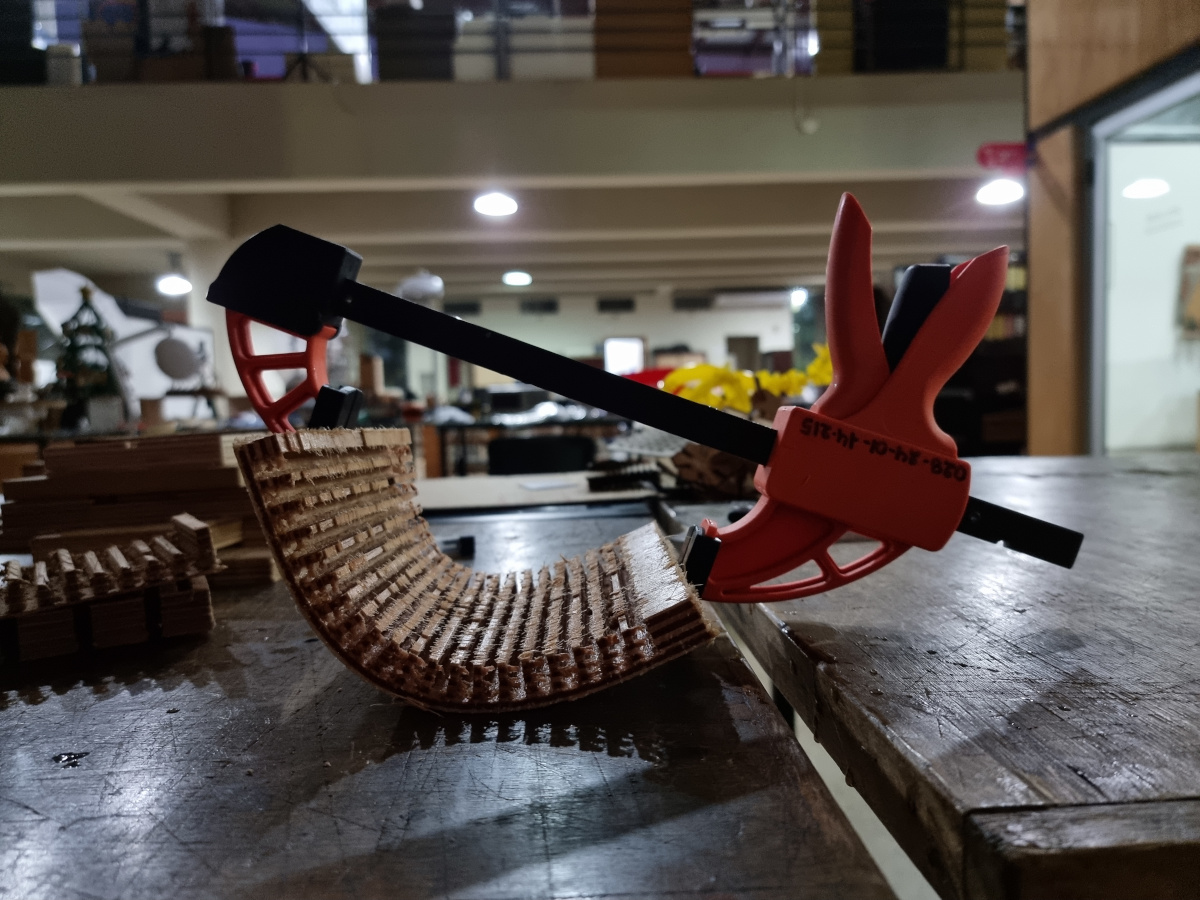
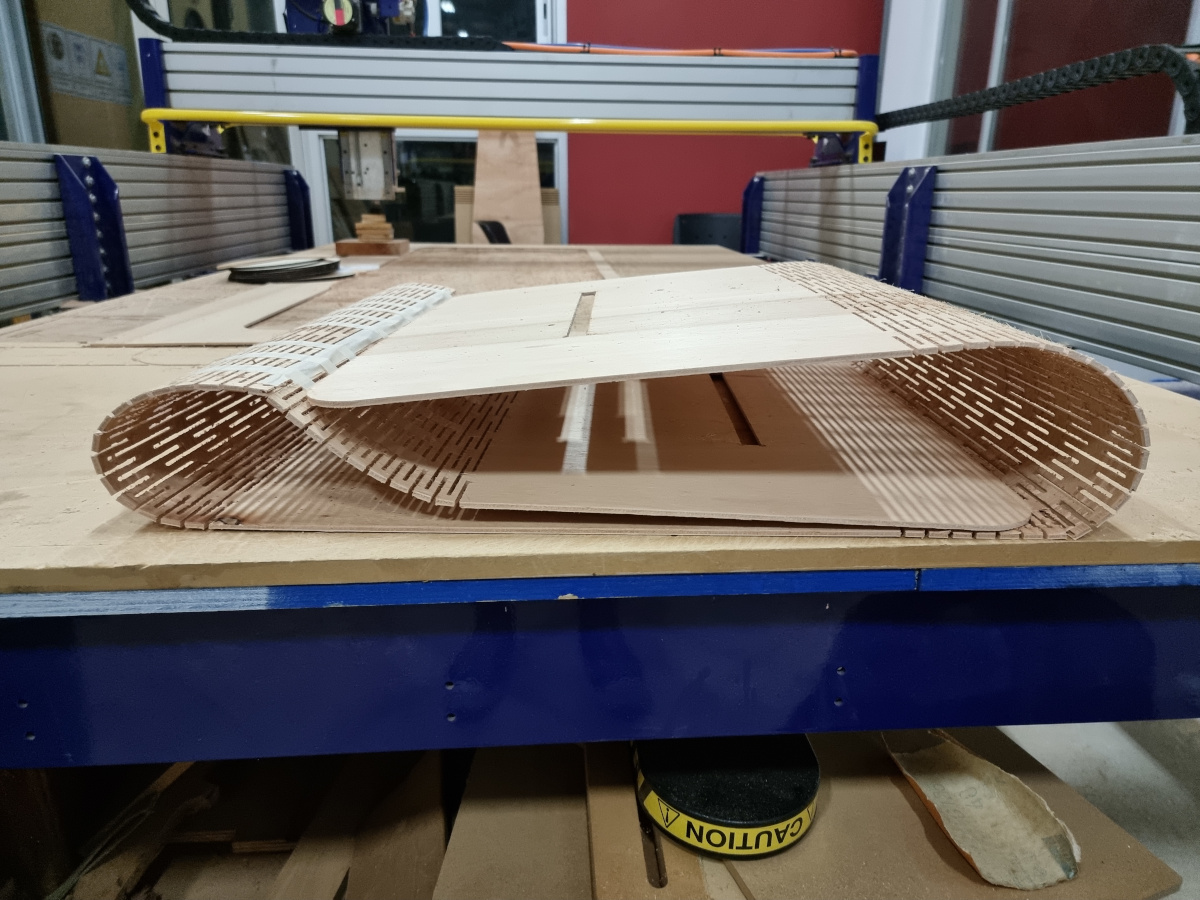
Later, the ancient technic of steam curving..without steam, only water and pressure.
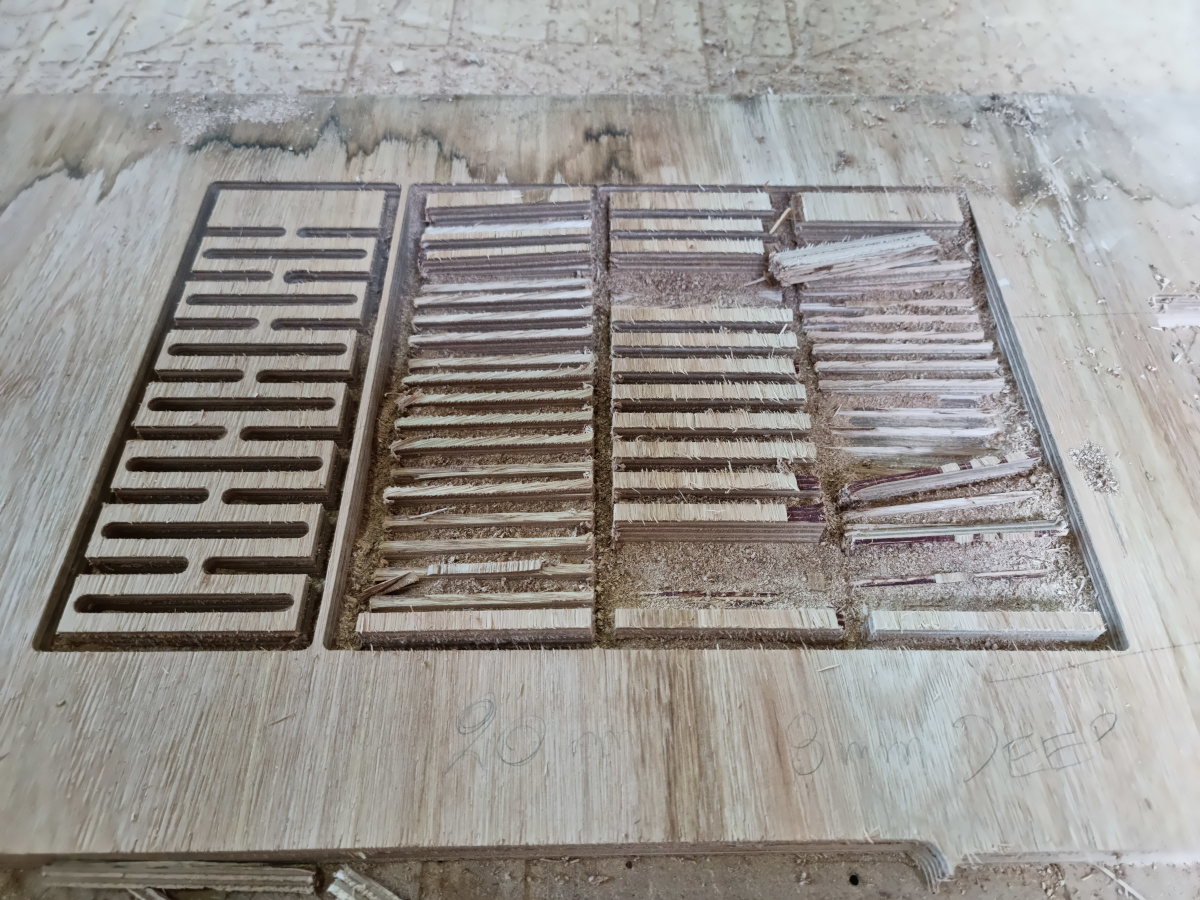
 Multi test files.
Next day, i found 6mm plywood, unused, also tried it....and eureka!! good results, finally. I used same formula, twice the diameter of the mill for the separation, but this time i used a 1/8th mill.
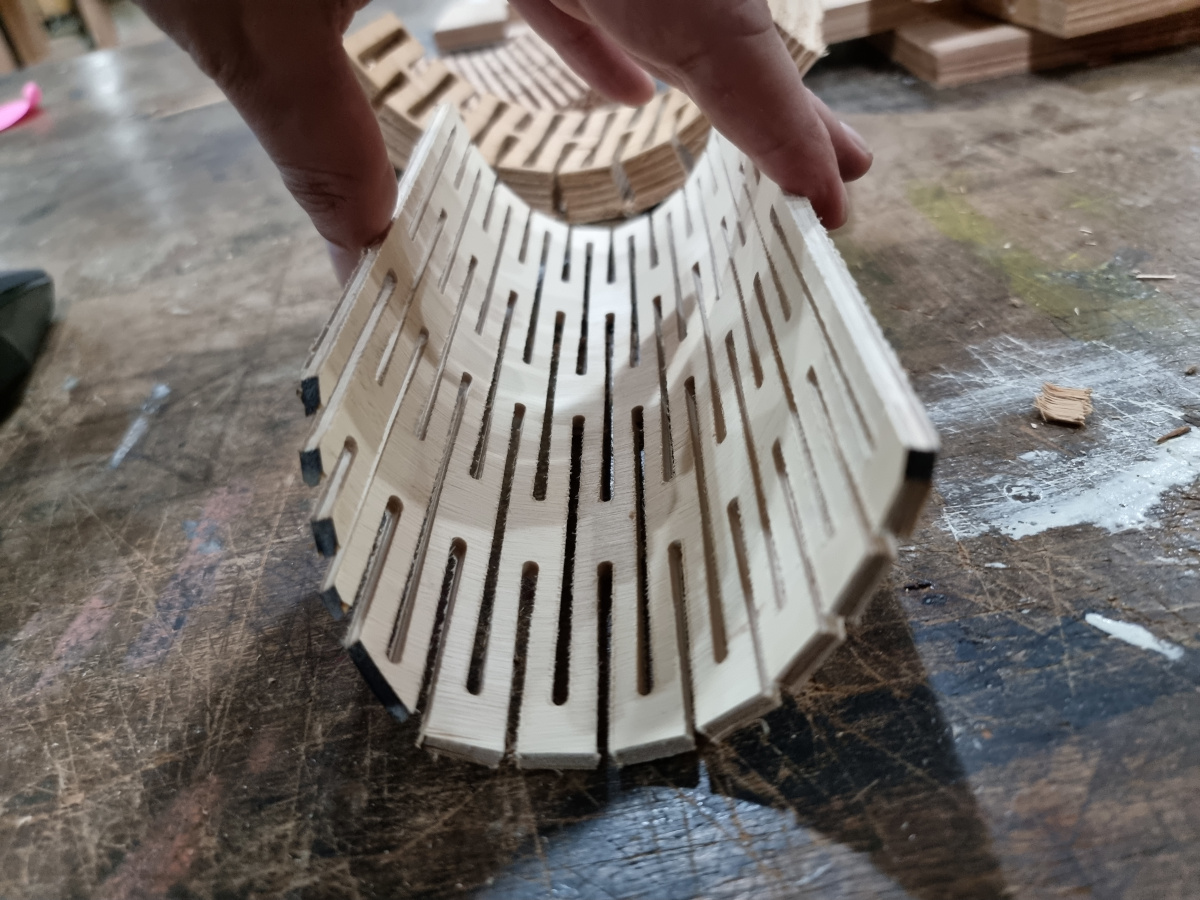
With lots of hope...i made another table board...this time with the kerf that worked most...and used a thinner mill, 1/8...half of the diameter of the original mill i was using.
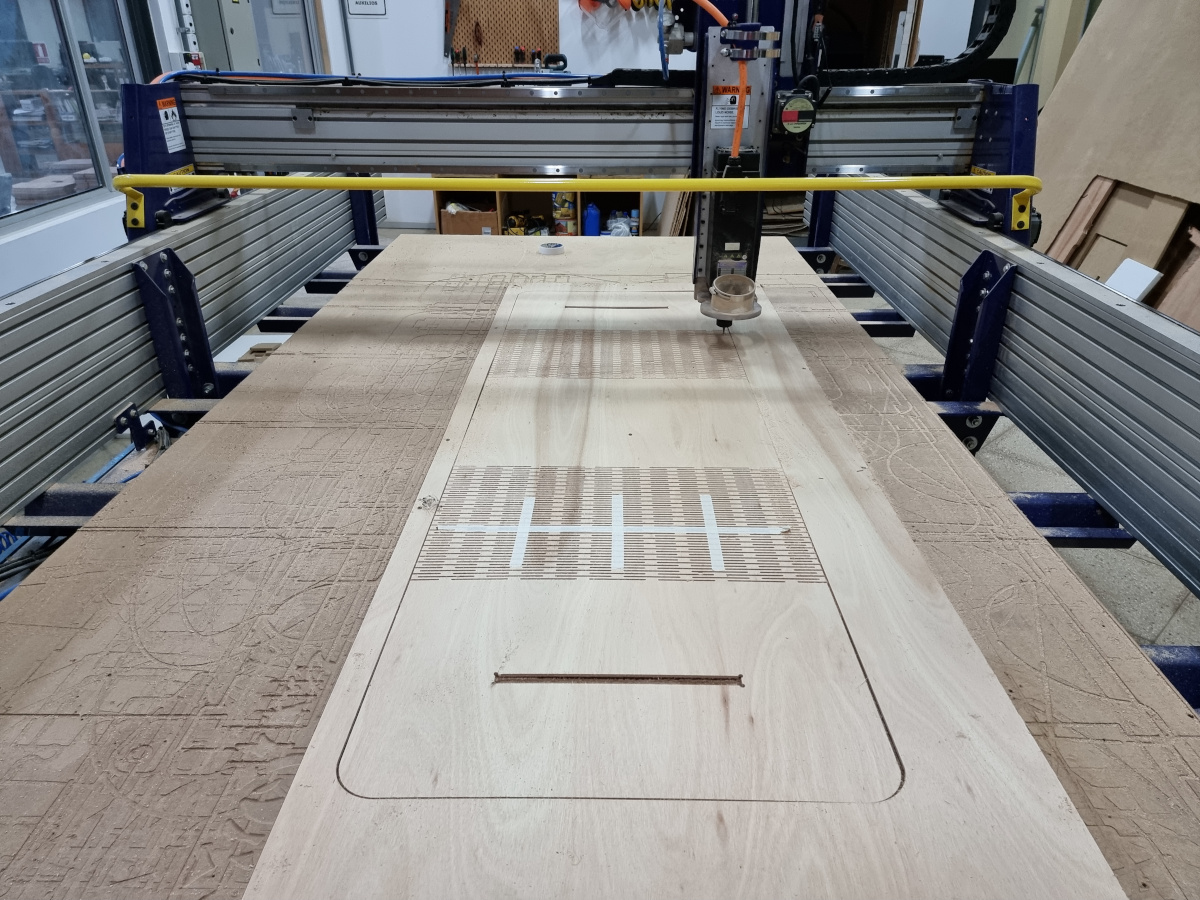
First inner holes, profiles through the material
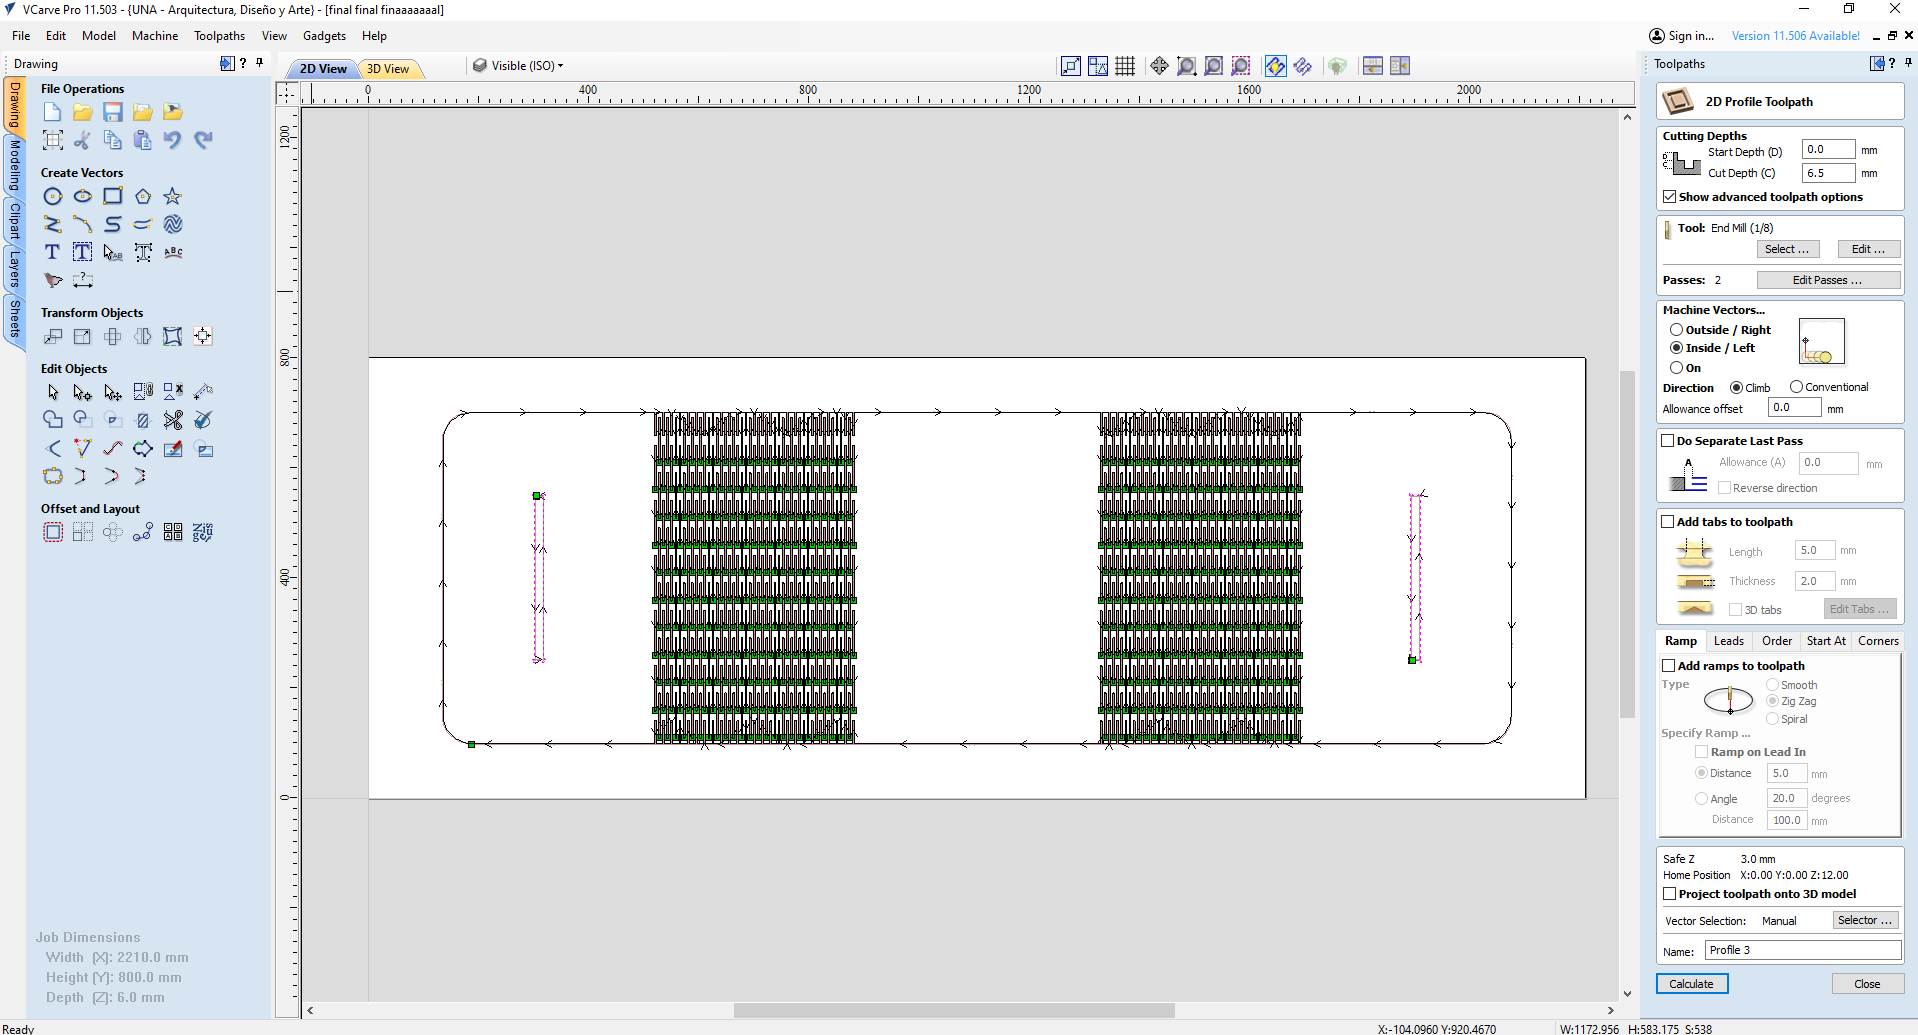
Second, kerfing cuts, also through the material.
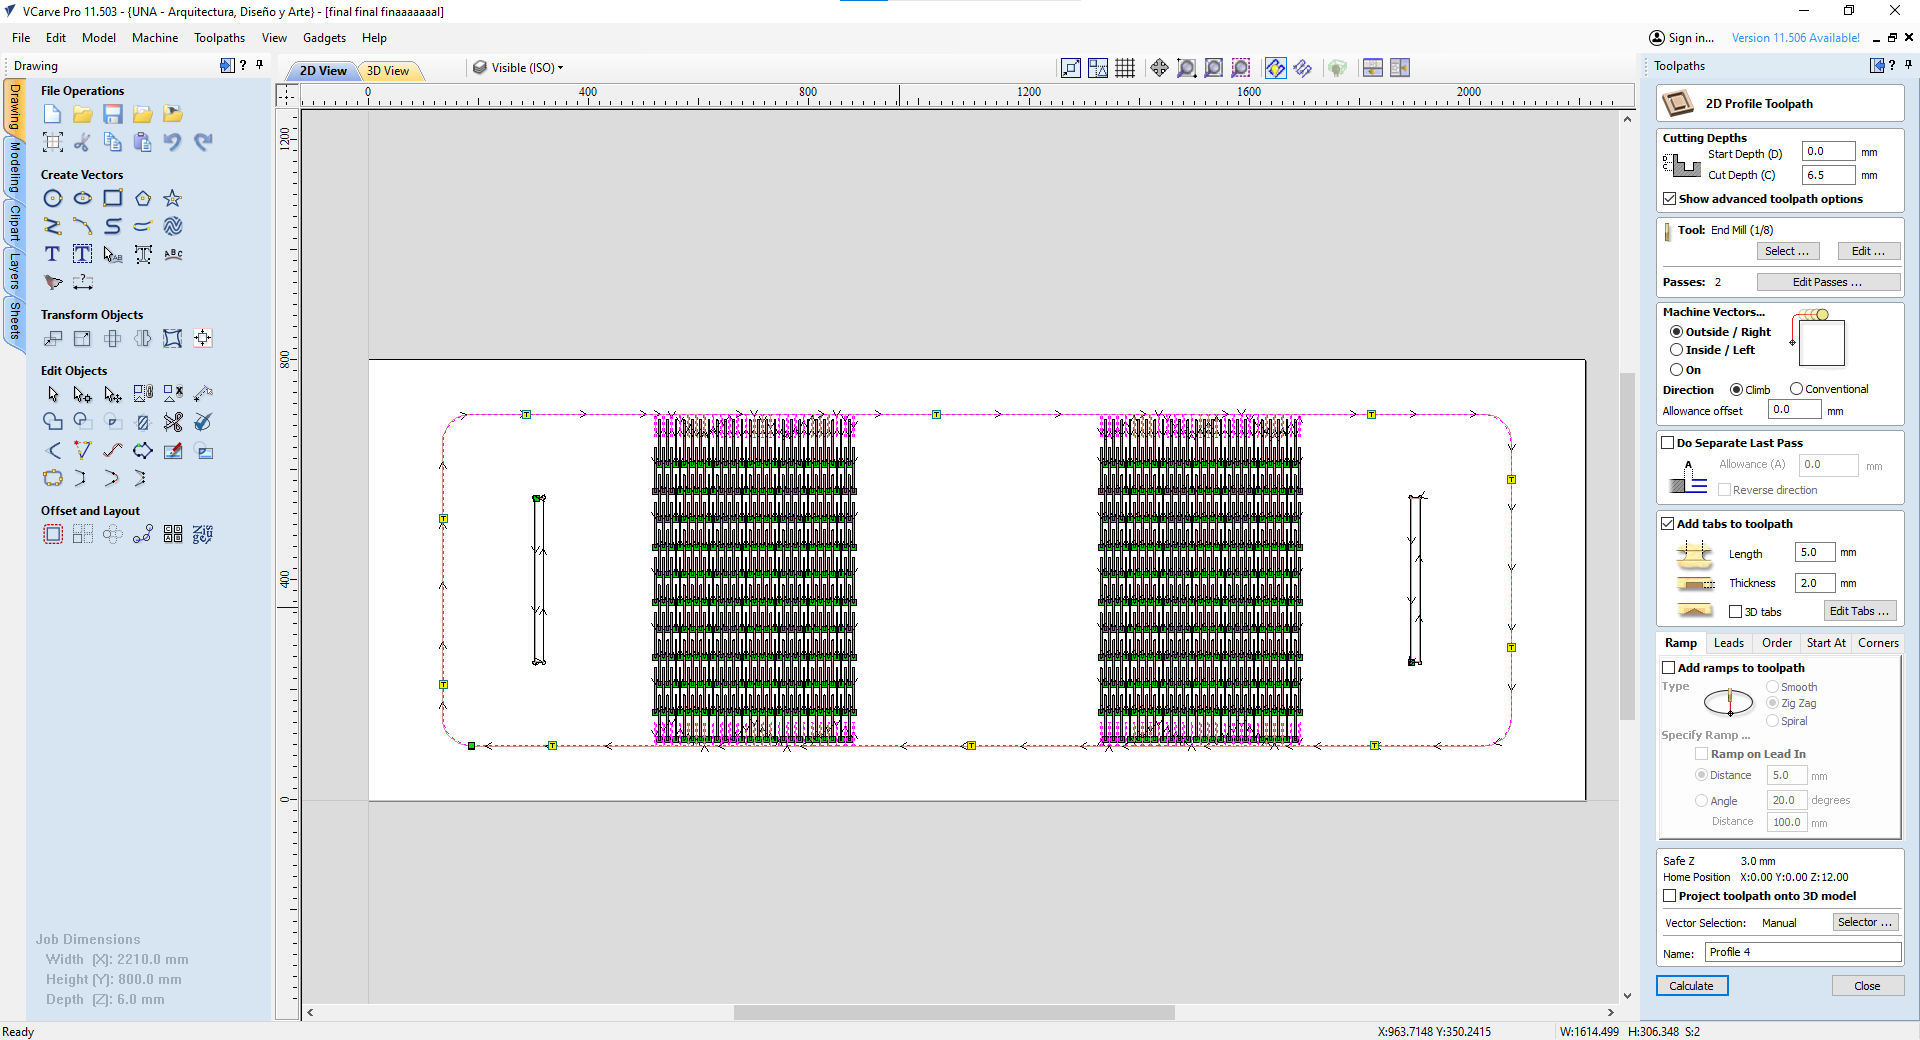
Finally, outside profile, cut through and tabs added.
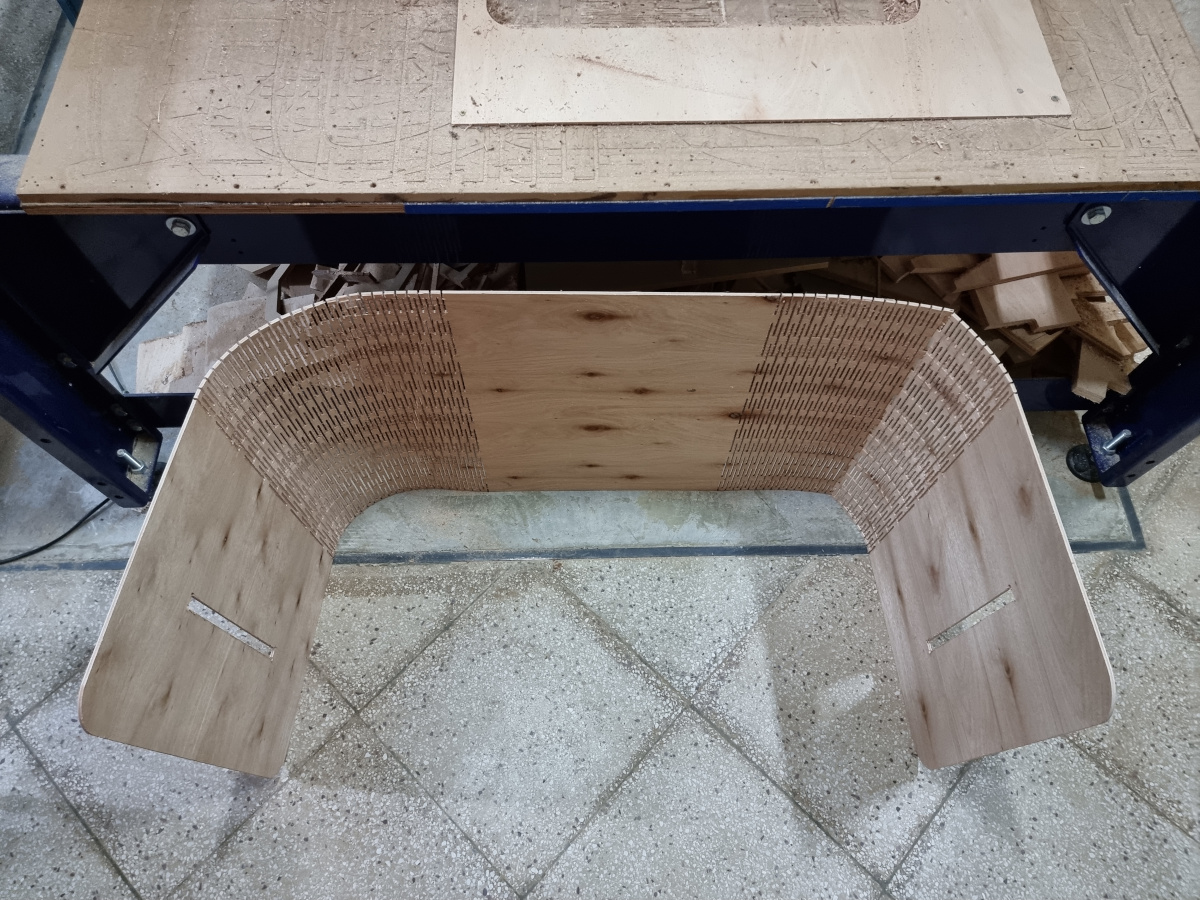
After all this journey, that took 2 weeks, i stop there with the table, not beacuse i wanted, it was time to keep going fordward with the other assignments.
In the future, i will finish it with plywood 18mm, sand it, burn the surface "yakisugi style", brush and barnish them.
Download file Link to group assignment