CNC Machine: Characterization
Machine factory specifications:
 |
|
|---|
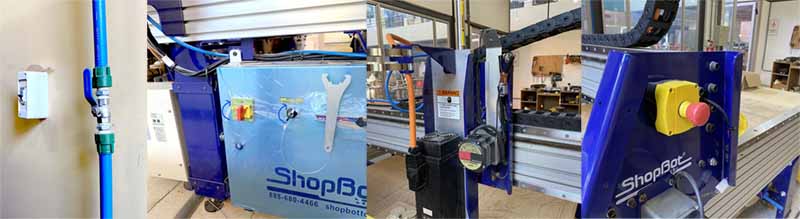
A Big and (noisier) machinehere you can fabricate BIG things, I mean... you have a work space of 305 x 60 cm and this machine have been in touch with us in the FAB LAB CIDI during our CNC practices, the instructor (Silvia) show us how to use it, what do and do not have to do.
Safety measures
When you're going to start using a CNC machine of the Lab with this characteristic you:
HAVE TO USE
- Hearing protection equipment:the exact amount of energy that have to receive to not burn this thing
- Visual protective: designed to avoid damage by physical objects such as wood chips from injuring your eyes
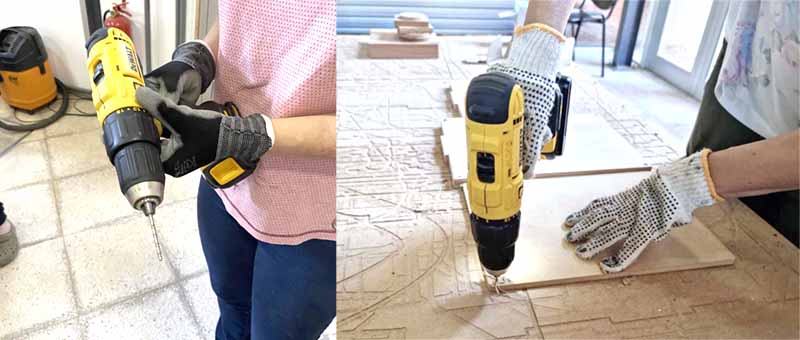
- Safety Gloves: for protection against grime, abrasion, cuts, and burns, also for transporting materials and stuff
- Appropriate clothes: Use tight clothes and closed shoes for protection (weir things can happened haha)
⚠️ Also you don't have to work with this machine if you are tired 🥱 😴 😪.
To start
- Air compressed valvule: This vavule is located besides the machine and you have to actioned it to activate the head of the machine.
- Run the green button to activate the machine.
- Red Button and activation key: Those always have to be activated before you begin a job.
- Once you do this, you can begin to ubicate your piece following this steps...
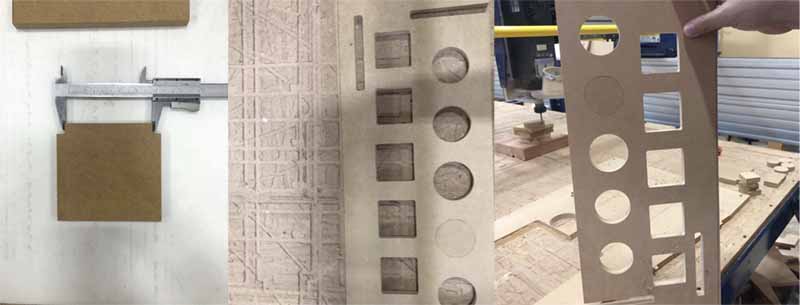
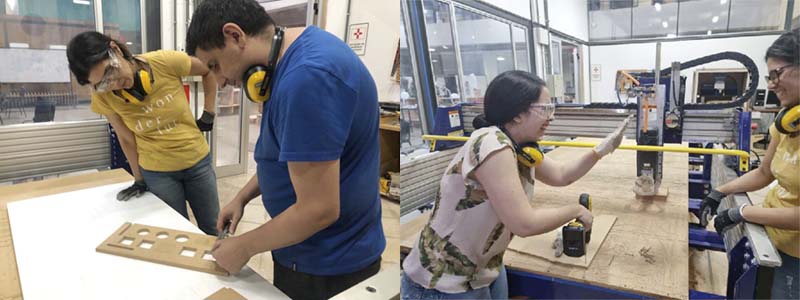
You have to fix your stock well to the bed of the machine. To do that, if you are working with wood or soft materials, you need to drill holes in the corners of the stock and then put screws through them to fix to the bed and lay the material safely.
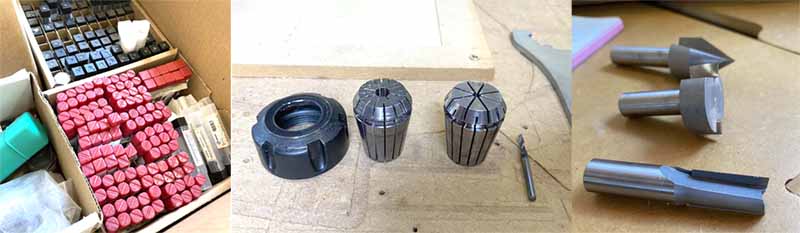
Now, you put your desired mill in the collet and tighten the nut strongly. All of these is to be sure that the material is not going to move away.
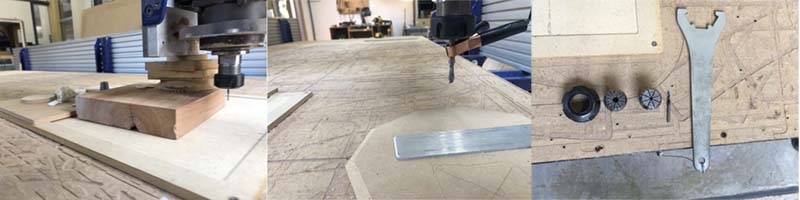
“Zeroing” the Z
You have two options, set your zero over the stock or over the bed.
The steps to do that are:
- Put the aluminum plate connected to the machine over the stocks surface (or bed surface).
- Connect the alligator to the mill.
- In the Shopbot software, choose the option to get the zeroing.
- While the milling head is going down, keep the killswitch near to prevent some damage collision with the material and the mill if something wrong happens.
Software things: V-CARVE
To work with the Shopbot, first you have to import your file (.dxf or .stl) to the Vcarve software.
Once you have measured your stock, you need to upload the data, height x width x length. Also if your stock should be machined one, two sided or if it is on a rotary base you need to put this data.
You need to define if your zero will be up over the stock surface or over the machine bed.
Define where it should start the job and the modeling resolution.
Last but not least, define the material. If you not defined it, the machine will start as a simulation over the stock and will not cut anything.
Well, now you have your stock and with your file imported, you need to set the parameters for the jobs that you are going to do to the stock, Pockets, Profiles, Drillings, 3D Engraving.
Configure the order for the toolpaths generated, save them and Cut your Piece.
Video

