Molding and casting
Introduction
Individual Assignment
In this individual assignment, the objective is to design a mold using computer-aided design (CAD) software
around the stock and tooling that will be used. The mold will then be milled using a CNC machine with a
rough cut followed by a three-axis finish cut to achieve a precise shape and smooth finish. Once the mold is
complete, it will be used to cast parts using a suitable casting material.
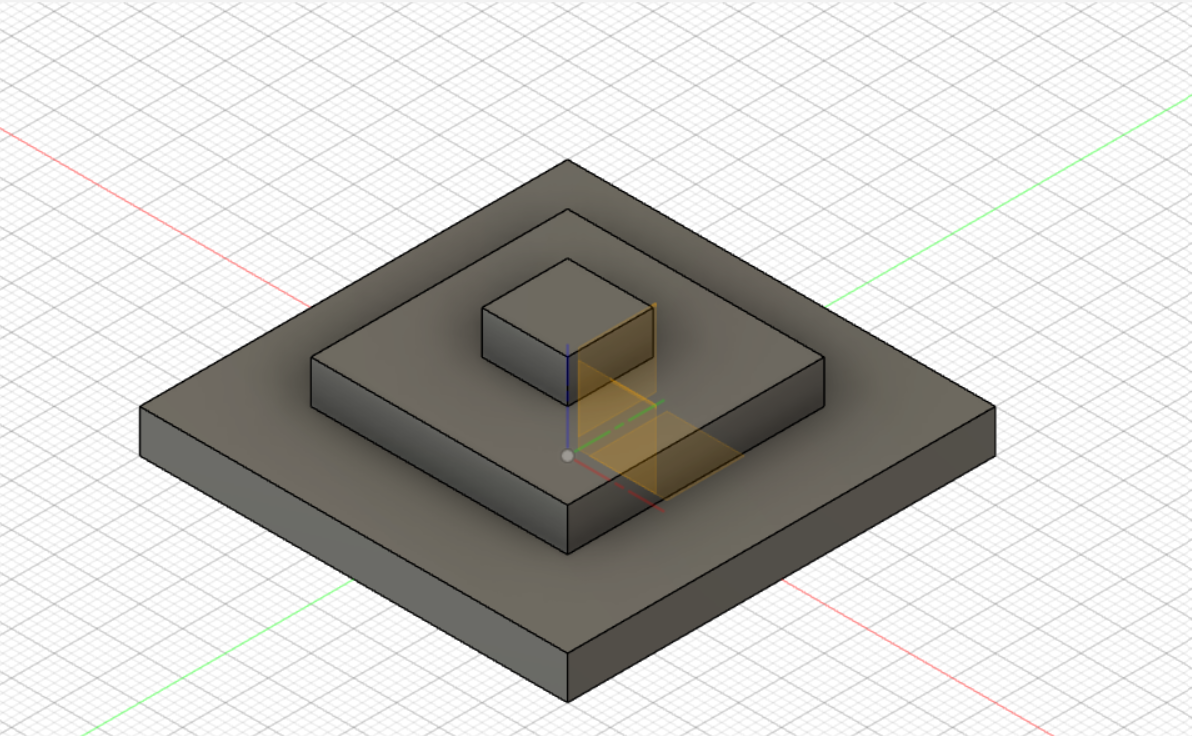
Step 1: Designing the Pyramid with Steps in Fusion 360
The first step in this assignment is to design a 3D model of a pyramid with steps using Fusion 360 software.
This design will serve as the mold for casting chocolate. The pyramid should have a base of 50mm x 50mm and
be composed of multiple steps, increasing in size as they reach the top. The design must be precise and
accurate to ensure the quality of the final product.
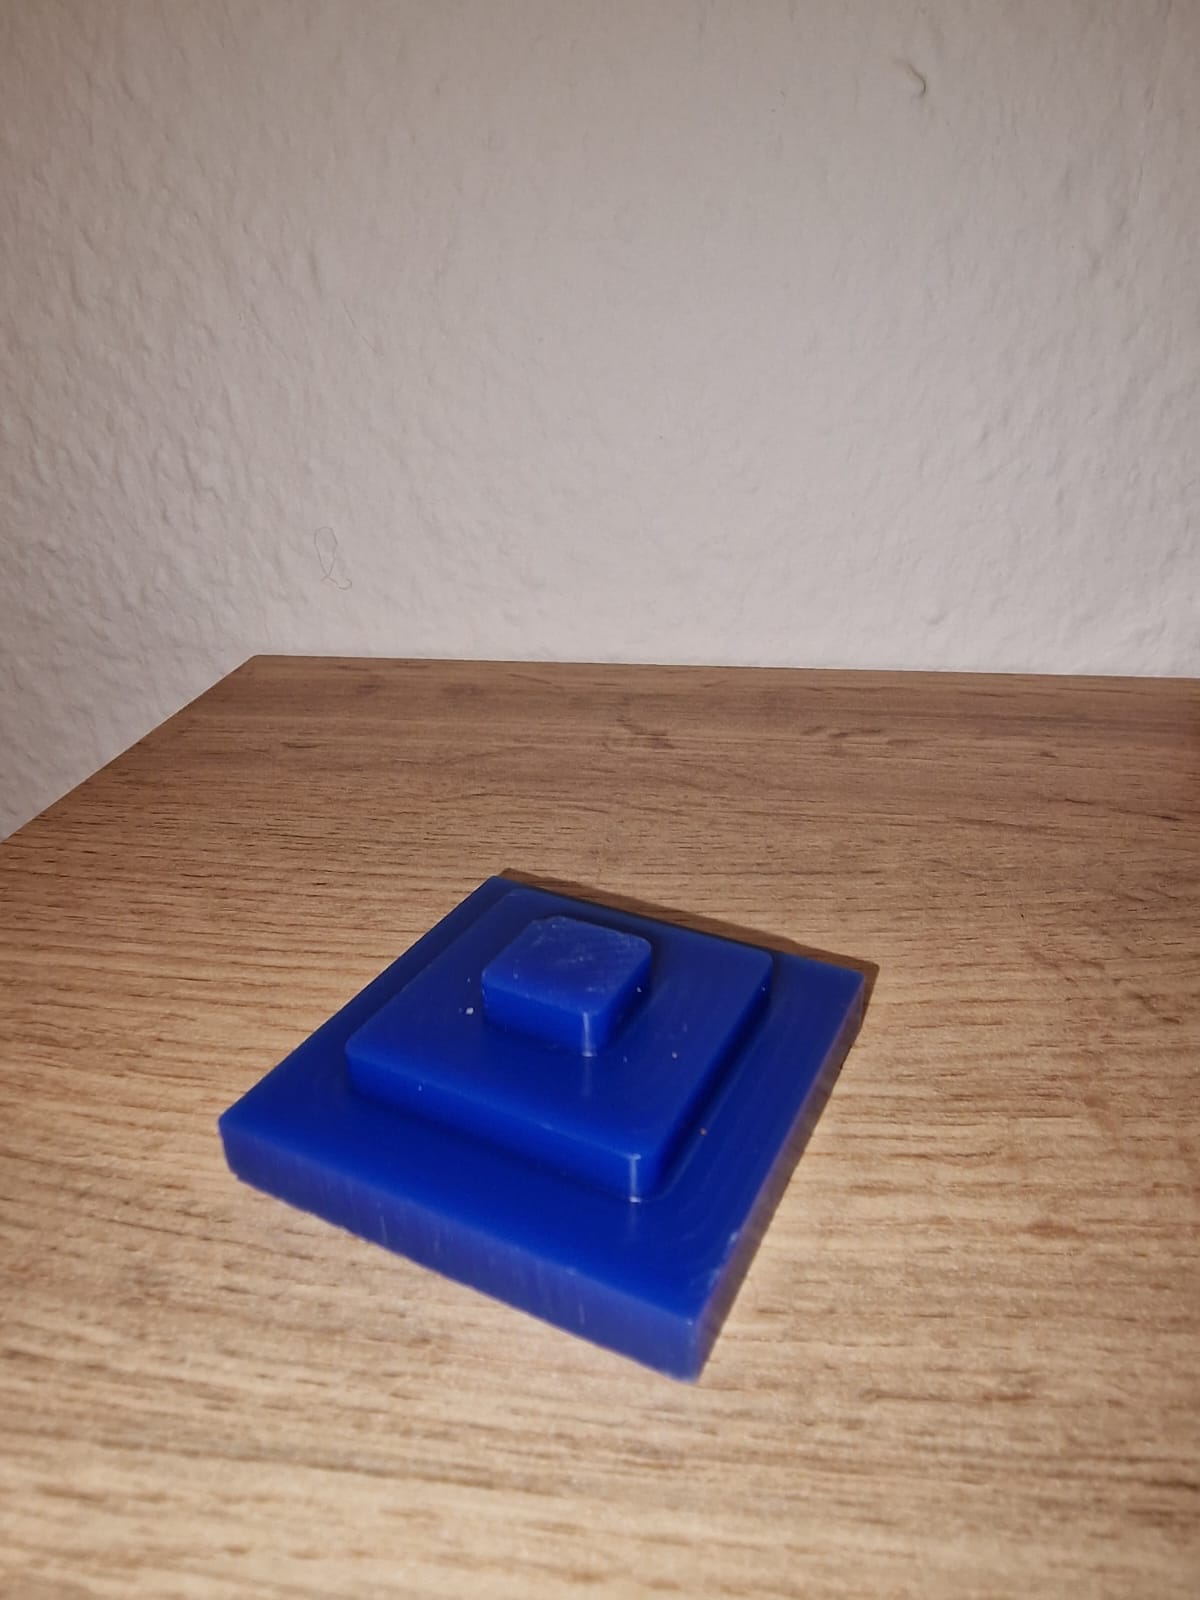
Step 2: Manufacturing the Wax Body using a CNC Machine
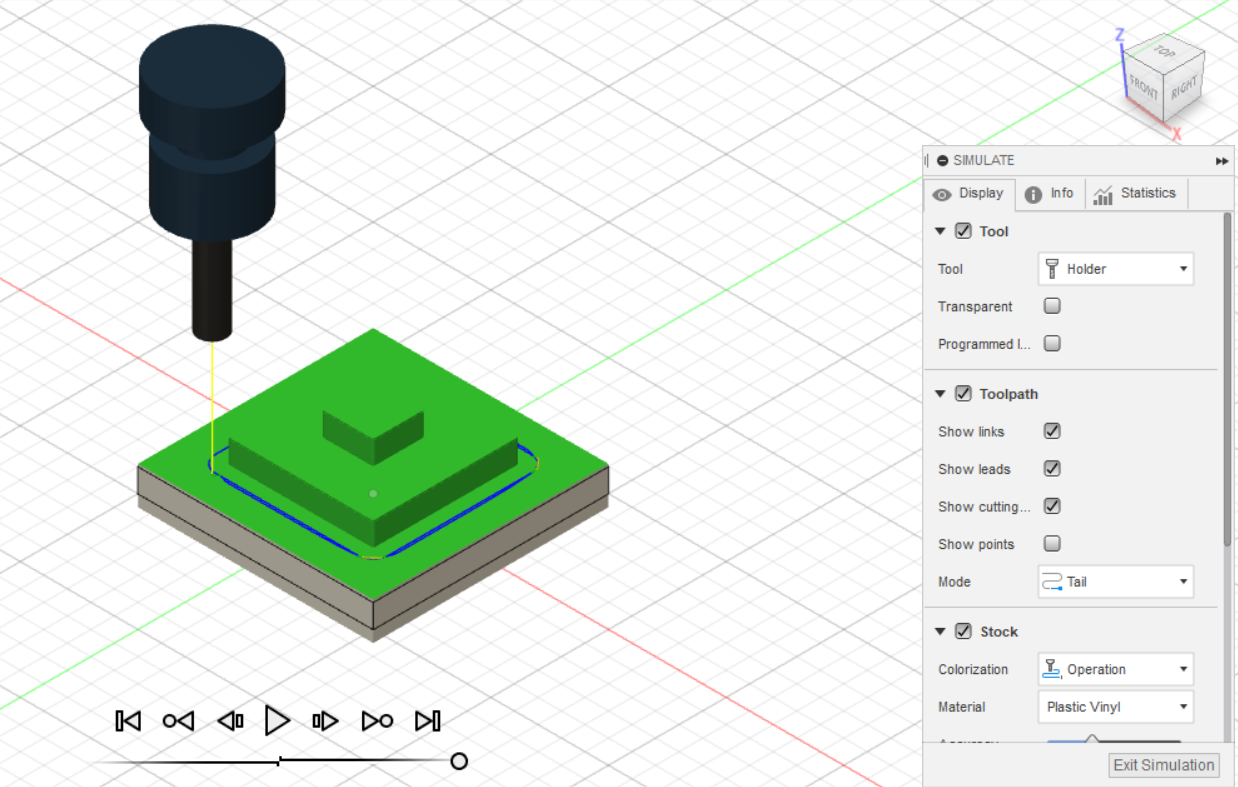
Once the design is complete, the next step is to manufacture the mold from a raw body made of wax. Using a
CNC milling and cutting machine such as the Stepcraft, the wax body will be cut to the exact shape and
dimensions of the pyramid with steps design. The machine will perform a rough cut, followed by a three-axis
finish cut to achieve the desired level of precision and smoothness.
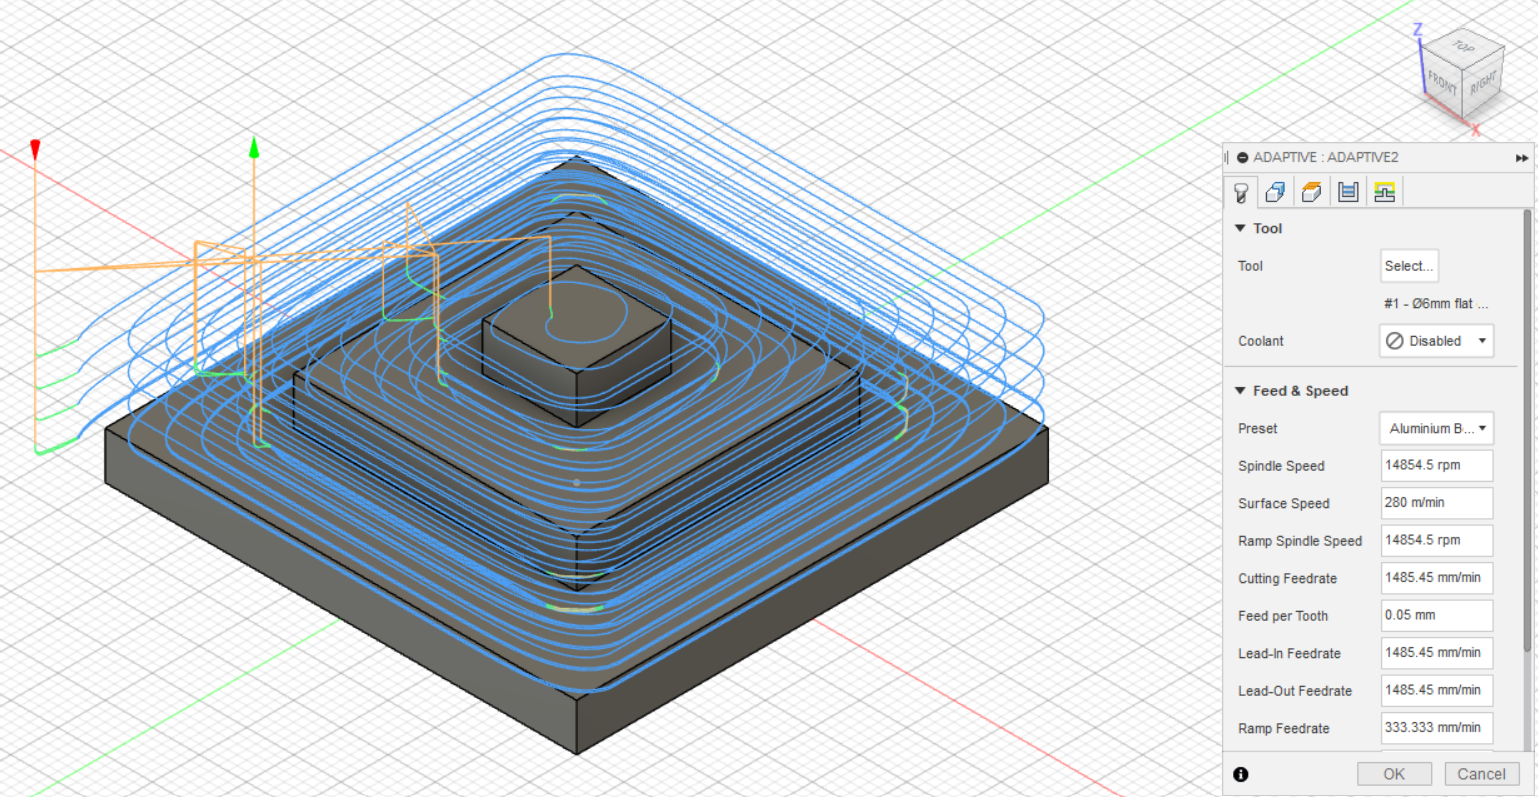
The raw body made of wax was manufactured using a CNC milling and cutting machine, such as the Stepcraft. The
manufacturing process began by using Fusion 360 software's manufacturing feature to select suitable CNC
tools. Initially, an adaptive clearing toolpath was used to remove the bulk material quickly, followed by 2D
contour cutting to smooth the external contours of the pyramid with steps.
Adaptive clearing is a toolpath strategy that optimizes the machining process by removing as much material as
possible using the cutting tool's entire flute length. This is achieved by removing large amounts of
material quickly, and as the cutting tool progresses, it removes smaller amounts of material, which reduces
the stress on the cutting tool and extends its lifespan.
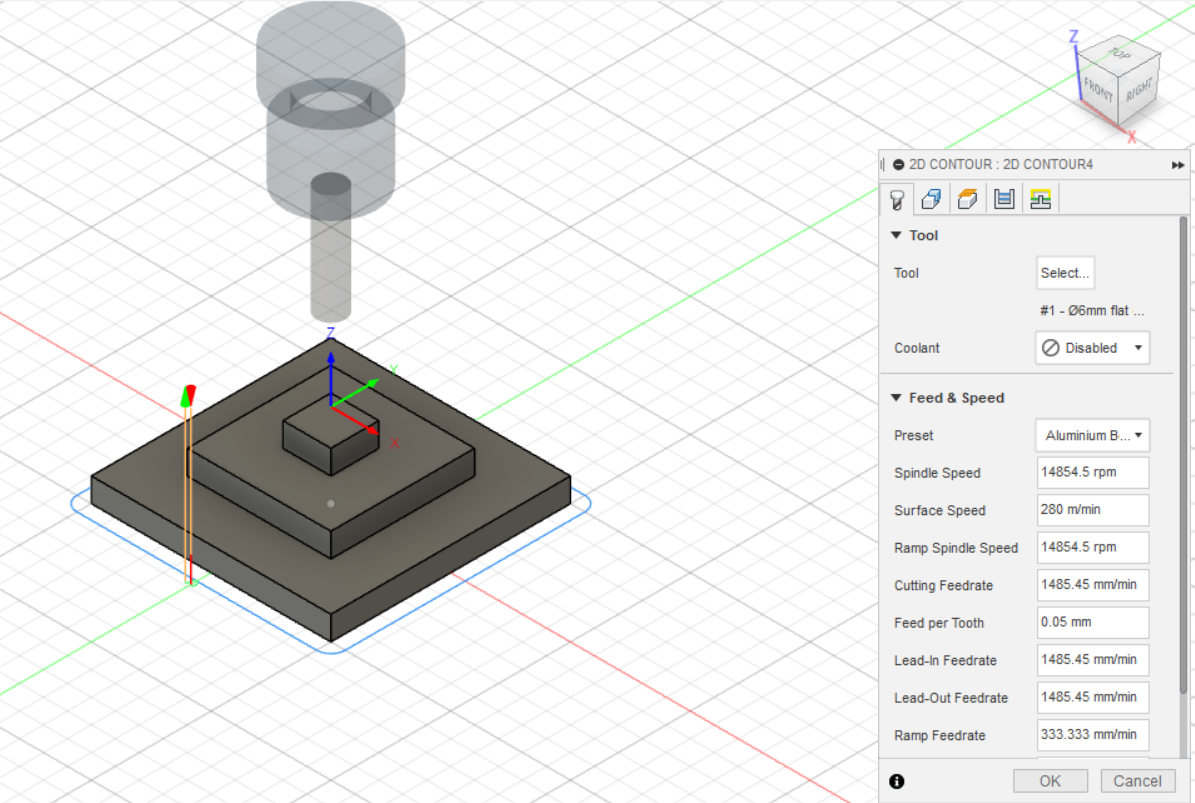
After the rough cut was completed, a 2D contour cutting toolpath was used to smooth the external contours of
the pyramid with steps. This toolpath strategy allowed for precise control of the cutting tool's movement
along the contours of the design to create a smooth finish.
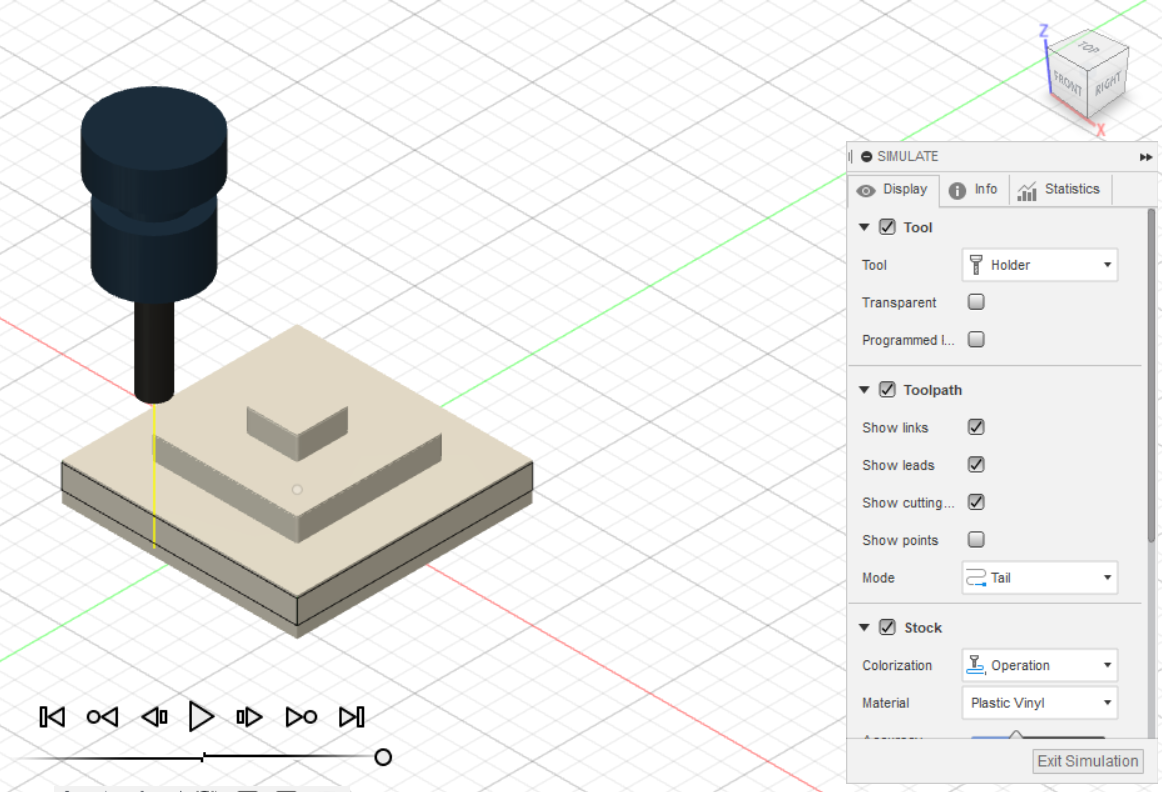
By utilizing both the adaptive clearing and 2D contour cutting toolpaths in Fusion 360, the wax body was
precisely cut to the desired shape and dimensions of the pyramid with steps design
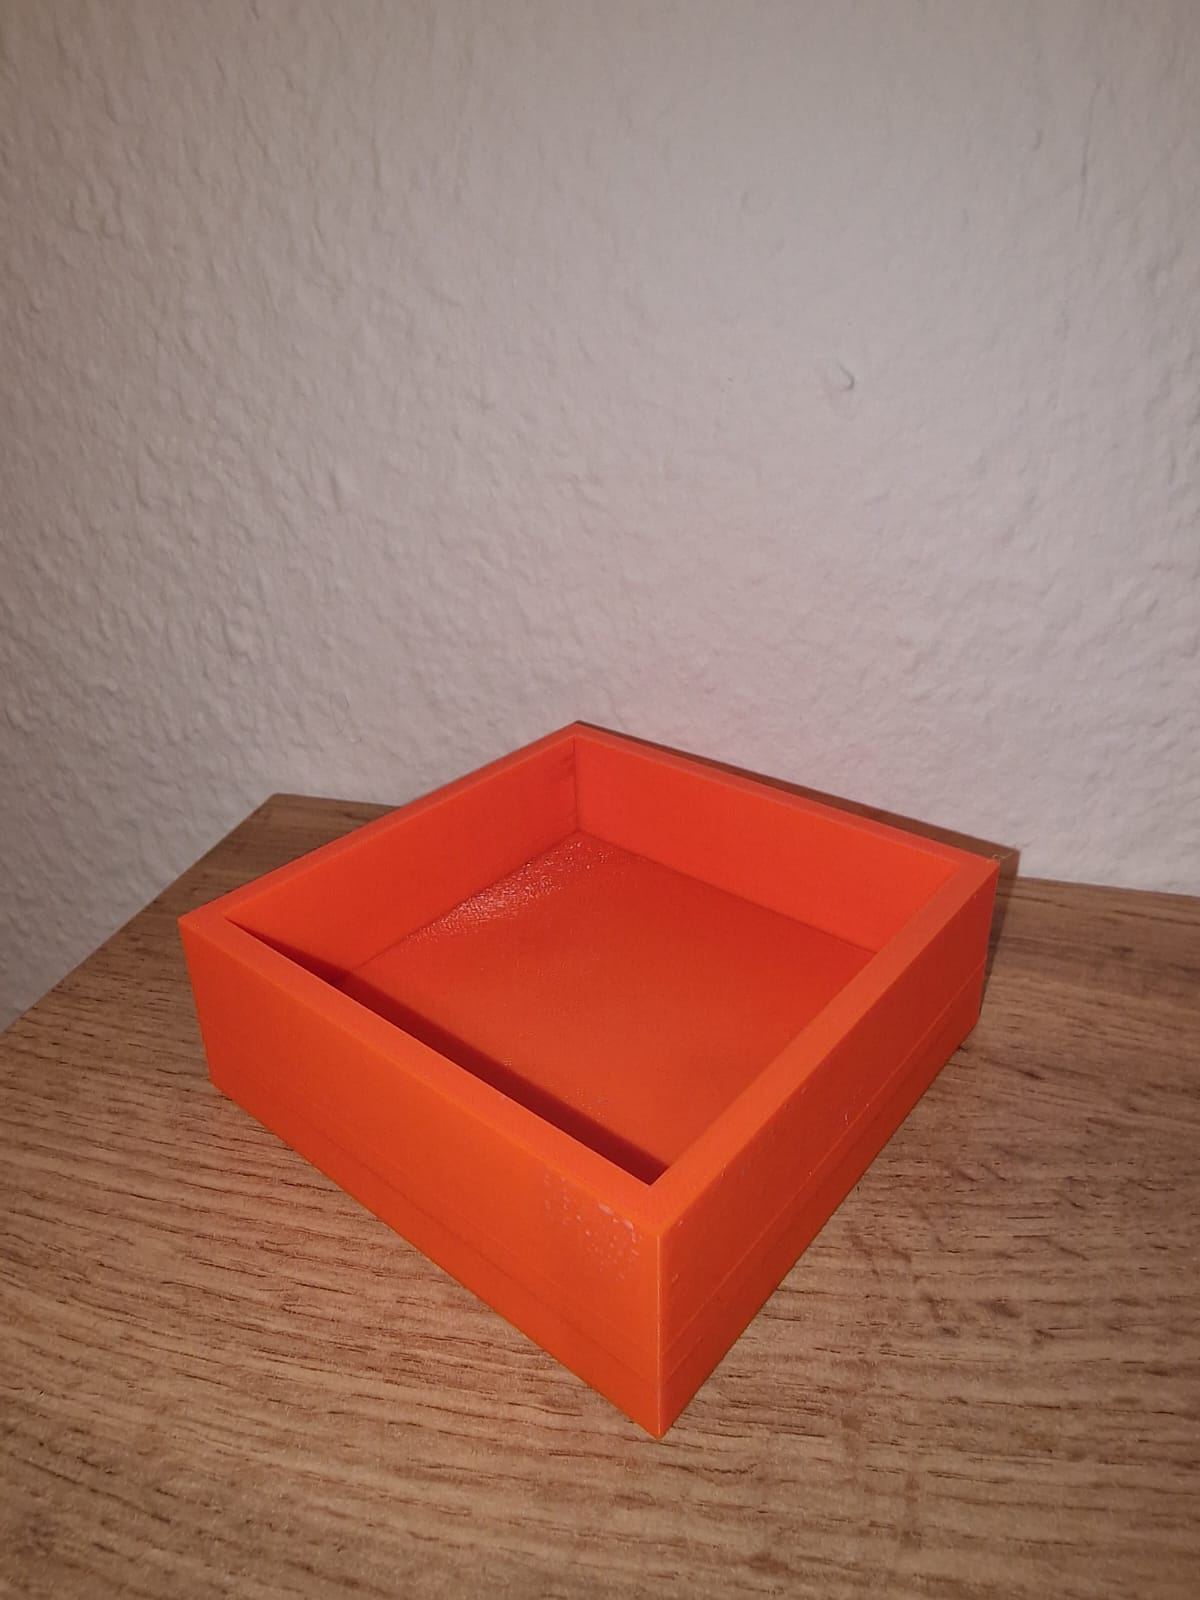
Step 3: Creating the Silicon Mold
The first step in creating the silicon mold is to place the wax mold in the center of a box designed in
Fusion 360 and 3D printed. The box must be large enough to accommodate the wax mold with sufficient space
around it for the silicon material to be poured. The box should also have a flat base to ensure that the
silicon mold is level and uniform.
Once the box is ready, the next step is to mix the silicon material according to the manufacturer's
instructions. The mixture typically consists of two parts: a base and a catalyst. The two parts must be
mixed thoroughly in a ratio specified by the manufacturer to ensure that the silicon cures correctly and
produces a mold with the desired properties.
After the silicon mixture is ready, it is poured into the box, covering the wax mold completely. The silicon
will fill all the crevices and contours of the wax mold, capturing its precise shape and dimensions. The box
is then left undisturbed for the silicon to harden over time. The curing time for silicon varies depending
on the brand and type of silicon used, but it typically ranges from a few hours to overnight.
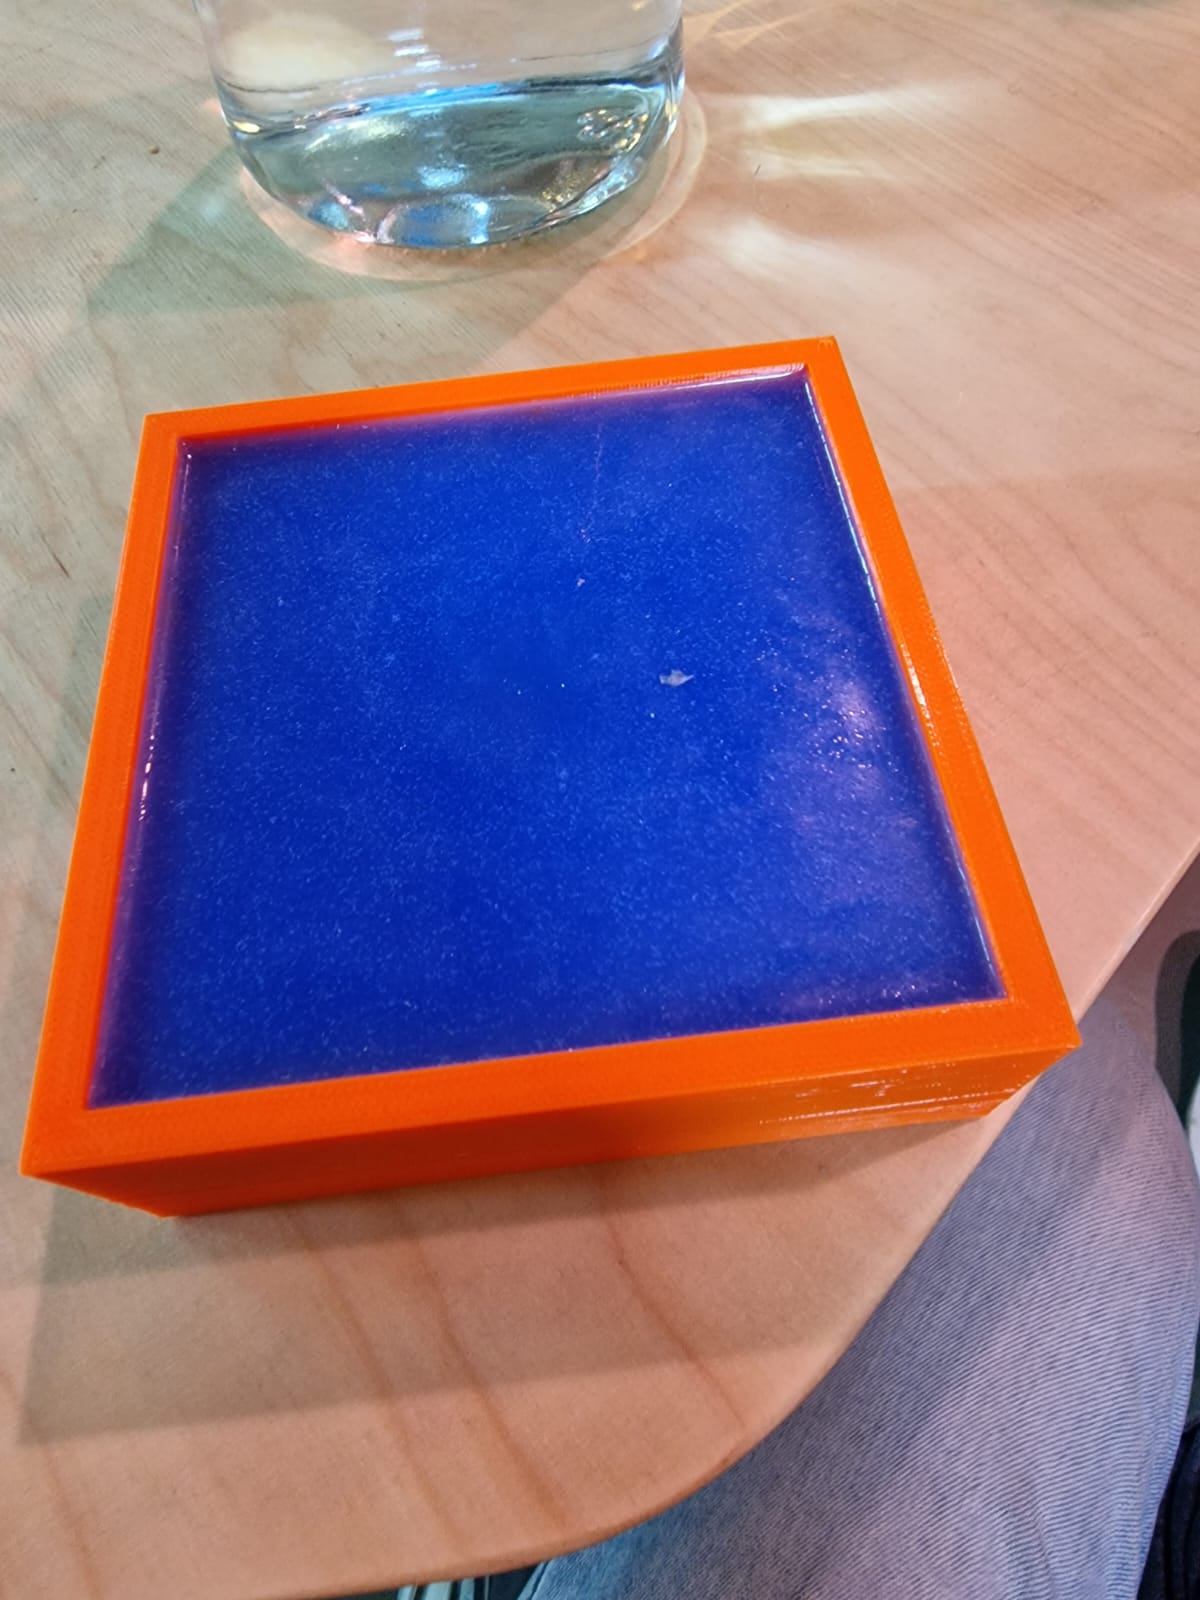
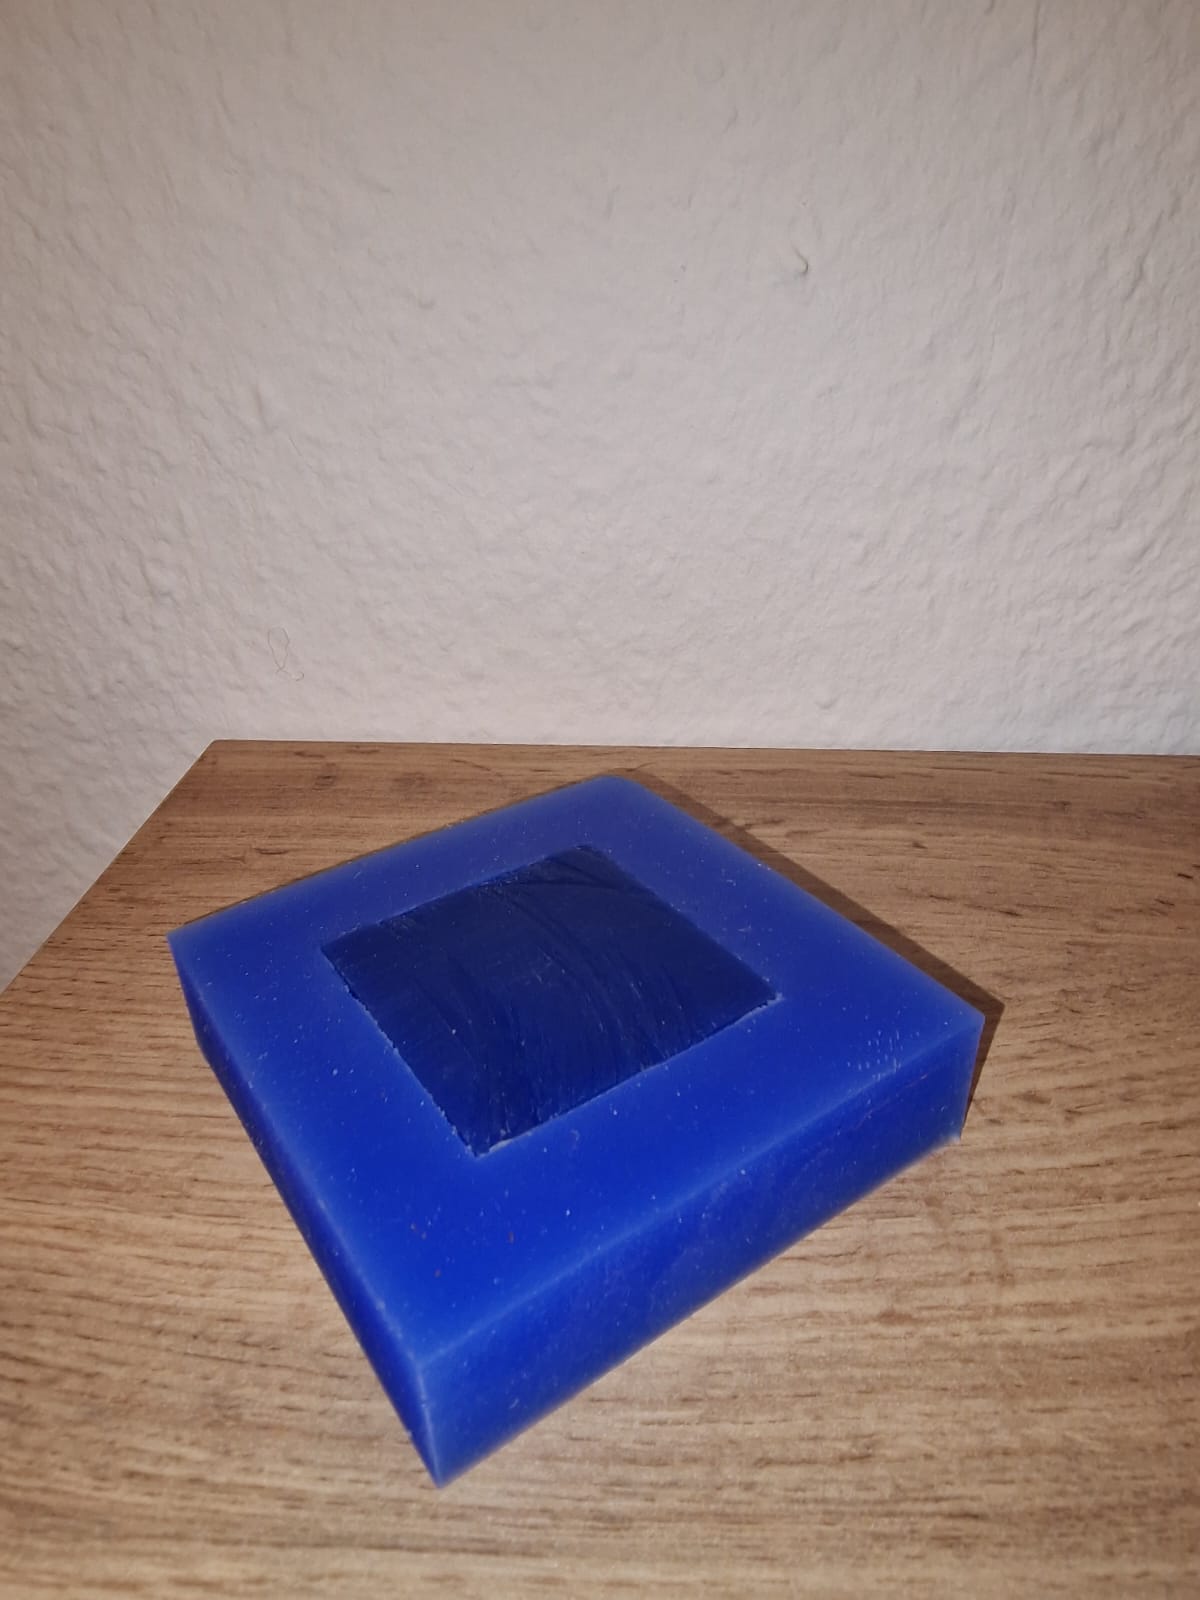
Once the silicon mold has cured completely, it is carefully removed from the box. The wax mold is then
extracted from the silicon mold by gently peeling it away. This process leaves behind a perfect negative
impression of the wax mold in the silicon material, creating a reusable mold that precisely replicates the
shape and dimensions of the pyramid with steps.

Step 4: Casting Chocolate in the Silicon Mold
The final step in this process is to use the silicon mold to cast chocolate. The mold is carefully removed
from the 3D printed box, and hot chocolate is poured into the cavity of the mold. After the chocolate has
cooled and solidified, the silicon mold is carefully peeled away, revealing a perfect pyramid with steps
made of chocolate.