Computer controlled cutting.
For week 3 we were assigned with group assignment and we had to identify and characterize the leaser cutter's force, power speed rate, kerf, joint and the clearence.
Link to our group assignment is here
Kerf and joint clearance
For the Kerf and Joint clearance,we printed out two combs from the same sheet. and below you can see the picture
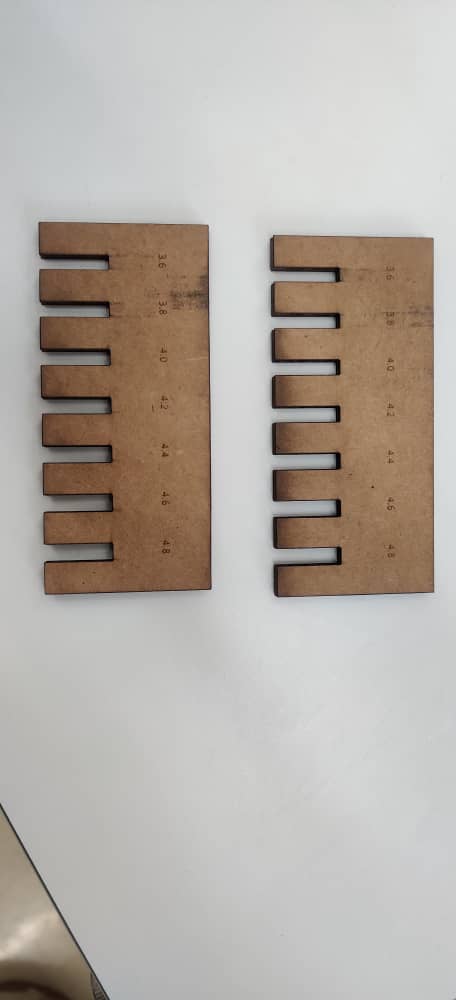
We cut out two combs from the same material. Our instructor sir Rico showed us a very essential kerf generating tool which was made by Atsufumi Suzuki a fablab kamakura graduate.
The cardboard thickness was about 4.10mm, and the comb gaps was ranging between 3.6mm to 4.8 mm, with 0.2 mm additions to determine the best fit. The svg created by the kerf generator tool was then saved and imported into inkscape.
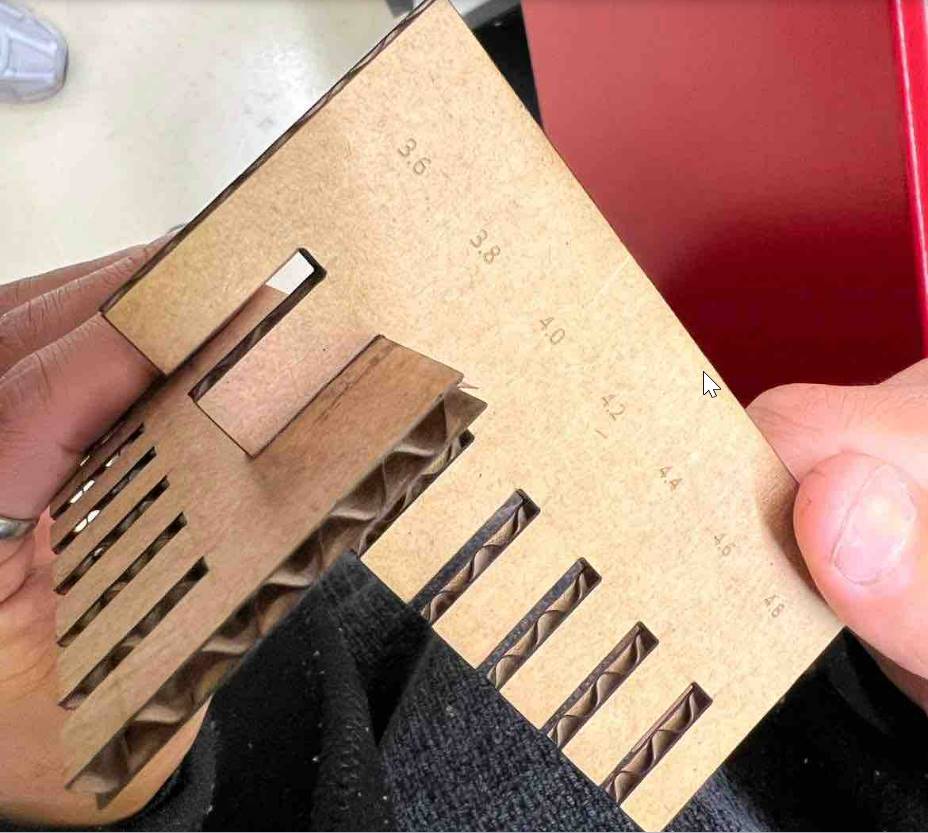
So you can see that 3.8mm gap is the best fit,so the clearance was to be noted and kept in mind..
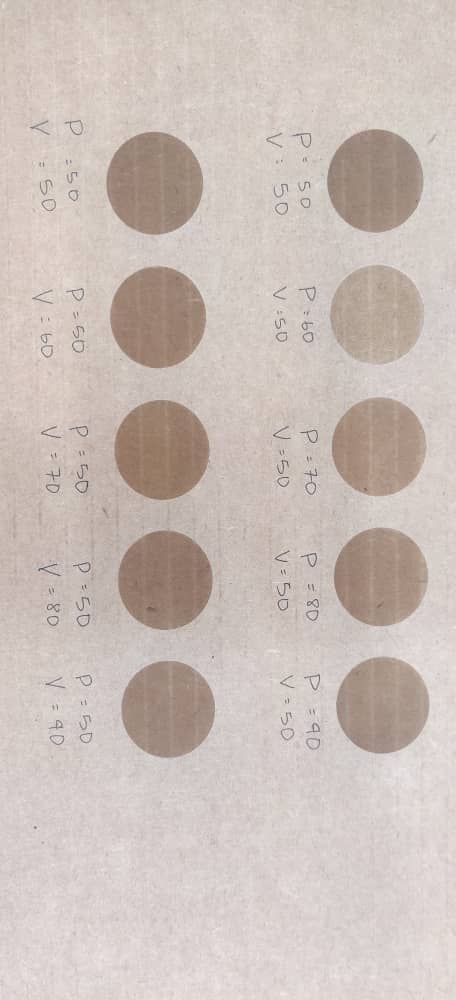
Power and speed test
For the power and speed test, we made an engraving with different power and speeds such that we print them individually to see the difference. Doing so we look at the level of power used and difference in the engraving. we changed the settings on the printing software (Check size of the print and any errors and Auto focused after that Then we look at the Laser cutter and set appropriate home point for it to start working.

Below you can see the leaser cut of a simple rectangle , just a test.

Trotect speedy 100 Leaser cutter
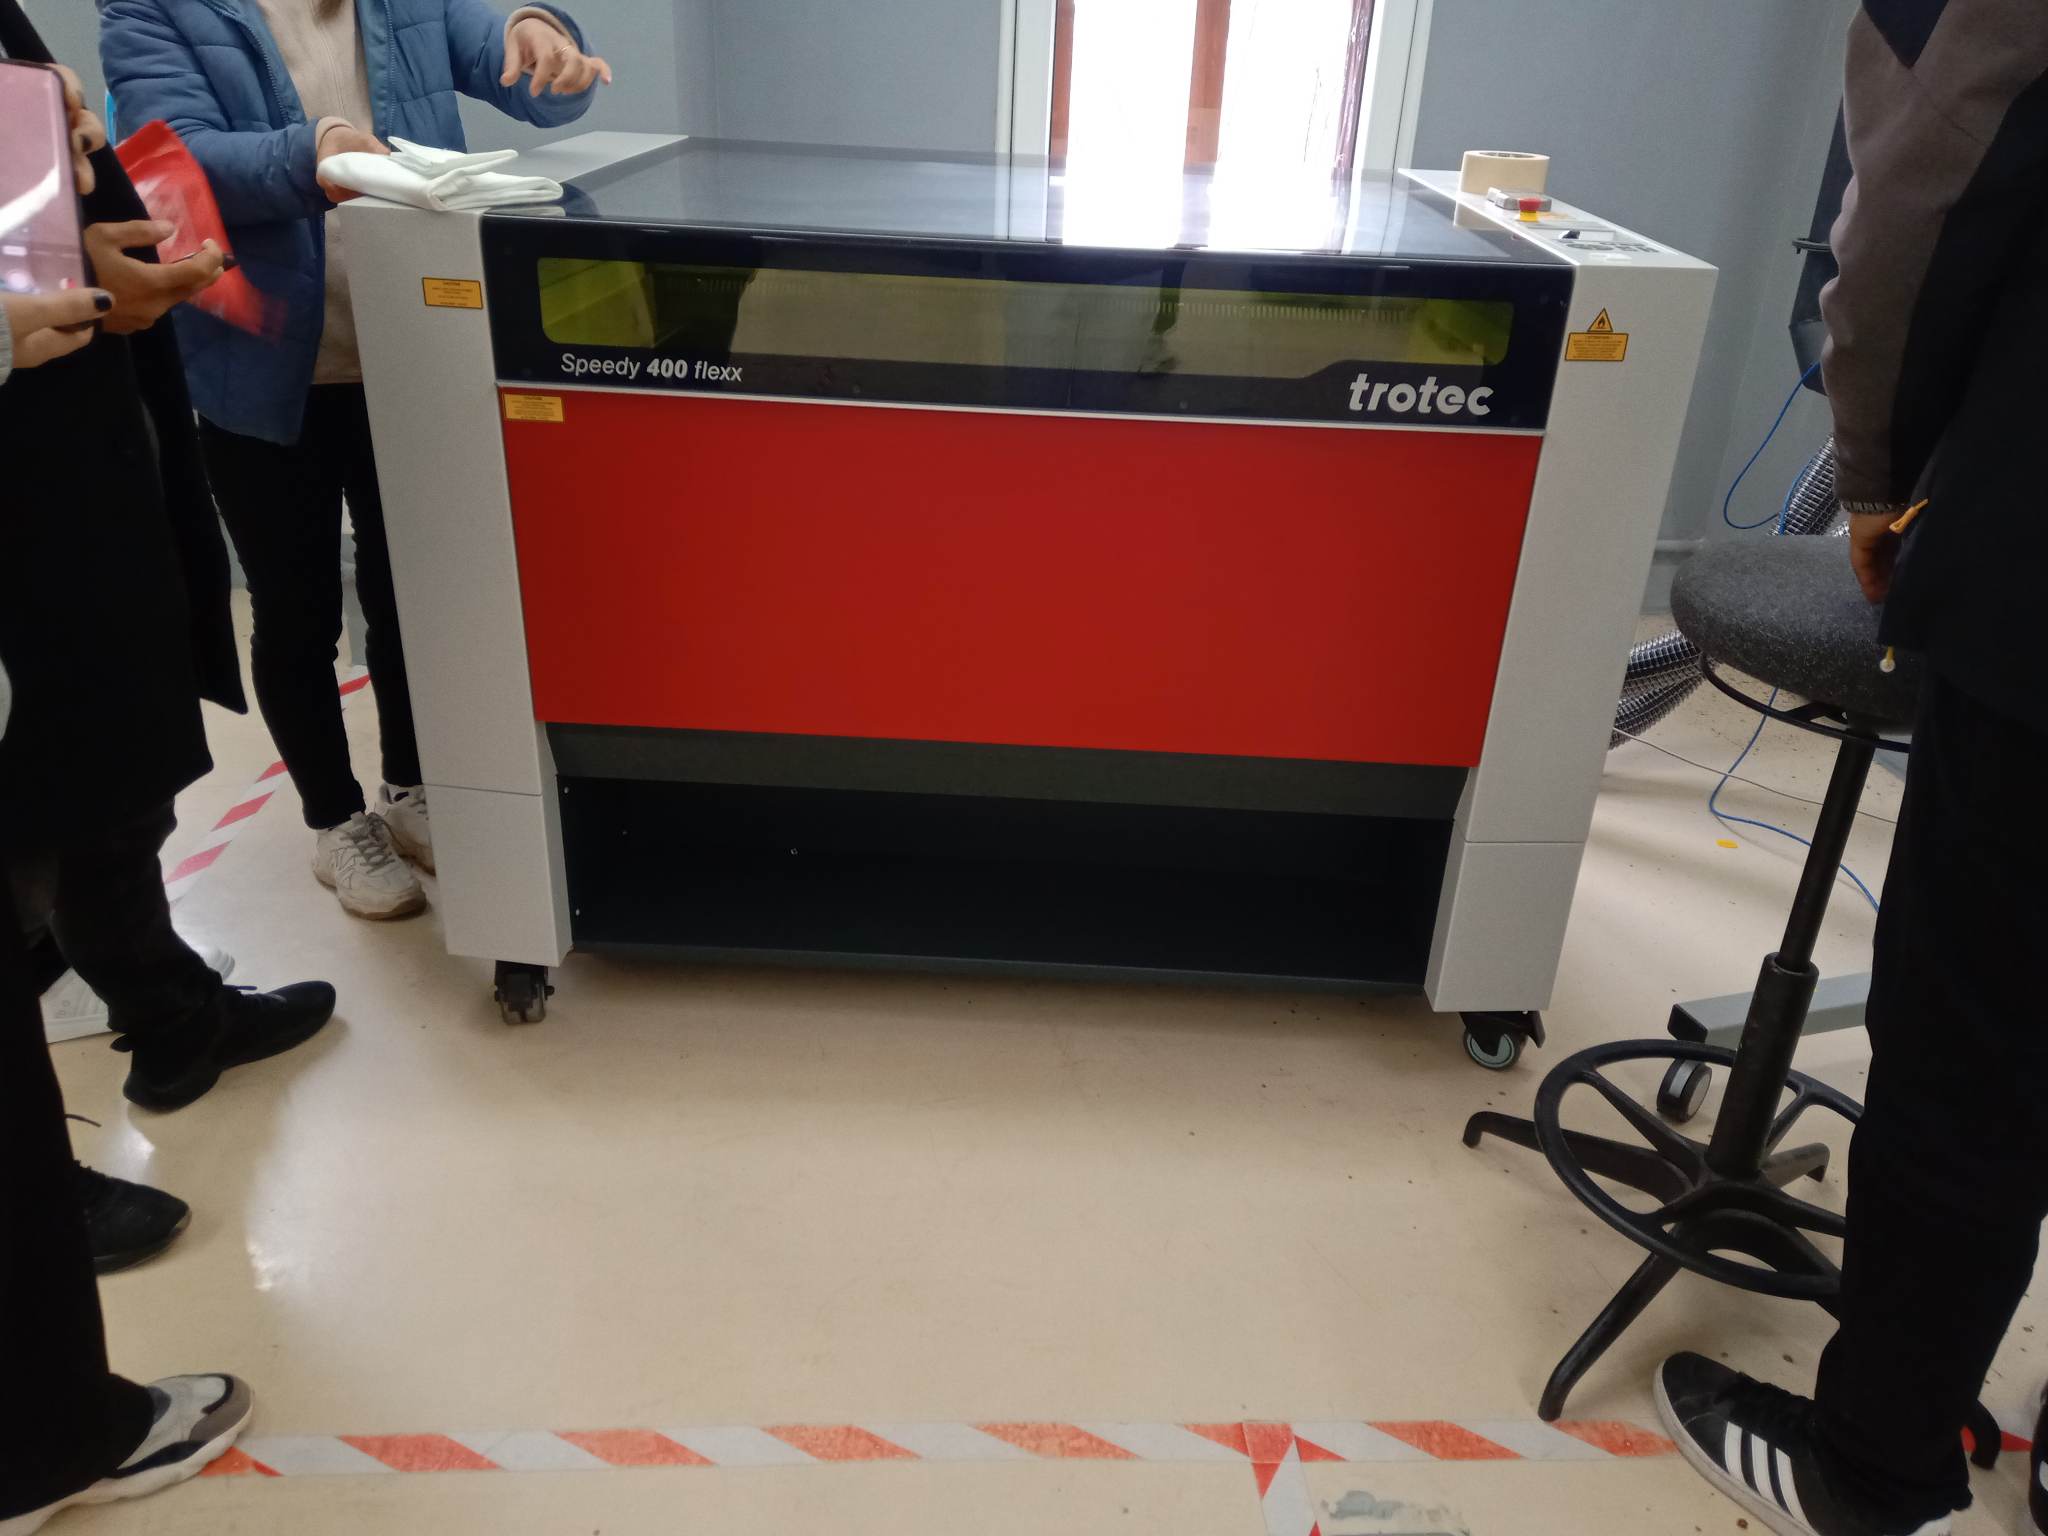
This is Trotect speedy 100 Leaser cutter
It can engrave Marvel, stone and even metal but cannot engrave or cut through hard woods. It is vurnerable to fire so a person has to keep, monitating within the red line. we can use fire extinguisher and fire blankets incase of emergency.so here are the process on how to operate the Leaser cutter.firstly turn on the key to start the machine
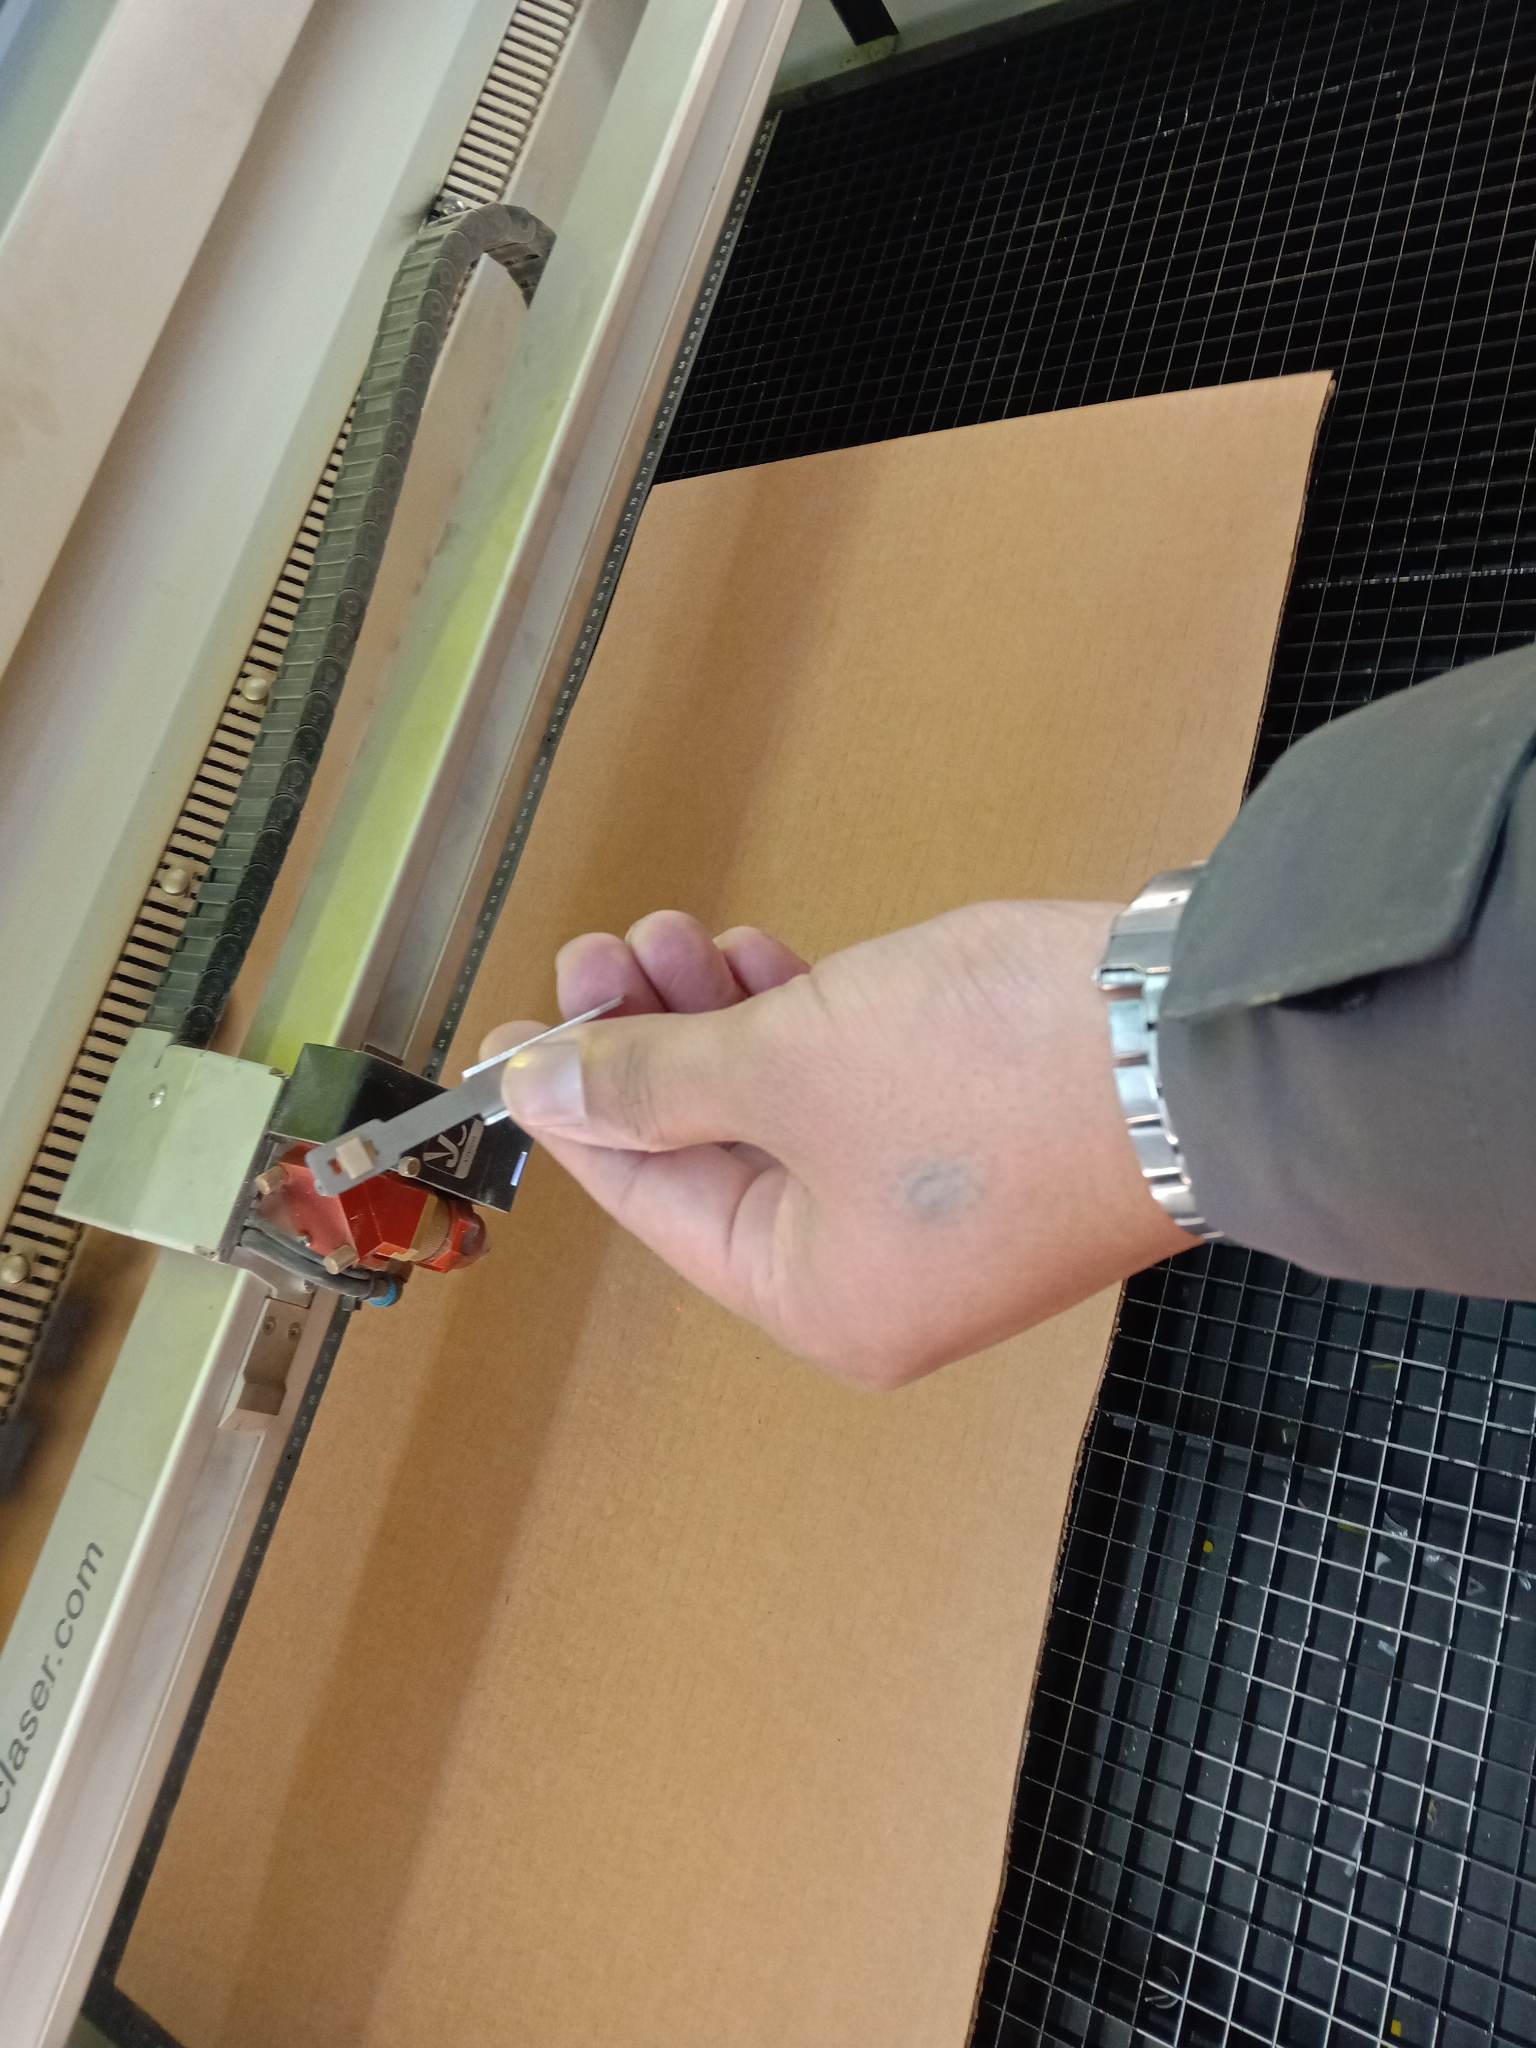
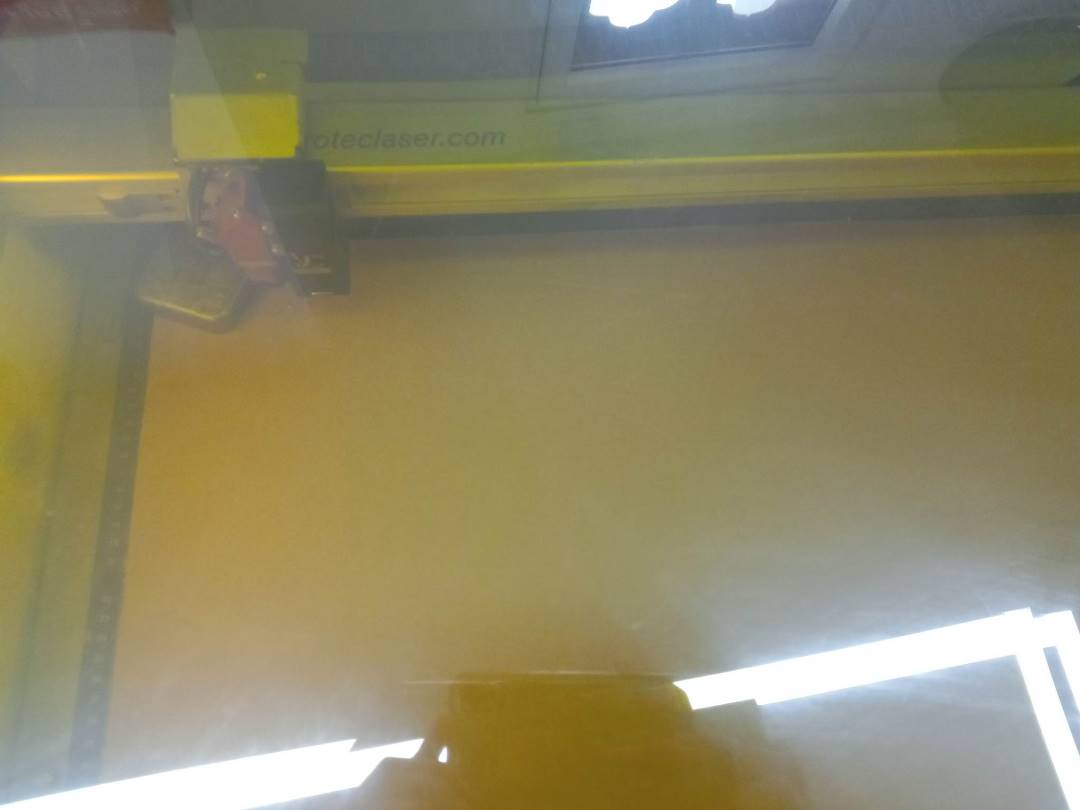
When the nozel reaches the home position you can hear a beep.
Below you can see the picture of zeroing
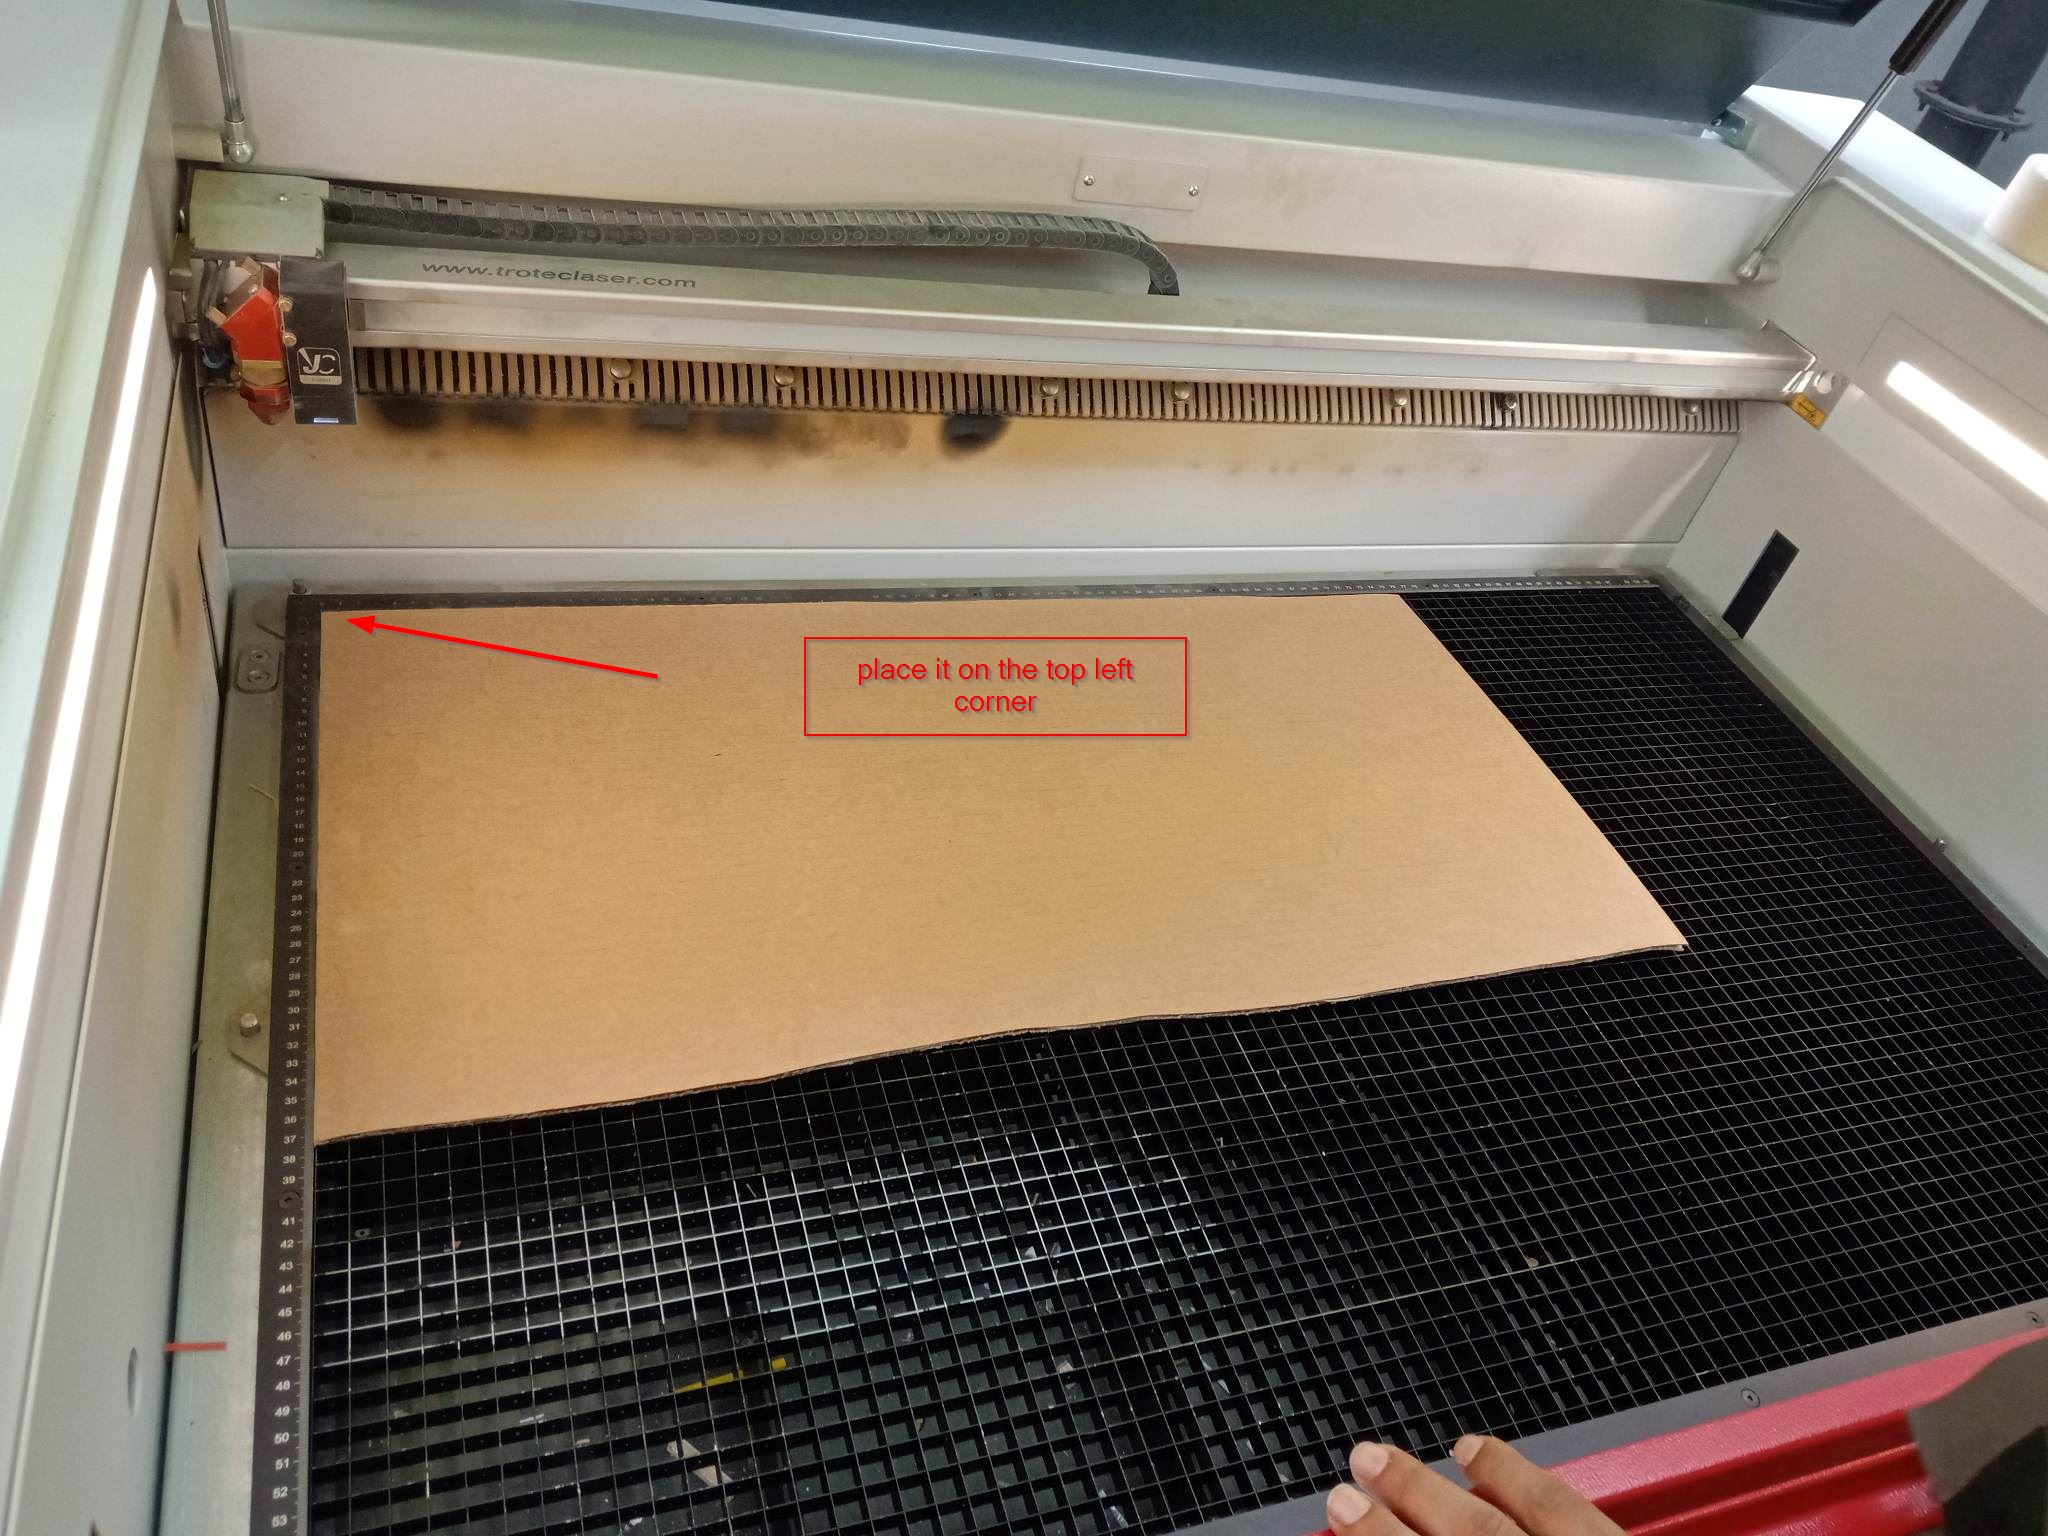
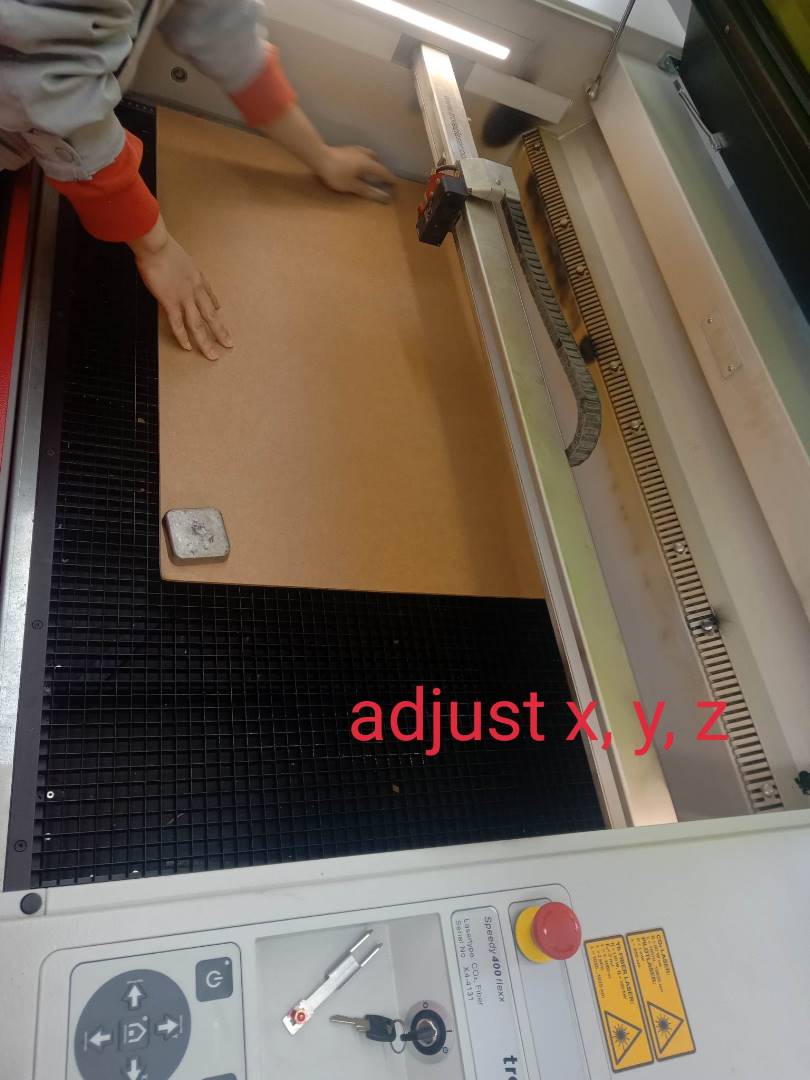
Place the sheet on the top left corner
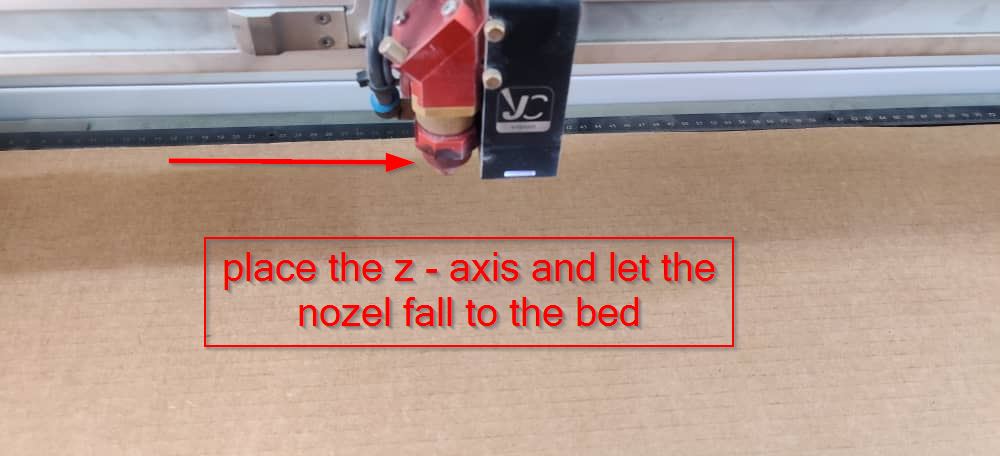
Place the nozel at the center to determine the z axis and let it fall on the bed for the proper focus.
For the design you may use inkscape or fusion 360 and convert it into dxf file.I used fusion 360 to design and let me show you the steps.So open the fusion360 in your desktop.After opening it just go to modify and you will see a drop down.
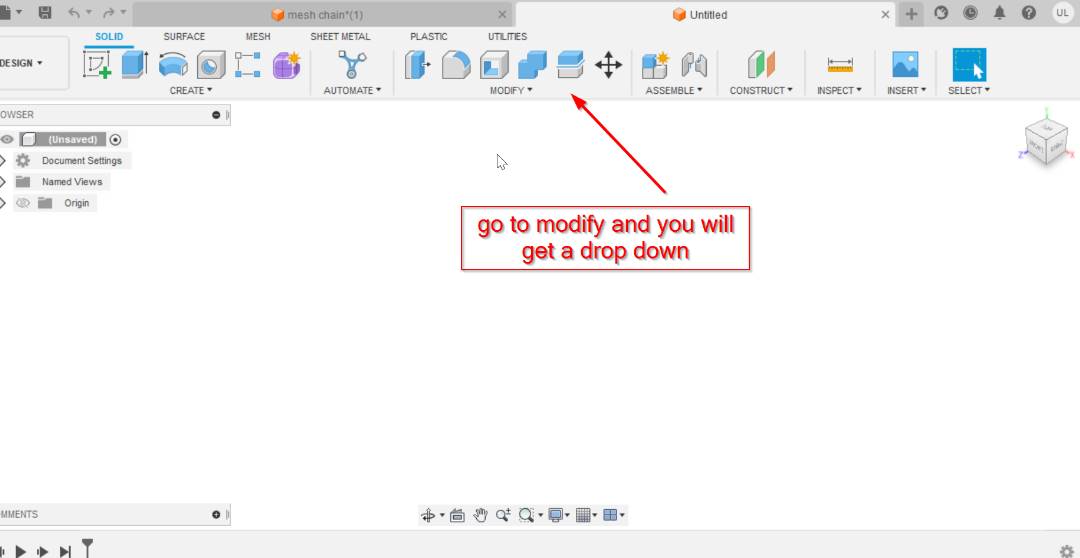
Here you can see a drop down and select the option below.
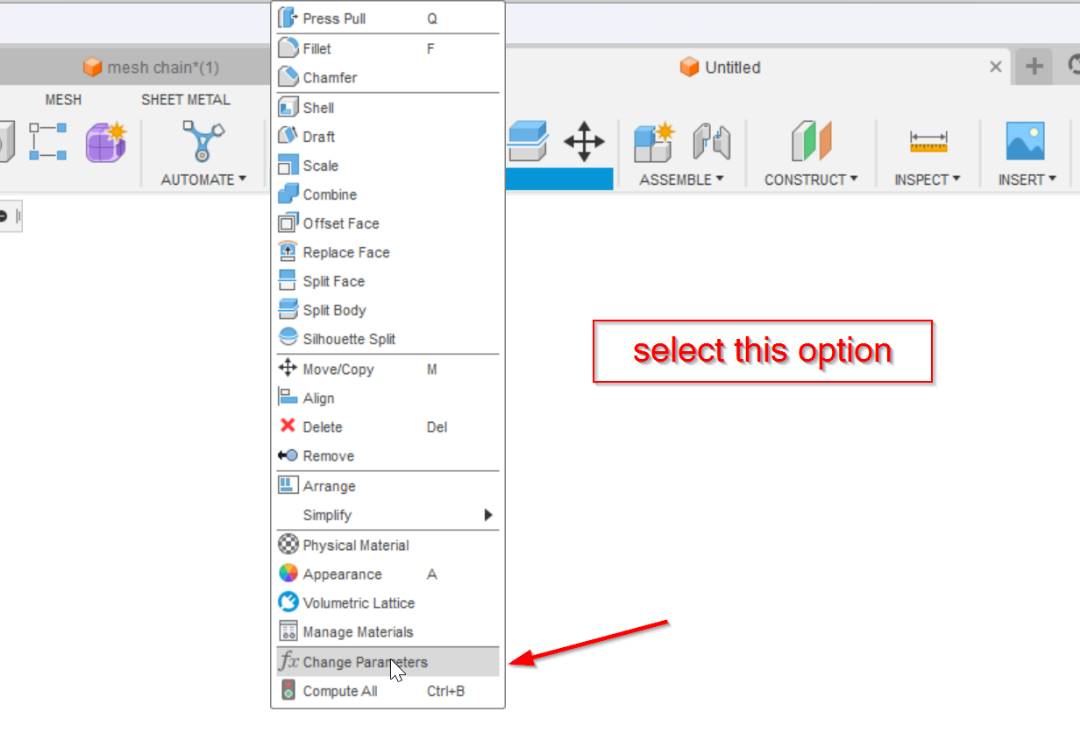
After selecting the option tap on use the parameter.
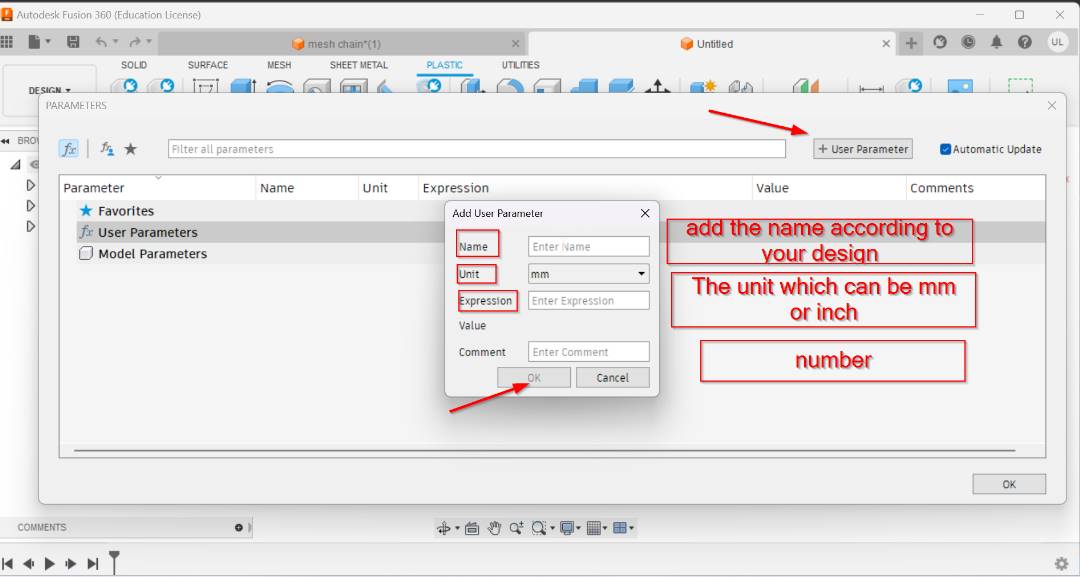
Changing the parameters or setting up the parameters according to your design since it is much easier and time saving when you set the parameters.
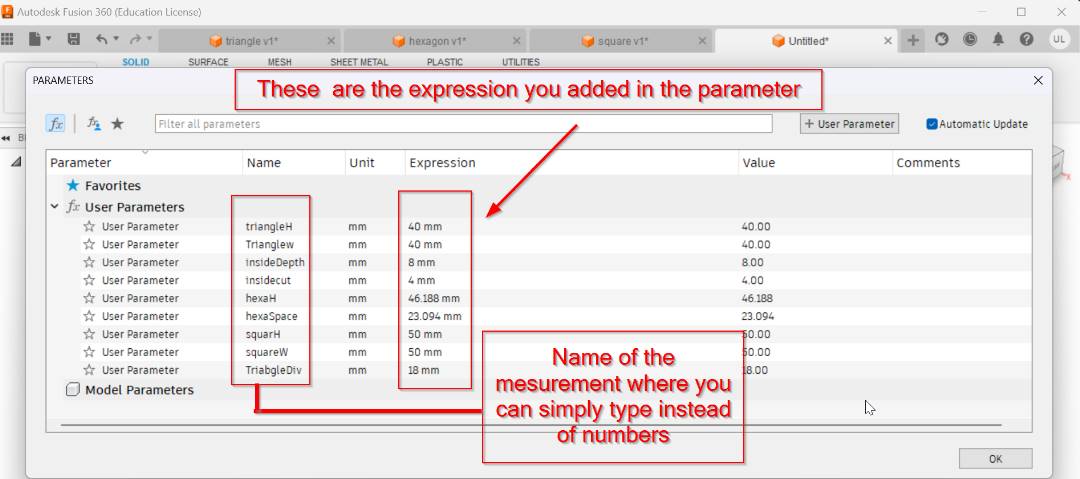
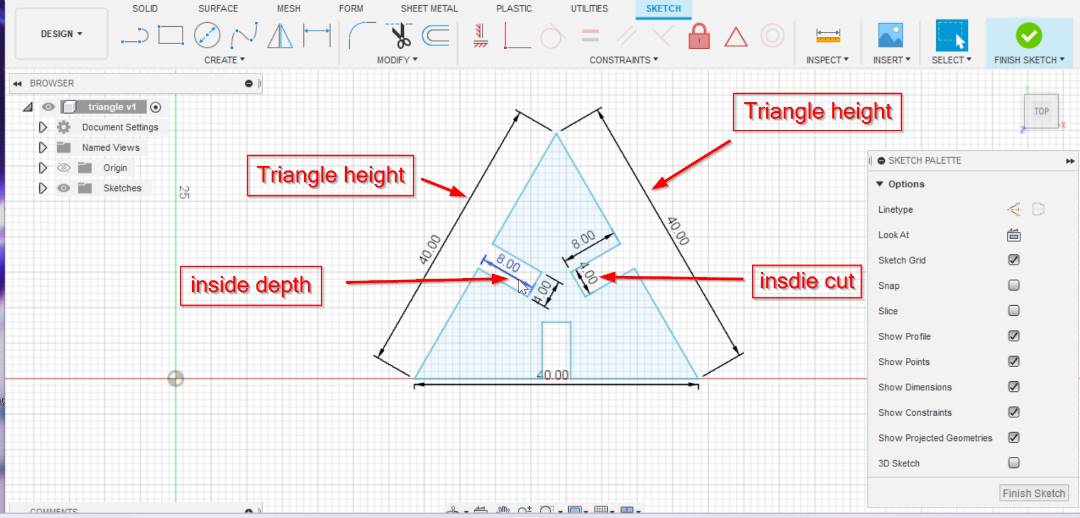
Now you can set the height width cut and depth of the shapes using paramters.
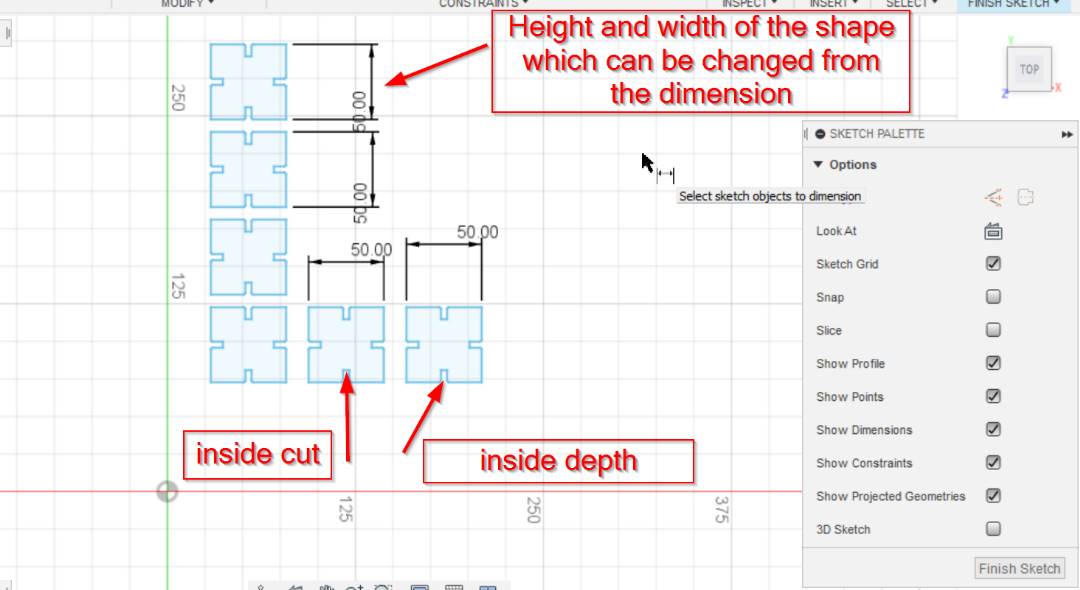
This is for triangle where can change it's height and width and even the cut and depth. which is constant to all the shapes.
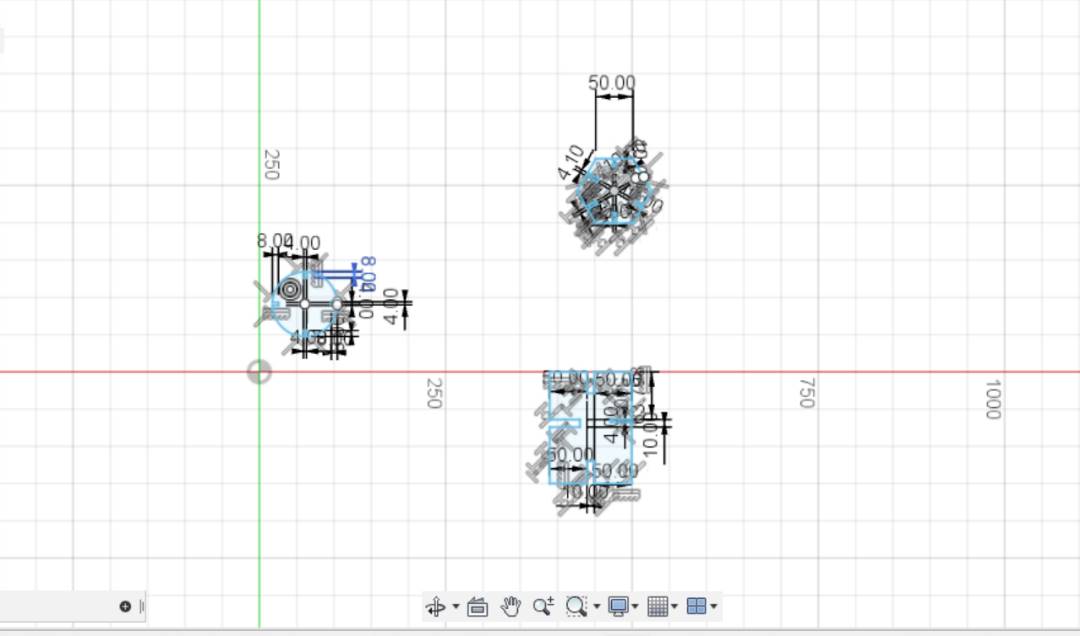
Now for hexagon changing the measurement using parameters, cut and depth. You can even set the space between the shapes in order to get the precise press fit while joining it.

Here is my rough and incomplete sketch on fusion just a raw sketch.(A hexagon, a simple circle and a square)
Below you can see the DXF file converted and imported on inkscape.
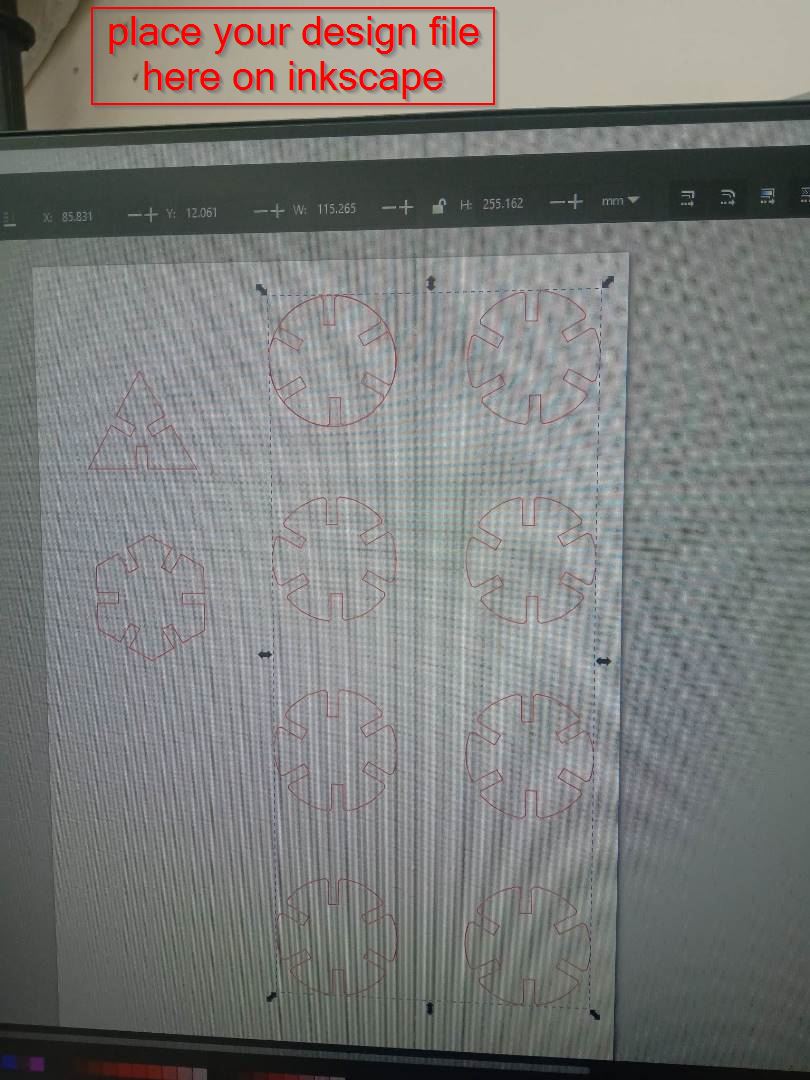
Here you can see my design in dxf file which i have opened in inkscape.
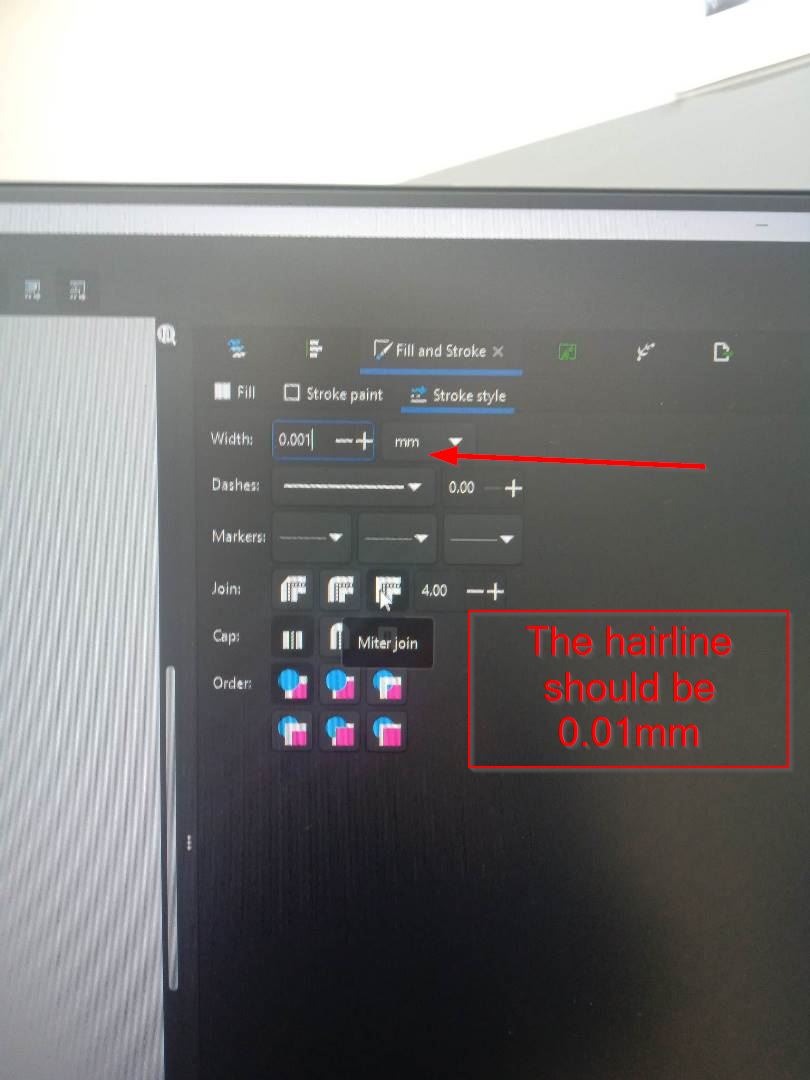
The hairline should be within 0.001mm
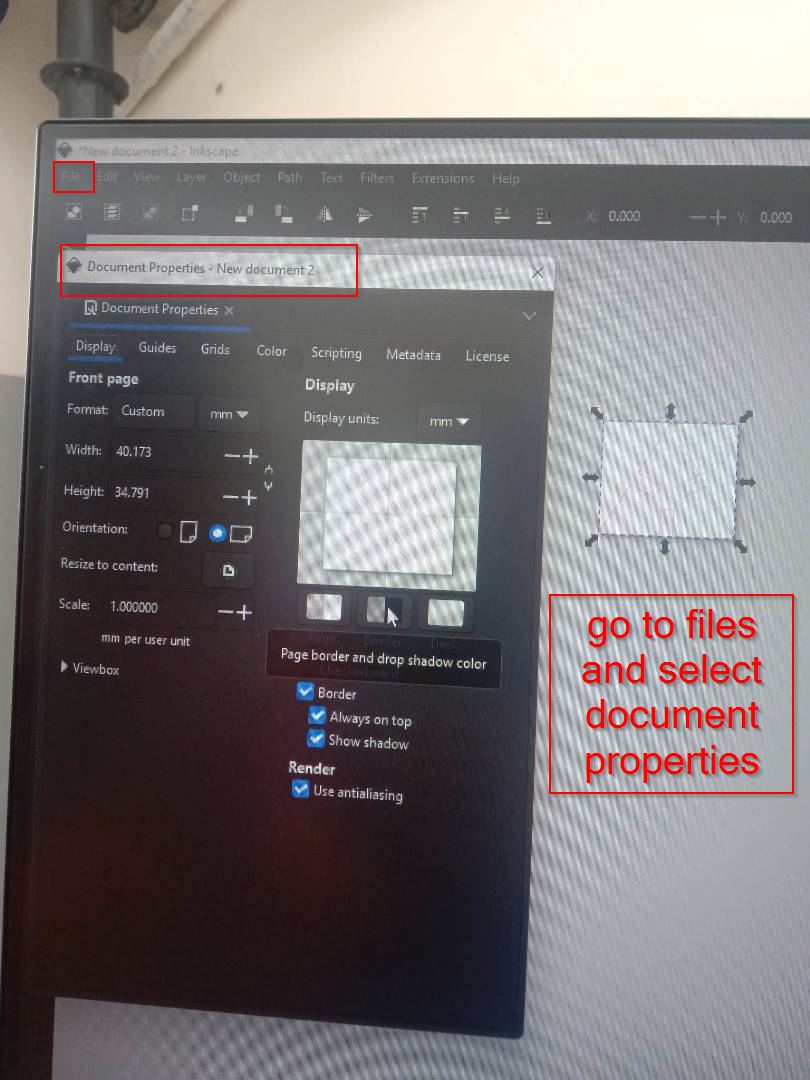
Go to files and you can see a drop down, select document properties
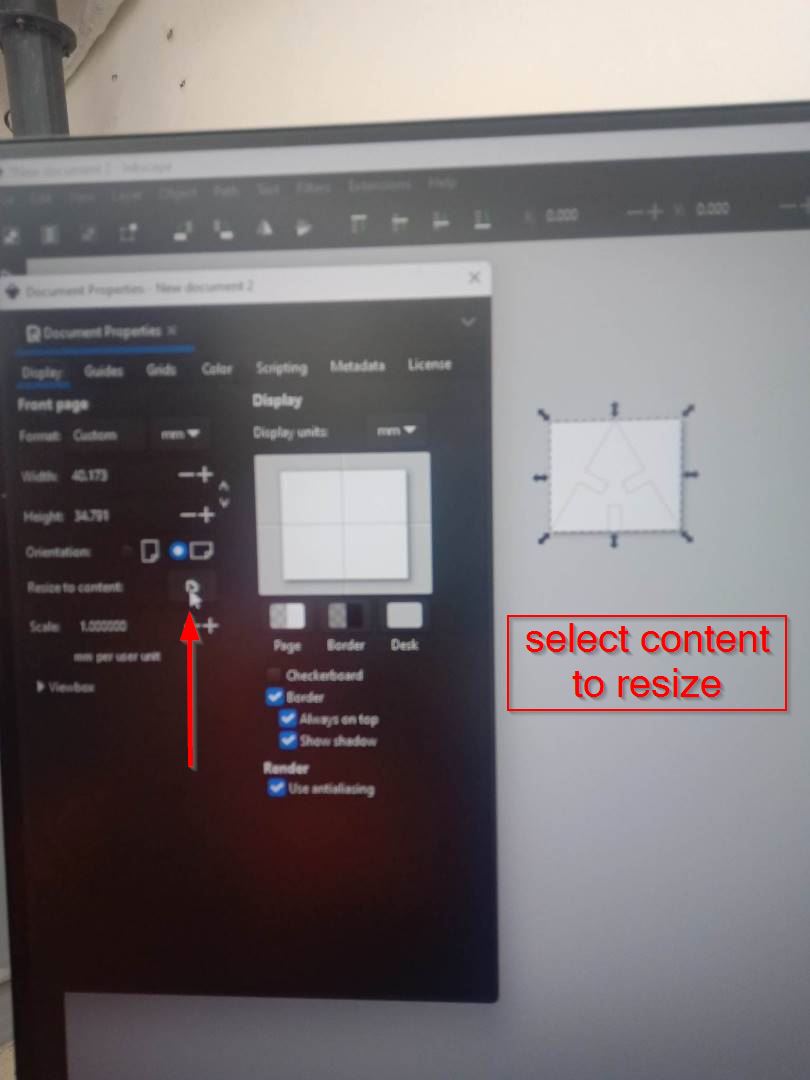
select resize to content
Go to extension and select cut studio (in order to run the machine you have to select the name of the machine software.)
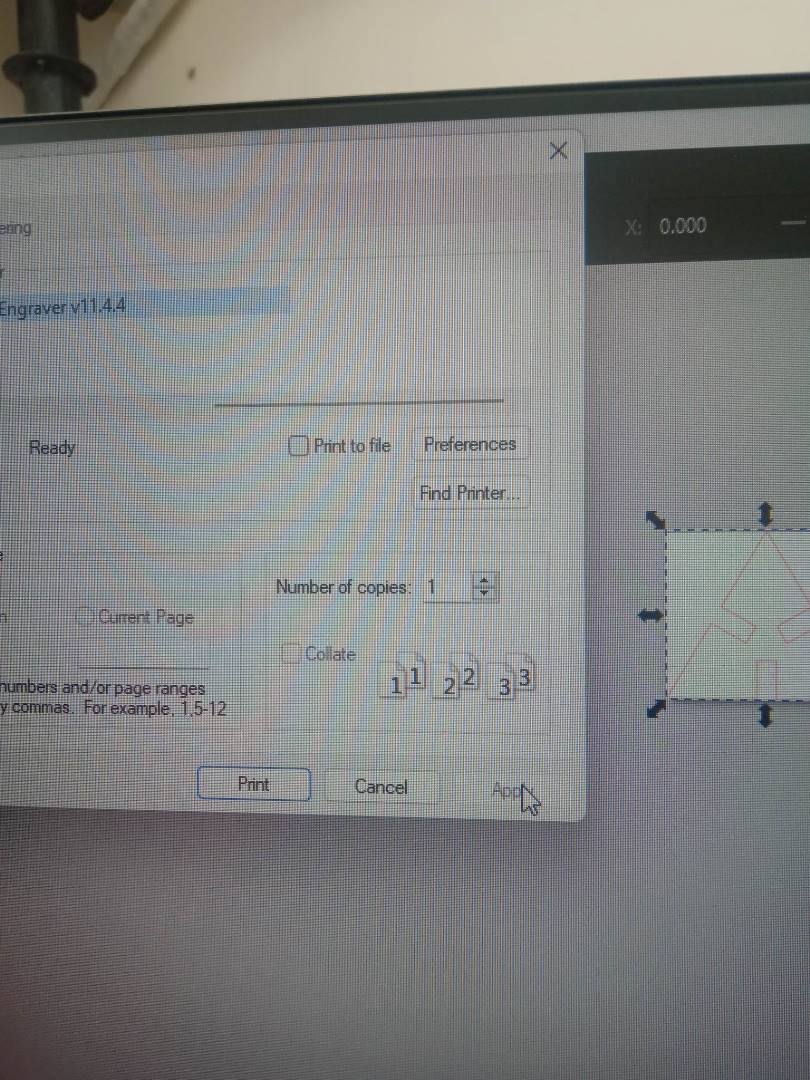
select the print option, and select Trotect Engraver.
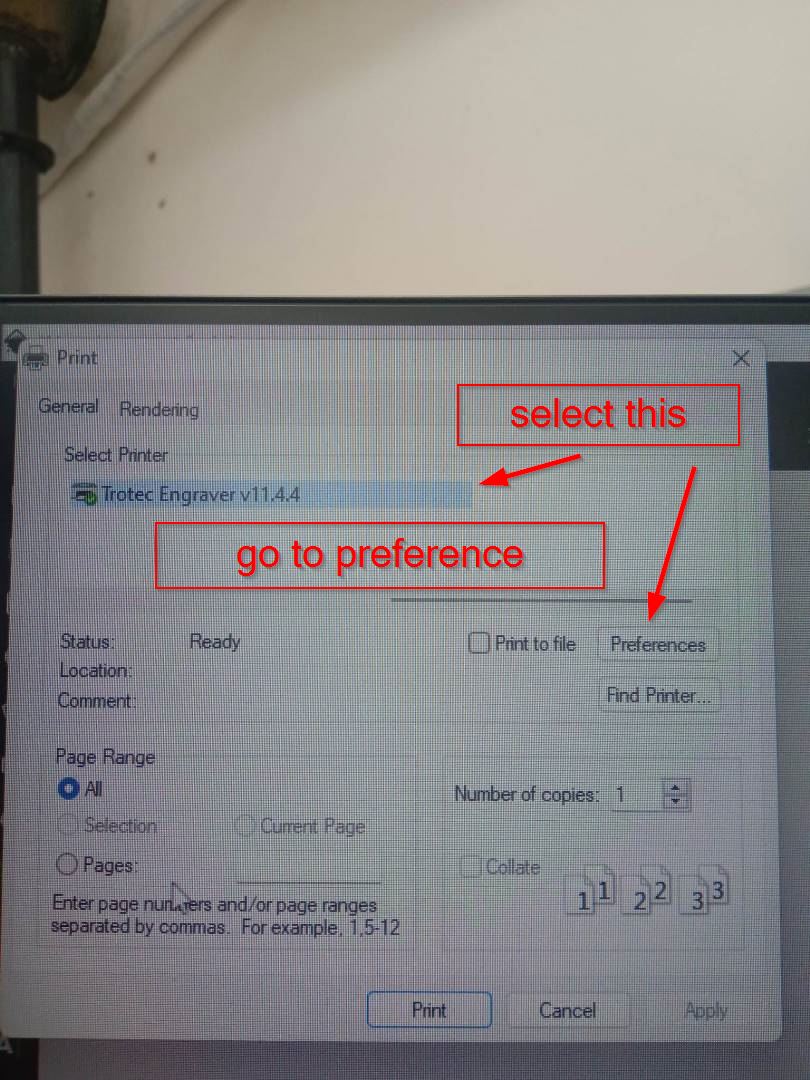
Go to preferences
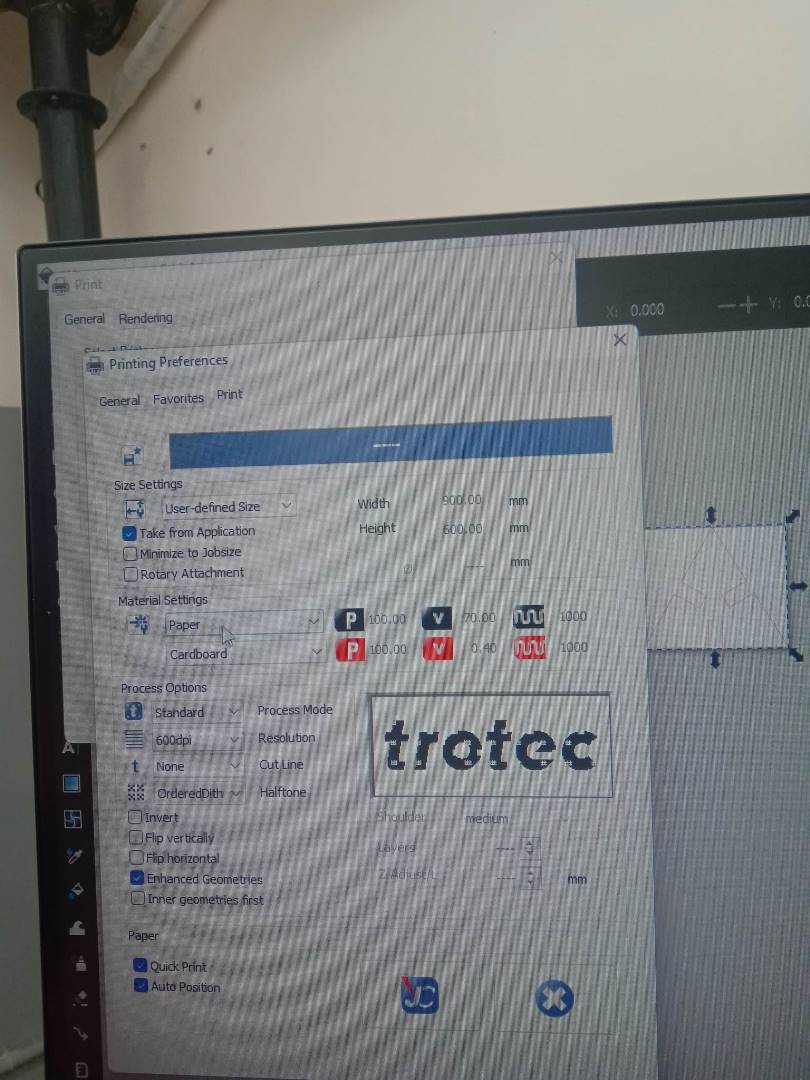
Next select the material type
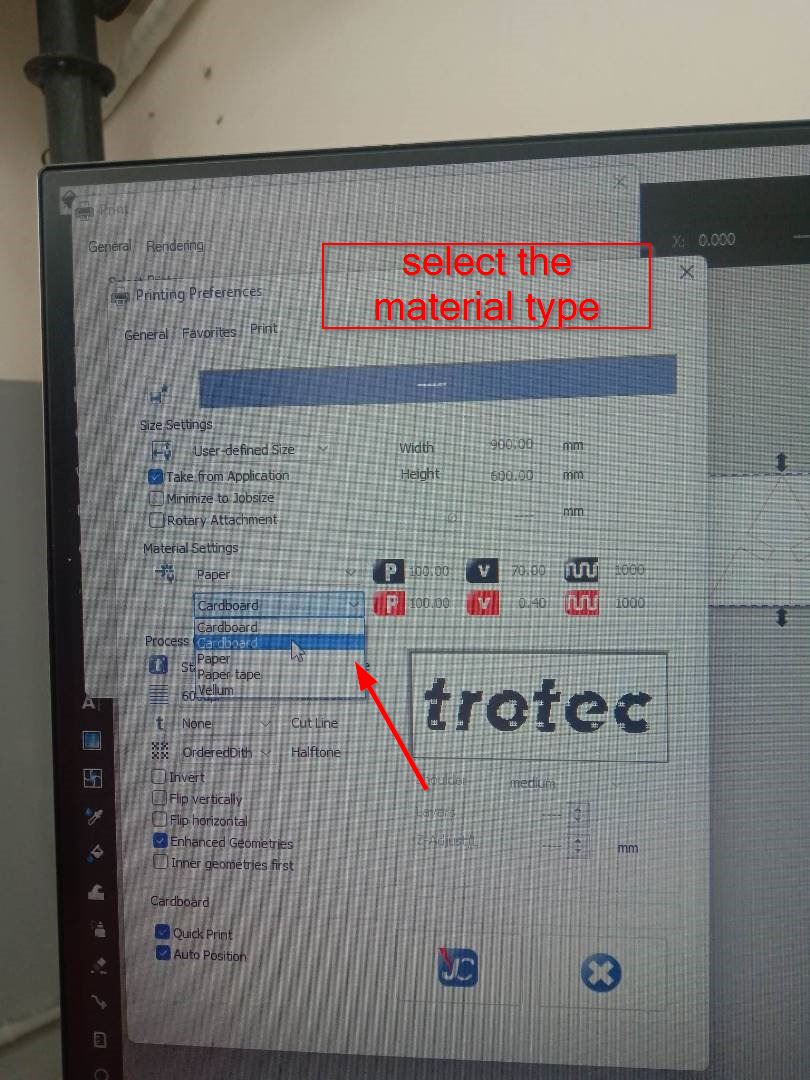
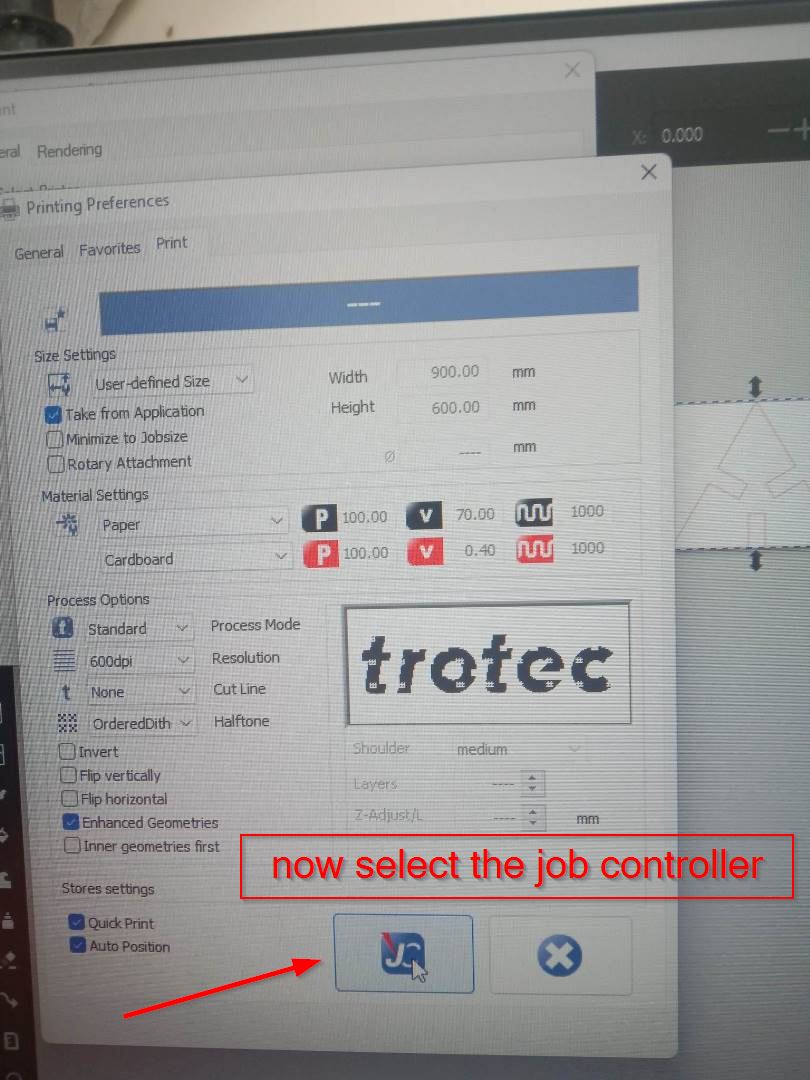
Then select job controller
Before that place the sheet and do zeroing
Just like the picture below place the sheet
As you can see just cancel with engraving

Now apply and print
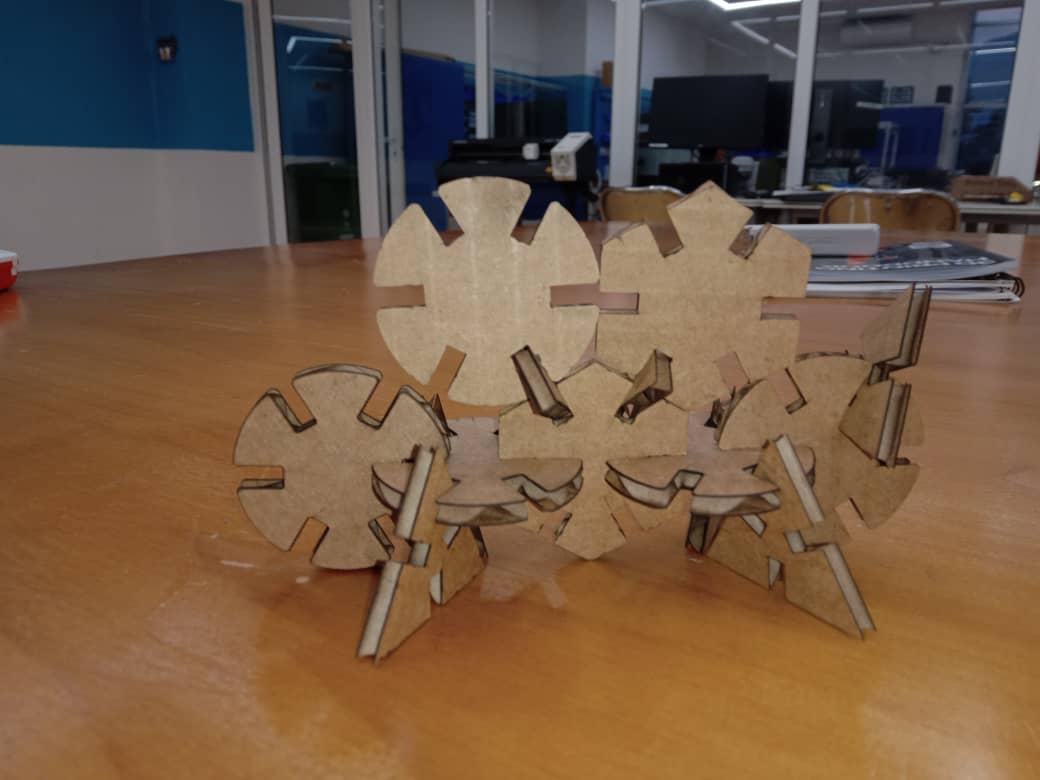
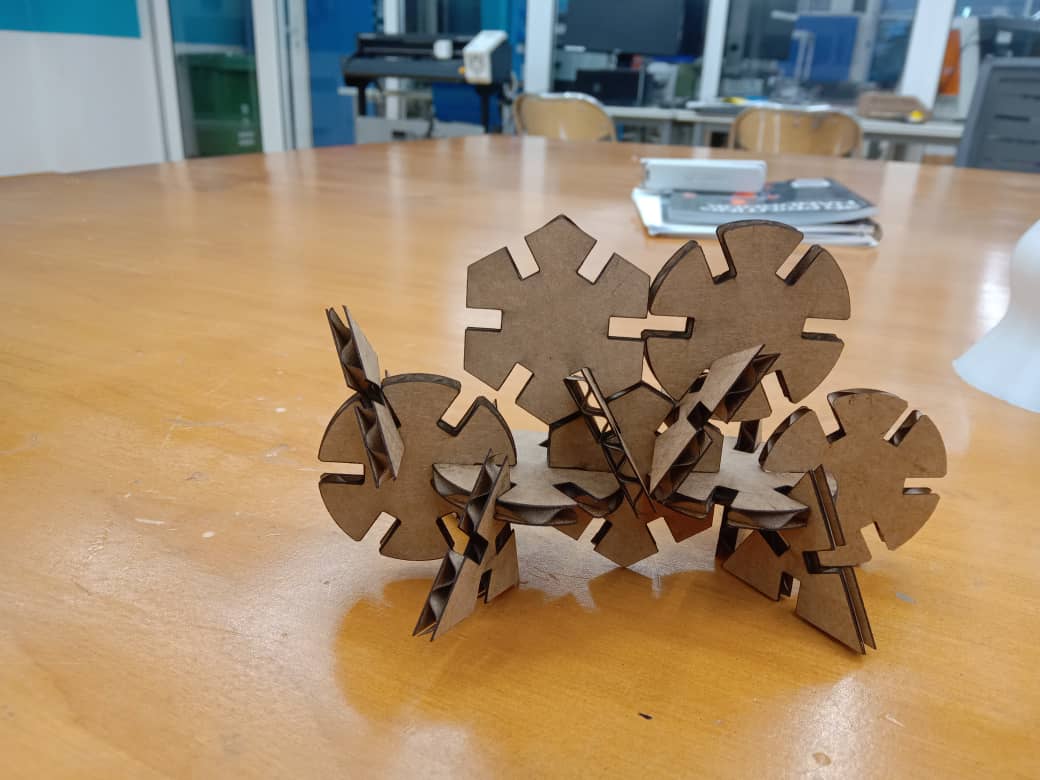
As instructed by our local instructor i just tried printing or just did a simple test
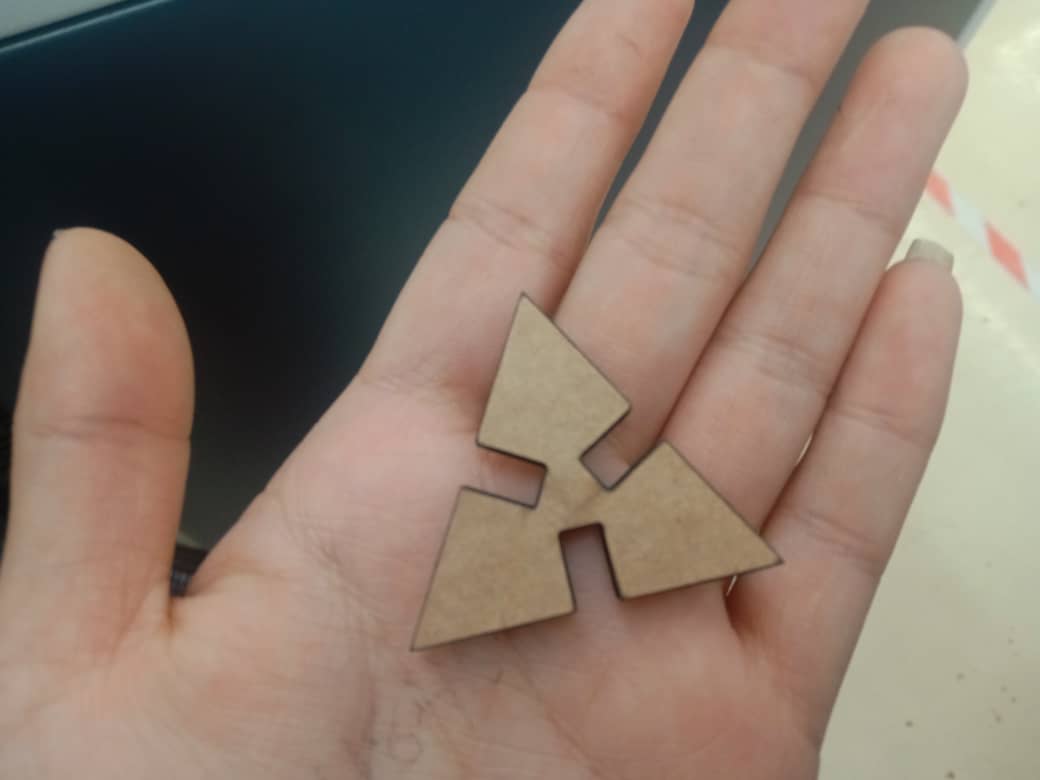
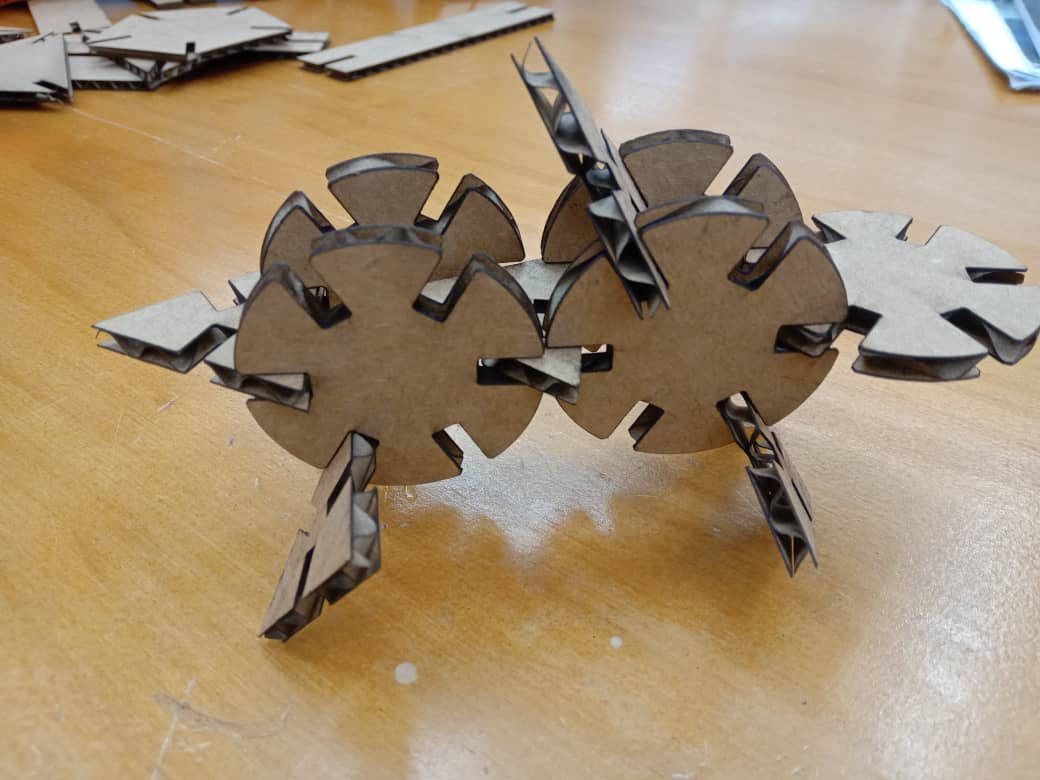
Here is my design on fusion, a simple design indeed. I tried designing an animal or I am not sure since Parametric design is very new for me,
I tried to learn from my instructor and even watched some tutorial. And came out with a design.
Vinyl cutter
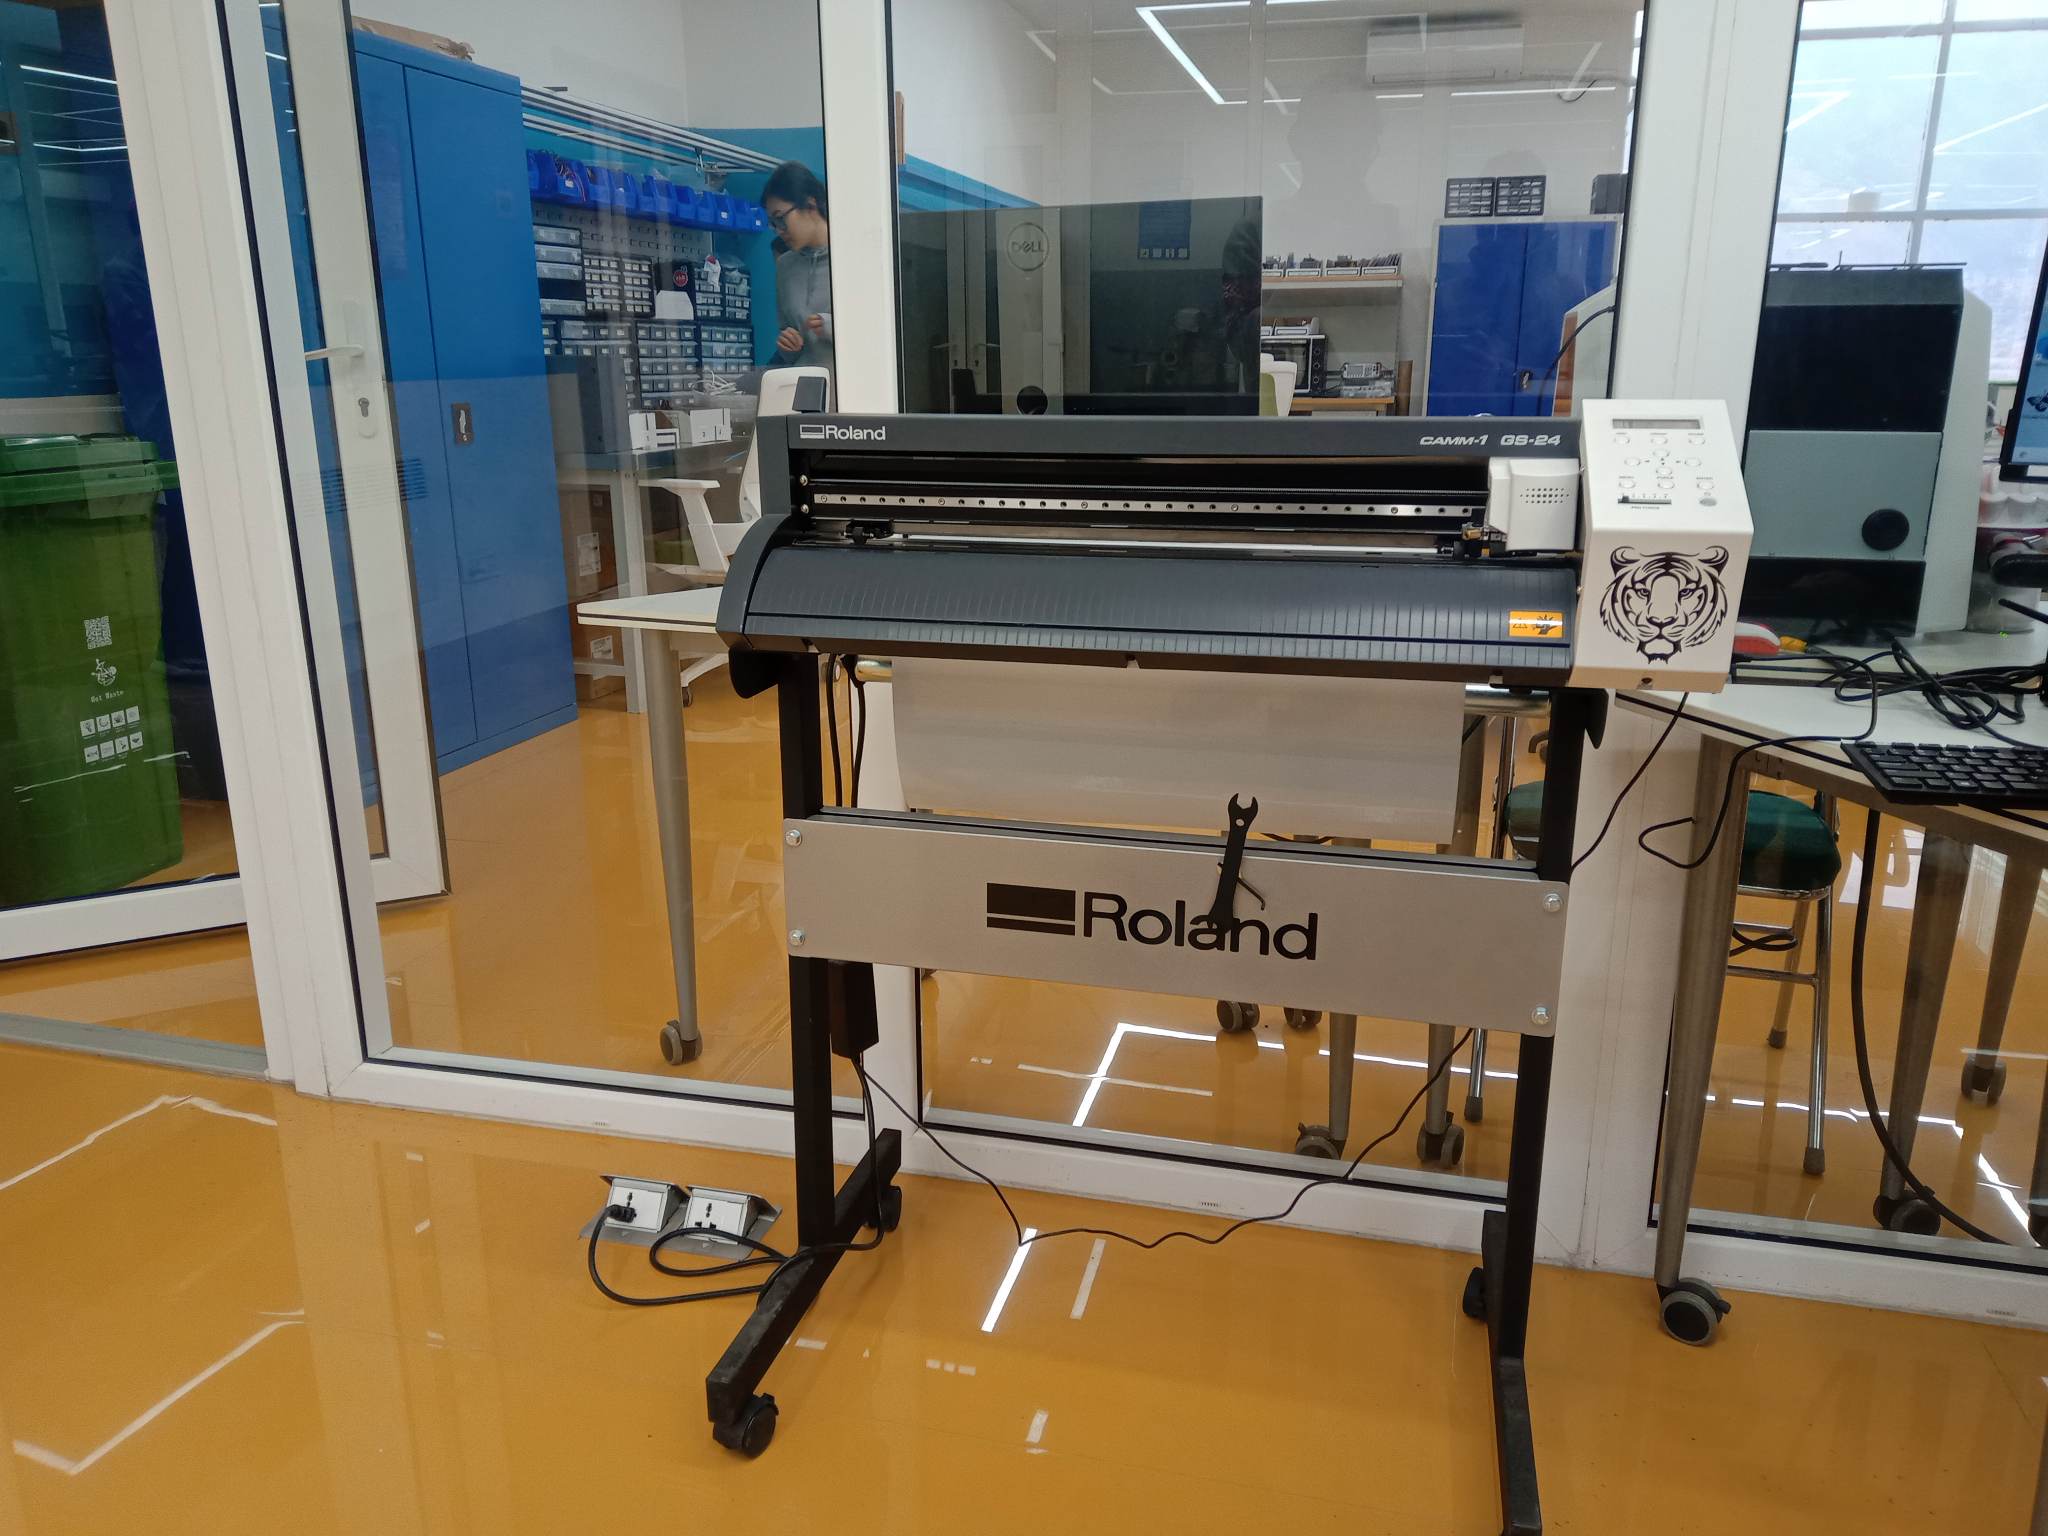
This is the vinyl cutter machine
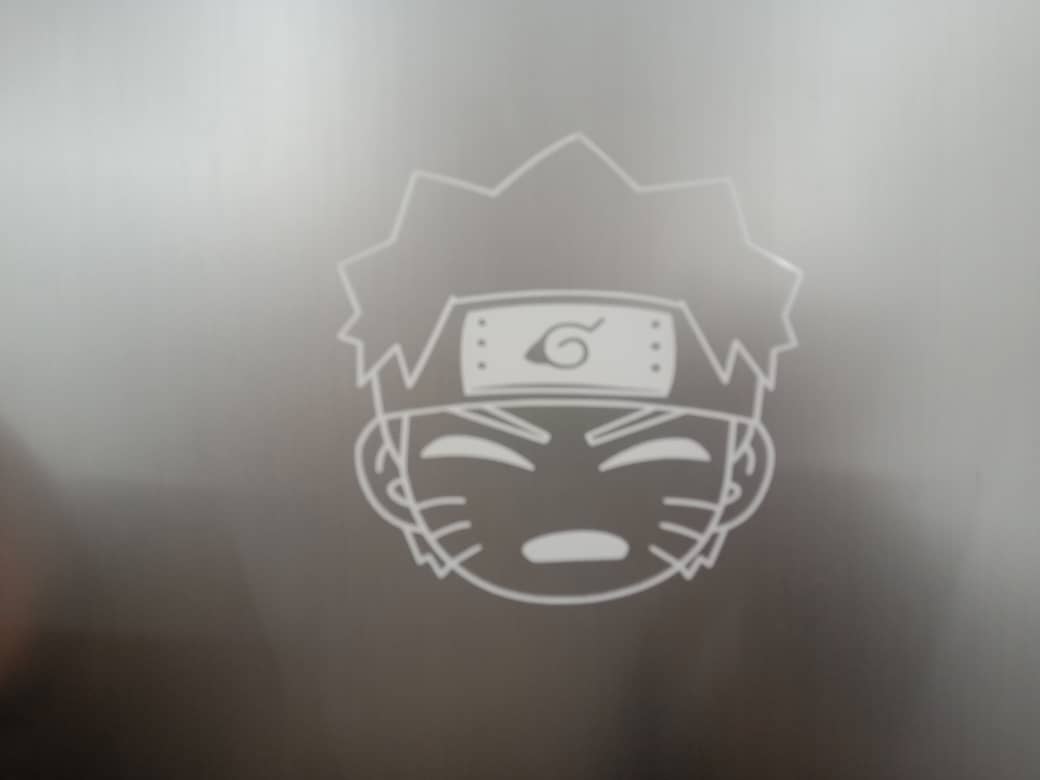
So in same week we even learned to operate the vinyl cutter machine. According to google;A vinyl cutter is an entry level machine for making signs. Computer designed vector files with patterns and letters are directly cut on the roll of vinyl which is mounted and fed into the vinyl cutter through USB or serial cable. Vinyl cutters are mainly used to make signs, banners and advertisements. Advertisements seen on automobiles and vans are often made with vinyl cut letters. So before using the machine we need to do test cut inorder not to waste the vinyl sheet and to make sure the settings are right or not. so before doing the design cut we did in group as a test cut by cutting a logo and checked the speed as well as the power setting on the desktop and after that I cut out my design of naruto for my laptop.
We got group assignment for leaser cutter and vinyl cutter.
And for individual assignment I used vinyl cutter and printed out an outline of naturo on my laptop and Logo for my final project sensor heater jacket. As shown below; picture source Google..
steps to operate the vinyl cutter machine.
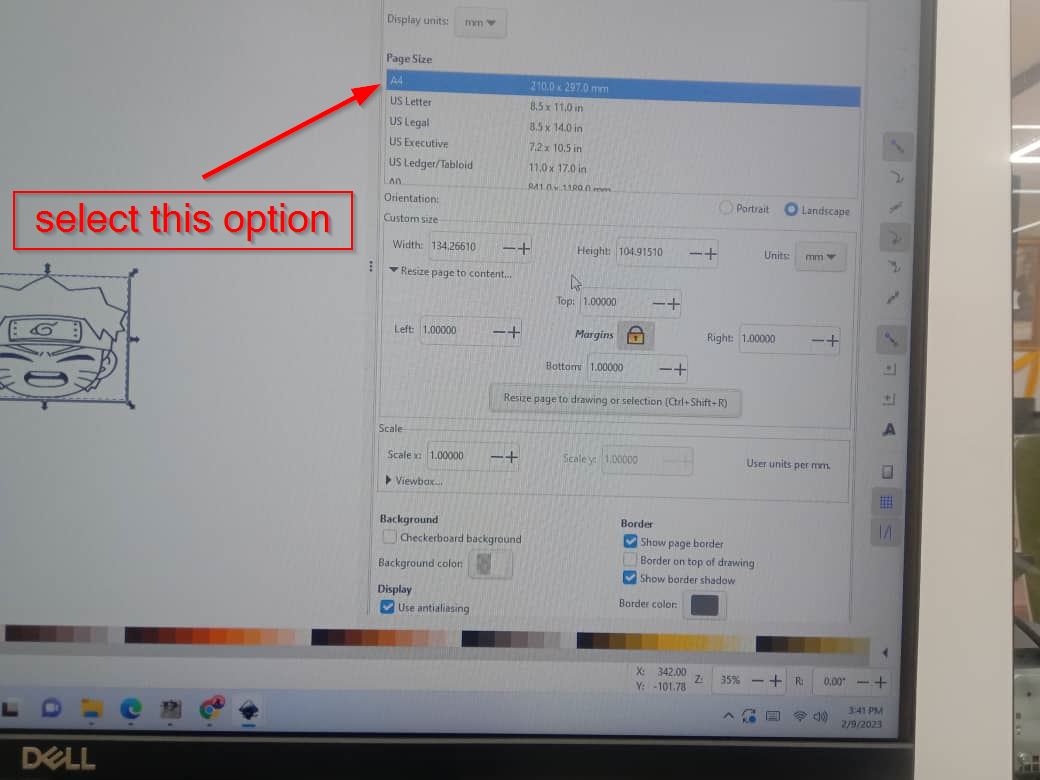
1) Simply google an image and copy paste on Inkscape. and go to document properties

2)You will get a drop down option where select A4 size option and change the height and width according to your wish
3)Now go to extension and you can see a drop down with different option.
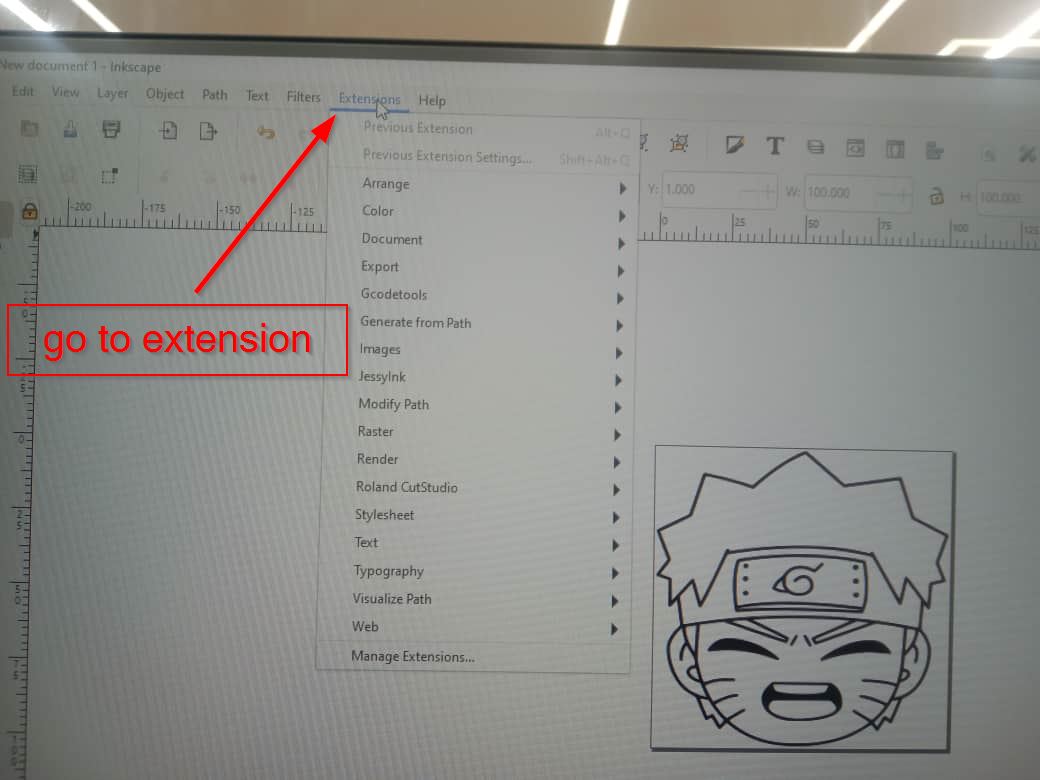
4)Go to Roland cutStudio
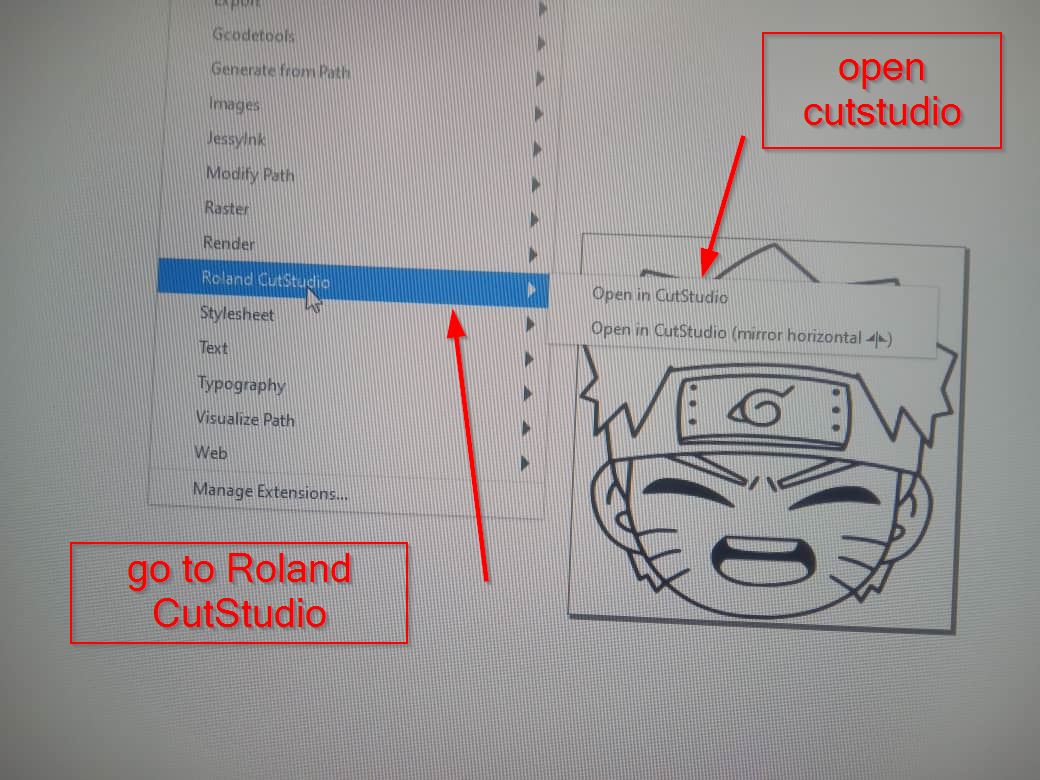
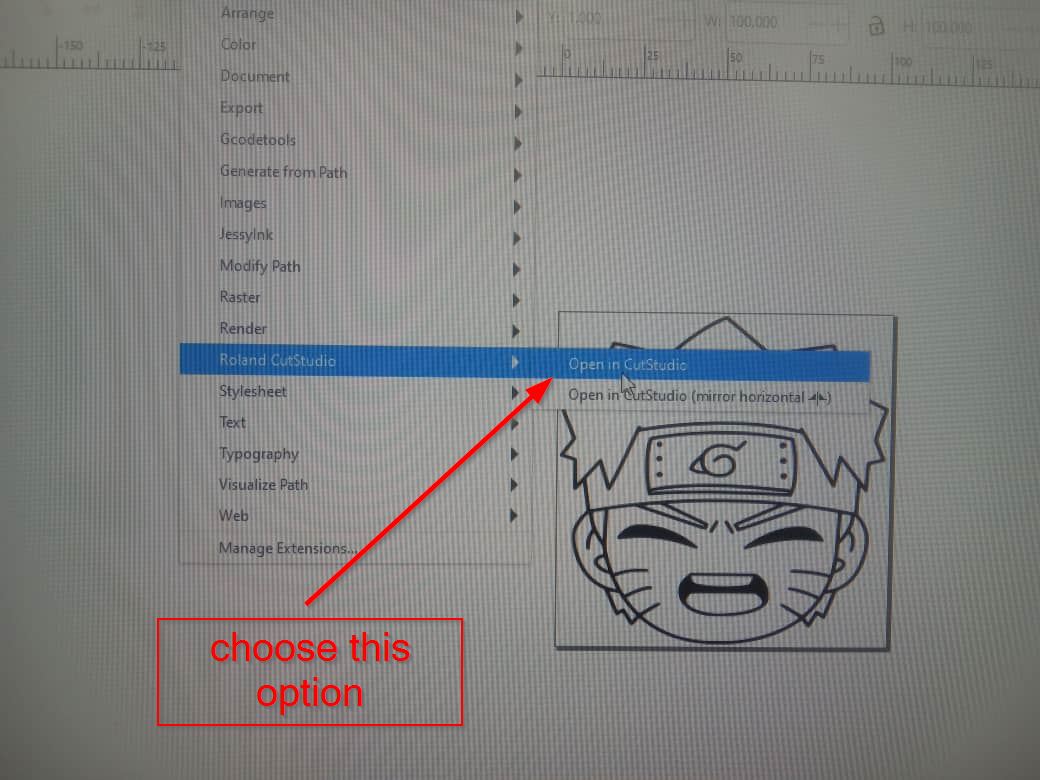
5)You will again see drop down were you have to choose open CutStudio
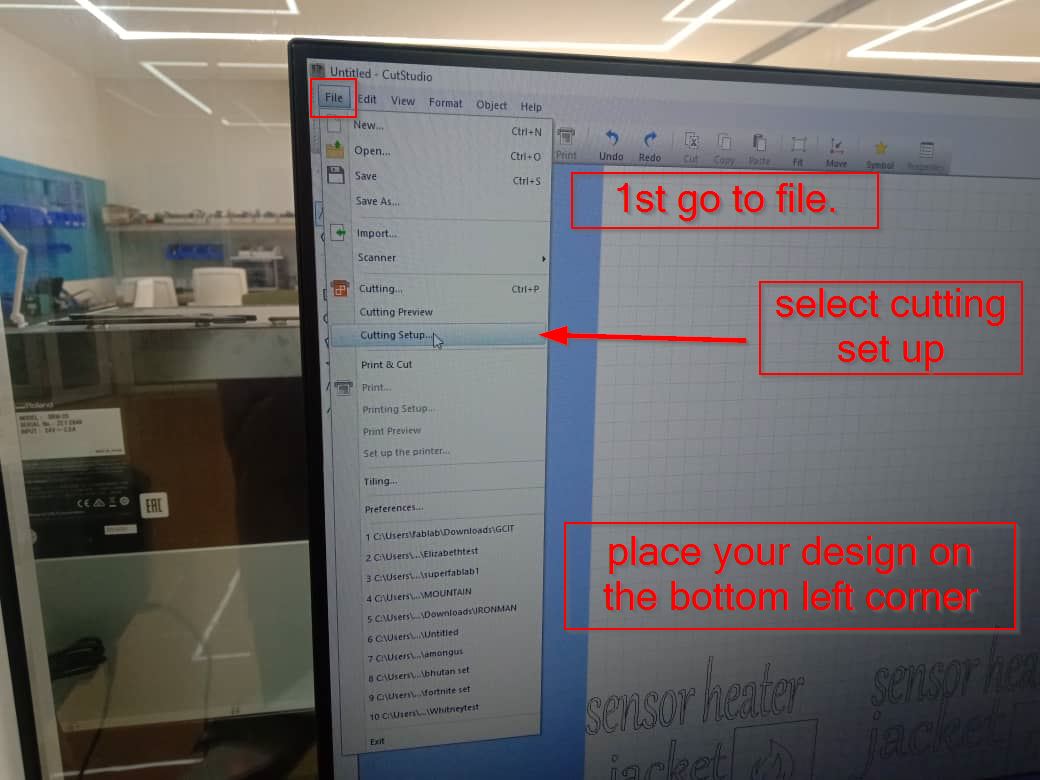
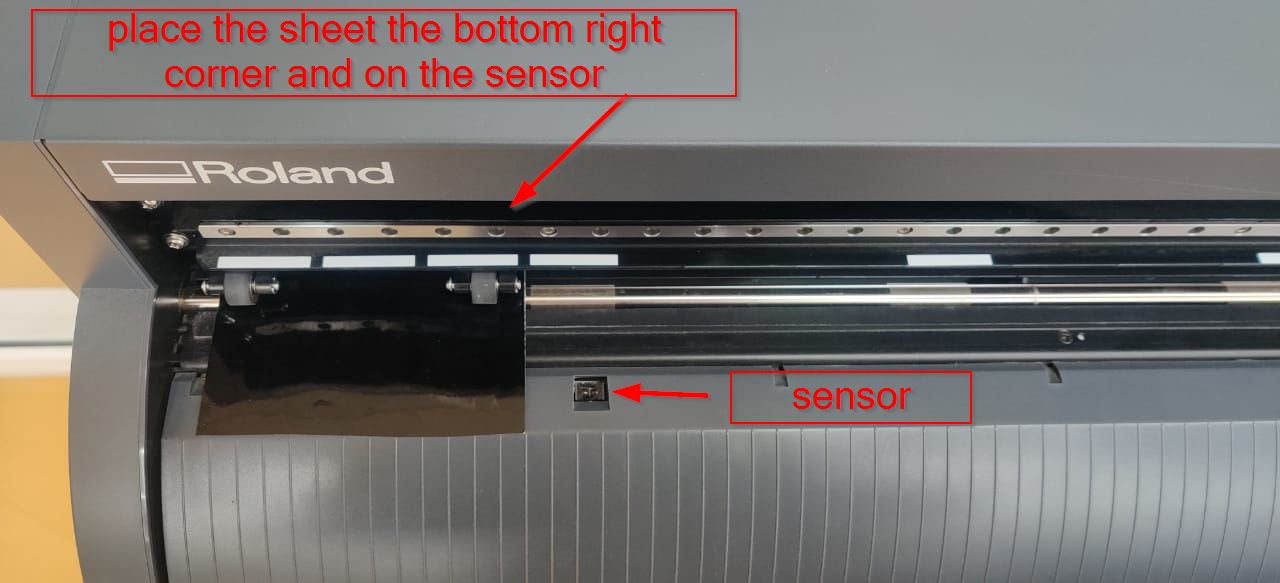
6)place your design on the bottom right of the grid in oder not to waste the vinyl cutter sheet. Now go to file and select cutting Setup.
7)Select Roland GS-24 name of the current machine.
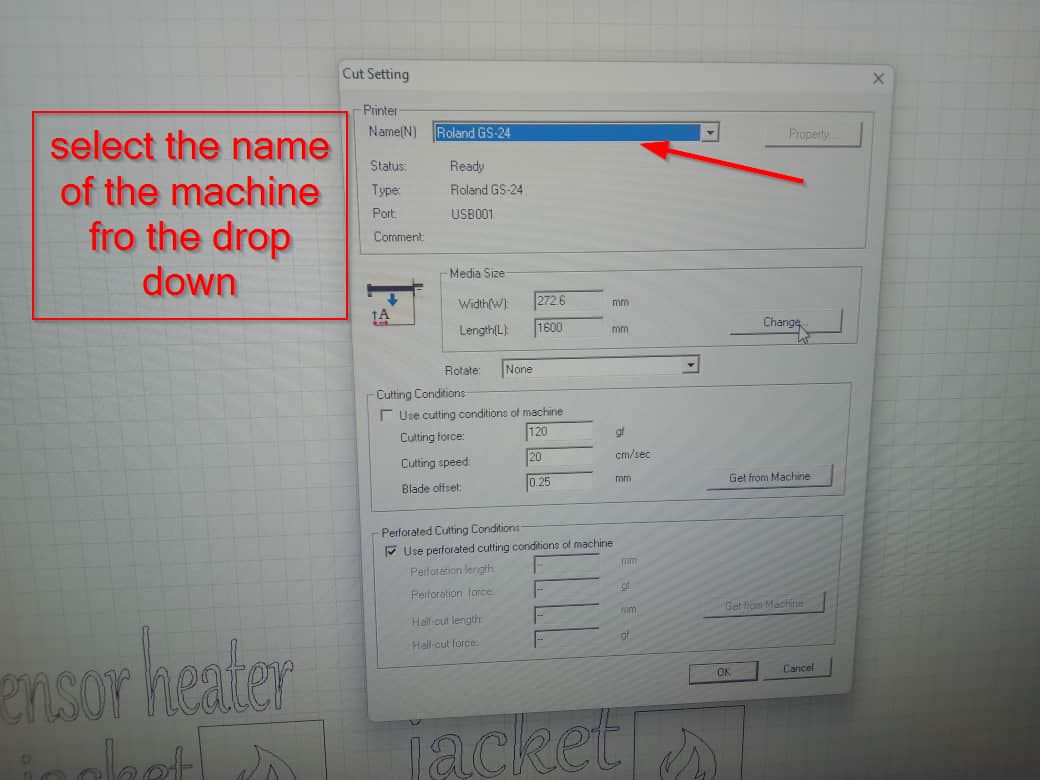
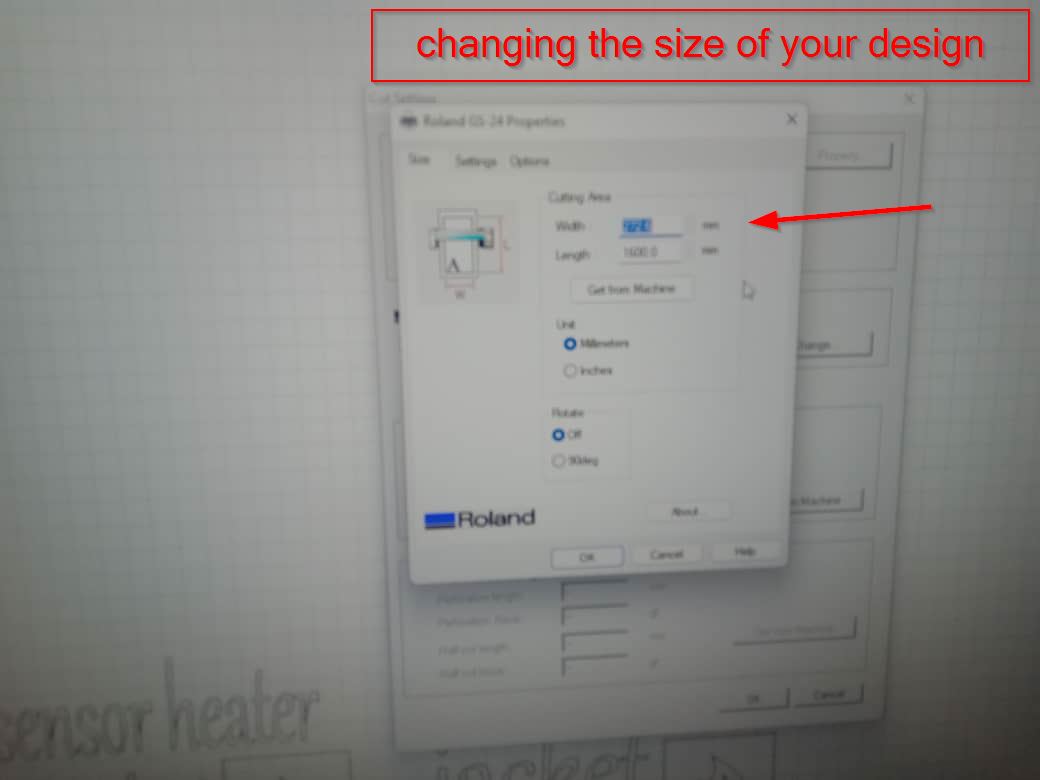
8)Change the width and height
(Before that auto lock in order to keep your design size and height in a uniform way.)
9)Now select get from machine option
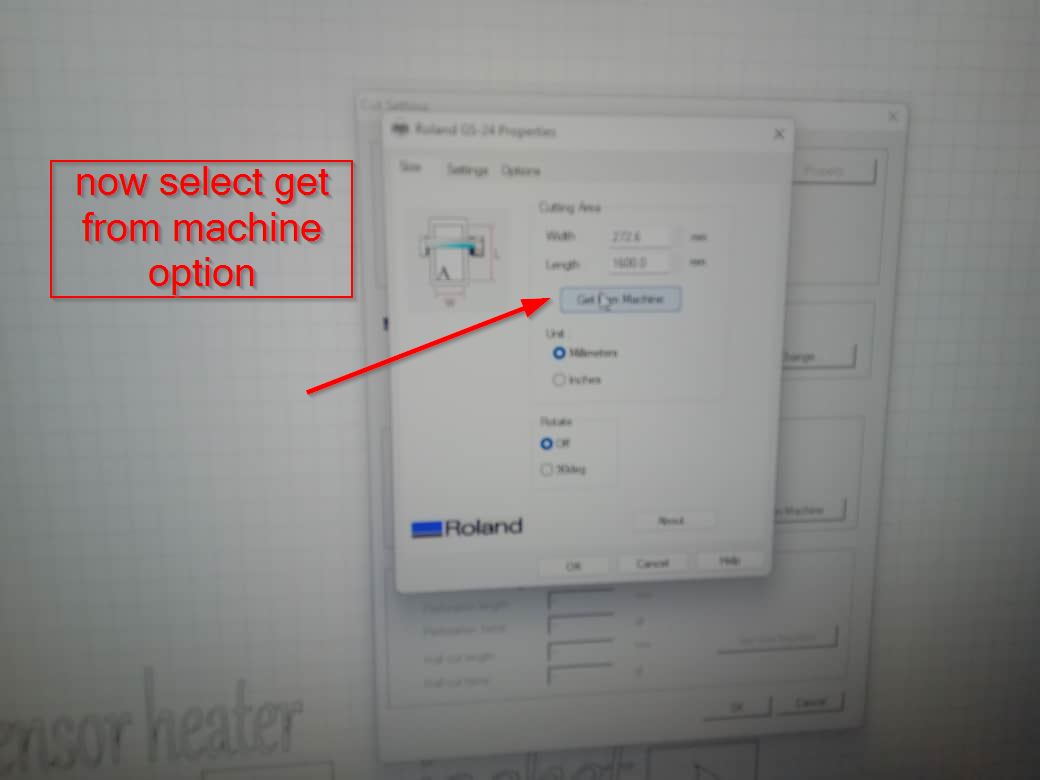
10)you will now see different types of option; just click on ok button
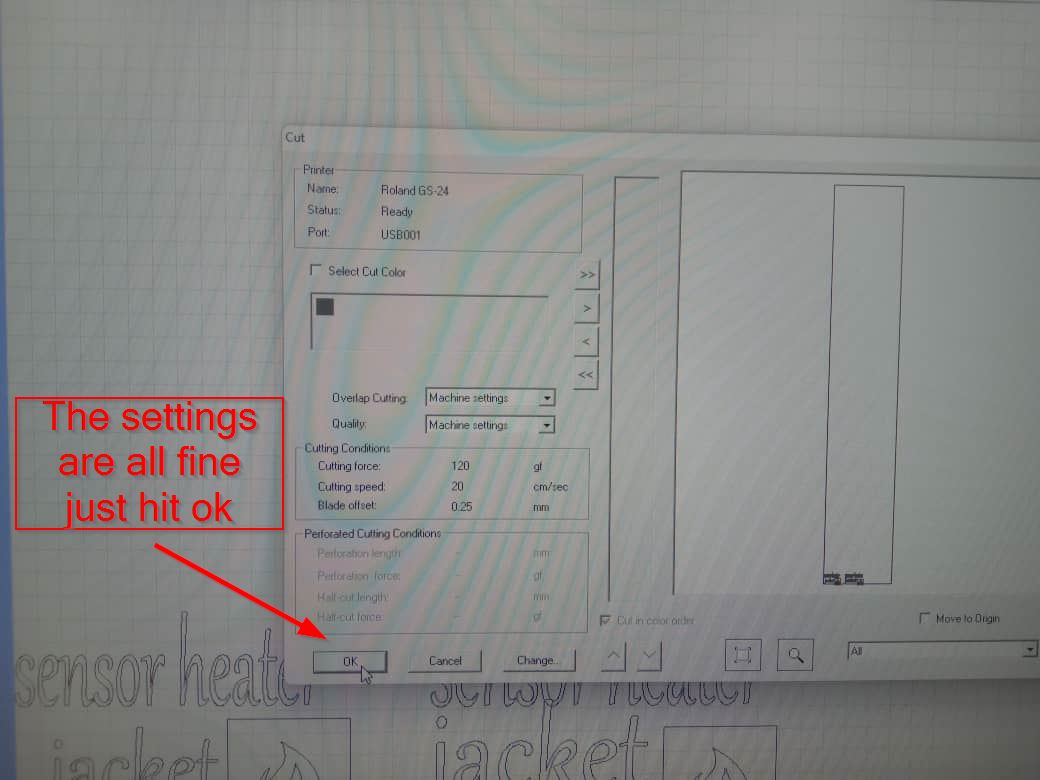
11) Place the sheet on the machine
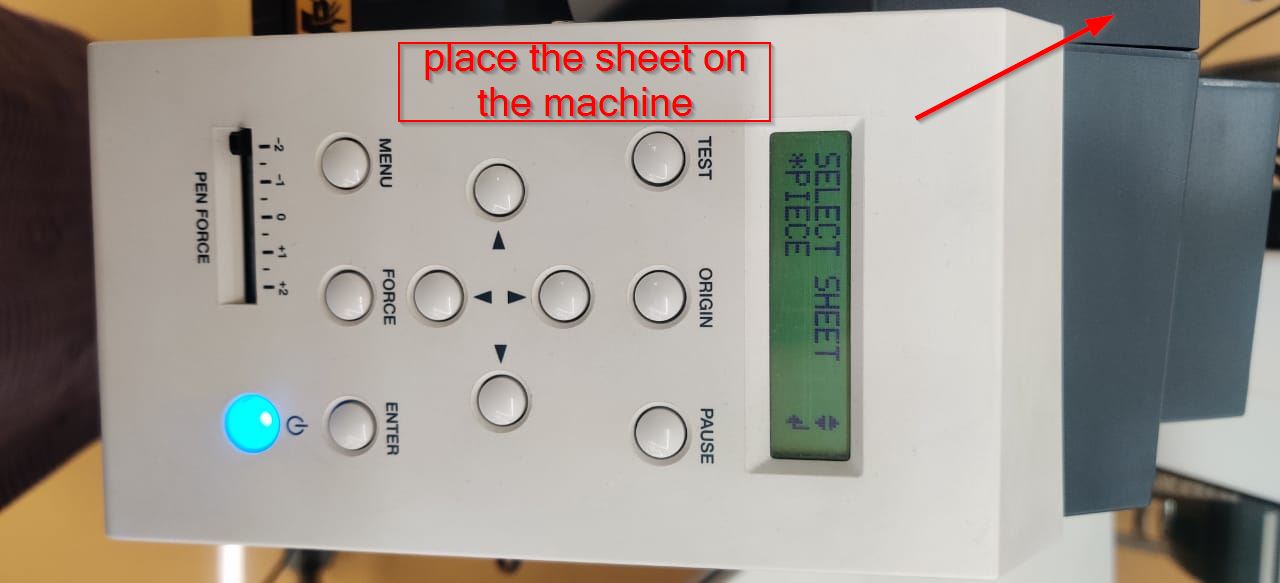
12)Now press enter
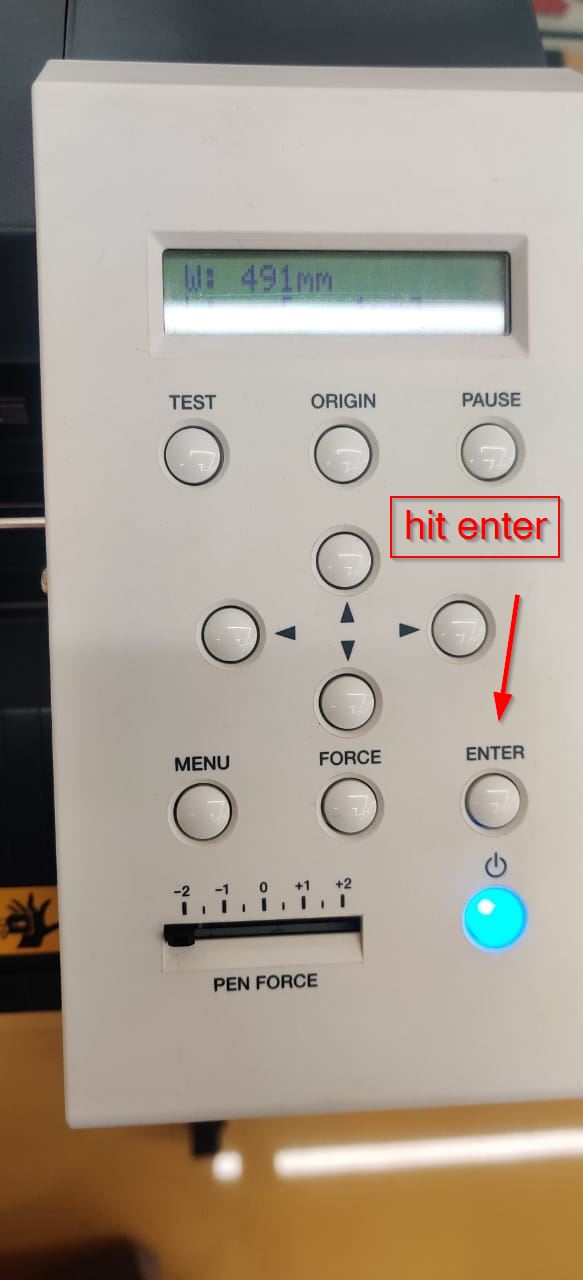
13)The machine will start printing the design from the bottom left to right as shown in the picture and video below.
This is how vinyl cutter works.
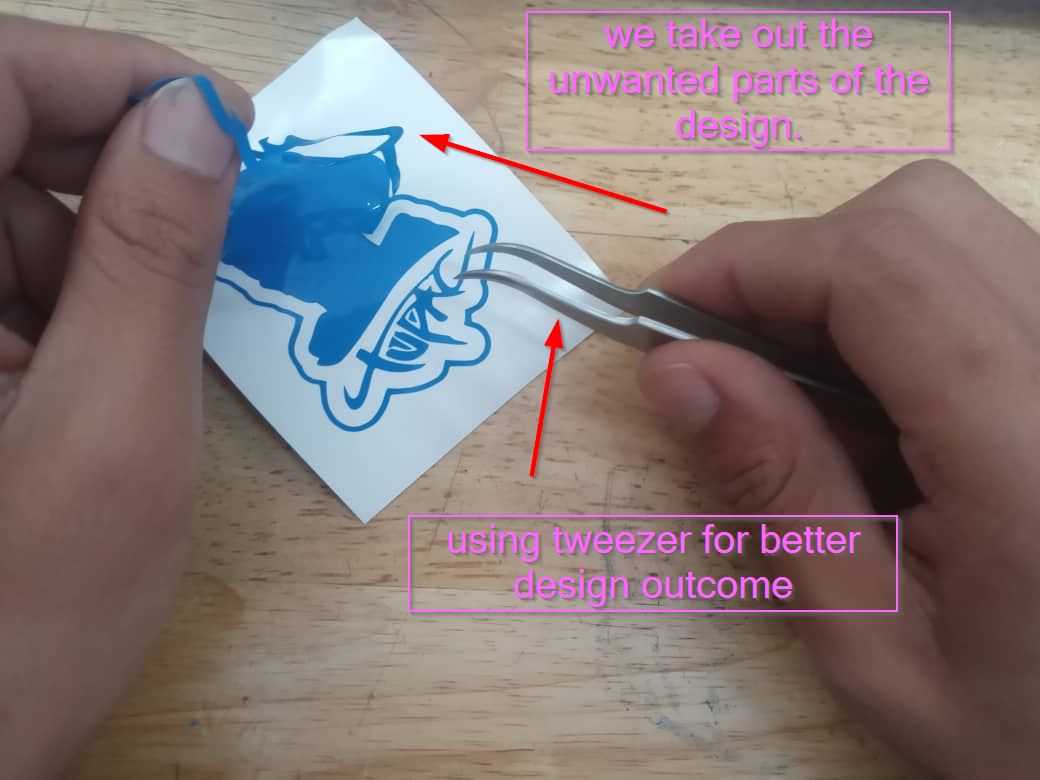
So after the machine is done cutting the design, we need to do the weeding and transfer to the tap for the better outcome.So i will show you how to do weeding and transfer tapping on the white sheet. so below here is an i mage of doing a weeding, since my design is already skipped with wedding and tapping on white sheet process will show you somehow. We do wedding very wisely with the tweezer.
Now lets go with the tapping on the white sheet this is for the sticker or the vinyl to paste without any air inside it while pasting it. you can even say for clean pasting on the area where ever you want. Since i am already done with my design, below this is the image I got from our group assignment that shows how tapping is done. after that take out the white sheet and paste on the designated area.
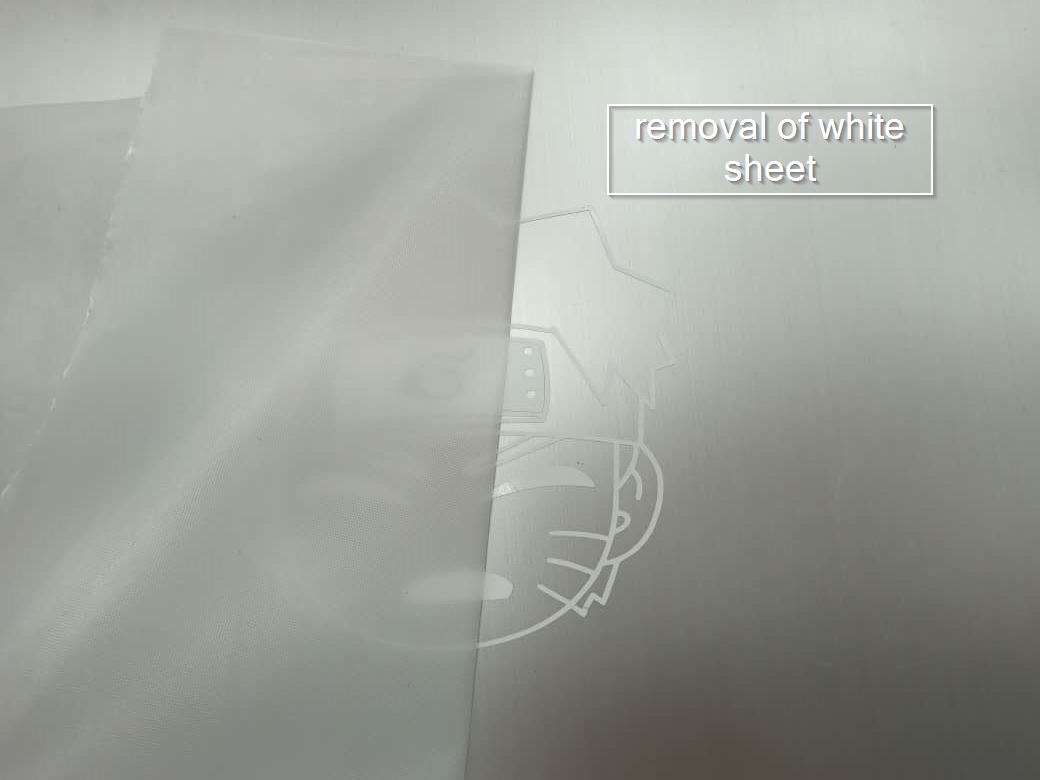
After the white sheet is is pasted above the design. Now just take out the transparent tape and just slowly pull out the white tape as shown below, this is the image we did this week and it is done.

(Before that auto lock in order to keep your design size and height in a uniform way.)
9)Now select get from machine option
10)you will now see different types of option; just click on ok button
11) Place the sheet on the machine
12)Now press enter
13)The machine will start printing the design from the bottom left to right as shown in the picture and video below.
This is how vinyl cutter works.
So after the machine is done cutting the design, we need to do the weeding and transfer to the tap for the better outcome.So i will show you how to do weeding and transfer tapping on the white sheet. so below here is an i mage of doing a weeding, since my design is already skipped with wedding and tapping on white sheet process will show you somehow. We do wedding very wisely with the tweezer.
Now lets go with the tapping on the white sheet this is for the sticker or the vinyl to paste without any air inside it while pasting it. you can even say for clean pasting on the area where ever you want. Since i am already done with my design, below this is the image I got from our group assignment that shows how tapping is done. after that take out the white sheet and paste on the designated area.
After the white sheet is is pasted above the design. Now just take out the transparent tape and just slowly pull out the white tape as shown below, this is the image we did this week and it is done.