Computure Aided design.(2D and 3D design softwares.)
In week 2 we were introduced to to 2D and 3D Designs and even dicussed on yesterday's class and as said by the insctuctor we were asked to create one folder and put all software that we will use to design 2D and 3D for our final project. for image and video compressioon we were asked to use XN convetor ffmpeg. and for 3D design we were asked to use two sfotware so i used fusion360 and Tinkercad.
Raster and Vector image
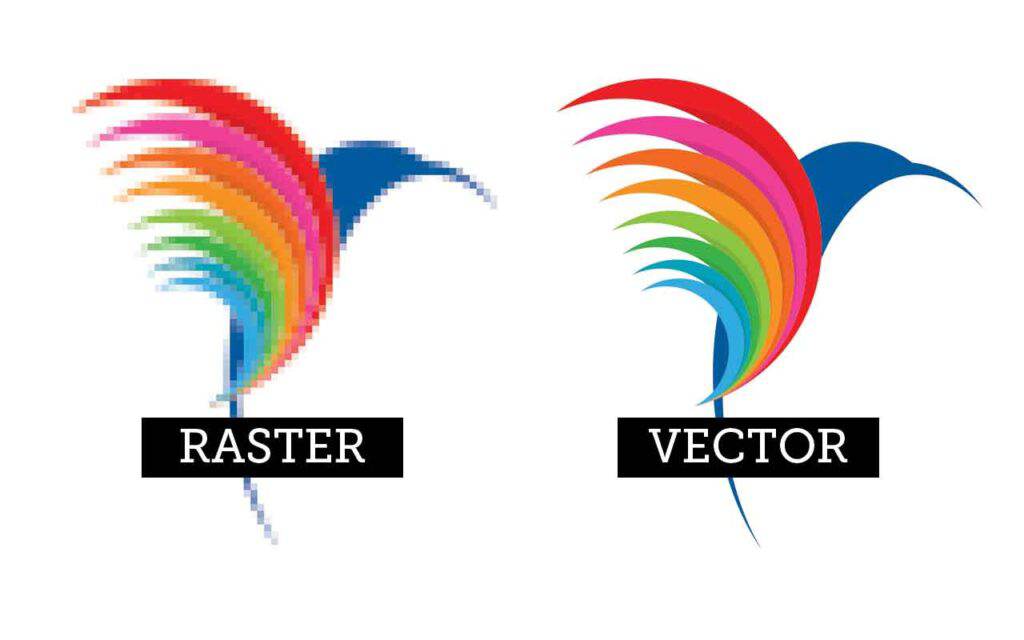
According to google the first factor that will help you define whether a certain image is in vector or raster format, is scalability. Vector images don’t lose their sharpness and clarity, no matter to what extend or how many times you change their size. In contrast, raster (or bitmap) images get blurry and pixelated once you examine them from a close-up. here are the difference between rastor and vector image.
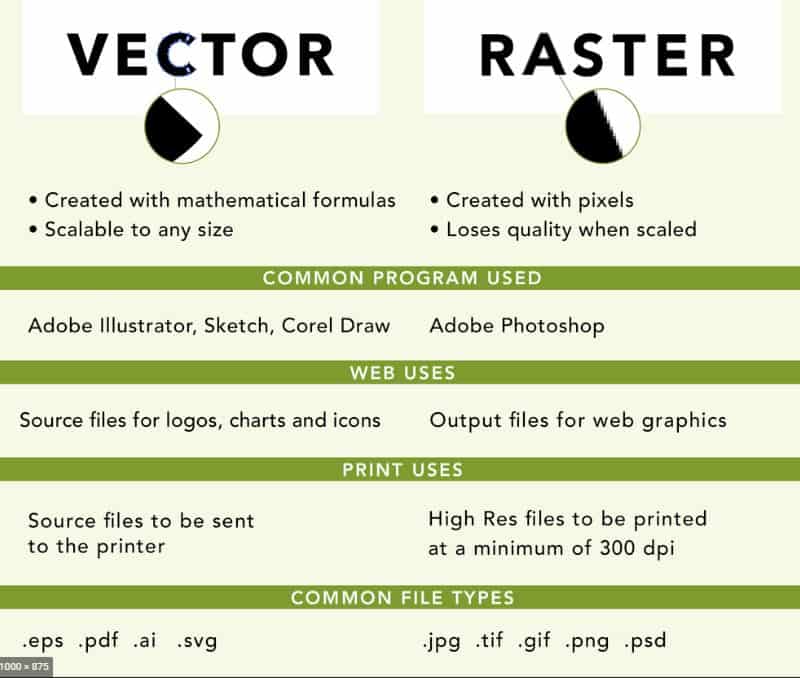
Image compression through XN convetor.
So XN convertor provides us freedom over image to reduce the quality as much as we want, as this app was recommended by my instructor and my friends.I decided to use this app inorder to reduce my picture quality, on the other hand sending images through whatsapp was quiet easily comparing to XN Convetor but through messanger and whastapp provides less option to reduce the quality, we cannot decide the image quality.
XN Convetor in desktop.

Steps to use XN Convetor.
Download XN Convetor for windows from google. and install it in your Mac or Windows. it is as same as downloading other software, all you need to do is install and set up on your windows.I think my image quality is reduced little more than expected but nevermind you just need to install and as you can see the arrow, just hit the add file button as shown by the arrow.
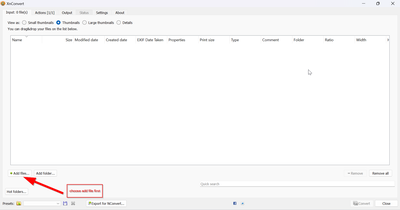
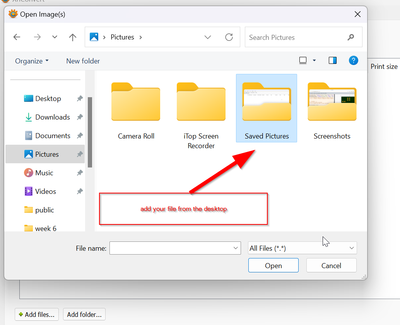
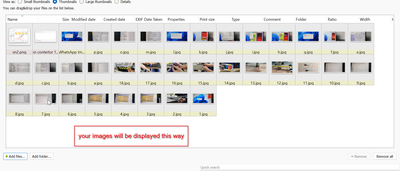
Now add the required image or the folder in bulk if you want your work to be completed faster. for me i created one folder to put all the compressed images, for me to easily find as well as to save my time.Now hit open.
you will get your image in this way , where all are displayed in a row.
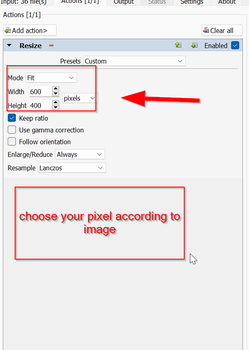
Now to change the pixel , size and height just hit on the action button to get more options. after that when you are done with the adjustment with your image quality.
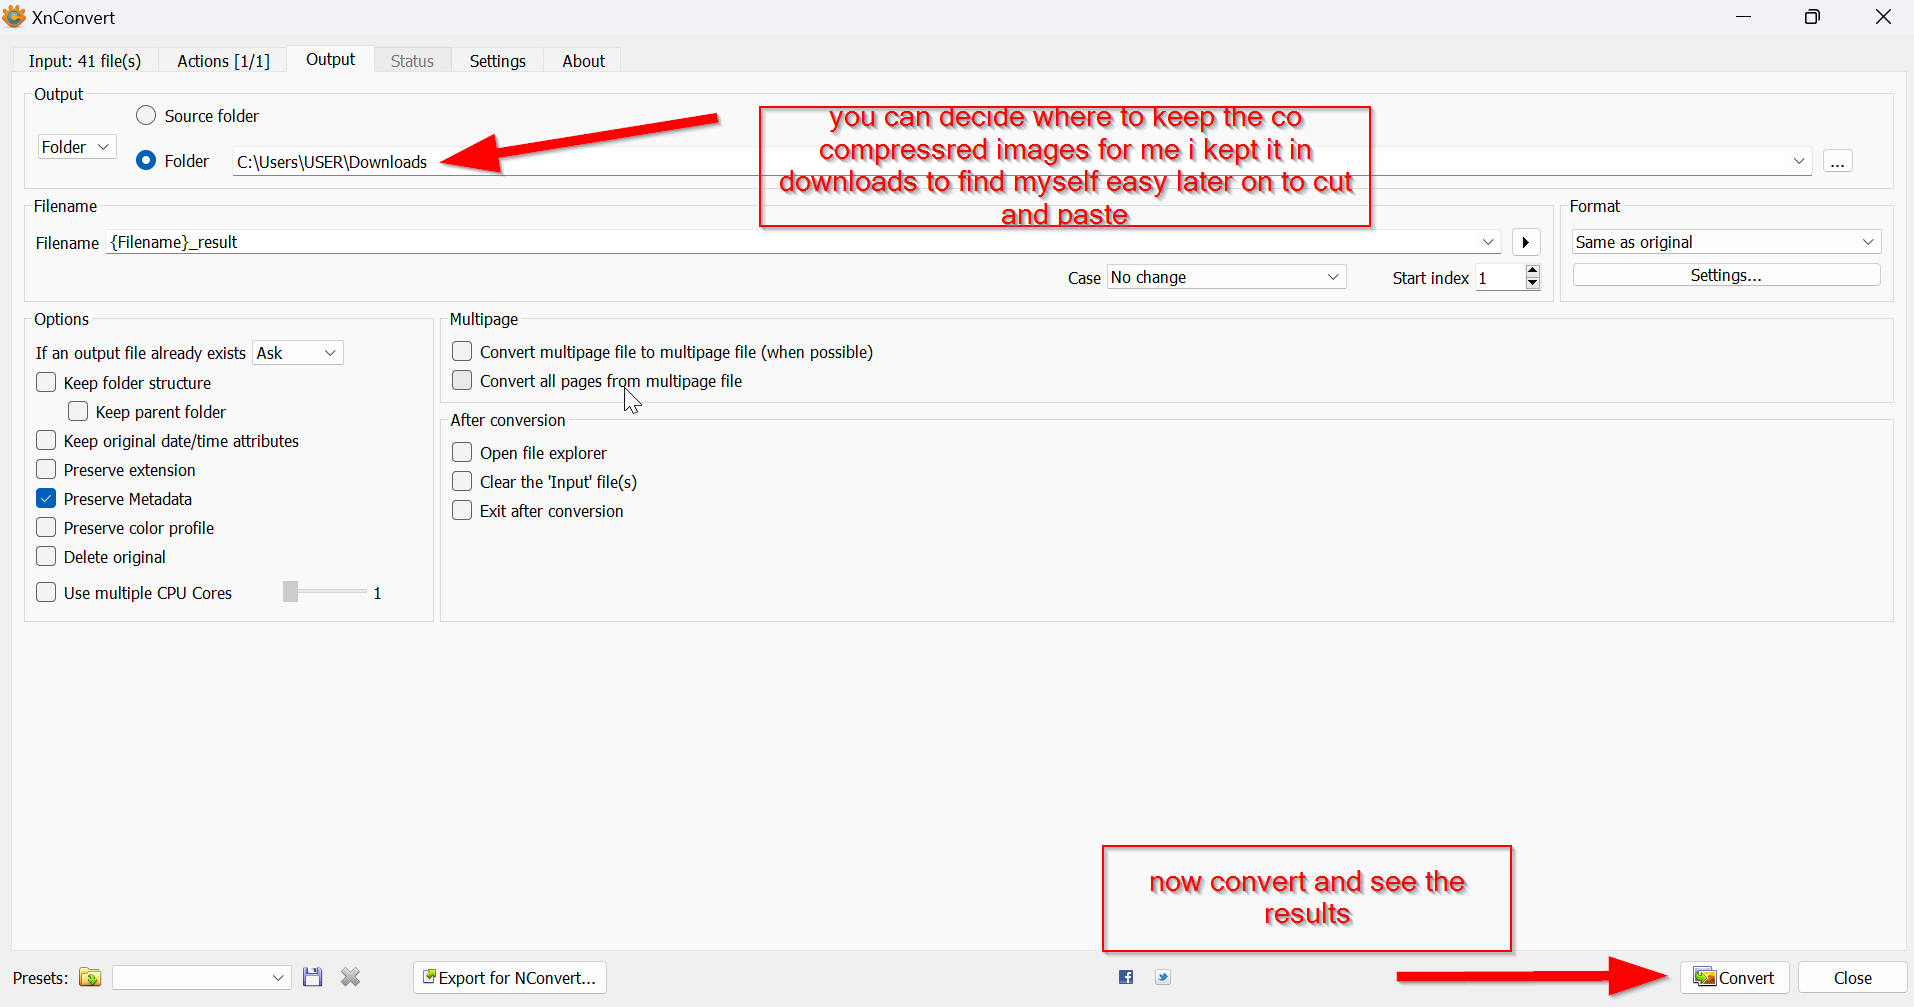
Go to output for your saftey since later you will find difficult to find the file location or the images ou have compressed right now. this way you can easily know where is your file actually goes.and now hit covert button on the bottom right side of oyur desktop
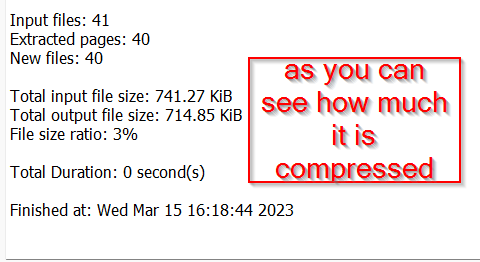
so you can finally see your images result. How much the image quality is reduced and compromised.
Video compression using ffmpeg
Since Ffmpeg was not easy to download from google I really had a hard time browsing through google and watching youtube tutroials and finally I was able to download it.Yaayy!!! so let me show you how I downloaded it and used to compressed my videos. since Ffmpeg is a multimedia framework it is not easy to download through google if you do not have nay knowledge like me. So first just type Ffmpeg in google and then download "windows build from gyan Dev"
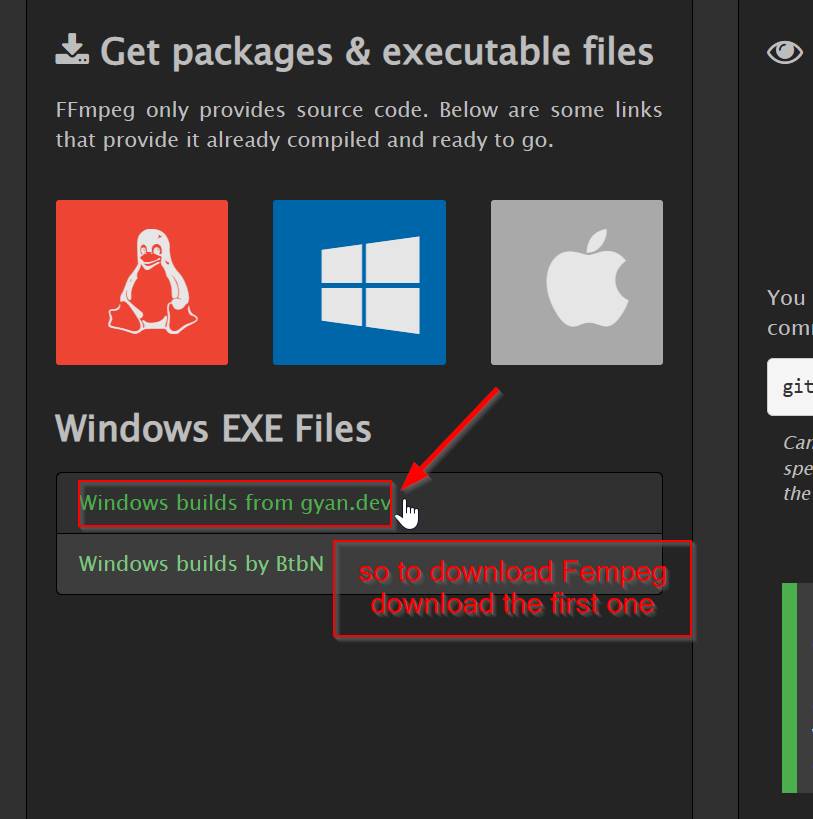
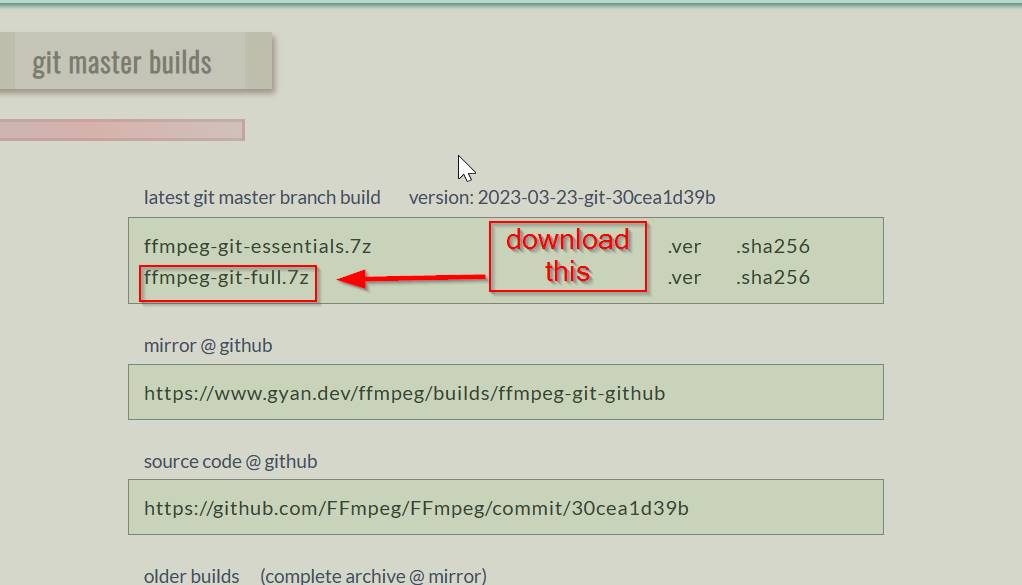
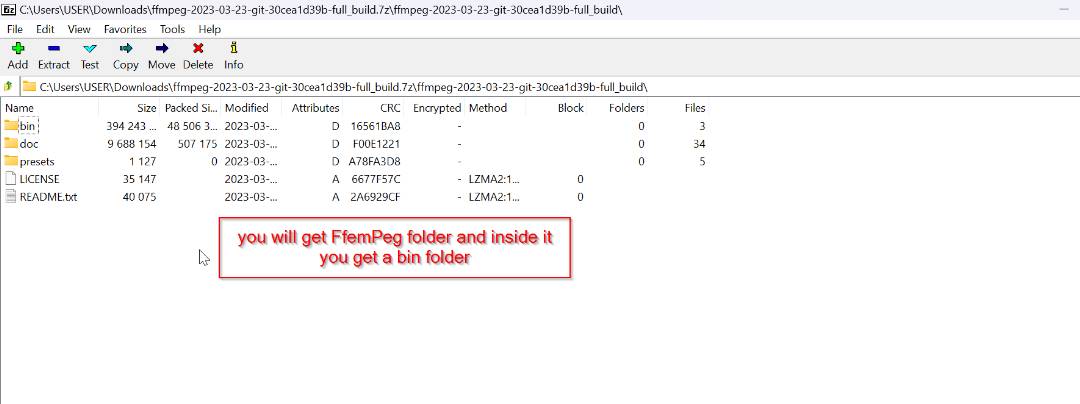
Now you need to go inside it and download the second option undet git master builts.
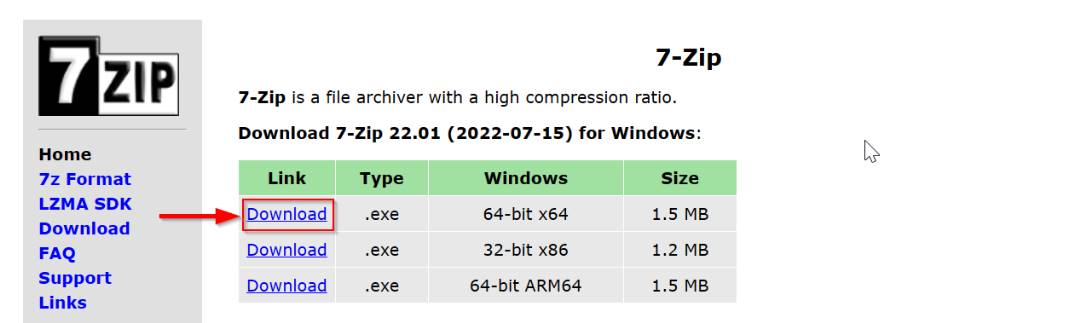
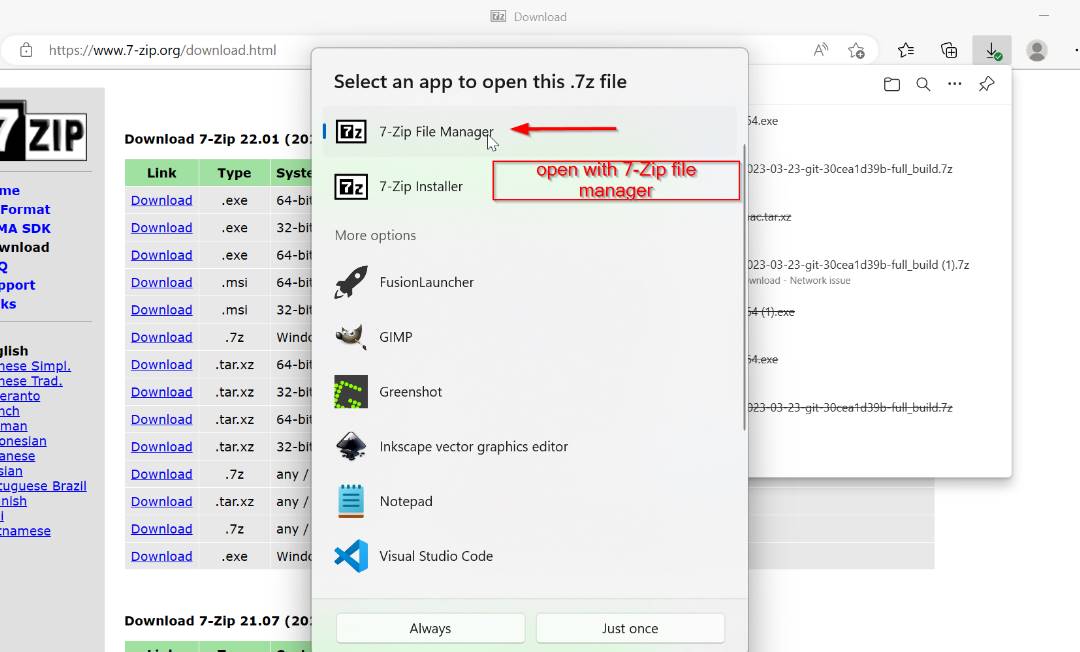
Now after downloading the file its not just easy to open it we need to again install 7-Zip inorder to open ffmpeg. 7-zip is similar to a zip or rar archive.
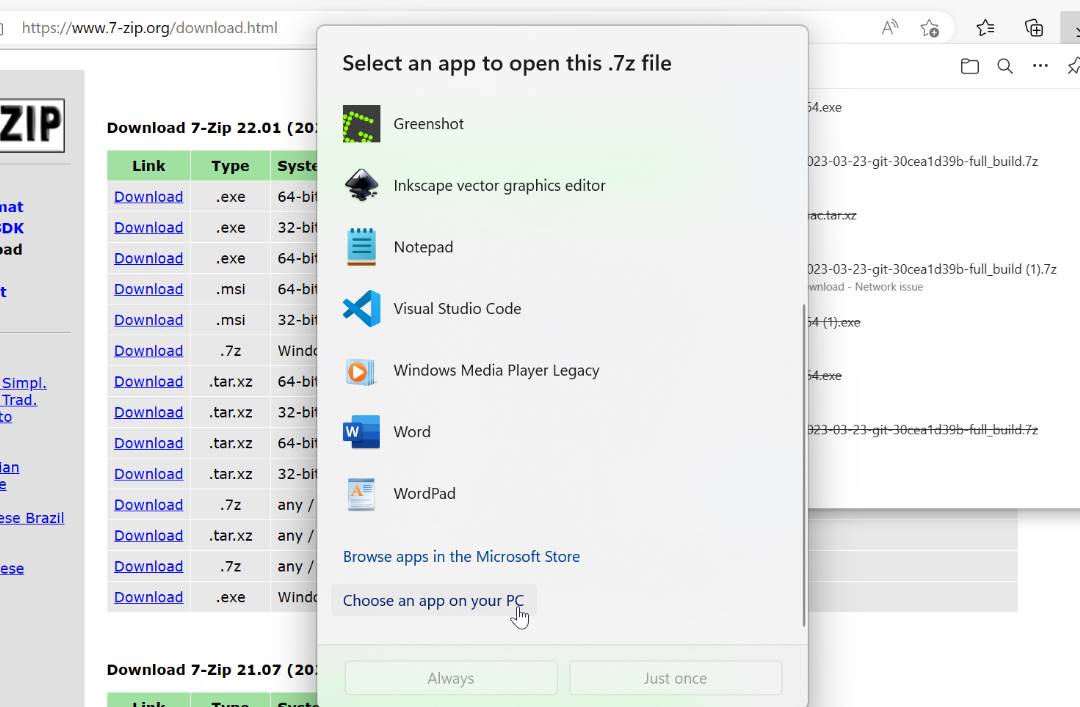
After downloading it choose an app from the pc.
Go to desktop and select this file. And open it.
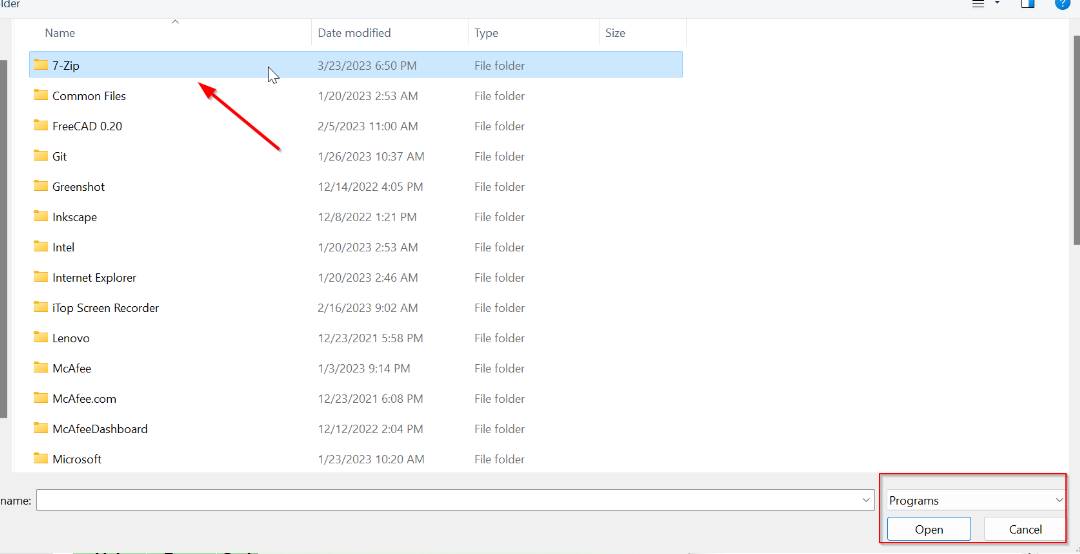
Now whe you select the file and you can see 72FM.
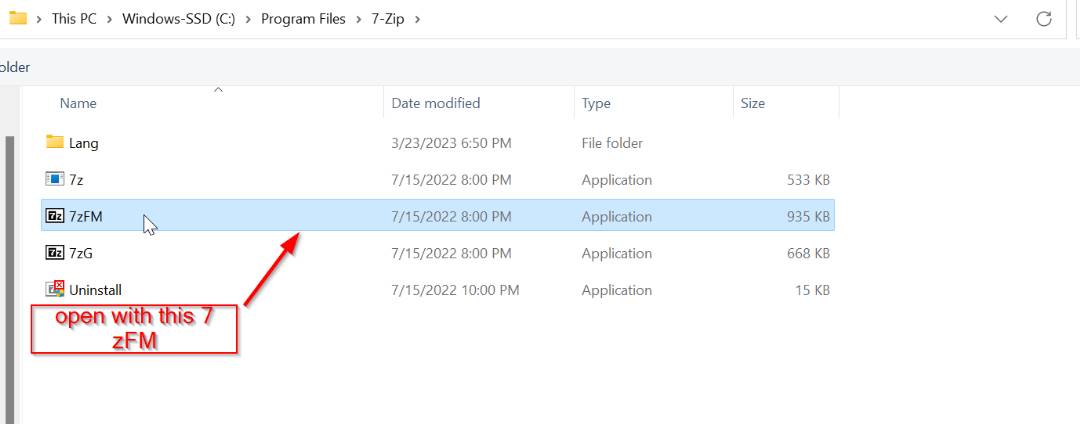
And select 7-Zip file manager.
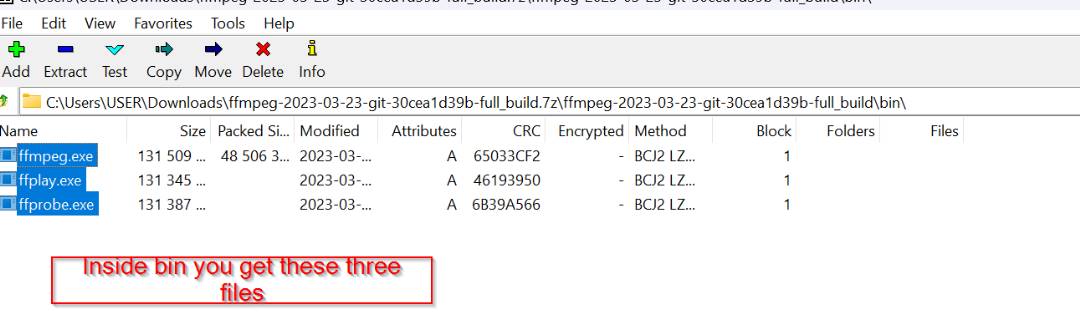
Now select bin folder and open it.
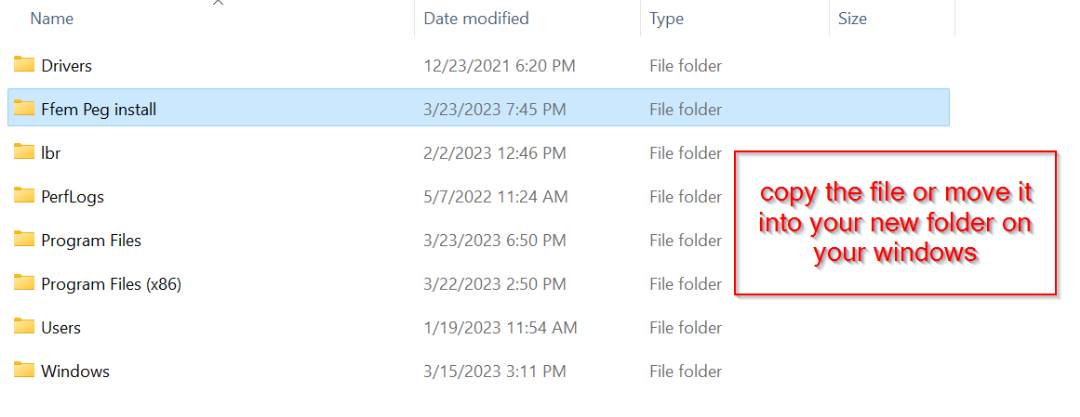
Now you will get three files so select all three file and copy or move to your desktop.
After you create a folder and copy or move it here.
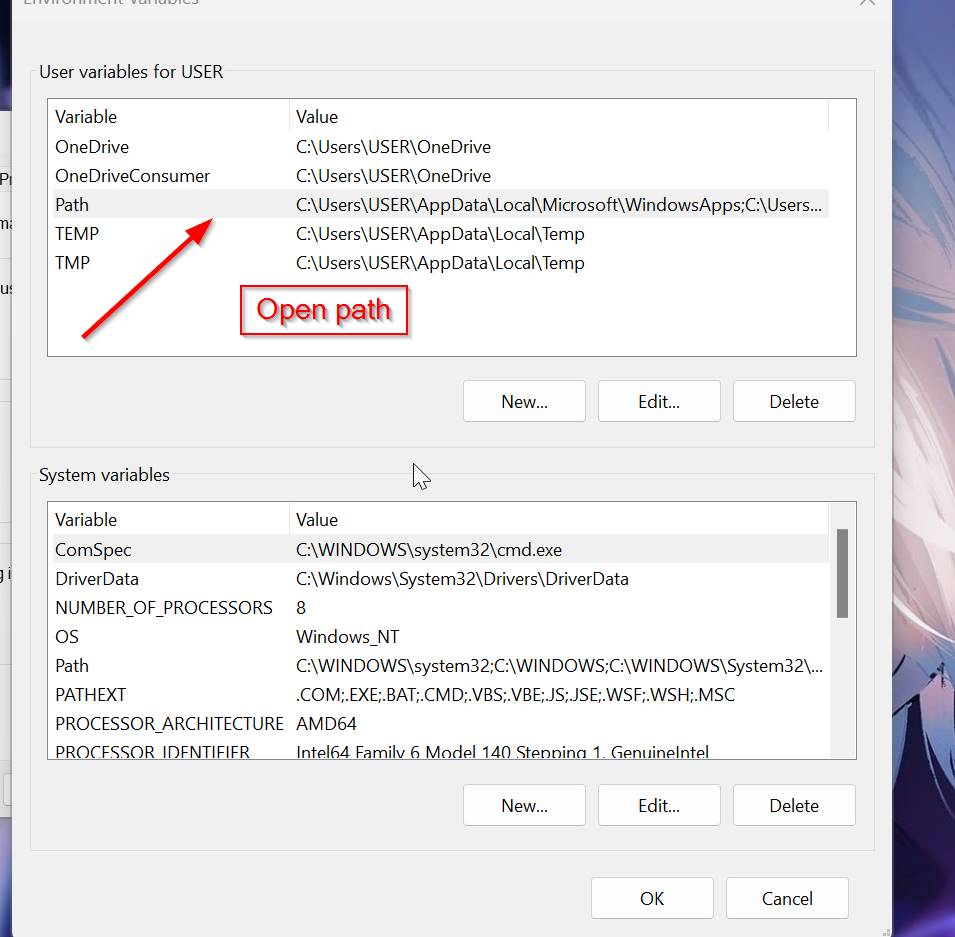
Open Environment variables in your desktop./P>
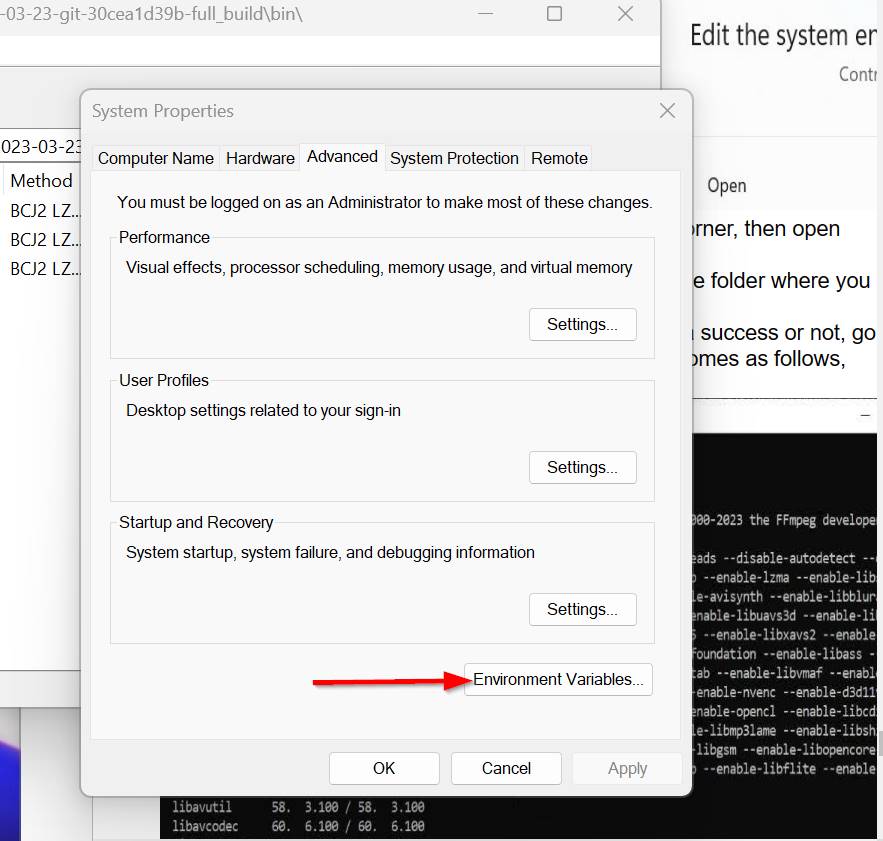
And select path > select new > and then paste the file address where you added the three files from the Bin earlier.
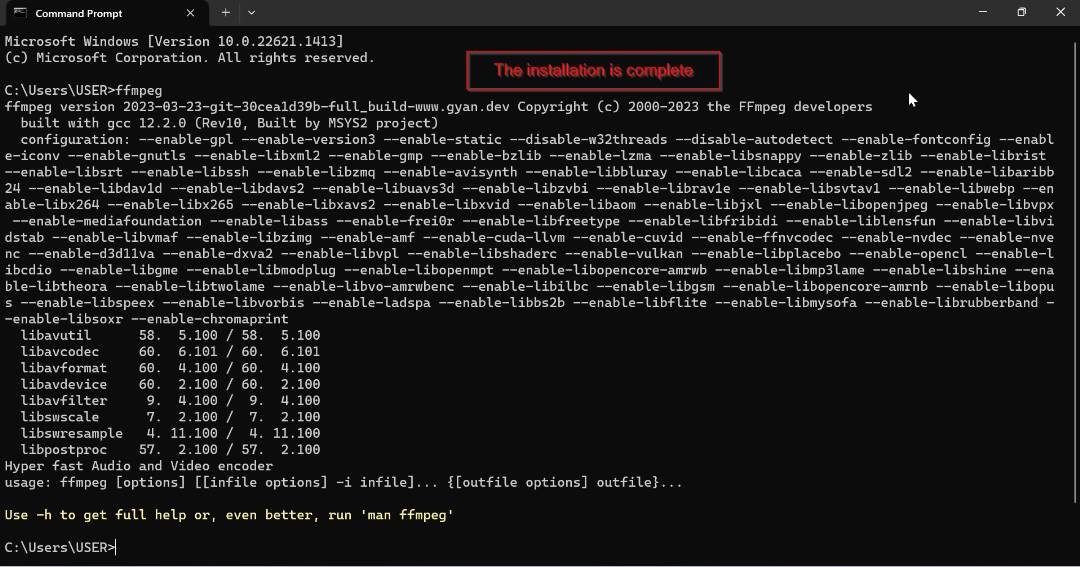
Now to check if the installation is complete or not just type see whether is was a success or not, go to "Command Prompt" and type "ffmpeg". And if it is sucessful your desktop will display like mine.
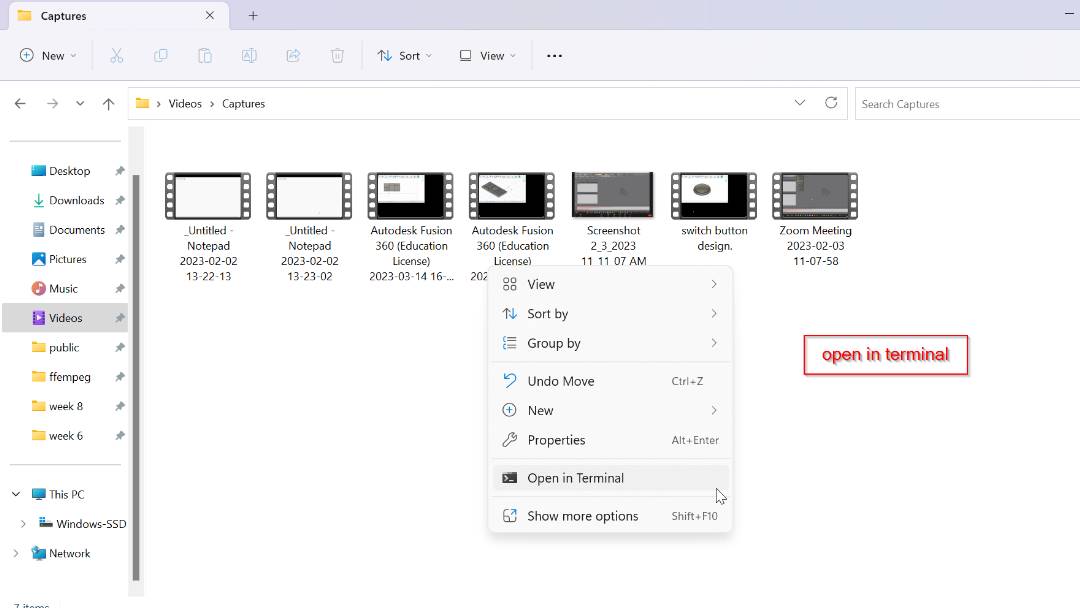
Now to compress your video open the folder where the video is and the right click on the open space and select; open in terminal.
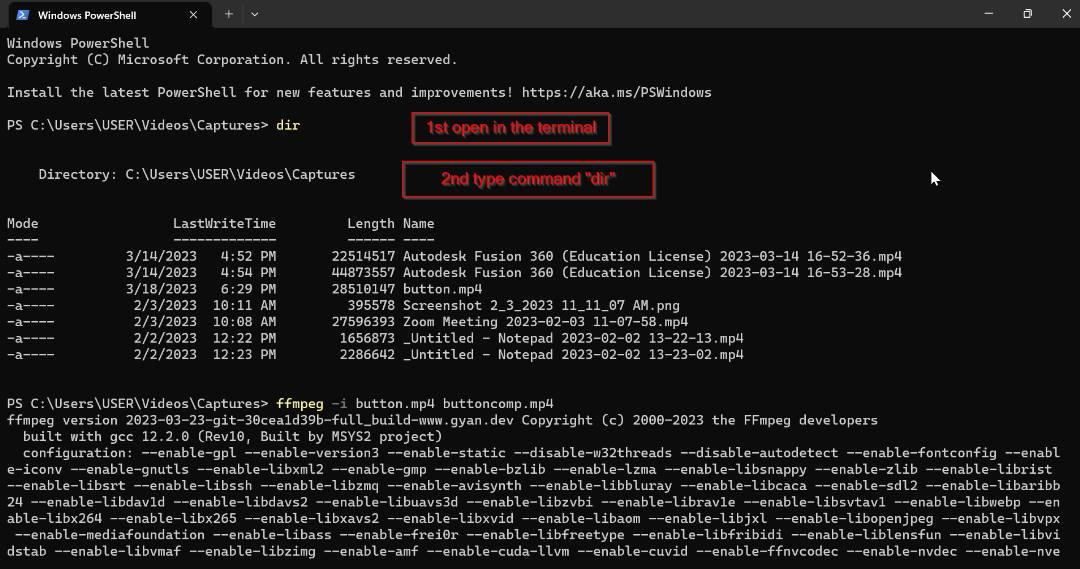
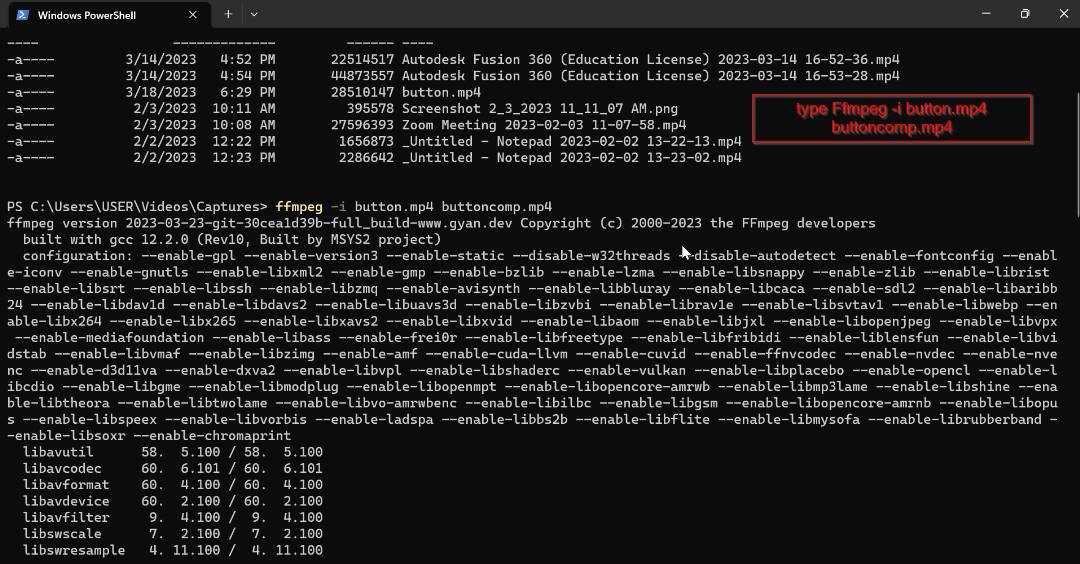
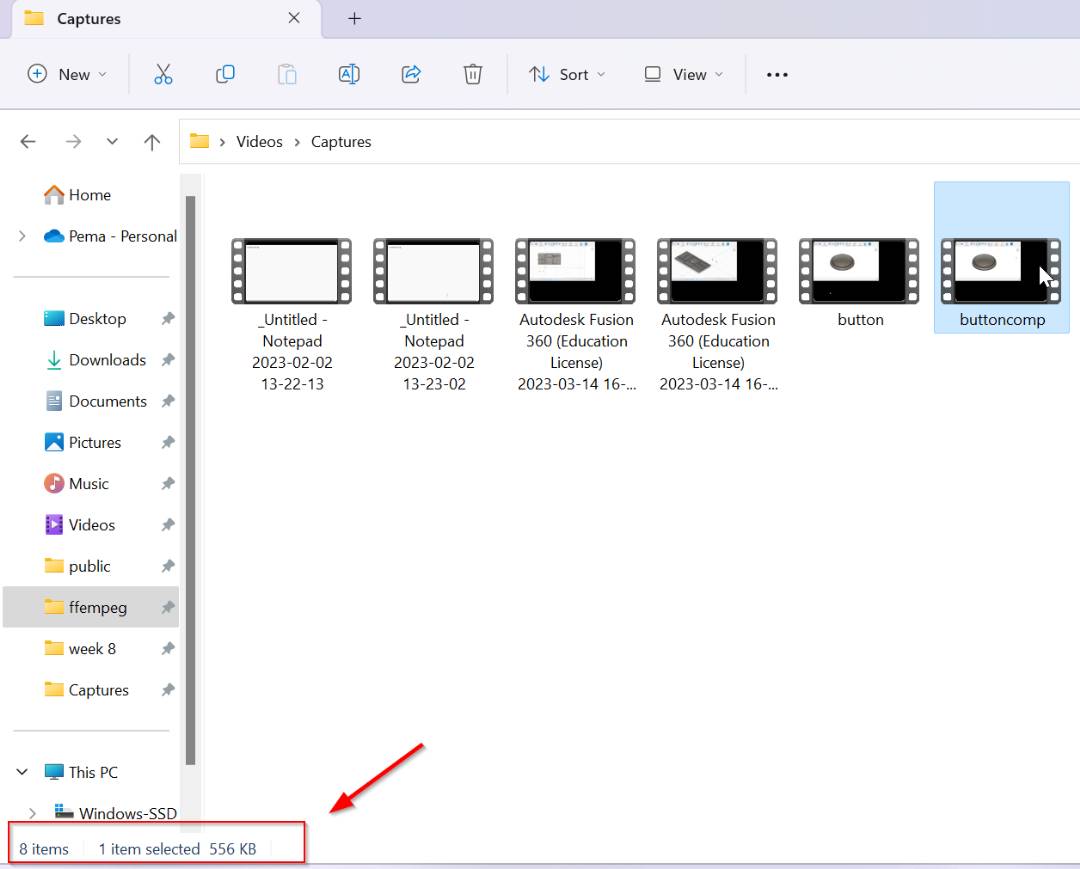
And then you will get like this where your folder name will be displayed. So type the command "dir" and then you are good to go. Now type Ffmpeg -i button.mp4 buttoncomp.mp4 the name of the folder of the video (button.mp4 ) And the video you want to compress.(buttoncomp.mp4) )
Now you can see how much video is compressed after using ffmpeg.

This is the youtube video that helped me to download ffmpeg and install it in my desktop.
2D Design for my project(Inkscape).
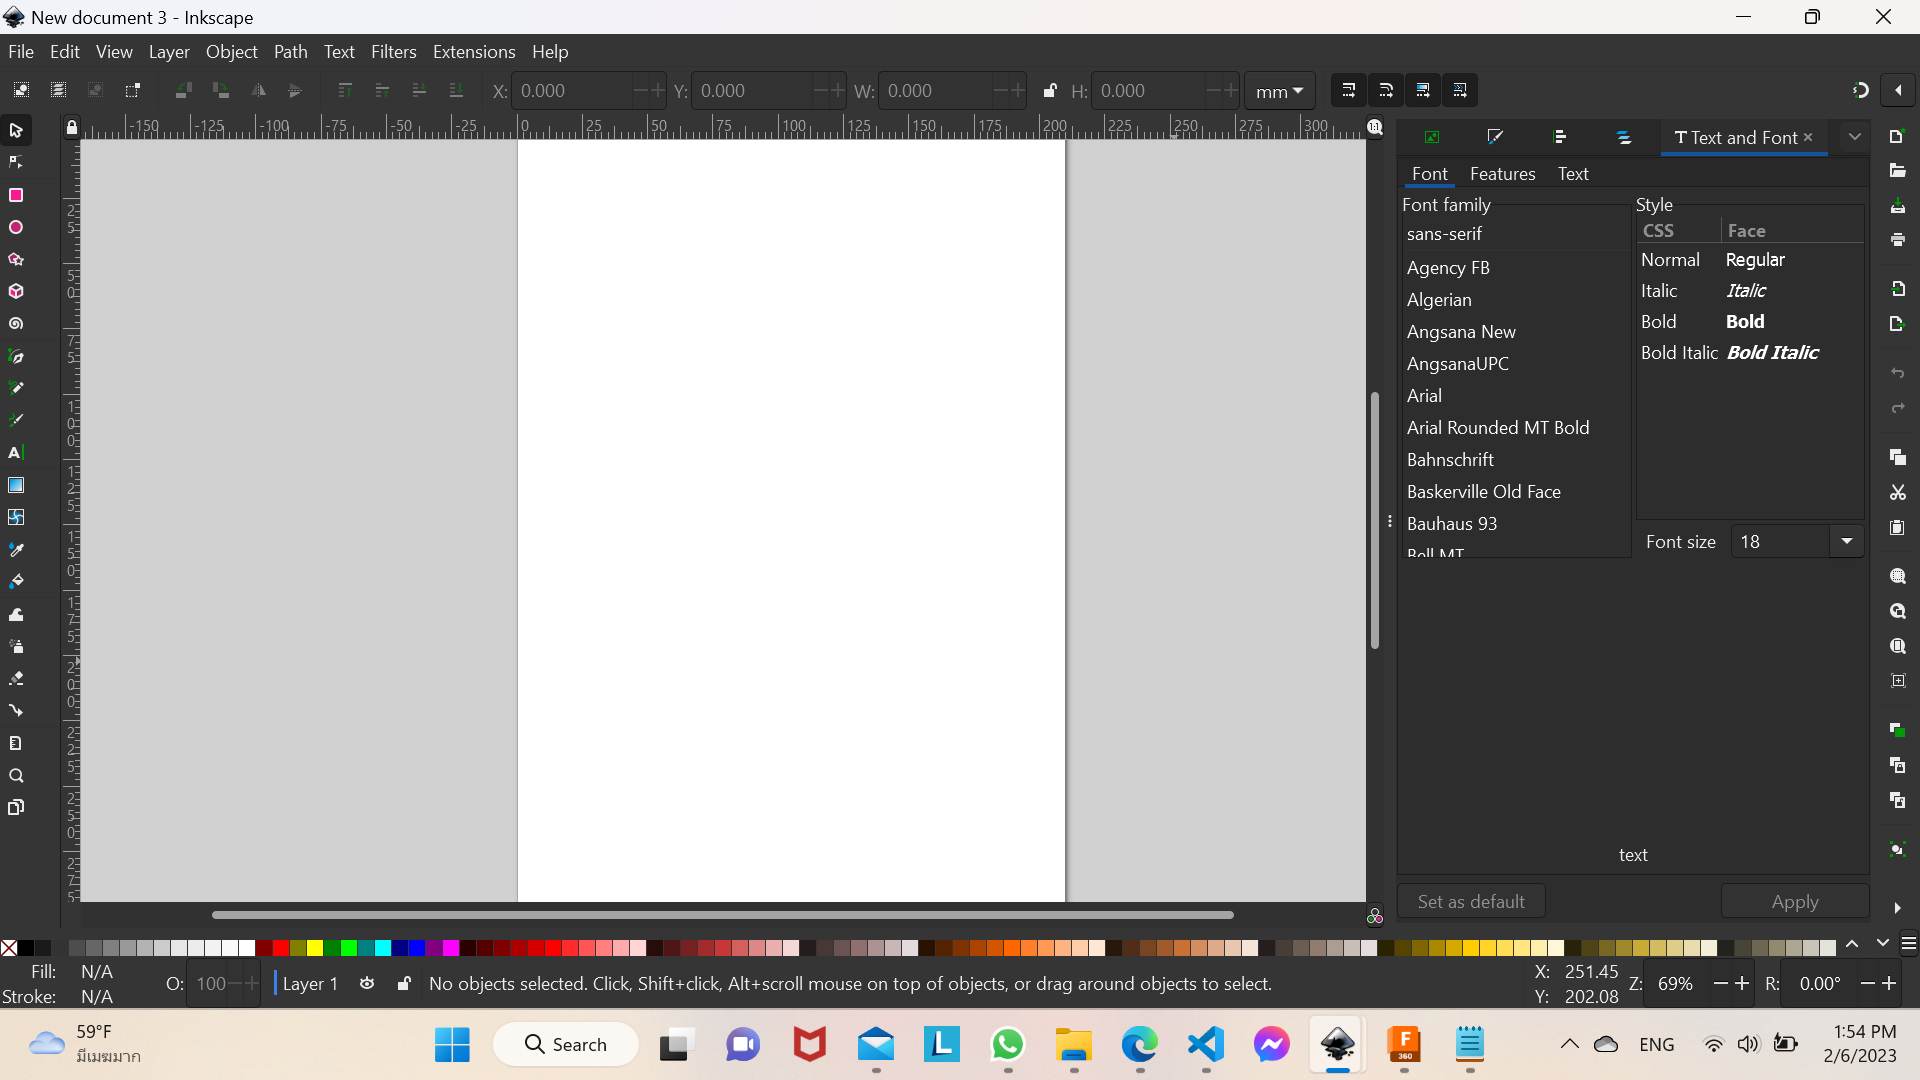
For my 2D design i used inkscape. a simple logo indeed so here is my work,first open inkscape in your desktop.
for the logo just go to google
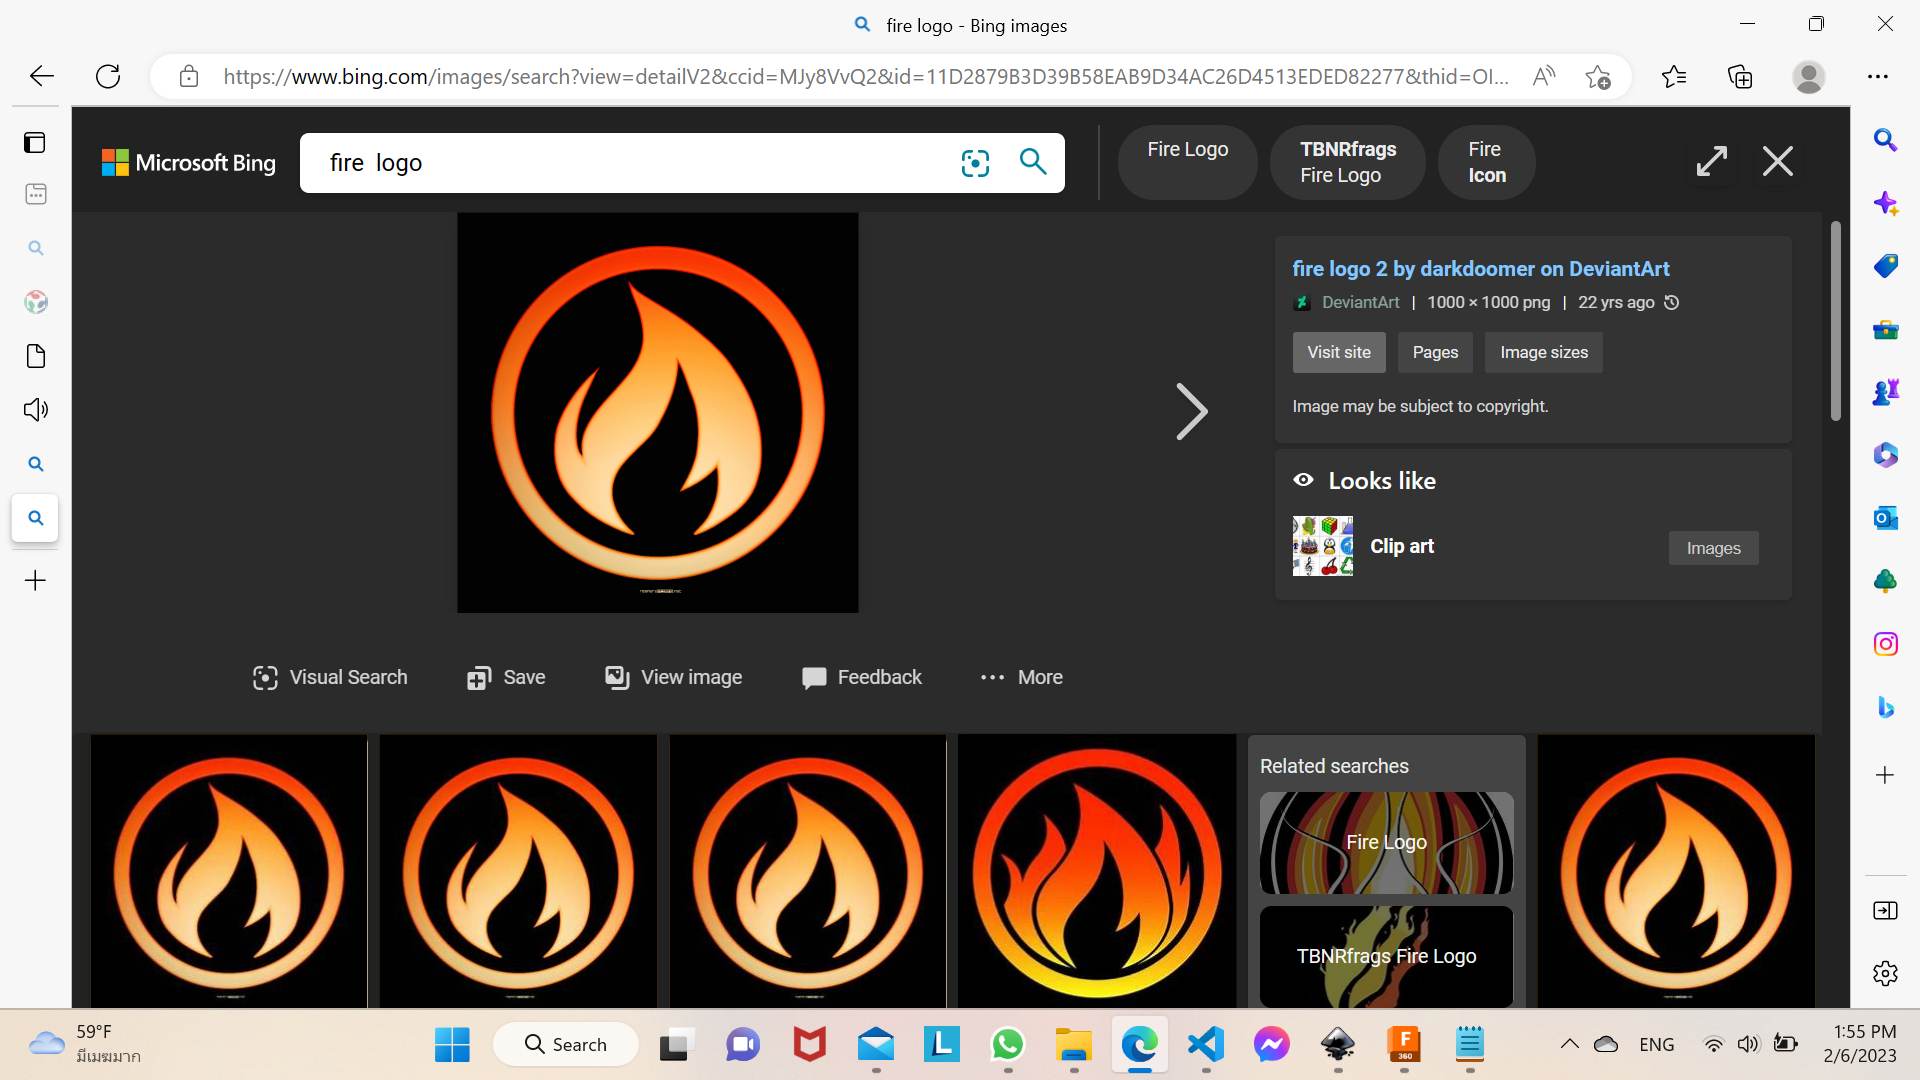
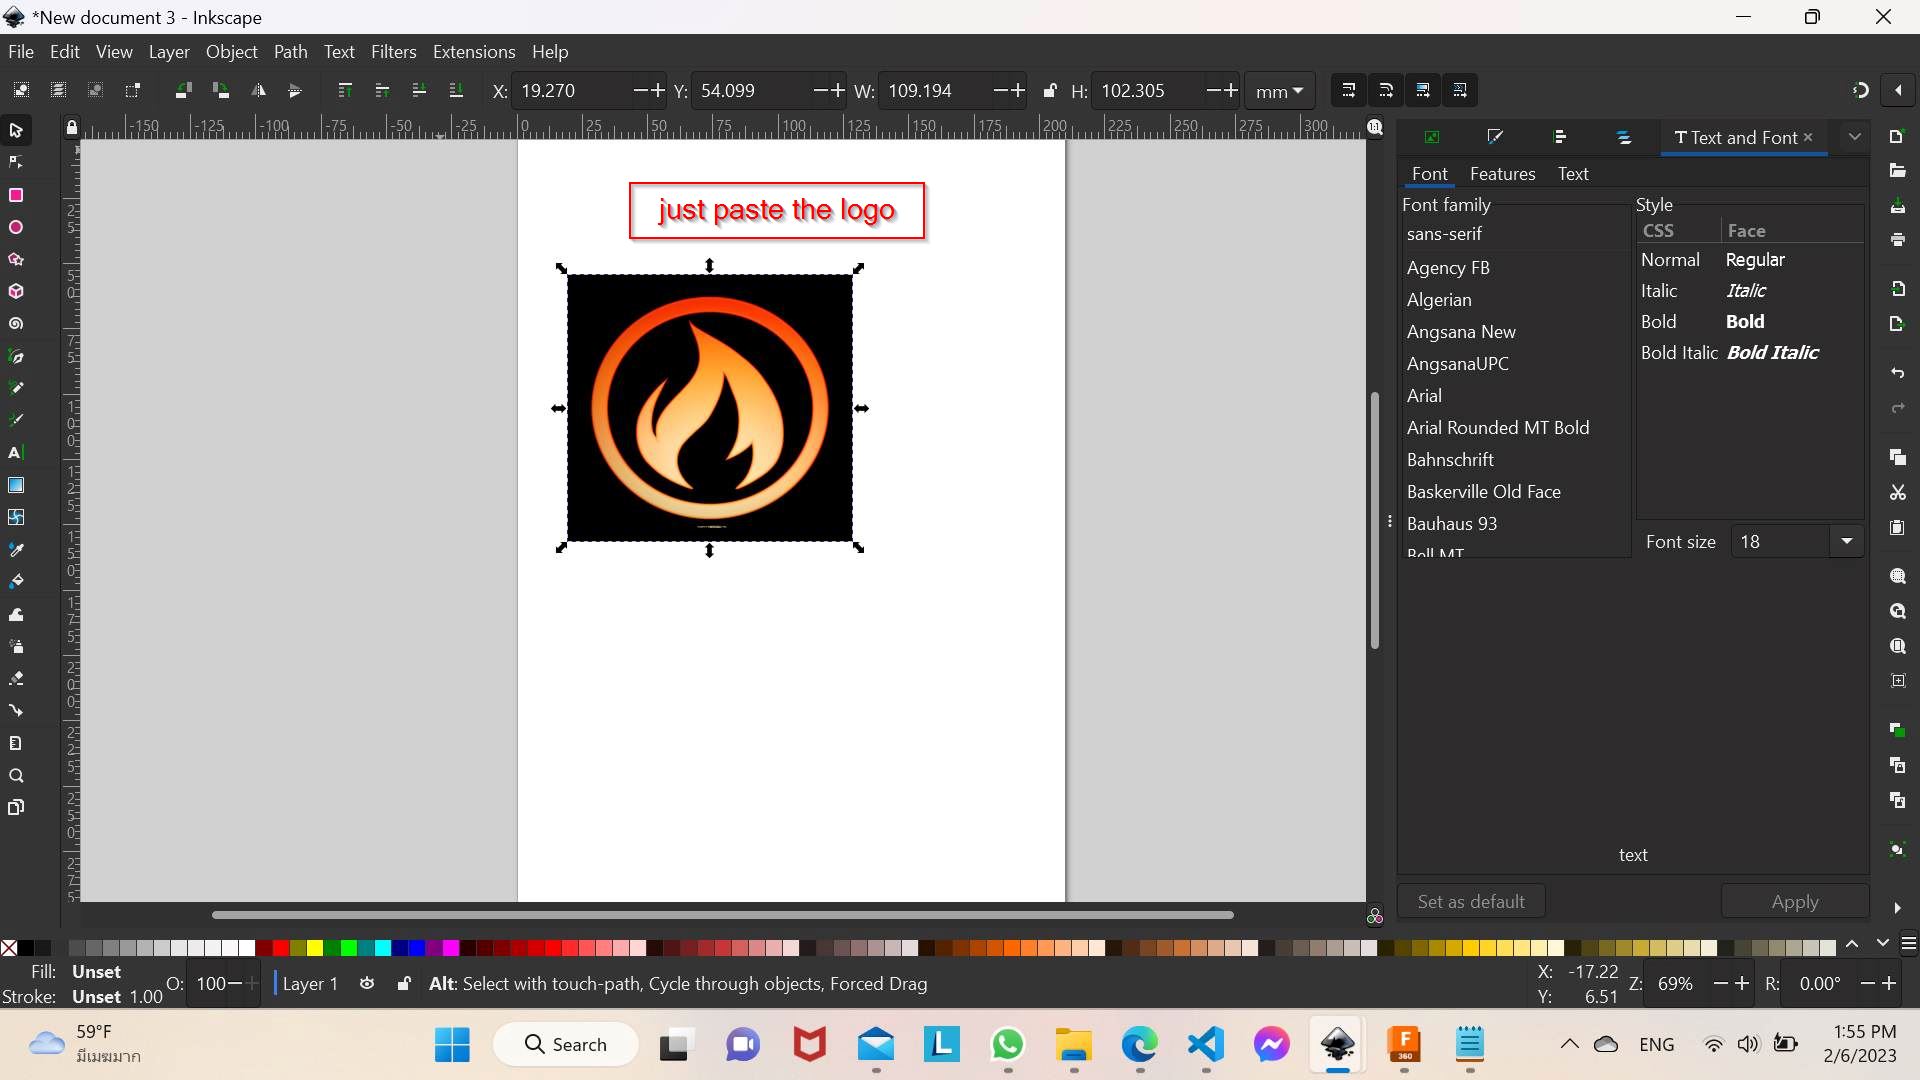
For my project i just googled the fire or heat logo and copy pasted on inkscape.The image source from google is below.
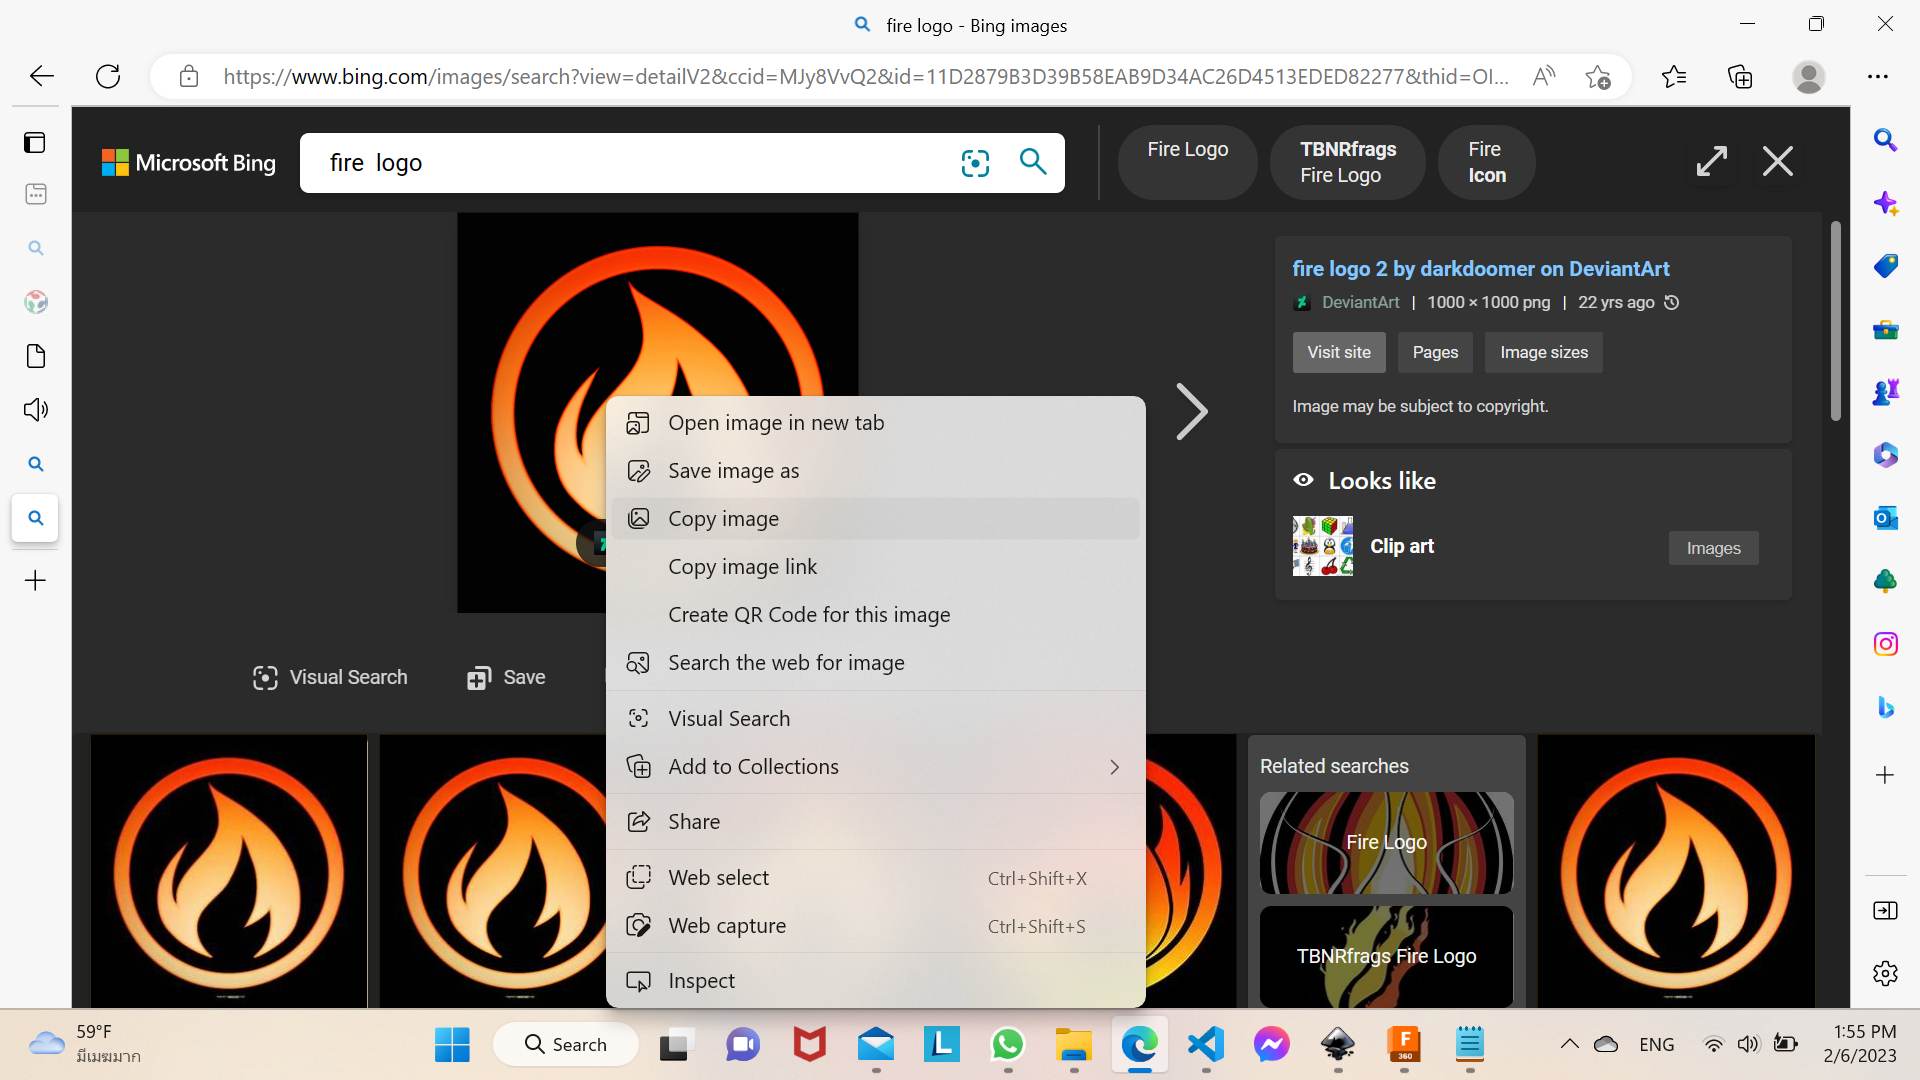
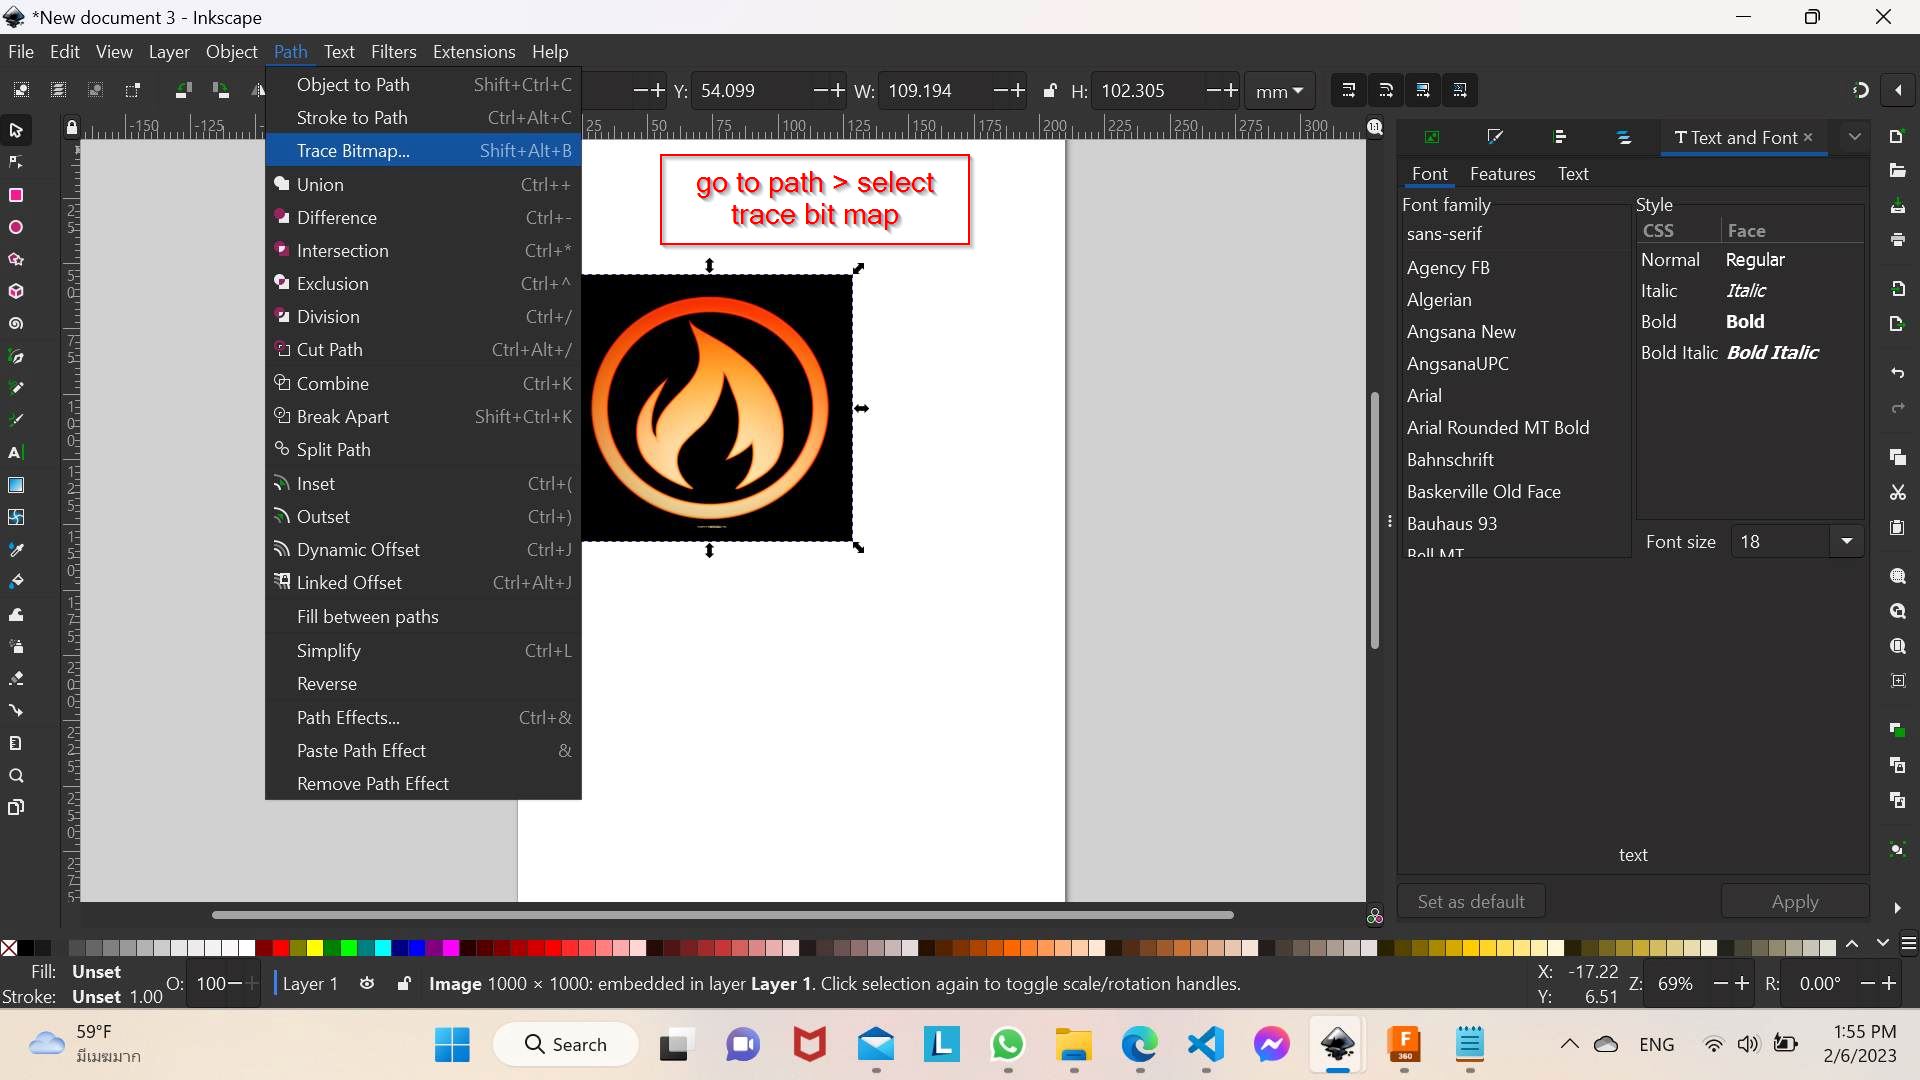
and pasted here on inkscape as you can see below. Now go to path and click on the drop down
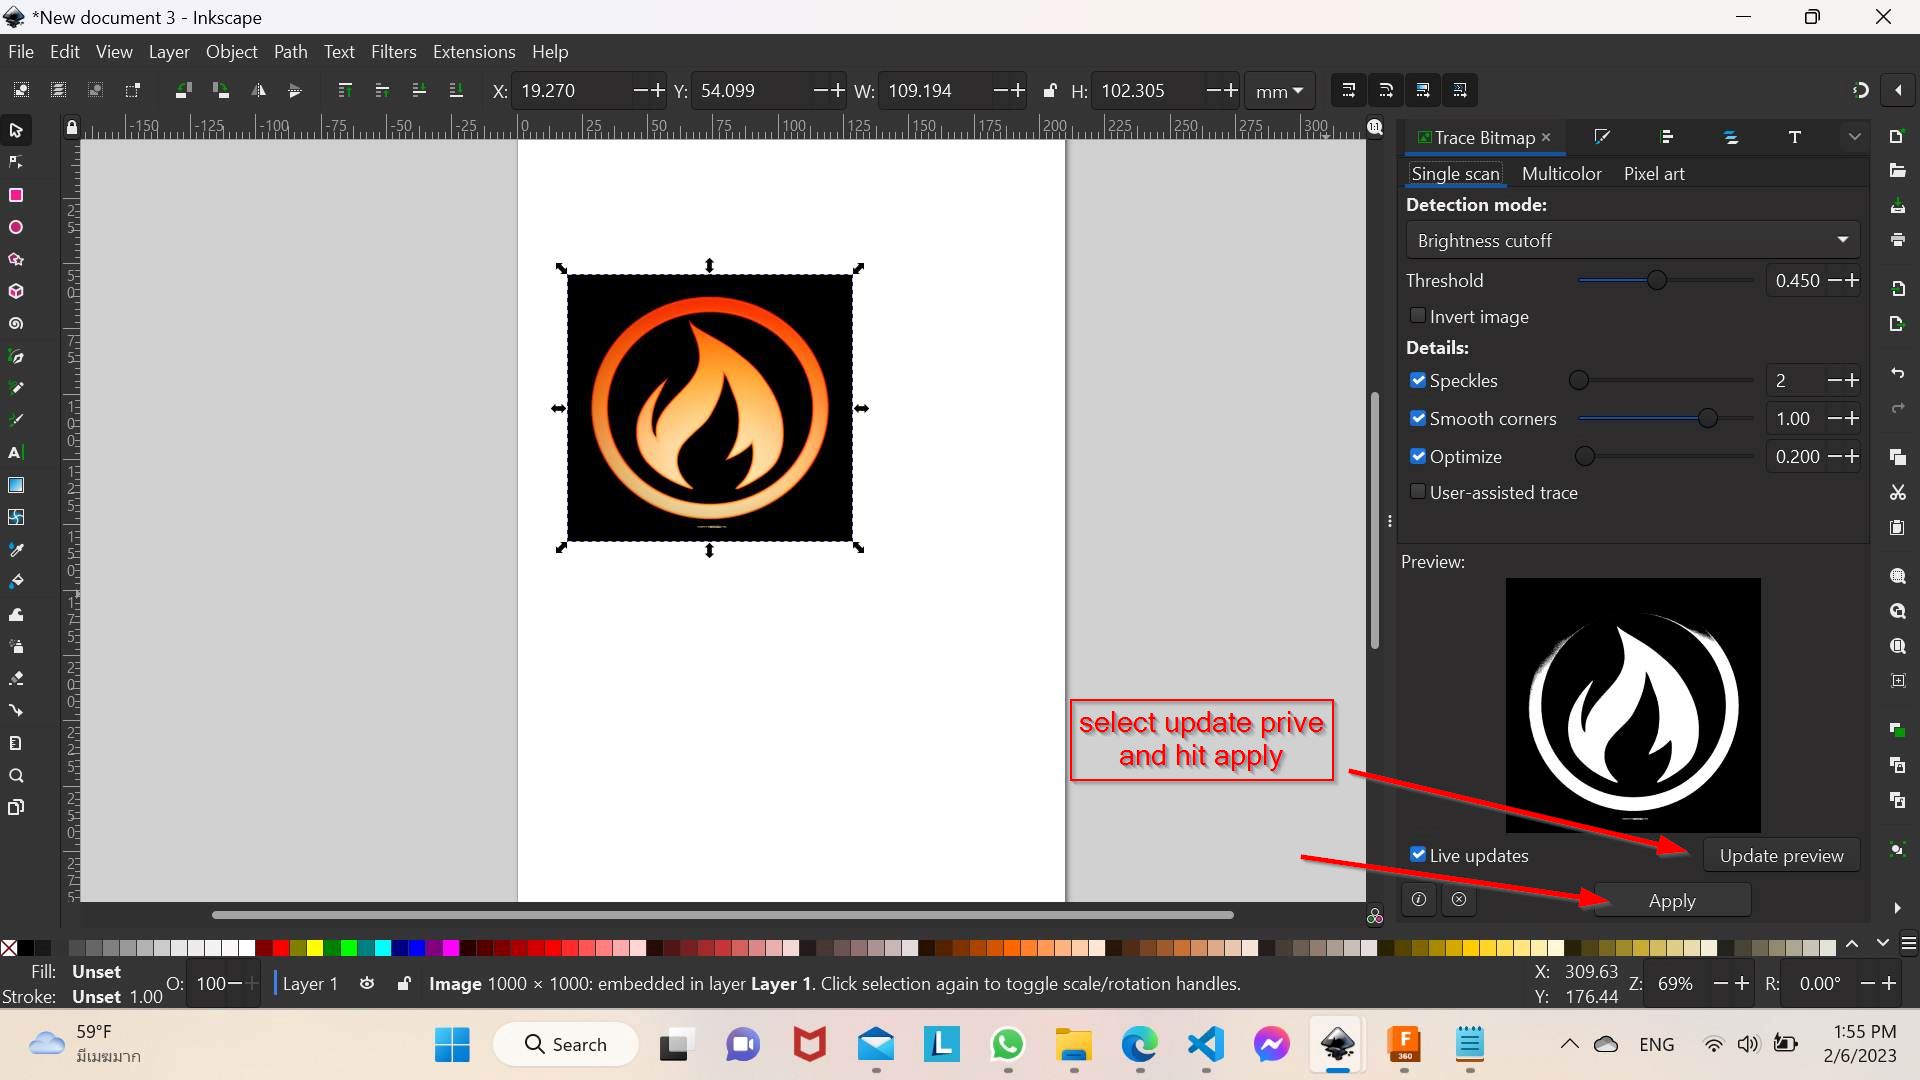
so you can now click on trace bitmap.
so on the right side you can see the preview and just click on apply which is on the right bottom.
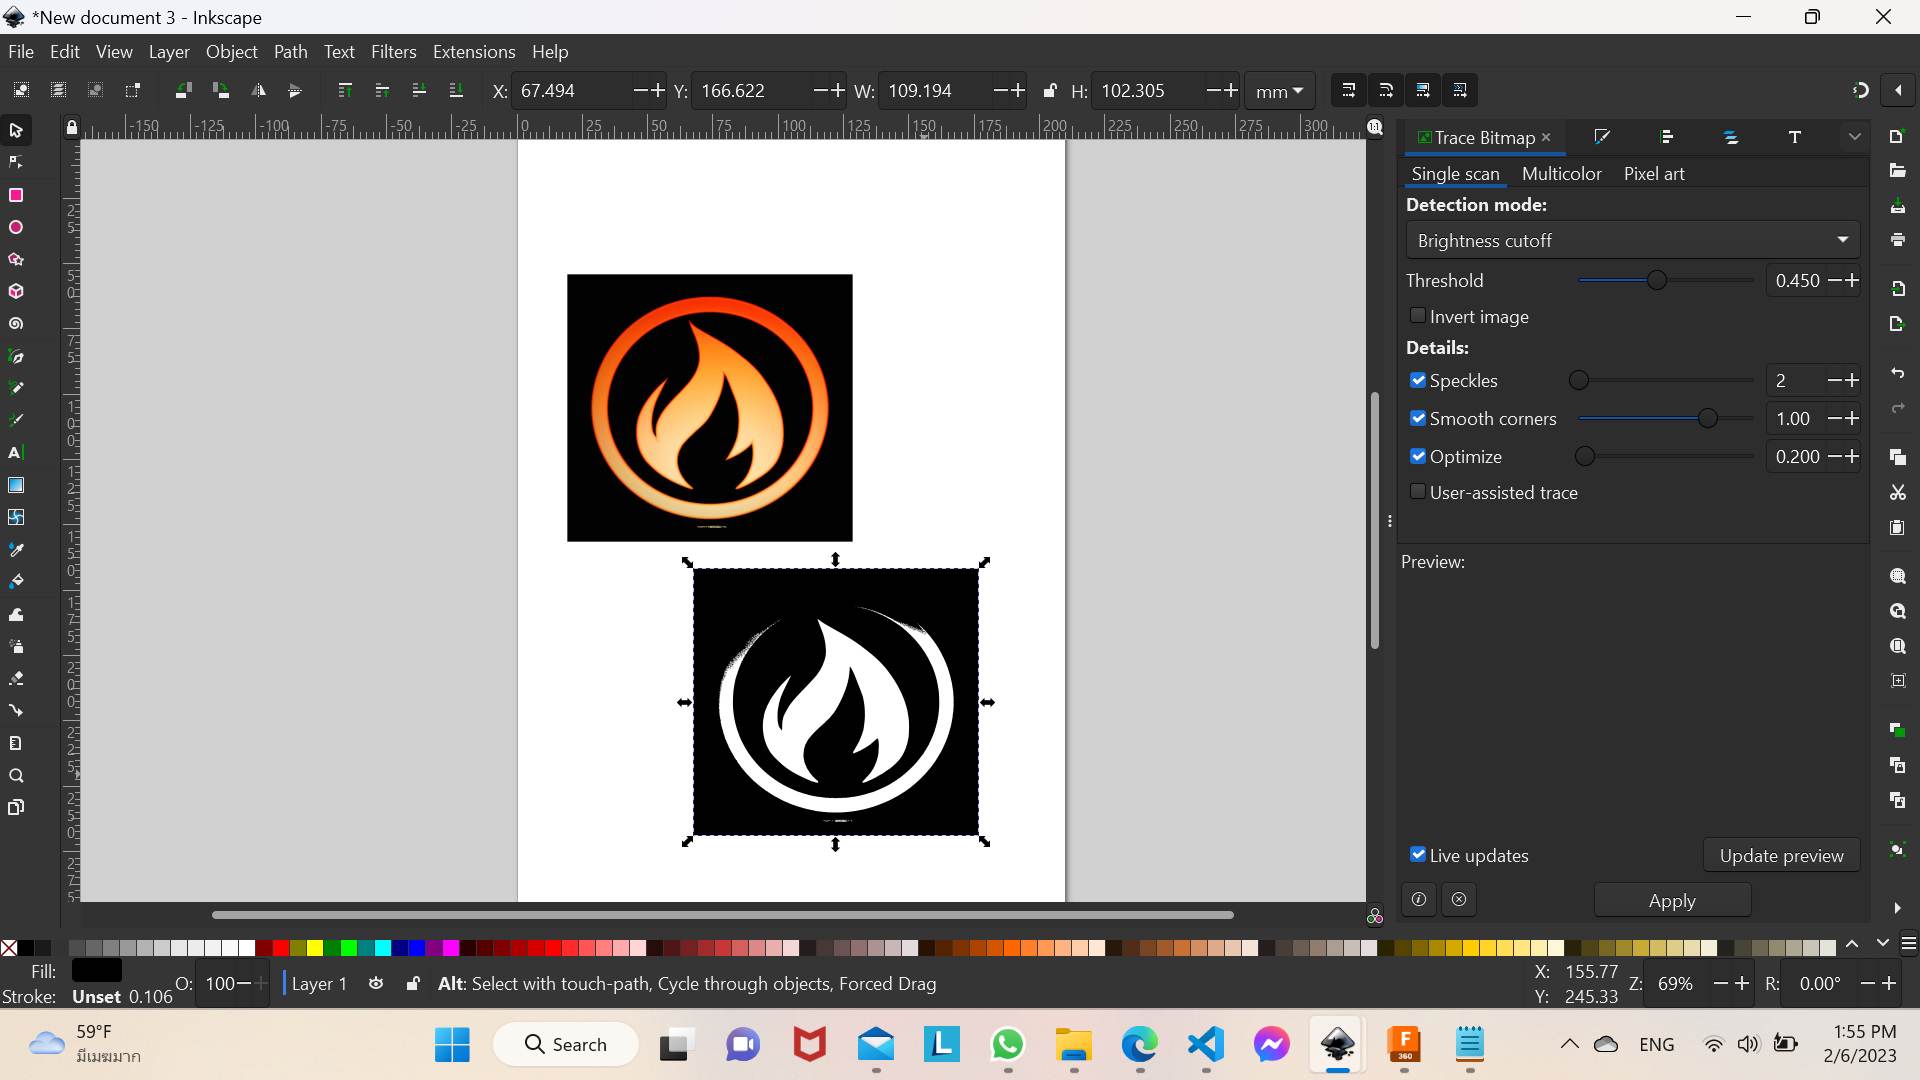
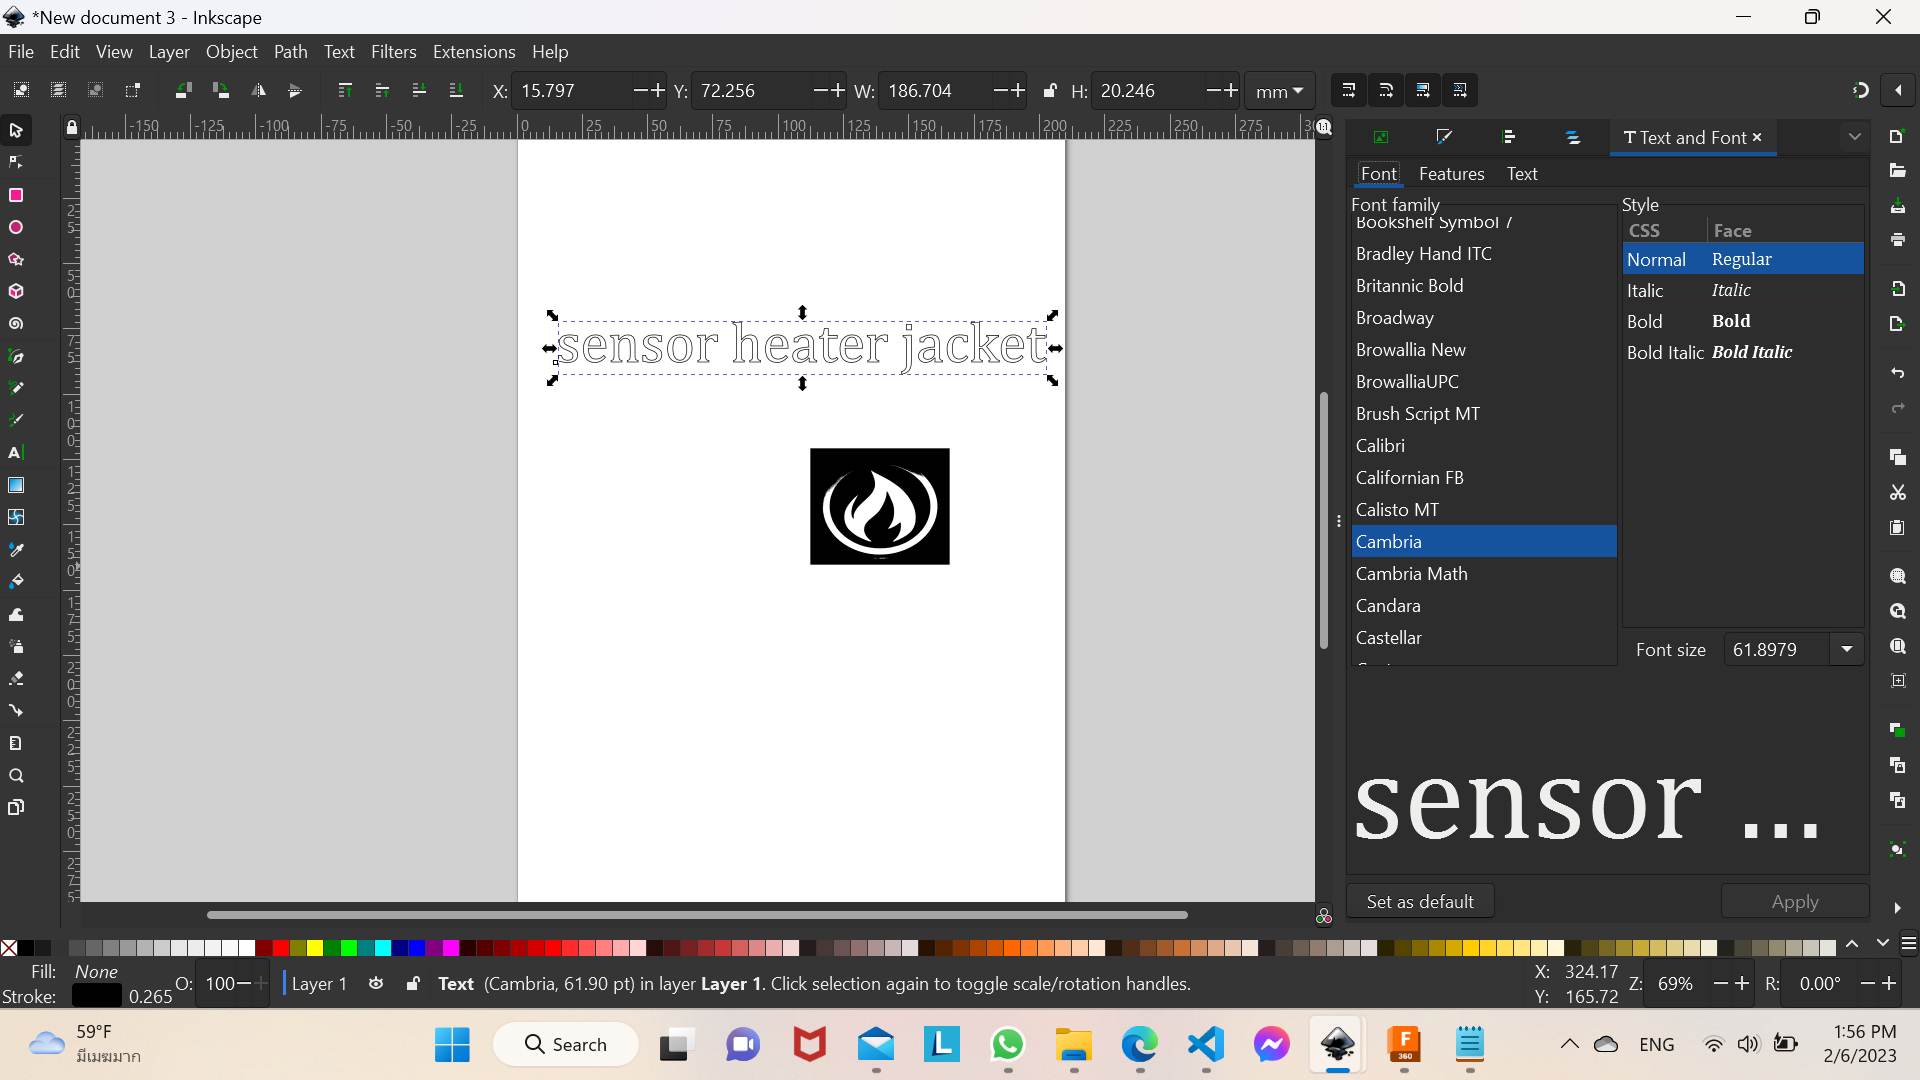
So now you can see one trace map and the original image so just delete the original picture we dont need that one. After that for fonts we can go the font which is on the left side of your desktop or computer.
for my project i just typed " Sensor Heater jacket",you can make it even more fancy or more intresting trying different fonts.
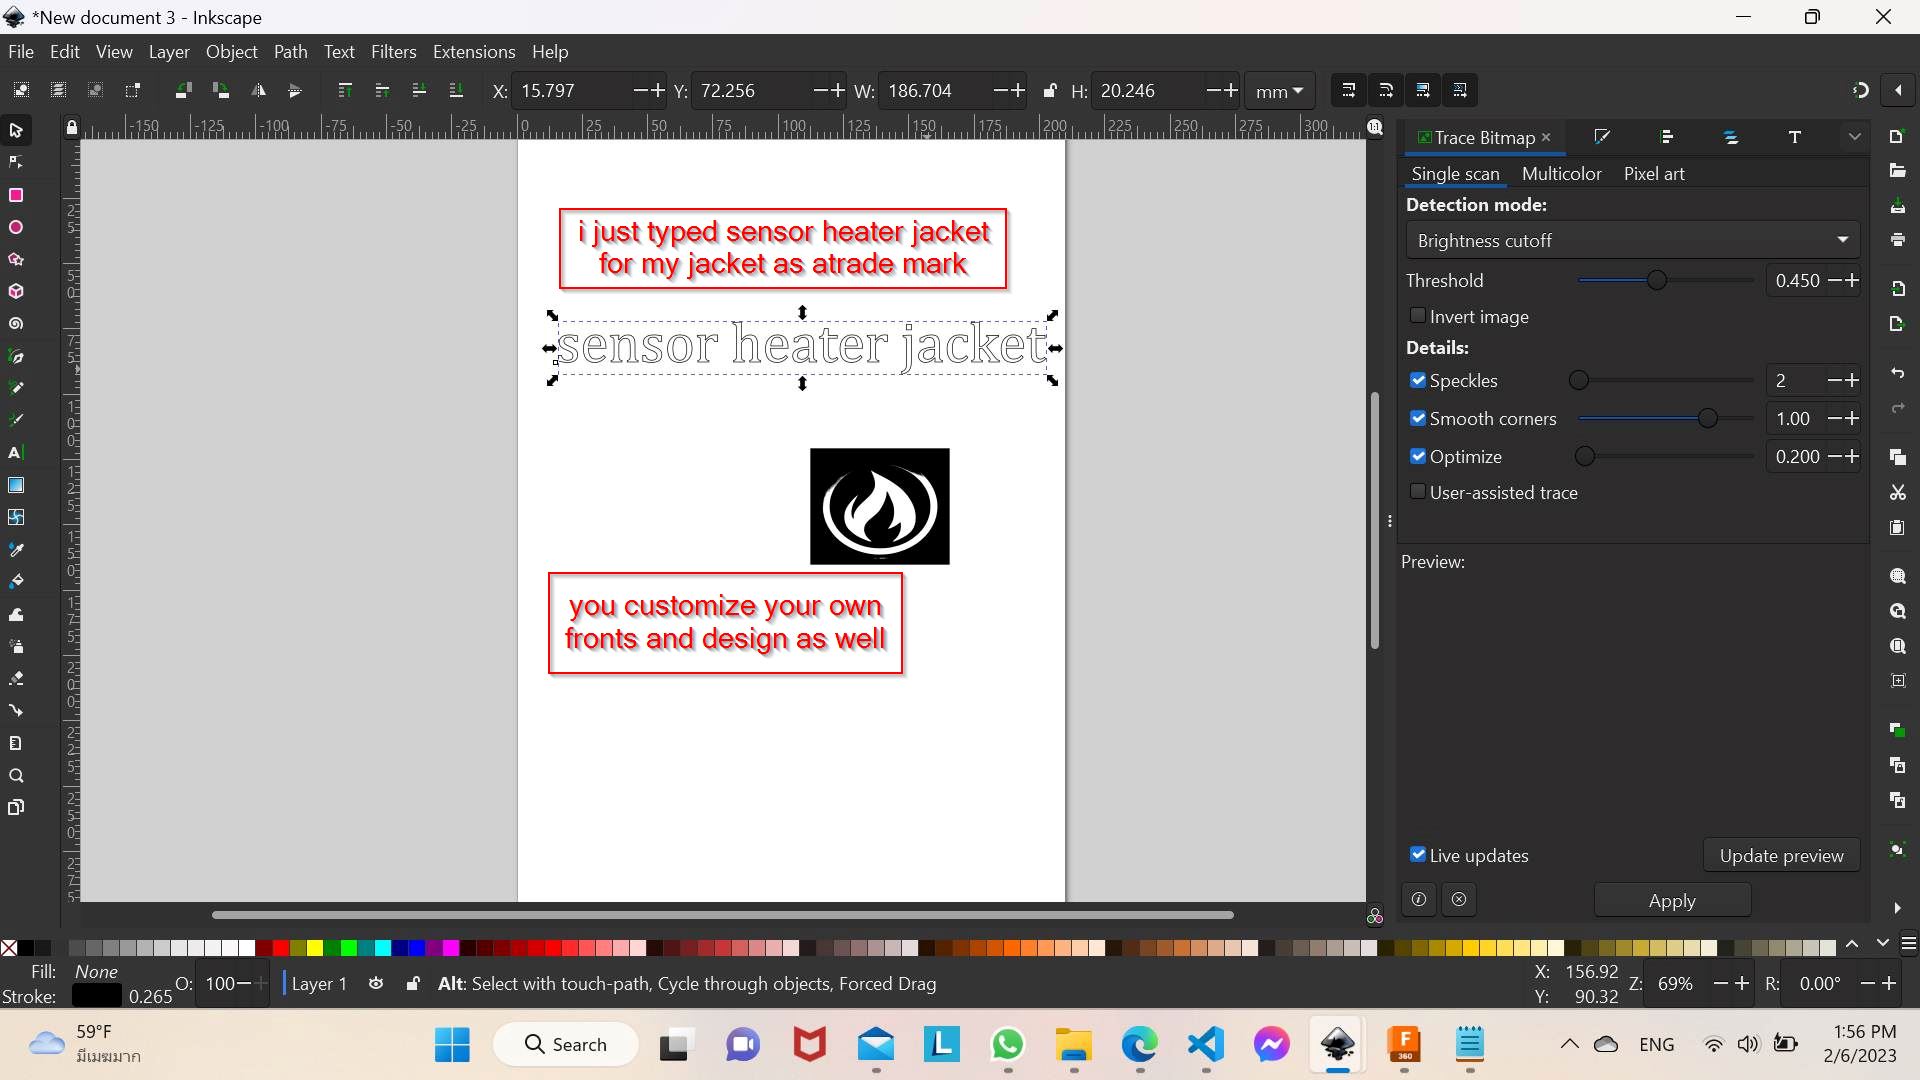
so here is my final logo bit simple.
now finally go to file.
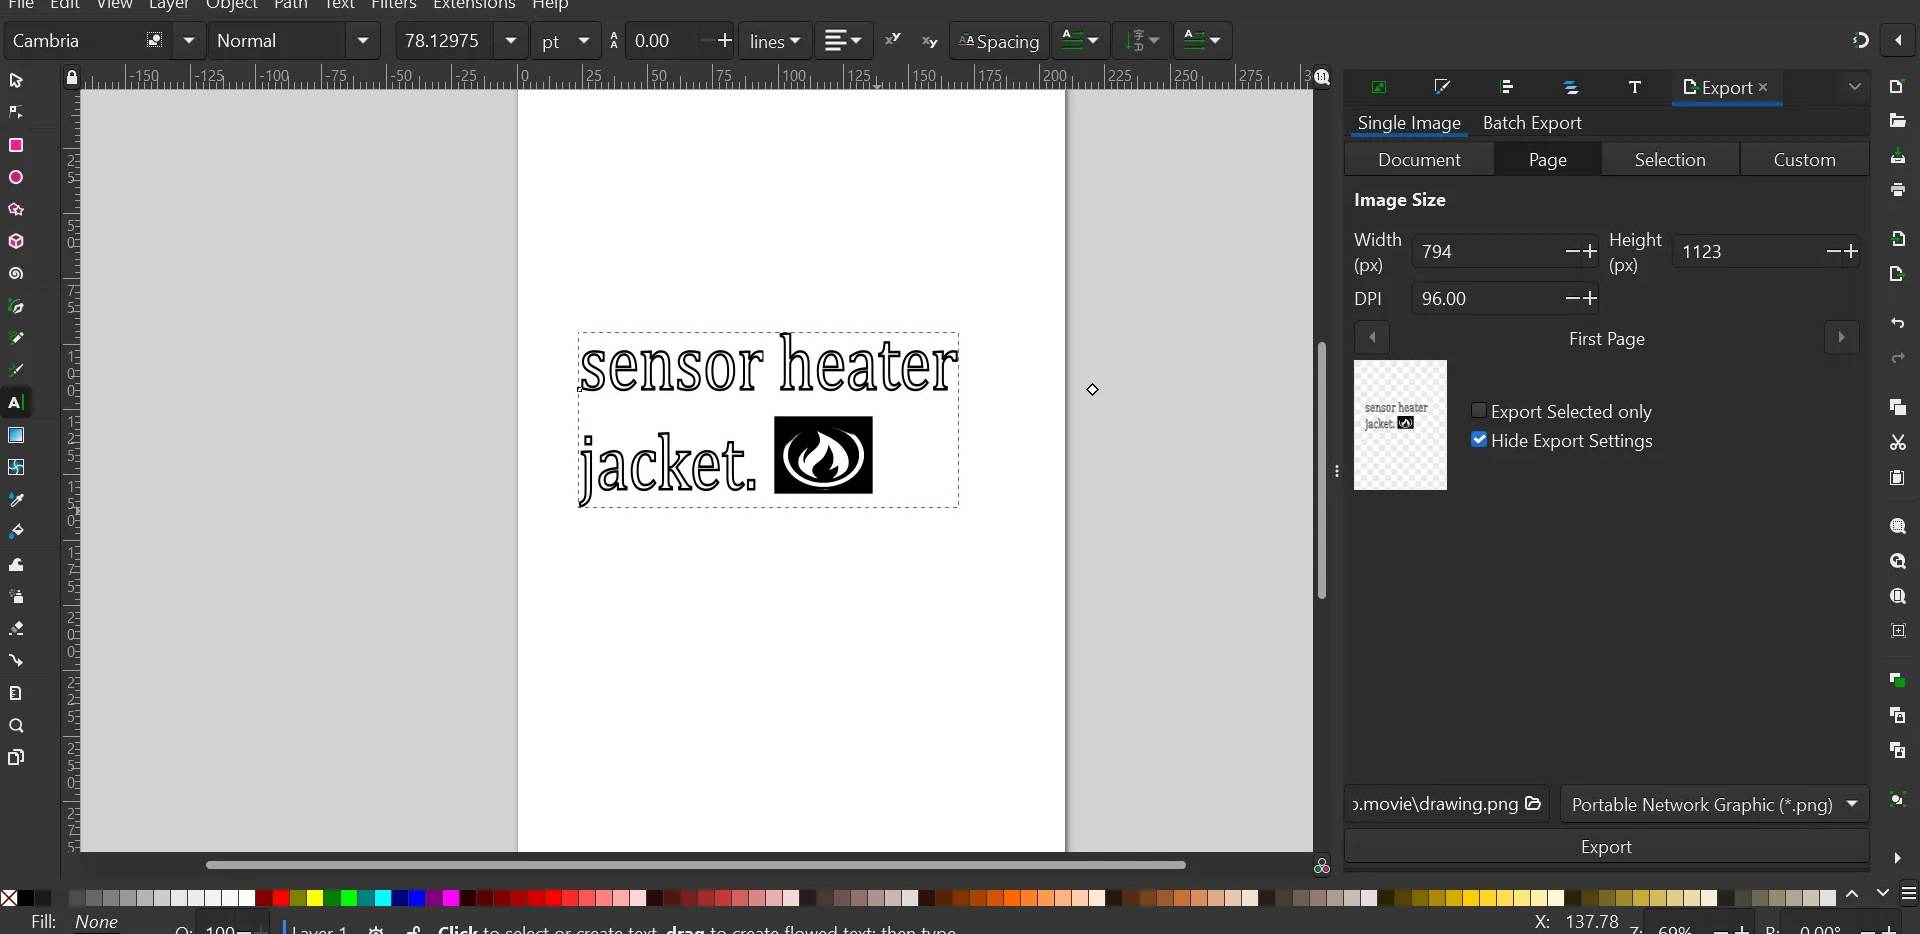
Click save as
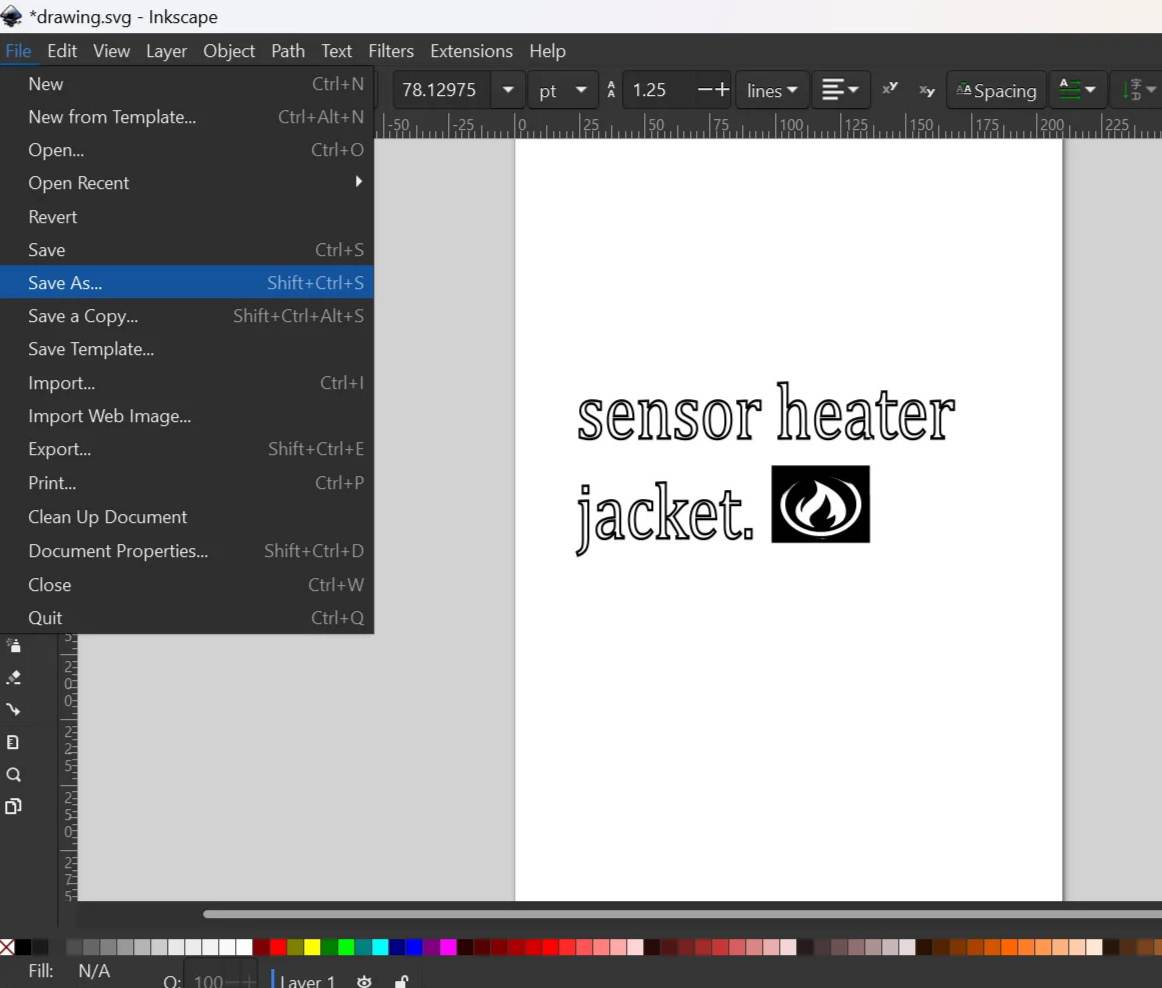
And save in svg file and rename in your desktop.For inkscape i did not have any troubles since i already leanted that during my pre fab class so it was much easier for me.
What is greenshot?
According to wikipedia,Greenshot is a light-weight screenshot software tool for Windows with the following key features: Quickly create screenshots of a selected region, window or fullscreen; you can even capture complete (scrolling) web pages from Internet Explorer. Easily annotate, highlight or obfuscate parts of the screenshot. Export the screenshot in various ways: save to file, send to printer, copy to clipboard, attach to e-mail, send Office programs or upload to photo sites like Flickr or Picasa, and others. ...and a lot more options simplyfying creation of and work with screenshots every day. Being easy to understand and configurable, Greenshot is an efficient tool for project managers, software developers, technical writers, testers and anyone else creating screenshots.
Steps to use greenshot.
below is the link to download Greenshot
click to download
After downloading in your desktop just press PrtSc on your keyboard and you can select the important part on the screen.These are the tools on greenshot which is very easy to use, so for this whole course I am using Greenshot which is very easy to use.So in the picture below shows all the tools which are important .
Below here is the greenshot turtoial which helps to know what are the tools used for although i have mentioned above. he explains the tools in detail. one intresting thing i have found out is that taking screenshot on Greenshot takes less mb comparing to the default screenshots on desktop
3D Software.
TinkerCad.
Tinkercad is a free 3D modeling program or a free online software anyone can be accessed to it and we can 3D designs,check electronic circuit and coding too. according to wikipedia;Tinkercad is the visual code blocks that fit together to create custom shapes and designs with visual programming. In this part of the system, users can manipulate the code blocks for each shape so that they get exactly what they need.There is another area of Tinkercad where users can learn about circuits and power electronics from a beginner’s standpoint. With the use of built-in codes, these users can create their own electrical needs for their project goals.
So i just designed a simple key hanger that I can put on the jacket chain or on the zip. so here is an example below. so instead of the ribbon i want to add my own design "Heating vest" on the zip or the chain in order to look a little attractive.
Here are the steps to design a simple chain on Tinkercad.
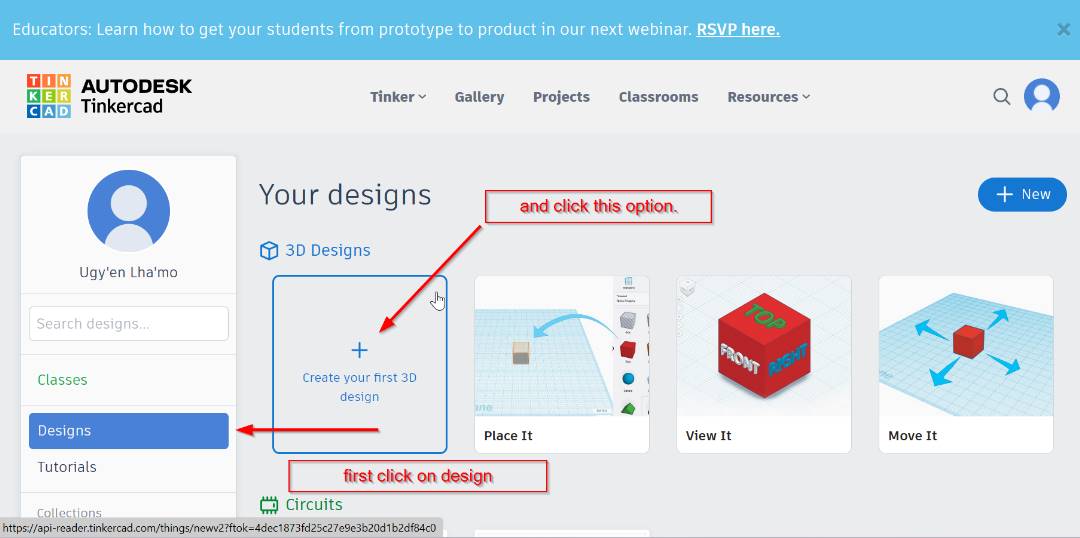
(1)So tinkercad is a free online software where anyone is accessed to it. You just need to create your own account using your google account.
After doing that just click on the creat new design and start exploring.
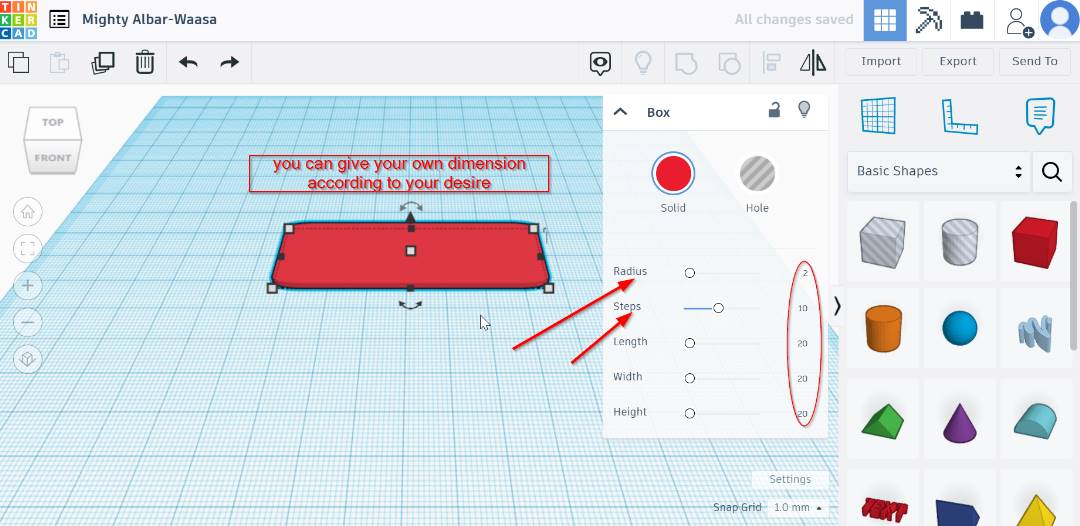
(2) As you can see different types of component on the right side of your desktop, you can simply drag and drop shapes,which ever you like.So for my heating vest I decided to add a hanger on the key or zip to look more attractive. so for me i selected a rectangle and gave the required dimension. and on the right side when you click on the shap you get option to chnage the dimension and radius as well,you can change from that.
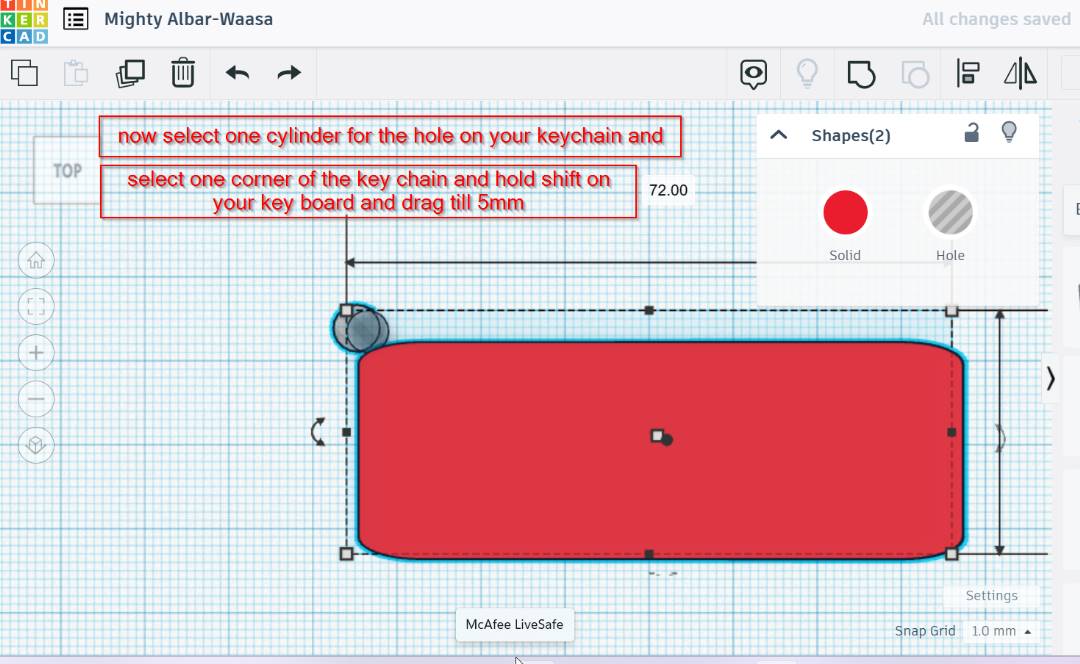
(3)So for the hole in odrer to put the chain I used one cylinder and gave the required dimension.(2mm) and to add on the hnager select one corner of the cylinder and hold shift on your keyboard and place on the required position. Wherever you like. And dragged till 5mm.
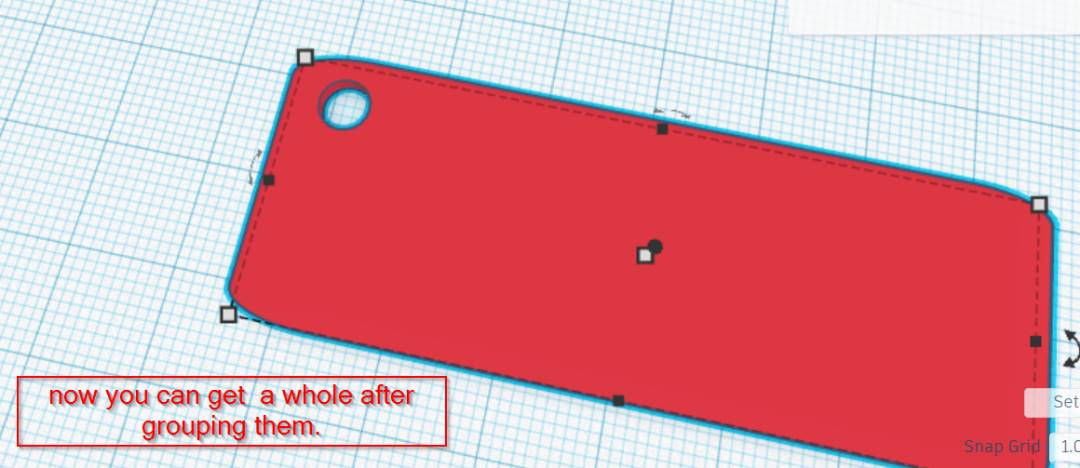
(4) Now to group them just right click on the screen and drag, you can select this way and just click on the group option and you will get like this. The cylinder will penetrate inside and you will get a hole.
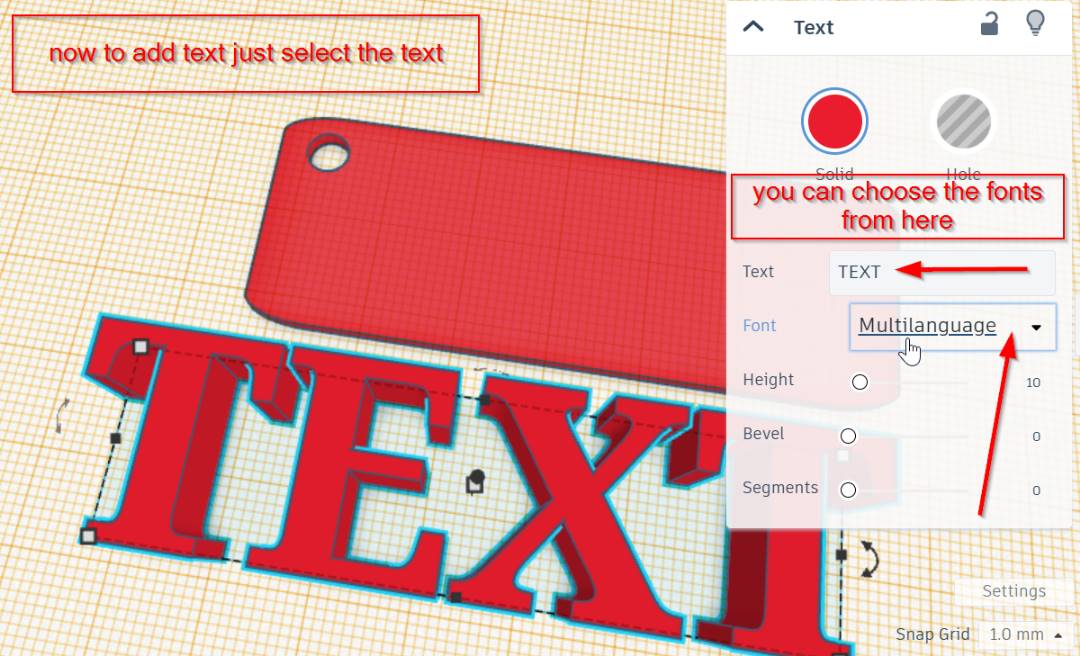
(5)Now time to add text. You can add whatever text you like so for my heating vest I just added for trade mark."Heating Vest" so to add text just select the text component and edit from the options displayed on right side.
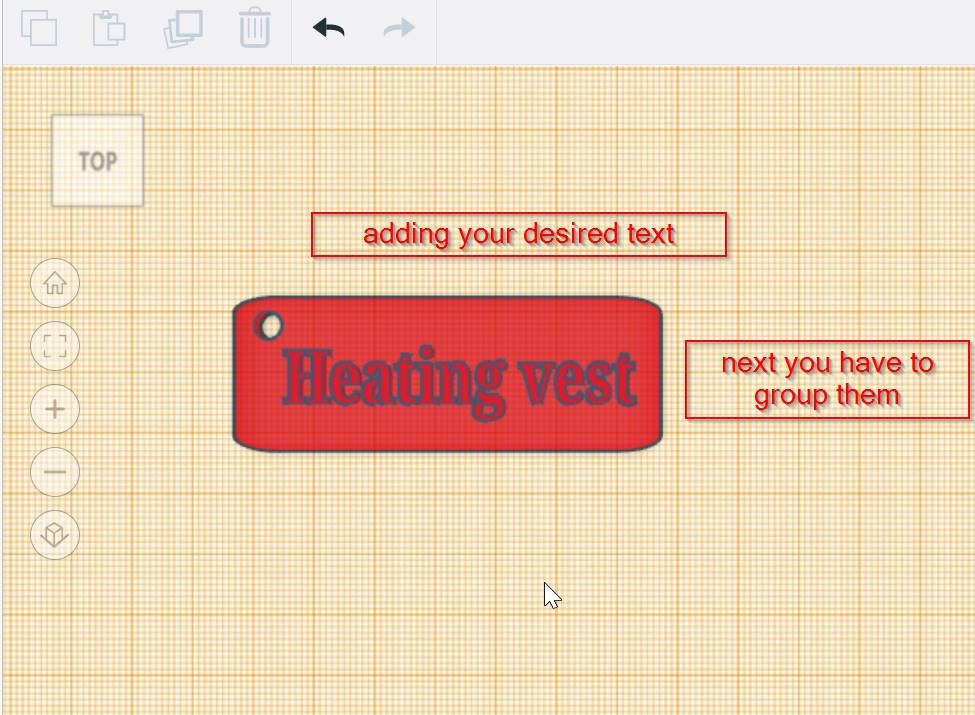
(6) Not to forget the dimension, give the dimension and just group the text and the rectangle.
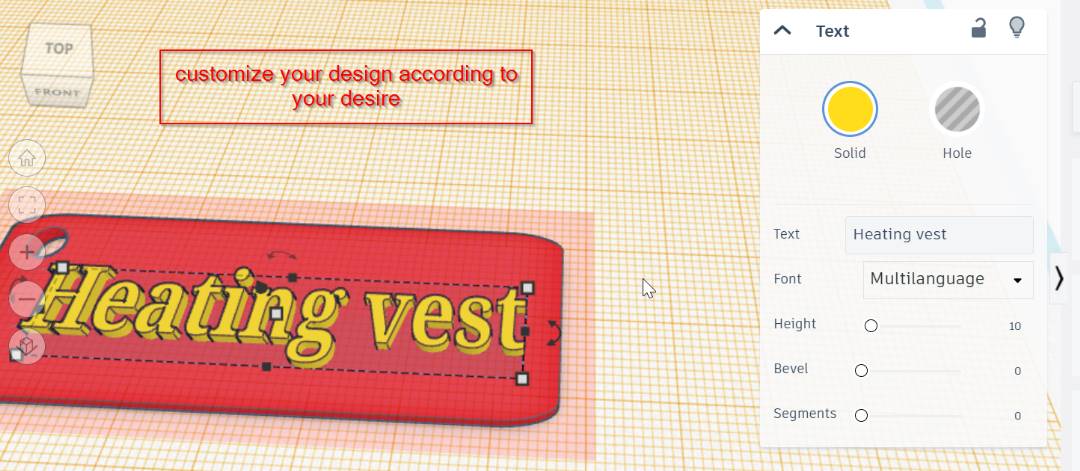
(7) for the text, so for mine i gave 2mm so it can look a little better than just a plain text. i just extruded 2mm upward.
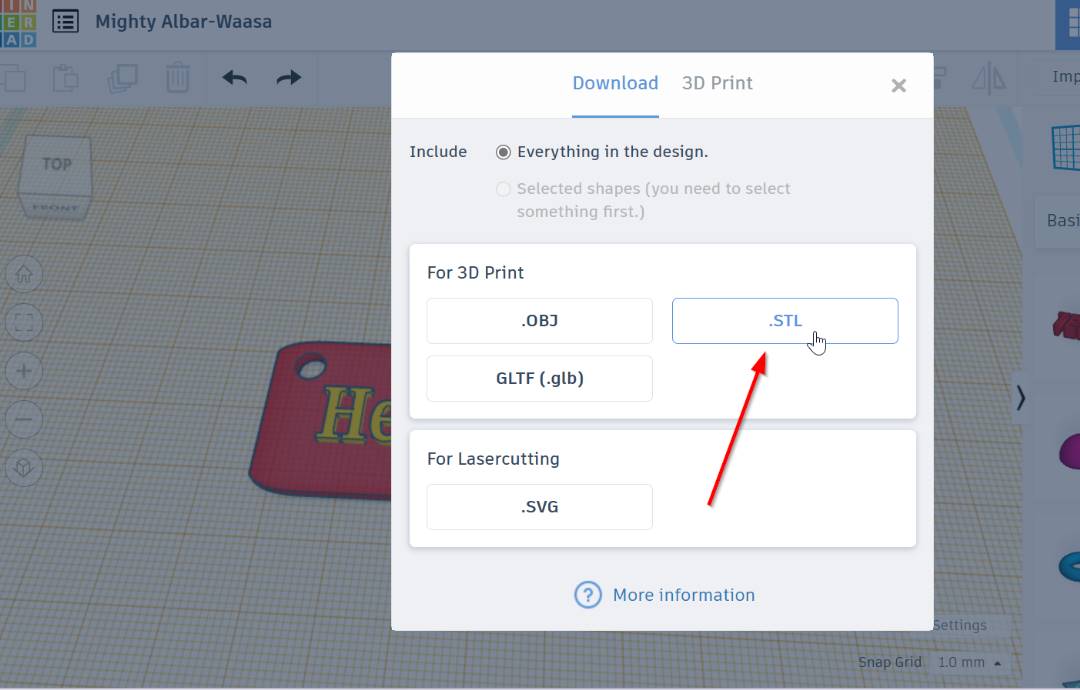
(8) Now the design is redy and you can just export in STL file for 3D printing.And will be downloaded in your desktop.
Fusion360.
Fusion 360 is a commercial computer-aided design(CAD), computer-aided manufacturing (CAM)and also for computer-aided engineering (CAE). Even for printed circuit board (PCB) design software application, which is developed by Autodesk. which is is available for Windows and macOS, with simplified applications available for Android and iOS.
Uses of Fusion360
According to google:Fusion 360 is a great resource which allows users to do everything in one place. With this you can even create 3D designs, collaborate, manage data, create toolpaths, and run simulations to validate your designs. Fusion 360 is also the tool of choice for manufacturing, machining, engineering, and industrial design expert
My 3D Design on FusionFor now i just created a simple design on fusion360
In fusion 360 i just designed a simple case for the components to be placed inside the jacket i just designed a box with a led
so firstly open fusion360 in your computer.
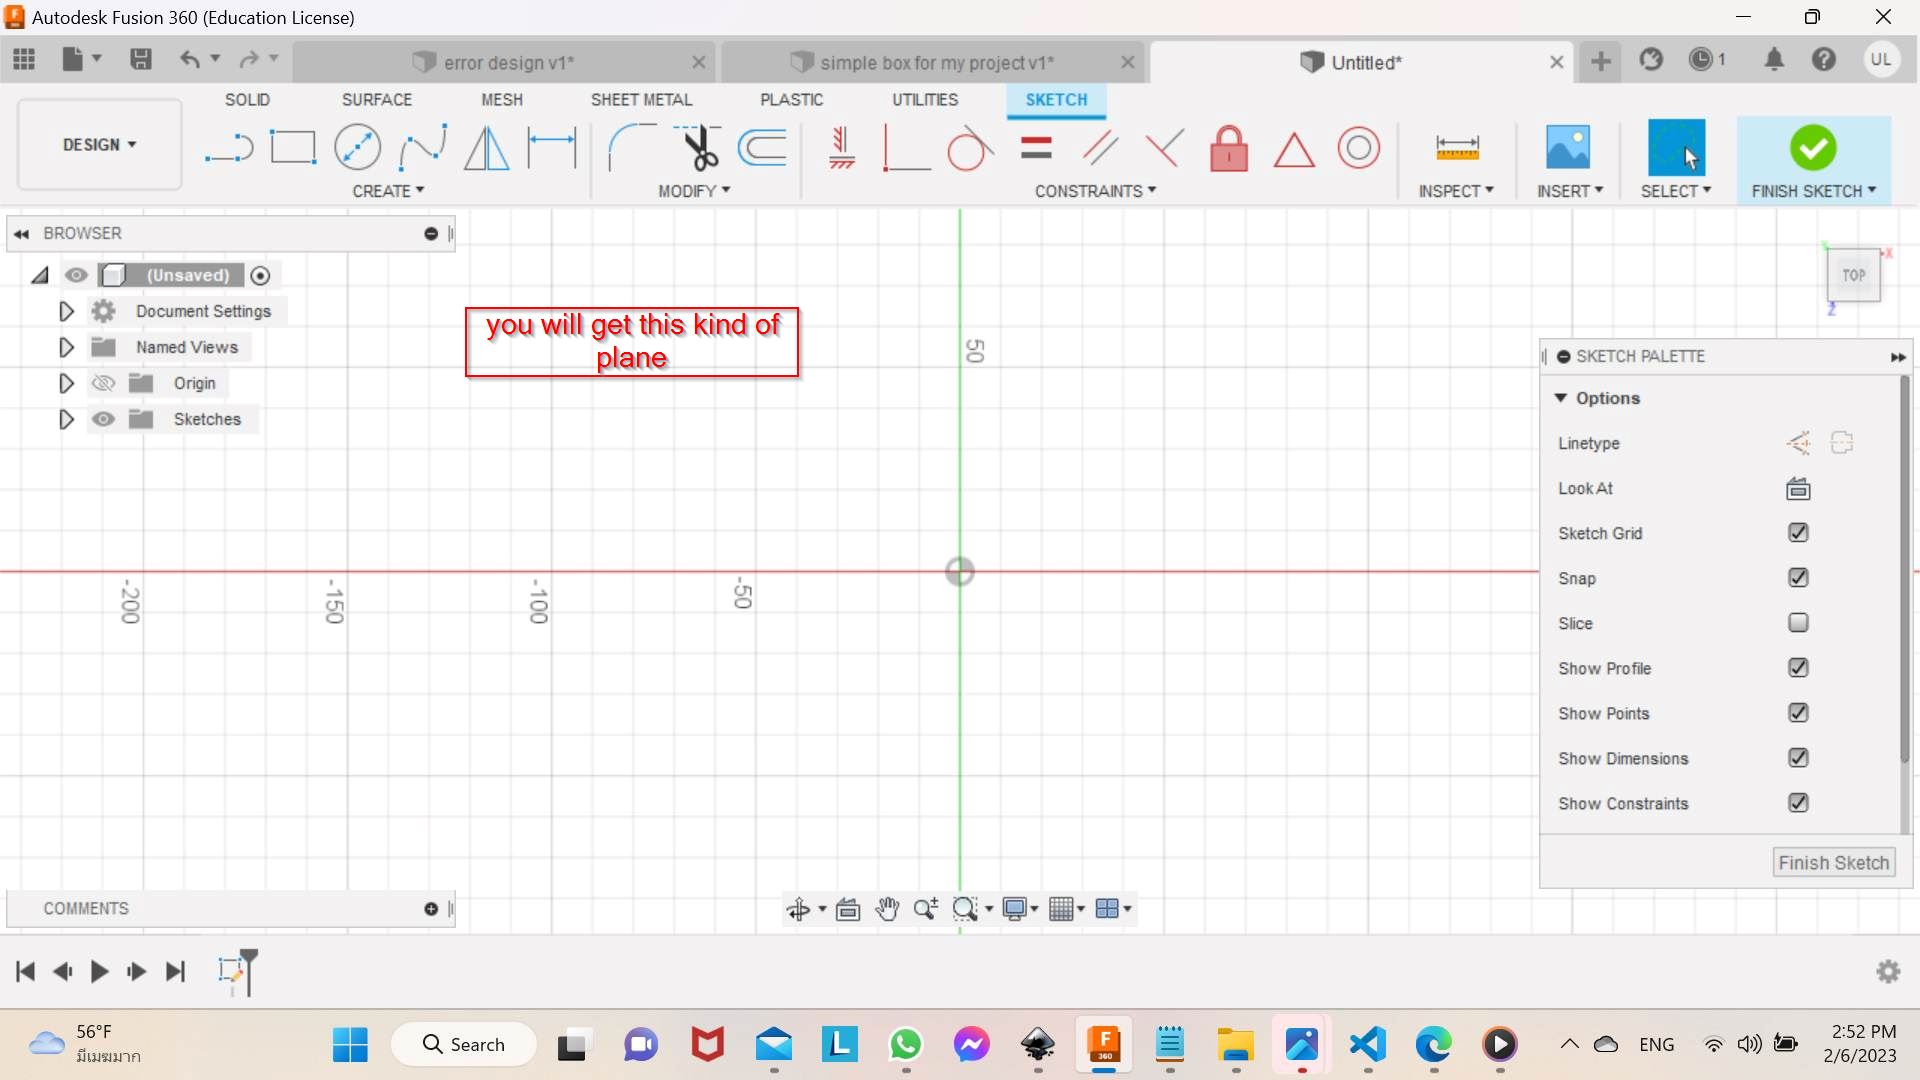
afrer that; select a plan or a panel face. click on the create button.
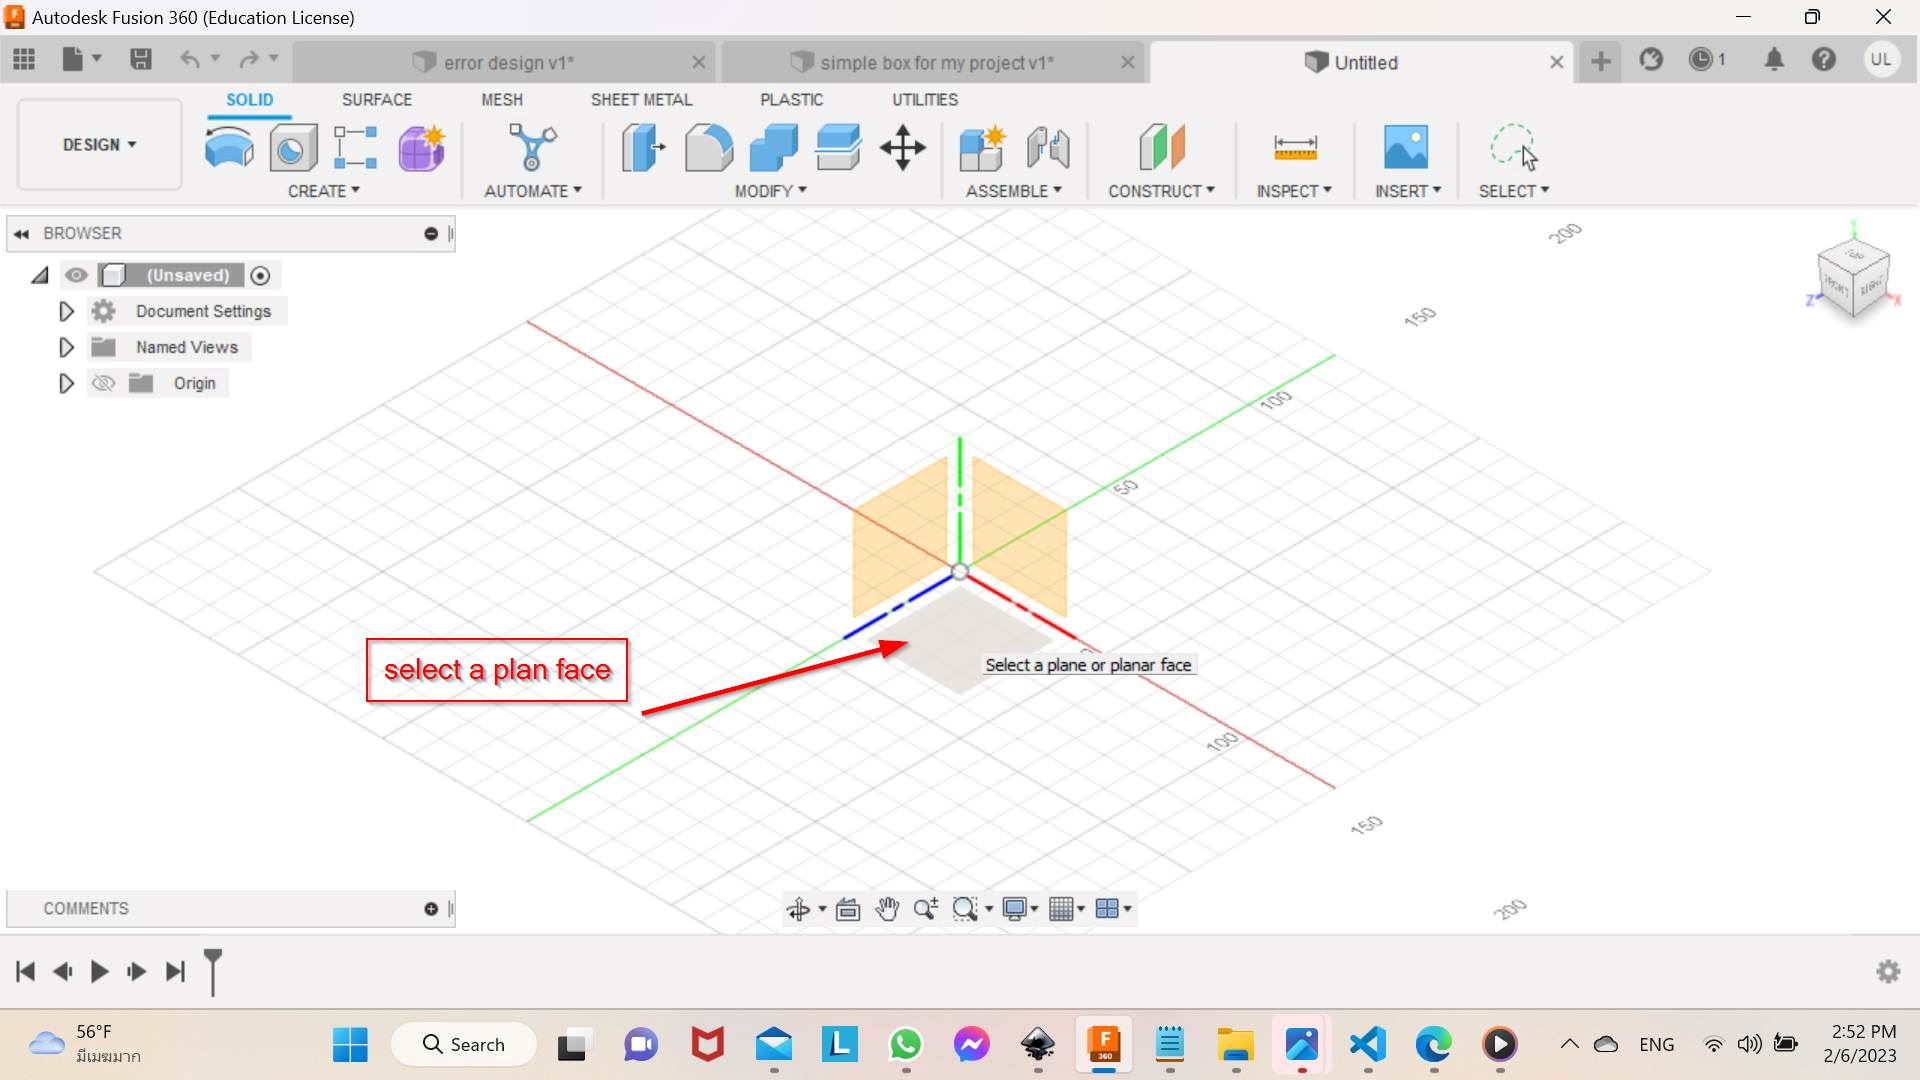
for that click on the origin
type 30 tab 30. finish my sketch and extrude up to 20mm and press enter
click on the two point rectangle and you can put on your own mesurement.
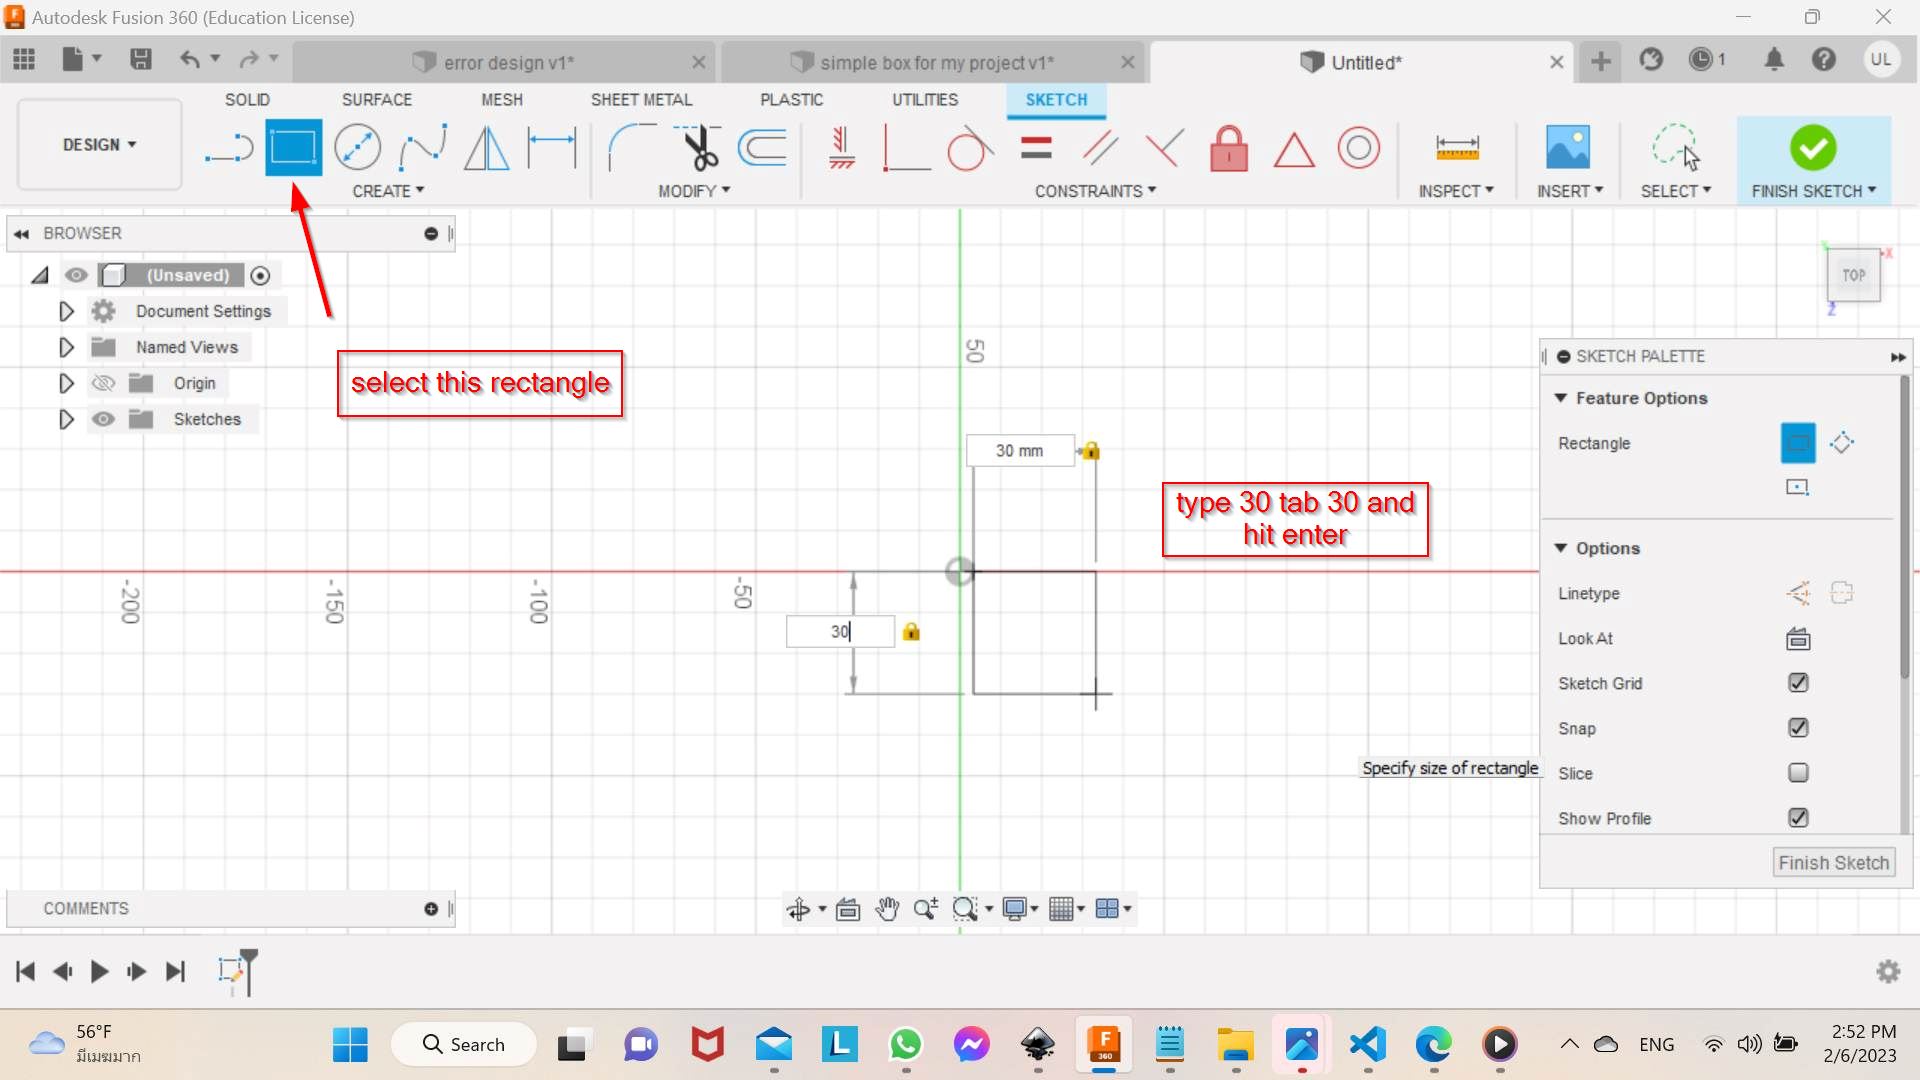
now press enter and go to excrude
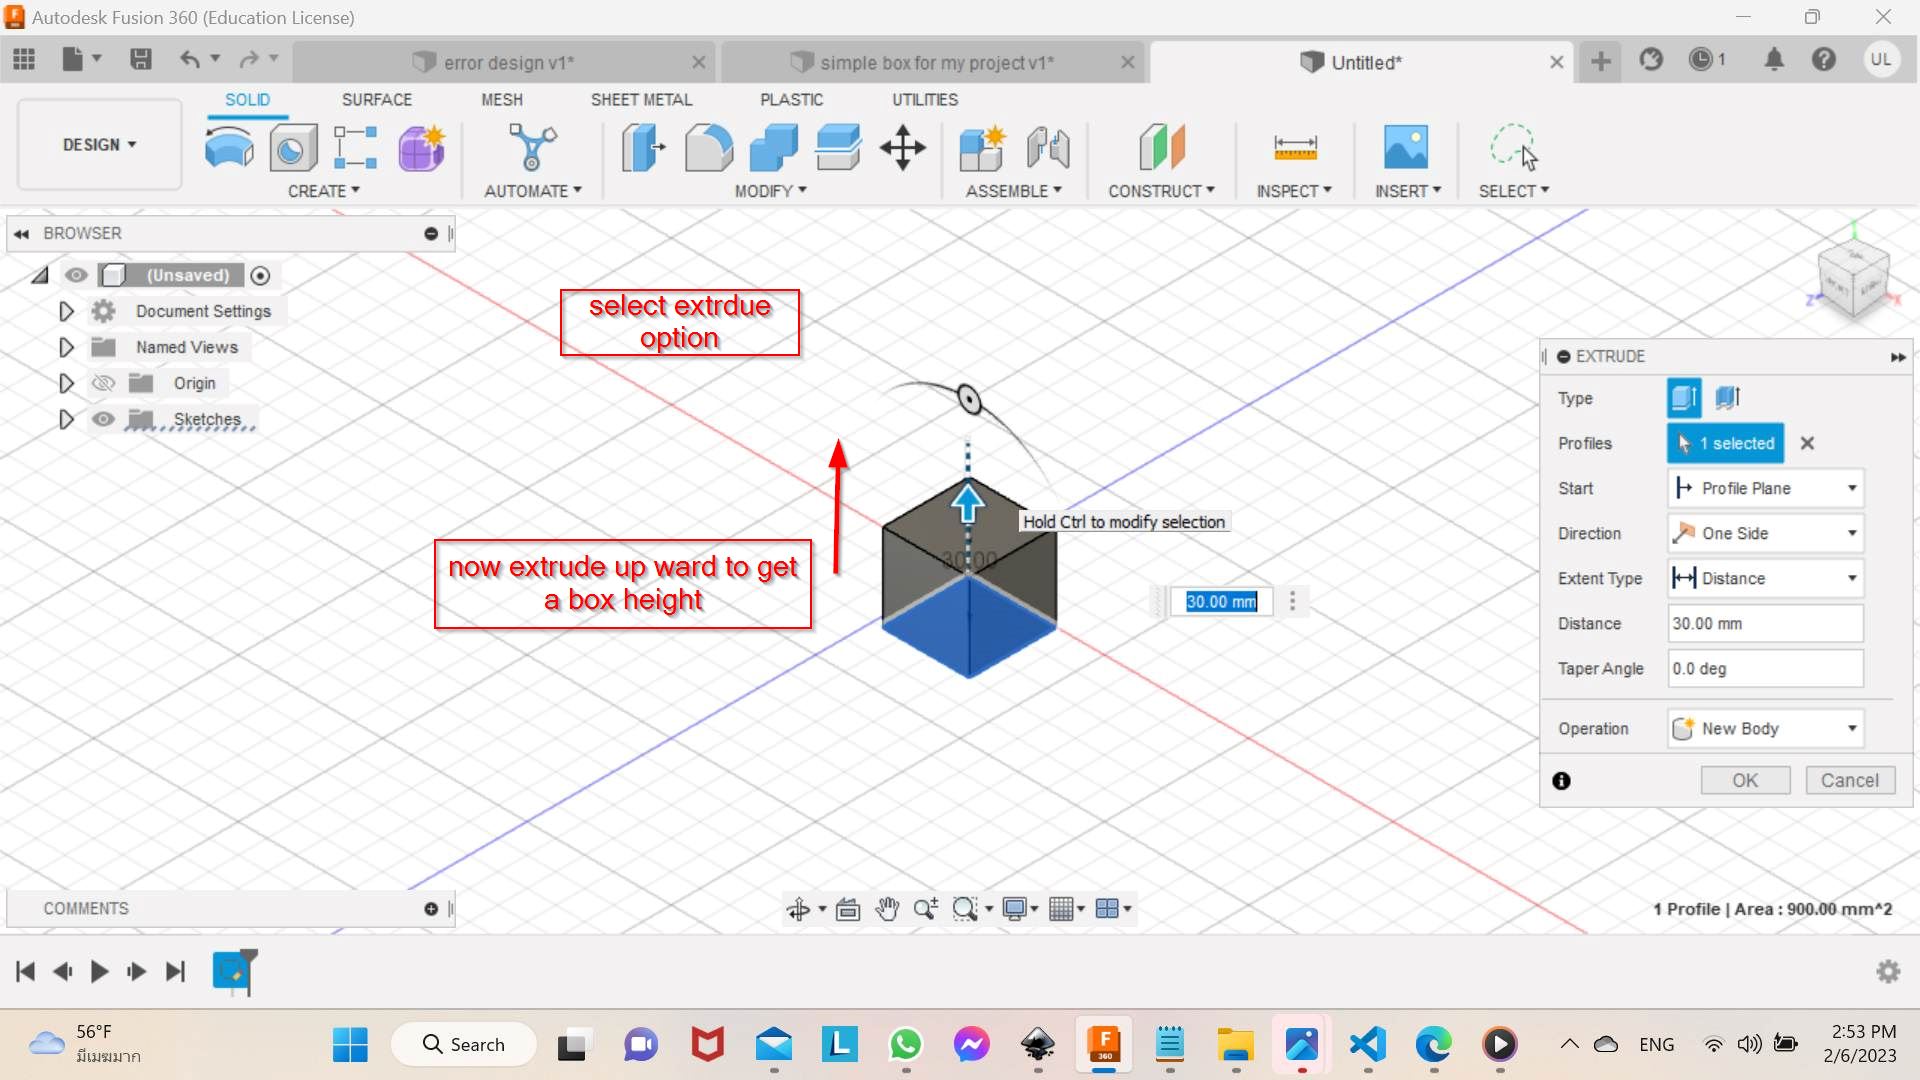
excrude up to your mesurement were i kept 30 mm
and press enter
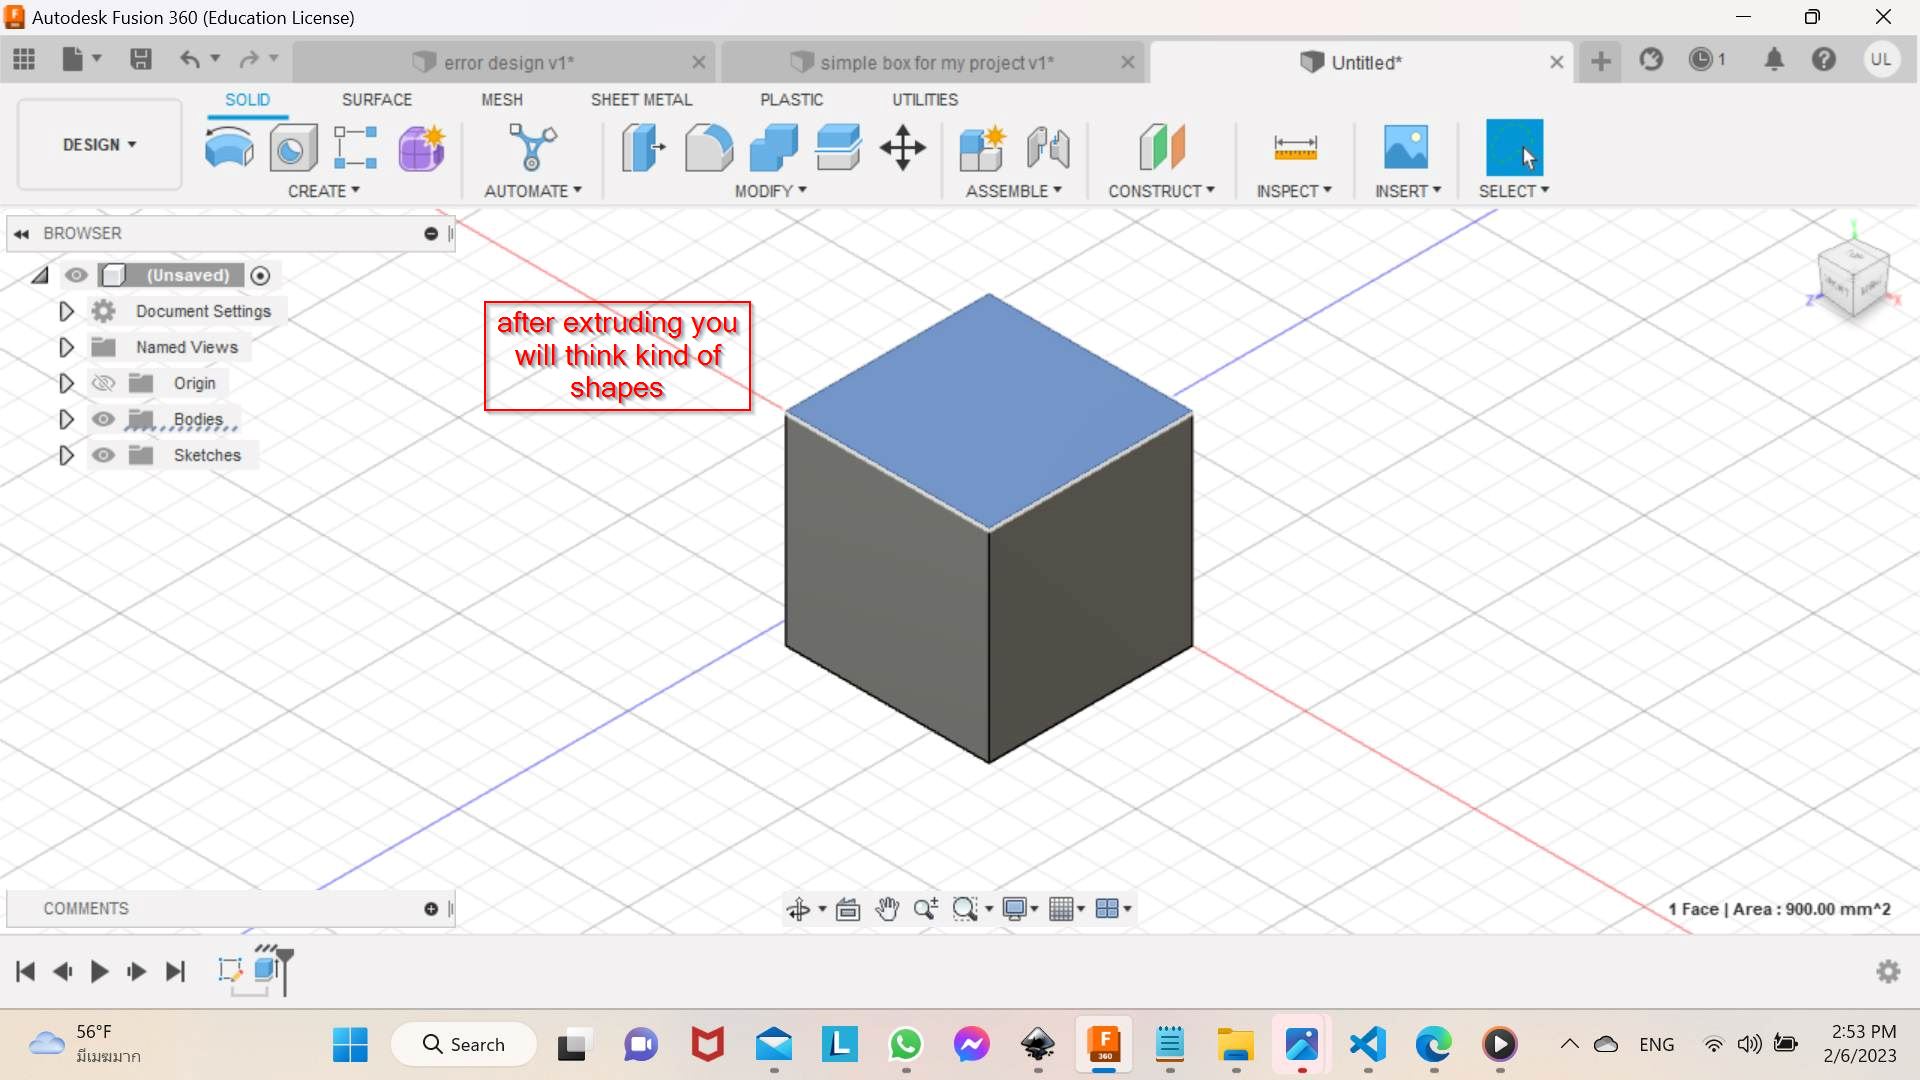
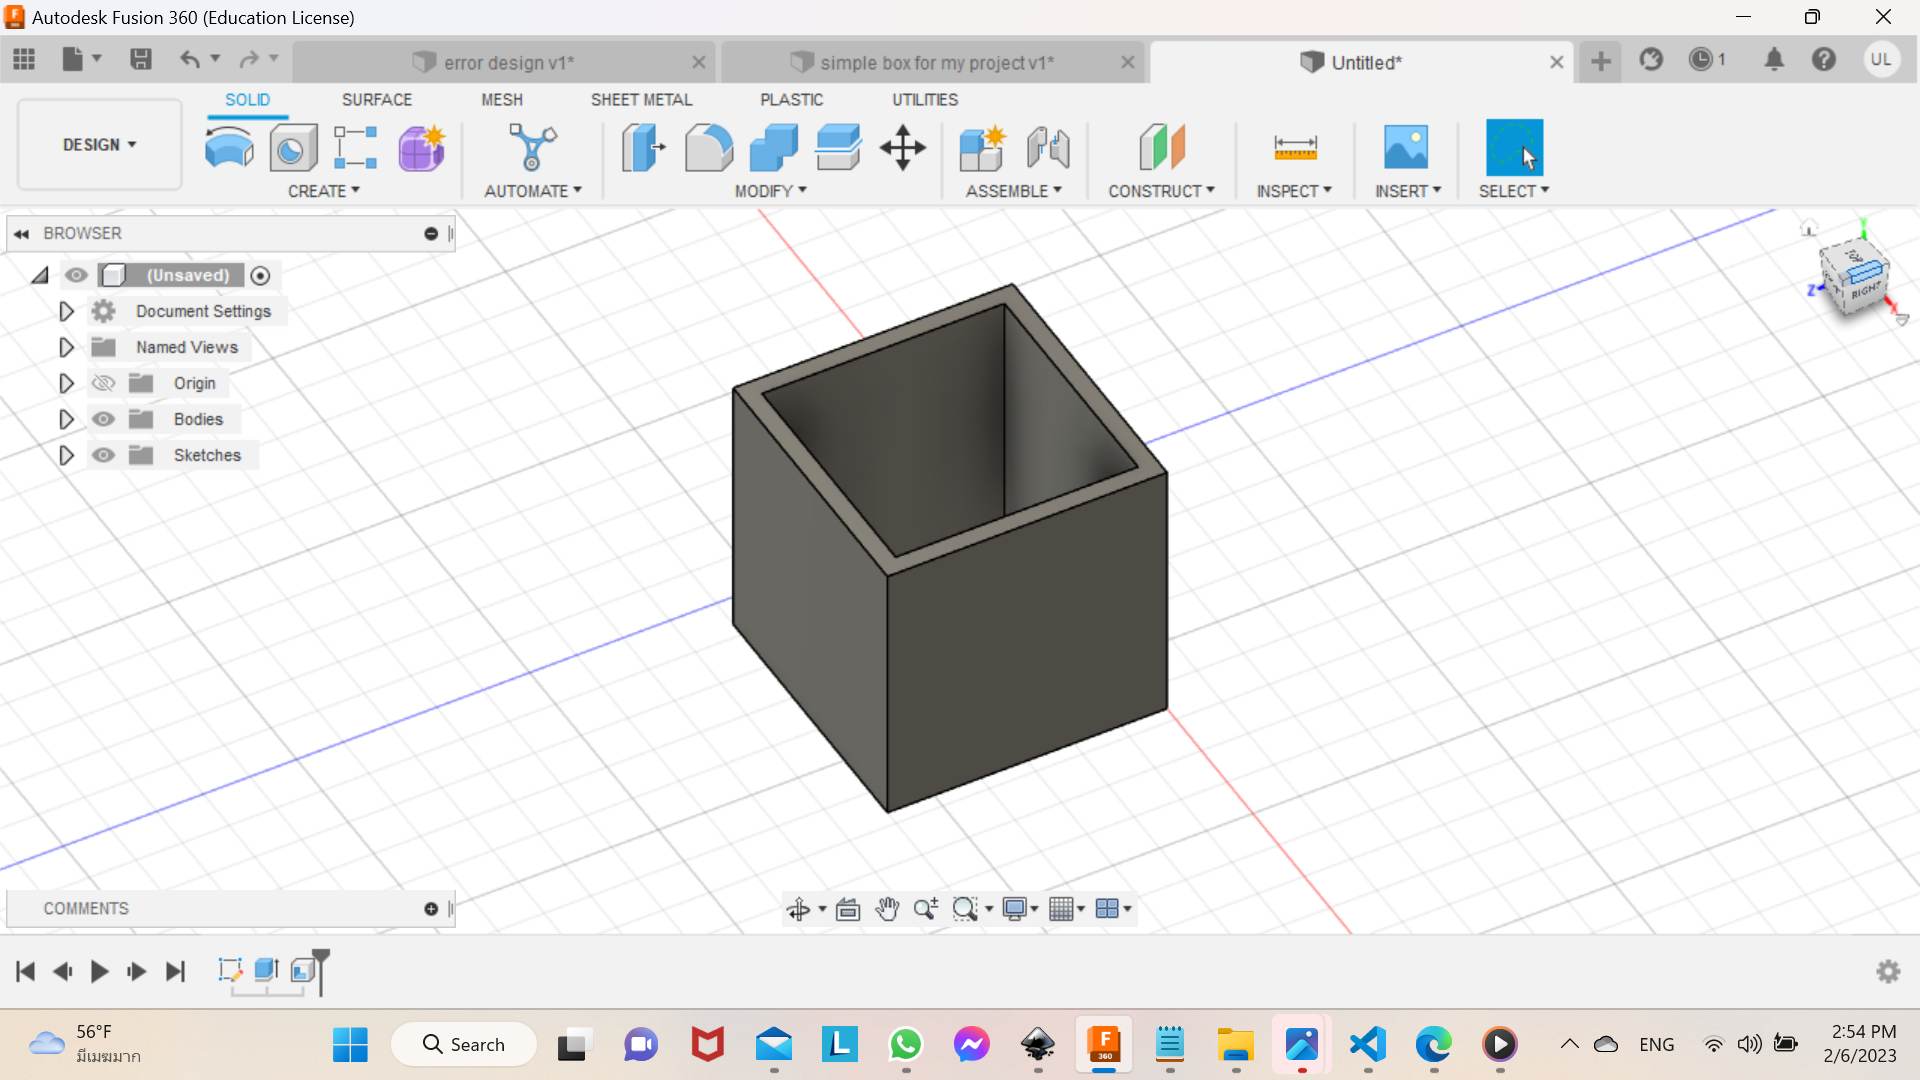
you will get this kind of shape. after select the top corner of the box. so for now to shell, click on modify and click on shell
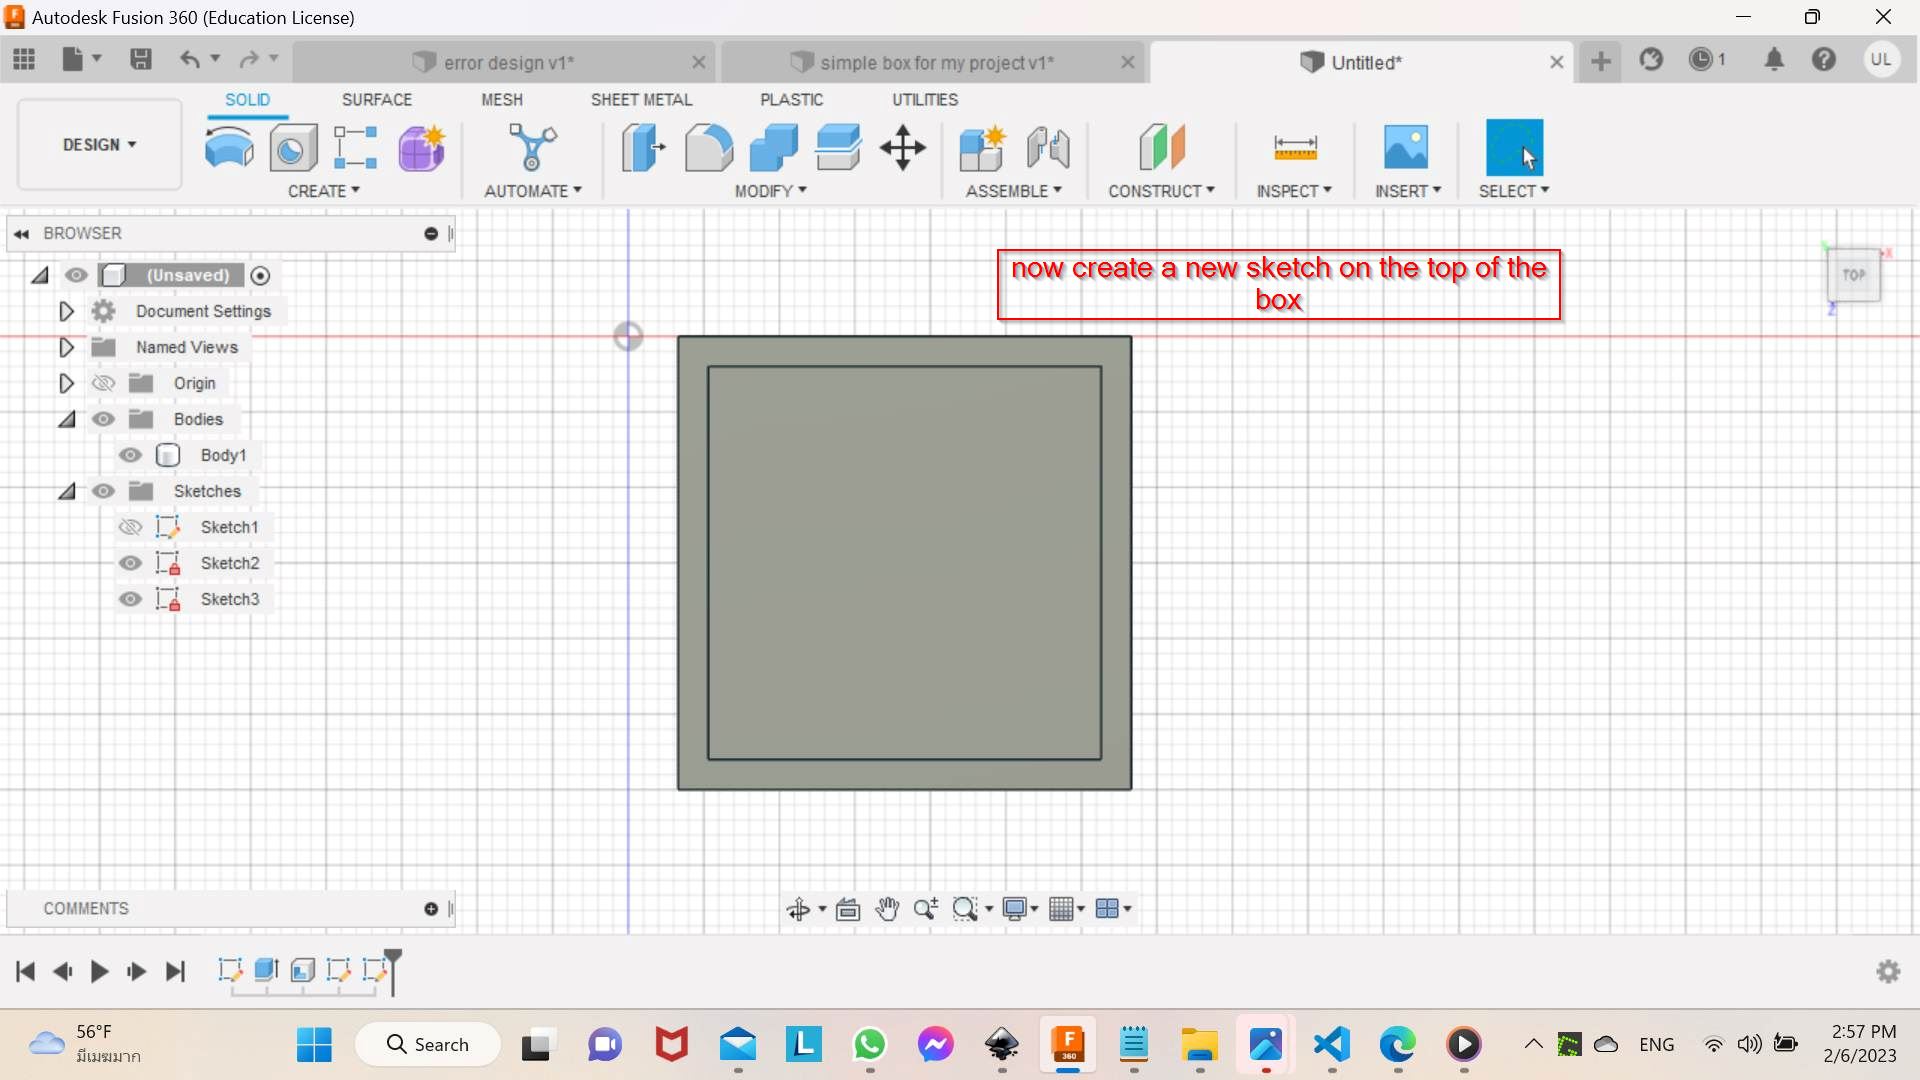
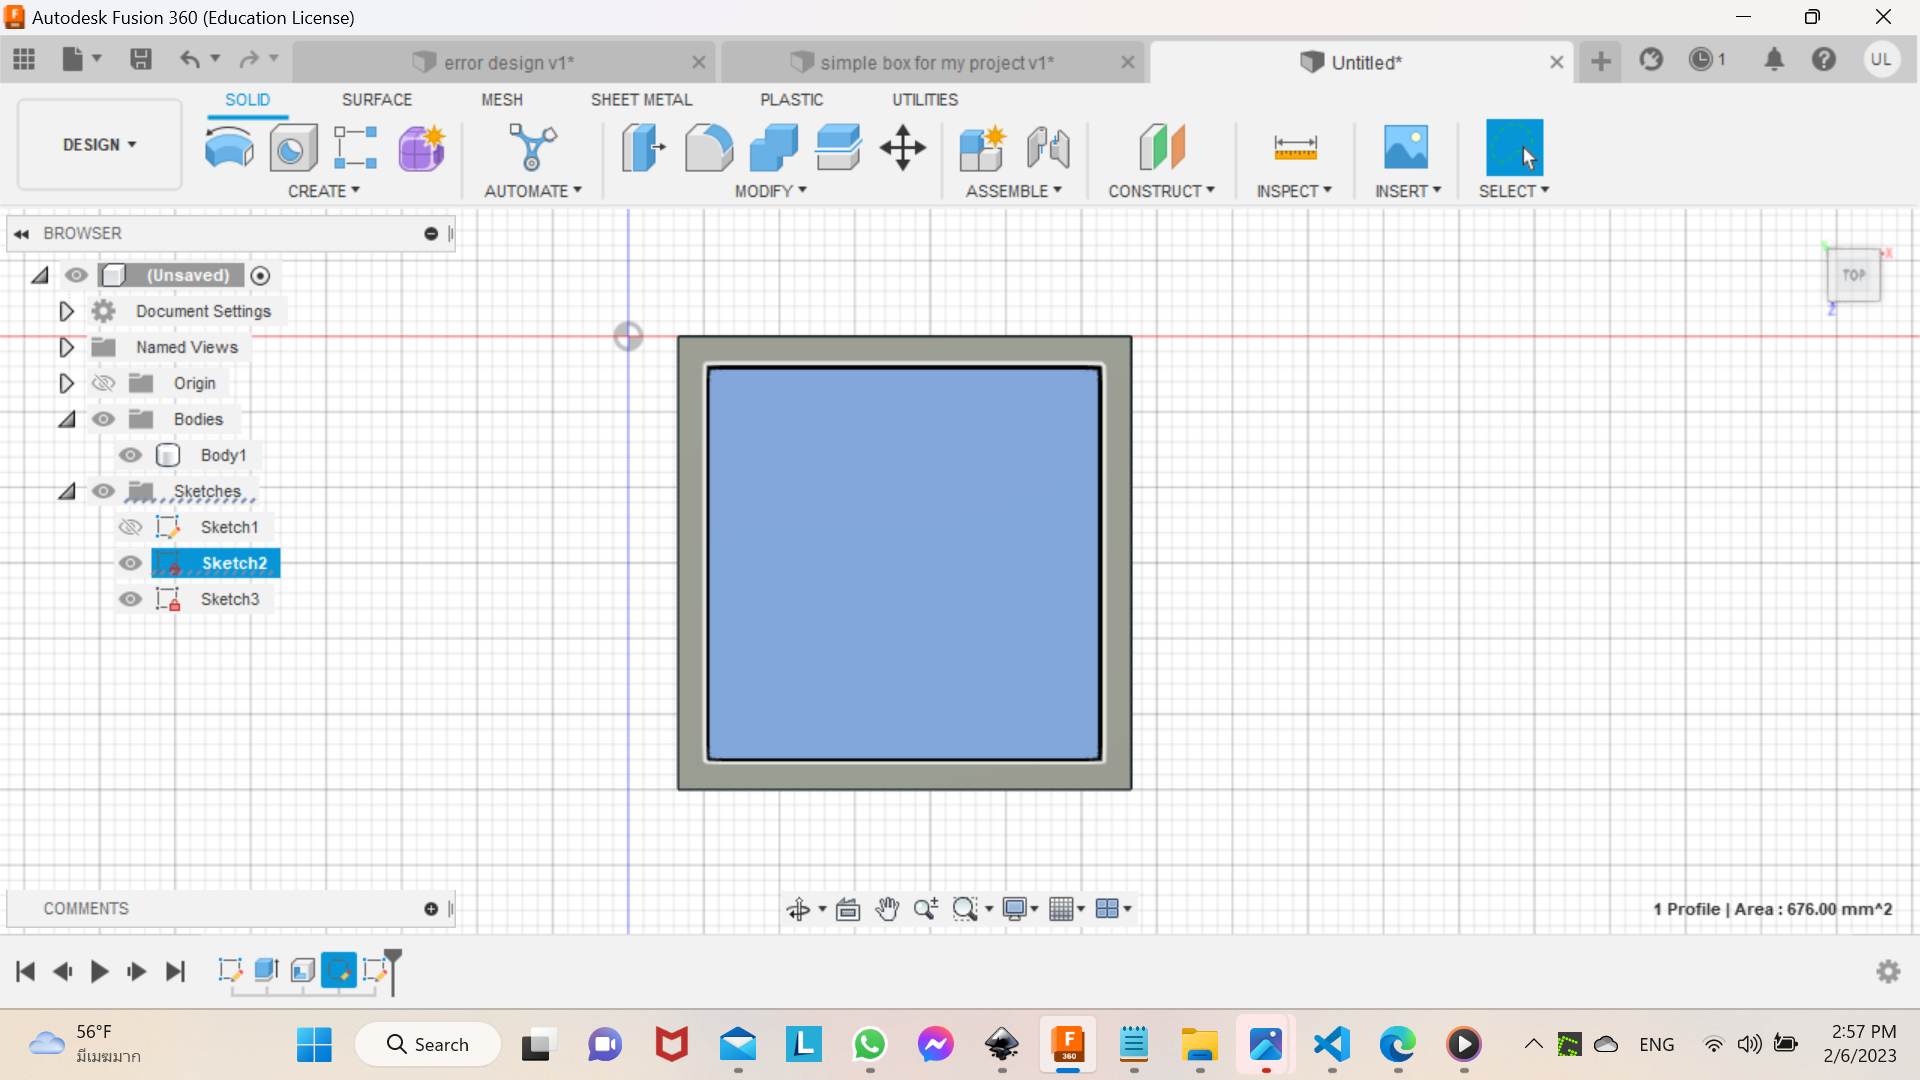
Next creat a new sketch on the top of the box
After that select on the top left corner of the box

Press p key on the keyboard for the project menu and select the geometry and select this face. press okay after that
After that hide the body icon and excrude
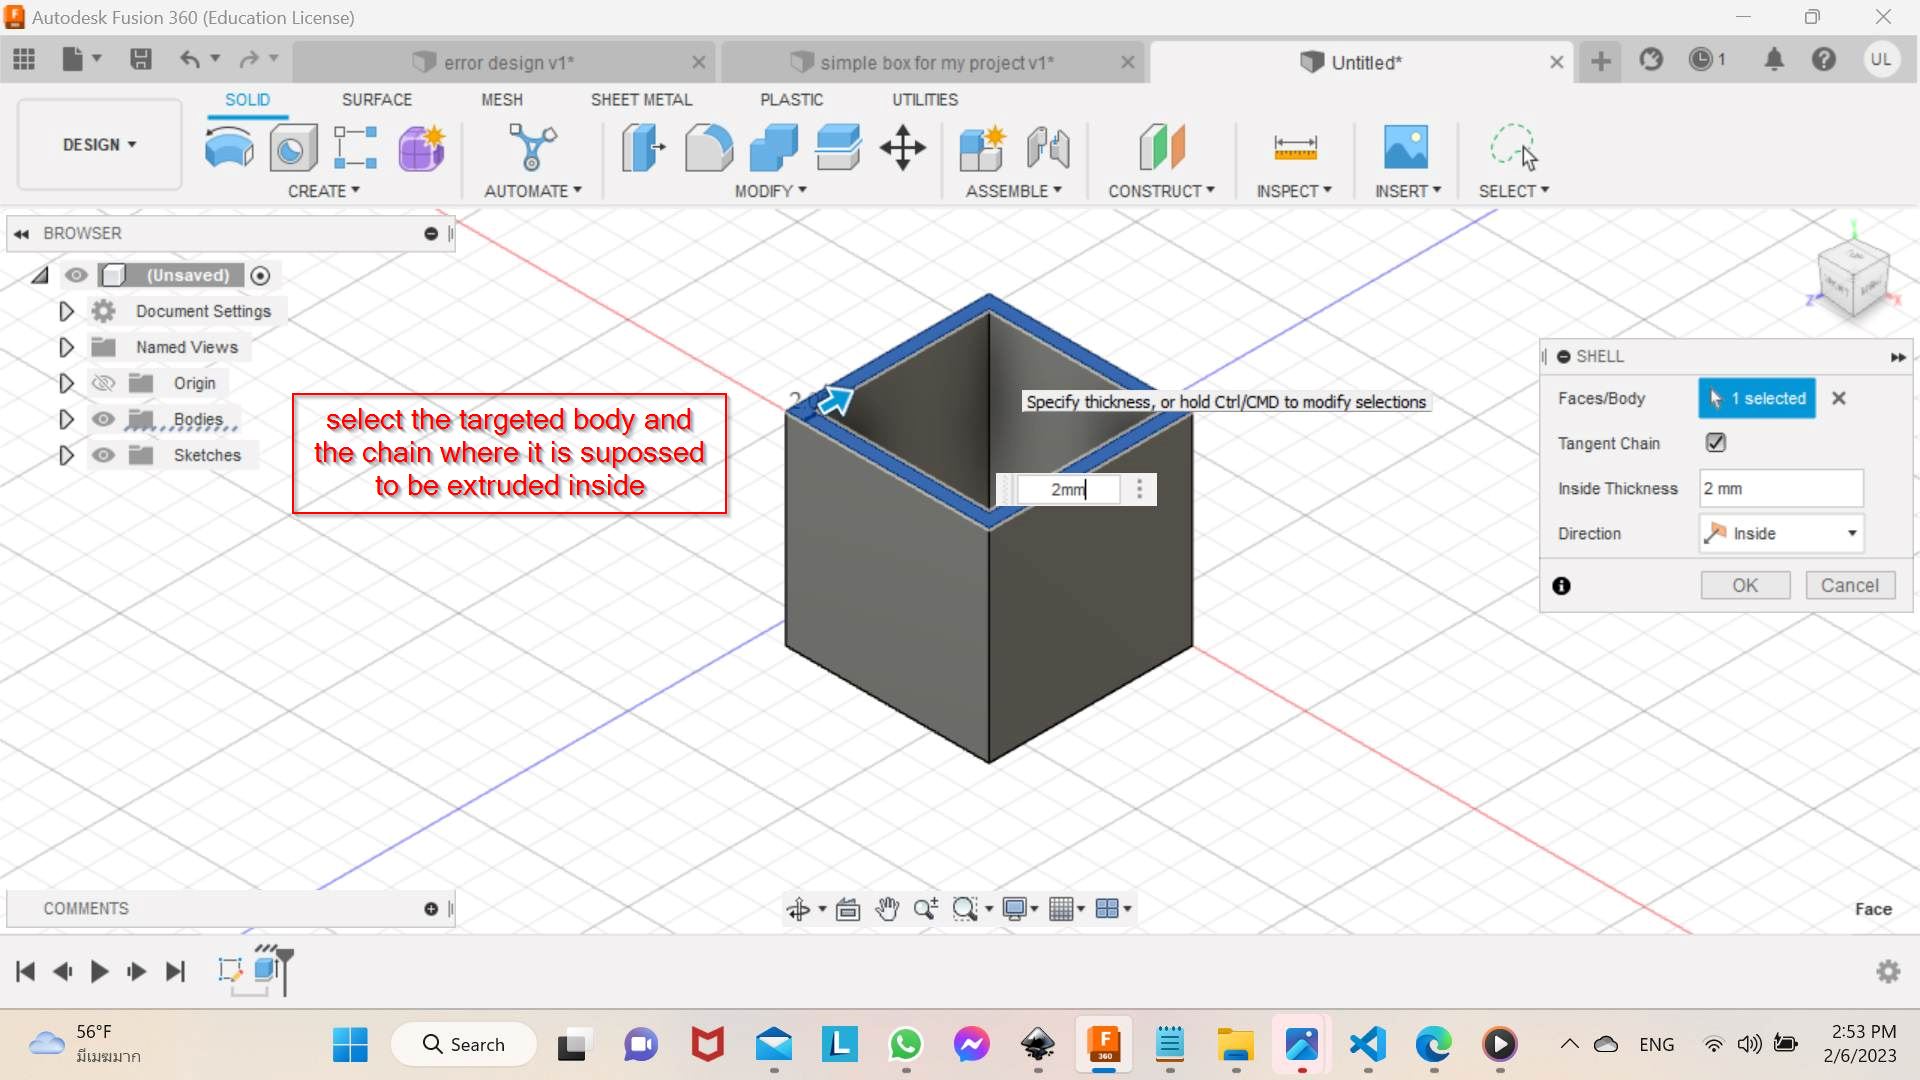
Now change the measurement to -2 and press okay
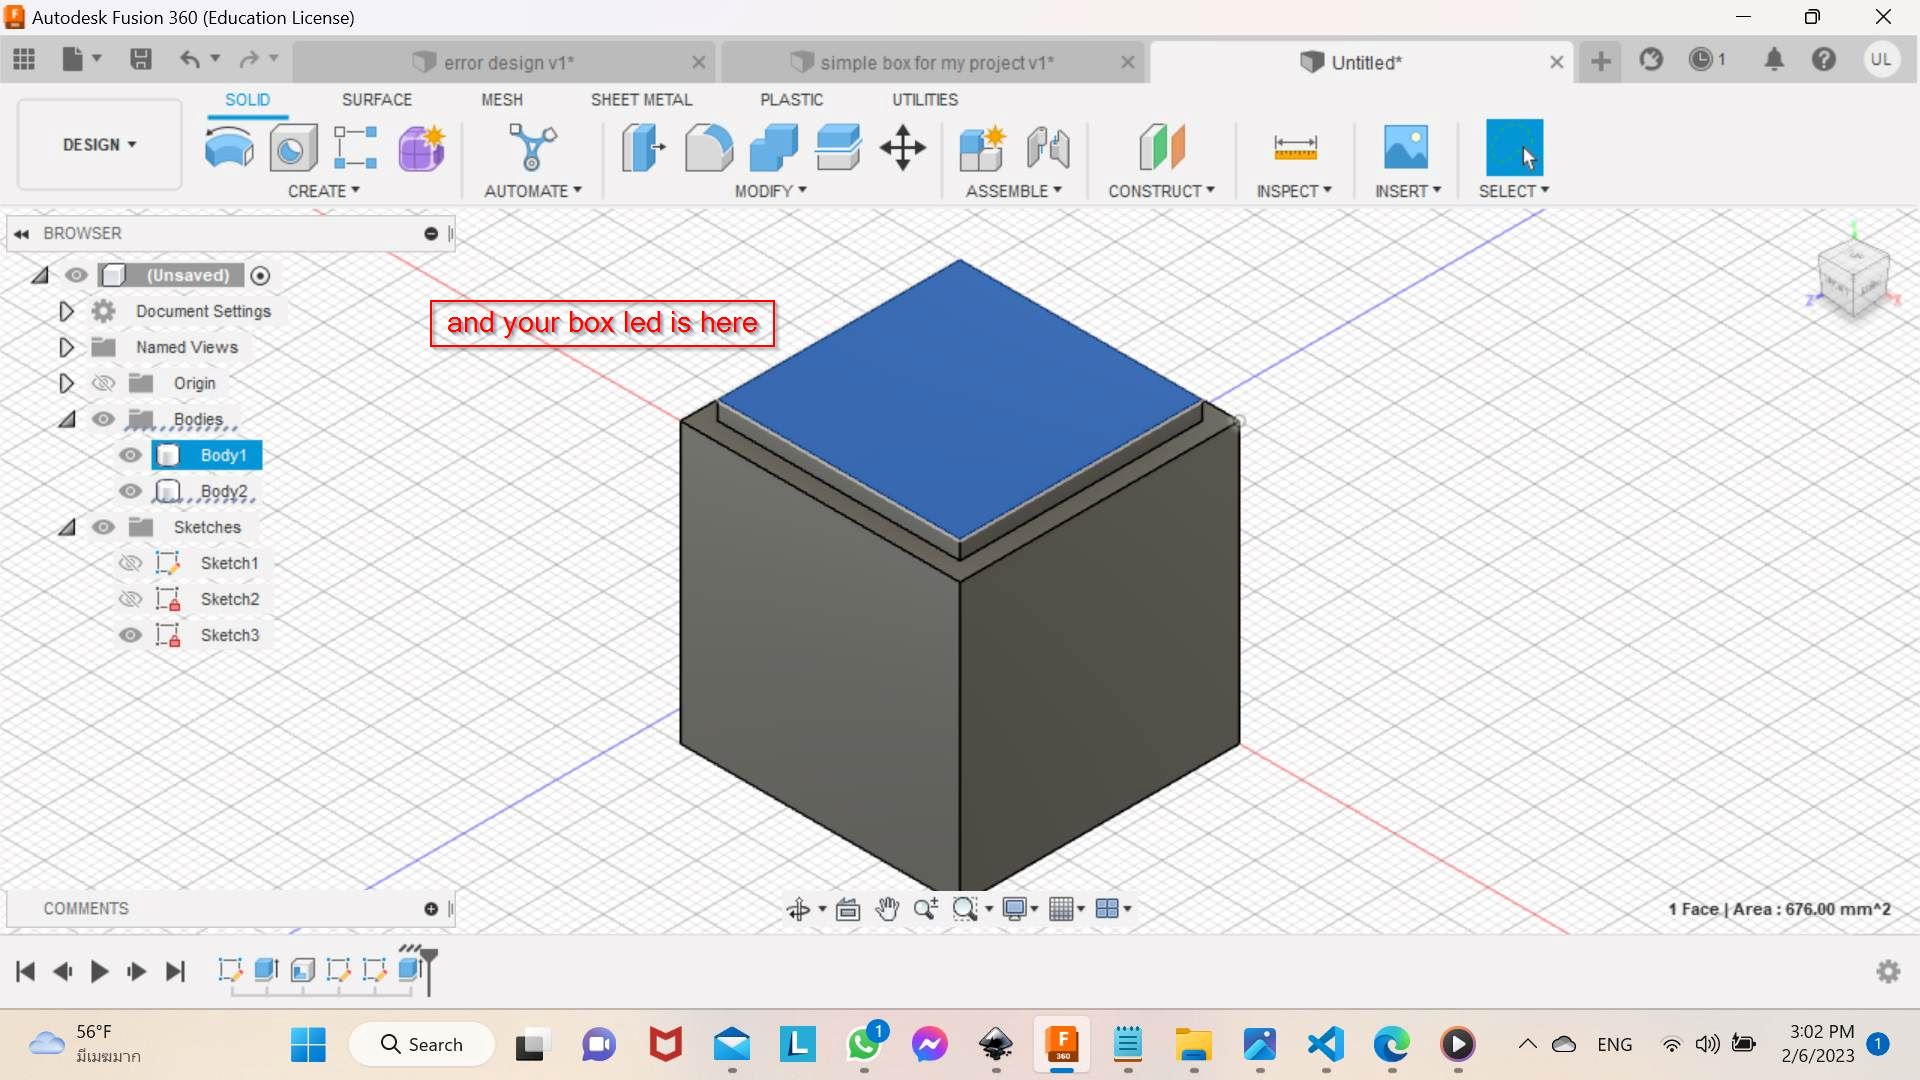
Now unhide both the body and see the result:here you can get your design ready.Mistakes I have made during this week 2 documentation was that i forgot to compress my images and i did my documentation from the start.For image compression i tried using xconvetor where my image quality could be reduced accoring to your wish.
you can get my 2D And 3D Designs file below
Since my simple box wasn't really qualifying for the assignment so I thought of designing a switch button for the jacket in oder to put on and off, as suggested by my instructor. I decided to design one switch button for 3D printing since for my final project it does not require any leasar cutting, so for componenets i designed one simple box with a lid and a button for the switch to turn on and off when needed.As you can see below is a youtube video of 3D switch button i designed on fusion 360 with the help of a tutorial video and I uploded in my youtube channel
Link to tutorial that help me alot to design the switch button is here.
This is my Switch Button 3D design file.