My Final Project
The video and slide of the final project
Final Slide
Final Video
You can also access my Slide and Video from following links in greater resolution
Final Slide
Final Video
Part1: Research and Activities (Final Project)
Part2: Initial Final Project Plan
Part3: Electronics and Programming (Final Project)
Part4: StoryBoard and Slide (Presentation)
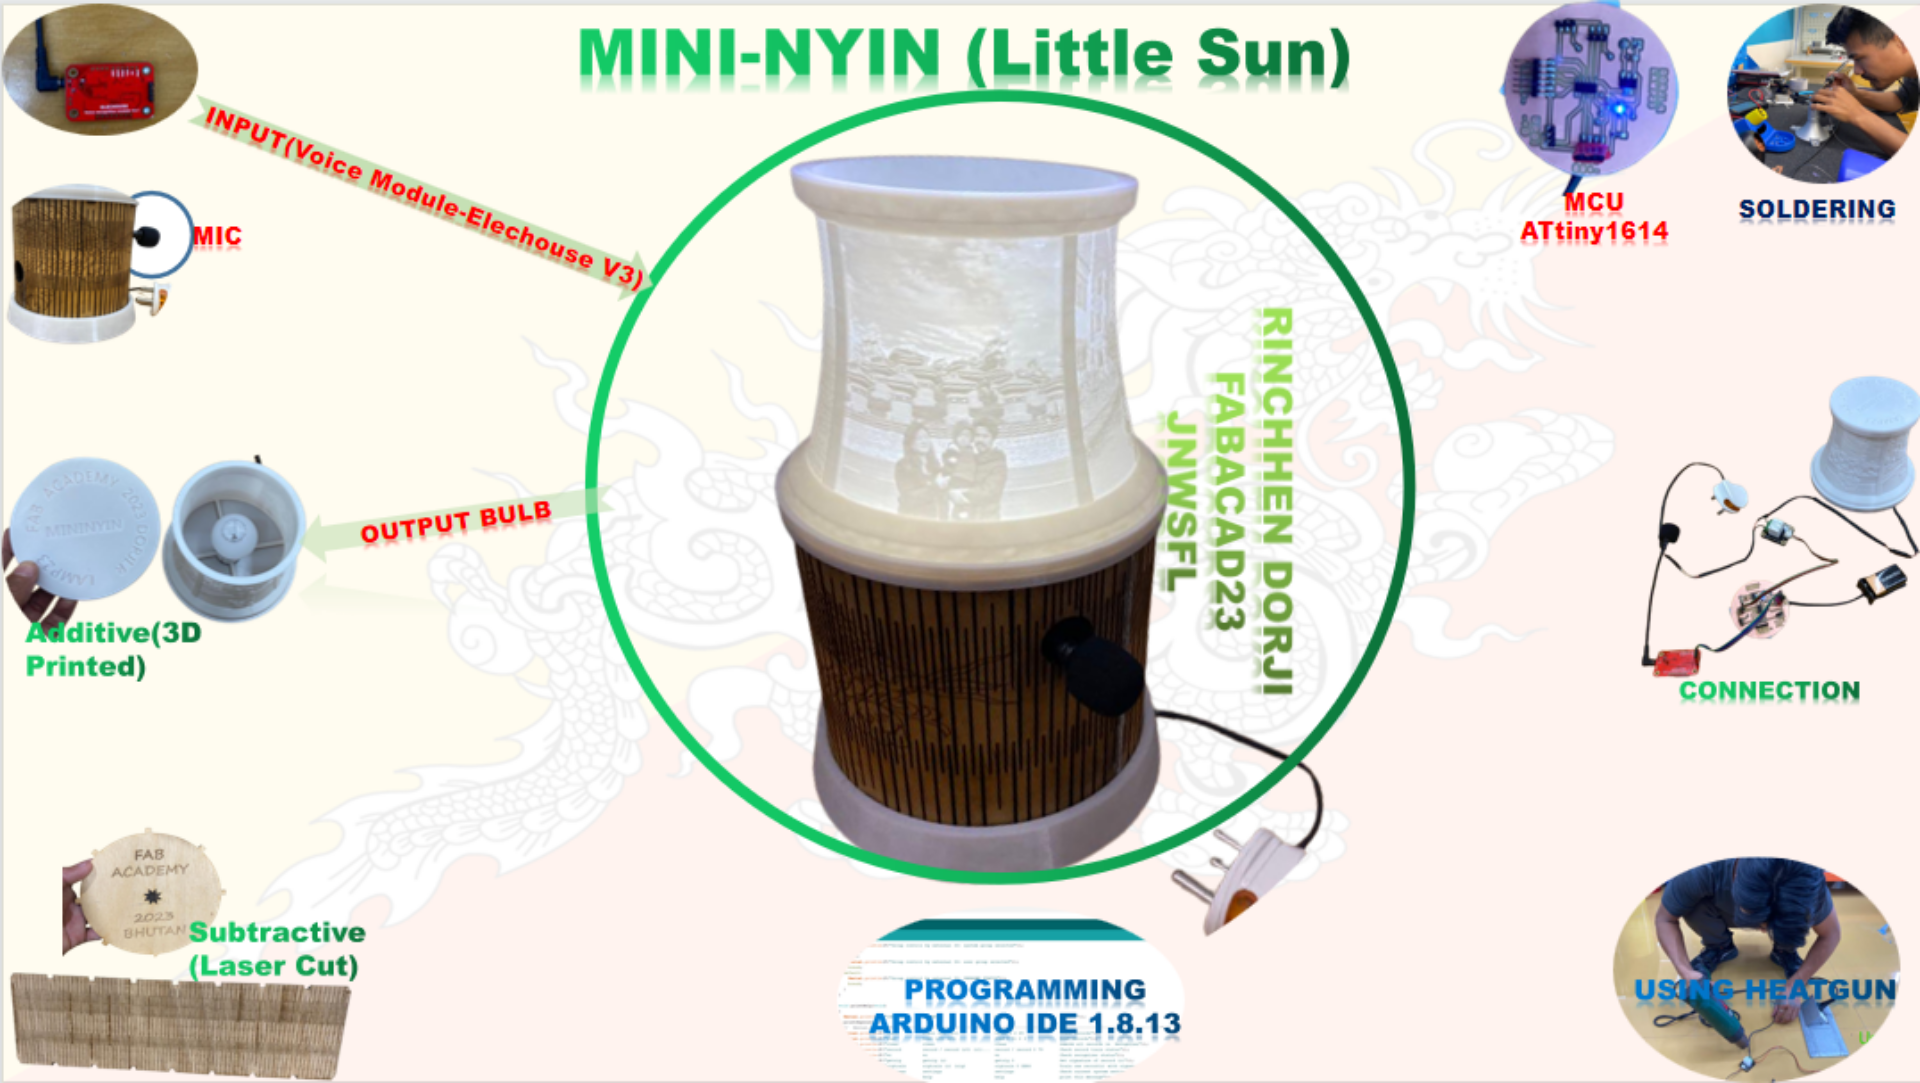
Second Final Project- Smart Power
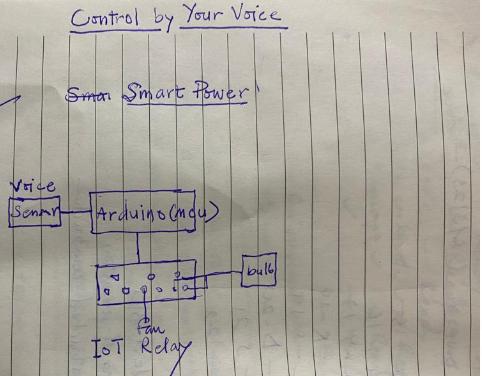
This Smart Power is about controlling your electrical appliances with your voice command. I thought it has become necessary in this technological era where you don't always have to manually hover around nearby switches to put and put out lights and fans. Also, I have seen in TV shows like Alexa which plays songs according to voice commands which literally inspired me to have something like it. The sketch below gives overview of how my project will function.
Why this project
Why this project
This project was basically inspired by application like Siri voice on phone and Alexa which requires no manual searching to call or change songs. Basically ordering device to work for you and therefore, I want to make people control home appliances through voice commands which is easy and fast, but for this project I will start with bed Lamp. Usually I get lazy to put out the lights when I am on bed, so this project will help me solve one of my problems as one and everyone's home can be converted to smart home as whole. With this idea I started skimming through google and found out there are already some projects on Science Buddies from which I learned about the materials requirement. This projects boost my confidence on developing my own to control bed lamp. Additionally, I watched youtube video on Door Lock YouTube Video to compare about the materials requirement and I found that fundamentals were all similar.
Materials Required
Bhutan Final Project Review- 13/03/2023
I presented my decision to change the idea of creating car detection device to making a voice controlled bed lamp to Mr.Rico and Ms. Zina and they have few recommendations which basically revolves around the spiral method. Ms. Zina particularly stated that I can check some of the previous projects to find similarity to have better understanding and easy development.Also, to align my project with FabAcademy Project Requirement.Mr. Rico suggested me to try some other means like whistling to put on and out the lamp because I had issue that the kids in the room could play with commands. In addition, I was given a link to learning about Audacity to explore on waveforms of sound/voice to add clarity to my input. I have time t explore more on the input commands.
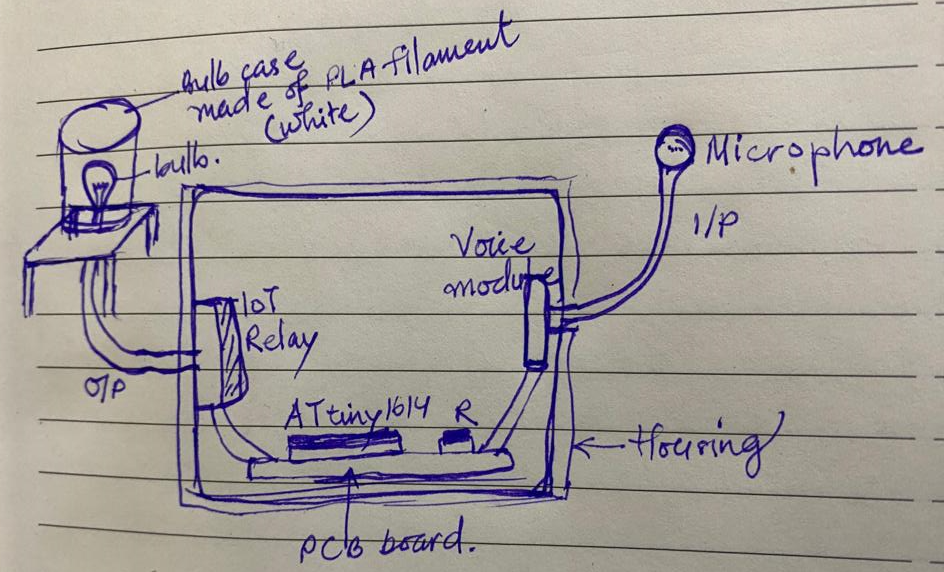
Project Sketch and Progress
Materials and Components (Bill of Materials)
| Particulars | Description | Quantity | Price | Link |
|---|---|---|---|---|
| MCU | ATtiny1614 | 1 | 2.00 $ | Digikey |
| 1 Relay | 3-5 V relay Module | 1 | 0.5 $ | Amazon |
| 1 Voice Recognition module | Elechouse Voice Recognition Module V3 with Microphone | 1 | 22.00 $ | Amazon |
| PLA filament | White PLA filament for lamp shade (1.75mm) | 1 KG | 24.00 $ | Amazon |
| PlyBoard | Ply of 5mm thick and 1 sq.m | 1 | 1 $ | Local market |
| Bulb | LED bulb 230V | 1 | 1.5 $ | Local market |
| Capacitors | 10 µF | 3 | NA | JNWSFL |
| Resistors | 499 Ohm | 2 | NA | JNWSFL |
| Jumper Wires | Male to Female | 15 Nos | NA | JNWSFL |
| LED | Orange color power LED | 1 | NA | JNWSFL |
| Connector pins | 2 Nos 3Pin connector, 1 No 6pin conns, 1No 4Pin connector | 1 | NA | JNWSFL |
| PCB | 1 Single sided PCB | 1 | NA | JNWSFL |
The overall cost for my specific project is 50.5$ and the budget was used from 100$ that we were entitled as a FabAcademy student. Those NA (Not Applicable) items were sponsored by DHI/JNWSFL for te students.
Final Project Update
In eight week, our gurus conducted mock test for final project development and individually, we were asked to develope a model on how our final project should look like or what it would be doing. With this we developed one and presented where I was recommended to make it easy to identify by other people as soon they see my model.
OutPut Device
From output device week I have tested my development board connecting with bulb and it worked. This is updated in week Nine. And the test video is uploaded using my board and relay to control bulb.
Final Project Update from Week 13
My final project is planned to include the following methods or processes to qualify for the final presentation.
Physical Fabrication
Electronics and Power
Programming Modules
Project Assembly
I will not have to use fasteners but definitely will be requiring connectors.
Presentation:Video and Slides
The final video of the project is planned to include the following features: Function:Voice controlled lamp is to make the life easier at night where you might not need to get up or move to put on the lights. Components:(1)Lamp: Table lamp (2)Housing: To hold the boards and relays (3)Voice Module: Module to recognize the command and link to board.
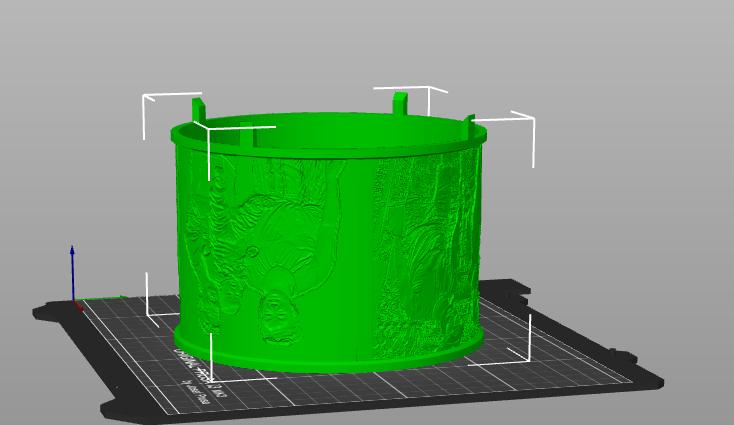
Components Printed (Lamp Cover)
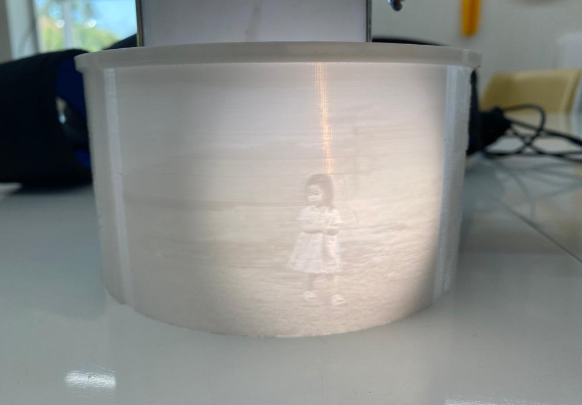
Lamp cover was planned to be 3D printed covering the additive aspects and I have designed the cover in Lithophane Maker with my family photos. I was introduced to this software by Mr. Sueui Choi (Korean Expert) . From lithophane maker you can generate the .STL file and then import in the prusa slicer for G-Code. I have used white PLA filament for transparency.
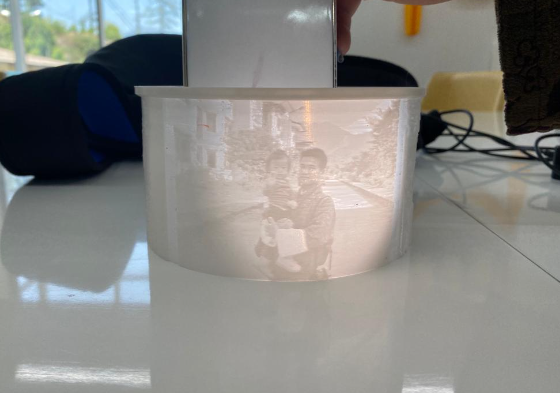
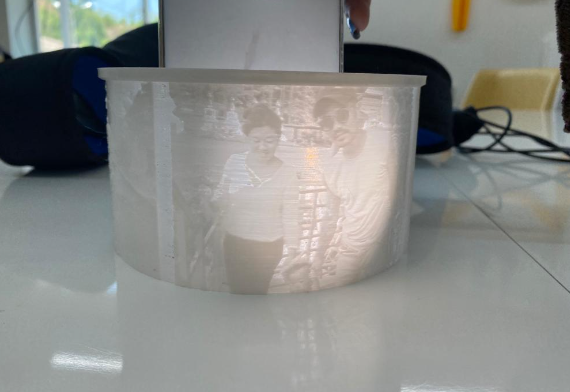
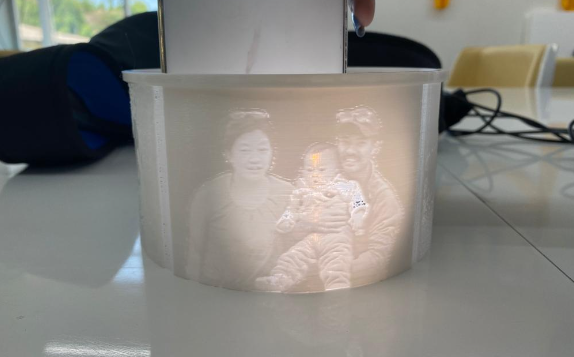
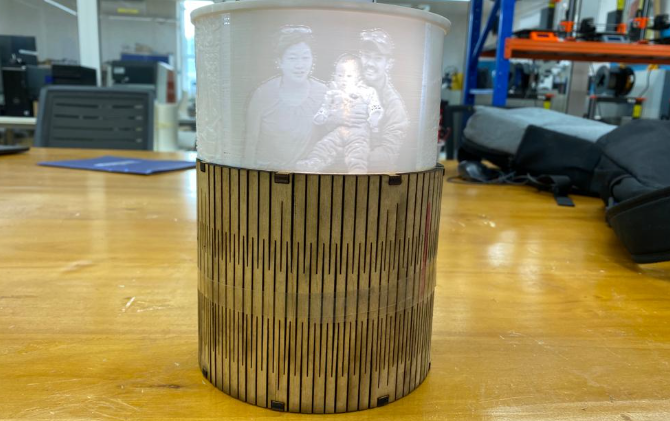
After design, I have printed and tested with mobile torch. I integrated four pictures of my beautiful family and following are the glimpses. But in the final product, I will have it with cover and stand.
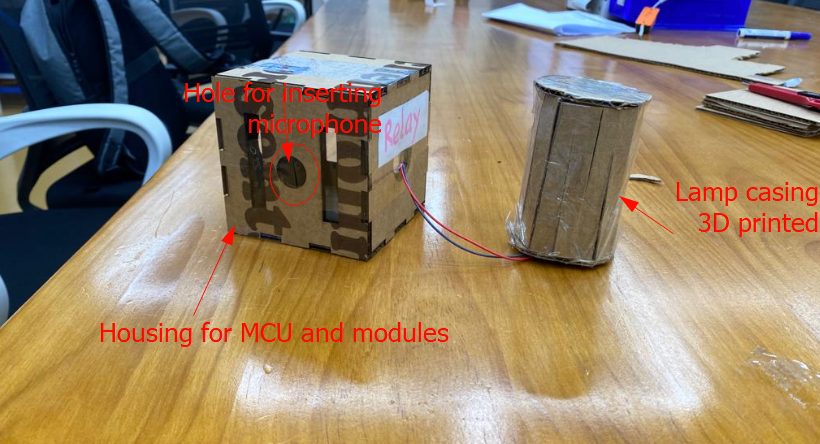
Creating Housing for Final Project
From the weekly review about final project, Mr.Rico recommended me to make a housing for my project and I have designed in Fusion360 and made with cardboard as trial. Circular/Cylindrical housing. Initially, my plan was to make cubical housing but Mr.Rico suggested everyone used cubical and I could try other shapes.

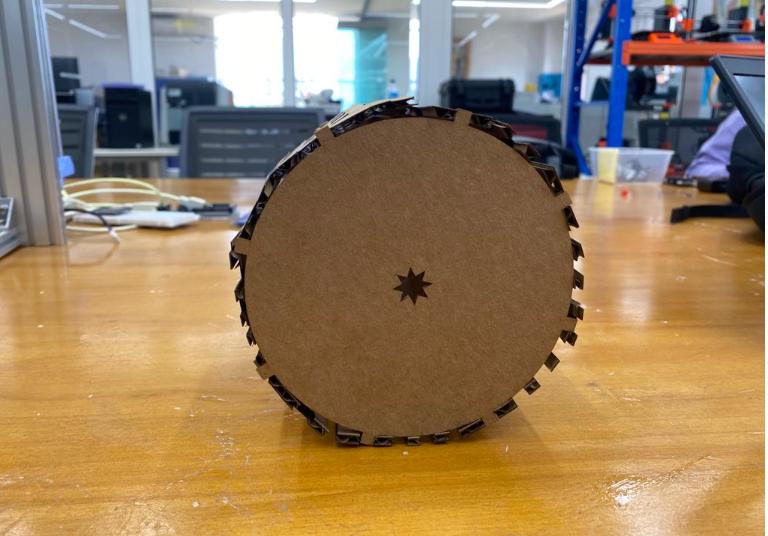
After laser cutting and trying to press fit, it didn't really get cylindrical and therefore some modification is needed in the design. Instead of cutting squares in the kerfing, I should use thin lines in the design.However, the press fit worked pretty well and satisfied.
Cutting the housing for MCU and other parts
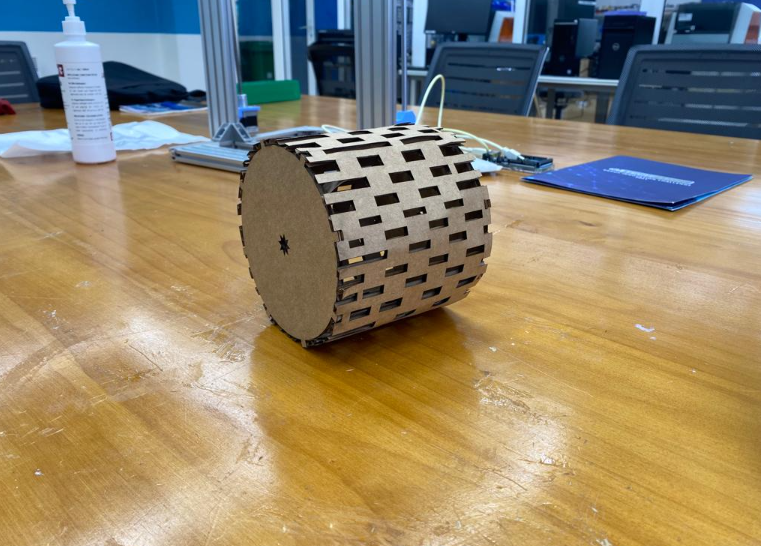
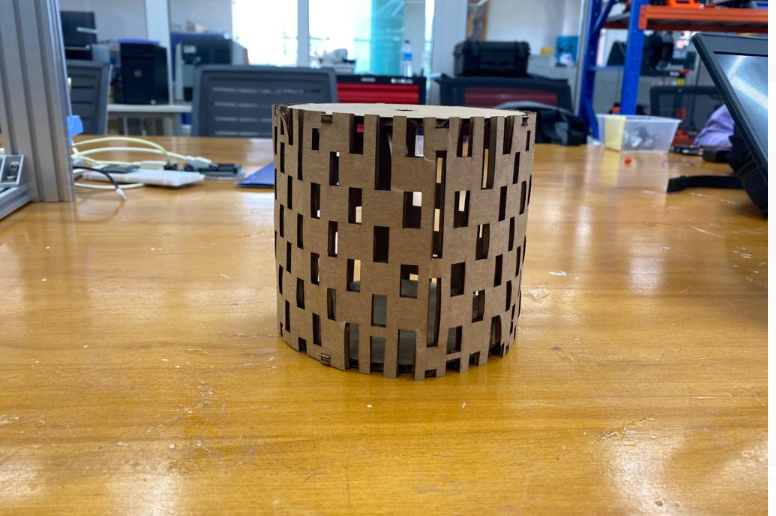
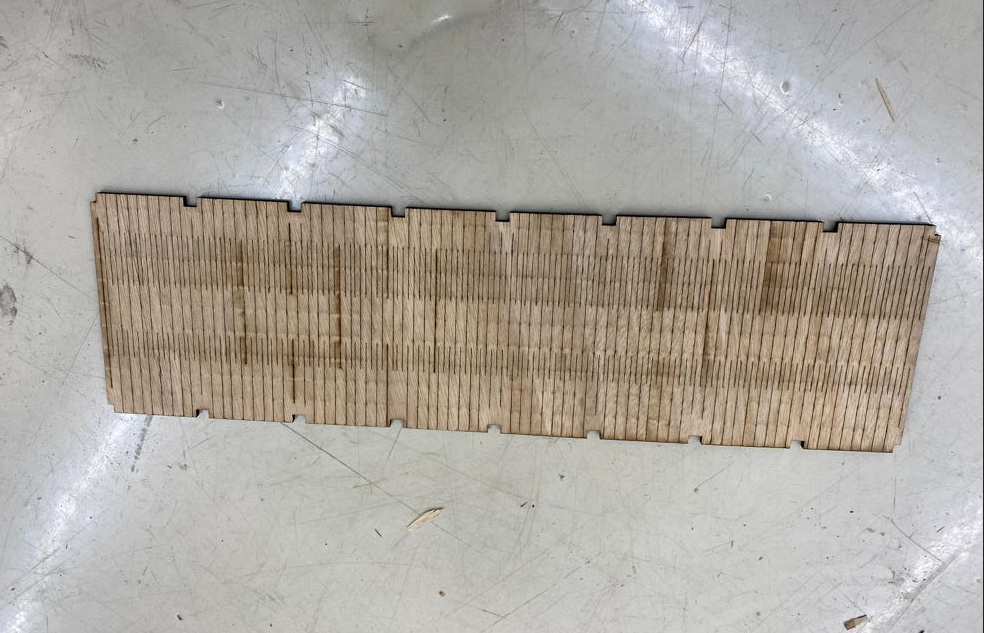
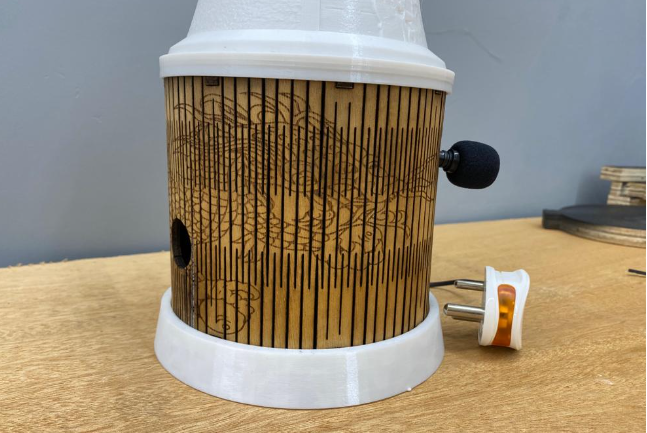
As a modification from cardboard design, I have used lines for cutting and changed the design keeping the overall idea exactly same. After cutting I tried to assemble and it fitted quite fine, moreover it covered aesthetic aspect as expected. The kerfing cutting was a good experience and satisfied for the effort I put in.
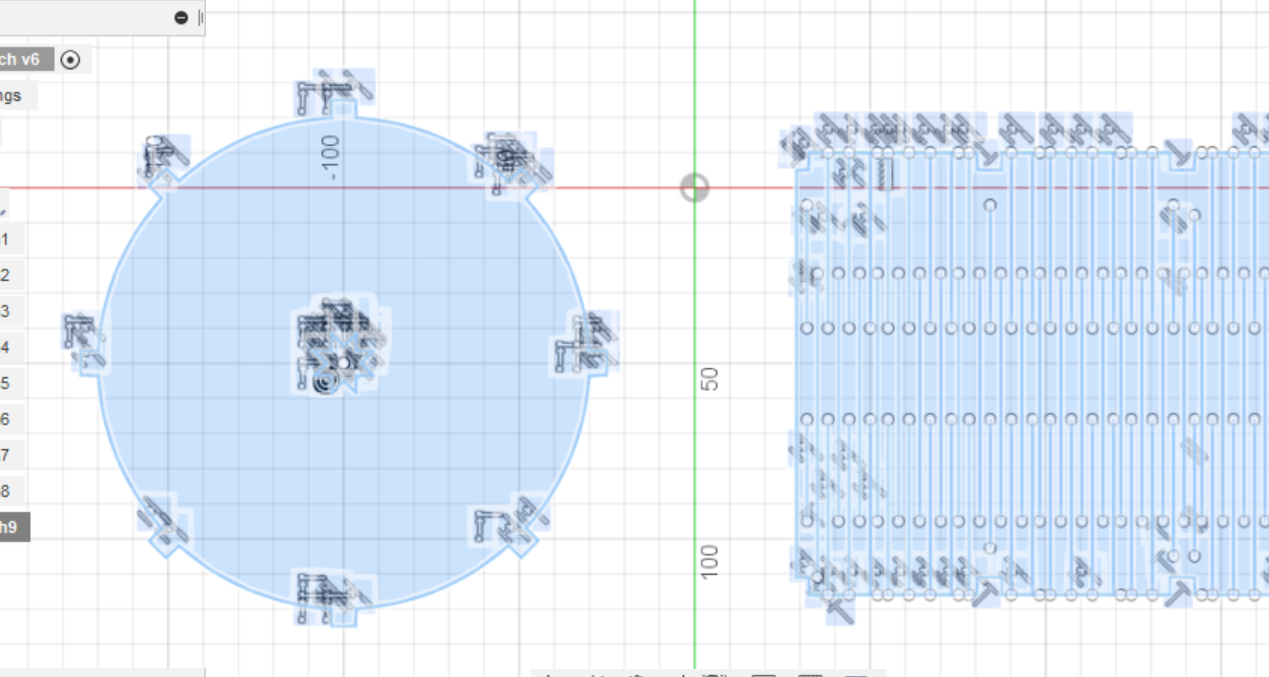
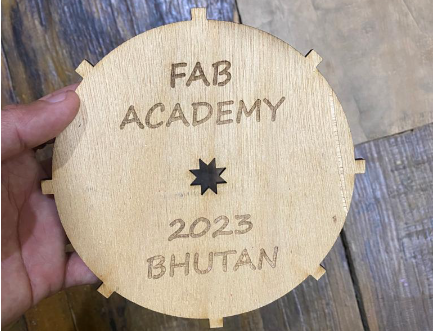
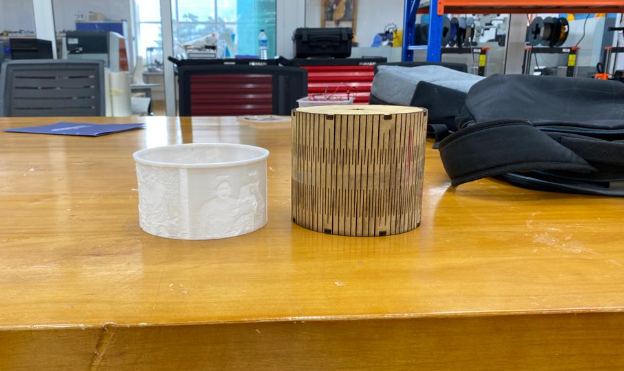
The product as it appeared after laser cutting are shown below. Basically, with this it covers the aspect of using Subtractive Method for my final project. Created a beautiful housing for my MCU and relay.
And some of the captures from this weeks update are given below:
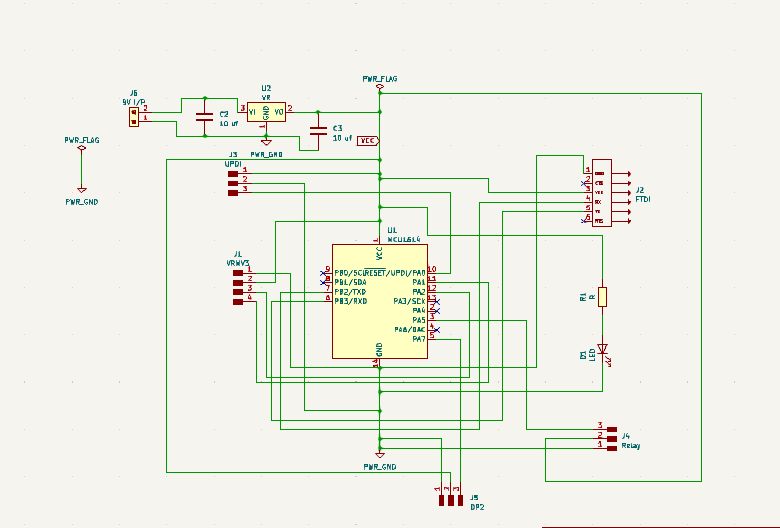
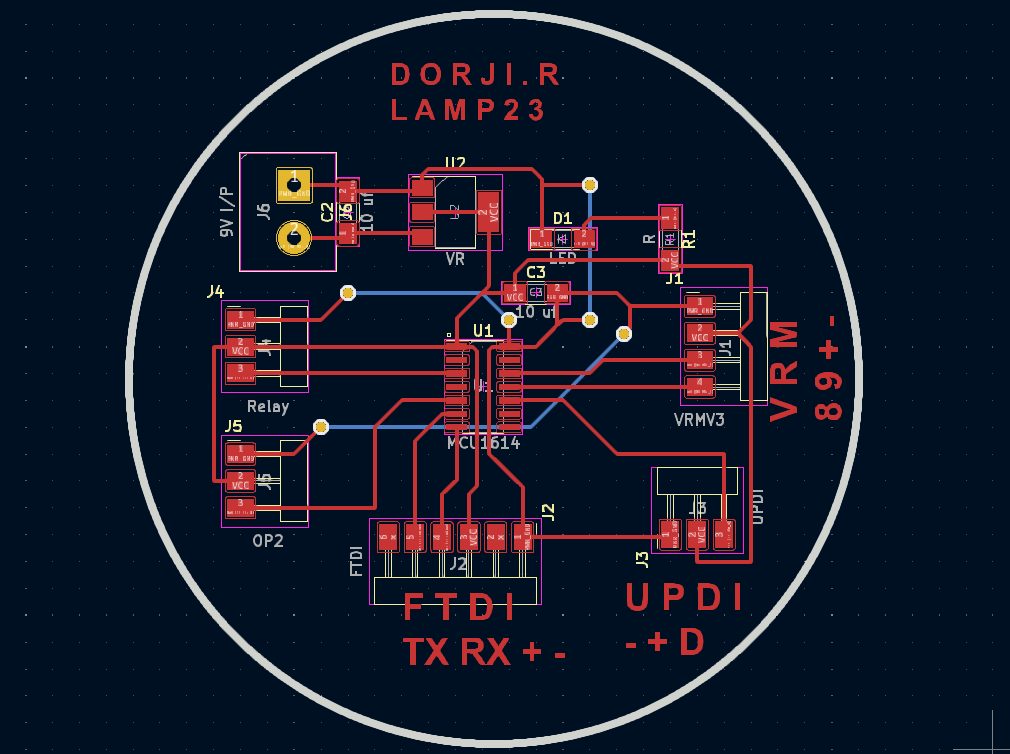
Re-designed Schematic and PCB
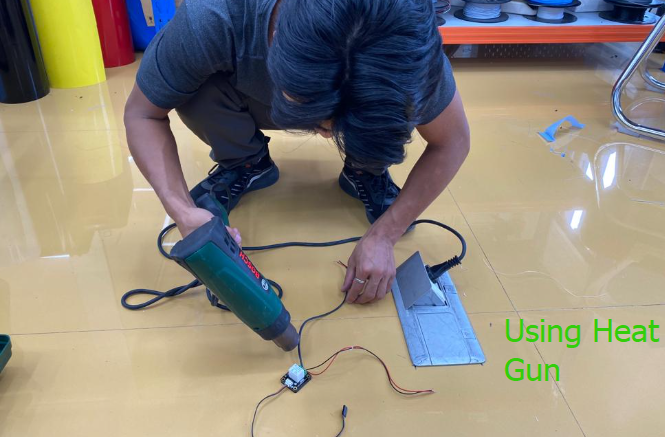
Assembling and Electrical Connections before putting it into the housing, wires are covered with insulation. Different connectors are used to connect bulb to MCU, Relay to MCU and Voice module to MCU.
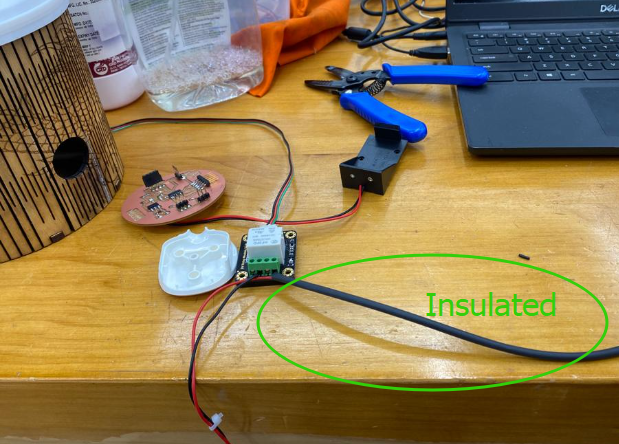
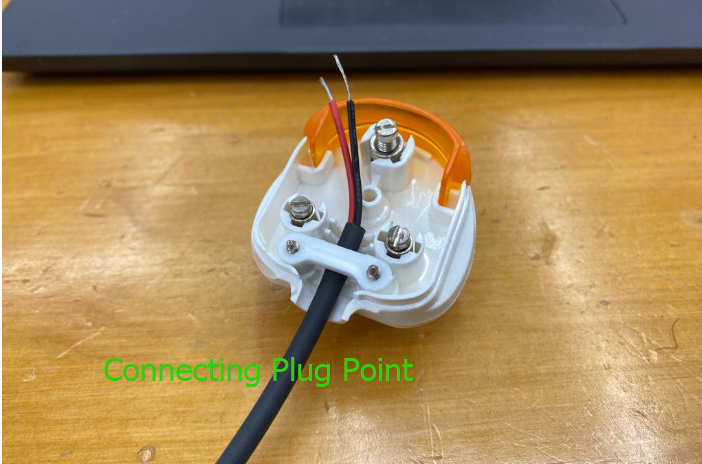
Connecting Plug top for the power source which is connected to relay. Relay will be activated by the voice command and the power of lamp will be up.
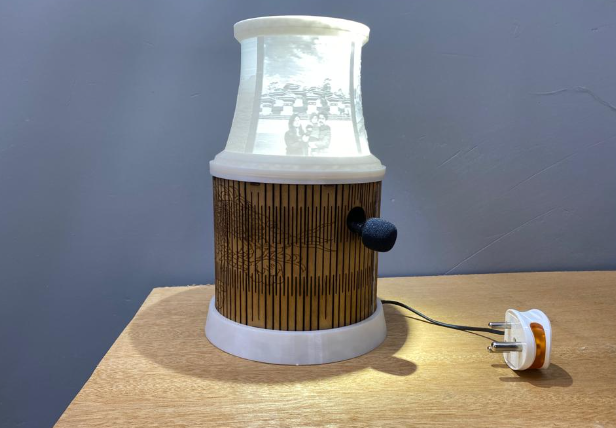
Overall outlook of the assembled project with light and family photo displayed when light is ON.
Assembly and Packaging of the Final Project
Regarding Assembly and Packaging I have show the connection details and kept the wires that can be disconnected and connected any time I want to do servicing. Moreover, I have fixed the MCU board so that it doesn't move. I have also attached coupling between lampshade and housing so that I can separately dis-assemble the parts depending up on which one is to be serviced.
Conclusion
My project has been completed from the Final Project Perspective. However, the voice recognition module could't be trained as expected because I had to go close to the module to command to turn on the lights. Therefore, I'm taking this as future project to work on and have a sensitive module so that my issue gets solved.
License Type
I am choosing another license type upon recommendations from Ms. Zina and I found one best license type that suits my project from CREATIVE License. It outlines about using their license for our own material which is safe for me to choose one from there.
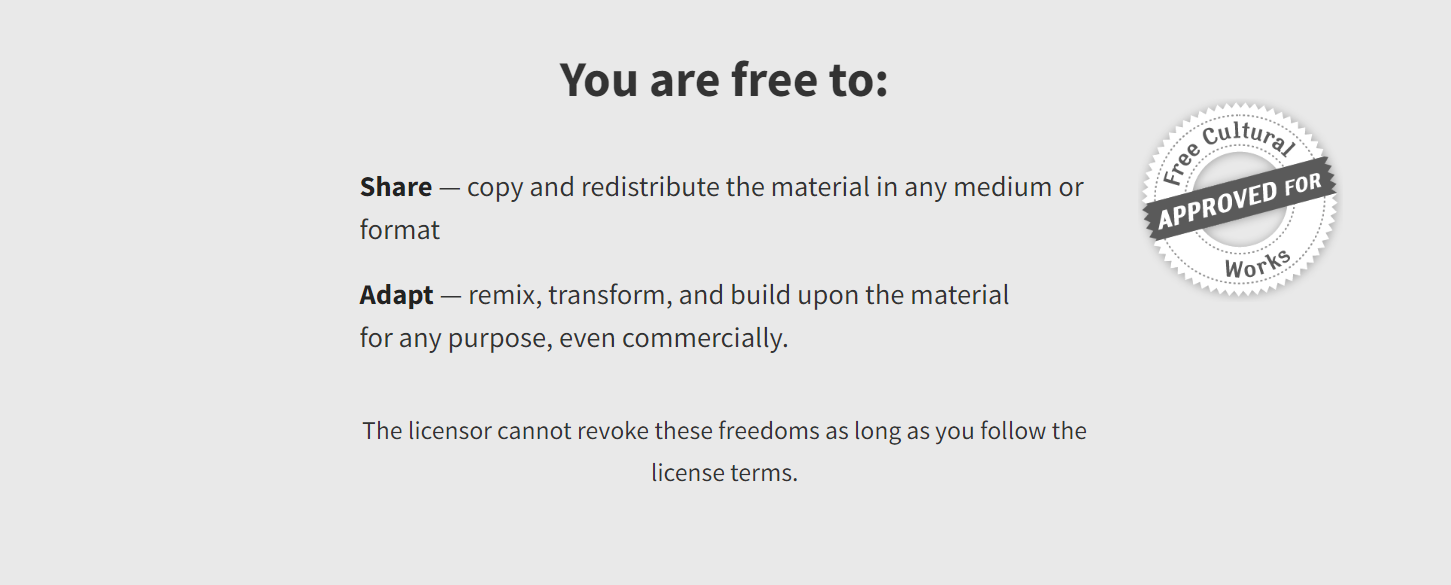
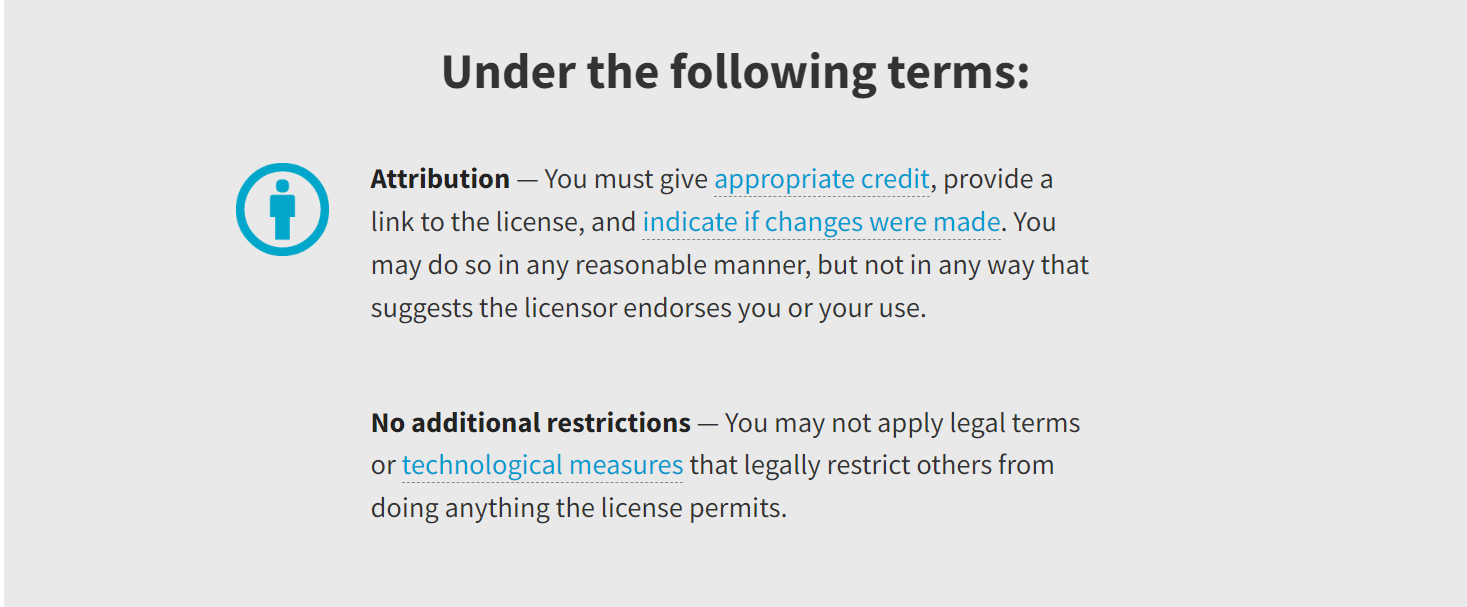
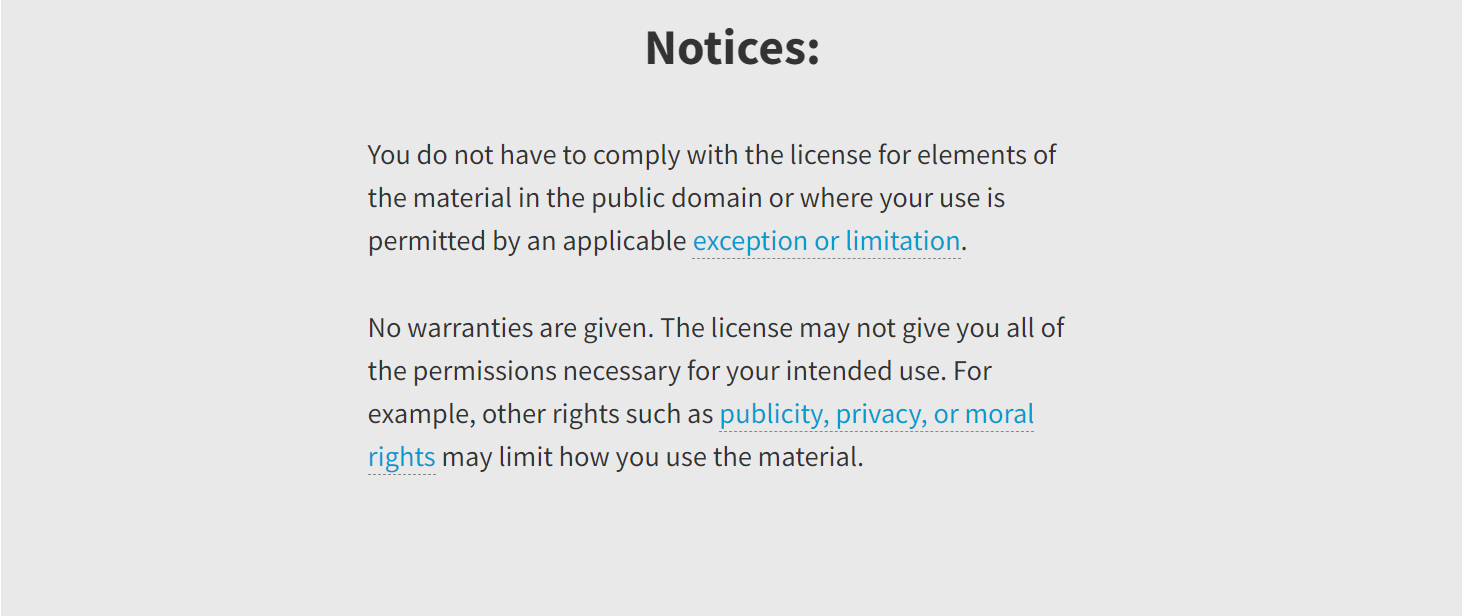
I choose Attribution 4.0 International (CC BY 4.0) and summary of the license are as described in pictorial for below: (As it mentions about crediting the person)
Making Slide and Video
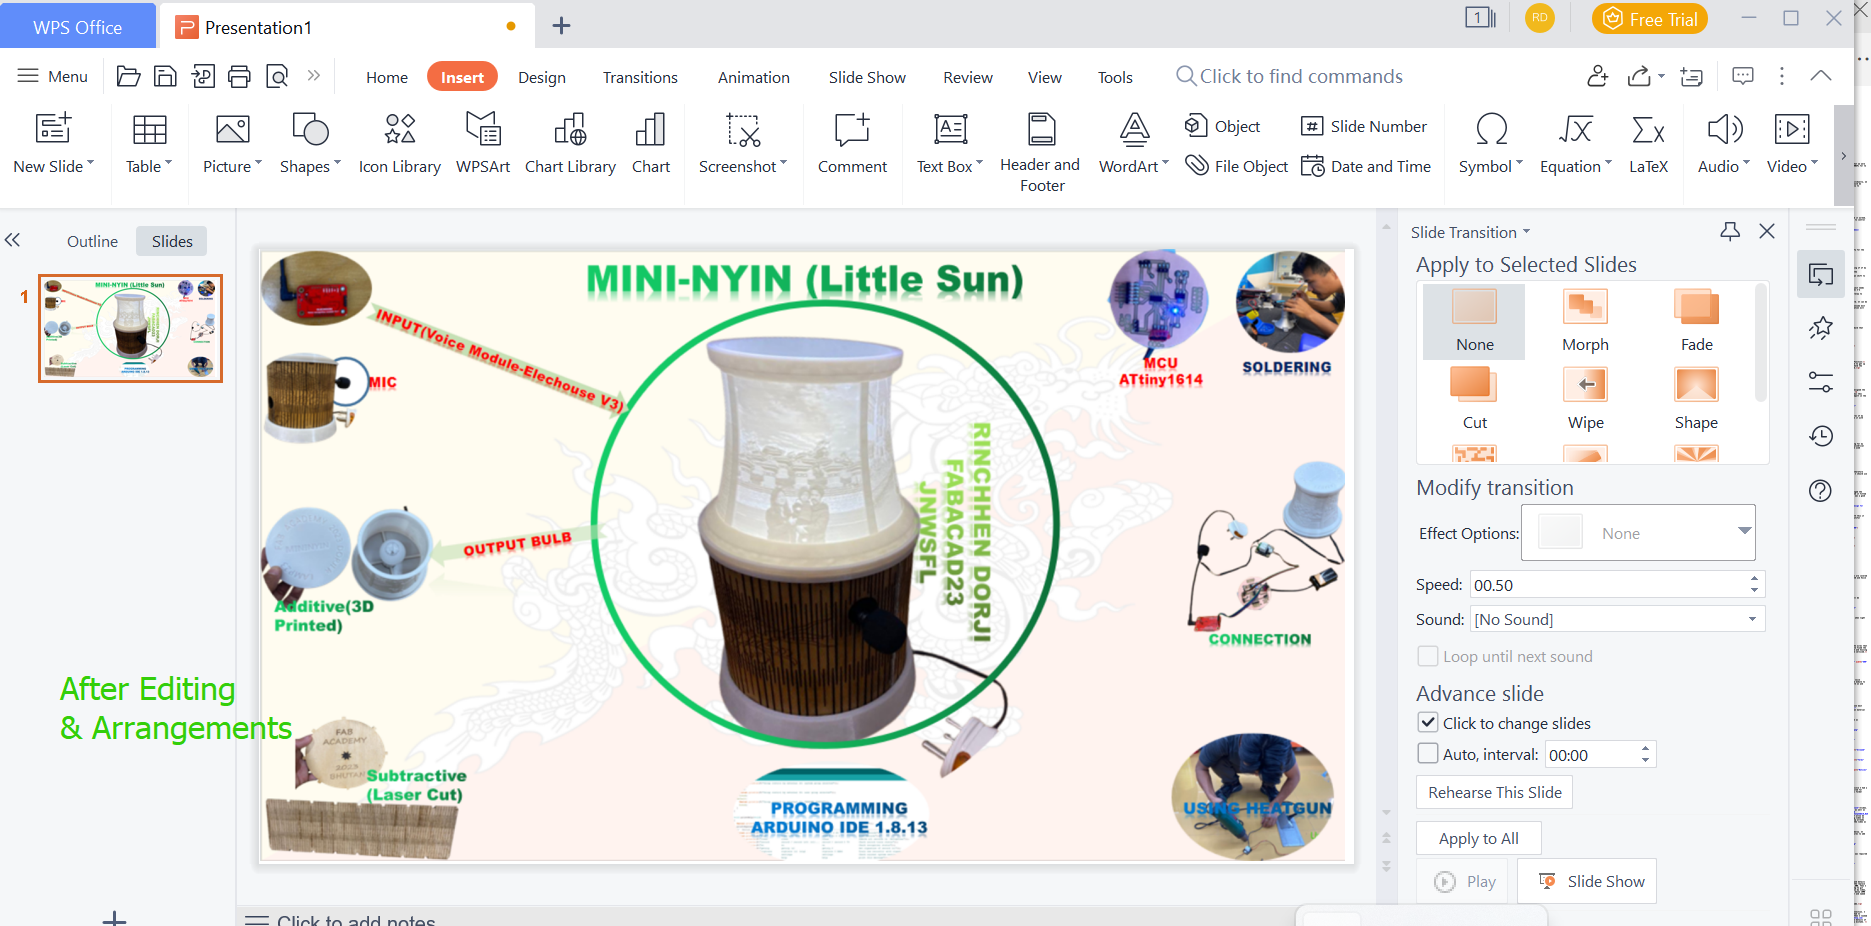
I prepared my slide for the final presentation in PPTX. I chose to work on PPTX since I had a month long training and was confident. But I made sure to fullfil the criteria required for slide as 1920*1080 in px. Then after preparation I have saved the slide under public folder where my index.html was located. The slide had to be named presentation.png.
I use WPS not the MicrosoftOffice. When you open WPS you get DOCS,Presentation where I edited my slide as shown below:
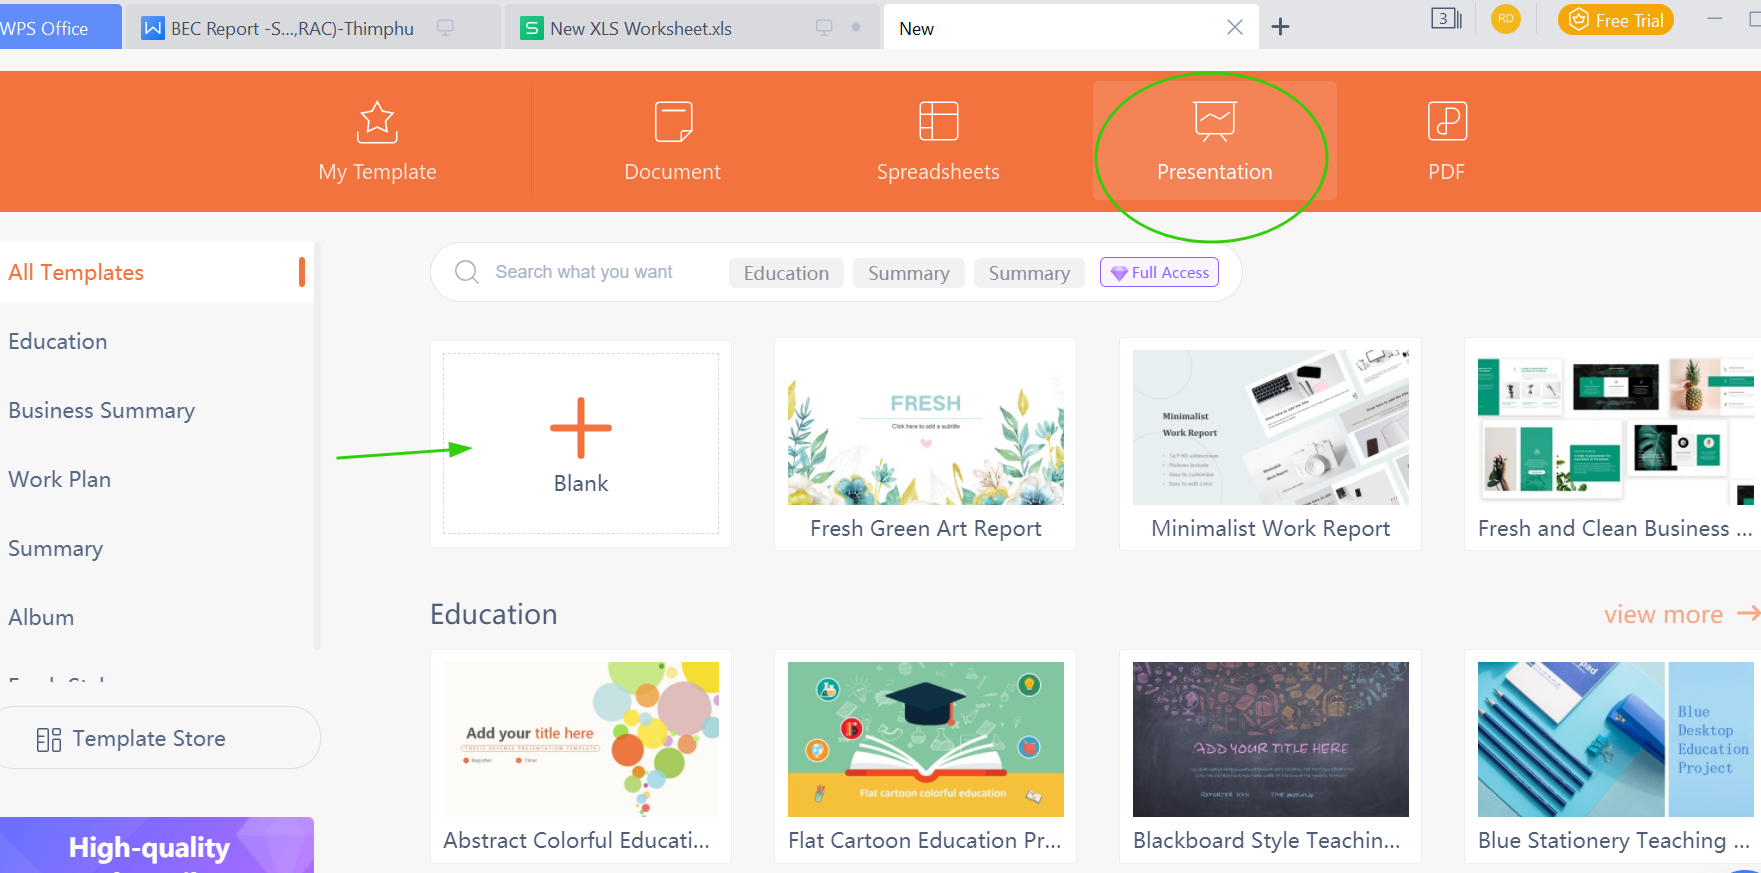
After selecting Blank page, you are directed to the slide where you can edit as per your requirement.
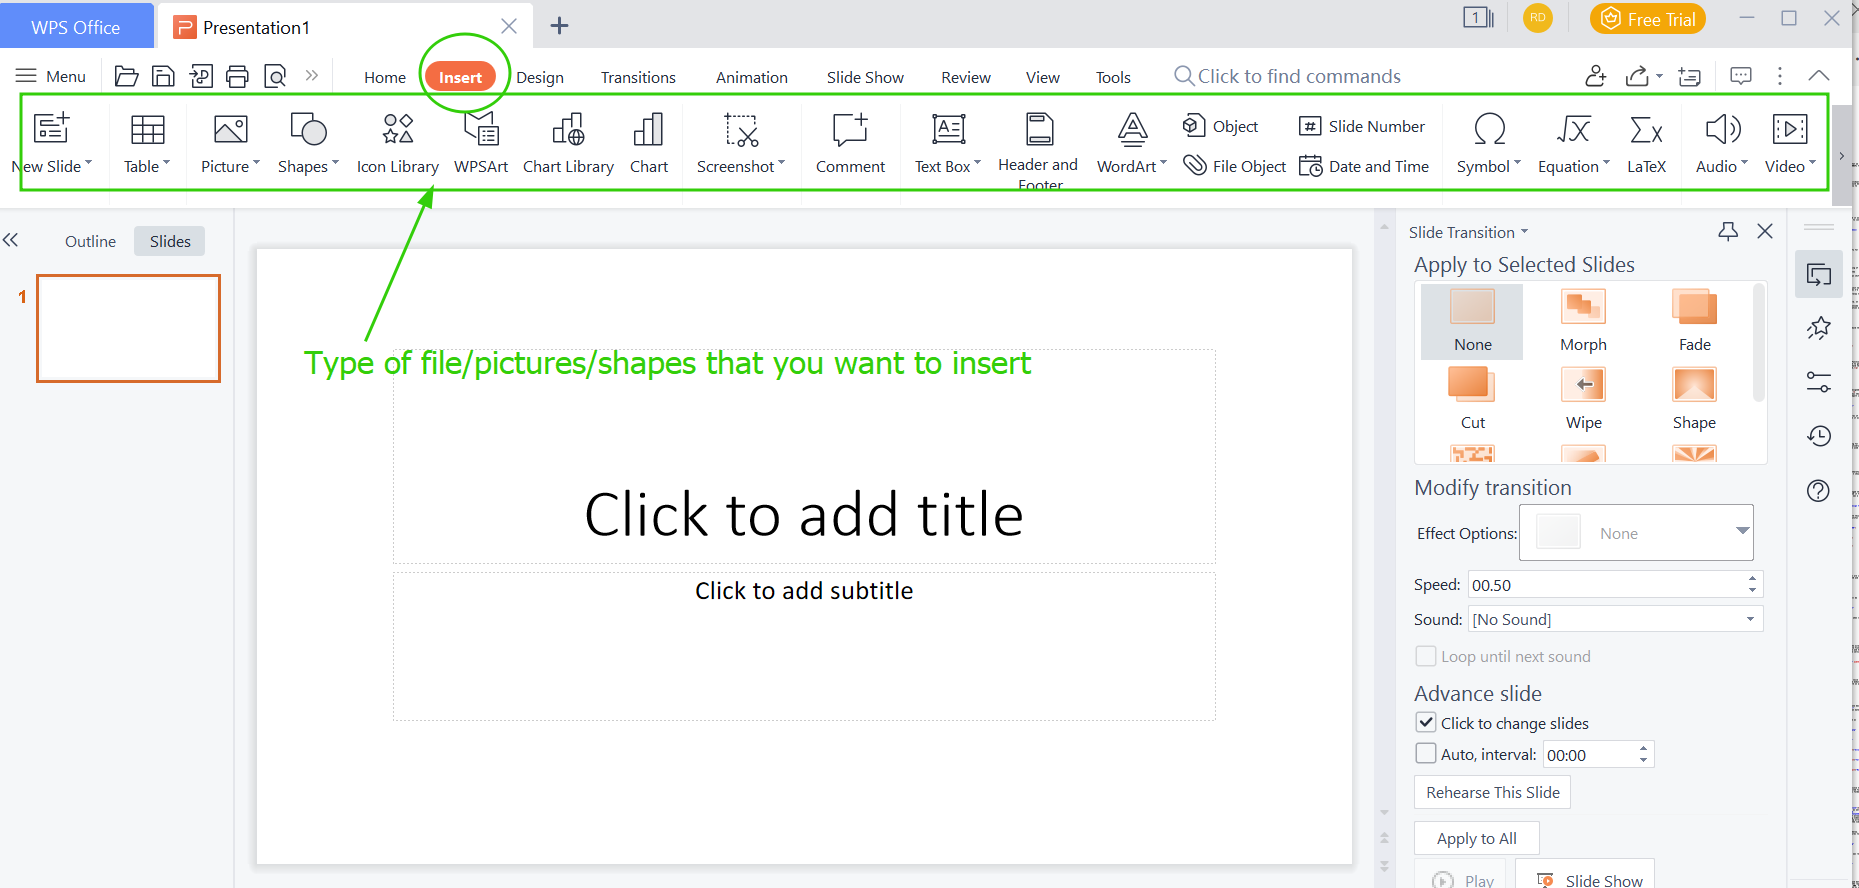
There are more features into using the slide to edit pictures and videos just like the normal PPT of Word Office/Microsoft Office.
For the video, I first used Clideo.com to trim my video and make it short. Then I downloaded and tried to edit and as well as compile in Filmora. Unfortunately, this software had Watermark and didn't allow me download the video after done compiling. Then I regretted of wasting my time editing video on it. Frustrated I checked online on what I can edit video and to my surprise my laptop already had free software called MicrosoftClipChamp. Then I could edit and download the video as per my requirement.
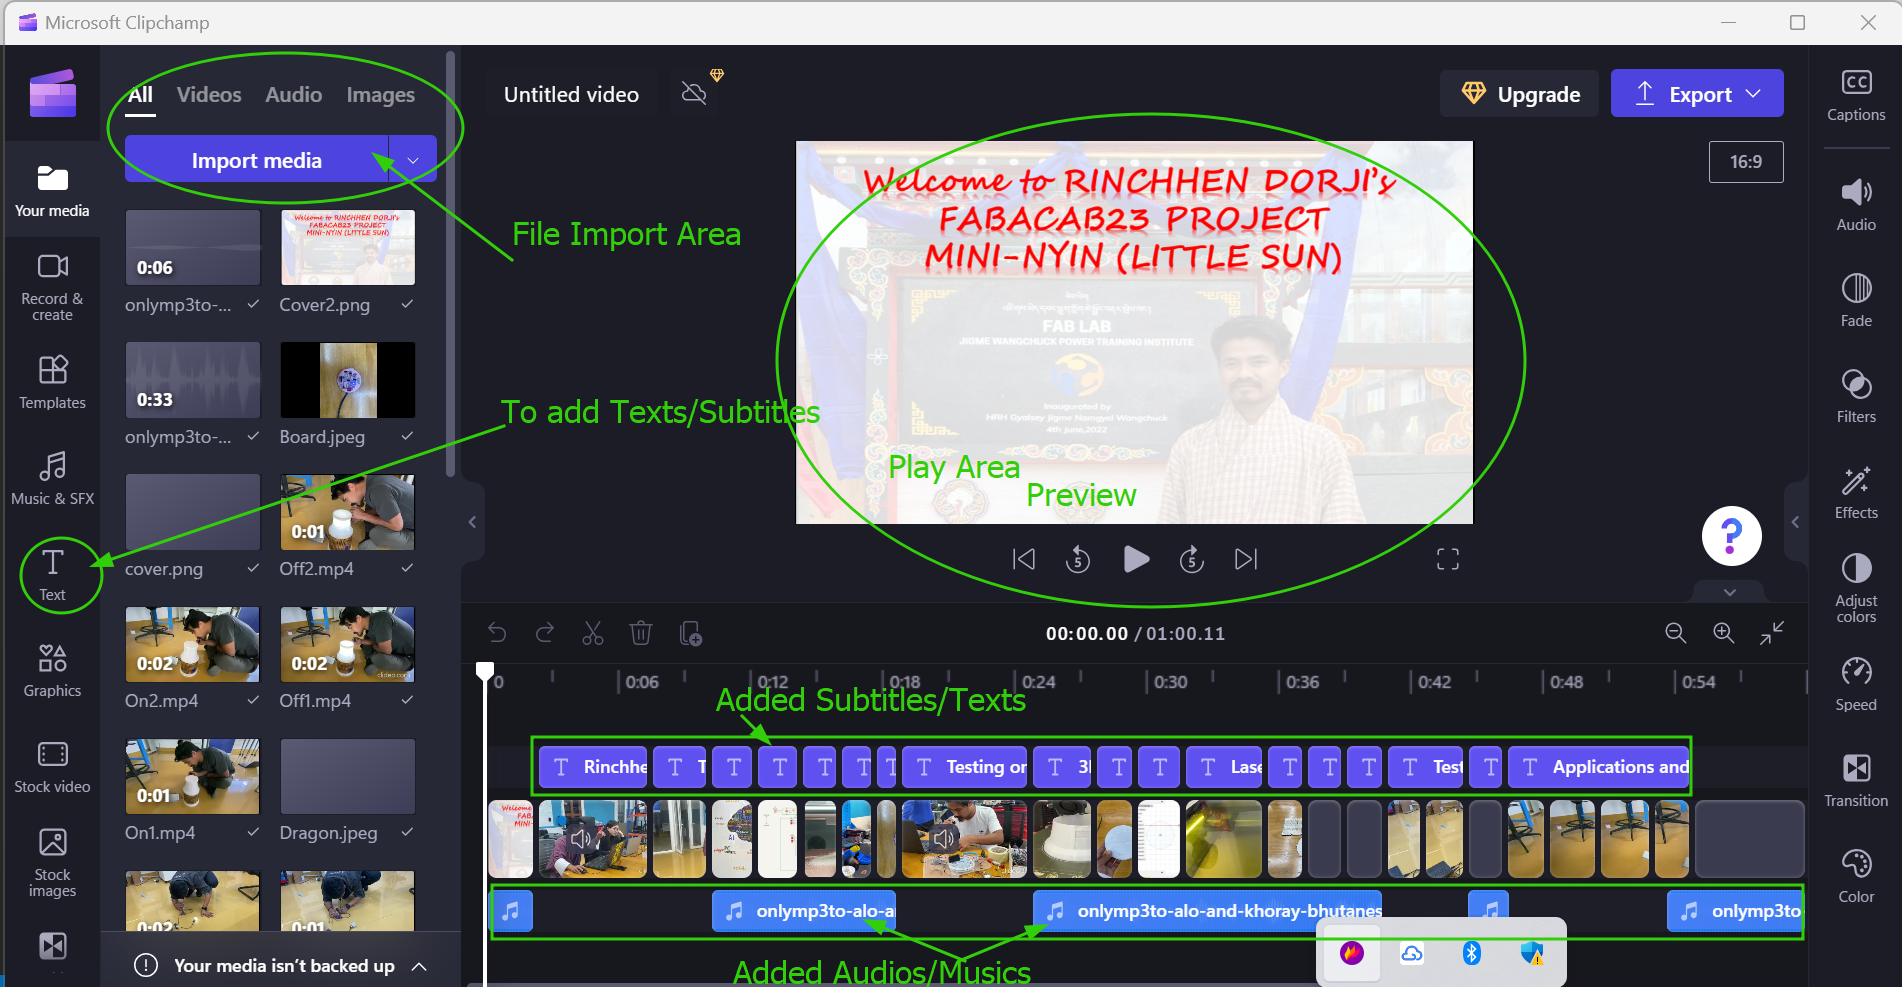
The Microsoft ClipChamp had the following features as best described by picture below. It allowed me to import files that I already had it ready to compile. It also had features to add subtitles and background audios/musics which I enjoyed using it.
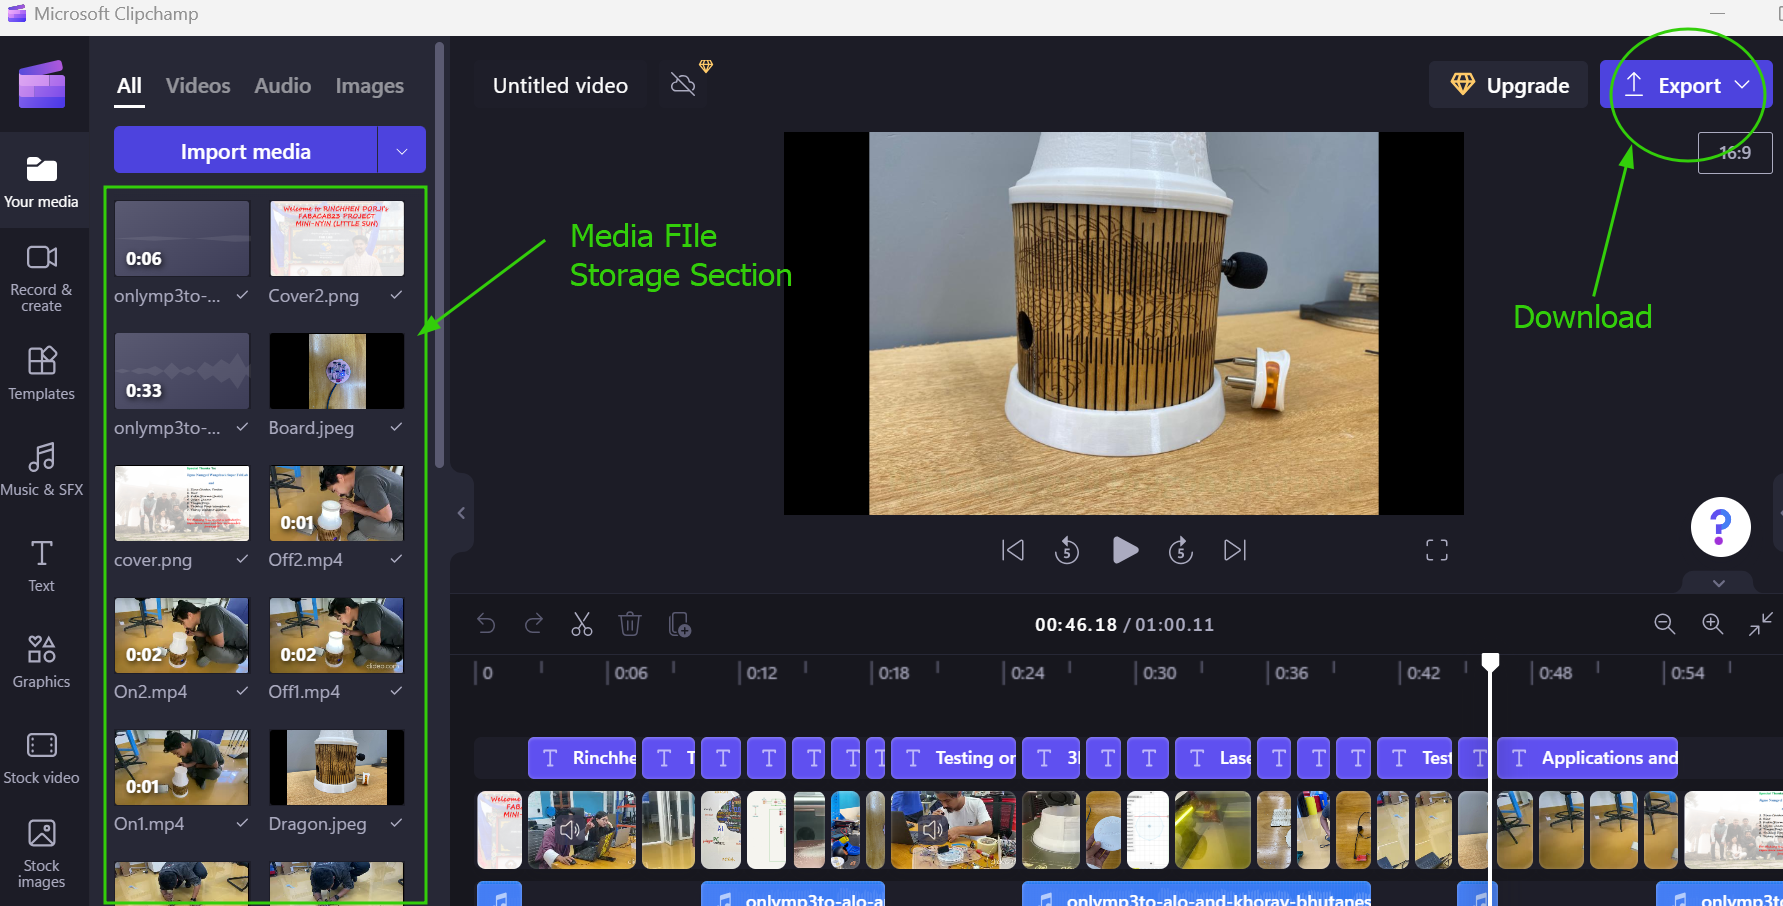
After you are done compiling and editing your video, I downloaded the video that was required for my final presentation by going to Export options as shown:
Issues encountered pushing the video to main repository.
I compressed the video using CMD by the code ffmpeg which I have shown the code and details in Week 2 : Computer Added Design. However, after compressing the video I selected the replace file of the original video and the file size was too large whereas my content was 7.8MB. Then I thought it was okay to push but didn't work. Then I directly uploaded the video going to git repository but I was told that my video size was too large. Then I had to re-compress my video, this time I saved the compressed video in different file and the file size remained below 10MB which was okay to push it. Then just like slide I saved my video under public folder and named it as presentation.mp4.
Steps I followed to solve the problems caused by pushing large size file in VS Code.
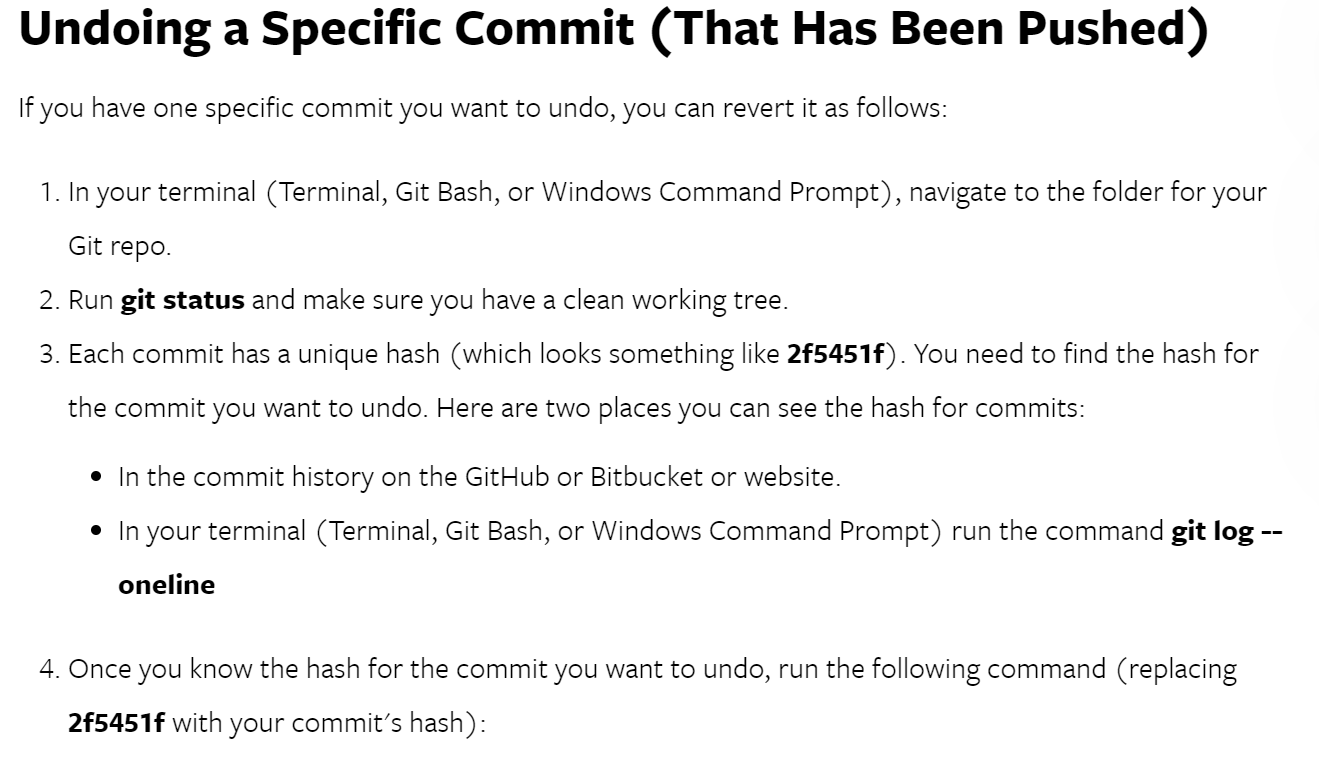
At first I thought VS Code is unable to push the file because of bad internet connection. I waited for one whole night. But next day I was told my video size was large then I had to uninstall VSCode and re-install, still my video couldn't be pushed through VSCode. Then I looked for git commands to undo the commits online and found NobleDesktop. This site has shown me the details of commands I can use to undo the commits and remove the large size file I committed by mistake.
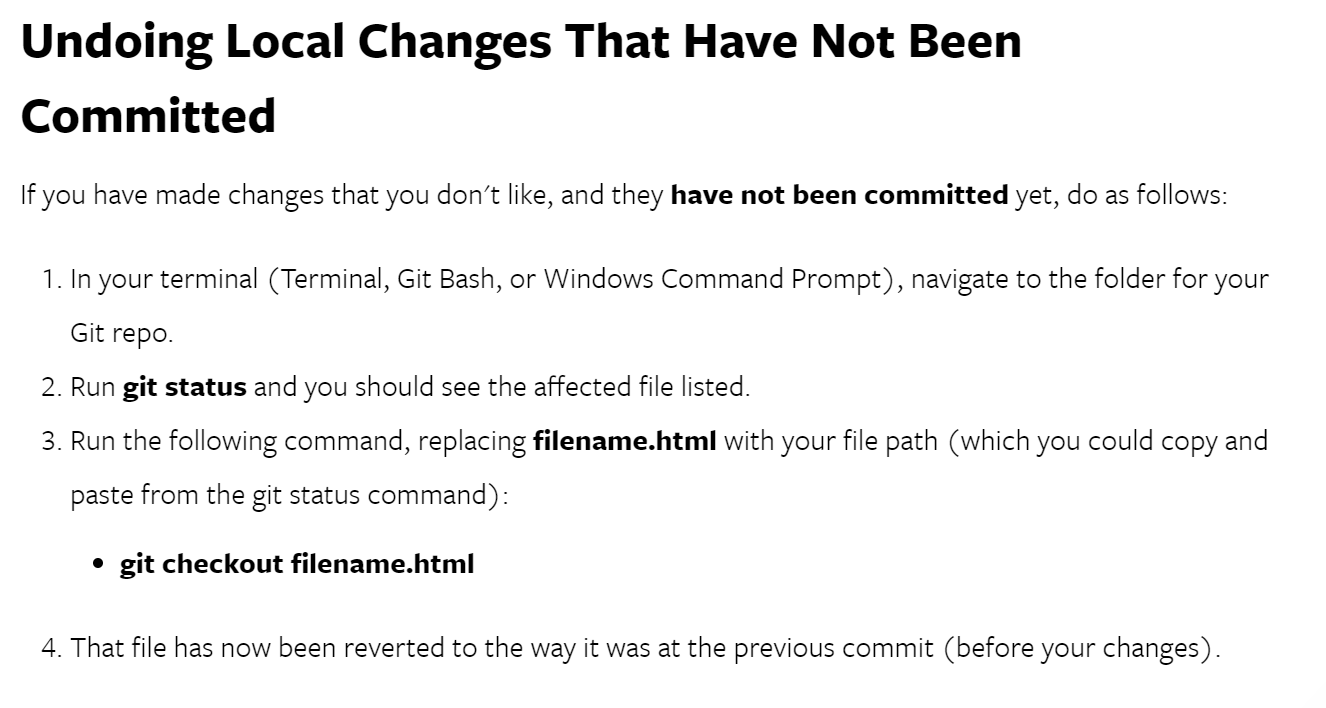

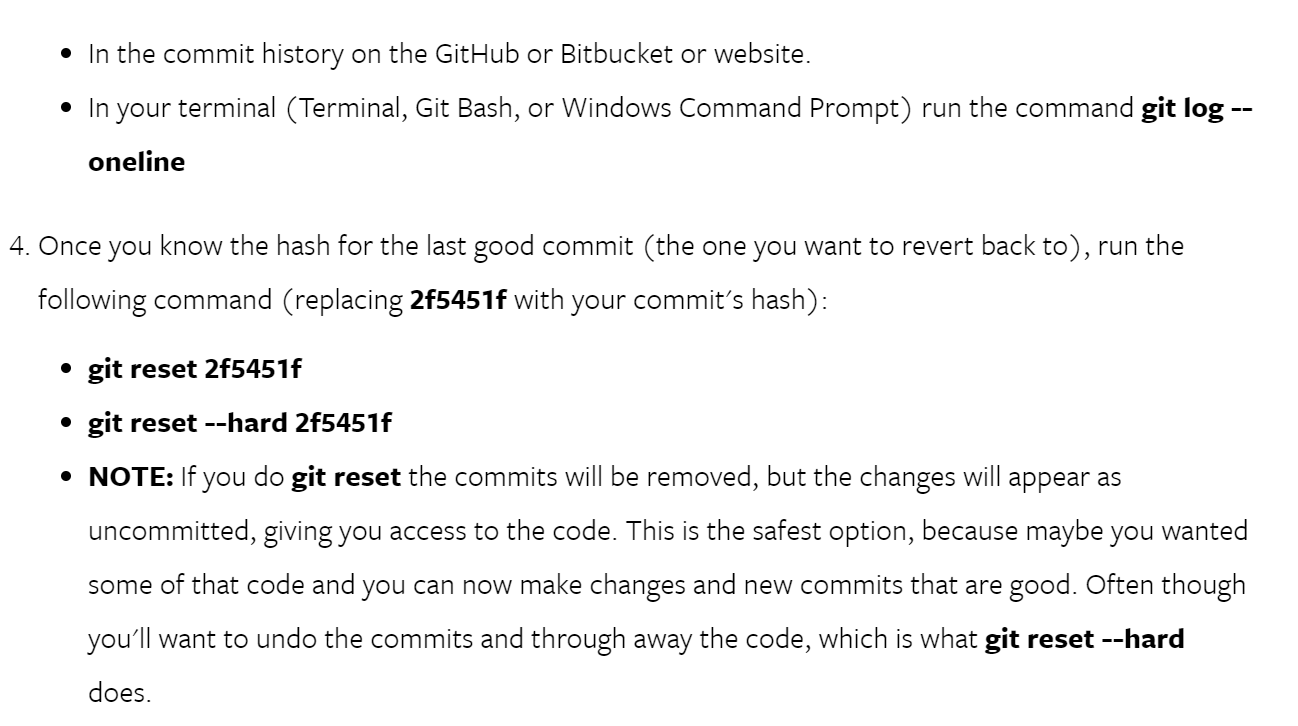
From the commands above , I tried one under the heading Undoing Local changes that have been committed (but not Pushed) . After performing hard-resetting my VScode worked again. Thanks to the steps from Noble Desktop.
Design Files
All Design Files