Applications and Implications
What my Final Project will do?
The Final Project "Mini-Nyin" can be translated as mini-sun rays and it is aimed at making my life easier and for my family. This consist of ATtiny1614 as main MCU triggered by Voice Module (Elechouse V3) an Input which will power the bulb connected to Relay as Output. This idea popped up when we are in hurry and need to turn on light in the dark and unable to locate the switch instantly. Moreover, we tend to break other items falling from table when searching for switches in the dark. With voice control, you don't need to look for switch manually preventing the breaking of other items and also don't have to look for switch at all in any sort of circumstances. In addition, I thought it has become necessary in this technological era where you don't always have to manually hover around nearby switches to put and put out lights and fans. Also, I have seen in TV shows like Alexa which plays songs according to voice commands which literally inspired me to have something like it.
Similar Projects done before
I had idea to power the electrical appliances with my voice command but didn't know how to start with. Then I started skimming through google and found out that some people already had similar DIY projects done with voice module in combination with Arduino. Then I got to know that my idea of controlling electrical appliances with my voice command could be possible and it further boost my interest to go ahead with the plan. The link I referred for concrete development of my idea Science Buddies/Arduino DIY project
My Designs
With the idea, I need to design PCB and I'm using kicad 7.0 for that and housing for embedding my MCU and electronic components. Also need to 3D design lampshade and couplings that can integrate lampshade to the housing.
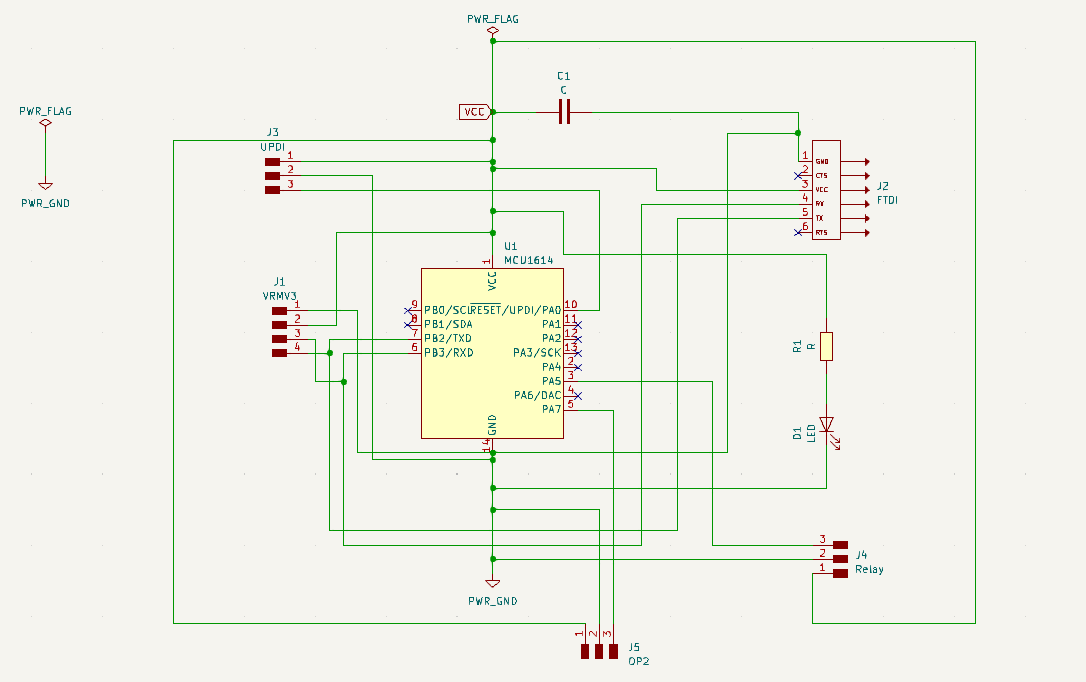
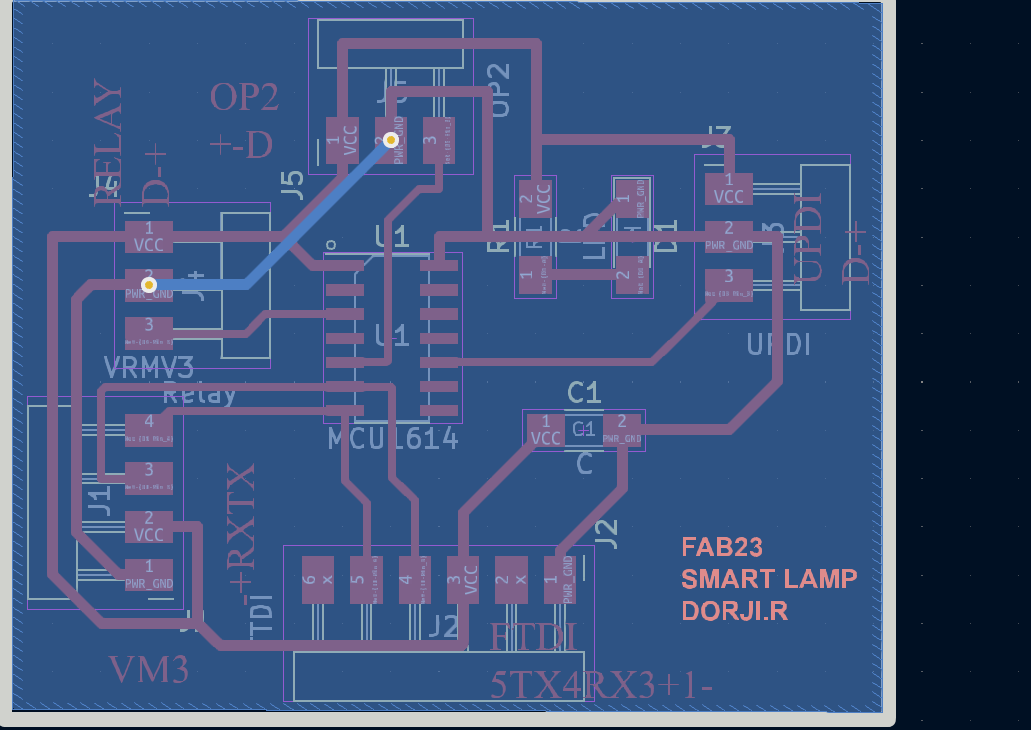
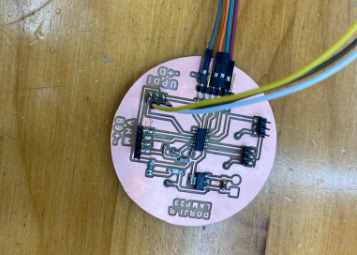
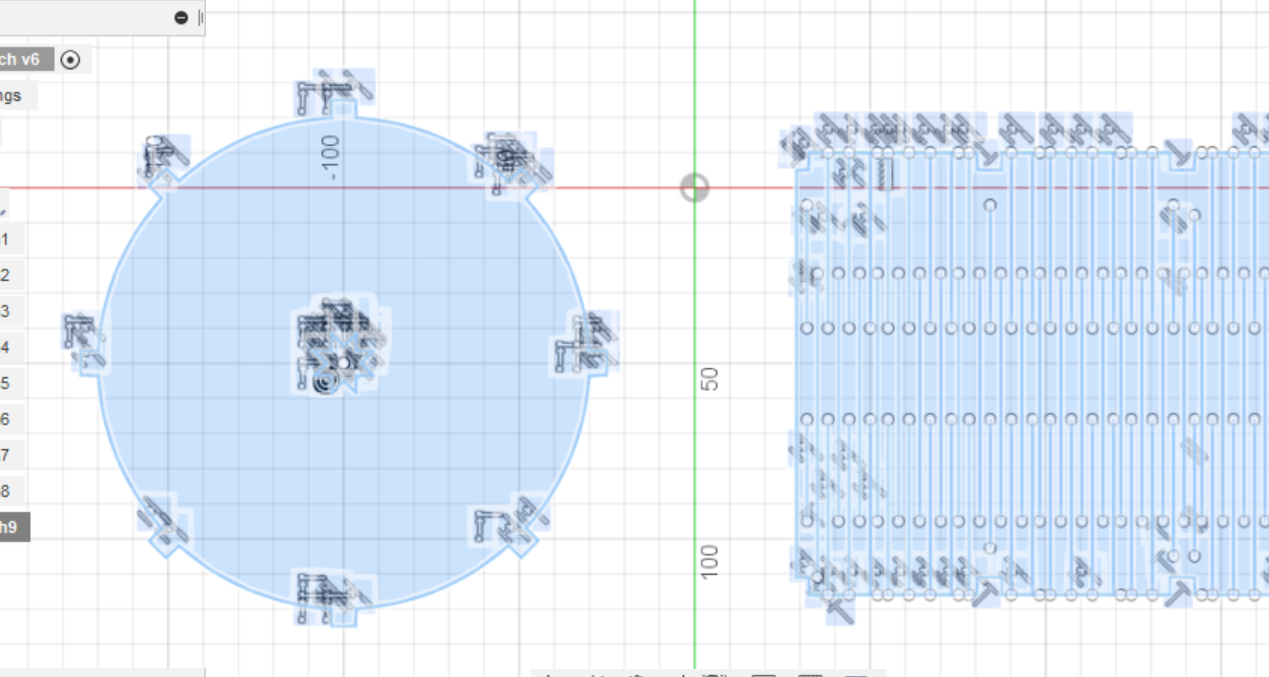
The Electronic Board
2D designs
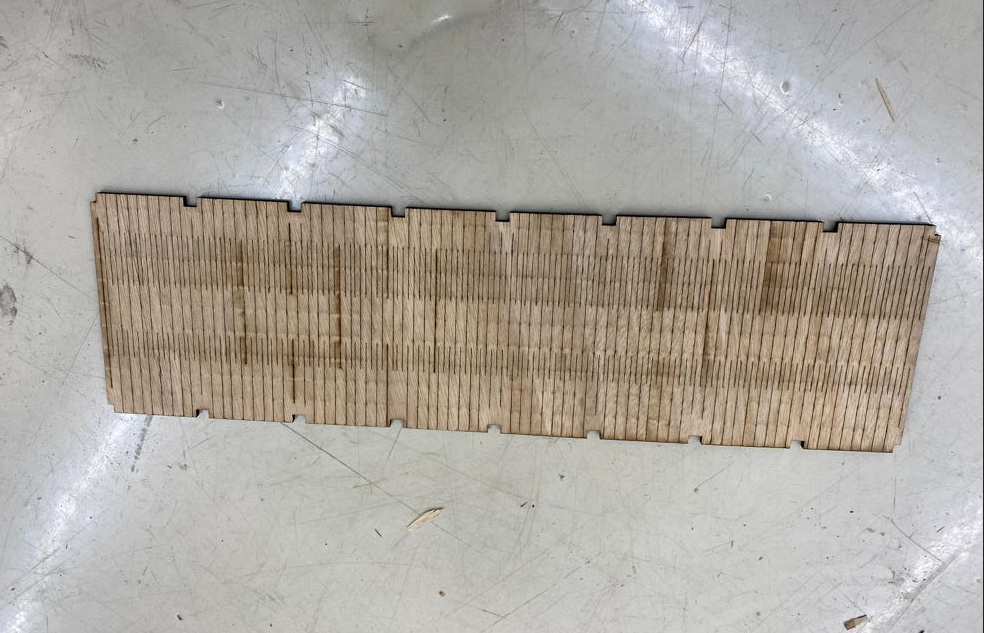
The .DXF file from fusion 360 is taken into the laser PC and used to cut my housing. The housing will be in the cylindrical format with kerf cutting. The material used will be ply and engraved on top cover.
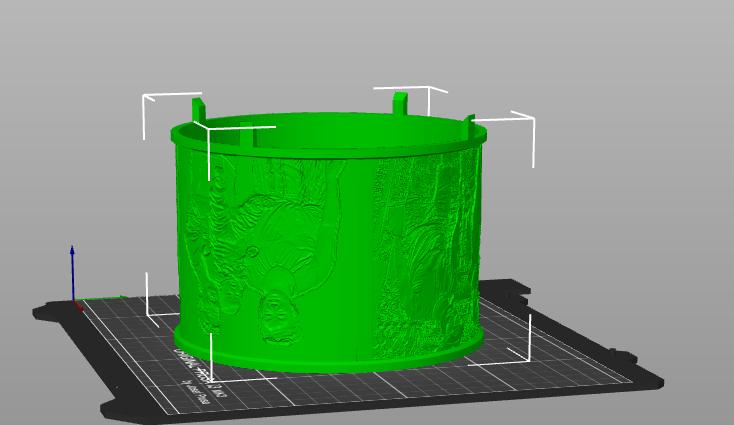
3D Design for Final Project
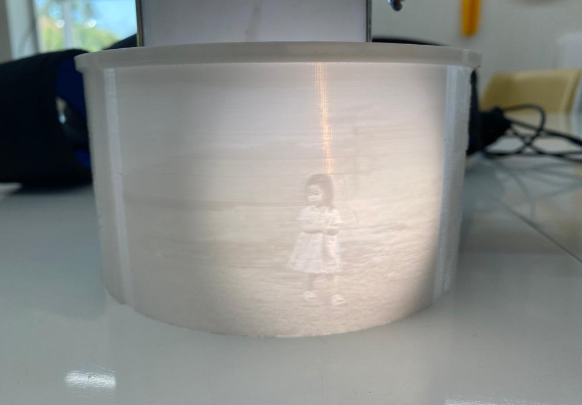
The lamp shade will be made in 3D printer covering the additive aspect o the final project. I used lithophane maker and printed the photo of my family to make it aesthetically appealing. Also I would use coupler to join housing and lamp shade which will be 3D printed, bulb holder as well:
Materials and Components
| Particulars | Description | Quantity | Price | Link |
|---|---|---|---|---|
| MCU | ATtiny1614 | 1 | 2.00 $ | Digikey |
| 1 Relay | 3-5 V relay Module | 1 | 0.5 $ | Amazon |
| 1 Voice Recognition module | Elechouse Voice Recognition Module V3 with Microphone | 1 | 22.00 $ | Amazon |
| PLA filament | White PLA filament for lamp shade (1.75mm) | 1 KG | 24.00 $ | Amazon |
| PlyBoard | Ply of 5mm thick and 1 sq.m | 1 | 1 $ | Local market |
| Bulb | LED bulb 230V | 1 | 1.5 $ | Local market |
Sourcing/Procuring materials
Majority of my materials are available in the lab. The only thing I bought is Elechouse module V3 and it is planned to be sourced from Amazon. It is good to plan on sourcing your materials and components because it is hard to get other tech components in Bhutan. It took two months for me to get my Elechouse Module.
Processes Involved
What questions need to be answered?
How am I going to assemble and attach the lampshade with housing? What will be used to couple the two? Also how am I going to arrange all the components and make it aesthetically appealing?
Evaluation Criteria
My project will be evaluated based on the project assessment criteria and also it will massively depend on its function that is the out put relay should be controlled with voice command sent through mic of voice module elechouse module V3 integrated to MCU ATtiny1614. Moreover, it depends on aesthetic point of view which means it should be attractive to the customer or other people who aspire to make/replicate the same.
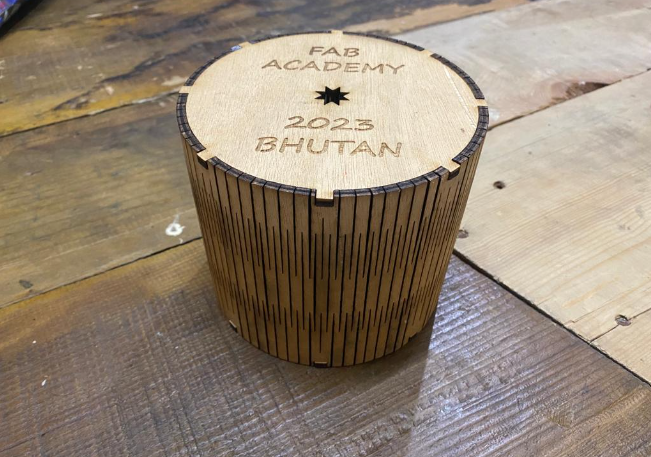
The main housing would look like image given below:
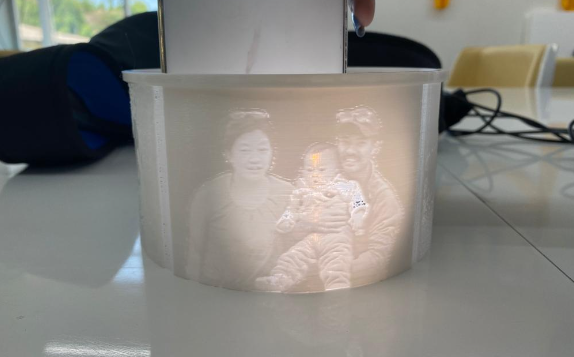
The lamp shade printed in 3D printer using white PLA filament:
Design Files
Schematic&PCB Final