Interface and Application Programming
Group Assignment
From the group work, I learned about comparing programming tool options for making applications. And also how to add GUI library and use it for individual assignment.
The link to the Group Assignment: FAB GROUP 23
Individual Assignment
This week we are exploring on how we can interact with our micro controller boards using an application or on how we can interface and interact with the data from our board. The programs and applications we could use for the week and it seemed very programming heavy. I wanted to visualize the data received from turning a LED with different colors. I did not know where to start and fortunately Mr. Rico's session practical recitation on Processing was informative and I learned a lot from there.
Processing is a language and integrated development environment through which one can produce visual and interactive media. For what I wanted to do for the week, Processing seemed perfect. If you are uncomfortable with Processing’s IDE, one can also integrate it with visual studio code and use that environment to edit and run the code.
Work Flows of using Processing Software
Installed Processing App from Installation of Processing App URL
After that I have tried some basic examples to get myself familiar with this processing app. For this I created simple shape at first meaning circle and rectangle as shown below. Before that we were taught by Mr. Rico to run through processing app with multiple code controls.
When you open the processing app the interface looks like image below:

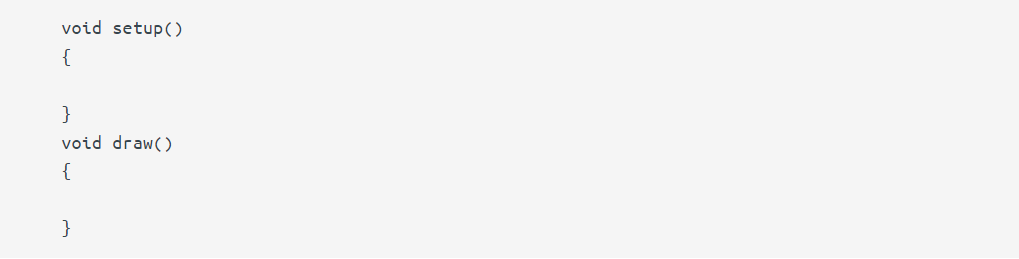
In Processing, we began with setting up the following block: Under void setup, you put all the functions you want to run once. for this case, like the size of the pop up window etc. whereas under void draw you put functions that you want to run repeatedly.
Some tips and useful information:
Under void setup(): * size(x,y) =creates a canvas size of x pixels wide and y pixels tall * noCursor() removes the traditonal white cursor in the canvas window
Under Void Draw: * In processing, the origin of most objects is on the Top left, so (0,0) is in the top left so x increases going right and y increases going down. * background(R,G,B) shows the color of the background in RGB coding. You can add a fourth value to control transparency. * noStroke() removes outline * stroke(R,G,B) stroke color, again RGB * strokeWeight(#)for the outline stroke thickness * rect(x position,y position, width, height) Create a rectangle with the origin (top left) is the first two values and the width and height is the second two numbers * rectMode(CENTER) to auto center the rectangle without having to compensate. * fill(R,G,B) fill rectangle/shape with the RGB color * circle(x pos, y pos, size) creates a cicle with its center at x,y and then its size * textSize(x) sets the size of the text * text("xyz",pos x, pos y) create text with whats in the quotes at position x,y * To create a new mouse pointer in the canvas: circle(mouseX,mouseY,20) creates a circle cursor in the canvas
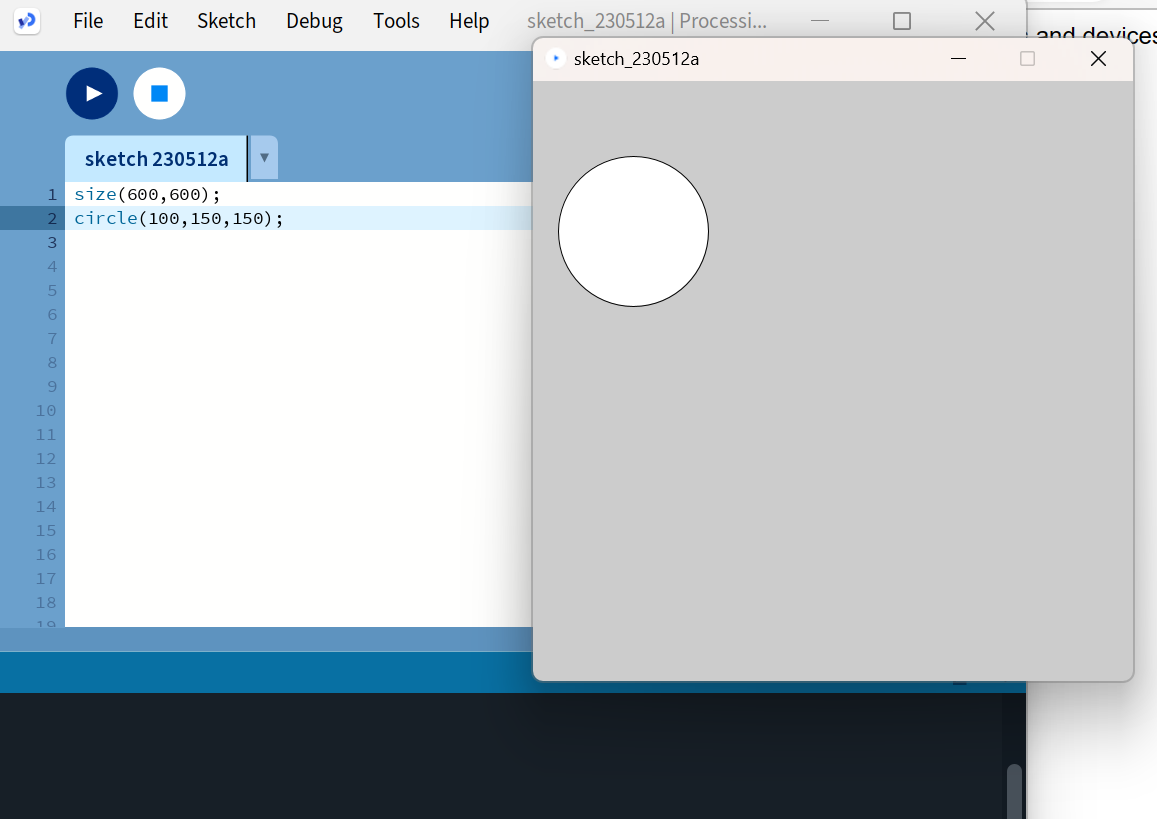

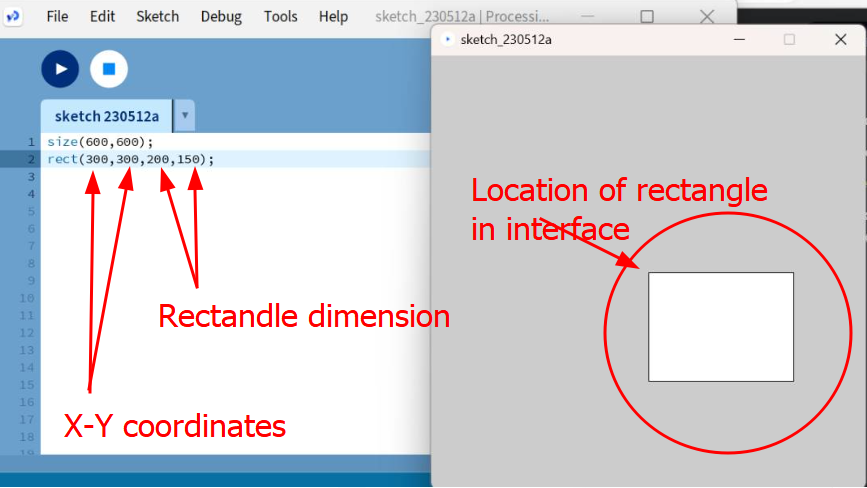
These images above shows that processing app can be used to create basic shapes by defining X-Y coordinates and then giving specific dimensions.
The Video of Interface and Application Programming on controlling multiple LEDs using color coding on my PCB board.
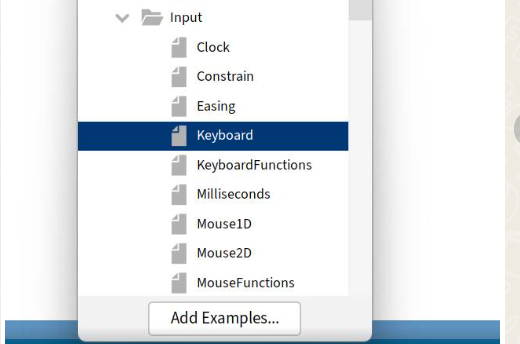
After creating shapes, I tried to control with keyboard from examples and following video shows some of the work flows.
Steps to go examples. Go to >>Files>>Examples>>Input>>Keyboard . After this you can use keyboard to control interface.
After this, I have added the GUI library to processing app and the link to add library URL to Add Library. From this link I have learned about how to add library also.
The code I used to control multiple LEDs are as below:
import controlP5.*; //import ControlP5 library
            import processing.serial.*;

            Serial port;

            ControlP5 cp5; //create ControlP5 object
            PFont font;

            void setup(){ //same as arduino program

              size(300, 450);    //window size, (width, height)

              printArray(Serial.list());   //prints all available serial ports

              port = new Serial(this, "COM3", 115200);  //i have connected arduino to com3, it would be different in linux and mac os

              //lets add buton to empty window

              cp5 = new ControlP5(this);
              font = createFont("calibri light bold", 20);    // custom fonts for buttons and title

              cp5.addButton("red")     //"red" is the name of button
                .setPosition(100, 50)  //x and y coordinates of upper left corner of button
                .setSize(120, 70)      //(width, height)
                .setFont(font)
              ;

              cp5.addButton("yellow")     //"yellow" is the name of button
                .setPosition(100, 150)  //x and y coordinates of upper left corner of button
                .setSize(120, 70)      //(width, height)
                .setFont(font)
              ;

              cp5.addButton("alloff")     //"alloff" is the name of button
                .setPosition(100, 350)  //x and y coordinates of upper left corner of button
                .setSize(120, 70)      //(width, height)
                .setFont(font)
              ;
            }

            void draw(){  //same as loop in arduino

              background(150, 0 , 150); // background color of window (r, g, b) or (0 to 255)

              //lets give title to our window
              fill(0, 255, 0);               //text color (r, g, b)
              textFont(font);
              text("LED CONTROL", 80, 30);  // ("text", x coordinate, y coordinate)
            }

            //lets add some functions to our buttons
            //so whe you press any button, it sends particulars char over serial port

            void red(){
              port.write('r');
            }

            void yellow(){
              port.write('y');
            }

            void alloff(){
              port.write('f');
            }
Arduino code for multiple LEDs
void setup() {

            pinMode(0, OUTPUT);   //set pin as output , red led
            pinMode(8, OUTPUT);   //set pin as output , yellow led

            Serial.begin(115200);    //start serial communication @9600 bps
            }

          void loop(){

            if(Serial.available()){  //id data is available to read

              char val = Serial.read();

              if(val == 'r'){       //if r received
                digitalWrite(0, HIGH); //turn on red led
                }
              if(val == 'y'){       //if y received
                digitalWrite(8, HIGH); //turn on yellow led
                }
              if(val == 'f'){       //if f received
                digitalWrite(0, LOW); //turn off all led
                digitalWrite(8, LOW);
                }
              }
            }
The work flows of using Arduino
Go to >>Tools>>Board Manager>> Select ATtiny1614>>Select port COM3>> Select programmer. But there was problem when defining BAUD rate at 9600, I changed to 11500 and it worked.
Week 14 Codes
Codes