Molding and Casting
Molding is the process of manufacturing by shaping liquid or pliable raw material using a rigid frame called mold or matrix. As usual, we had group assignment and individual work for this week and we mainly focussed on making a mold by milling in SRM20 and then casting.
Group Assignment
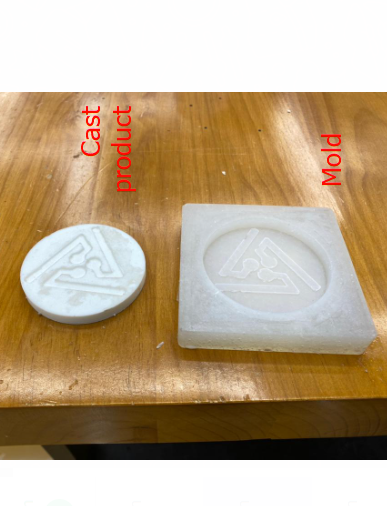
For this week, we were required to cast an object or product using the existing mold in the lab as a group project and therefore we used the mold which had an SFL logo. However, before getting into work we were asked to read the safety data sheet of the chemicals and materials that came along with the resin. Ms.Zina and Mr.Rico emphasized on reading it before working on molding and casting as they re-iterated that working with resin and other materials can be hazardous since it involves chemicals.
Reading Safety data sheet
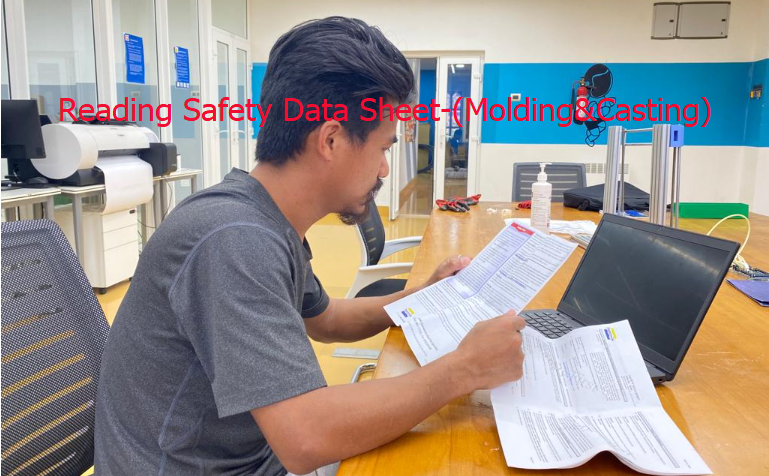
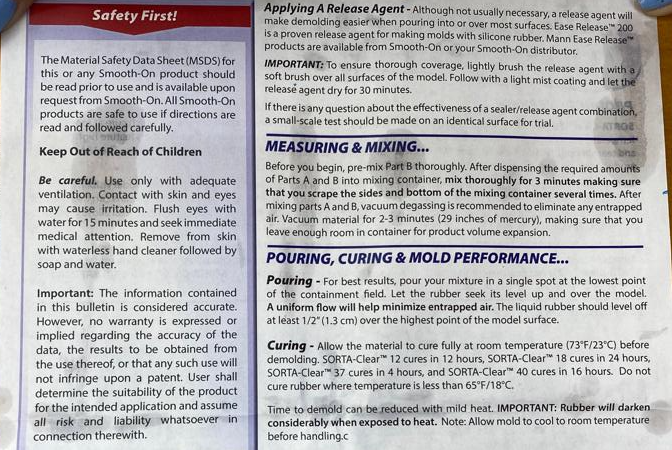
It was clearly stated in the safety data-sheet about requirement to read it before beginning the practical or hands on work with resin. And there were some crucial critical points that has to be followed such as given below:
First Aid Measures
In case of Inhalation, remove sources(s) of contamination and move victim to fresh air. Give artificial respiration in case of stoppage of breathing and provide oxygen if needed. (Contact physician immediately). Ingestion: Not to induce vomiting unless instructed by physician.(Never give anything by mouth to an unconscious person). After first aid measure, get appropriate in-plant, paramedic, or community medical support.
WorkFlows
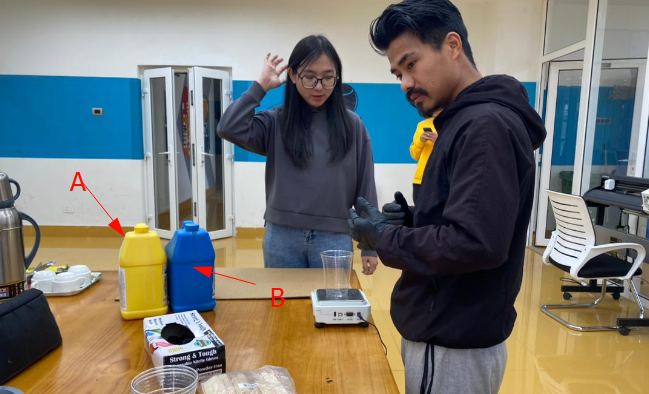
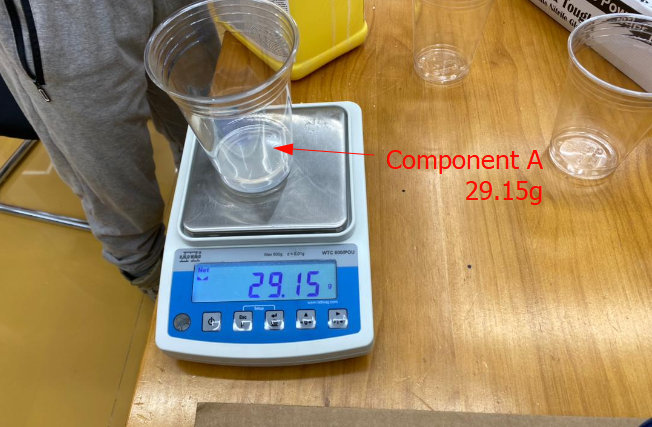
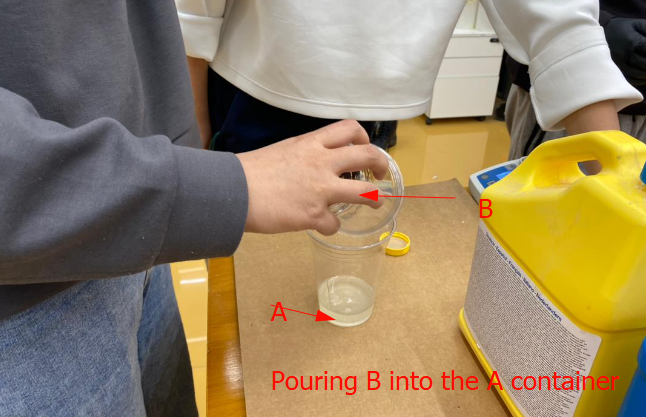
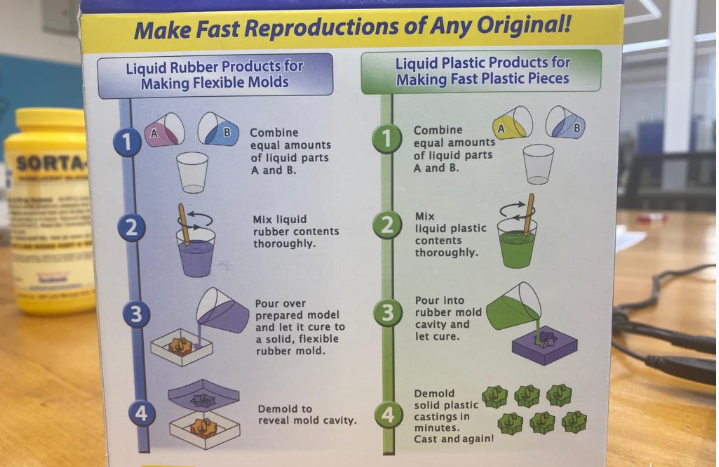
There were two types of raw materials present in the lab for casting purposes which were hydrostone and resin. For our group project we only used resin to demonstrate the process of casting. For casting with resin there were also components A and B, where we mixed them in equal weight ratio (1:1). Components A&B as shown by Image1 below:
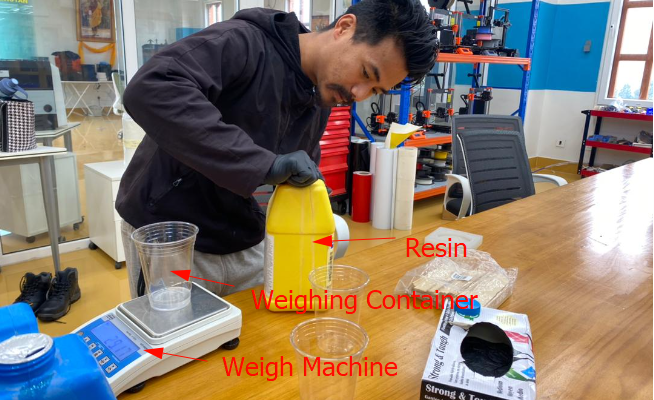
We shook them(A&B) well in the container before weighing and poured them into the weighing container/cup and it weighed 29.15 g each on the machine. Weighing process shown by image 2 & 3 below:
After weighing them, we mixed and then stirred gently with the help of a flat wooden stick/spoon as indicated by images below:
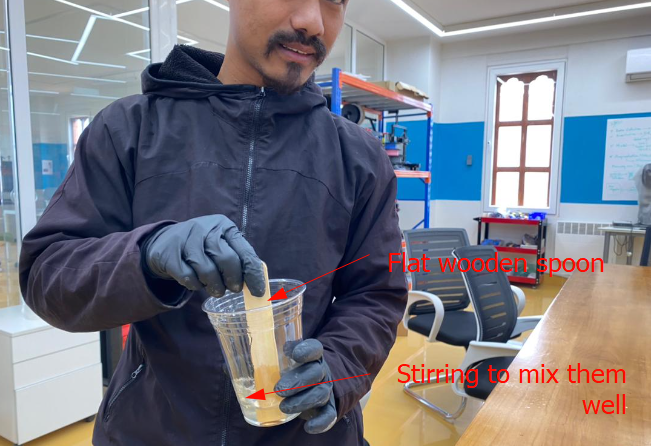
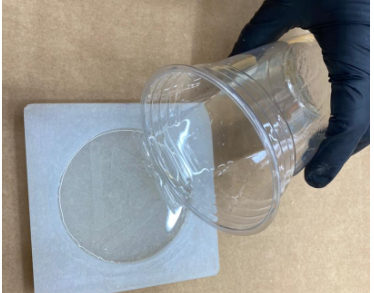
We stirred the mixture for 5 minutes and then gently poured onto the mold. We had to be careful when pouring onto the mold to avoid the air bubble getting trapped inside. After filling up the mold, we also had to shake the mold gently to let the mixture settle or to let the trapped bubbles out if there was any.
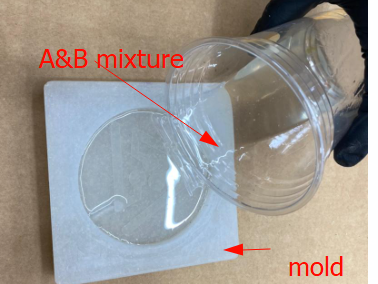
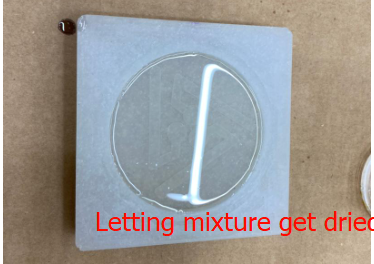
Then we let the mixture get casted in the mold by keeping it for approximately 30 minutes or more.
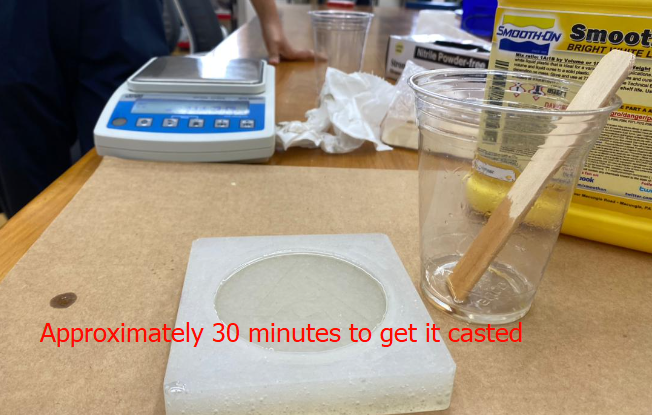
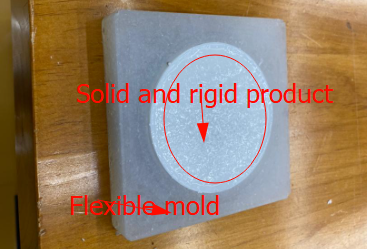
After approximately 30 minutes, we checked our casting process and found out that it worked. The cast was strong and then we took out the product.
Casting with Hydrostone
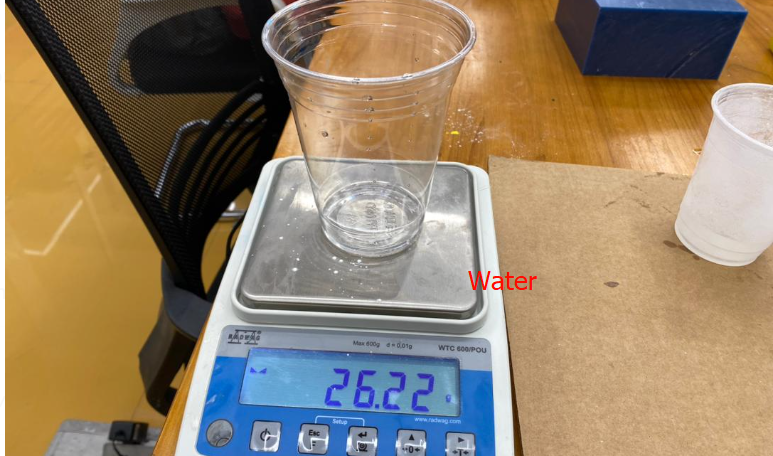
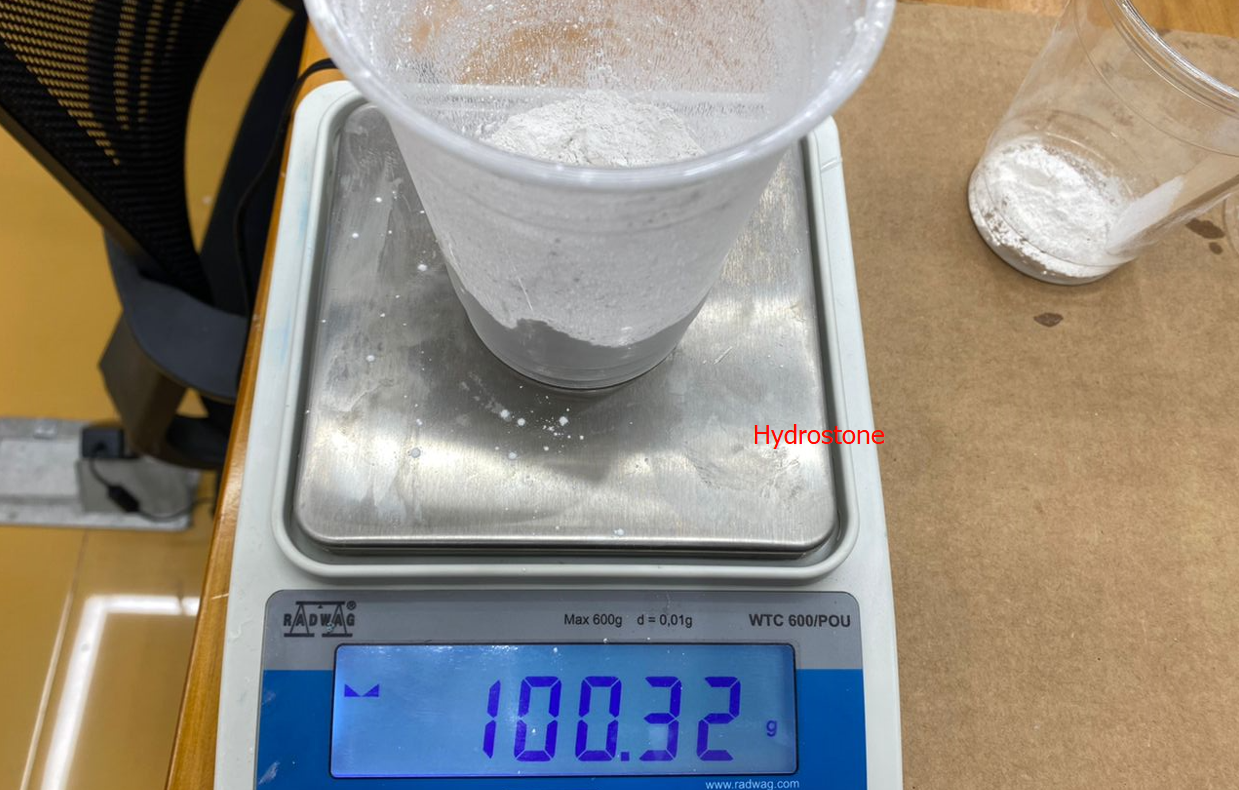
We used the same mold as with resin for casting with hydrostone. Measured hydrostone and water in weight ratio of 100:25.
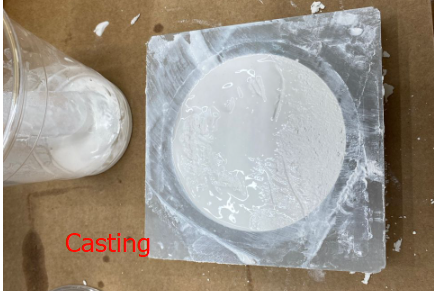
We were supposed to stir the mixture at 1750rpm with an electric mixer but we used a hand drill with an extension and added the hydrostone into water of ½ or ⅔ at a time. After mixing evenly, we poured the slurry(mixture) into the mold from the lowest point of the mold as recommended in the hydrostone data sheet.
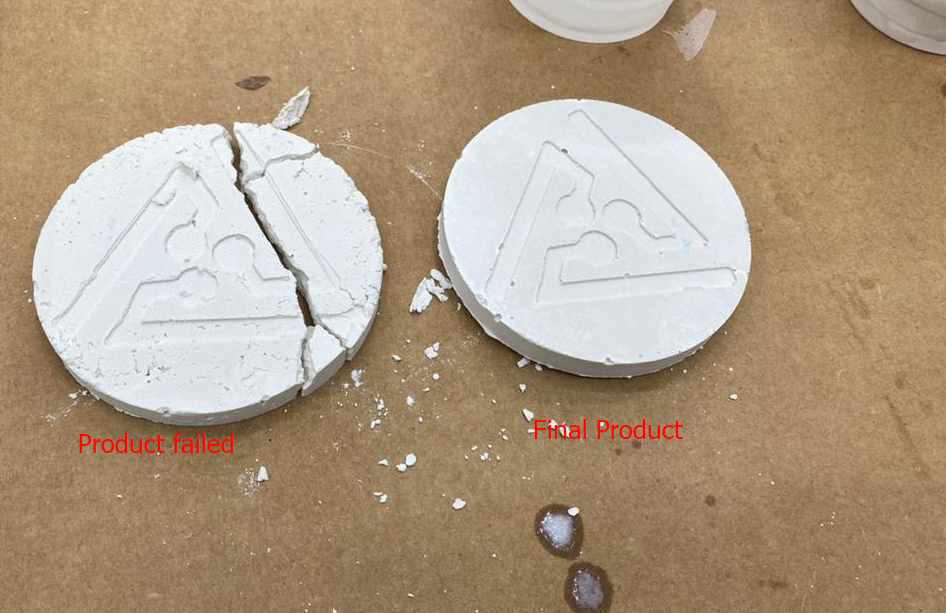
Comparing failed products and the final product. The hydrostone cast product failed at first because we tried to take it out from mold before it was set properly. Then we learned a lesson and kept the next one in the mold for more than 30 minutes.
Link to group work Bhutan FAB23
Individual Assignment
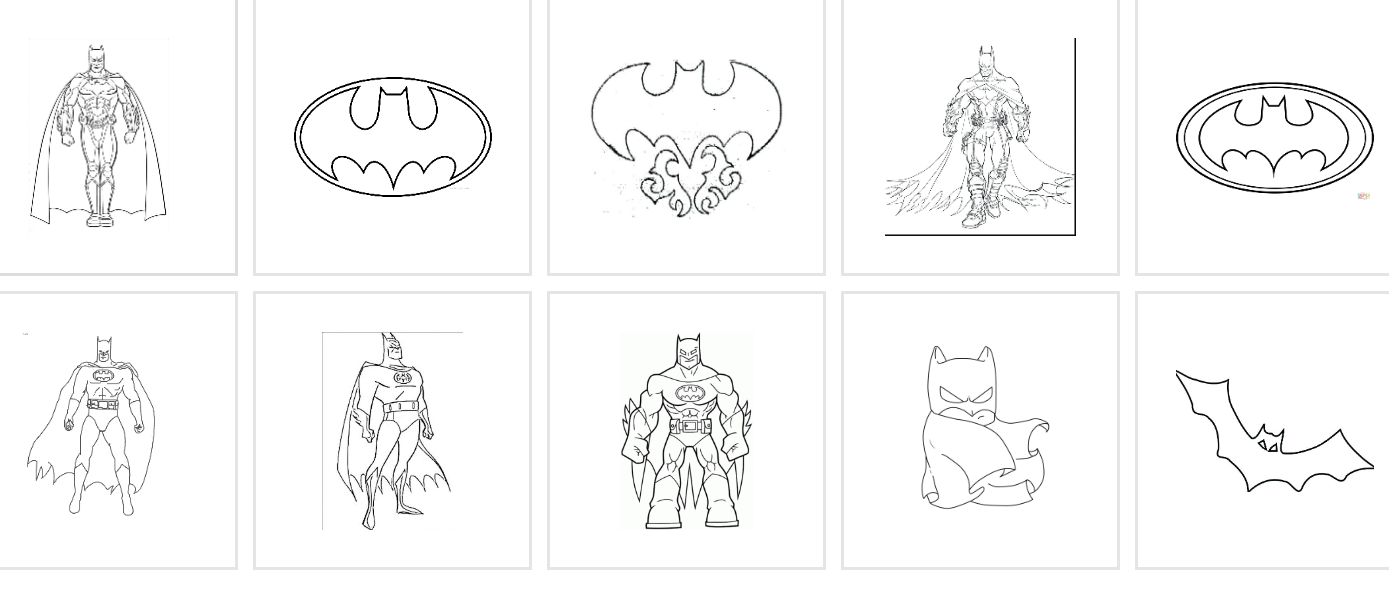
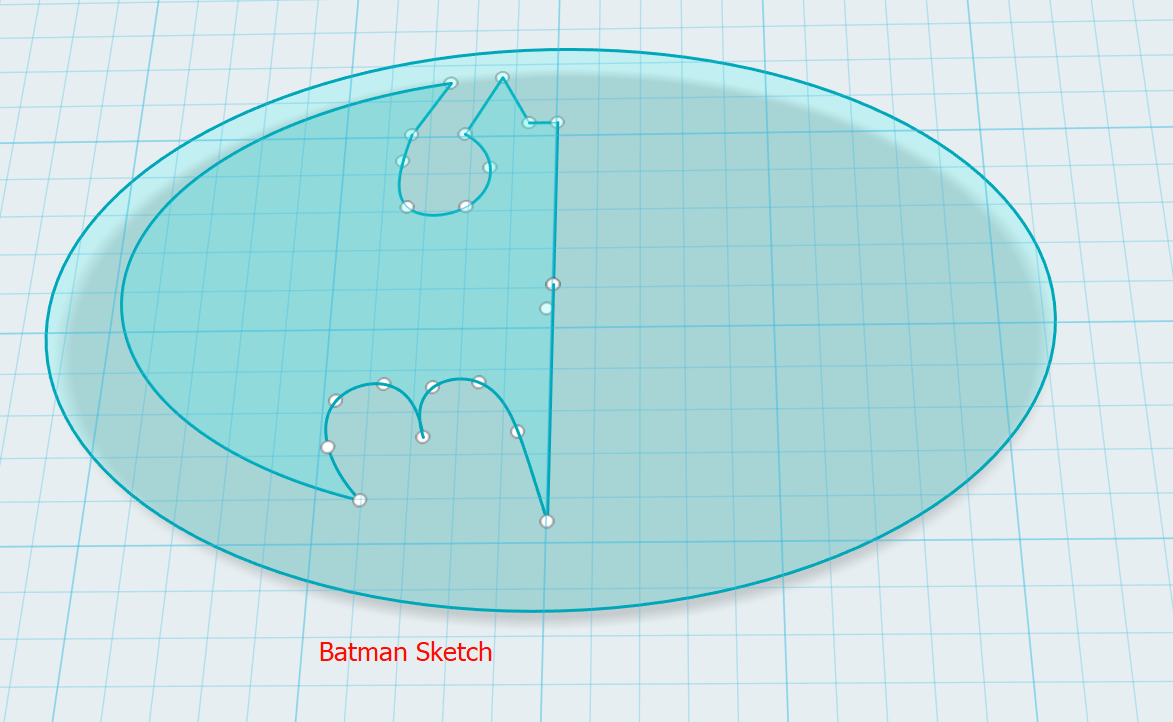
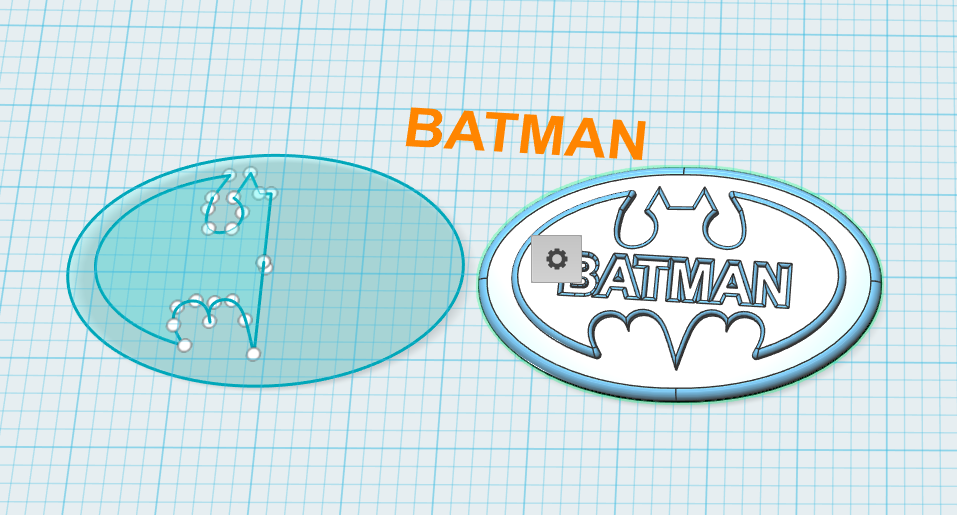
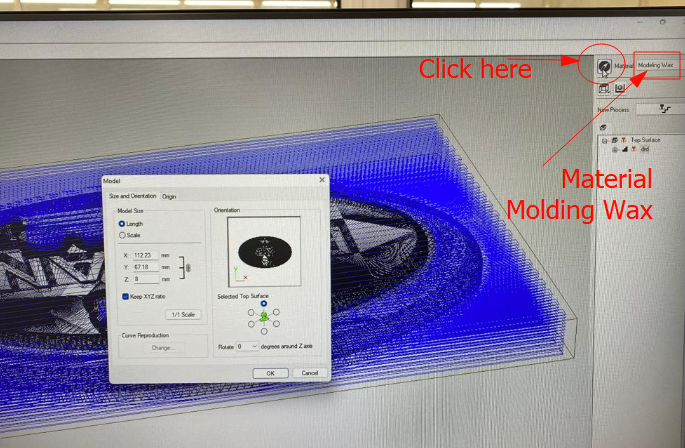
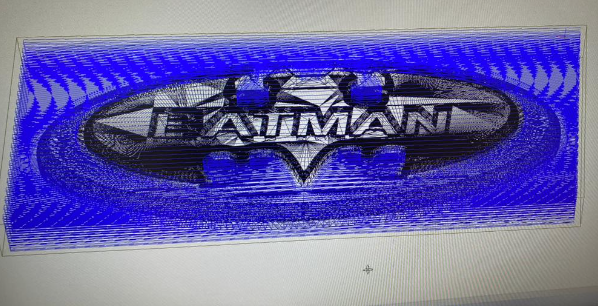
Individually, I had to make a mold and then cast the product specifically with round corners on the top surface. Before really going to milling the mold object pattern in SRM20, we had to design the pattern which can be used to create a mold pattern. To design the mold pattern I used 123D design. To design batman symbol I took reference from google image as shown below:
Then I started with sketch drawing in the software which is 123D design.
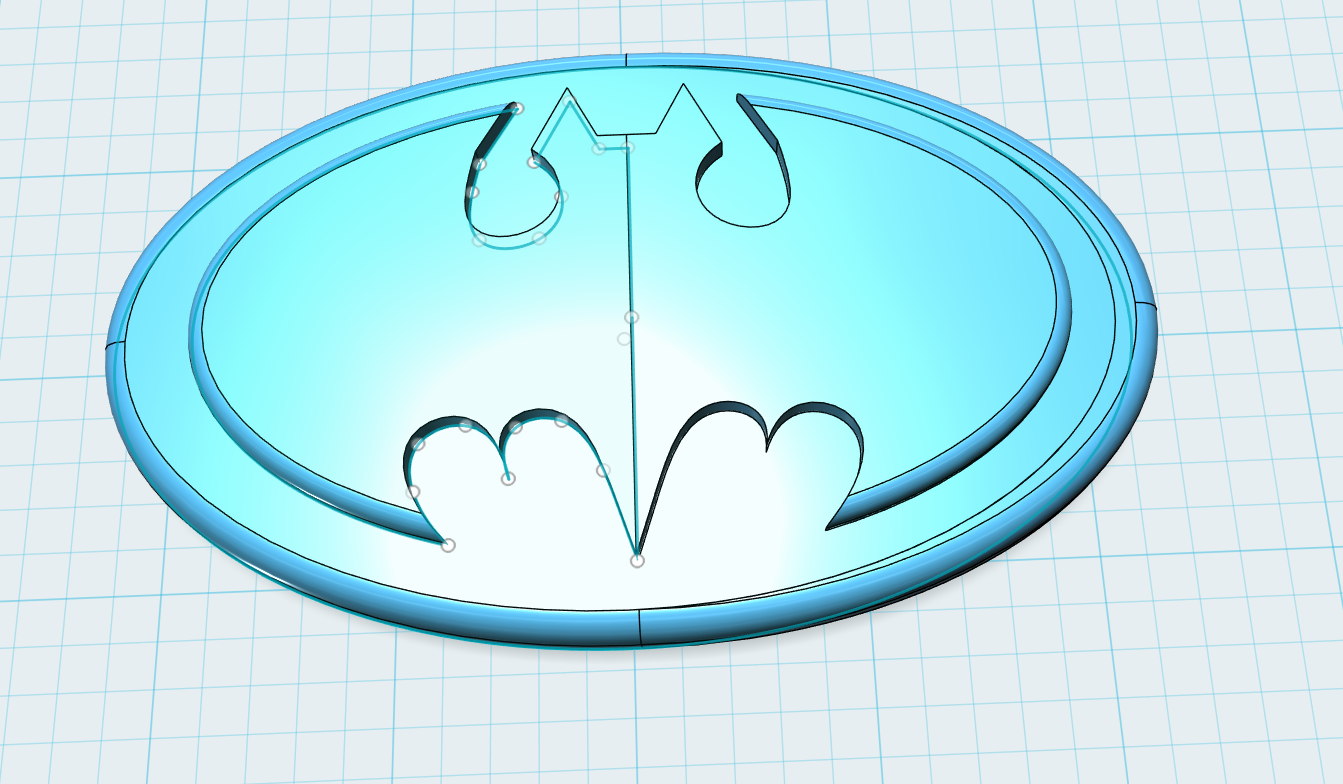
After sketch and extrusion, I sent the design files in the whatsapp group for verbal approval from Mr.Rico and Ms.Zina and Mr.Ricos suggested me to add more curves on the top surface and then I started adding description.
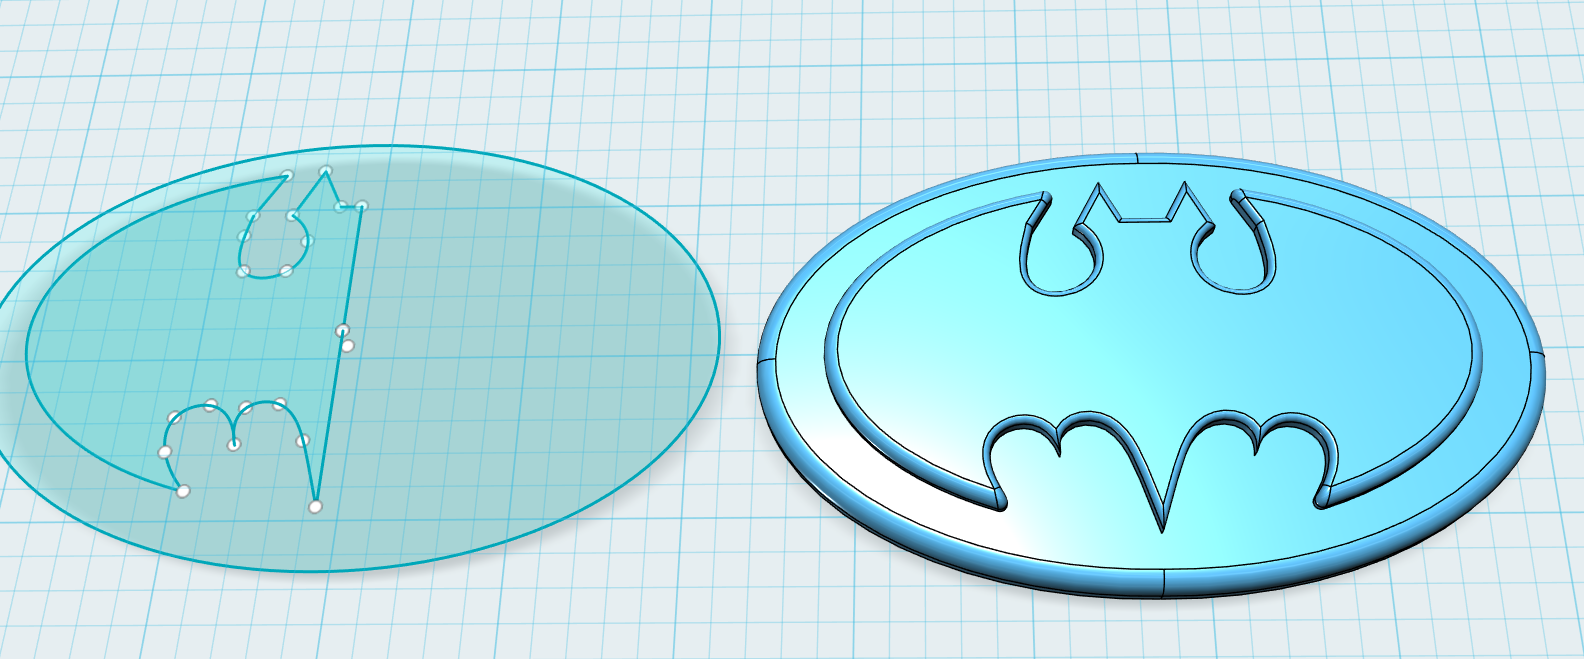
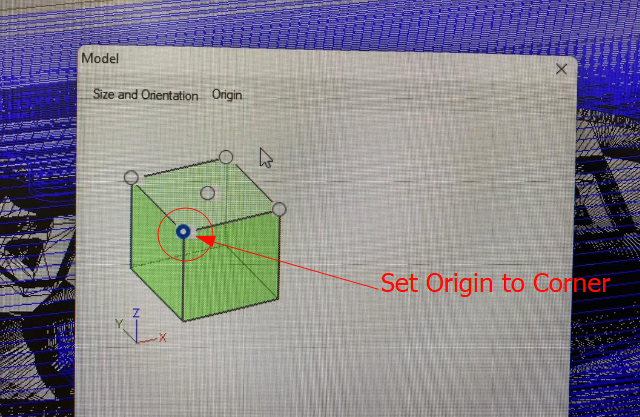
Now export the design file in .STL file format which can be read in the MODELA (Software used to generate tool path for milling).
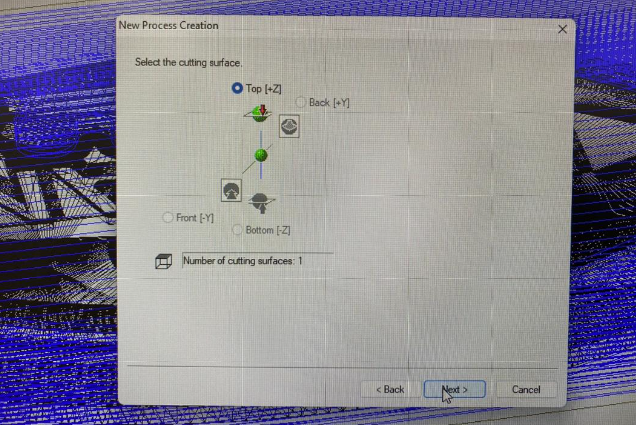
Using MODELA
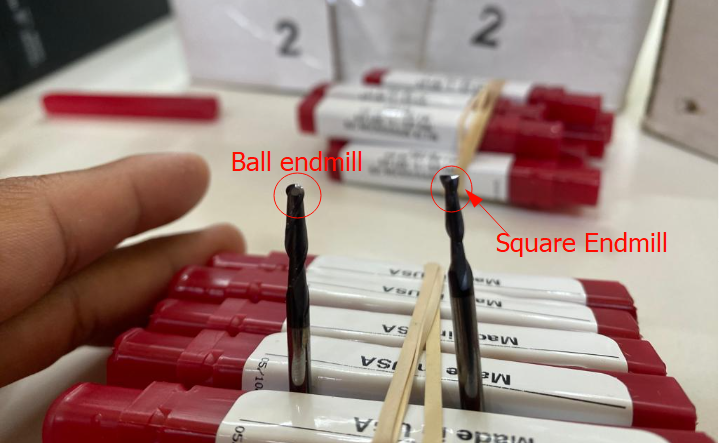
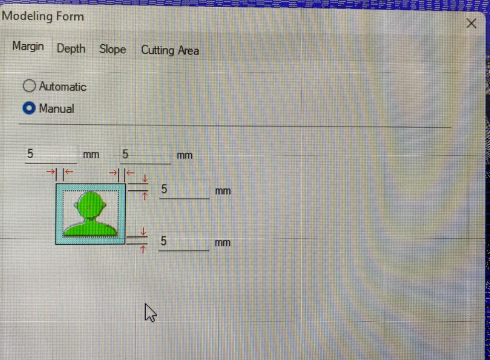
MODELA is the software used to generate tool path and convert our .STL file into .PRN format which can be used to mill in SRM20. For this tool path generation, there are two processes (1) Roughing and (2) Finishing which required to use different end-mills respectively. The end-mills are as shown below.
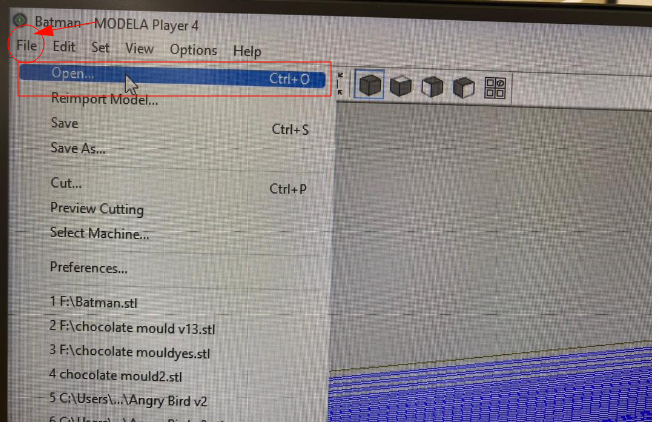
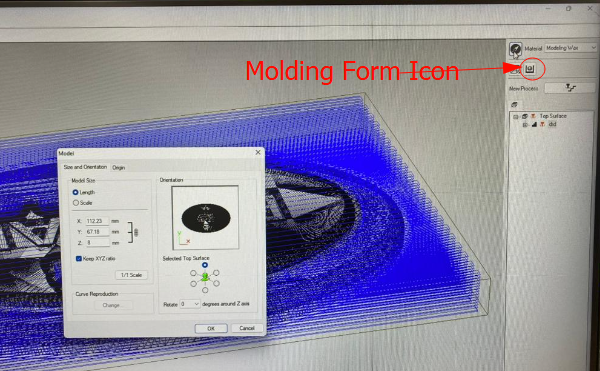
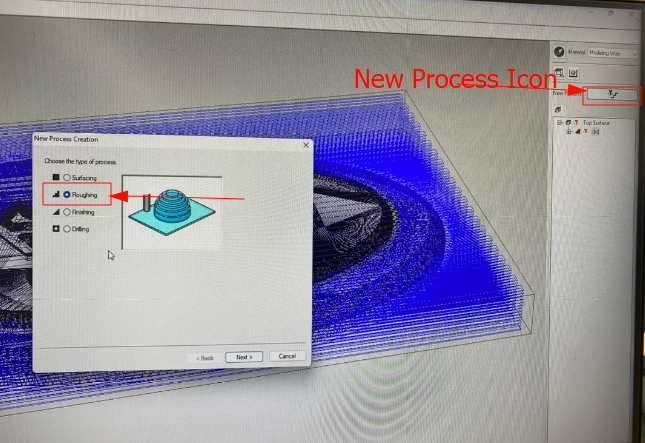
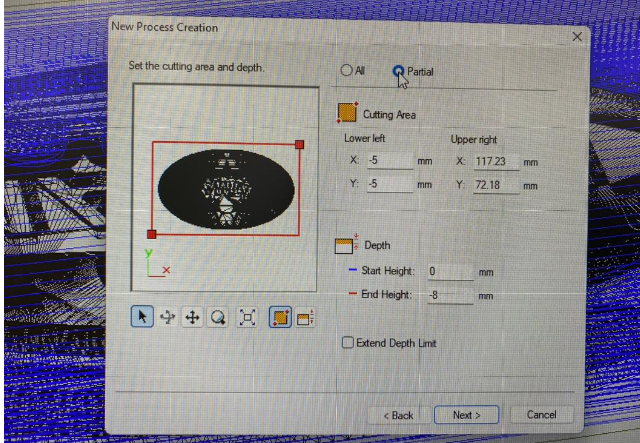
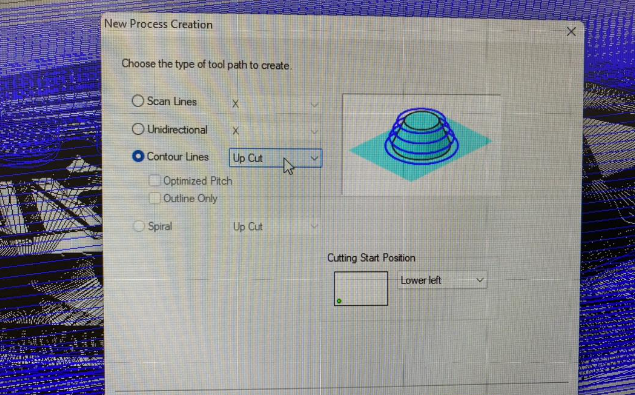

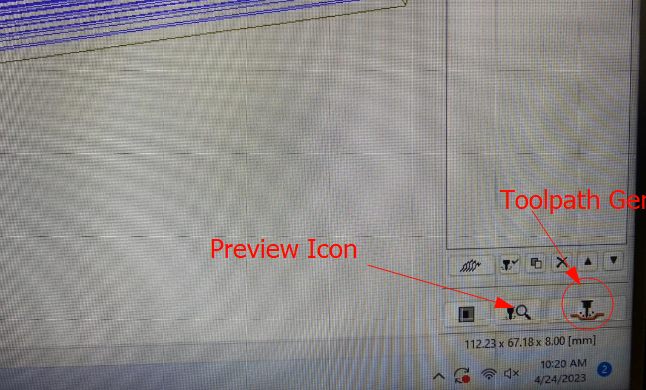

Finally tool-path is generated and file converted from .STL to .PRN. Hero shot from the MODELA software.
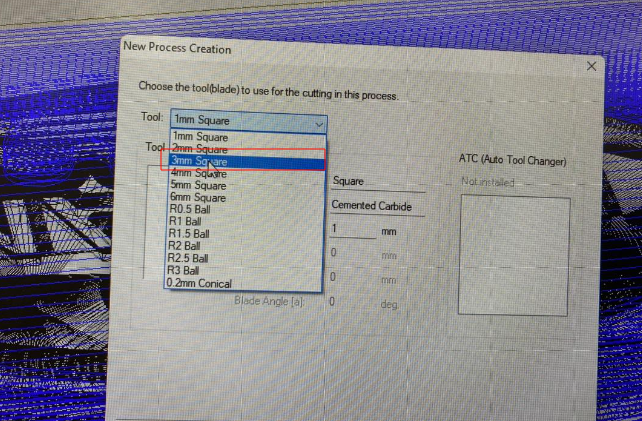
Note: Repeat same process from step 1 for Finishing cut, but use 1.5mm ball type end-mill for finishing cut.
Milling the .PRN file exported from Modela in SRM 20.
First mill for rough cutting with an endmill 3 mm square and after rough cutting then change an endmill to 1.5mm ball end-mill and mill again. Using VP panel for SRM 20 remains same as milling the PCB board. It took almost more than an hour to mill the mold pattern in SRM 20.
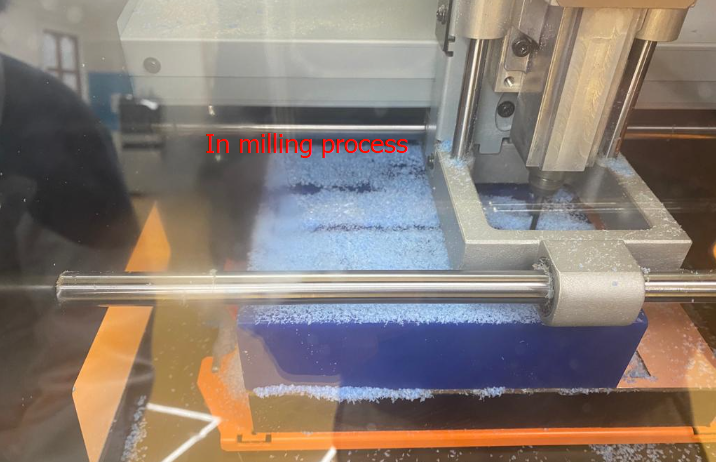
Product after milling in SRM20 and more than an hour wait.
Preparing Silicone Mold Rubber Solution/Mixture
Now I need to prepare solution that will be casted in the mold pattern which is milled in SRM20. For this, I used Silicone Mold Rubber to create a solution which ultimately would produce flexible mold after casting in the mold pattern I hae designed and milled.
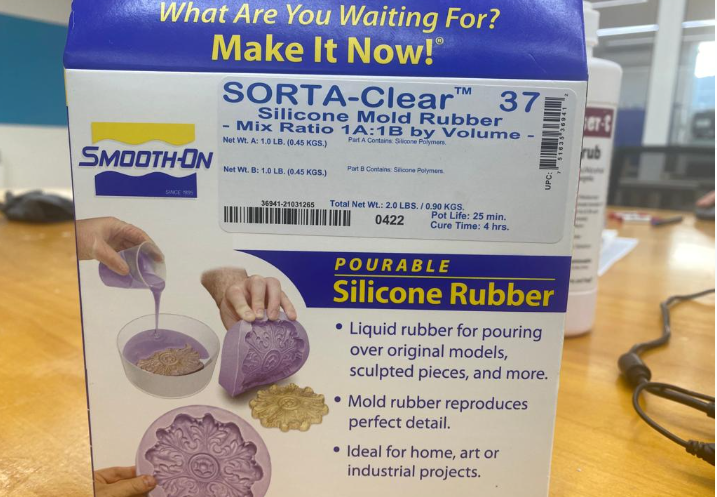
This silicone mold rubber contained PART a and PART B which I had to mix in the proportion 1:1 weight ratio.
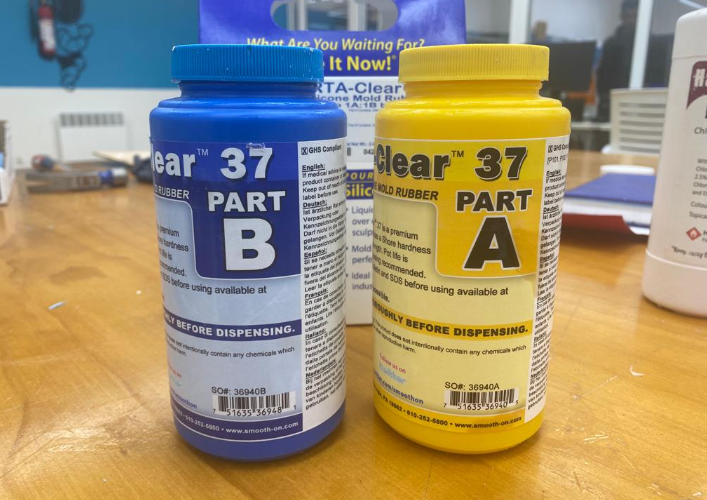
Directions are all given in the data sheet of silicone mold rubber box or provided separately inside.
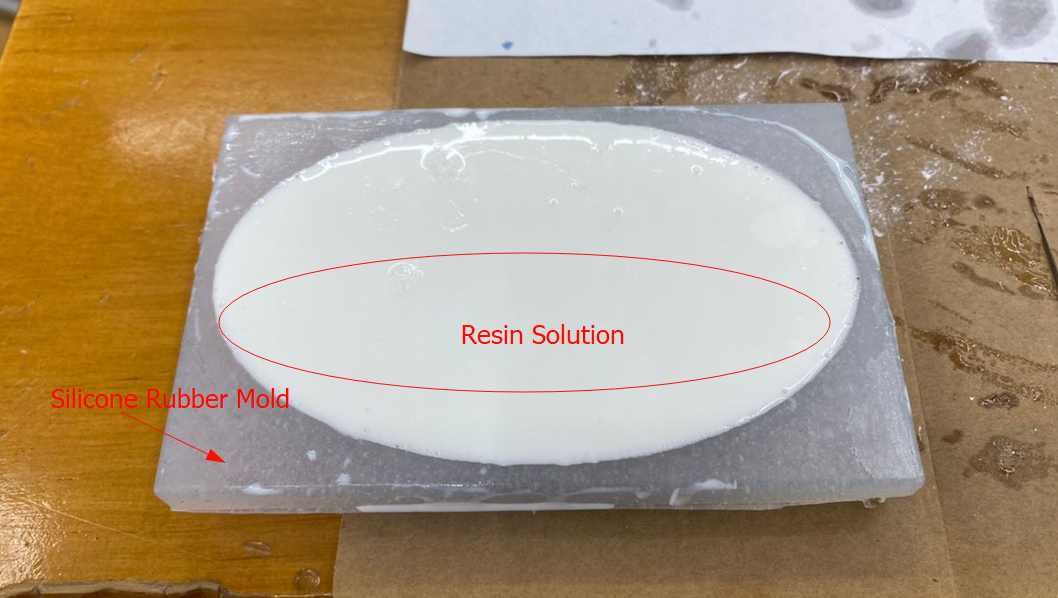
After preparing the mixture and perfectly blending them, I casted them into my mold pattern which was milled.
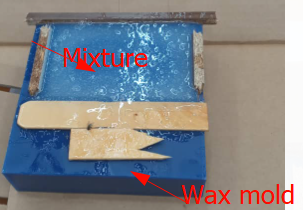
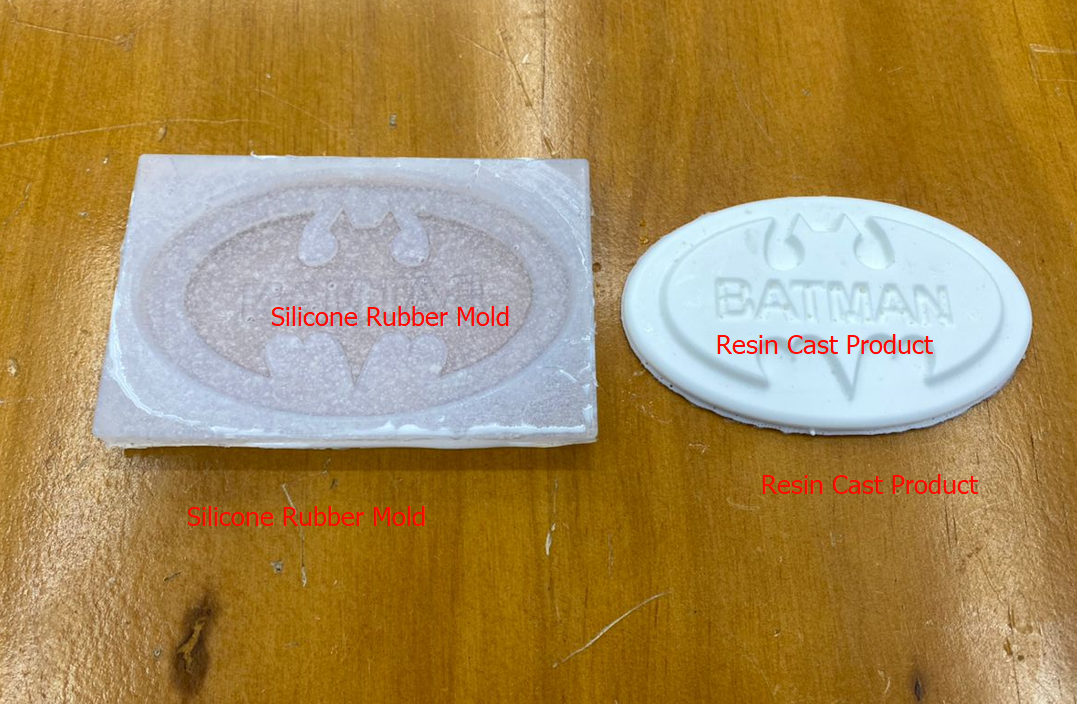
After casting, I kept it overnight to let the mixture cure and get hard enough. Then removed the silicone rubber mold. Into that rubber mold, I casted resin solution mixture of PART a and B like I did in group work. And then casted the resin solution into silicone rubber mold and kept about 30 minutes to cure.
The silicone rubber mold and resin cast product as shown below:
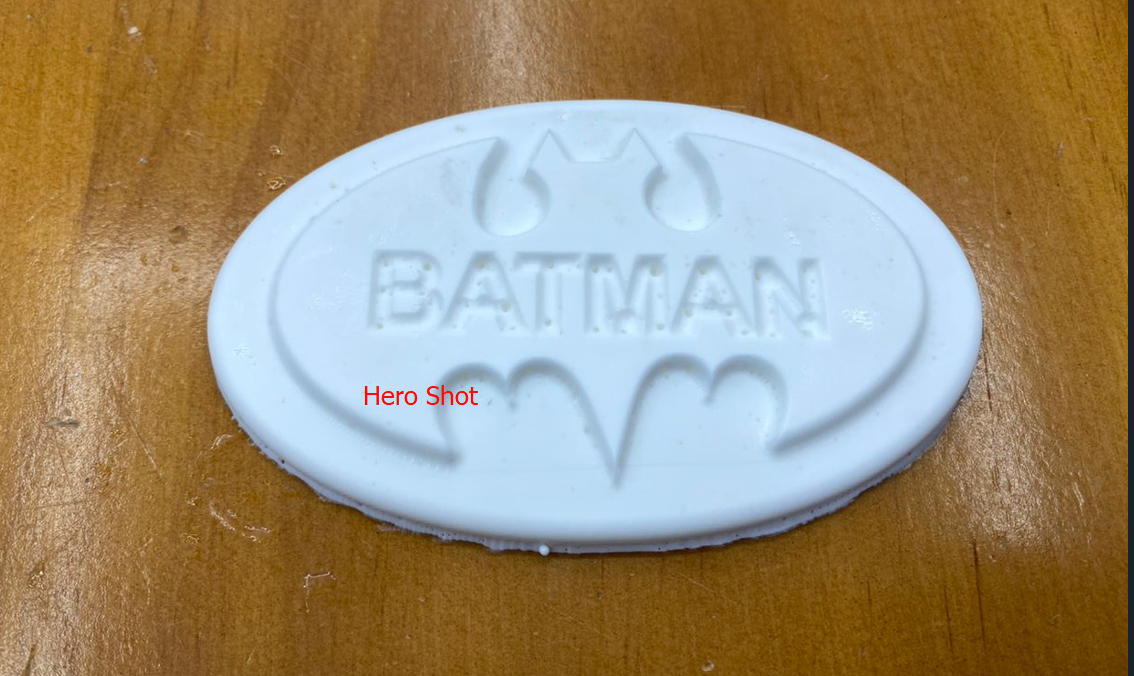
Hero Shot of the Week
Overall, this week was exciting and was full of practical session. I learned to mill the wax mold using SRM20 and MODELA software, including different type of casting and various mold processing.
Design Files
Designs File Week12