Computer Aided Design (CAD)


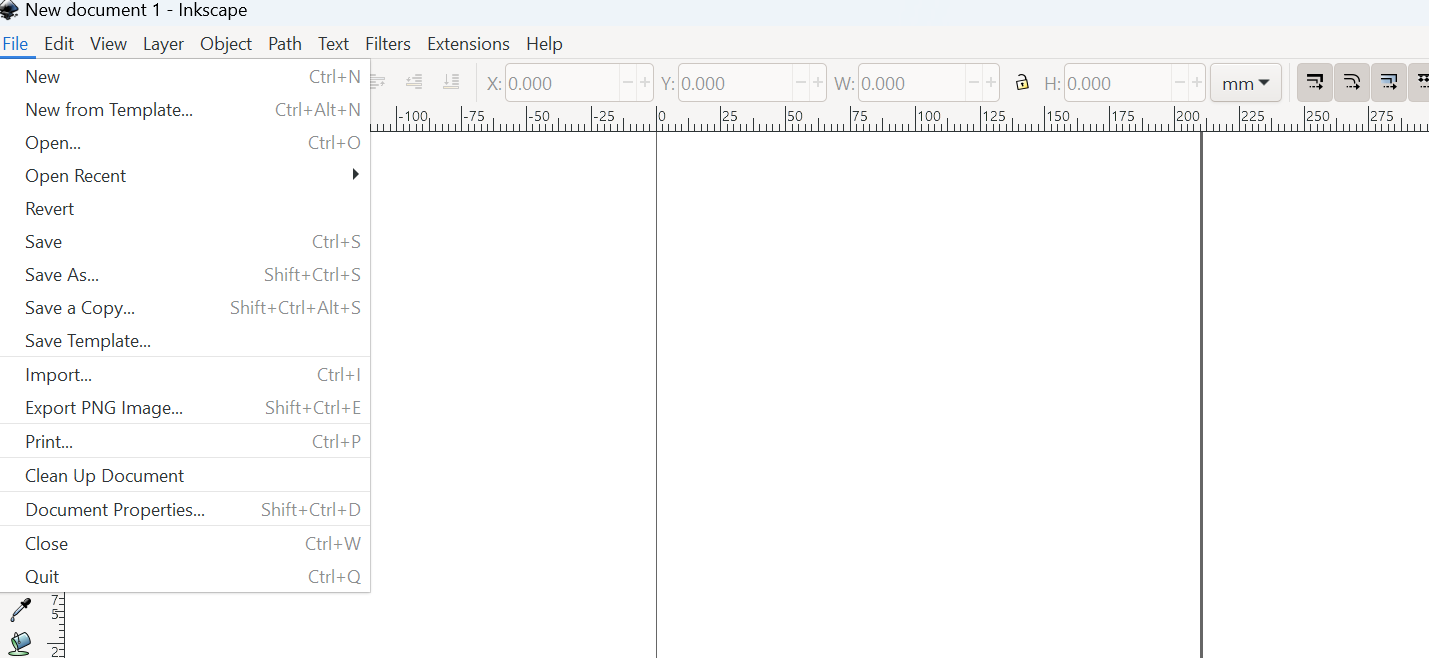
The second week was certainly different from what I initially expected it to be. That is because I had intermediate skills on CAD and assumed it to be light session however, it was by far the most challenging. We were given multiple options of softwares to choose one from which we are comfortable with. For 2D designing I go with Inkscape mainly because of having prior ideas and experiences of using, and Fusion 360 for 3D designs despite having skills of using inventor, as most of the participants are using it and I found it to be useful for everyone when troubleshooting. Also, we were constantly reminded to compress our images and videos before uploading into our site/git repository and for that Mr. Rico (our remote Guru) recommended to use XNconvert for image compressing and likewise FFMPEG for video. Therefore, download XNconvert from Softonic.


Using XNConvert to convert images


  • Open XNConvert by double clicking (working window pops up)>>Drag images from folder to application window under input section>>In output section choose output folder/keep in the same folder>>Choose the file format from drop down>>And choose quality from setting button>>Hit convert where you can see status getting updated. Then check in the folder if your image size has reduced or not. This is done because the optimum file size of your weekly assignment website should not cross over 10MB.
  • 
          
                                                    Importing folder 


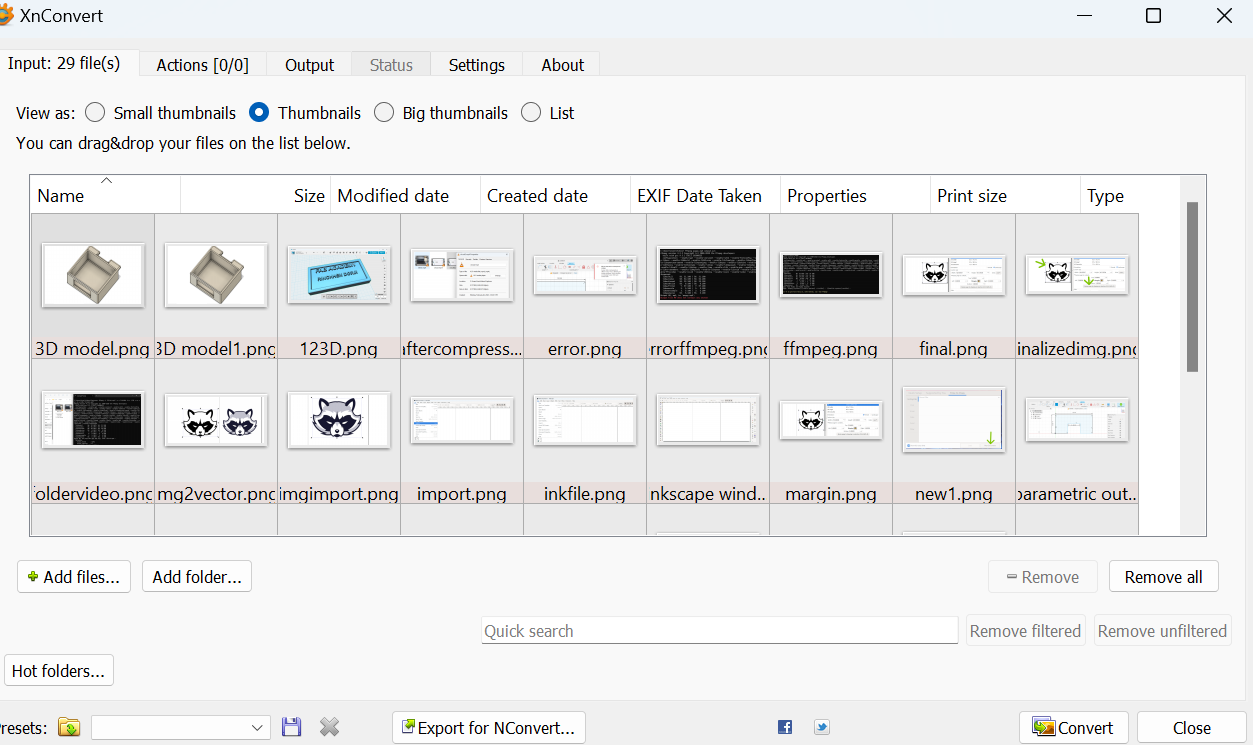
    This image shows the window of XnConvert. You can add file or Folder as indicated by green arrows shown in the image, or You can directly drag and drop folder. Then follow the steps mentioned above.


                                                    Evidence


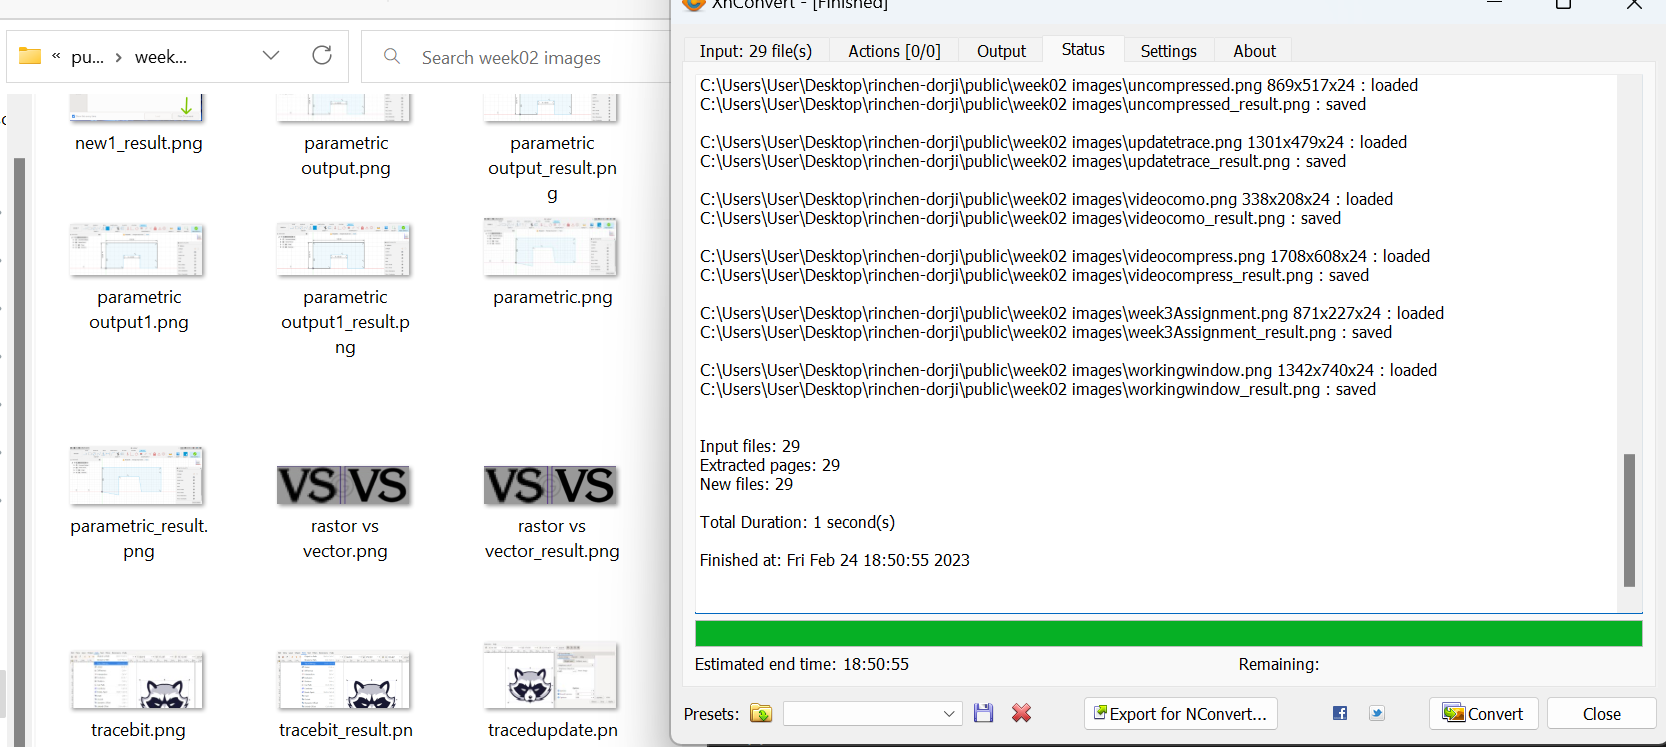
    This image shows that after conversion, you images are stored in the same folder or you can select other location. The converted image will have extension "image-name"-result.png where image-name is your original image name.


    Steps to download FFMPEG


  • 1. Use this link Go to chrome
  • 2. Select windows, MAC Os, or Ubuntu as per your operating system, I used windows.
  • 3. Click on windows builds from gyan.dev.
  • 4. Then on "https://www.gyan.dev/ffmpeg/builds/ffmpeg-git-github" and you will be directed to github repo. >> And download zip file "ffmpeg-2023-02-04-git-bdc76f467f-full_build.zip" which is almost 150MB
  • 5. From the downloaded zip file extract all the files and copy to C drive.
  • 6. Open the folder name bin and copy its path.
  • 7. Search for "Edit the system environment variables in your laptop search bar".
  • 8. Click on "edit" button >>Environment variables and under system variables, click on path>> "edit" button, >>New and then paste the path.then >> ok>>Ok
  • 9. Open CMD/ GitBash to check if ffmpeg is installed by using command line ffmpeg -version and press enter, image as shown below will appear if successful.
  • 
          
                                                    ffmpeg


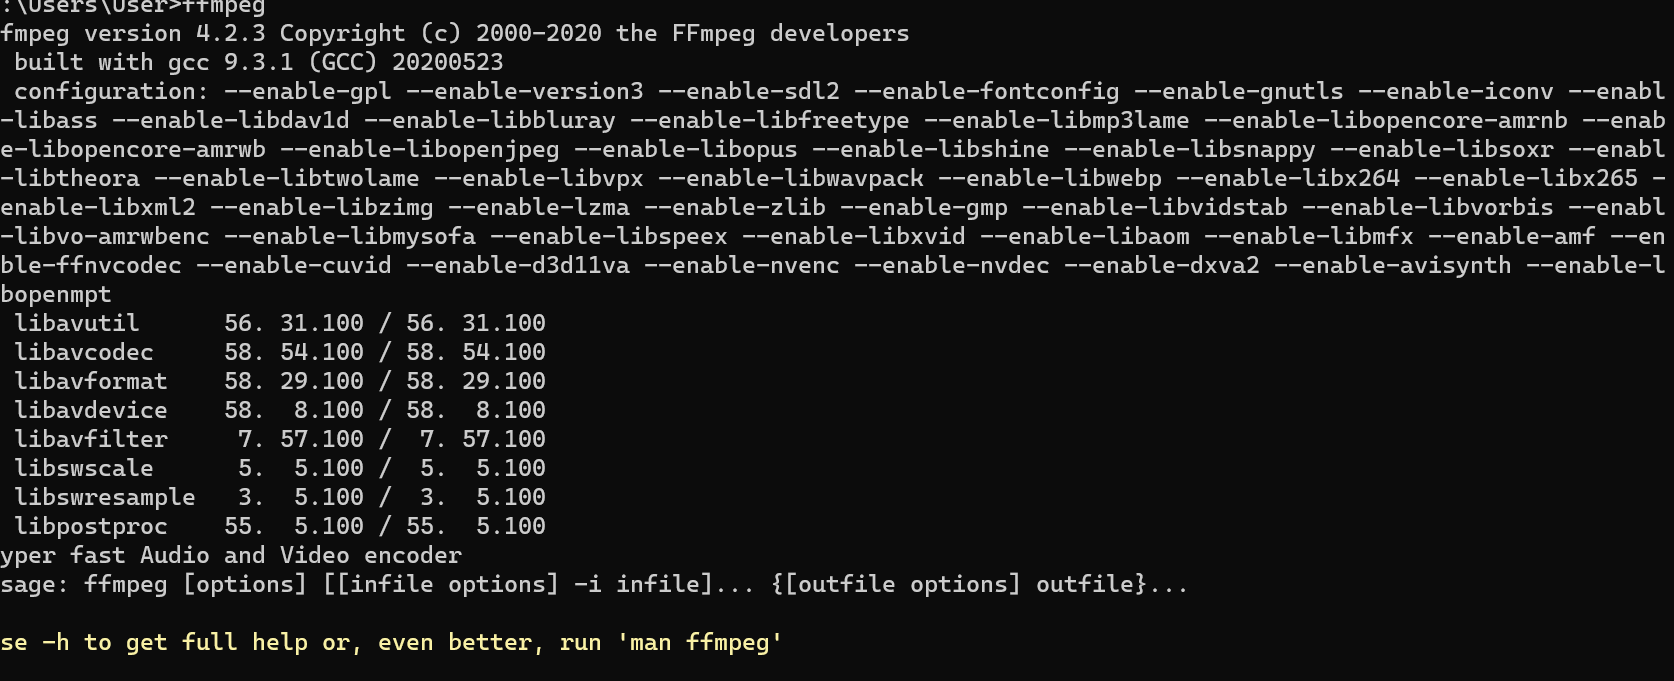
    Using FFMPEG to compress video


  • 1. Right click on empty space inside folder which contains video.
  • 2. Click more options >>Git bash>>.
  • 3. Then type > ffmpeg -i input_video -vcodec libx264 -b:v 1000k -vf scale=-2:1080 -acodec mp2 -b:a 256k -ar 48000 -ac 2 output_video.mp4 .
  • 4. And edit your names of video , initial and final >> Hit enter.
  • Note: The video have to be compressed because the optimum size of video to be uploaded for documentation is quite small and therefore the videos are compressed so that the weekly documentation storage size is not exceeded. Example given below: I used CMD to compress video after installing ffmpeg in my computer.


                                                    ffmpeg


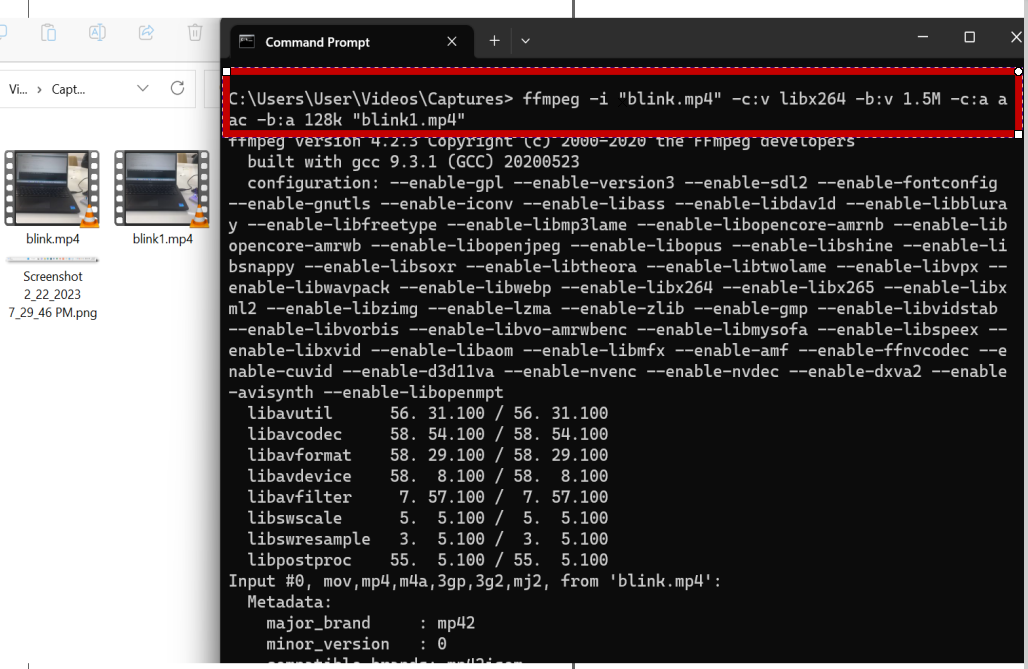
    Here, I have used CMD from computer directly to compress my video named blink by command as shown in the image.


                                                    ffmpeg


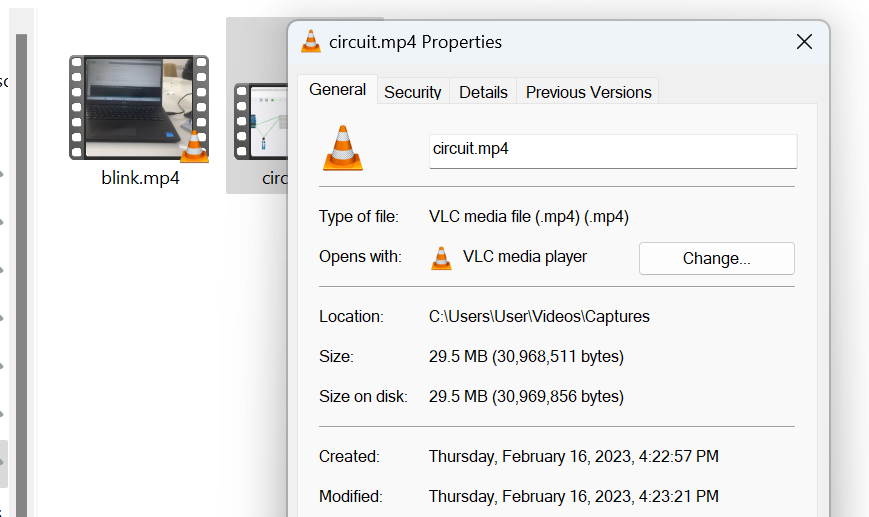
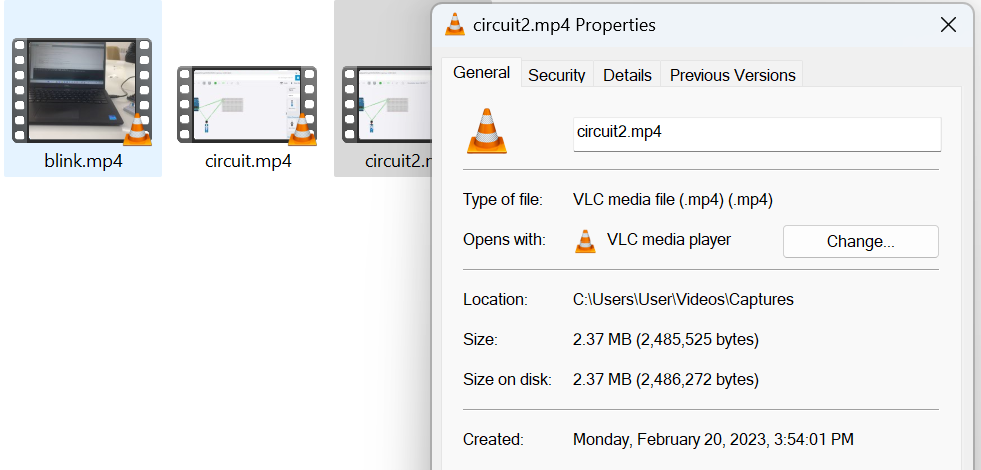
    Video size before compressing was like 29 MB and after compression in ffmpeg it was reduced to 2MB as shown below.


                                                    ffmpeg


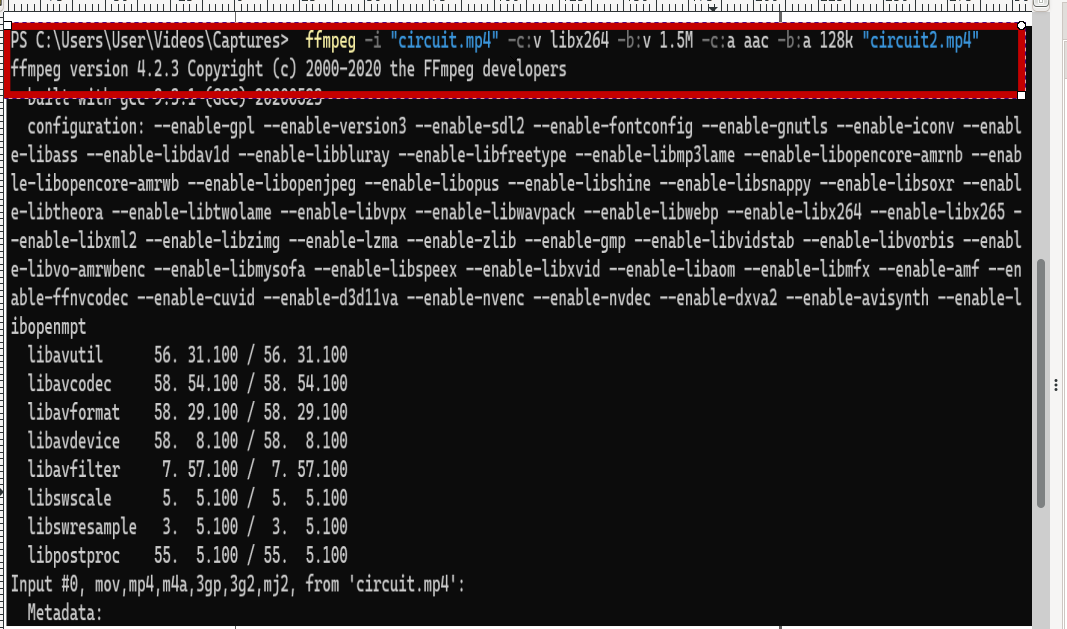
    Alternative to use ffmpeg from git terminal

  • 1. Open Git terminal
  • 2. Open directory by command > cd (your folder name)
  • 3. Then type > ffmpeg -i (input_video name) -vcodec libx264 -b:v 1000k -vf scale=-2:1080 -acodec mp2 -b:a 256k -ar 48000 -ac 2 (output_video).mp4 .
  • OR
  • 4. I used command : ffmpeg -i "circuit.mp4" -c:v libx264 -b:v 1.5M -c:a aac -b:a 128k "circuit1.mp4"
  • As the command image shown below and compression of video by status. Circuits are name of my videos, and compressed video automatically gets stored in the same folder.


                                                    successful compression
    
          
  • 4. And edit your names of video , initial and final >> Hit enter.
  • What is Raster and Vector Image?

    Basically, we deal with two types of images in Inkscape for 2D designs that is raster and vector. To easily differentiate between the two, you just need to see the blurred image when zoomed in will be the raster. On the other hand vector image remains same irrespective of zooming in or out, however both are useful in designs as raster image is good for engraving and other for cutting purposes. For more information visit Google.


                                                    raster vs vector


    2D Design in Inkscape


    For 2D designing, Inkscape was found to be effective since the file produced can be used in laser cutting, CNC shop-bot and vinyl cutting. Moreover, I already had basics of using from FABZERO and PREFAB training, and it appears to be comfortable for Fab Academy.
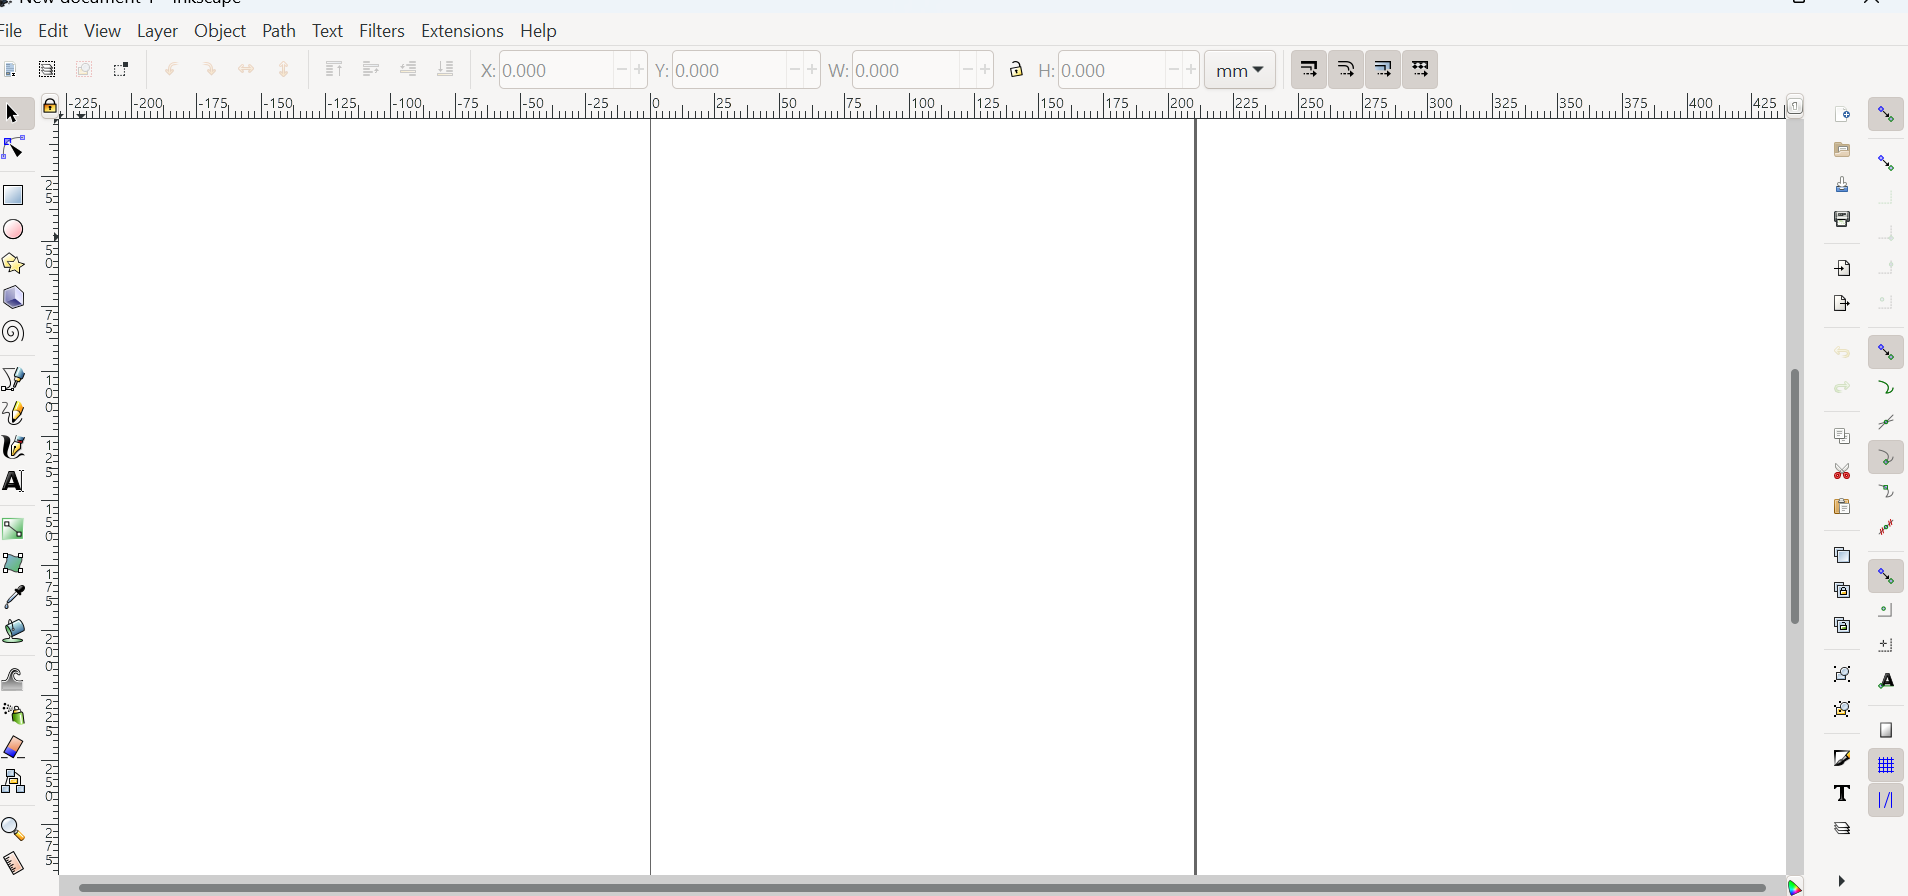
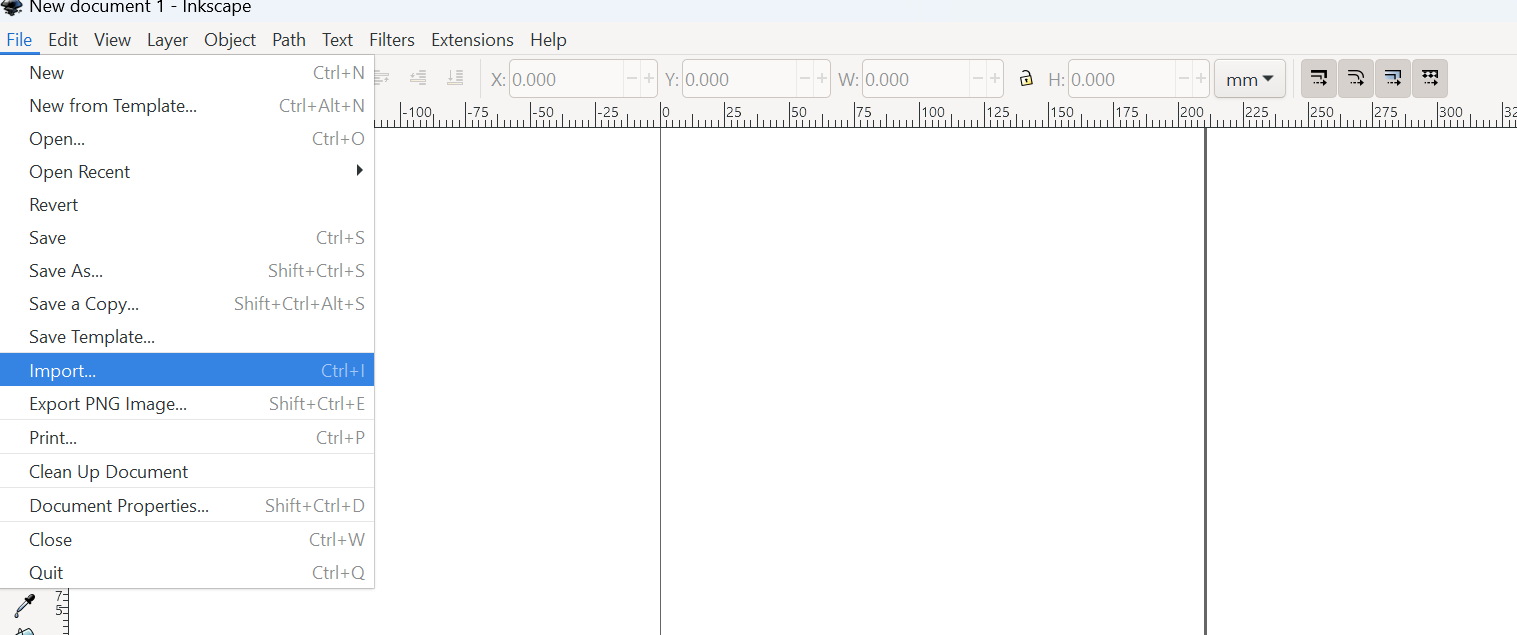
    Using Inkscape


  • Ctrl + N create new document.
  • Ctrl + O open a document.
  • Shift + Ctrl + E export to PNG.
  • Ctrl + I import bitmap or vector.
  • Ctrl + P print document.
  • Ctrl + S save document.
  • Shift + Ctrl + S save under a new name.
  • Shift + Ctrl + Alt + S save a copy.
  • 
          

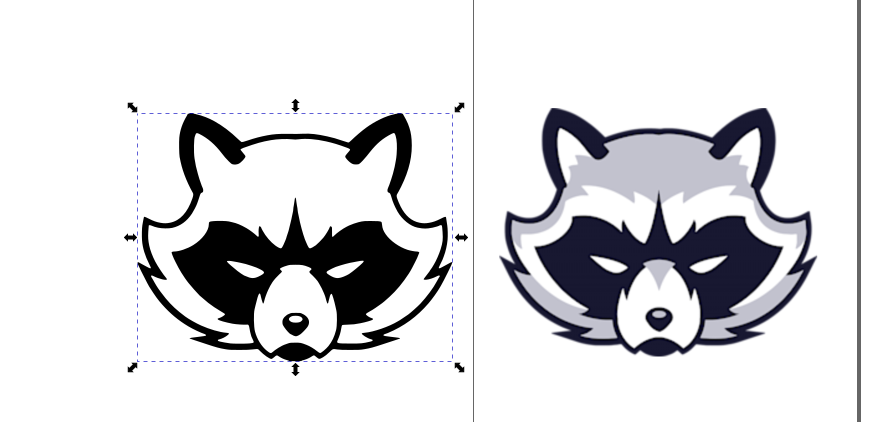
    Using Inkscape to vectorize from raster image.


    It is used to vectorized raster image an editing strokes for cutting and engraving. I was supposed to edit the image of my final project but I was not ready about my final project logo and I have shown example to use Inkscape to vectorize image.

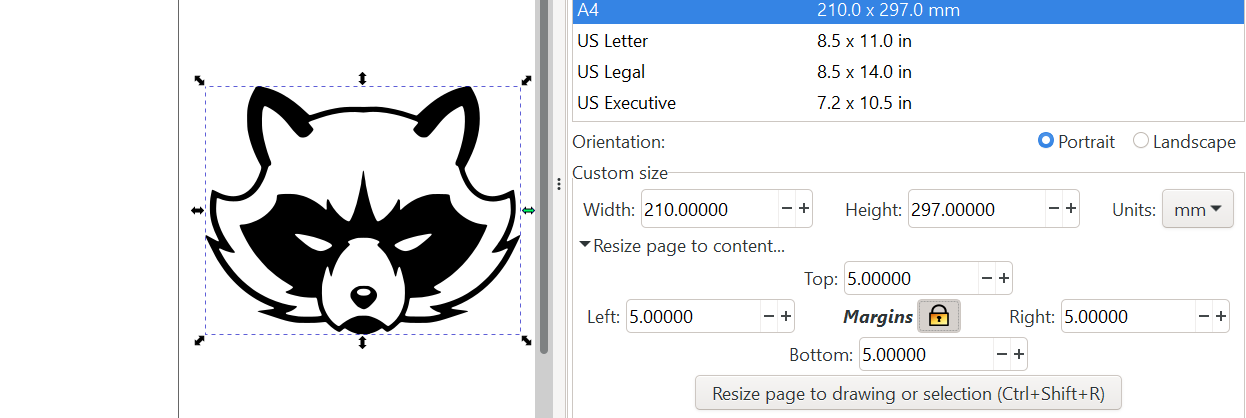
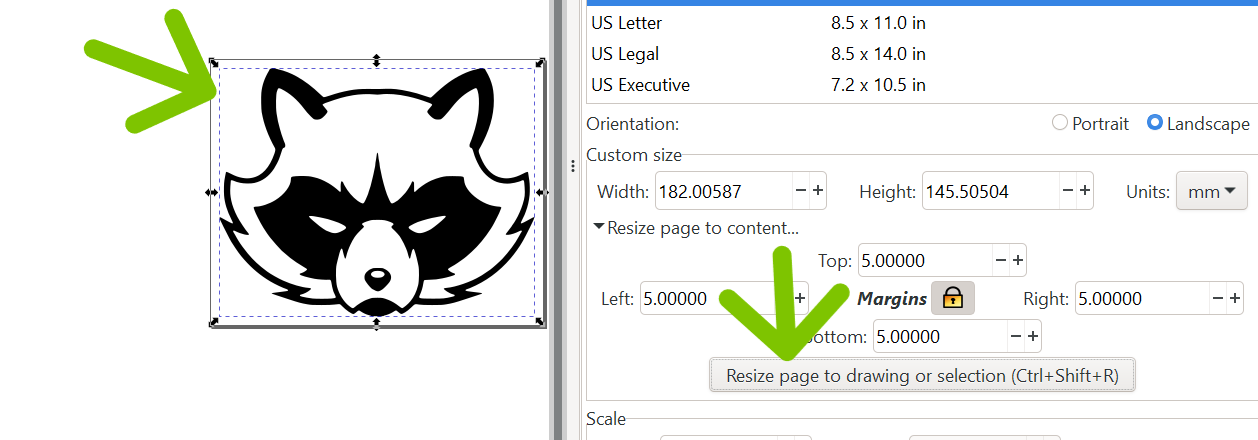
    Steps to vectorize and Editing in Inkscape

  • 1. Open Inkscape and following appears
  • 
          
                                                    raster vs vector
    
          
  • 2. Click on new document as shown by green arrow mark above.
  • 3. Working window like below appears
  • 
          
                                                    raster vs vector
    
          
  • 4. Click on file.
  • 
          
                                                    raster vs vector
    
          
  • 5. Then click Import.
  • 
          
                                                    raster vs vector
    
          
  • 6. Then choose the file that you want to vectorize.
  • 
          
                                                    raster vs vector
    
          
  • 7. Click on path and then trace bitmap.
  • 8. This window appears and then click on update and >>Apply, which gives two images as shown. From which first layer is vectorized and other raster. Click on same image and drag to other position to see two images.If you cannot differentiate, zoom in and see, the one which does not get blurred after zooming is vectorized image.
  • 
          
                                                    raster vs vector
    
          
  • 9. Click on raster image and delete.
  • 10. Drag vector image to working window>>File>>Document properties>>Resize page to content to fit the image with paper size.
  • 
          
                                                    raster vs vector
    
          
  • 11. Enter value 5mm in margin, this is to keep margin of your image from exterior paper size and then click on open lock icon which gets closed and 5mm appears in all other four corners i.e top, bottom, left and right.
  • 
          
                                                    raster vs vector
    
          
  • 12. Click on resize page to drawing selection and then your image and paper size appears with 5mm margin as shown by green arrow mark.
  • 
          
                                                    raster vs vector
    
          
  • 13. Go to file>>Save As- SVG format>>Choose folder to store>>write file name>>Save. Now your file is ready to be cut in vinyl, laser and shop-bot.
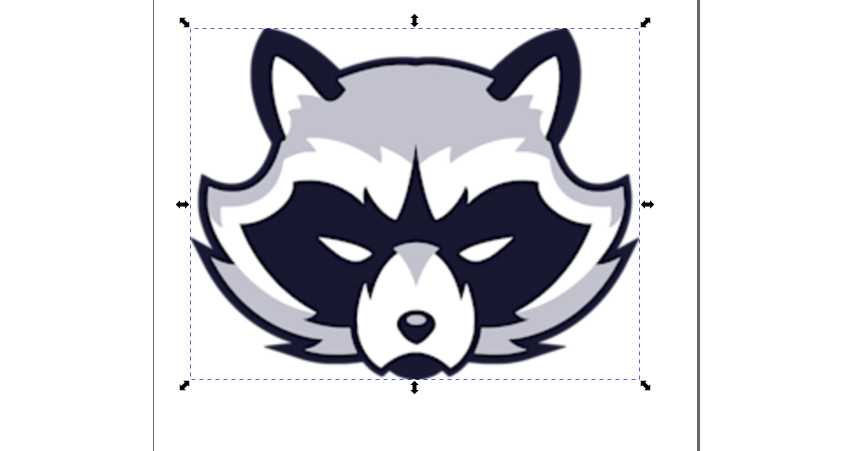
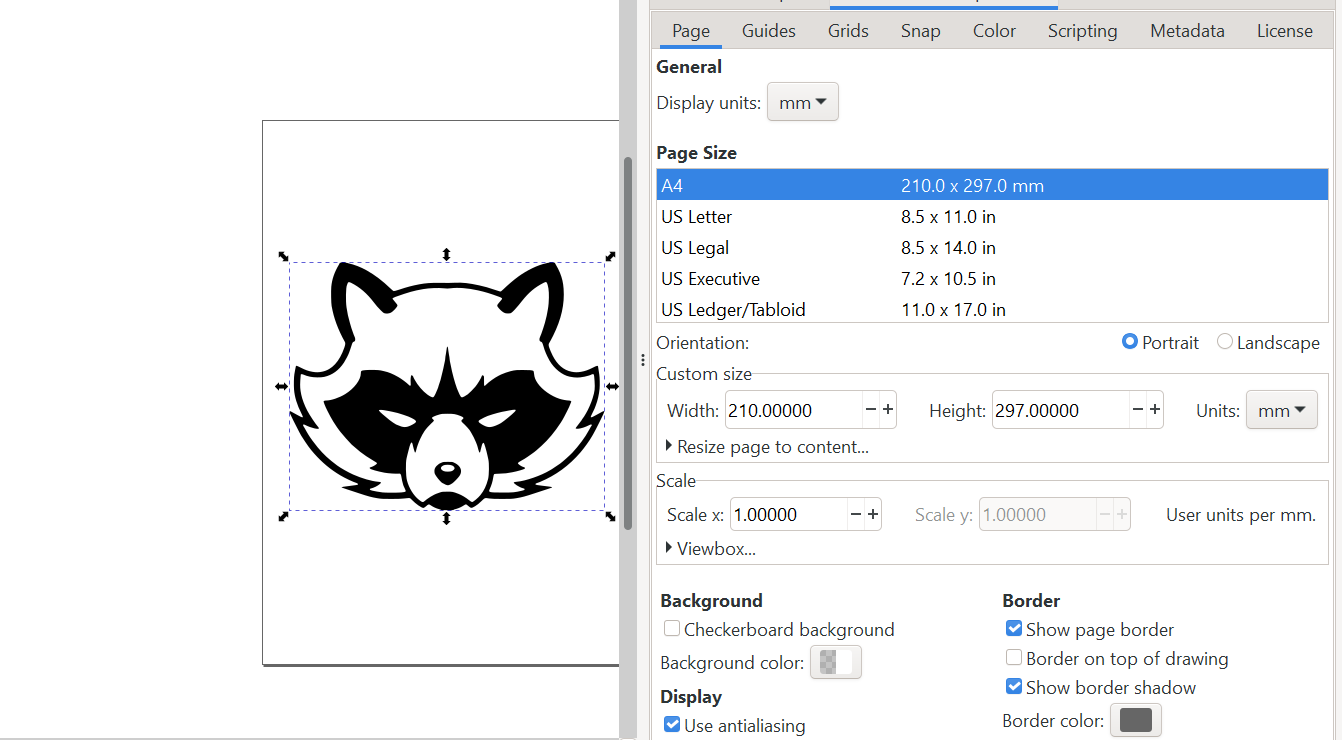
  • To learn more about inkscape and its details, please follow tutorial YouTube

    According to recommendations from Mr.George Tremmel during Asia review session, I have edited the image size with width parameter excluding height, as my image appears distorted when using both the parameters, i.e width and height.


    Alternative Software to Edit/Manipulate Images = (GIMP)


    I followed YouTube Tutorials to download and install GIMP. As recommended by Ms. Zina, I was supposed to use another software for 2D designs than Inkscape alone (or software for 2D Designs), so I chose to use GIMP at it was user friendly and easy for me it being free and open source. Since I was new to this, I followed YouTube Tutorial and down below is my progression of using GIMP.

  • 1: Working window of GIMP
  • 
          
                                                    Working Window of Gimp
    
          
  • 2: Go to File>>Open (to import image for editing)/ Short cut key : Ctrl+O OR New to create new image. Choose whichever option you like to go with.>>You will be directed to the folders containing your images and choose the folder>> Select image.
  • 
          
    Importing file in Gimp Importing image in Gimp
    
          
  • 3: Now your image is ready to edit and you can play around with commands. Before this after selection of image, you will be directed to page with convert prompt which you have to click on convert.
  • 
          
                                                    Importing image in Gimp
    
          
  • 4: After editing your image is ready to export or save. GIMP allows you to export the images you create in a wide variety of formats. It is important to realize that the only format capable of saving all of the information in an image, including layers, transparency, etc., is GIMP's native XCF format. Every other format preserves some image properties and loses others. It is up to you to understand the capabilities of the format you choose.
  • 5: GIMP has option to export as .xcf, and save as .jpg. I have added bottom layer in my image with statement for practice.
  • 
          
    Editing image in gimp Adding text Color added


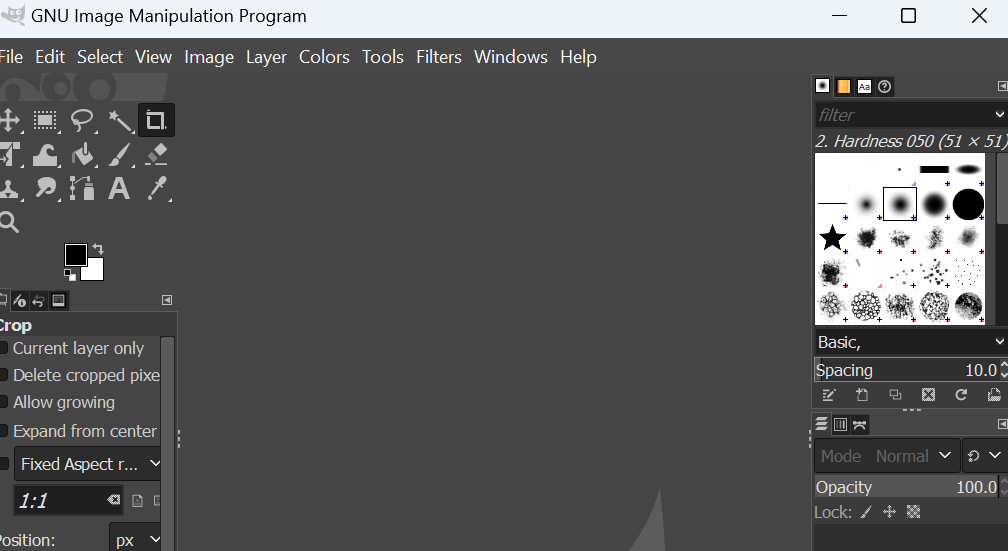
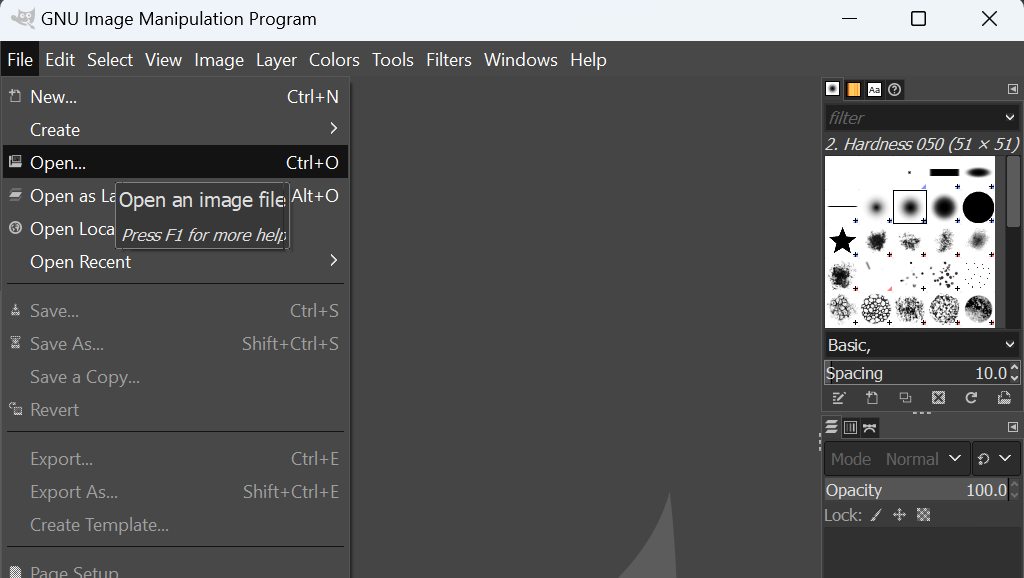
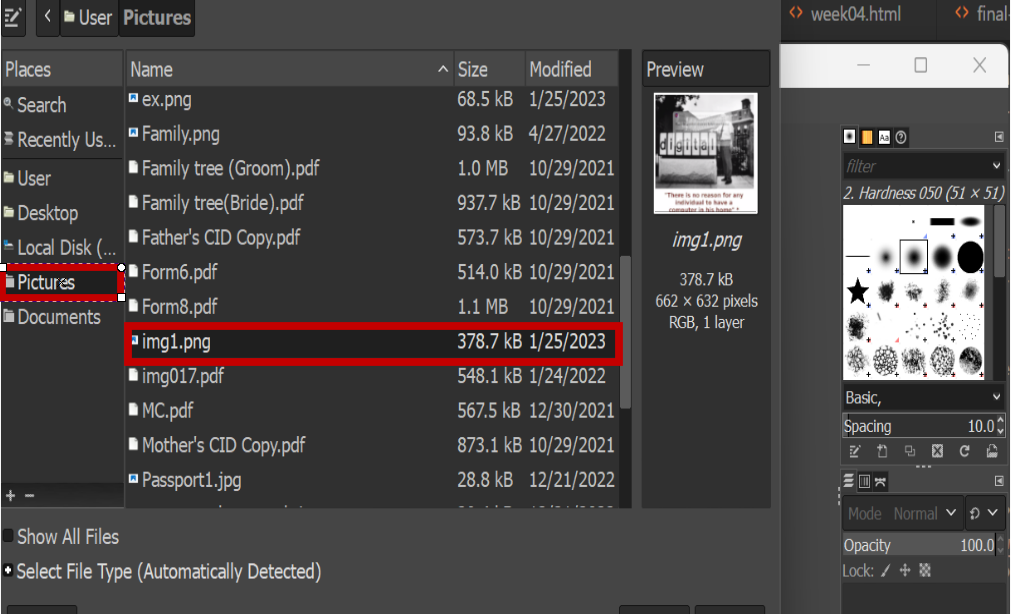
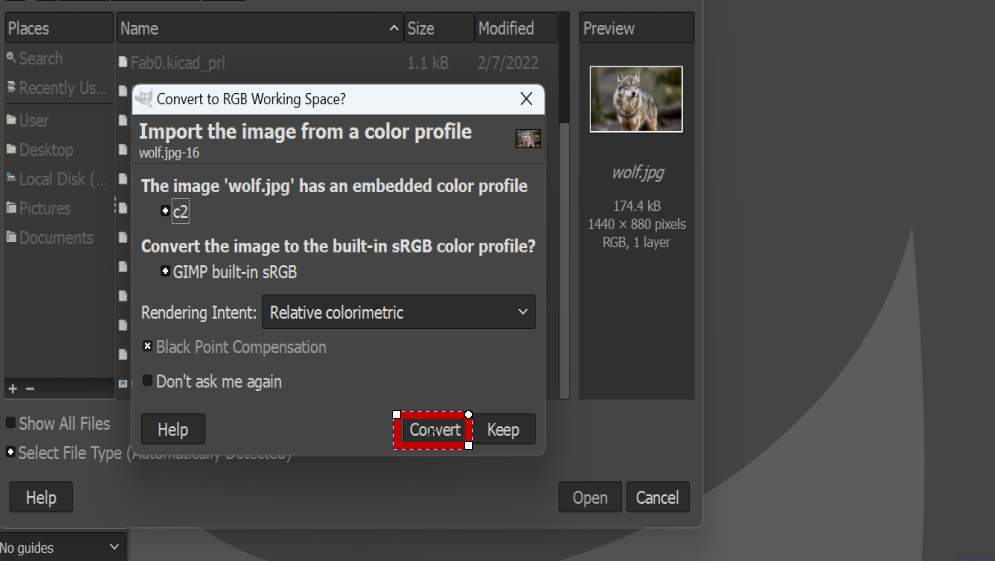
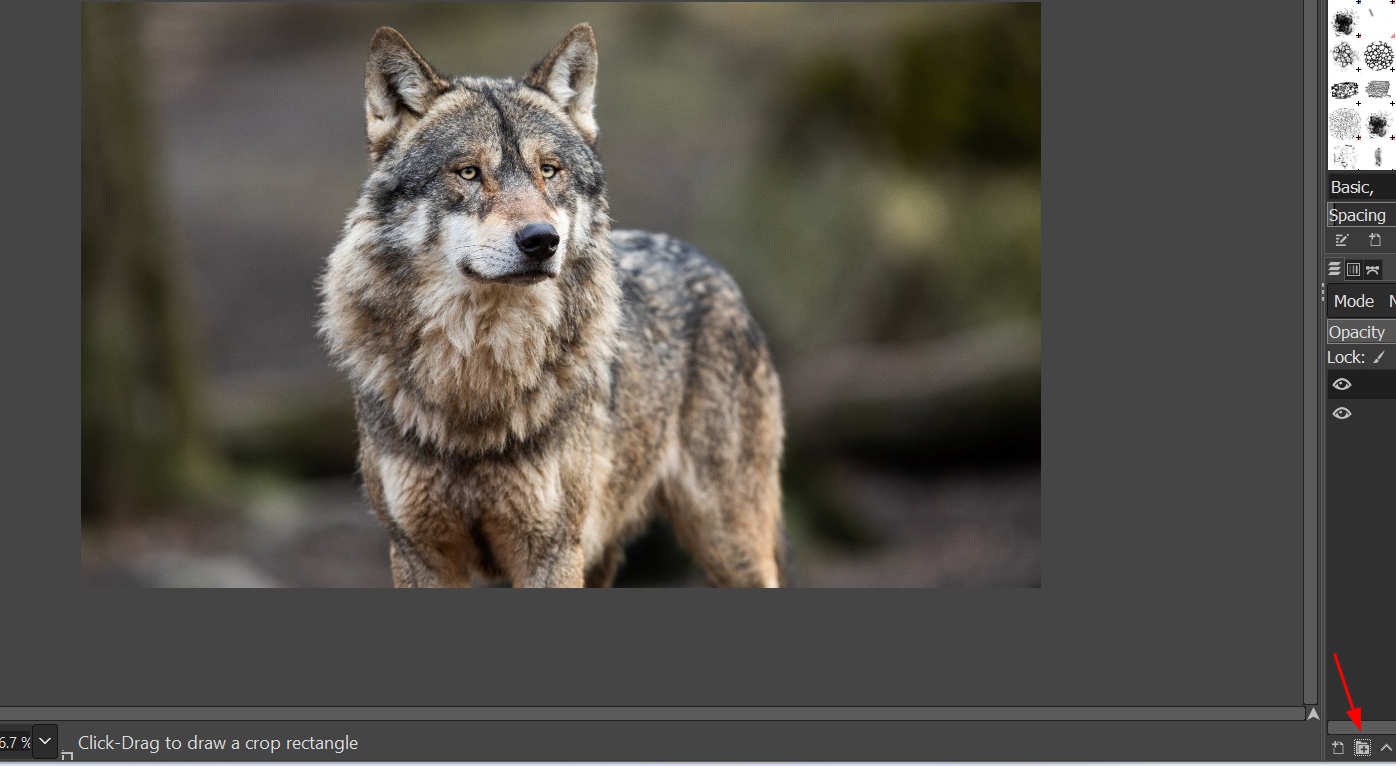
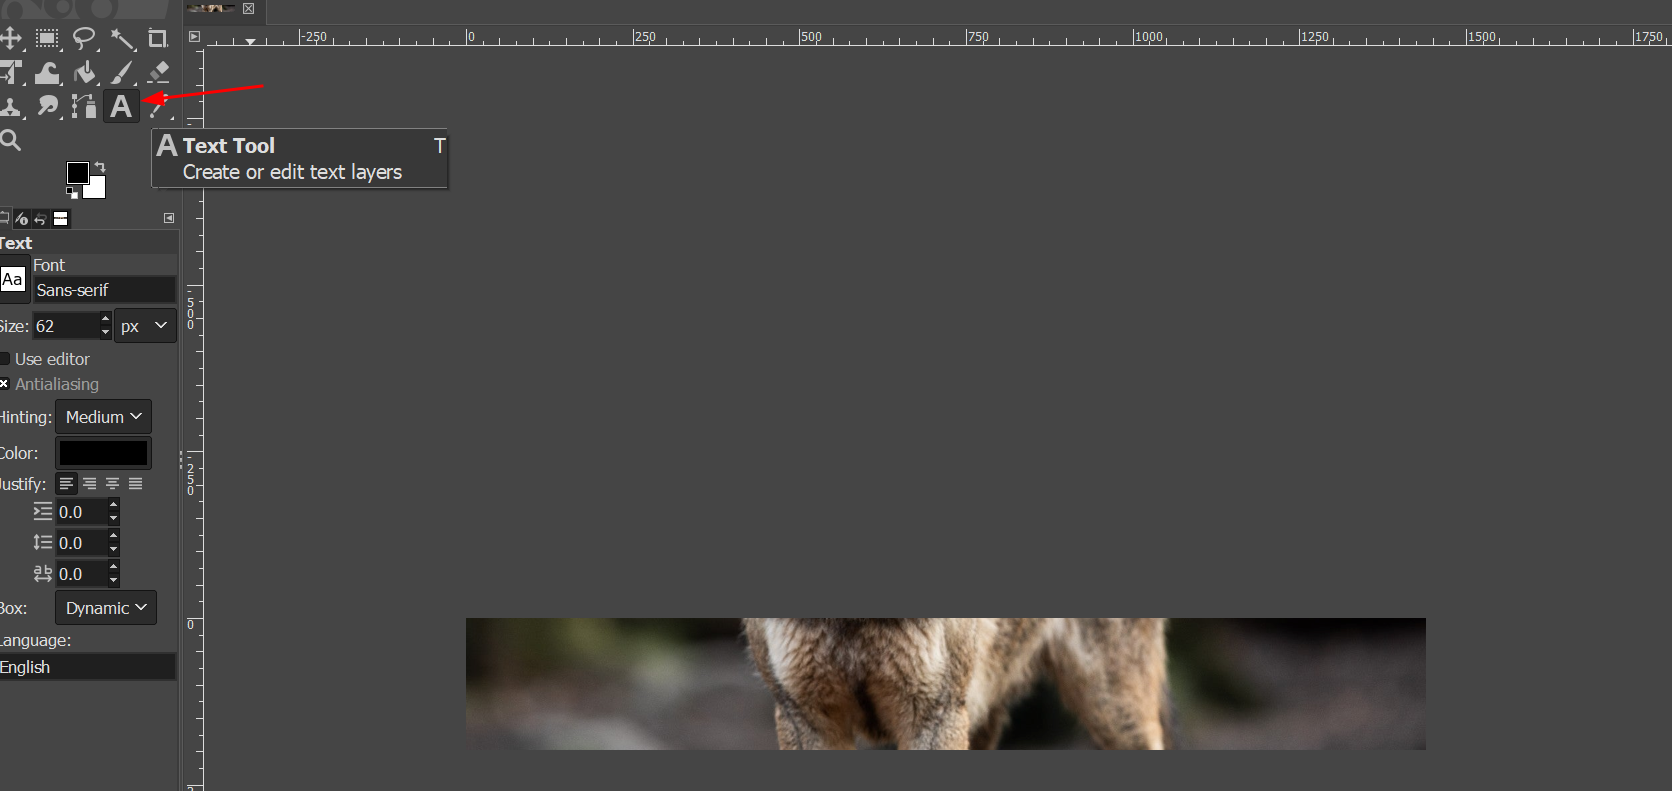
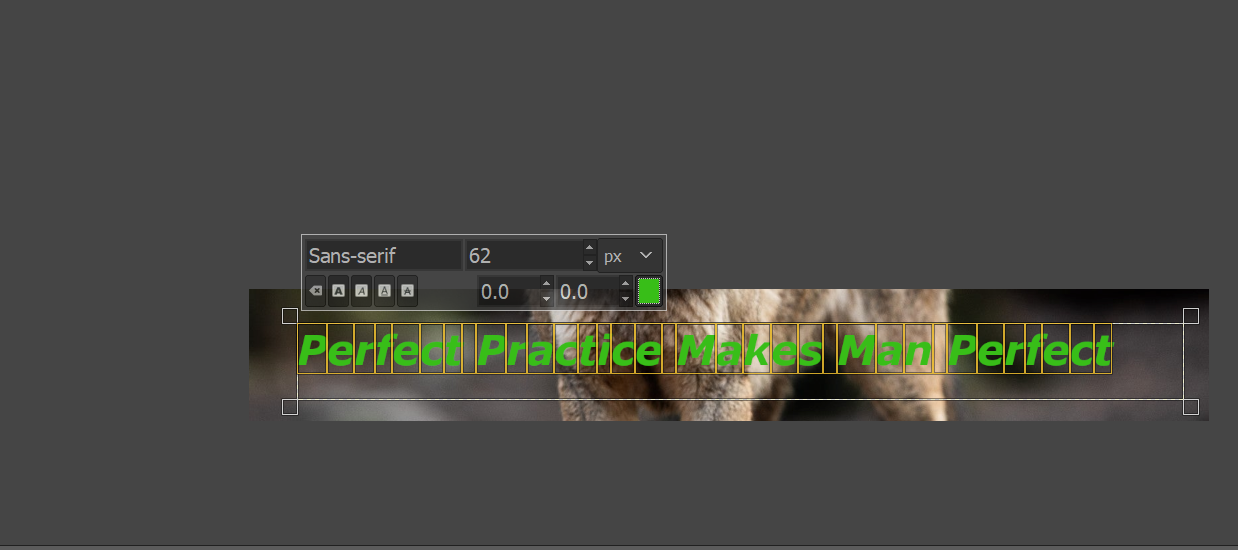
    Using GIMP to manipulate images


    I have heard about GIMP and its usage from peers and other sources but never gave try, now it ahs become mandatory for documenting my progress in FabAcademy. Some of the steps to using GIMP are:


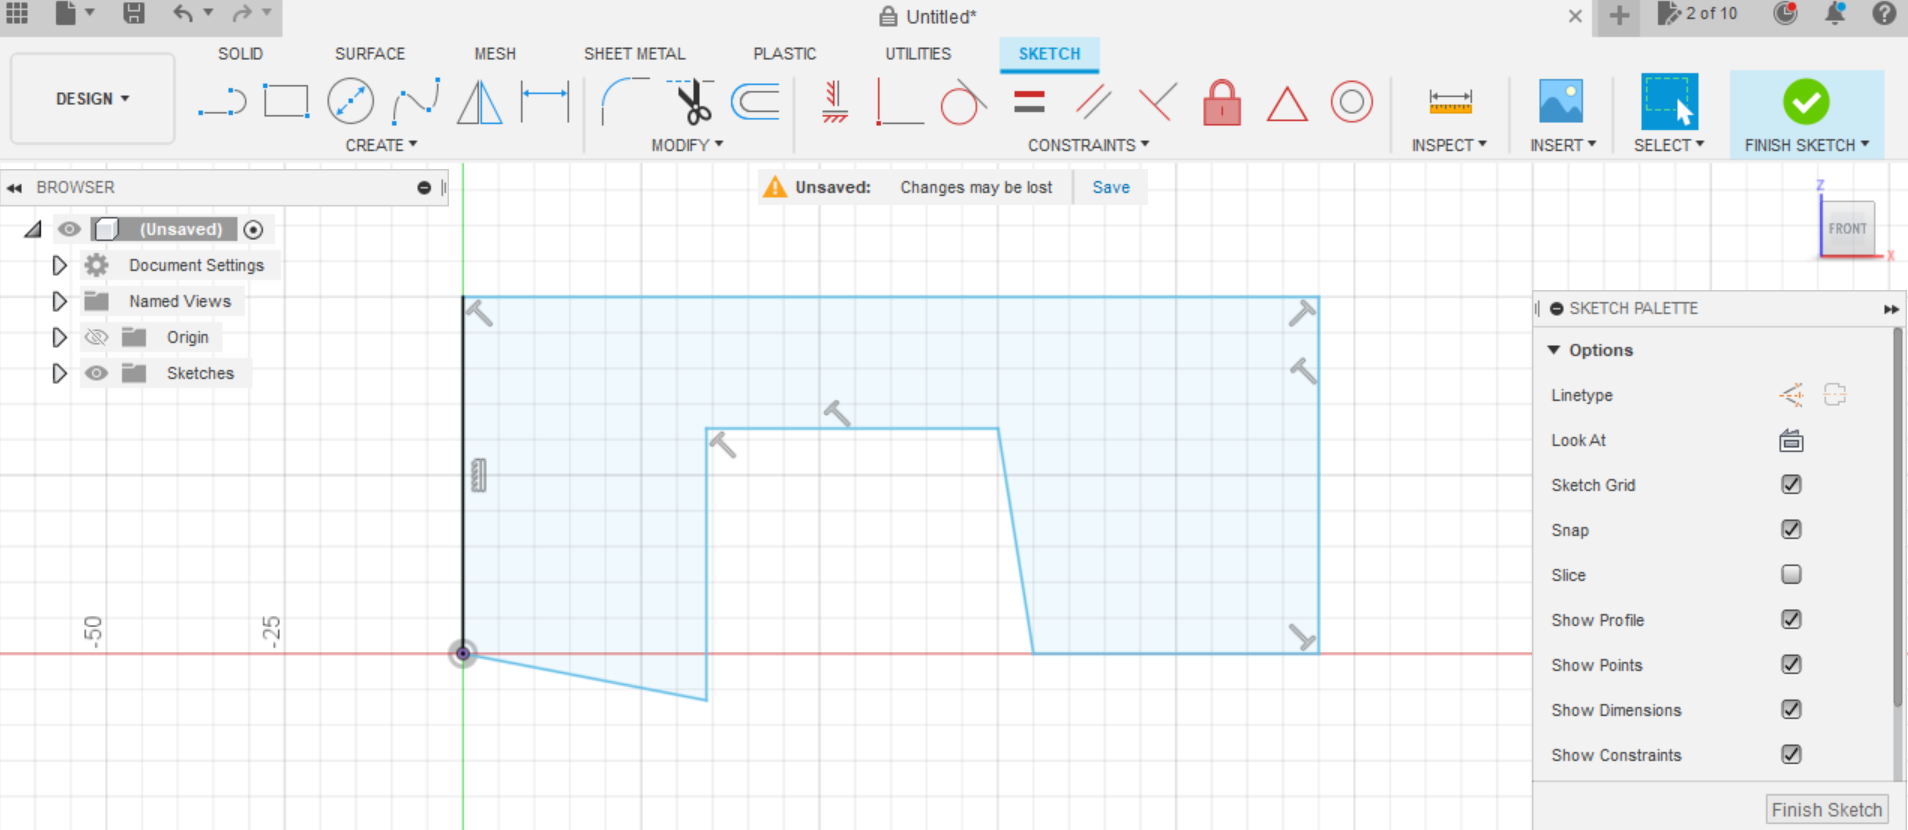
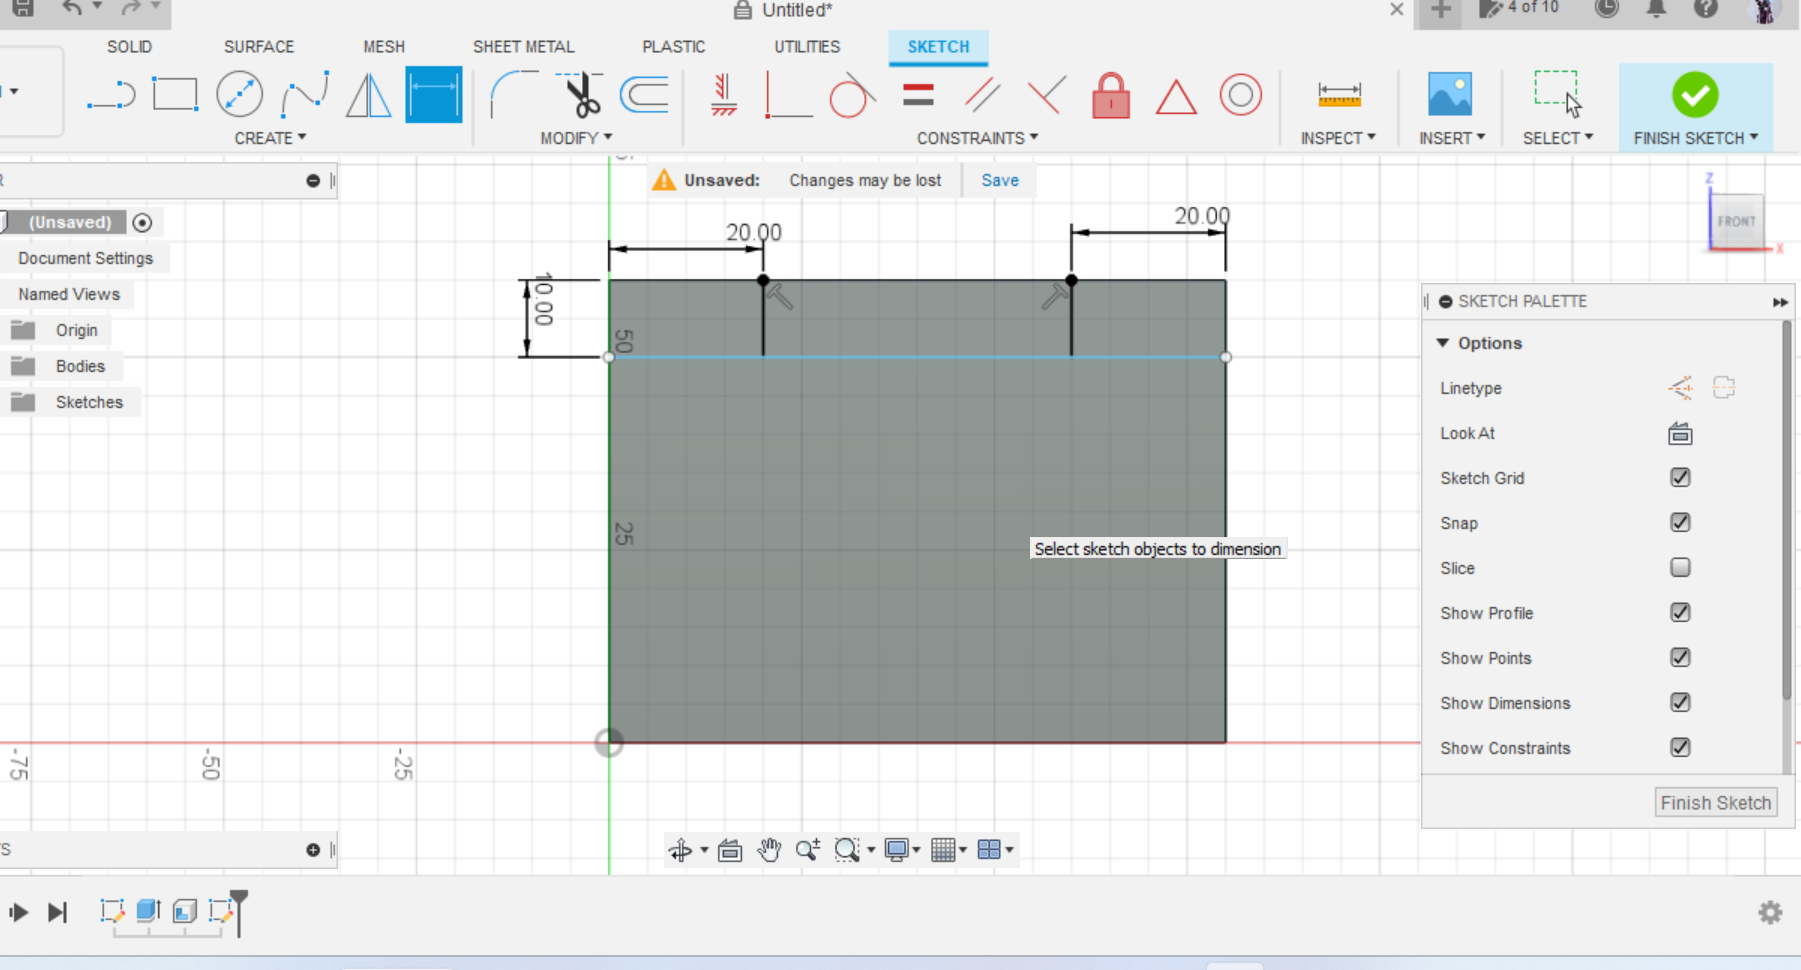
    Aspects of Parametric Design


    This week, we focussed on some of the aspects of 3D design in Fusion360 and parametric design is one of them. Basically, dealing with 2D sketch and setting some of the constraints like parallel, perpendicular and coincident. Using mathematical expressions to control the dimensions of each parameters.


                                                    raster vs vector


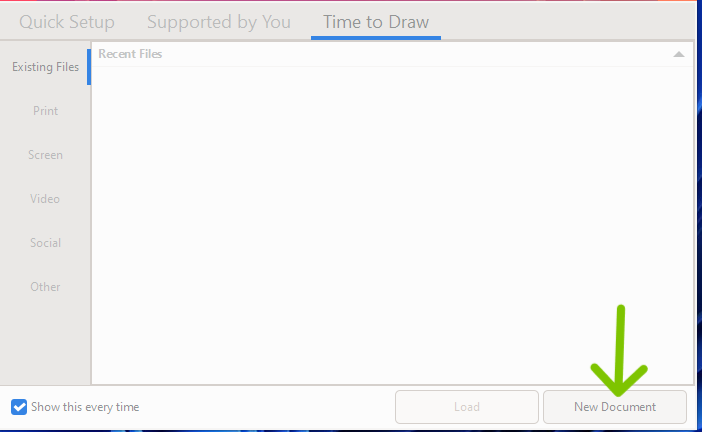
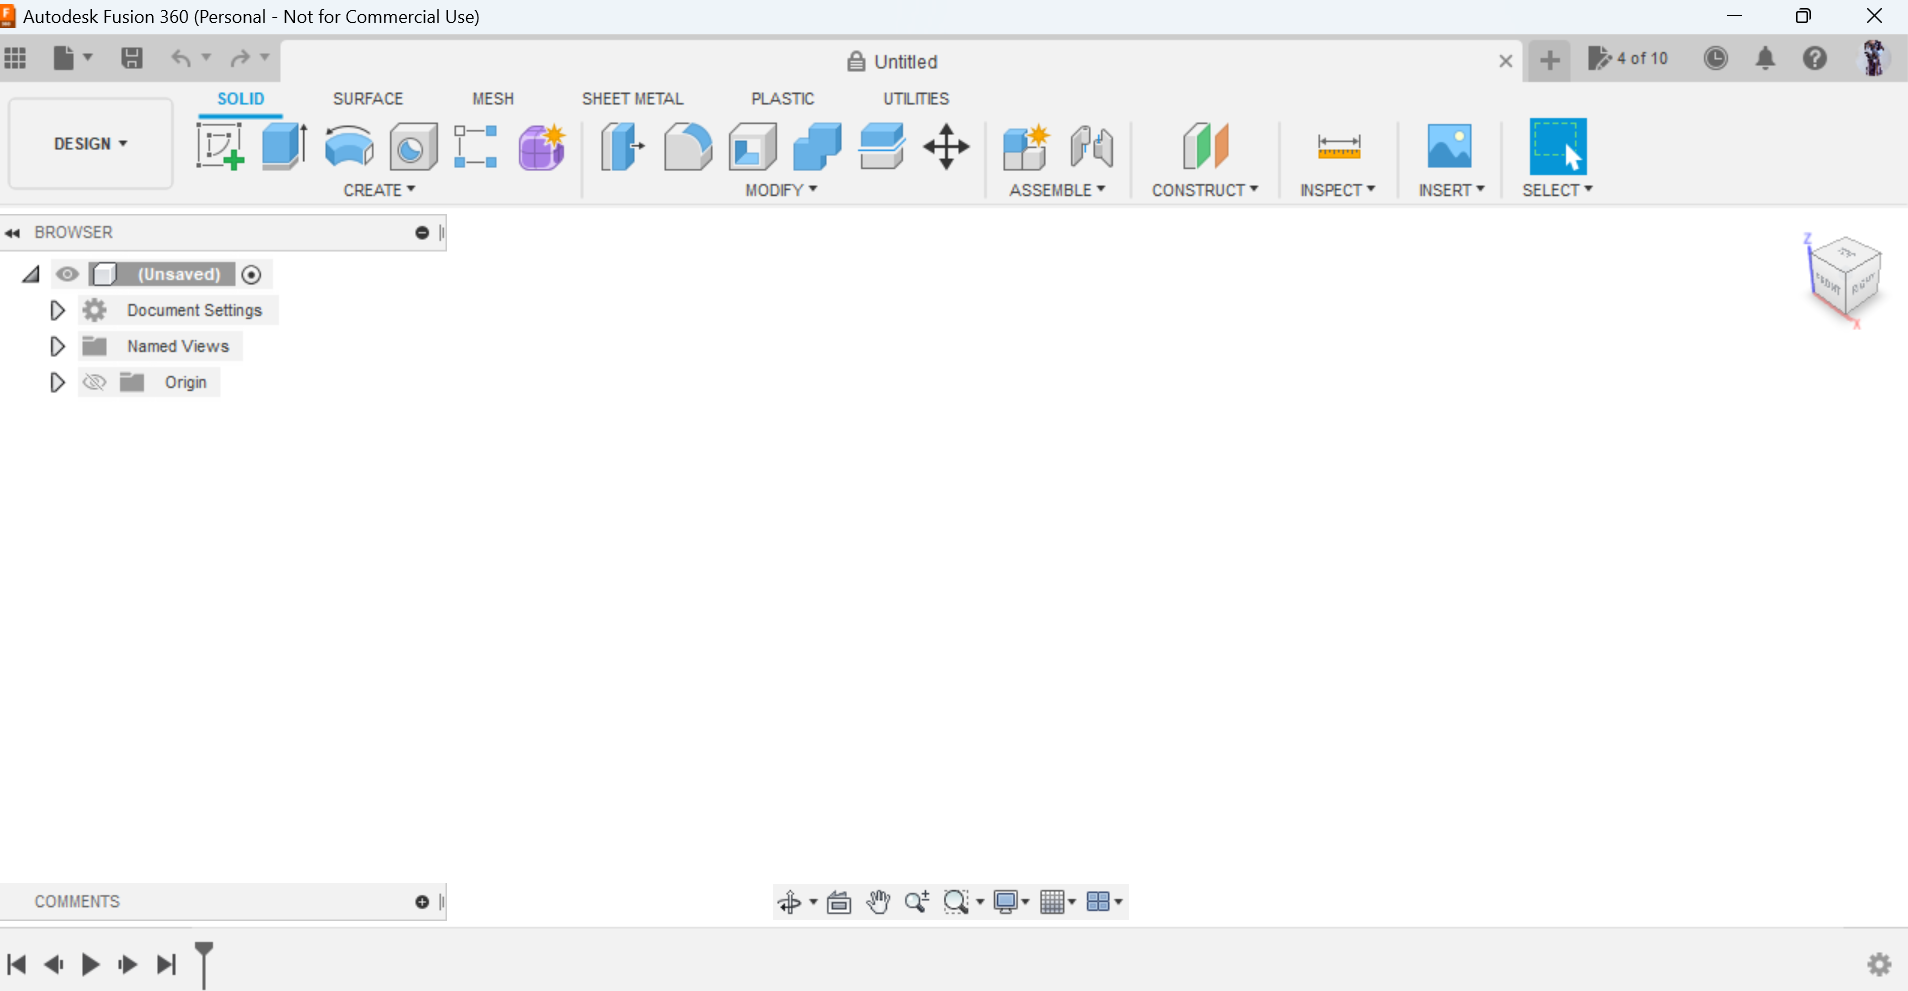
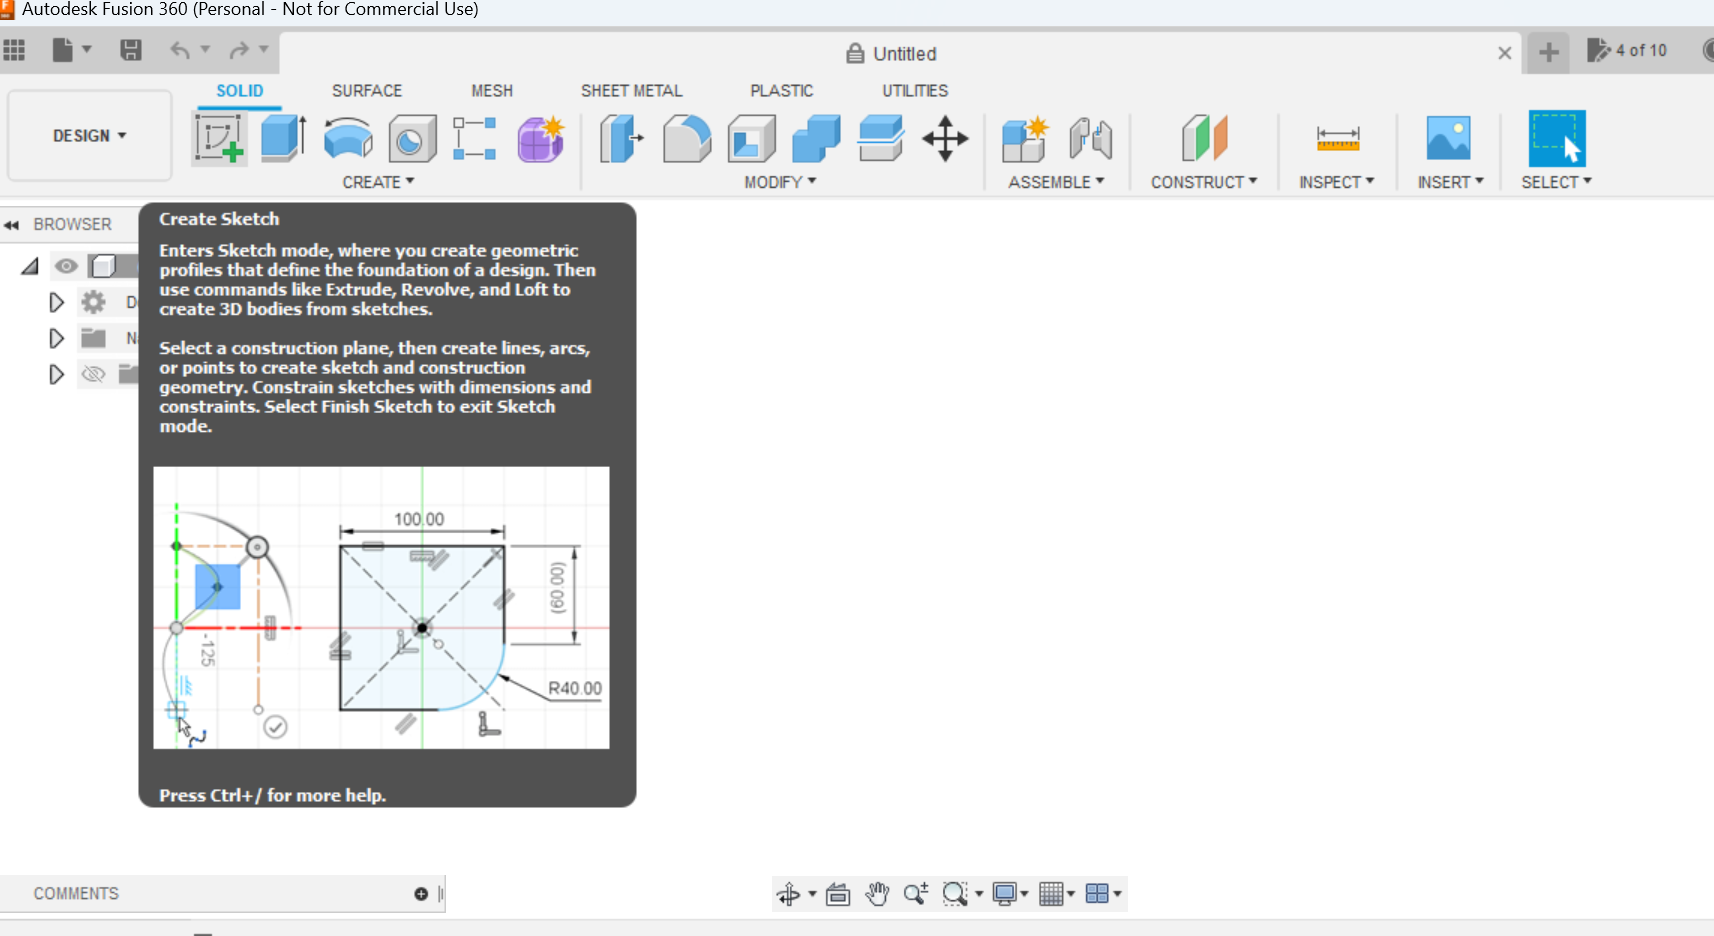
    Started Fusion 360 with virtual coaching from Mr.Rico and local guidance by Ms.Zina.


                                                    raster vs vector


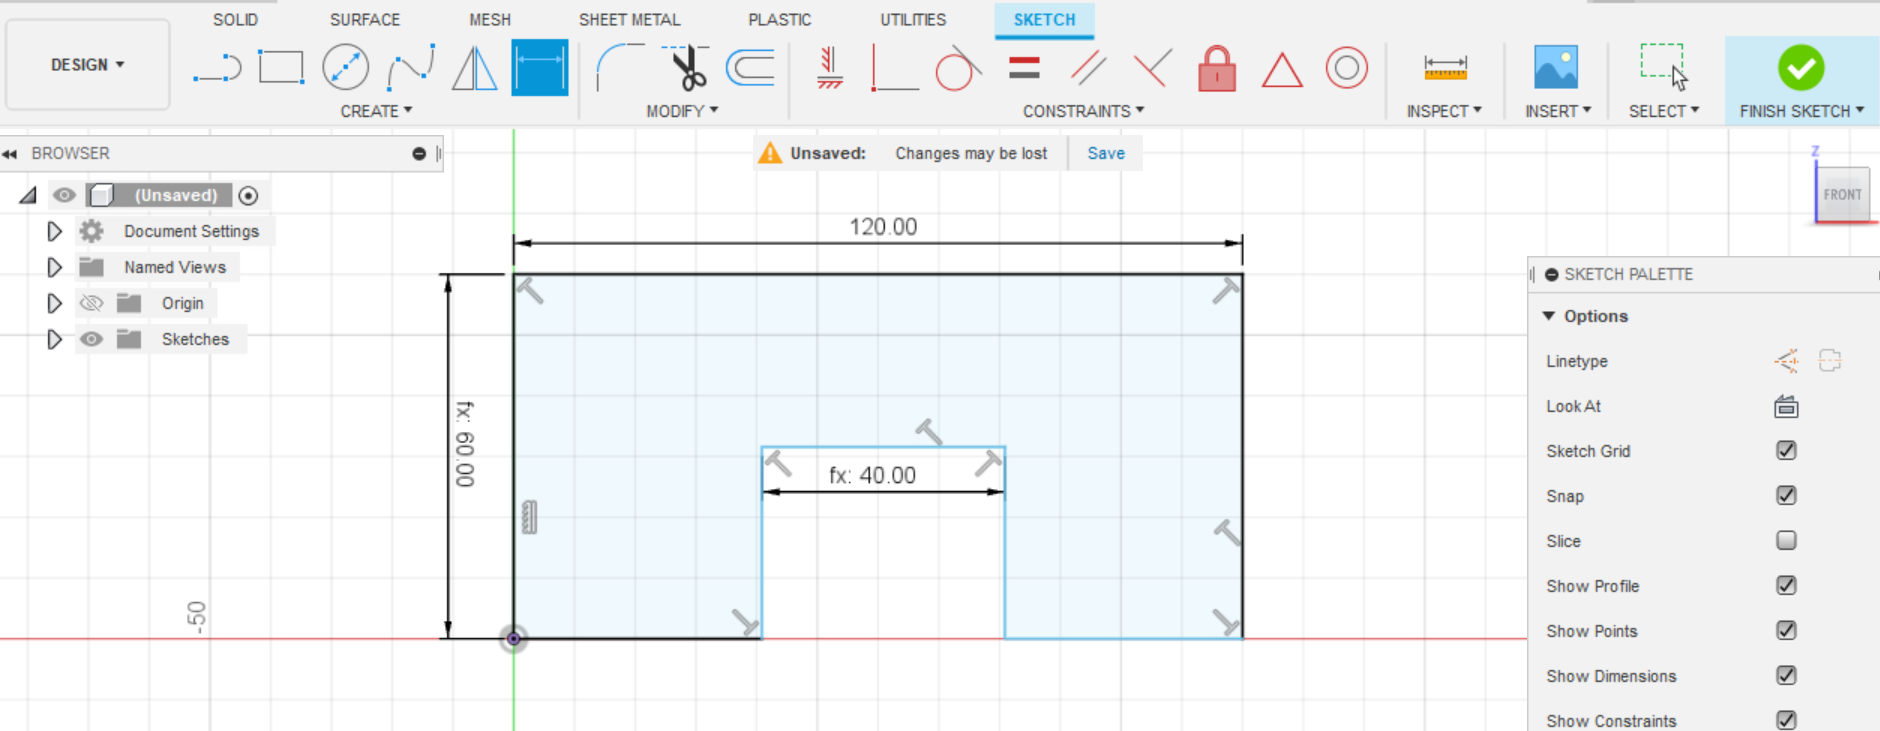
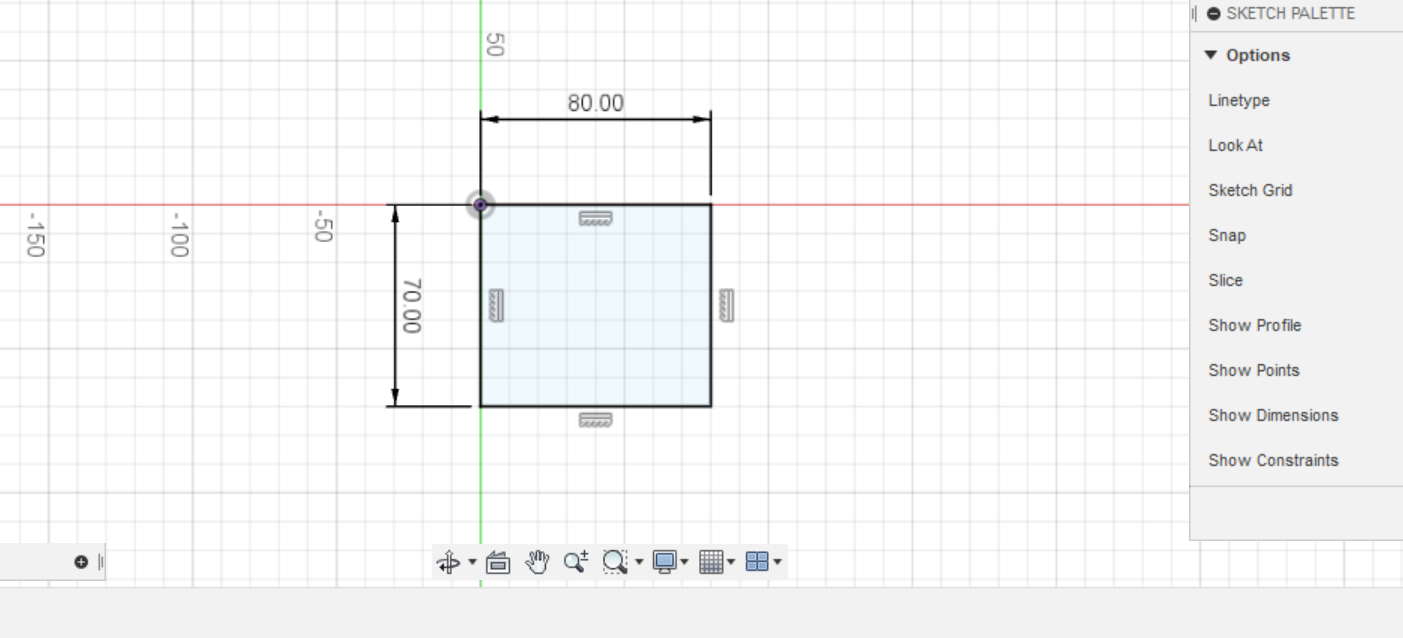
    This is the example of 2D sketch after setting all the dimensions using mathematical expression with constraints. With existence of these features, Fusion 360 is easier and faster to use for modelling and designing.


    3D Design in fusion 360 for final project


  • 1: Open Fusion 360 software
  • 
          
                                                    Fusion360 window
    
          
  • 2: Start design from sketch which I prefer the most. Click on create sketch in the create panel.
  • 
          
                                                    Fusion360 sketch
    
          
  • 3: Draw rectangle of 80*70 sq.mm after selecting the plane you want to draw sketch on.
  • 
          
                                                    Drawing REctangle
    
          
  • 4: Extrude at height of 60mm from rectangle to make solid box.
  • 
          
                                                    Extruding
    
          
  • 5: Click on shell under Modify panel to make hollow box and enter the wall thickness.Note: You can crate hollow box alternatively by drawing sketch in another form. Follow whichever is convenient.
  • 
          
                                                    Creating Hollow box
    
          
  • 6: Choose the face on which you want to construct holder point(hinge) like shown below and draw sketch>>Extrude. I selected front face.
  • 
          
    Hinge Construction Hinge Construction
    
          
  • 7: Now on side of hinge boxes draw small circles to create hole by extruding in negative direction to serve as holder.
  • 
          
                                                    Hinge Hole Construction
    
          
  • 8: Now round all corners by clicking on Fillet under modify panel at radius convenient to your requirement. Note: You can rotate your drawing by clicking mouse scroll button+ Shift Key. Then my construction of box is ready as shown by video below.
  • 
          
                                                    Filleting


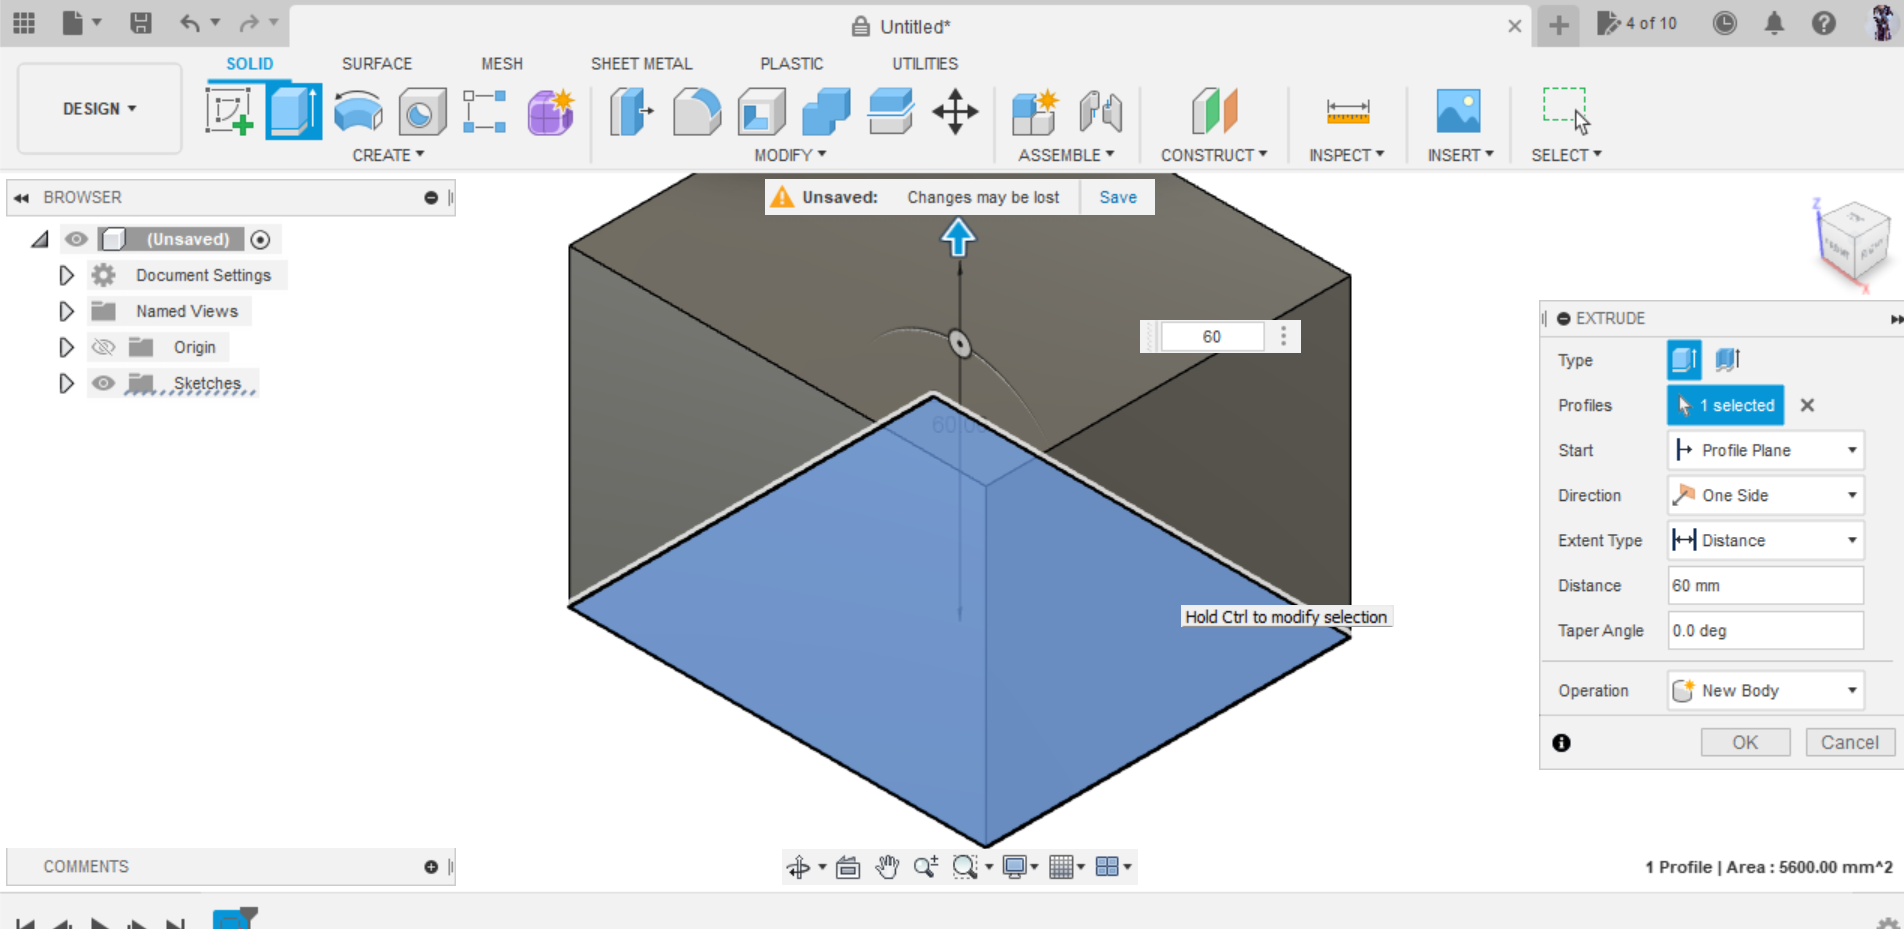
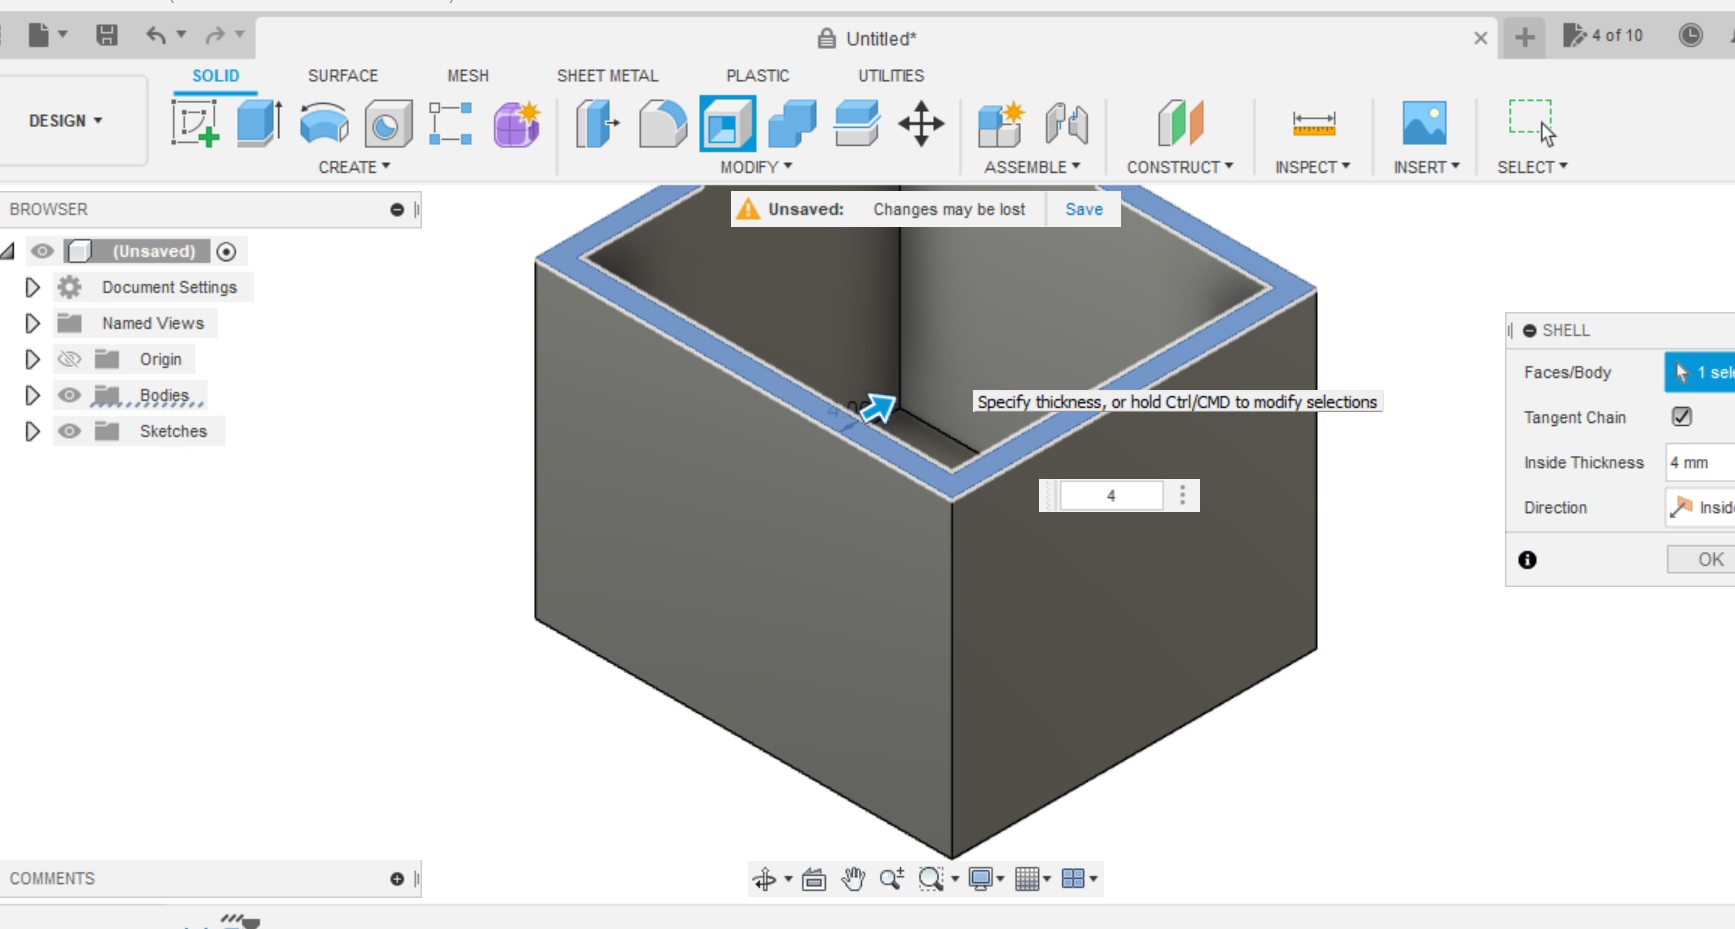
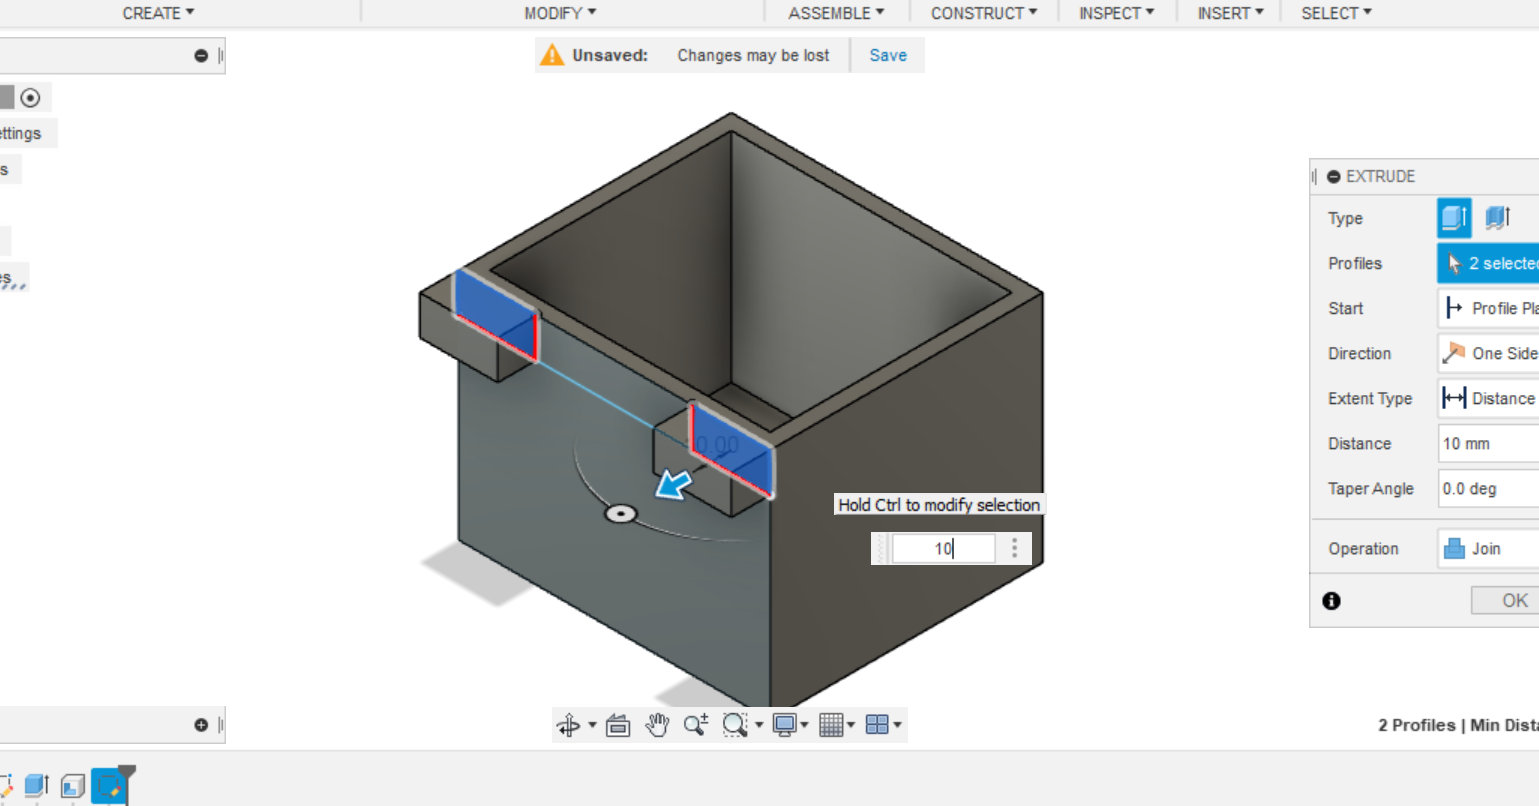
    You need to record video of your working in Inkscape and Fusion for documentation and to record video from your PC in windows, use the key "WINDOW + ALT + R. Although I am fluent with 123D design software, I am using fusion 360 for it having rendering, simulation and animation features in contrast to 123D design. I have started learning basics of fusion 360 by designing casing for my final project car detection device and recorded the video. I suggest to follow tutorial on YouTube for beginner to advanced practices.


    Recording of My First model design in Fusion360 for Final Project


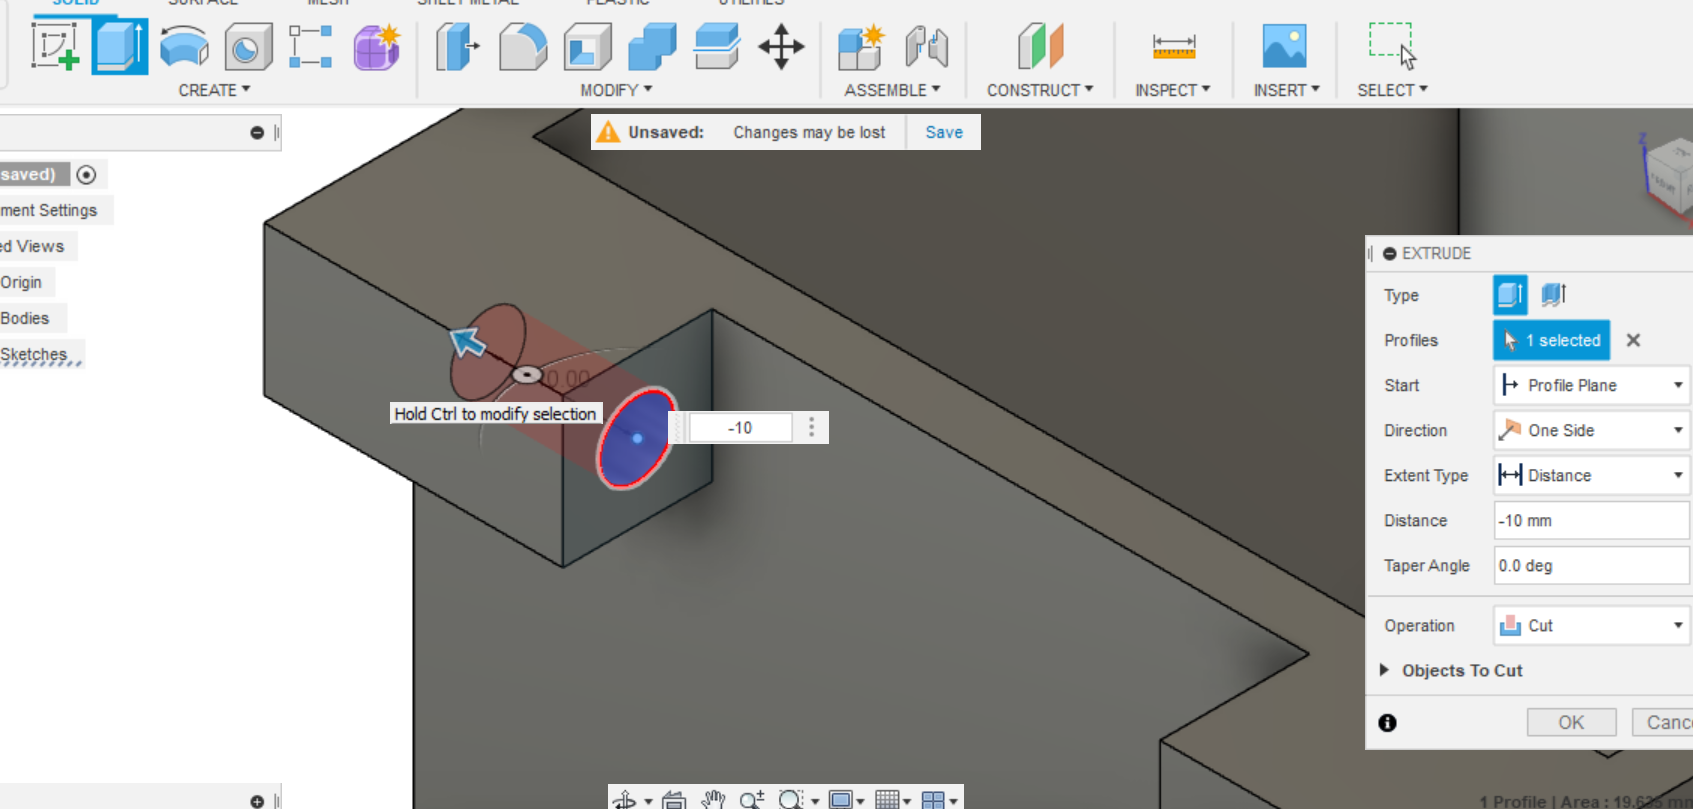
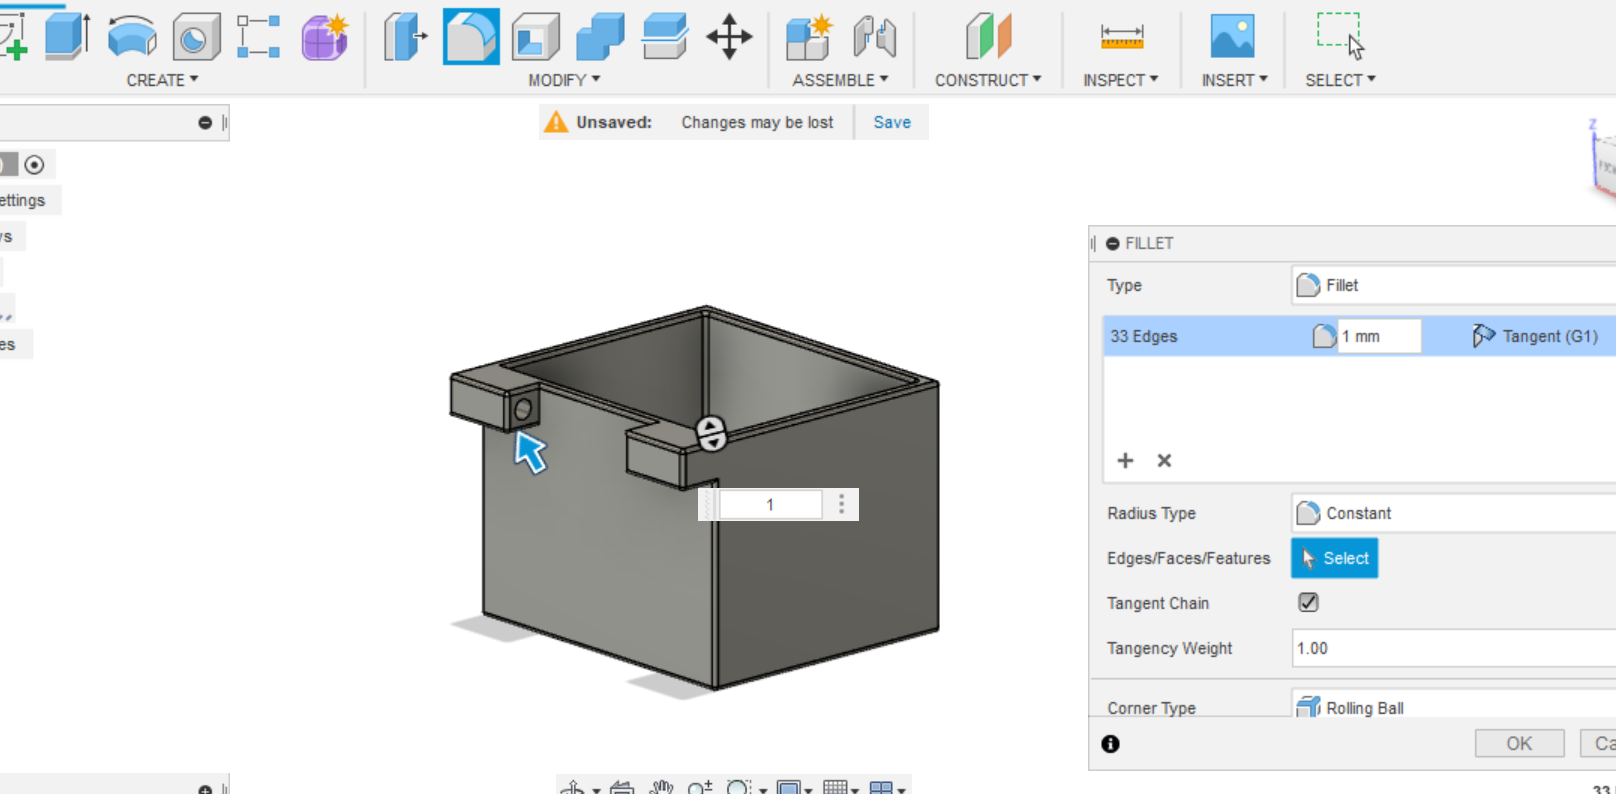
    This is the design of base casing of car detection device that is to be installed on dash boards of any car. However, this is not the final design, and it can be modified to make it simpler, small and efficient. When designing this I learned about crating new project, using sketch to extrude to make 3D models, aspects of parametric design, using fillet etc, lofting and many more.


    Alternative software to 3D Design, 123D Design


    I used 123D design software as it has similar features to that of TinkerCAD and some of the captures of my work in this as shown below.


    Work Flow of 123D Design


  • 1: Open the Application window of 123D design
  • 
          
                                                    123D window
    
          
  • 2: Go to primitives icon with box and then box as shown by green arrow marks in image below, after that enter the required length, width and height as indicated by arrow marks to design name card. OR Start from 2D Sketch which I prefer the most as shown by next image below. Go to Sketch icon shown by arrow marks >>Choose rectangle and enter the length and width by pressing tab key on your computer to fix the digits.
  • 
          
    Starting name-card design Starting name-card design sketch
  • 3: Click on off set after creating rectangle of required size as indicated by green arrow mark to create another bigger of smaller rectangle.
  • 
          
                                                    Starting name-card design
    
          
  • 4: Then click on extrude icon and hover around your 2D sketch and it will turn black border line. And extrude(pull) to a required height.
  • 
          
    Extruding Hovering Height
    
          
  • 5: You can change the view of your design by clicking on top right corner of window having house icon shown shown by green arrow. Now go to Text and choose the face on which you want your text and type the text you want to appear on name-card>>OK. Then align text by clicking and holding on red box.Note: You can also change the style and size of text from that panel only.
  • 
          
    Texting Text Align
    
          
  • 6: Extrude text after clicking on text.
  • 
          
                                                    Text Extrude
    
          
  • 7: Click on fillet button under modify icon and enter the fillet radius as required to round the sharp corners.
  • 
          
    Filleting Fillet
    
          
  • 8: The name-card is ready and export 3D as STL or DXF/DWG under 123D Design drop down.
  • 
          
                                                    name-card


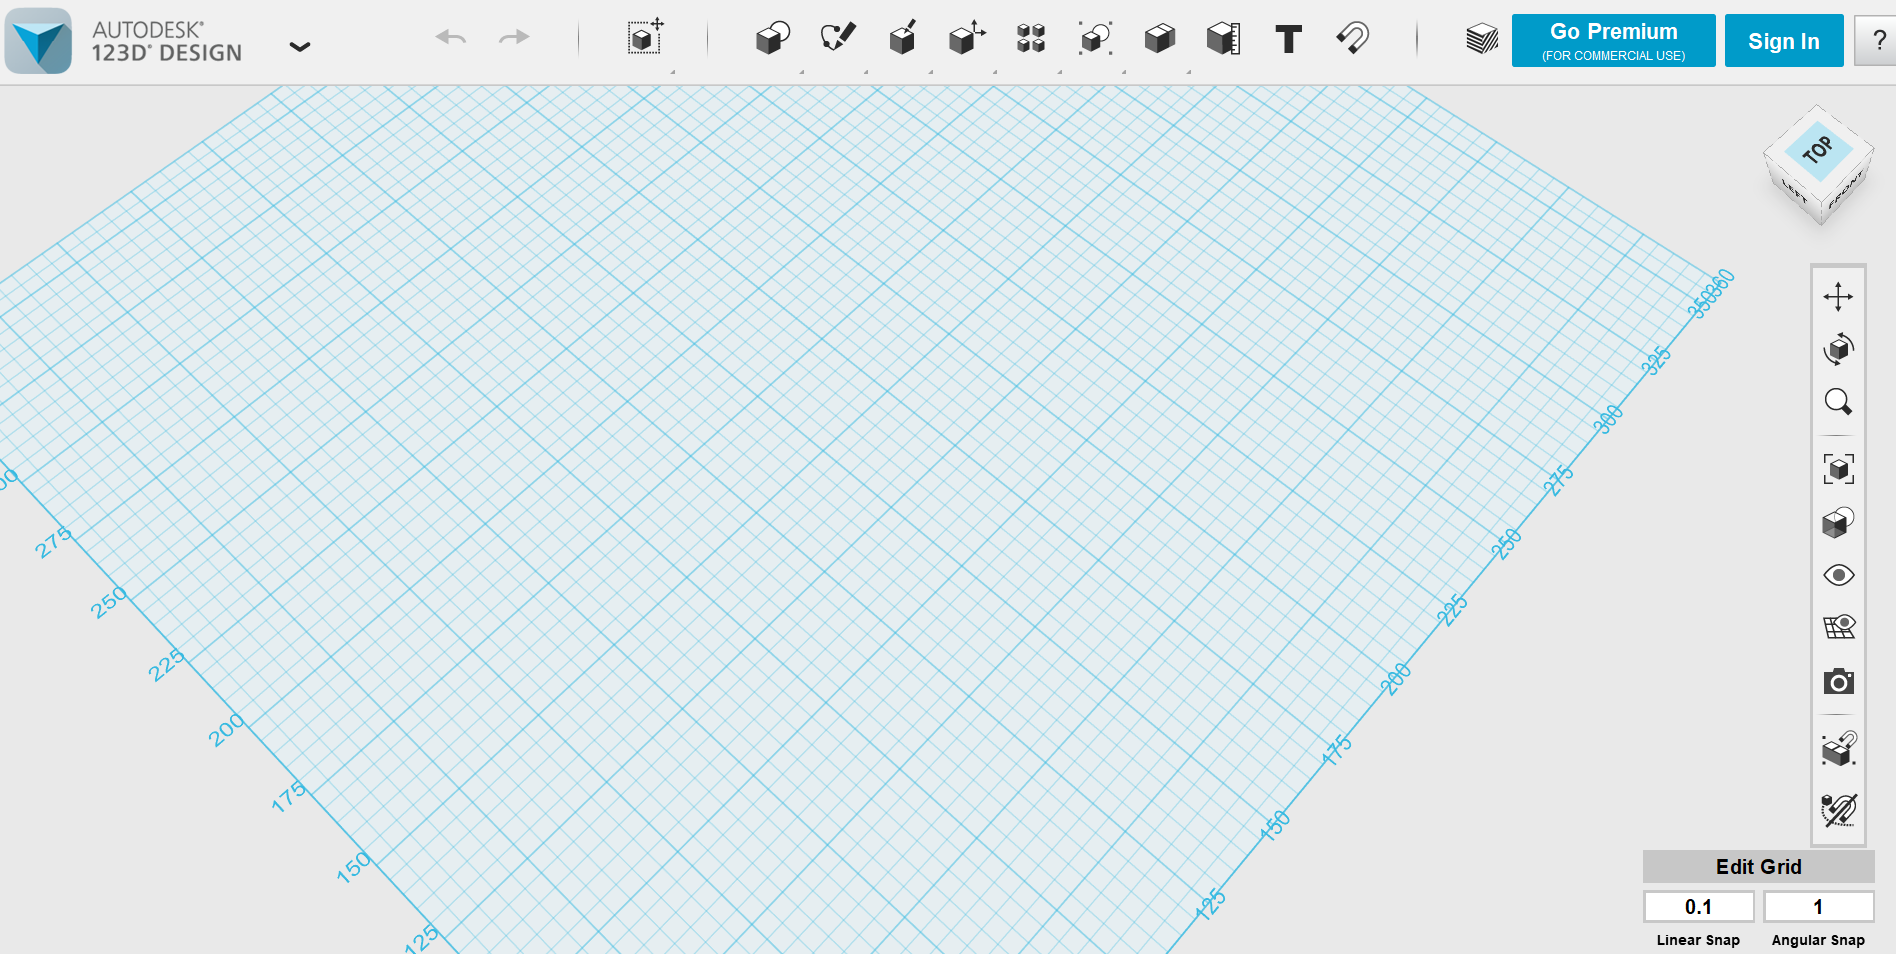
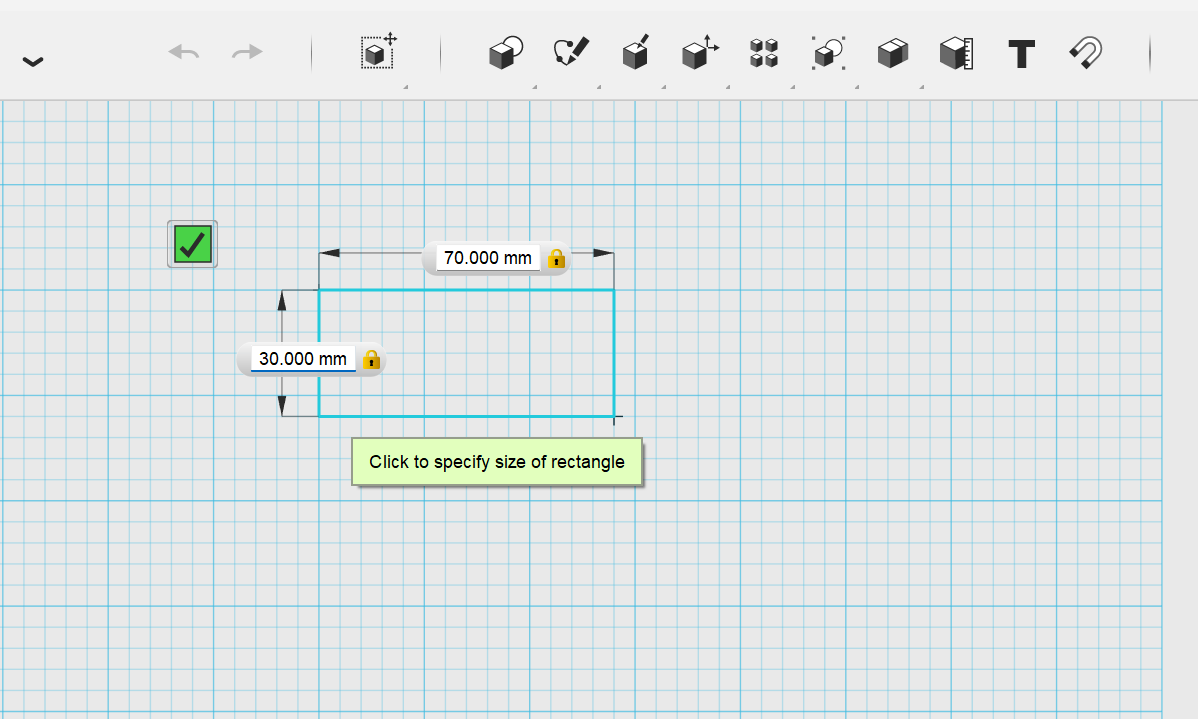
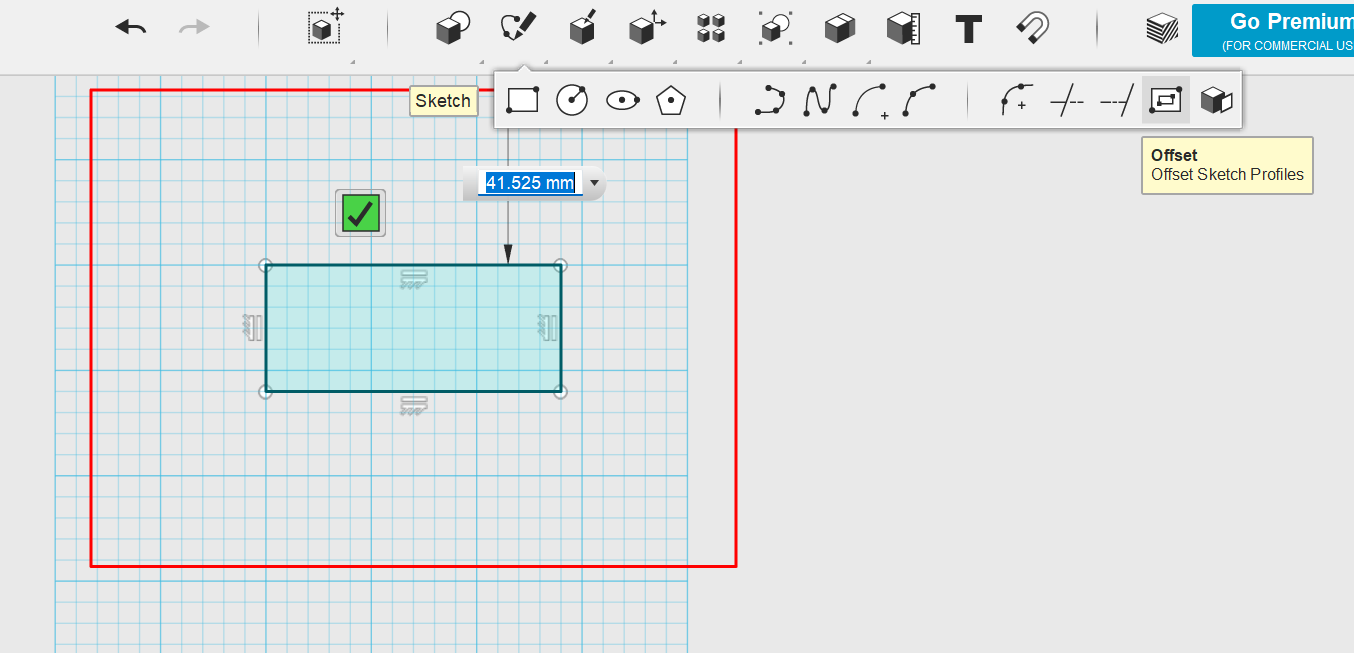
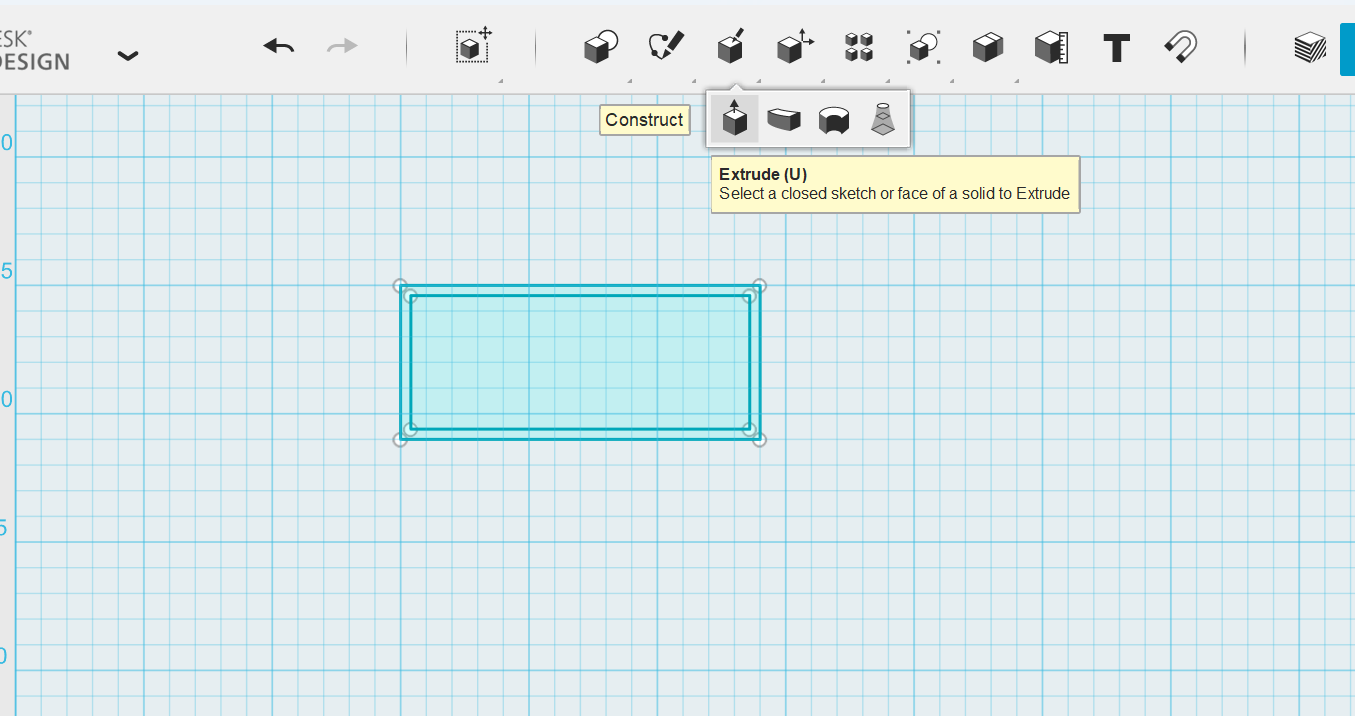
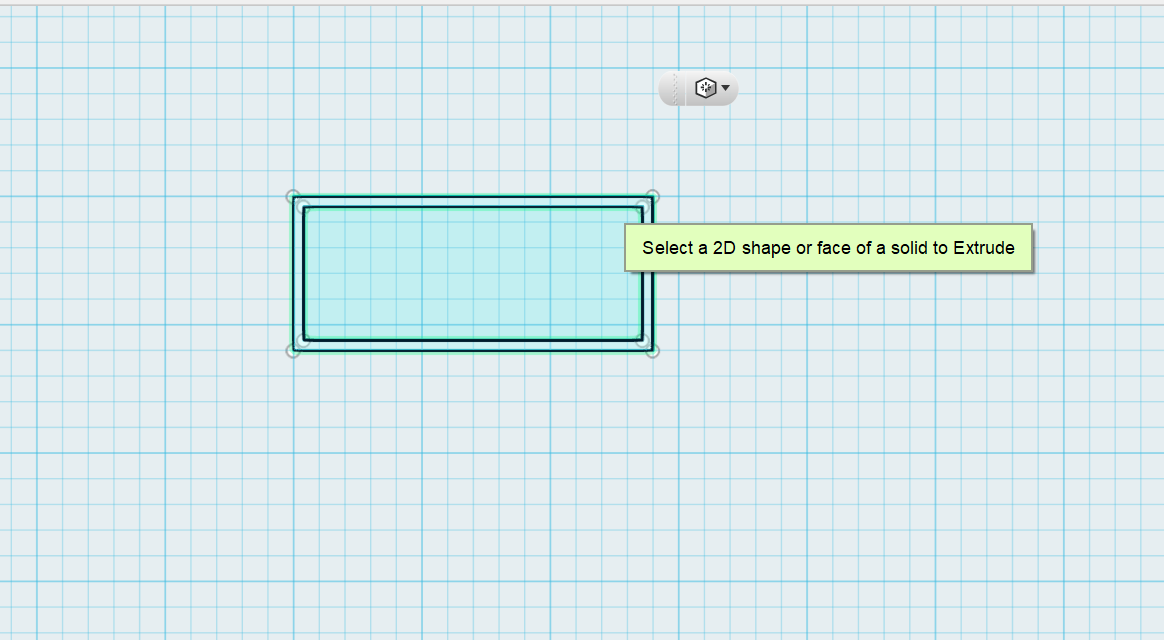
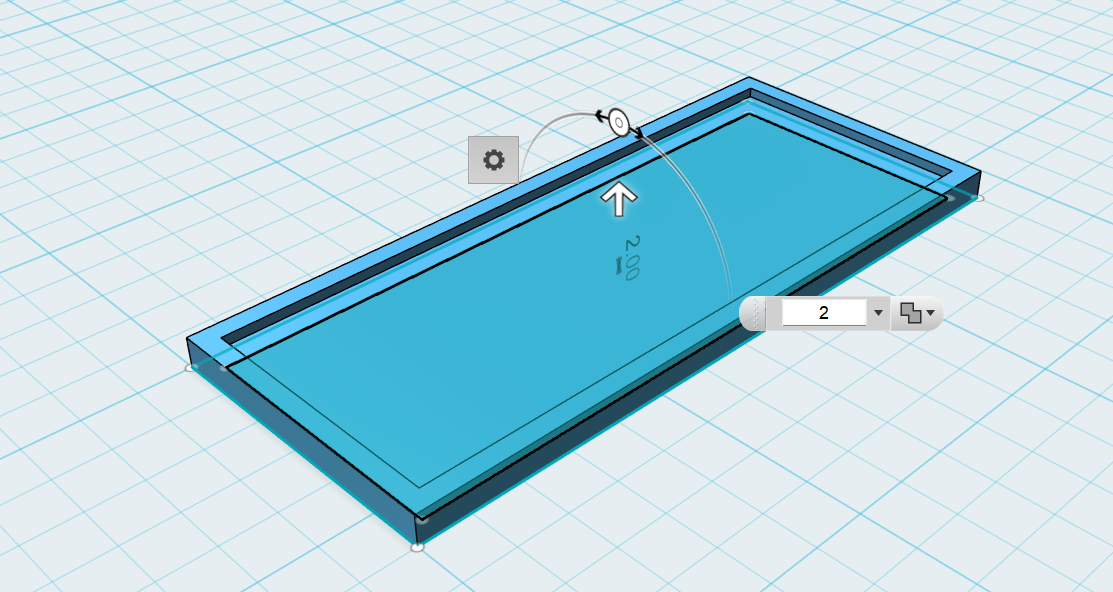
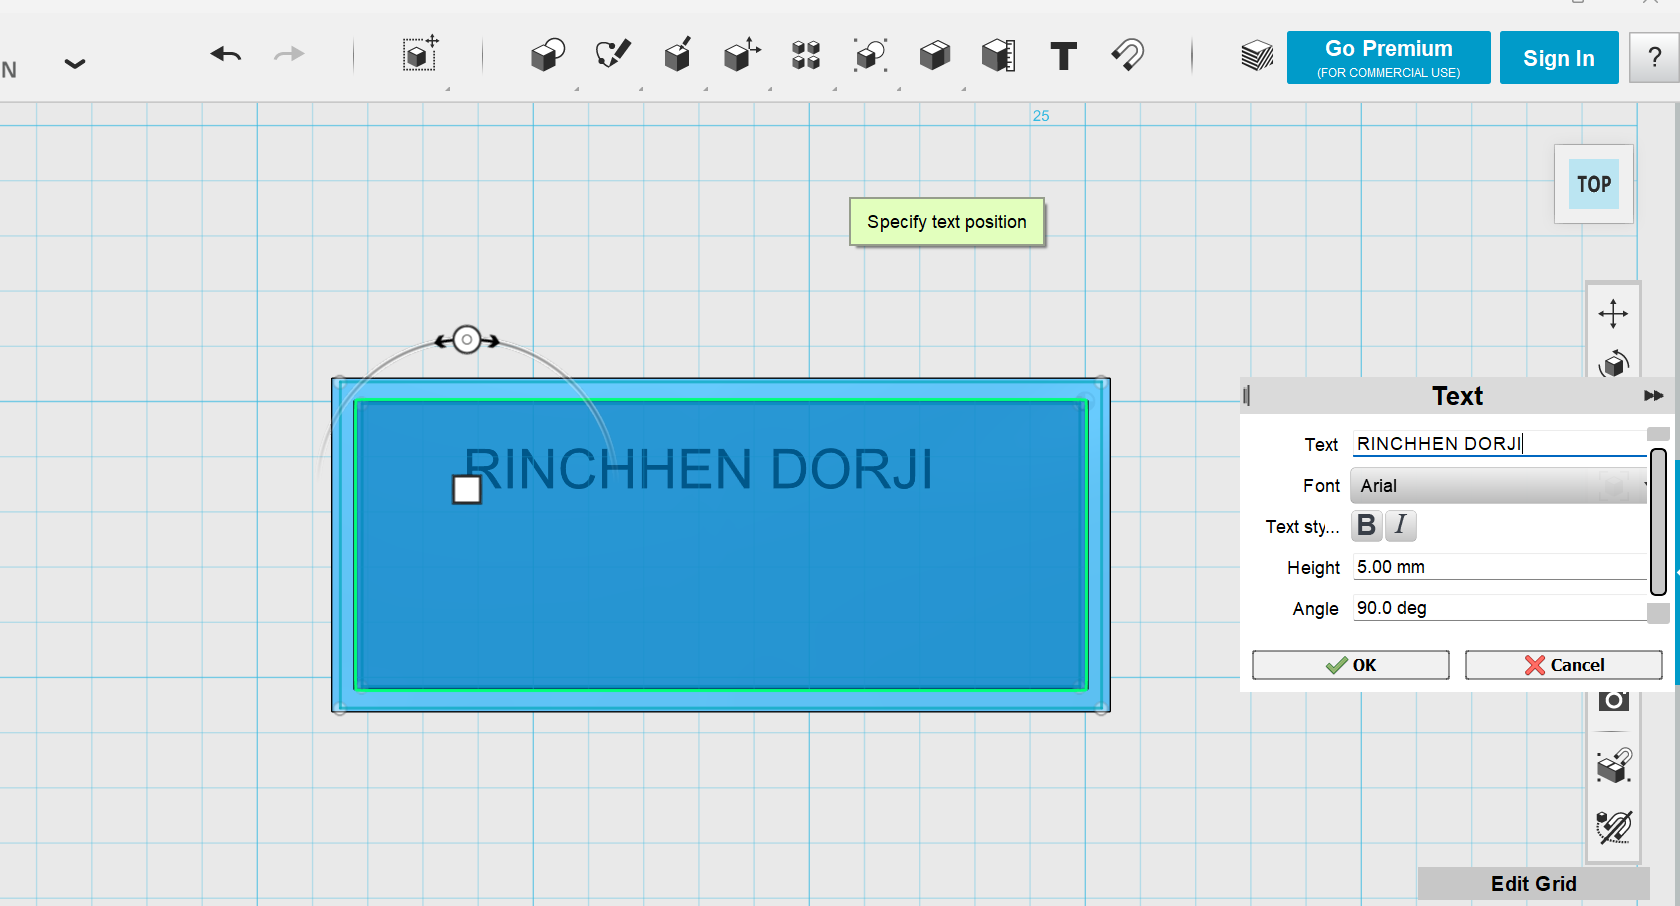
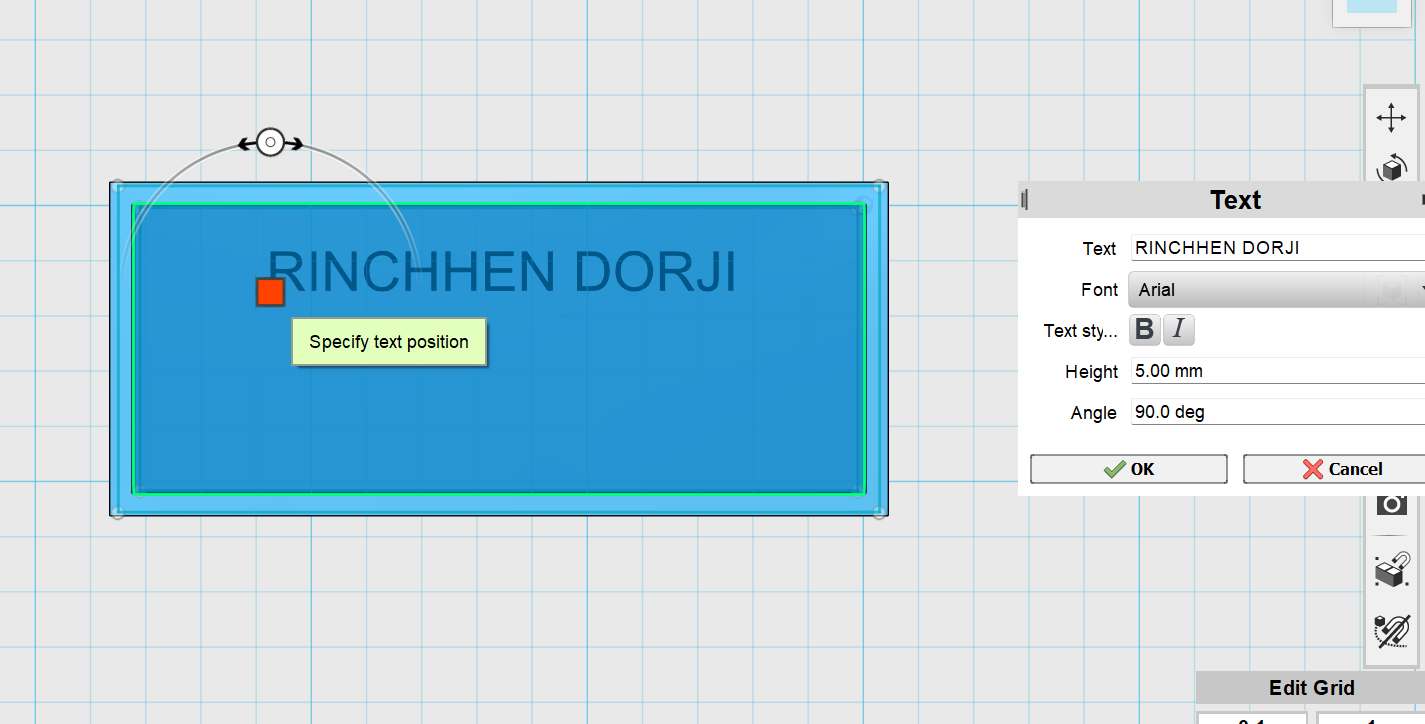
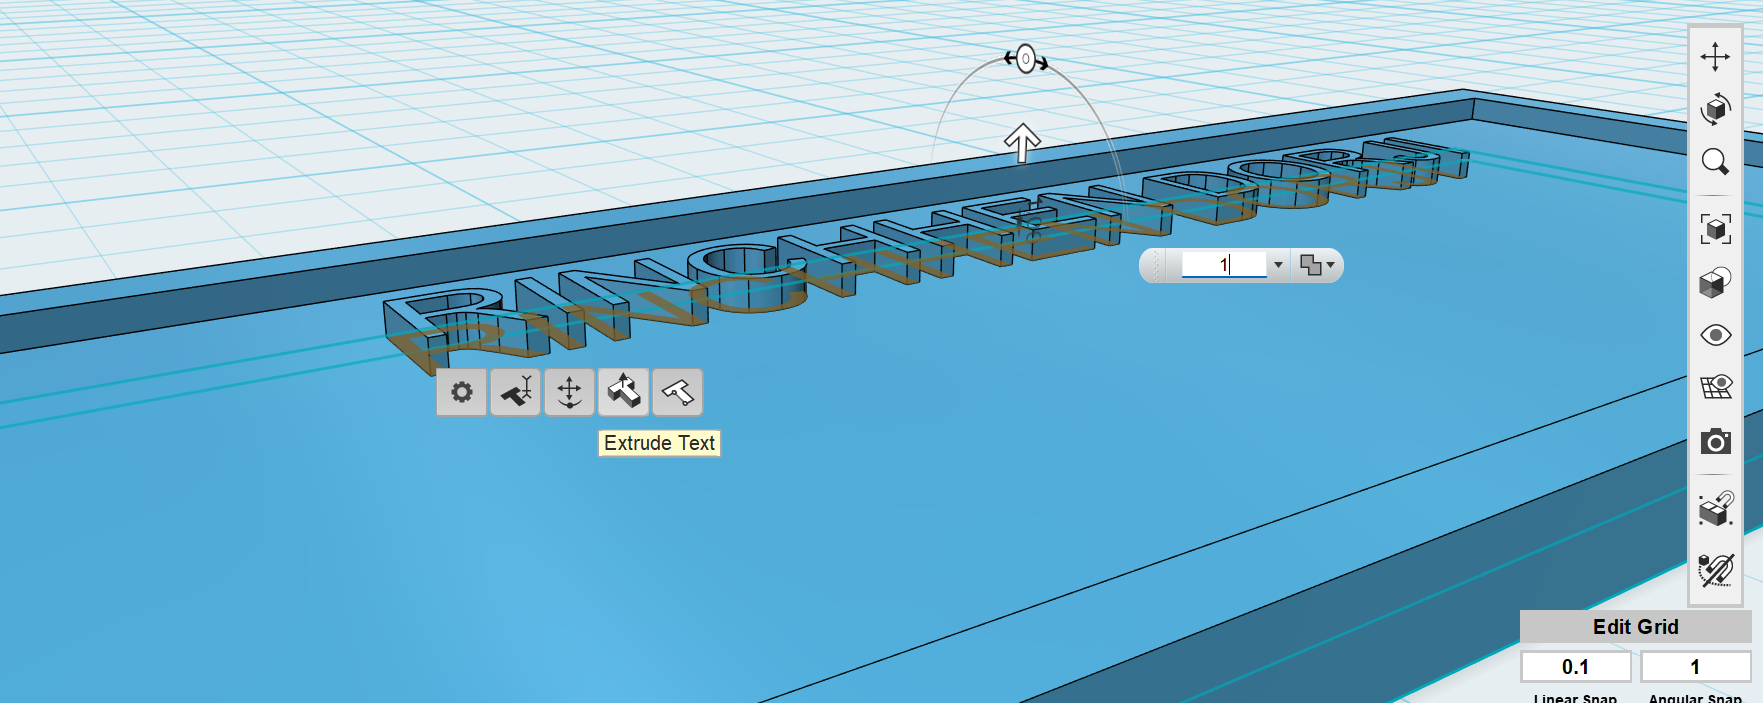
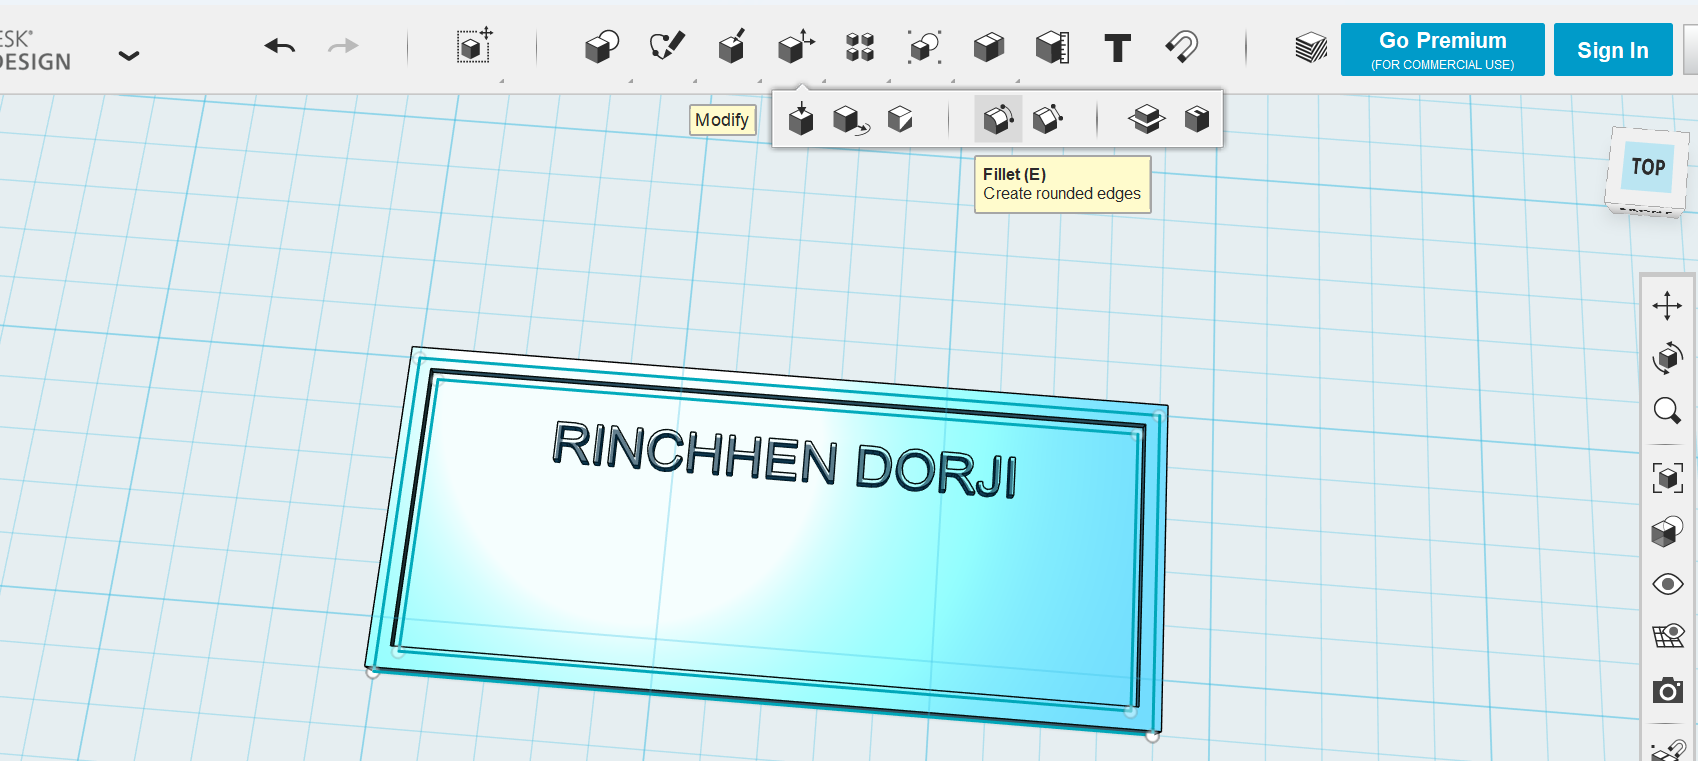
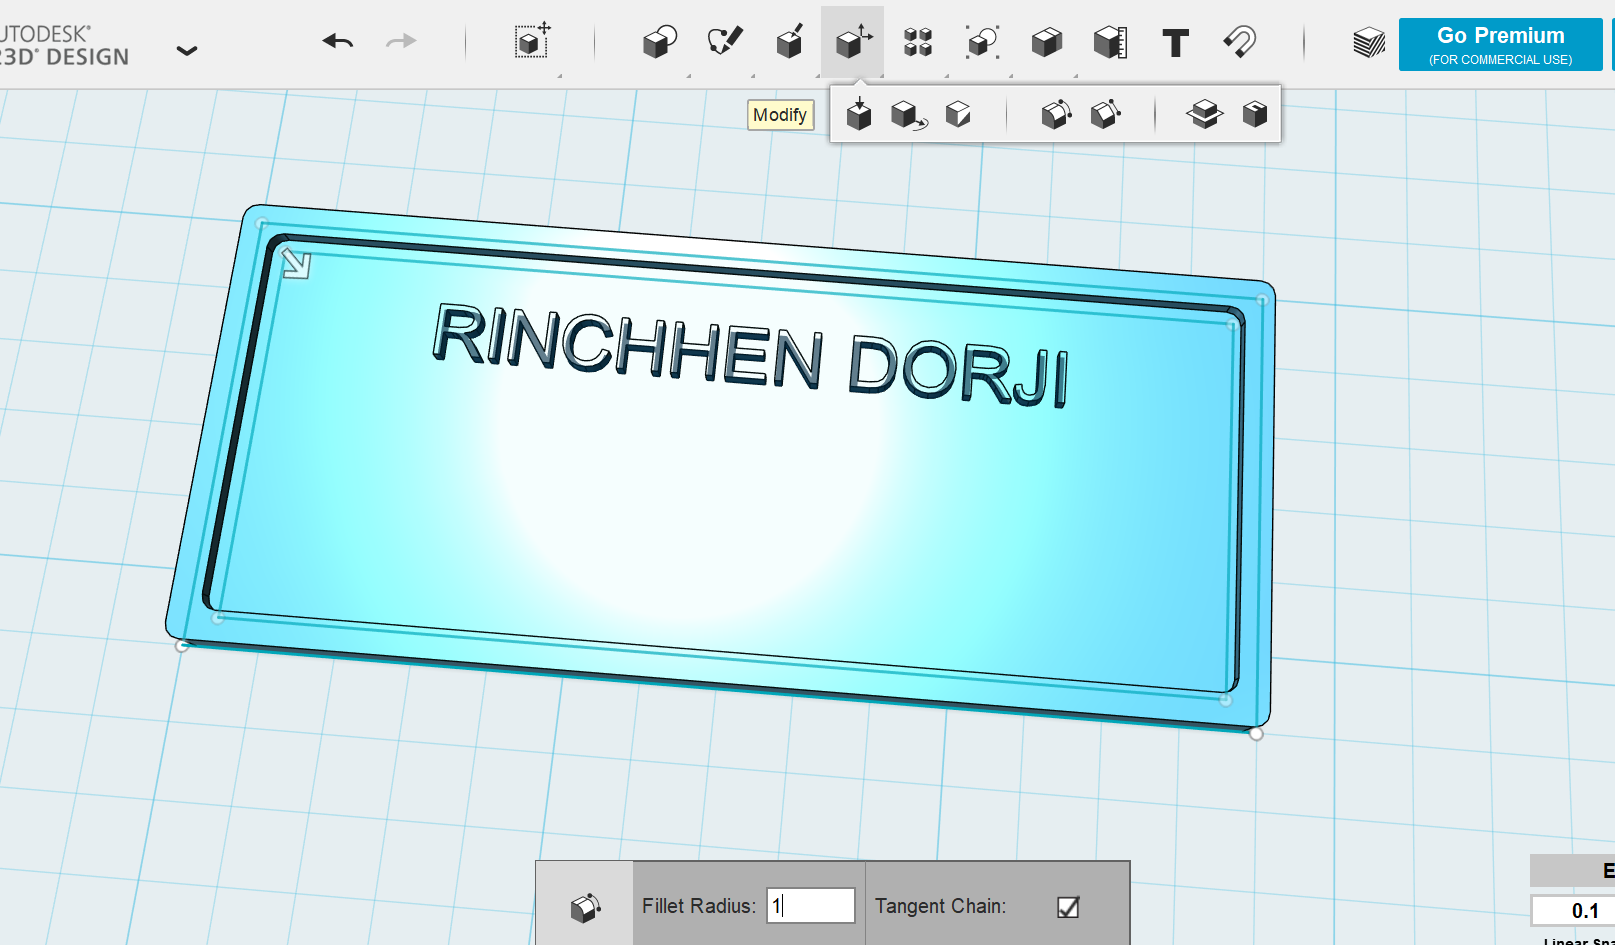
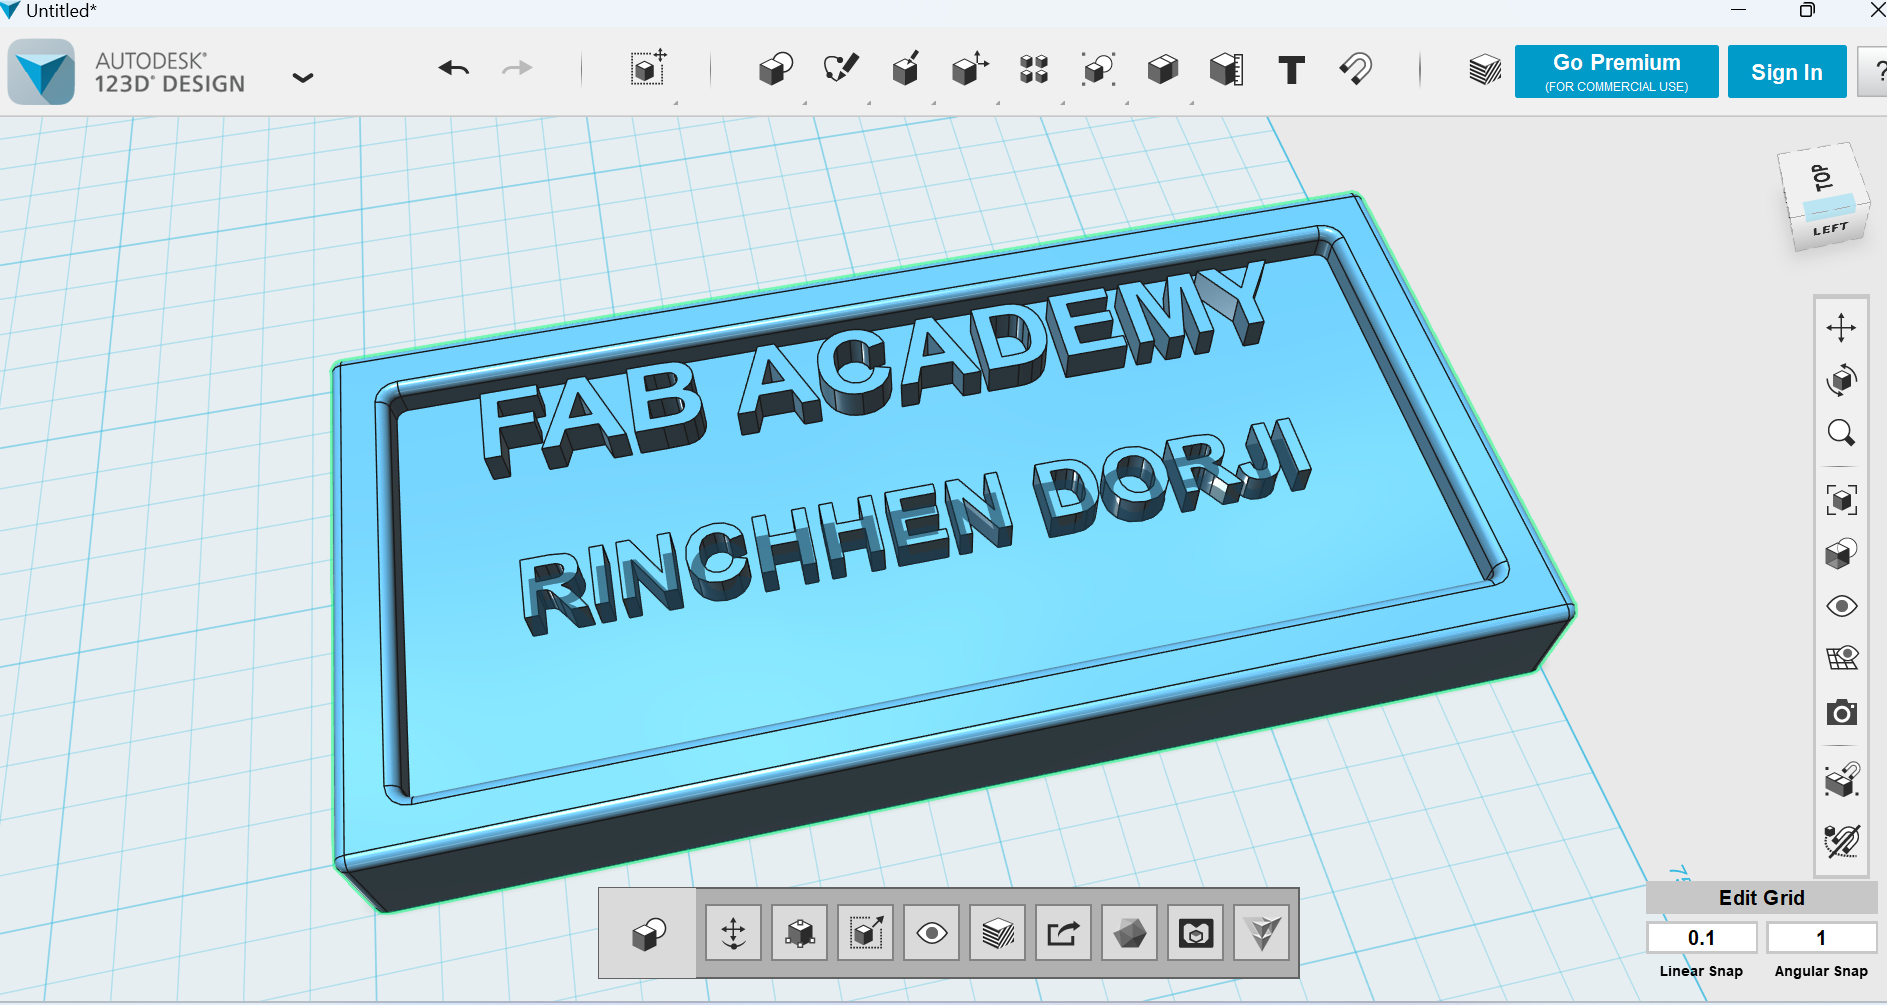
    I have designed the name card with specific dimensions. This software is also handy for 3D design and it has options to export, import in the format such as STL, DWG/DXF, SAT/STEP, X3D, and VRML, usually STL file is extracted for 3D printing purposes. There was no issue using this as I having been using this for teaching my participants back in institute for almost two years now.


    Issues Encountered


    When using Fusion 360, at first I could not export file or save my design and the error message said, device not connected to internet despite it being connected to WiFi. However, I could download/export successfully after two days


                                                    issues


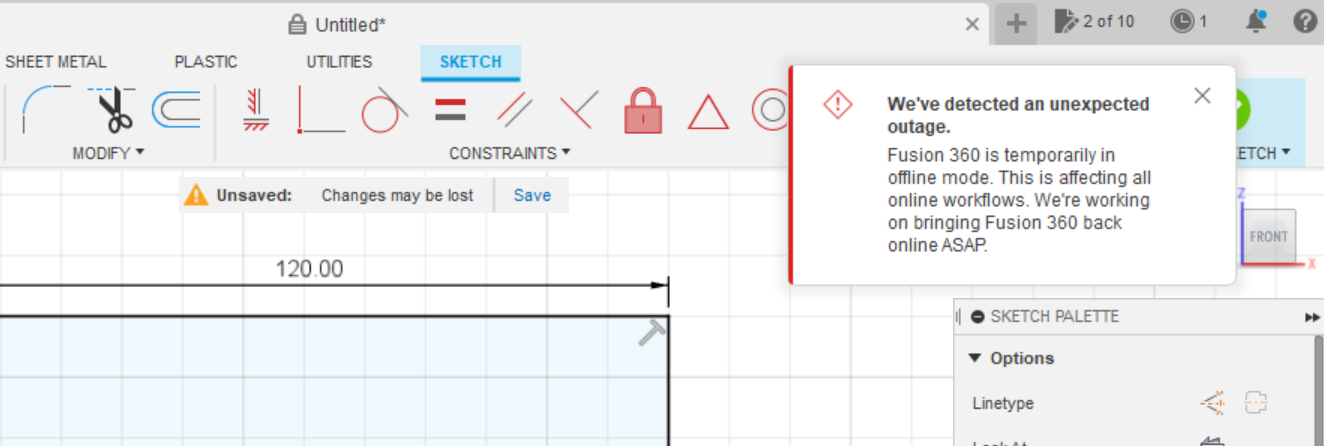
    Moreover, my device does not seem to be compatible using Fusion 360 because the message says the graphics of the device may restrict come of the operations.

    Design Files

    Here, my design files are exported in DXF format and then stored in a folder, then zipped the folder to be uploaded using VS Code editor by linking.

    Designs