Embedded Programming
Task for Week 4
- Group Assignment
- - Comparing the performance and development workflows for other architectures
- - Documenting the work to the group work page and reflecting on our individual page what we learnt.
- Individual Assignment
- - Browse through the datasheet for your microcontroller.
- - Program a microcontroller development board to interact and communicate
Group Assignment
Link to our group assignment is here
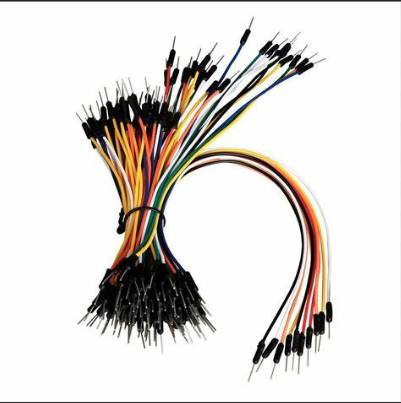
For a beginner, it was fun at the same time intimidating too, seeing all these boards, wires and stuff. Programming word itself seems so alien to me since I've never even learnt the basics of programming. That didn't stop me from exploring.
Explored programming using Arduino Uno and Esp32-s3-WROOM 1 development boards for this weeks assignment.
I was little bit familiar with Arudino Uno but with ESP32, it was my first time getting to know about.
Even though ESP32 seems attractive due to its advanced features like wifi, bluetooth and stuff, for now I would prefer to use Arduino since its user friendly and isn't as complicated as Esp32.
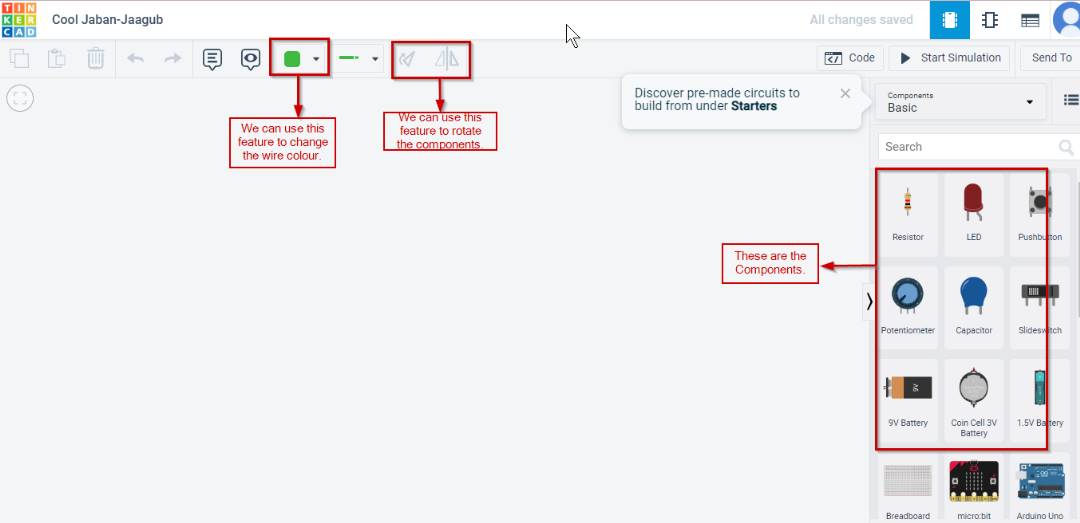
Tinkercad For Circuit Design
- I used tinkercad for circuit designing, for understanding the connections.
- Tinkercad is a free web app for 3D design, electronics, and coding. It is easily accessible and user friendly.It has three different components which includes Electronics, 3D design and Codeblocks. So we can learn about circuits and power electronics from a beginner's perspective which is exactly what i needed.
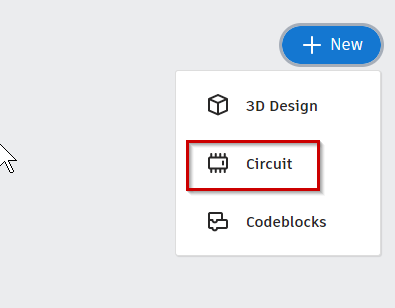
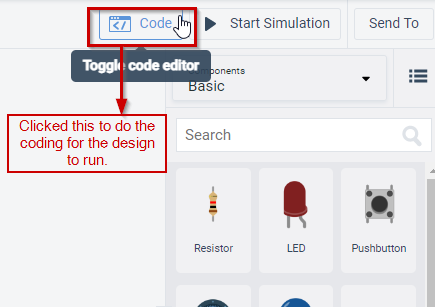
- After opening the webpage, logged in using my Autodesk account. Then to start a new design, selected "Circuit" to do the design
- The feature that i used are explained below.
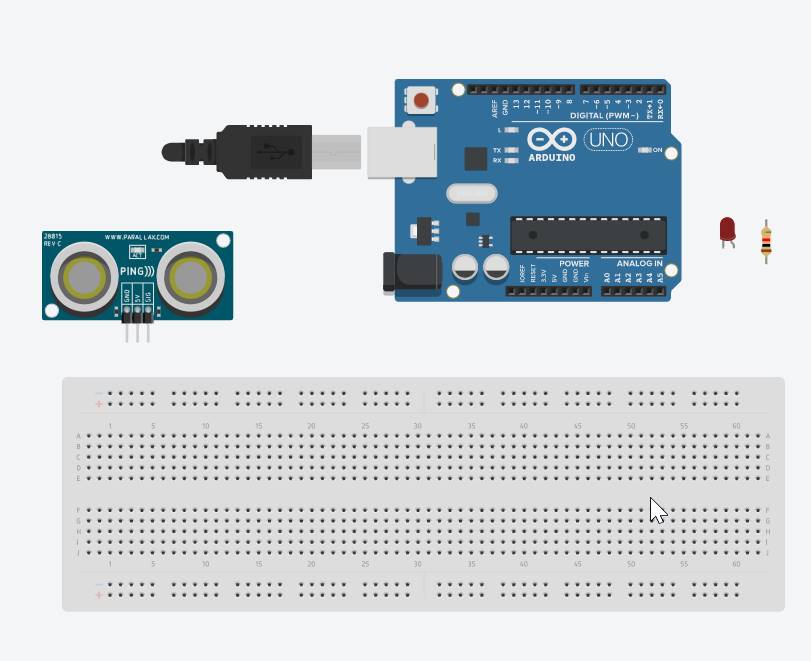
- As guided by the Insructor, we added components to design the circuit.I'm using ultrasonic sensor to light a LED by sensing obstacle at a certain distance.
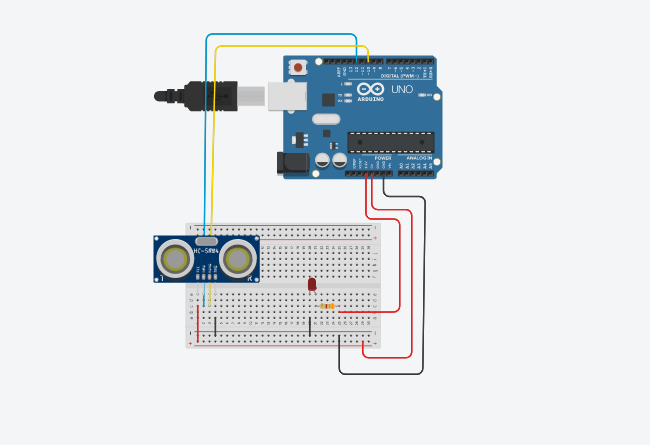
- Then using wires connected the components and made connections
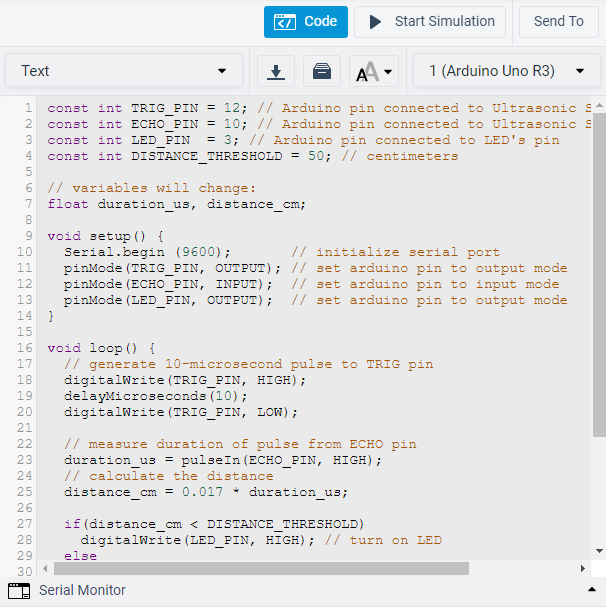
- Ultrasonic Trig Pin to Arduino Digital Pin 12
- Ultrasonic Echo Pin to Arudino Digital Pin 10
- Ultrasonic GND to Breadboard GND
- Ultrasonic VCC to Bread Board VCC
- LED +ve to Resistor to Arduino 3.3V
- LED -ve to Breadboard GND
- Breadboard GND(-ve) to Arduino GND
- Breadboard VCC(+ve) to Arduino 5V
- After that I added the code for running the program.Got the code from here
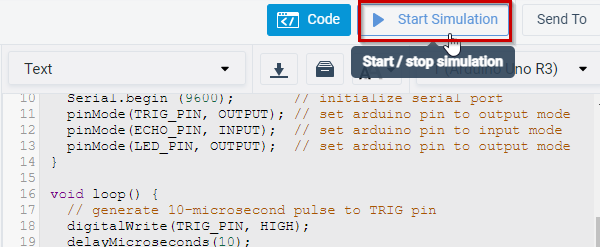
- After adding the code and making some changes, started Stimulation.
- The design finally worked. As shown in the video below, as soon as an obstacle reaches 50cm or less, the LED lights up and when the obstable is 50cm and more, the LED light turns off.
- Hence this is how I explored Tinkercad to help me understand the electronics and the workflow.
Arduino IDE
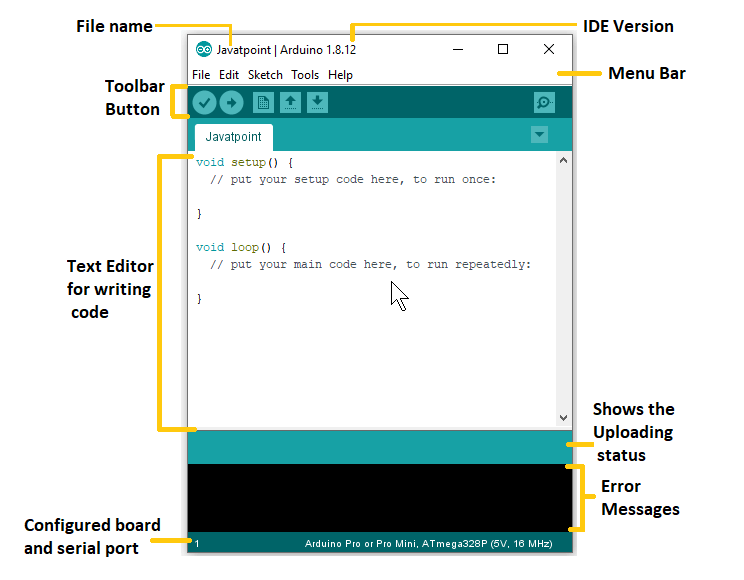
- Arduino IDE is an open source software mainly used for writing, compiling and uploading codes to almost all the Arduino Modules. I used Arduino IDE for both the boards(i.e Arduino Uno and Esp32).
- We can download the software from here
- Arduino IDE will appear as:
- After installing the Arduino IDE, first step to to add Library that you need. Since I'll be using ESP32, I need to add ESP32 library.
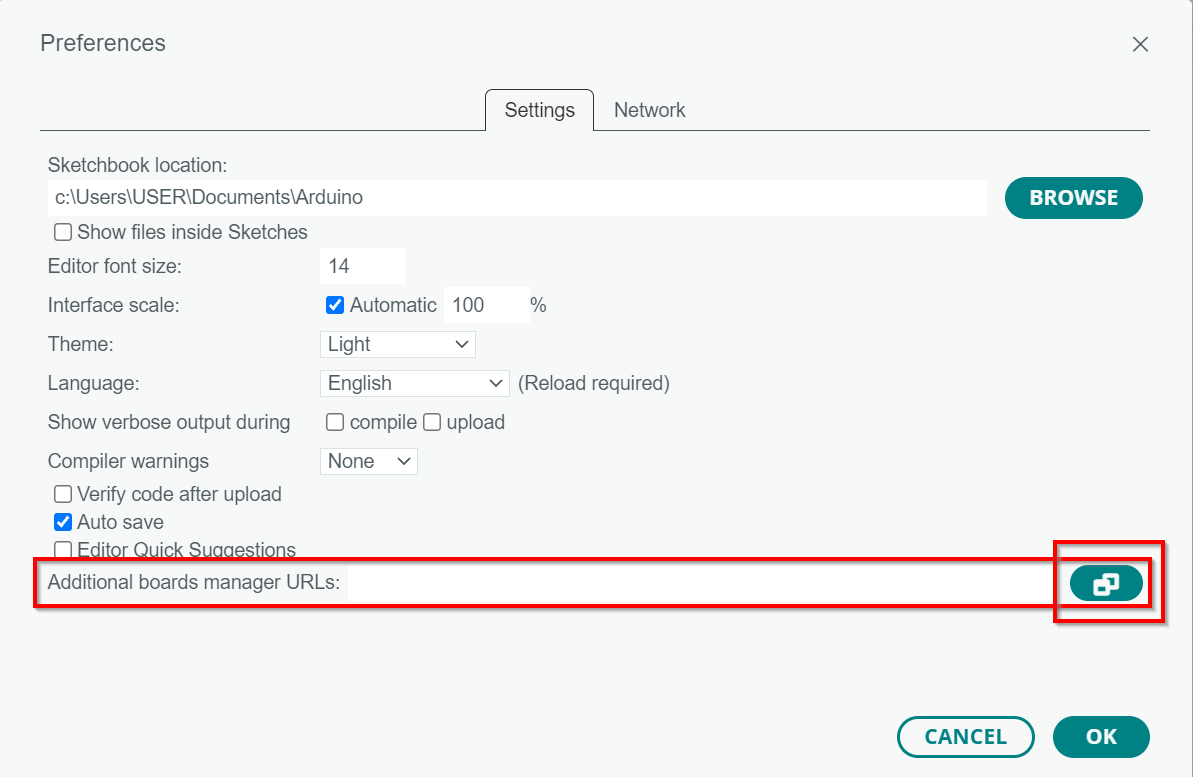
- To add the ESP32 library, first you have to add additional board manager URL of esp32 in the Preferences.
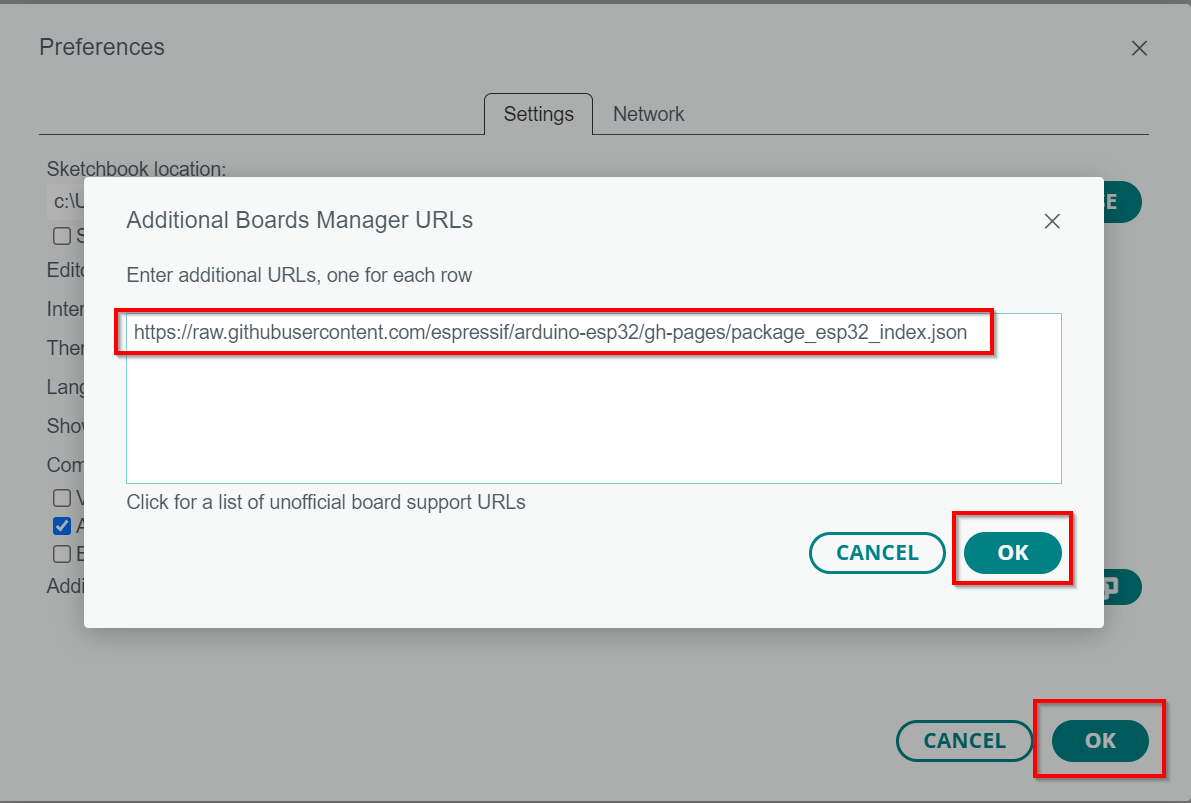
- "https://raw.githubusercontent.com/espressif/arduino-esp32/gh-pages/package_esp32_index.json" is the URL for ESP32.
- To add the above URL in the Arduino IDE, go to File, then click on Preferences.
- Then on the right side of the Additional Board Manager URLs, there is a Small Icon, click on it
- Then you can Paste the above URL in here and Click OK. This way you will be able to find ESP32 on the Board Manager.
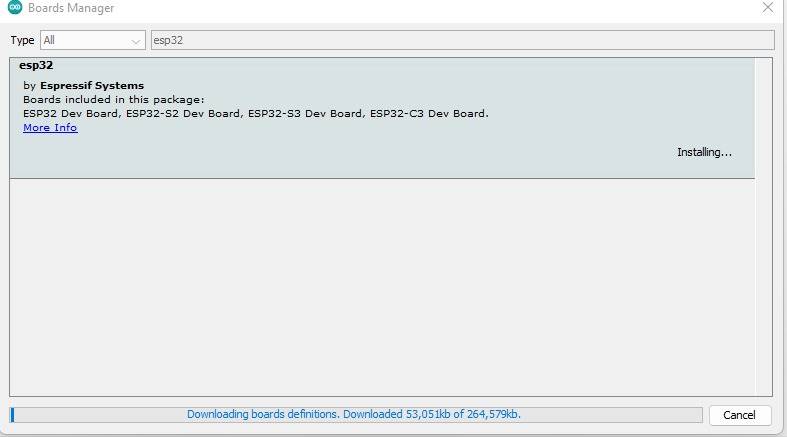
- Then I installed the Esp32 library by going to tools, select board and go to board manager. Then search for esp32.
- Similar to that if you are using any other kind of microprocessor, you can add library by following the same steps.
Individual Assignment
For individual assignment we are asked to browse through the datasheet of the microprocessor that we are using. For my final project I'm thinking of using Esp32 and for this week, I'm using Arduino Uno.
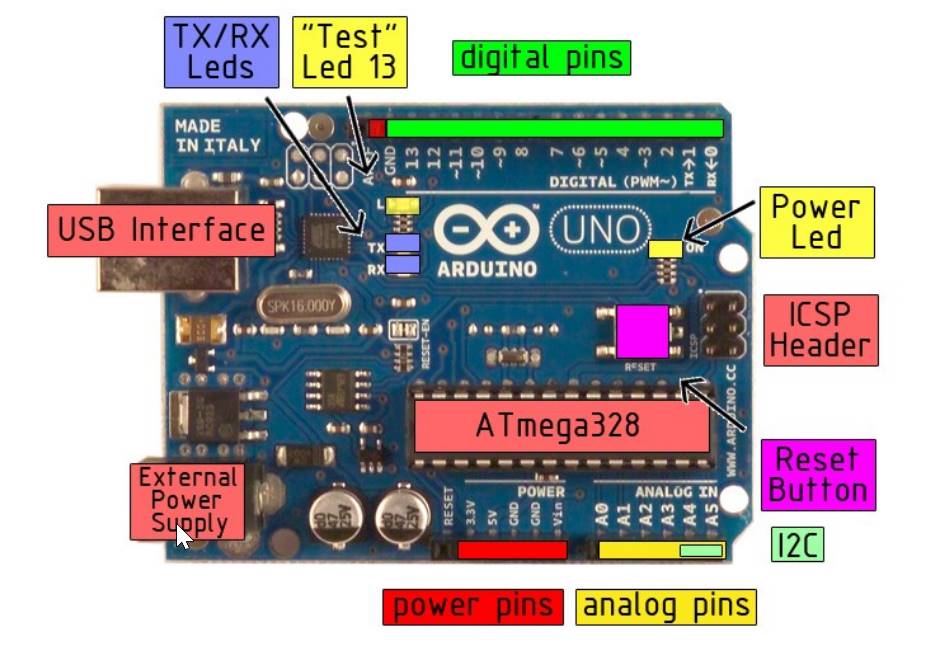
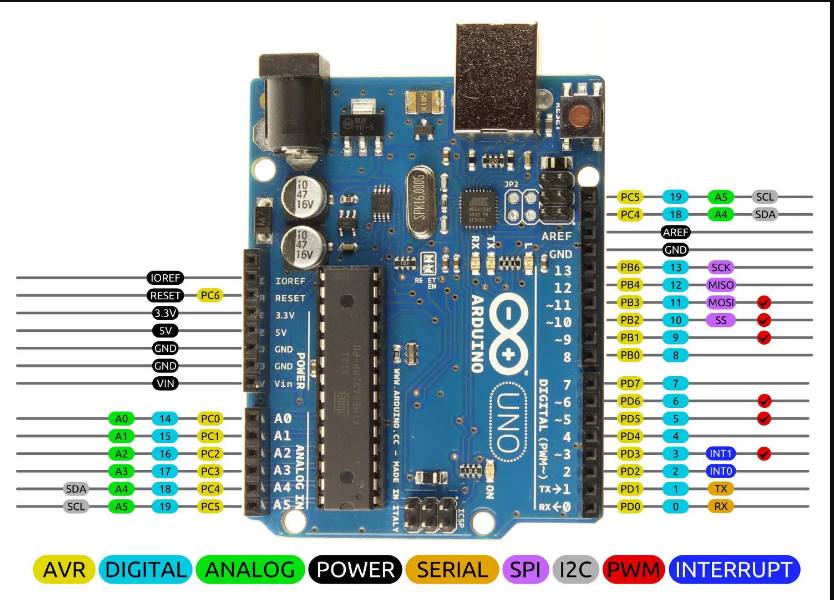
Arduino Uno
- Arduino Uno is an open-source microcontroller board based on the Microchip ATmega328P microcontroller and developed by Arduino.cc.
- The architecture of the Arduino Uno is customized Harvard Architecture with 8 bit RISC processor core.
- The crystal oscillator present in Arduino UNO comes with the frequency of 16MHz(Clock Speed)
- Types Of Memory
- Arduino Uno or any other microcontroller has 3 type of memory:
- 1. Flash
- 2. SRAM
- 3. EEPROM
- 1. Flash
- - Where arduino sketch is stored
- - The stored content is not lost even when the power is turned off.
- - Slower to access than SRAM.
- - It generally has 10,000 read/write cycles.
- 2. SRAM
- - It stands for Static Random Access Memory.
- - Where the normal variables of the sketch are created, stored and manipulated.
- - The stored content is lost when the power is turned off.
- - Very quick to access.
- - Has practically unlimited read/write access.
- 3. EEPROM
- - It stands for Electrically Erasable Programmable Read Only Memory.
- - Can be used to store long term information irrespective of the sketch in the Flash.
- - Is the slowest to access among all the 3 memory types.
- - It generally has 100,000 read/write cycles.
- Arduino Uno has ATmega328p, which has Flash- 32kb, SRAM- 2Kb, EEPROM- 1Kb.
Programming Arduino Uno with Arduino IDE
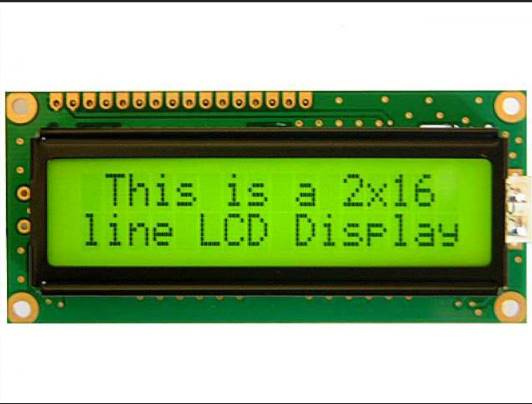
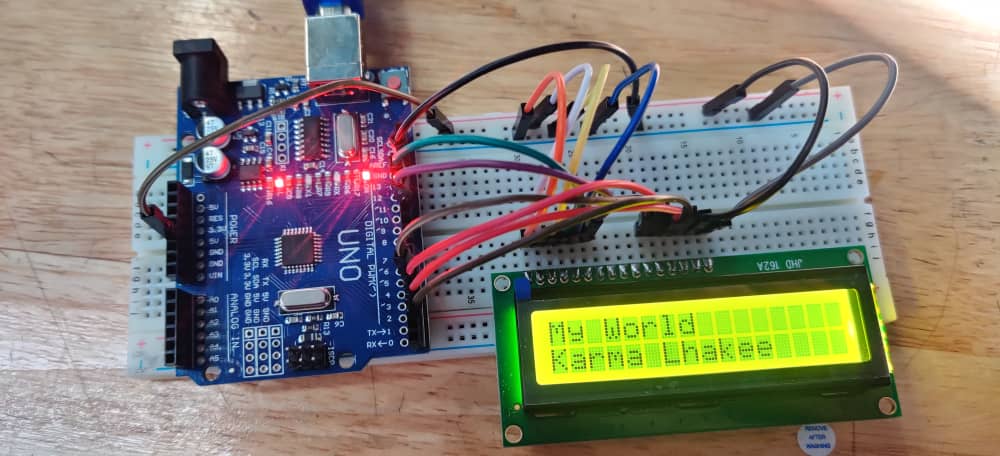
Displaying My Name in LCD
I used LCD to show/display my name on it using Arduino Uno.Since it was my first time using LCD, I did some research on it. LCD that I was using was 16x2 LCD(JHD162A) and this LCD could display 32 Characters.
- - The Components used are:
  #include <LiquidCrystal.h>
  LiquidCrystal lcd(12, 11, 5, 4, 3, 2); // sets the interfacing pins

  void setup() { lcd.begin(16. 2); // initializes the 16*2 LCD
  }

  void loop()
  {
    lcd.setCursor(0,0); //sets the cursor at row 0 column 0
    lcd.print ("My World"); // prints My World
    lcd.setCursor (0, 1); // sets the cursor at row 1 column 2
    lcd.print ("Karma Lhakee"); // prints my name Karma Lhakee

  }
LCD with Serial Monitor
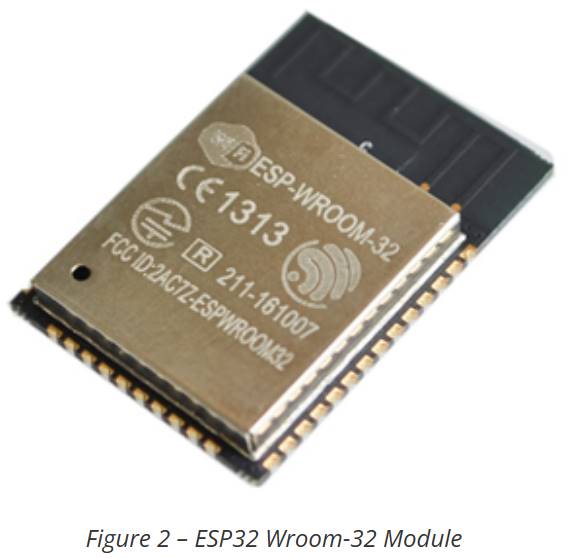
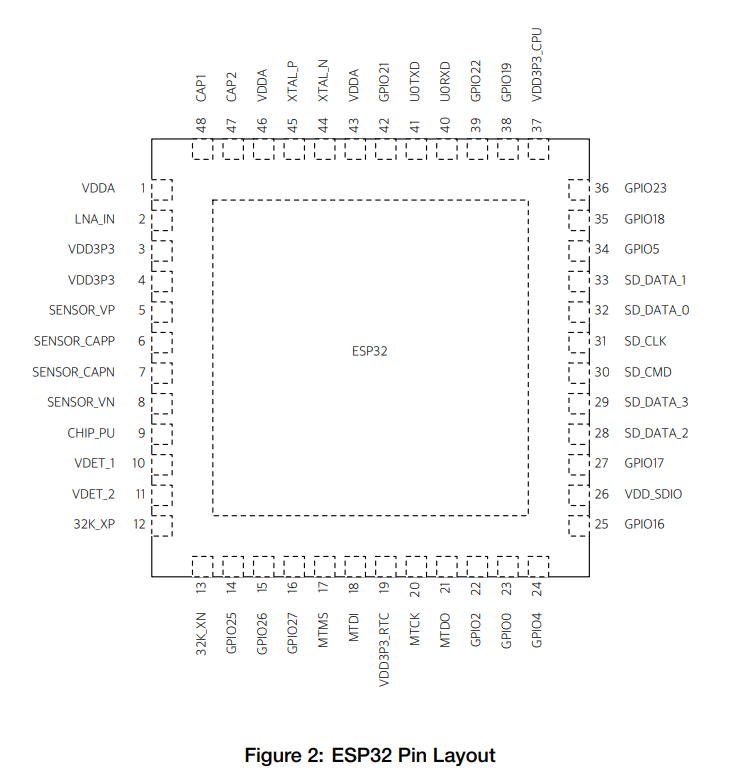
ESP32 Datasheet
- Datasheet for Esp 32
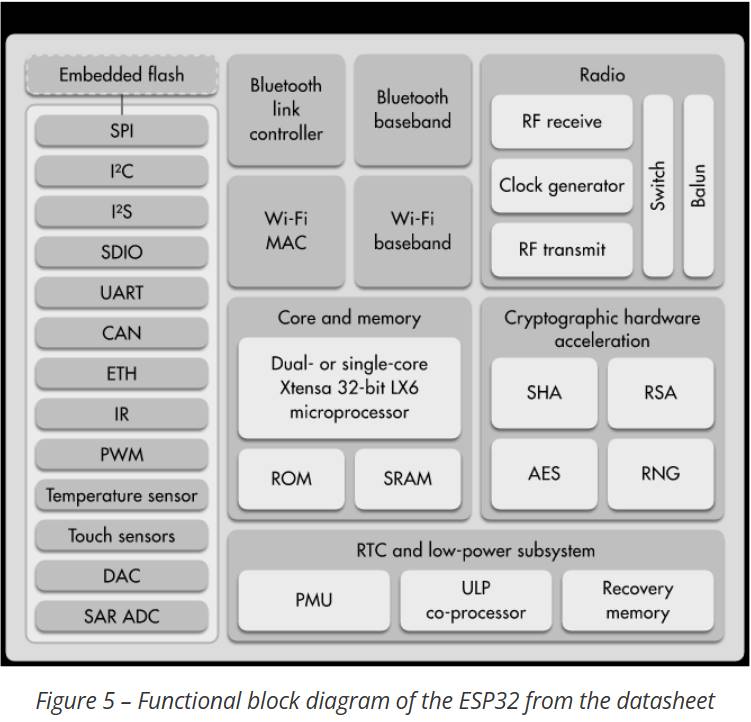
- 1. It is a series of low-cost, low-power system on a chip microcontrollers with integrated Wi-Fi and dual-mode bluetooth.
- 2. ESP32 is designed for mobile, wearable electronics and IoT applications. It is the most integrated solution for Wi-Fi+ Bluetooth applications in the industry with less than 10 external components.
- 3. Its main processor is Tensilica Xtensa 32-bit LX6
- 4. All versions of the ESP32 series are dual-core except for ESP32-SOWD, which is a single core.
- 5. It has clock frequency up to 240 MHz.
- 6. It also has a performance up to 600 DMIPS.
- 7. Wirless Connectivity:
- A. Wi-Fi: 802.11 b/g/n/e/i(802.11n @ 2.4 GHz up to 150 Mbit/s)
- B. Bluetooth: v4.2 BR/EDR and Bluetooth Low Energy(BLE)
- 8. Memory
- A. ROM: 448 KB - For booting and core functions.
- B. SRAM: 520 KB - For data and instruction.
- C. RTC fast SRAM: 8 KB- For data storage and main CPU during RTC Boot from the deep-sleep.
- D. RTC slow SRAM: 8 KB - For co-processing accessing during deep-sleep mode.
- E. Embedded Flash: 0 MB((ESP32-D0WDQ6, ESP32-D0WD, and ESP32-S0WD chips), 2MB(ESP32-D2WD chip), 4MB(ESP32-PICO-D4 SiP module).
- F. External flash and SRAM: supports upto 16 MB.
Perks Of ESP32
- With so many amazing features, it would seem that ESP32 would cost fortune but surprising it is quite reasonable. ESP32 dev modules cost in the ballmark of Nu.500/-.
- The Chip dimensions are also quite small(25mm x 18mm) including the antenna area allowing its use in devices requiring a very small form factor.
- ESP32 can be programmed using the Arduino IDE making the learning experience convenient and comfortable.