Biofabricating Materials. Gelatine & Agar Agar
Before the Start
Introduction 🖊
After my first experience working with Alginate, I decided to try out new bioplastics recipes. This time cooking the ingredients instead of blending them cold.
My Goals 🎯
- What I think I already know:
- I have theoretical knowledge about Gelatine and Agar Agar Bioplastics. I did research about them over the past few months.
- What I want to learn:
- Make my first cooking experiments with bioplastics, using structural materials such as Gelatine, and Agar Agar.
- Follow already existing recipes.
- Use the knowledge got by experience to make variants and discover possible new materials.
Project Management 🔢
| Task | Time | Day |
|---|---|---|
| Research | 3h | 22, February |
| Preparation | 1h | 23, February |
| Development | 3h | 23, February |
| Results waiting time* | 2 weeks | 7, March |
| Documentation | 3h | 23 / 24 February, 7 March |
*Time needed in order to check the final materials results. Bioplastics change their apperiance depending of time.
Research 🤓
Before making my first Bioplastic experiments, I did watch the Biofabricating Material’s Video imparted by Cecilia Raspanti for the FabriAcademy course.
During the Process
Results 🌸
Material creation: Gelatine Bioplastics 🧑🎨
When working with Gelatine, I did not have powder material. Lukly, a student currently enrolled in the FabriAcademy course - Laura Caroline Silvera Flores - kindly shared with me leftover biosilicone material that I used to make the first experiments.
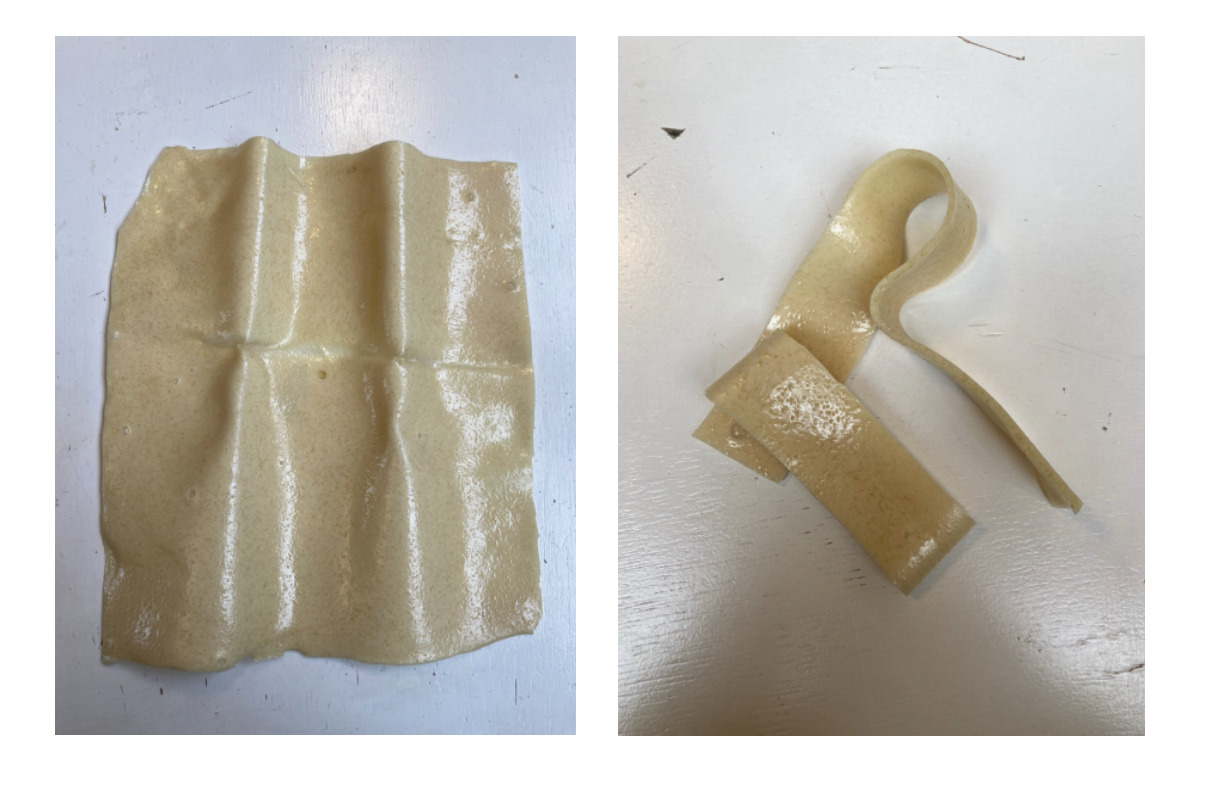
She also shared with me the recipe that she followed to make it, in order to be able to replicate it in the future in case of need.
Ingredients
| Name | Quantity | Unit |
|---|---|---|
| Water | 1 | ud |
| Gelatine | 2 | ud |
| Glycerine | 2 | ud |
Process
- Mix all the ingredients together and put the mixture in the microwave for about 10 sec
- Put the biosilicone in the mold
- The silicone will dry almost instantly
Ingredients
When developing my own Gelatine experiments, I did use this materials:
| Name | Quantity | Unit |
|---|---|---|
| Gelatin Leftovers | 150 | gr |
| Water | 400 | ml |
| Natural Dyes | x | x |
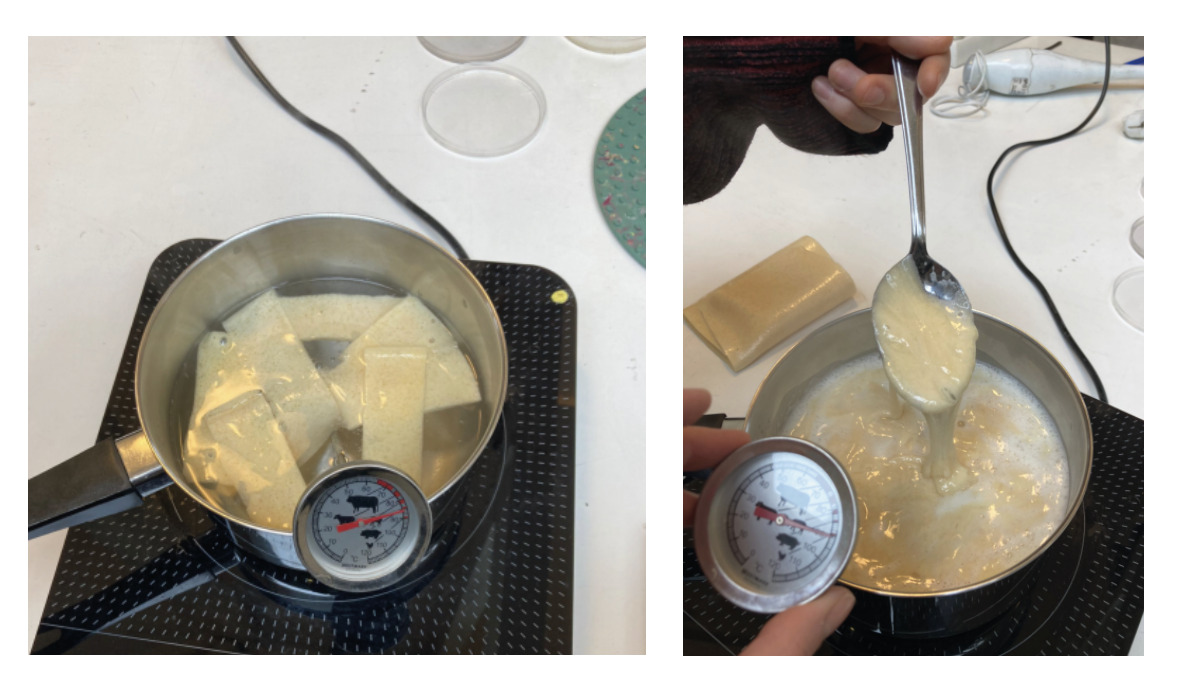
Tools
I used this tools to make the precious material:
- Pot
- Stove
- Spoons
- Moulds
- Thermometer
- Drinking Straws
Process
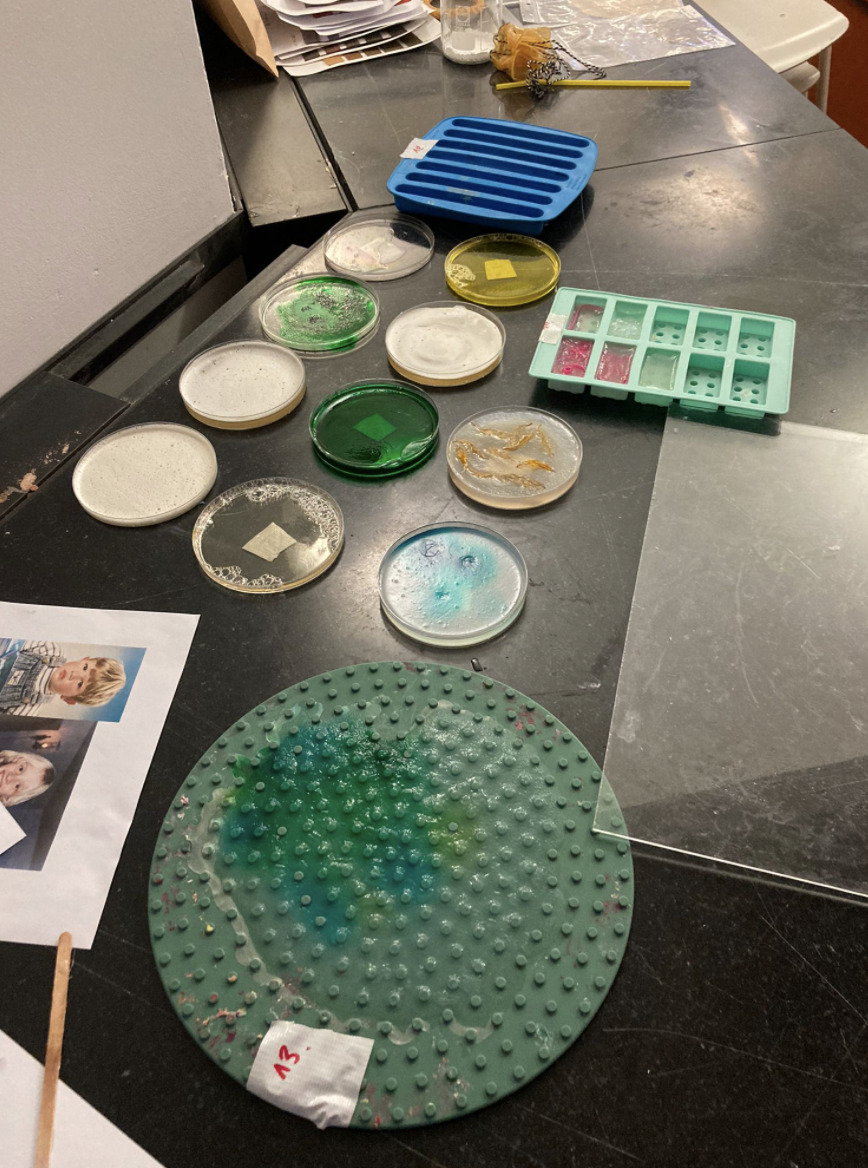
I tried 6 different variants of bioplastic gelatine. Attached is a table with all the processes which I followed:
| Test Nº | Process |
|---|---|
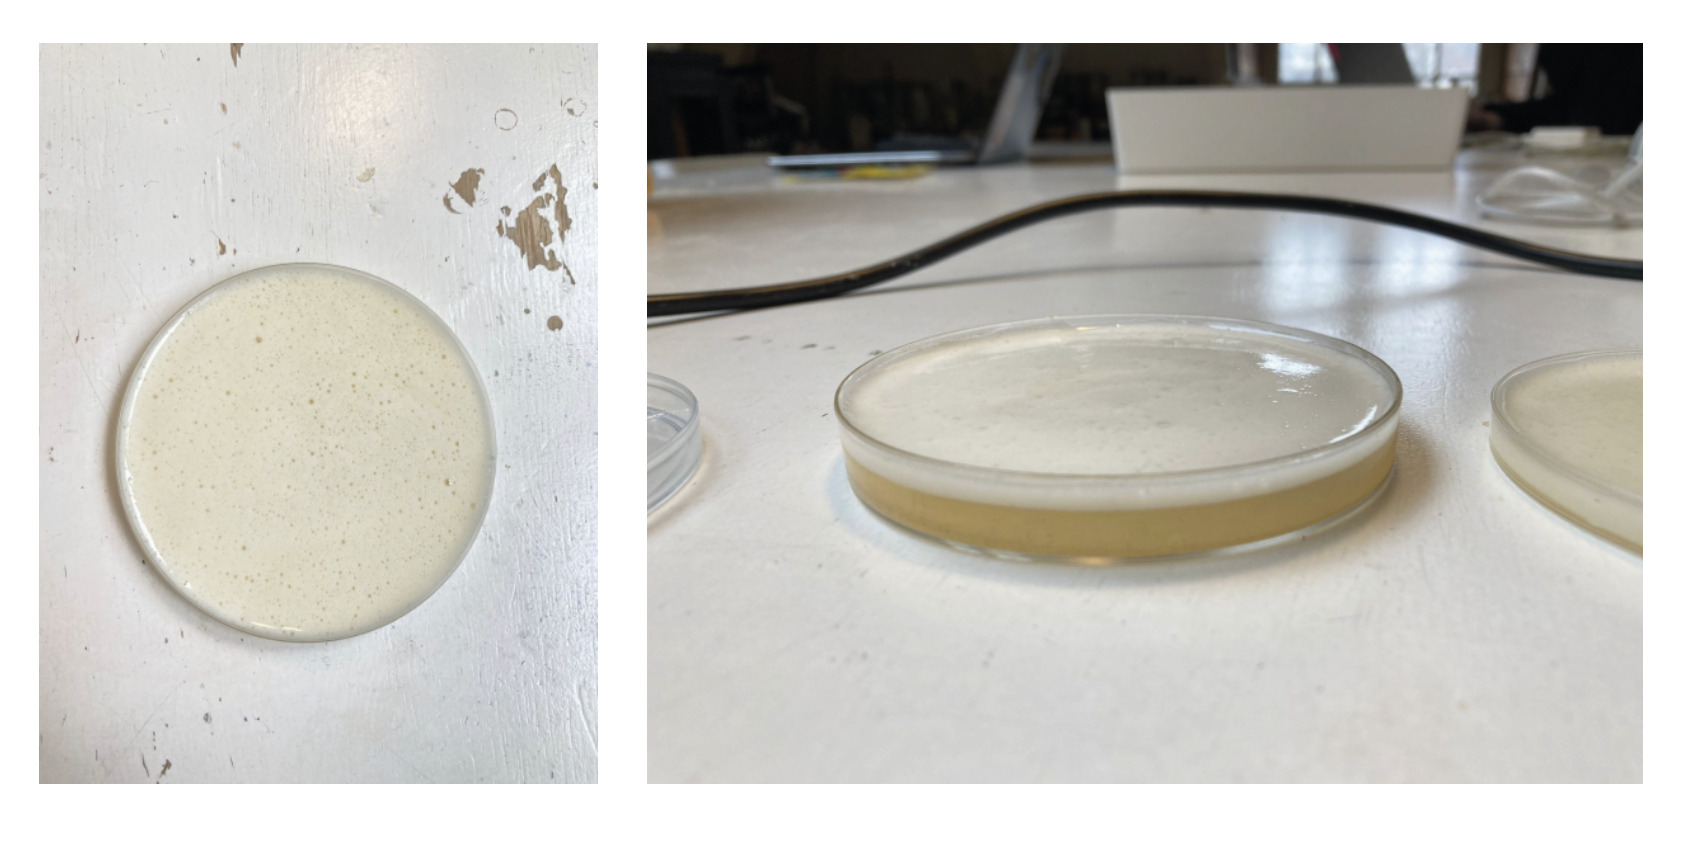
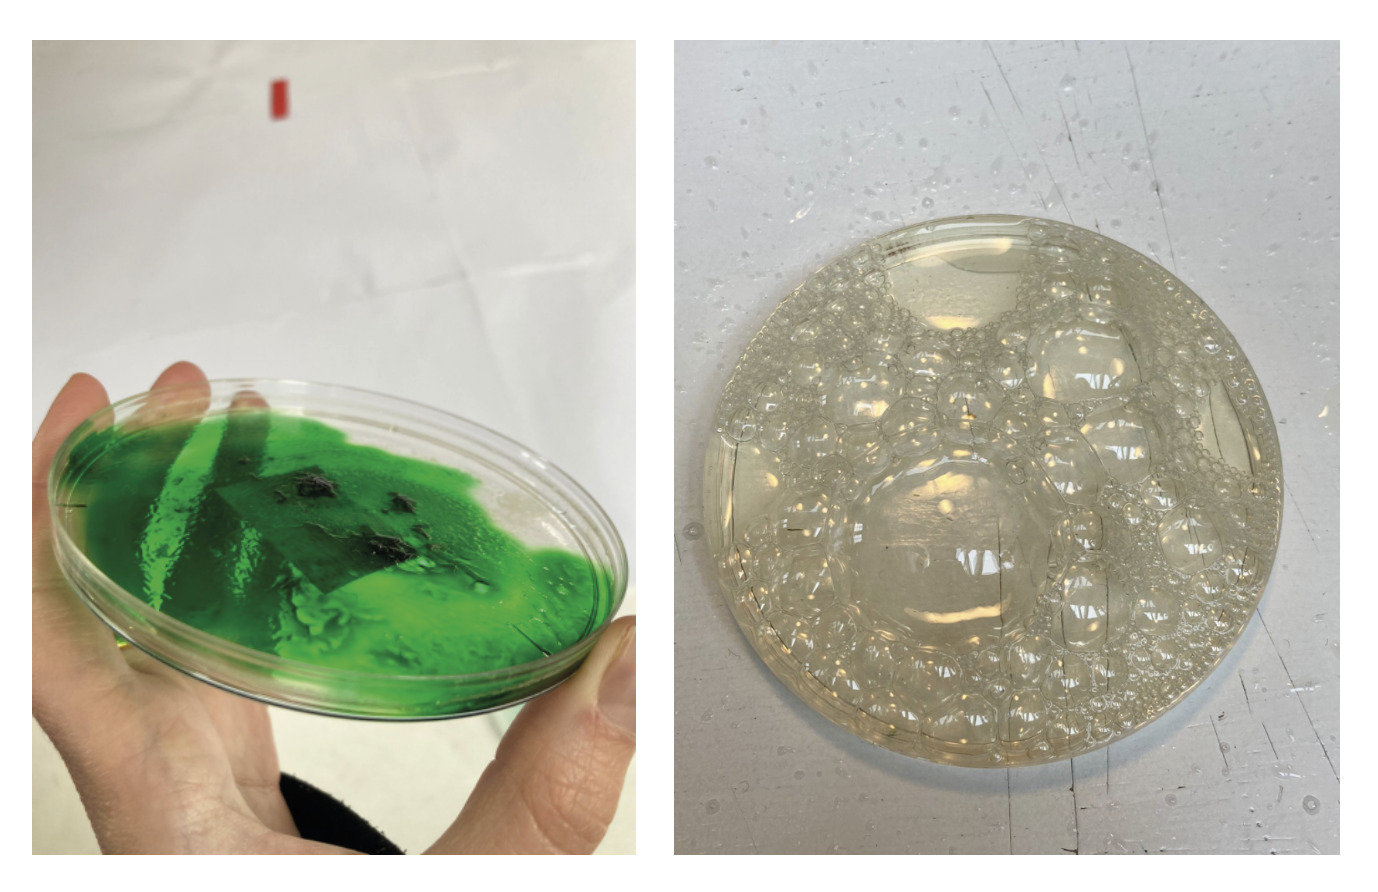
| Test 1 | Heat the water and gelatine for 20 minutes at 60º. Afterward, reach 80º for another 10 minutes. I found the visible bubbles on the mixed surface interesting, so I took a first sample of the material, scooping up only the bubbles with the spoon and depositing them in the mold |
| Test 2 | I took a second sample, scooping the bubbles + 1.5 height of the liquid mix |
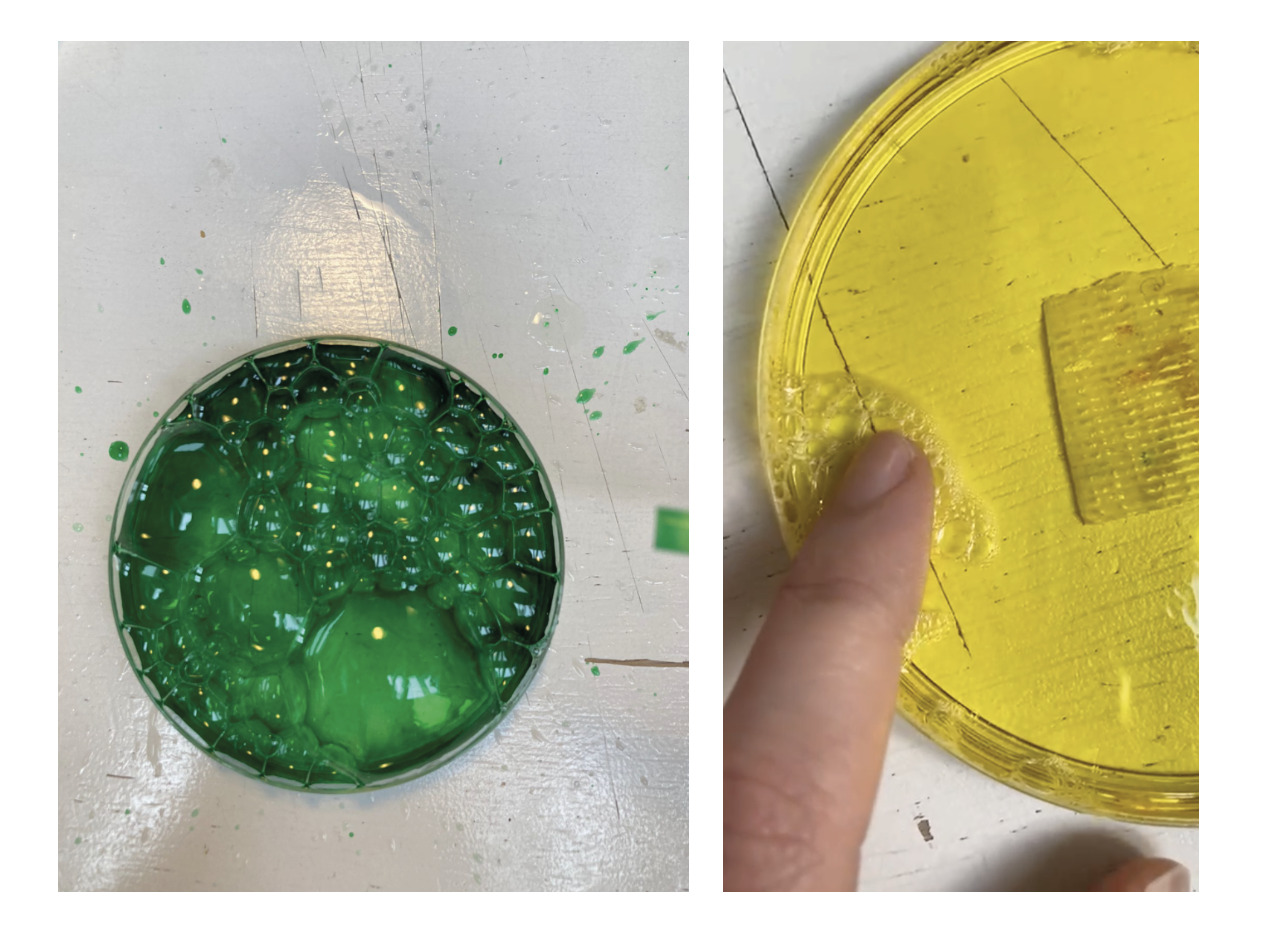
| Test 3 | For the third sample, I experimented blowing bubbles and color. I took a sample with 0.5 cm height of the liquid, added green natural dye, and blew the surface with a straw. The volume of the collected mixture was not enough, so not much bubbles appeared |
| Test 4 | For the fourth sample, I wanted to make the bubbles work. I did take a sample by scooping 1.5 cm of the liquid mix, then and blew the surface using a straw. This time lots of bubbles appeared on the surface |
| Test 5 | I did a fifth sample, blowing the surface and adding green dye. The bubbles continue to appear, but after a few minutes they decrease in quantity |
| Test 6 | With the intention of getting the bubbles to remain on the surface. I did a sixth test, adding an extra 40g of Gelatin to the mix, and heating the mix at 80º for another 10 minutes. In this way the mixture would be stickier and less liquid. I also added yellow dye to better distinguish it from the previous tests |
Heating up process
Test 1 - Left, Test 2 - Right
Test 3 - Left, Test 4 - Right
Test 5 - Left, Test 6 - Right
Material creation: Agar Agar Bioplastics 🧑🎨
Ingredients
When developing the Agar Agar experiments, I did use this materials:
| Name | Quantity | Unit |
|---|---|---|
| Water | 400 | ml |
| Agar Agar | 7 | gr |
| Glycerine | 6 | gr |
| Natural Dyes | x | x |
Tools
I used this tools to make the precious material:
- Pot
- Stove
- Spoons
- Moulds
- Thermometer
- Drinking Straws
Process
When experimenting with Agar Agar, I was looking for a more artistic way of making the material. Experiment with textures, colors, and solid components within the mix.
I tried 4 different variants of bioplastic gelatine. Attached is a table with all the processes which I followed:
| Test Nº | Process |
|---|---|
| Test 1 | Heat up all the material together for 30 minutes at 60º T. I took the first sample of 1.5 cm height of the mix, adding green drops of natural dyes, without mixing them with the liquid, in order to have an idea of how color behaves with the material |
| Test 2 | I took a second sample, experimenting with adding sunflower petals to the mix. I did this to check how the material behaves when drying off with a solid component within it |
| Test 3 | I tried out the last Agar Agar sample by pouring the mix onto a dots surface, where different natural dyes were added to the surface |
| Test 4 | I took the last 2 samples looking to check how the material behaves when drying off on top of a textured surface. I poured the third sample on two silicone molds, adding pieces of pink paper with the mix |

Retrospective 🤔
This week’s research turned out to be very creative and inspiring.
I was looking forward to cooking materials. Doing so and understanding the infinitive possibilities that biomaterials allow - in terms of color, shape, smell, and experimentation -, inspired me for new challenging projects.
I did want to follow in the first place already existing recipes, but I instantly found myself experimenting lateral ways to process the mixtures and pour them into molds.
Smelling hot gelatin for the first time made me understand how transversal this method is as a technique.