WEEK 15: WILDCARD WEEK
For this week, we "only" have to test out something different that what we´ve done till today. I have to remark that for me, every week has been something "different" and new.. ;). So, for this assignment my intention is to make the Delta 4070 Pro WASPclay 3D printer that´s unused and alone in a corner of our fablab since I started fabacademy, and therefore needs some attention! PD: The other option was to use the waterjet cutter, but we used it in the computer controlled cutting assingment as an extra bonus. Gosh, it´s amazing how much i´ve really learnt, and most important how much hands on i´ve done in the last months. So, to get started my planning will be:
- Read the data sheet and get to know the Delta 470 Pro Wasp printer .
- Do a test run and prepare it for clay printing.
- Design something to print and print it.
DATA SHEET AND GETTING TO KNOW EACH OTHER
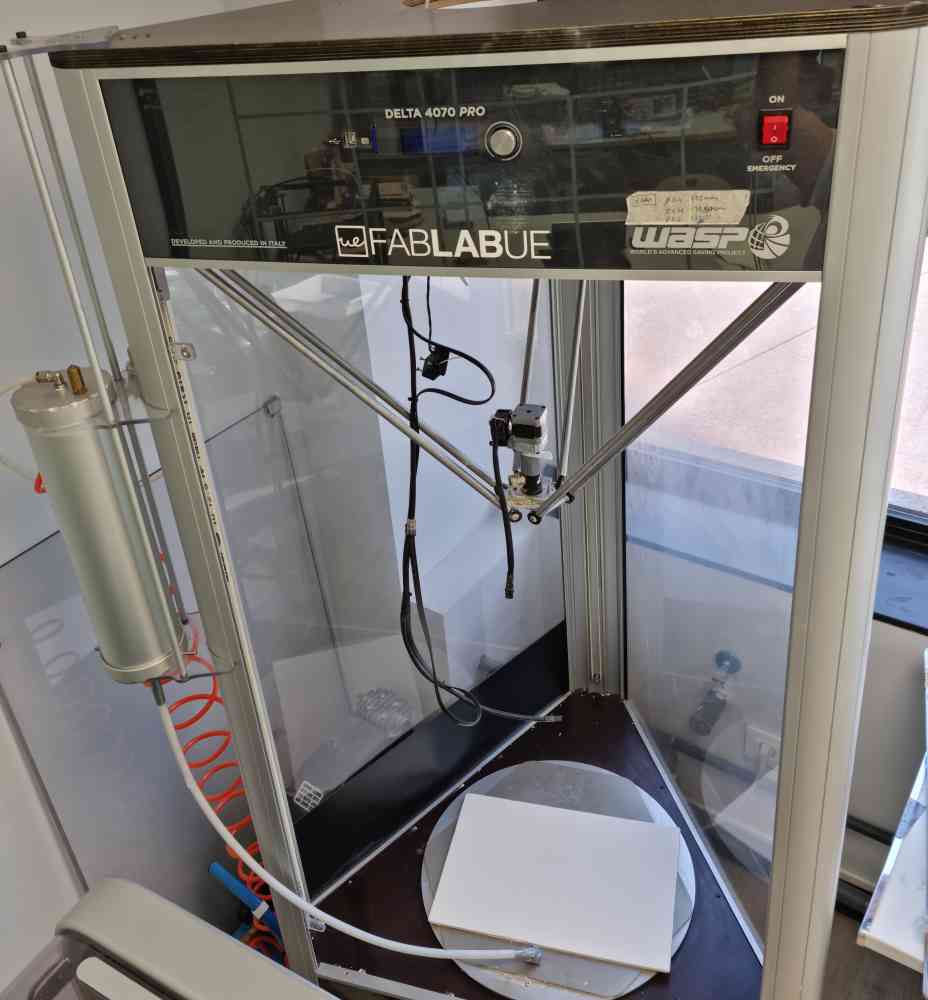
First of all, we dove into internet to gain information regarding our "new" machine, the Delta 470 pro combined with the WASP Clay Kit. I say "new" because as you can see in the web page it´s no longer available,,, but that doesn´t take a bit of my enthusiam of printing with clay.
For first impressions, this printer, is a big, heavy 3D printer with a quite considerable printing volume and with the following characteristics, as you can check in the data sheet:
| Physical dimensions: 850x770x1990mm. 50kg of weight. |
| Supply: Input: 220/240 V 50/60 Hz (110 V available). |
| Printing information: Print volume: Ø 400 mm x h 670 mm. Maximum printing and travel speed of 200mm/s. |
| Extruder: LDM WASP Extruder for fluid-dense materials. Nozzle diameter: 1.2 mm. With a suspended bowden. |
| Temperature: Use: 20-30°C, Warehouse: 0-30°C, Nozzle: max 260°C and Hot Pad: max 110 °C. |
| Software: Works with Cura, Slic3r and Simplify3D. File type: File type: .stl, .obj, .gcode that Gcode is loaded via SD card. |
Here you can check how it looks, just as I found it:
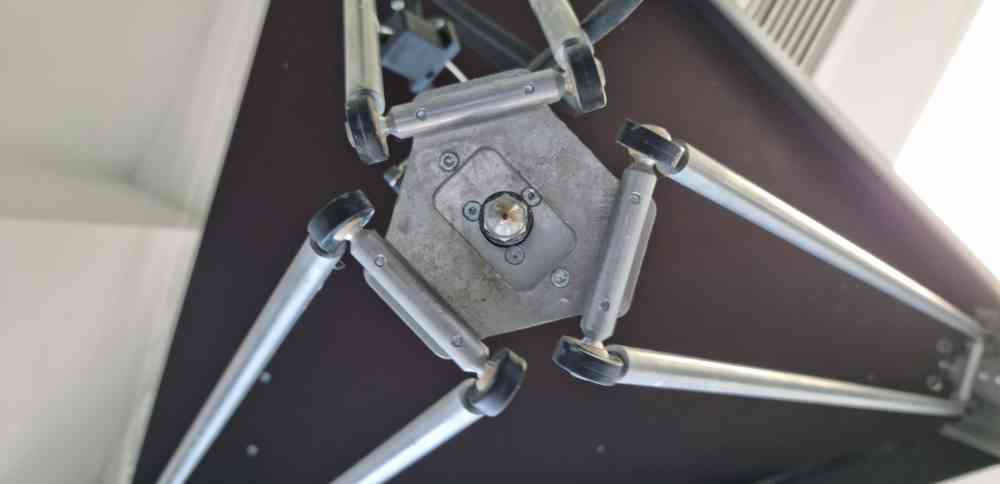
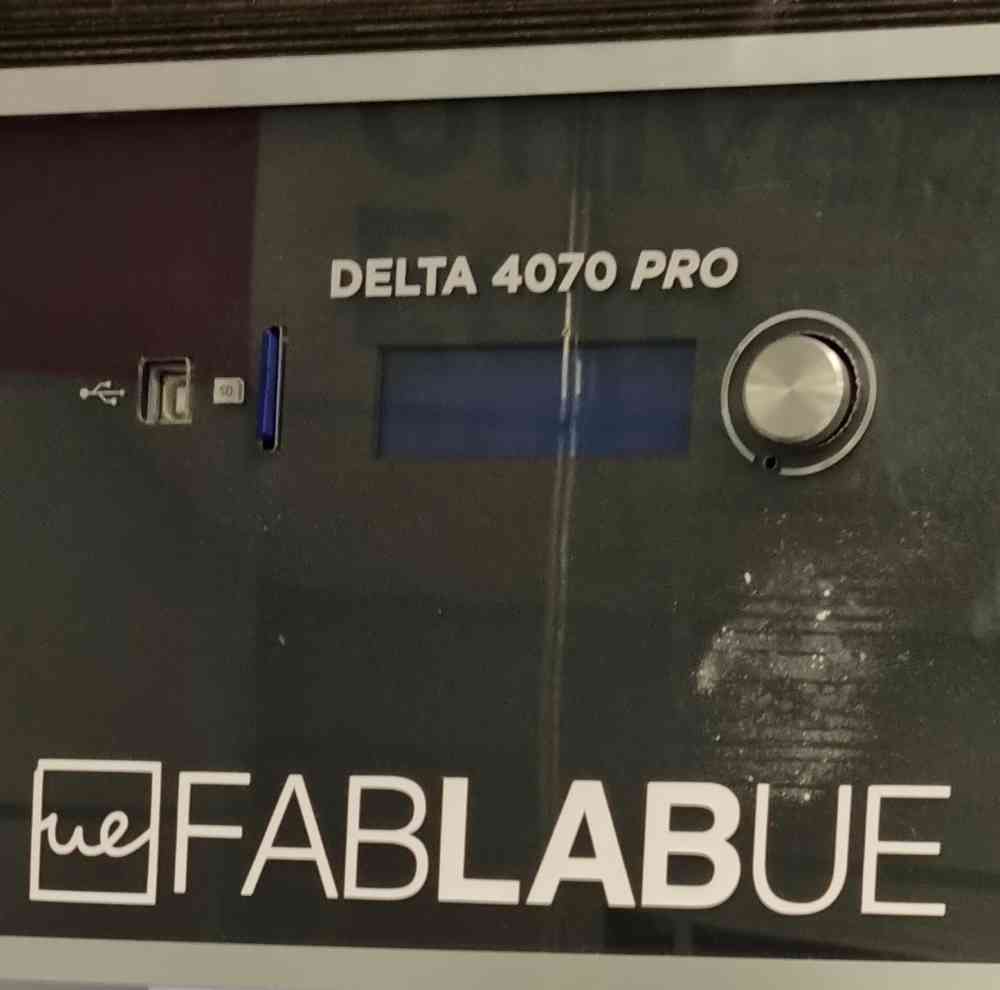 SD and LCD Display.
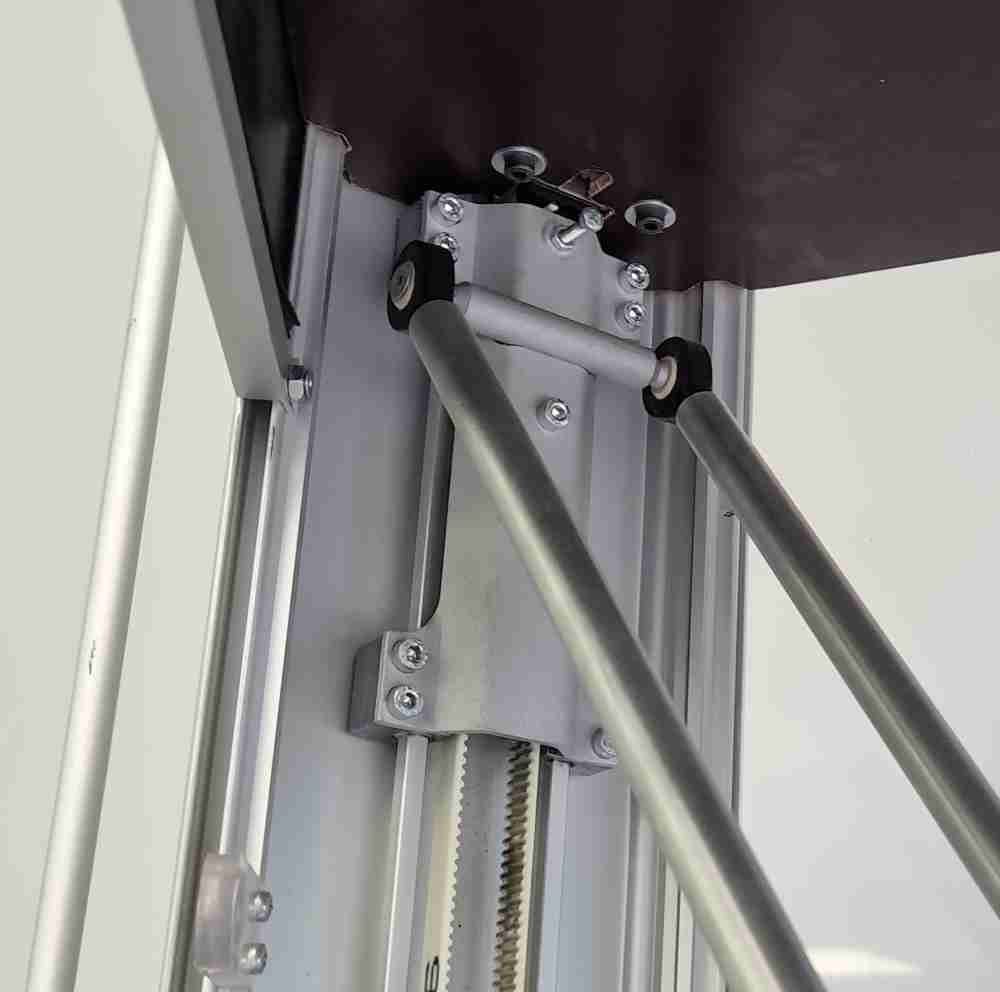 Suspended mechanism.
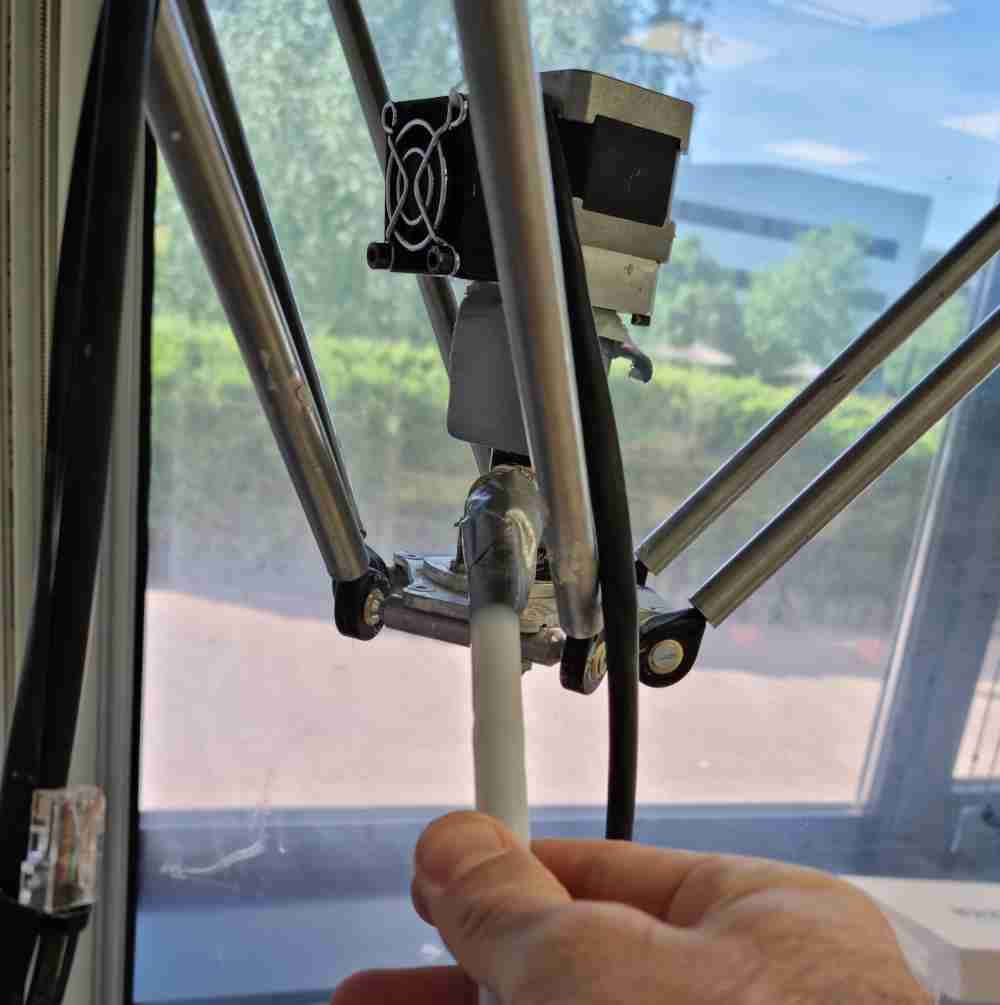
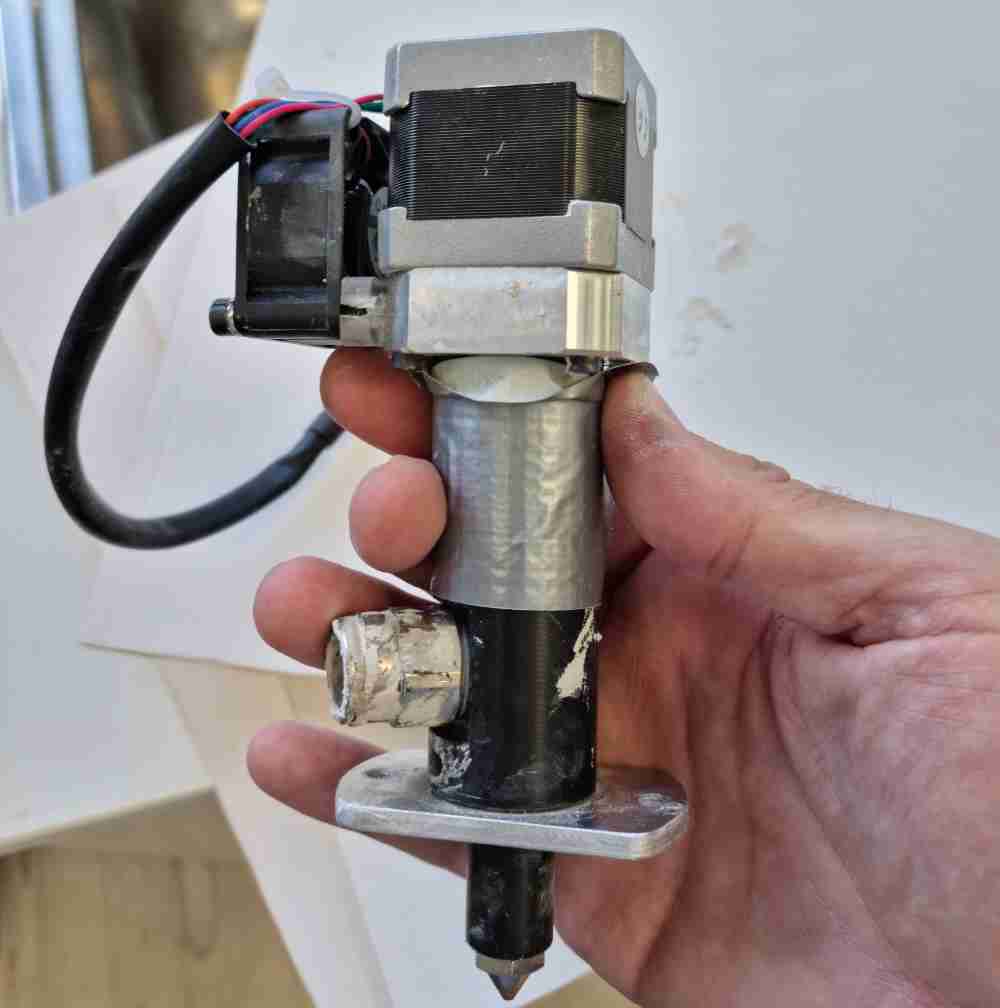 LMD WASP extruder.
As our Delta 470 pro printer comes with the WASP clay kit, a professional instrument for the deposition of dense fluid material as clay mixture, silicons and experimental materials, that contains:
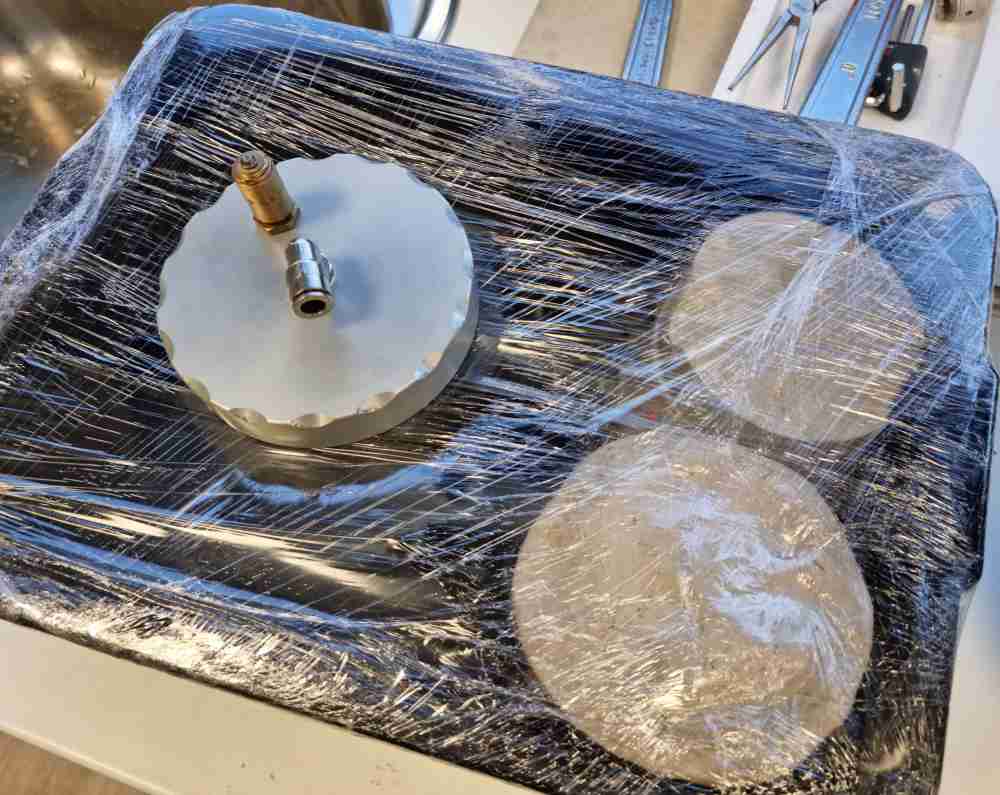
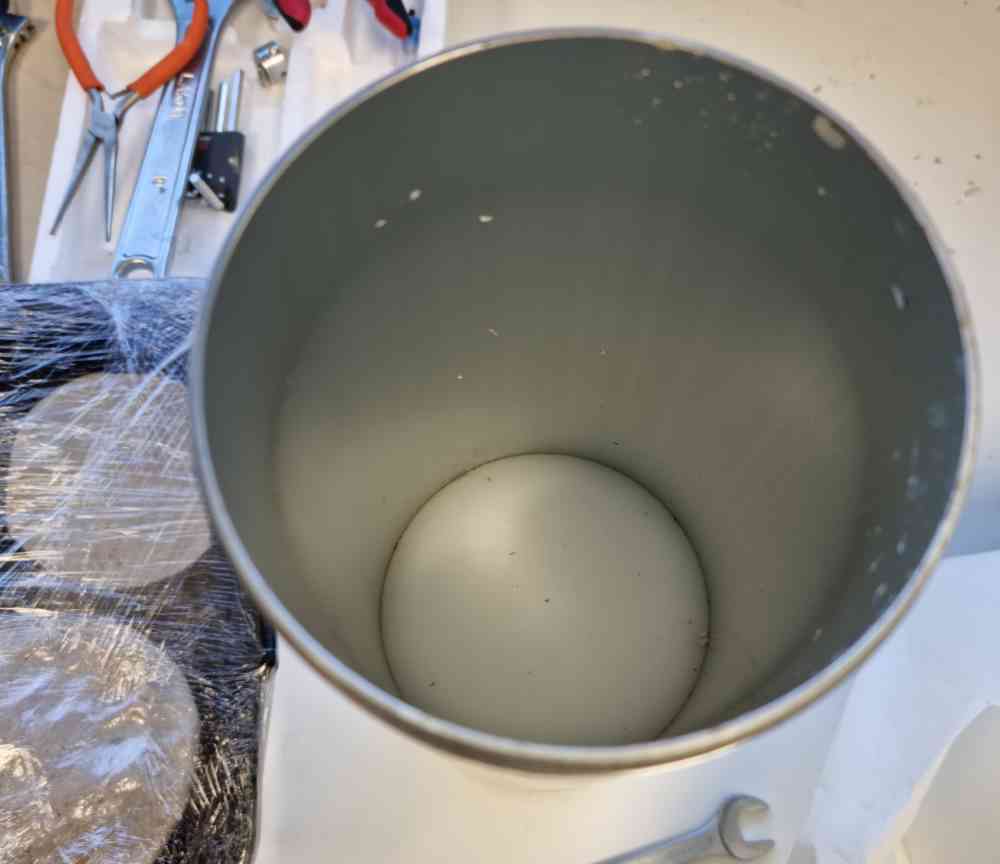
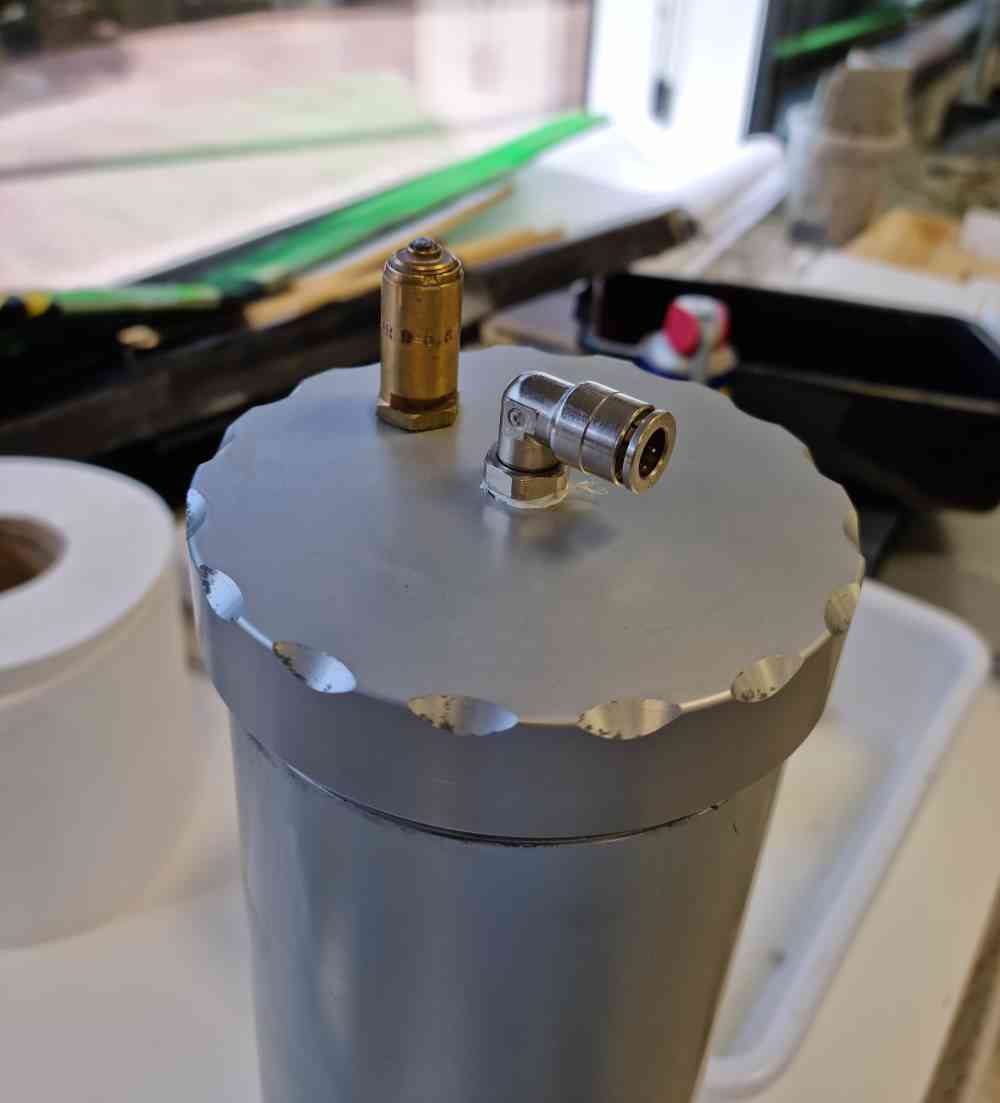
- A 3 litres aluminium tank with a nylon piston.
- A tank support and pressure control system.
- An interchangeable 1.2mm noozle.
- A LDM extruder and a 6mm diameter nylon hose.
And to that, you have to add a compressor with enough power to obtain 4 bars of pressure. That means that manufacturer declines all liability for injury to persons and damage to components due to an incorrect use of the product. And, even though it can be used to "print" dense fluid materials such as silicones and experimental materials, the only material certified is ceramic material.
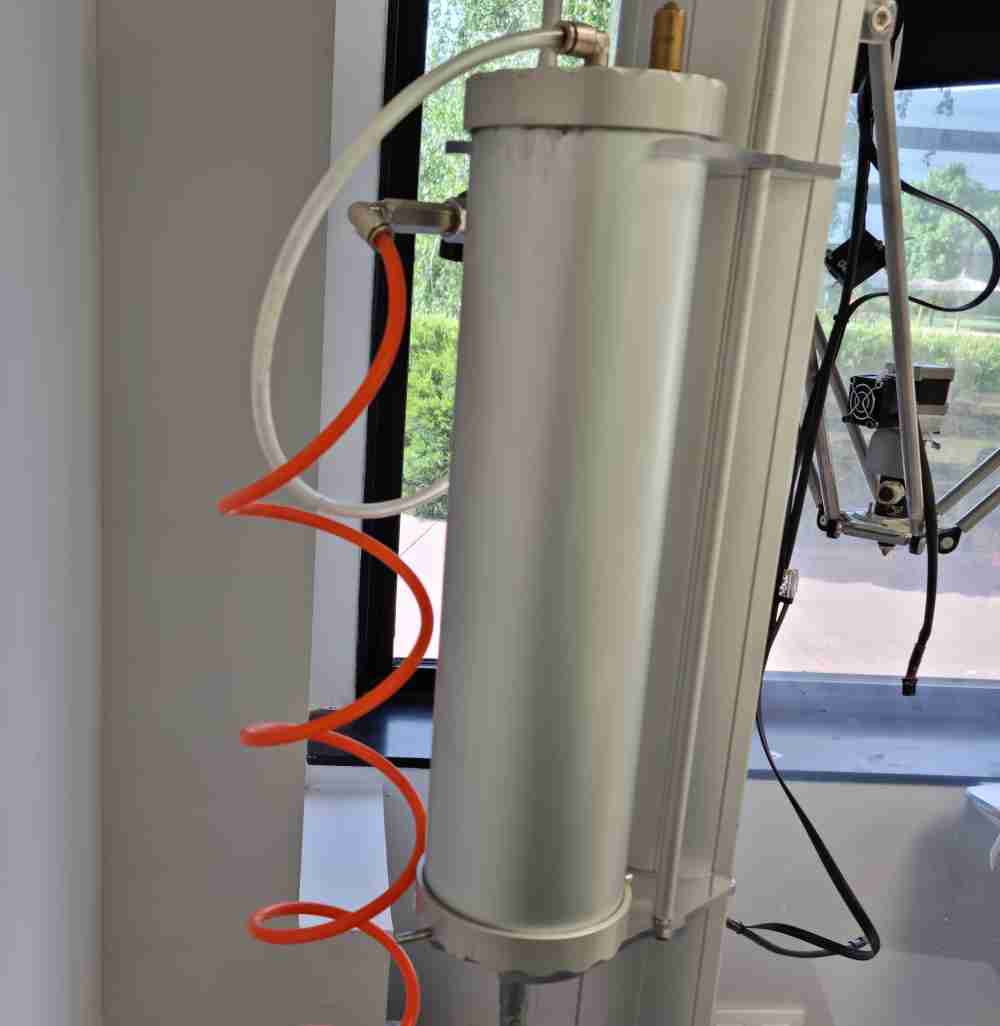 Aluminium tank.
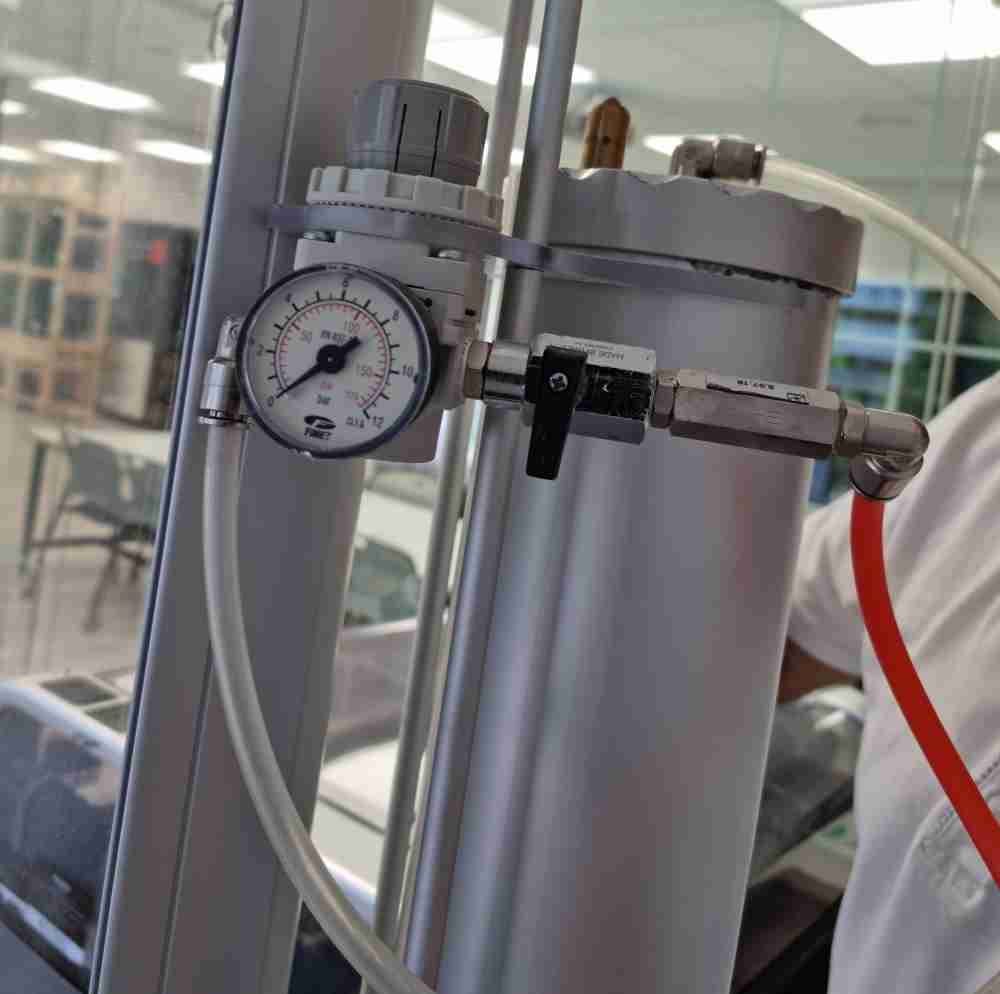 Pressure control system.
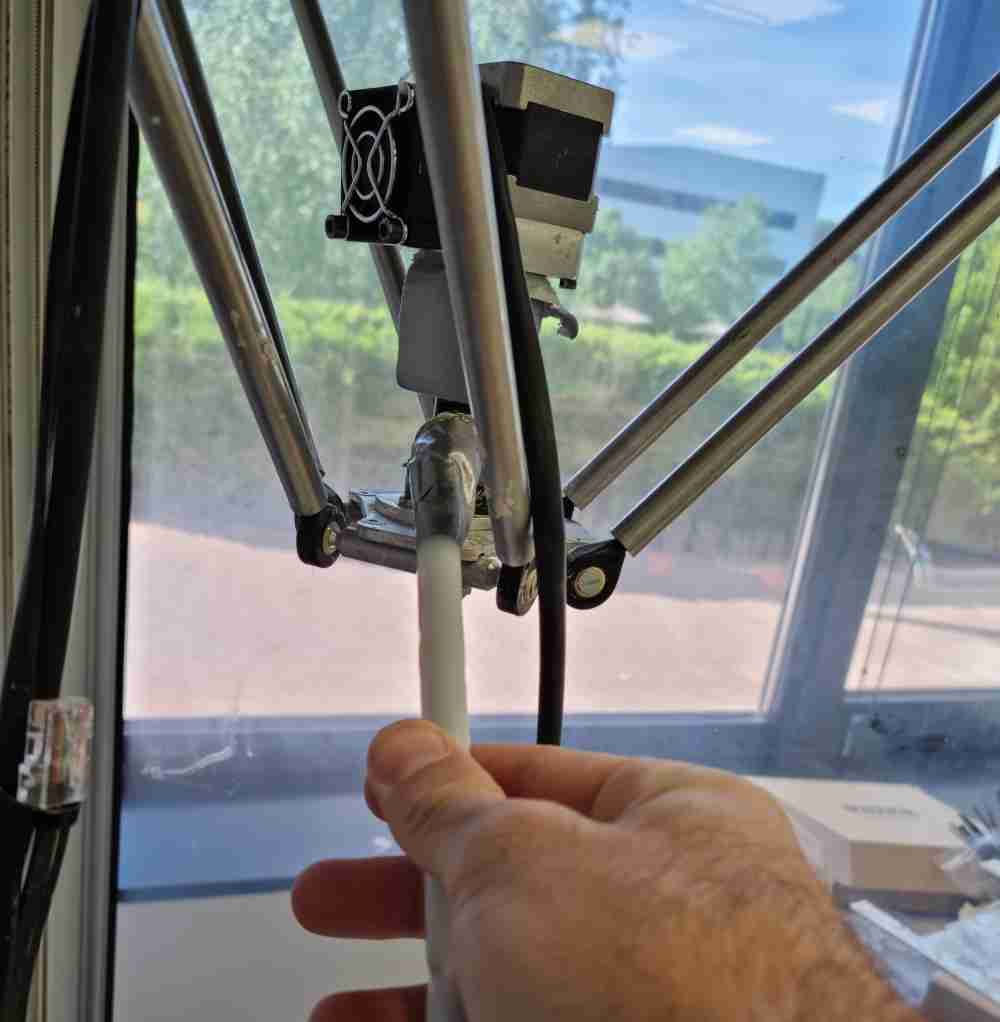 nylon hose.
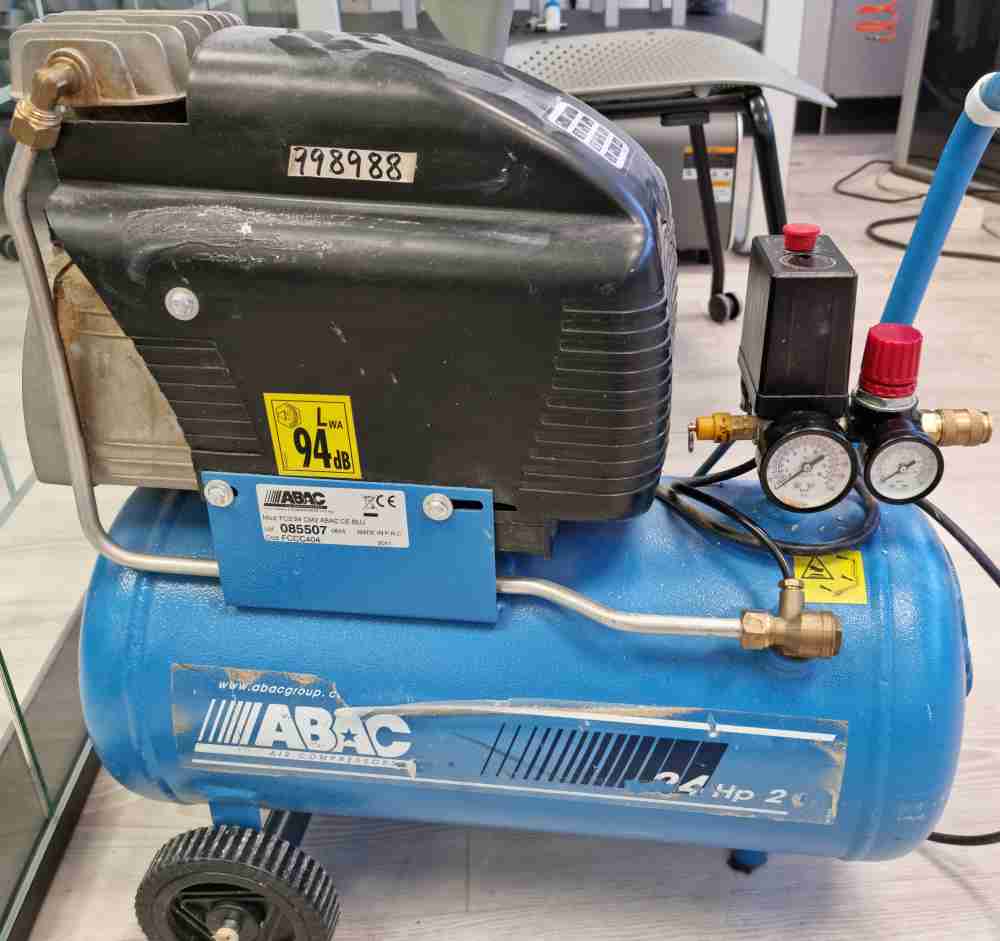 Compressor.
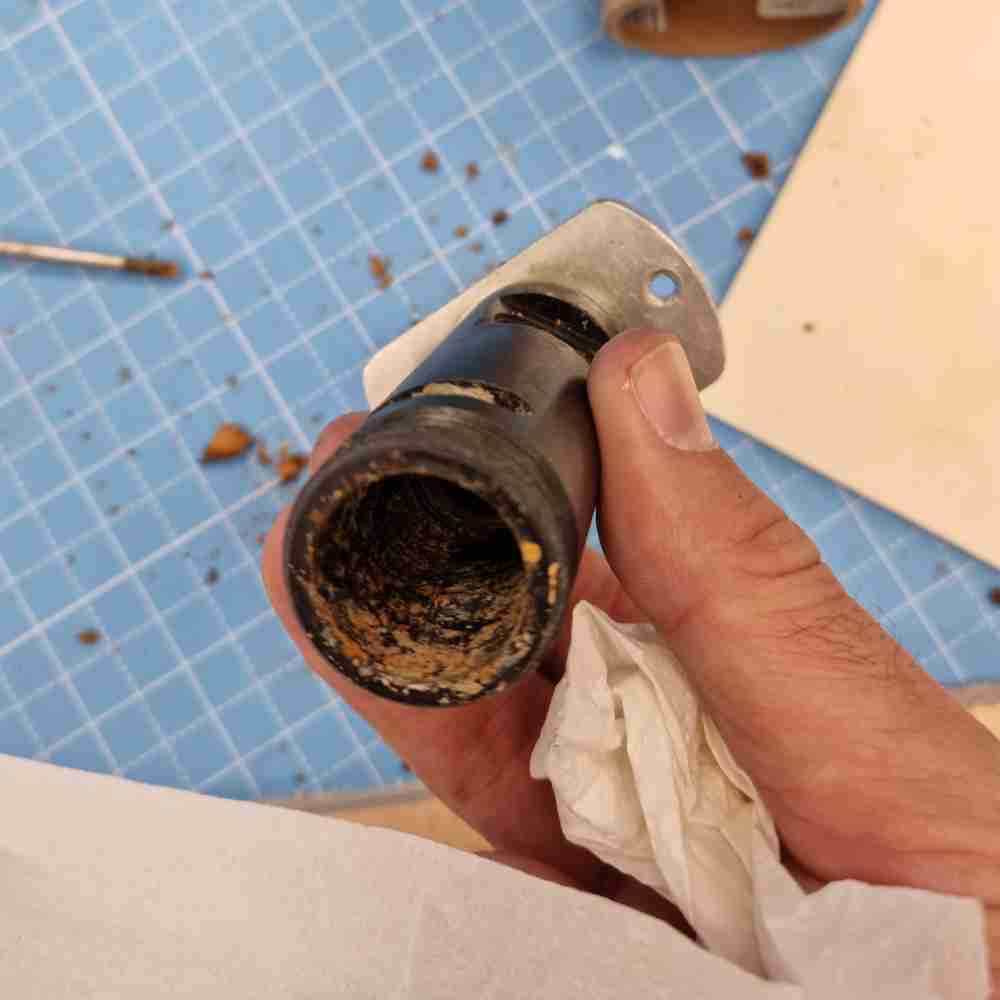
Once we´ve had everything under control, little did we know of what was going to come.. I had the most practical experience of what happens if you don´t take care of your machines maintenance... It seems like the last users of the Delta 4070 pro didn´t clean up after using it. So, 6 long months of clay inside the extruder, and hose, did its work and everything was obstructed with dry clay, so we had to dismount it completely, clean it/repair it, and mount it back again before even been able to use it. So, even do it takes time, if you think of it as a learning process, now this machine has no hidden secrets for me! So, this is how it went:
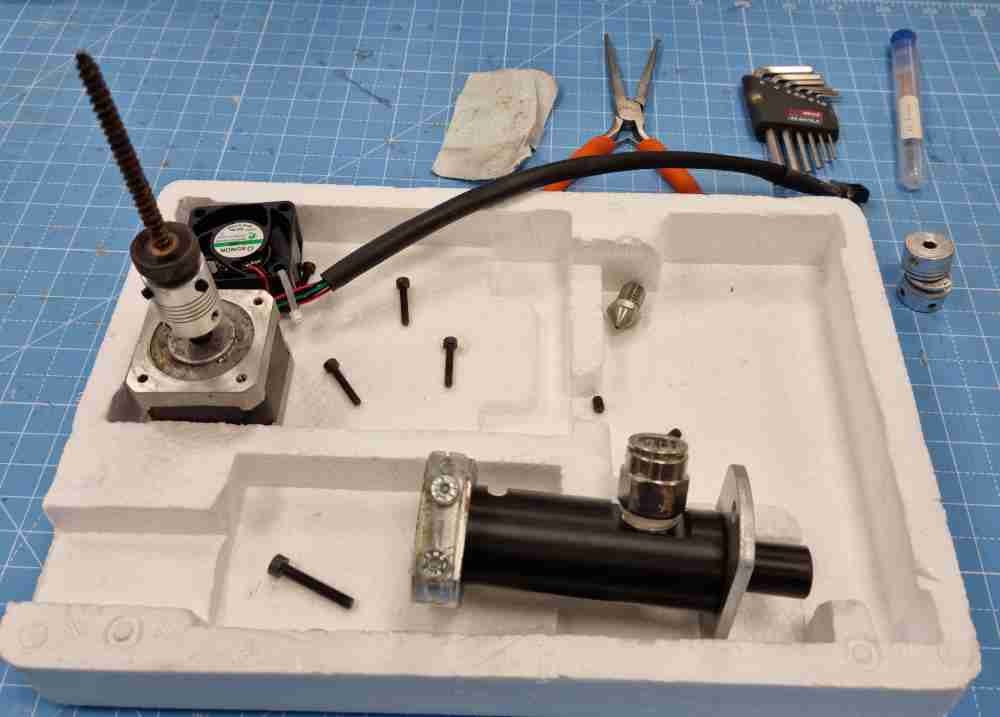
First of all, disassembling the LDM extruder completely, that´s were we found that clay had solidified inside the extruder, and that the motor support was broken:
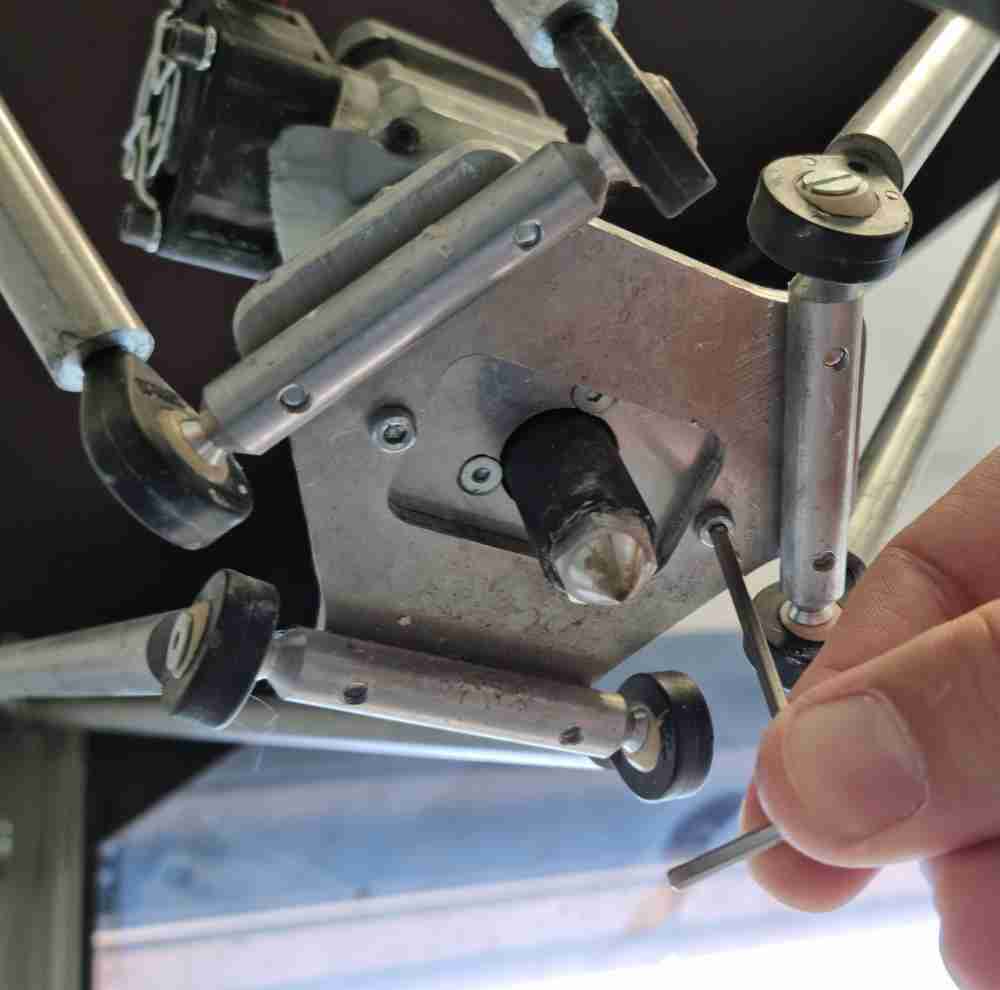

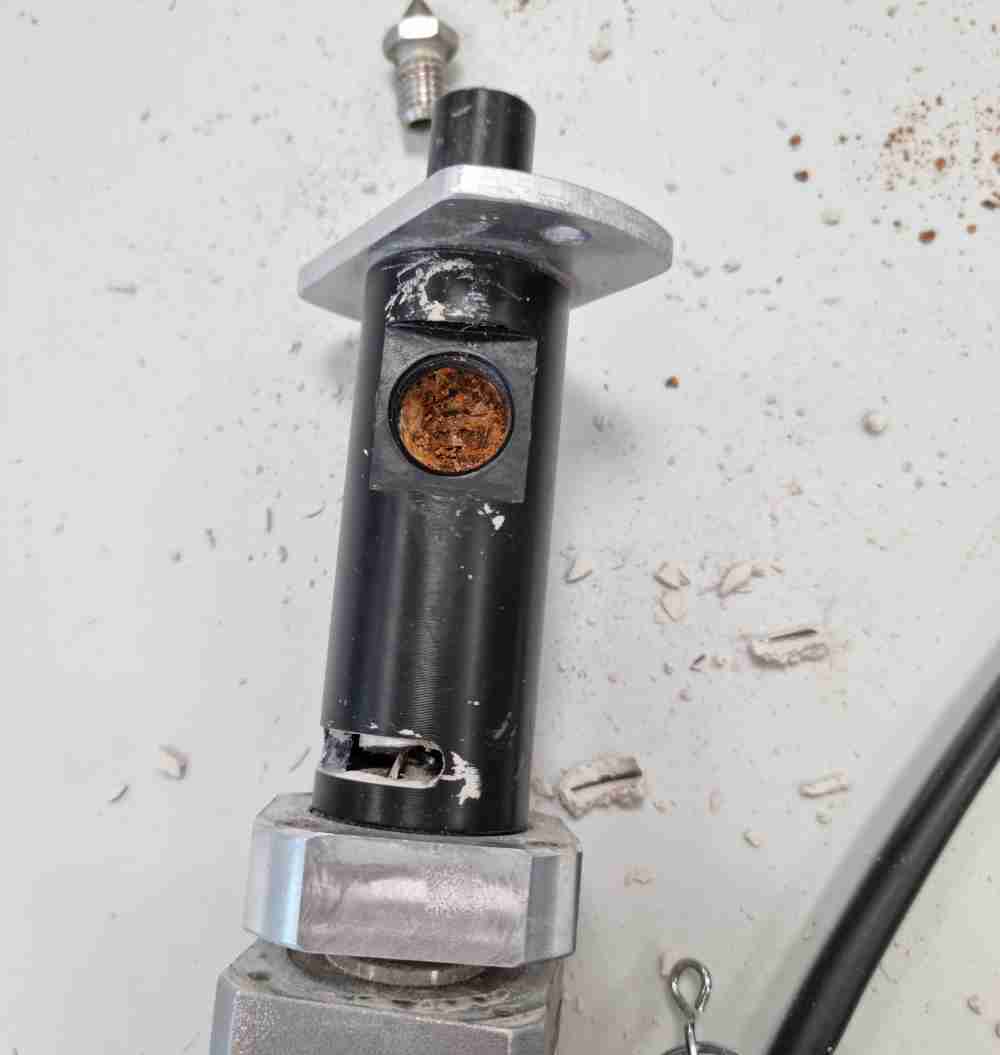 Obstructed nozzle.
Second, cleanind and repairing the extruder, were the part connecting the screw to the motor was broken, luckily we had a spare part in the lab, so we replaced it with the new one.
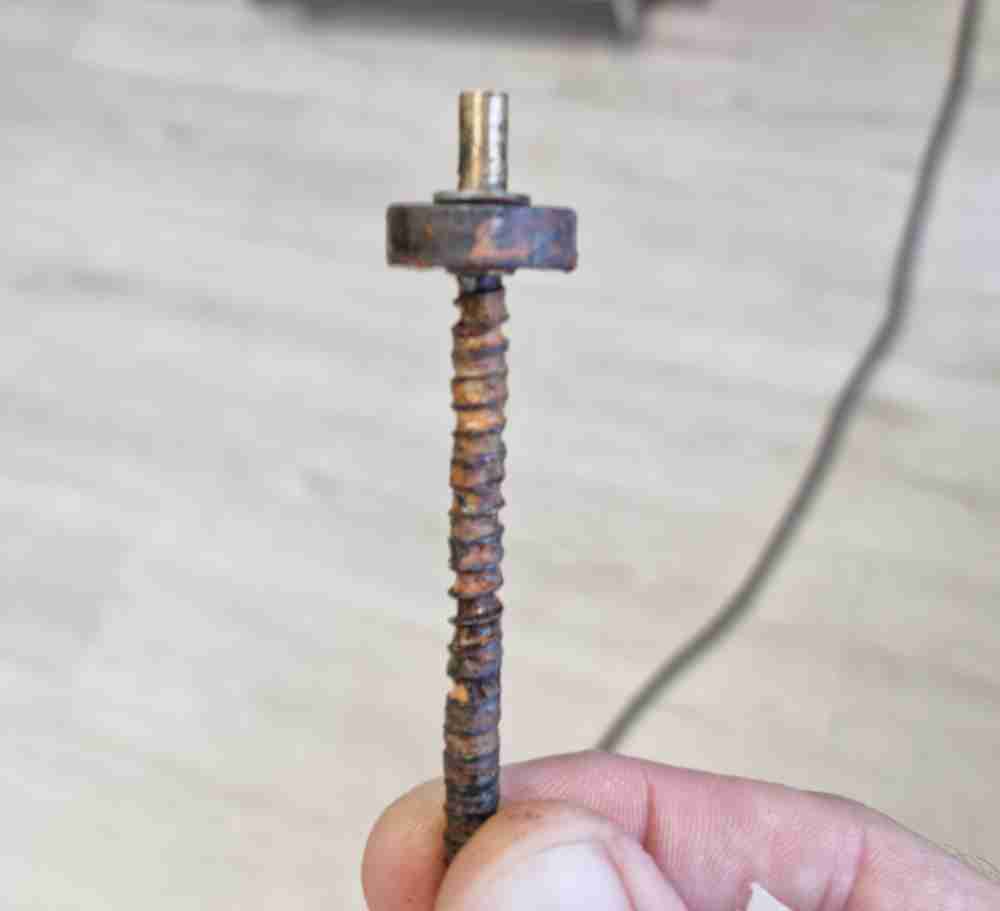
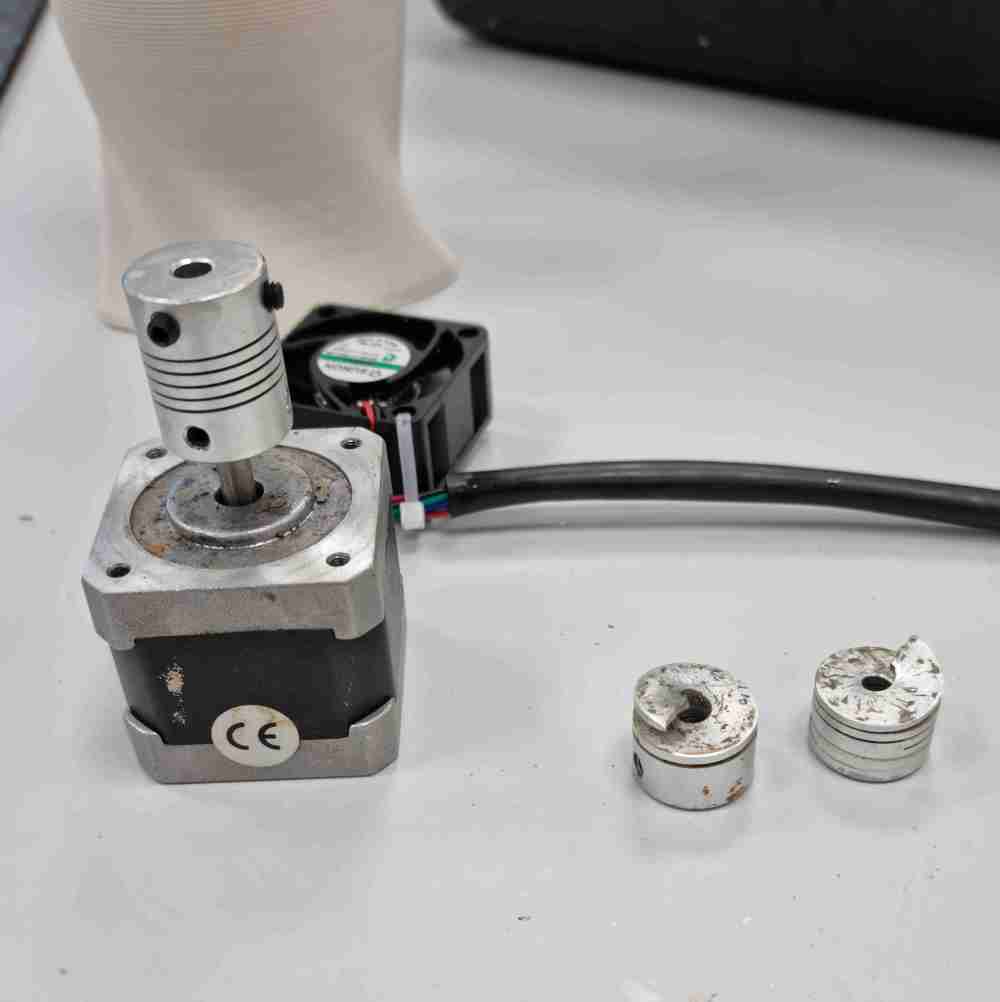 Broken motor.
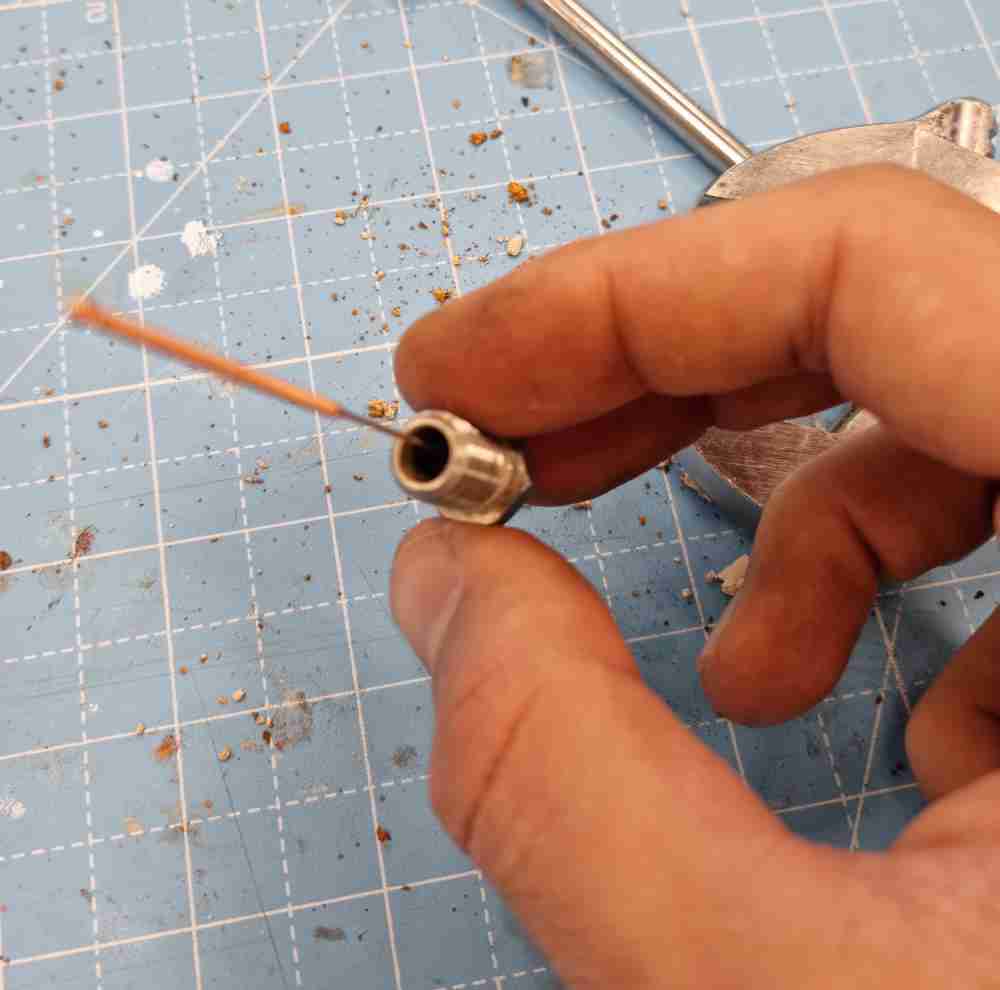 Nozzle obstructed.
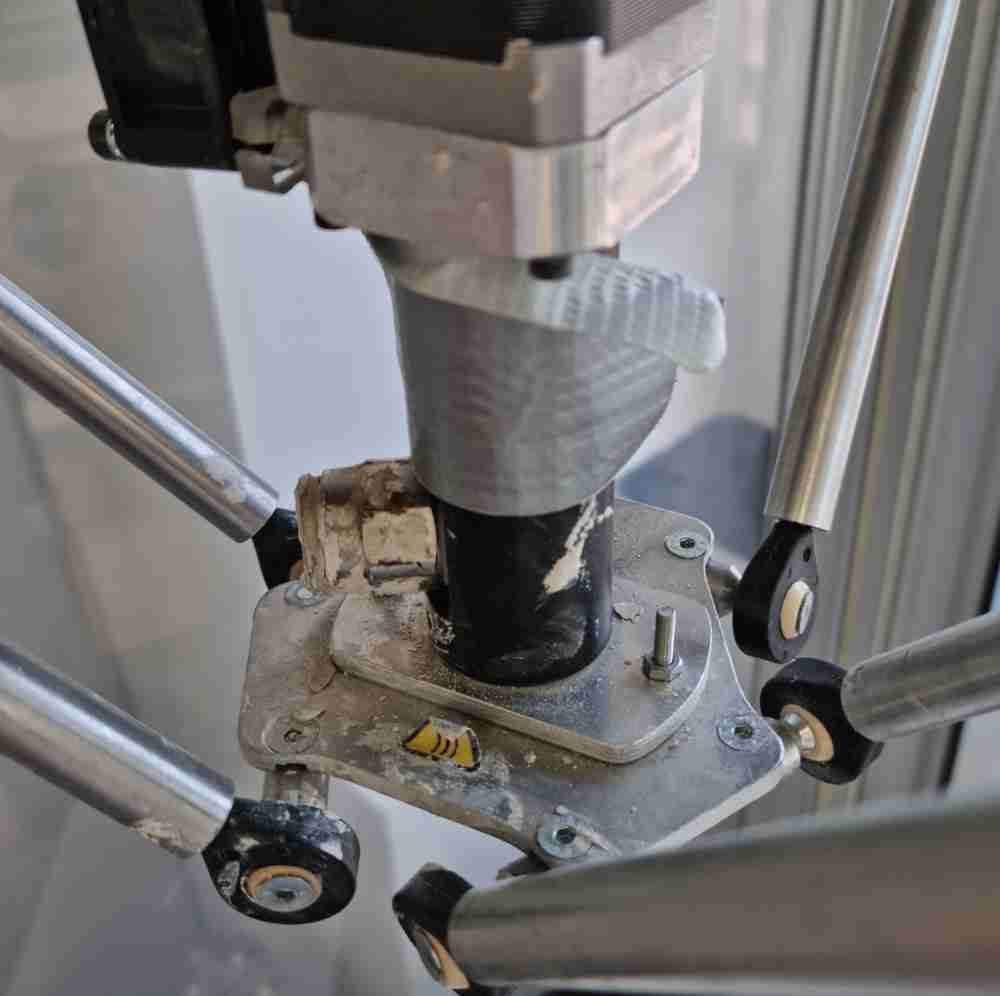
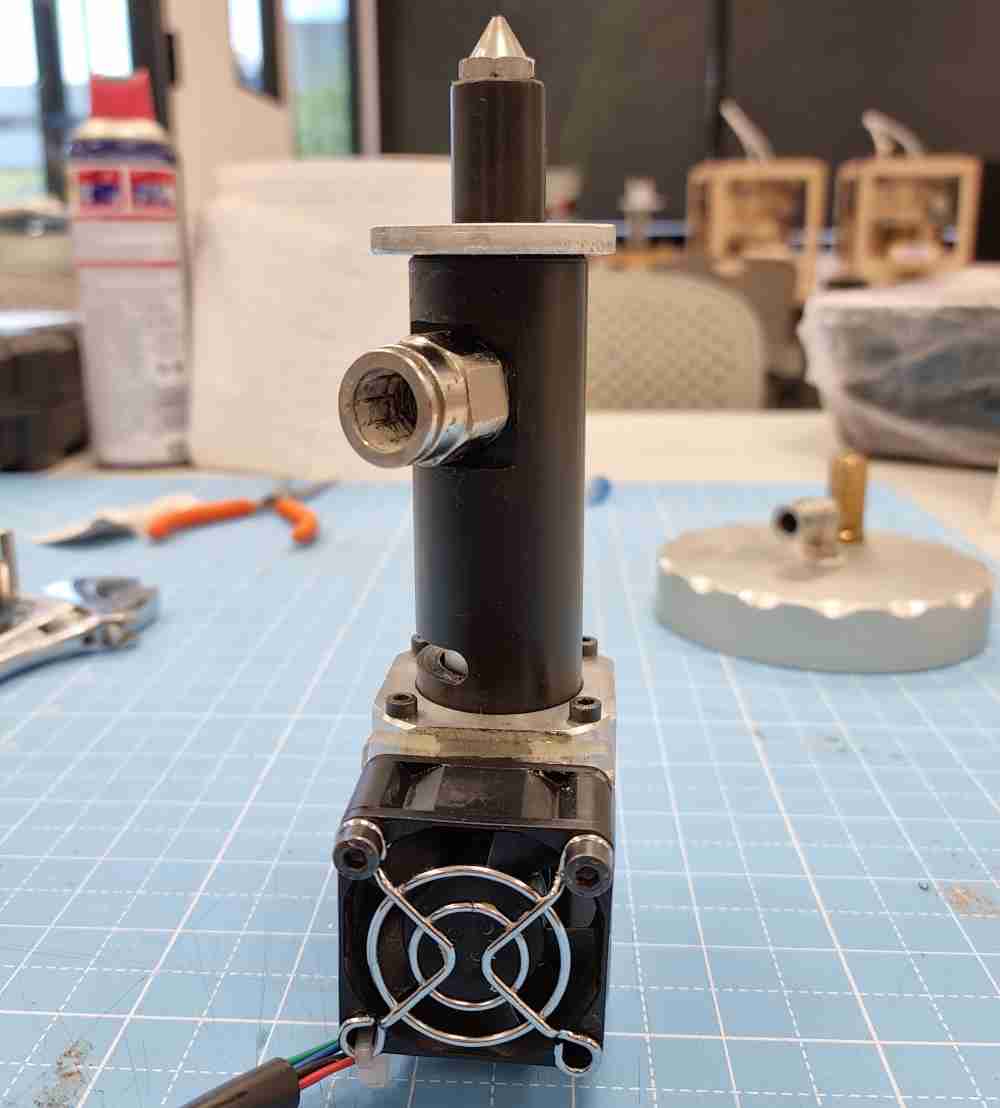
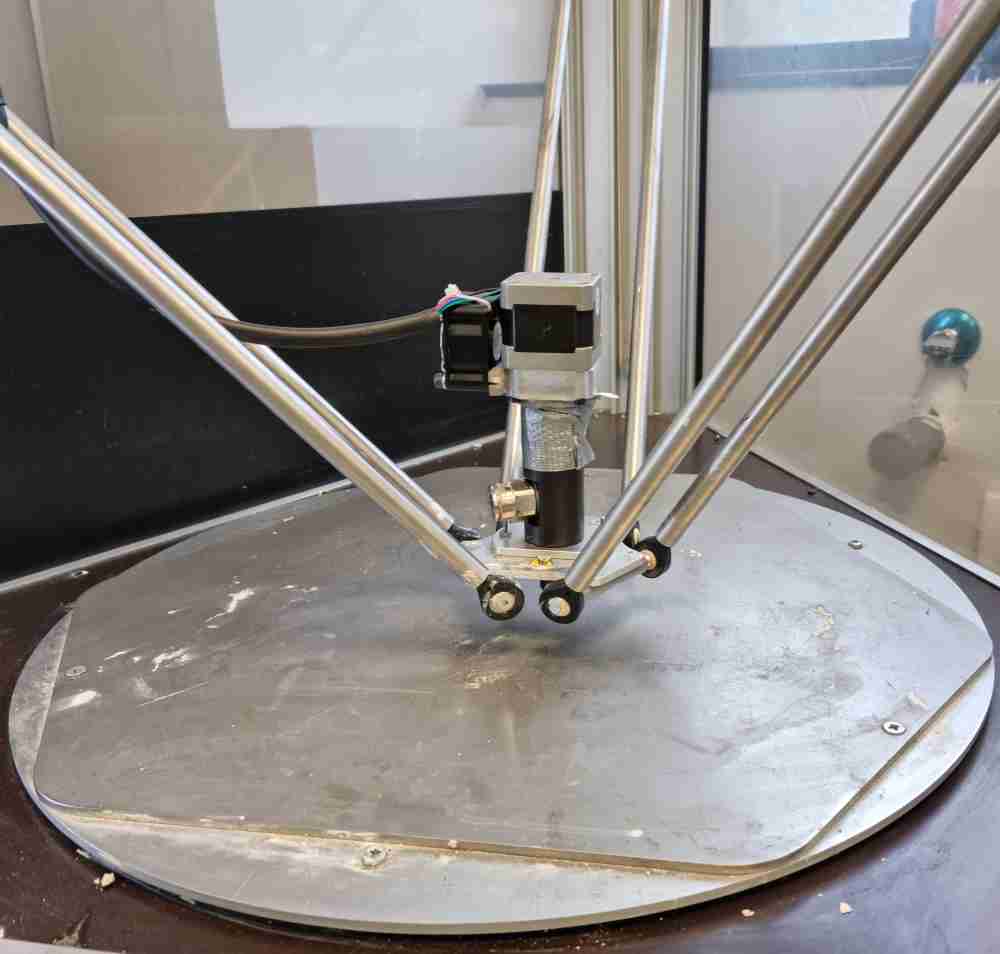
And finally mounting it back again. First we mounted the extruder reassembling the screw, the motor and the fan. After, we mounted it back again in the Delta 470 pro as you can see in the image below.


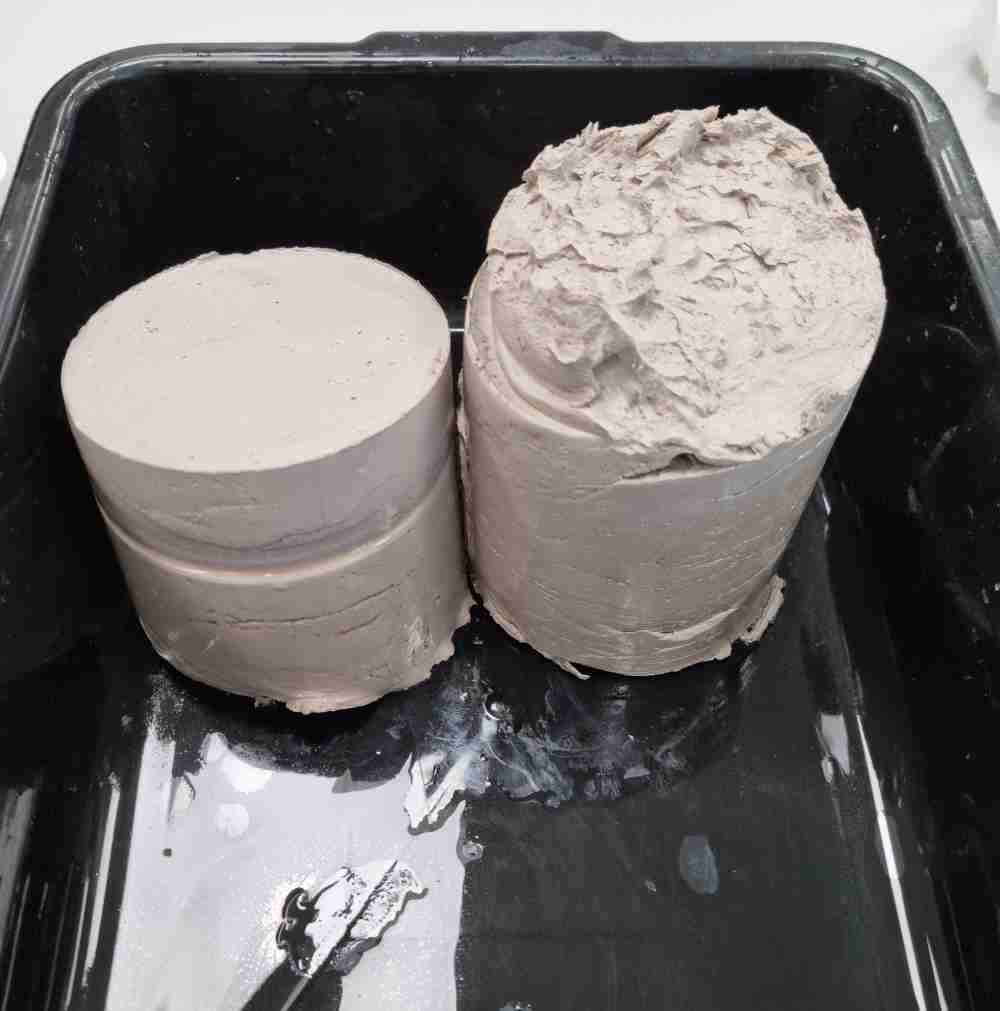
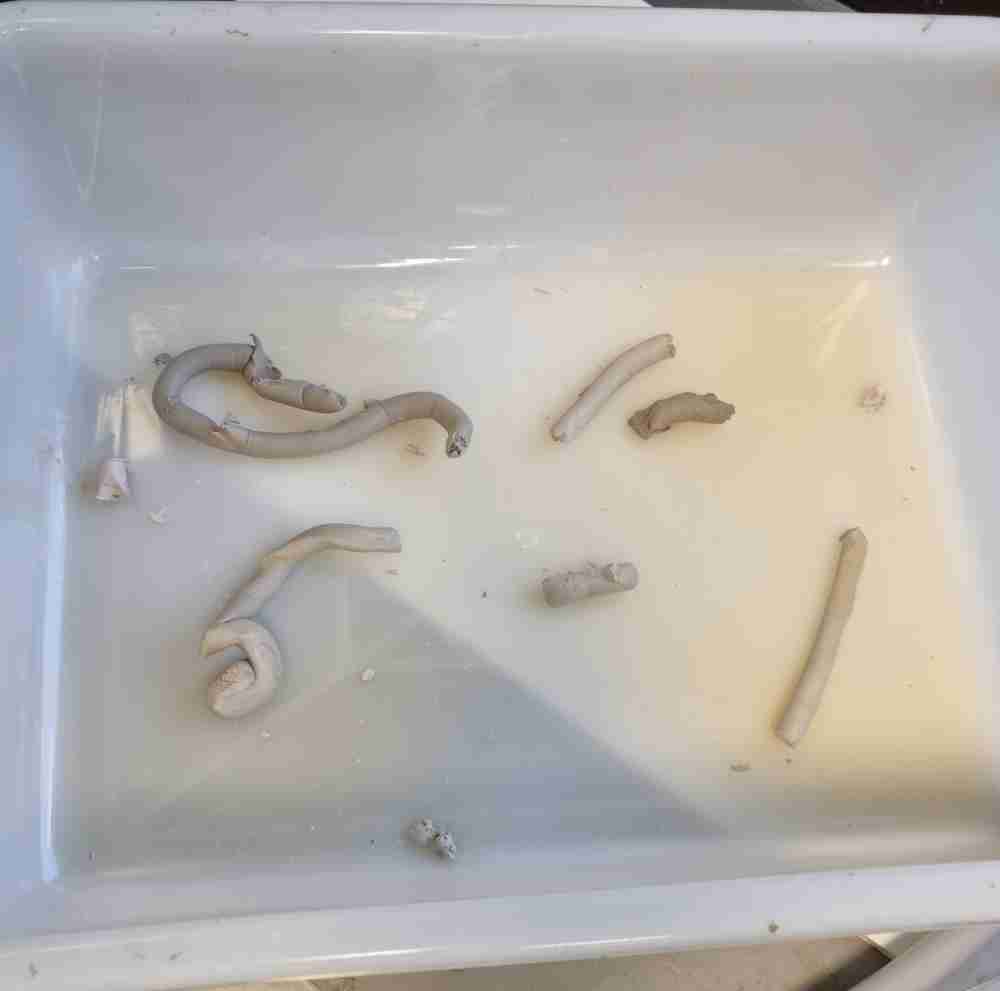
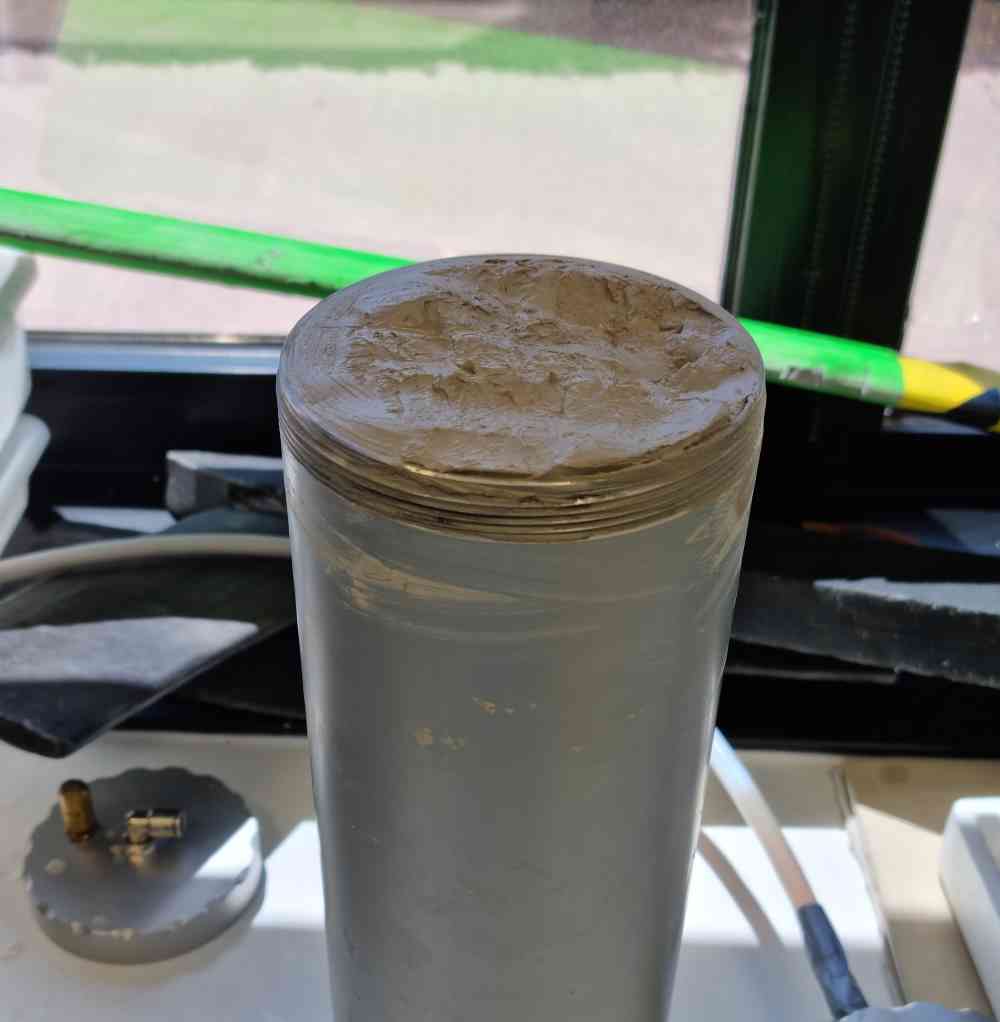
After completely cleanind the extruder, we emptied the clay inside the aluminium tank, which was surpringly in good conditions, and cleaned the nylon hose.

 Hose cleaning.
Now, the Delta WASP 4070 pro is ready to use. So we go to the next spiral. As for thoughts until now.. I preferred not to invest so much time in preparing it but, on the other hand, i´ve learnt a lot and feel much more confindent when operating the machine, so happy with the results for now.
TEST RUN AND PREPARING IT FOR CLAY PRINTING
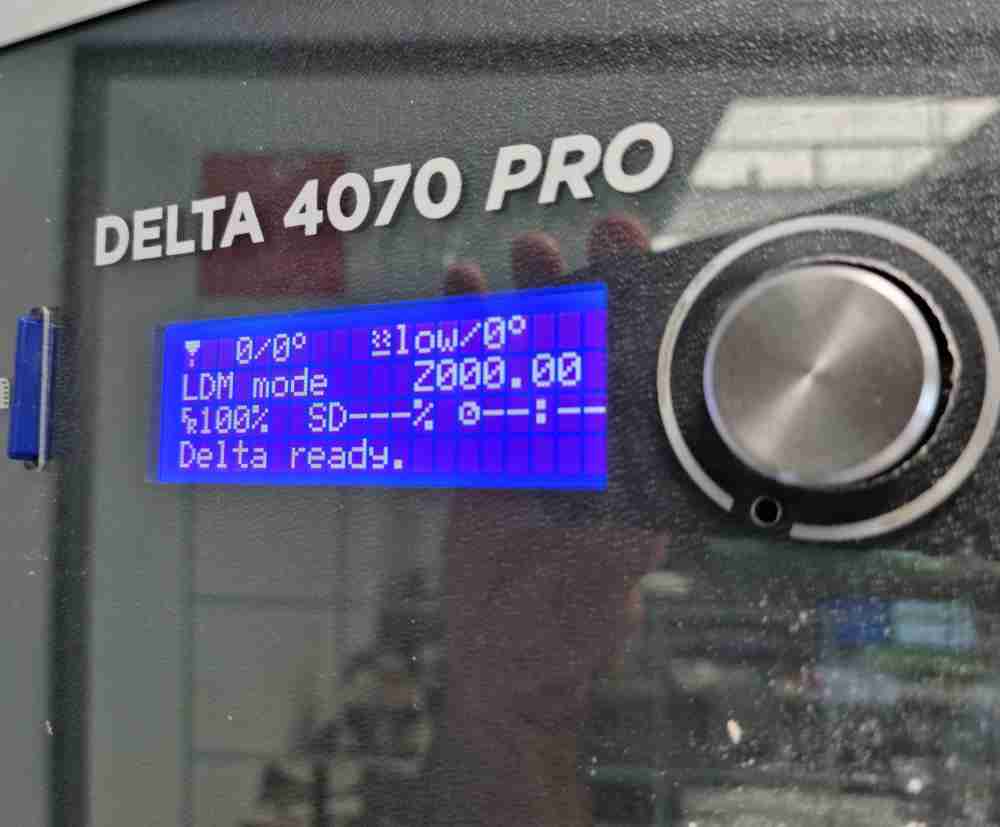
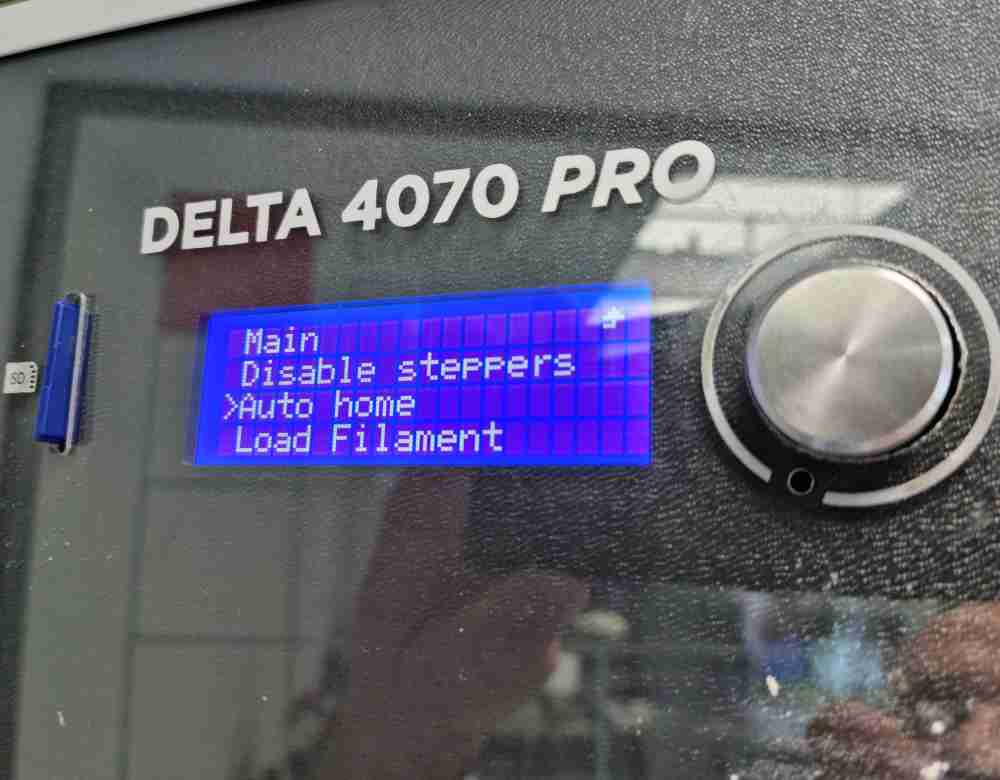
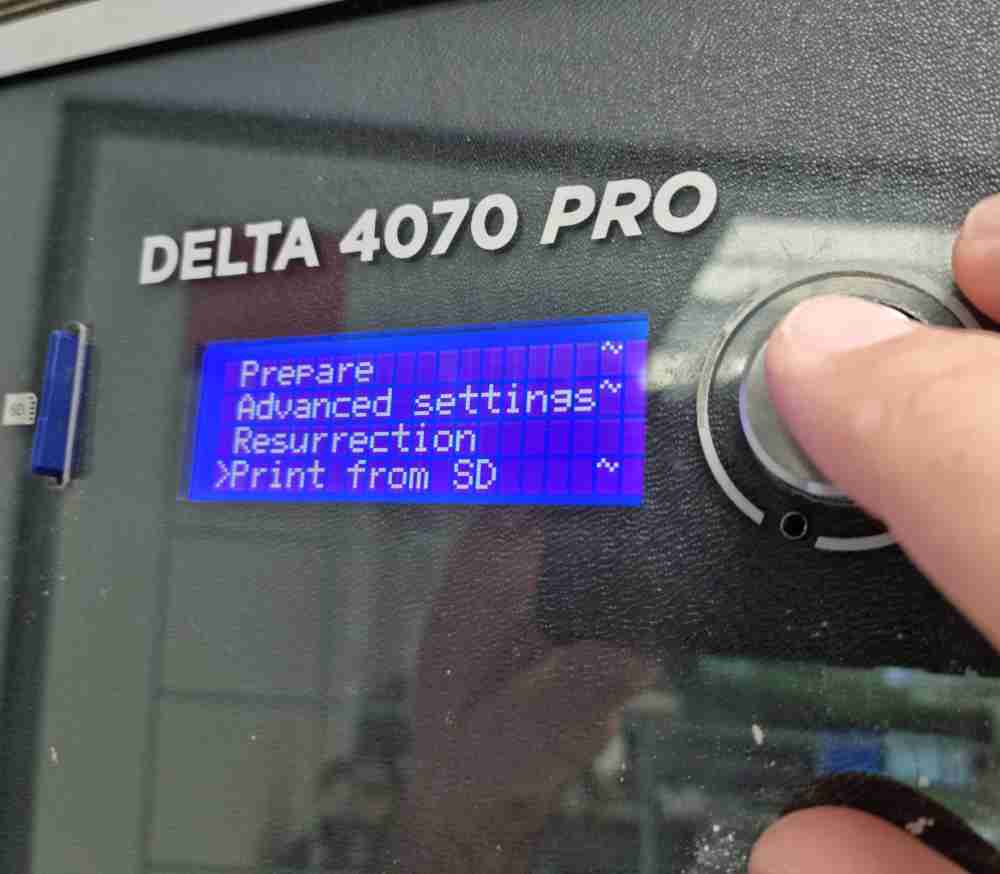
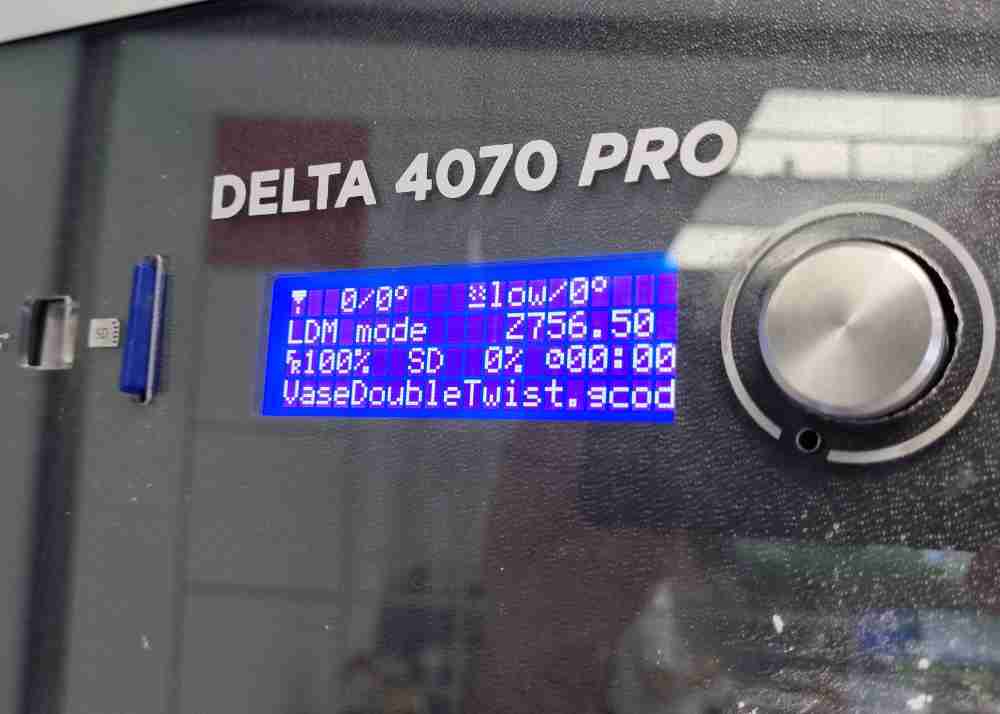
Now that it looked like we finally had everything ready to run, we did a test run on the printer, doing firstly an auto home, and checking if it was calibrated, which it was, and it successfully did an "air" impression with no material. In order to achieve it, it´s a simple task similar to any 3D printing machine:
| Load your code to the SD card, and insert it into the machine. |
| With the display control handle: Go to auto home and check if its calibrated. |
| Go to advance setting and turn the LDM Mode to ON. |
| Select, again with the display control handle, the file to print: And print it. |
| In our case we did an "air test": If it were a real print, we need to turn or the compressor and and "add" the clay to the extruder. |
Here you can check how to operate the display control and a video of the "air" test.
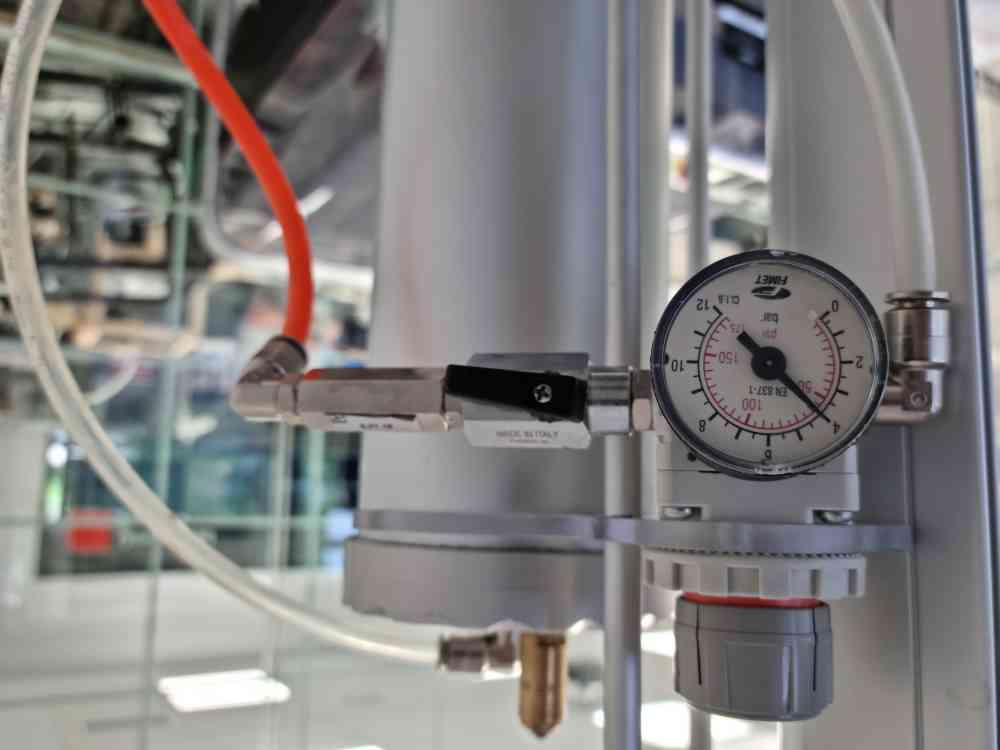
So, the next step is to turn on the compressor, as we need about 4 bars of pressure to move the nylon piston inside the aluminium tank, as its the mechanism that´s going to "push" the clay from the tank to the hose and into the extruder, and from there, to create our figure. But... another surprise.. it didn´t work properly, as it only compressed to 1 bar.. So we had no choice than to stop it, as it´s not a machine to play around with. This issues reminds me that maybe now is a a good time to indicate the warnings, and what we have to take care of, when we handle the clay extruder, to ensure that everything works properly:
- Don´t pressurize the tank if the two tank caps are not tight, and if there´s old or dry material inside the nylon hose.
- Don´t exceed a maximum pressure of 8 bar.
- Be sure that the 12mm hose is inserted correctly before using it and check that the pipes don´t present narrowings or bottlenecks.
- Check that the extruders cooling fan is functioning.
- And check periodically the consumption of the hose in the connection points.
Going back to the broken compressor, this, apart from slowing us down (again), obliged us to find a second compressor, which we did.. an old, very old compressor that worked! but unfortunately only gives us 2 bars of pressure. And we don´t know if it´s going to be enough.. By this time, thursday and friday have flown by, and on monday the fab is closed, so we´ll see if tuesday and wednesday are friendlier with us, and we can get those extra bars we need! (nobody said fabacademy was easy..!)
 Broken compressor.
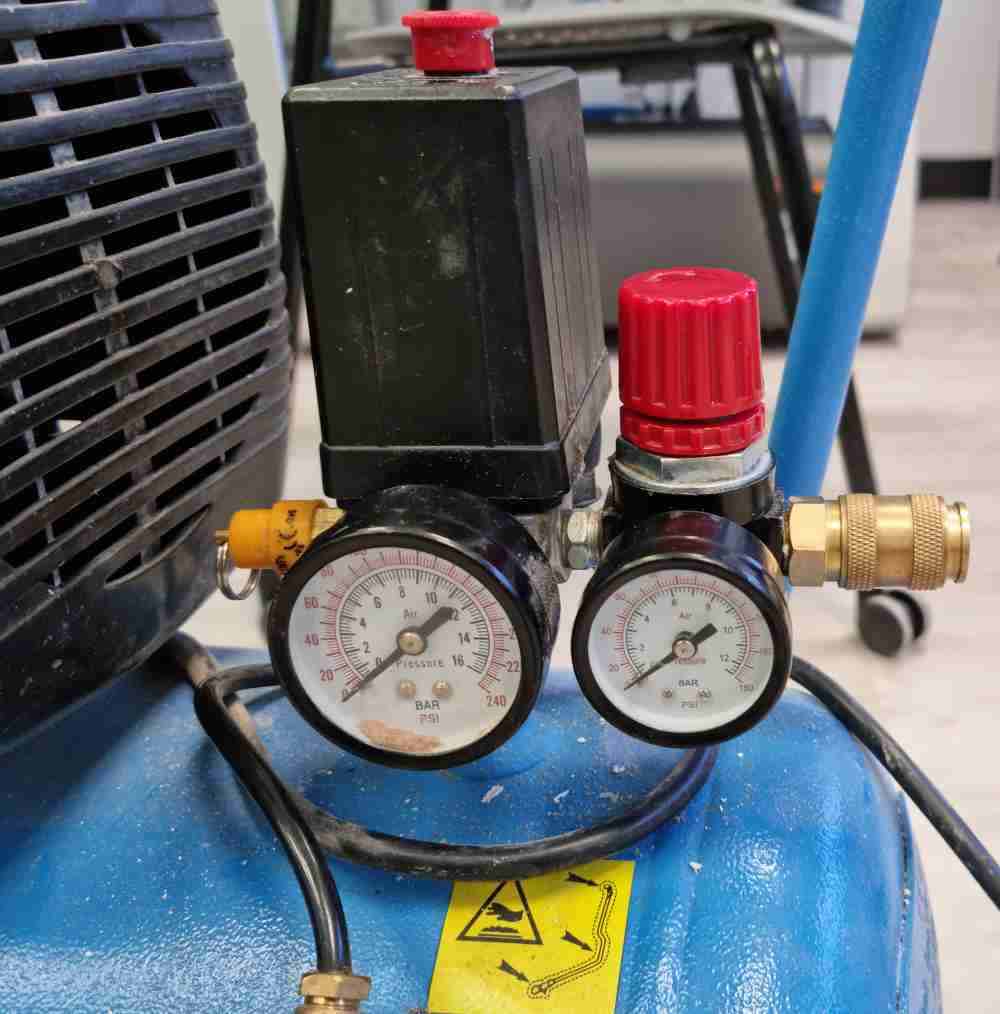
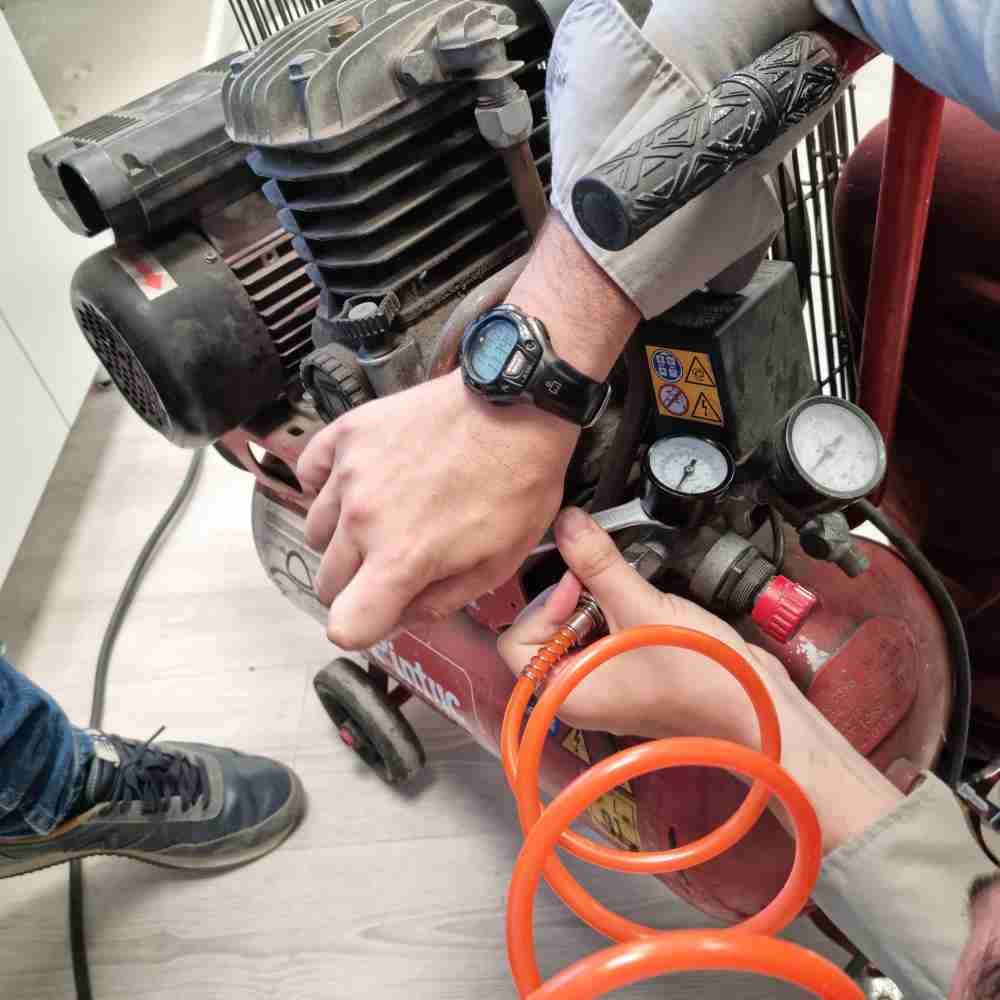 Connecting "new" compressor.
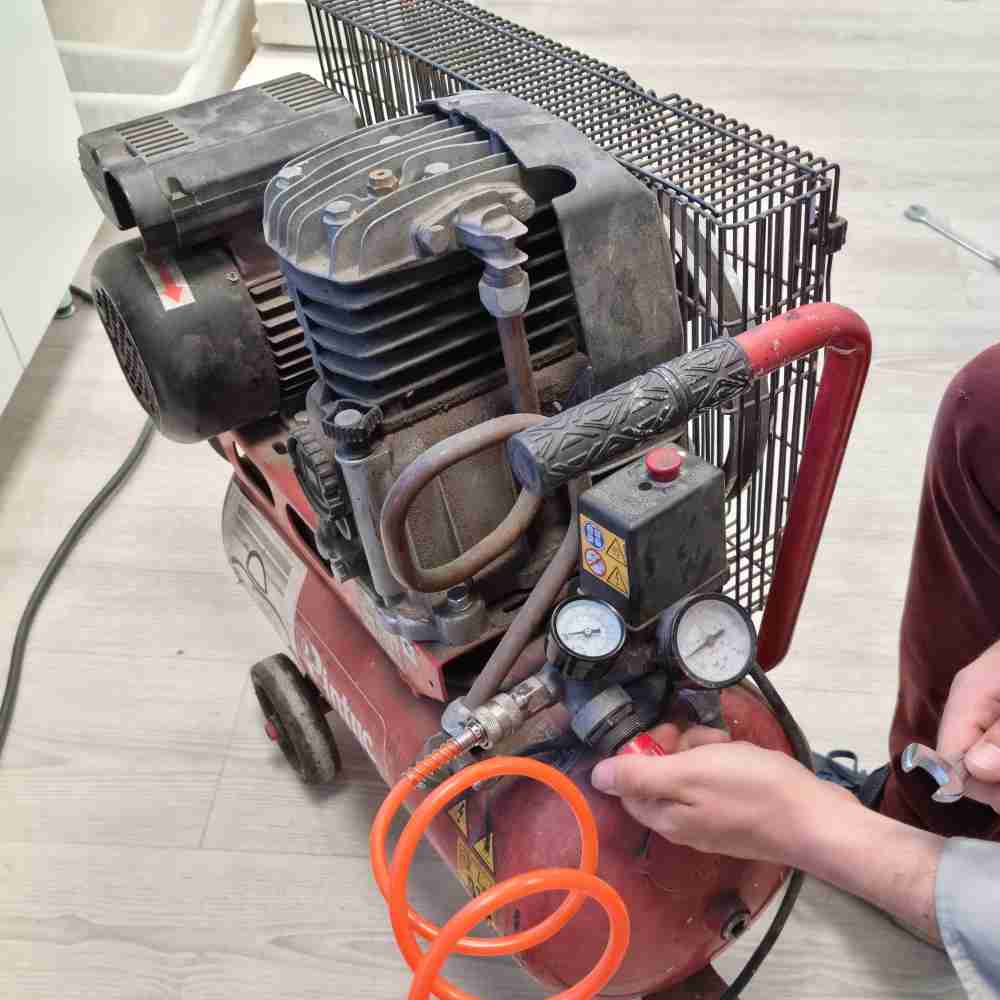 Adjusting pressure.
Meanwhile, as we wait to see if we´re lucky and we can get those extra 2 bars of pressure needed, we prepared everything to get the printer running, to help us I reviewed this useful video tutorial of how to print with clay extruder.
MIXTURE PREPARATION
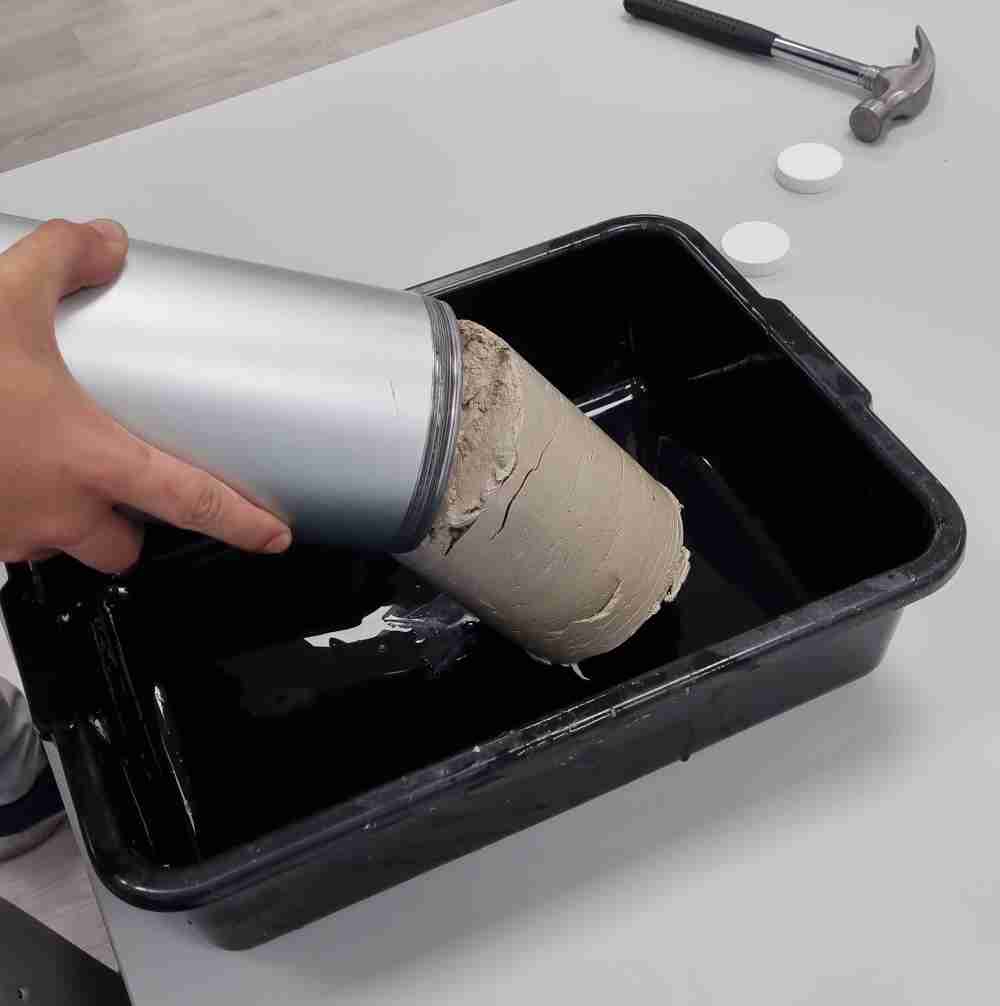
Luckily, regarding the mixture preparation we can reuse the clay that was inside de aluminium tank, so we just need to add a little more water and nothing else, but for future clay preparations, we just have to follow the manufacturer´s recommendations, as you can see them listed below:
| Flat down the mixture on a clean table, making a 1 cm thick layer. |
| Add denatured alcohol and mix until it’s completely absorbed. :Repeat 4-5 times. |
| Subdivide the mixtura into balls. |
| Open the aluminium tank from the side without a valve, and push the nylon piston to the bottom of the tank. |
| Insert and compress the clay balls into the tank, andding small amounts of water and alcohol between them. |
| Close the aluminium tank cap. |
And FINALLY!, after a lot of working in the compressors, we managed to get one working by combining pieces of the two existing and not working compressors, so now we have our 4 bars of pressure and we´re ready to go!
DESIGNING SOMETHING TO PRINT AND PRINT IT
Now that we´ve got our clay printer ready, its time to prepare our PRINTER SETTINGS in order to launch to print our .gcode. So, to achieve it, we used the Ultimaker Cura software. I had to checked some tutorials to use this software for clay printing as you have to set very specific settings. To test it, I designed a simple cylinder and an adaptation of the Fab academy logo, and configured the settings in Cura.
So, after a lot of parameter testing, this is the steps and the settings used to prepare the .gcode with the Ultimaker Cura software in order to print with clay:
| Go to Ultimaker Cura: -> Printers -> Add new printer. |
| Select the new printer -> Machine settings: Modify X, Y Z and plate shape. Also add in Start G-Code M302 S0 so the program will skip the nozzle heating. |
| Still in Machine settings -> Create a new profile: In my case, I named it as the nozzle diameter. |
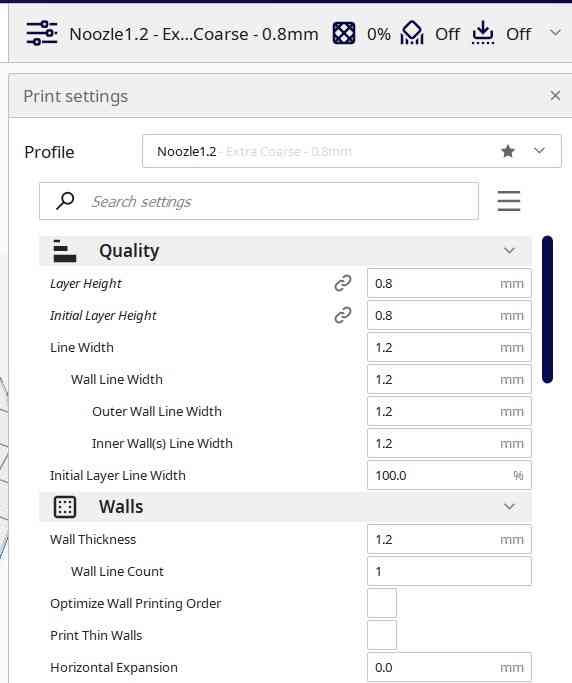
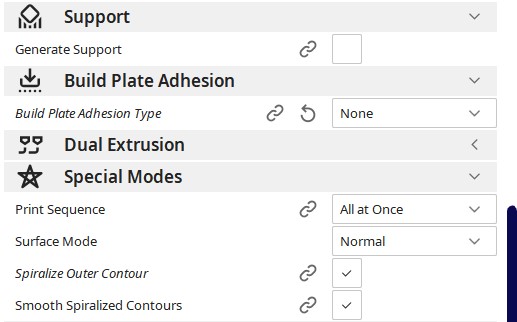
| Open the file to print and prepare your printing settings: Line width and wall thickness as the nozzle diameter = 1.2mm, 0 top and bottom layers, Infill = 0, Speed = 15mm/s, build plate adhesion = none and activate the spiralize contour. |
| Preview your design and save the final .gcode. |
| Now export it to the SD card of the printer and print. |
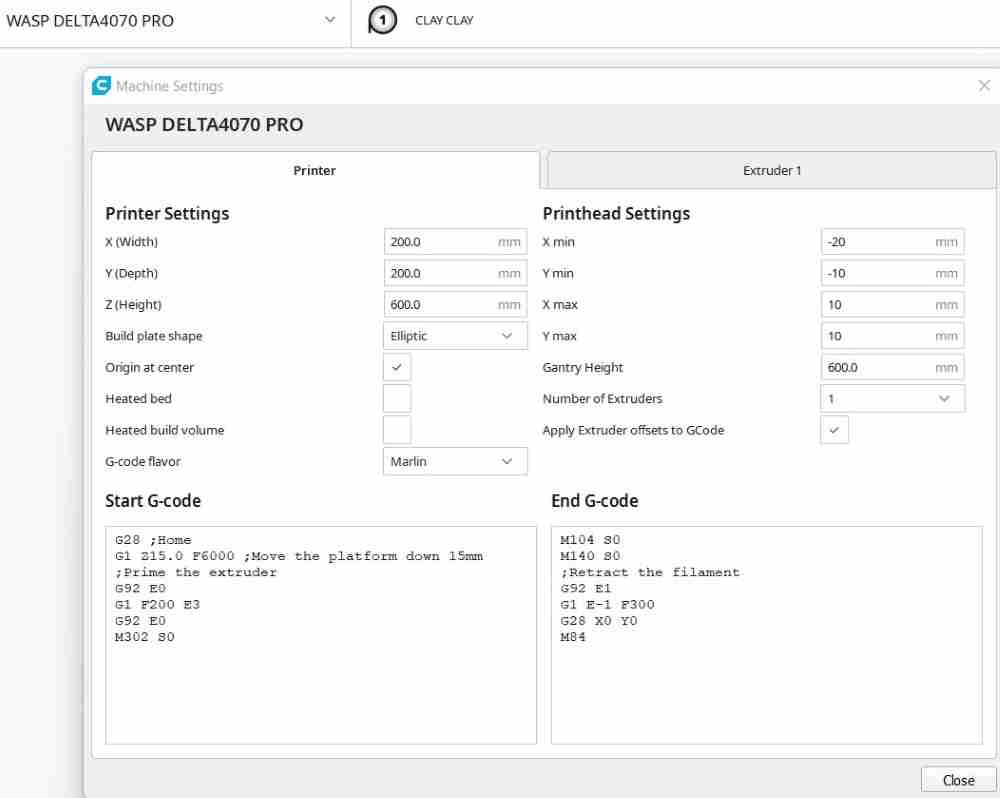 Printer settings
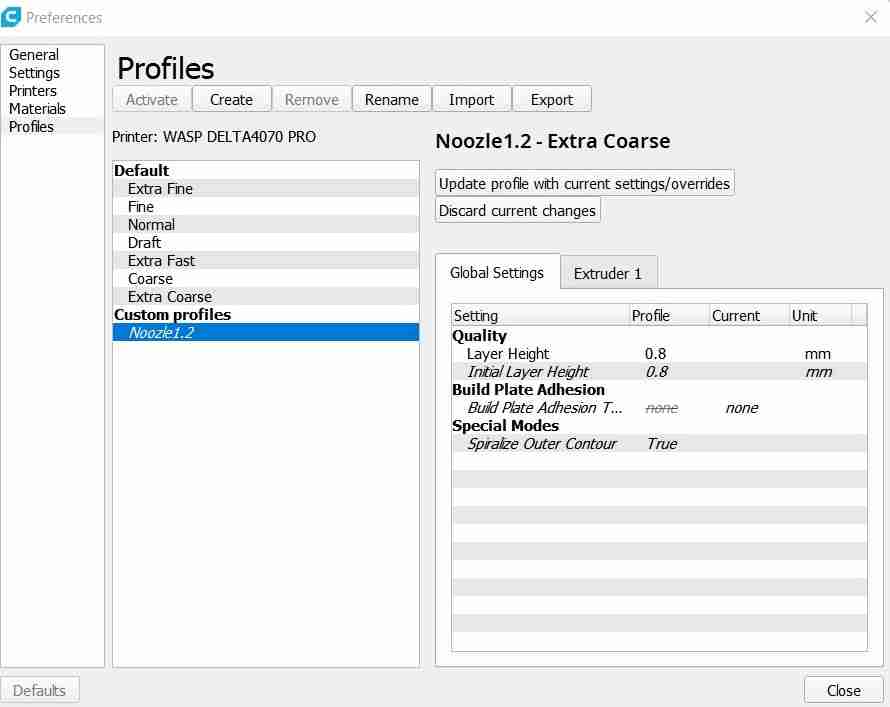
 Profile settings
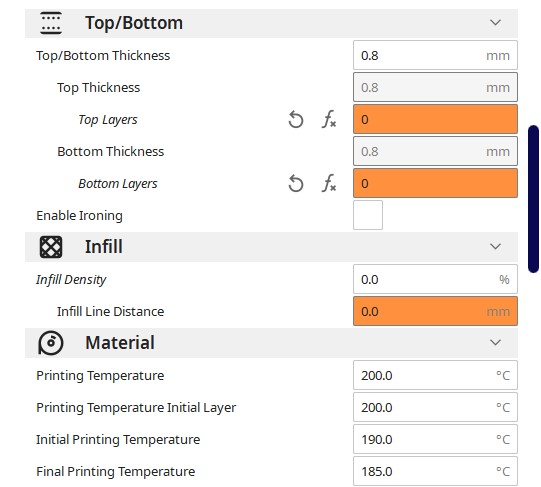

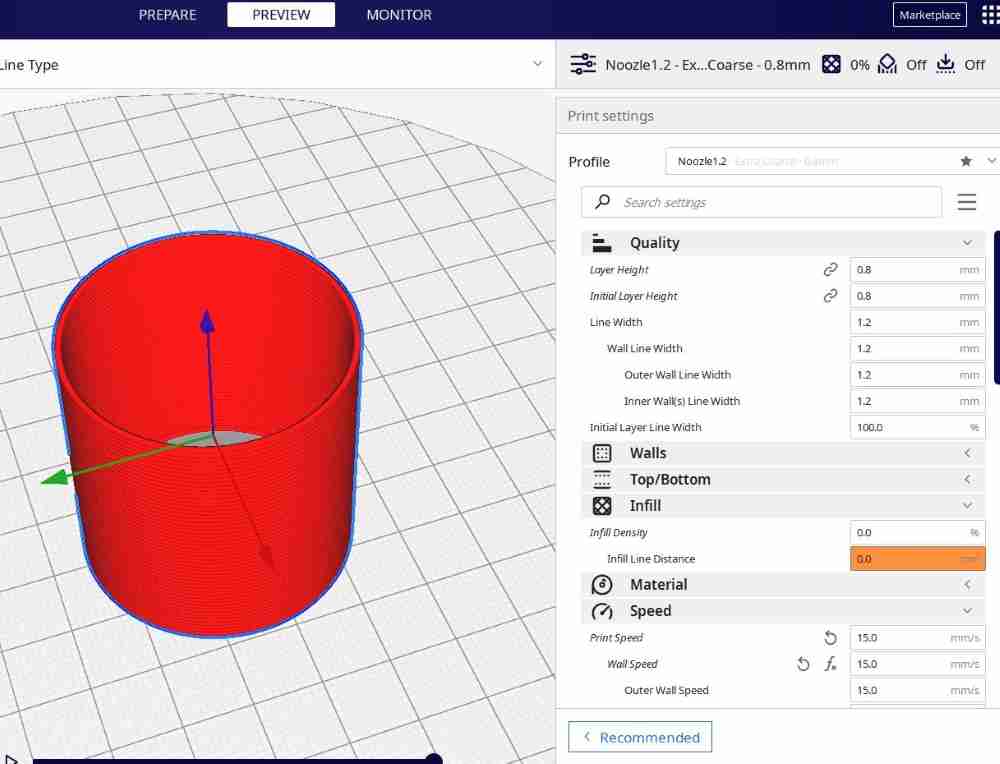 Cilinder example
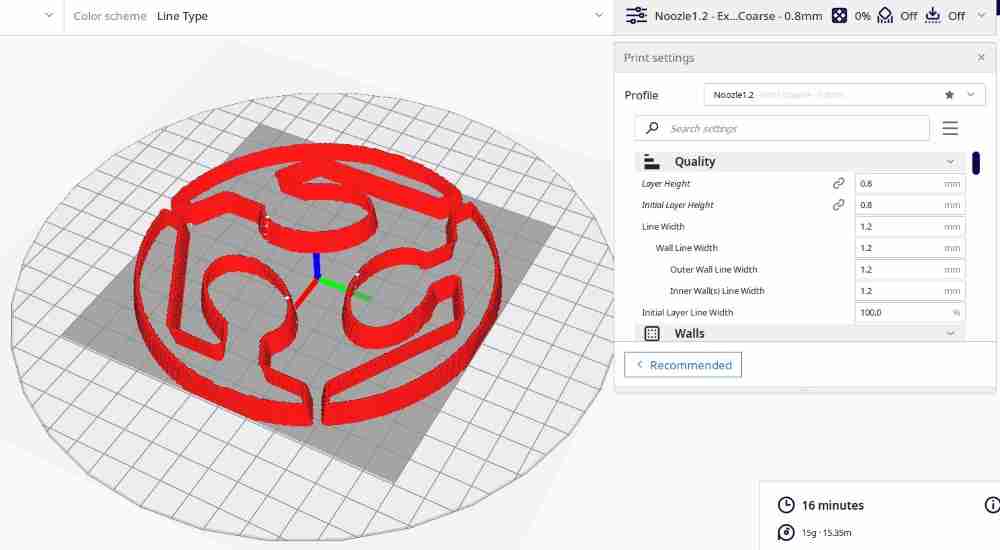 Fab logo example
Here below you can download the WASP Delta 4070 pro clay cura settings used and the .stl and .gcodes files:
Download Wasp Delta 4070 pro clay cura project settings .3mf: WASP Delta 4070 pro clay Cura settings (.3mf).
Download cylinder .stl file: cylinder .stl file.
Download cylinder .gcode file: cylinder .gcode file.
Download fab logo .png file: fab logo .png file.
Download fab logo .gcode file: fab logo .gcode file.
Finally, to do a proper first clay print, we have to follow these steps, as indicated in the LDM WASP Extruder Manual:
| Turn on the compressor until it reaches a pression of 8 bar.. |
| Rotate the pressure gauge clockwise in order to reach 4 bar. |
| Start the print of the .gcode from menu/print from sd/.gcode without the nozzle and wait for the extrusion of the material. |
| When the material starts to flow from the extruder, stop the print, auto home the printer, clean and insert the nozzle. |
| Level the printing bed: menu/prepare/manual levelling. |
| Restart the gcode and wait to be sure that the material is flowing correctly from the nozzle. |
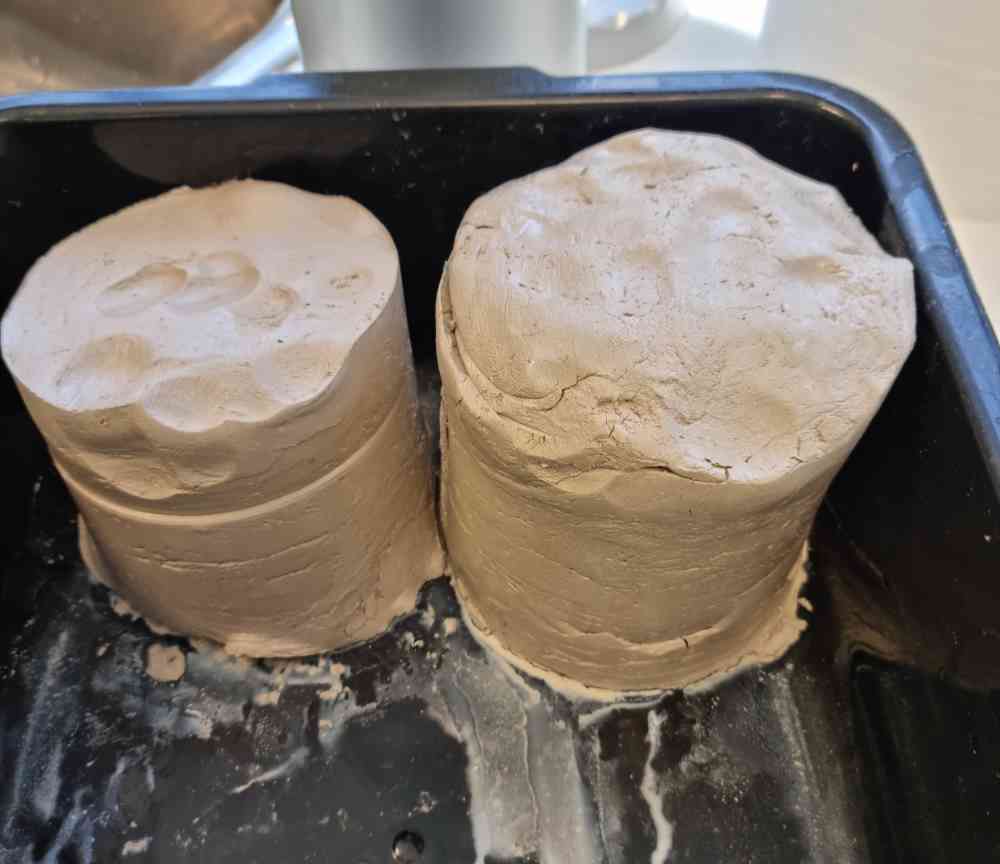
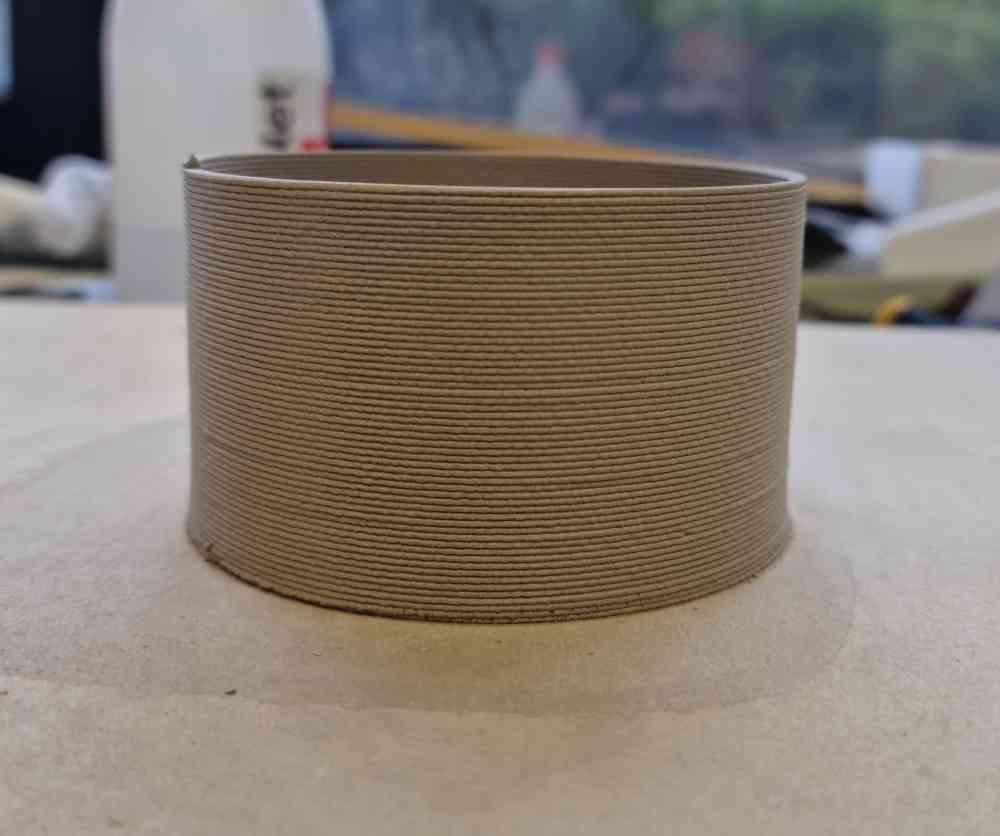
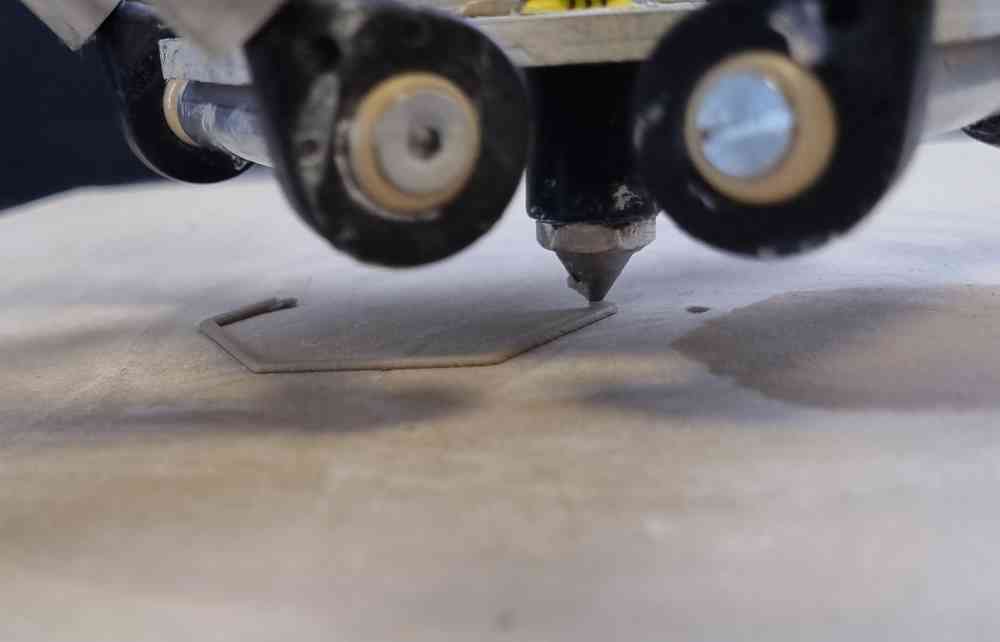
Here you can see the results of the cylinder, at first we had some printing failures as we were printing with too much speed, but once solved we were impressed by the quality of the clay printing! It definetely was worth all the maitenance and settings done beforehand.
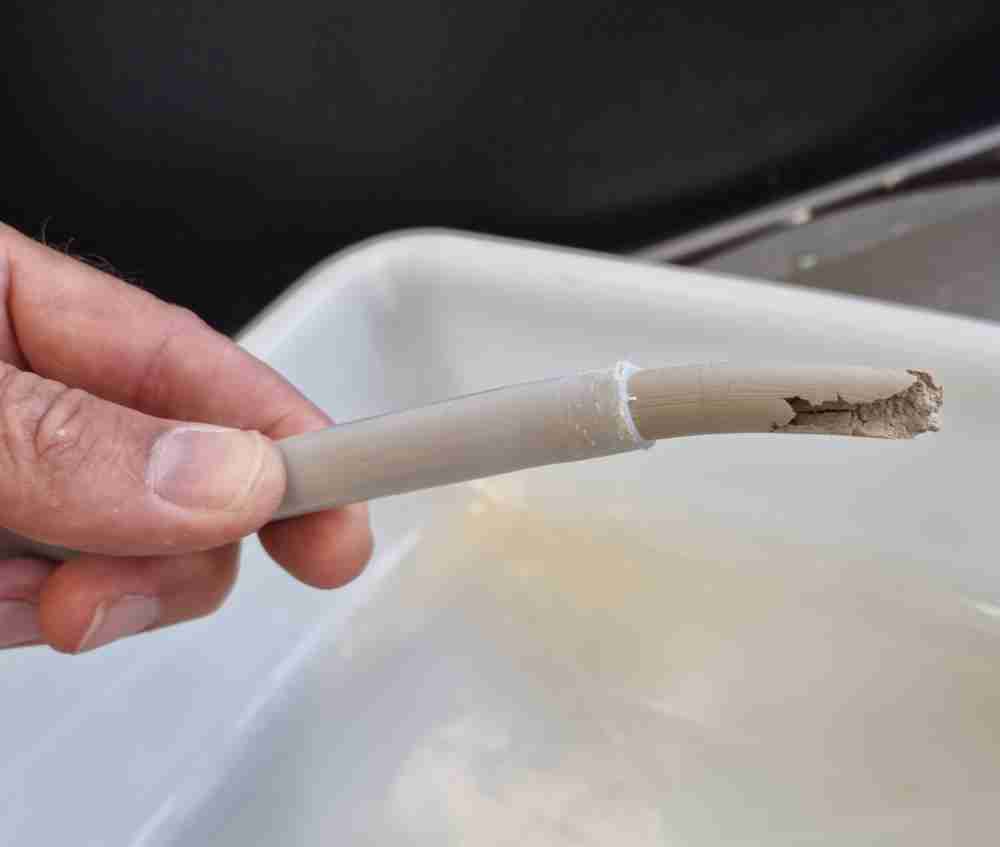 Material flowing from hose.
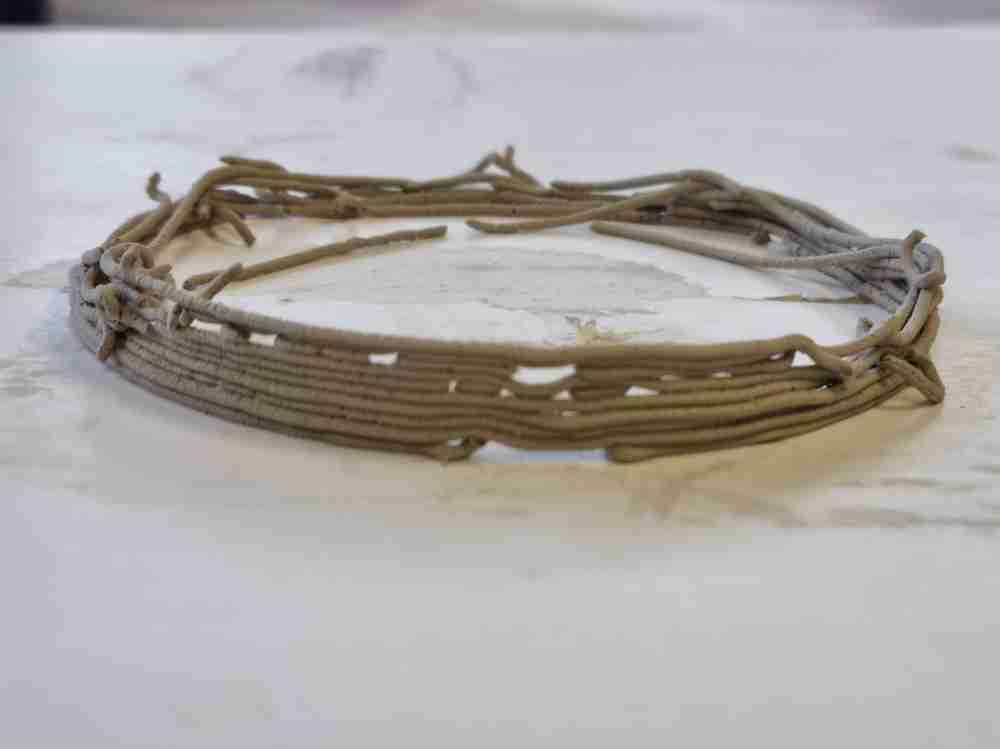 Speed error.
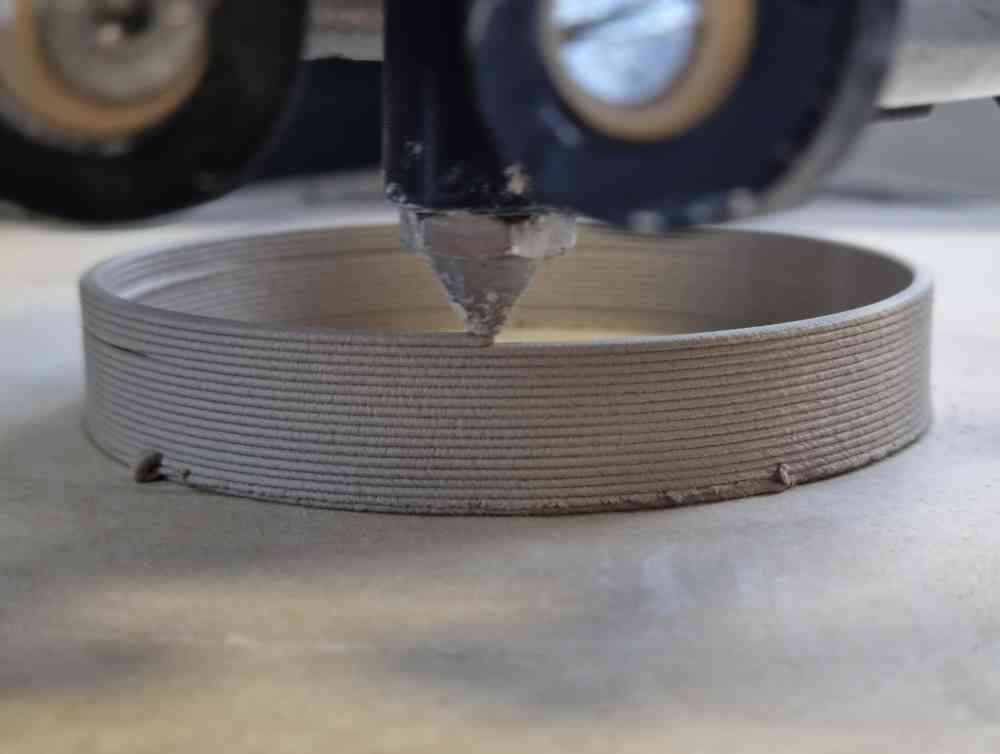
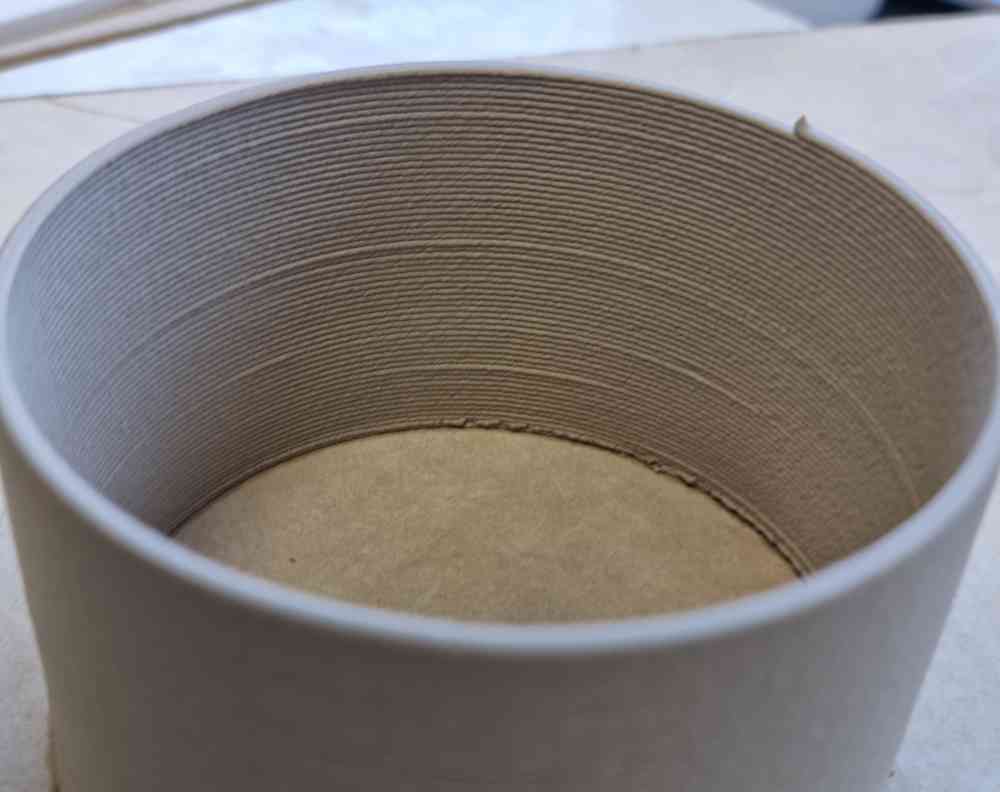 Cylinder printing.
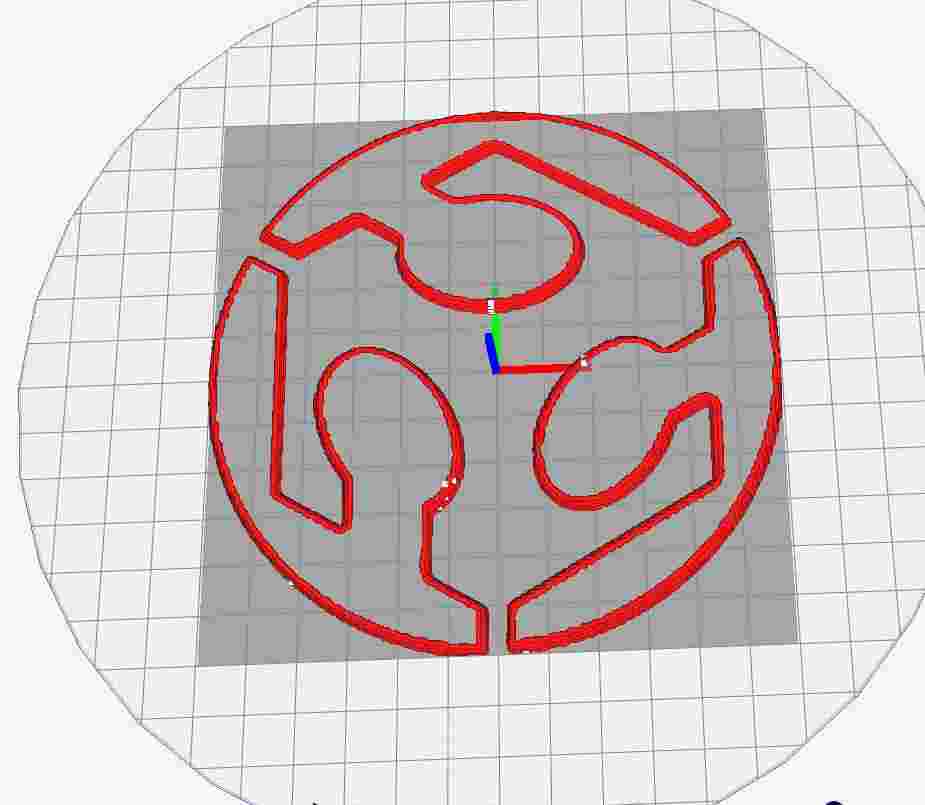
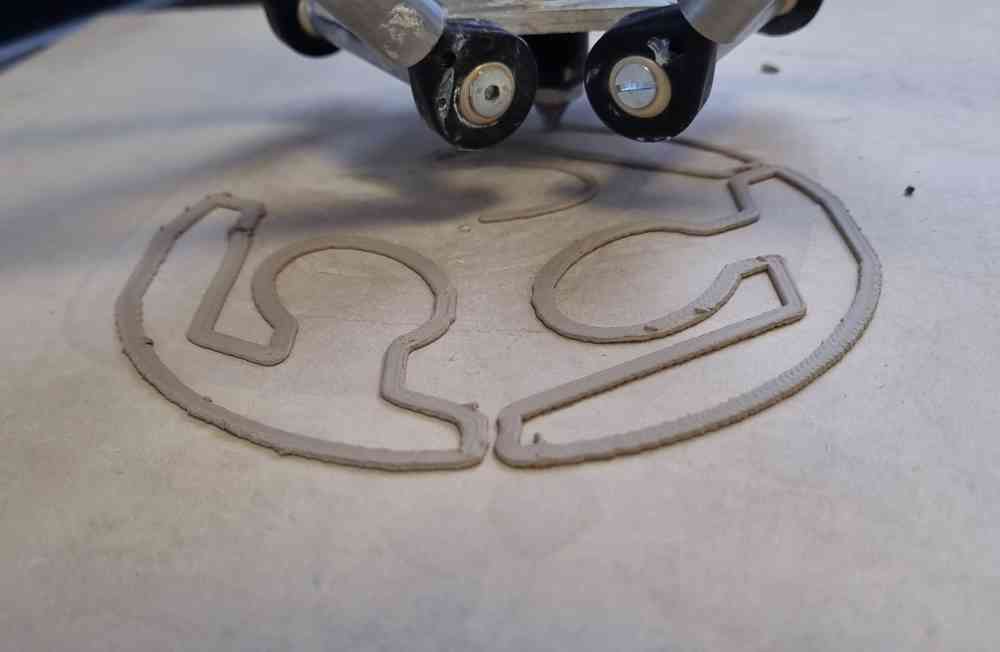
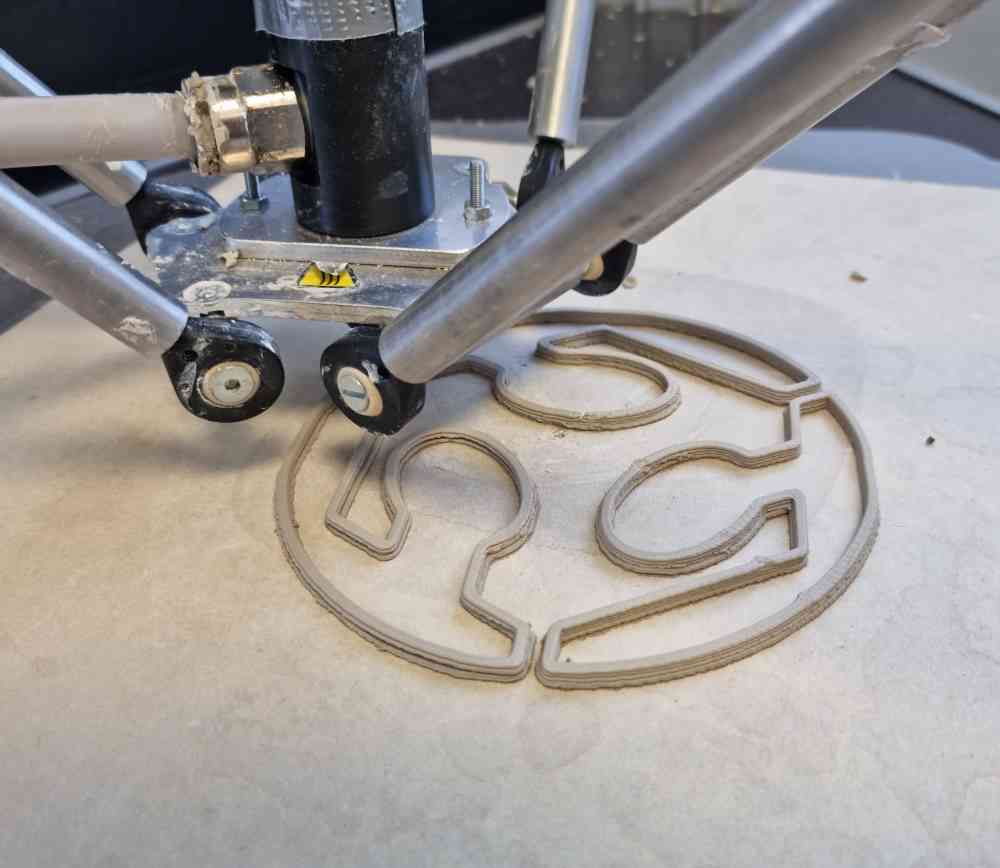
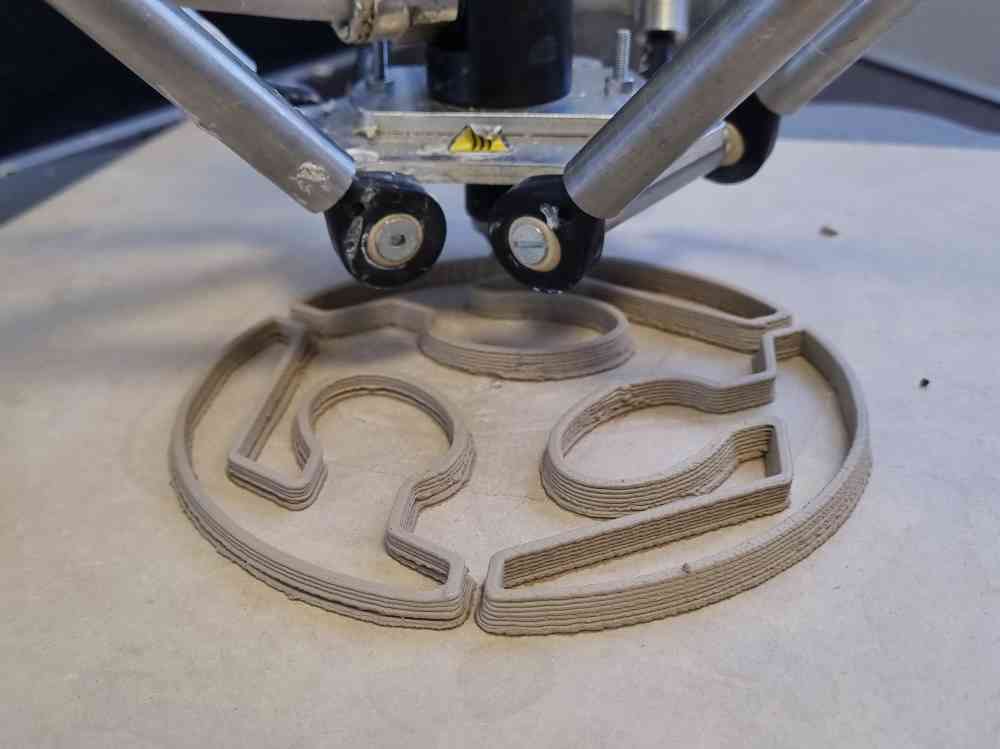
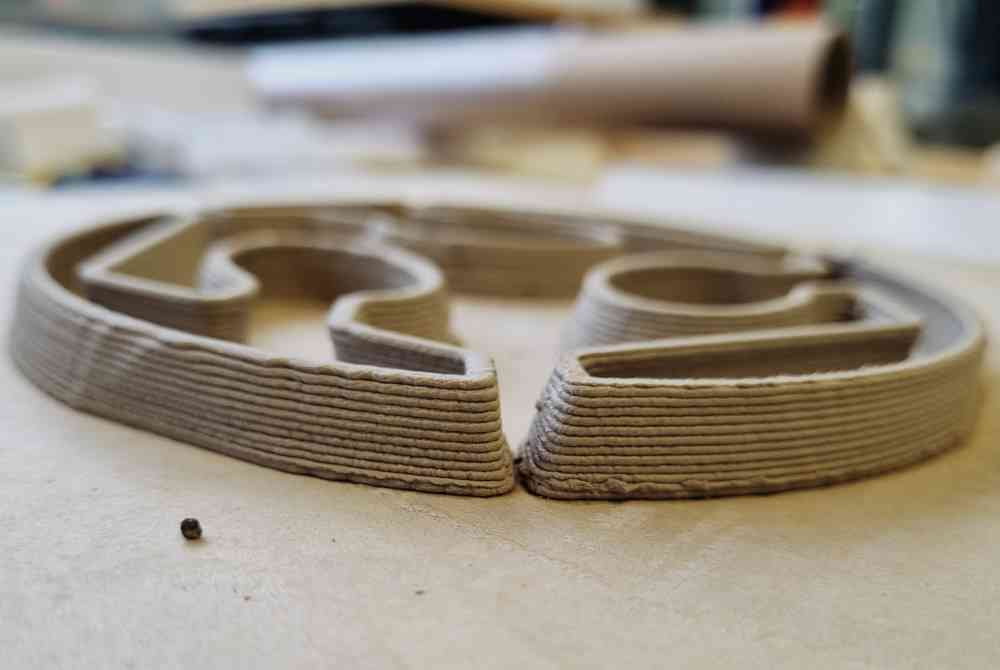
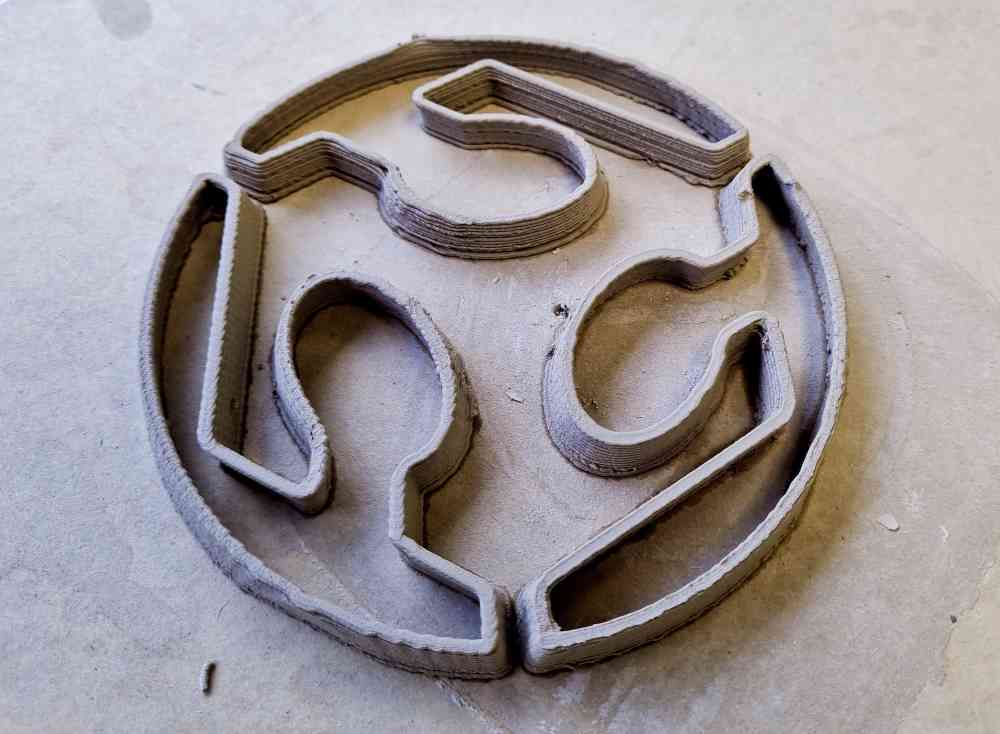
After, we did a test with the Fab logo. I really didn´t expect that opening the .png file directly in the Cura software would work, but it did! After I just modified the Z value to make it a little bit higher and as you can see it also got printed very well.
And to finish, we tested printing a more complex design, in this case a twisted vase, and this is how it went:
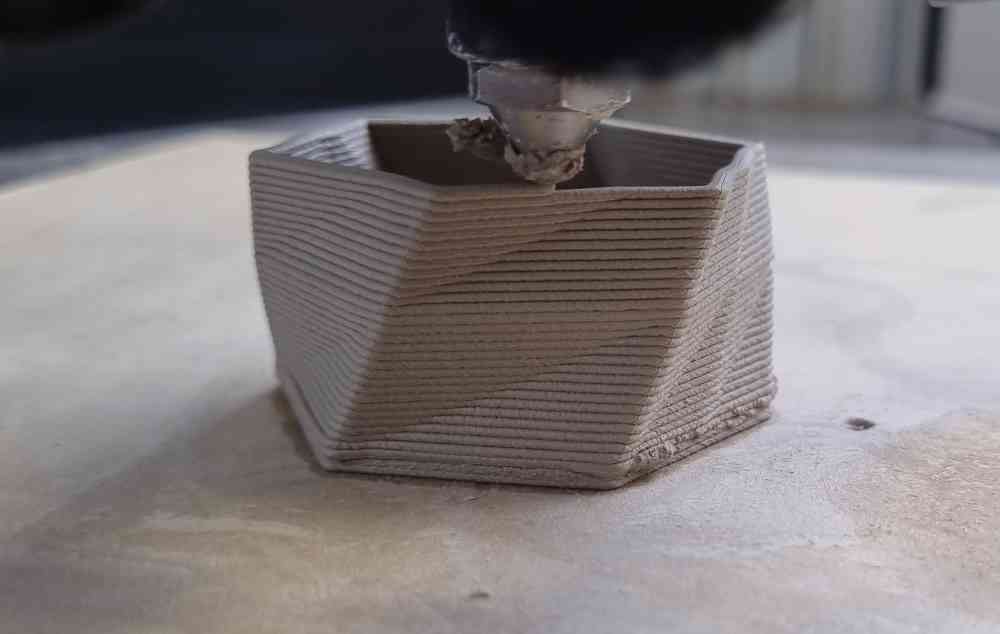
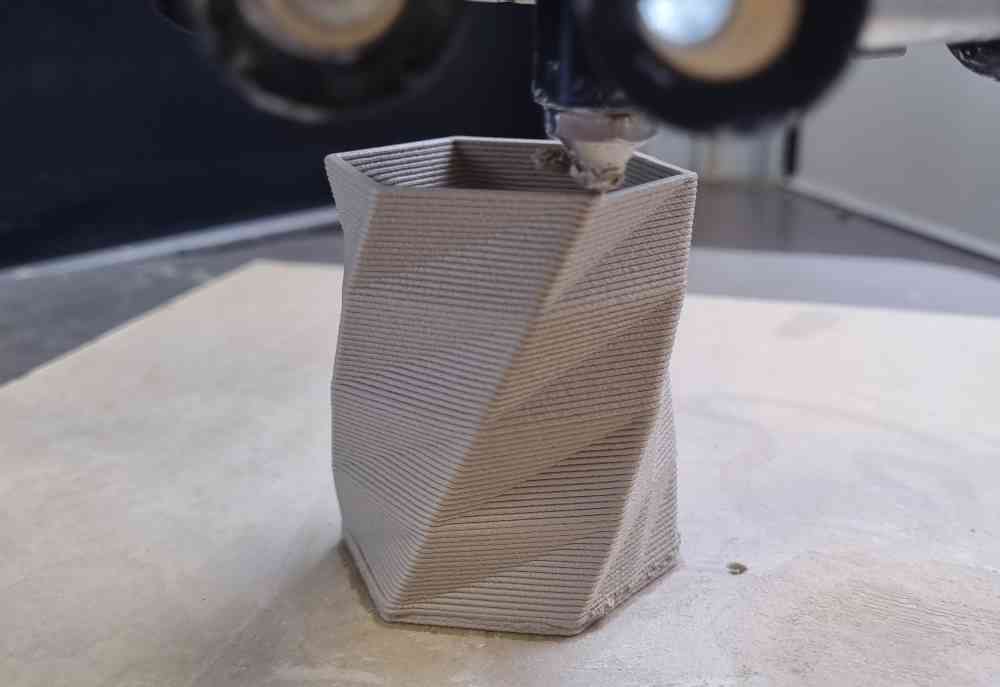
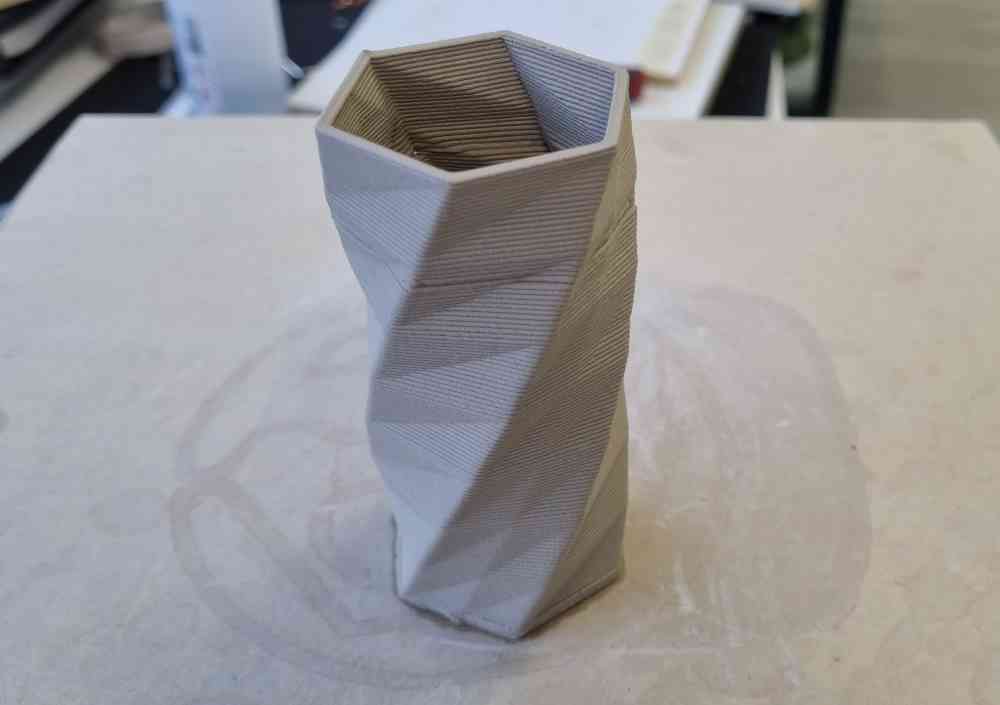
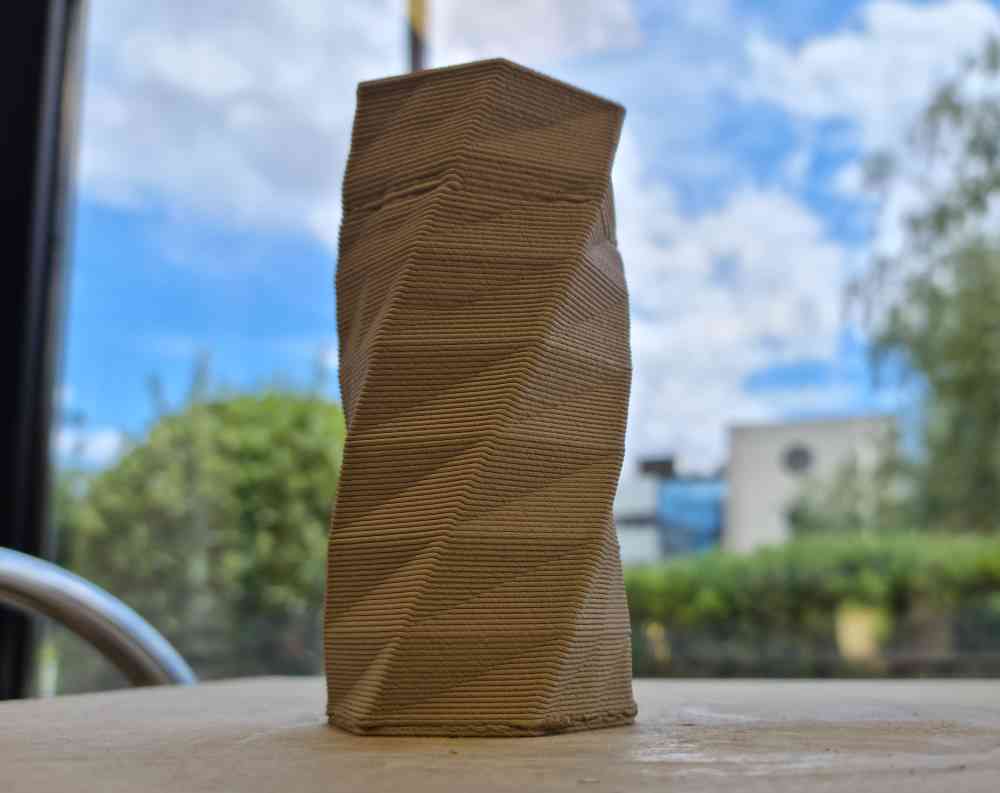
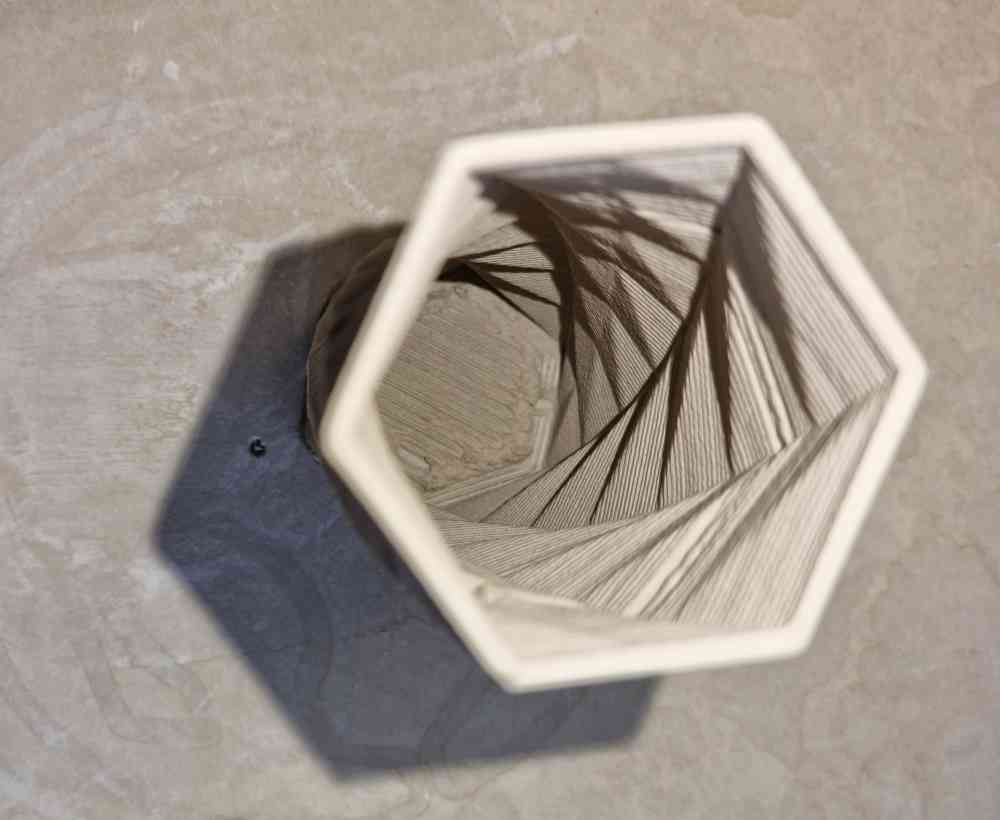
Download twisted vase .stl file: Twisted vase .stl file.
Download twisted vase .gcode file: Twisted vase .gcode file.
For final thoughts, this assignment has given me a lot of extra work. And it´s the only assignment I haven´t managed to finish during the week time due to technical failures. Its what happens when machines are not carefully maintained, so that´s a lesson to take home, but on the other hand I´ve learned a lot, not only of clay printing, but of maintenance, compressors, debugging, repariring, etc. So, happy with my final achievements, and I hope my experience can help anybody interested in clay printing. Even do its a "dirty" machine that needs a lot of cleaning and supervising it definetely gives you the oportunity to work with different materials, such as clay, permiting the development of incredible designs!
Back to top