WEEK 02: Computer-Aided Design
Weekly planning
This week, our goals are as follows:
- Model (raster, vector, 2D, 3D, render, animate, simulate, ...) a possible final project.
- Compress your images and videos.
- Post a description with your design files on your web page.
As I start with 0 background on this subject, I planned, after the global session, a progressive documentation + practice schedule dividing my first spiral goal in three different levels:
- Inkscape and FreeCad for 2D modeling.
- FreeCad and Blender for 3D and motion.
- Fusion 360º for the final design (Let´s see if I make it up to here...!).
INKSCAPE
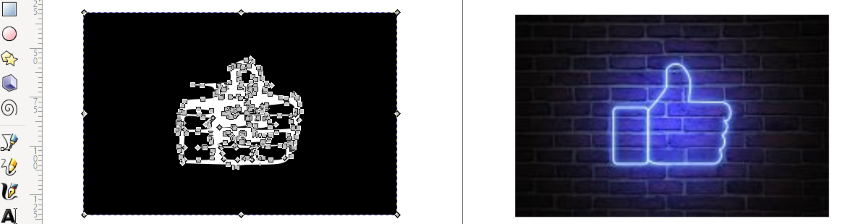
The first step, of course, was to download and install INKSCAPE. Once installed, I spent some time getting used to the commands and usability of this progam in relation to 2D modeling. Once it started running, and got familiar with it, I attempted, with quite good success, transforming rasters to vectors with the help of this tutorial. In this case, I imported a hand made drawing of one of my Fab Academys notebook, and transformed it from a raster (images using a grid of pixels) to a vector (images defined using algorithms):

| Trace bitmaps path function or: Control + Caps Lock + B |
| Select brightness cut-off, edge detection and color quantization. |
| Reduce nodes: with Control + L |
FREECAD
Once with enough knowledge to manage through Inskscape, it´s time to start exploring what sketch, constrain and extrude means, by taking my first steps with FreeCAD.
After spending some mindbreaking time trying to figure out if I can get to understand FreeCAD, I realize i´m beginning to have the same sensation as when I started with GIT..(I haven´t a clue of how to get it working by myself). So, next step, invest time reviewing some past students repositories Simple but effective tutorial by Lars and a couple of quick tutorials FreeCAD skecthers for beginner students in a hurry..! and there you go!.. my first sketches in FreeCAD actually knowing what i´m doing.
Sketch and Constrain
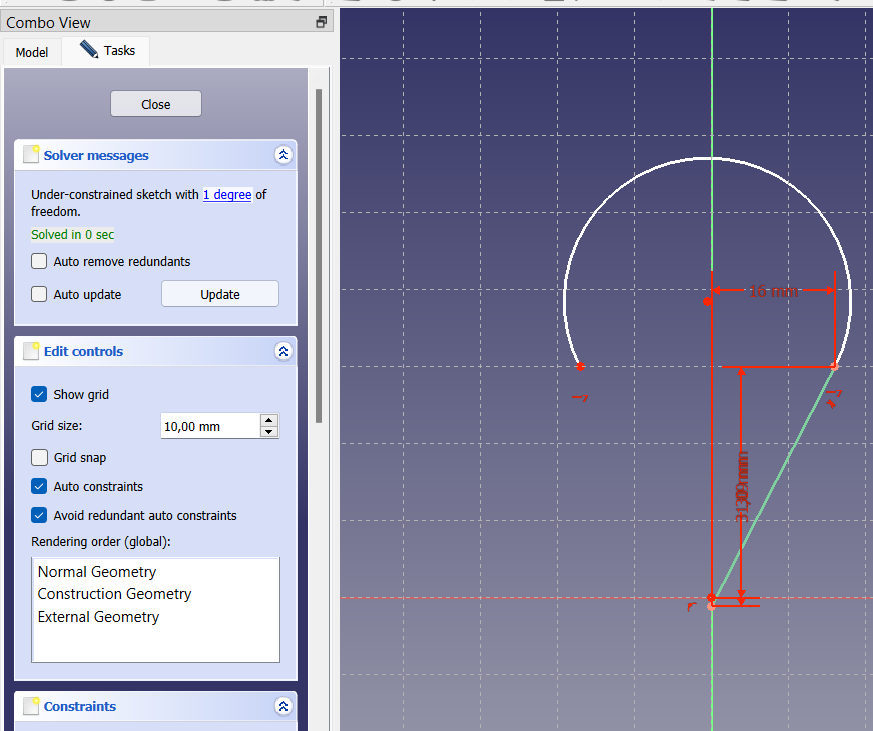
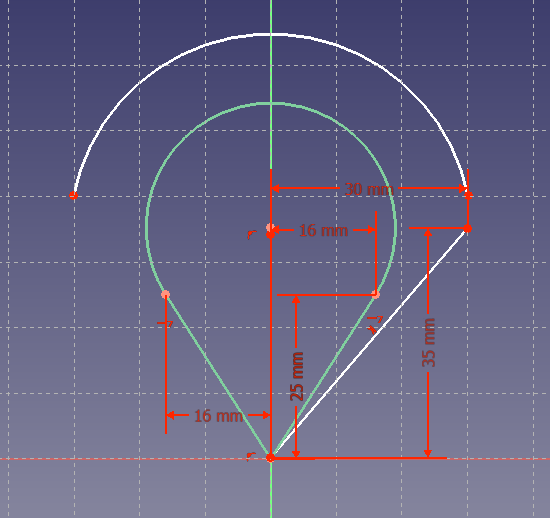
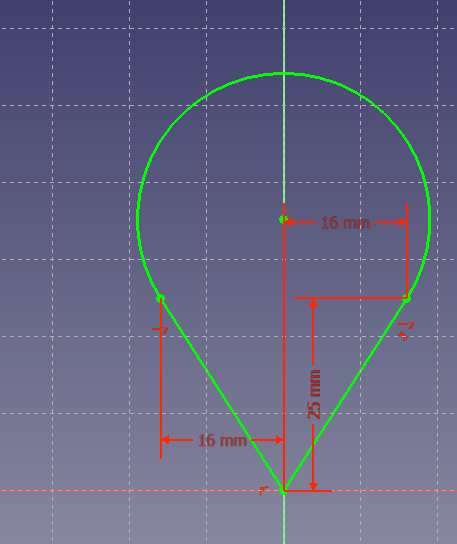
Practicing my "skecthing" after seeing quick tutorials was easy and fun, do it takes more time that expected. Now.., constraining seems easy but it can give you a bit of a headache of you aren´t able to find that "degree of freedom" that is keeping you away of your first fully constrained segment. A usefull way to figure it out is to try to move all the parts of your object until you find the one has still moves freely (it works for me). Here below you can see my first attempt.
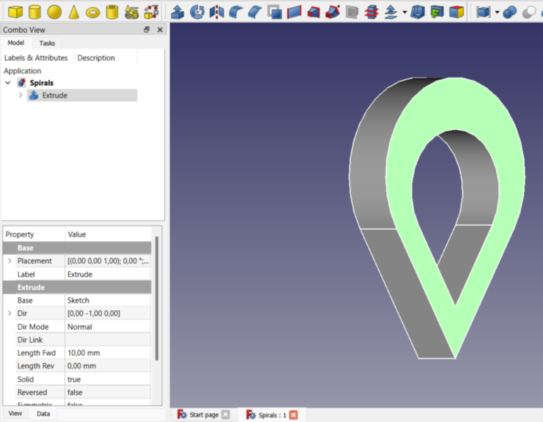
Once you have your green object fully defined, don´t forget to close the skecth before attempting to extrude. Once I had my object selected, you just have to select your skecth of interest, go to a new tab -> part -> and extrude a selected sketch. And, there you go!, finally, I have a nice first "spiral" completed and extruded!
IMPORTANT STEPS THAT WORKED FOR ME AS A BEGGINNER |
|---|
| Choose your skecth plane: You´re working in dimensions. |
| Practice all constrains: Our goal is to be fully defined. |
| Green is good! If a segment is green = We´re fully constrained. |
| To extrude: Don´t forget to close first your sketch |
| download spiral example in .STL |
As for the final impression with FreeCAD, it´s a though program to work with, after reviewing and practicing a couple of times all the FreeCAD video demonstrations, from the second week´s Global session, and supported by tutorials recommended at the Global Open Time by the instructors How to get started with FreeCAD i´ve been capable of using from loft, sweep and constructive solid to hierarchy, constrains and constructions, and managing workbenches and macros. At the final steps, I had issues with the rendering in FreeCAD, as my program couldn´t find the correct path for POV-Ray executable, son after cheking the web and some tutoriasl and not being able to make it run I had to let it go and move on... beacuse it´s definitely not going to be my preferred progam to work with during Fab Academy.
PD: After the regional review, I got feedback regarding my rendering issues, and it all sorted out by re-installing again the progam.. Thanks guys!
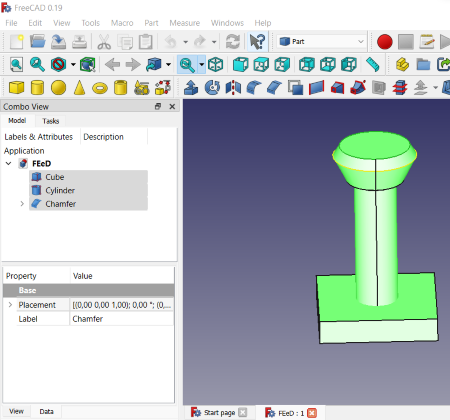 Attempting to fusion
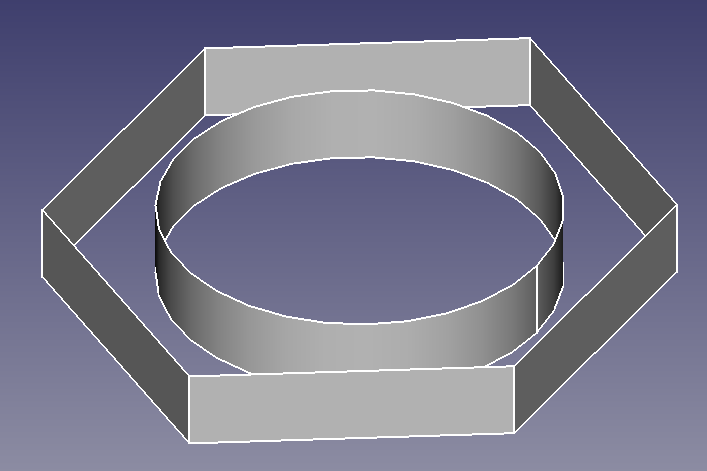 Construction
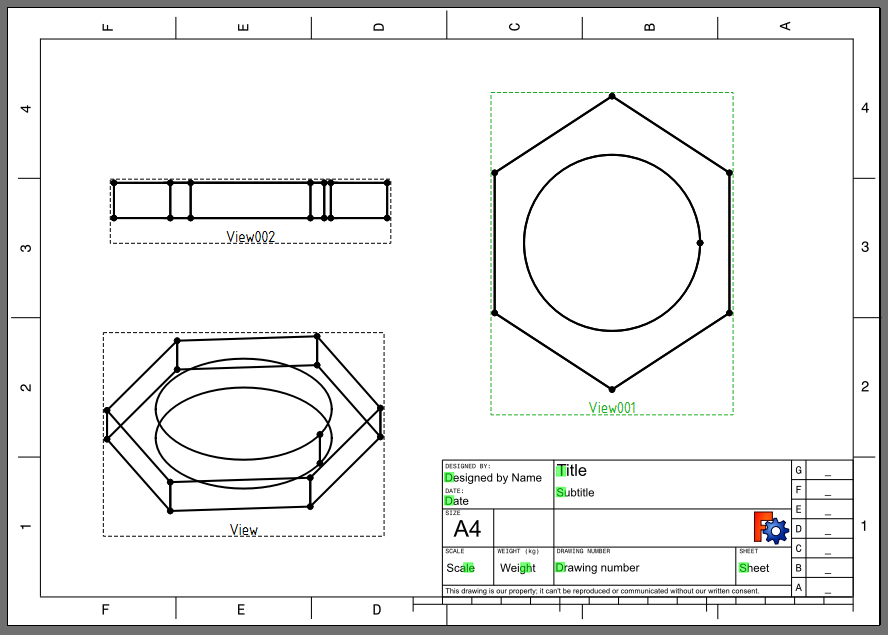 Tech Draw
Here you can download the: FCStd file
BLENDER
Blender intimidates from the moment you open it. It´s full of buttons, options, windows, layouts, lights, cameras, etc.. There´s no way no move that box from the middle! So as it´s getting to be a tradition in Fab Academy, I began to document and to research how it works through some tutorials Blender 3.0 Beginner tutorial courtesy of the Global Open Time (Thank you!), and past students repositories (Nadie Bremer) By the way, if you wan´t to make your life easier with all these programs, buy a mouse!! Here are some beginner commands that got me started:

TO GET MOVING AROUND |
|---|
| Move: Select object + "G" and move it around. (if you press at the same time, X, Y or Z it will only move in that plane. |
| Rotate: Select object + "R" and rotate. You can also add +Z, +Y or +X as before. |
| Scale: Select object + "S" and scale.(ZYX as before). |
| ESC or right click: To cancel movement. |
| Middle mouse button: Rotate view. |
| SHIFT + Middle mouse: Move around view. |
| SHIFT + S: To select cursor position. |
| Press Z for quick access to useful sub-menus. |
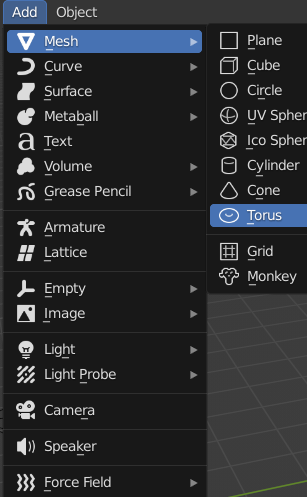
For a quick start, I began adding a Mesh (a torus for example), adjusted it size properties and applied the scale with not too many issues. It´s true that it´s got a lot of commands and possibilities, but once you handle the main/hot keys you can quickly begin to get confident. From my "short" experience, intially you have to invest time practicing in the Layout workspace learning how to create. move, adjust size and scale objects, and to understand all the "viewing" posibilities that this powerfull program has, such as the viewport shadings displays and the Toggle X-ray. As a concluding experience for this first experience I explored and practiced with the EDIT Mode where I made my first changes in the aspect of my torus. There are a lot of commands and possibilities, I list below what i´ve been experiencing with:
SIMPLE BUILDING AND EDITING |
|---|
| Add object: Layout -> Add Mesh (or whatever)// SHIFT + "A" |
| Delete object: Press X |
| First time you select an object: Click in lower left corner (add "object) to resize or F9. |
| Apply SCALE! "N" (size properties) + scaling + Apply Scale// CONTROL "A" + scale. |
| To edit your object you have to Tab to the EDIT MODE: For selecting multiple points = "O" or go to proportional editing. |
| See trough items (X-ray): ALT + Z or upper right corner, click on Toggle X-Ray. |
| To select part of an object: Grid + ALT Z + SELECT part of the object. "P" (Separate) in selection mode, and SHIFT + "D" to duplicate. Finally, add Solidify in Modifier properties to edit thickness. |
| Change object display: On upper right corner, choose from Wireframe, Solid, Material and Rendered view. |
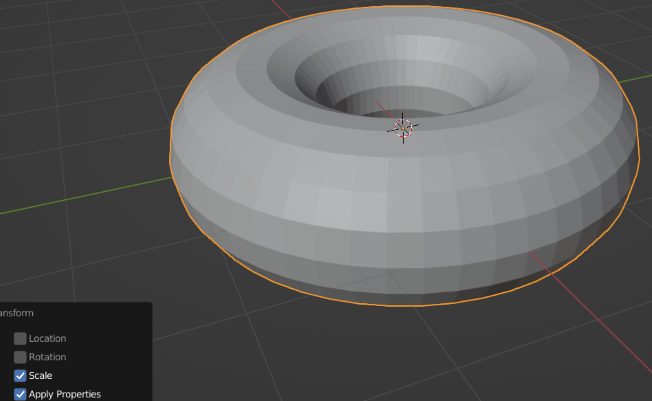 Scale
Scale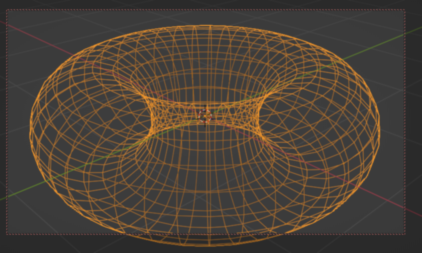 Edit
Edit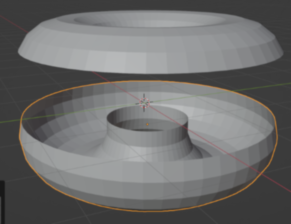 Modify
My first impressions with Blender are very encouraging taking into account that i´ve 0 background. It´s complex, with a lot of possibilities, but if you stick to the main tools and master a few hot keys you can feel very comfortable with it. For this second week I haven´t got all the time that I would like (That´s going to be constant in Fab Academy...) So, as for a second step with Blender, we´ve got the sculpt mode, but I just tiptoed over it (time management) and went directly to the shading workspace. As I have learned in these few days, this workspace is very very useful because it lets you prepare in a very easy way your objects for rendering as it´s capable of creating textures an colours through node editors. You just have to add the Node you want to work with, and connect it to your object. It can be a color, surface, etc.. So this, for sure would be one of my first recommendations with Blender
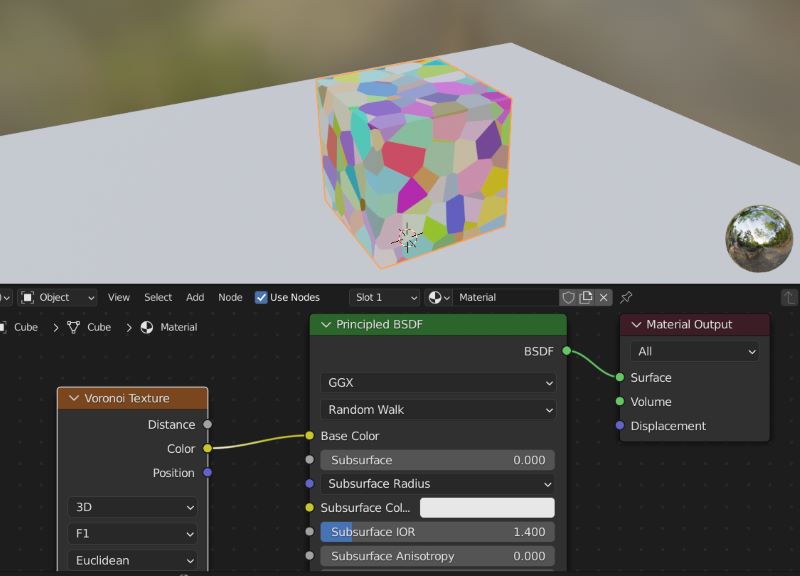 Shading.
 Rendering after shading.
To finish my experience with Blender, my third and last step has been modeling a part of my final project. As for the modeling part, it´s taking me some time to practice, but once you get the hang of a few mandatory commands you can begin molding different shapes with solvency, another issues is the quality of the finishing.. but i´m happy with my achievements so far. To get inspired, I whatched the following tutorial The definitive Blender guide I´m sorry to tell you that´s in Spanish, but you can change the language of the subtitles easily. Here you have the most useful commands and steps i´ve dealed with in my first incursion to Blender modeling, and some examples of my progression:

TO MODEL ANYTHING |
|---|
| Be sure you´re on object editing: Once there you must select between vertex, edge and face modeling. |
| TO EXTRUDE: Letter E. For a controlled extrusion CONTROL + E and double click on the right button where to want the extrusion to end. |
| TO INSERT: Letter I. IMPORTANT: The further away you click from the object, the bigger of the size change possibilities. |
| BEVEL CREATOR! Control + B. To smoothen it you can use the mouses wheel. |
| TO SUPREME: Letter X. |
| To reverse a deleted face: ALT + CLICK (Select vertexs) + F. |
| TO CREATE FACE: Letter F. |
| ADDING SUBDIVISIONS: Control + R. |
Here you have the final object example: download .obj
VIDEO EDITORS
In between program experience and program experience, I made a little break to check some video editors that i´m going to need to record, edit and compress some video examples for this assignment. The first step was to figure out how to embed in HTML a video, so I went to this source w3schools.com fantastic to learn code, especially aimed at begginers as me.
After a couple of searches and recomendations I opted for two programs. The first was aimed at screen recording, so I chose ShareX. I heard of its existence by reading past years students repositories, It´s probably the one of the simplest and powerfull i´ve tryied and it´s open source!. And now, it has become one of my favourite tools not only for screen recording but for screen capturing as well. There´s not much more to say about this program. you just need to install it and start recording. Another nice thing is that you can add its extension to your web browser too.
Now, as for the video editor programs, I tried two at the same time, Open Shot and Handbrake. Finally, i´ve decided to use Handbrake, just because it suits my needs better, to simply compress video files. You just have to edit you video compression settings to get the best result at the lowest size. Here you can see an example:
- Format mp4.
- Change frame rate same as source.
- The encoder preset as low as possible for better quality and smaller files.
- Constant quality from 22 to 30.
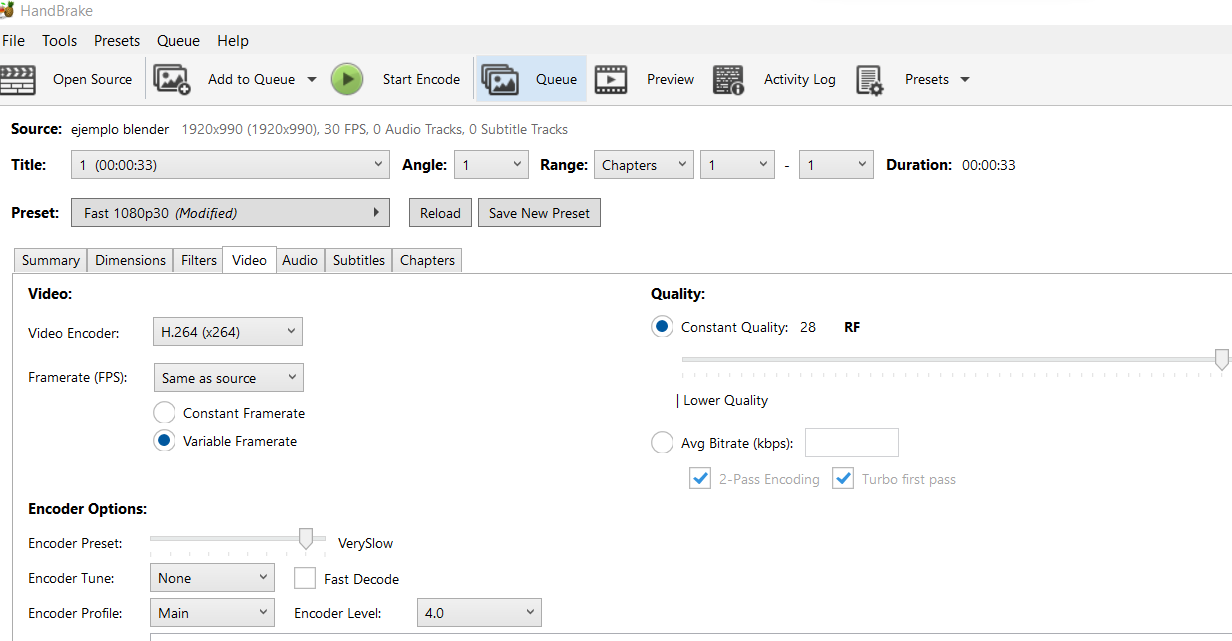 Example of video compression settings
Last but not least: FUSION 360
At the end of the week´s time, I get a first contact experience with FUSION 360, To manage my time i´m going to go straight to modeling, now that i´ve got more skills, so let´s see how it goes.
As usual, I checked a beginners guide tutorial getting started with FUSION 360. As i´ve gained a better understanding in 3D object modeling I jump directly to design a solid, with the aim of sketching a first object that hopefully looks slightly similar to my final project sketch. My first impression is like it´s a mixture between FreeCAD (constrains, extrude,..) and Blender (visualization and commands). Here yoy can see some initial sketch:
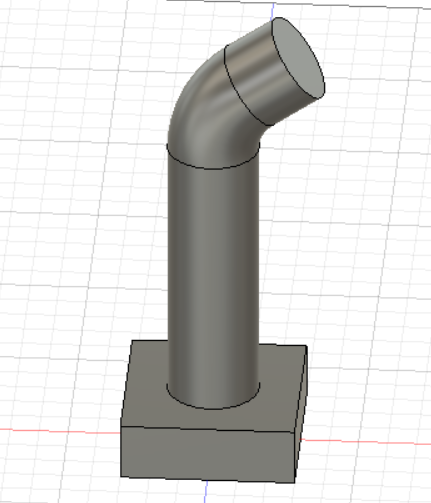
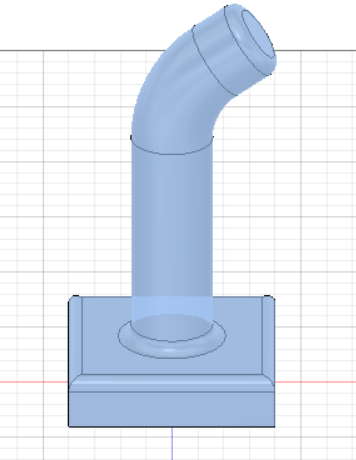
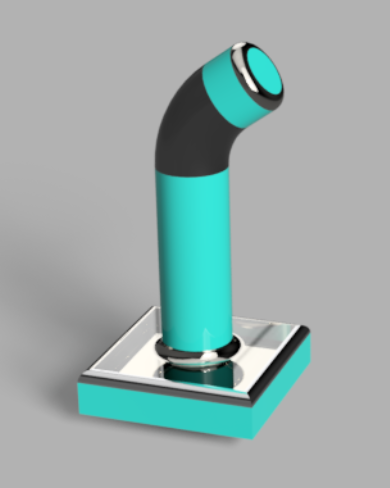
download fusion example in .OBJ
download fusion example in .STL
Here you can download the: F3D file
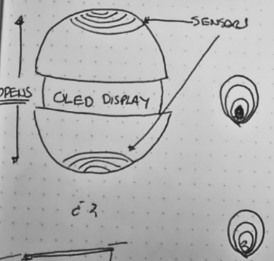
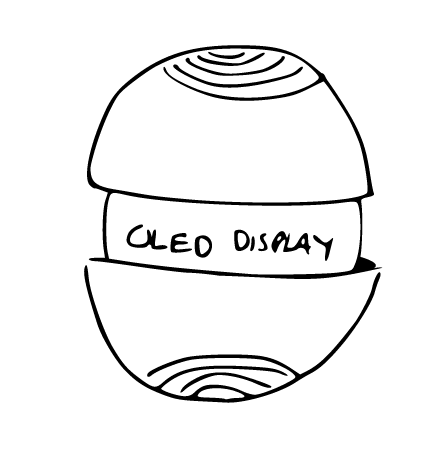
Check more about my final proyect idea HERE

Unfortunatelly, I haven´t got more time to explore with Fusion 360. I´ve explored how to design a solid from a sketch, extruding and modeling an object in not too much time, and without major issues, and even had time to practice the rendering. I really like this program, and for sure will continue to work with it in the future, so that I can finally design my project idea properly..!
In order to try to give you a 360º of view of my experience troughout this week, regarding thoughts, difficulties and delights, I would honestly have to say that it´s kind of hard going to sloooow at first in every week as you documentate, figure out how everything works, go hands on, and being capable of understanding it. It looks like the learning-curve hill won´t stop going up, but, suddenly, you reach a point were you get a burst of eficiency and everything begins to speed up (I suppose thats when you hit a spiral achievement) , not only for this weeks assignment, you feel that your skills and competences in this area have substantially increased.
Even do i´m happy with what i´ve achieved this week, I haven´t completely fulfilled my aims, because I still want to get a deeper hands on experience with Fusion 360. It´s definetively my preffered program for the rest of Fab Academy!
