
In this section we list the activities to be solved in the following table:
| Checklist | Estatus |
|---|---|
| Modelled experimental objects/part of a possible project in 2D and 3D software. | 
|
| Show how you did it with words/images/screenshots. |
|
| Included your original design files. | 
|
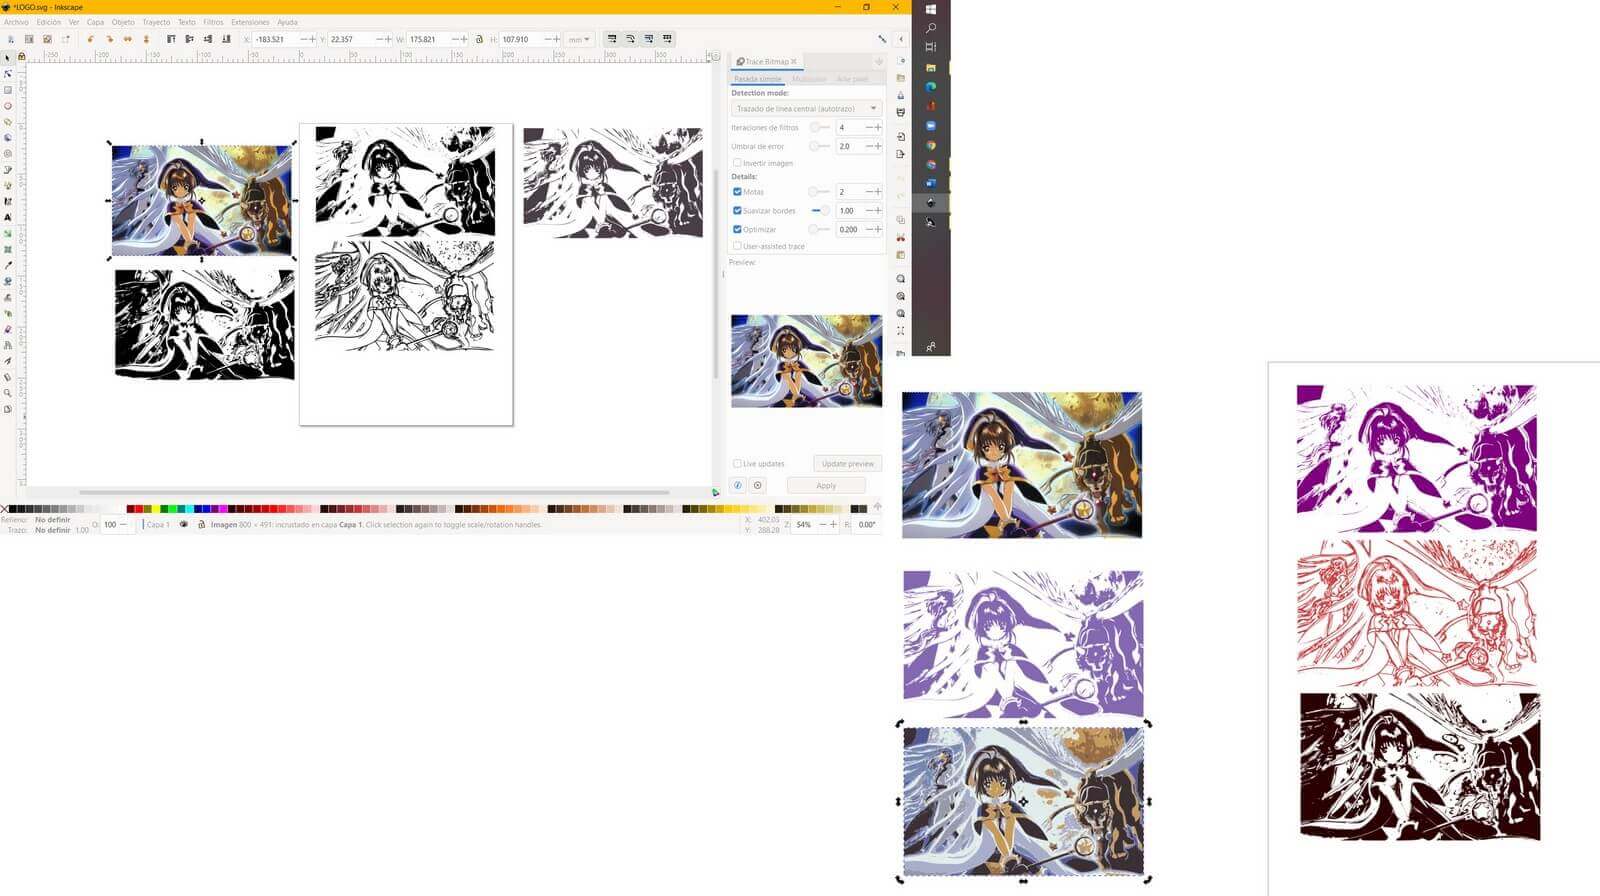
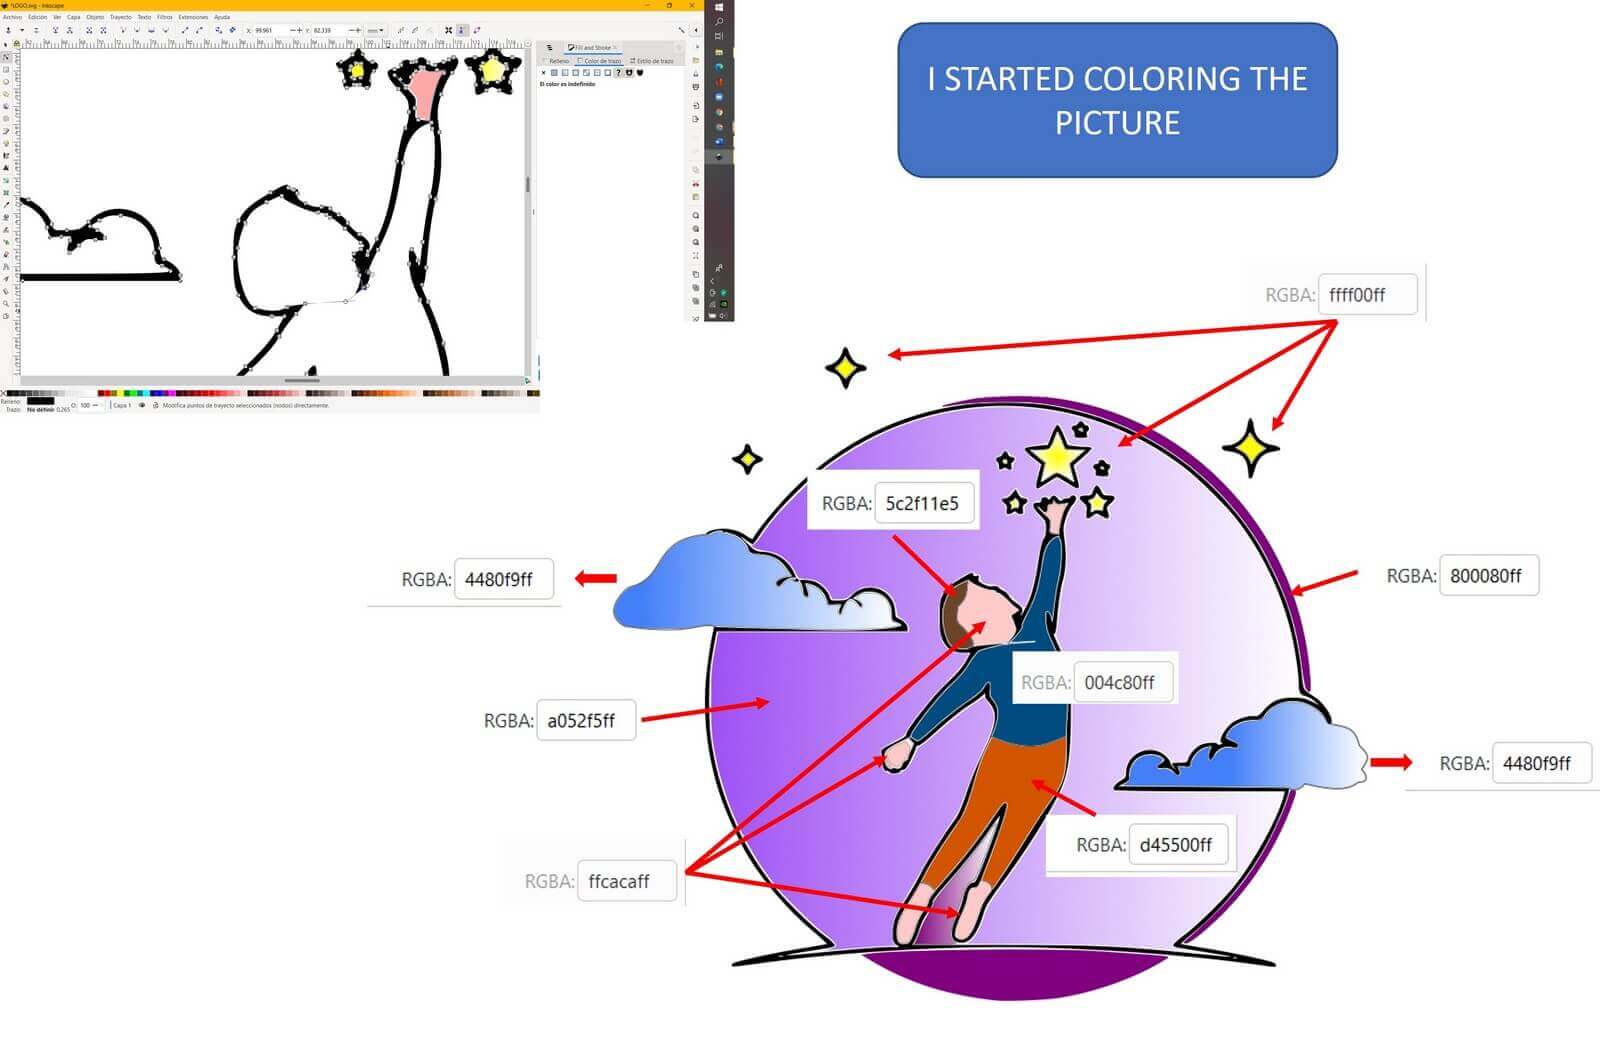
From the variety of programs that Neil came up with, first I chose Inkscape. Here is my work! I had read that you could make vectorizations with this program, so i did some tests, here is the result:

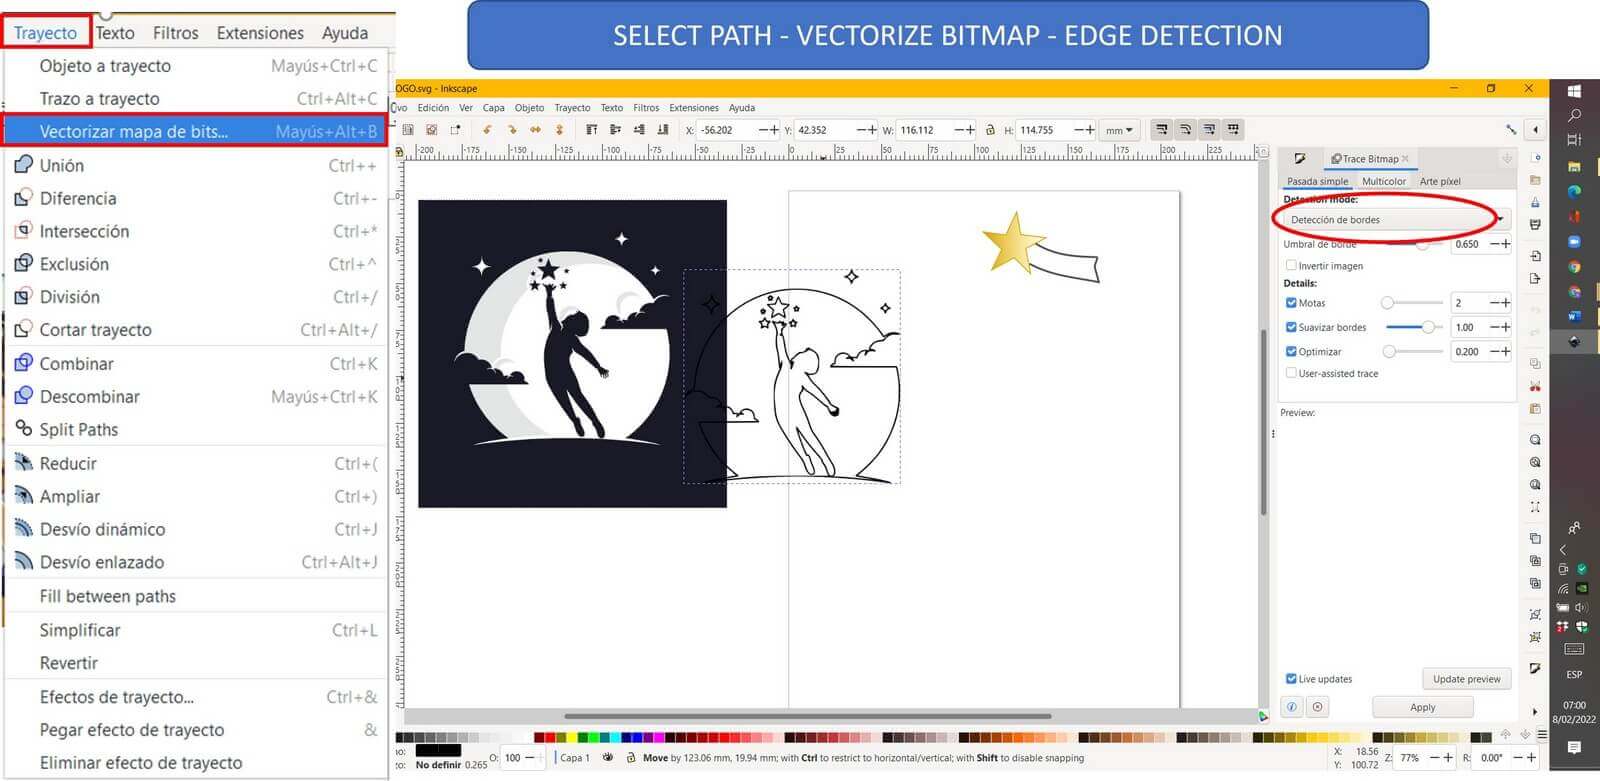
 To make my logo I chose an image as a sample and did the following steps:
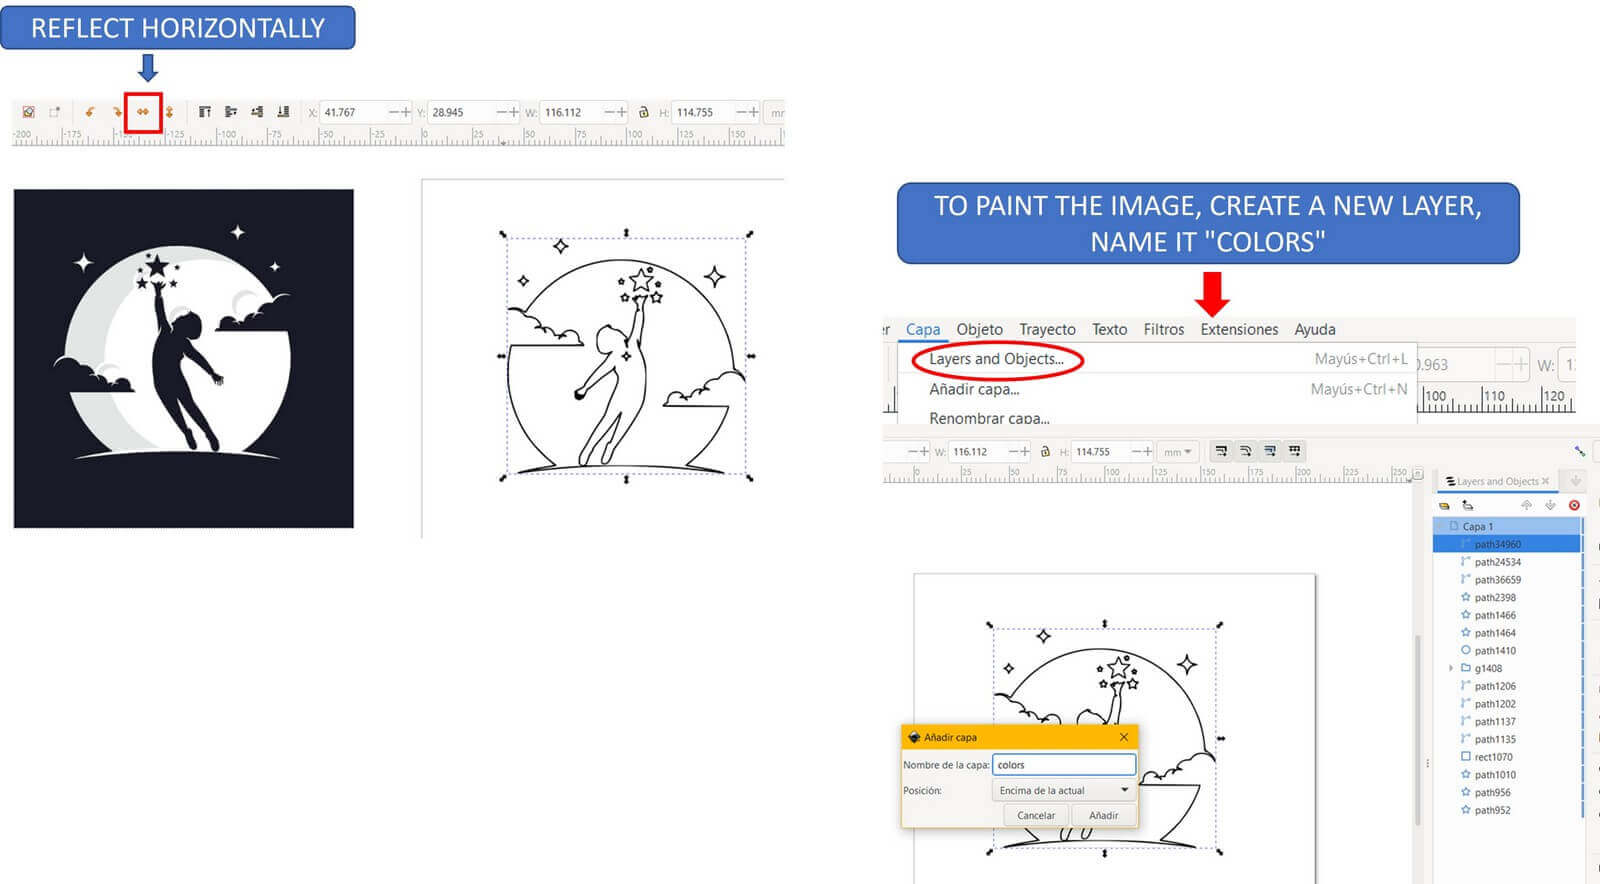
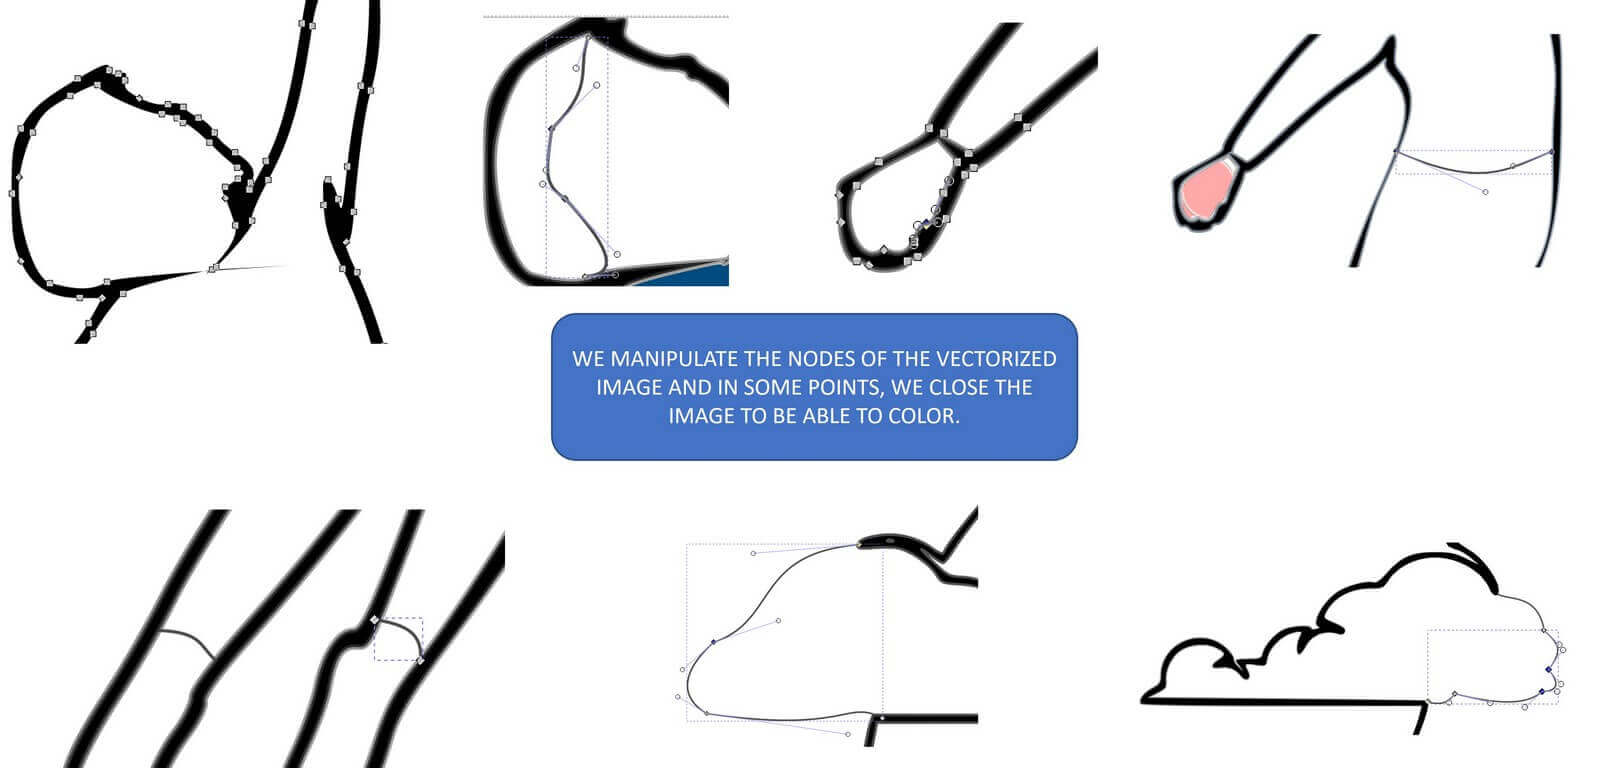
Working with the vectorized image

GIMP is a digital image editor in the form of bitmaps, both drawings and photographs. Gimp is free software with very powerful tools. You can download it here for Windows, OSX and Linux.
If you want to know more about this software and how it works; I leave you here links of tutorials that will be very helpful to you.
After downloading and installing GIMP (these steps are very simple, so you won't have any problems) we open the program and click on “new”. We indicate the size of the working area.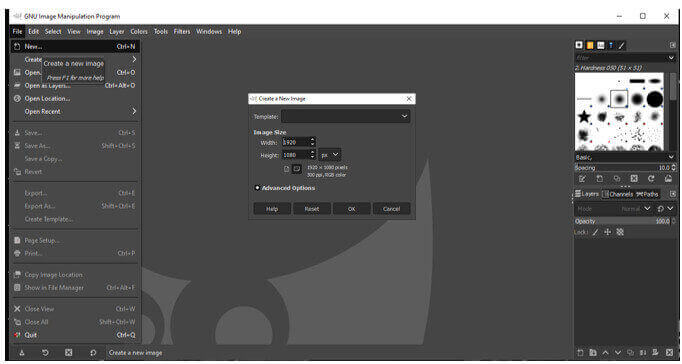
With Paintbrush tool, I drew a house. Something important GIMP is a very powerful software for manipulating pixels. GIMP creates a raster image (it is made up of pixels) which are basically a matrix of colors that make up the final image; For this reason, when zooming in on the drawing, it is shown as follows: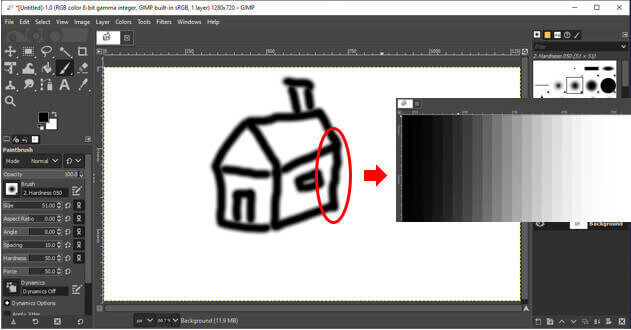
Something important, the files are saved with the extension “.xcf”.
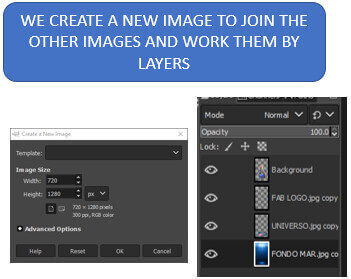
I chose five images to work on; i plan to edit them to get just one, let's see what it turns out.
These are the five images that I used

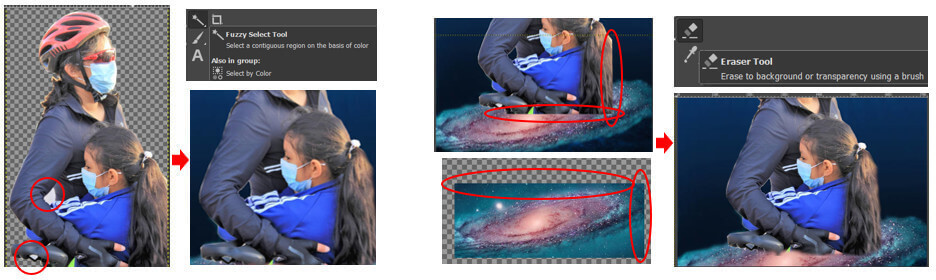
We begin editing the images
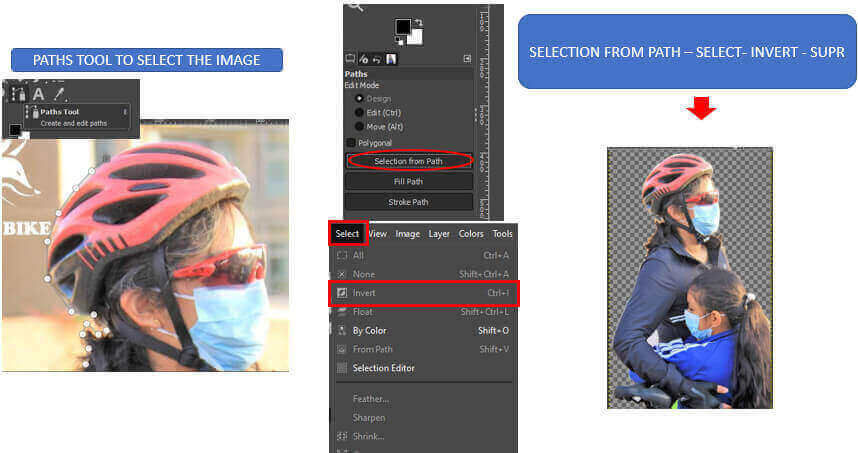
Using the "Fuzzy Selection Tool" and the "Eraser Tool"

Exporting the edited image
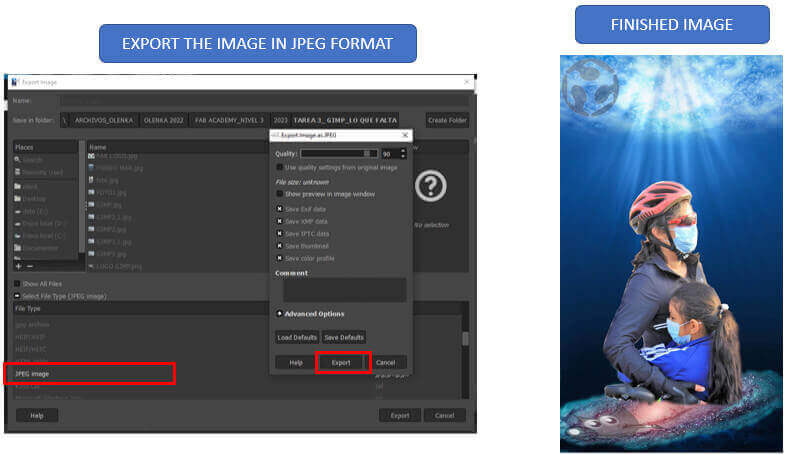
I think it turned out very well for the first time I've worked with GIMP. Something that I learned when using this software is that it is advisable to make sure that when working with the images they have an alpha channel so that it is easier to work by layering the images.
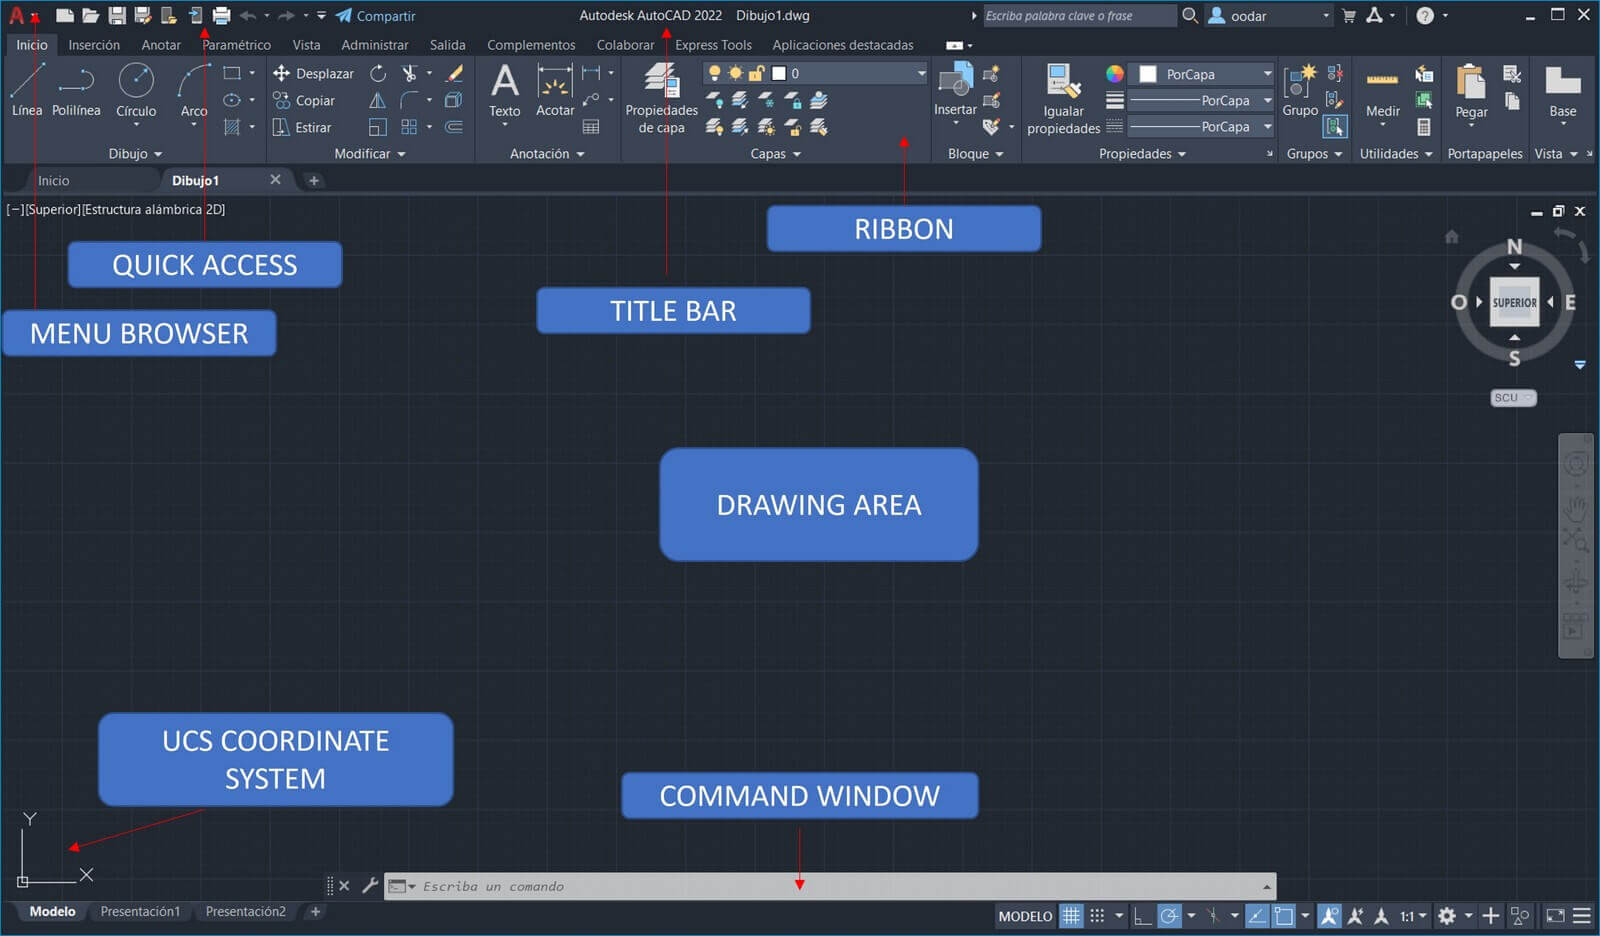
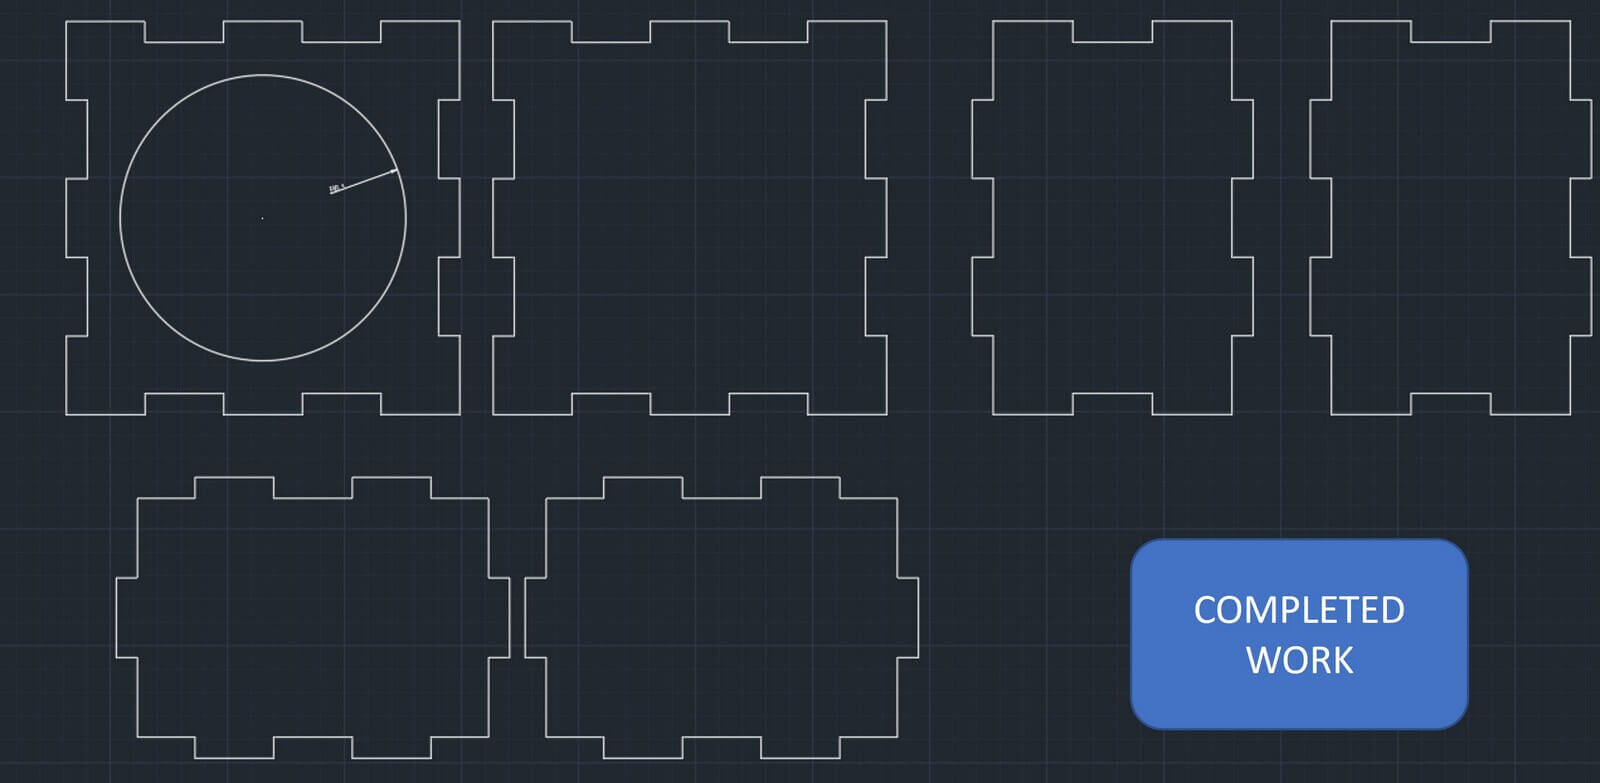
The job for the week is to model our final projector in CAD tools, so I decided to model my lamp base (pressfit box). Of the proposed programs, I chose Autocad for 2D design, so let's get to work.
We entered the program, I work with the educational version, I started sketching the pressfit of a part of my project. I worked in millimeters.
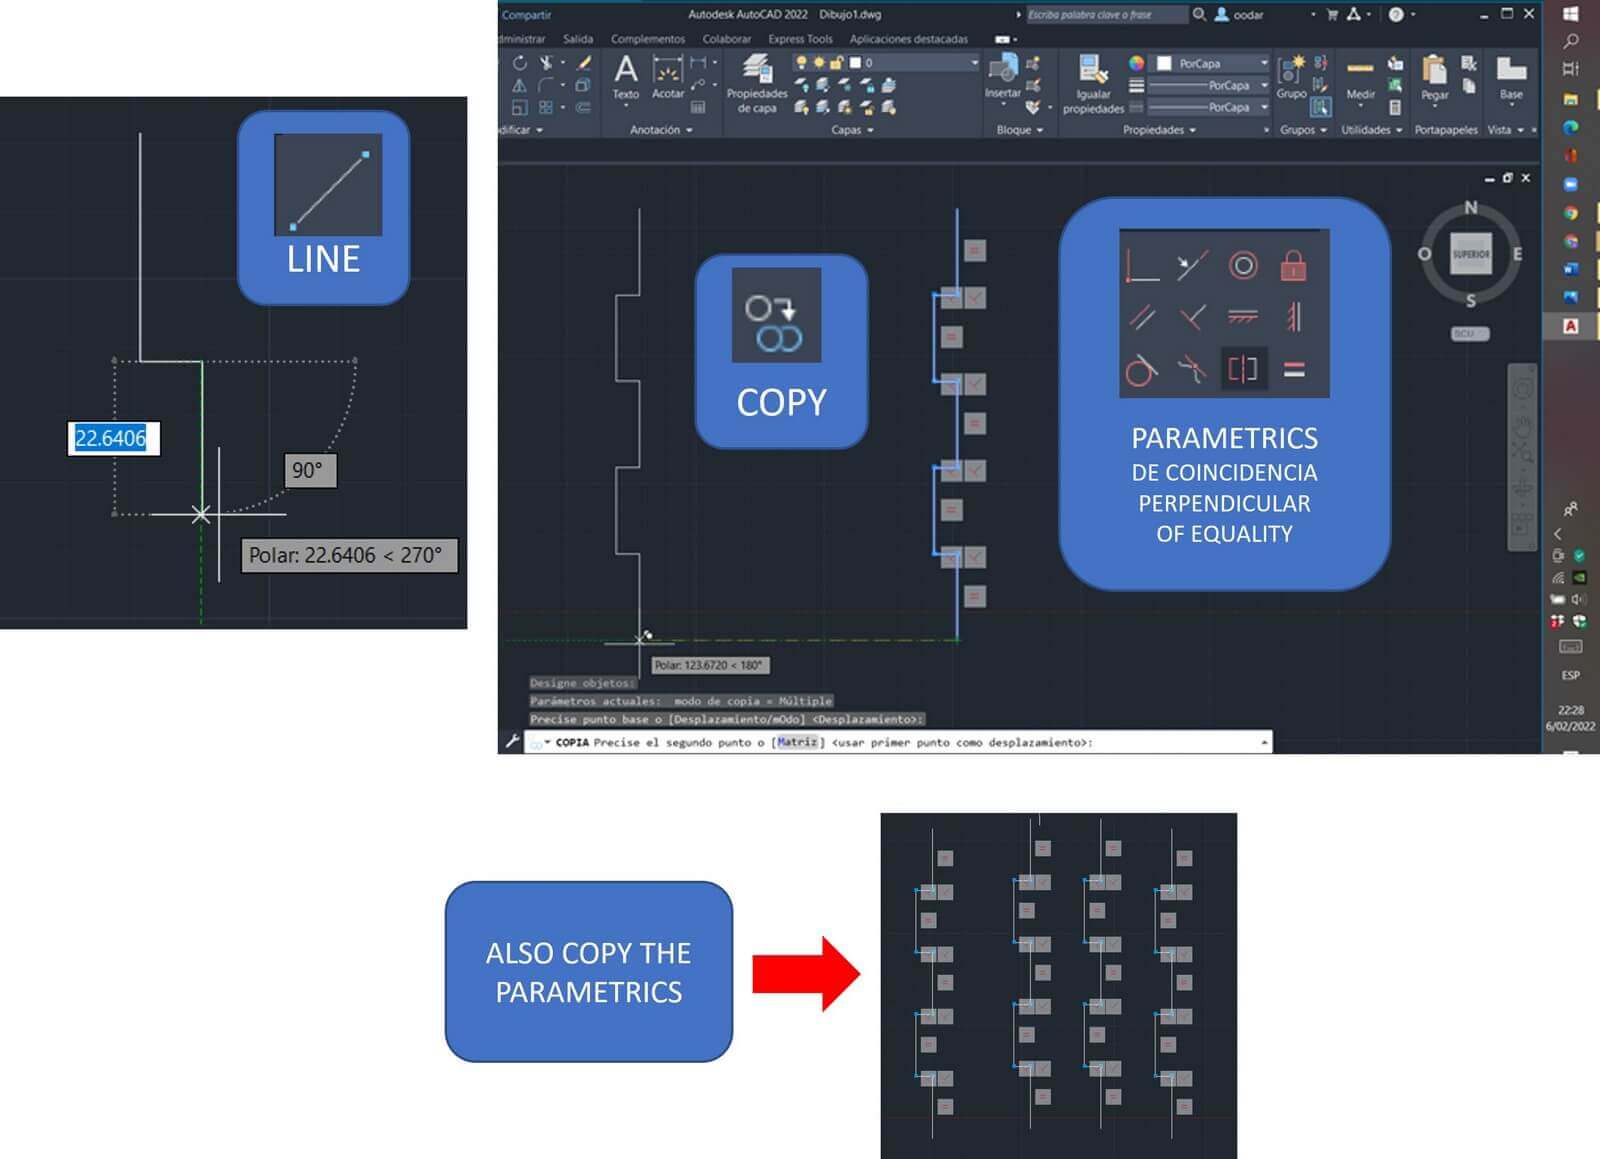
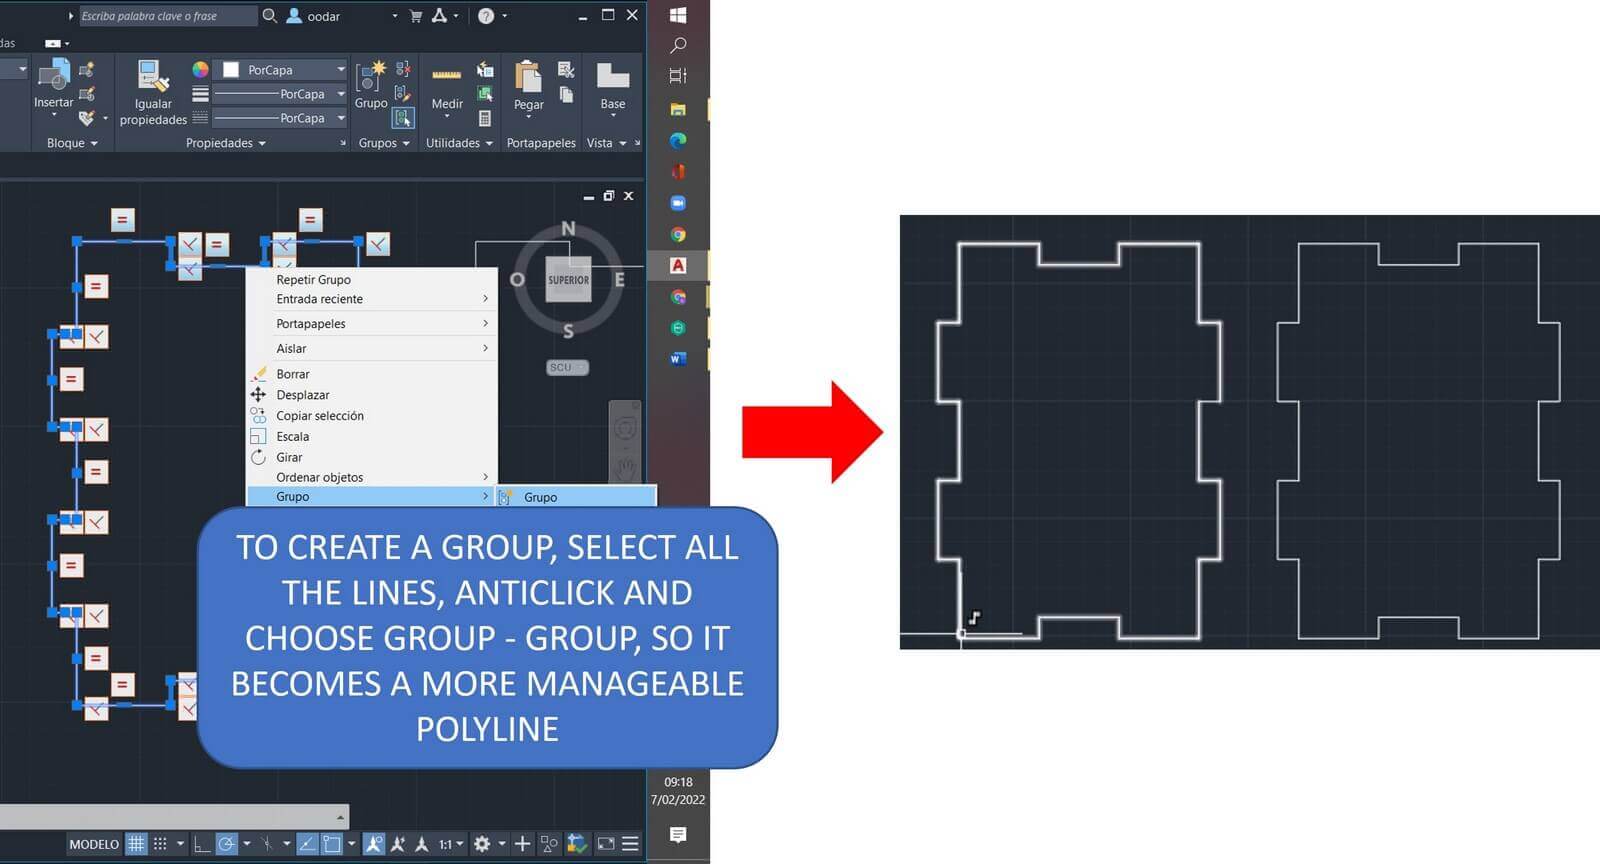
To make my drawing I used the following commands: Line, copy, symmetry, polynea (Then I remembered this command), create group (Allows you to group all lines into a single polyline for easy manipulation) and parametrics.
Let's get started!
THIS IS THE WORK AREA OF AUTOCAD
Using line, copy and parametrics
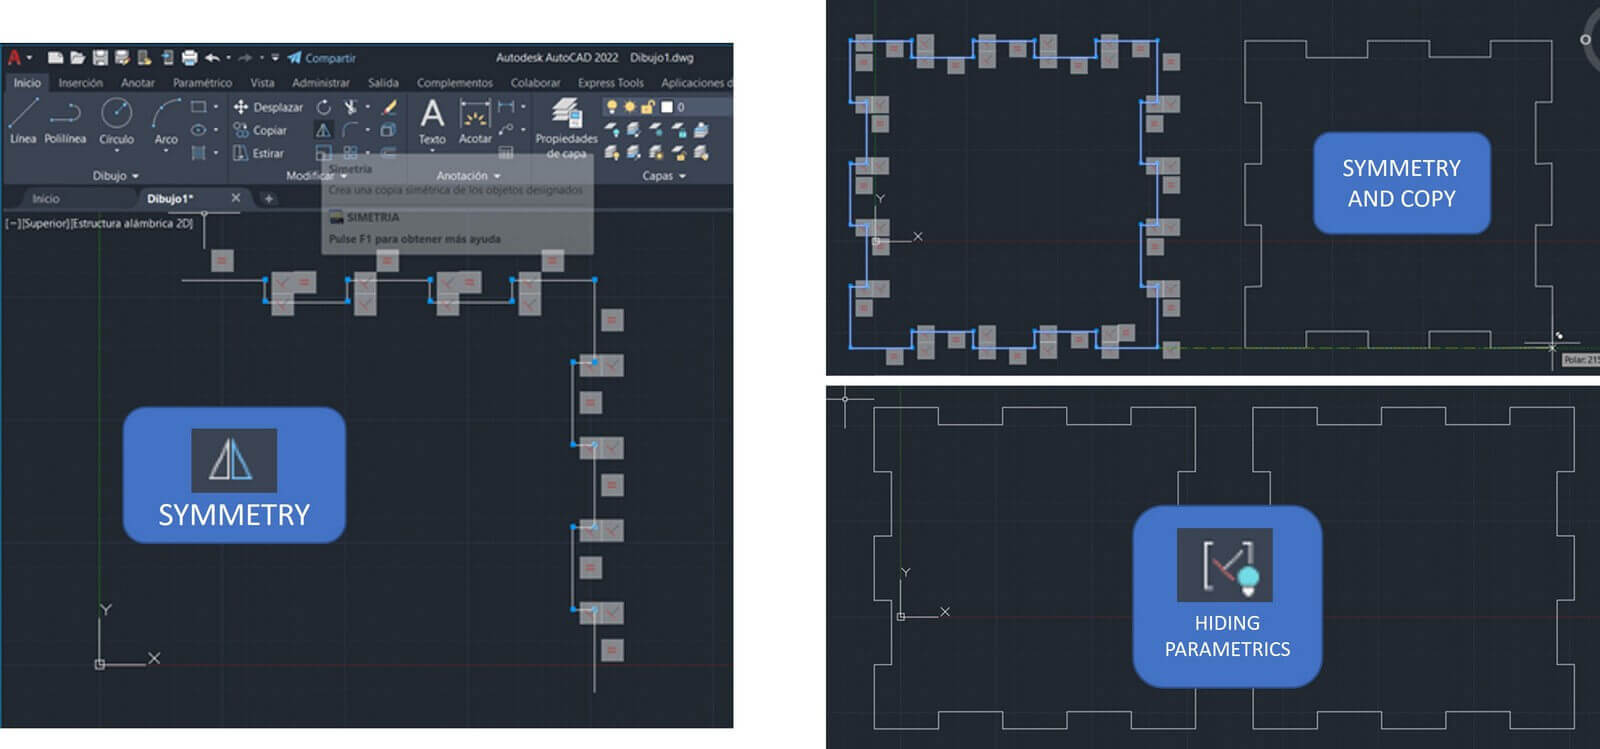
Using symmetry and hiding parametrics
Creating group
Finally
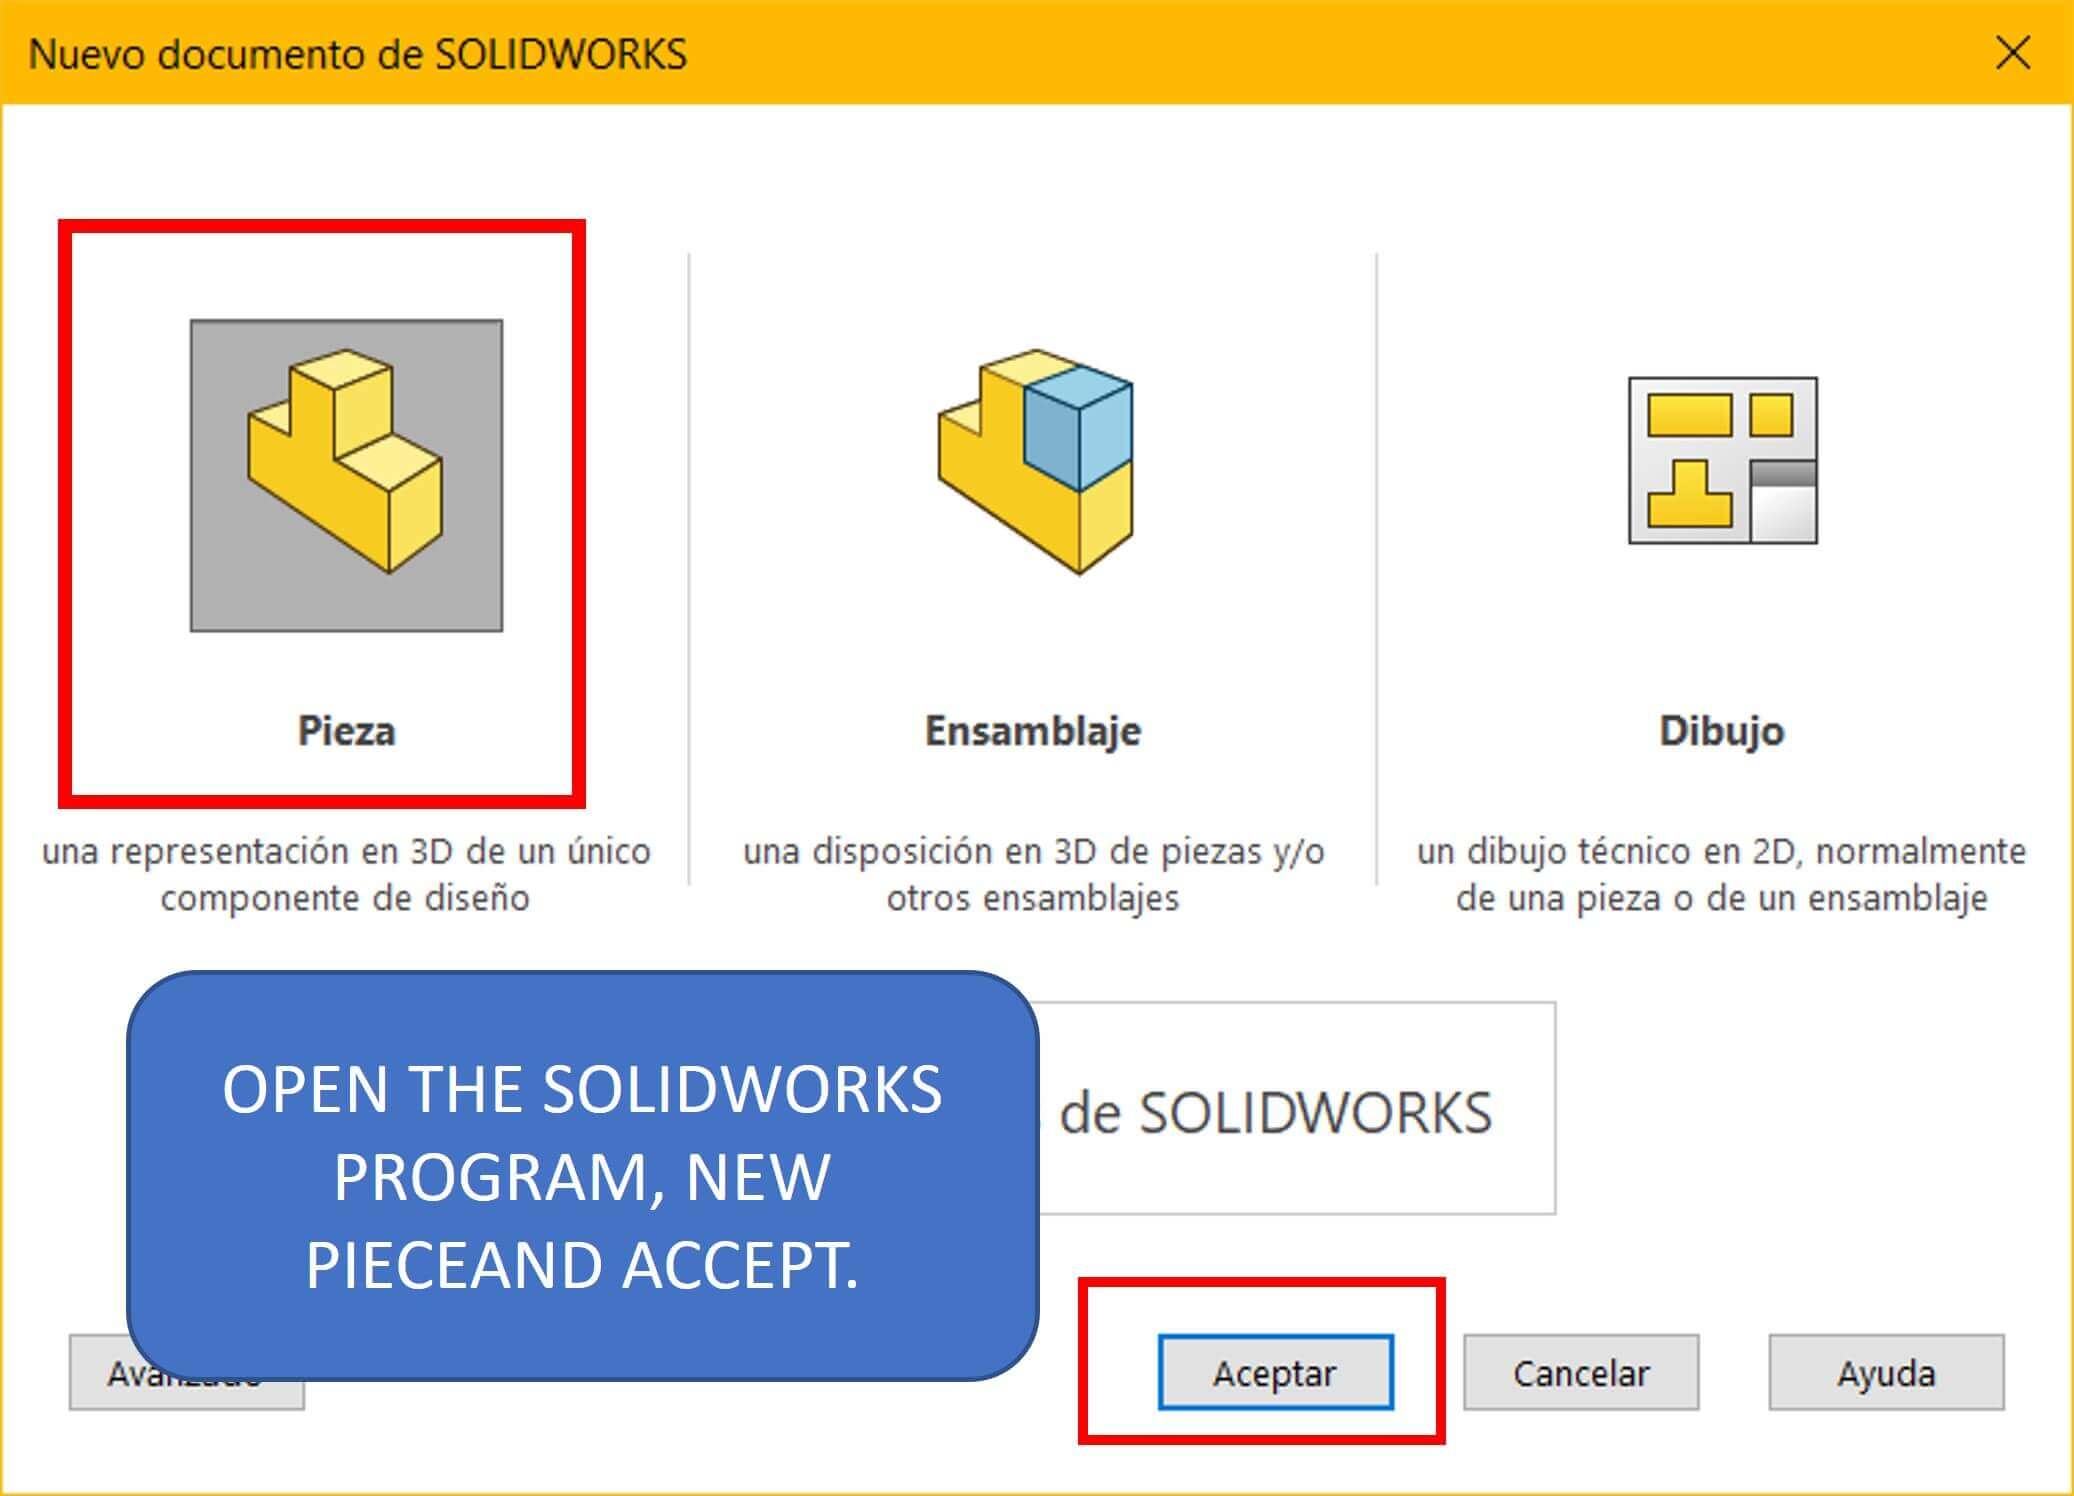
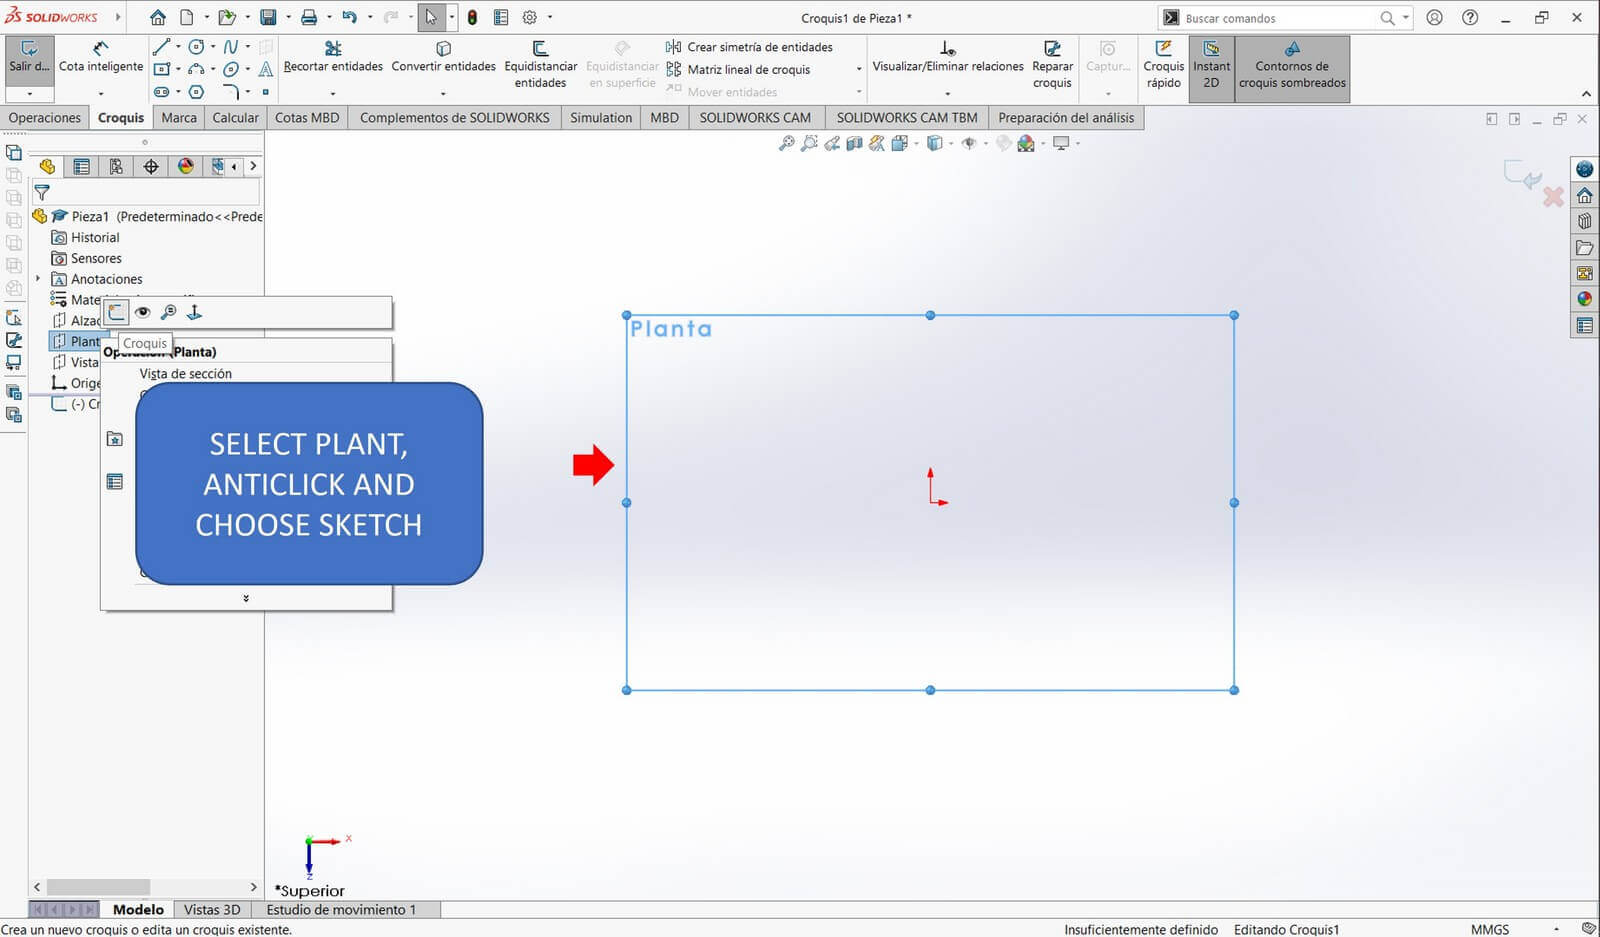
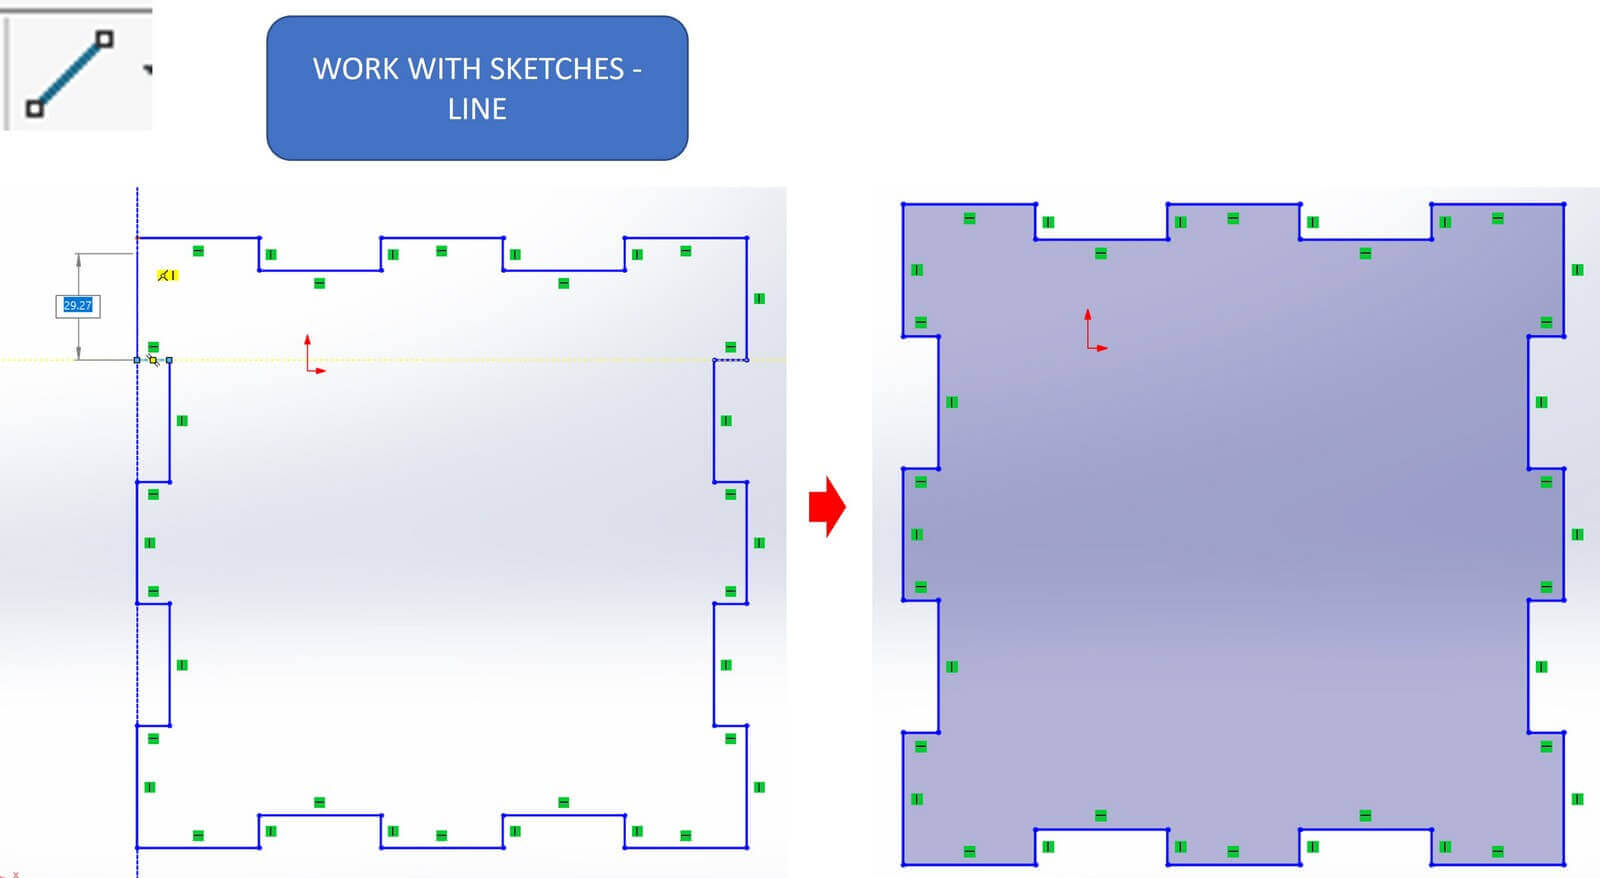
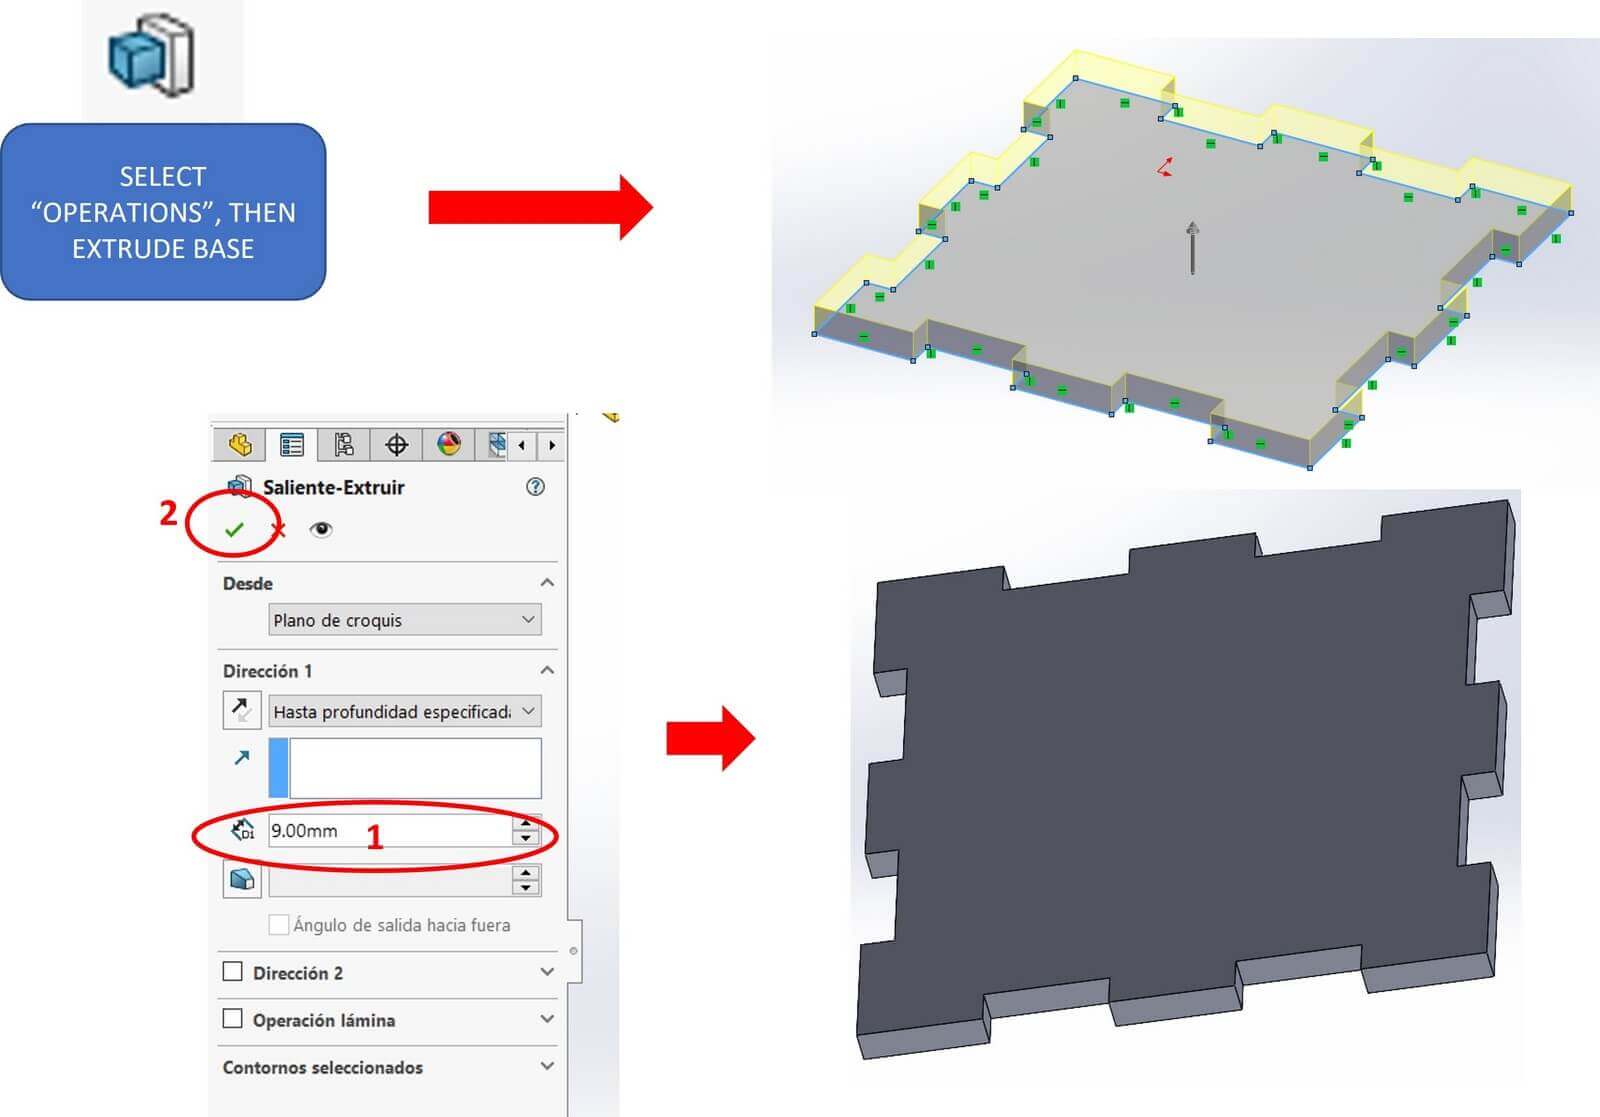
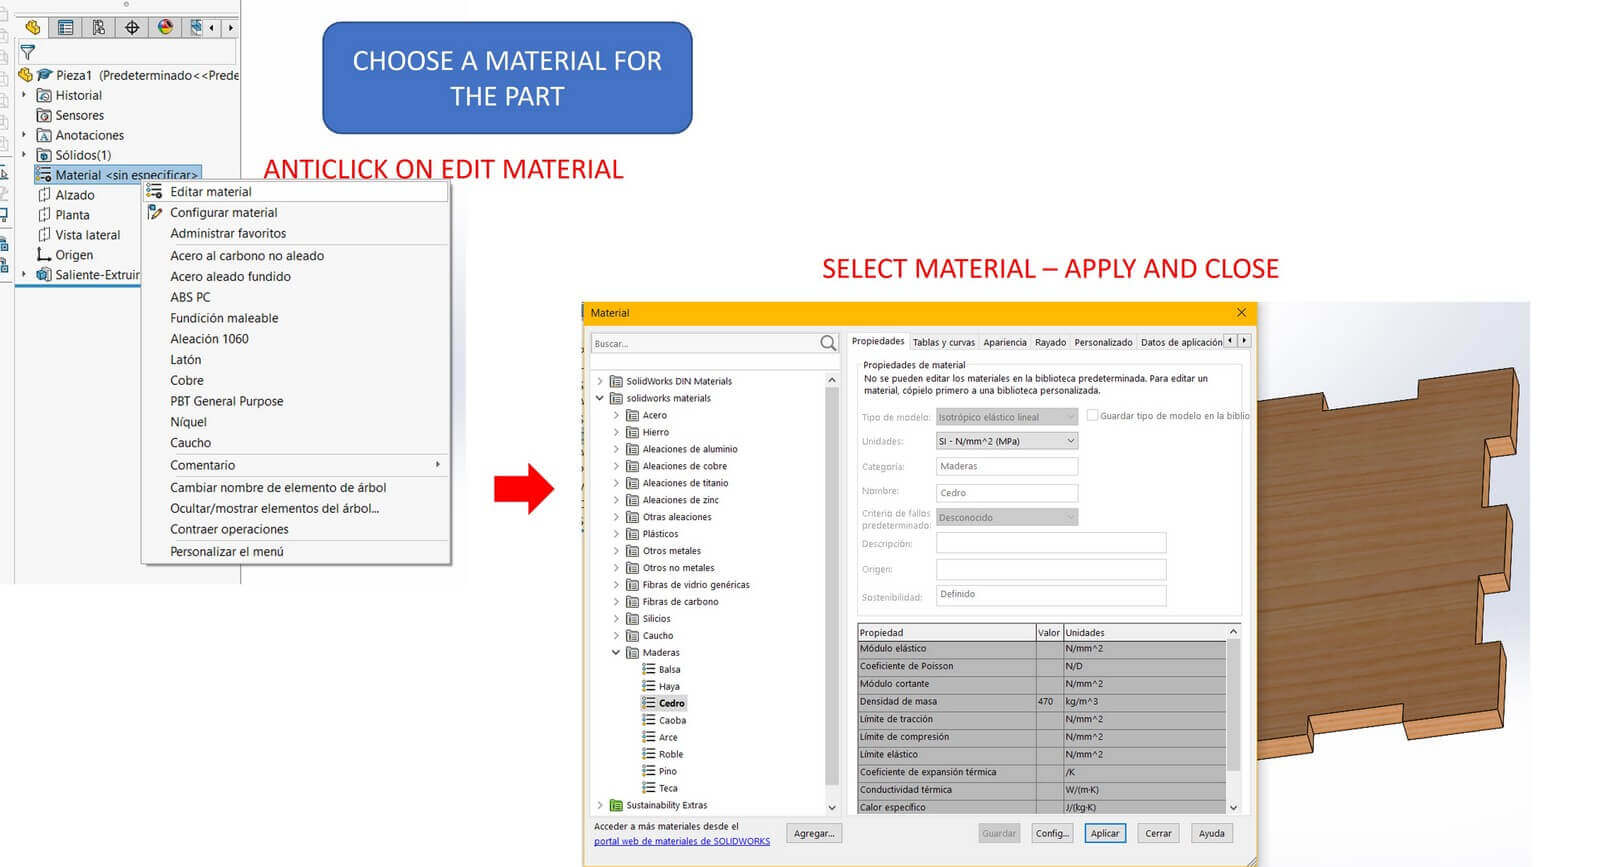
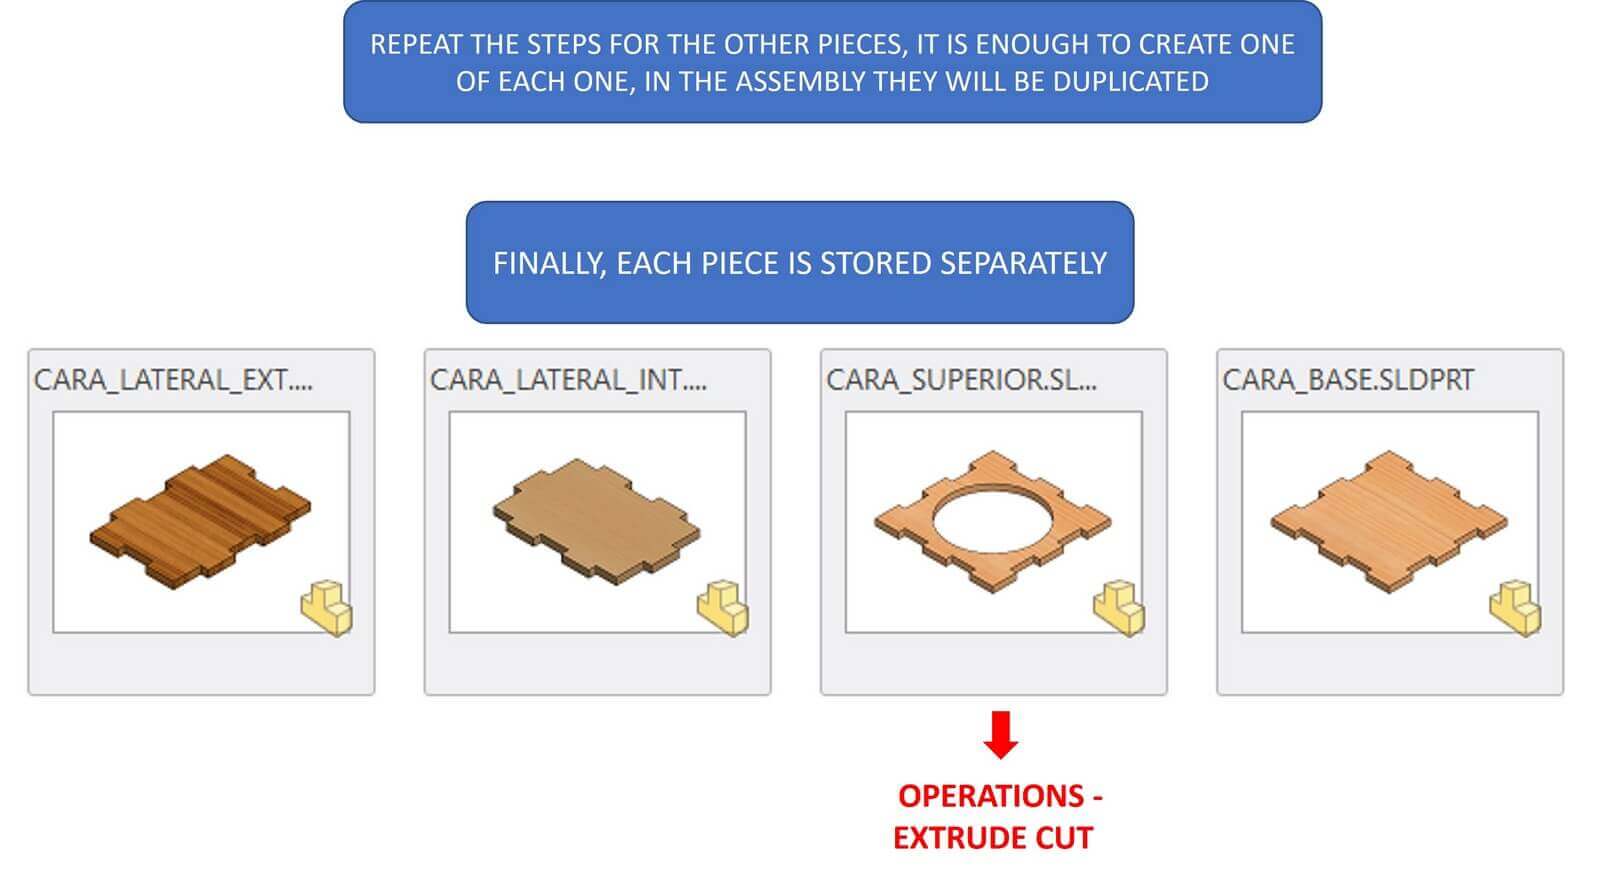
For the 3D design I opted for Solidworks, it was a bit difficult, but I managed to finish the modeling. Below I indicate the steps performed.
Edit material of the part
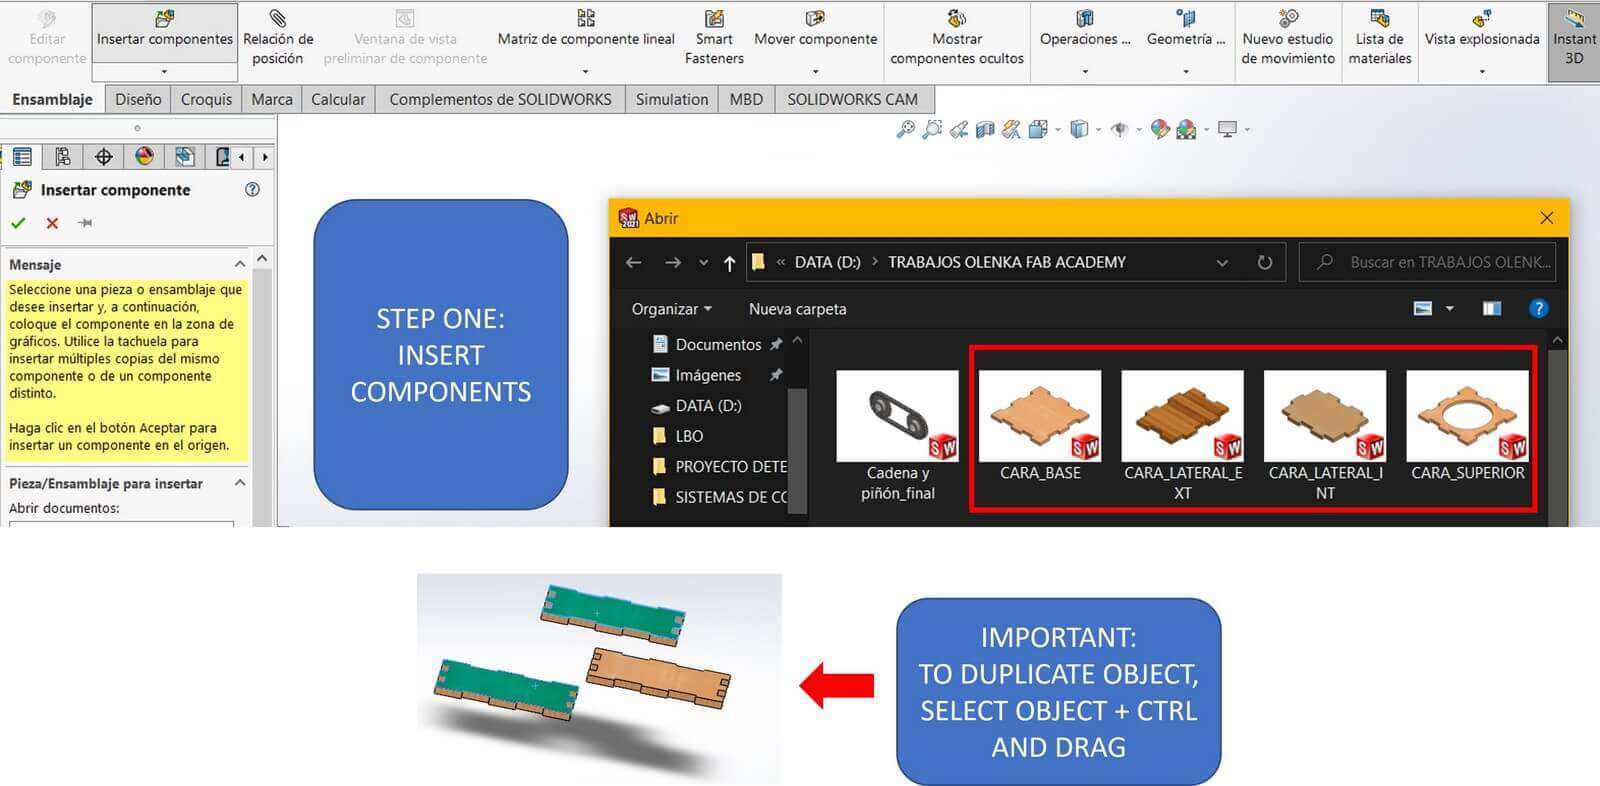
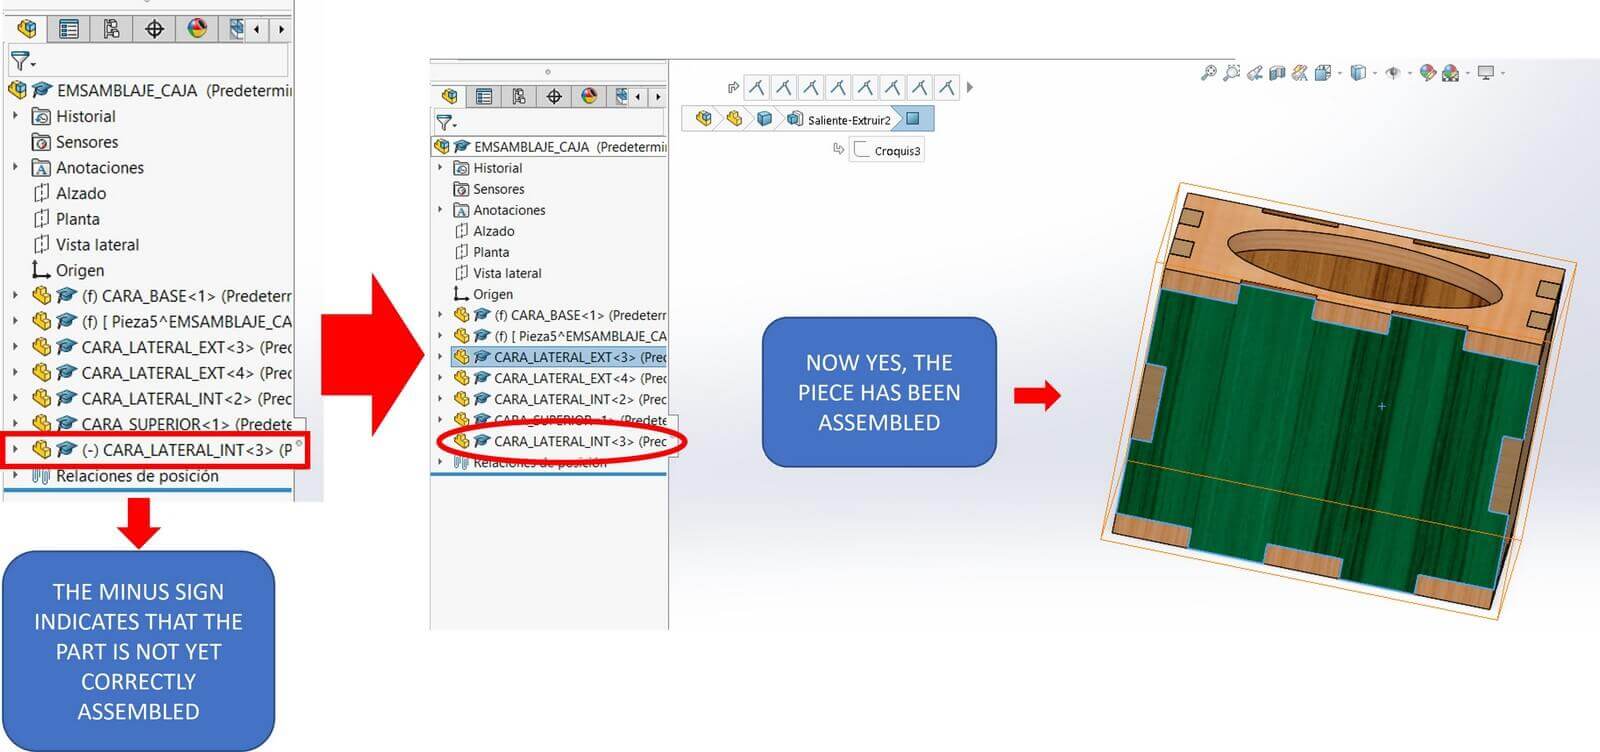
Assembling the pieces
Insert components
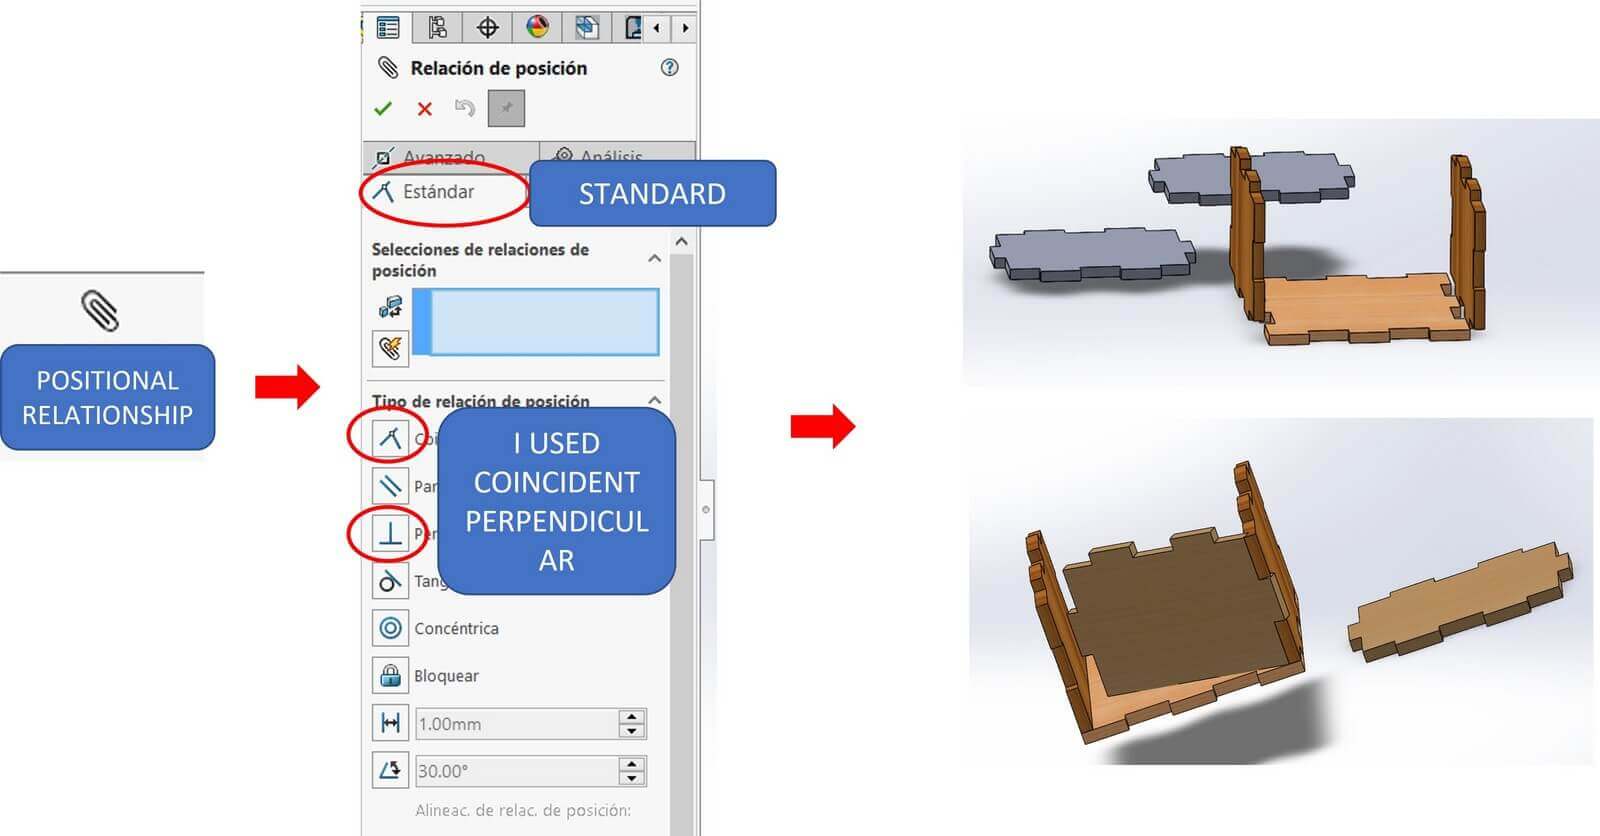
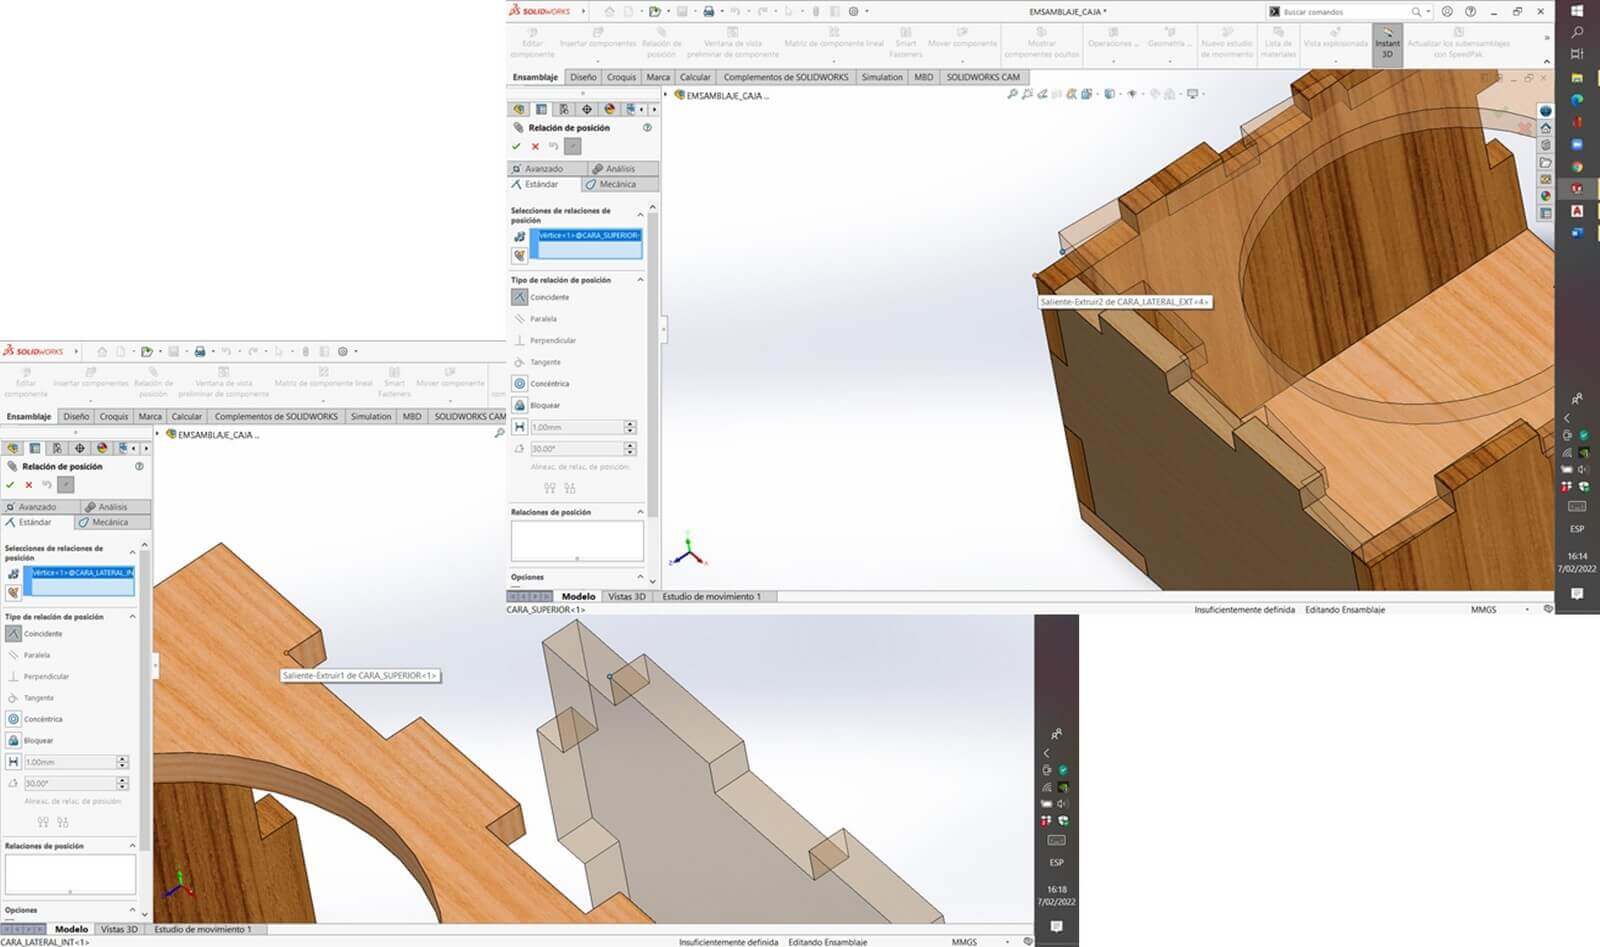
Establishing position relationship between the pieces
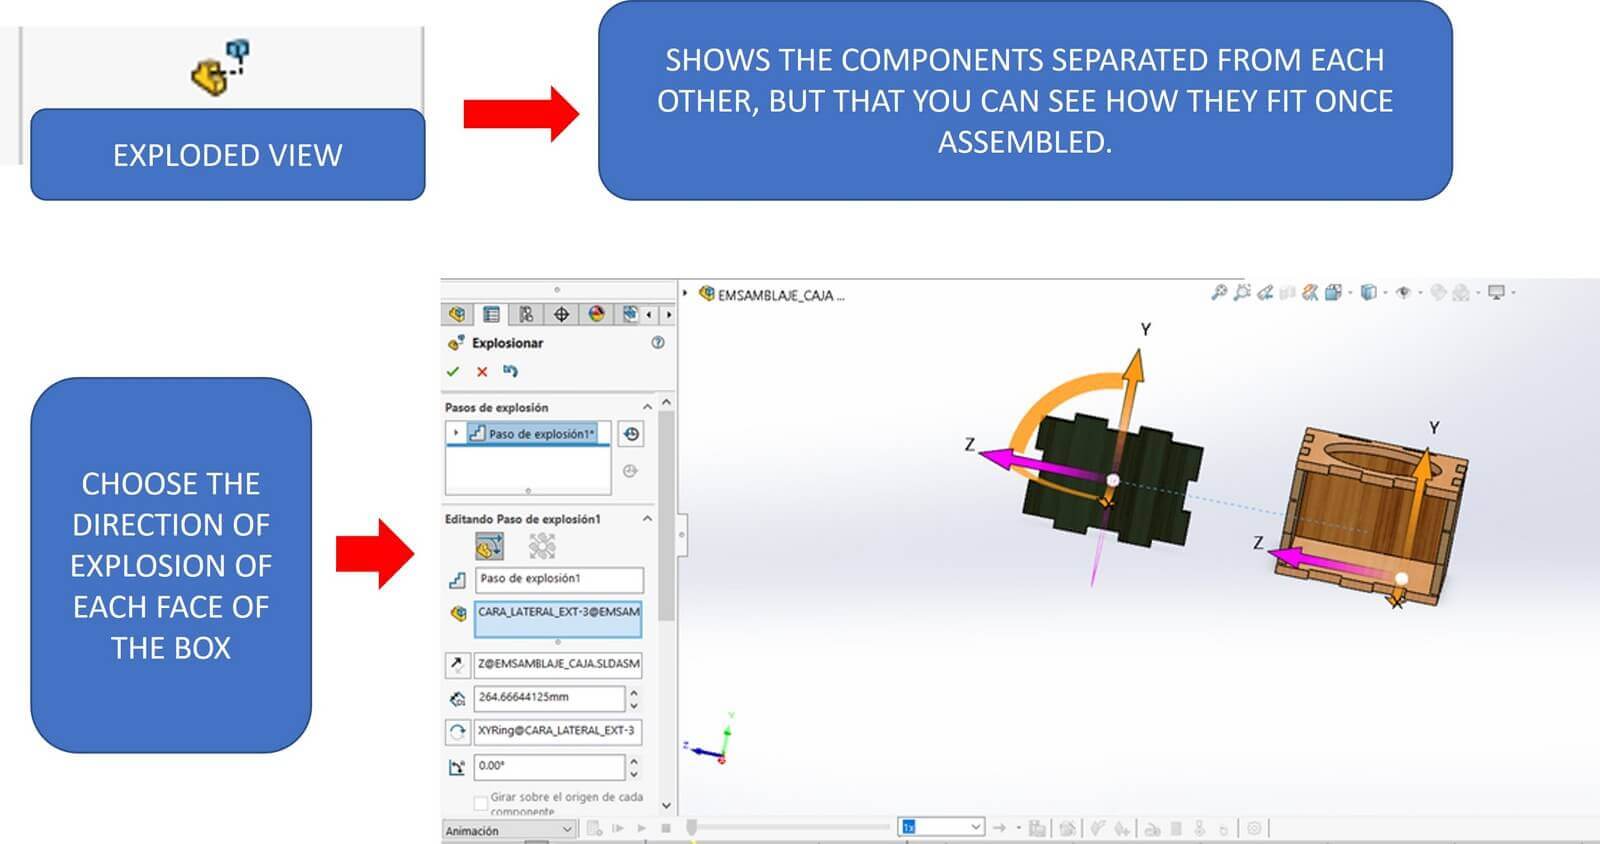
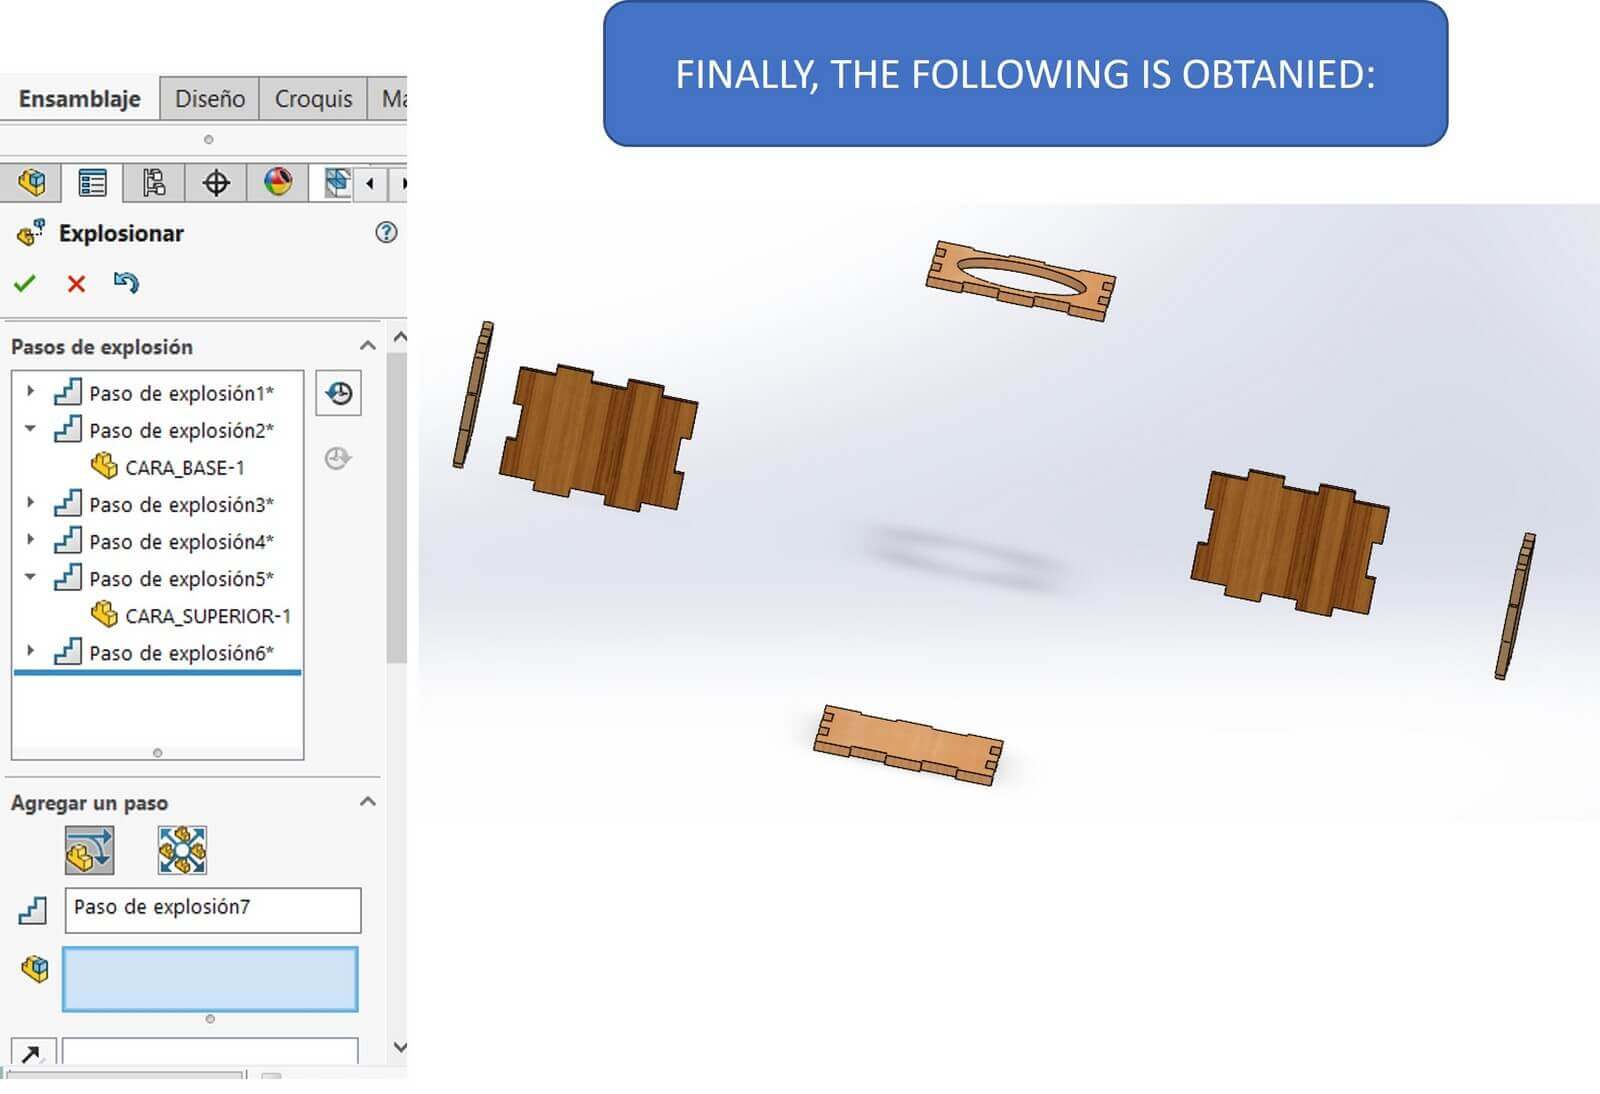
Creating exploded view
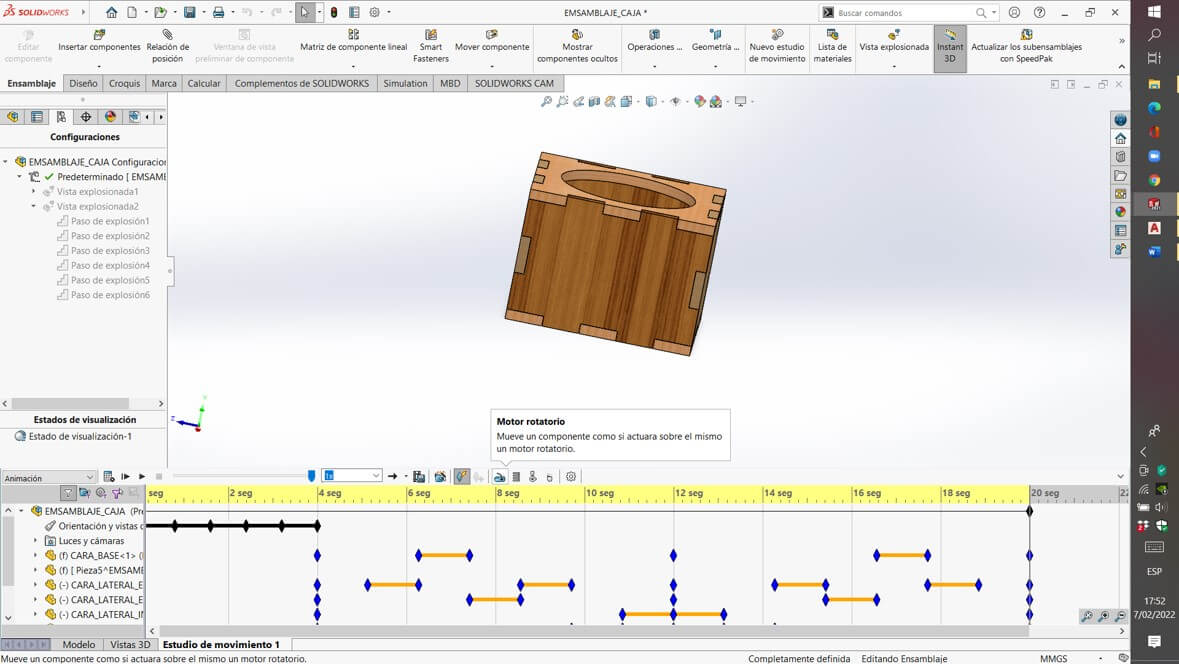
Creating an animation in Solidworks
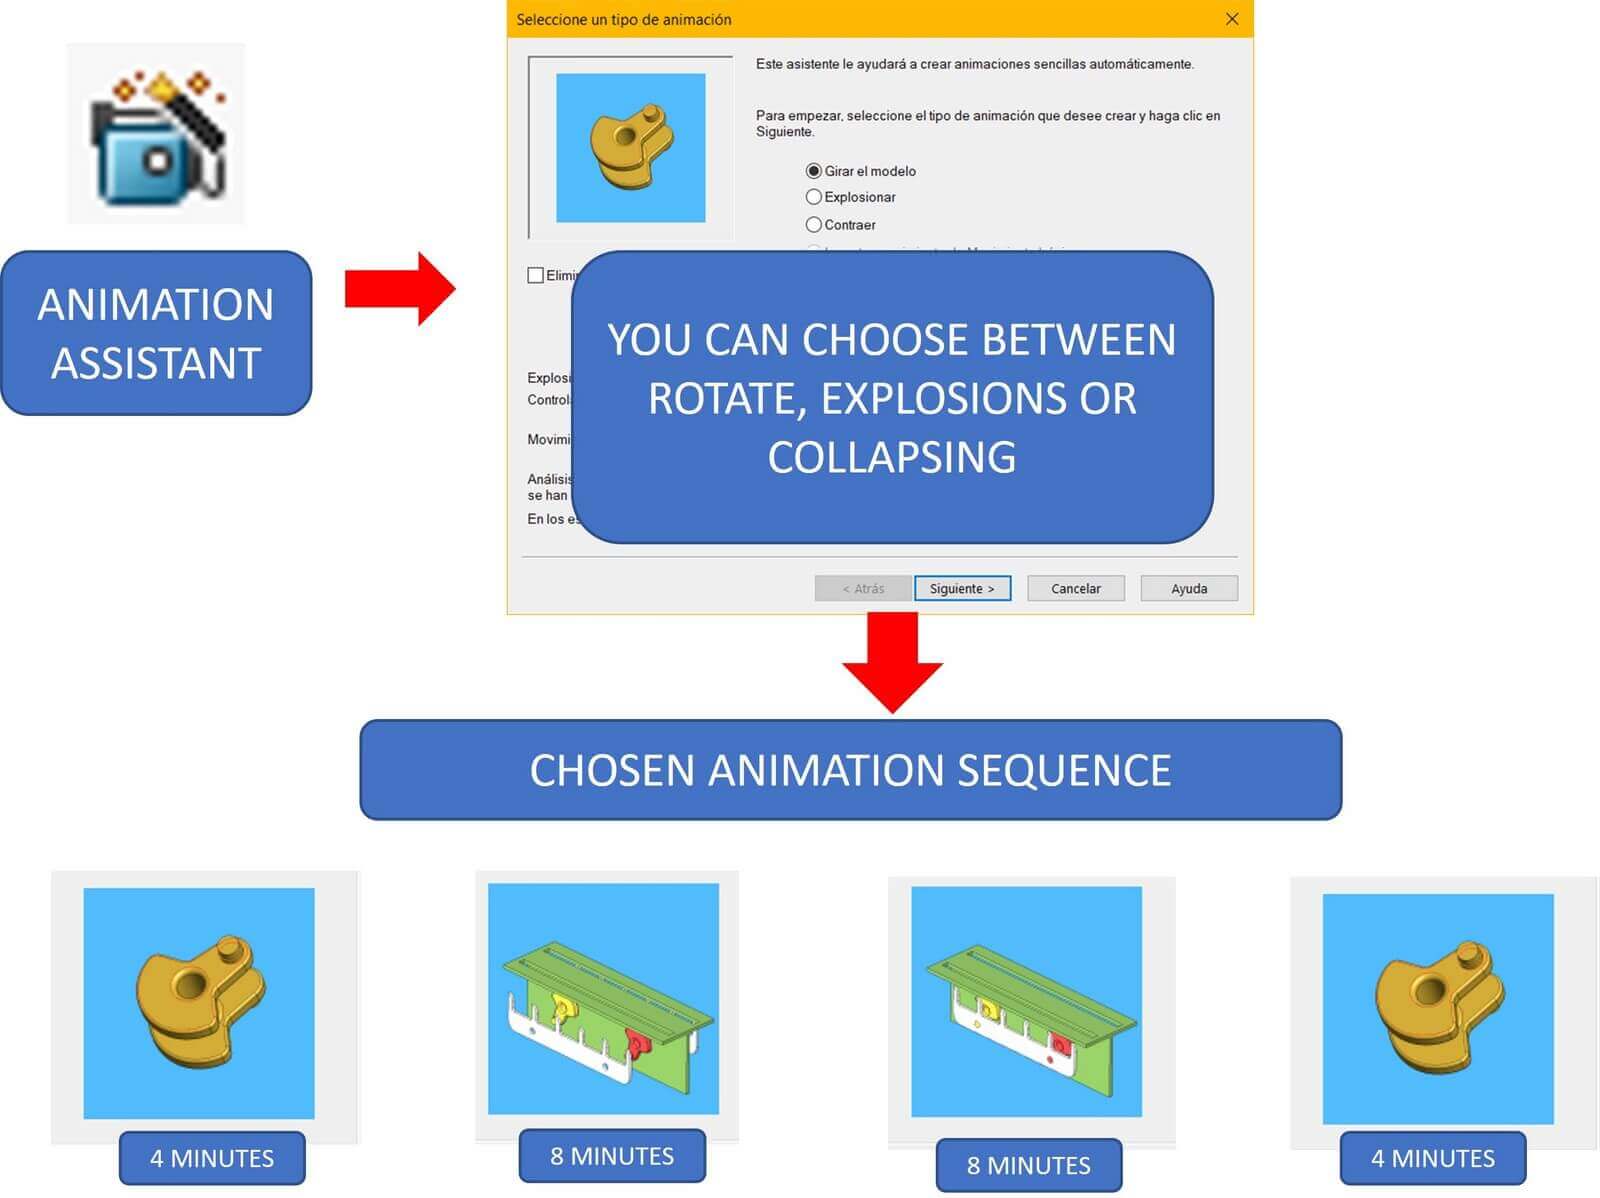
Motion Study
Animations are made in the "Motion Study" tab
created with
Offline Website Builder Software .