In this section we list the activities to be solved in the following table:
| Checklist | Estatus |
|---|---|
| Made a website and described how you did it | Finished |
| Created a section about yourself on that website. | Finished |
| Added a page with a sketch and description of your final project idea(s). | Finished |
| Documented steps for creating your Git repository and adding files to it. | Finished |
| Pushed to the class GitLab. | Finished |
| Signed and uploaded Student Agreement. | Finished |
To create a website it is necessary to know the HTML language. HTML is the code most used to structure and organize the content of a web page. An HTML is composed of the following parts (see image).
 They suggested me to work based on a template, then my instructor recommended the Nicepage software with which you can build your own template and little by little my website took shape, the good thing is that as you make the changes it gives you the option to a preview.
Once we have downloaded Nicepage, these were the steps I followed to create my website.
Importing project

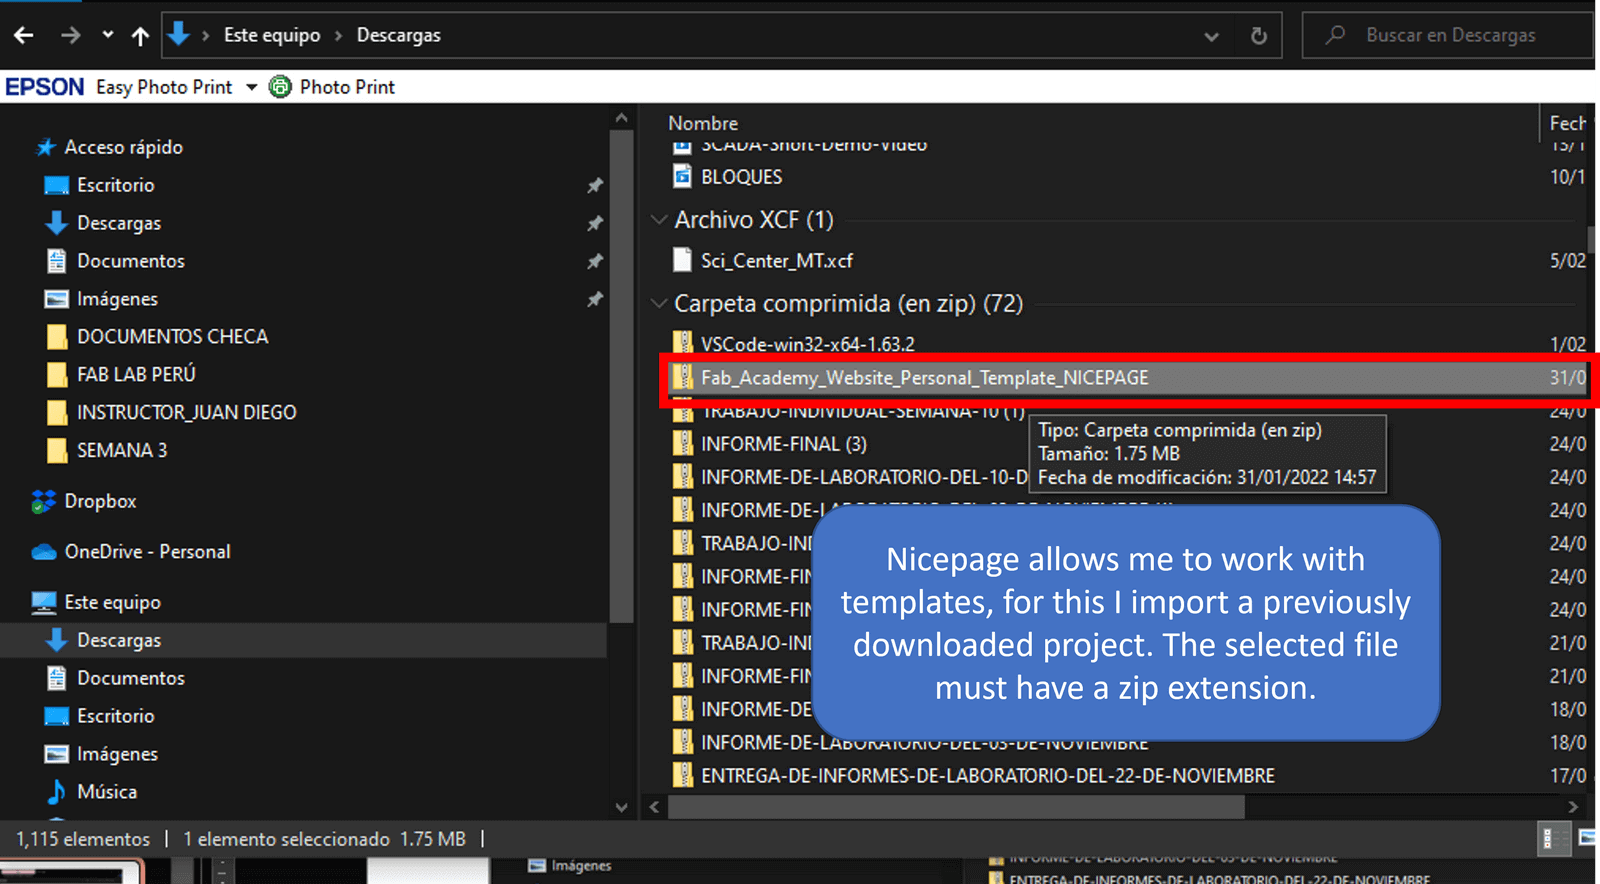
Adding a new block
 Adding text block

Adding image block
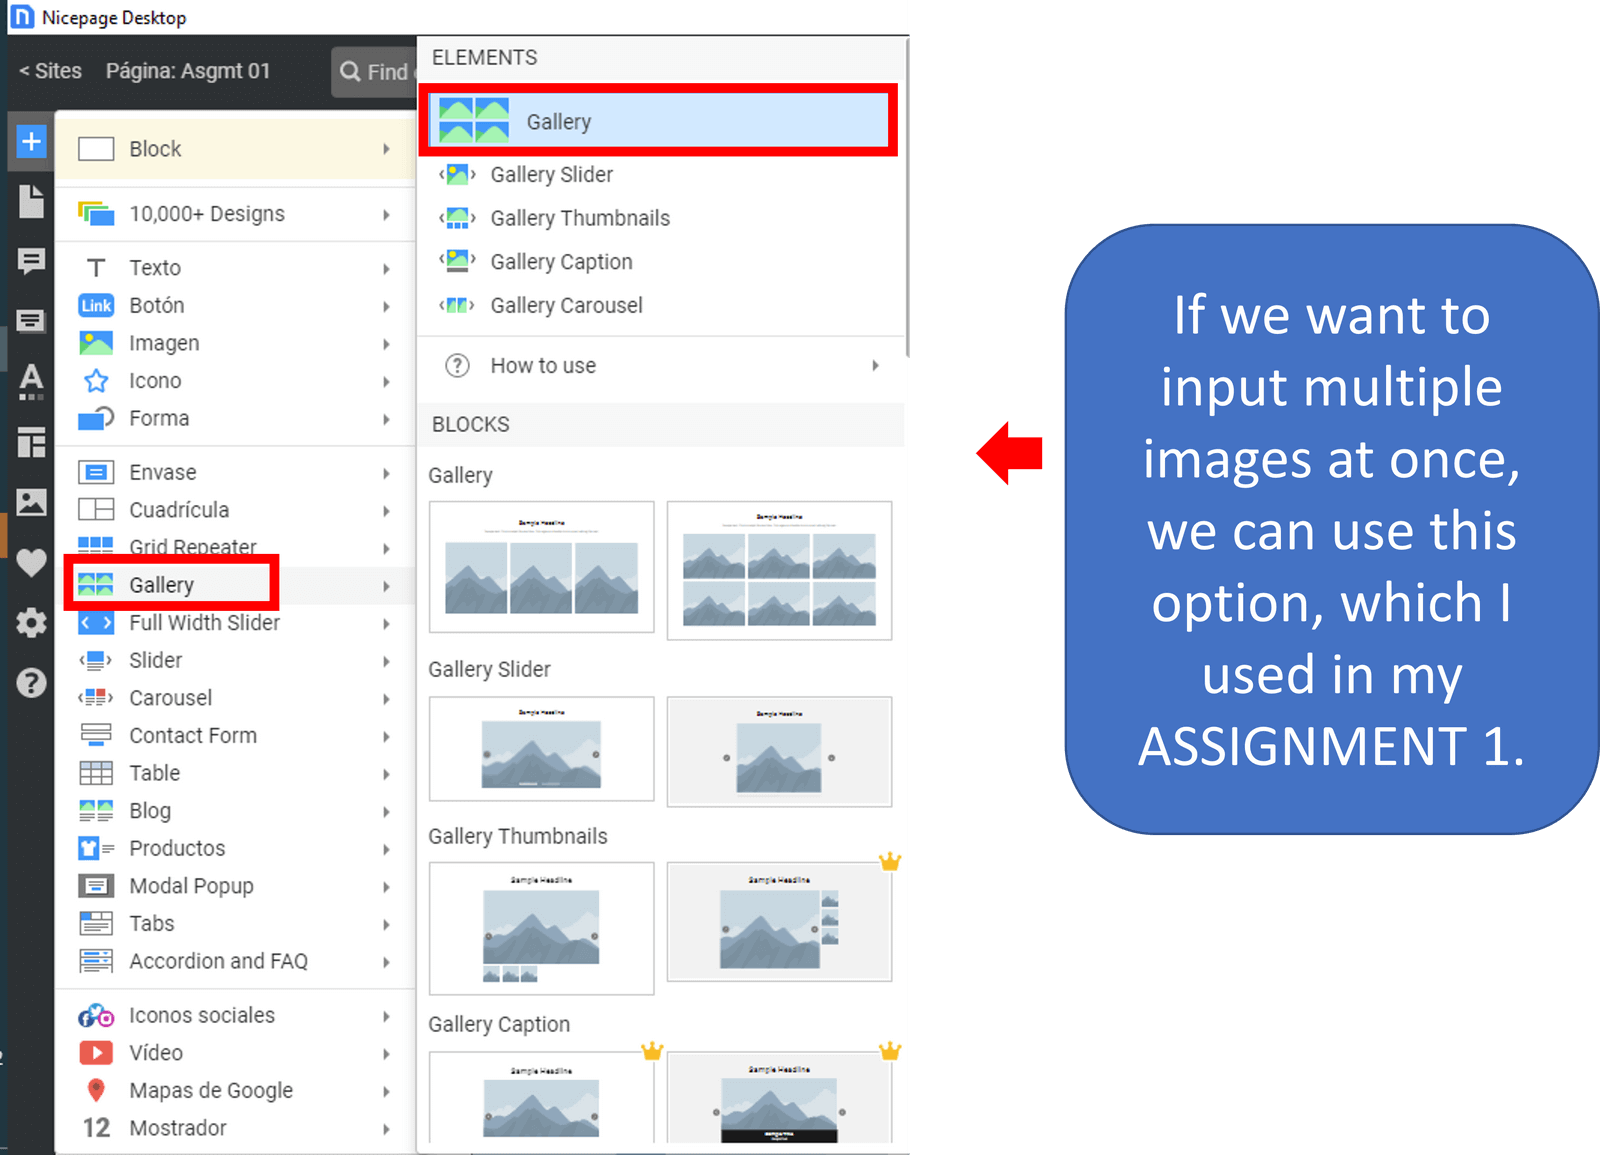
Uploading an image 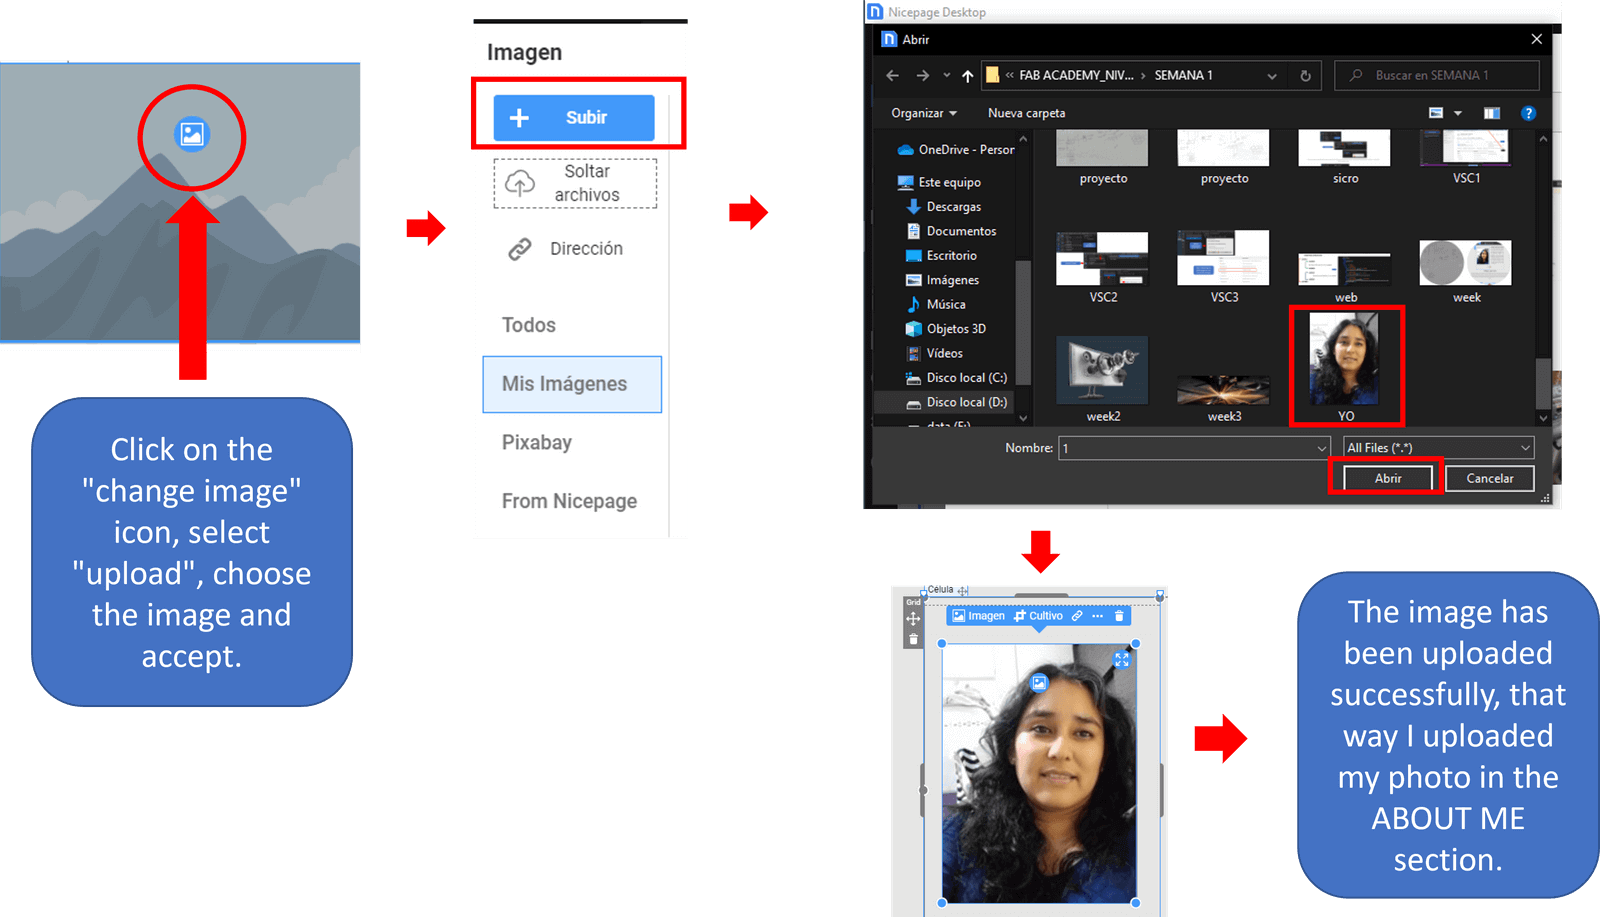
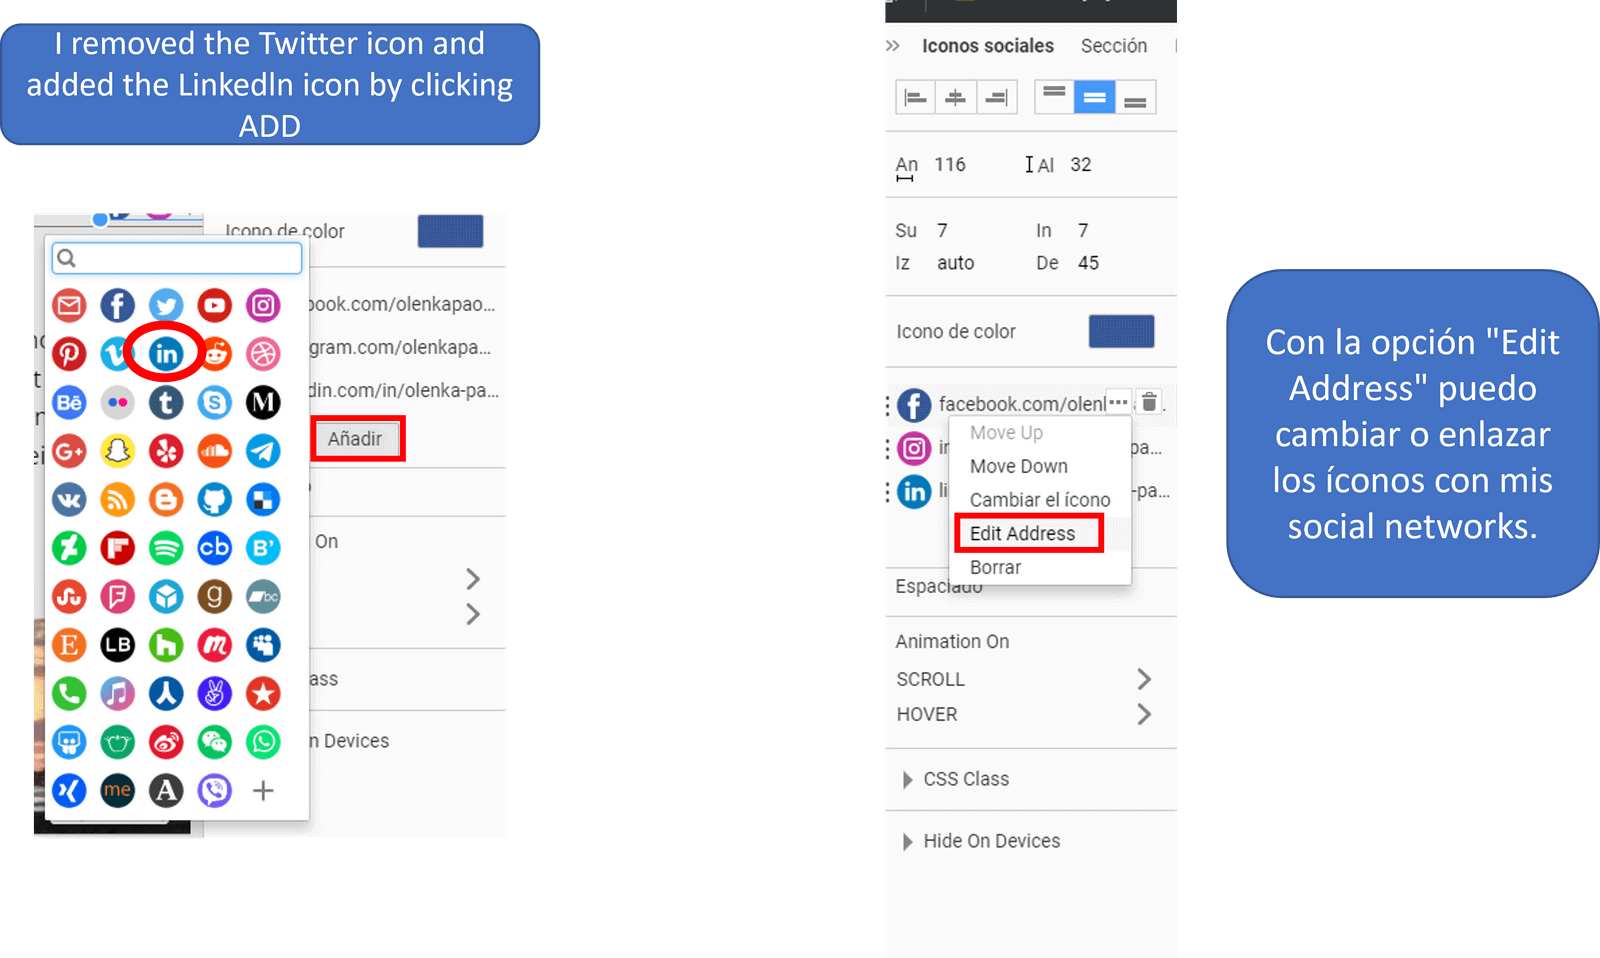
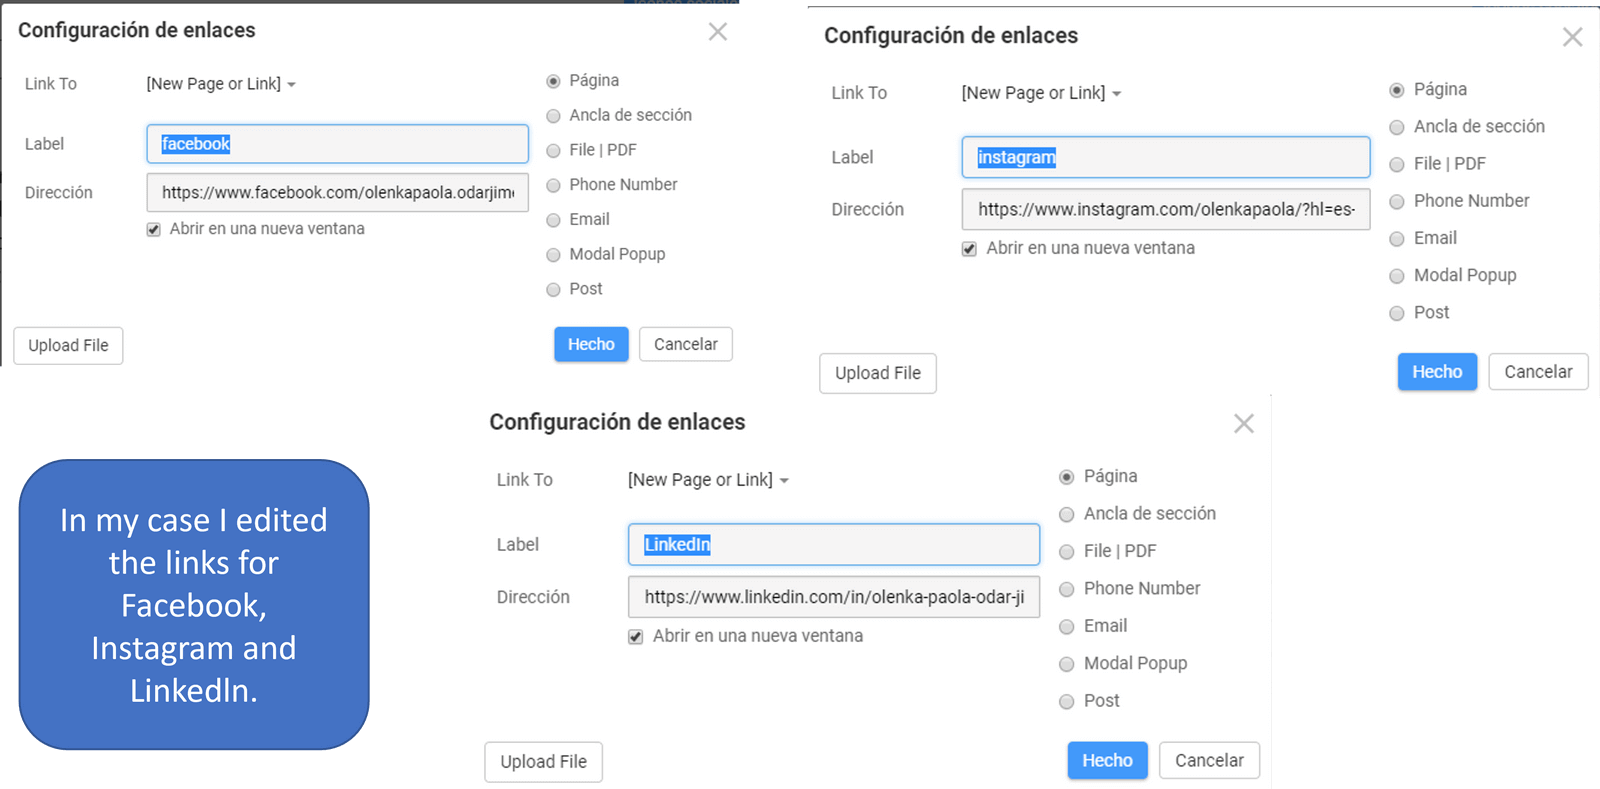
Add social network block
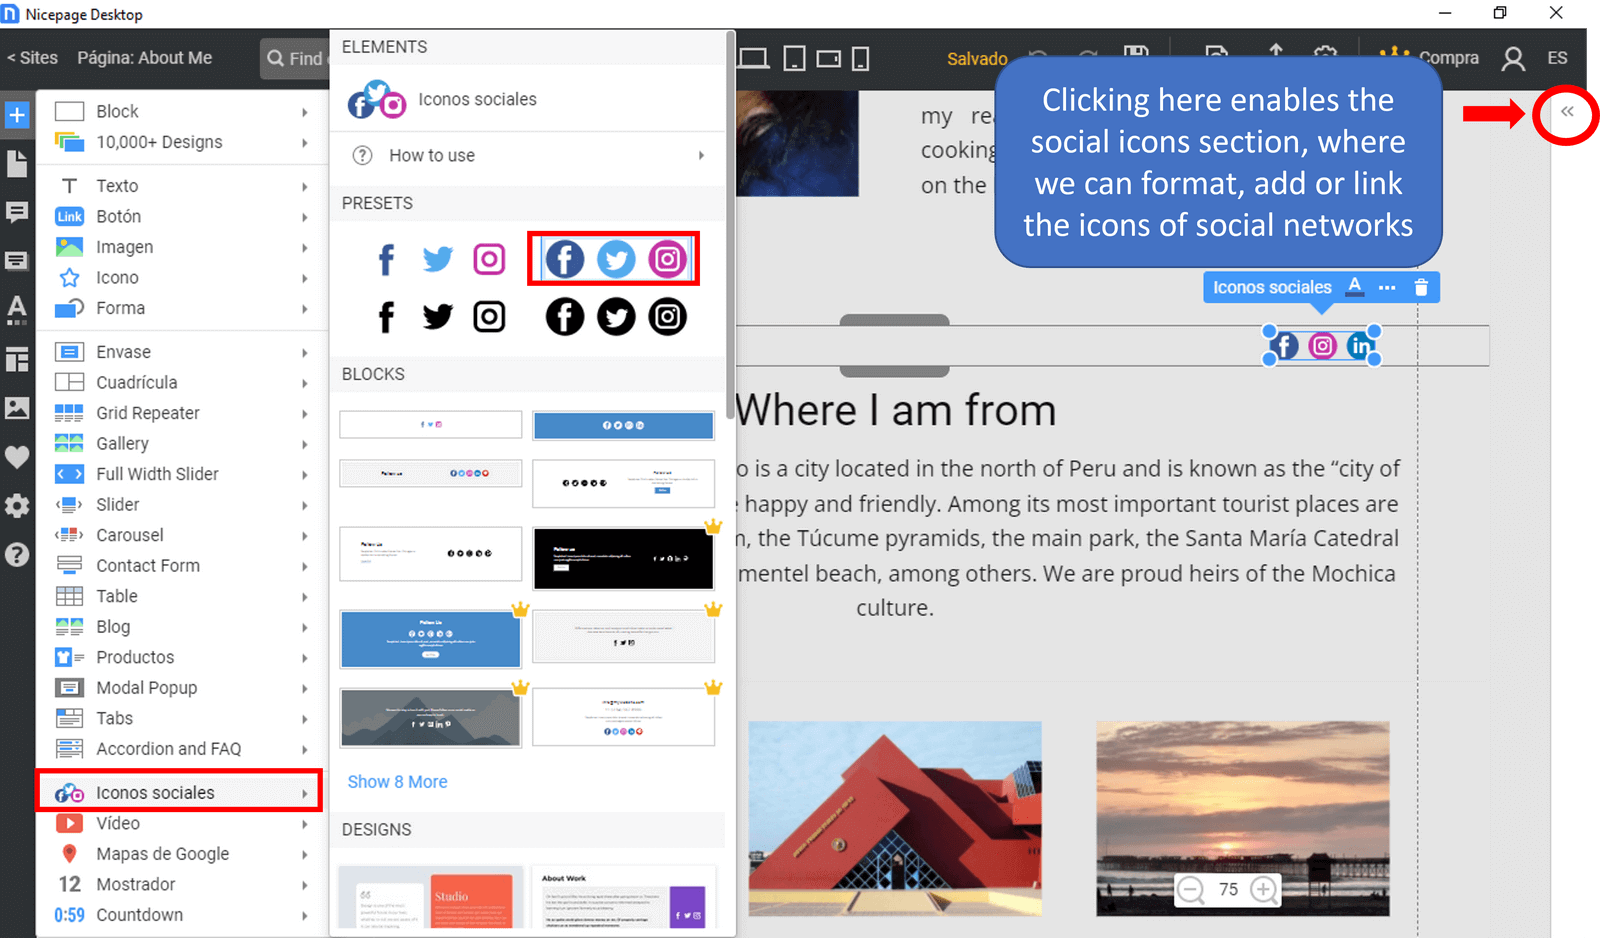
Assignments
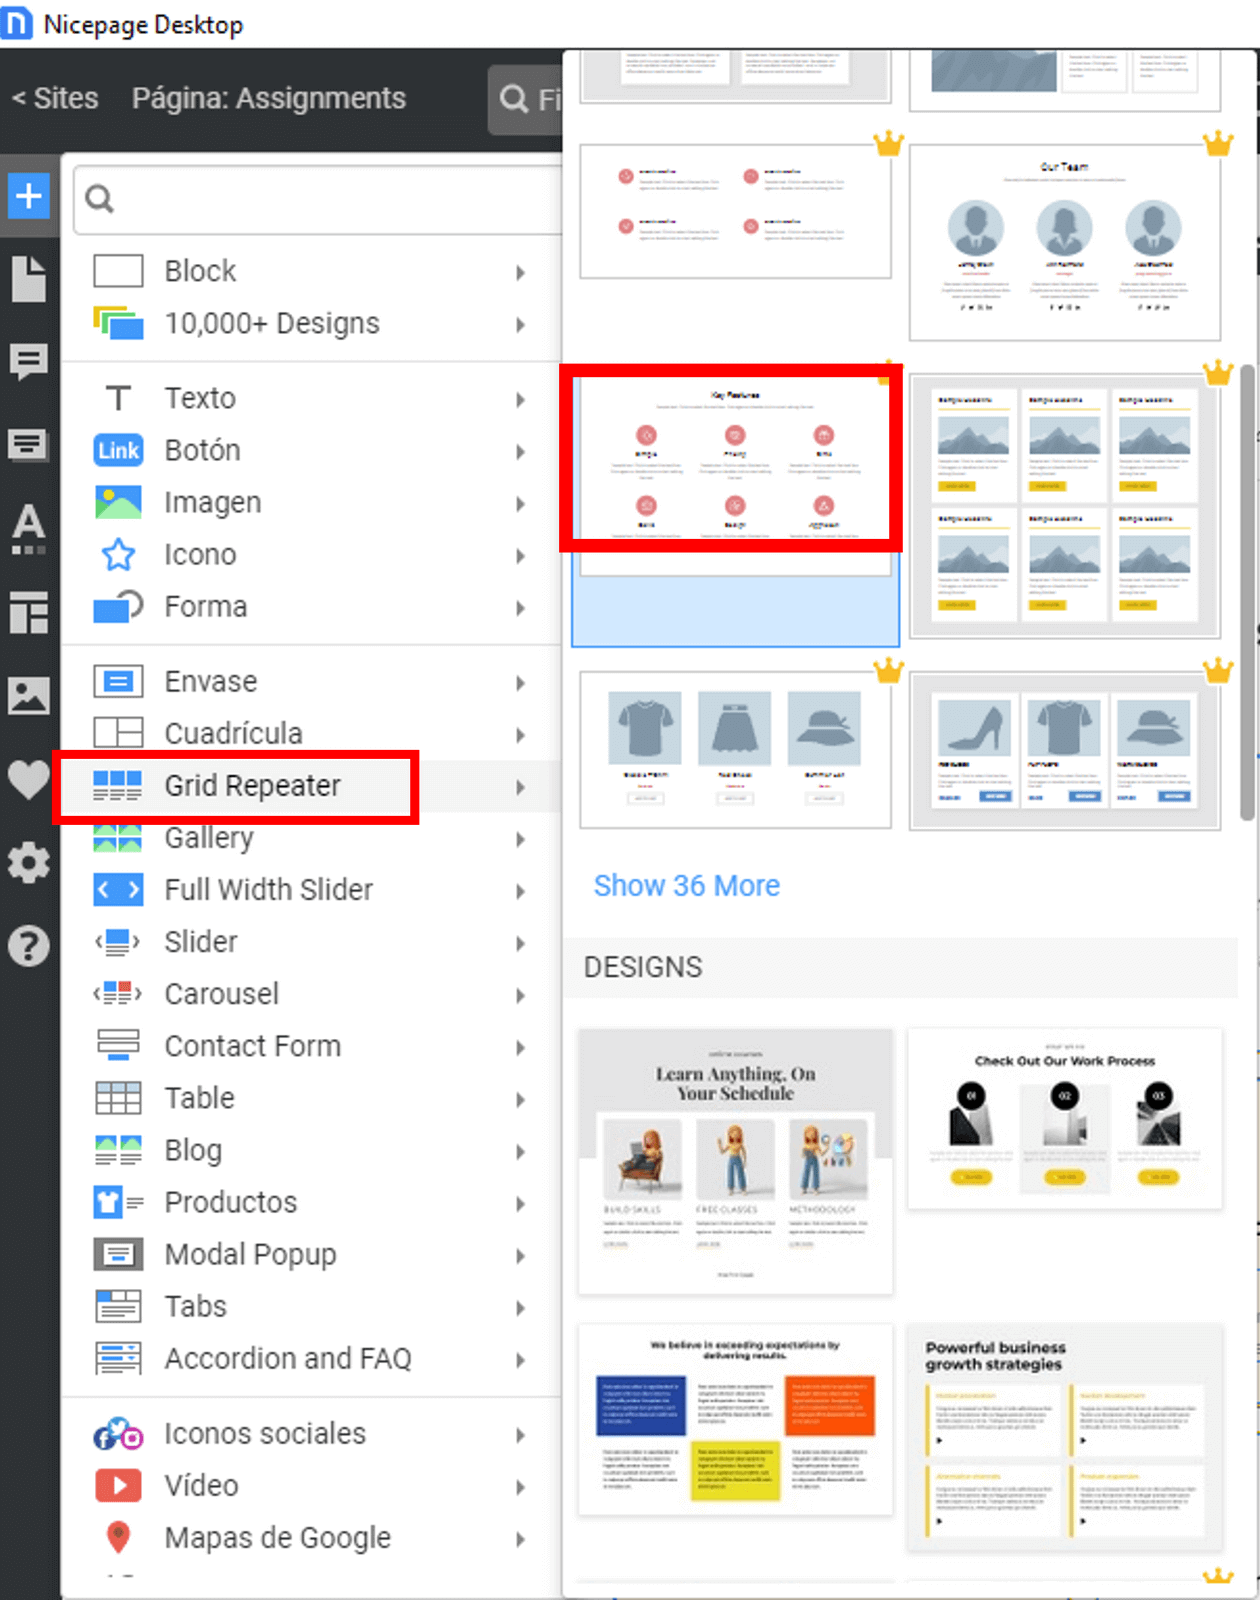
For the Assignments, we open a blank page and select the option "Grid Repeater" and choose in BLOCKS the option shown in the image.
The images are changed as explained above and the text can be edited. Don't forget to link each Assignment to its individual page.

Header y Footer
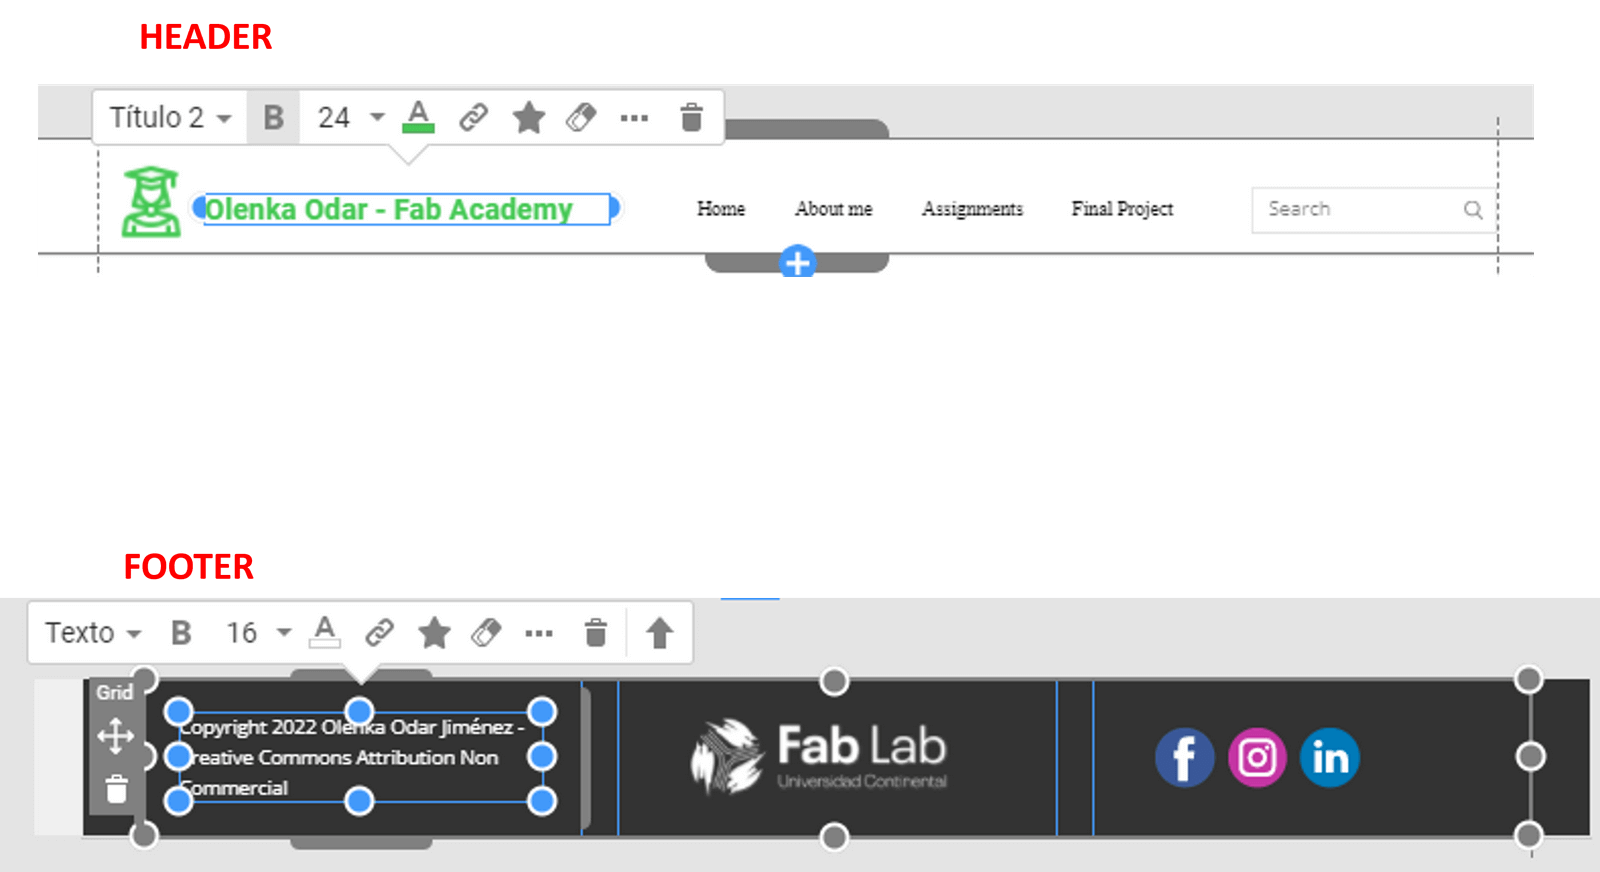
As it is a template, we must not forget to edit the header and footer.
Add videos from YOUTUBE
To add a YouTube video, we add a new block, we choose VIDEO - ELEMENTS - VIDEO

We replace the default link with the link of the video we want to show.

Now yes, my website is ready!
Version control, also known as "source code control," is the practice of tracking and managing changes to software code. Version control systems are software tools that help software teams manage changes to source code over time. Like many of the most popular version control systems available today, Git is free and open source.
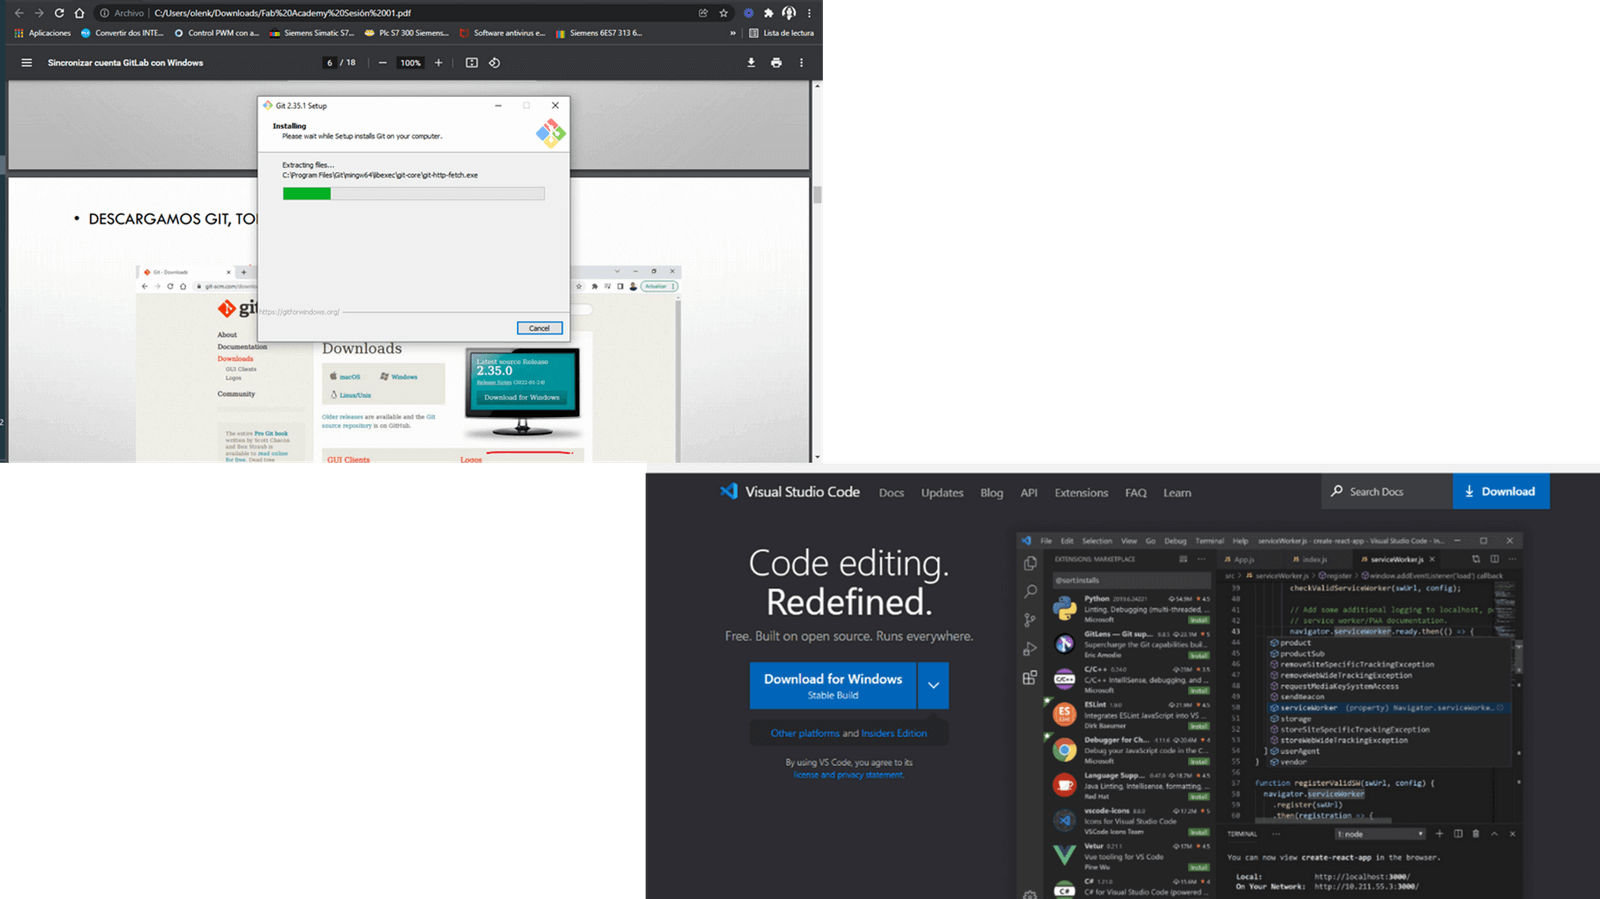
To clone the account we need Git Bash and Visual Studio Code.
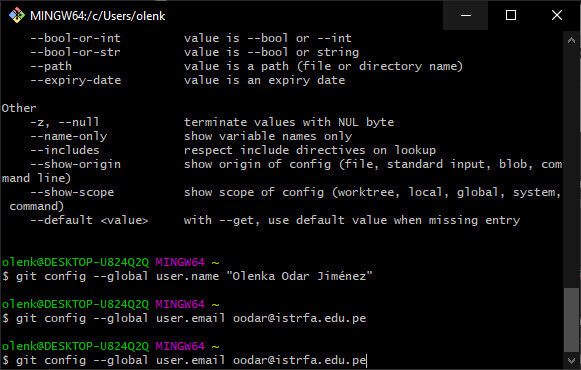
We enter the corresponding commands in Git Bash so that it allows me to clone the repository.
Now from Visual studio code we clone Fabcloud Account, as follows:
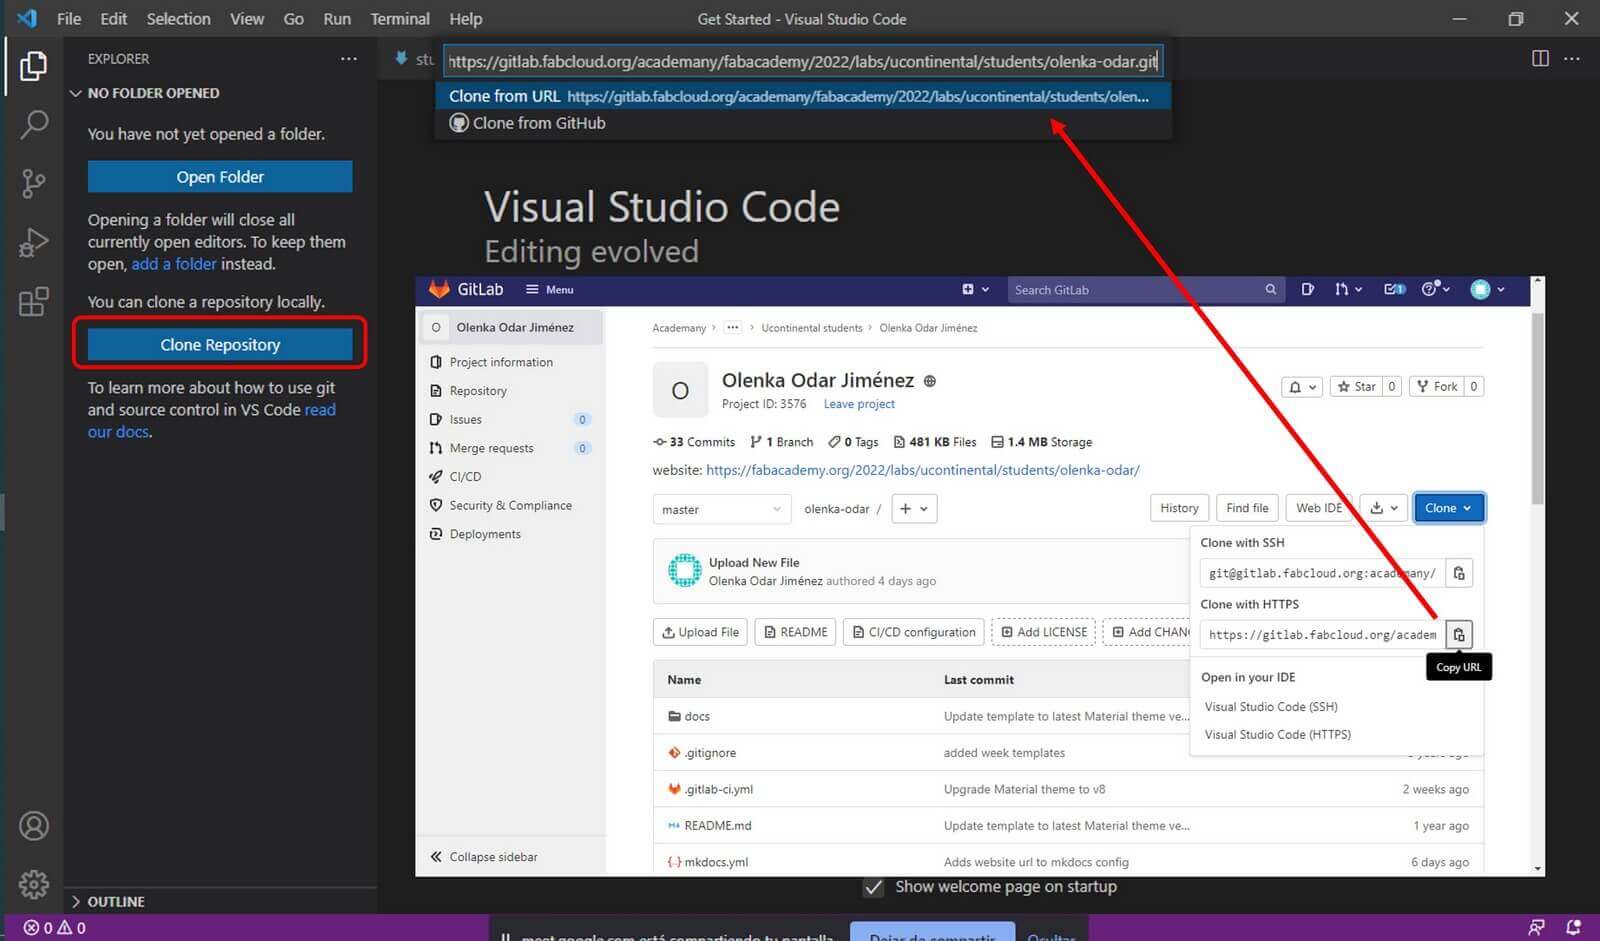
The folder has been created, we have done the cloning!

Every time we make any changes, sync it with the Fabcloud Account. To understand how to perform the synchronization, I did an exercise, as shown below:
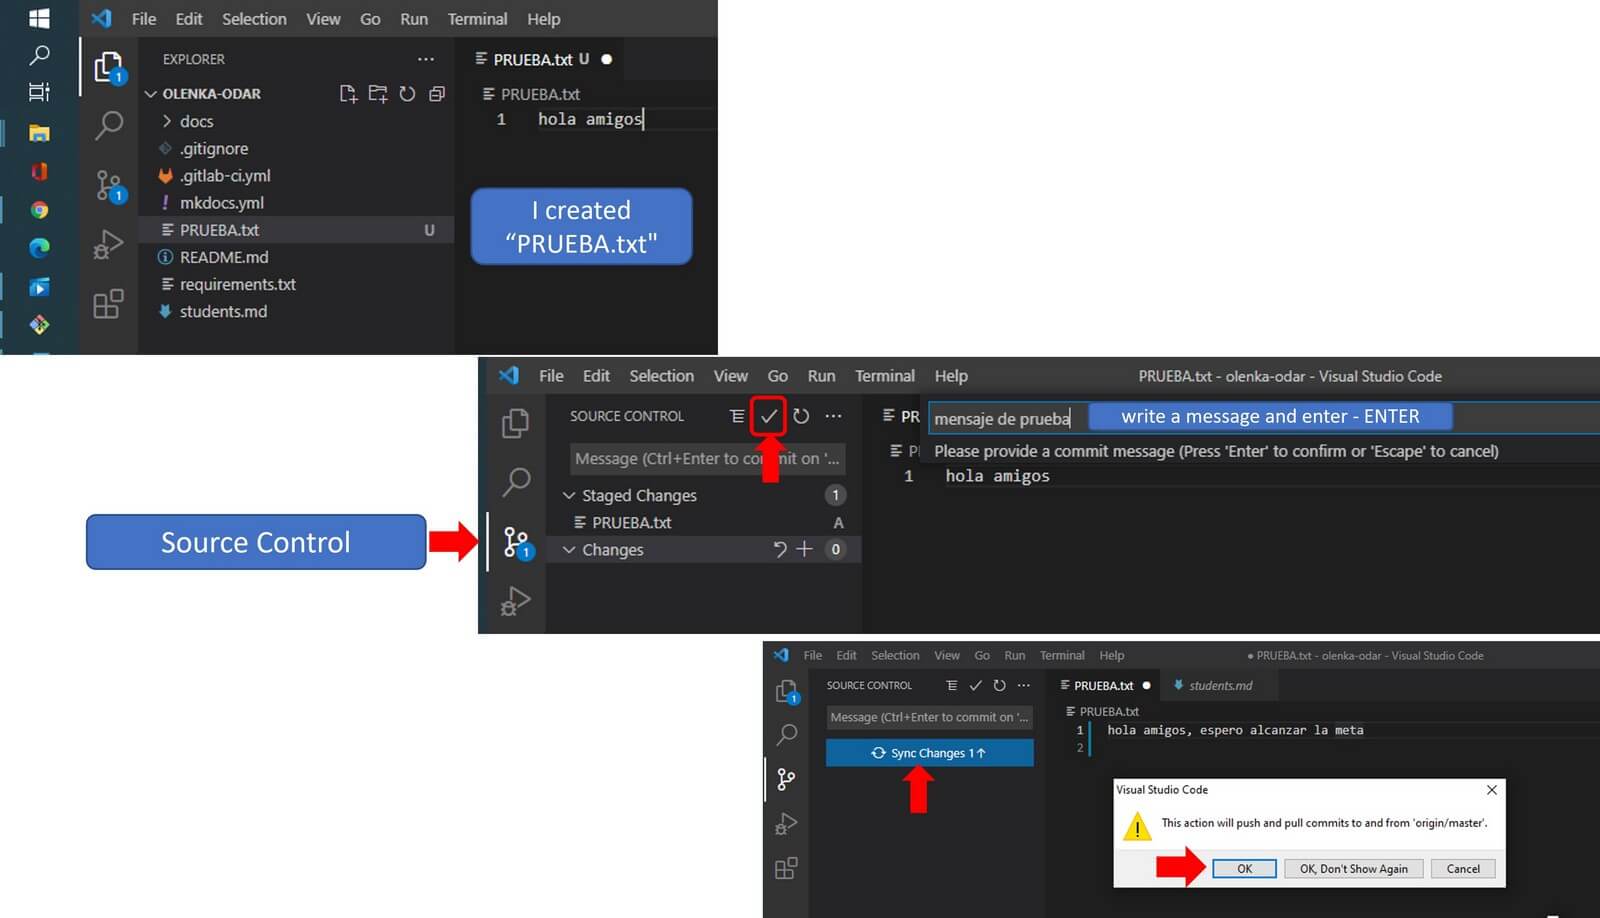
Entering credentials and verifying the synchronization with the Fabcloud Account (don't forget to update the Fabcloud Account, I didn't do it and couldn't see the changes made).
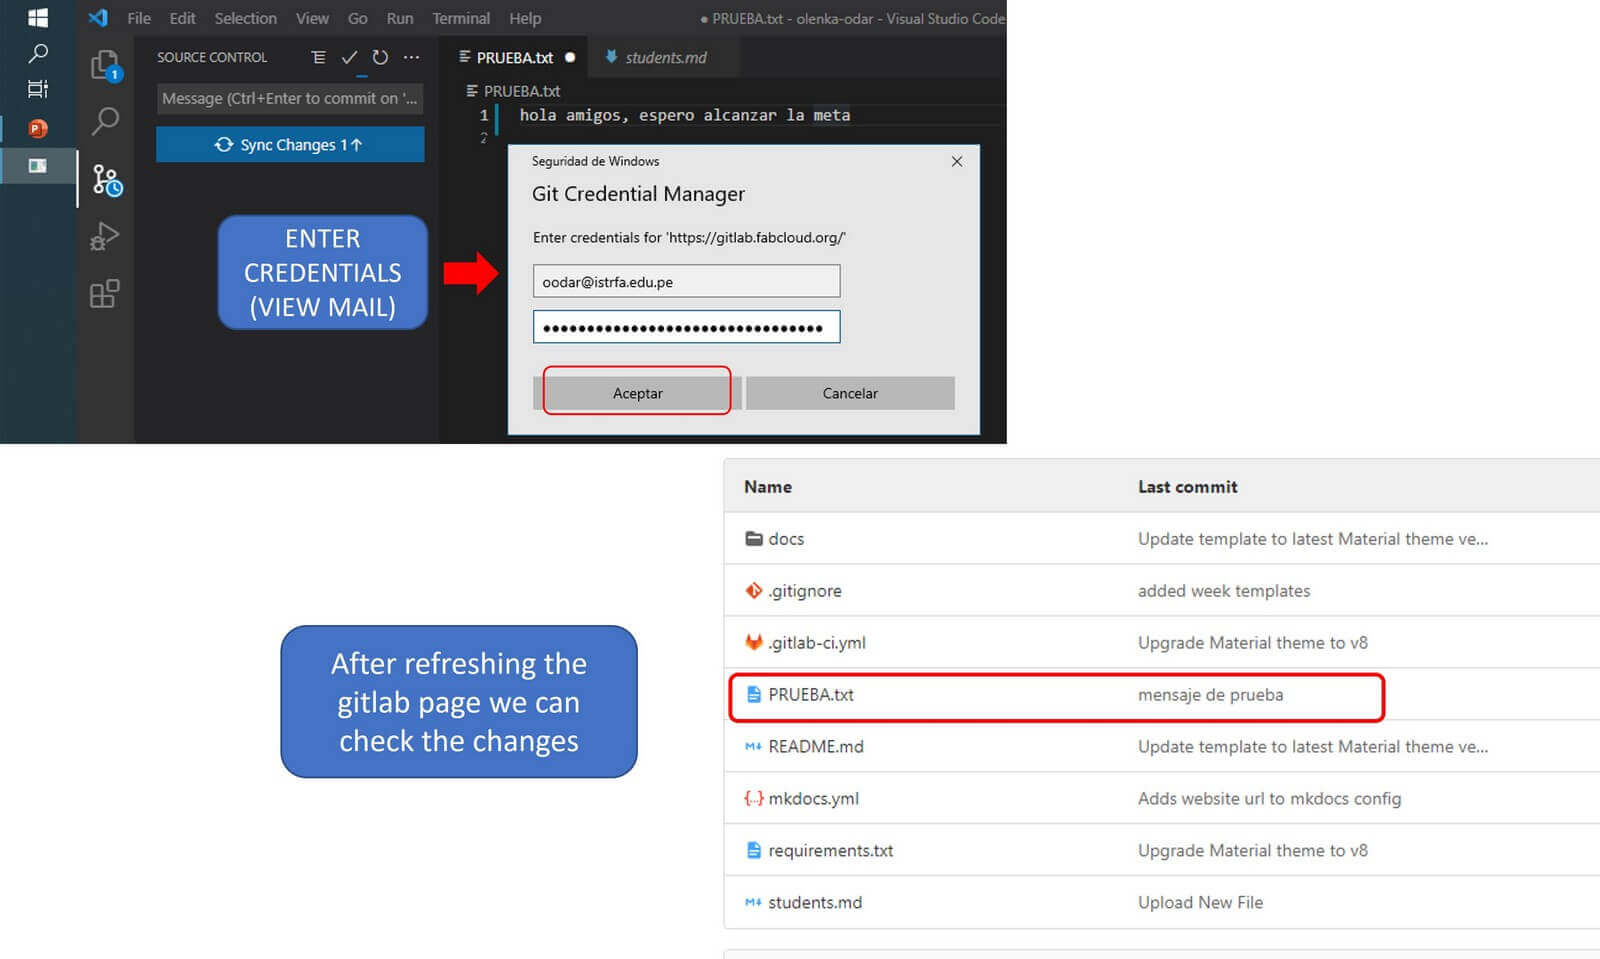
My file appeared in my repository, I managed to sync!
Please, listen to Neil and Julian's recommendations and do not upload more than 10MB in each commit, because they will have a real headache to synchronize their web page.
I had to clone my repository more than once and update each change in parts because I was not careful to check the weight of my files.

- Dowload: Nicepage, Visual Studio Code, Git
created with
Static Site Generator .