Computer-Controlled Machining
Group Assignment 2022 (Raffaele Alone)
The group work has been carried out with the milling machine is the SW1325 de CNC Barcenas click here for more information.
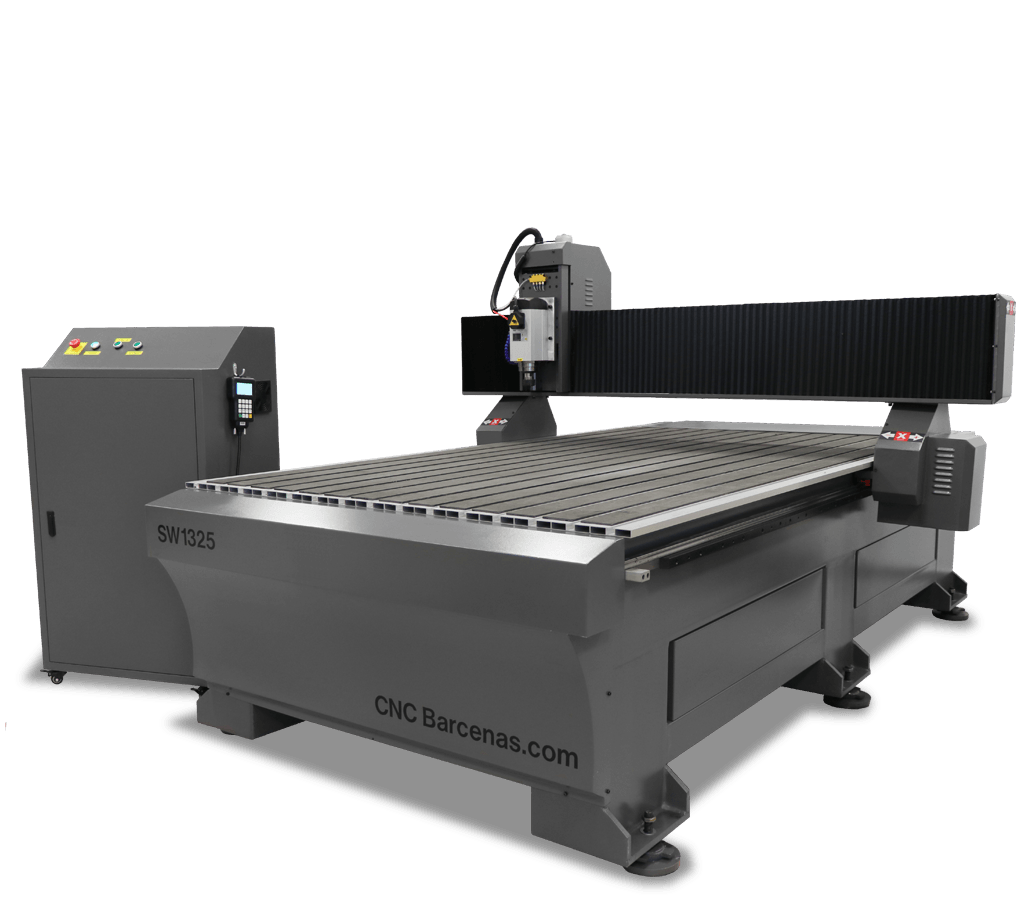
| Total measures | Work area | Weight | Workpiece clamping | Guidance system | Transmission system | Transmission engines | Spindle | Tool change | Numerical control | Maximum speed | Resolution | Included | Power supply |
|---|---|---|---|---|---|---|---|---|---|---|---|---|---|
| 2100x3150x1750 mm. | 1300x2500x200 mm. | 900 Kg. | T-slotted aluminum profile table. | HIWIN sliders on all axes (20mm). Double line on each axis. | XY axis: helical racks. Z axis: high quality ball screw. | Stepper motors. Double motor in Y axis. | 4.5 KW - 6HP(cv) HQD brand. Air cooled. | Manual ER32. | DSP A11. Independent control. No computer required. | On air: 20 meters / min. Working: 15 meters / min. | +/-0.05 mm. | Set of milling tools for soft materials. Probe for zeroing Z axis. | 400 V. Optional 220 V. |
Like many 3D machines, this milling machine also needs to generate a G-Code to be able to manufacture. The steps to use are similar to individual practice.

To start the profiling job, go to the right panel and select the metric tool (End Mill = Straight 6 mm).
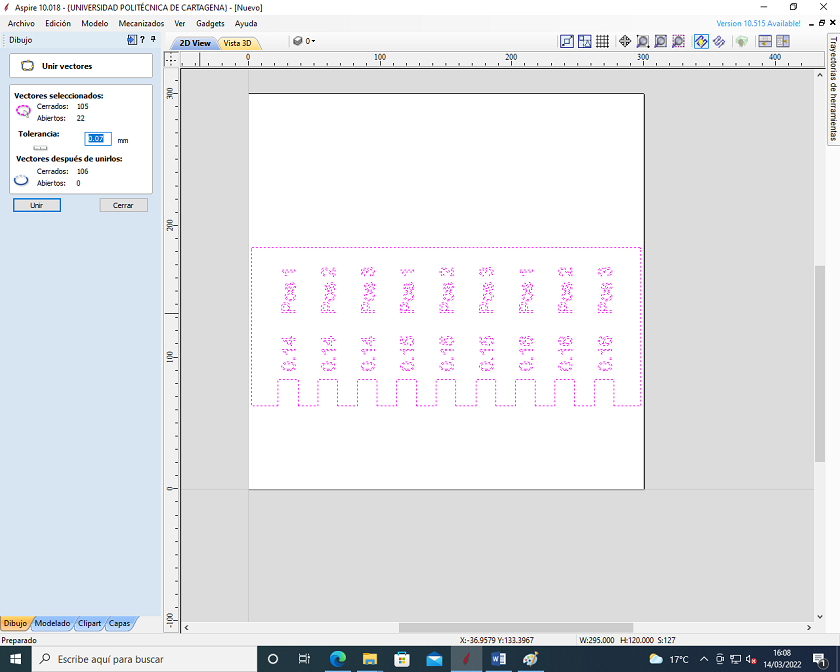
We check that there are no gaps in the groove and add the tabs to hold the wood in the groove and work safely.
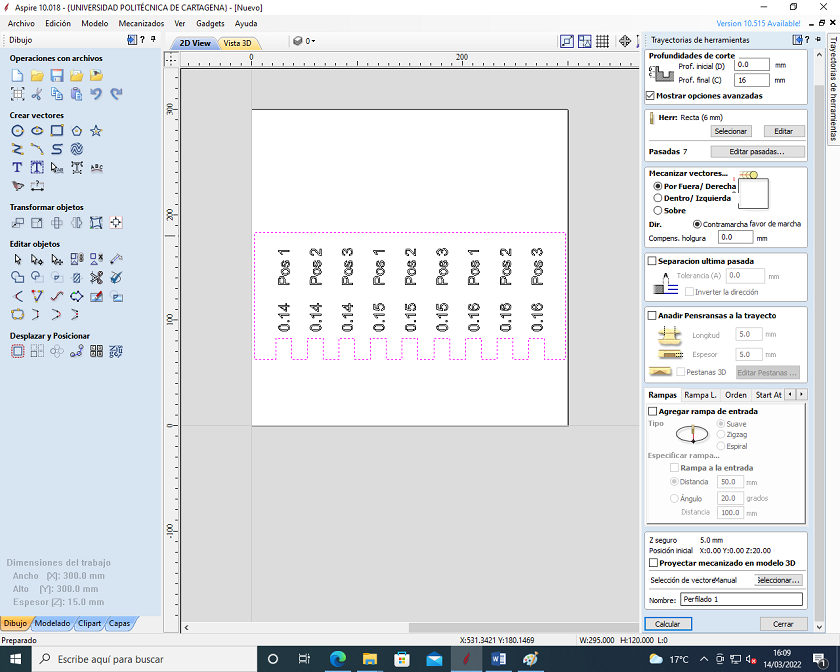
We select "Simulate toolpath" to preview the milling.
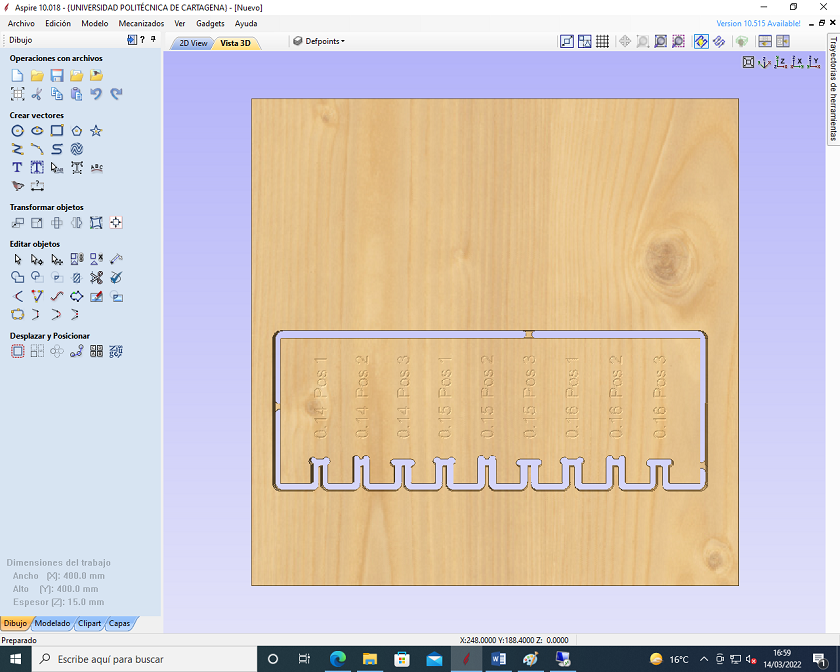
We visualize the engraving and simulate the trajectory in search of possible errors.
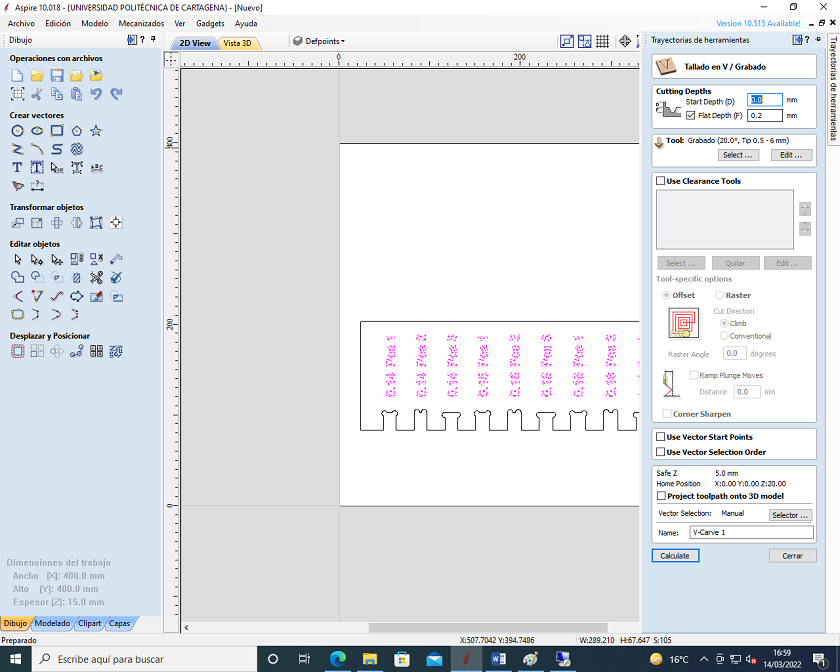
Select "Save trajectory" and export the files in "G-Code Arcs (mm) (*.Tap) format. These files are saved on a pendrive and then inserted into the usb reader that controls the machine.
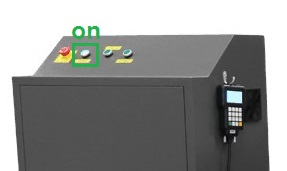
Step 1: Switch on the router with the safety contact.
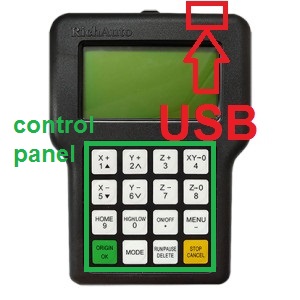
Step 2: Insert the pendrive into the DSP with the files in Postprocessor format “G-Code Arcs (mm) ( .tap)” or “ISO plain G-codes-mm ( .iso) for the 4th axis”.
Step 3: Tidy up the house. The DSP will display: HomeTypeAtStart.
Step 4: Press the start of the axis and the OK key. The machine will position itself at its starting point. The X axis to the left, the Y axis to the top of the table, and the Z axis to the top. 3.2 The machine is now ready to work. This step is essential for the proper functioning of the machine. You ALWAYS have to do it AT HOME.
Step 5: Once the cutter is in the desired position, we will mark XY0 by pressing the ON/OFF + XY0 key. Once pressed the DSP will indicate the X and Y axes at 0.
Step 6: WITHOUT SENSOR: We locate the position we want and press ON/OFF + ZC0 and mark DELETE Z.
Step 7: We load the machining files.
Step 8: We press RUN/PAUSE DELETE and the DSP will show us two options. Here we must choose where we have saved the machining file. The 1st option (U Disk file list) is the one we will use since we will always use the pendrive. Therefore, we press ORIGIN. 9.2.- The DSP will show us a list of the files on the pendrive. We will move to the file we want and we will accept it with the ORIGIN/OK key.
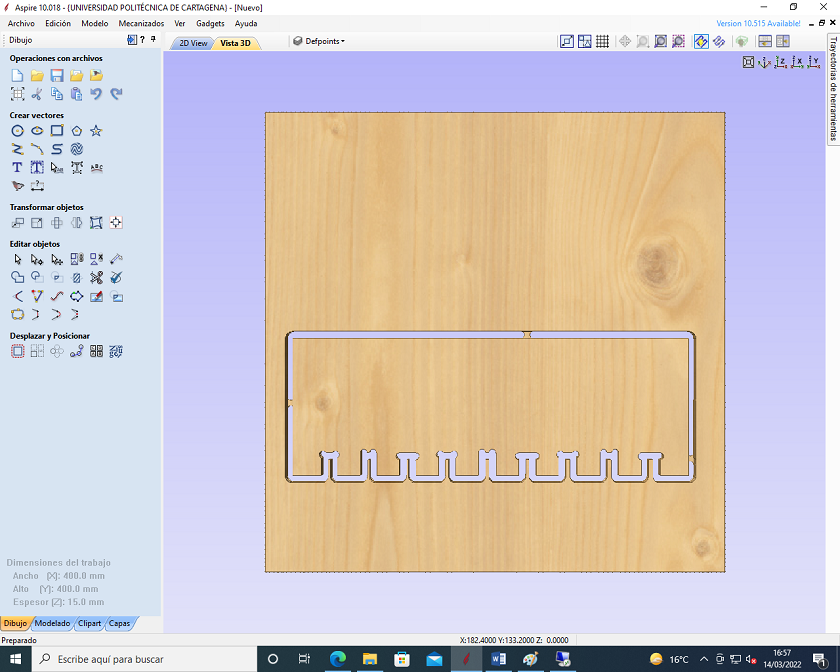
Put the wooden board on the router and secure it with the fasteners to prevent unintentional movement during routing.
Select the home to take the tool to xy0 and with the tools place the End mill, then select the Z axis to go down little by little until the end mill is touching the wood.
Press "Start" on the knob to start milling, the engraving strategy will be executed first, and then the profiling strategy will be finished.
We measure the outside and inside values to compare them to the design values and calculate the milling margin of error. In the outer cut there is an error of 0.42mm and in the engraving an error of -0.29mm.
The wood pressing jaws are enough to assemble the pieces.
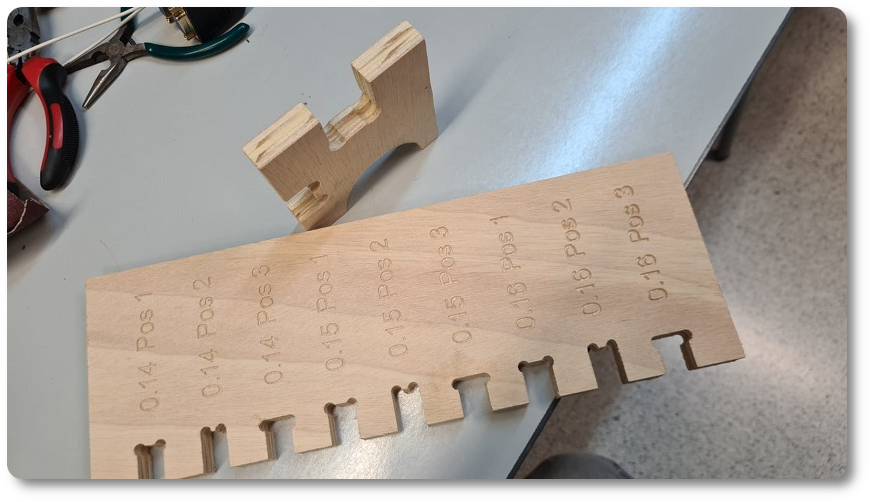
In the end, in order to evaluate the best setting of the pieces, a meter with different chamfers has been studied.
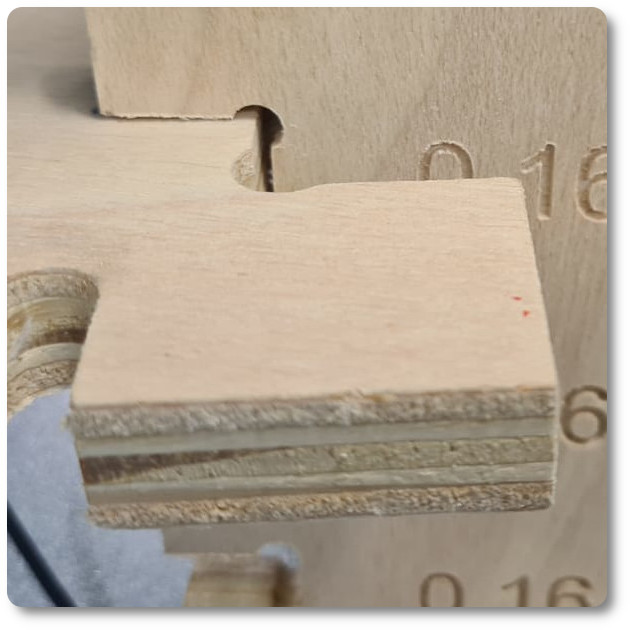
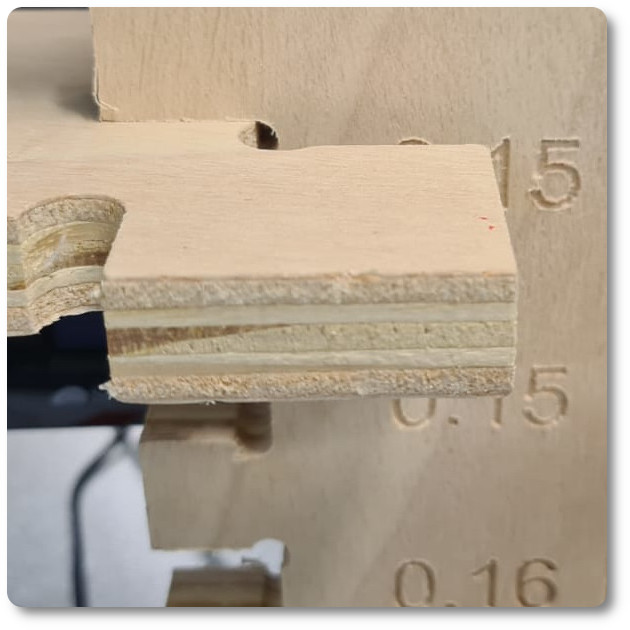
Analyzing the two photos, it can be seen that by choosing the embedment at 0.15, it is necessary to force the pieces to connect. With 0.16 mm it enters easily, in my case, being a transportable chair, it is more indicated to use the 0.16 mm. .