Wildcard week
Design and produce something with a digital fabrication process (incorporating
computer-aided design and manufacturing) not covered in another assignment, documenting the
requirements that your assignment meets, and including everything necessary to reproduce it.
3D printing "fabric"
For this week I decided on 3D printing fabric like material.
I was inspired by this video: https://www.youtube.com/watch?v=BW_l6PvyC3c&t=176s
The way it works is surprisingly easy: You create a shallow 3D model of a part of the sewing
pattern and import it into Cura. In Cura, you tweak the settings so that only the infill is
printed. This lets you work with all of the different available infill patterns Cura has to
offer and it's super easy! :)
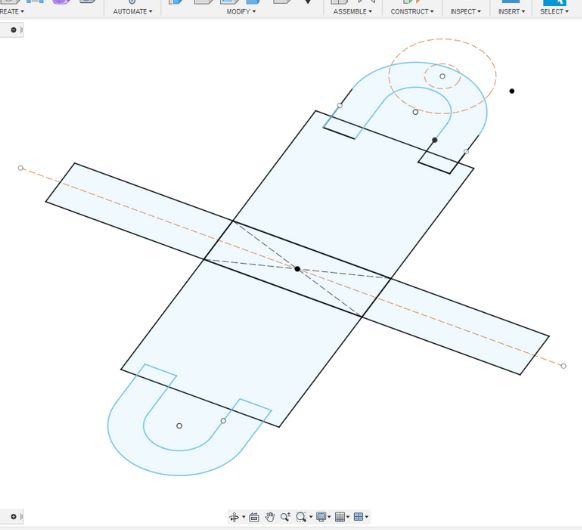 I started by sketching out this bag in Fusion.
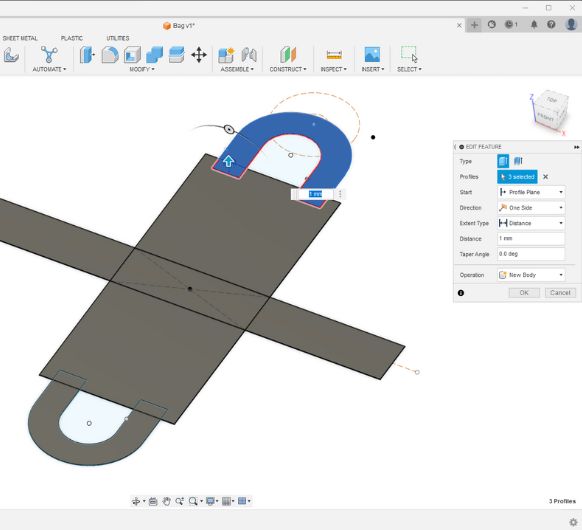 Then I extruded each part
individually to get seperate bodies that I could send to Cura. Each part has a
thickness of 1mm.
Then I extruded each part
individually to get seperate bodies that I could send to Cura. Each part has a
thickness of 1mm.
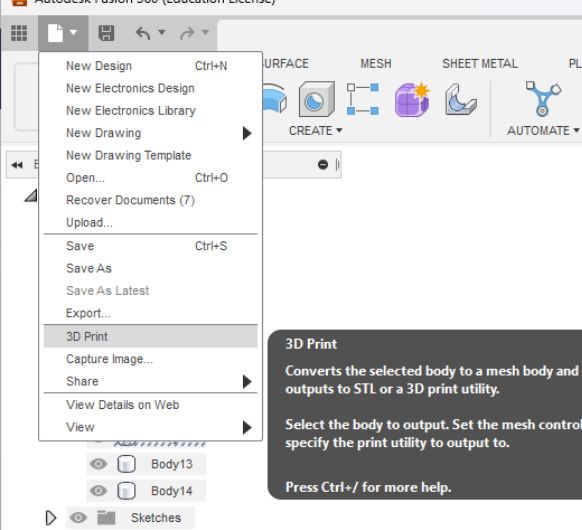 Choose 3D print.
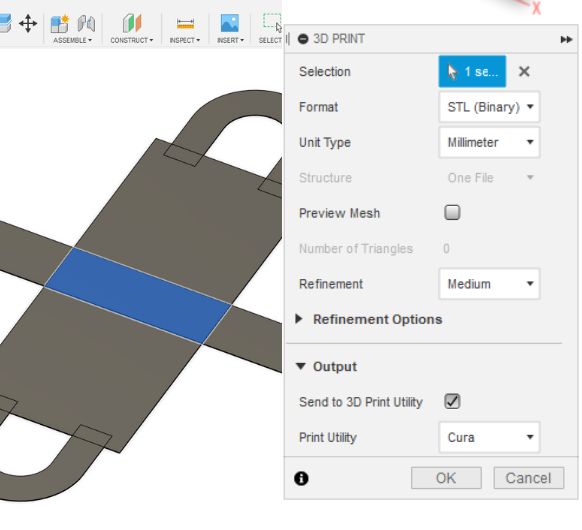 And select the desired body.
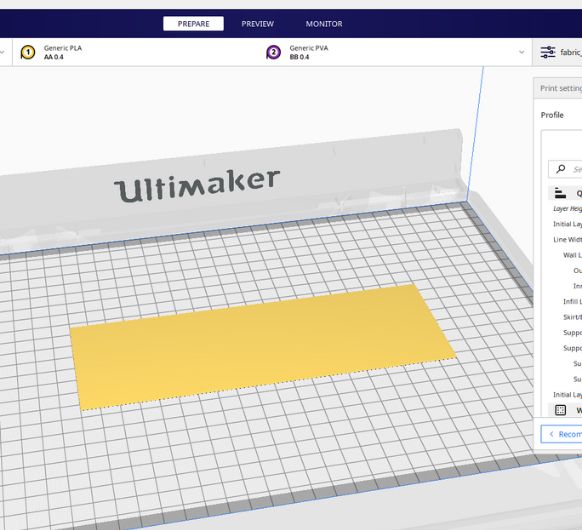 Fusion will automatically open it in Cura.
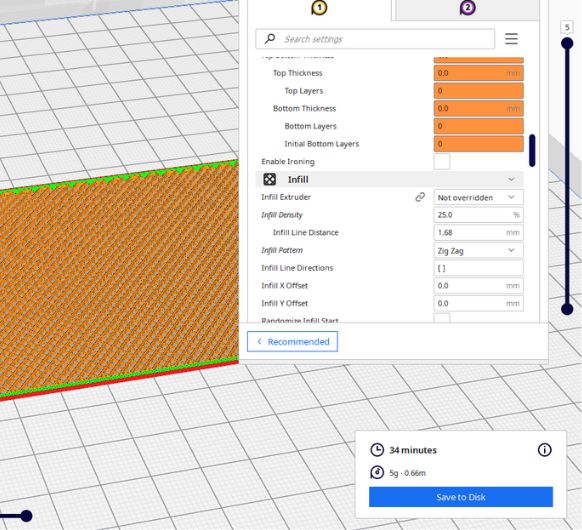 After applying the right settings it looks lice this in preview
mode.
After applying the right settings it looks lice this in preview
mode.Or have a look at this table including all the important settings.
Essentially what these settings are doing is making the printer print just the infill (with a
wall count of 4, but no top or bottom "wall").
This way, you can use the different infill methods to create a woven like texture.
| Version | Name | Definition |
|---|---|---|
| 4 | fabric_cura_profile | ultimaker_s5 |
| Key | Value |
|---|---|
| adhesion_type | none |
| layer_height | 0.2 |
| initial layer_height | 0.2 |
| print_sequence | one_at_a_time |
| infill_pattern | zigzag |
| infill_sparse_density | 25.0 |
| retraction_enable | False |
| speed_print | 60.0 |
| top_bottom_thickness | 0 |
| wall_0_inset | 0 |
| wall_0_wipe_dist | 0 |
| wall_line_count | 4 |
| wall_thickness | 0.8 |
| zig_zaggify_infill | True |
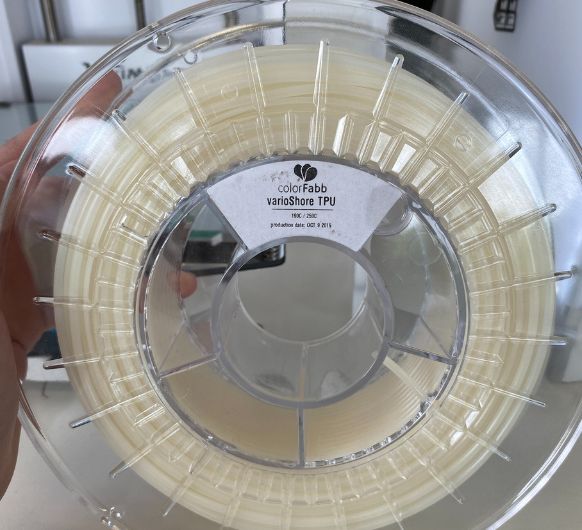 I am using TPU. TPU is a type of flexible filament. It belongs to a
class of materials known as elastomers, which are known
for their rubber-like properties. TPU filament is highly elastic.
I am using TPU. TPU is a type of flexible filament. It belongs to a
class of materials known as elastomers, which are known
for their rubber-like properties. TPU filament is highly elastic.
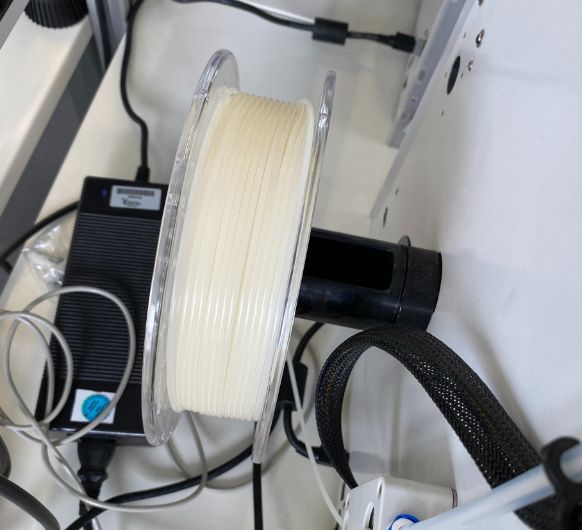 Loading it onto the Ultimaker. Generally speaking, it's better to have
a direct extruder when working with TPU (because it's so flexible). But at the time,
I only had the Ultimakers available, which have bowden extruders.
I was advised to choose the smaller Ultimaker 2's, because the distance between
extruder and nozzle is smaller than with the S5's.
Loading it onto the Ultimaker. Generally speaking, it's better to have
a direct extruder when working with TPU (because it's so flexible). But at the time,
I only had the Ultimakers available, which have bowden extruders.
I was advised to choose the smaller Ultimaker 2's, because the distance between
extruder and nozzle is smaller than with the S5's.
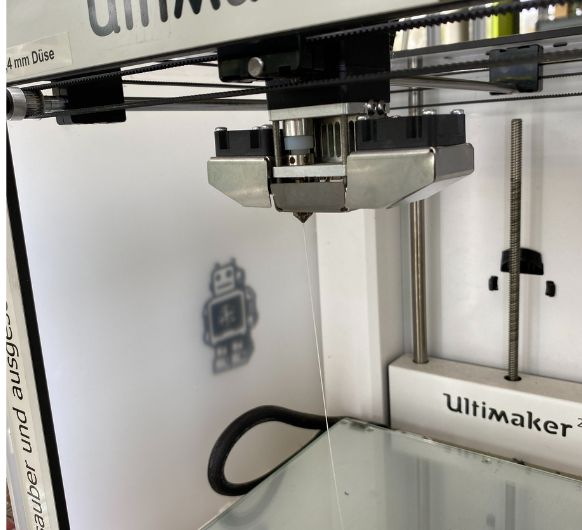 Note that this filament extrudes very easily, it might come out of the
nozzle even before the print is even starting.
Note that this filament extrudes very easily, it might come out of the
nozzle even before the print is even starting.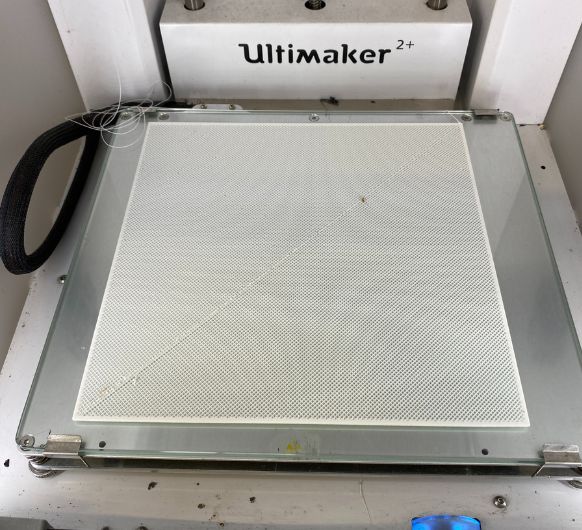 I chose Zigzag as my infill pattern afterall. I liked it's appearance
better and it also held together better than the gyroid infill.
I chose Zigzag as my infill pattern afterall. I liked it's appearance
better and it also held together better than the gyroid infill.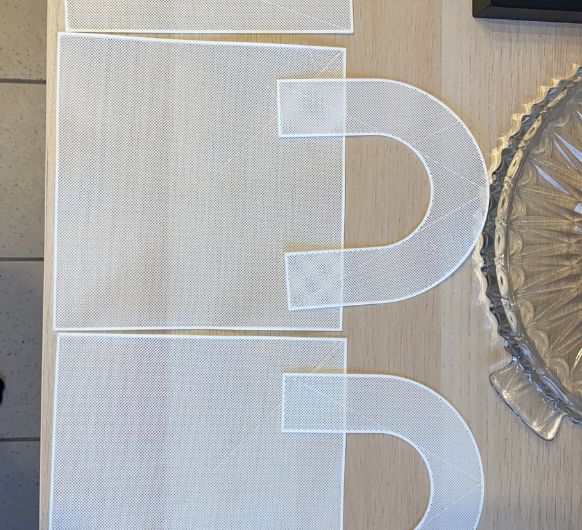 All of the parts printed and layed out on my kitchen counter
top.
All of the parts printed and layed out on my kitchen counter
top.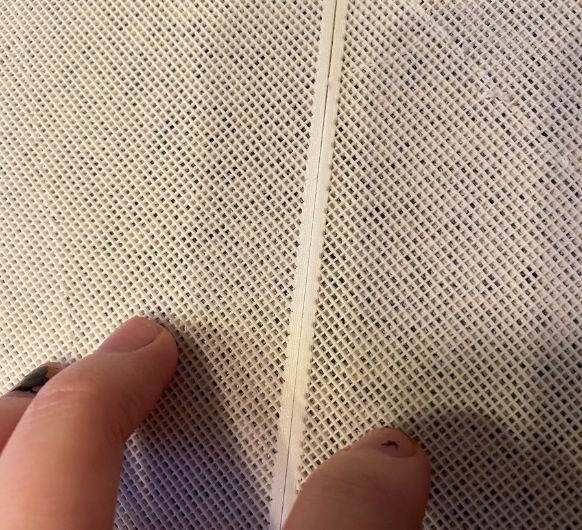 I aligned the seams next to each other.
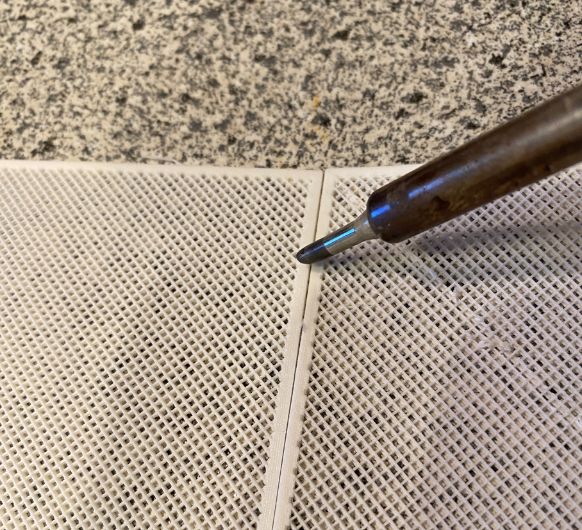 And then melted them together with a soldering iron (at about 280°C,
can be less hot as well)
And then melted them together with a soldering iron (at about 280°C,
can be less hot as well)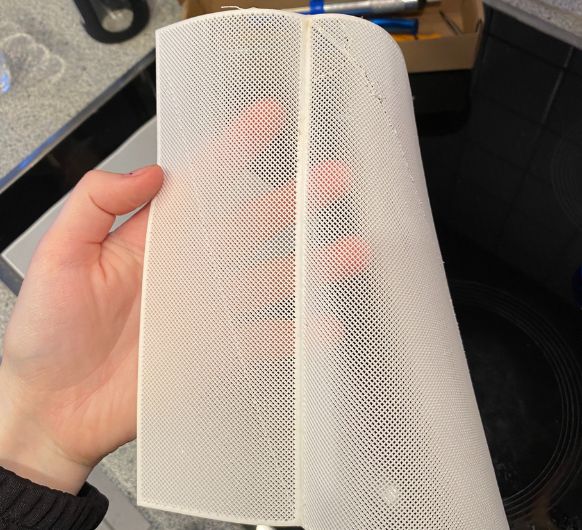 Here we go!
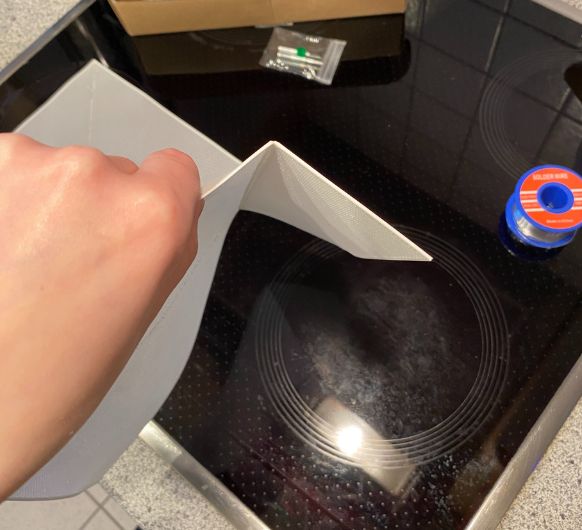 Worked very well! And it holds together very nicely.
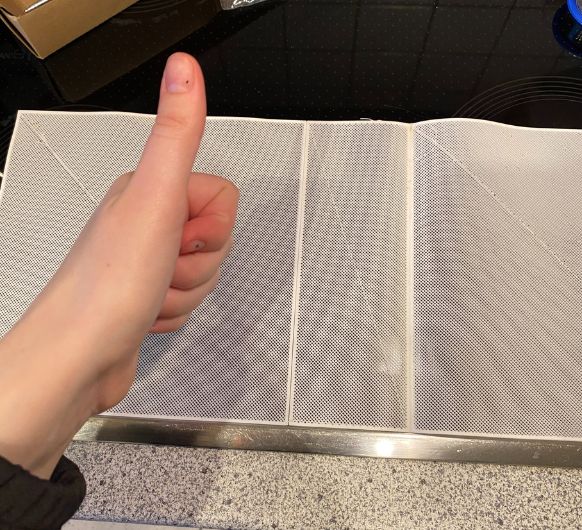 Cool! Gotta do the rest of them.
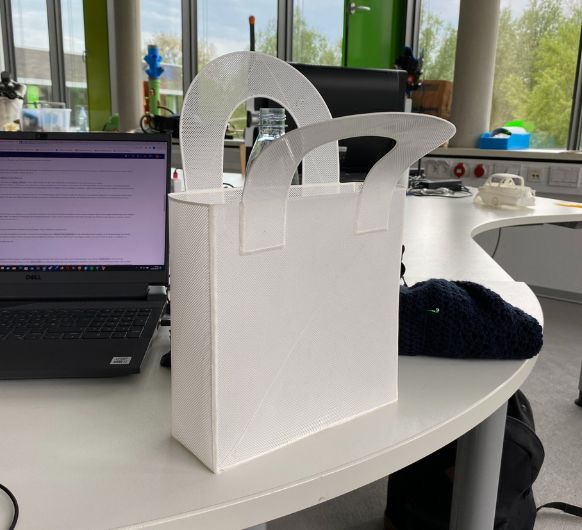 It's done!!
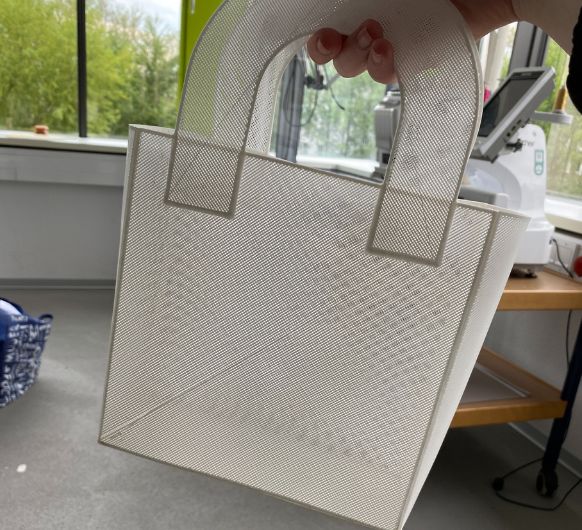 Quite nice for a first try!
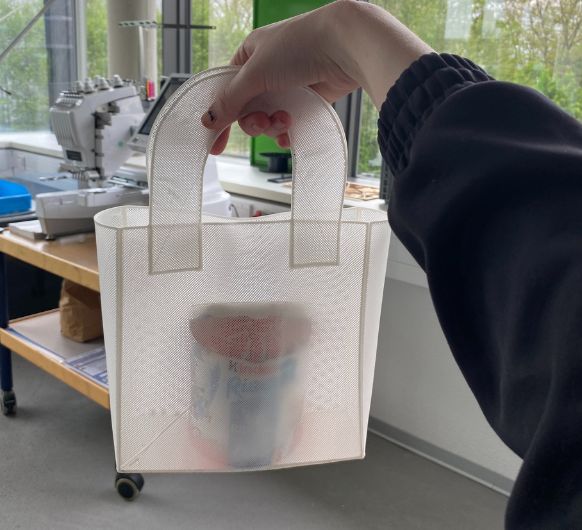 It cannot hold too much weight though. This is about 500g. 2kg is
probably the maximum.
It cannot hold too much weight though. This is about 500g. 2kg is
probably the maximum.