Leen Nijim
Assignment 2
Project management
Quick Fix
In this sprint I learned about version control management and how much of a powerful tool git is. However, due to very much foreseen circumstances I could only allocate minimal time to learn and practice with git Bash, HTML, CSS and the whole thing of how to make your own website. So as an application of a very nice concept we learned during our very first lecture with Neil Gershenfeld, I decided to triage – I hope nobody minds me using it as a verb. My experiment for this week was then to test whether it was possible to set up my website by tinkering in my repo directly online on the GitLab website. Nevertheless, I fully plan to borrow one of those nice HTML website templates from https://html5up.net/ and teach myself how to be a proper web designer. Meanwhile though and with the help of our fabulous local instructors, I was able to successfully install Git, Git Bash and the text editor Visual Studio Code with the extensions “HTML Snippets” and “Live Server”, as well as set up my SSH key in GitLab. This palette of programs is supposed to get me through editing my website and – hopefully – running it online without crashing GitLab or anything else on the way.
Reporting half an hour later:
So now that I have actually been able to commit both editing my “About me” page and exchanging the avatar picture with an uploaded photo of mine, it seems like this bare-minimum technique is working out glitch-free so far. Nevertheless, I must admit to not enjoying it very much because it is really anticlimactic, hmm.
I have also had to use Paint for resizing an image, and then the webpage https://imagecompressor.com/ to compress it before uploading to my website. That went fairly straight forward and I’m happy with the result.
A Couple of Days Later
My Website
So now that I have a little bit more time to invest in my website, I have decided to download the template “Solid State” from HTML5 UP and try reverse-engineering it to learn how to build websites using HTML, CSS and JavaScript.
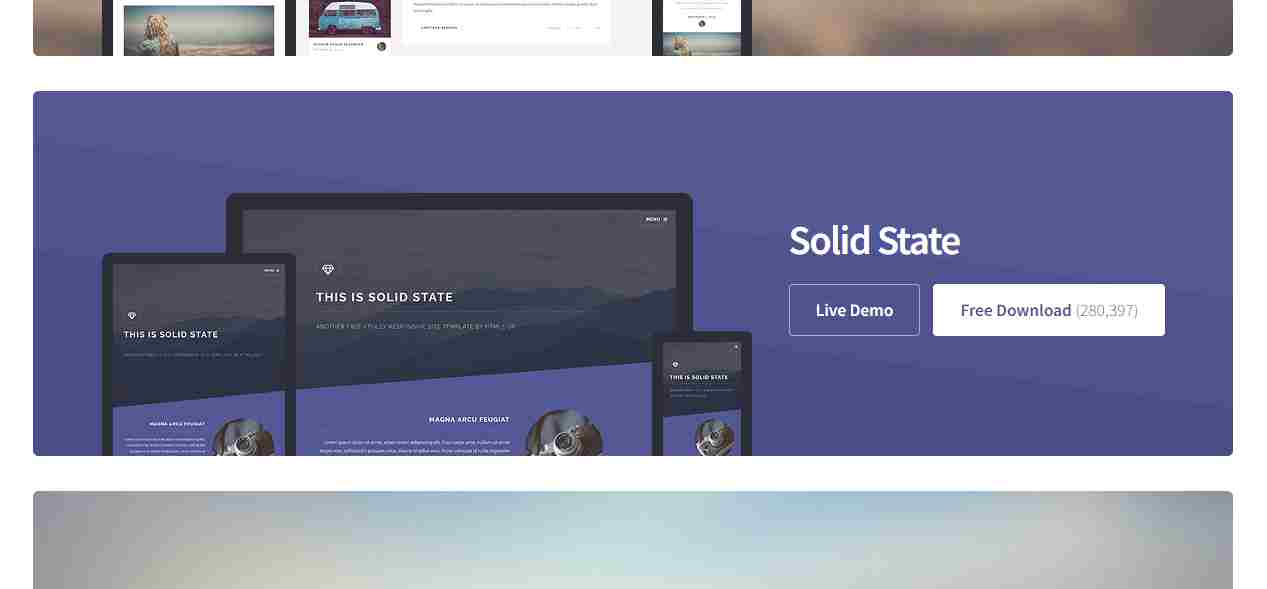
But before trying to do that, I found a quick and simple tutorial that taught me the basics of these three website components and how to combine them to produce a functional website efficiently and nicely. Going through this tutorial https://docs.microsoft.com/en-us/learn/modules/build-simple-website/ took me about an hour and a bit, but I must say this was enough time for me to go from zero-knowledge about web-designing to being able to build a simple website, and ultimately understand what the contents of the downloaded website template from HTML5 UP meant, or at least know where to look for help when anything didn’t make sense.
After that I downloaded Visual Studio Code to edit my website, and installed the extensions Code Spell Checker, HTML Snippets, Live Server, and Open In Browser. All these tools allow me to control my typos and edit my website offline and still be able to see the changes live on a local website.
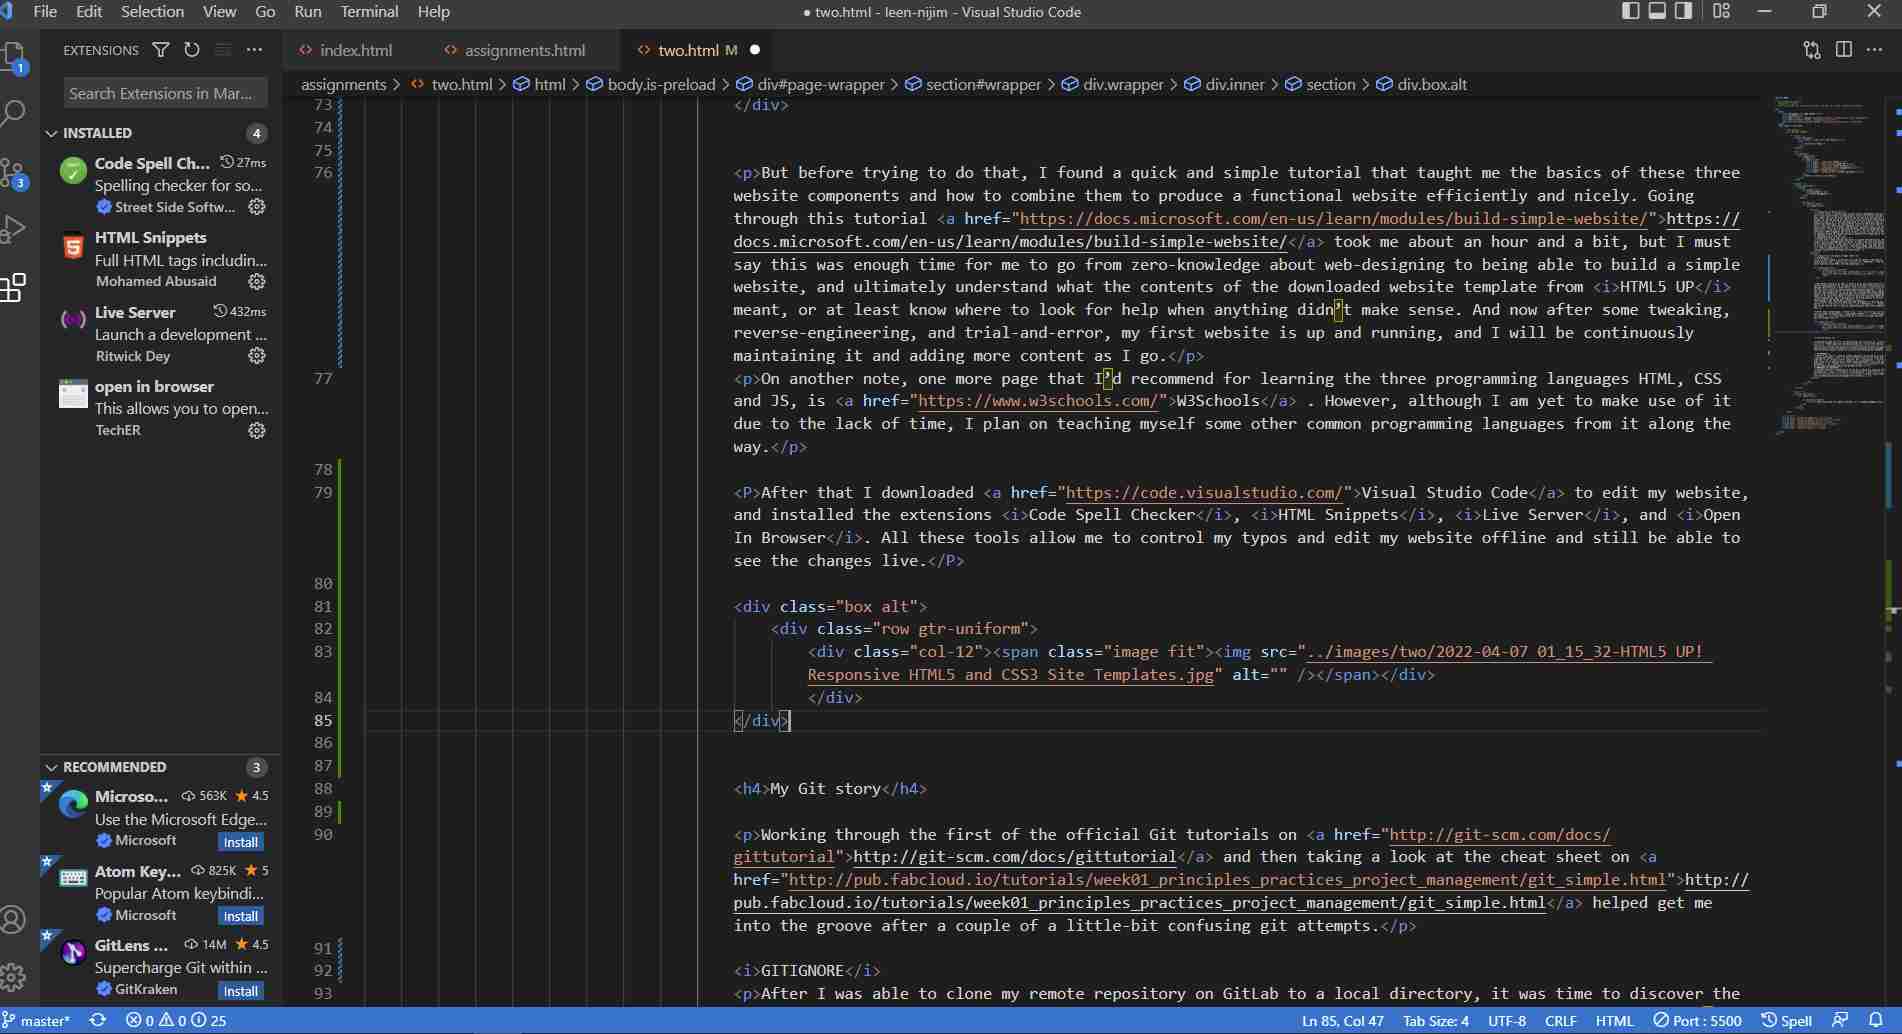
And now after some tweaking, reverse-engineering, and trial-and-error, my first website is up and running, and I will be continuously maintaining it and adding more content as I go. Here is also a note to my future self on how to link websites, pictures, videos, and some basic text formatting:
Website:

<a href="websiteLink">websiteName</a>

Image:

<div class="box alt">
	<div class="row gtr-uniform">
		<div class="col-12"><span class="image fit"><img src="imageLink" alt="" /></span></div>
	</div>
</div>

Video:

<video width="50%" ; autoplay loop><source src="videoLink" ></video>

Text:

<i>italic</i> <b>bold</b> <u>underlined</u>
On another note, one more page that I’d recommend for learning the three programming languages HTML, CSS and JS, is W3Schools . However, although I am yet to make use of it due to the lack of time, I plan on teaching myself some other common programming languages from it along the way.
My Git story
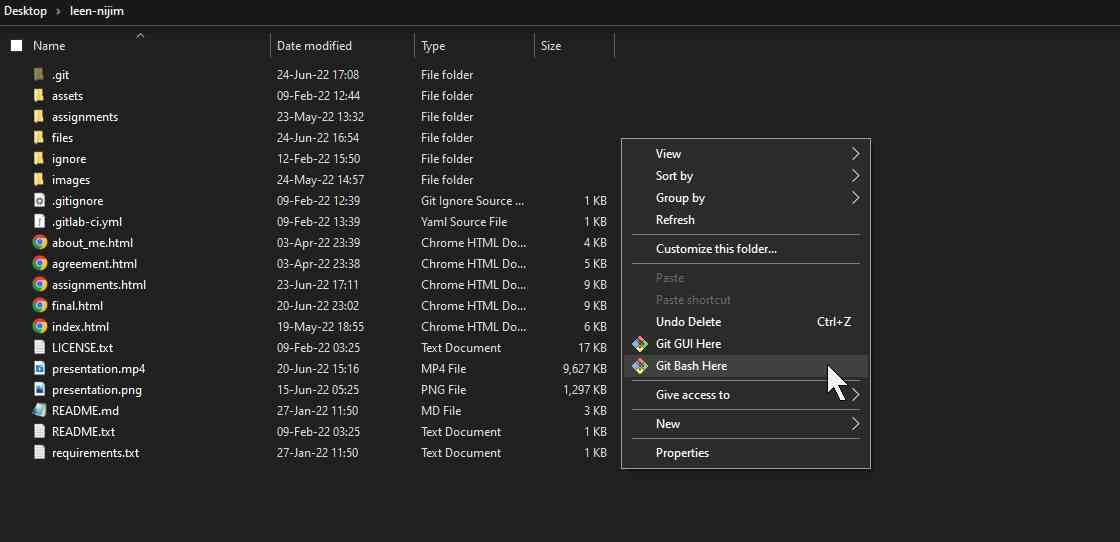
as a first step I downloaded Git and set it up to use Visual Studio Code as my text editor. After that I opened Git Bash terminal by right-clicking in the local folder I want to add and track my repository in and choosing Git Bash Here
Then working through the first of the official Git tutorials on http://git-scm.com/docs/gittutorial in conjunction with the cheat sheet on http://pub.fabcloud.io/tutorials/week01_principles_practices_project_management/git_simple.html helped get me into the groove after a couple of a little-bit confusing git attempts, and I was able to use the commands:
git config –-global user.name “YOUR_USERNAME”
git config -–global user.email “jSmith@mail.com”
And then had to generate an SSH key to link my local repository to the online one in GitLab using:
ssh-keygen -t rsa -C "$your_email"
cat ~/.ssh/id_rsa.pub
clip < ~/.ssh/id_rsa.pub
Than I went and pasted it in GitLab's Preferences > SSH Keys.
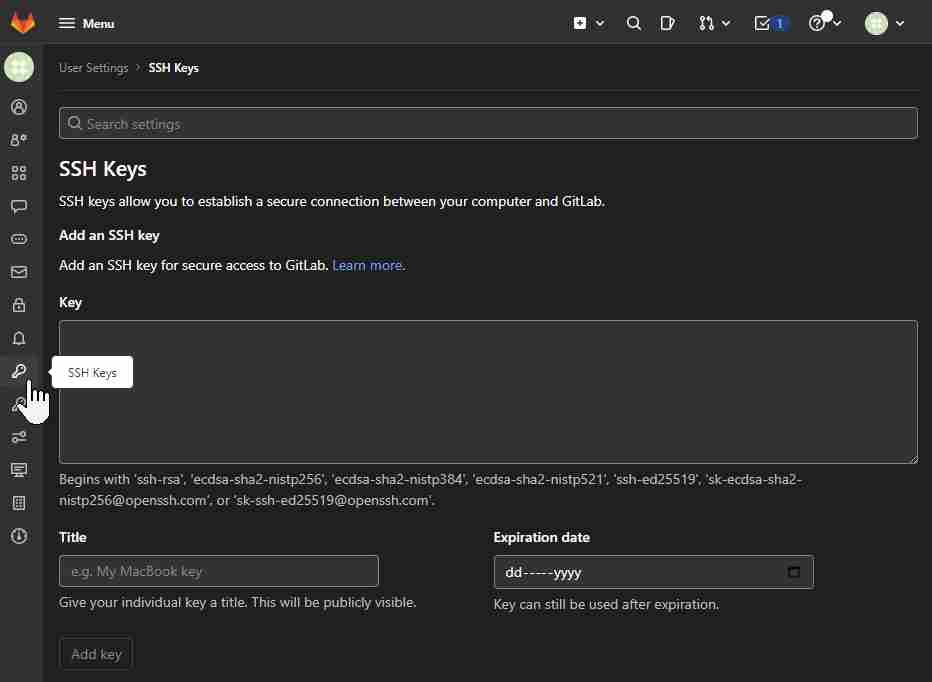
After that I cloned my academy personal repo with:
git clone git@git.fabacademy.org:fabacademy2017/yourlabname/yourstudentnumber.git
And finally deleted everything in there and put the template website files instead, and added the .gitlab-ci.yml file so that my website loads correctly.
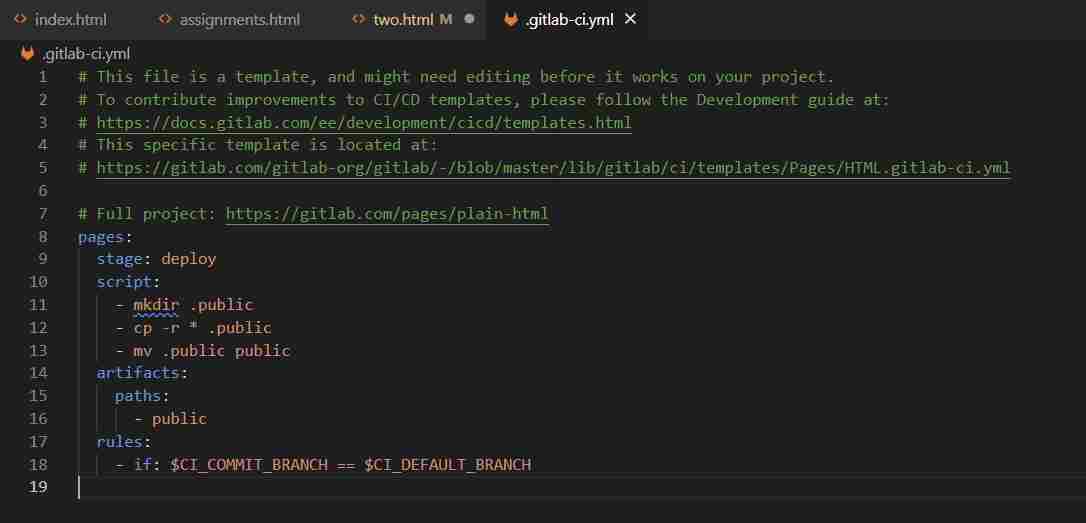
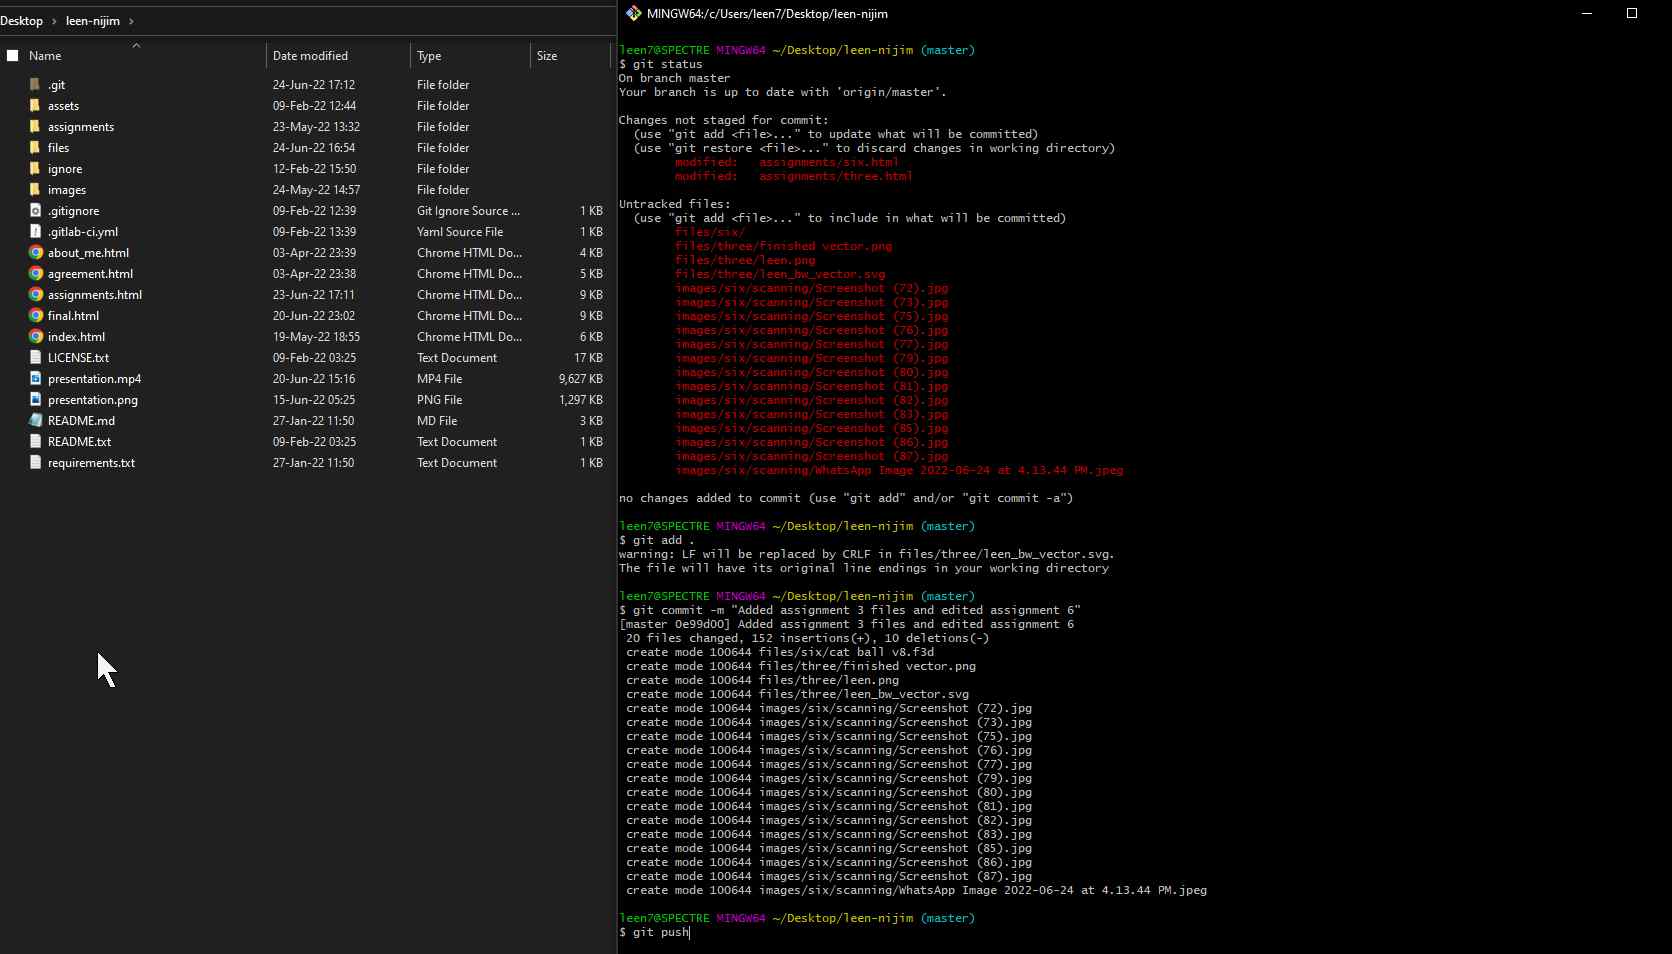
Finally, the sequence of the Git commands below enabled me to commit and push changes to the online repo and update my website.
git status
git add .
git commit -m "descriptive message"
git pull
git push
I just need to navigate to my directory after adding all files I want to push to the website, and open a Bash terminal.
And enter the sequence of Git commands from the list above.
After I was able to clone my remote repository on GitLab to a local directory, it was also time to discover the “.gitignore” feature. This is a text file that contains all files and folders within my repository that I’d like Git to not include (not to “watch”). My .gitignore text file, for example, includes the template HTML files for my website that I don’t need published. A very nice page that helped me set up my .gitignore is https://www.pluralsight.com/guides/how-to-use-gitignore-file.
REMOVING GIT TRACKINGAnother question I asked myself is how do I remove Git tracking completely? The answer is simply by deleting the .git directory as explained by https://www.cloudsavvyit.com/14500/how-to-remove-git-version-tracking-from-a-folder/.