Leen Nijim
Assignment 3
Computer-Aided Design
Task
For this week, we had to play around with some 2D and 3D computer-aided design software as well as converting images back and forth between raster and vector formats. This format conversion is important for computer-controlled cutting, such as laser cutting. For “filled” effects on a plane of material you need to use raster images because that orders the laser to work as an inkjet printer and etch the material through applying laser pulses to specific points. But for machining operations, such as milling or using the laser cutter to cut material, the computer will need positional and mathematical representation of the design to be able to create machine tool paths for the manufacturing operation.
For designing and editing the manufacturing files, I have had experience with different software like QCAD, FreeCAD, Fusion 360, Catia and ANSYS. Whereas the formers are used for creating designs and some also assemblies, among other functions, I have used the latter only for finite element analyses within my master studies.
Files to Download
Hero Shots
My mini-project
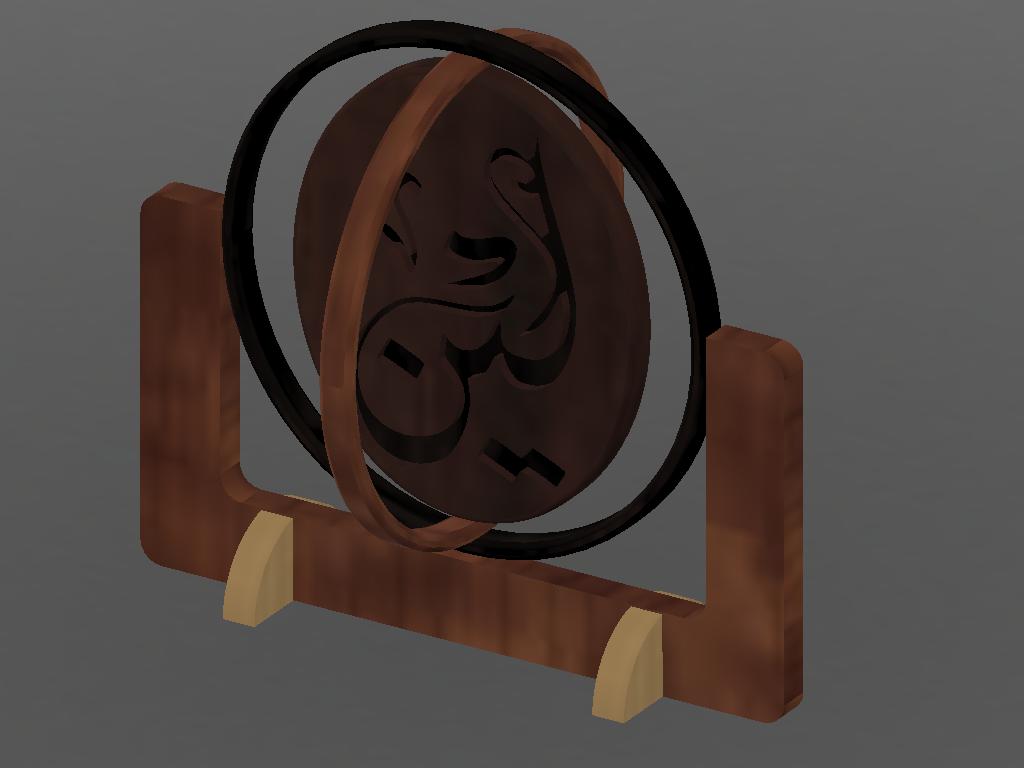
Regarding the task at hand, I did not have enough ideas for my final project to fully experiment with raster-vector conversion and the related software, so I decided to create a mini-project to practice with. The task is to build a small gyroscope design with my name written on the middle plate.
Raster Image to Vector Image
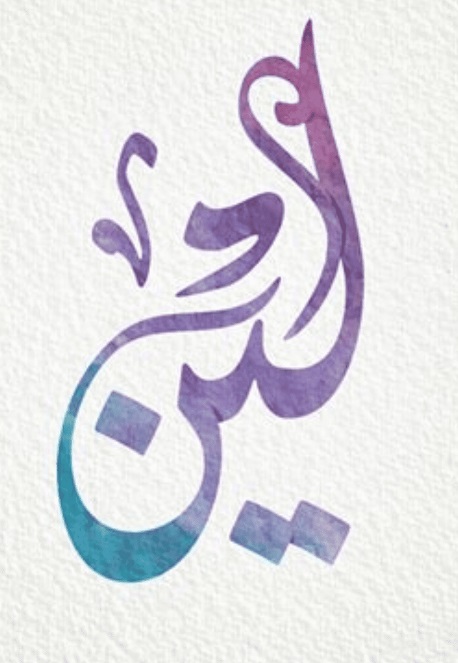
First, I looked online for a nice, colorful Arabic calligraphy of my name and downloaded a picture. Then to convert it into black and white so I can extract the calligraphy features better, I used the software GIMP and extracted a black raster image of my picture.
For that, I clicked on the Fuzzy Select tool and played with the Threshold bar to try and get a nice selection of the colored writing. However, that ended up being a lot of work to select all the details.
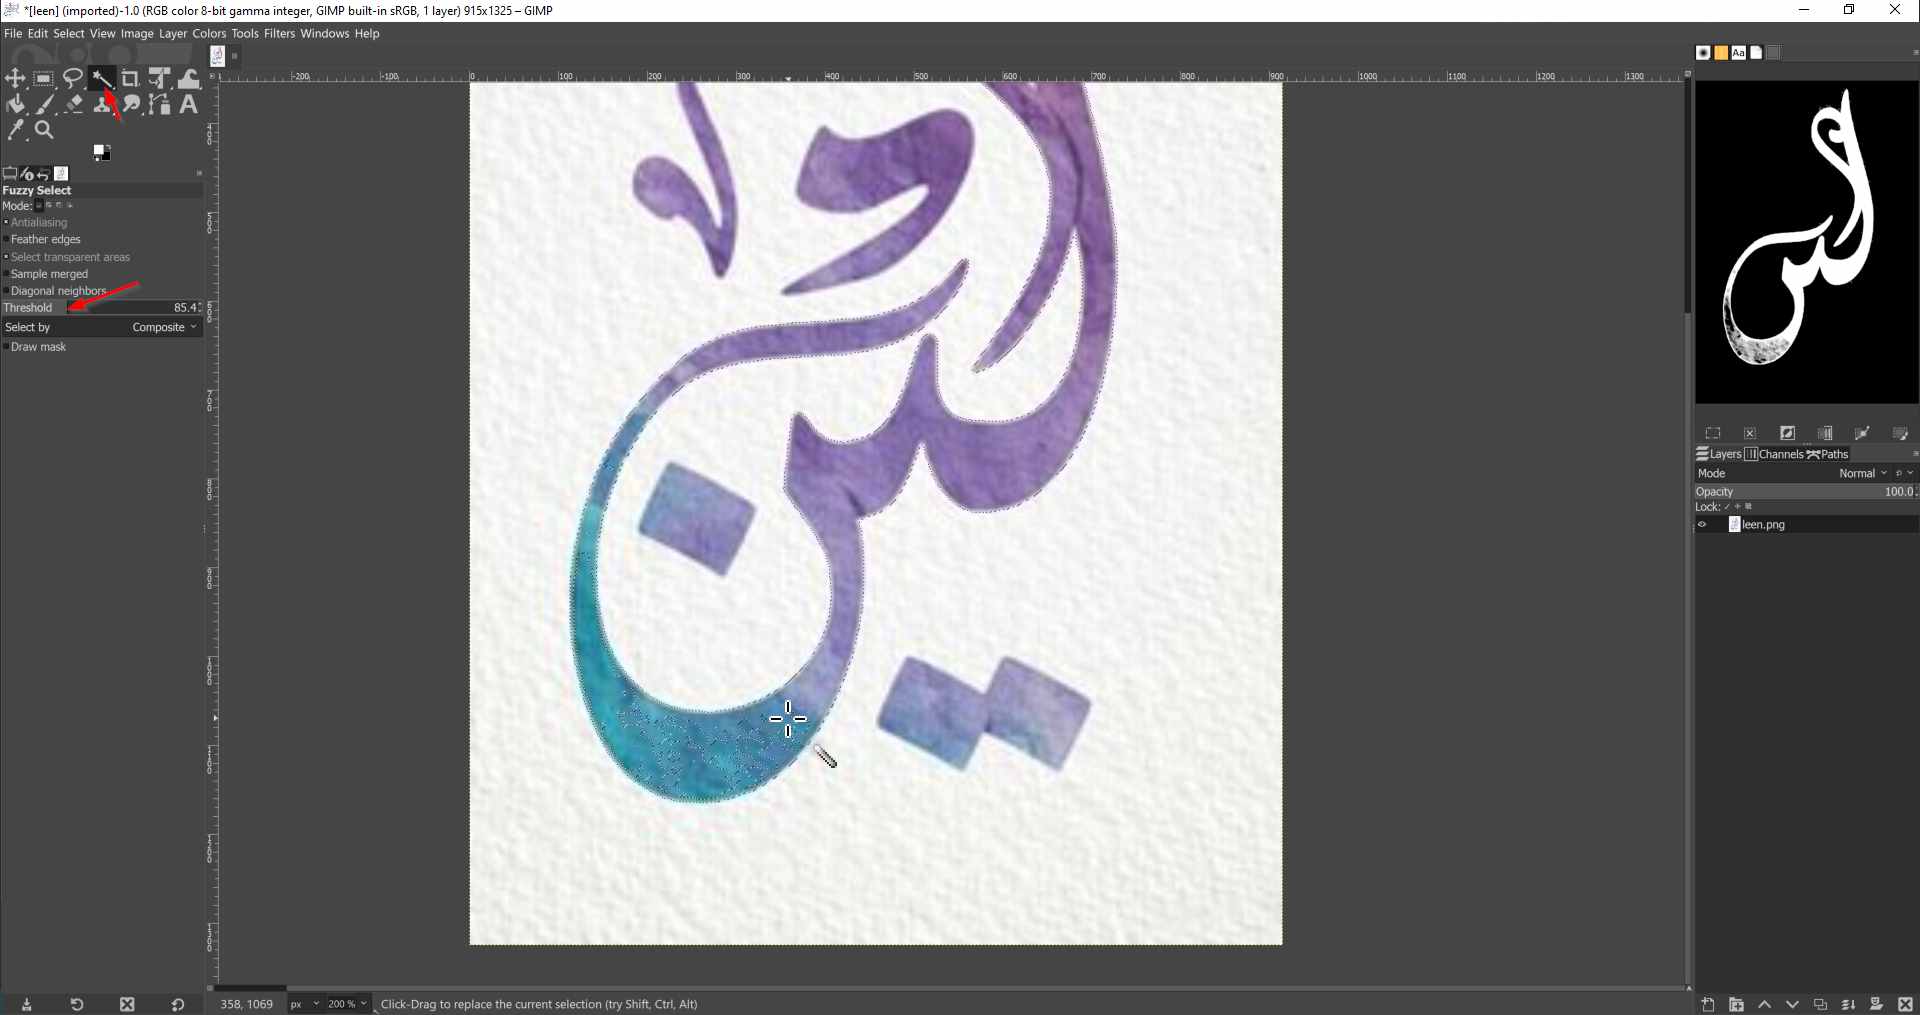
So I changed tactics and selected the background instead of the name, and that worked perfectly since I wasn't doing any precision selection and just needed the rough outline of the letters.
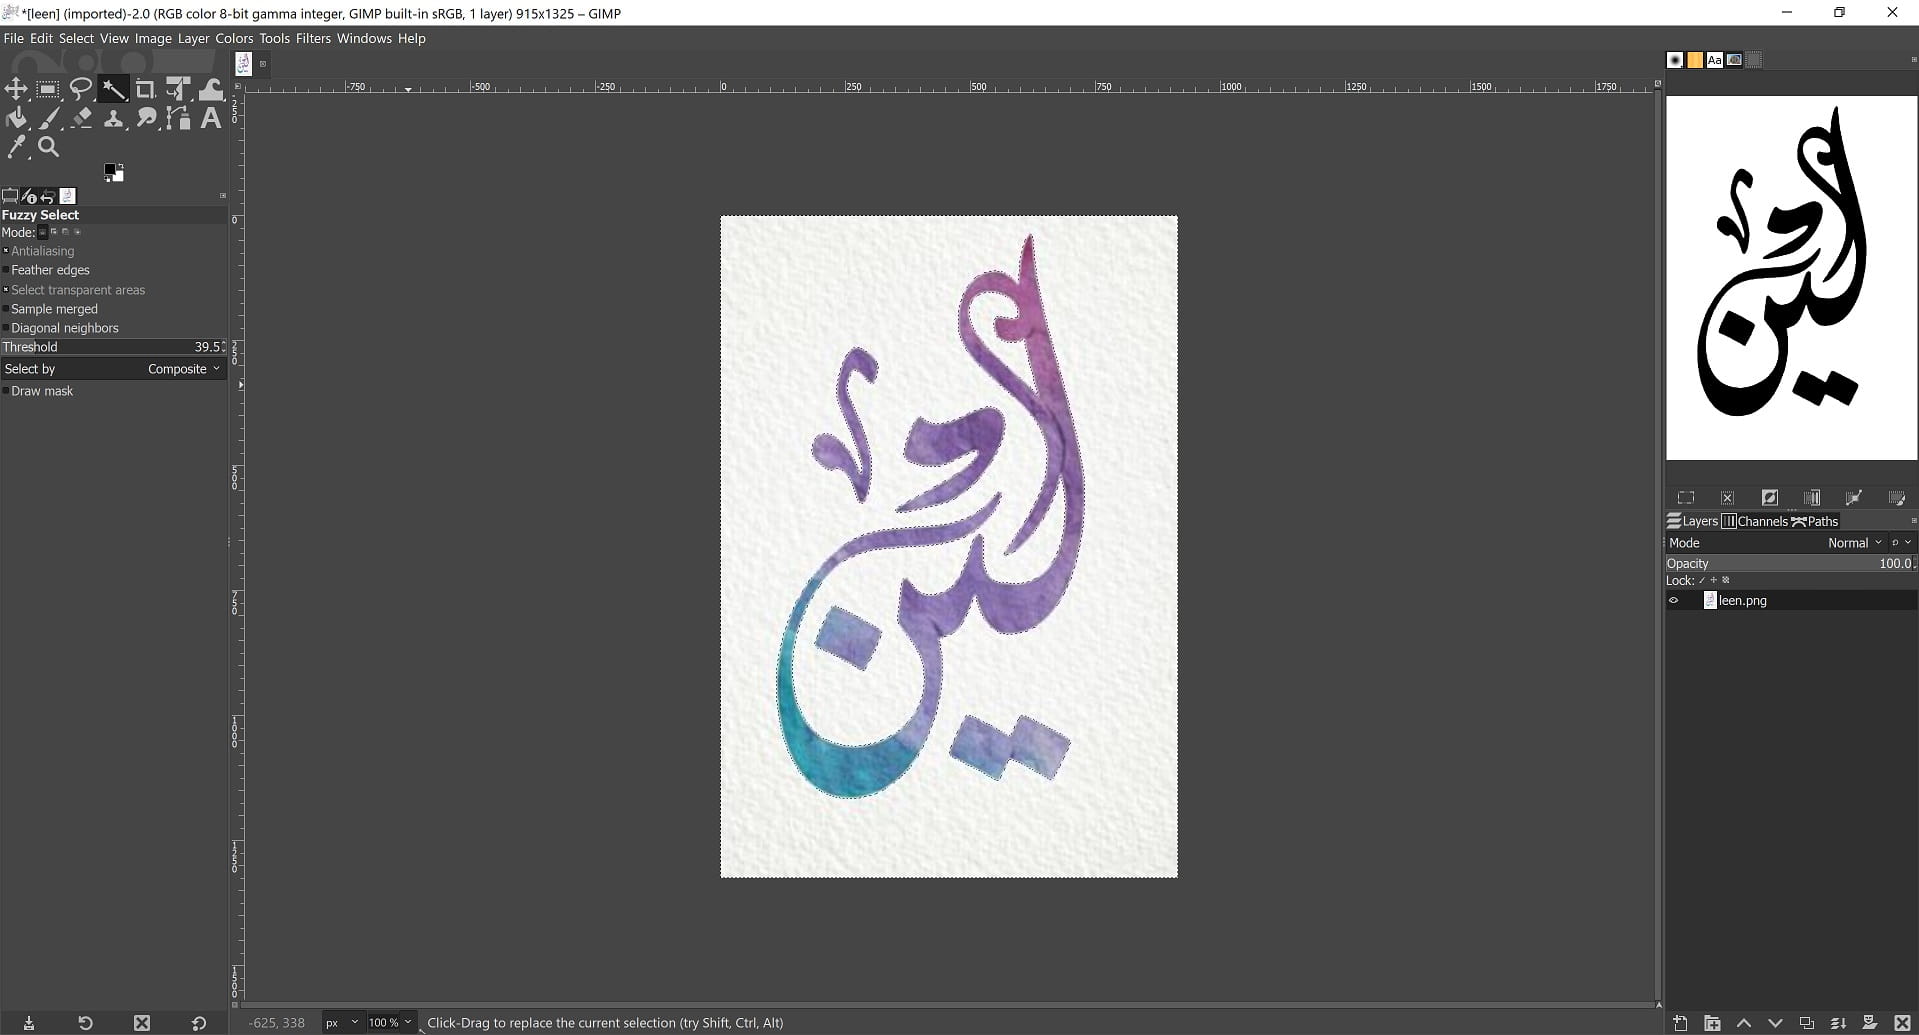
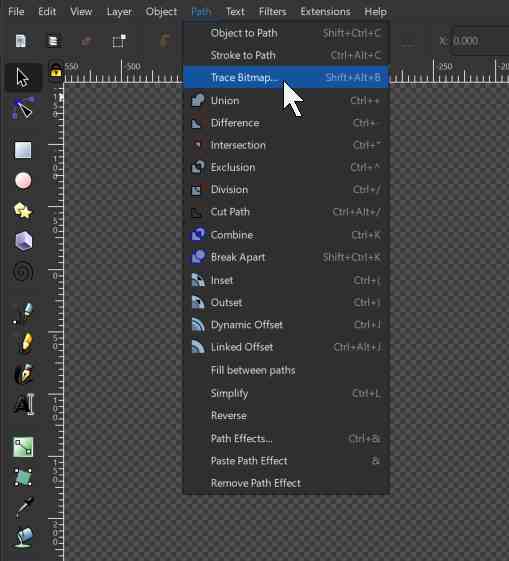
After that, I saved the edited black and white version and opened it in Inkscape and there I was able to trace the bitmap of the calligraphy by going to Path > Trace Bitmap.
And I used these settings in the panel on the right.
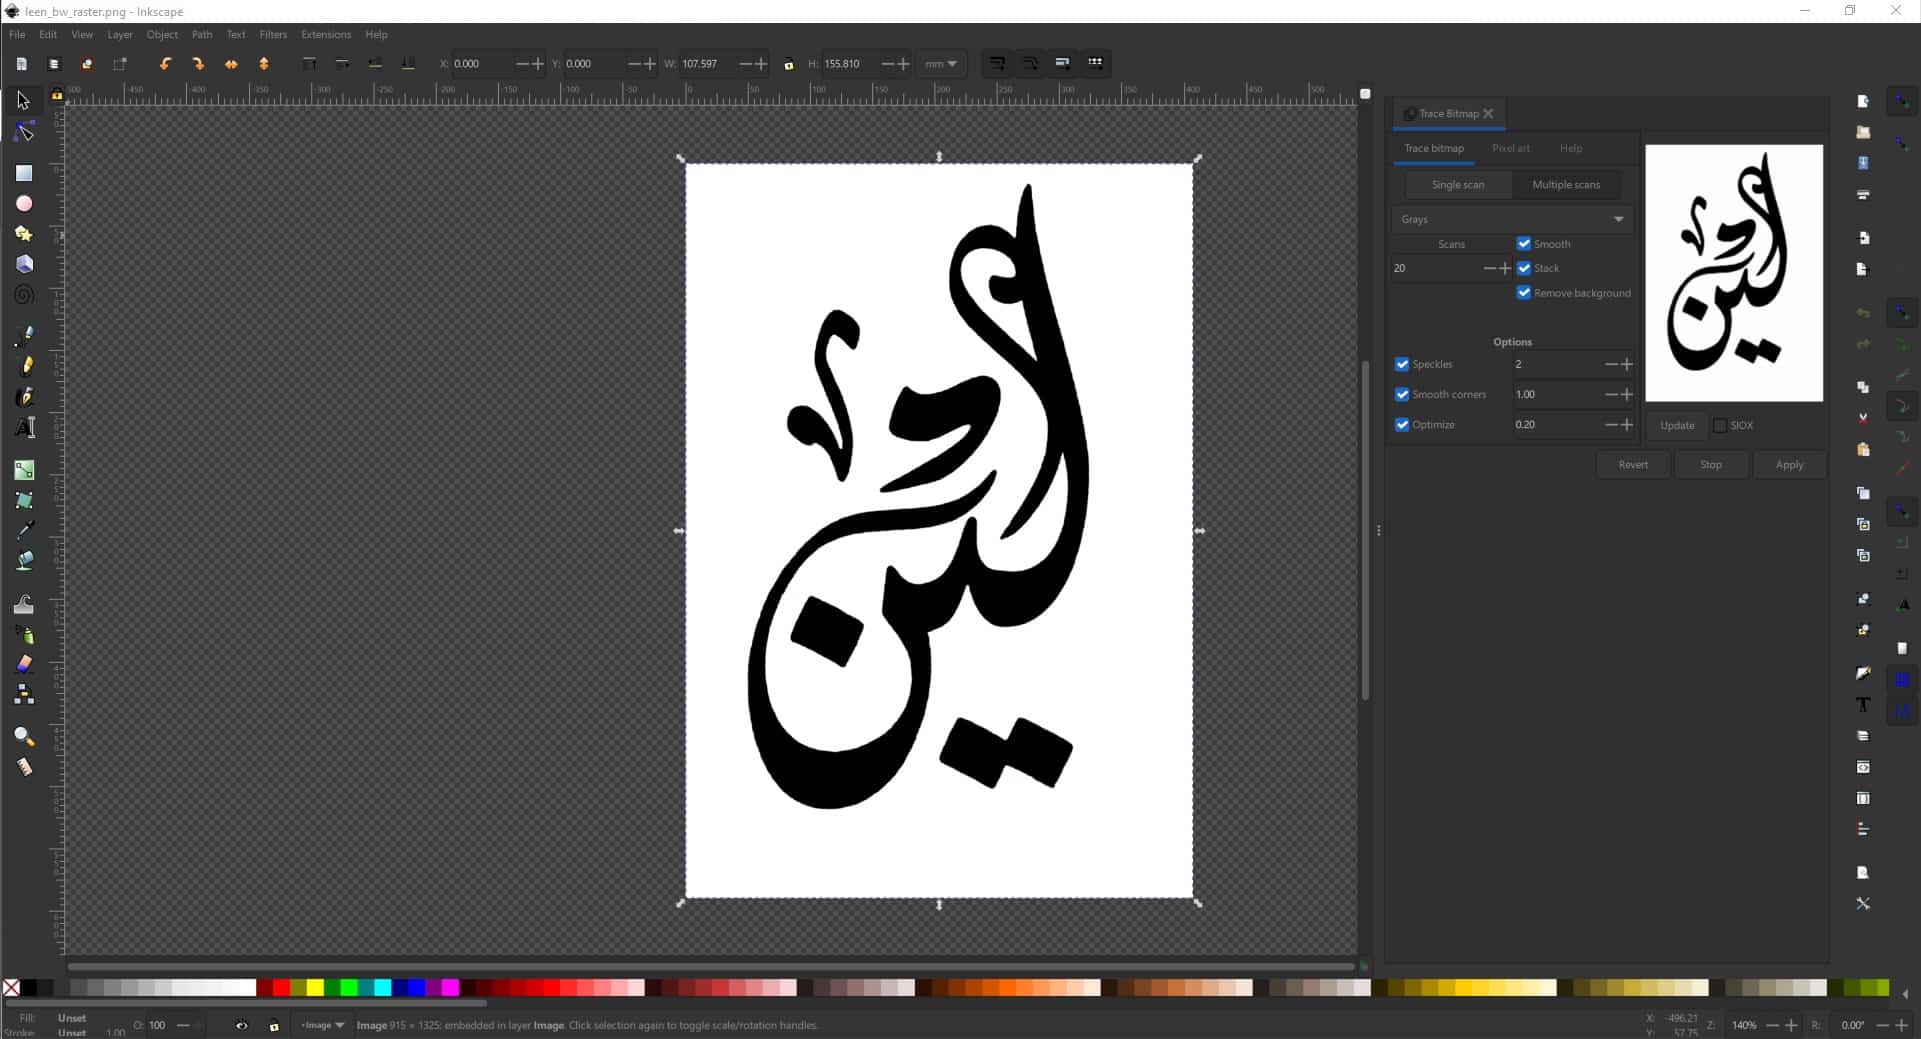
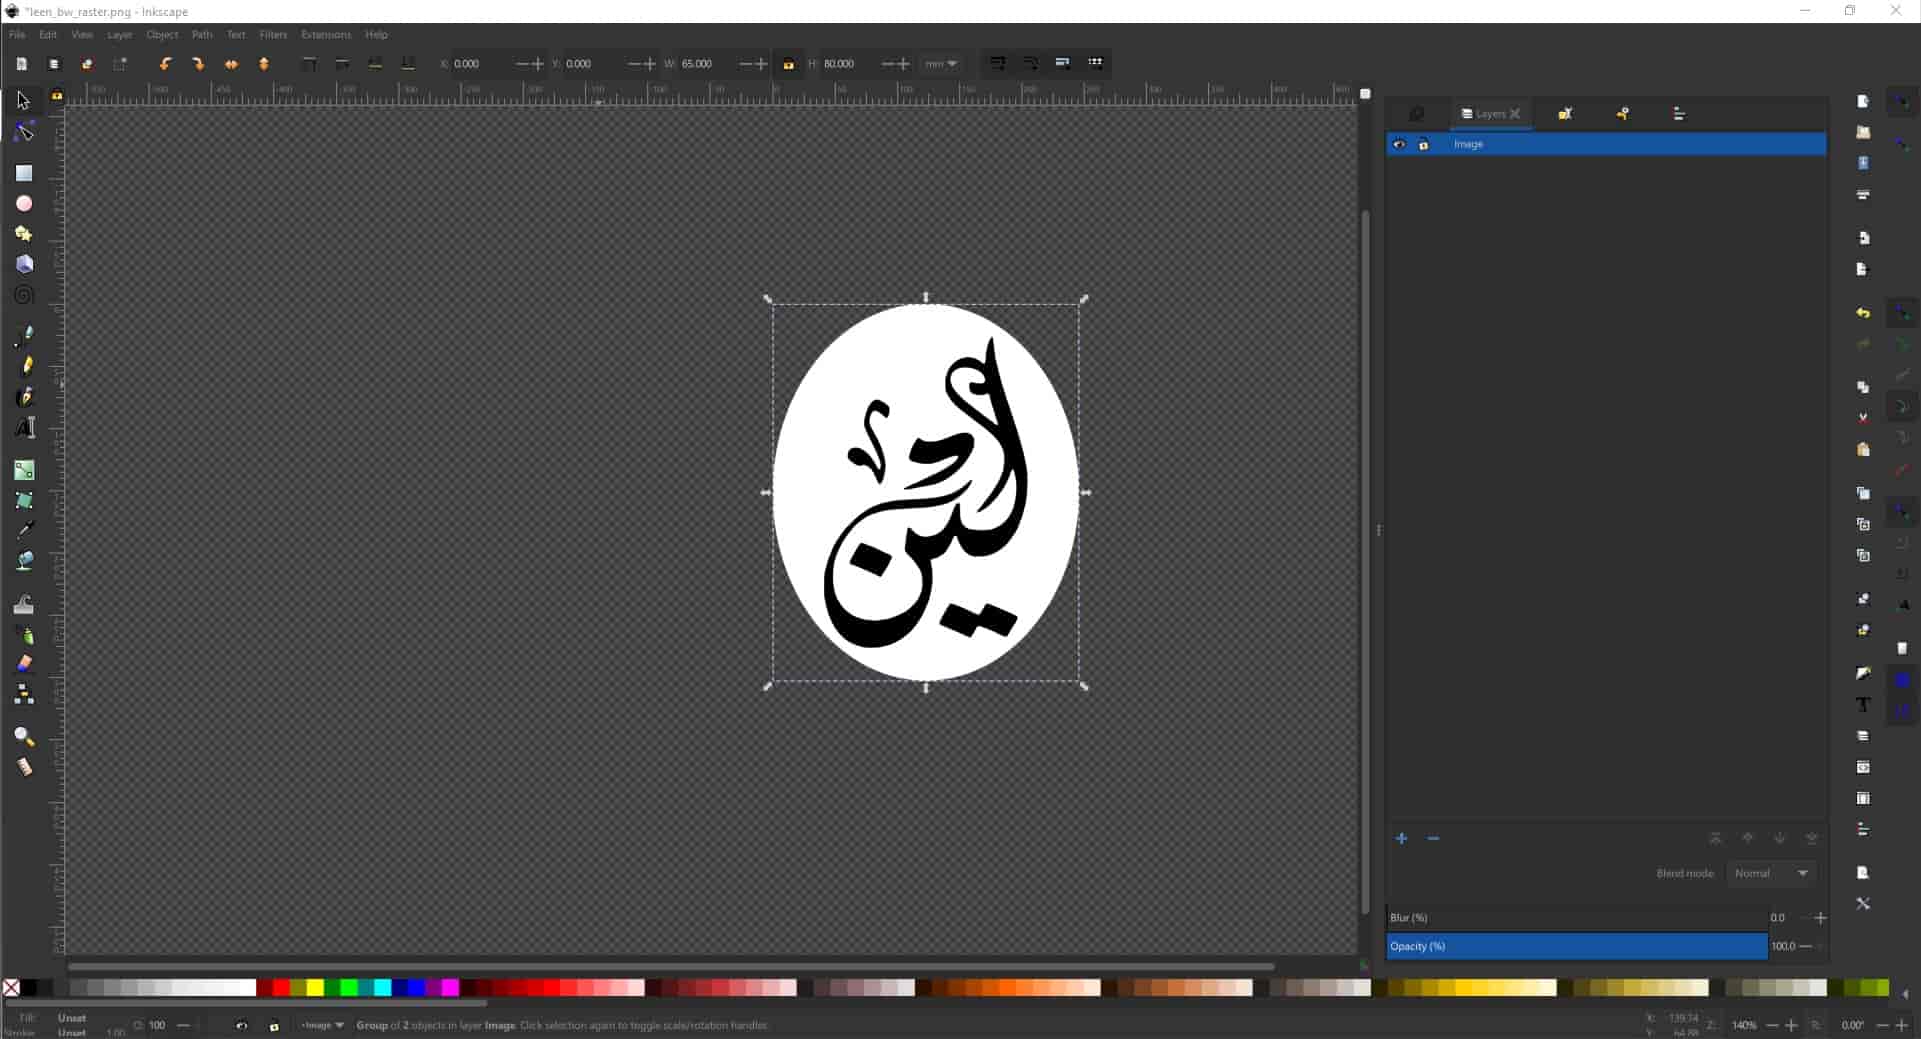
I then edited the background shape and the overall size of my image and saved it as an SVG file to be imported into Fusion 360.
3D Modelling with Fusion 360
After that I opened Fusion 360, created a sketch on a plane, and clicked on Insert > Insert SVG.
.jpg)
I then did some face extrusions with different depths to create a 3D shape.
After that I made a new sketch on the same plane and drew a ring around the SVG, and extruded it.
.jpg)
I did the same procedure but with choosing different sketch planes to create the rest of the 3D shape.
.jpg)
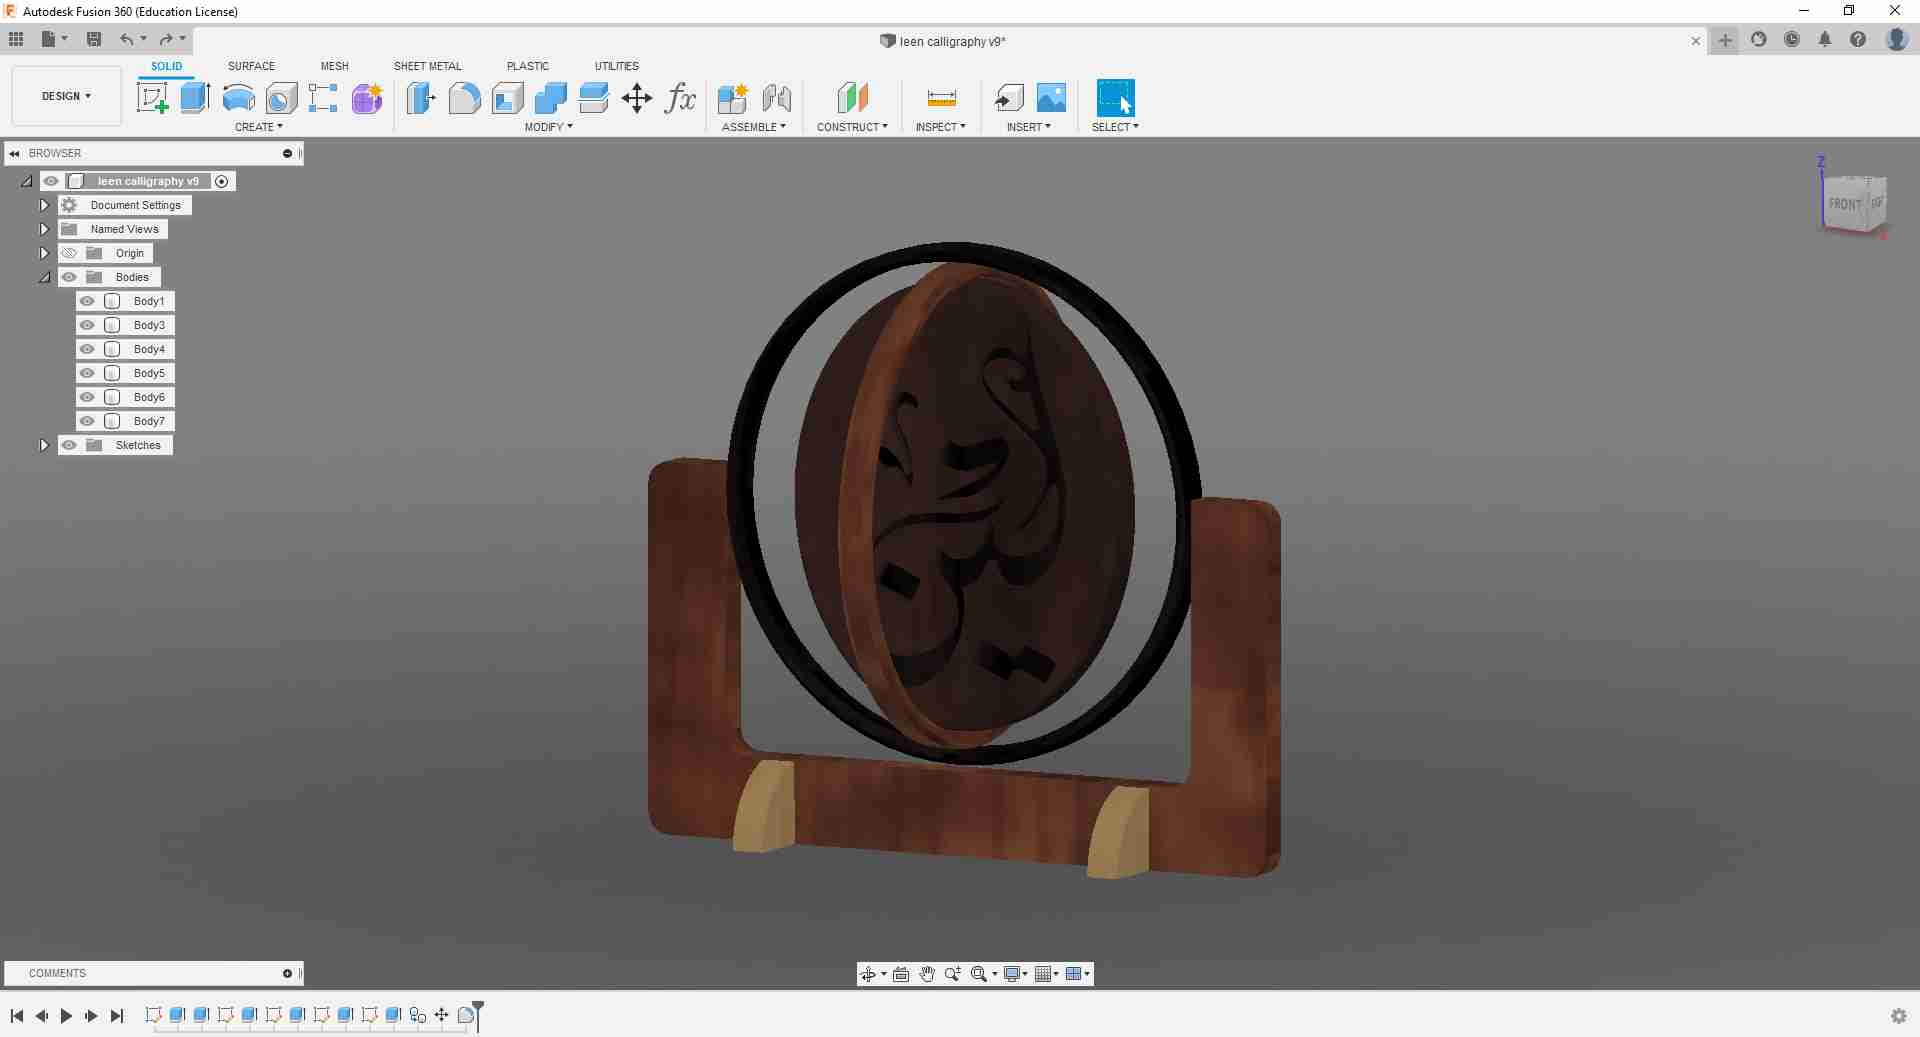
Later, I started adding physical materials to the bodies.
.jpg)
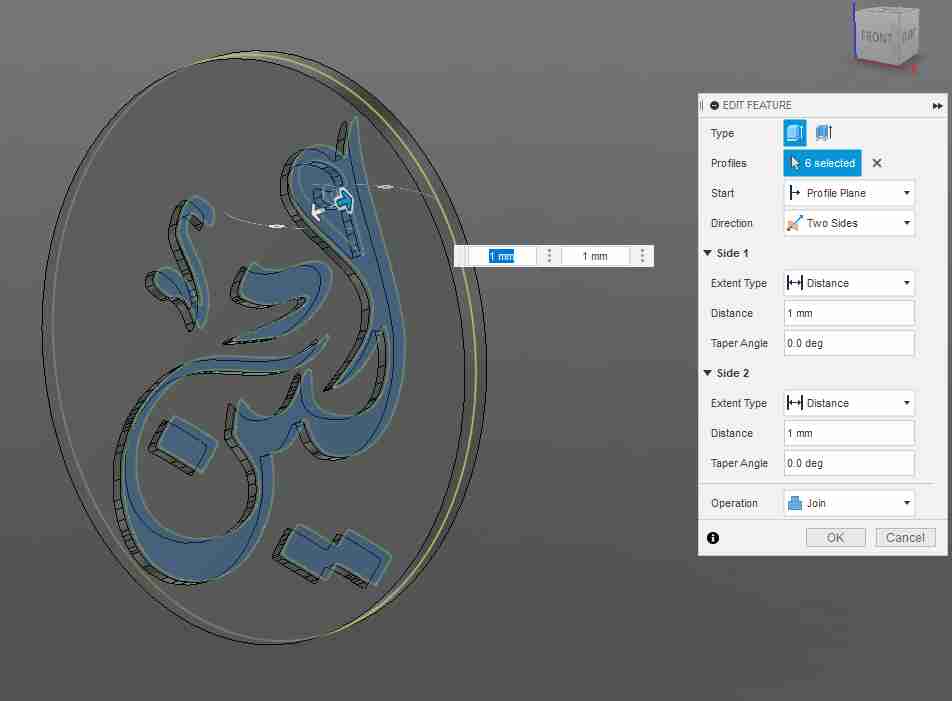
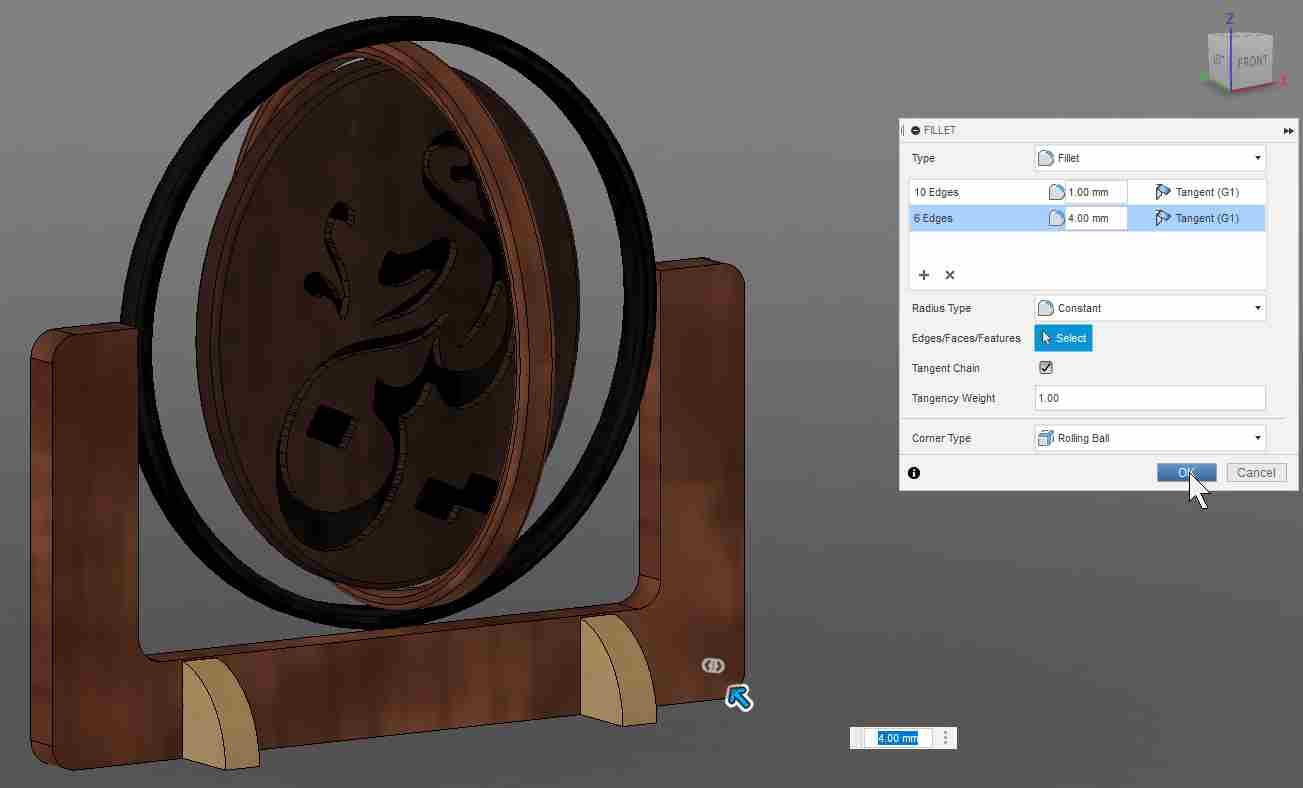
And for the last step I wanted to add fillets to smoothen the edges out.
.jpg)
There I created two groups of fillets with different fillet radii.
And that was it for the 3D design part.
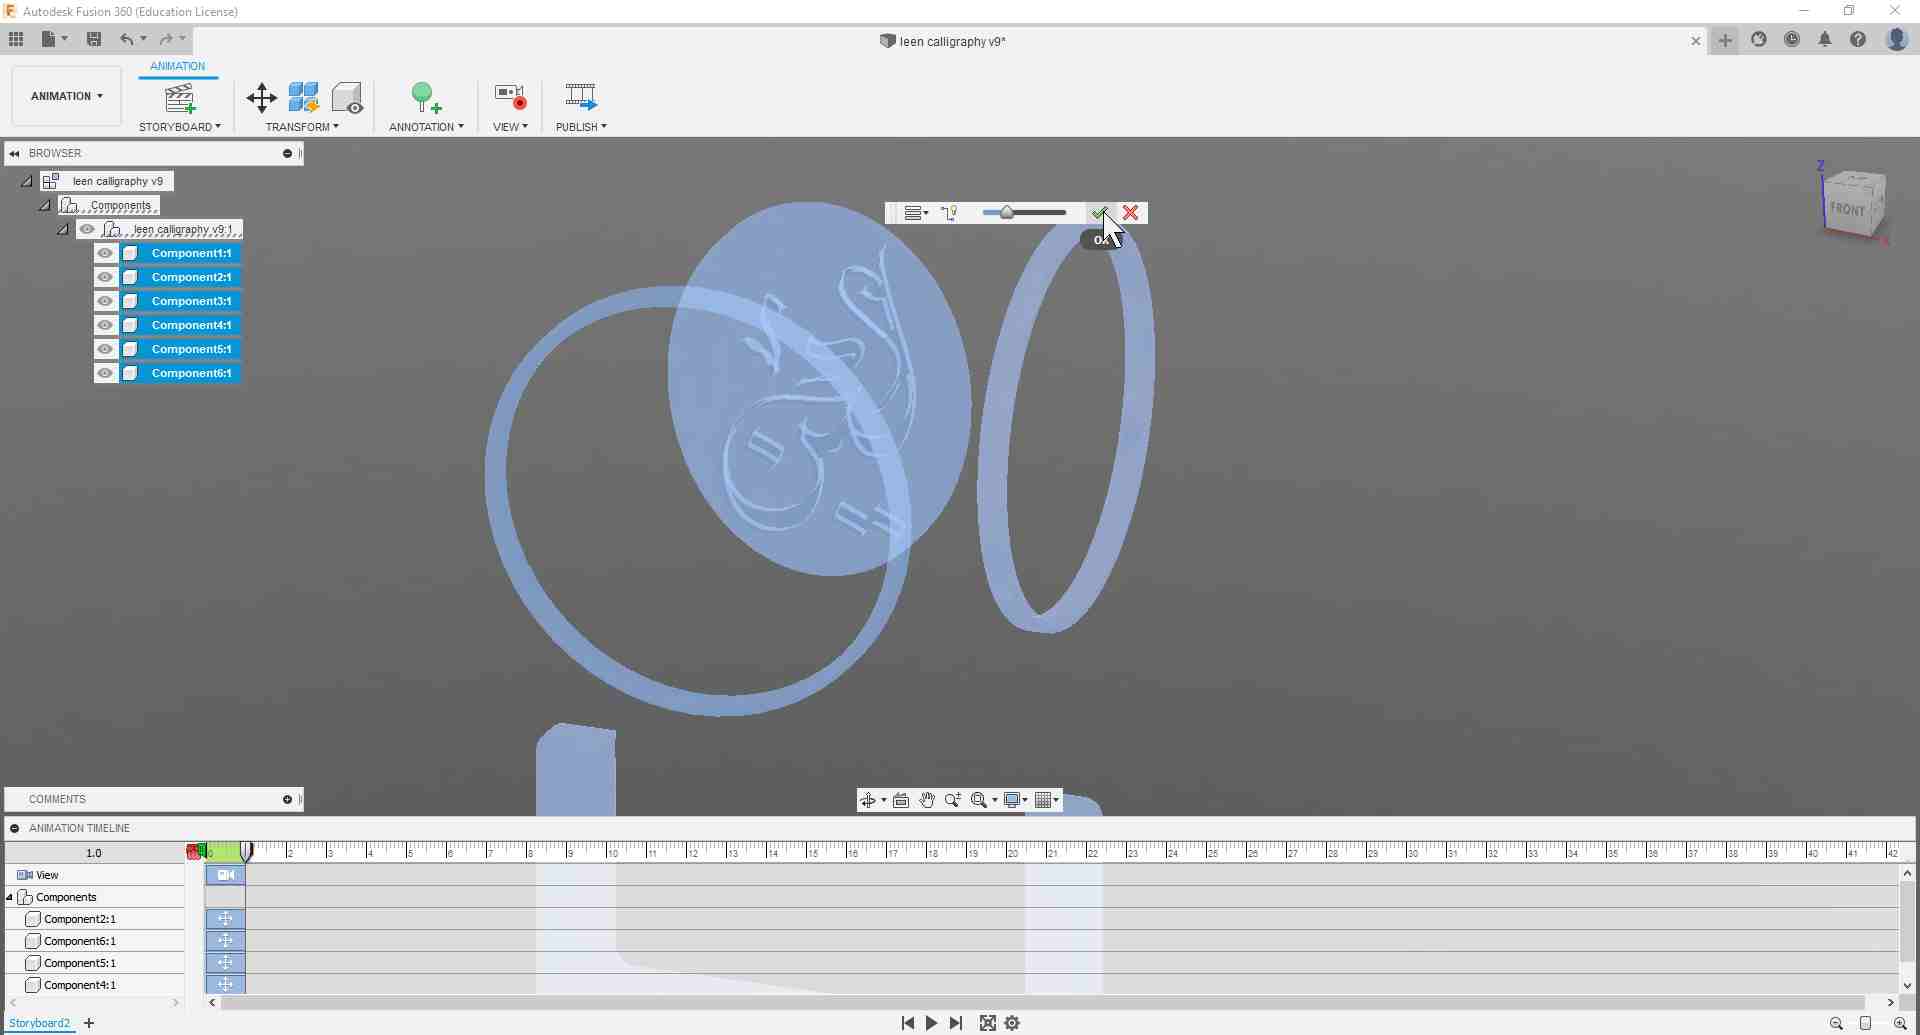
After that was done I created components from all the extruded bodies in preparation for the animation part.
.jpg)
I then went to Fusion 360's Animation environment, and started a new storyboard.
.jpg)
.jpg)
Then I selected all my CAD components and went to Transform > Auto Explode: One Level.
.jpg)
After I was satisfied with the settings there, I clicked on OK.
I then added another scene where the model goes back to the un-exploded view.
.jpg)
And this is the result!
After Several Weeks of Fab Academy Under My Belt
I feel like this section should be added after gaining some more experience from the various Fab Academy assignments. In terms of software to use, I found it the easiest to stick to Fusion 360 since I was pretty comfortable with it (and I have the educational license at the moment as well). I've been using it for 2D and 3D design, as well as any project that needed parametric design. FreeCAD would have also been an awesome substitute had I no access to Fusion 360. And from my limited experience with it, I felt it followed the same logic as Catia, which I had used extensively during my studies. The one drawback, in my opinion, is the GUI, although that can also be tailored to my needs in the settings. But compared to that of Fusion 360, the difference is clear. However, and as is the case with all software, there is always a learning curve whenever switching to a new program, and the more comfortable with it I become, the more useful it becomes.
Another impressive software I got to work with was Inkscape. I was positively surprized at how powerful it can be, what with all the available add-ons and the fact that it is all freely available. At the moment, it is my number one vector image editor. I can either use it on its own to sketch my designs in vector paths to be later used in manufacturing operations, or I can import existing images and convert them to paths just like I did with the calligraphy design here. The advantage of working with vector images is that the sharpness is never lost when scaling the designs, since all shapes are processed as mathematical function traces. On the opposite end of the spectrum, raster image processing was also a field that I did not know I had worked in before. MS Paint is probably the first such program I have used, and in the exercise above, I have been introduced to GIMP. Working with raster images means that the editing takes place on the pixel level, and therefore the resolution of the design (aka the actual size of the pixels) determines the sharpness of the image. A note worth mentioning is that raster image processing is not as hardware intensive as vector image editing, since less computational power is needed to edit the shapes and their attributes. Nevertheless, the combination of both flavors enabled me to come up with the calligraphy design in the exercise. And this, along with the Fab Academy assignments that came afterwards, allowed me to better understand when to use which approach.