
Assignment 3 - Computer-Aided Design
This week was filled with programs and ideas completly new to me. I have never before worked with a program like Fusion360 and my usual 2D program for pictures is still good old MS Paint, so i had alot of learning before me. My instructors helped me greatly answering questions and taking their time showing me certain procedures multiple times so that i can understand them better. Apart from CAD programs the only ecperience i have working in 3D were Gmae Engines, where i had a short introduction into Unreal before and also worked for a greater amount of time with Unity creating two games and multiple virtual reality experiences. I also have used Blender once before following this tutorial by Blender Guru on Youtube to mixed results, so i was excited to give Blender another try and look into animation and simulation.
Raster
GIMP
Since I already used GIMP a few times before, but mostly for resizing images, i wanted to use GIMP for some extend in this Assignment. I never really played around with GIMP and its functionality. Since i learned that a laser cutter could turn the raster image into a carving, i wanted to more or less design a logo to put onto my pet food dispenser. Before that i quickly created a placeholder image for all coming weeks of assignments for my assignment page:
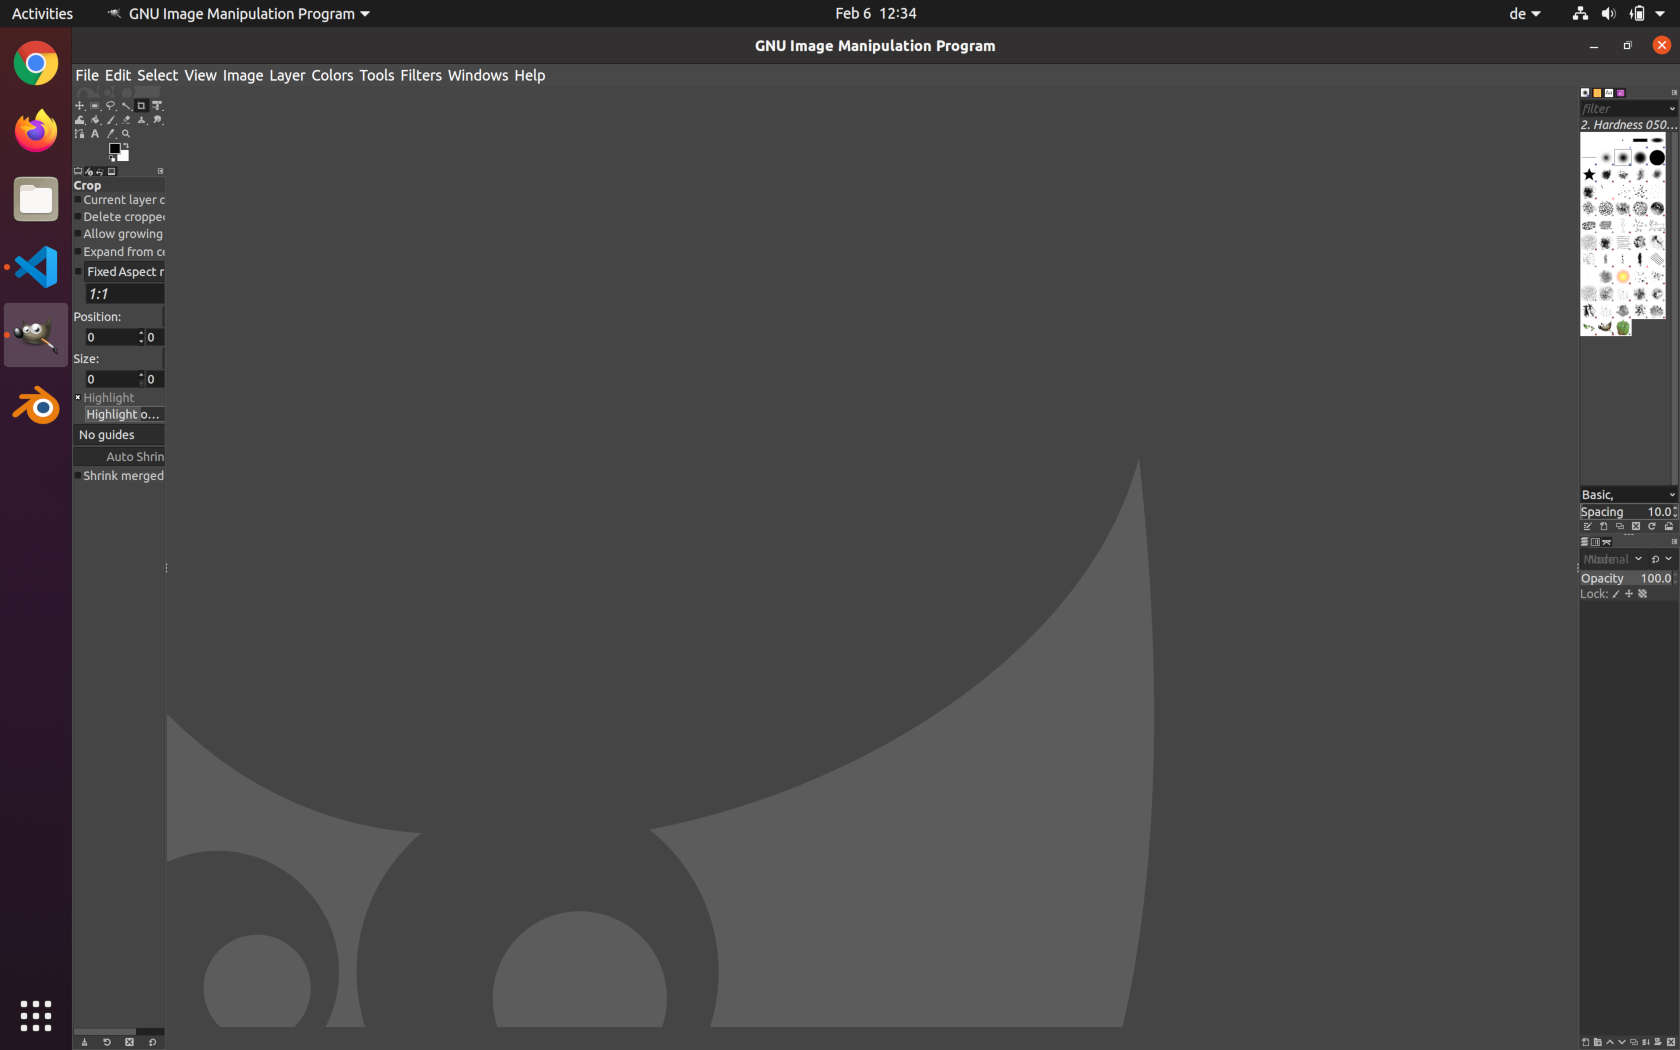
With the Overview Image you can directly see one of my huge problems with GIMP. It sadly does not scale well with monitors that offer a high resolution. Even after setting the whole display scaling up, GIMP still refused to scale correctly. So for GIMP atleast i was stuck with small UI Elements. I read that Version 3 of GIMP will change this and that they even offer a experimental version to try out, but since i already am using GIMP through a Ubuntu VM, i had enough problems with performance and did not want to make it worse by using experimental versions.
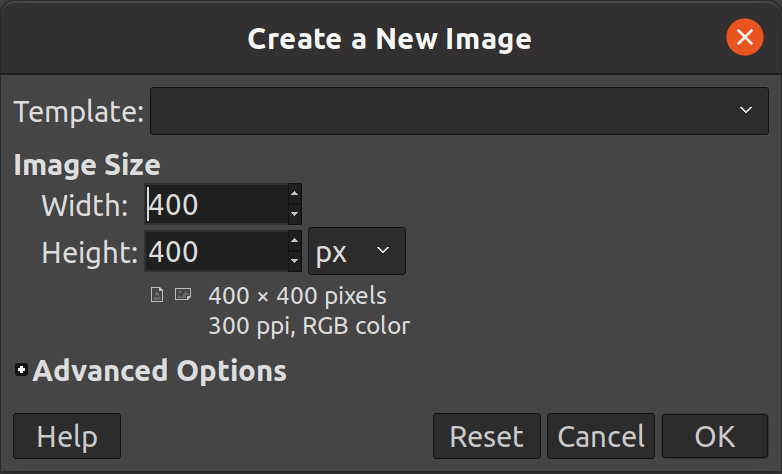
After setting GIMP up, the first thing i wanted to do was creating a new placeholderimage for the coming weeks of the asssignments to display on my page. For this i first created a new canvas with the resolution I would like to use:
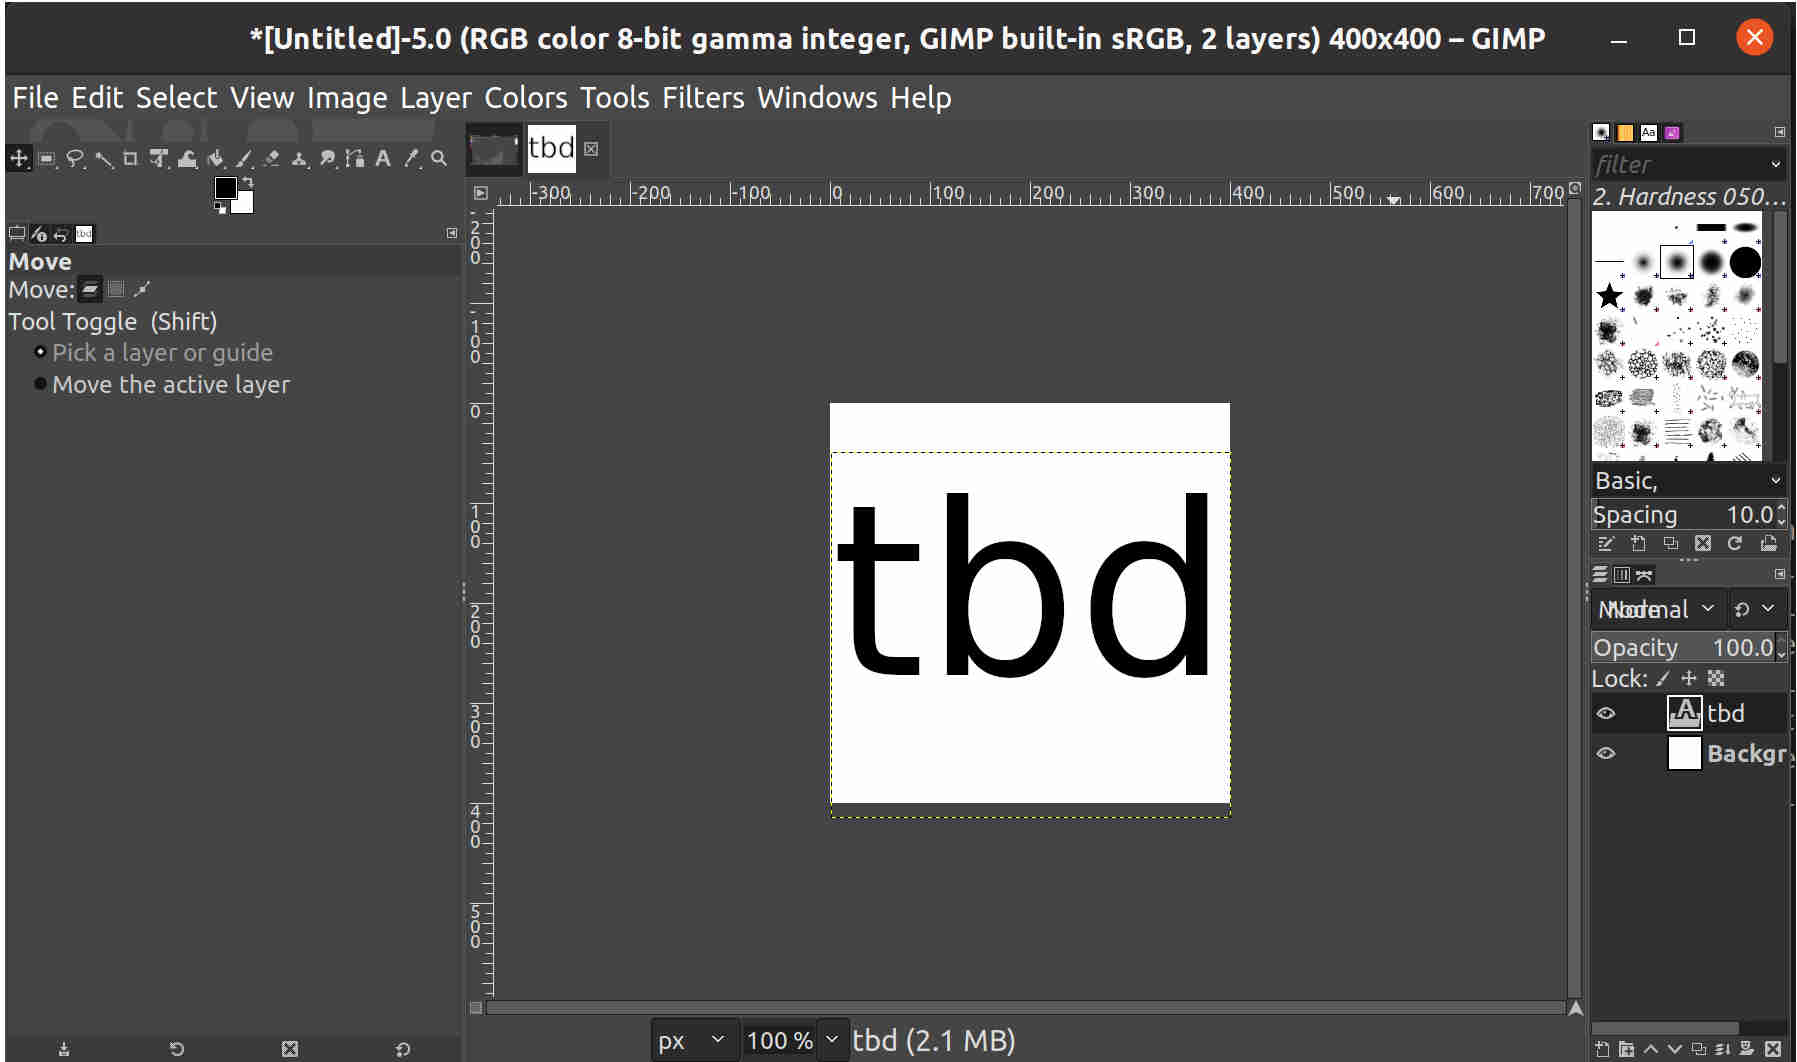
Since i wanted to keep it simple i just used the white background and used the text tool to write tbd on the canvas. After scaling the text properly, the placeholder was done:
After this i went into unknown GIMP territory. My goal was to create some kind of Logo to later on use for the laser cutter to edge into the food dispenser. So here is my approach to this:
At first i created a new Canvas. Since i did not quite knew what i wanted to do at that moment, i scoured the internet to find some inspiration. I was quickly pushed to pixel art, as that does not need a steady hand at the mouse but rather just patience. SO the first thing after deciding on Pixelart i did, was finding a font with which i could write out the name of the device on the Logo. I found one i liked and installed it. After this installation in Ubuntu the font was accesible in GIMP so i could use it:
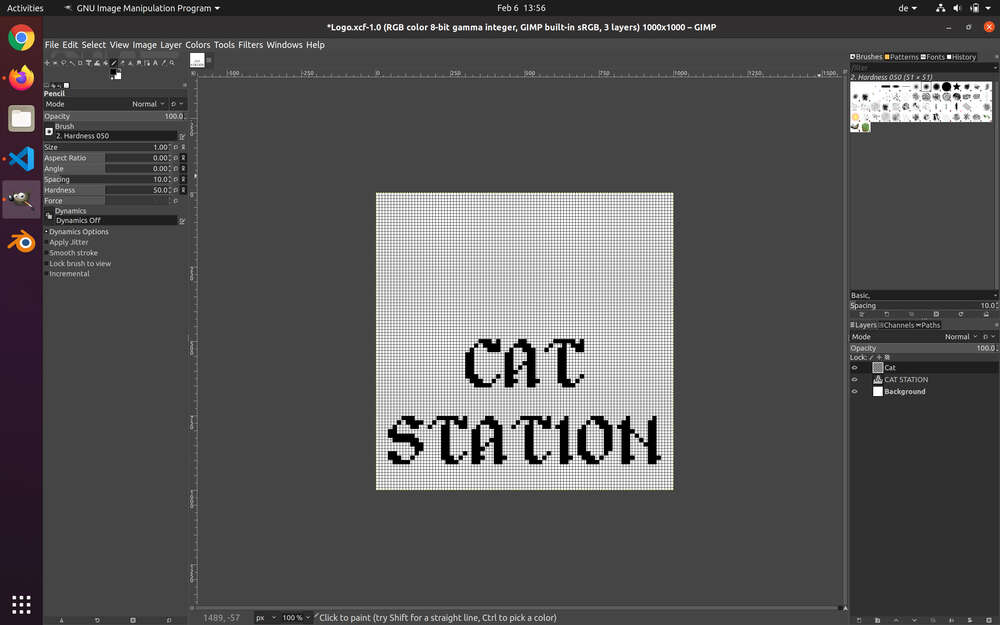
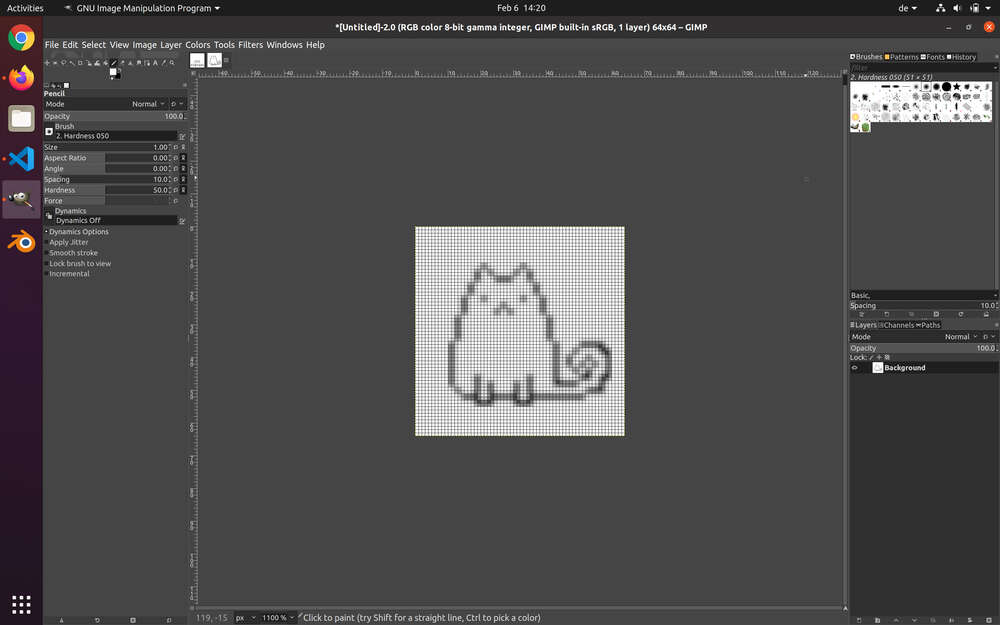
After this i created a new canvas to draw a pixel cat. I followed an advice i found online and created a 64x64 canvas with the grid enabled and set to width 1. The pencil tool was also set to 1. This allowed me to draw perfectly within the grid, making it simple to follow some pixel art tutorials online. After a bit of drawing i was left with an pixelated stylized image of a cat sitting:

Since my original canvas was quite larger than the cat i had to scale it up. Here i had a big problem. Given that this is raster and no vector, upscaling of images is a little bit problematic since GIMP tries to fill in all unknown pixels. After trying tom scale up the image of the cat, it looked like this:
After trying out diferent things and not succeeding i almost wanted to just let the cat be blurred and fix this problem with my vector imaging. But after googling one last time i found the solution. This most certainly only works because the cat is made in pxel art fashion but i could scale the cat by simply telling GIMP not to use any interpolation whatsoever. The funny thing is, that i played around with the interpolation setting beforehand but never tried out the "None" option until i found someone with the same problem as me online. After scaling up the image without interpolation, the image looked like this:

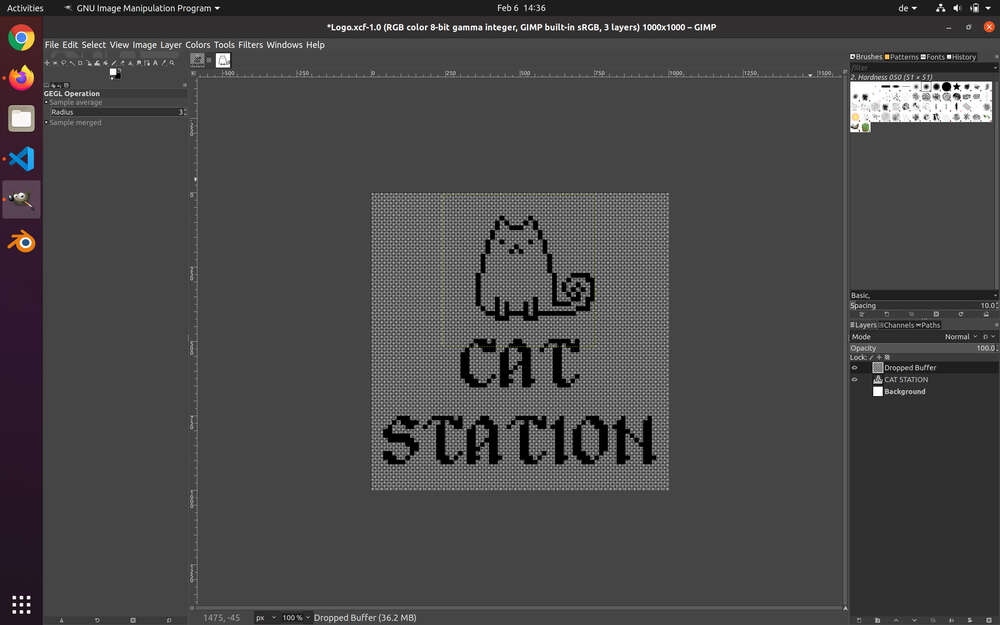
Finally i added the cat image to the canvas with the device name in the new font:
The last problem i had to face in order to make this Logo work, was that the background of the cat
image was interfering with the device name. The solution to this problem is quite simple. You have
to right click the layer with the cat and add an alpha channel if it has none already. After that
you select the layer and right click it on the canvas. In the upcoming context menu you then can go
to Colors > Color to Alpha.... In the new window you select the color that shoould be
alpha after the operation (in my case it was white) and after clicking ok, the background color is
colorless. After doing all this my final Logo in GIMP looked like this:
Krita
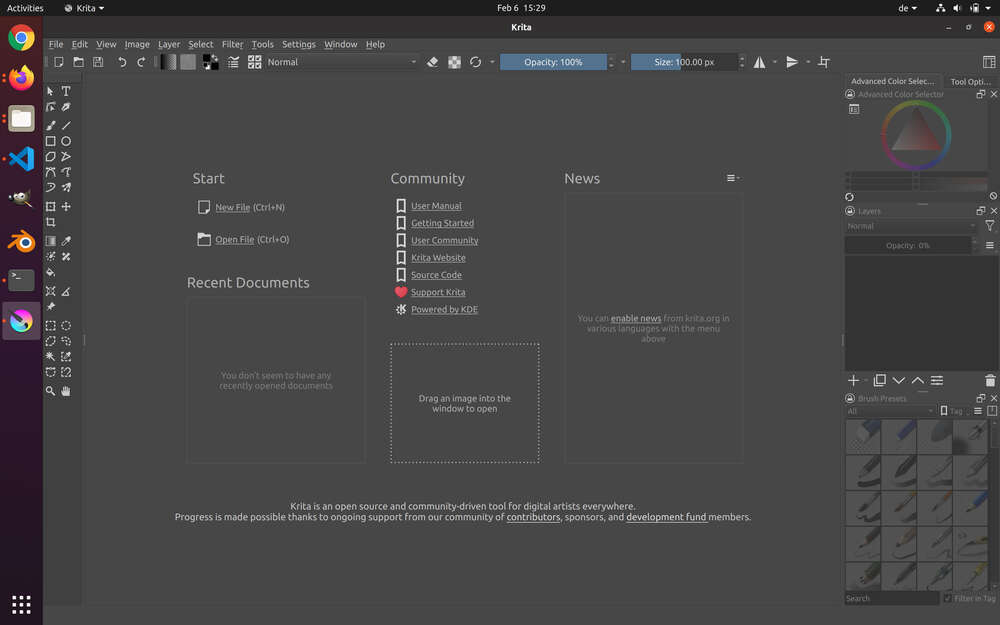
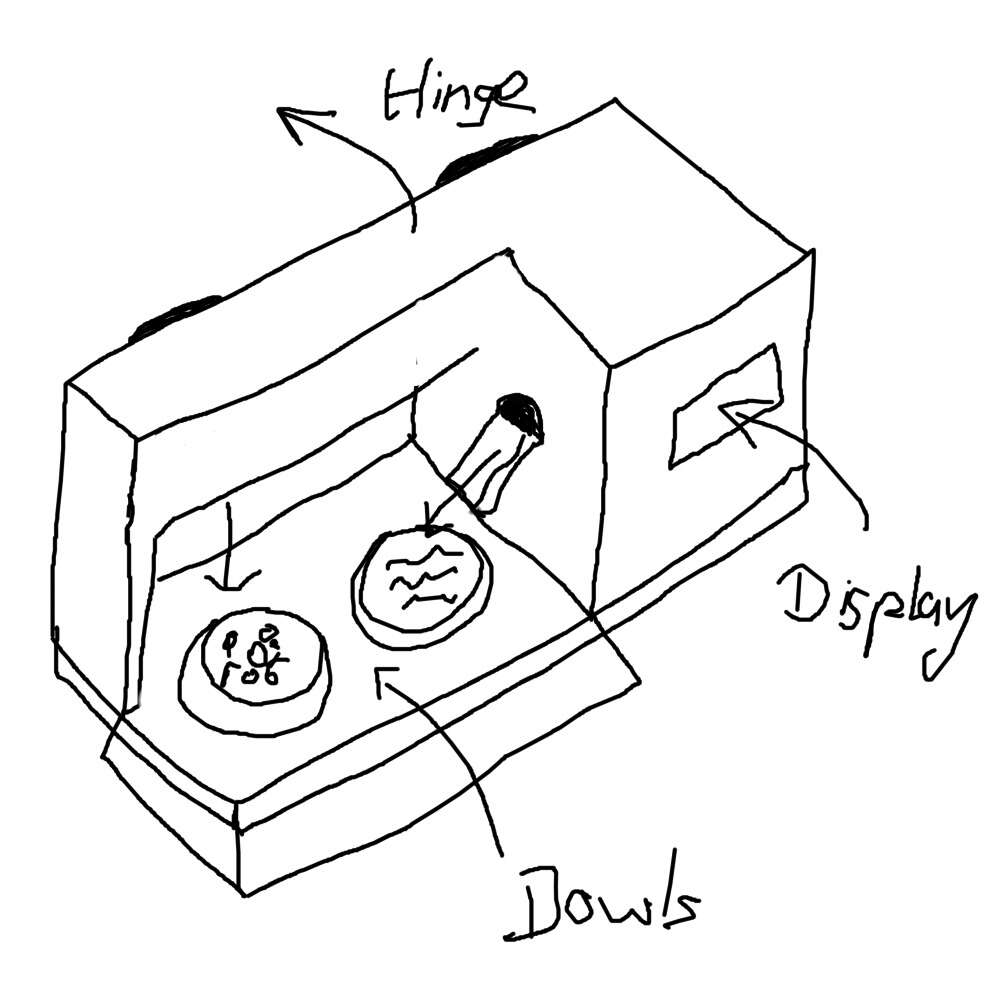
For a second program to look into with raster imaging i chose krita. here i simply wanted to recreate my pen and paper sketch of the device to have a proper digital file for it. AFter installing Krita over the Command Line i started it for the first time. A huge positive point for me was the seemingly much easier to grasp GUI. This could however also come from the fact that Kritas UI was scaled perfectly for my screen resolution. Krita then looked like this for me:
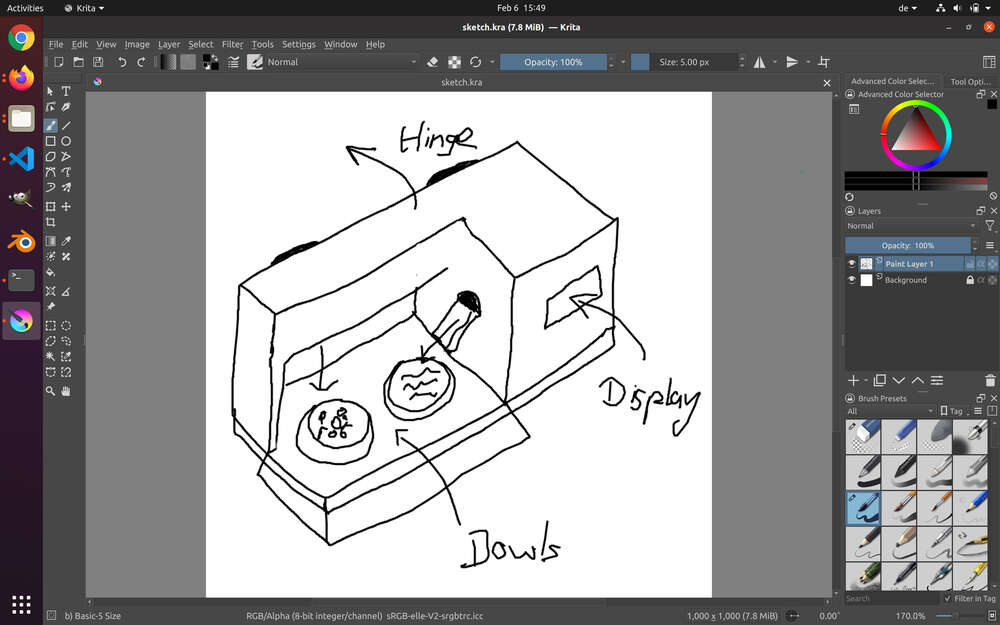
After playing around a bit i sadly had to realize that atleast on my machine Krita showed terrible performance. It was so bad that i would say it was on the edge of unusability. Undo commands were taking seconds to perform and free sketching had the line appear far behind the cursor making it hard to be precise. I cannot say why my performance was so exceptionaly bad but i would guess it was due to the VM. My wife uses Krita in ehr free time and she says its performance is not nearly perfect but what she saw on my screen was also far away from the perfomance she would get on her windows machine. Given the bad performance and my time limitations, i threw together a quick sketch from my cat food dispenser and closed krita. I guess if i would need to use it again, i would simply install it on my windows machine and not on my laptop in a VM.
Vector
On to the vector imaging! When I first tested out Krita in the last segment i accidently used its vector functionality by using the vector layer. After finding out i had to to everything again on the normal layer. For vector imaging I selected Inkscape as i already heard of this program through my wife. My other selection fell onto Sketchpad, as i was fascinated by the idea of such a program only living within the web.
Inkscape
Just like Krita i installed Inkscape over the command line within my Ubuntu VM. After booting the program up, the user is being welcome by these screens:
My goal for the Vector imaging was on one hand a scalable Logo, like that made in GIMP, and on the other hand i wanted to ahve a clean vectorized sketch of my device. With inkscape i chose to make the sketch of my device. After getting used to the GUI of Inkscape I began work on a vectorized sketch of my device.
To have more control over how i draw the lines, the first thing I did was to enable the grid. You
can enable the grid under View > Page Grid. After that you can change the grids
behaviour and how snapping works under File > Document Properties... > Grids/Snap.
After that was set up i began recreating my sketch from week 1 using clean lines. At first i just
used the tool for creating rectangles. Not only did the resulting sketch look awful, but more
importantly i could not edit single lines of the rectangle. Later on i switched to the tool that
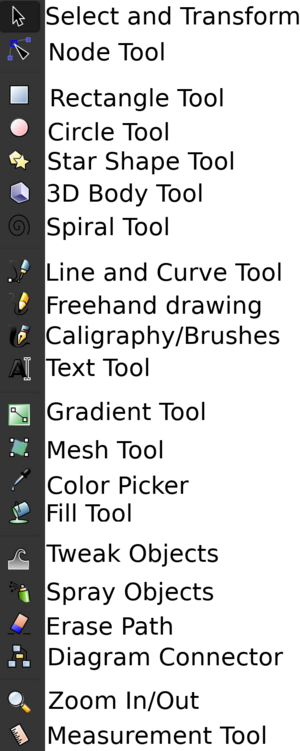
allows drawing straight lines and bezier curves. I put together a short overview of all quick access
tools in Inkscape which you are able to use:
After getting to know the straight line tool i was quickly able to recreate both views i gave on the device in week 1:
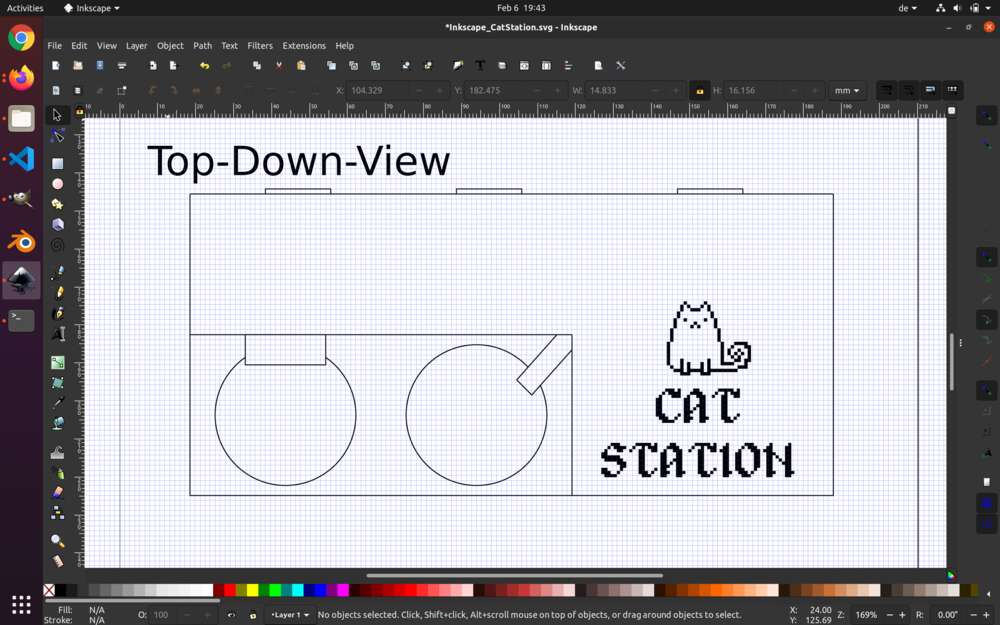
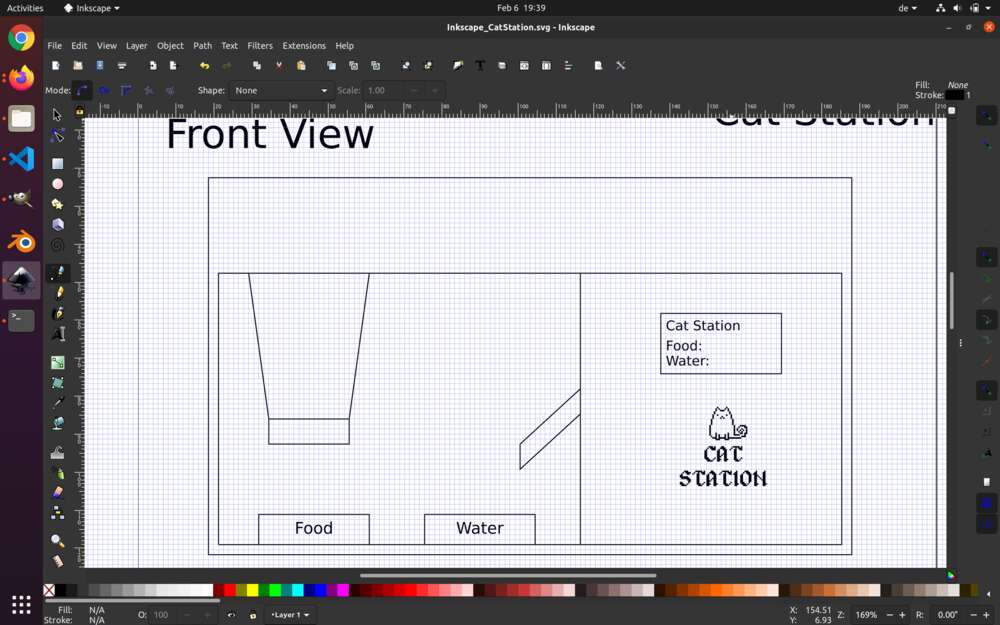
As you can see i was even able to just import the cat station logo from GIMP to use within Inkscape. I think it looks pretty nice.
Sketchpad
With Sketchpad i was mostly interested in cheking out a webbased program to create graphics. As mentioned above my second Goal for the vector imaging was to sort of recreate or make a compleetly new Logo which looks like the one i made with GIMP. Sadly my Time ran out for the day, so sketchpad was moved to the end of my timeline for the week. TODO: Use Sketchpad.
2D
As one can see, hand drawing isnt really my strong side and so vector imaging with normal lines suits me a little bit better. However, given a bit of time and maybe a hefty amount of training sketching with my wife i could maybe crteate better images from hand. I certainly see the positive sides for both approaches. When entering a theme like laser cutting they even do something vastly different. For all the programs I used there is one thing i want to point out. And this is, that they have a very complex GUI, but once you are familiar with the core tools, almost everything goes smooth. Going forward, i think i will stick to GIMP and Inkscape, as i liked them the most. They were intuitive after a short time and on top of that they both have a pretty large community, meaning almost every question I had, I could already find answered Online.
3D
Like i wrote in the beginning, I am a total beginner in the field of 3D-CAD. The only time I realy worked with 3D-Design were my projects using the Unity Game Engine. I was quite interested to learn the process and asked my instructors which of the licenses would make the most sense to use for me. In the end I settled for Fusion360 and Solidworks.
Fusion360
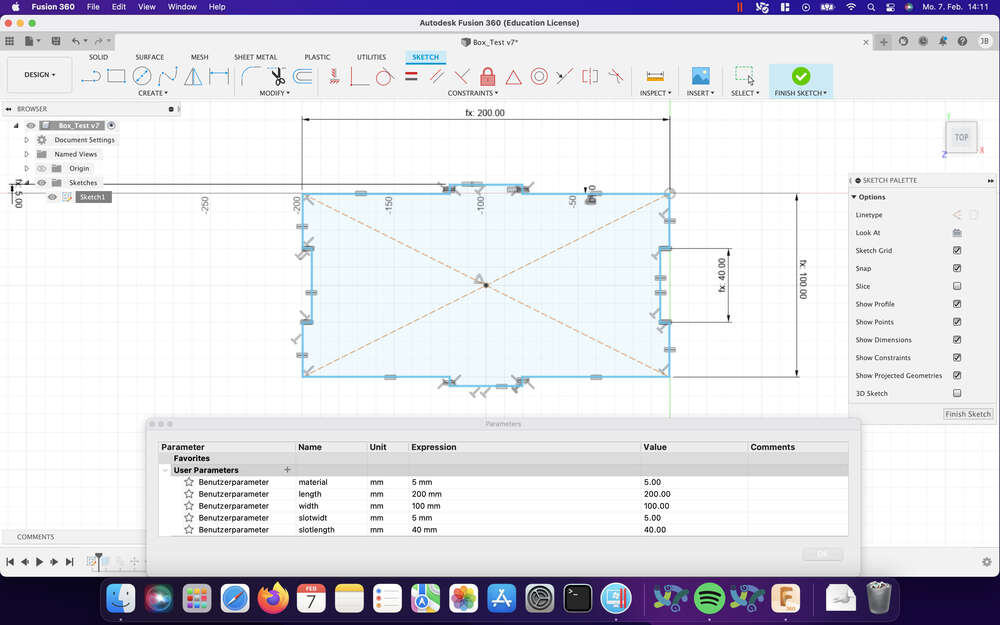
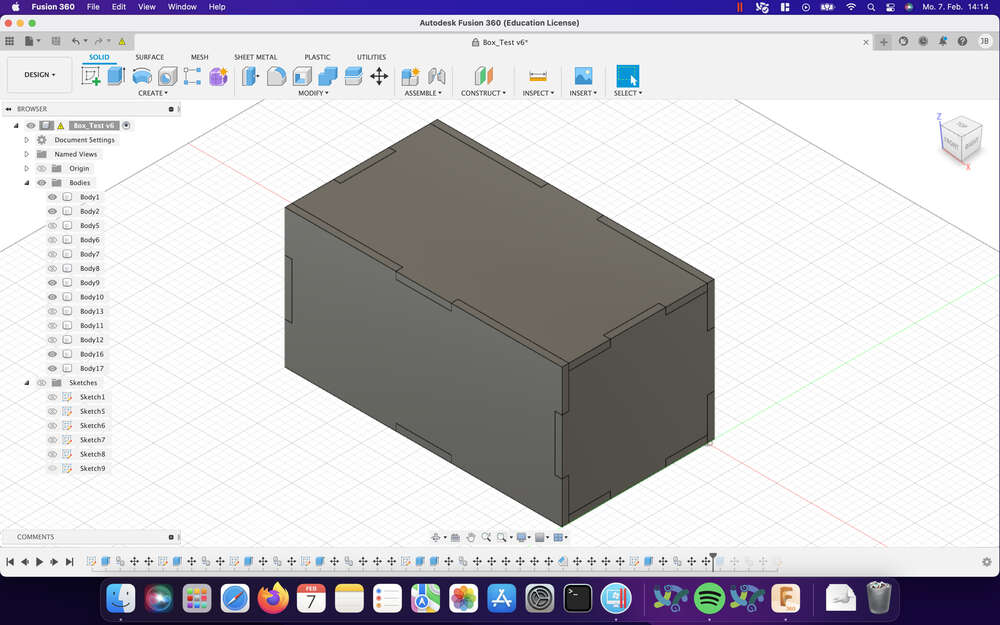
Since Fusion360 was recommended to me and was also the biggest part of our local lecture, I needed to install it. THe problem was, that atleast to my knowledge, Fusion360 does not work on Linux operating systems. So for everything I am doing in Fusion360 im using my native MacOS environment. After our local lecture where we had a longer introduction into Fusion360 I started palying around, trying to make a Box which would click together. I started by laying out the basic shape of one end of the box and began constraining the edges to match my desired shape. This for me was already one of the tougher things as i made many mistakes constraining the wrong edges and not quite understanding how Fusion360 handles constrains. After constraining I always tested everything by scaling the sketch. More often than not the shape would massively change after scaling, having strange angles and lines everywhere. After enough trying and with the help of my instructor i finally managed to create a shape which was ready to be extruded.
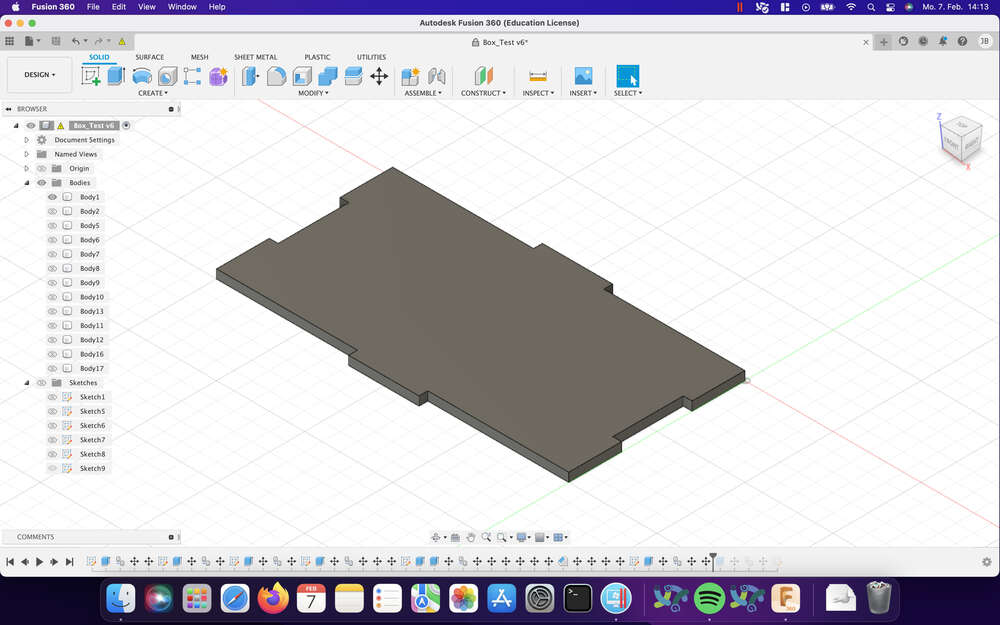
After the extrusion i could take a look at the body i just created. I duplicated it and set its transformed its position to above the other Box. I then created a new sketch with the forced perspective looking on the side of both Models. With this forced perspective I then could create the missing faces of the Box, even with the parameters i declared for the first two objects, so that everything scales accordingly. After extruding these missing faces i was presented with a Box. Upon further inspection I noticed a big mistake. Since i had designed every Face with two teeth outwards and two slots inwards, the box was missing a small chunk on every of its corners.
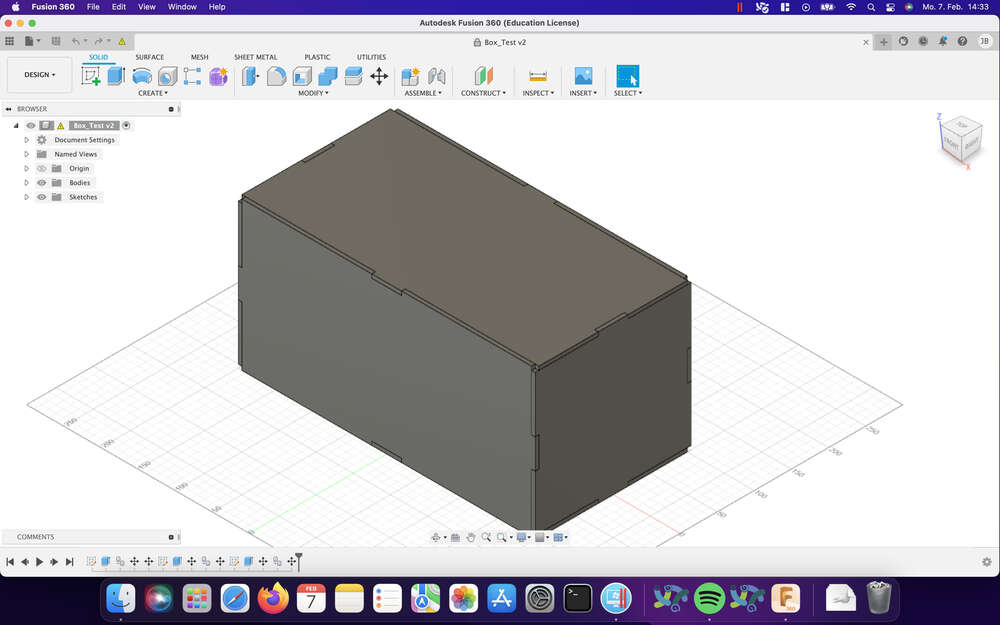
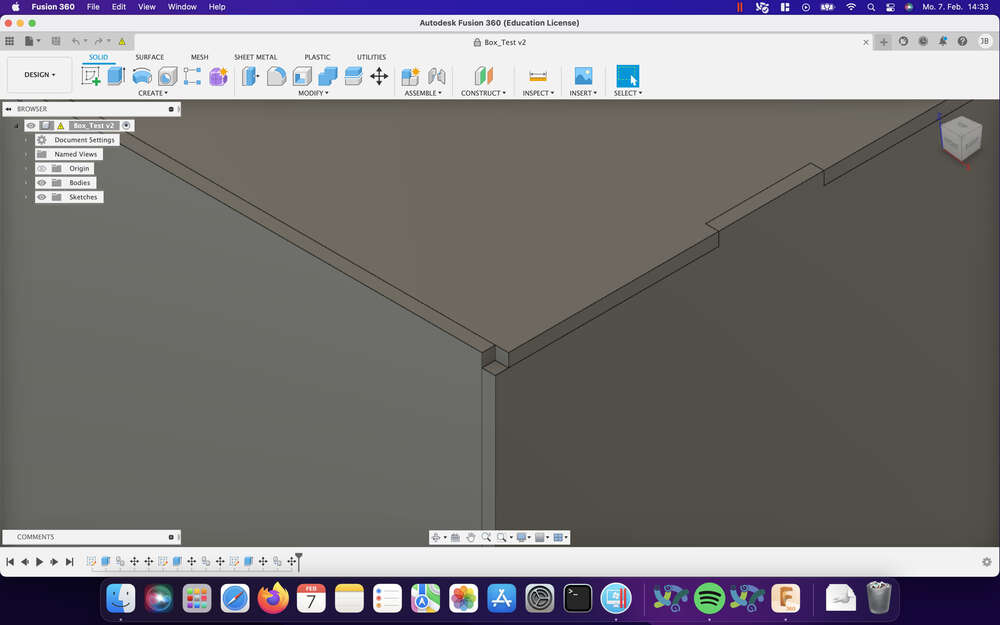
It looked super cool and so i kept these models but for my plan to create one whole box i had two make the later four faces completely new. One pair with four slots and one pair with four teeths. After doing so i finally had a closed Box infront of me.
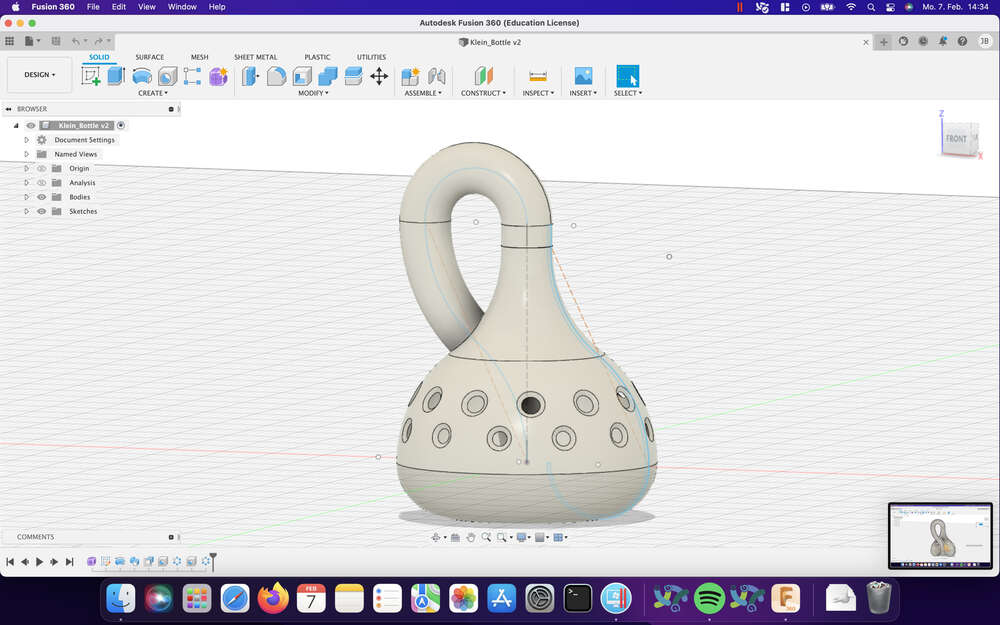
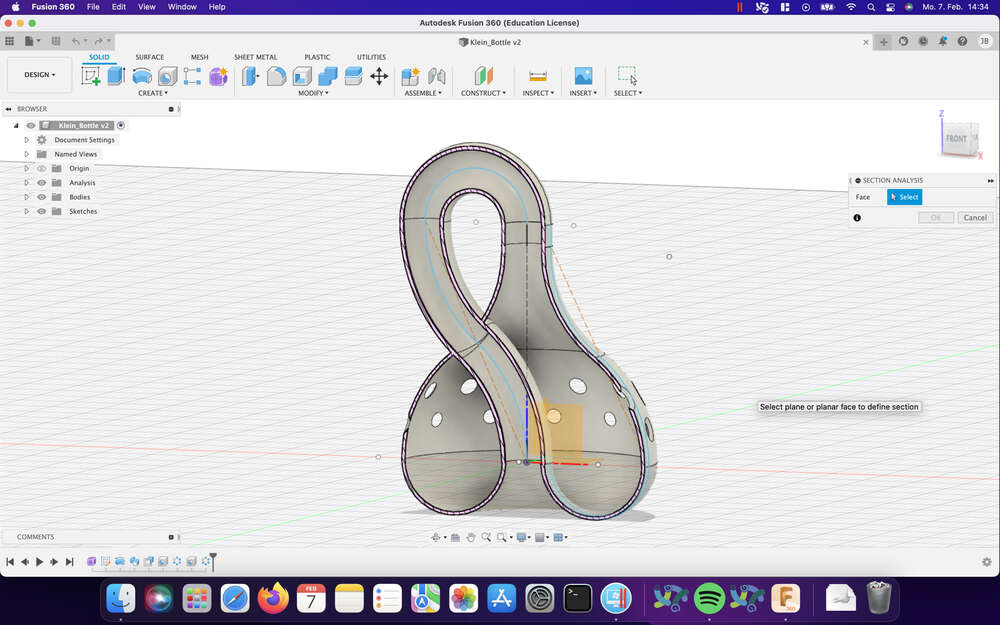
After creating the box, my curiosity got the better of me and i tried myself in creating a klein bottle. I first heard about and saw the klein bottle fove years ago on the channel Numberphile on Youtube in this and in this Video respectively. There the odd shape and its characteristics piques my interes back then and this fascination never really stopped. So naturally I wanted to try and create my own klein bottle in Fusion360. Here I hit my first major roadblock. It find it quite hard to think about how my 3-Dimensional body will look by just creating a 2-Dimensional sketch. After many tries that mostly ended in a bottle without the characteristic bottleneck going right back into the bottle from the top, i stopped for the day. The next day I began working on the klein bottle again. This time i followed a tutorial which greatly helped me understand how to thing and map the 2D-Sketch with the later 3D-Models. After following the tutorial i was greated by my very own klein bottle. I later even gave it Holes so that you could see the bottleneck though the base of the bottle.
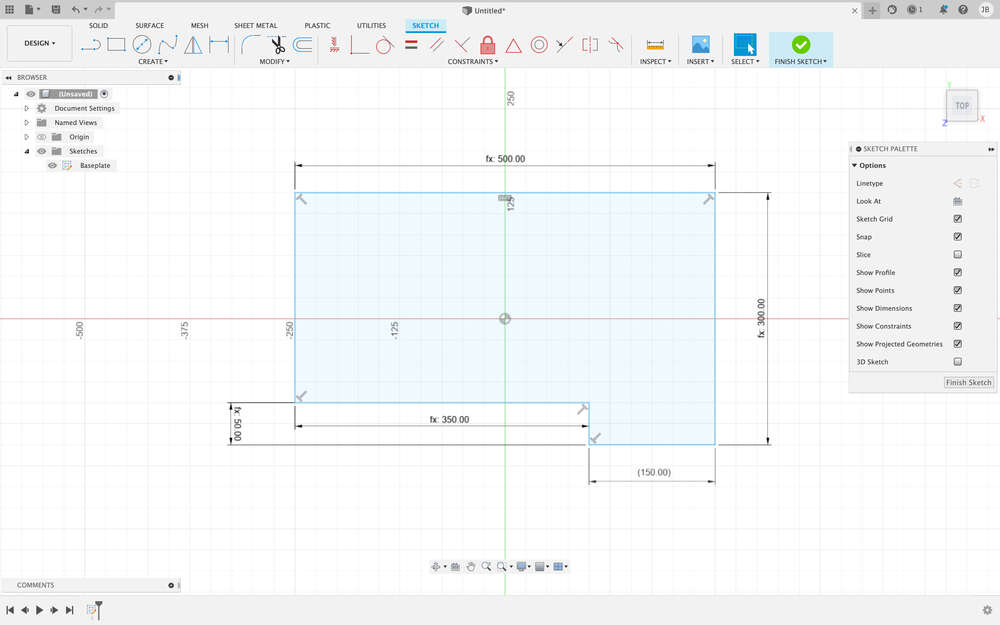
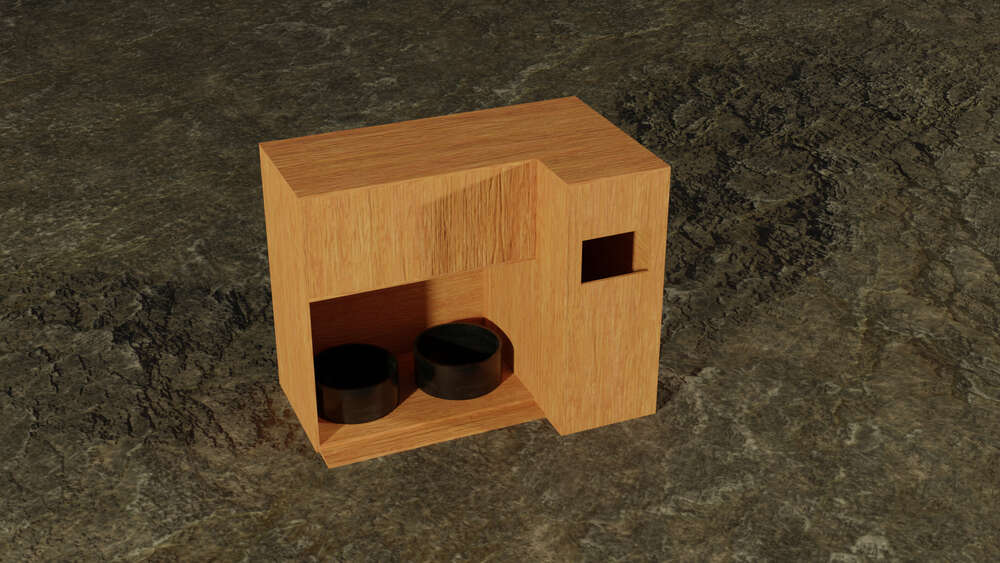
After already playing around with rendering and blender a little bit, I had the feeling that my CAD work was not really what i needed and decided to start and model one of my final project ideas, the cat station for which I already designed a logo earlier that week. So I started up Fusion360 once again and began laying out the different plates the device would need. T get an idea of how big the device should be in the end I went to the place where we feed our cats and measured some things. For one I measured the silicone pad where the bowls are standing on to get a rough idea, how big the feeding area should be. After that I measured the bowls themselves to recreate them later on in the design process. At last I just roughly guessed the rest of the devices dimensions based on what i had measured before.
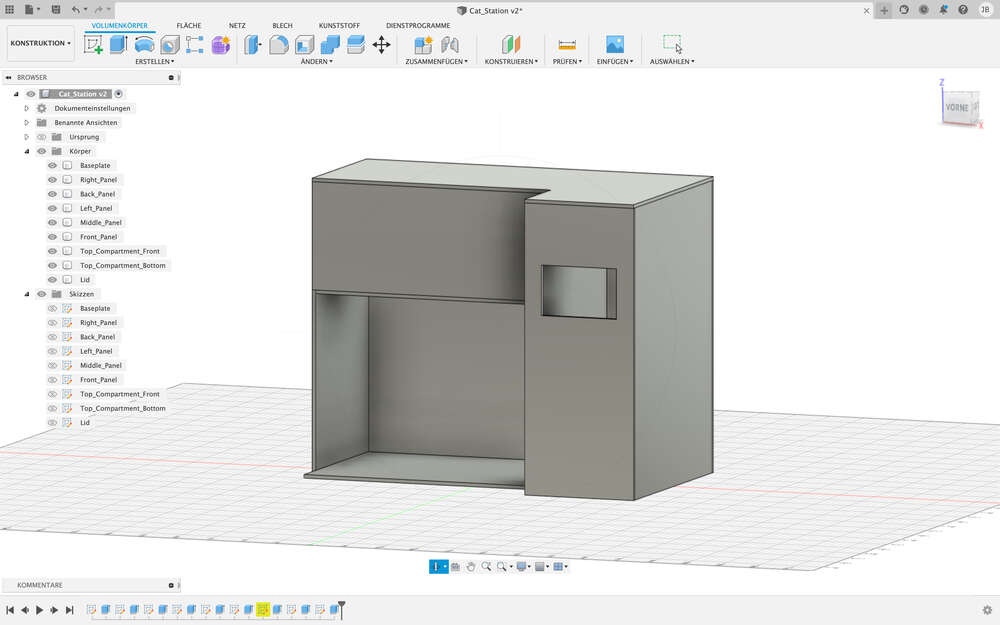
Since I have already shown many things about Fusion360 above I will only show you the greater increments of this design. After a little bit of time and without greater problems I arrived at the following design:
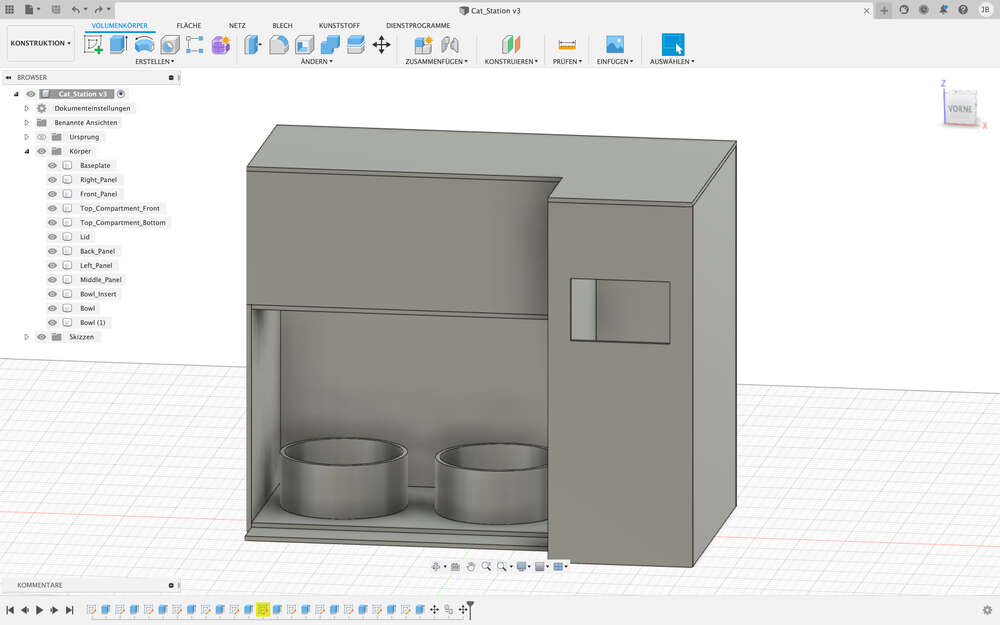
After adding the last few touches and after adding in the bowls i arrived at my final design for now, since my time is really starting to run out:
SolidWorks
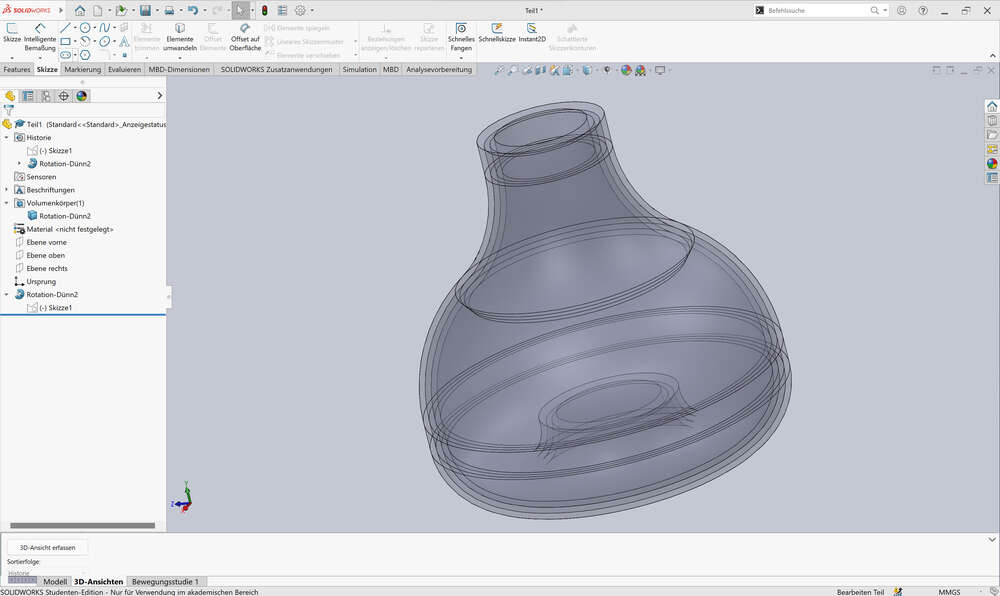
Since solidworks does not come with a native Linux distribution nor a native MacOS distribution I simply added a second VM to parallels running Windows 11. There I installed git and all the features like visual code, that we were supposed to install in the first week. After this, I downlaoded and installed Solidworks onto the VM. When i first opened Solidworks, I was a little bit lost. The welcoming interface was different then the one of Fusion360 and i needed a bit of time to get used to it. Apart from these first confusing minutes, I found working with Solidworks very pleasant and straight forward. I did not find everything I wanted on my first try, but after a bit of searching I was able to create my first Sketch. The first thing I did in order to get used to Solidworks was trying to recreate the Klein Bottle I made back I Fusion360. For the first few lines and curves this went great and was no problem at all. After revolving the Shape of the bottle around a center axis to make the Bottle itself, the performance of Solidworks went from very good to unusable. Clicks needed multiple seconds to register and editing the sketch was also now almost impossible. I dont think that this is Solidworks fault, but more the fault of my Windows 11 Setup for the VM. Sadly I could not work further with Solidworks this week as I had very little Time left and still had animating and rendering to go. I will in the future install Solidworks onto my main Windows PC at home, where it should work thoudsands of times better than on a VM on my Laptop. So the endresult of my short experience with Solidworks is shown in the picture below:
Going forward i will definetly try to get Solidworks installed on my main Machine at home to have a better reference as to how it works and compares to Fusion360. What i can already say from the perspective of someone who has never before worked with either of the two programs, is that I found Fusion360 to be more beginner friendly. THis however could also only come down to the point, that our instructor used it during our local lecture, which made it easy to follow the beginning steps. All in all i think i still have a long way to go regarding CAD and i wish that i had more time this week to just keep on making new object to train different skills within the two programs.
Render
Like I said in the beginning, one of the only times I had something to do with rendering something was using Unity3D. And there everything was rendered in Realtime and i had to to next to nothing to make everything look good as Unitys pre built pipelines already do a fantastic job and are easy to use. The other time was my short but not so fruitfull adventure with Blender following a tutorial. I never came to the step of rendering though, so I had to learn how to render within Blender on top of using Fusion 360 to render something.
Fusion360
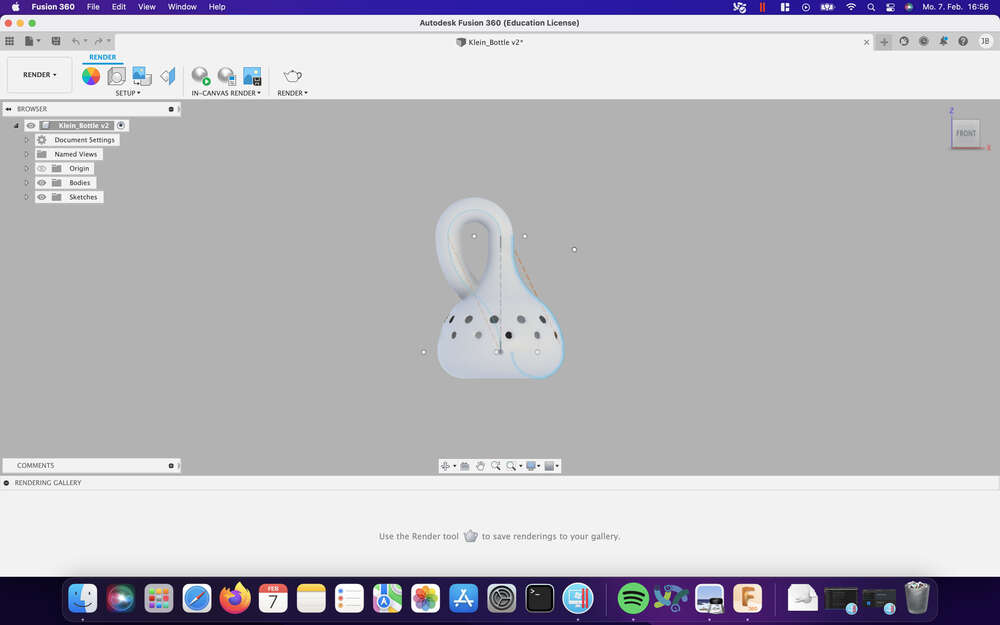
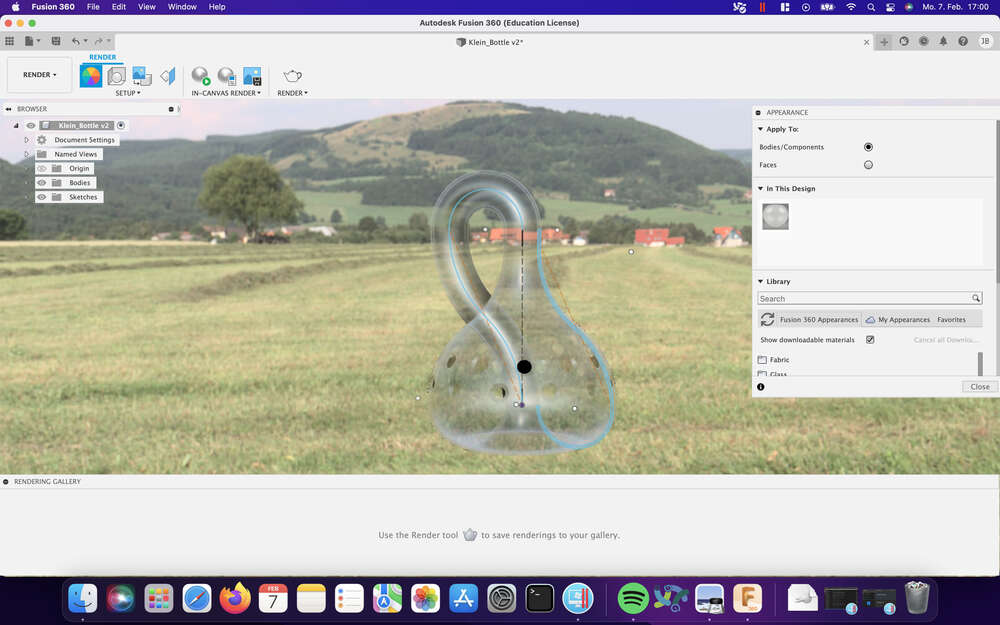
For the rendering in Fusion360 i wanted to try and render the klein bottle i made, as that could look really cool if the bottle was made from a translucent material. Not really knowing anything about Rendering i just switched from the design tab to the render tab and found my klein bottle already standing there.
I then began playing around with the different settings which Fusion360 has to offer and changed the Scene around the bottle, as well as the material of the bottle itself.
Fusion360 has multiple ways to render an image. It offers in canvas rendering, which is fast but not super detailed and like the name suggests only lives within the canvas. You are still able to capture an image of the render this way though. The other way to render was the way I always thought rendering was working, where everything is placed in a different window and rendered in high detail. For comparison I rendered the klein bottle once with each of the two possibilities. And on top of that saved one image from in canvas rendering with the setting turned to excellent and one image with the setting turned to final:

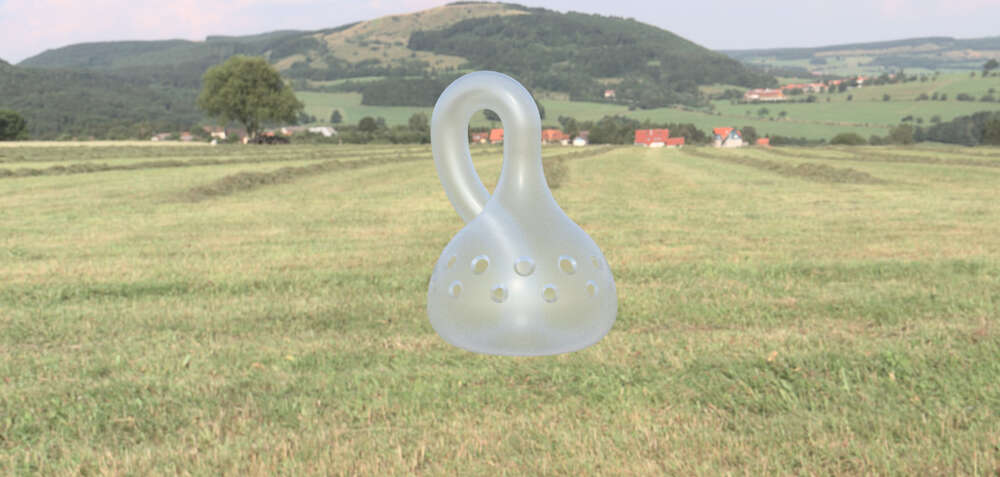
The render of the final version took around double the time of the excellent one and I am not seeing a significant difference between the two.
After the In-Canvas renders I tested out the standard render option of Fusion360. Fusion360 lets the user choose between a local render and a cloud render. The difference in settings between the two can be seen here:
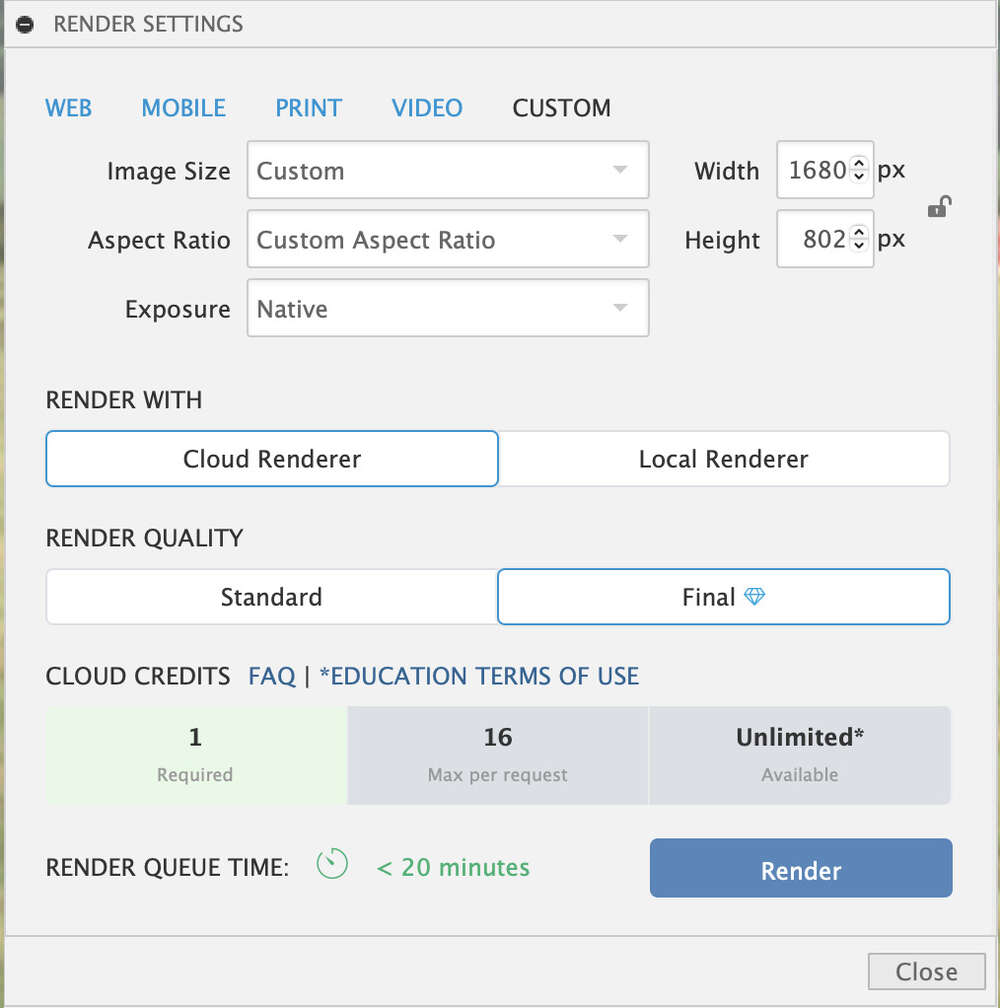
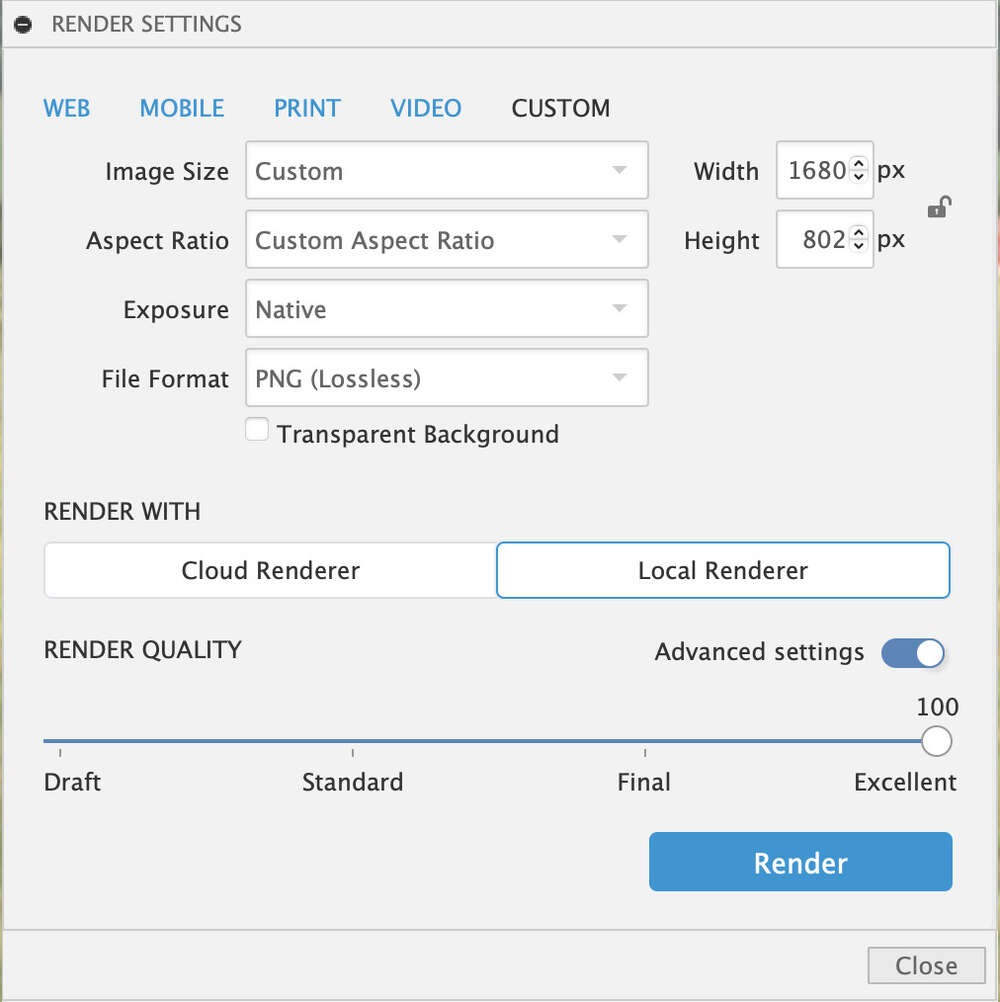
One thing I thought was very confusing is, that when rendering locally, the best setting is excellent and not final, unlike with the In-Canvas renderer where final was better than excellent. There however you could render infinitely long by adjusting the setting to infinity. As i did not want to wait in the queue for the cloud based rendering, i chose the local renderer and started it. The local renders are being done in the background and can be followed by clicking on the render in the rendering gallery. After a few minutes the render was done and could be saved locally:

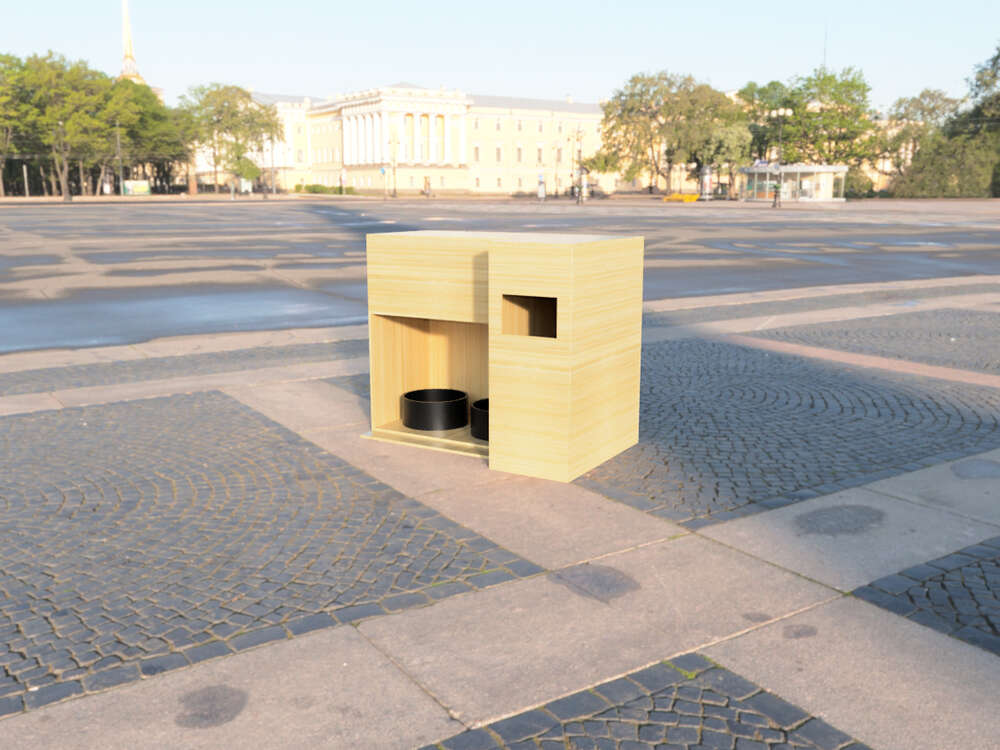
Like I mentioned above, after rendering everything from above in Fusion I had the feeling that I needed something more substantial and chose to create and render/animate the CatStation, one of my possible final projects from the first week. For this I chose the Could based rendering Fusion360 has to offer. If your resulting image stays under one megapixel the rendering is free. After choosing the cloud based render, Fusion360 places it into the cloud queue. Here you just have to wait until your render is next in queue and gets processed. After the rendering was finished I was greeted by the following Render:
Blender
Onto Blender! I have seen many renders done with Blender and was always fascinated how good they can look. I still had Blender installed on my main Windows machine and just updated and used this version, as this would also cut off of the render time later on due to more powerful hardware. I began by playing around in Blender to create and interesting shape which would look good on a Render. This was harder than expected as I did not know nearly as much as I had hoped from back when i palyed around with Blender. Because of this I followed the new version of the tutorial mentioned above once again to ge to know Blender a little bit better.
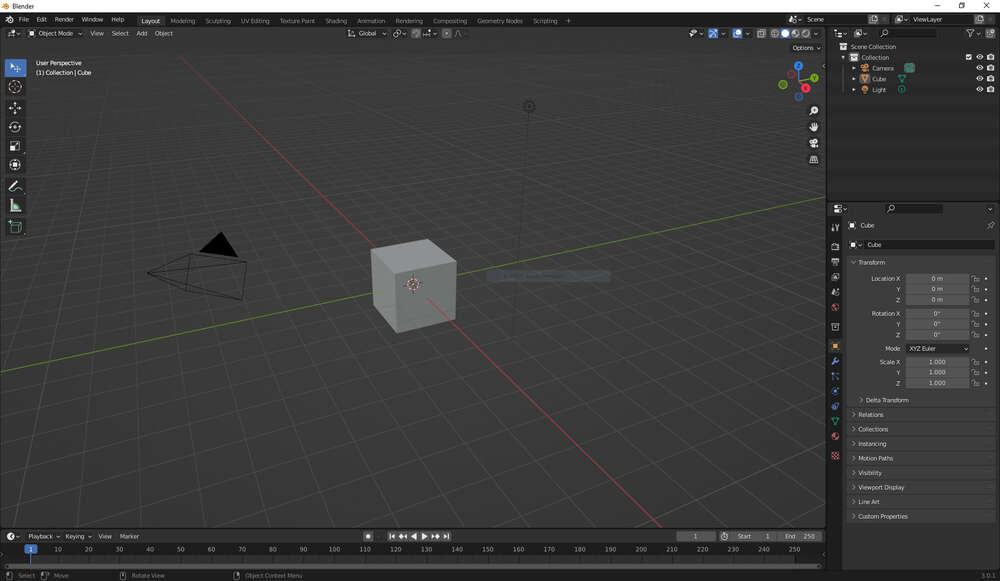
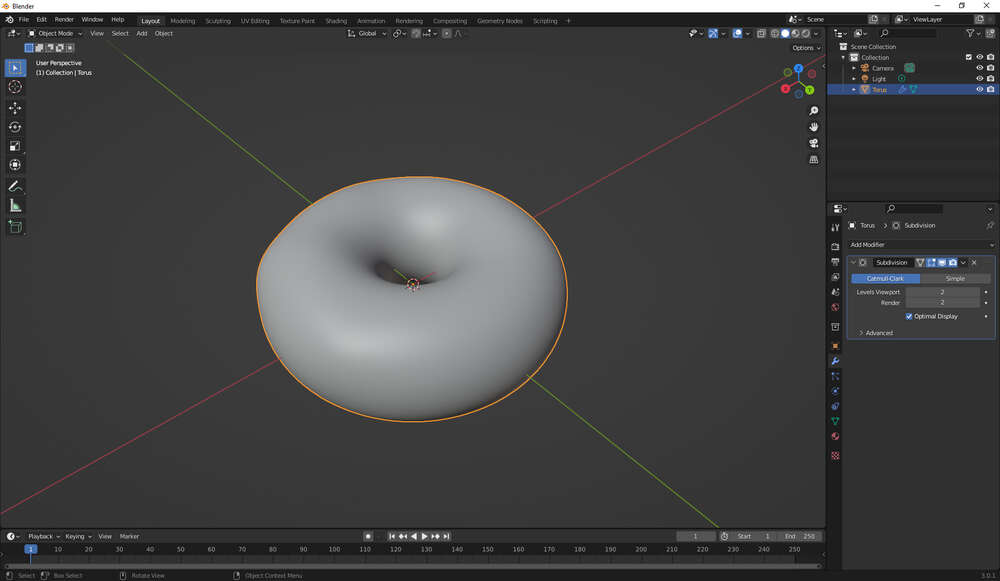
Immediatly I learned important shortcuts and how to use them to cut down on time to click on UI-Elements. They were simple to understand and perform. After the introduction to shortcuts and blenders interface, the modelling could begin. I have to say, that if I didnt know what to do and simply started Blender blind, I wouldnt have been able to create something. You need some sort of cheatsheet for the first few times of using Blender. But after this, everything went smooth and was understandable. Since this section is for Rendering, I will only show the beginning and end of my model I created by following the aformentioned tutorial:
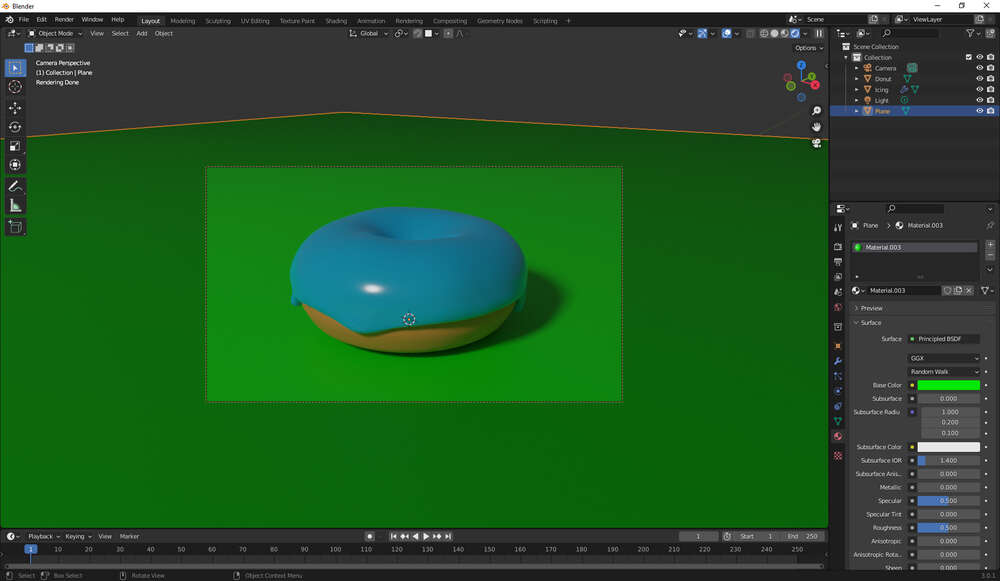
Since the time was running against me, I sadly had to cut the multi-part tutorial short and so this is how I ended with my Donut:
After playing around with the tutorial and creating the donut, it was time to Render the Cat Station. So what i did was exporting the Cat Station from Fusion 360 into Blender. Here two mistakes happended to me that could have been easily avoided if I just looked better and simply knew better baout the resulting object files:
- The standard for Fusion360 is to export all bodies as one file, resulting in one part in Blender. This wouldnt be a problem if I could UV-map, but sadly I dont quite understan UV mapping just yet, so i wanted to have multiple objects in Blender to texturize them.
- The Fileextension I chose for the first tries was always .stl as i knew this extension from friends who own a 3D-Printer. I could import the files without a problem into Blender, but when trying to texturize them i just got a plain color instead of the texture I applied. After a little bit of reading I found the soultion online. Apparently .stl files cannot be texturized that easily as they are commonly used for 3D-printing where you dont need texturized objects. At the end I just exported my bodies from Fusion360 as .obj files.
After importing the .obj files into Blender I had to scale them all down significantly. Even with the export setting of Blender set to millimeters, the resulting objects in Blender were measured in meters and so were crossing the clipping plane of Blenders Camera. To my surprise you can just time "mm" instead of "m" into the transform window of the Blenderobjects and it will recognize the scale change. After doing this for every object in the scene, I placed a plane below the CatStation so that the camera would not capture the device just floating in an empty space. Next up was texturing of the objects. As I wanted to achieve a similar optic to the render from Fusion360, I went ahead and downloaded some freely available textures that I liked. From the Blender tutorial I watched, I learned that the Add.On "Node-Wrangler" from Blender greatly simplifies the process of creating a material from these downlaoded assets. So I went ahead and activated the Add-On and switched the tab within Blender to "Shading", were you can work on the textures of your objects. After a little bit of time and adjustments to the scale of the textures I could render the Cat Station for the first time with the following result:
Looking at the Render once more at the end I have to say that I could have done a much better job with the lighting, but the good thing is that i know this for the future now. All in all I have to say that I think that Blender is hard to learn and hard to master. The Interface is very crowded and the settings you need are always somewhere nested where you never would have guessed. I always had troubleshooting tabs open next to Blender to quickly search for solutions. On the other side Blender is a very powerfull Tool with many very cool functions from wwhich i definetly only saw a very very small amount during my experimentation. I will definetly keep using it.
Animate
Onto Animation. Just as with Rendering and 3D-Design, I have never animated something before, so i just started out in Fusion360 playing around within the Animate Tab.
Fusion360
The first thing I saw, was that my CatStation was represented as one component. What i had to do in order to have every single body of the CatStation as one compnent is go back to the Design tab and create a component from the bodies. After that I could see them all independently. After trying out the Auto-Explode feature which sadly didnt really work for my design because almost nothing moved, I decided to simply transform one piece after the other away from the origin point. After doing so and arranging these transform operations on the timeline and palying around a little bit with the camera, I was left with the following animation:
Blender
Back in Blender i wanted to do something different than in Fusion360. So instead of animatiing the single parts of the CatStation, I animated the camera of the scene to follow a given path around the cat station. For this I had to create a circle and scale it, so the camera could turn around the CatStation. This was done with a follow Track constraint for the camera referencing the circle from before. The position of the camera was set to the position of the circle by parenting. The only problem left was that the camera still looked straight, even when moving. The soultion was to create an empty object and set it to the middle of the CatStation. After that the looking direction of the camera can than be constrained to this empty object. Since I had no clue how animations are rendered i just clicked the render animation button int he top left of Blender. What happened was, that Blender rendered a single frame, just like before with the still render. What I didnt knew, is that the animation of circling the CatStation needed to be set up with Keyframes under the Aniamtion tab in Blender. So I manually shifted the Camera around the circle and added Keyframes. Im sure that there is somehow a button that does that fully automated for you when you have set up a camera that follows a path, I couldnt find it that quickly however and the manually created Keyframes worked either way. After setting up all Keyframes I could click on Render and Blender rendered 100 single Frames which I then had to stitch together using Blenders Video Editing. Doing so resulted in the following 4 second clip:
Simulate
As I was already working with Blender for the past day at this point, I made the decision to only simulate within Blender as I sadly did not have the time to do both Fusion360 and Blender.
Blender
After animating the scene in Blender I had to get rid of the path which the camera followed as well as the empty object within the CatStation. My idea for a simulation was that I would create small bits of dry food to the best of my possibilities and then let them all drop into the left bowl. If I would have enough time i also wanted to try Blenders fluid system with the right bowl. But for now I just wanted to create little bits of food that would fall down into the bowl. I started by creating a sphere and gave it the stone texture of the ground, just much smaller. I did this in order to convey the uneveness of these food bits. Because dry food does not look grey in my experience, I created a color mix node which mixed the color of the downlaoded texture with a color of my choosing, in this case dark brown. After this step I went ahead and placed the food bit in the top compartment and added a rigid body to it via the physics option of the object. I also added a rigidbody to every object the little bits of food could interact with. What I did next was a big mistake. Instead of testing everythin with this one bit of food, I multiplicated it to test out the physics. This would make troubleshoot later on a real pain and would cost me so much time, together with other problems, that I sadly could not test out Blenders fluid system. After running the animation for the first time I noticed something was wrong. Not only did the animation run with way under one frame per second, also nothing seemed to happen. To troubleshoot I disabled all but one bit of food in the render and canvas view. What happened now, is that after one frame the bit of food was simply gone. Zooming out later one explained this, as the little food bot was being shoot out at an immense speed and was falling into the nothingness of the canvas. After much more troubleshooting and a little bit of frustration I found my mistakes. For one, Blender does not seem to like objects with a small scale. As i went from metres to millimeters i shrank the scale by a huge factor. What I had to do to combat this was to apply this scale to all objects. This keeps the new dimensions of the objects but sets the scale of the objects back to one for each dimension. My other mistake was, that I atleast think, that the other disabled objects still were active rigidbodies and so were interacting with my single bit of food. All this seemingly led to the small object being flung out of the scene. A third mistake I did was making every rigidbody active. All stationary objects needed to be passive. After changing this and enabling the canvas view for all bits of food again, they started dropping down, but were stopped by the hole at the bottom of the compartment. As I worked with Unity before I immediatly thought of a wrong collider being used for this part. It turned out htat it was indeed the wrong collider, leading to the holes in the bottom of the compartment to be "closed". After changing the collider og the object in the physics tab from "Convex Hull" to "Mesh". The bits started falling down into the bowl but all collected at the top of the bowl. This was the same problem as with the bottom of the compartment, so i changed the collider to mesh. After that the bits fell into the bowl but collected at the back wall. After troubleshooting for a long time I found the solution in a forum where it was suggested to change the collsion margin to zero. This was what went wrong. After changing this setting the bits of food dropped into the bowl.
I then went ahead and wanted to render this simulation. Here i made following mistakes:
- I did not delete the keyframes from the old render nor did I delete the imported frames to stitch together the last render from the video editor. These were the reason for a problem I had with rendering where everytime I went to "Render Animation", the old animation would be stitched together.
- I did not bake the dynamics of the scene, resulting in low frames everytime i started the aniamtion.
After searching for a little bit on the internet i found how to bake the physics simulation into
keyframes. You just need to mark all objects you would like to have keyframes from and then press
F3. In the upcomming window search for Bake to Keyframes. Then you can
toggle at which frame to start and end and in which interval the keyframes should be taken. After
doing this for my food bits, I was finally able to render this simulation:
Final Thoughts
This week was hard for me. Learning so much new stuff and doing it with multiple programs was very time consuming. These tasks uccpied my whole week but in the end im quite satisfied with the end results. Sure there are better renders and animations and i would have loved mine to look better but it is how it is and i think the renders are all looking fine. That said, not everythin in this week went smoothly. I was troubleshooting problems left, right and center and more often than not ended the day by being impressed at the amount of tabs Firefox could keep open. I also had some major setbacks I did not mention above. Fusion360 froze and I had to force close it. After that it outright refused to start with the MacOS operating system throwing an error everytime I wanted to start it. This was very frustrating and in the end I had to reinstall Fusion360. What i found quite amusing was, that the survey you get when uninstalling Fusion360 even has a section for this exact problem, where you can state that you uninstall to reinstall the program. I found that to be quite funny. The other major setback was when Blender froze and quit itself multiple times when i tried to keyframe the single food bits. Of course all the problems with programs not running smoothly on my VM are also not very amusing.
Apart from this I am happy that i finally learned such a skill as 3D Modelling. I am by no means good at it yet, but this week was a good beginning and I am happy I could try out this multitude of different programs.
File Downloads