Mechanical Design, Machine Design
Fab Lab Mexico City is working with two labs of remote mode, Querétaro (QRO) and puebla, because the student's working in the respective lab with partners for only group assignment. However really 3 group assignment to generated of only assignment.


The idea is designed a motorized rail for time lapse recording.

The end result is this thanks to teamwork
And the resulting final project it is, objective completed.
The first step was to make conceptual sketches to land the ideas that seemed most efficient to us and then establish the first dimensions according to our needs and the available material (the length of the lead screw rods, for example).
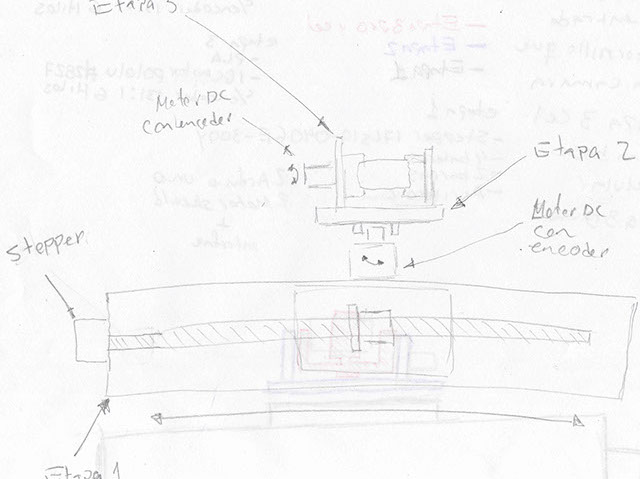
Once we agreed on the functions that the machine would have and the mechanisms that it would require, made a draft in Solidworks.
The Mexico City team proposed making the chassis out of corrugated cardboard, that way the cost of a larger piece was considerably less than the cost of making it out of plywood or acrylic.
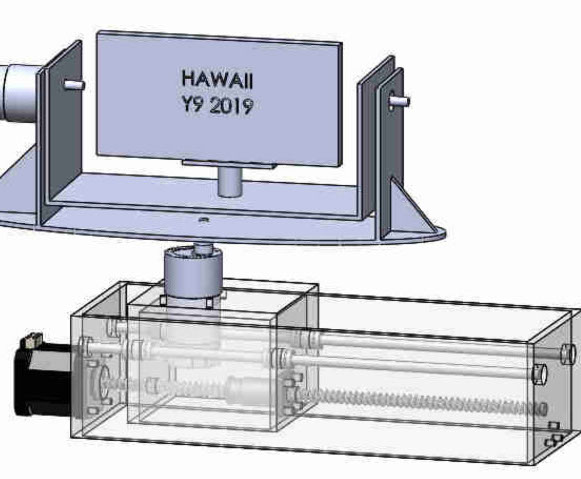
The final model of the chassis with the motors looks like this
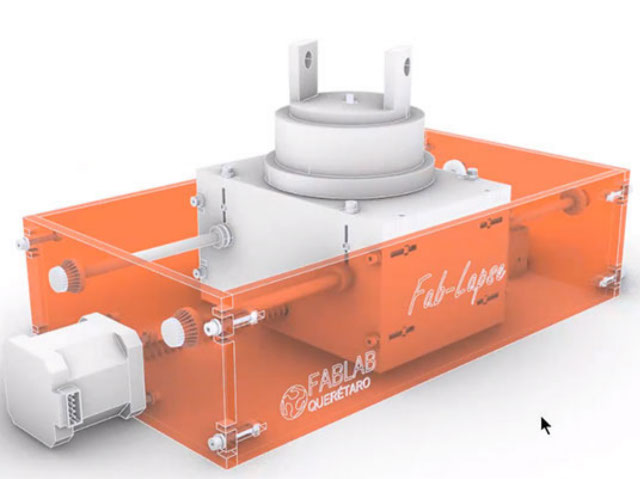
The machine looks like this:
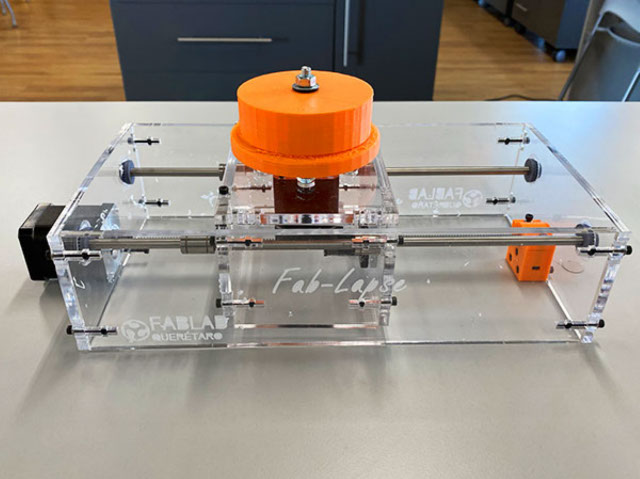
Once we were done with the conceptual machine design and operation, a prototype machine was built in Querétaro and brought to Mexico City to proceed with the electronics design and continued design process.

First test manually
Next steps:
1. Make the changes needed to install both killer-switches physically and within the board.
Second test manually
Then, we tested manually the rotating base, concluding that solving the movement with a ball-bearing worked fine, and up to the standards we defined in the previous work stages.

Then, to design the new board including headers to plug in both step-motors at once, we made two different boards, one with a ground plane and a second one with conducts for ground.

After that, we proceeded as we did in the Electronics Design Assignment, milling and cutting the board with the Modella MDX-20. Then, we wielded the components to the plate and continued to the board programming.


Final Result
Next steps:
1. Make the changes needed to install both killer-switches physically and within the board.

