3D Scanning and Printing
Group Assignment for Week 5
Group Assignment:
- test the design rules for your 3D printer(s)
The group work that our group has done can be seen here
Individual Assignment:
- design and 3D print an object (small, few cm3, limited by printer time)
that could not be made subtractively
- 3D scan an object (and optionally print it)
Design of an Object
In order to learn about the 3D printing, I used some YouTube lectures on Additive manufacturing as suggested by Rico, my instructor, What is Additive Manufacturing? by Pete Zelenski.
In summary, he describes Addtive Manufacturing as the process of 3D printing. The advantages of 3D printing is that, there is a minimal requirements of component assembly as many parts can be printed easily. It is an emerging technology of easy production.
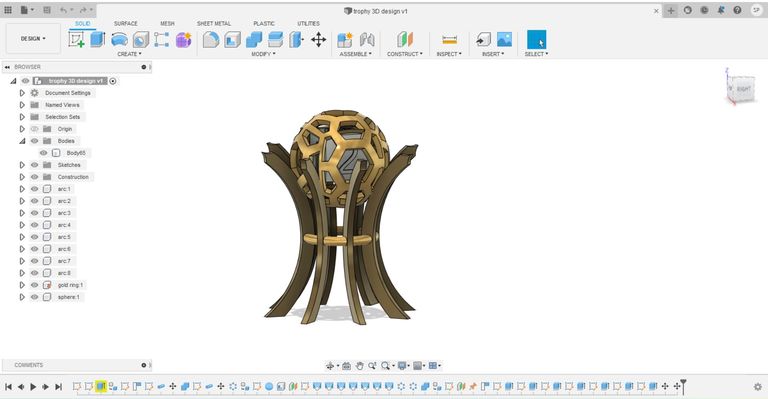
For my assignment, I used fusion360 to design a trophy. I designed the trophy with the structure of curves hold together by ring of pipe. I placed a ball of perforated sphere on top and inside it a 6 sided dice.
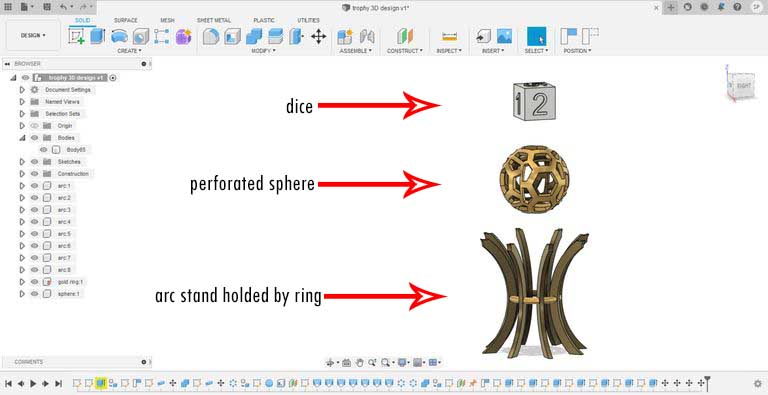
This symbolises broken and shattered earth but still being hold strong by a prayers of a determined and strong people. I dedicate it to Ukraie. Slava Ukraine
Download the original design file here here
The 3D Printing
Note: I committed my files and it was larger than it is actually permitted. Therefore, I was not able to push. I did some youtube tutorials and deleted my last commits. Unfortunately, the comments have also removed all my files in my local repositories. The updates from here is the new files I made. Lessons learned! Keep a copy before you remove any commits.
I have sent my files to be printed. Since, my region is again under lockdown, I was not able to access to the lab. But, I seeked some helps from my friends who are able to access the labs.
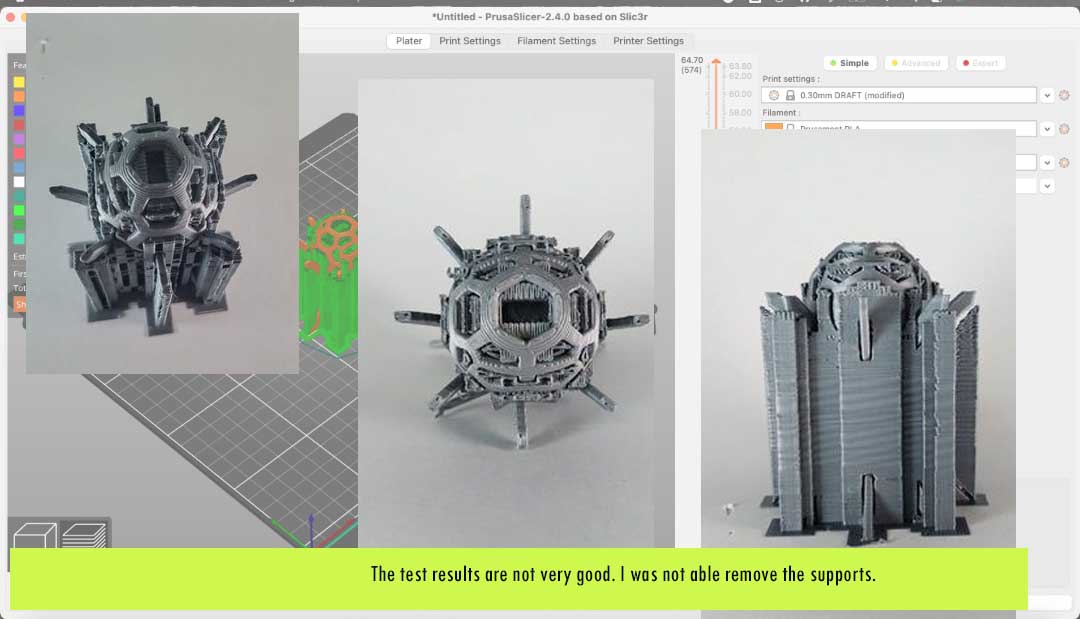
I exported my files into .stl formats: as shown below:

My friend Sonam used a prusaslicer as a tool to print my model. But clearly, I have overlooked the design rules of a printer wehreby, my printings are not as good as I wished as there are so many supports required. I was not able to remove the supports.
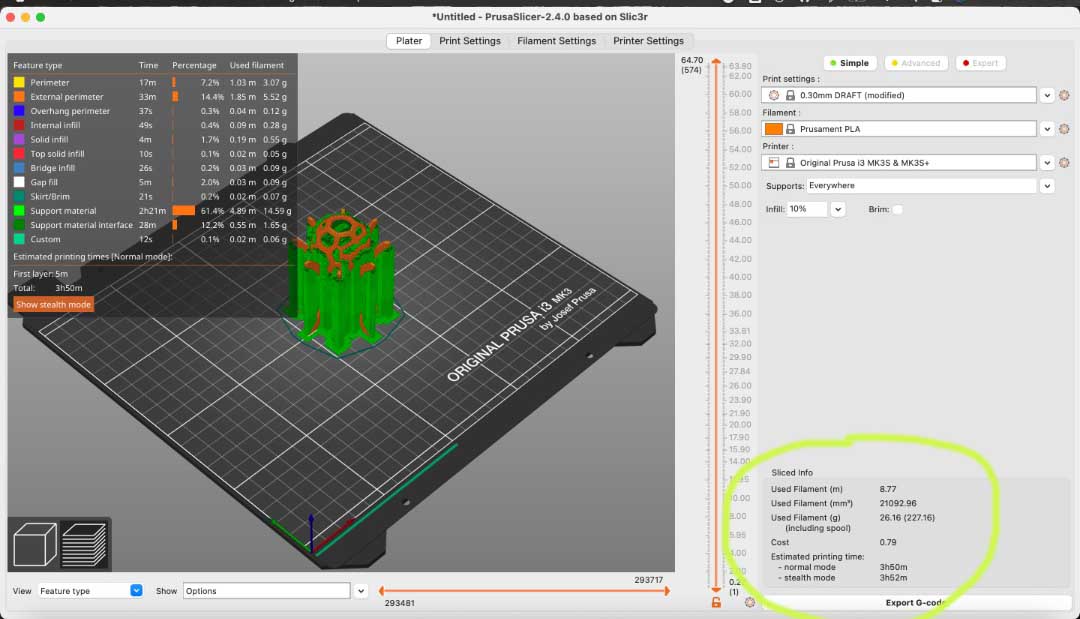
The test results as shown below are pretty bad.
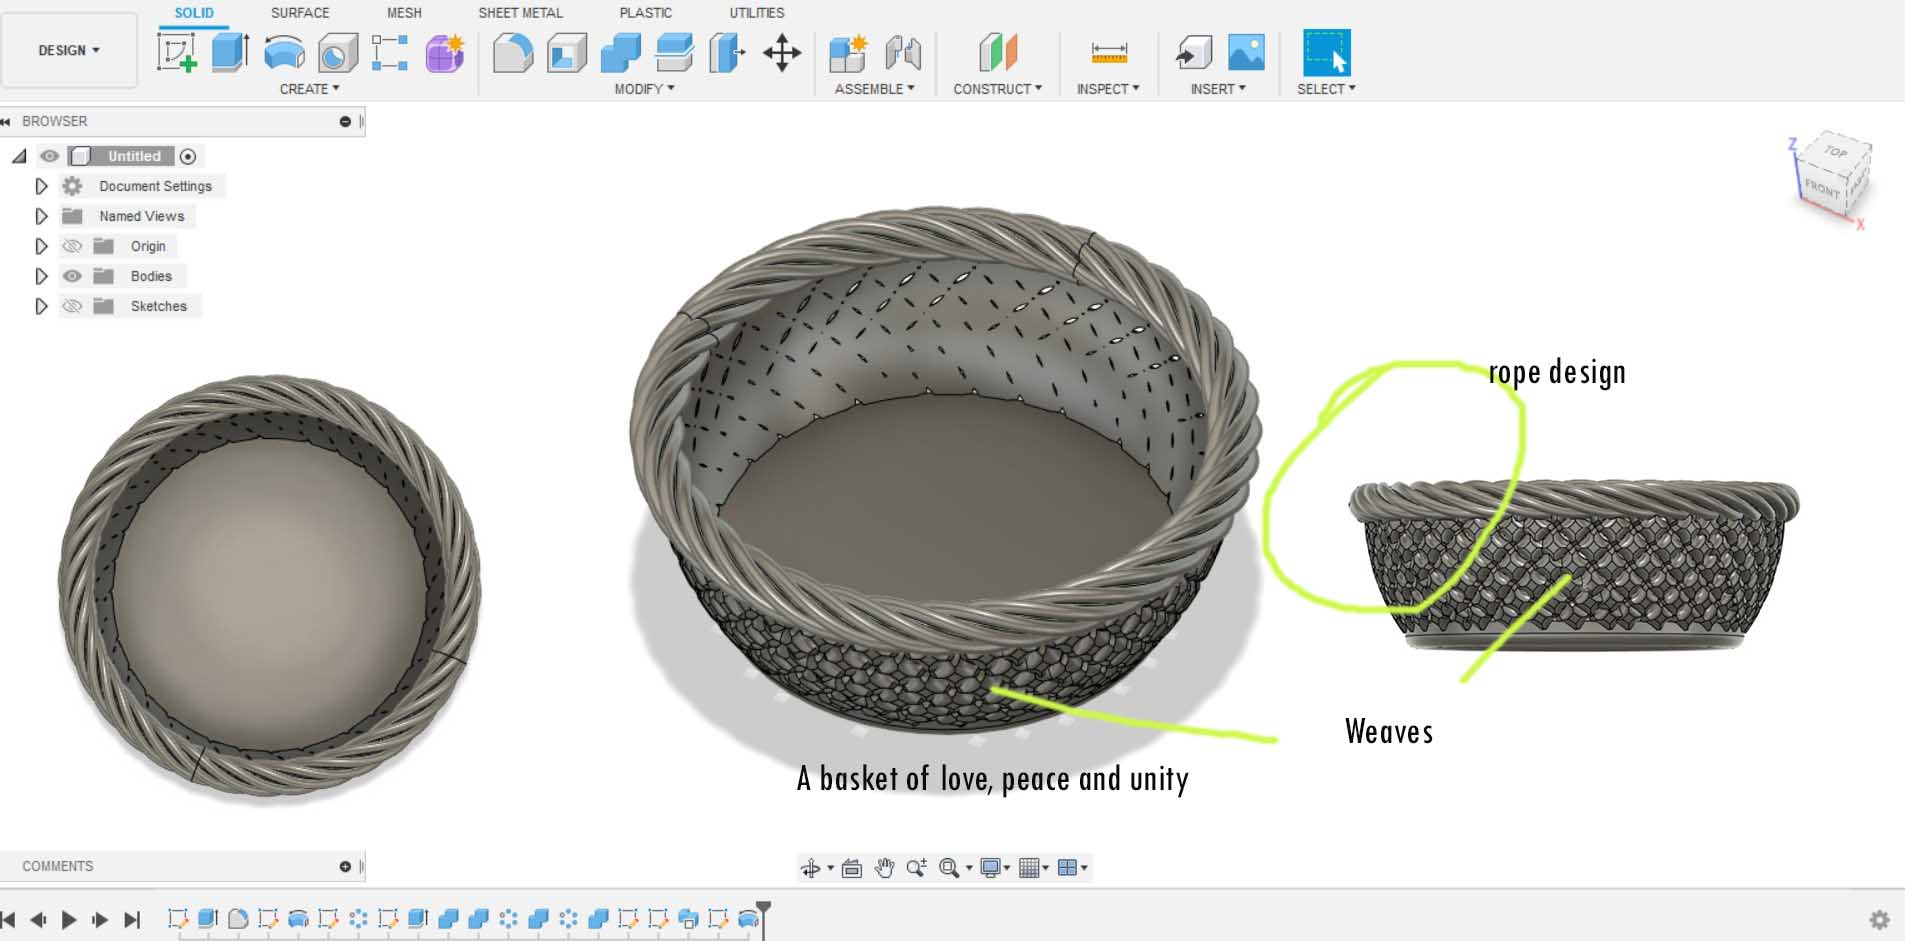
Since, I was not satisfied with my print results, I decided to design another object, the basket of love and peace. I designed some intricate patterns with the design rules in mind this time. I want to see how well the printer can print the patterns I intended.
I am not going to upload the design files as it is slightly heavy. It is the reason of my issues with the commit, which removed my files.
Meanwhile, I have also sent this design to my friends to print it for me. Hopefully, it will come out good. I will also print it myself once I get access to the lab.
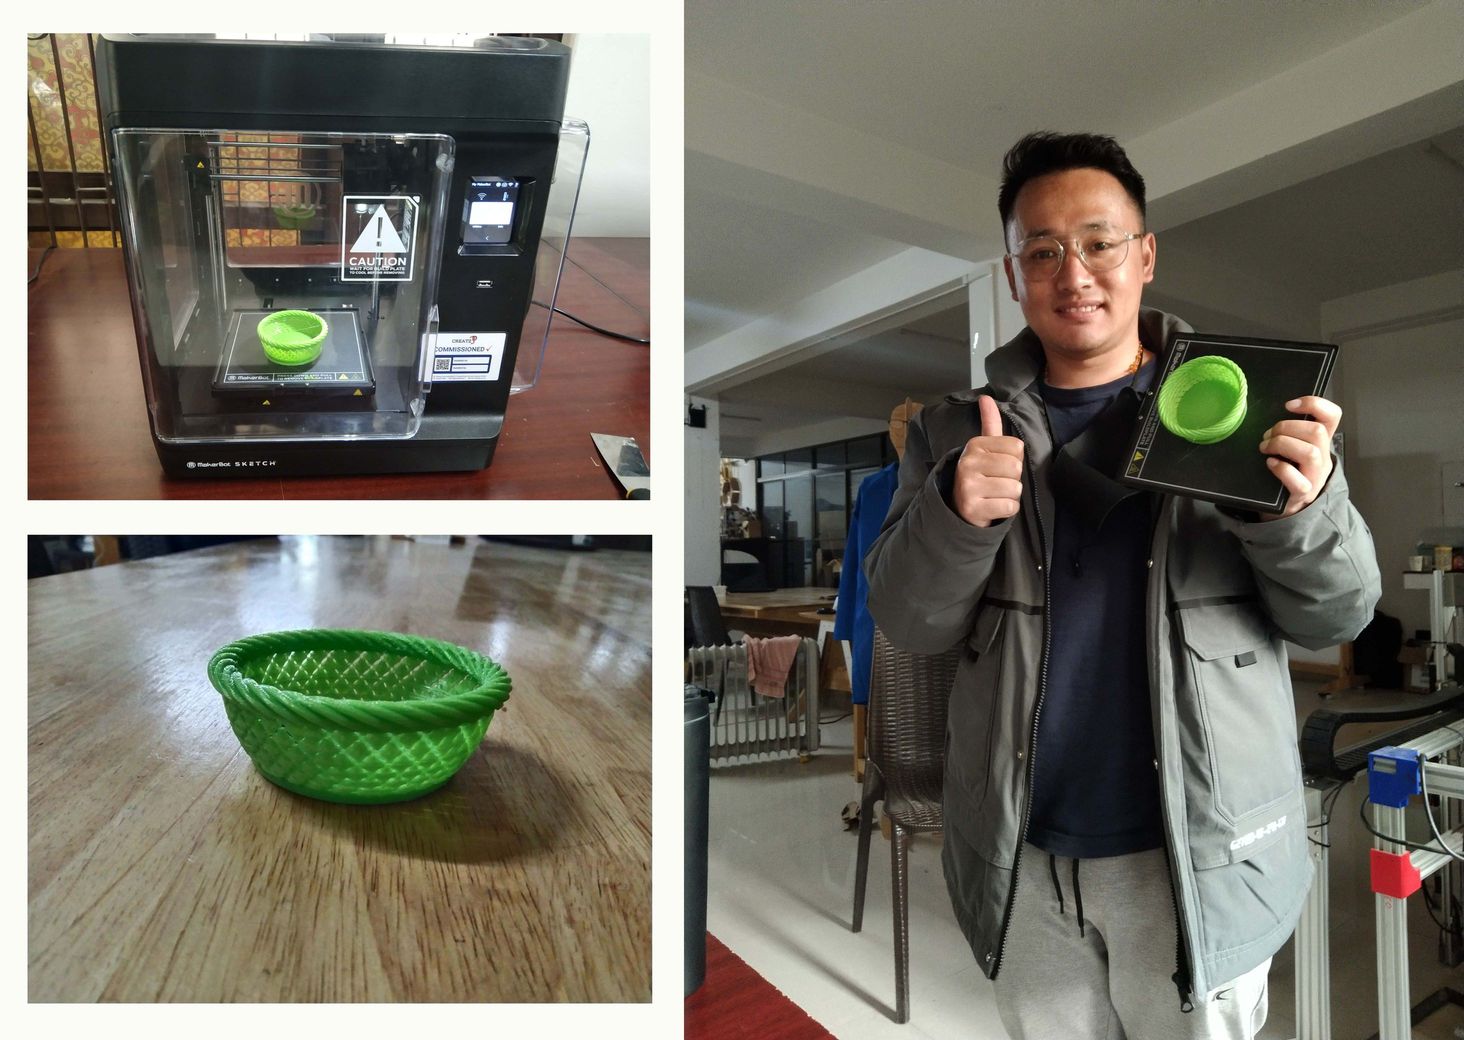
Finally, I could go to the lab and do my remaining works. Therefore, I went to the lab to print my design by myself.
My lab has pre-installed software to 3D print called makerbot. I checked their website
. We have makerbot 3D printer in our lab.
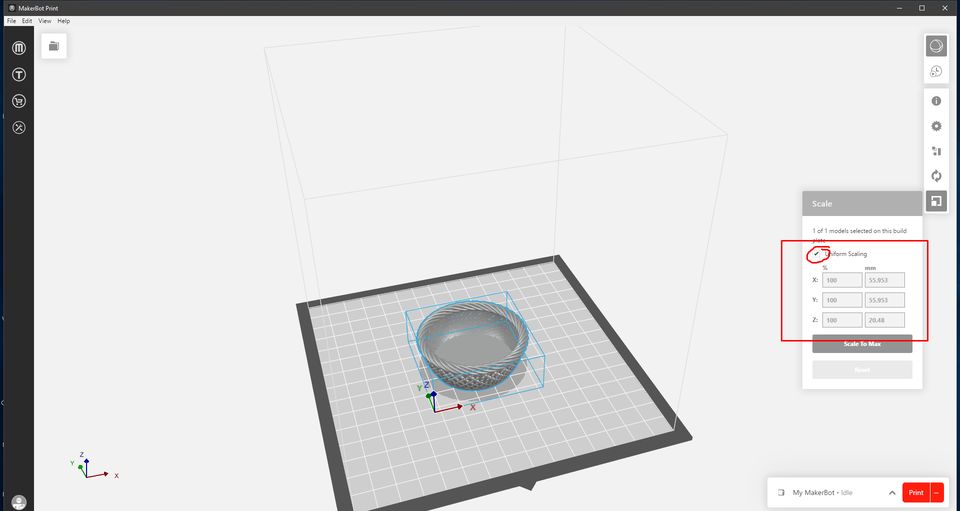
I opened a makerbot print software by double clicking on it. A "New Project" windows pops up, I chose "New built plates" under built plates.
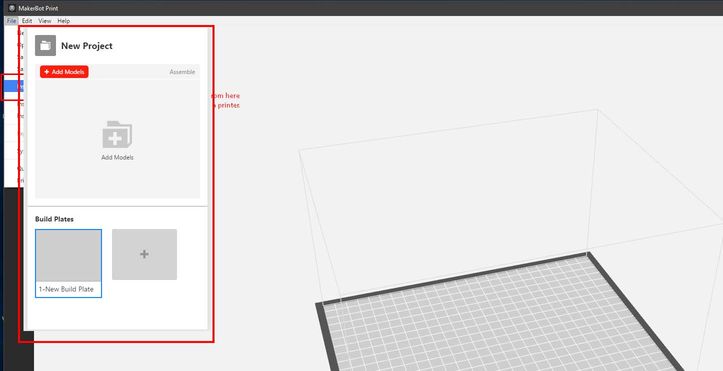
A workspace simple as shown below:
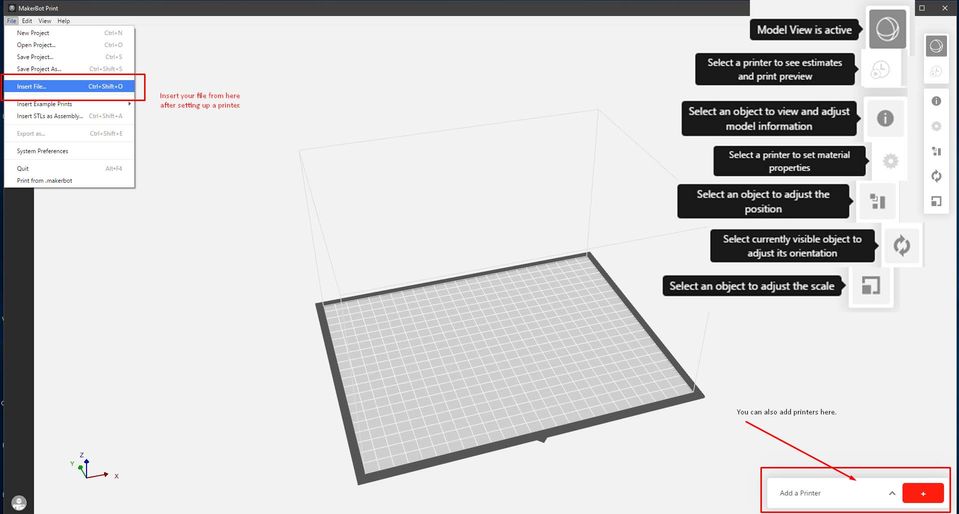
Import file by Clicking on File ---> Insert file.
Make sure that your file is in STL format. You can also scale up and down your model.
The process of 3D printing can be viewed here
The final print is quite amazing.
3D Scanning
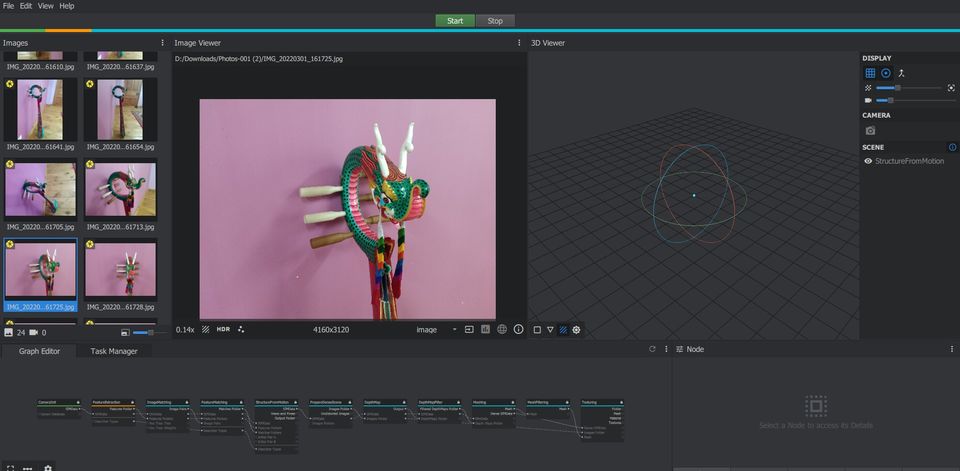
For my 3D scanning assignment, I MeshRoom as in the syllabus of fabacademy github.com/alicevision. The meshroom Windows Version doesn't have a installer for now. There is also a Linux version.
It is a very easy tool to generate 3D scan using just set of photos. I tried to scan my traditional Bhutanese musical instrument called Dramnyen. But the result is not so good.
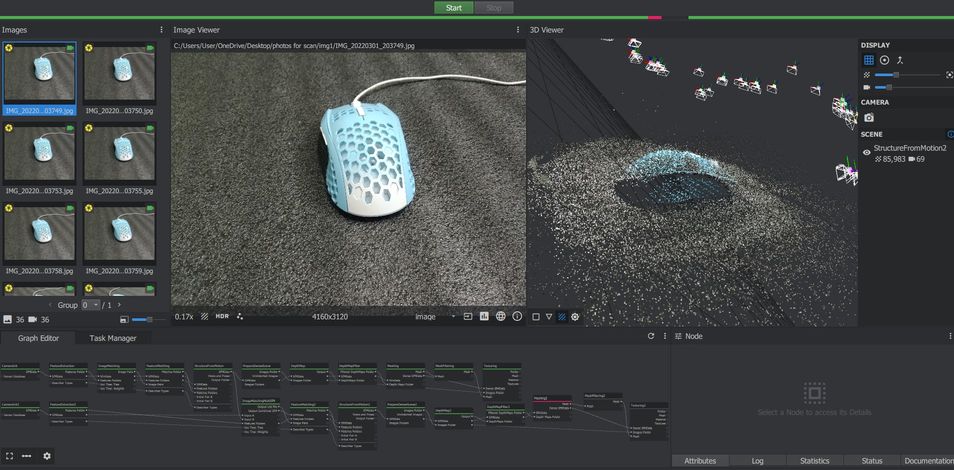
After that, I started scanning my mouse. The first attempt was not so good, as I have only few photos.
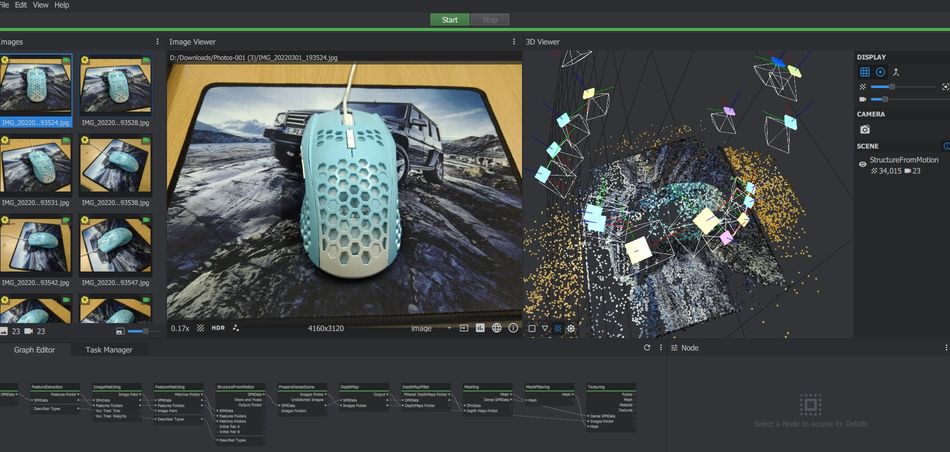
In the second attempt, I tool 100 plus photos to try and scan my mouse. It takes a lot of time to scan, but the results are quite good,
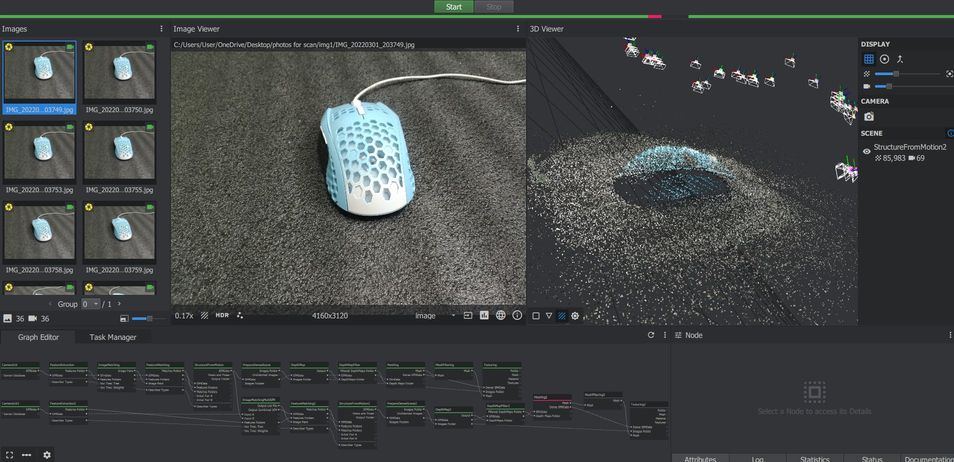
But the amount of time taken for a good quality scan is too much for my device.
I need to mesh up the points generated by the scans. I prefer it to do in Blender.
After I could come back to my lab, I got scanner called a Revopoint scanner in the lab. I scanned the files using the device. You can also buy this device from here.
I scanned a model of Bhutanese style stupa that is available in the lab. Before starting with anything, setting up a platform for scanning is very important. My lab and Guru Take San has set up the scanning platform with readily mounted revopoint scanner.

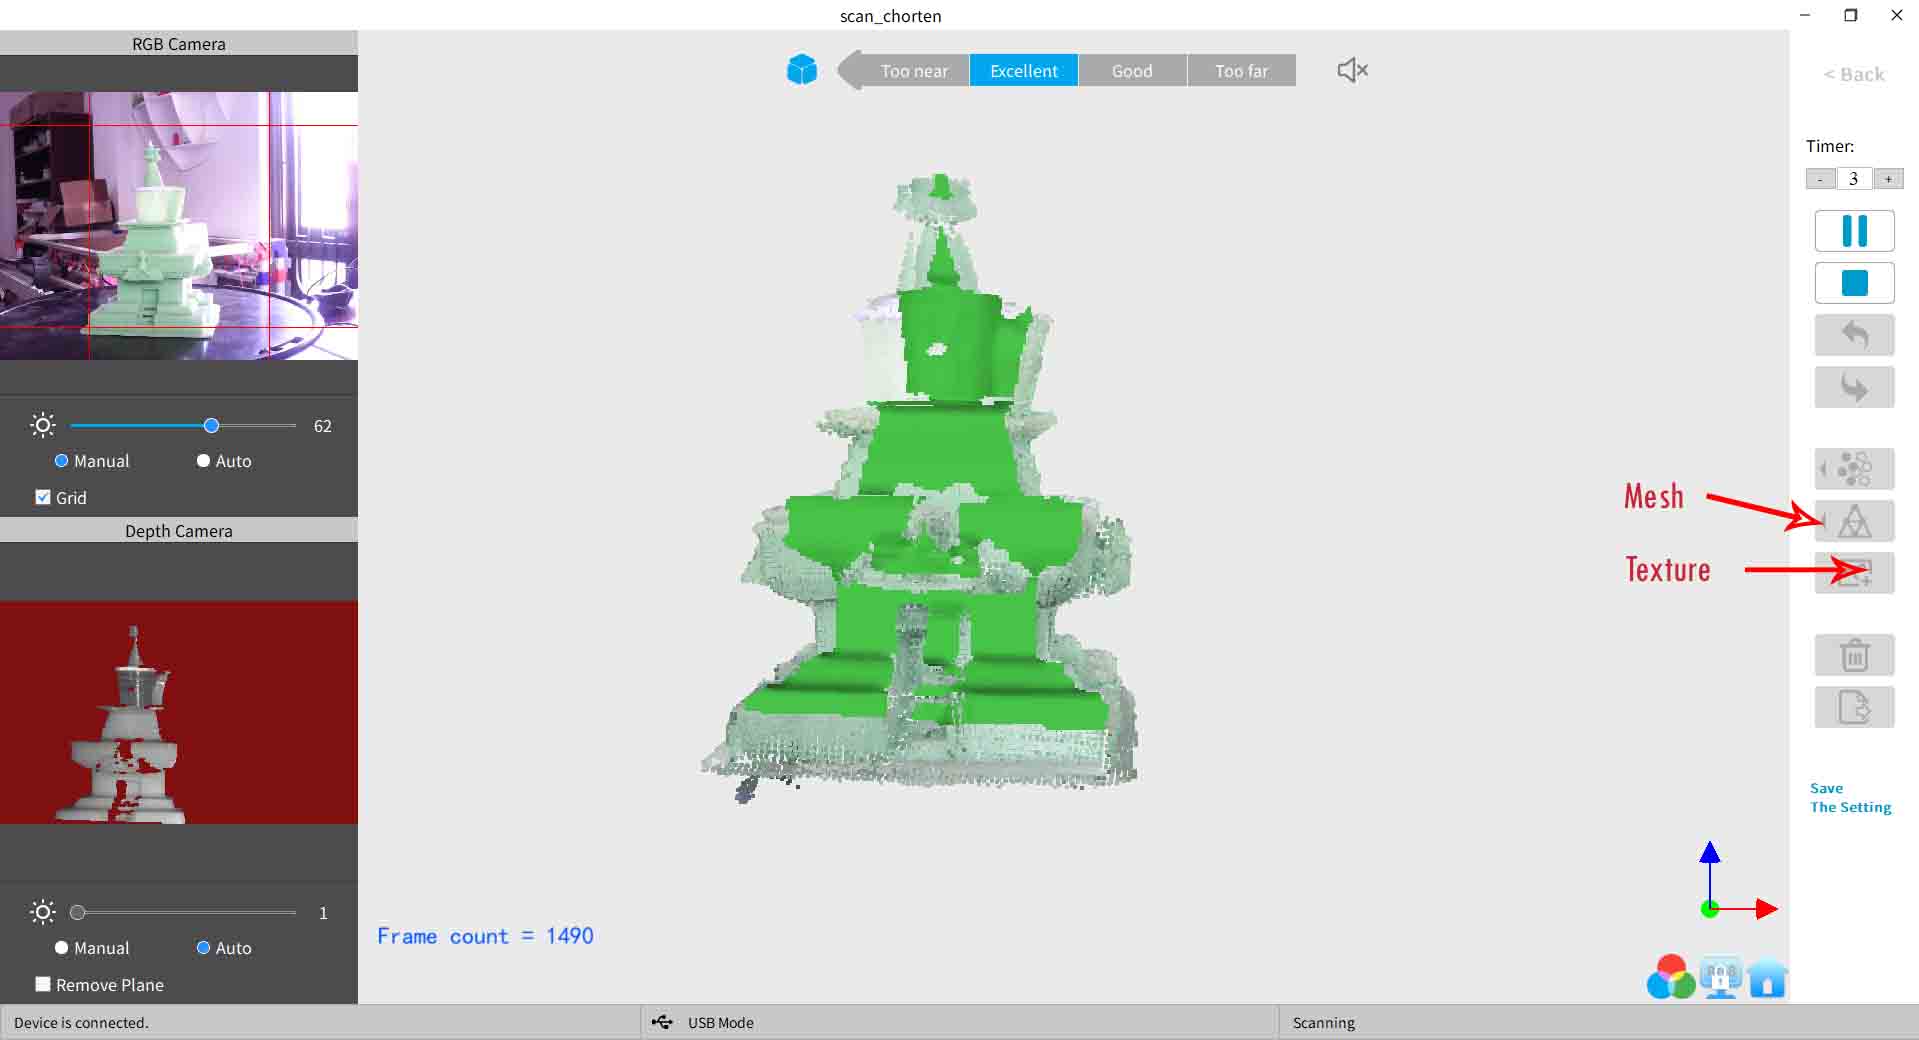
Then open "Revo Scan", a software for scanning with Revoipoint Scanner. A new name and file location should be saved before goin forward with the process. After that, necessary setting must be done. For my model, I kept my setting to "features" and "Colorful".
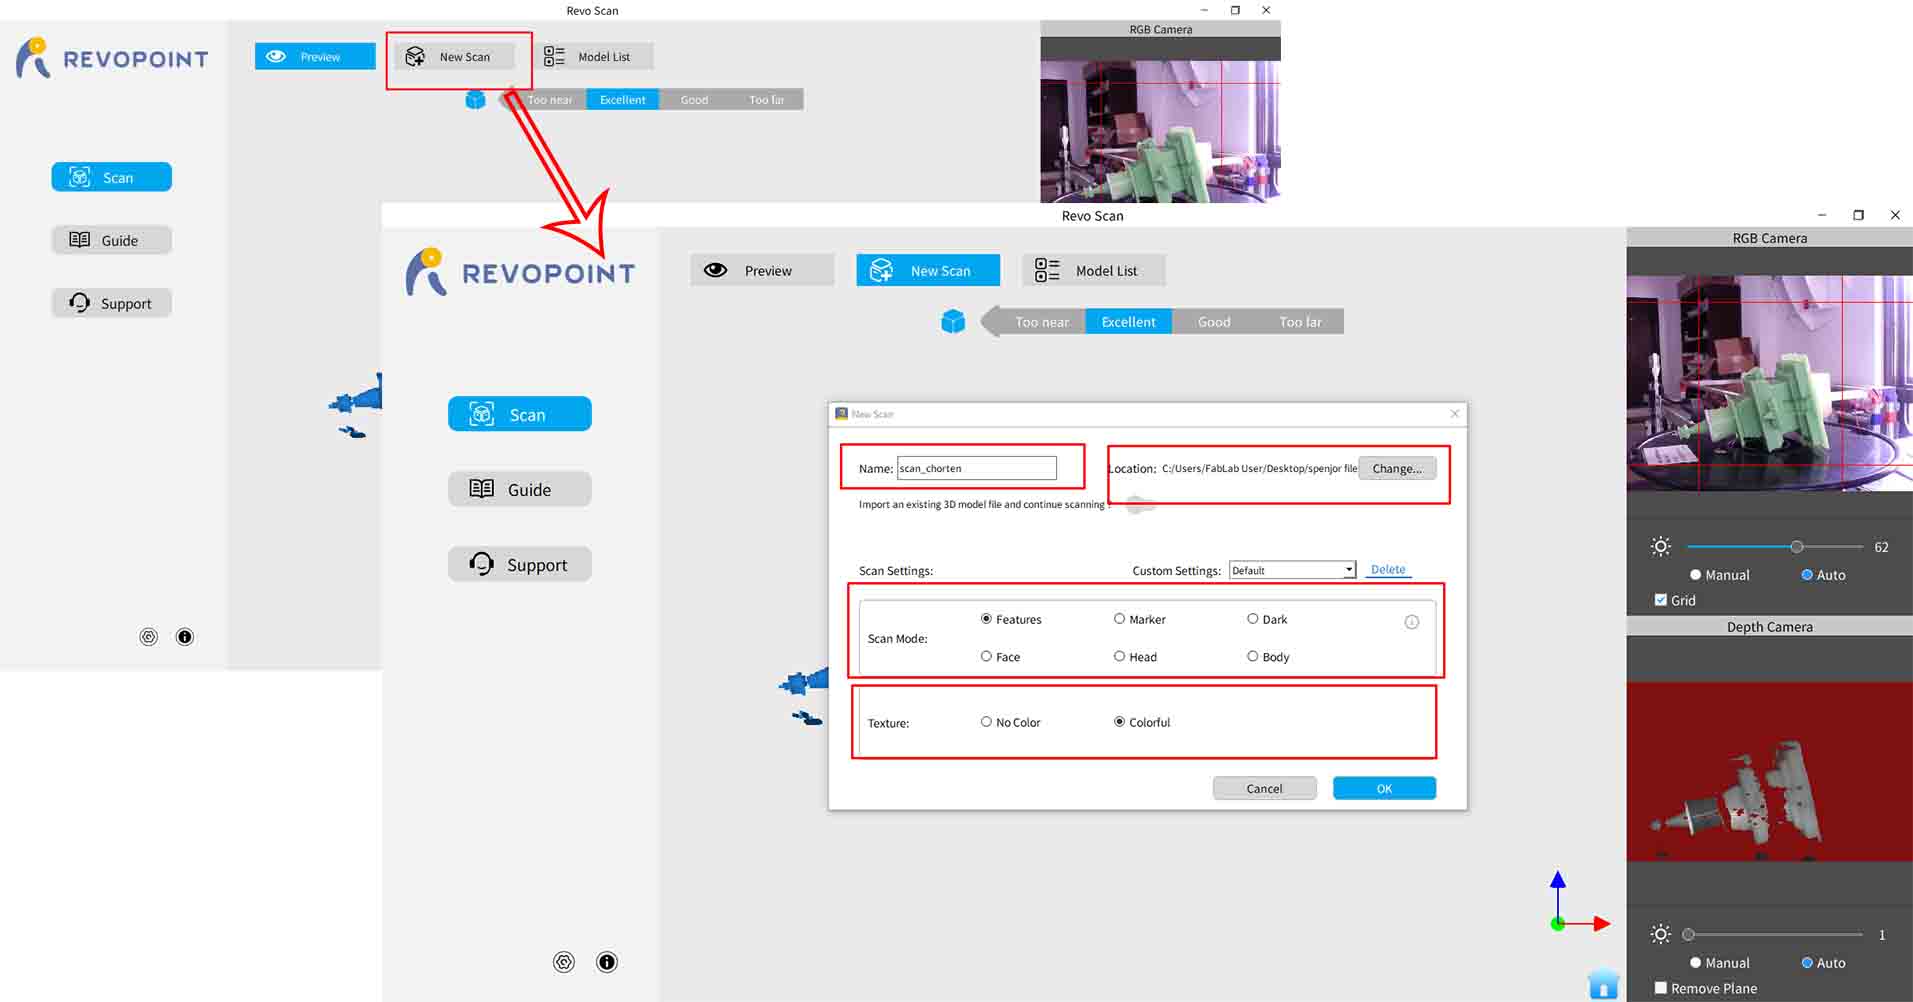
As you start scanning, the software can automatically detect the distance between the scanner and the object. (Smart) ... You have to keep the distance at Excellent, meaning it is an excellent distance to detect the points for scanning.
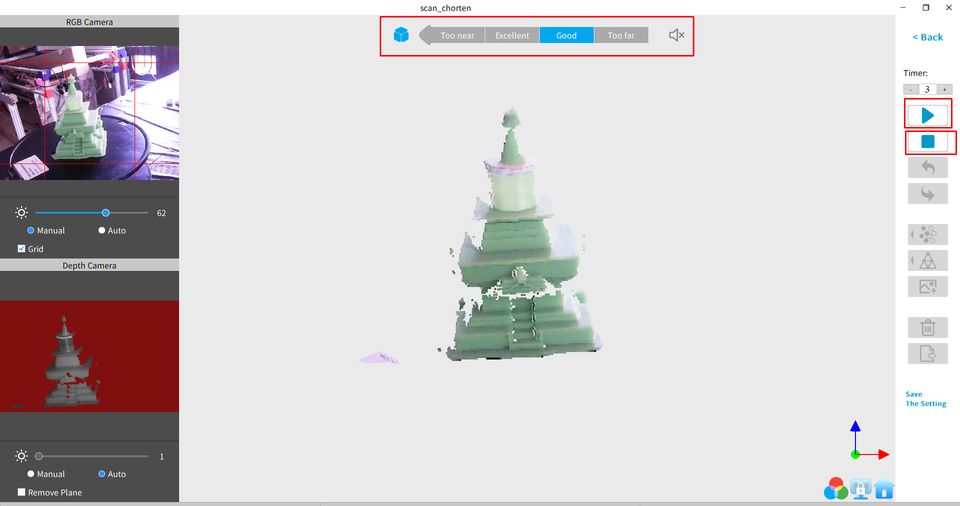
After you are done, scannning, press on stop and save the file Mesh it and texture it.
Then save it as .obj or .stl file. Watch the following video for more details:
I made an account in sketchfab.com tp generate a basic model after I scan.You can view my scanned model here:
I downloaded meshmixer from www.meshmixer.com so that I can edit my scanned files in it. I have no issues with my model as it was generated perfectly. Therefore, I don't want to edit it in the mesh mixer for now.