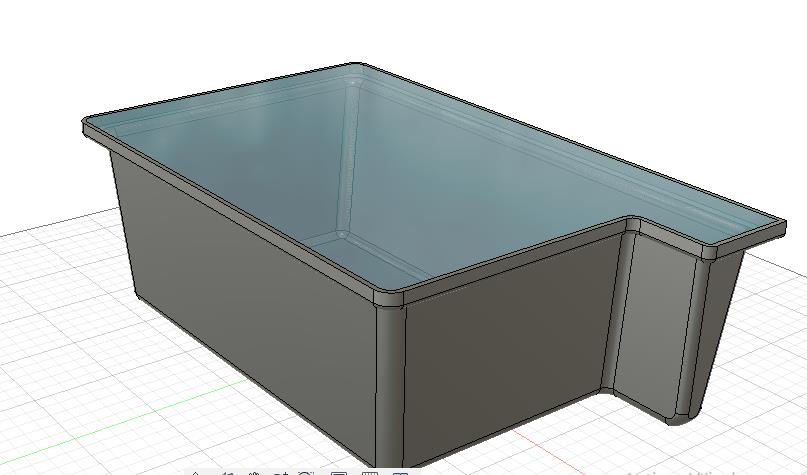
The idea is to create the water tank and plant tray, that will be used on my final project. I'm planning to use thermoformed plastic to make the tank, the mold will be milled using 3axis CNC milling as digital fabrication process.
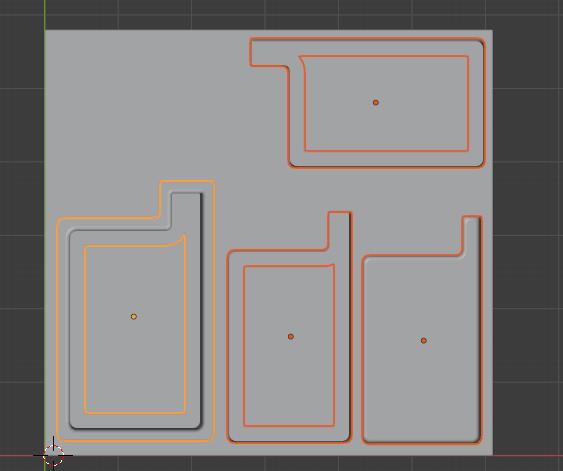
I use Artcam to generate the toolpaths and lately the G code,the idea was to make first a roughing pattern that will take out most of the material and then a 3D surface finish. The last step was a cutting pattern that will cutout the middle parts to re use that material and release the mold parts to be later assembled.
Fabrication
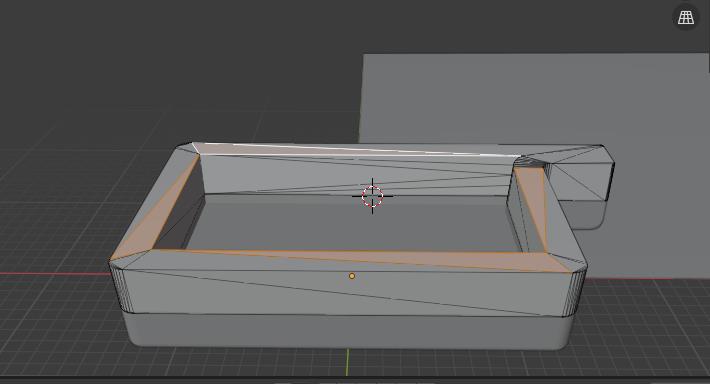
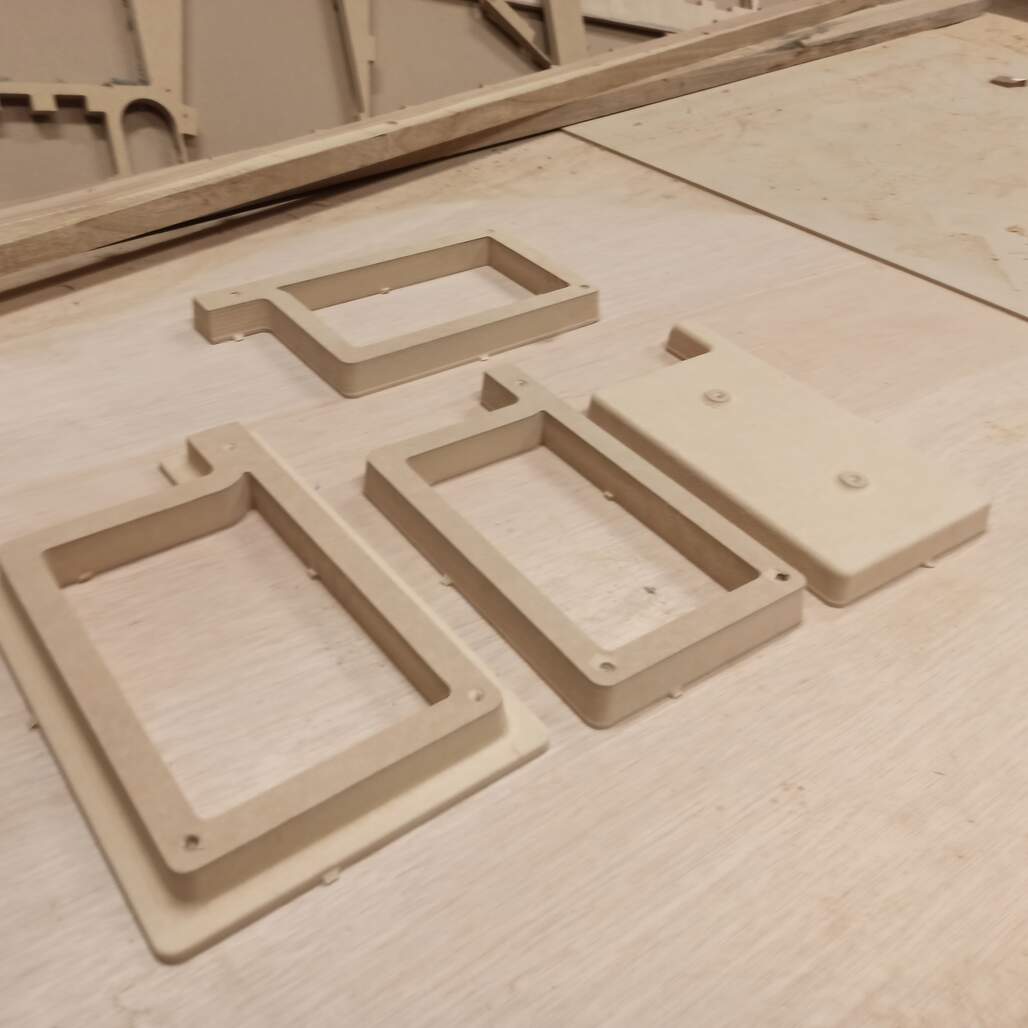
Mold
I choose 30mm MDF as the material for the mold, I slice the final male mold shape on 4 slides of 30mm that sum 120mm that is enough to enclose the volume of the mold.
Here you can see the difference between the rough cutting pass and the finish surface toolpath
Thermoforming
Sadly the machine that my local instructor initially have a contact to do thermoforming wasn't able to make a thermoforming job with enough deepness to fit my mold. he also try to contact other sites that offer the service buy it wasn't possible.
So I have to switch from the idea of using thermoforming and use another technique. I decided to go with a simpler composite.
Composite to make the water tank
I decide to make a composite material using a polyester mesh, TecnoFlex that I have left over from a roof waterproofing product Permaseal, combined with Transparent Polyester resin.
Materials used
This will summarize the safety and material data sheets of the materials used on this assignment
Transparent Polyester Resin
A three component system, based on the polyester resin, cobalt salts as accelerant and Meck Peroxide as hardener. When mixed you should first combine the resin and accelerant, to add later the hardener. Make sure that everything is mixed properly. see the safety data sheet
Wear respiratory protection. Work on a well ventilated area.
Use protective gloves.
Use a square edge mixing tool.
Flammable.
Avoid any component contact with skin, if happens wash with fresh water and soap, it needed call medical assistance.
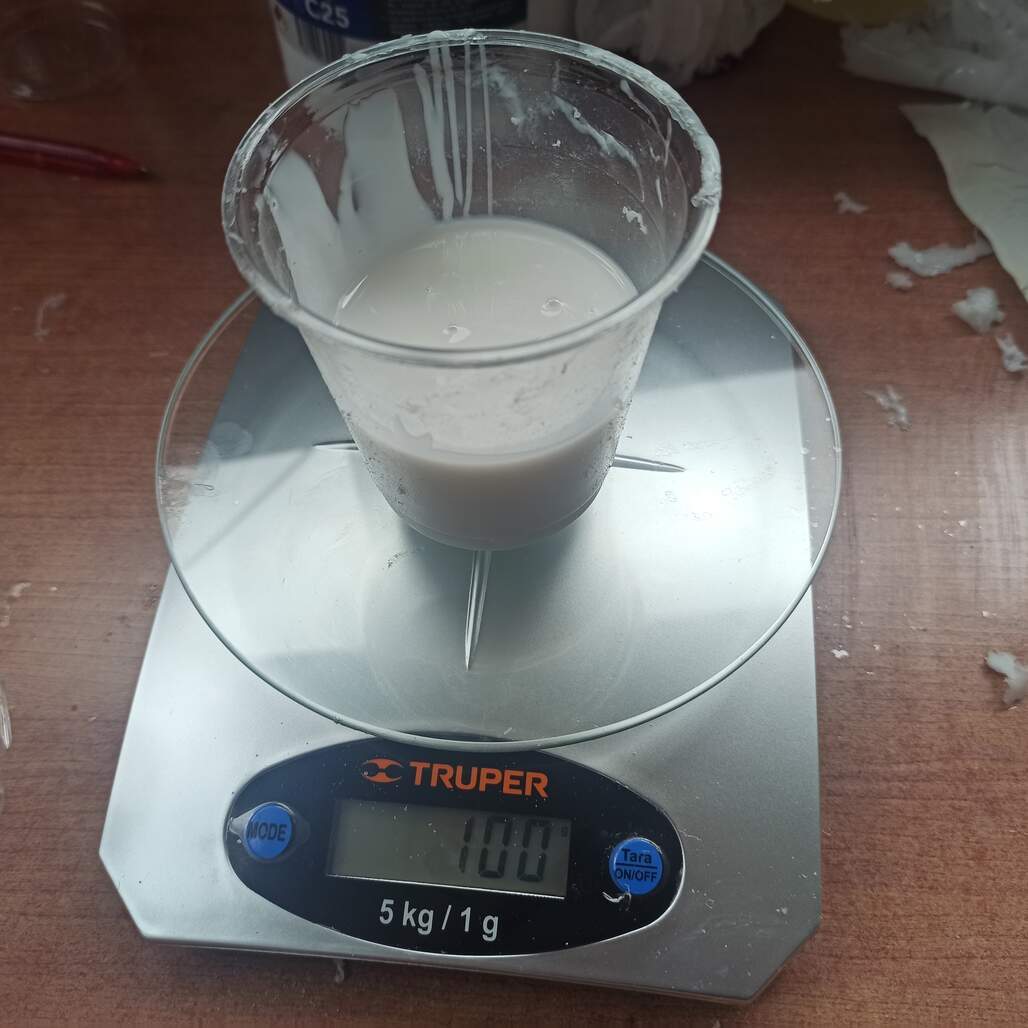
Silicon Rubber RTV2C25
Food grade silicon that, can be used to coat, apply by mixing the two components on a 100A + 3B ration. It should be hardened on 3-5 hours. And fully cured on 12. see the data sheet
Wear protective gloves, on skin contact flush with abundant water.
Work on a well ventilated area.
Mix properly
Testing!
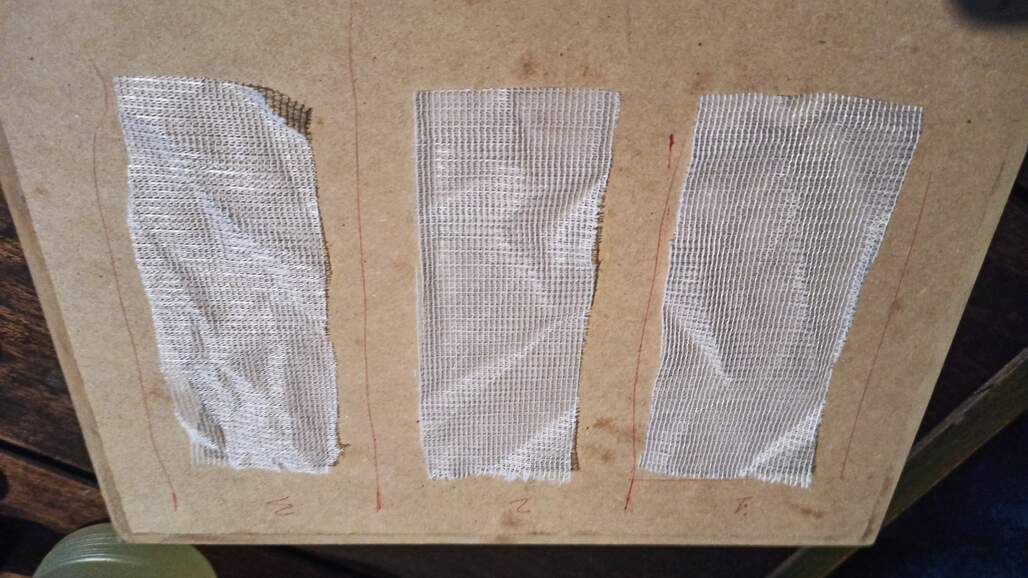
Before doing the final composite for the mold I make a few test coupons to familiarize myself with the materials, mixing ratios and overall process.
The plan was to make three tests: one with silicon rubber and mesh to test if it was rigid enough; one layer of silicon, let it dry and then the mesh and resin to make all the tank in one go; and finally just resin and mesh to be later coated with the silicon. As base I use a MDF board and places baseline as release agent.
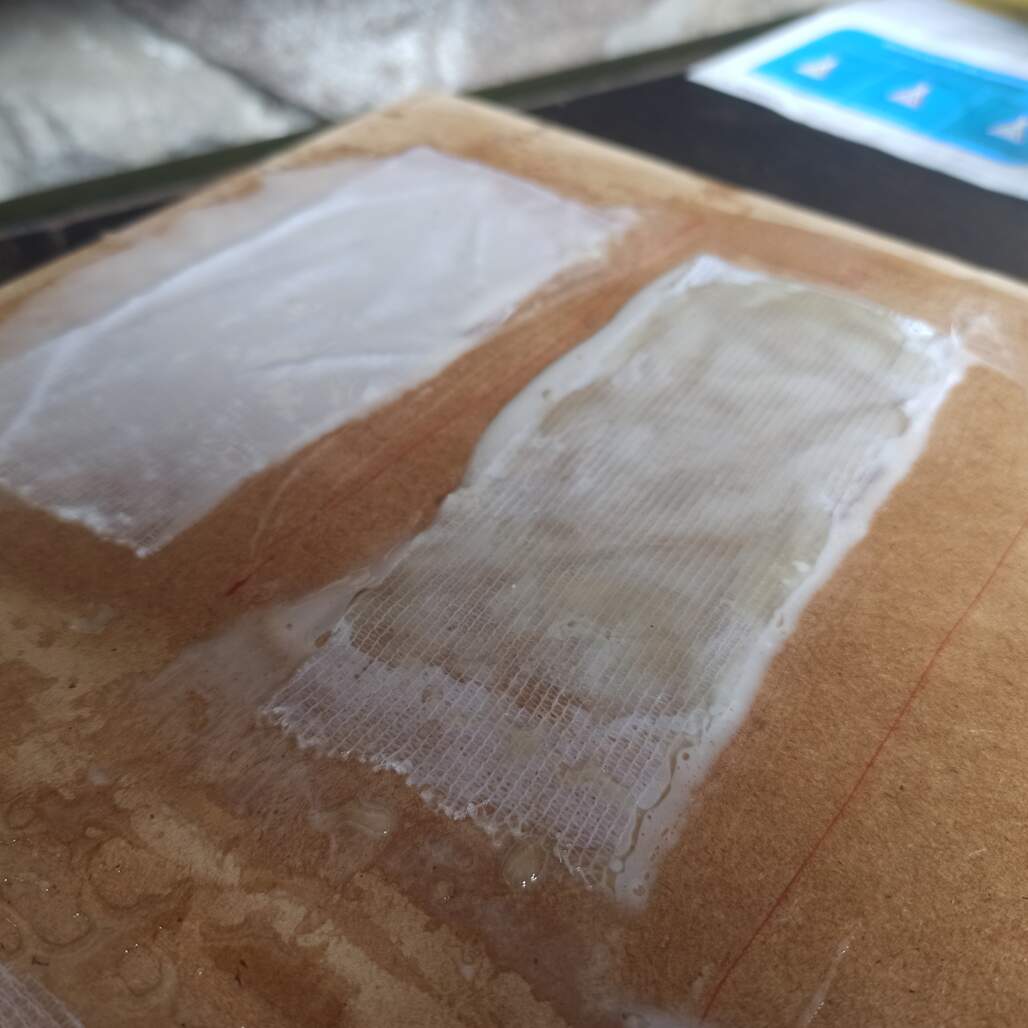
The results... I mixed the silicon rubber wrong and there was to little catalyzer and it never cure, so those coupons were a failure, but the third one was a success and although it was a bit thin (just 1 layer) it was promising and also rigid.
So I decided to make the mold fist with just resin and mesh,and when de-molded it will be coated with food grade silicon to provide good water quality to the plants.
Making the part!
The idea is to make the part by an open molded composite, were I will place resin and mesh layers 1 by 1 to make a multi layer material.
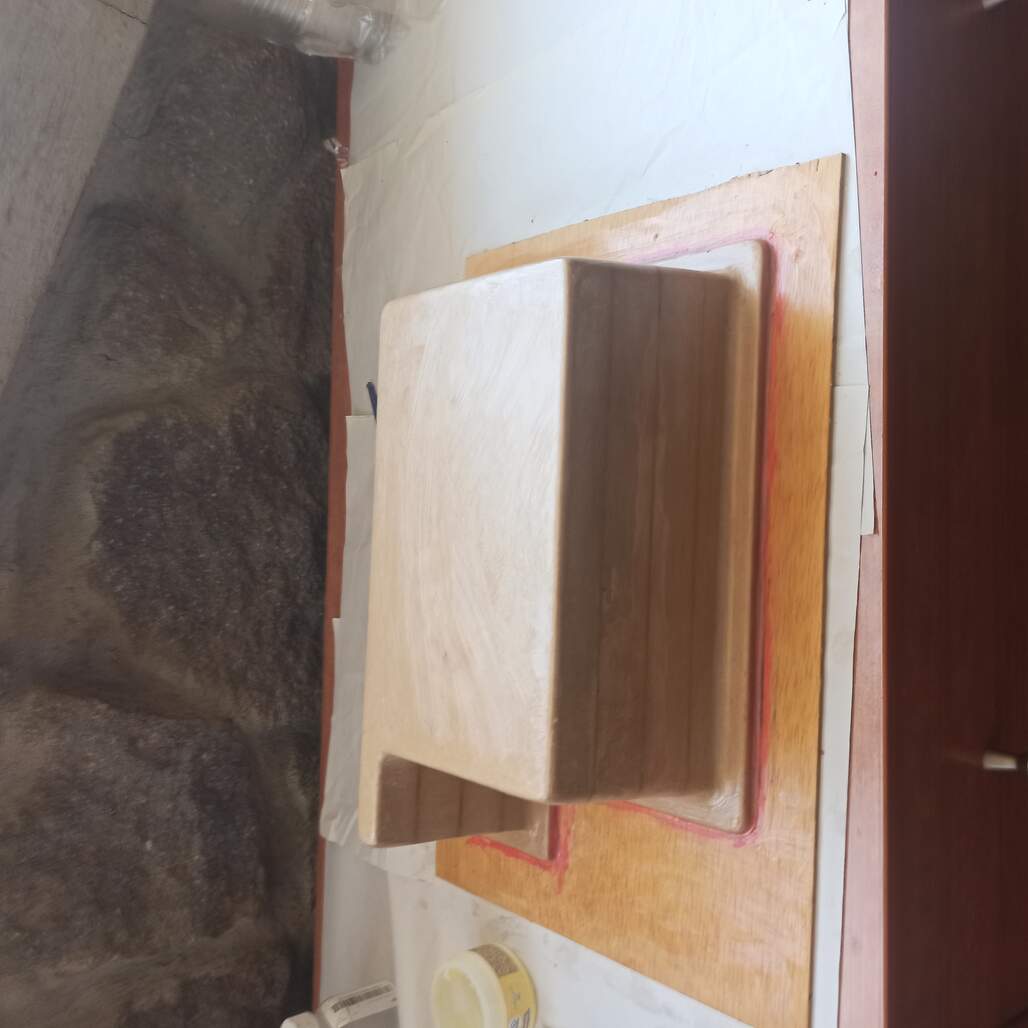
First I prepare the mold, I pasted it to a plywood table, and place some plasteline to avoid the resin flowing below the mold border. I also add baseline as a realise agent.
As the polyester resin is a 3 component, you first measure the virgin resin, add the accelerant mix and then add the catalyzer before a last and proper mix to ensure an even mix of all the components.
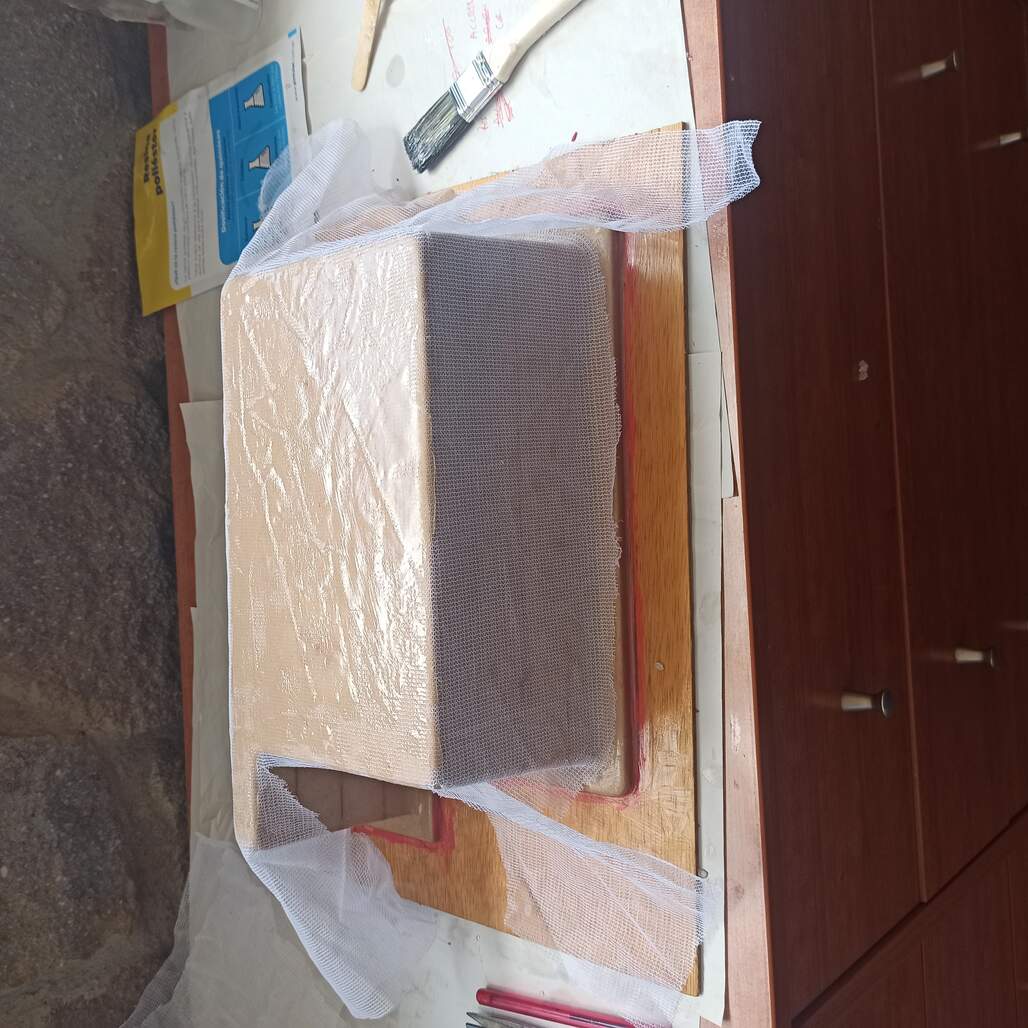
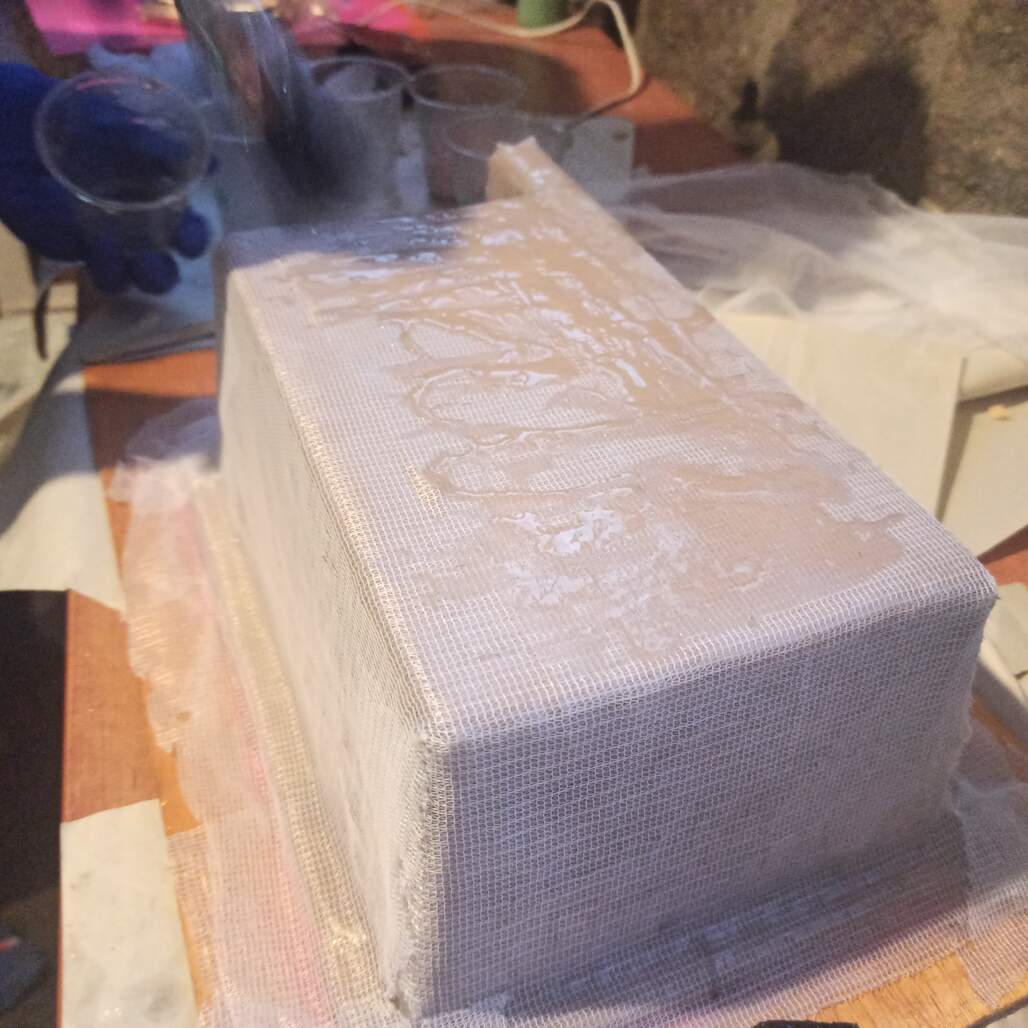
The I started to place the resin and mesh from the top face and then covering all the sides. Using scissors to cut the mesh and make overlaps to cover all the parts.
I then add a second layer stating from 1 side, to make the mesh cover the other direction so they can make a stronger final part, also this help me to take special care of the corners and the front detail.
When this two layers were touch dry I placed one of only resin to fill up the gaps and add more thickness. After 1 hour this layer was also hard but still a bit sticky I then place another layer of mesh. This time it was applied more nicely becaus it was sticking to the resin below adn I also was working without the pressure of the resin already mixed. With this I achieve a very nice and even coat of mesh.
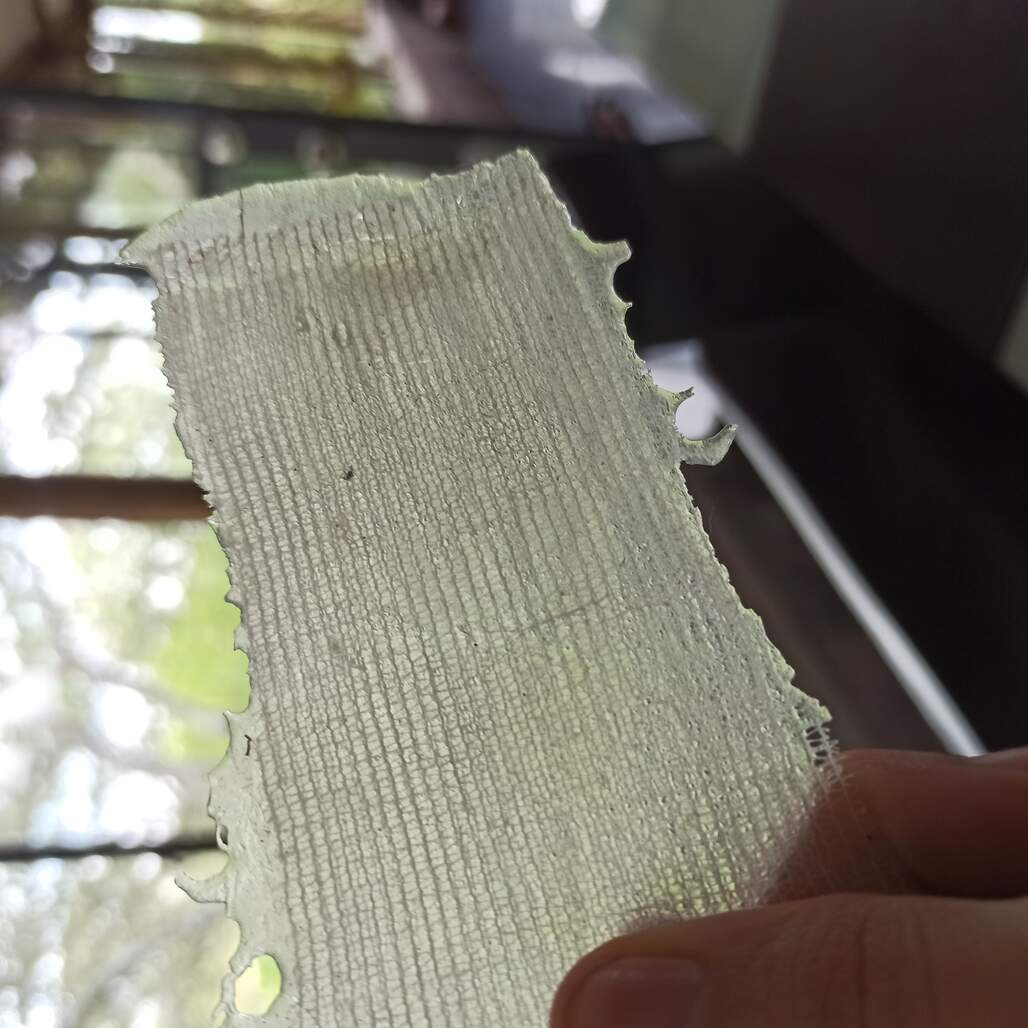
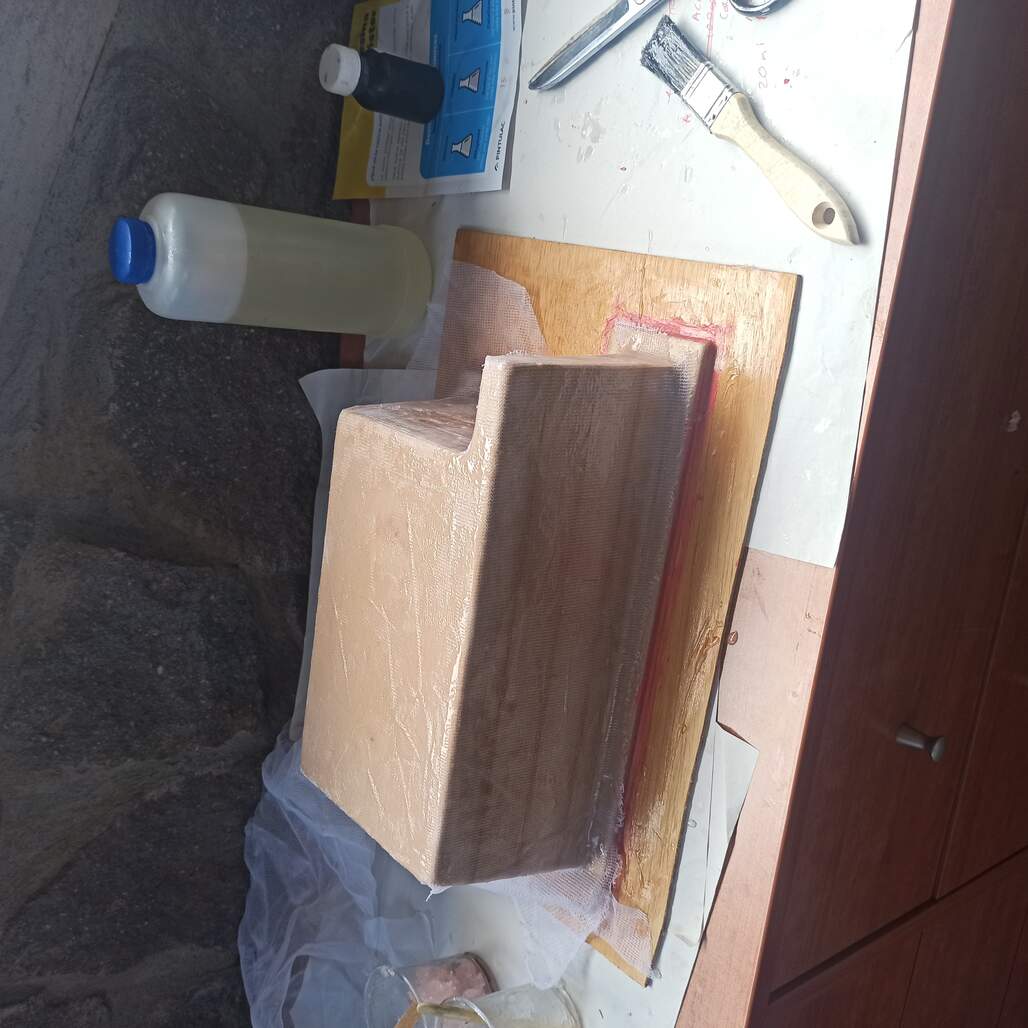
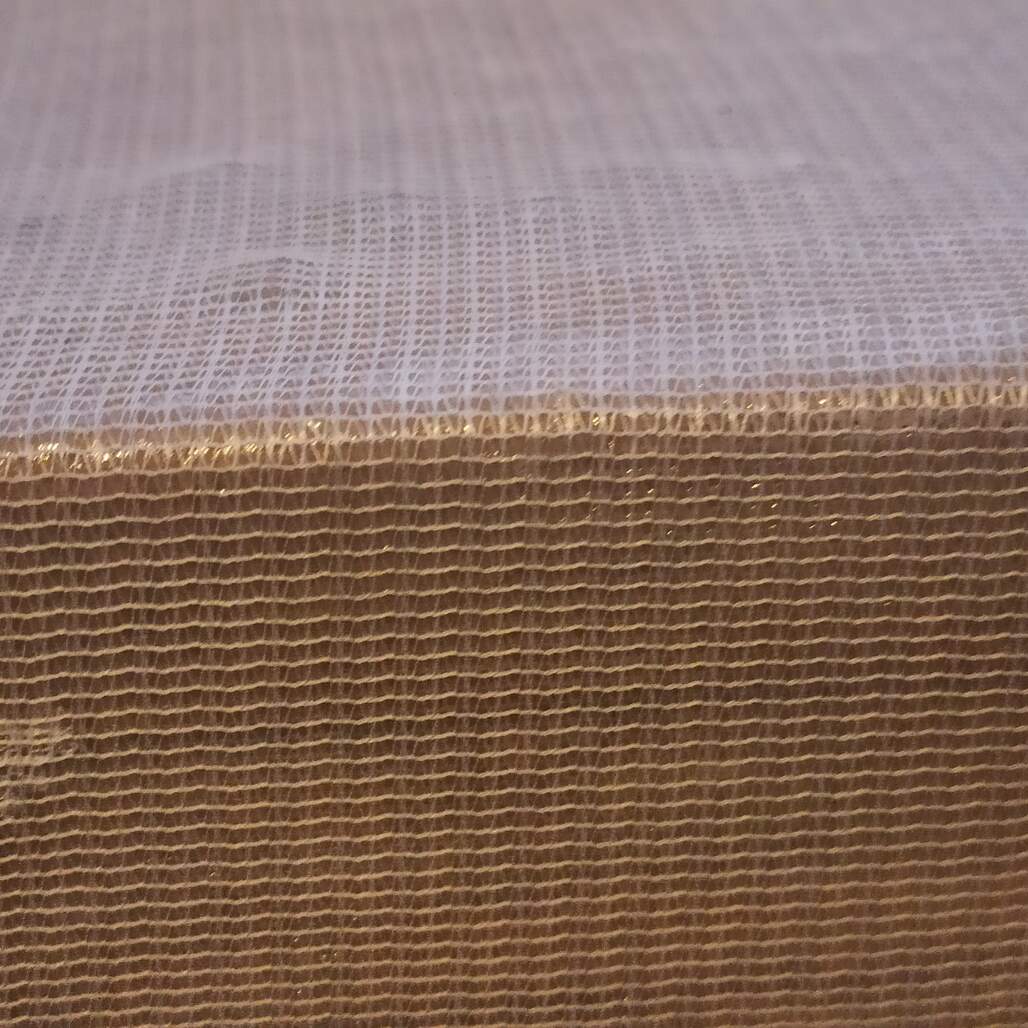
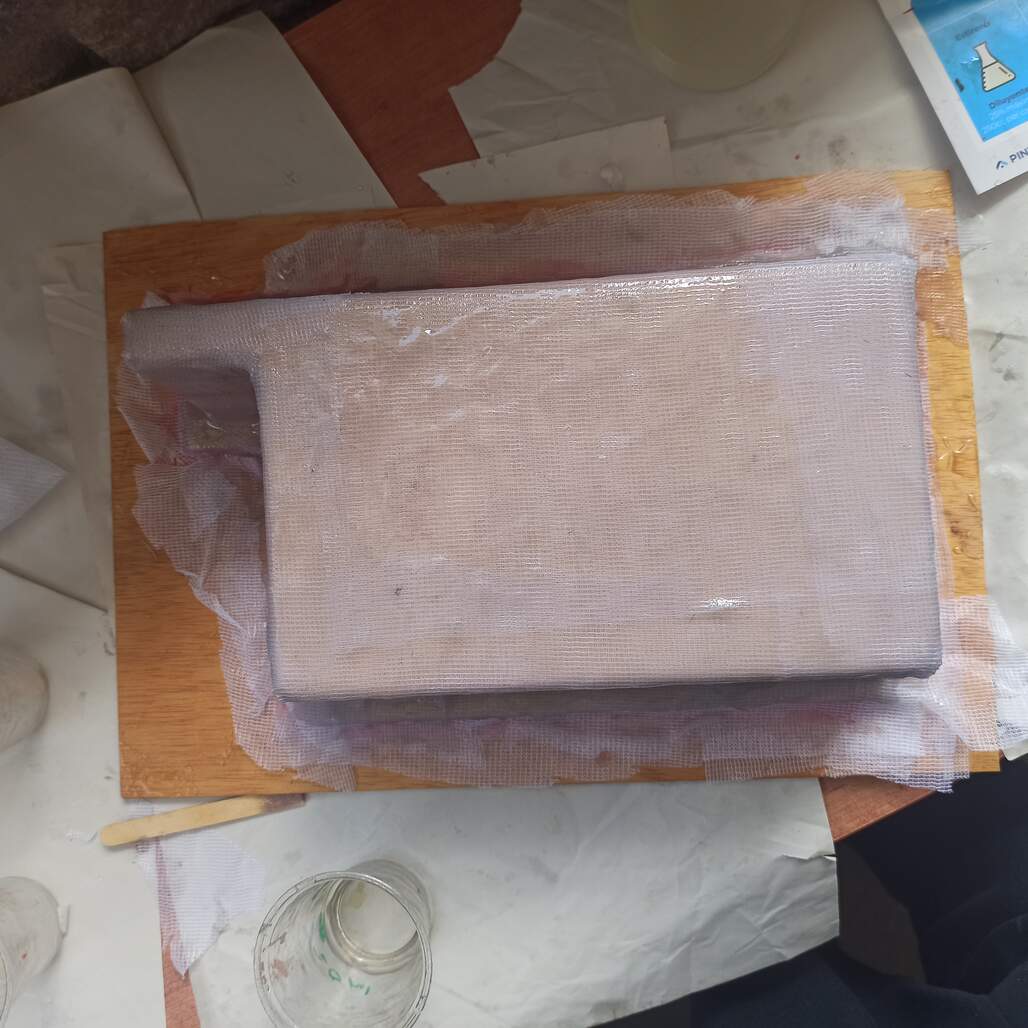
Here you can see how the surface of the mesh was flat and nicely place, also the details on the front part were covered evenly.
Poring resin over the last layer of mesh you can see the process on the left and the end result on the right
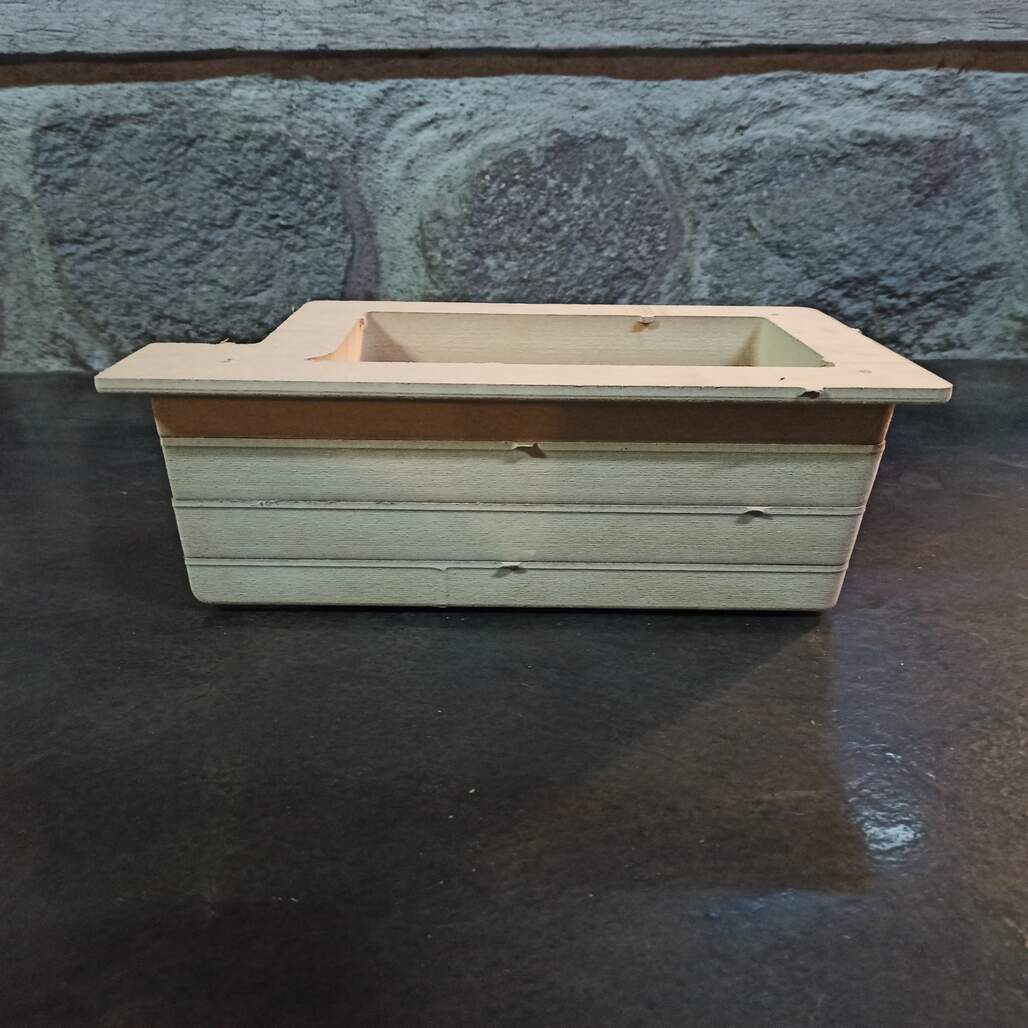
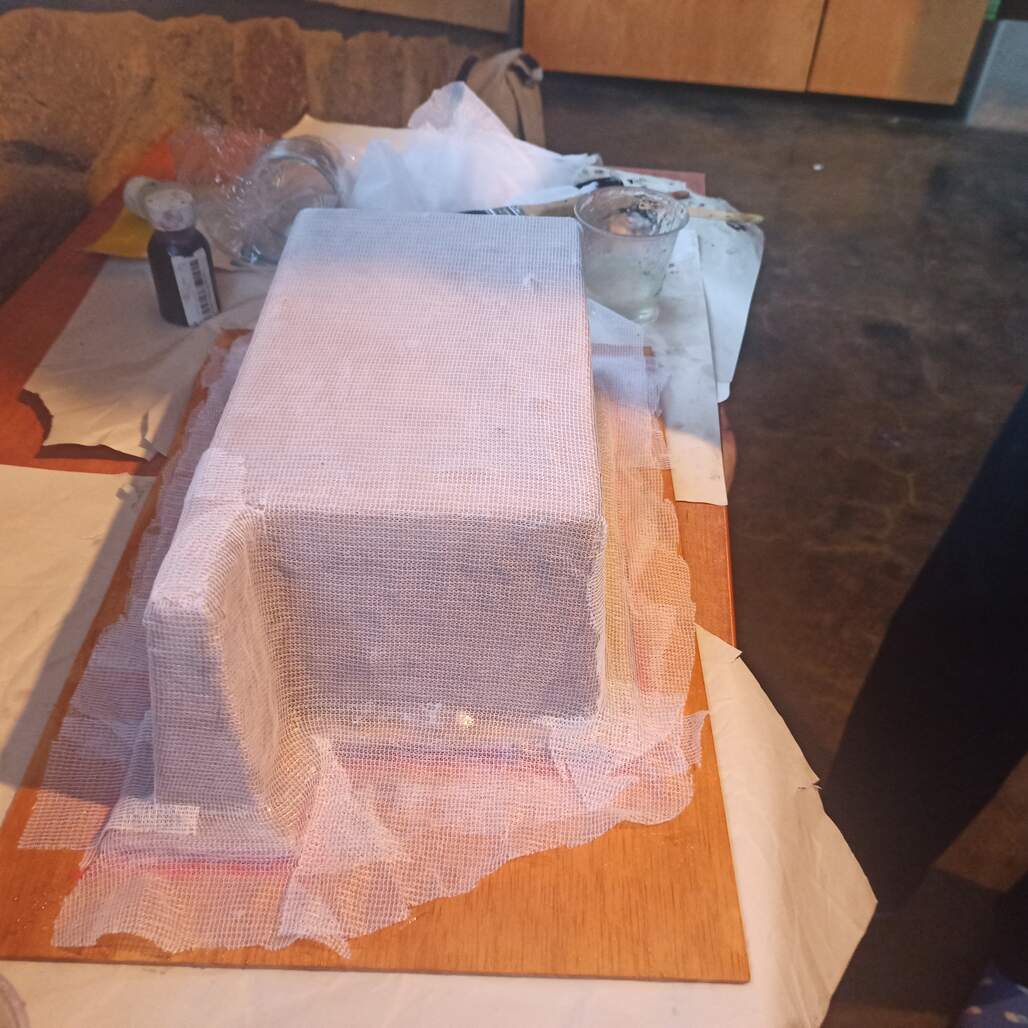
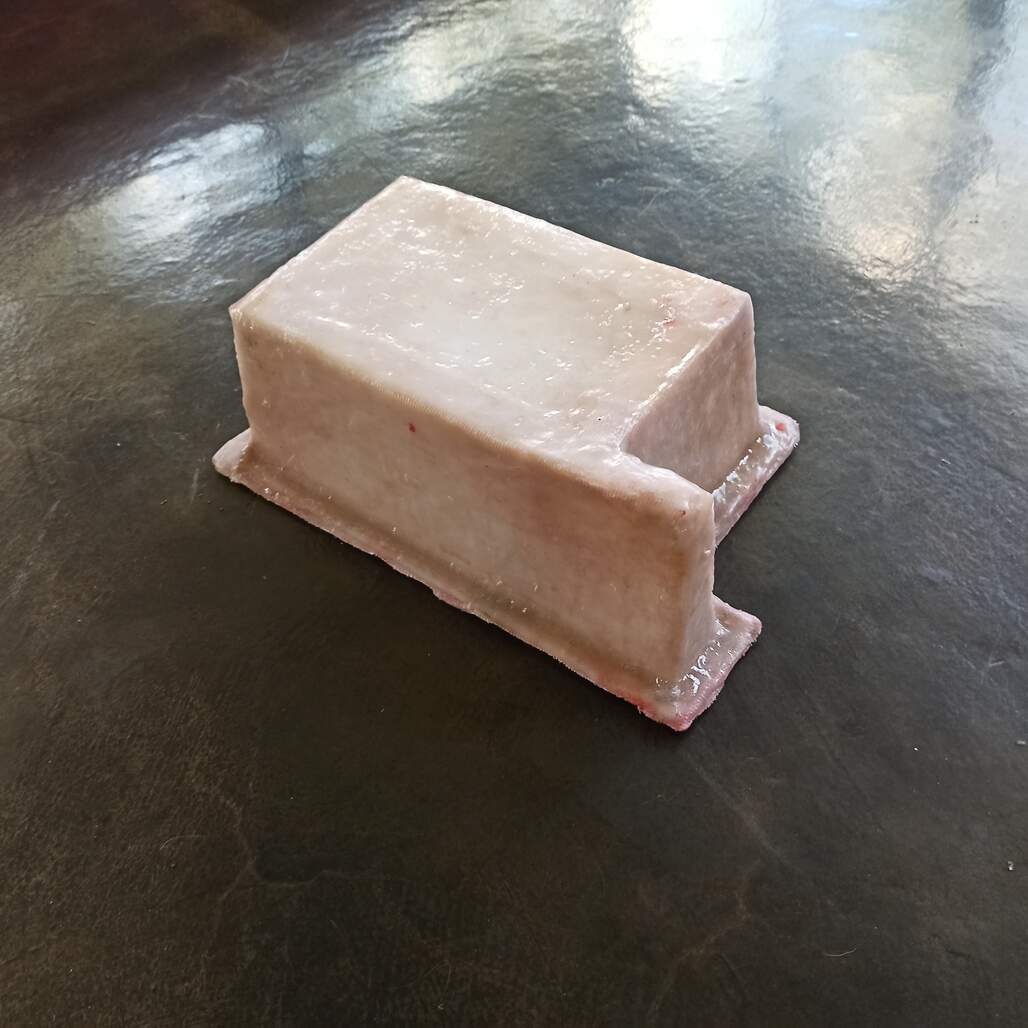
After that a final layer of only resin was applied and then It was let to cure and later be de-molded. Although this was a hard and long process I hope that after de-molding the final pice can be used as water tank. :)
Hero Shot!
Some issues when de-molding...
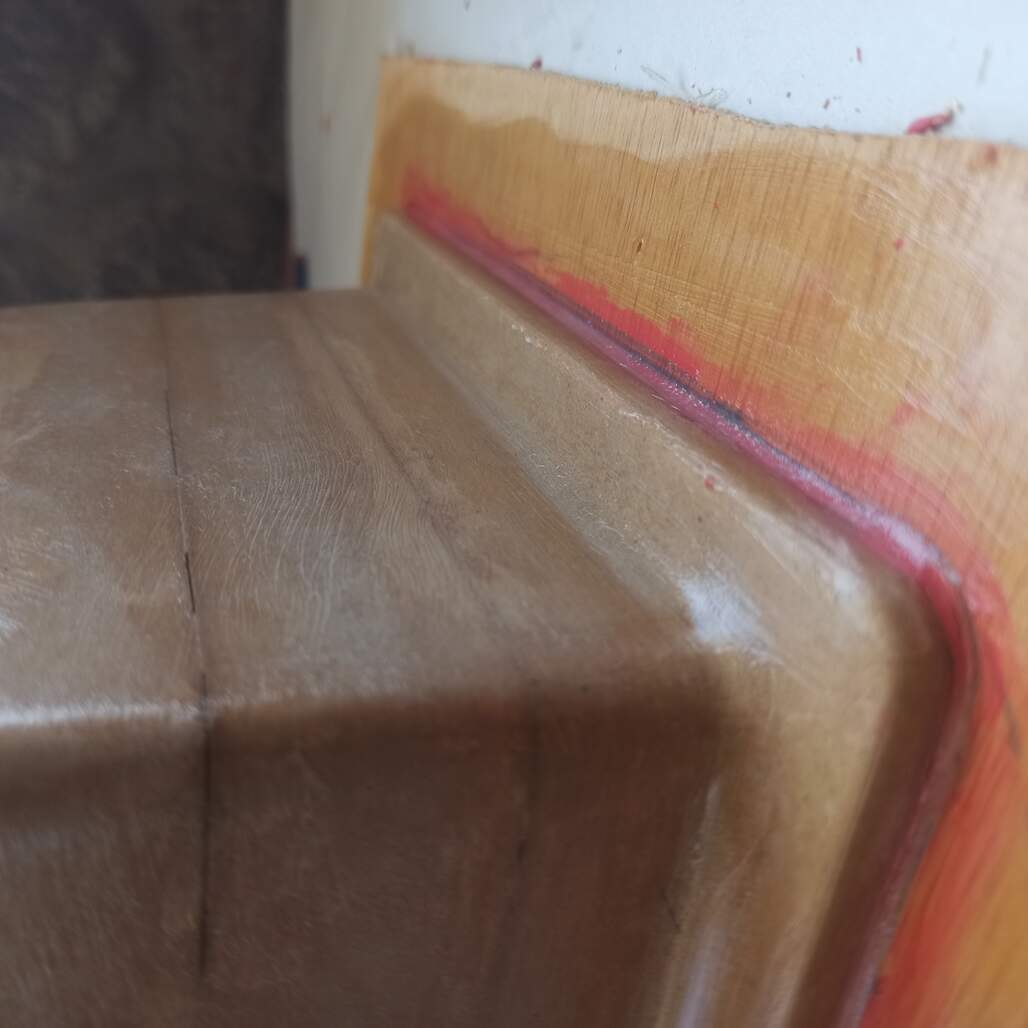
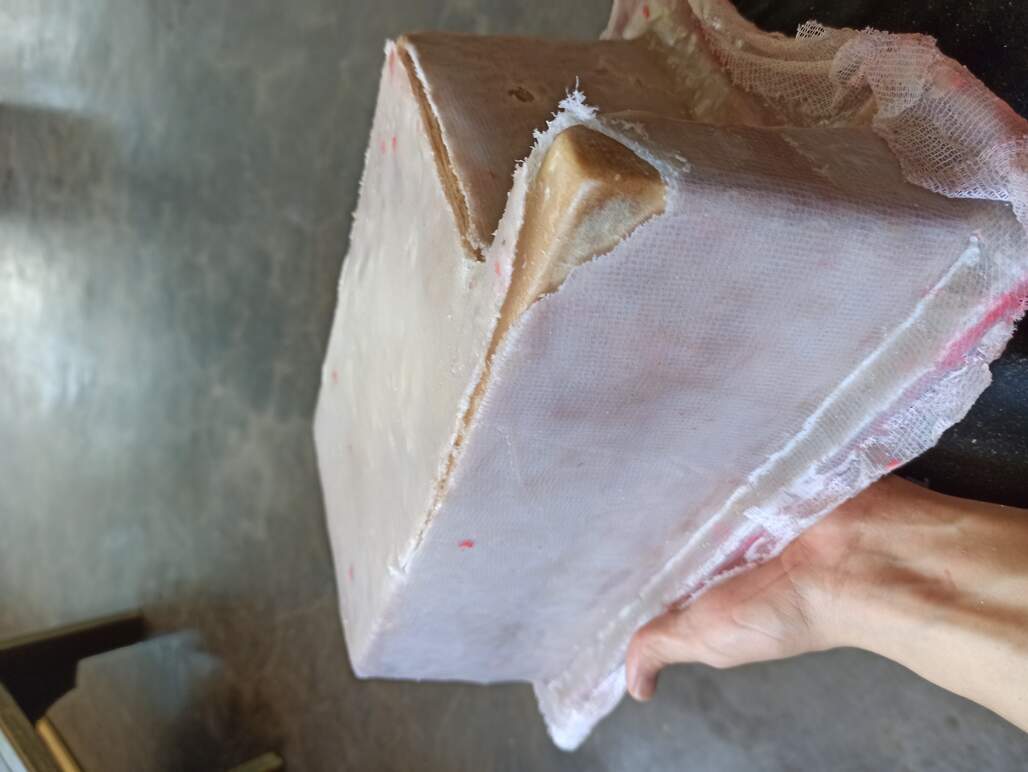
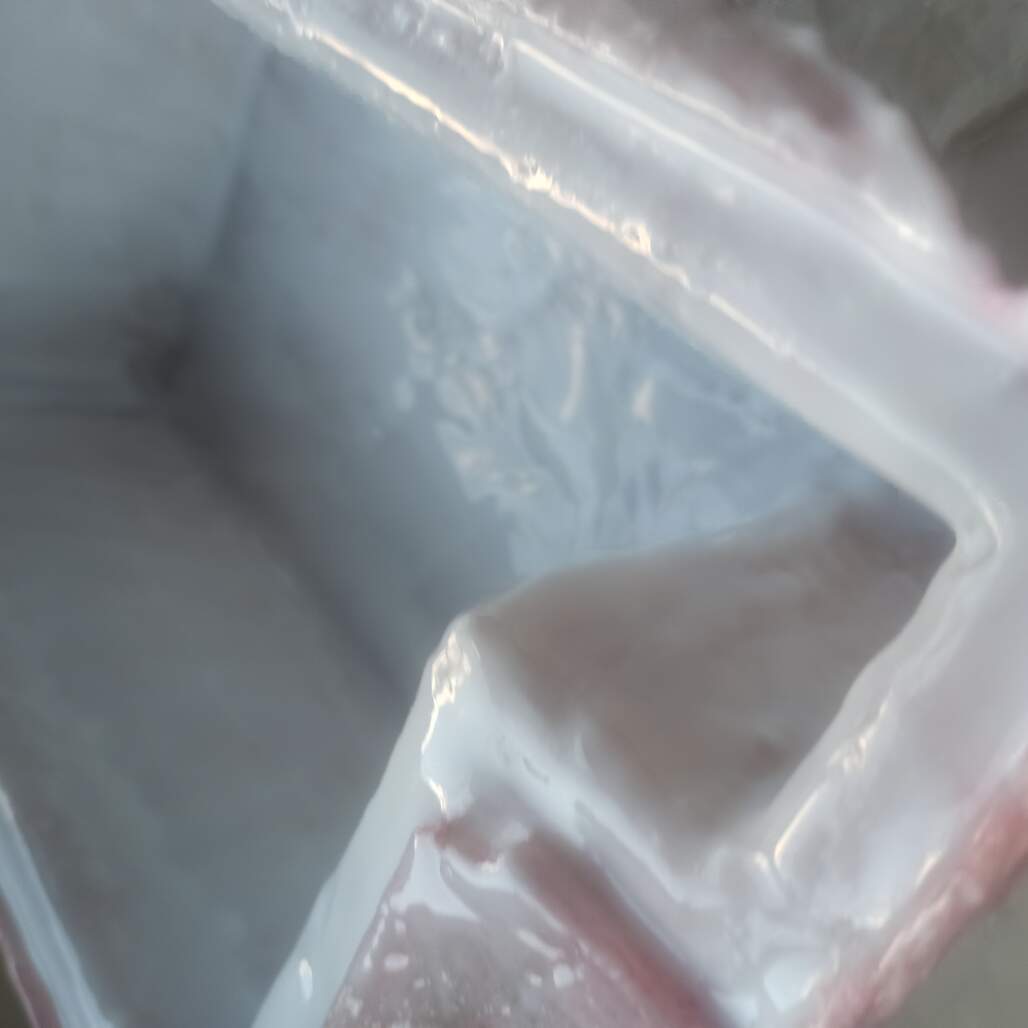
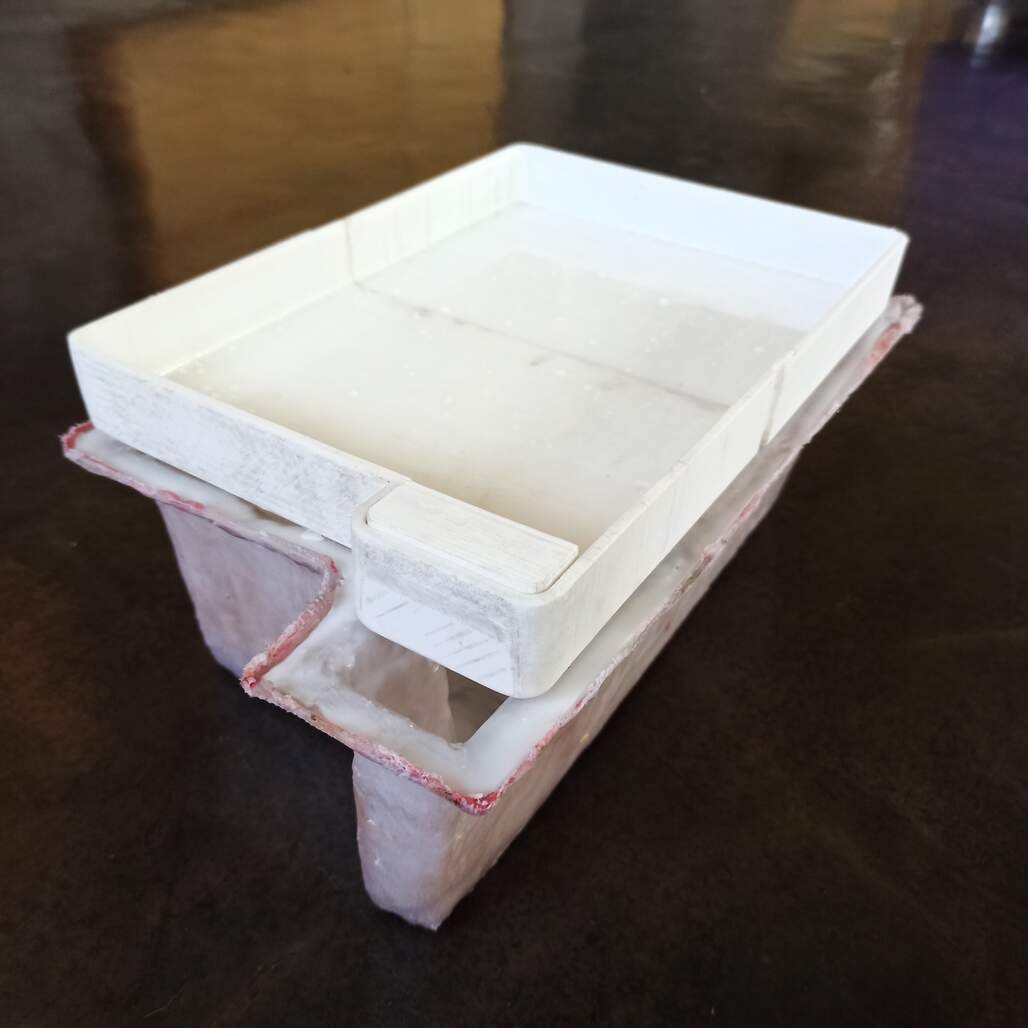
Sadly when the mold was fully cured it was stuck to some parts of the mold, after hours of slowly trying to release it using a spatula and oil, it didn't work and it broke on some point, I decided to break the bottom edge to have more angles to release the tank.
Here you can see the broken edges and the corner of the feature that was heavily pasted to the mold. Then I decided to fix the void and reassemble the tank, the bottom was easily pasted together and then the corner was a bit more difficult but making it from the inside facilitate the job.
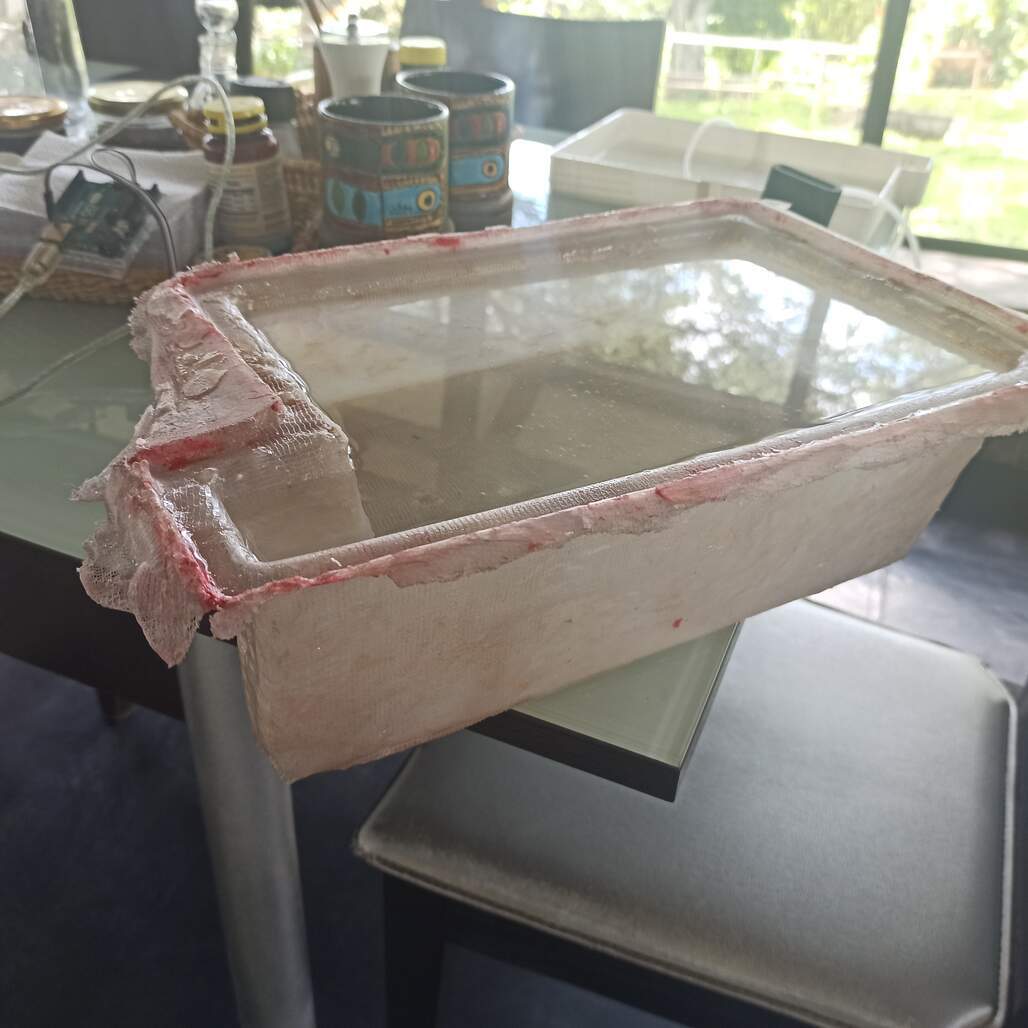
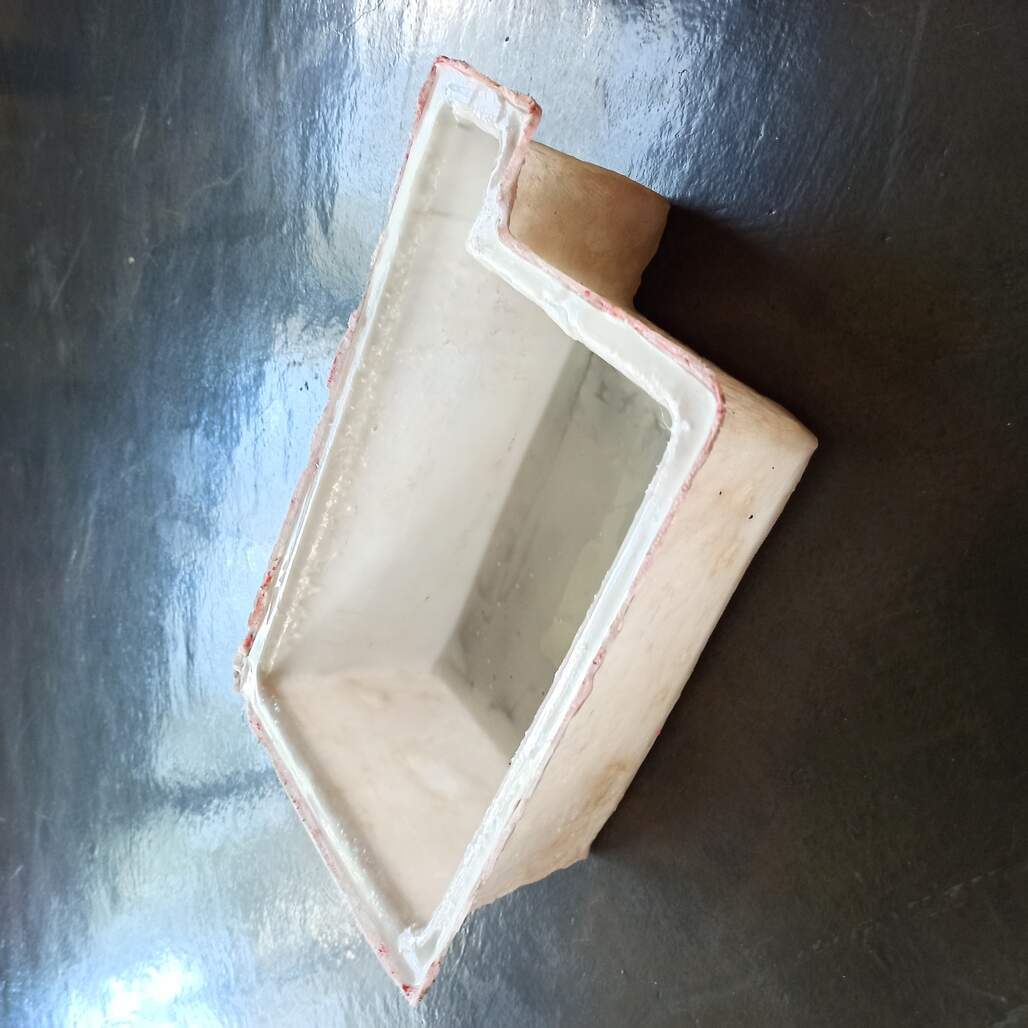
When it was fixed and cured I put water inside to ensure that it can hold water. Then I apply a food grade silicon coat on the inside to make the water safe and ensure that no chemicals from the polyester resin end up on the plants.
Note that the silicon has to be measured by weight, although my scale wasn't precise enough to measure the small amount needed of hardener, so I instead use drops, approximating 20 drops = 1mm = 1 gram but then I found that it works by 40 drops = 1 gram.
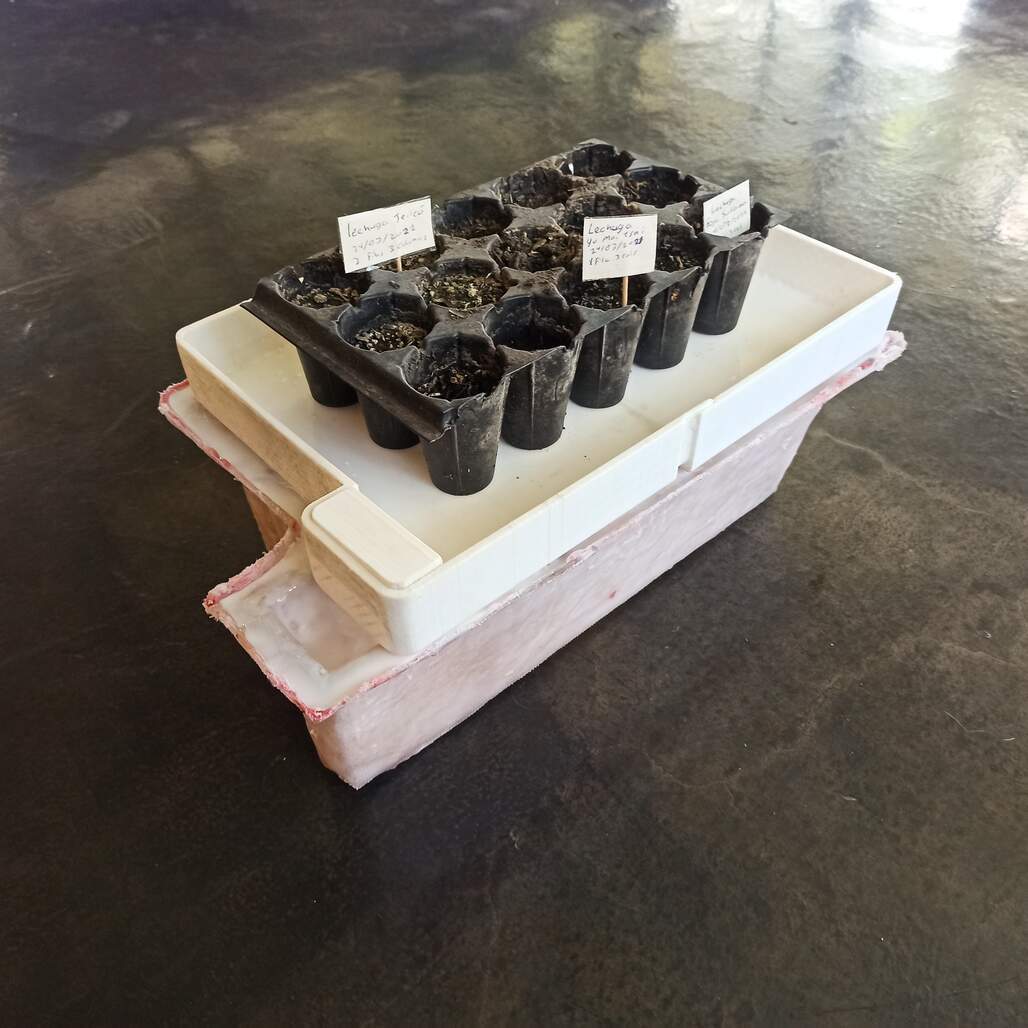
Here you can see the tank and also the 3d printed tray coated with silicon.
Then finally the water tank!
Going further with composites!
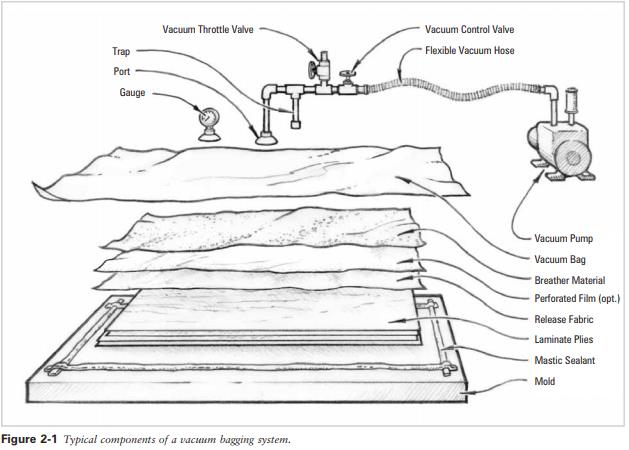
Trying to complete the composite assignment the proper way I read a lot about how to make them and the vacuum bagging technique that chough my attention. Although all the tutorials I watch use a special plastic as bag, a peeler material and dedicated pumps. I then found DIY alternatives, plastic wrapper is all you need. I make a intensive search on the stores near me to find the vacuum bags for cloth storage, but I found them.
This image taken from this super useful PDF by WEST SYSTEM. At first you can be overwhelmed by the amount of layers and 'special' materials you need, but the release fabric can be replaced with plastic film perforated, the breather material can be almost any absorbent cloth. And the vacuum bags for clothes are the best!
Making the test coupons
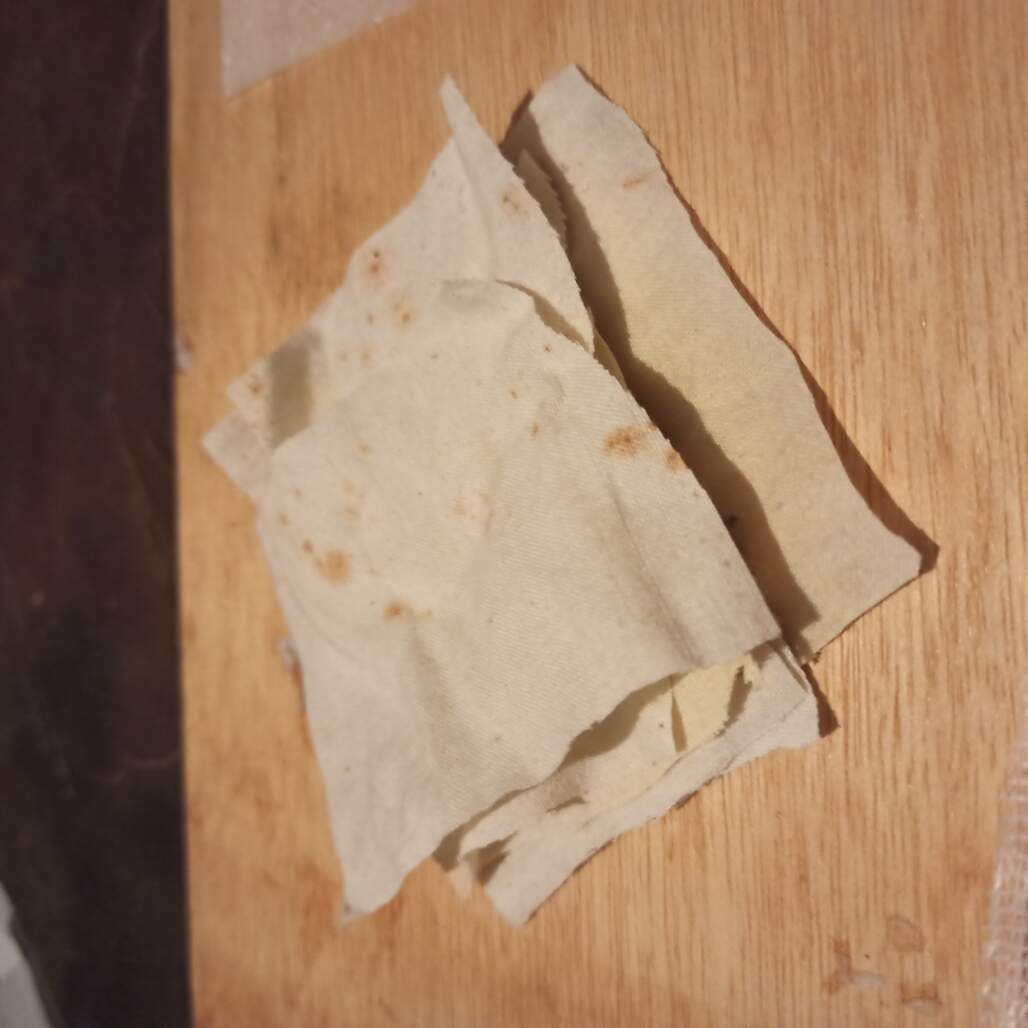
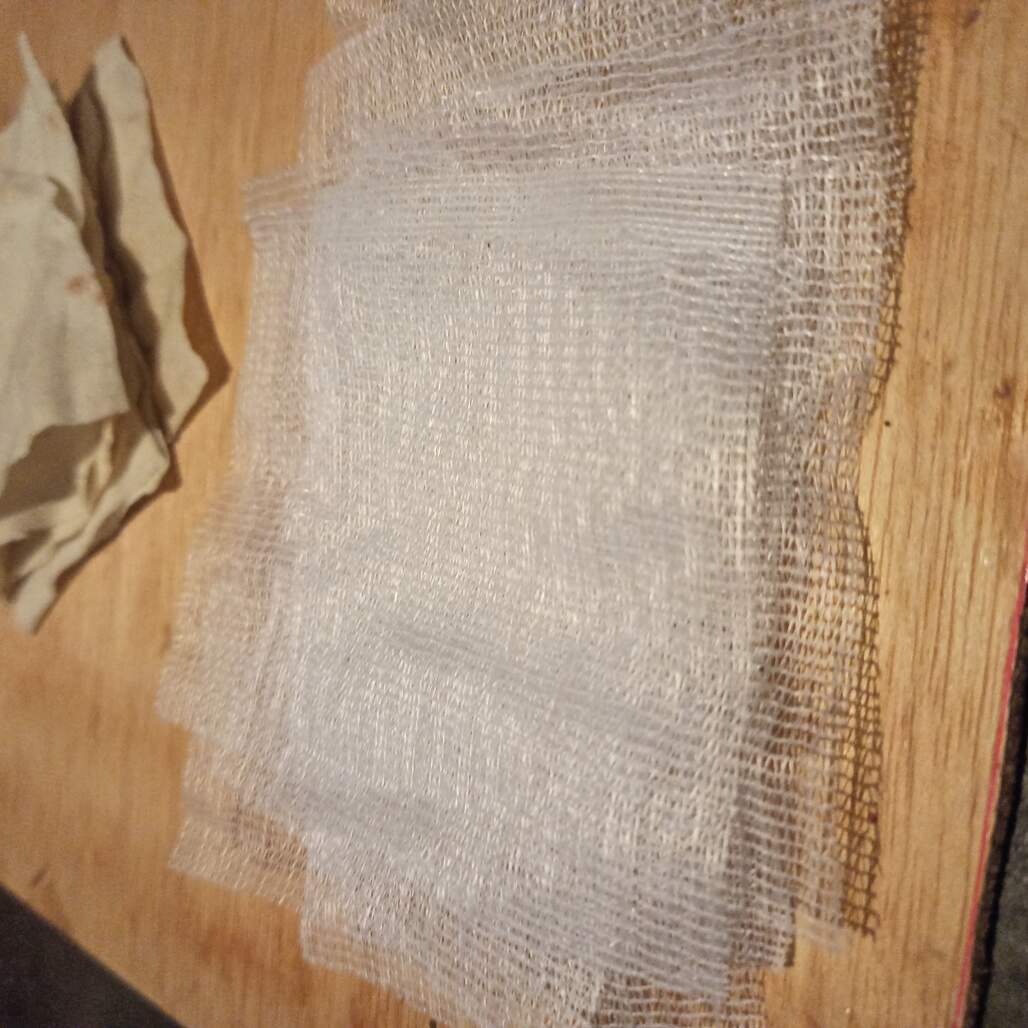
I use the same polyester resin that I bought for my first attempt, I tested with the same mesh and also with some old cotton cloth that I found on my house. I want to test the potential release fabric substitute, plastic film and wax paper.
Here you can see the perforated plastic film, the holes where made by punching the film on top of cardboardTesting the holes on wax paper, much easier to perforate than the plastic film.
6 cotton cloth pieces to make 2 coupons of 3 layers10 mesh pieces to make 2 coupons of 5 layers
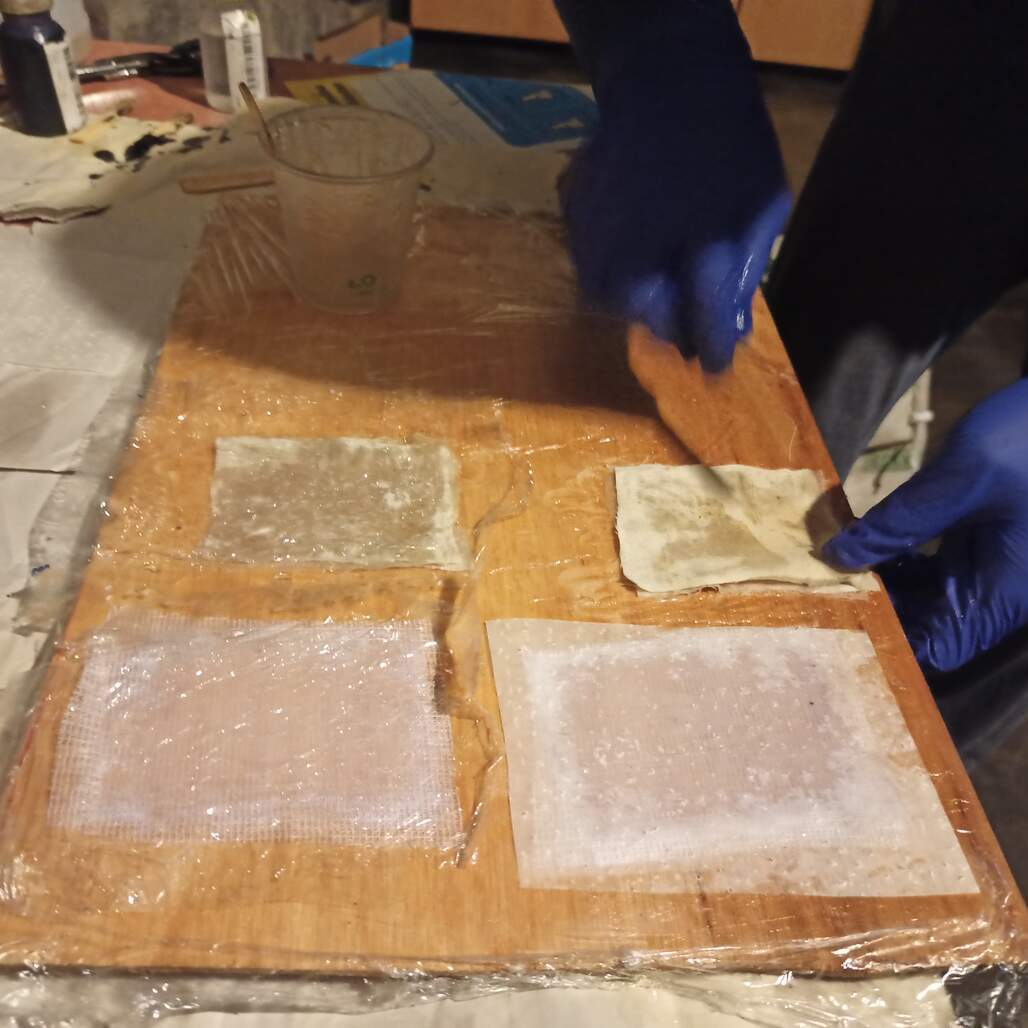
With all the materials ready I also prepare the vacuum cleaner and bags to have them near my workspace. Then I mix the resin and start te assembly, layer by layer making sure to remove any air bubble and trying to avoid putting too much resin to avoid problems with overflowing the resin into the bag or paste the release layers.
Making the test coupons, soaking each layer on resin until it become translucidAdding breather material, and mesh to ensure the proper flow of the air outAfter removing the air and sealing the bag it was let to cure overnight
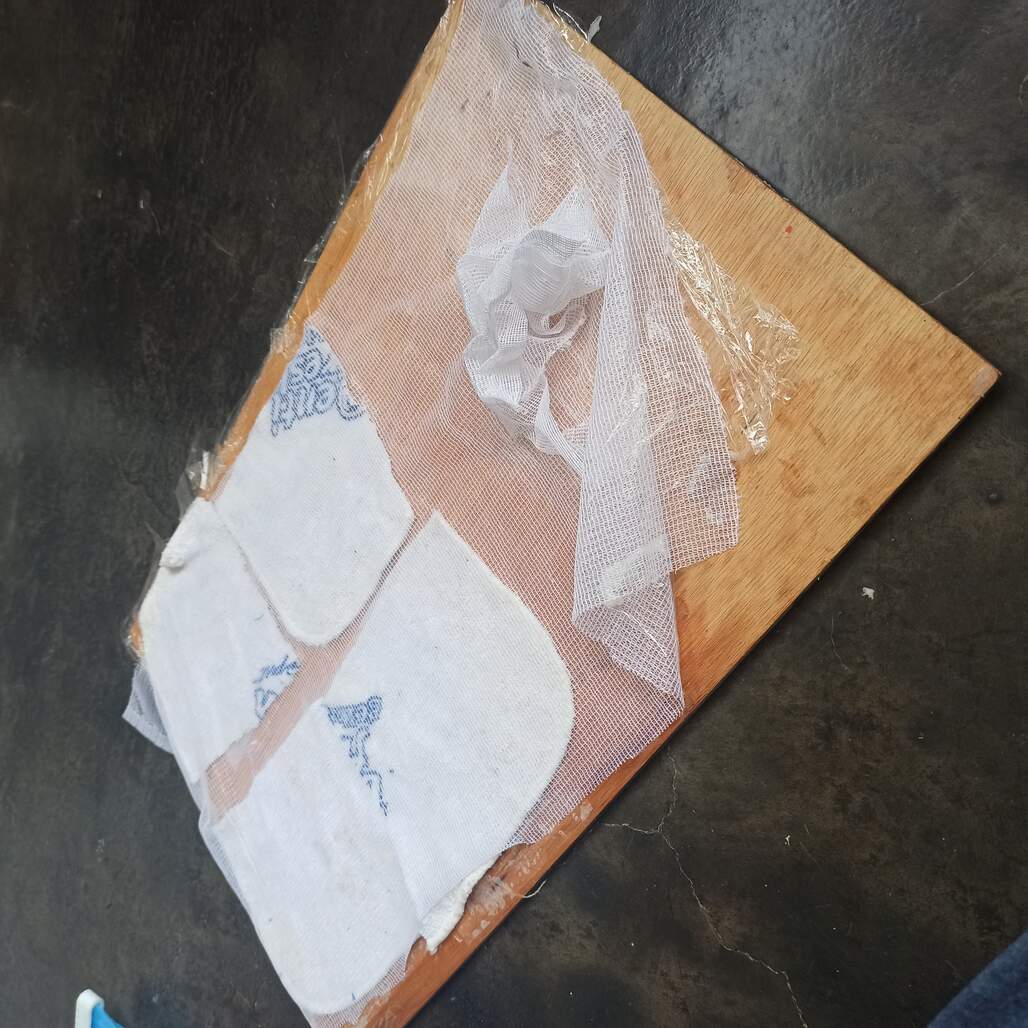
After it cure I remove the vacuum and the breather layer that ony have some dots of resin, the peel process was easy the with the plastic film, but the wax paper was bonded to the resin on the holes edges.
Here you can see the peeling process of the plastic film, although this test have the resin a bit uncured because it was too lean on catalyzer and cured on cold conditions, this was the prove that the technique was working and also the bag.
First results
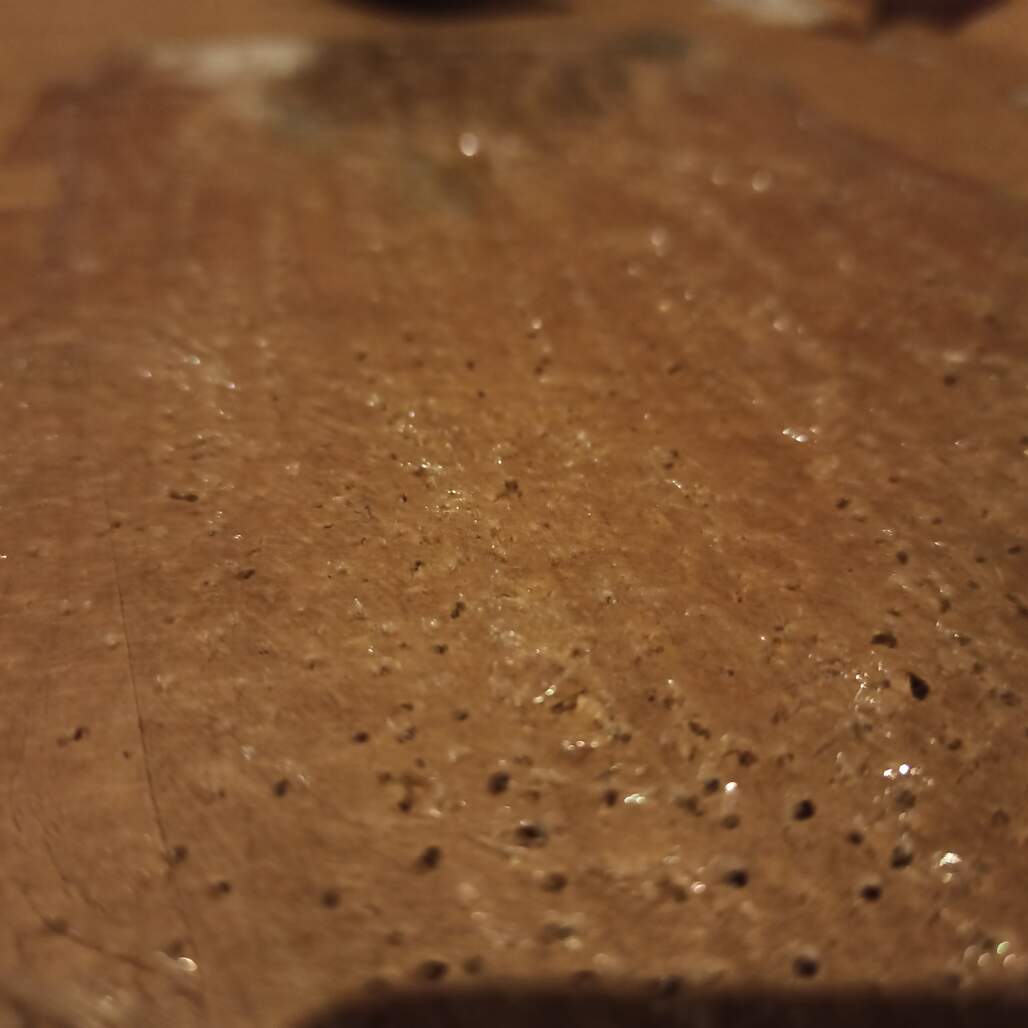
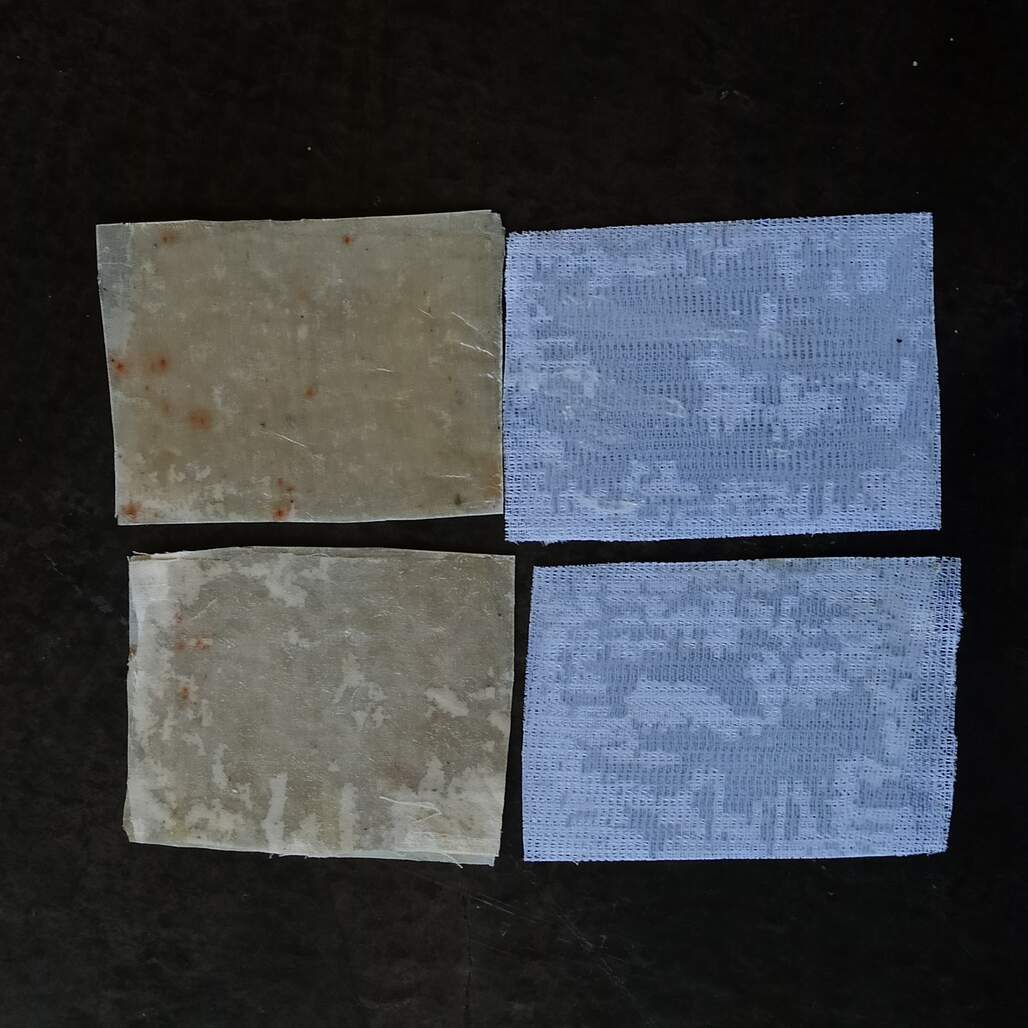
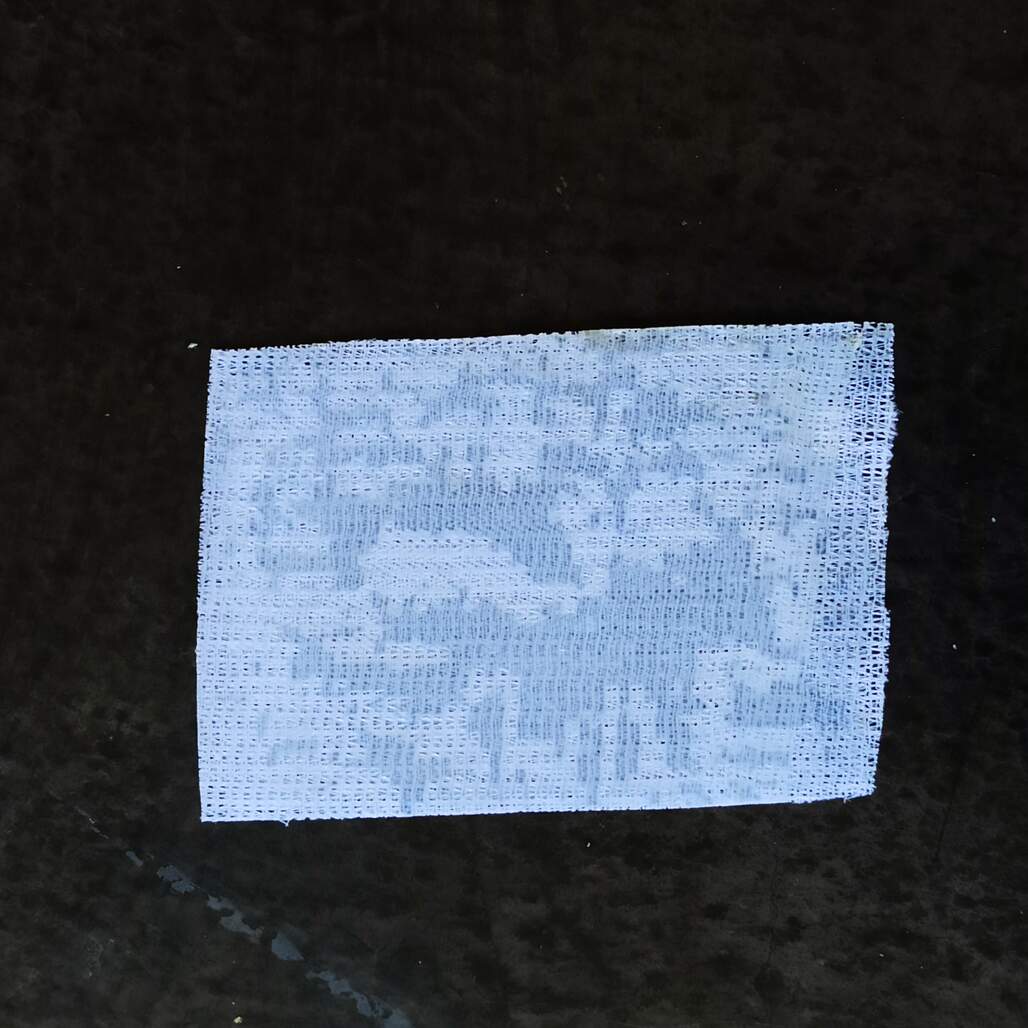
Here you can see how the coupons came out, the wax paper was bonded to the compositeHere you can see on detail some of the holes inside the material due to the lack of resin.With the light on the back you can appreciate this issue on the mesh and cloth materials.
After this tests and exited with the success using the vacuum bag I decided to make another round of tests ensuring enough resin between each layer to avoid holes.
Here you can see the detail video of the vacuum compressing process of the second round of coupons
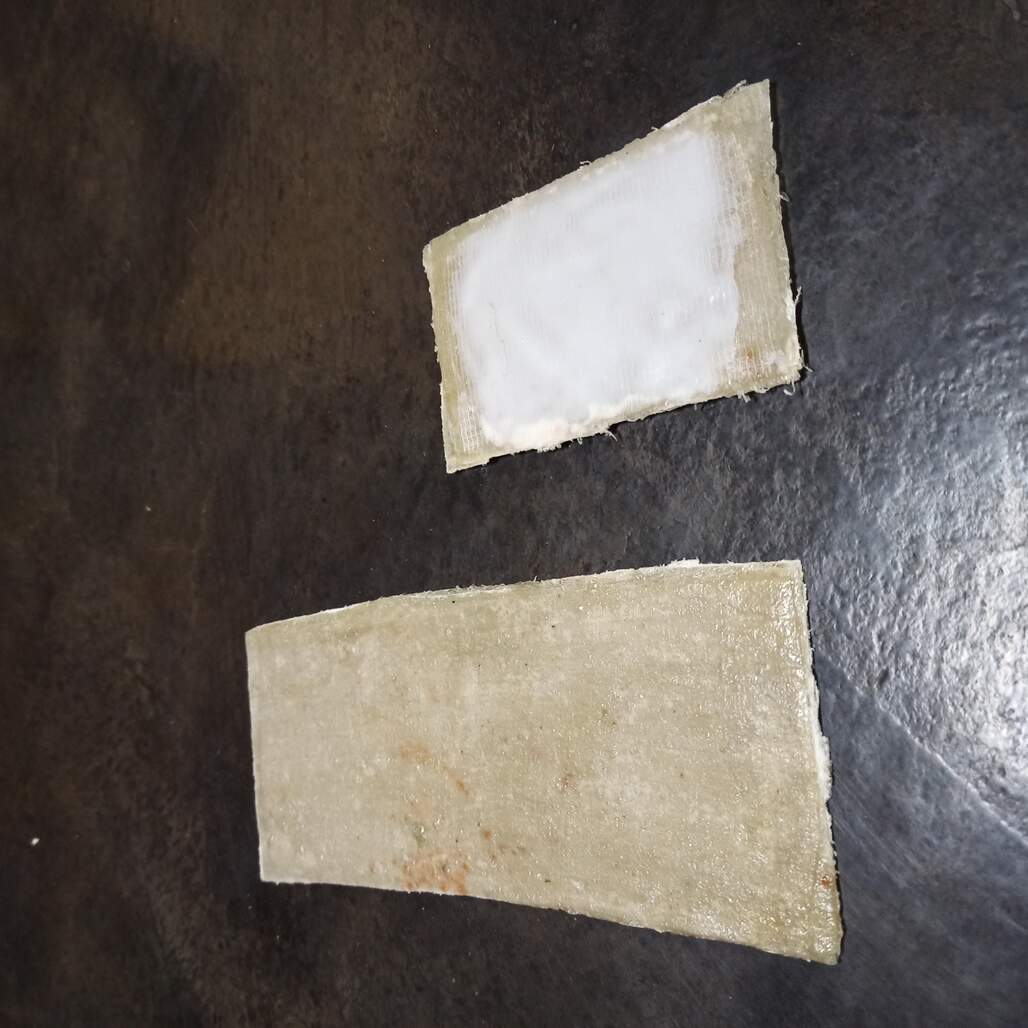
The idea with this new round was to experiment with a larger 4 layers of cotton composite to test strength and one with a first layer of silicon rubber and then the composite on top that can be used on the tank to make the inside surface safe for the water.
Round two results
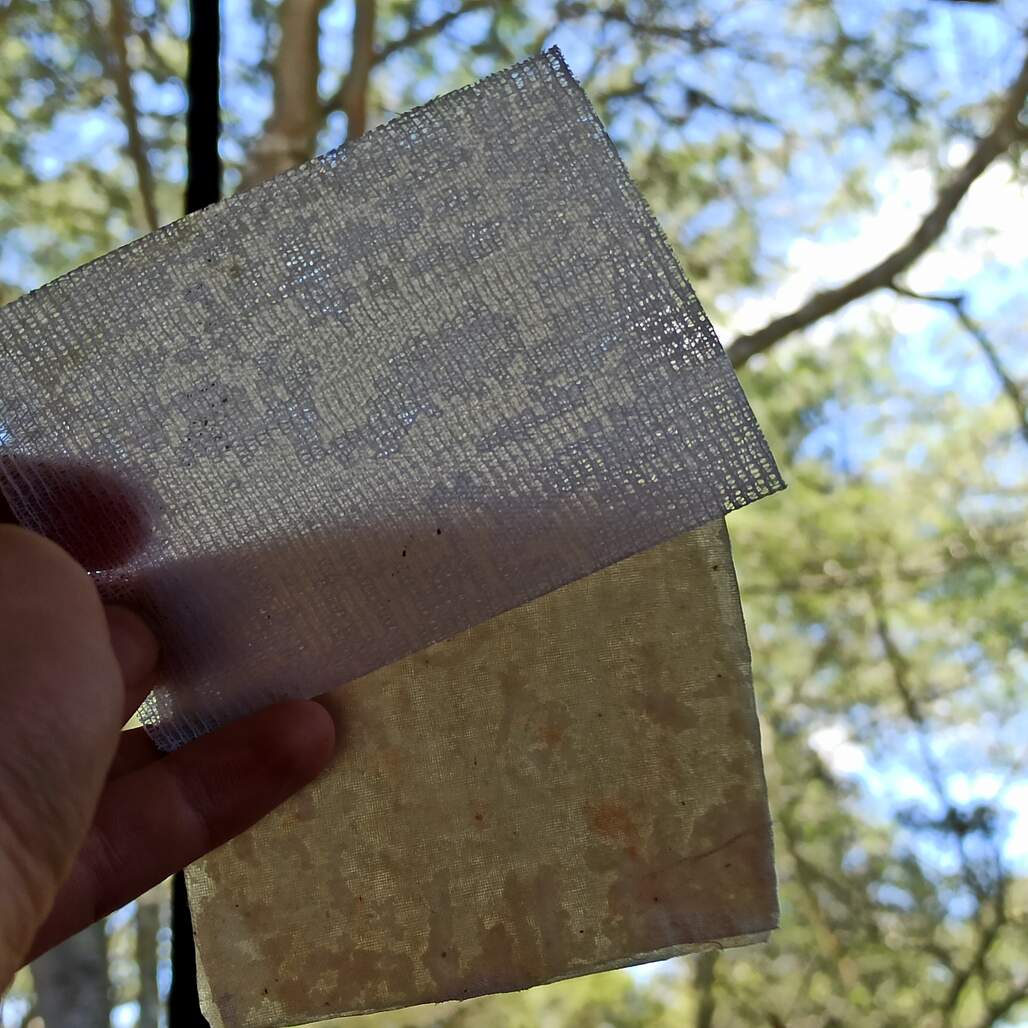
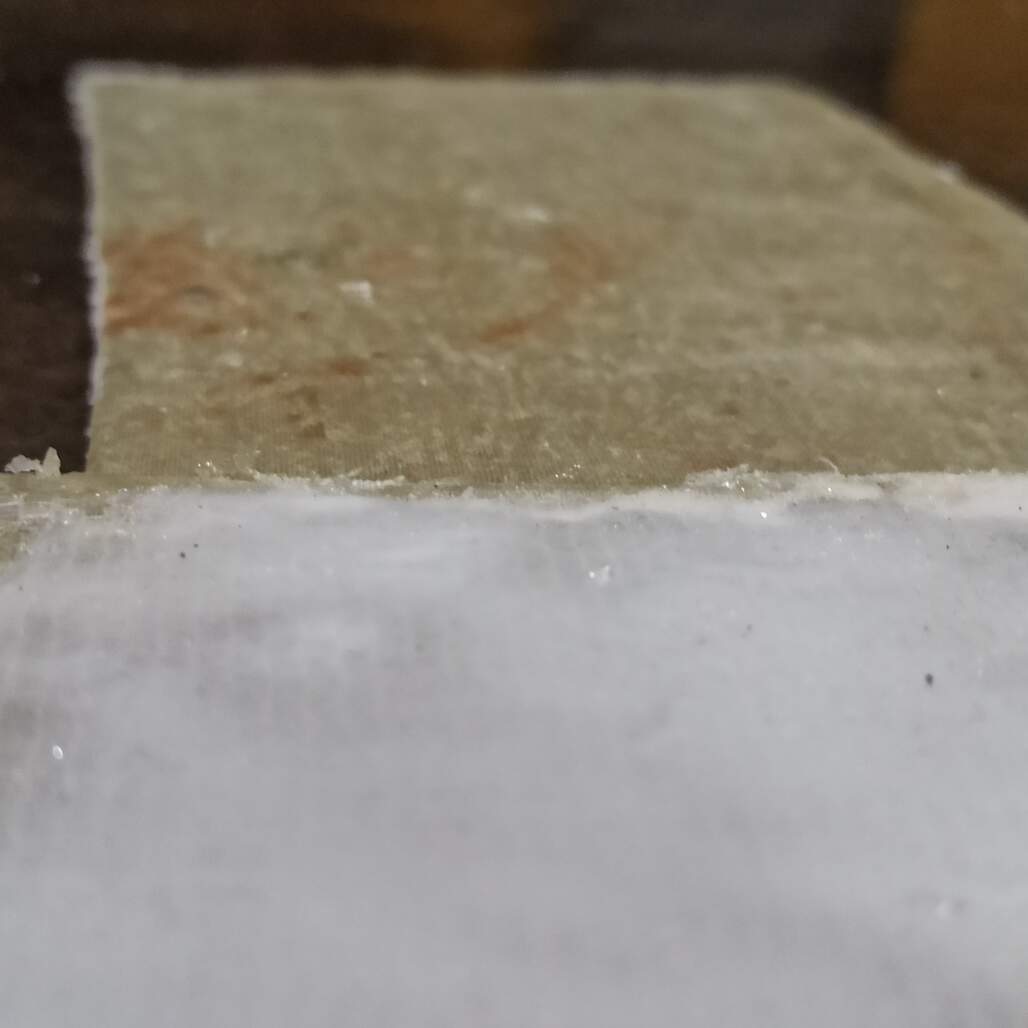
Here you can see the size difference of the two coupons, both now with enough resin avoiding holesDetail of the different surface finish, the silicon rubber test was a success.
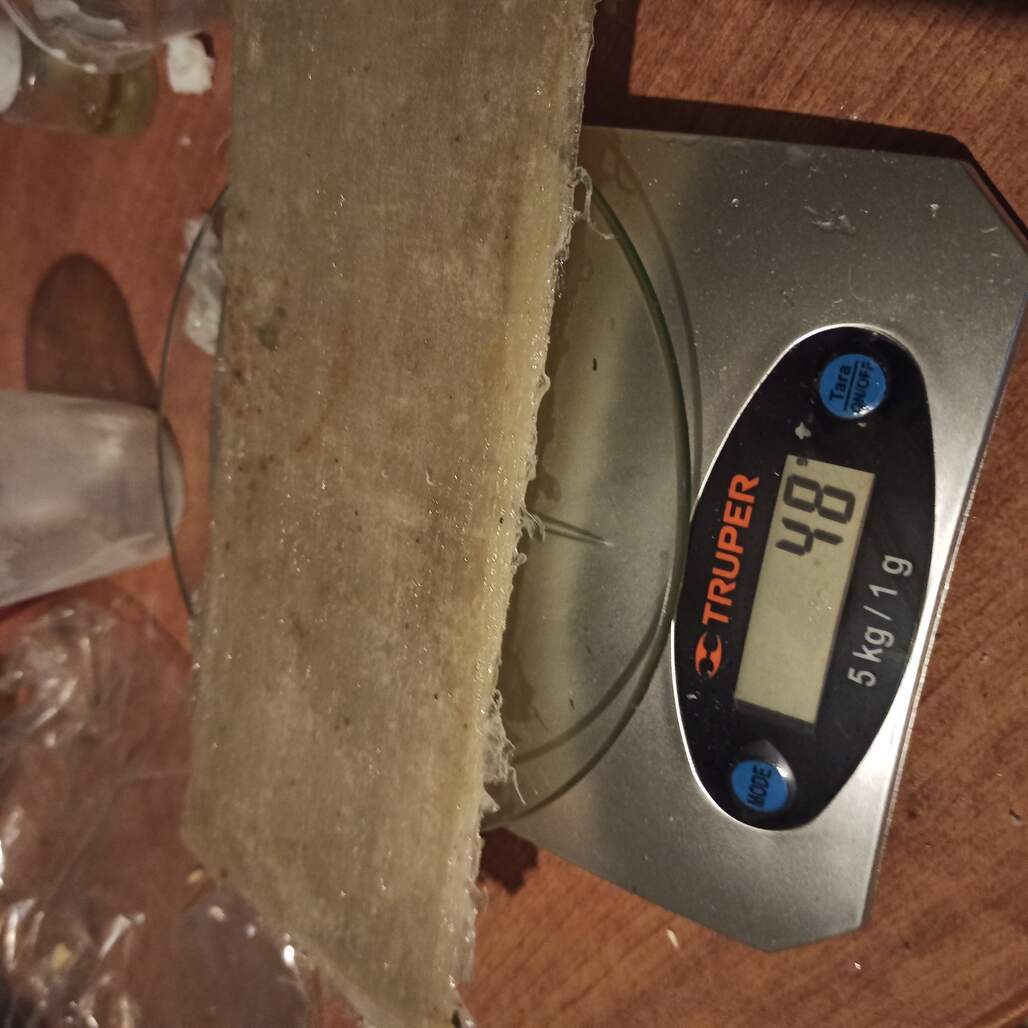
This was the 'strength' test, this coupon holds 1kg over a 16cm span without any problem and it only weights 48 grams
I consider both tests a success, the silicon rubber surfaces is nicely integrated with the composite material, the mesh provide good adhesion between the resin and silicon. This could be a nice second attempt to make the water tank. Also the strength of the other coupon was amazing, making this was a great experience and I now really see the potential of making composites using compression to improve the end results.
Conclusions
This assignment took way to long to be realized, the week that was initially planed for was only used to create the mold, the thermoforming process was delayed and finally we were not able to fabricate the water tank this way.
The change on fabrication process was also challenging for me, as I never have done composites or something similar ever before. I was a bit lost and after some research, I have a better understanding of the topic but I felt that more tests and tools would help me to make this easier. But I make my best try with what I have.
I want to thank Epifanio, my global evaluator, for pushing me further into compression composites, it was an awesome journey! I first intended ti make this week a thermoforming process but then I have to shift to composite, I choose the easiest, a simple open molded composite that I build layer by layer. I'm very happy with the end coupons!