Individual: design a mold around the stock and tooling that you'll be using, mill it (rough cut + (at least) three-axis finish cut), and use it to cast parts
Group: review the safety data sheets for each of your molding and casting materials, then make and compare test casts with each of them
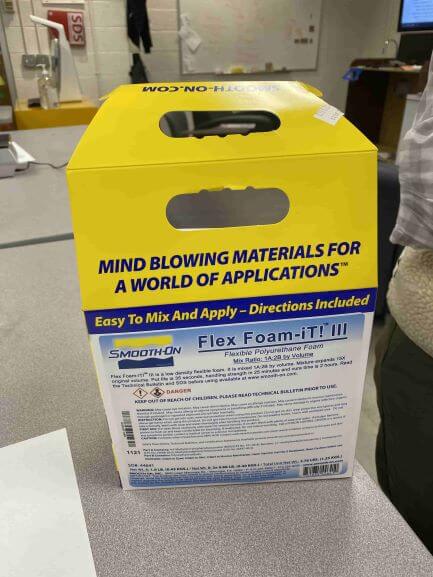
For the group assignment, we used an existing wax mold to model the Wheaton Logo using Flex Foam-iT III
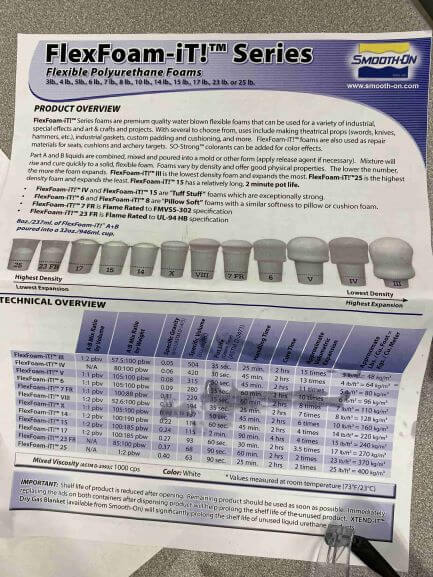
We saw that it has a 35-second Pot Life, 25-minute Handling Time, and 57.5A:100B by Weight Ratio
To clarify, the Pot Life means that we had 35 seconds to mix the correct ratio and pour.
The Handling Time means that after 25-minutes, we could handle the final result.
The Weight Ratio means that the ratio of substance A to substance B had to be equivalent to 57.5:100. This was not super easy as we had to use proportional math to tell how much of each we needed.
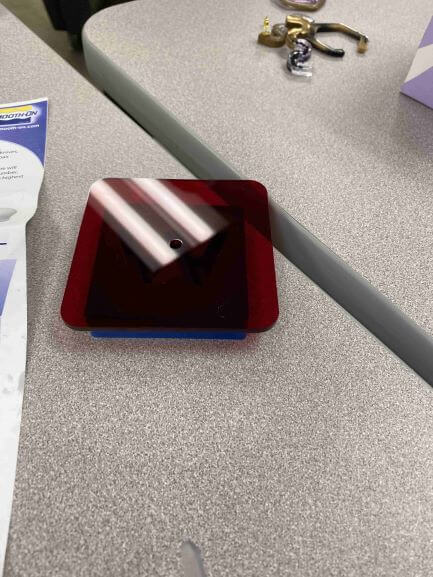
This material expands when curing, so we had to use a lid with a hole so that the W would be flat on the bottom
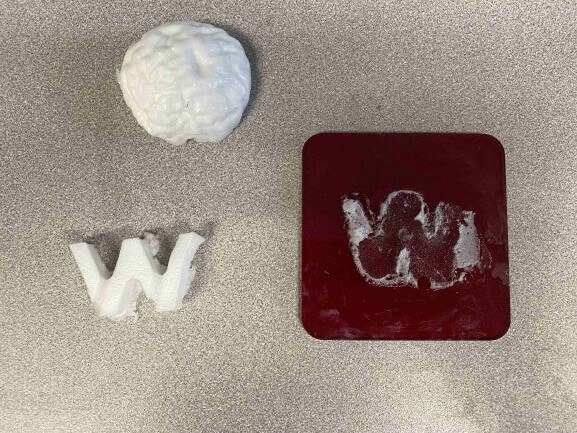
The final result came out okay, but it was very difficult to remove
I really didn't like working with Flex-Foam-iT III because of the extremely short pot time. I was stressed trying to get the ratio right while also mixing properly and pouring, all within 35 seconds!
Also, we learned that gloves are required while handling this mixture because the material can easily stick to skin for weeks, causing a rash!
All groups also worked together to create this spreadsheet which contains all necessary information for all molding and casting materials in the lab, as well as some helpful tips. Please note that I cannot control the sharing settings of this document, so hopefully you can access it!
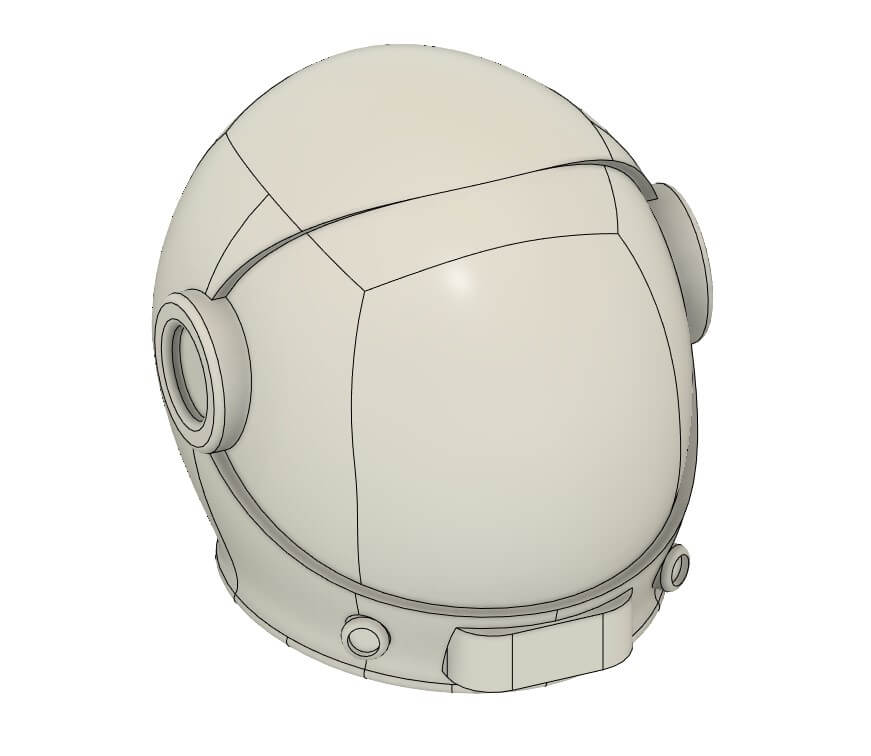
For my mold, I decided to make an astronaut helmet because I figured milling the curves would be really neat! I also have been wanting to mess around with forms and modeling in Fusion, and this was my first ever attempt.
The forms in Fusion definitely have a steep learning curve and aren't easy to work with, but I think my design came out pretty good!
For anyone trying to learn how to sculpt in Fusion, I highly recommend the F1 Helmet tutorials by Edwin Rivera. He goes through the basics and some great techniques to get you started.
And, lucky for me, the fact that he was sculpting a helmet really helped!
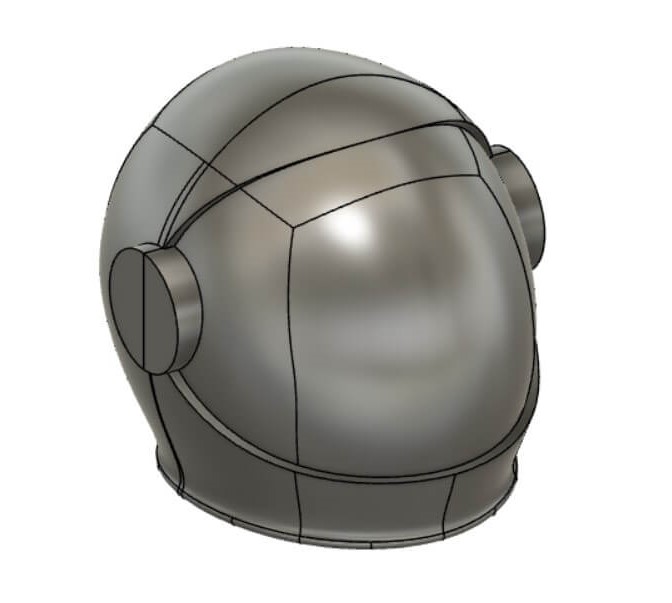
I then realized that the small details on the bottom of the helmet would be difficult to mill, especially the two circular pieces along the jaw. I also realized that the indents on the side rings would be impossible to mill with a 3-axis desktop mill (the Roland). So, I simplified the design to work for this assignment.
Here is the Fusion model of my helmet with more detail
And here is the simplified, millable design
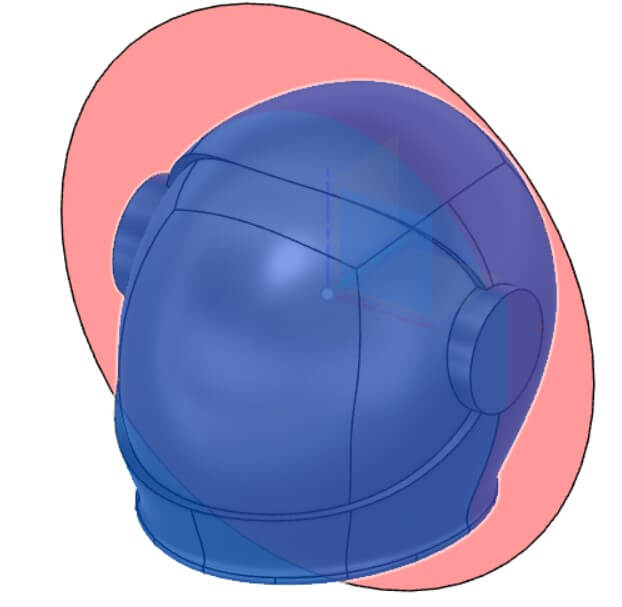
I then split this design in half such that the mold would create 2 pieces that could be adhered in the middle
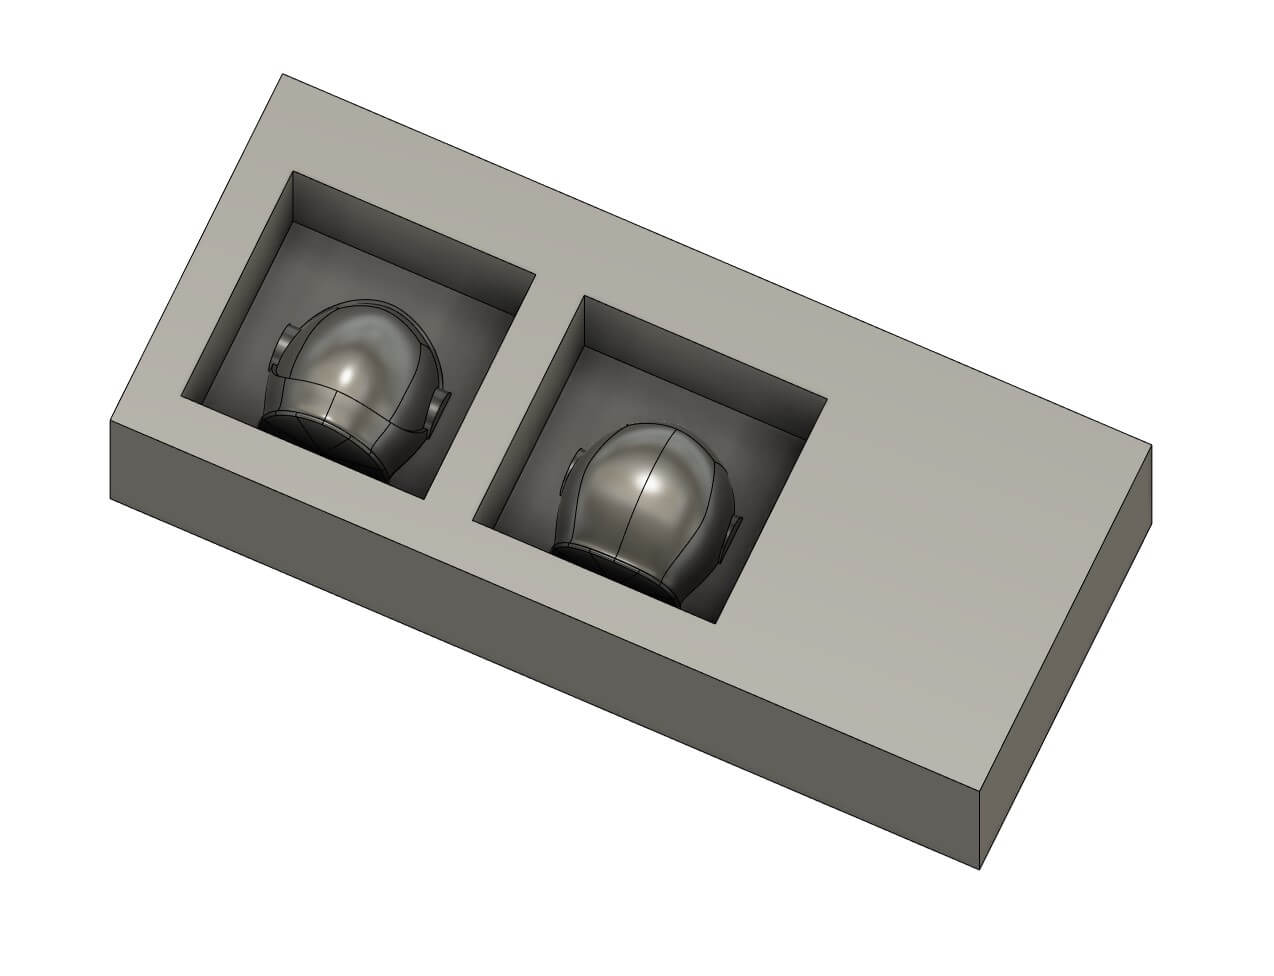
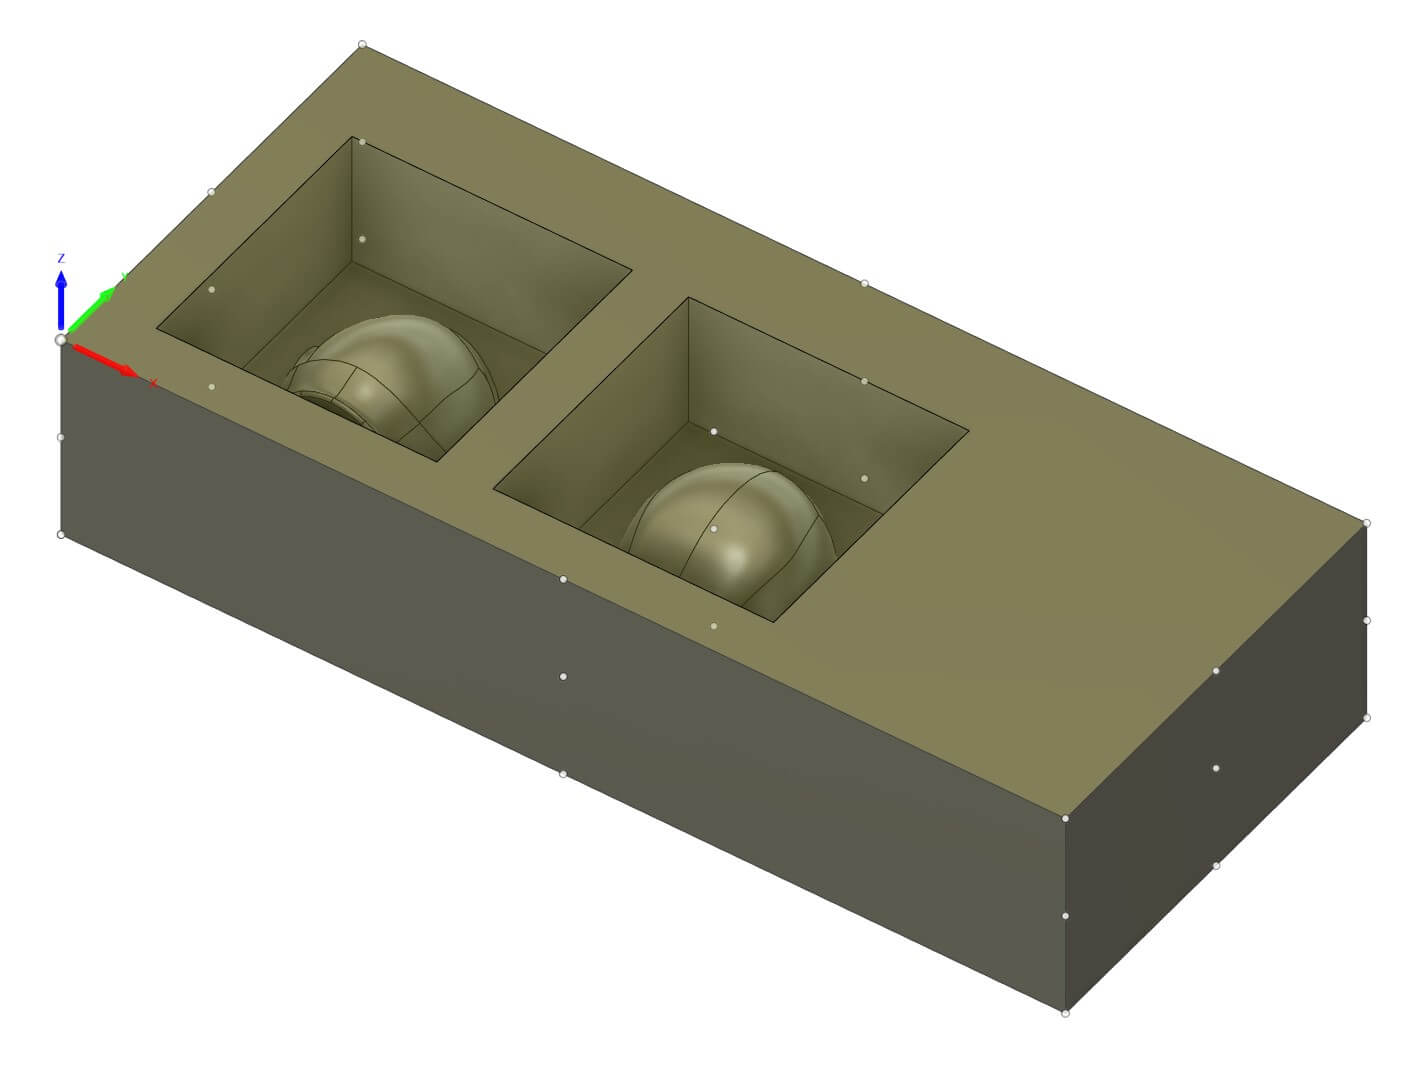
I measured my molding-wax block and added it into the design
I then added 2 pockets to the wax block and aligned each piece into a separate pocket to make two positive molds in which to pour the silicon.
Now I was ready to specify the machining process within Fusion!
I knew that I would need 4 toolpaths because each half needs a rough cut and a finishing, smooth cut.
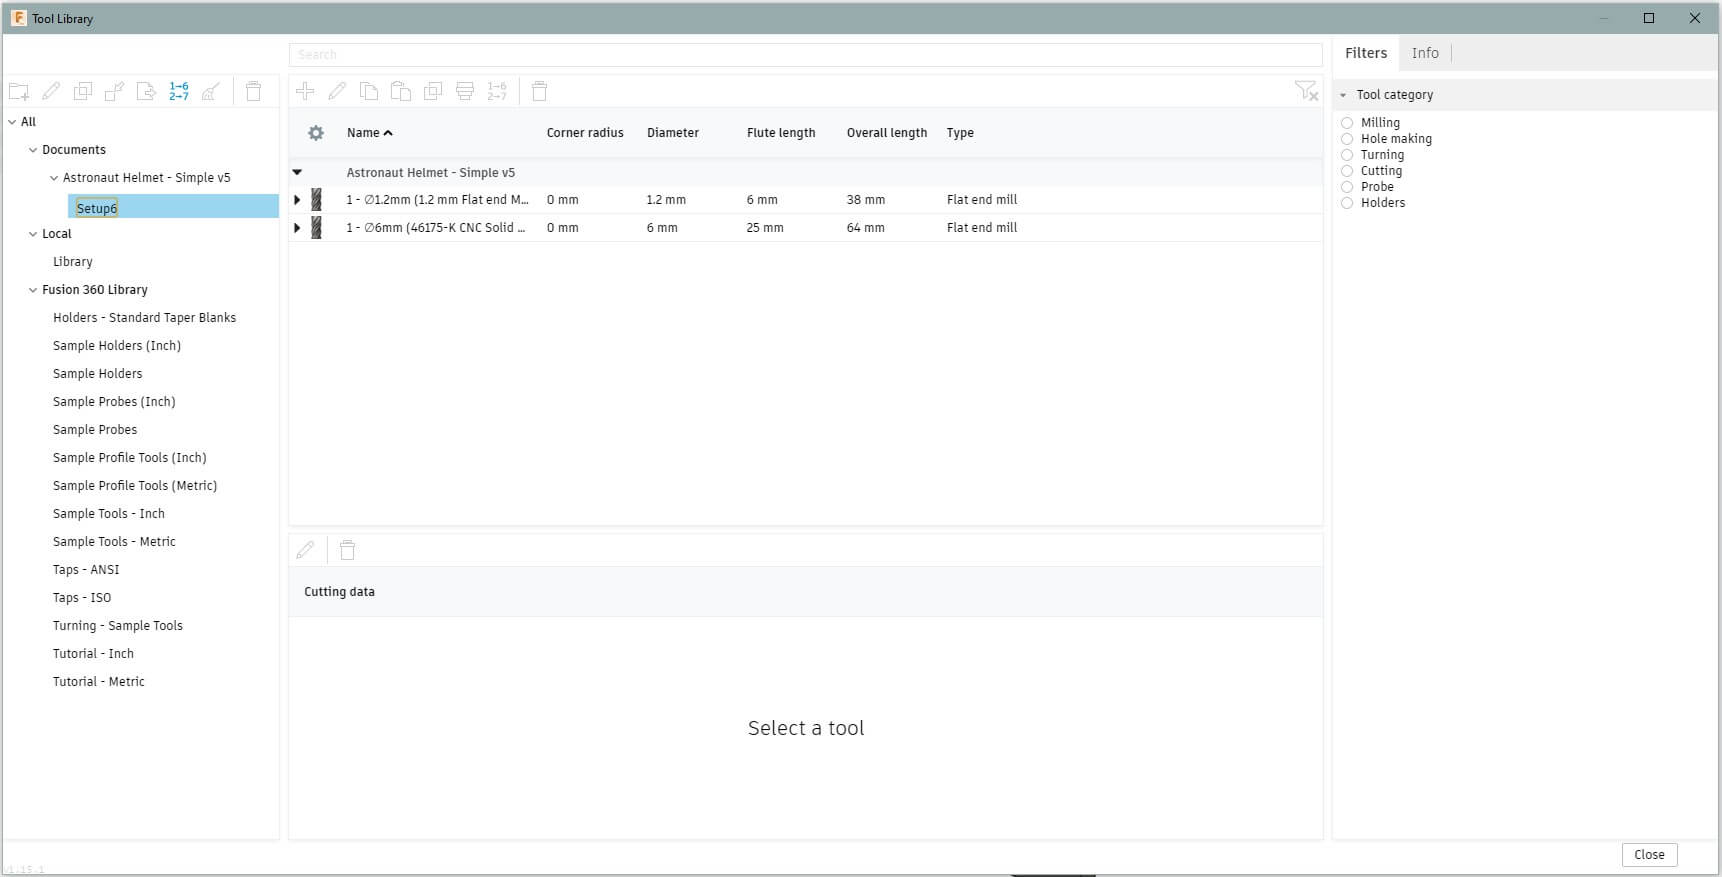
But first, I had to import the endmills we were using into Fusion. Our classmate, Tuna Ozturk, created the libraries to import and shared them with us.
Once the two endmills were in my tool library, I could specify the toolpaths.
I started by using 3D Adaptive Clearing with the 6mm endmill for the rough cut.
I first generated the setup that used my wax block as the stock and set the origin to the bottom-right corner when looking from the top.
Here is the tool library showing both endmills that I used in my design. For this rough cut, I wanted the larger, 6mm endmill.
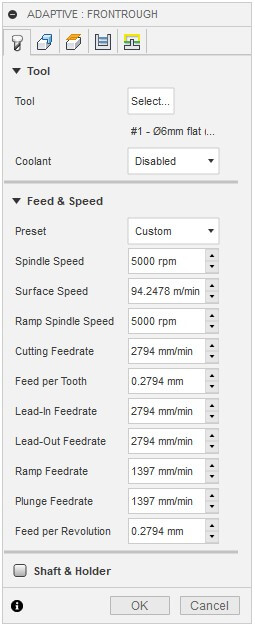
On the first tab (Tool), I had to select the 6mm endmill, disable coolant, and set the spindle speed to 5000 rpm
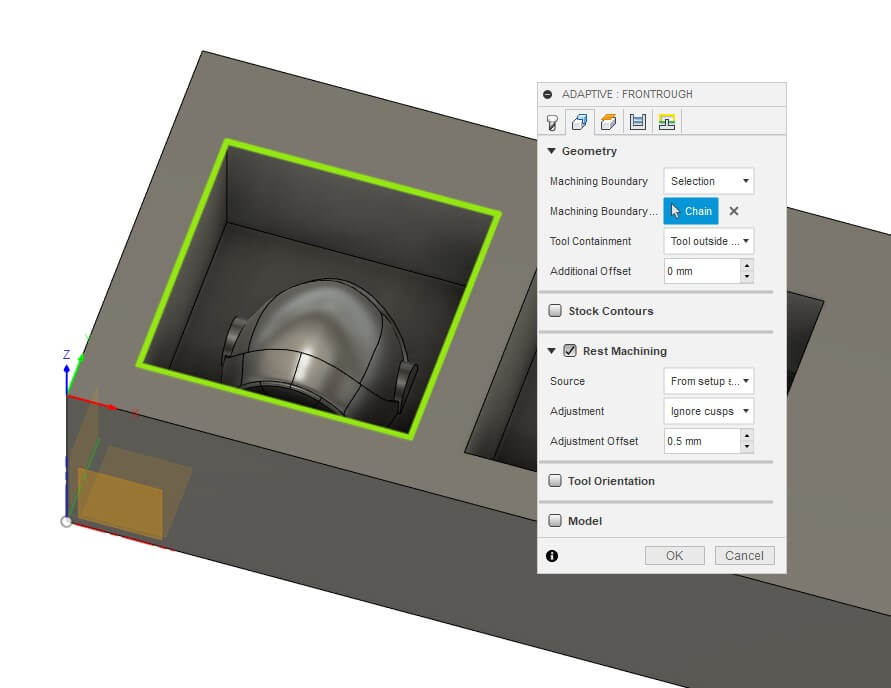
Then in the Geometry tab, I had to change the machining boundry to 'Selection' and select the outline of my pocket as the area to clear
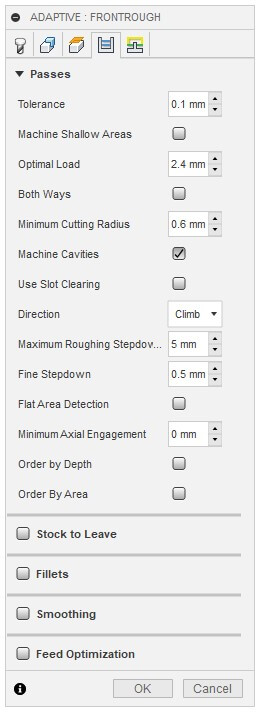
Finally, on the Passes tab, I had to change the Maximum Roughing Stepdown to 5mm and disable Stock to Leave
I did this for both rough cuts then used Fusion's Simulation feature to simulate the toolpath.
It looked like it was doing what I needed, so I repeated this process with the same settings for the back mold.
Now it was time to specify the smoothing path.
There were a few different options within Fusion for what type of 3D path I wanted for this design. I was between Scallop and Spiral but ultimately chose scallop because it looked like the best fit for my design.
Here is the tool library showing both endmills that I used in my design. For this smooth cut, I wanted the smaller, 1.2mm endmill.
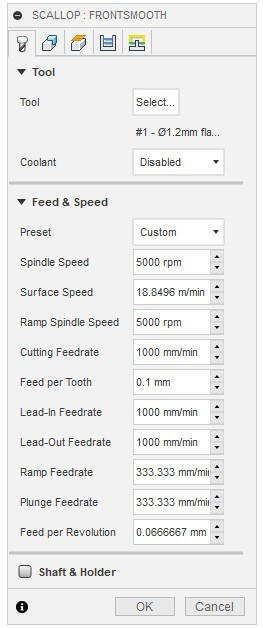
On the first tab (Tool), I had to select the 1.2mm endmill, disable coolant, and set the spindle speed to 5000 rpm
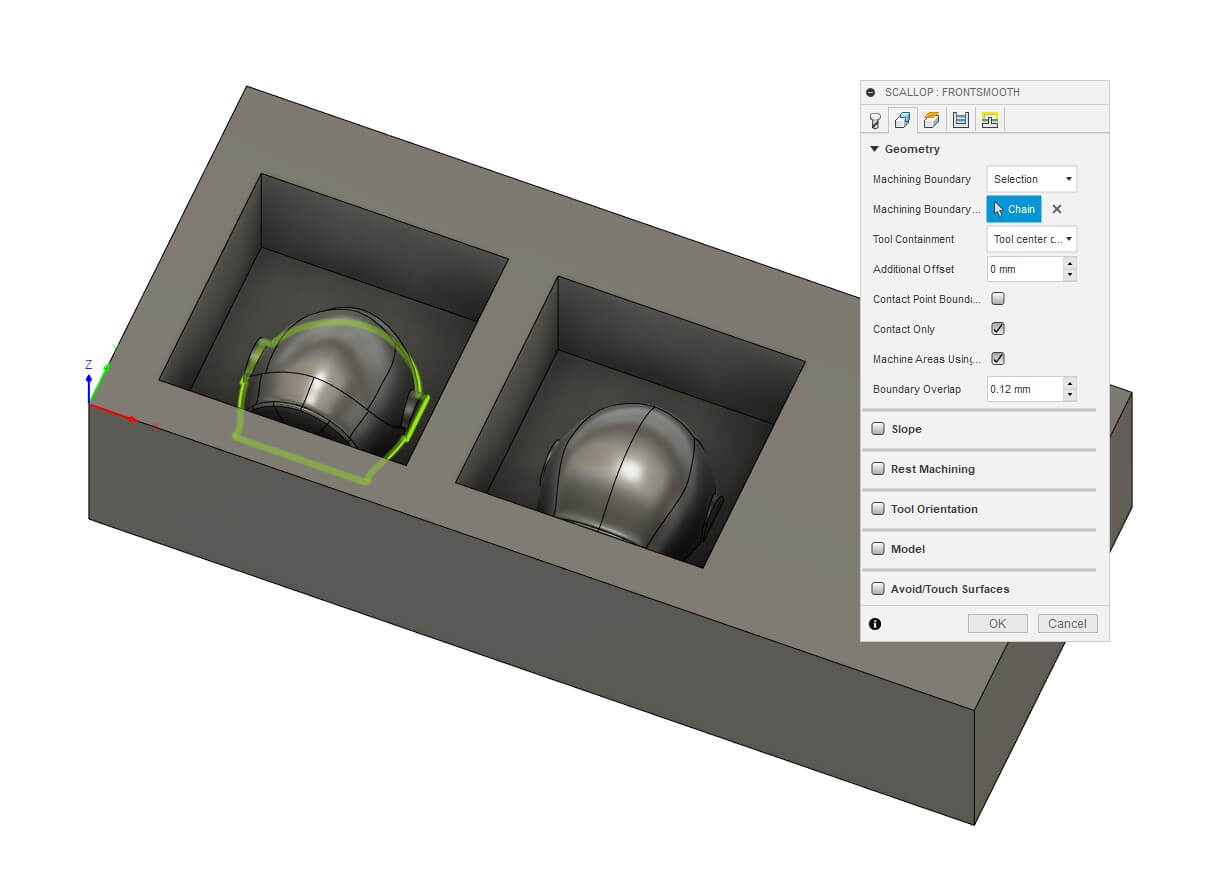
Then in the Geometry tab, I had to change the machining boundry to 'Selection' and select the outline of my helmet as the area to clear
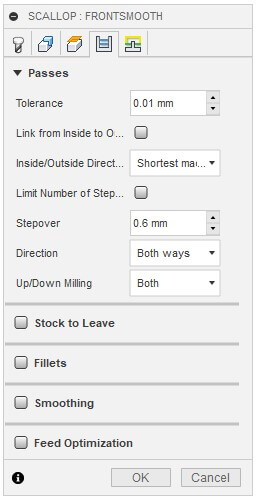
Finally, on the Passes tab, I left everything as the default settings for a 3D scallop with this size endmill
I want to very quickly note that when I was first creating the smoothing paths, I had set the geometry to be the same as the rough cuts, so it included the walls of the pocket.
I ended up milling the front with this geometry, but quickly realized how pointless it was to have smooth walls since they wouldn't even show in the final product. It also added a ton of unnecessary time to the milling.
As you can see in the simulations below, changing the geometry changed the estimated time from 15 minutes down to about 2! This was also true when I physically milled it.
Here's the simulation with the pocket selected as the geometry
And here's it with the helmet selected. Much faster!
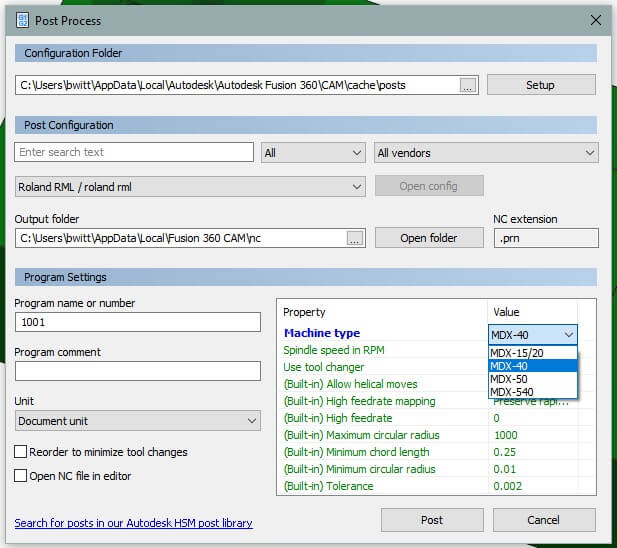
Then, I right-clicked each toolpath and selected 'Post Process' to generate the machine code.
I had to set the machine as 'Roland RML / roland rml' in Post Configuration and select 'MDX-40' as the Machine type under Program Settings to make it compatible with our Roland Desktop Mill.
When actually posting, I had to keep the program name as a number, but was able to rename it when selecting the save location.
Now I was ready to begin milling!
I installed the 6mm endmill, secured my wax block using double sided tape, loaded the first rough cut into FlatCam, and set the origing to the left corner closest to me.
There was just enough clearance for the mill to move above the block!
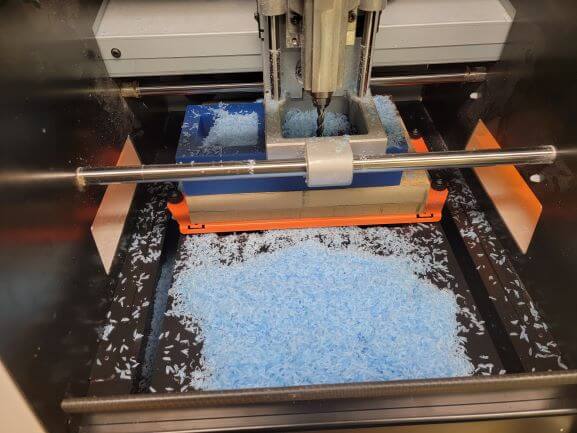
I began my first rough cut!
Here's the milling of the rough cut
The rough cuts resulted in a lot of wax chips to vacuum.
The image to the right is just from one mold!
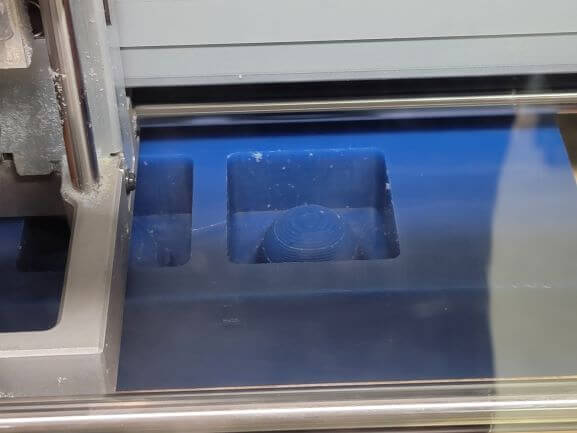
Here's what the back mold looked like after the rough cut was complete!
I then switched the endmill to the 1.2 mm one and began the smoothing pass.
The process of switching bits was a bit of a pain because we had to transition from the head that held a 6mm bit to one that holds the 1.2 mm bit.
It was the exact same process and putting a mill in the Axiom. You use 2 wrenches to loosen the head and then remove it using your fingers. It is just such a confined space that the wrenches kept slipping causing me to slam my hands into the Roland.
I eventaully got the hang of it with some help from a classmate and then was able to help a different classmate myself!
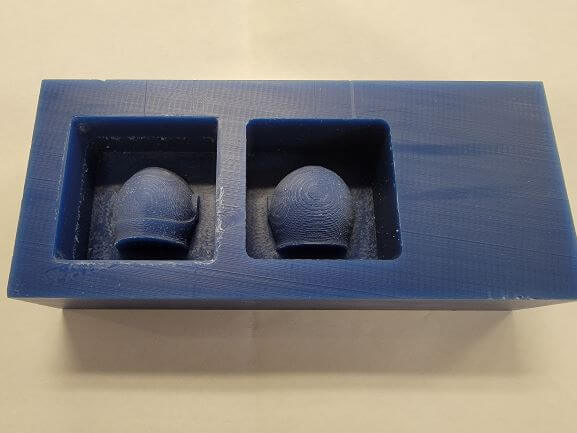
Here's the milling of the smooth cut
My molds were now ready to be poured!
I decided that I wanted to make my astronaut helmet out of chocolate for a taste that's out of this world!
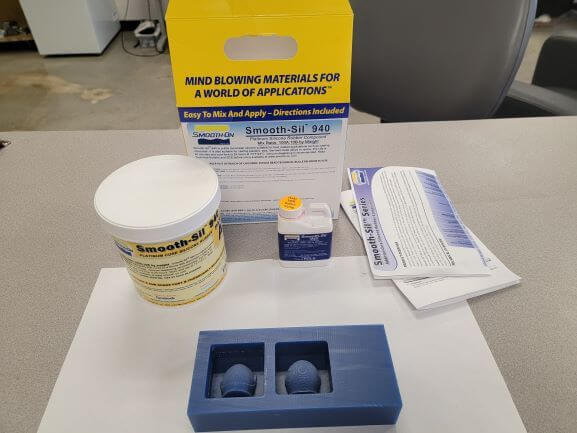
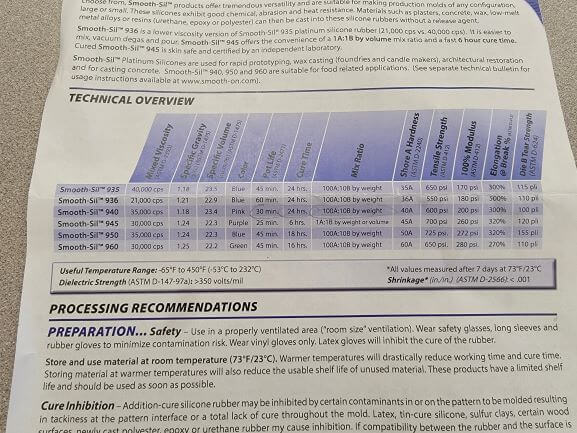
Our lab had Smooth-On Smooth-Sil 940 food-grade silicon for me to cast my molds with.
The info sheet showed me that Smooth-Sil 940 (3rd row) has a pot time of 30 minutes, a cure time of 24 hours, and a mixing ratio of 100A:10B by weight.
I found that my molds took about 60 grams A and 6 grams B to fill completely. Any less and you could see the blue of the astronaut helmet.
I don't really have pictures of the process because my hands were an absolute mess, but I attempted to use the vacuum chamber to remove air bubbles, but I think I left it in too long or had the pressure too high. The mold ended up overflowing in the chamber, so I had to mix some more silicon to fill in what spilled.
I then let this sit for 24 hours.
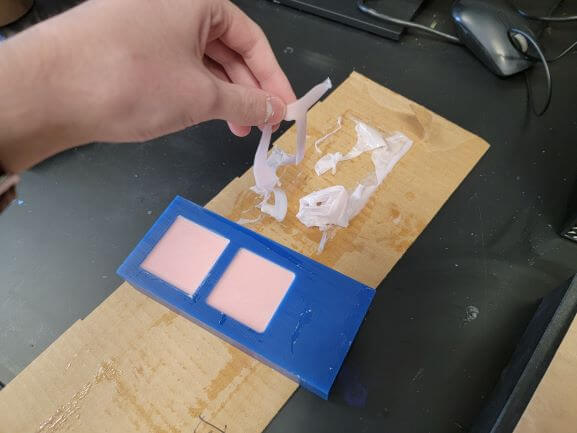
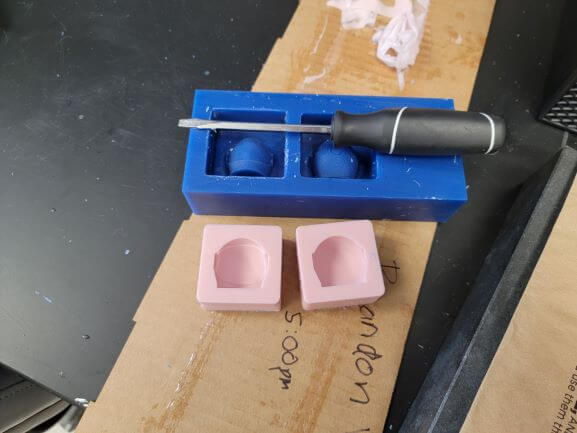
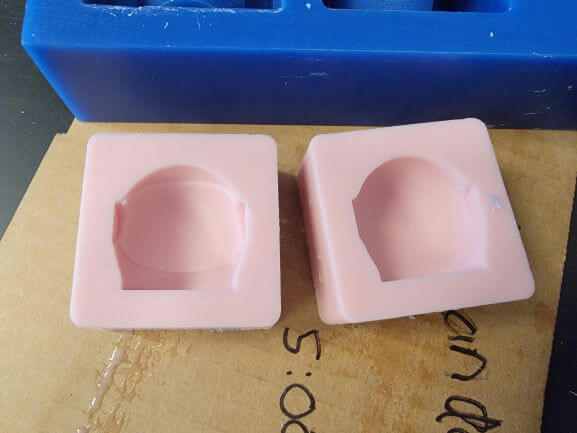
After the molds sad for 24 hours, I cleaned up the wax. This was actually very satisfying...
Then I very carefully pried the molds out of the wax using a flathead screwdriver
They came out perfectly!
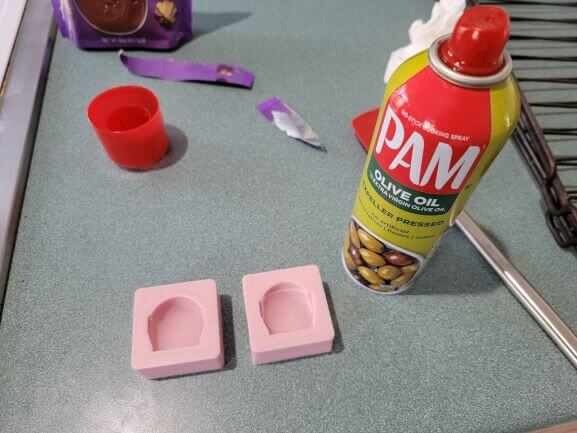
I then washed them with dish soap and warm water then sprayed them with Pam to make removing the chocolate easier
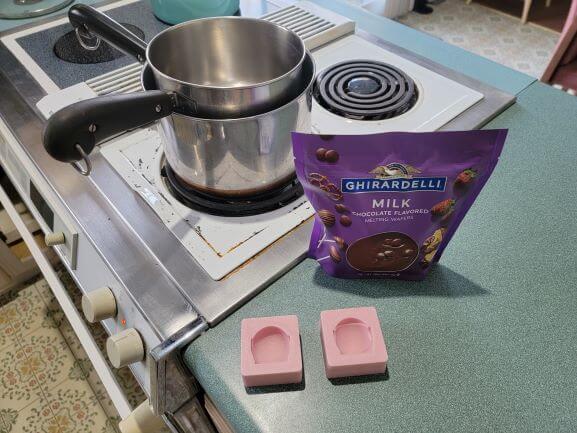
Then I set up a double-boiler using 2 pans on my stove. The bottom pan holds hot water while the top pan melts the chocolate.
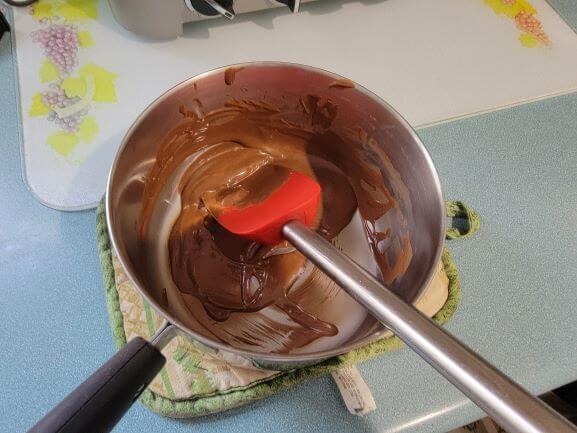
Then I continuously stirred until the chocolate contained few clumps. I kept stirring until it was room temperature.
This stirring process of the cocolate is called tempering and it ensures that the cocoa butter doesn't separate from the cacao. This results in a smoother, better-textured, shelf-stable chocolate if done correctly.
Did I do it correctly? Keep reading to find out!
I followed this tutorial on how to temper chocolate.
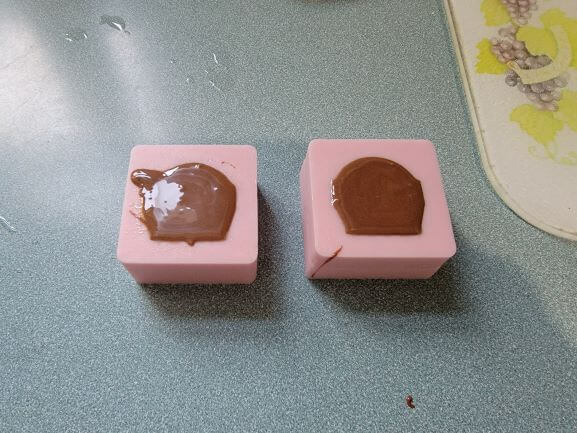
Then, I poured the chocolate into the greased molds and popped them into the freezer for about 15 minutes.
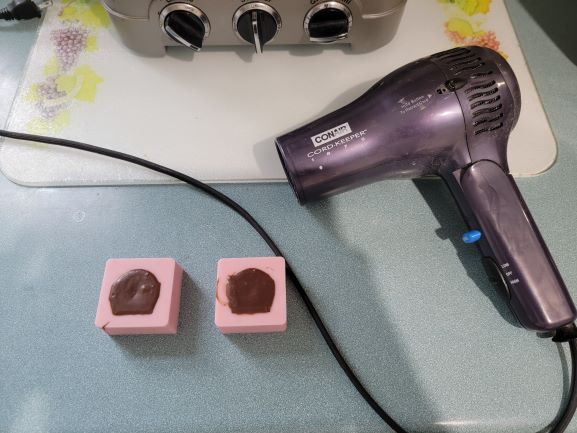
Then I used a hair dryer on the lowest setting to melt the chocolate at the top of each mold
Then I pushed the two halves together and popped them back in the freezer for another 15 minutes
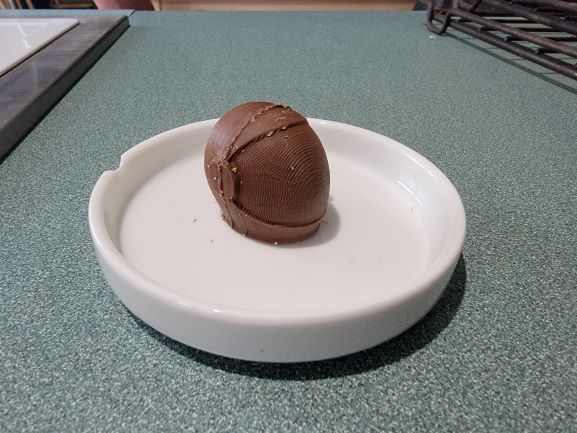
After removing the final chocolate from the molds, I used a knife to cleanup the seam between the 2 halves a little bit.
I think my astronaut chocolate came out spectacular!
This really is one small step for man, one giant leap for mankind!