Week 1a Project Management.
Welcome to the first part of week 1. We've learned how to build a website!
Summary
Project management with git is powerful for documenting progress during Fab Academy. In this article I’m going to show you step-by-step how I set up this Fab Academy website. The last section provides an overview of the problems I ran into and contains some tricks and tips for debugging. To navigate quickly to a topic, a table of content is enabled as you can see in summary. The second part of this week’s assignment, about the final project, can be found in Week 1b Principles and Practices.
Assignments
- Make a website and describe how you did it
- Introduce yourself
- Document steps for uploading files to the Gitlab archive
- Push to the class archive
- Sign and upload the Student Agreement
Workflow and planning
Planning is essential to succeed in the Fab Academy. We were handed over some useful tools. One of them is spiral development.
Spiral development
Essentially: make an MVP (Minimal Viable Product), and add features on top of that. This enables bottom-up debugging. It’s the opposite of top-down debugging, where the project is too complex and becomes a black-box.
This is the first time I’ll be using Markdown and a Static Site Generator. Therefore, I’ll explain the process step-by-step. Using the ‘spiral development method’, my plan is to:
| Spiral | Tasks |
|---|---|
| 1. | Install all required programs for web design |
| 2. | Set up git |
| 3. | Learn how to write in Markdown and document the first week in .md file |
| 4. | Learn what MkDocs is and how it works |
| 5. | Download the MkDocs template locally and change it a bit |
| 6. | Upload it using git |
| 7. | Find a good template for a static site generator e.g. Hugo or Jekyll |
| 8. | Download the template locally |
| 9. | Install the required Jekyll software |
| 10. | Modify the files: add basic information in the .about config.yml page |
| 11. | Remove all images from the file and temporarily store it in a folder on your desktop (to not worry about file size of the template) |
| 12. | Upload the new Jekyll template to git |
| 13. | Remove all sample blog posts |
| 14. | Copy and paste the .md files with the weekly assignments from the MkDocs template to the blog posts folder in the Jekyll theme |
| 15. | Write personal introduction and add student agreement |
| 16. | Upload files to Gitlab and test if it works |
| 17. | Remove elements from the Jekyll theme that are not needed or desired, such as the contact form, sign-up for email list, link to theme in footer, etc. |
| 18. | Upload documentation for Week 1a |
| 19. | Document sketches for final project Week 1b |
| 20. | Compress all images and add them to the posts and pages |
| 21. | Create an avatar and replace the one used in the template |
| 22. | Upload a new logo |
Bonus, if all goes well and there is time left:
| Spiral | Tasks |
|---|---|
| 23. | Modify the theme’s .css file to customize the design |
| 24. | Make custom-graphics |
| 25. | Make interactive components with Javascript, Google editors |
The basics before getting started
If you’re not an experienced programmer (just like me), you’ll have to get familiar with and/or install a bunch of programs: terminal, package manager and a text editor, to name a few. I’m briefly introducing them here. Note: I’m working from a macOS operating system.
Learn to work with the Terminal
According to our local instructor Henk, the terminal is going to be our best friend. Open Spotlight Search and type ‘Terminal’. Here are a couple of commands to get started:
ls = list (to show the files/directories in that folder)
cd = change directory (to move to another folder)
pwd = print working directory (shows your current location)
A great tutorial on how to use the command line is written by Jim Hoskins in this blog for Treehouse.
There is an option for a more advanced terminal: iTerm. But for now I’ll use the terminal.
Install Homebrew
Homebrew is a package manager for Apple to help install programs from the command line. Install Homebrew here.
Choose a text editor
The text editor is an environment to write your code in. The most basic option is Notepad (Windows) or TextEdit (macOSX), a pre-installed text editing tool.
Back at MIT, I worked with Sublime and Atom. At Waag, we use Visual Studio Code, a free source-code editor made by Microsoft. This is the one I’ll be working with and learning along the way.
Compared to Sublime and Atom, I like the user interface and the many features such as:
- Possibility to switch between languages
- Many plugins, see my favorites below.
- Direct communication with Git (will have to figure this out)
- Preview function in split screen
The plugins I’ve installed are (this list will be updated throughout the course):
- Code Spell Checker for checking errors in text
- GitLab Workflow to integrate with GitLab
- vscode-icons to show icons
- Browser Preview show in your browser
- Bookmarks to make lines and jump to them
Setting up Git
Git is the language we’ll be using to upload material to GitLab. It is essential to get the website up!
Git tutorials
I’ve set up git using the following tutorials:
- Tutorials provided by Git.
- This is a living collection of tutorials created by Fab Academy instructors/students around the world to support Fab Academy.
- A video tutorial by the Aalto Fablab
- Information on choosing the SSH key by Gitlab.
- Student page from Elena Cardiel, mentioned by Neil in this lecture.
- I also consulted Harm’s page for guidance.
- And some guidance from Nadieh who’s also in the Waag 2021 team.
Installing Git
Git has been pre-installed on my macOS. If you need to install it, you can do it here.
-
Check your version
$ git --version
If you haven’t installed it, it will prompt it automatically.
Getting the SSH-key
The first step is to check your SSH folder ~/.ssh to see if the key pairs already exist. In my case they weren’t there yet.
Once this is done, the next step is to create an SSH-Key, that allows us to establish a secure connection between your computer and GitLab. Open your Terminal and follow the steps below:
-
Identify yourself. Type
git config –-global user.name “your_username”and press enter and then typegit config -–global user.email “your_email”and press enter again. In this step Git doesn’t give me any response (use the same credentials that you use for GitLab). -
Check if you already have a SSH-Key. I want to use ED25519 because GitLab mentions that this is more secure than RSA. Type
cat ~/.ssh/id_ed25519.pubif you use ED. If you see a long string starting with ssh-rsa that means that you already have a key so you can skip the next step. -
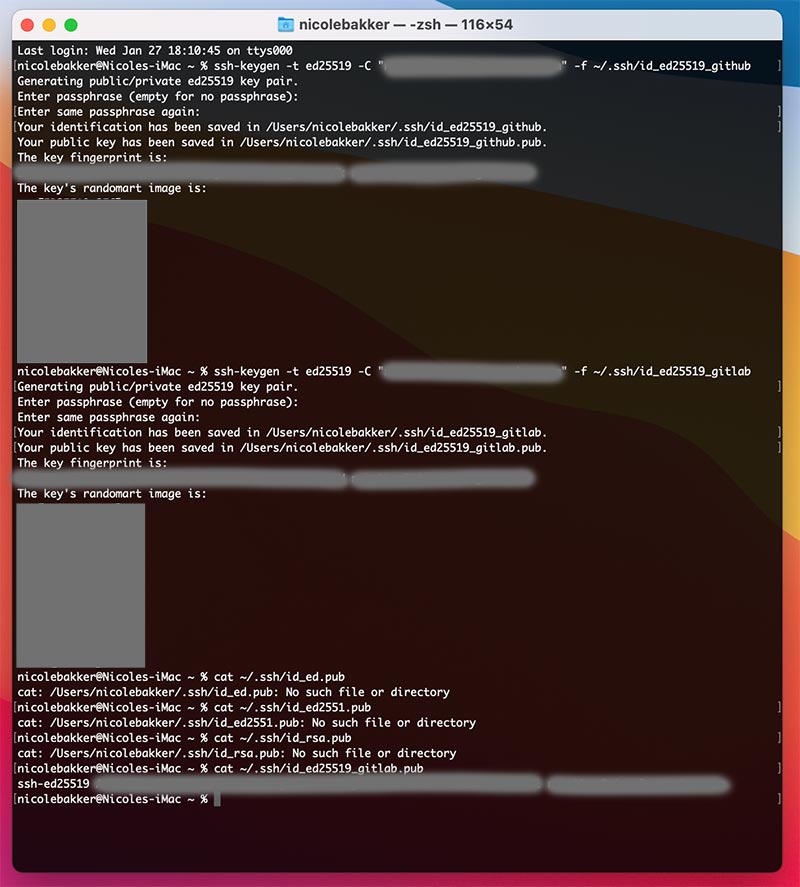
Generate the SSH-Key, using this resource type:
ssh-keygen -t ed25519 -C "your_email"
Here we press enter and will be prompted to enter the paraphrase code. It’s invisible, so hard to find out what you’re typing! Solution: type it in an editor and copy - paste twice. Then you see your “key’s randomart image”.
-
Let’s see our public key. Type:
cat ~/.ssh/id_ed25519.pub
and that huge string is our key.
-
Then we’re going to copy the string:
pbcopy < ~/.ssh/id_ed25519.pub -
Now we’re adding the public keys to GitLab. Navigate to ‘Settings’ and then ‘SSH Keys’.
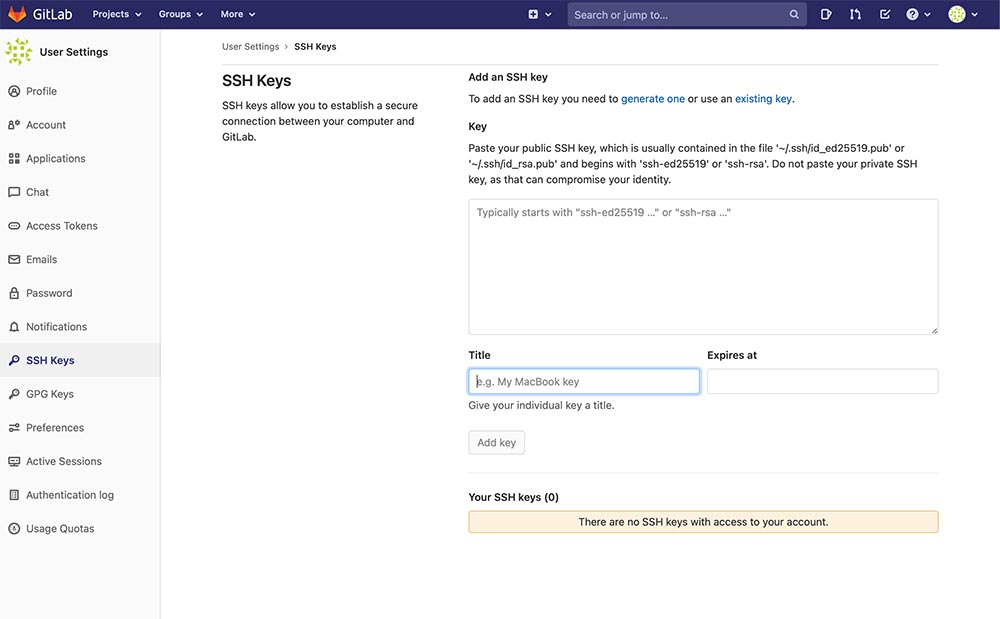
Here I pasted the key, named it Nicole’s iMac, left the expiration date blank, and saved it.
To test that I had set-up the SSH key correctly I ran the following code to add my GitLab account to the known hosts on my laptop.
ssh -T git@gitlab.fabcloud.org
When I tried this the first time I received a “permission denied (public key)” message. That was because I was not using the right name: id_ed25519.pub vs id_ed.pub vs id_rsa.pub.
This is when I learned how to delete a file using the command rm -r, followed by the name of the directory you want to delete:
$ cd ~
$ cd documents
$ pwd
    /users/nicolebakker/ssh
$ ls
    id_ed.pub
$ rm -r id_ed.pub
When I entered the name of the key correctly, after typing yes it returned:
Welcome to GitLab, @nicole.bakker!
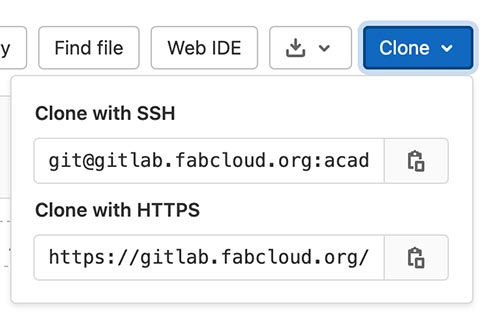
Next, it’s time to clone the online version locally. Navigate to your project page on gitlab and click “Clone”.
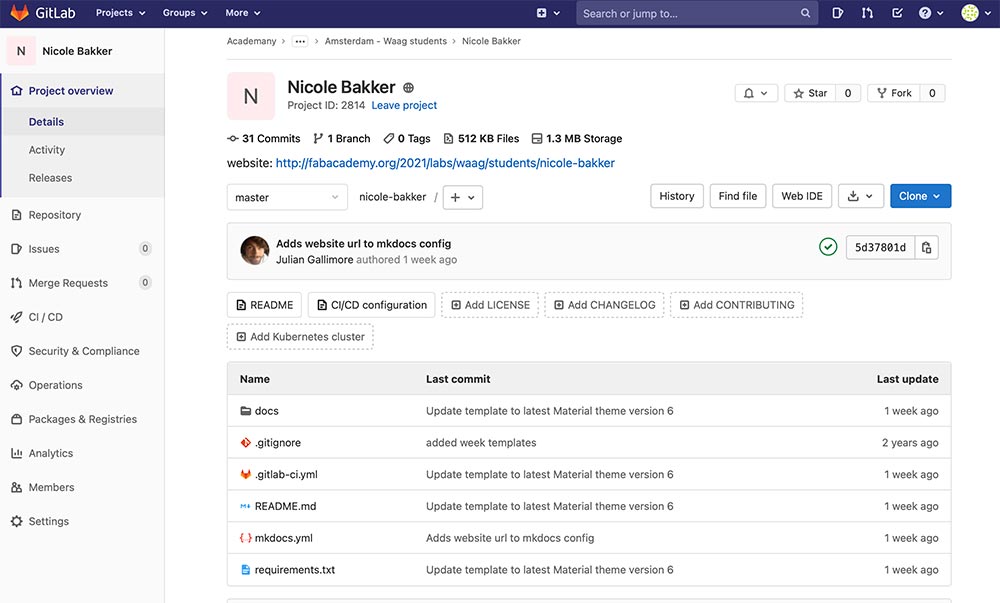
This will show ‘Clone with SSH’ and ‘Clone with HTTPS’. Select SSH.
In your terminal, navigate back to the main folder by:
cd ..
Or navigate to a folder you’d like to put your website in.
Neil’s presentation, including all git commands can be found here.
In your terminal, type:
git clone git@gitlab.fabcloud.org:academany/fabacademy/2021/labs/waag/students/your-name.git
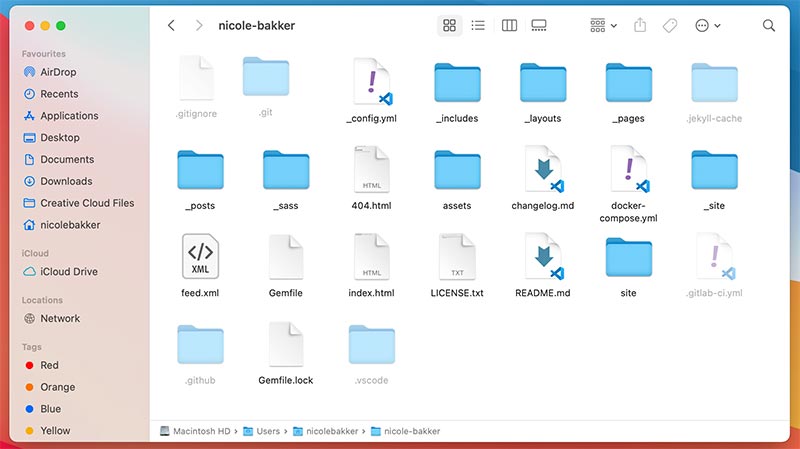
If all went well, you should have folders on your local machine. :)
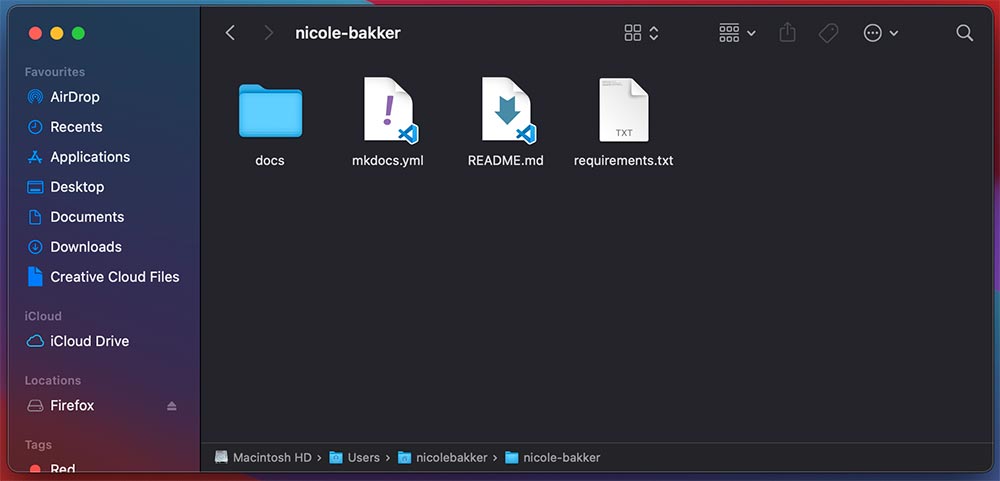
Well, that’s done. Congratulations!
Using Git to upload changes
The list with git commands from Neil can be found here. A git cheat sheet is here. The general procedure is as follows:
-
Navigate to the folder of your website.
cd /users/nicolebakker/nicole-bakker -
It’s good practice to check if there are changes.
git status -
To download the last copy from the repository
git pull -
Add the new files you added to git
git add index.html to upload file by file git add . to upload all the files at once -
To have a working copy of your repo
git merge -
Now name your update, so you know what you changed with this push.
git commit -m ‘change you did’ -
Upload to the Repository
git push
Other commands:
In case you need to remove a tracked file.
git rm
move or rename a file ,a directory or a symlinkgit.
git mv
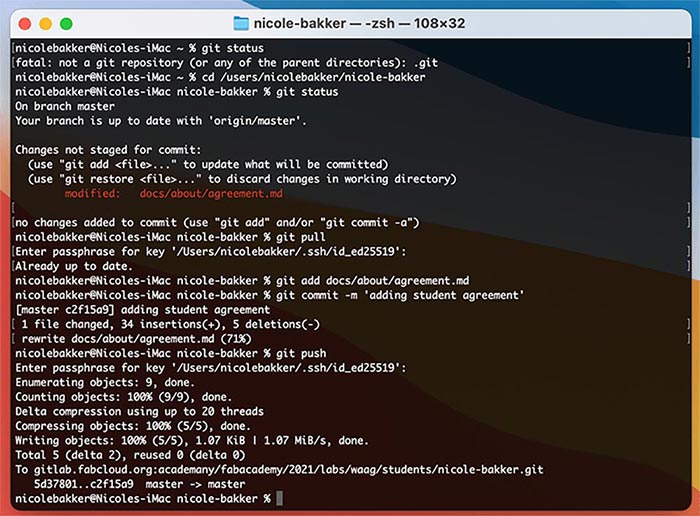
Upload student agreement
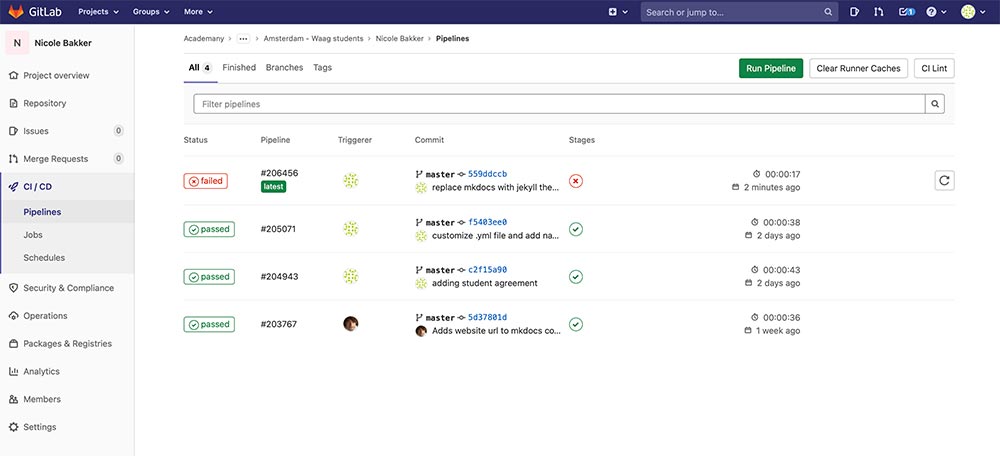
To test if git works, we’re going to upload the Student Agreement:
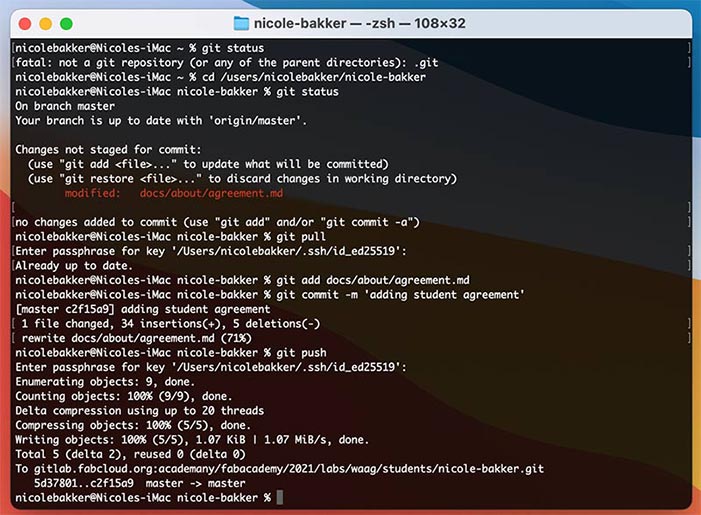
After a couple of minutes in the pipeline, gitlab confirms it’s uploaded.
Using the Visual Studio Code GUI
It is also possible to push changes through the Visual Studio Code interface. I might add this later (spiral method).
Website basics
At MIT, I completed the first 6 weeks of the Fab Academy program. Thus, I’ve built a project page before. Check it out here. Following the principle of bottom-up vs top-down debugging, at the time I chose to write everything in raw html and css, from scratch and without using any template or static site generator. In retrospect, that was pretty hardcore. Why did I do this again? This time I hope to make my life a lot easier. Enter the magnificent world of… Markdown and static site generators!
Markdown
Using the ‘spiral method’, my plan is to first learn how to write in Markdown, which converts text into html (turns out, it’s SO MUCH EASIER than writing in html). Check out my page with commands for the syntax.
Static Site Generators
A static site generator is a software application that creates HTML pages from templates or components and a given content source. The most well-known are: MkDocs, Jekyll and Hugo.
MkDocs
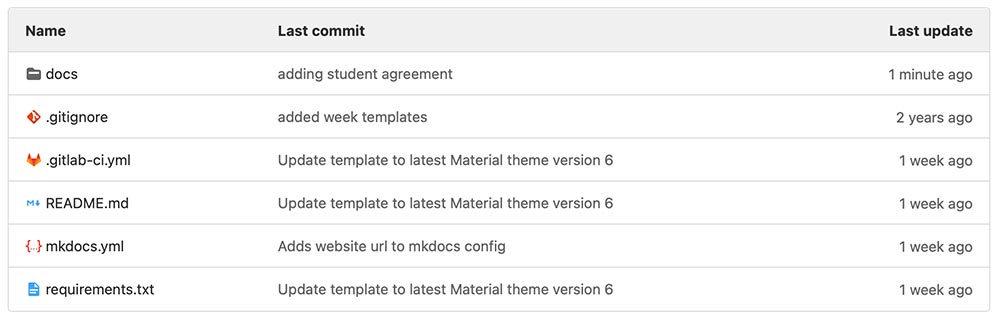
The Fab Academy provides a template in MkDocs: the Material theme.

This template has been added to your gitlab account:
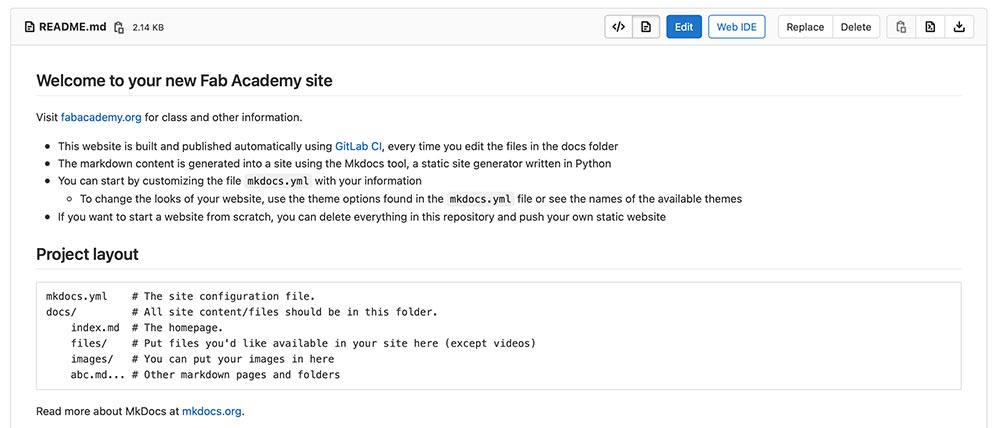
An installation tutorial for MkDcos can be found here.
“In order to manually install MkDocs you’ll need Python installed on your system, as well as the Python package manager, pip. You can check if you have these already installed from the command line:”
 python --version
 pip --version
MkDocs supports Python versions 3.5, 3.6, 3.7, 3.8, and pypy3. If needed, upgrade to the latest version:
pip install --upgrade pip
When your python and pip are installed and updated, install the mkdocs package using:
pip install mkdocs
In my case, there were some issues with pip and python. Check out the section on debugging to see what went wrong and the solutions.
Change MkDocs template
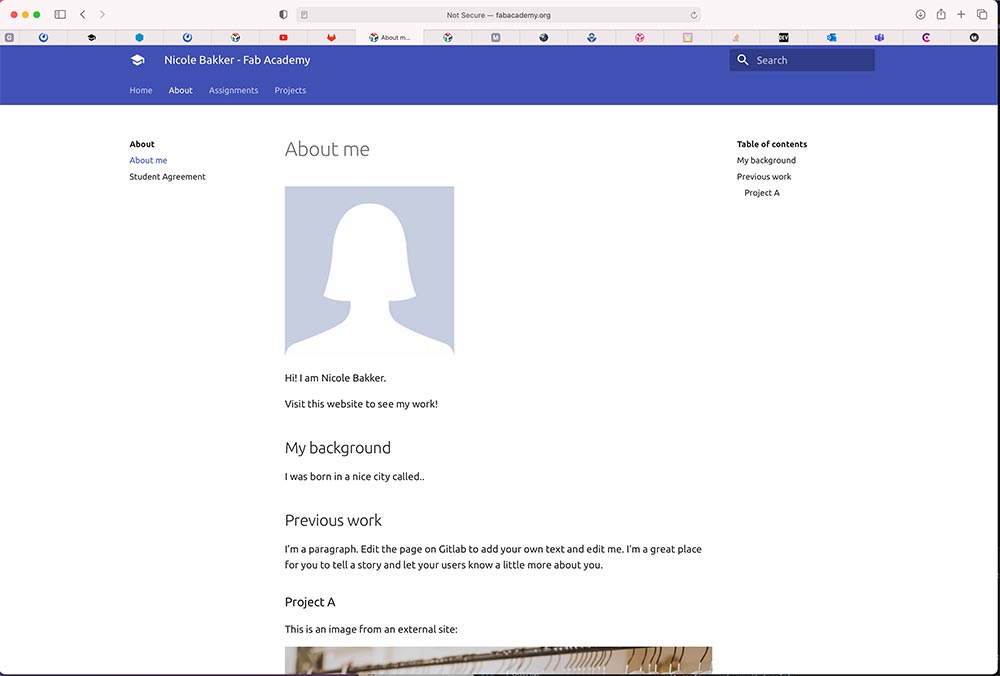
After I downloaded the MkDocs folder locally, I played around with the template. For example, I added my name in the header and text. See the result below. This gave enough confidence to continue with another template that offers more design freedom.
Jekyll and Hugo
Both Jekyll and Hugo are more advanced tools compared to MkDocs. In Hugo you can extend Markdown by creating your own shortcodes. If it all works out, I plan to make this website in one of them. If it doesn’t work, I will switch back to MkDocs.
Here is how they compare:
Jekyll
- Co-founded by co-founder GitHub
- Most widely used static site generator
- Write in markdown
- Free for github users
Hugo
- Newer & faster than Jekyll
- Write in markdown
- Ethos of maintaining simplicity
- Lacks extensive plugin ecosystem available to Jekyll
Next, I started searching for themes and made a shortlist with the ones I liked most:
Hugo themes

Jekyll themes

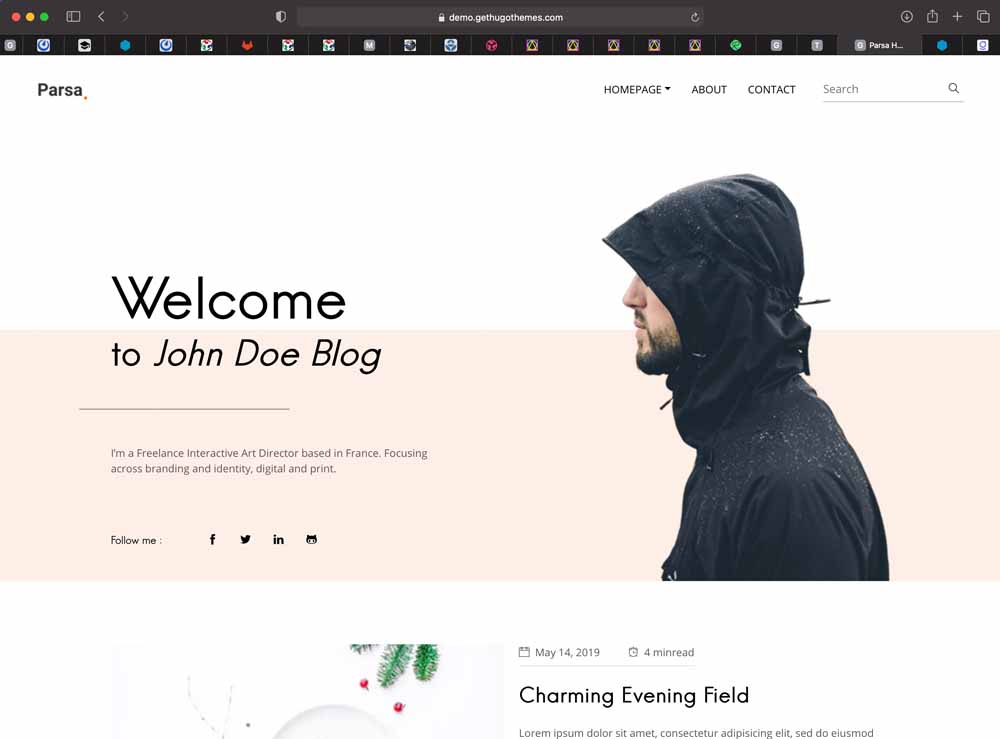
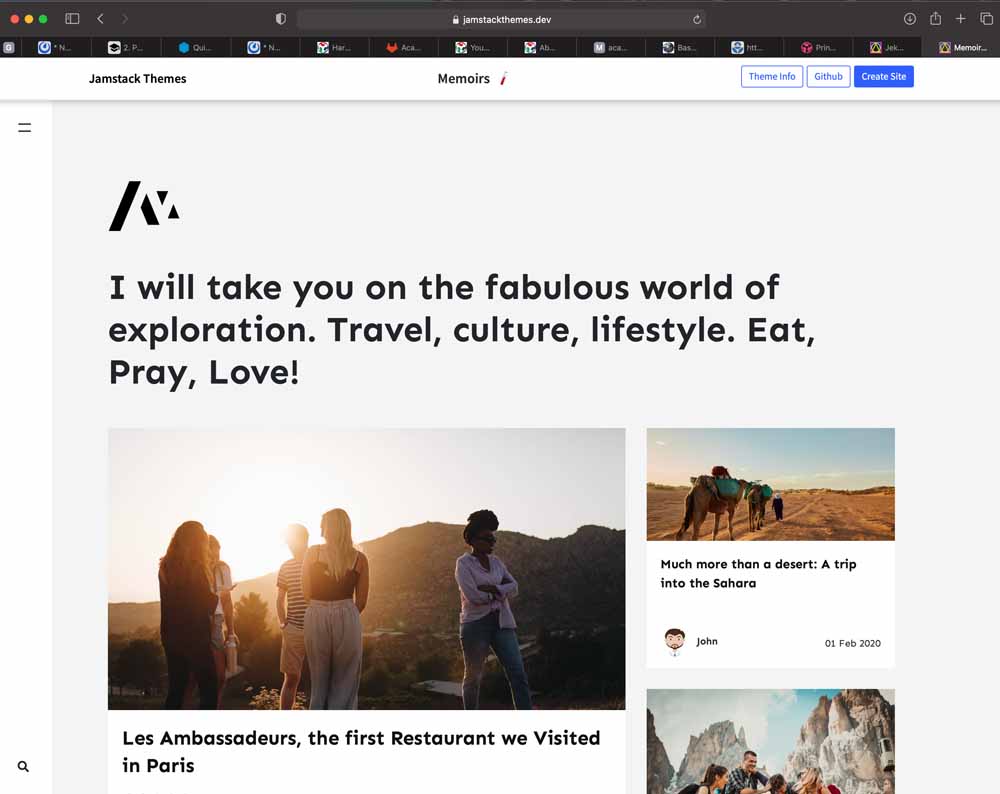
I chose the Memoirs theme. A minimalist Jekyll theme built with Bootstrap 4, for blogging purposes. “Trendy, modern design, for people who love the beauty of simplicity.” according to its developer. The demo website can be found here.
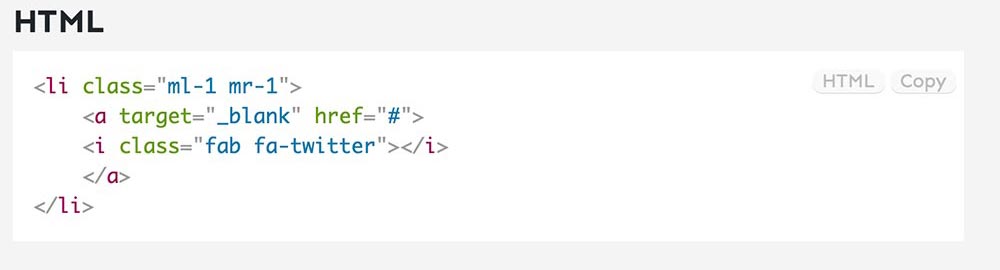
It also has a nice feature to display the type of programming language in the upper right corner of a coding block. As well as an in-build feature to copy the code, see below. That looks good!
GUI website design
Before we jump to website design with Jekyll, I’d like to point out another option. You can use other programs for website design, for example with a GUI. A GUI is a Grapical User Interface. It allows you to design a website in a different way than text-based user interfaces working with commands, such as static site generators.
An example is Adobe Dreamweaver. It looks like word processor, and exports as HTML. It is easier, but according to Neil, ‘they make pretty ugly HTML’s’. I guess it’s the same with Adobe Xd. Adobe Xd is a visual design environment, somewhat similar to Illustrator.
Below is an example of a webpage I created with Adobe Xd. The link to the interactive webpage can be found here.

This is the first time I worked with this program, and it’s pretty intuitive. This is how my design workflow of the webpages looked like:
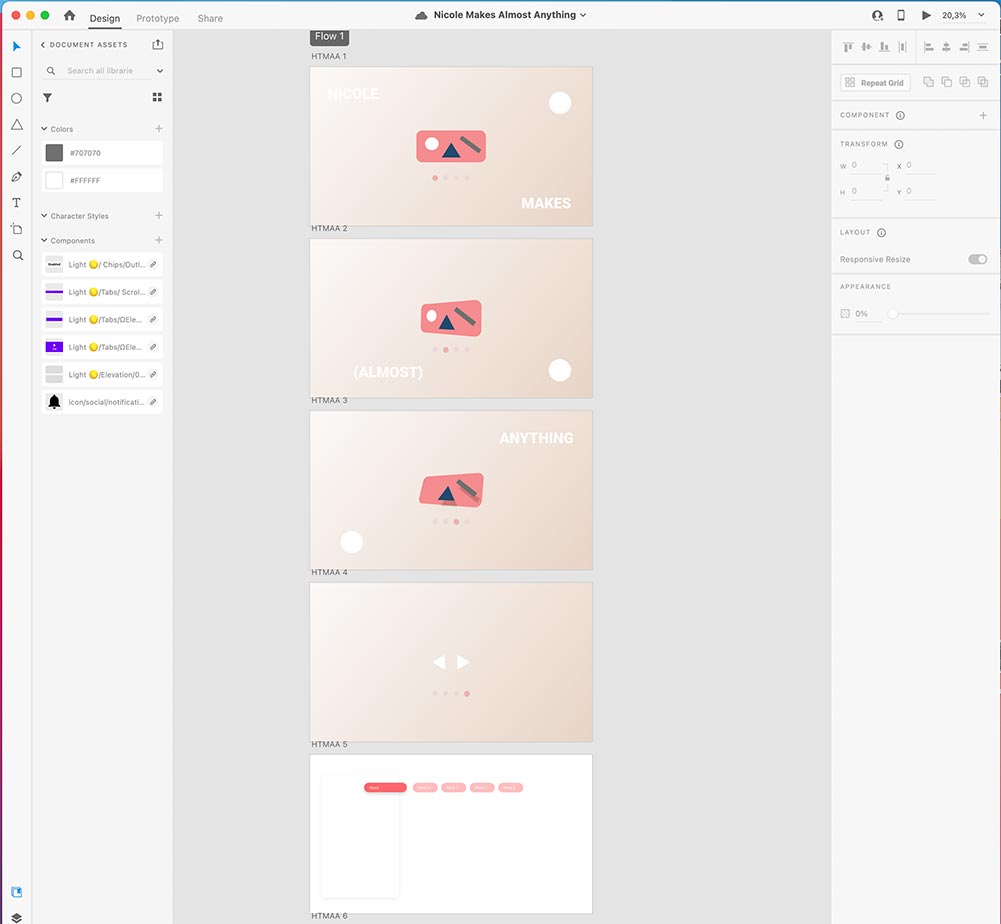
Indeed, the HTML code is not very pretty. And it’s a lot of work to connect the buttons across pages. That’s why I prefer to work with a static site generator.
Website design with Jekyll
Procedure:
- Throw everything away in the folder
- Put in what you want from Jekyll
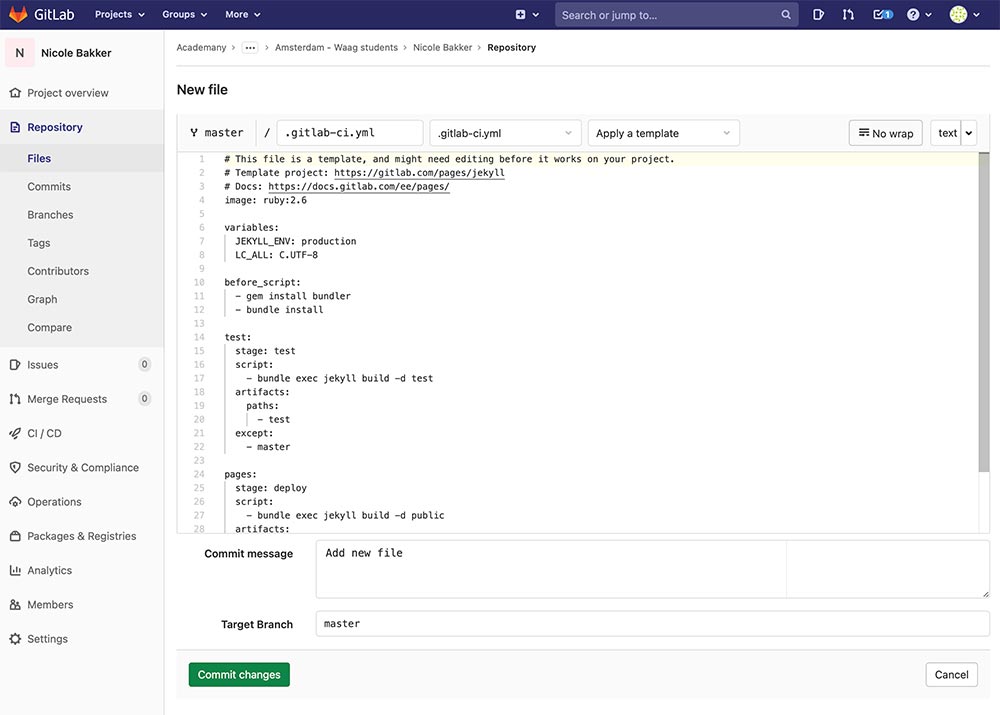
- Change .gitlab-ci.yml
- Customize the rest of the pages
Installing Jekyll
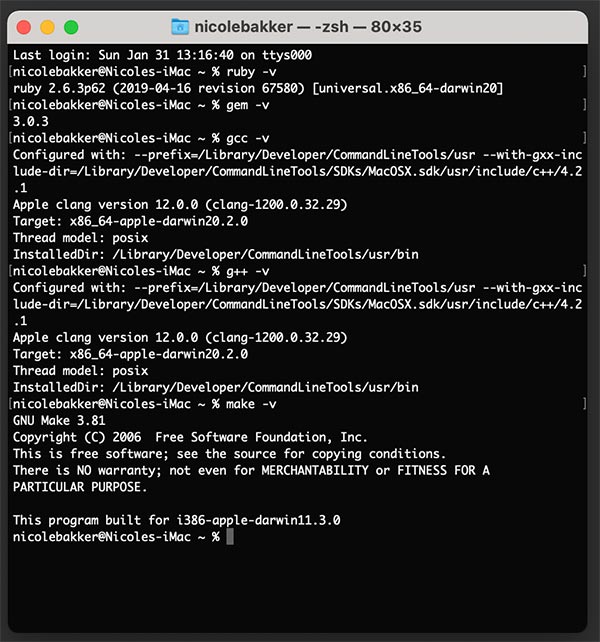
Requirements for installation:
- Ruby version 2.4.0 or higher, including all development headers (check your Ruby version using ruby -v)
- RubyGems (check your Gems version using gem -v)
- GCC and Make (check versions using gcc -v,g++ -v, and make -v)
Here is the general Jekyll installation guide for Mac. After installing Ruby, install Jekyll and Bundler. Navigate to ‘Local Install’.
Open your terminal and install the bundler and jekyll gems:
gem install --user-install bundler jekyll
Get your Ruby version:
ruby -v
ruby 2.7.2p137 (2020-10-01 revision 5445e04352)
Append your path file with the following, replacing the X.X with the first two digits of your Ruby version:
# If you're using Zsh
echo 'export PATH="$HOME/.gem/ruby/X.X.0/bin:$PATH"' >> ~/.zshrc

# Unsure which shell you are using? Type
echo $SHELL
Check that GEM PATHS: points to your home directory:
gem env
Done!
Installing the Jekyll theme
Here is the tutorial for installing this theme.
Navigate to the root folder, open terminal and install:
gem install bundler
Then:
bundle install
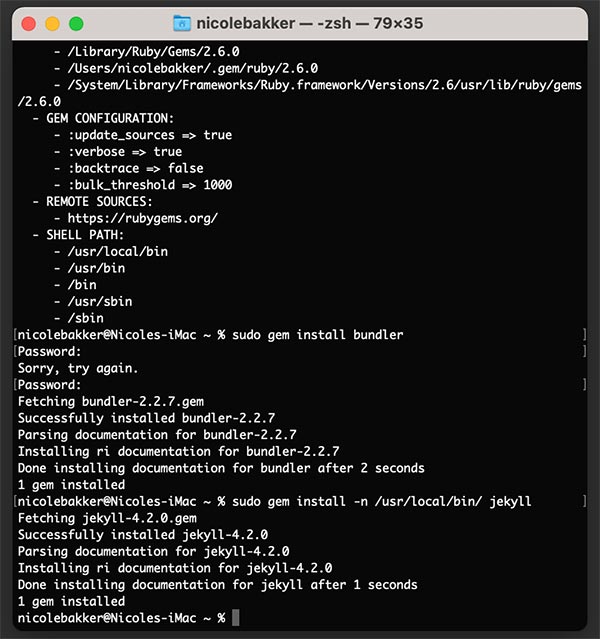
Trouble!
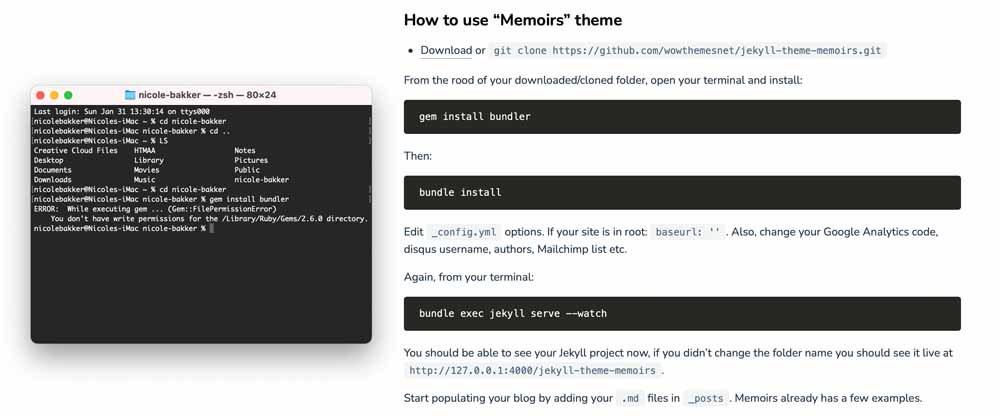
So, first: this ‘failed permission’ issue was solved by adding sudo to the code:
sudo gem install bundler
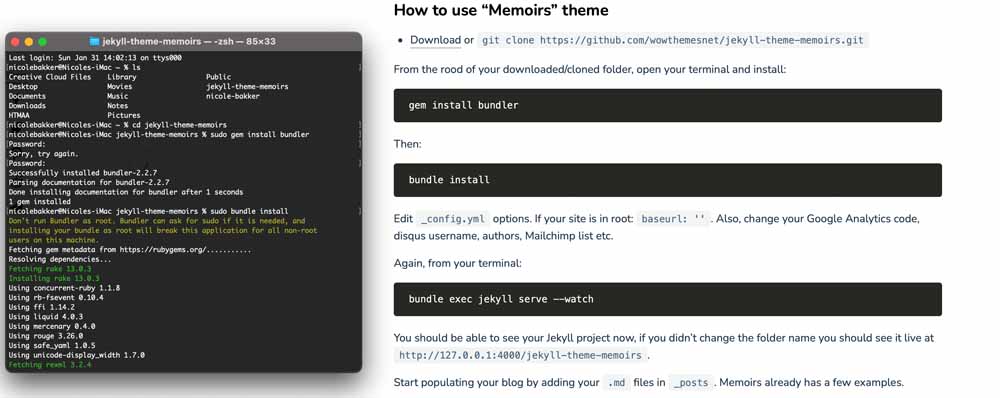
Then:
sudo bundle install
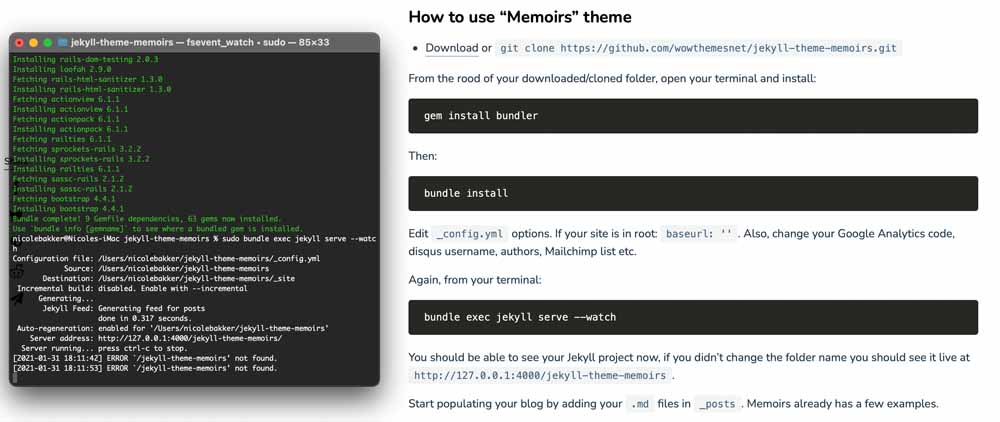
If that succeeded, you can set up a temporary server to preview what you coded locally in the web browser:
bundle exec jekyll serve --watch
You should be able to see your Jekyll project now, if you didn’t change the folder name you should see it live at http://127.0.0.1:4000/jekyll-theme-memoirs.
Unfortunately, this didn’t work for me the first time due to a weird issue with my terminal. It was fixed however. Check out the debugging section below.
Customizing the theme
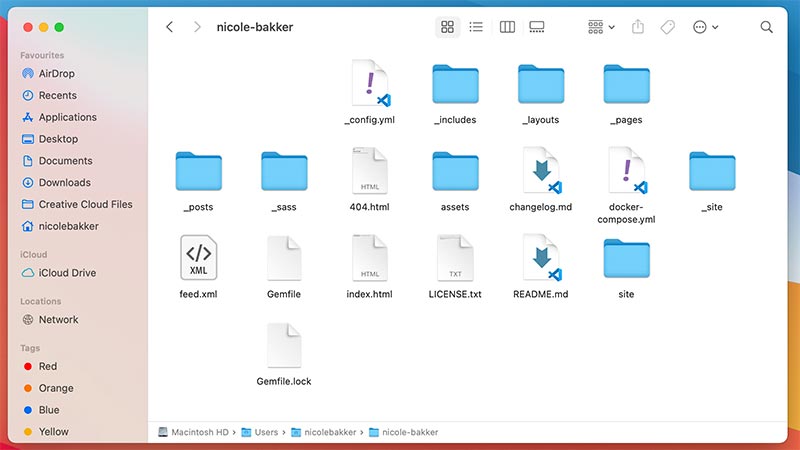
After the Jekyll theme was successfully installed, I removed elements from the theme that were not needed or desired, such as the contact form, sign-up for email list and the link to the theme in the footer. Next, I started adding the images, created an avatar for the posts and changed the logo.
Compress images using ImageMagick
ImageMagick is a free software application for creating, resizing, editing and converting images. This is to keep track on archive size of your git repository: do not check in large images!
Notes from Neil’s lecture; with ImageMagick you can adjust:
- File format
- Image size in pixels
- Amount of compression
Advice:
- Students upload O(MBs)/person/week
- Check size before commit with NCDU = important
- Compress images to web resolution, experiment with image size
- JPG files are easier to compress than PNG files
- Compress and encode video’s for web with ffmpeg
ImageMagick commands:
- List formats:
convert -list format - Convert JPG to PNG:
convert input.jpg output.png - Convert all JPGs to PNGs:
mogrify -format png *.jpg - Convert SVG to PNG at 1000 DPI:
convert -density 1000 -units PixelsPerInch input.svg output.png - Compress JPG to quality 50% width 1000:
convert input.jpg -quality 50% -resize 1000 output.jpg - Compress all JPGs to quality 50% width 1000:
mogrify -quality 50% -resize 1000 *.jpg
Because I don’t see myself working with ImageMagick in the future, I’d like to explore the image resize workflow of Photoshop.
Resize and compress images using Photoshop
First, open the file in Photoshop. It has a size of 1,7 MB.

Next, click on ‘Image’ > ‘Image Size’. This shows a preview of the image with options to resize.
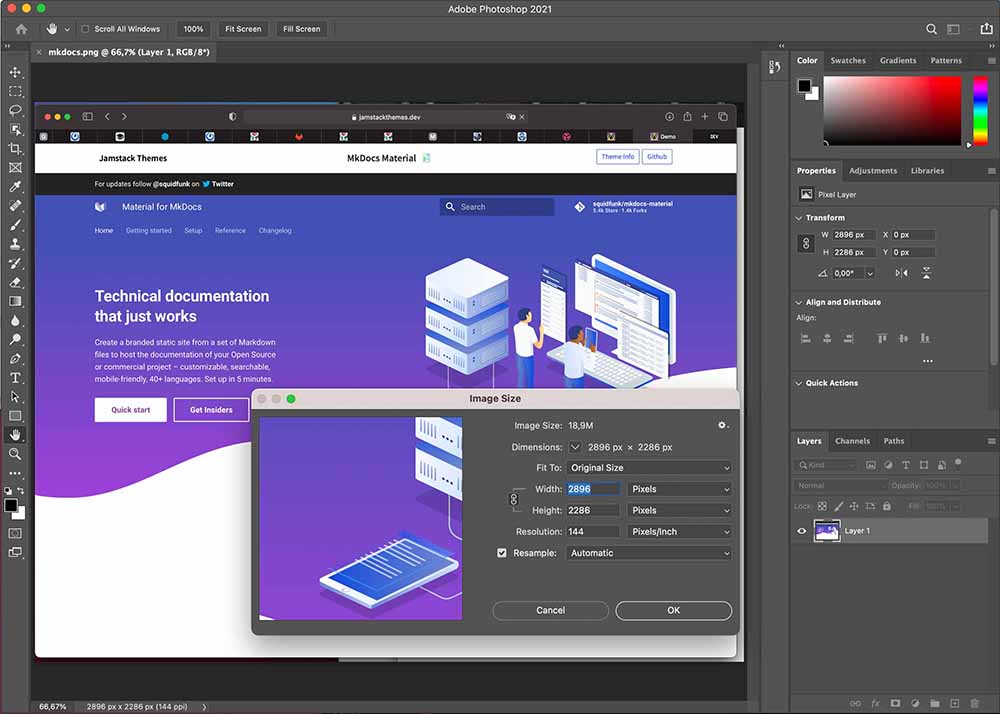
Change the width to 1000 pixels.
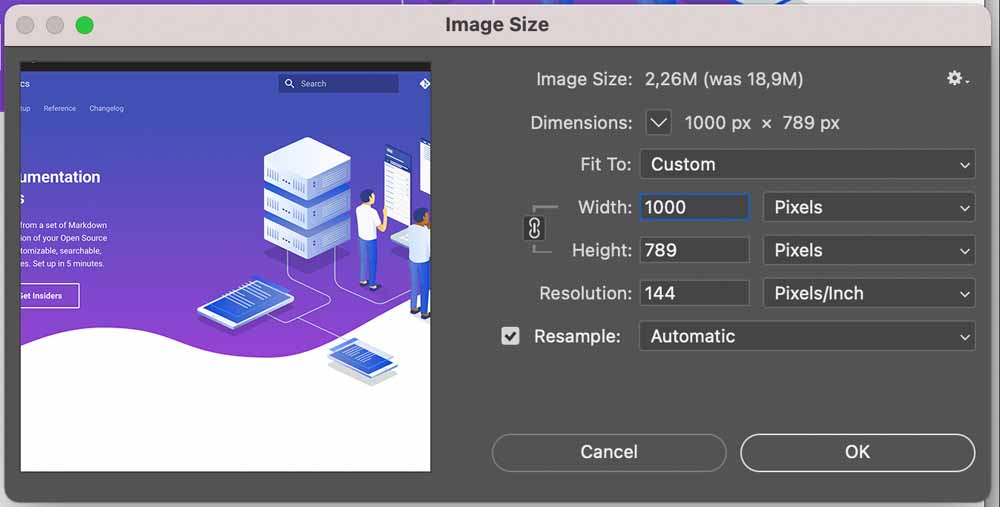
Click OK and navigate to File > Export > Export As. The file size has been reduced from 1.7 MB to 331.8 KB. Hit ‘Smaller File Size’.
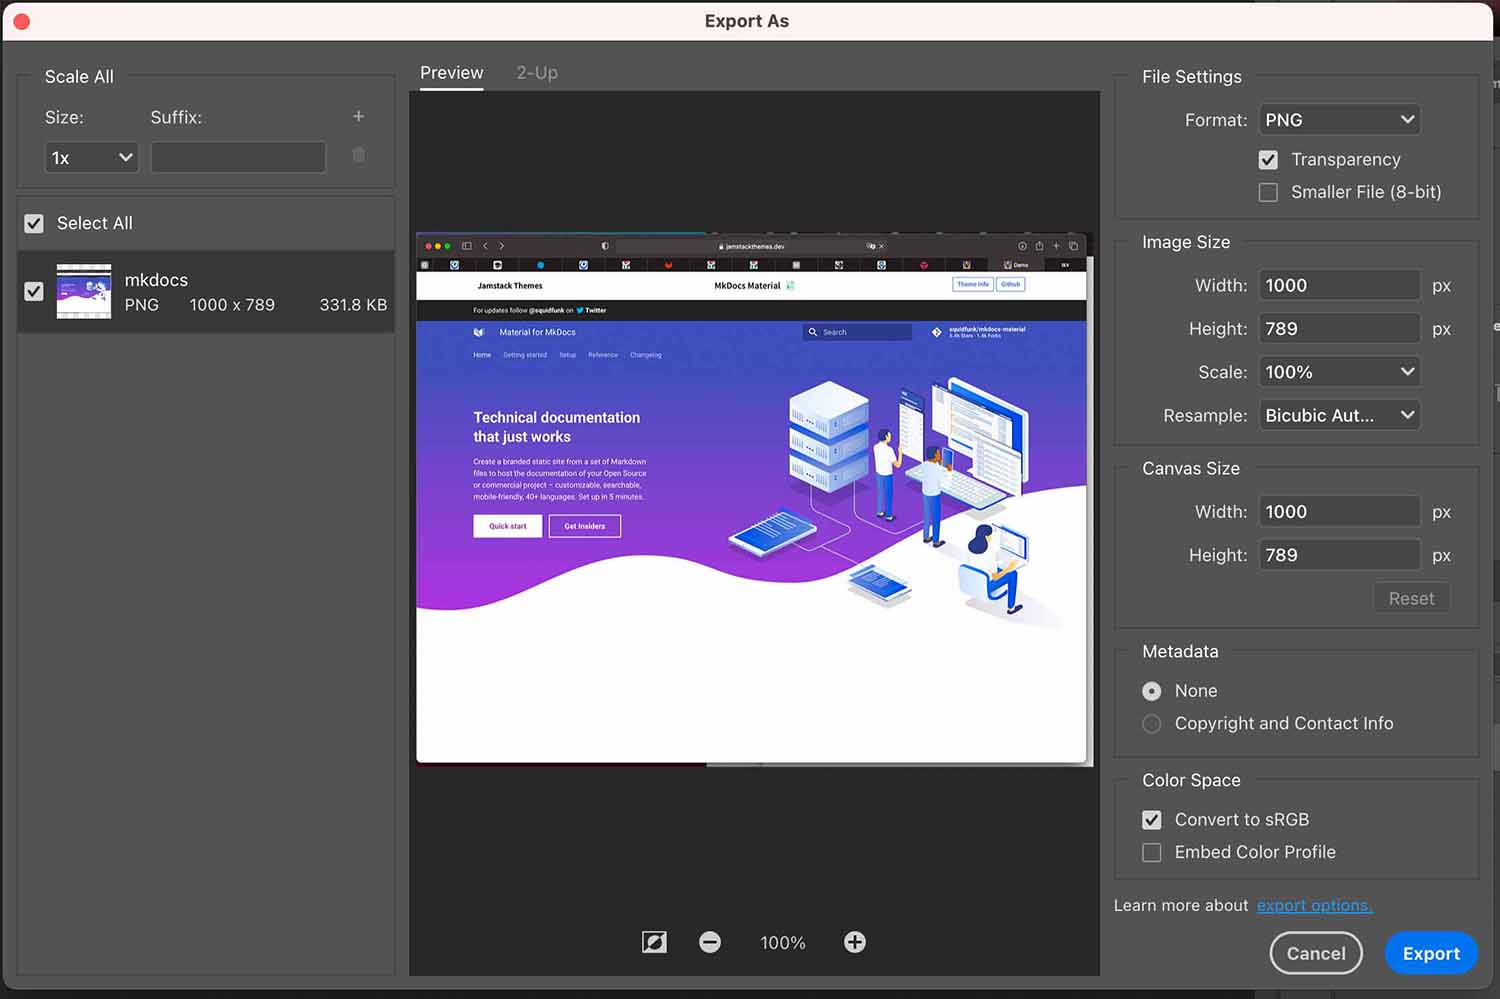
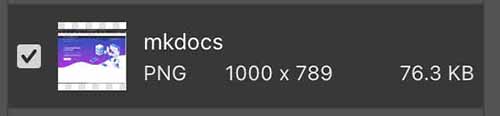
This further reduces the file size to 76.3 KB. Hit ‘Export’ and change the file name.
In the folder, the resized image is added.

Addition: this procedure can be done faster when you open the image and hit File > Export As. In the dropdown menu select JPEG, set the quality to 50%, width to 1000, and hit export. Done!
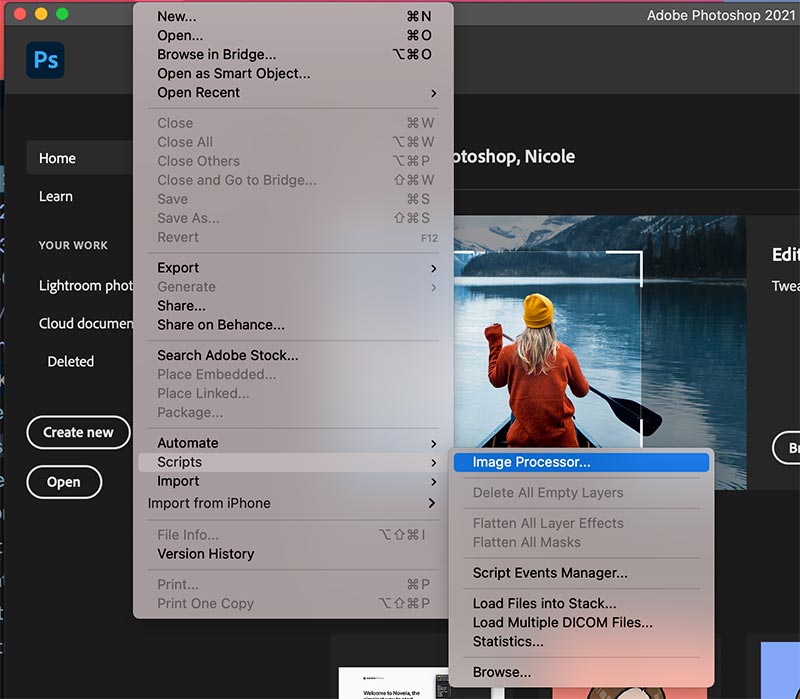
This is one possible process for resizing a single photo. But we need to resize a lot. So that’s where scripts come in. The Photoshop Image Processor script allows for batch processing. With the help of this tutorial:
Choose File > Scripts > Image Processor.
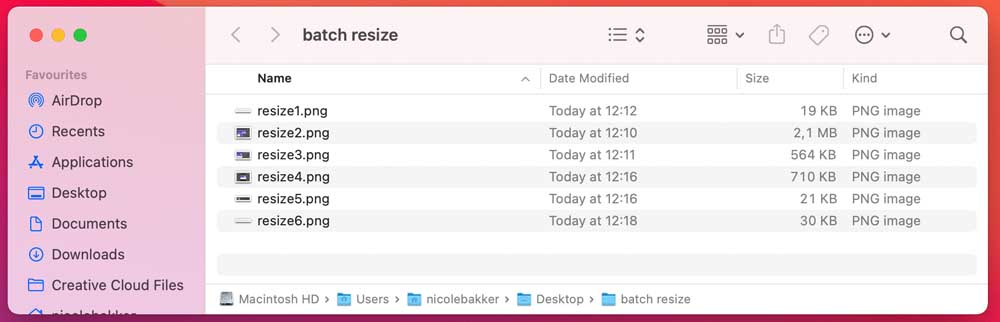
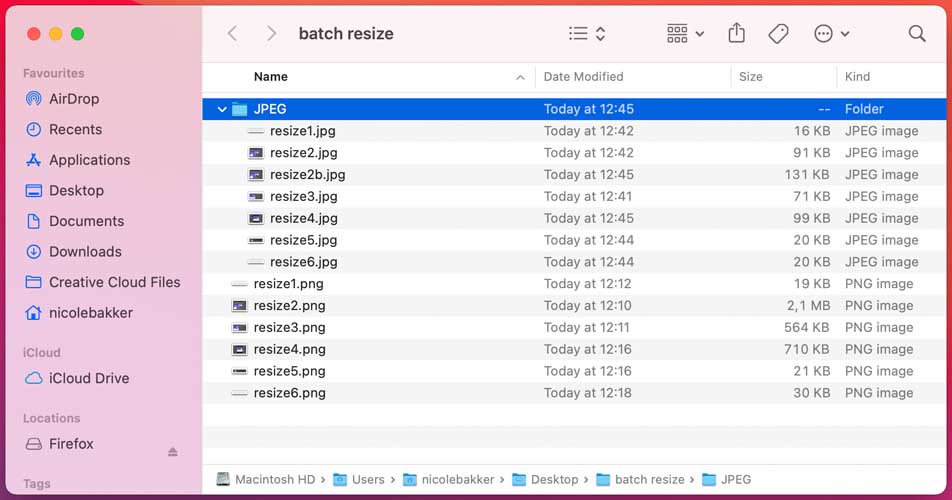
To make sure not to override any of your files, create a new folder for all images to resize. I named it ‘batch resize’. Select ‘Include all Subfolders’ to include all subfolders of the selected folder.
In Step 2 of the menu, select where to save the images. If you select ‘Save in Same Location’ Photoshop creates a subfolder in which to save the images so you don’t have to worry about overwriting them. If a subfolder by the same name already exists with images with the same names in it, Photoshop saves to that folder but adds a sequential number to the file so you still won’t lose your files. Alternatively, you can select a different folder for the resized images.
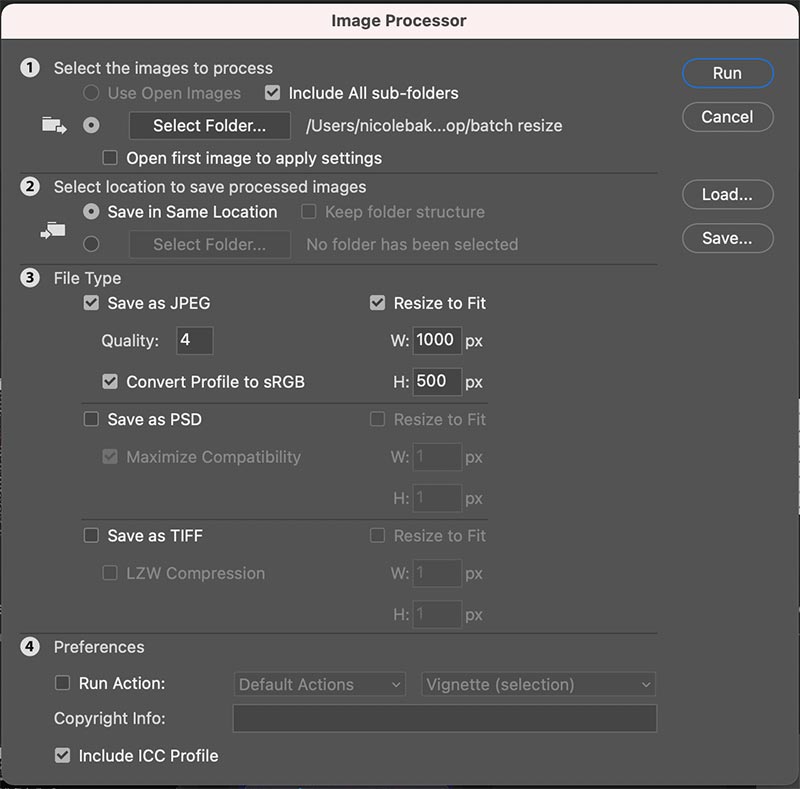
In Step 3, select the file type to save in. For the web ‘Save as JPEG’ is the obvious choice. Set a Quality value in the range 0 to 12 where 12 is the highest quality and 0 the lowest. We’ll set it to 4. For better color on the web, select ‘Convert profile to sRGB’ and ensure that ‘Include ICC Profile’ at the foot of the dialog is checked so the profile will be saved with the image.
To resize the images, select the ‘Resize to Fit’ checkbox and then set the desired maximum width and height for the final image. For example, if you type 300 for the width and 300 for the height, the image will be resized so that the longest side of any image, whether it be in portrait or landscape orientation will be 300 pixels. The images are scaled in proportion so they won’t be skewed out of shape.
If desired you can save in another format such as PSD or TIFF. In Step 4, you can also select to run an Action on the images, if desired. I skipped this.
When you’re ready, click ‘Run’ and the images will be automatically opened (if they are not already open), resized, saved and closed. In your folder, check the results. If needed, iterate with the settings until you’re satisfied with the results.
Compress videos
Videos can be compressed using HTML5 ffmpeg encoding. The code lines are found in Neils documentation:
Variable bit rate 1080p MP3:
ffmpeg -i input_video -vcodec libx264 -crf 25 -preset medium -vf scale=-2:1080 -acodec libmp3lame -q:a 4 -ar 48000 -ac 2 output_video.mp4
Fixed bit rate 1080p MP2:
ffmpeg -i input_video -vcodec libx264 -b:v 1000k -vf scale=-2:1080 -acodec mp2 -b:a 256k -ar 48000 -ac 2 output_video.mp4
No audio:
ffmpeg -i input_video -vcodec libx264 -b:v 1000k -vf scale=-2:1080 -an output_video.mp4
Crop size (width:height:xoffset:yoffset):
ffmpeg -i input_video -vf crop=1500:800:200:100 -vcodec libx264 -b:v 1000k -an output_video.mp4
Trim time (-ss start time, -t duration):
ffmpeg -i input_video -vcodec libx264 -b:v 1000k -an -ss 00:00:10 -t 00:00:10 output_video.mp4
Mix audio and video:
ffmpeg -i input_video -vcodec libx264 -b:v 1000k -vf crop=1120:876:0:100 -i input_audio -acodec mp2 -b:a 256k -ar 48000 -ac 2 -ss 00:00:20 -t 00:00:20 output_video.mp4
Crop, pan, composite:
ffmpeg -i input_video_1 -i input_video_2 -filter_complex ‘[1:v]crop=175:95:930:860[cropout];[cropout]scale=350:190[scaleout];[0:v][scaleout]overlay=10:10[outv]’ -map ‘[outv]’ -vcodec libx264 -b:v 1000k -map 0:a -acodec mp2 -b:a 256k -ac 2 -t 00:00:05 output_video.mp4
Numbered images to video:
ffmpeg -r 30 -i %04d.jpg -vcodec libx264 -b:v 1000k -vf scale=-2:1080 -an output_video.mp4
Another way is to work with the Adobe Media Encoder application. This short Youtube tutorial shows how that works.
GIF
Adobe provides a tutorial on how to create a GIF with photoshop here.
Create an avatar
In the Memoirs Jekyll template, there is an avatar connected to each author. The standard one doesn’t look like me at all, so I’d like to customize this.
![]()
In this theme, it is not just an image that you upload. The config.yml file mentions a “gravatar” number.
![]()
A Gravatar is a Globally Recognized Avatar. A service bought by Wordpress, that lets you create an image URL which can be used on any blog across the web. A deeper dive in post.html shows how the Gravatar has been built into the blogposts in this theme.
<!-- Author & Date  Box -->


    <div class="d-flex align-items-center mt-4">
        <div>

            <img class="author-thumb" src="https://www.gravatar.com/avatar/?s=250&d=mm&r=x" alt="">

        </div>
        <div>
        Written by <a target="_blank" class="text-dark" href=""></a> on
        <span class="post-date"><time class="post-date" datetime="2021-01-29">29 Jan 2021</time></span>

        </div>
    </div>
A personalized avatar can be set up using the “Gravatar” service. This can be a picture or an image. With the Zmoji app, you can create an avatar based on Facial Recognition of your picture. I selected the free version and created this manually.
![]()
In Photoshop, I changed the background color by selecting the background with the magic selection tool and filling it with the bucket tool in the desired color.
![]()
Next, the image was uploaded on the Gravatar platform. Unfortunately, it didn’t succeed to create the hash. That’s why I decided to dive in the Jekyll theme and replace the URL with a link to my own avatar.png file.
In line 16 of the post.html file, we can find the link to the gravatar.
![]()
When we publish a post, it generates this:
![]()
We now link it to the local avatar.png file.
![]()
The result!
![]()
The Homepage and Assignments page still contain the old gravatar, as can be seen below. So there must be another file in which a gravatar link is used.
![]()
First we check the config.yml page. After replacing the link below, the image didn’t change.
![]()
The categories.html and index.html both refer to postbox.html. And indeed, in line 34-38 we can find the link to the avatar.
![]()
We change this and make it link to the local avatar.png file.
![]()
And upload it. Done!
![]()
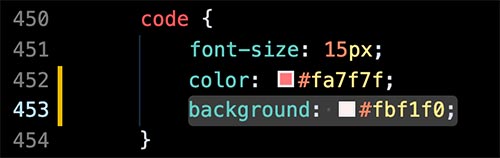
Change the color of inline code blocks
The grey code blocks are a little boring, that’s why changed the color. There are two css files in this theme: prism.css and theme.scss. I found the right one in line 450 of theme.scss. There was no background color, so I added this as well.
Add live code
A really cool tool to add live code to the webpage is Asciinema. I might add this later.
Debugging
When things don’t go as they should! All issues and solutions are collected in this section. Let’s get the debugging party started!
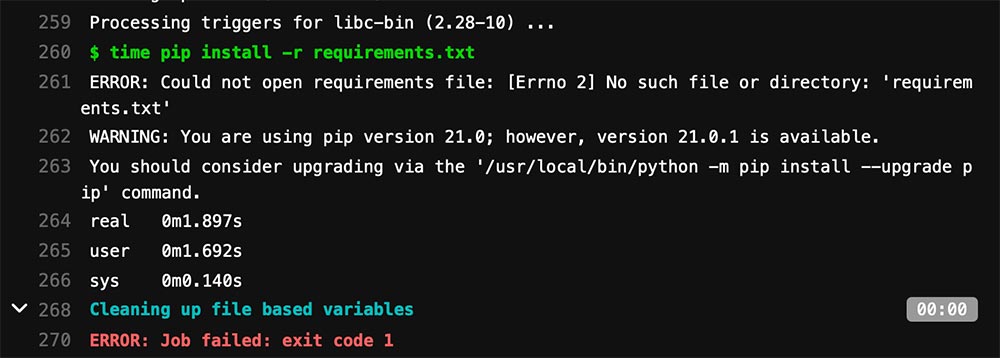
1. Terminal didn’t recognize Python and pip
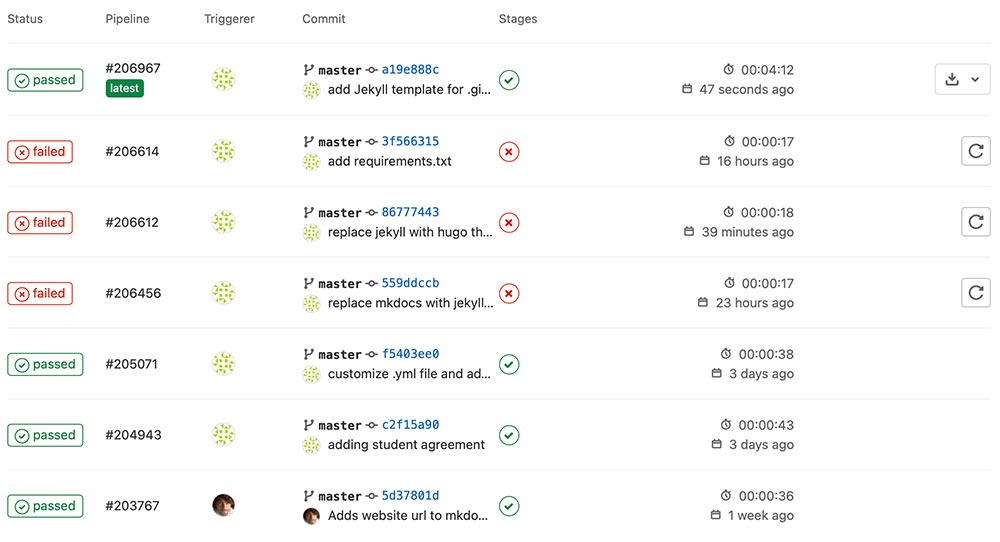
While trying to install MkDocs, something went wrong with my python and pip versions. My terminal couldn’t recognize the programs. This should go right, and is where it went wrong on my machine. In line 262 of a failed push, gitlab also mentions that pip should be upgraded.
There was a path issue.
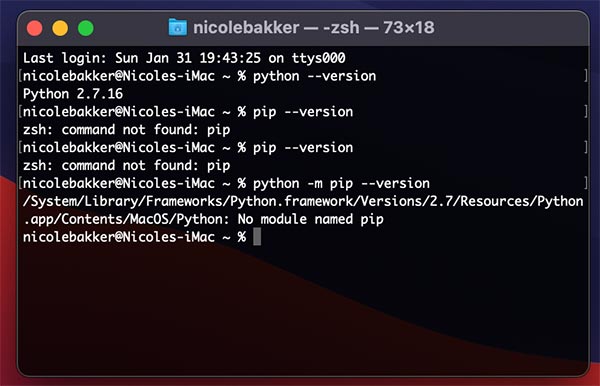
The files are in the folder, but terminal can’t find them.
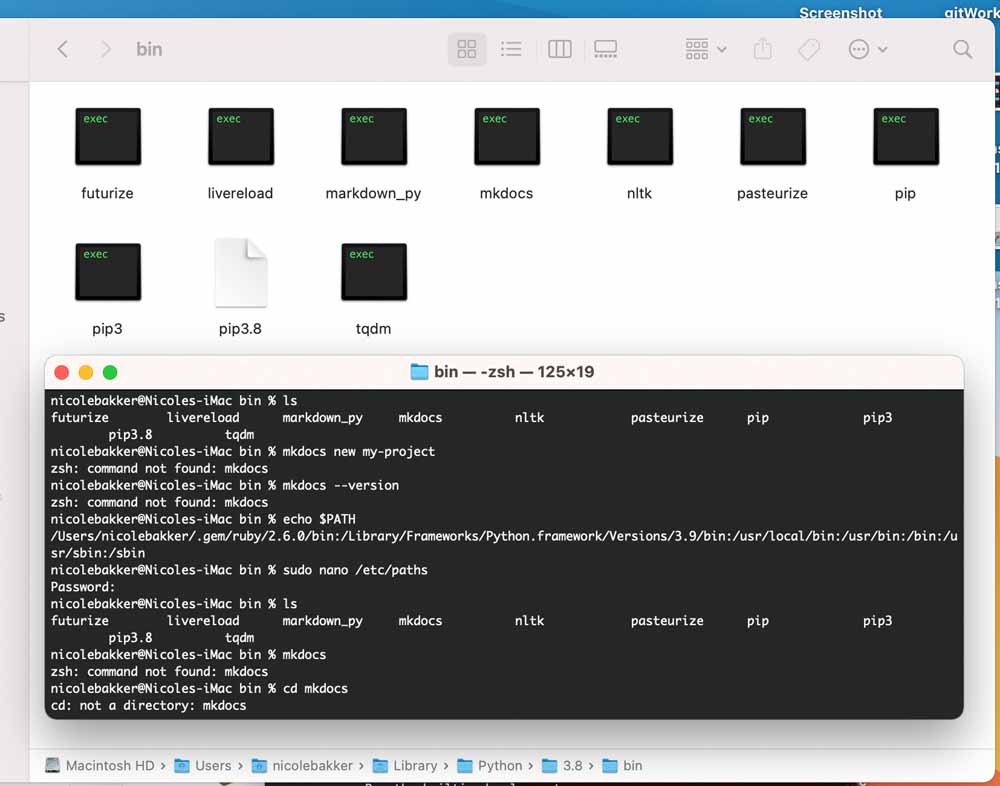
I had to find the (hidden) ~/.zshrc file and add two lines of code:
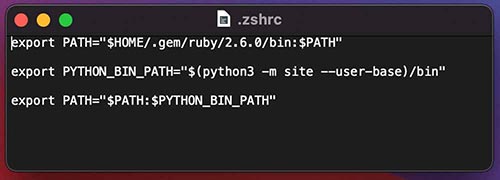
With the help of Henk, our fablab instructor, I entered the following commands in terminal.
And finally, we added the Jekyll template in the config.yml file.
This solved the problem (along with adding a requirements.txt file, see point 5 below).
In additon, I should always use the pip3 command instead of pip in the future.
2. Hidden folders
On my computer, couldn’t find certain files in my folders. It turns out they are hidden.
Hidden folders can be shown by typing the following command in a folder: Command Shift .
And this in terminal: ls -al
Problem solved!
3. Installed Hugo as a backup solution for Jekyll theme
This problem with python and pip was super frustrating. More of my local teammates at Waag were having trouble with Jekyll, and considering time constraints I decided to switch to Hugo.
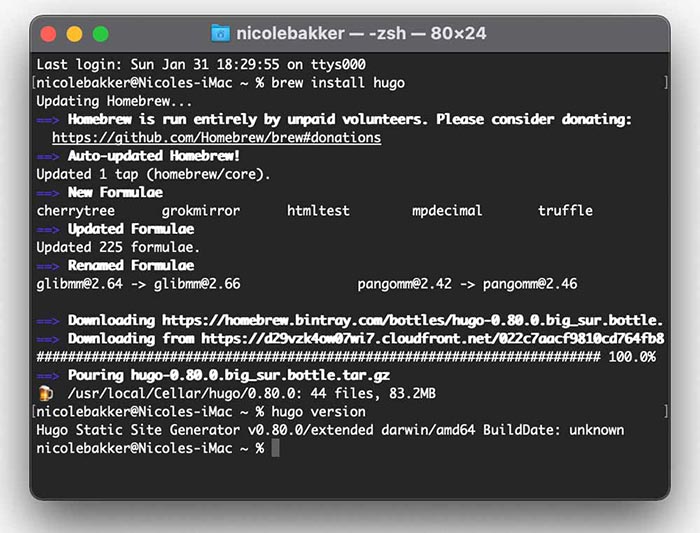
Install hugo using the quick start tutorial.
brew install hugo
To verify your new install:
hugo version
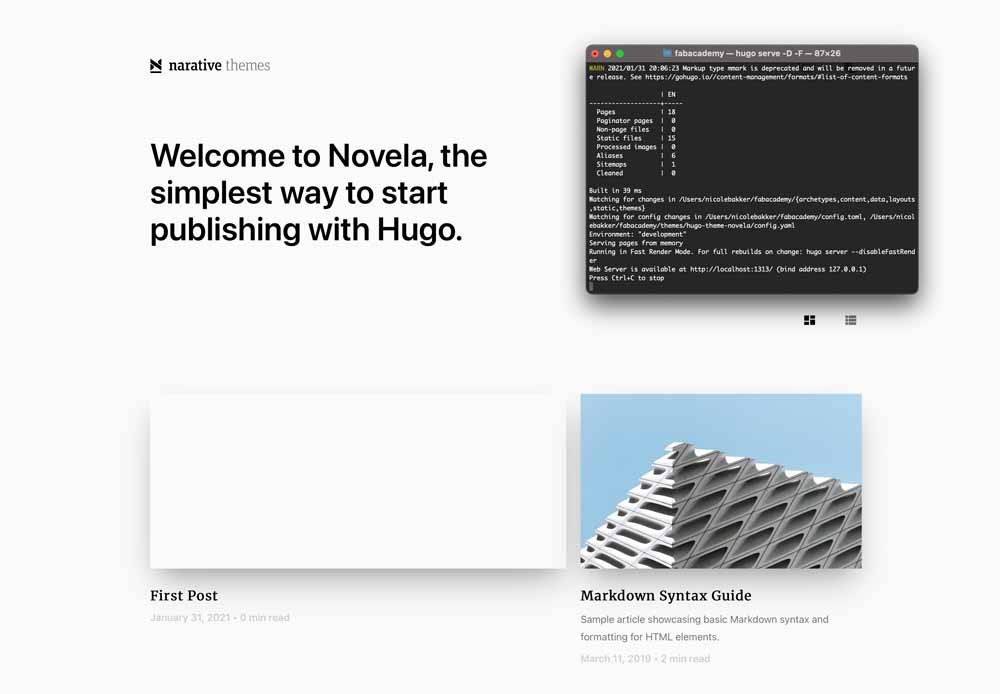
Next, add a theme. The Novela theme resembles the Jekyll theme most.
cd fabacademy

git init

git submodule add https://github.com/forestryio/hugo-theme-novela themes/hugo-theme-novela
Done.
echo 'theme = "hugo-theme-novela"' >> config.toml
done
Copied all the example files from the exampleSite into the main fabacademy folder.
hugo serve -D -F
Installed locally! Later, I fixed the problem with the Jekyll theme and removed this Hugo template.
4. Local server doesn’t work
Somehow, my http://127.0.0.1:4000 server was already taken. This meant I couldn’t use the following command:
bundle exec jekyll serve --watch
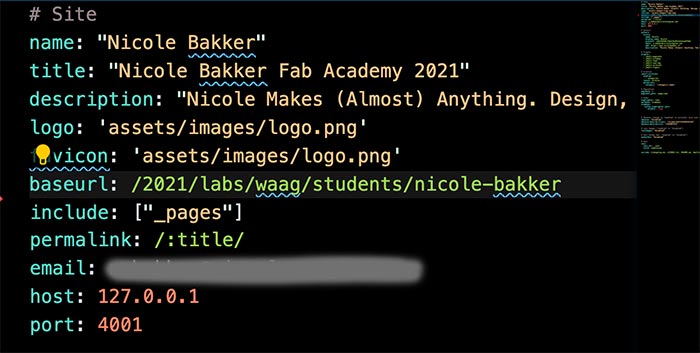
With the help of Henk, I changed it to: http://127.0.0.1:4001 and the problem was solved. In the config.yml file I added a host and port number.
5. requirements.txt was missing
There was a pipeline fail on gitlab with an error about a missing requirements.txt file. In both the Jekyll and Hugo themes I used, this file was missing. Gitlab mentions this in line 261.
This blogpost explains nicely what it is, and why it’s important!
In short, we generate and share requirements.txt files to make it easier for other developers to install the correct versions of the required Python libraries (or “packages”) to run the Python code we’ve written.
He’s pretty clear about it in the subheader: “Using a Virtual Environment to Avoid Seeming like a Sadist”
This is where a requirements.txt file comes into play. As long as the developers of this app provide a file listing the necessary packages, we can simply $ pip install -r requirements.txt and voila! All of the program’s “dependencies” will be downloaded, installed, and ready to go in one fell swoop.
And also provides advice:
But alas: The developers failed to include a requirements.txt with their code, so we are back to error-message ping-pong, installing packages one-by-one as our terminal bosses us around. What clown forgets to include a requirements.txt? Certainly not our future selves.
So I opened a text editor, made a blank requirements.txt file and added it to my directory. This solved the problem!
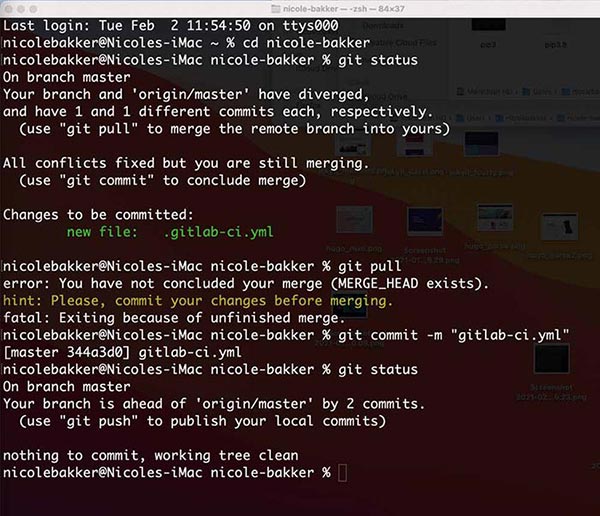
6. Upload to git failed (it was late..)
I accidentally typed git commit instead of push:
 git commit -m 'message'

 git commit

 git push
That resulted in the error message: “Your branch is ahead of ‘origin/master’ by 1 commit”.
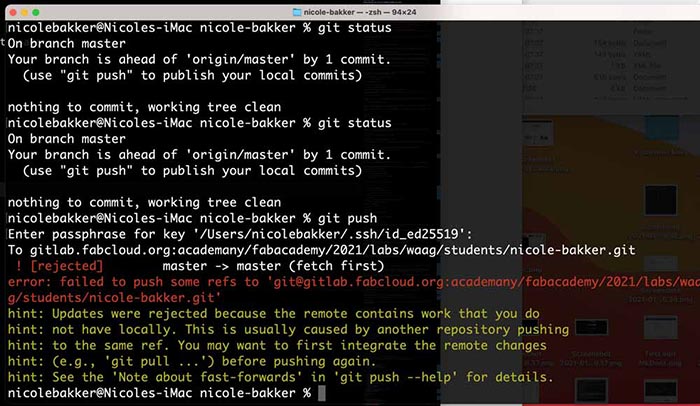
It was solved by typing:
git pull
After that I repeated the regular git process. Problem solved!
7. Links to internal pages don’t work
When I uploaded the site to the gitlab server, something was not quite right with the links to the ‘pages’ in the navigation sidebar. Internal links to ‘posts’ were fine on gitlab. When I ran the jekyll local server, all internal links of the website worked perfectly. However, when I upload the page to git, it couldn’t trace the links to the pages.

This is the process of debugging:
In default.html it automatically creates the links:
<li><a href="/2021/labs/waag/students/nicole-bakker/finalproject">Final Project</a></li>
There is a difference between the baseurl and the siteurl in the config.yml file. Perhaps if I’ll change it to:
<li><a href="/2021/labs/waag/students/nicole-bakker/2021/labs/waag/students/nicole-bakker/finalproject">Final Project</a></li>
Unfortunately that didn’t work. Next, I added .html as an extension behind each individual page.
<li><a href="/2021/labs/waag/students/nicole-bakker/2021/labs/waag/students/nicole-bakker/finalproject.html">Final Project</a></li>
I also added this to the permalink on each page to make sure it matches:
        layout: page
        title: Final project.
        permalink: /finalproject.html
        comments: false
        image: assets/images/screenshot.jpg
        imageshadow: true
And in the in-text links:
<a href="/2021/labs/waag/students/nicole-bakker/finalproject.html">Final project</a>
Problem still not solved! Next, I found a tutorial on making robust links in Jekyll. There are two ways to create relative links:
A root-relative link: these type of links only work for local links, and they follow the directory structure on the server starting from the web root because of the initial slash, /.
[Link Text](/post-name)
A relative link: this is also for local links and starts following the path from the same directory as the page that contains the link.
[Link Text](post-name)
Let’s try a variety of methods:
Markdown internal link [test 1](/page-about)
Markdown internal link [test 2](/page-about.html)
Markdown internal link [test 3](/page-agreement)
Markdown internal link [test 4](/about)
Markdown internal link [test 5](/about.html)
Markdown internal link [test 6](about)
Markdown internal link [test 7](about.html)
- Test 1, 2 and 3 create: http://127.0.0.1:4001/page-about
- Test 4 and 5 create: http://127.0.0.1:4001/about.html
- Test 6 and 7 create: http://127.0.0.1:4001/2021/labs/waag/students/nicole-bakker/project-management/about
The output: none of these methods work. I also tried the the post_url variable he mentioned in the tutorial, and placed it in a code block. Unfortunately that didn’t even make it through the git pipeline and the local server.
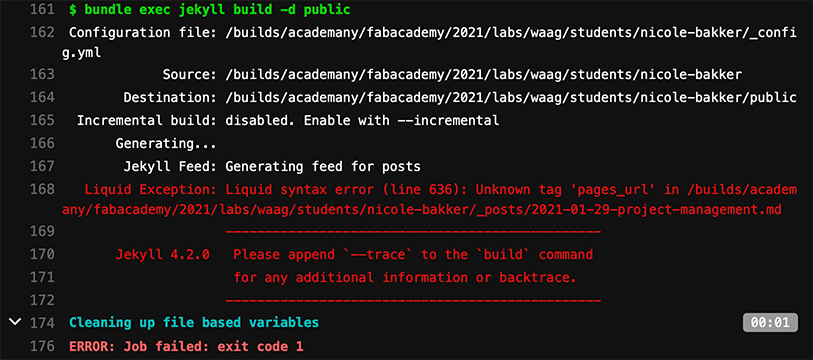
That clearly didn’t work! It was solved by writing the links directly in html. In all my files and the code snippet below, I actually write site.baseurl in between two sets of these guys {, instead of writing /2021/labs/waag/students/nicole-bakker in every link. The html file automatically generates the entire link, even in a coding block.
<a href="/2021/labs/waag/students/nicole-bakker/about.html">Introduction</a>
Conclusion: to write directly in html is a way to solve the problem.
8. Images don’t load in markdown
Next, a similar problem arose with images. In markdown, the following code should work:

or without the slash before 'assets':

However, it didn’t. What did work was to write it directly in HTML, with help of the w3schools tutorial:
<img src="/2021/labs/waag/students/nicole-bakker/assets/images/week1/3.png" alt = "image 3">
This solves the problem.
Explore more like this

Week 17 Invention, Intellectual Property and Business Models
After acing through the technical assignments of Fab Academy, the last two weeks have a lighter load so we can focus on the final project. But this does not mean...
Week 16 Applications and Implications
Propose a final project masterpiece that integrates the range of units covered, answering: