Week 02
Computer - aided design
This week assignment: model (raster, vector, 2D, 3D, render, animate, simulate, …) a possible final project, compress your images and videos, and post it on your class page
CAD Software
 - model a possible final project, compress your images and videos, and post it on your class page
 - try making a clickable box
 - research online on different examples
 - be able to draw 3D
For 2D drawing it is split into raster (pixel based) and vector Raster is good for images but not for parametric design, so nice for photo editing etc but not for what we are doing in Fab Academy, the laser cutters needs a line to follow not separate pixels. Vector seems like the way to go, which gives us programmes like the ancient CorelDRAW and Illustrator (which i already know from decades ago), so i would rather learn a free version so i decided to focus on FreeCAD, which also does 3D.
There are a million ways to draw starting from paper to autoCAD, this is the road i would like to travel this week:
Draw in
- Gimp/ImageMagick to try out a 2D raster software
- FreeCAD to try out 2D Vector based software
- OpenScad to try out how drawing with code works
- Fushion 360 to try out visual and mouse based 3D drawing
- Blender, if i have enough time, hopefully even animate
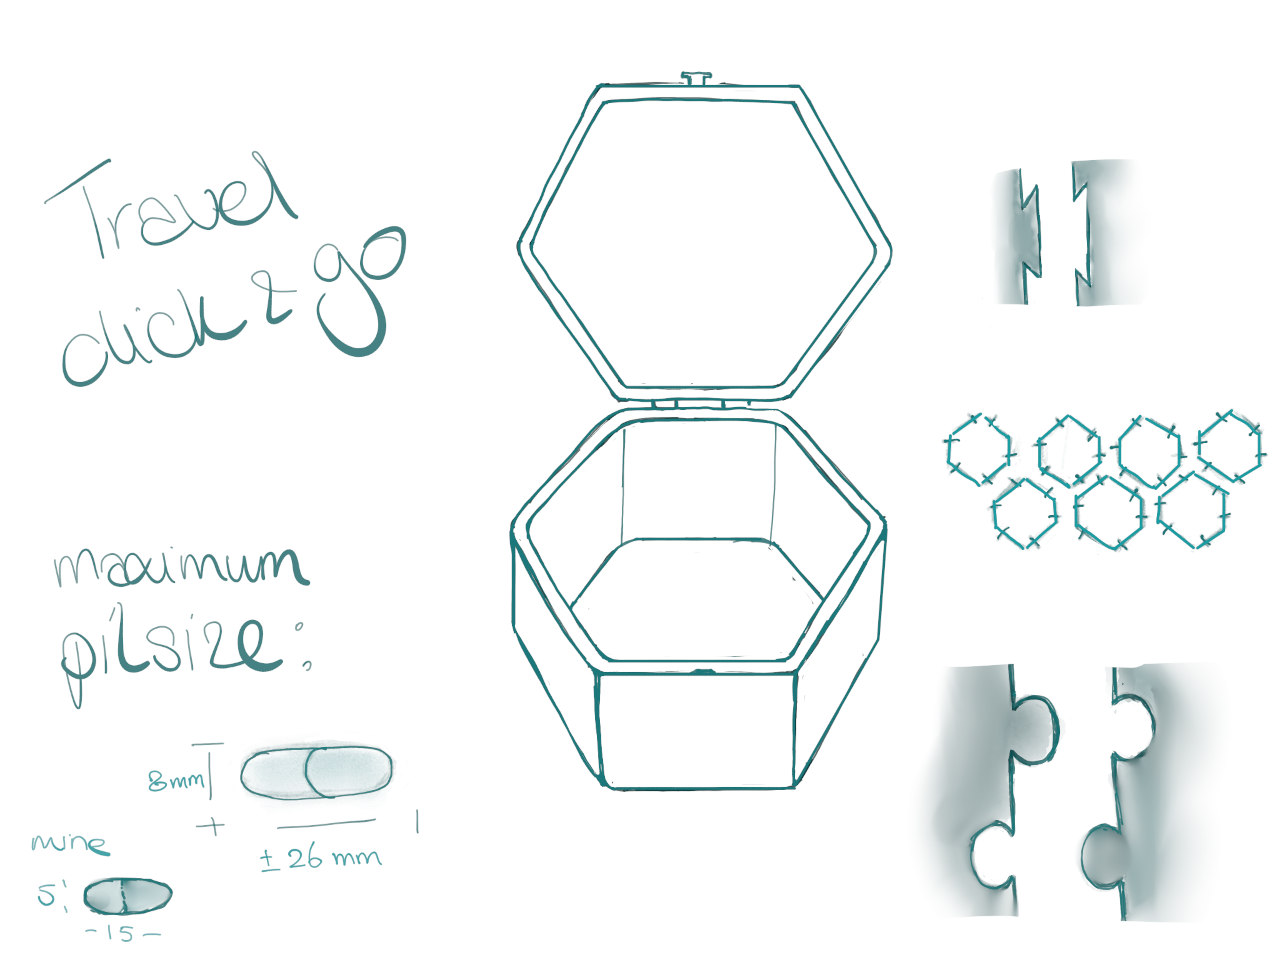
I made a little sketch of what i am aiming to achieve:
GIMP
Gimp is a open source software that can resize and compress your images for you, there are some links below.
I started with some scaling, cropping and translating to understand the software a bit and it seems very self explanatory, works like all editing programs, now i just need to figure out on what settings works best. I used Gimp to make a explanation of menus for Fushion (see below)
ImageMagick
list formats:
convert -list format
convert JPG to PNG:
convert input.jpg output.png
convert all JPGs to PNGs:
mogrify -format png *.jpg
compress JPG to quality 50% width 1280:
convert input.jpg -quality 50% -resize 1280 output.jpg
compress all JPGs to quality 50% width 1280:
mogrify -quality 50% -resize 1280 *.jpg
Fushion 360
Will start with learning Fushion by watching a few tutorials Fushion tutorials and Learn fushion in 30 days.
Main sections:
- Application Bar - Tabs from all the files, save, undo/redo
- Data Panel - New projects enz.
- Profile and Help - Account, preferences enz.
- Toolbar - Organized in tabs which you can customized
- Browser - like a file structure
- ViewCube - orbit or view from standard positions
- Canvas and Marking Menu - where you actually draw, right click has a mark up menu
- Navigation Bar and Display Settings - zoom and orbit, also appearance (like shadow etc)
- Timeline - the history of the file, you can change in the history.
I make a screenshot at the end of one of the tutorials and used gimp to put the menu info in. The software takes me back to the old CorelDRAW.. a very different approach to drawing to what i am used to these days but i must say its very handy to downsize and rescale images. So far i now try to go for JPEG with width 1000 pixels and a maximum size around 100-150kB

There is a list with all the shortcuts in my cheatsheets. Here are a few that i used regularly:
s activates the Design Shortcuts box
e to extrude
f fillet
d dimensions
m to move and or copy
to not let the grid change when you zoom in and out at the navigation bar
| grids and snaps | set increments | fixed option
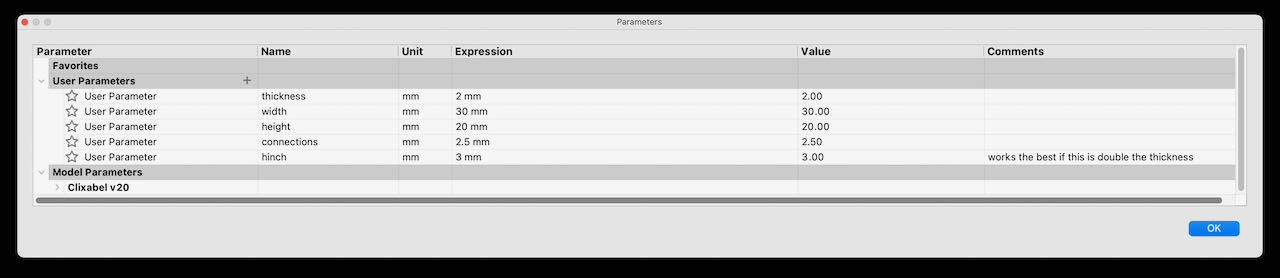
Drawing of a box using parametric control requires another mind set, the first thing to do is when you open a sketch is to set the parameters. I used Thickness (of the material) Connections (for the size of the click connectors) and the obvious Height and Width (the inside width). It was fun trying to keep the dimensions organized and to use only parameters no real number.. which can be done because you can calculate with the parameters.
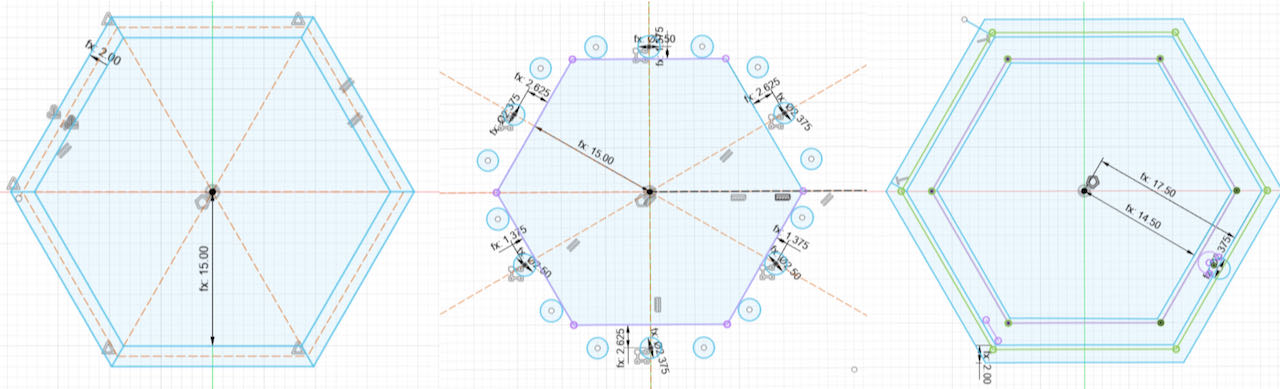
I ended up making 3 base sketches which in retrospective i think i could have combined them more but it did give me a good overview of what’s what..
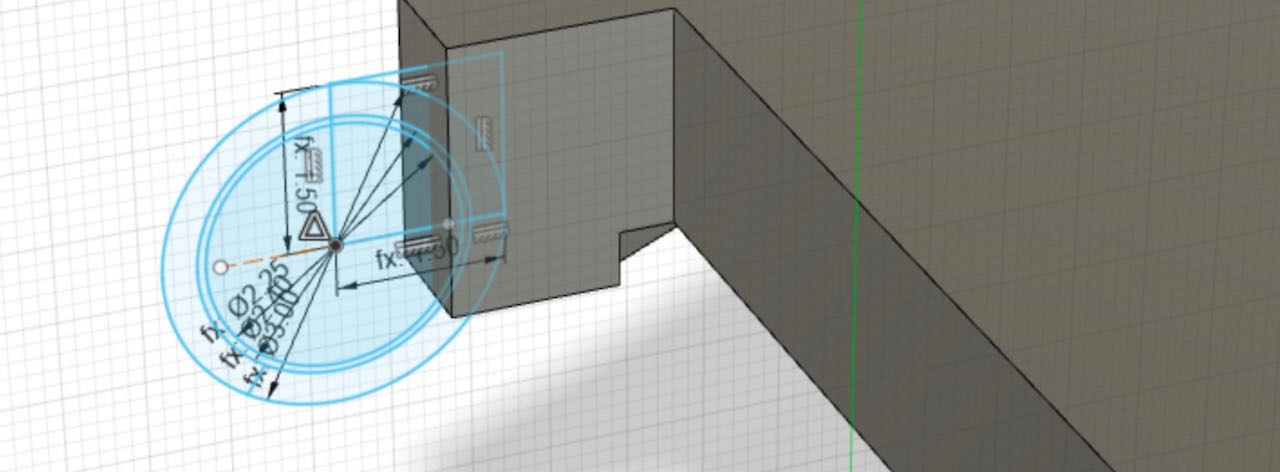
For the hinch i had to make a sketch that was on a different plane, took me a bit of time to figure this out and again in retrospective i should have made a mid plane between the 2 walls because with the plane beeing on one side i loose the parametric design, the lid doesn’t move with the parameters, later in the weeks i learned how to make this work but for week2 i am happy i made a box, any box.
Of course lots of trial and errors but with some tutorials and just trying i came far.. now its sunday afternoon and i seem to be stuck at trying to open the lid in a realistic way.. to be continued
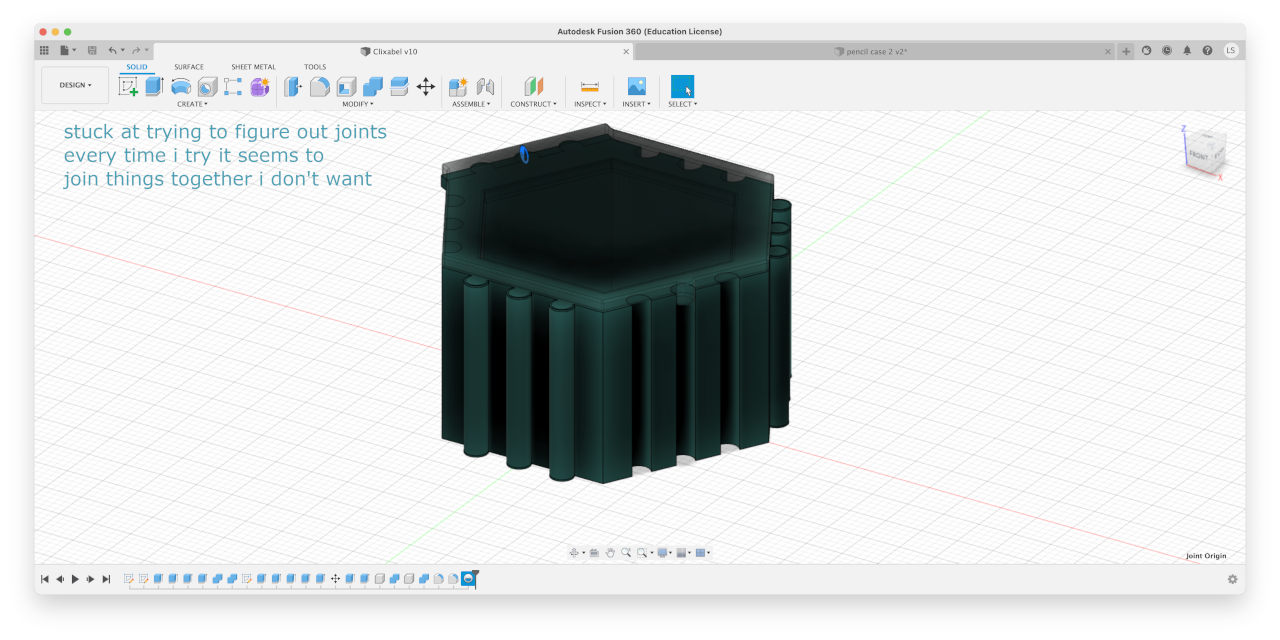
Found a tutorial which explains joints in a comprehensive way, which gave me also some ideas about the lock and hinch.. so back to the Fushion board
Ended up spending a whole day fighting to get the hinch to work with the parameters.. in the end i didn’t succeed, to be continued…
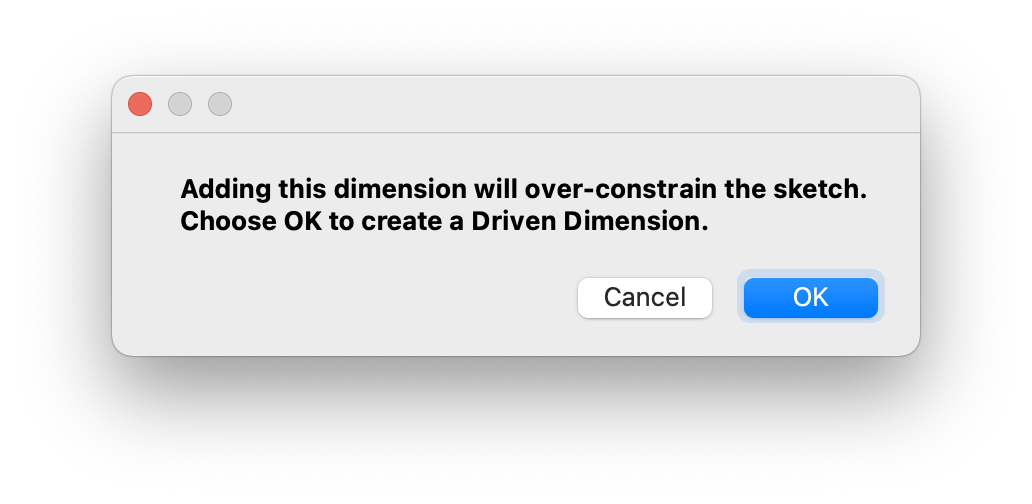
I kept on getting confused with constrains and dimensions, need to take the time to watch a couple of tutorials to get the frustration out.
Thanks to Philip that send me this link i managed to get my video in
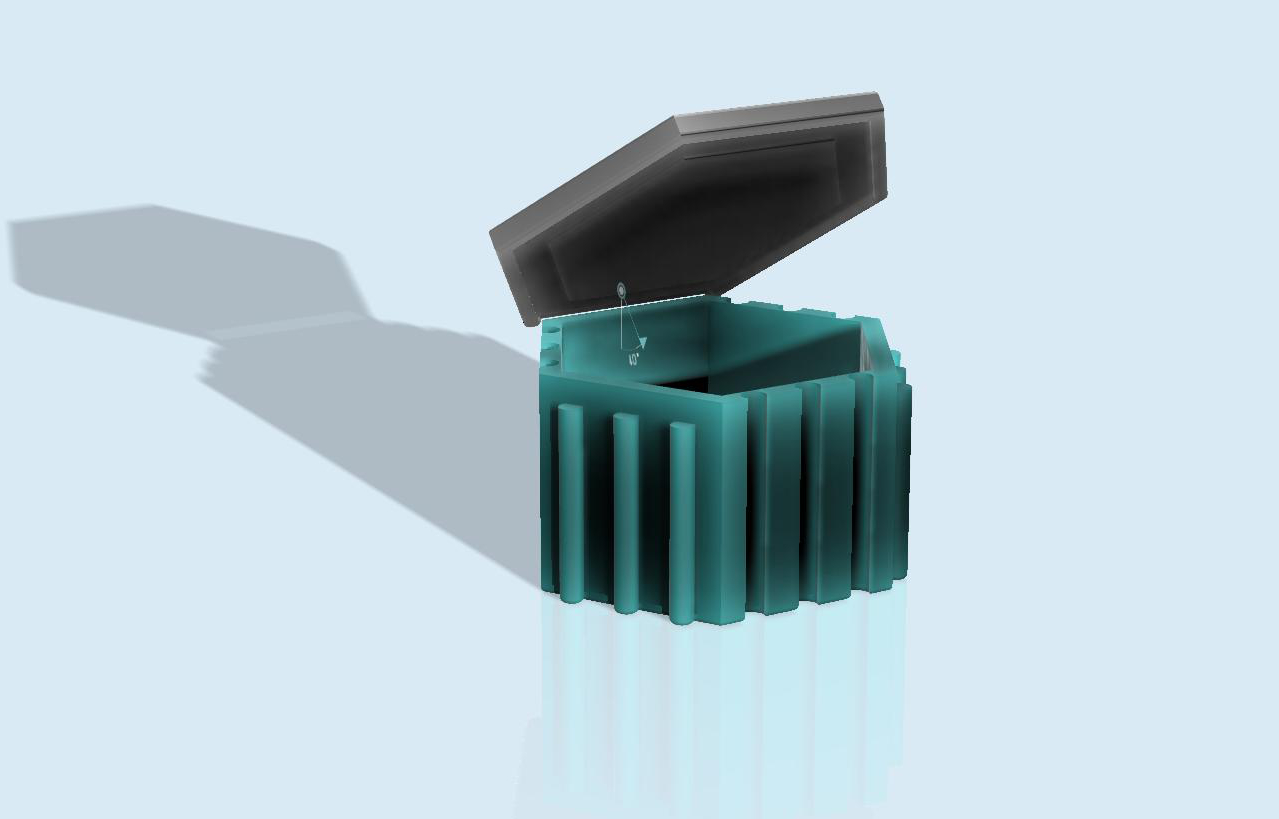
Also still managed do get a rendering out
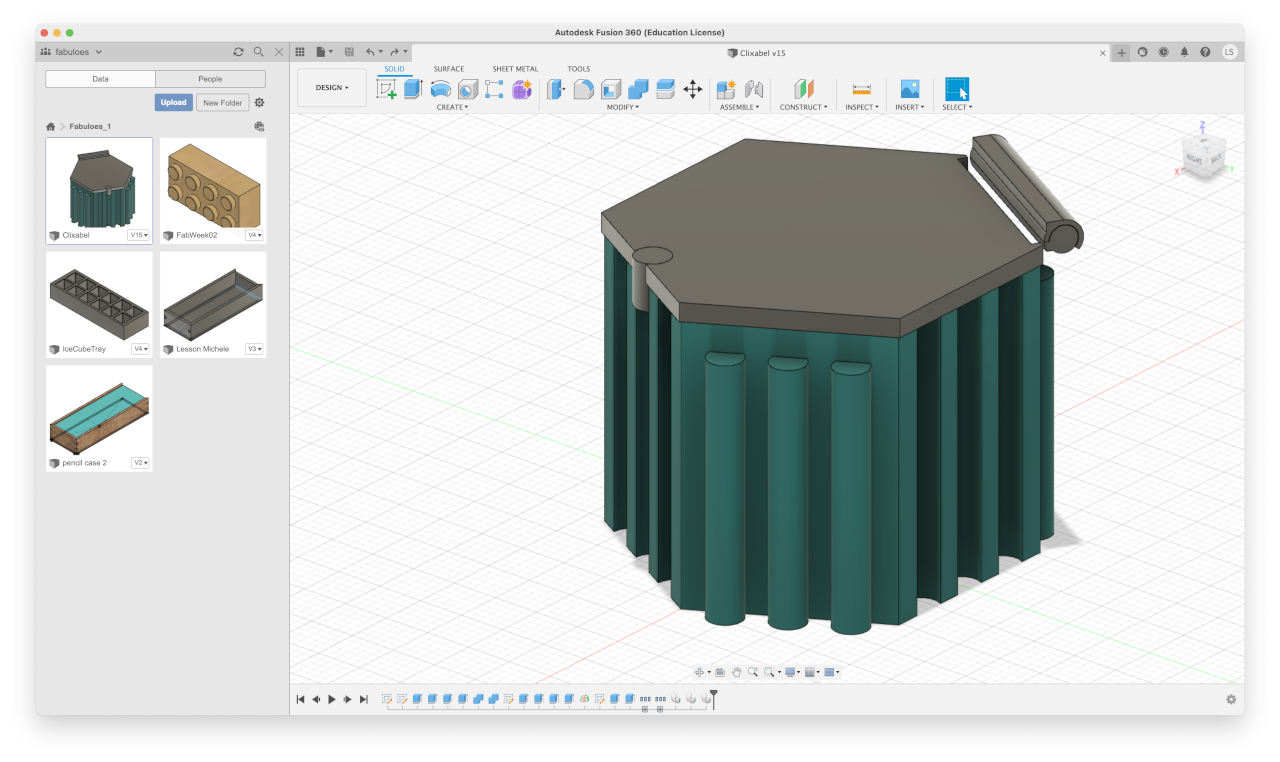
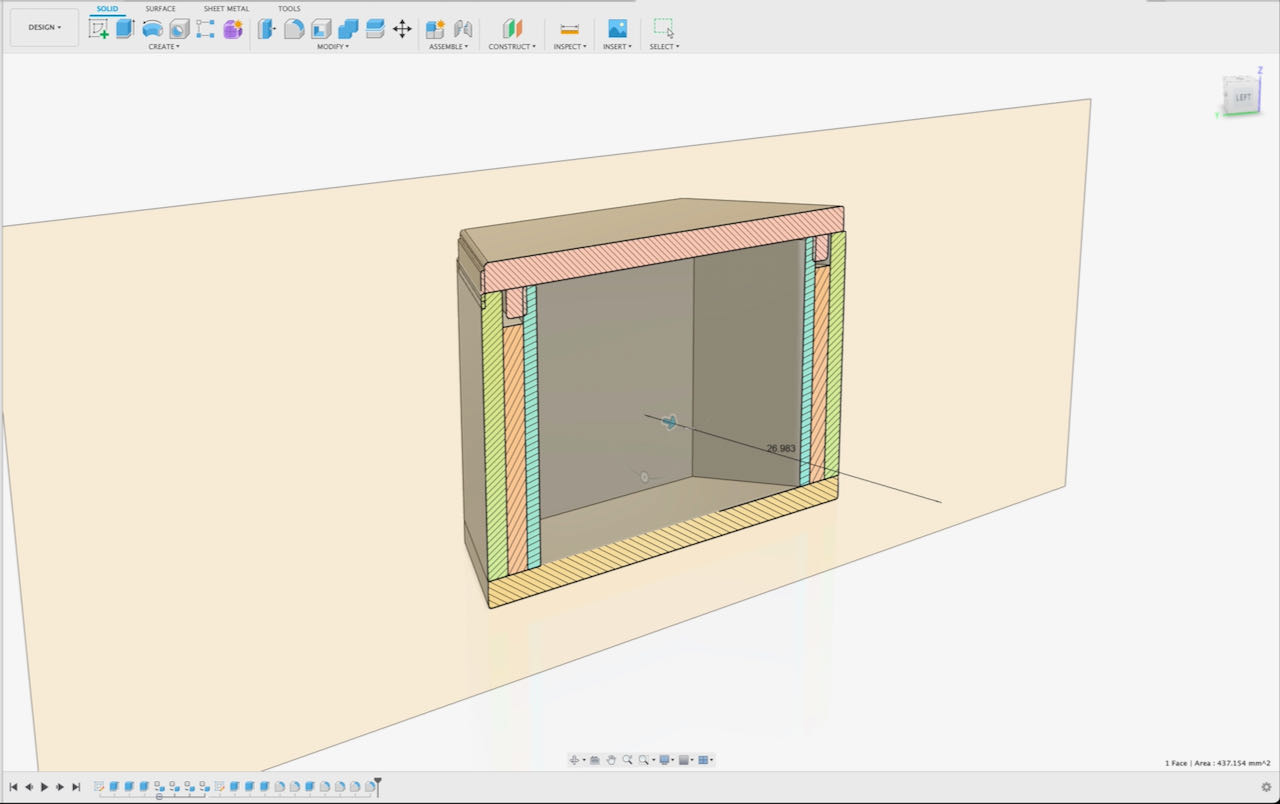
I started again with a hexagon box with a lid to have something workable for next week, this time very slowly going through making it, making sure i looked at the parametric design as i was moving along - this box will be the base for my honeycomb pill box with “trut, you missed it” alarm.
From the outside it looks really simple but i tried to make the walls logic and everything fully parametric, which worked in the end. This hinch like this is not gonna work, will need time to figure out how to do this properly. Below a section analysis view to show the inside of the walls.
During this i had a weird moment when my object stayed selected and i couldn’t figure out why, when i scrolled through the timeline i figured out when it happened and realized i didn’t close a edit feature (twice), stupid thing is that you can’t see it until you actually edit the feature.
During the regional meeting i got some very remarks for example this useful link to disable constraints and some links to projects
OpenScad
To install OpenScad i used homebrew with this command:
brew install openscad
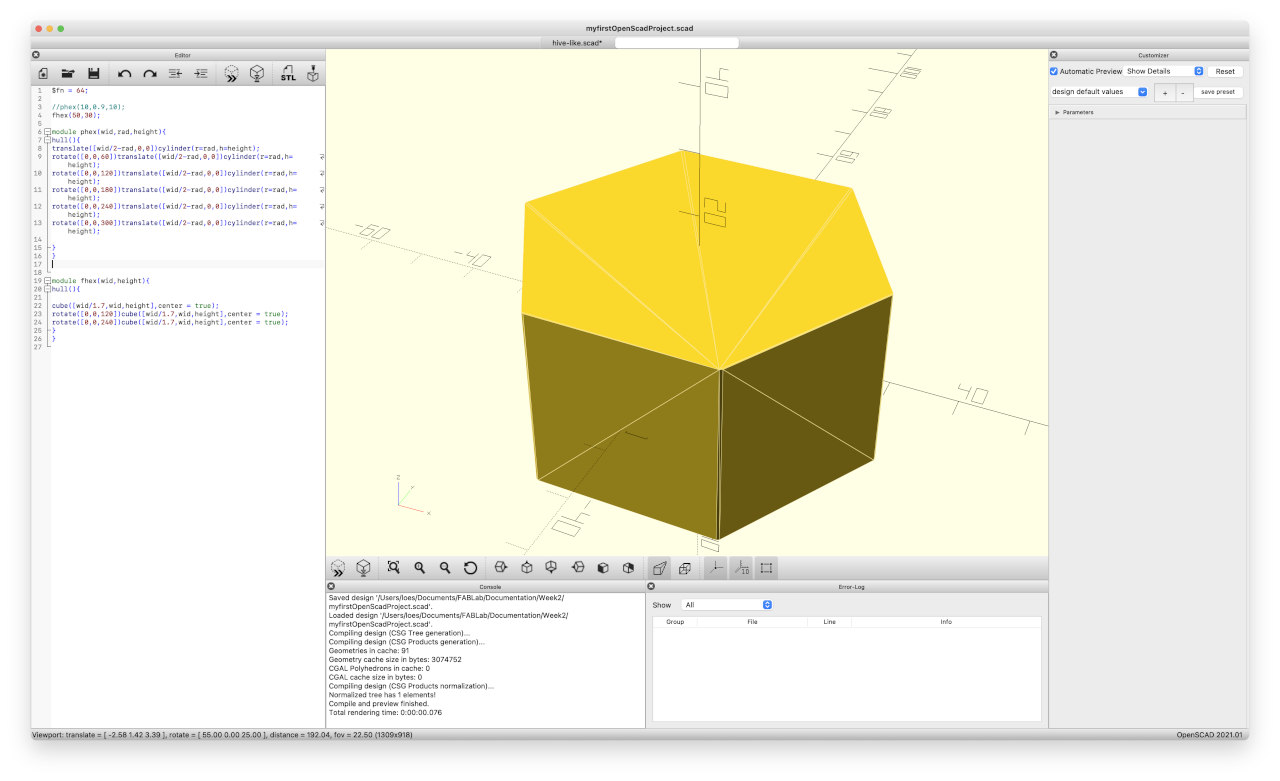
I really wanted to give OpenScad a try to work a bit less with visual a bit more with code to really understand what i am doing, started with a bit of browsing through the OpenScad and their wiki page which is really help full and after some fooling around i made a little hexagon using this tuturial which seemed a bit like cheating..
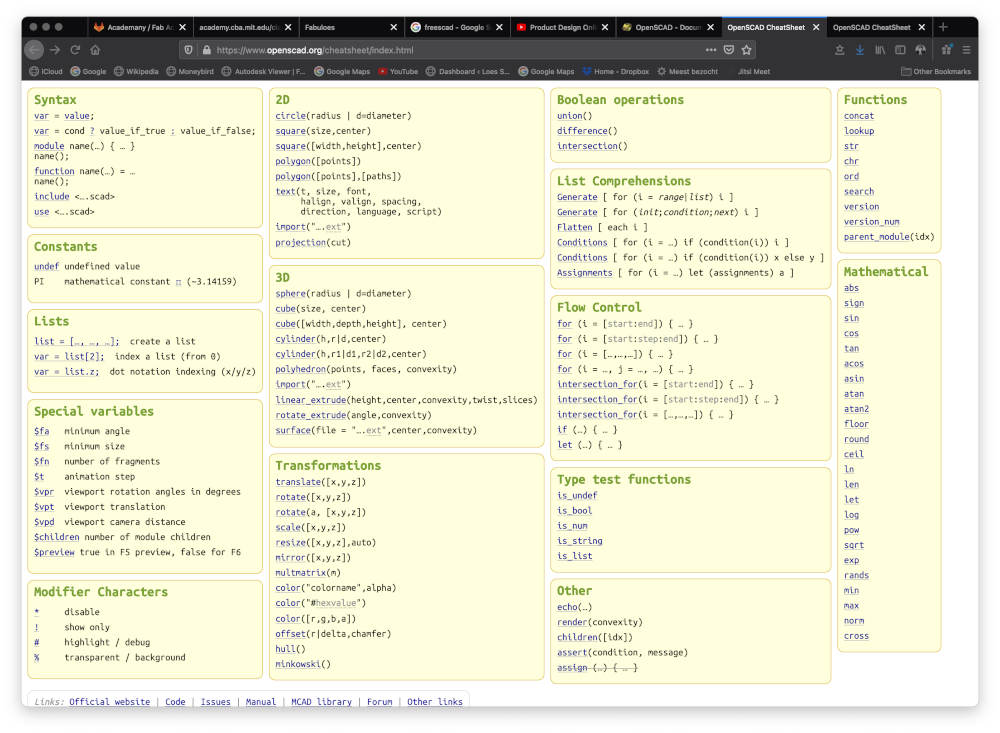
Here are the shortcut of OpenScad which are very helpful.
But then i found another tutorial which helped me a lot more to understand the way that OpenScad works. Doing this i realized that learning how tot program would help me in many ways so thats one of the sidetracks of my Fab Academy.

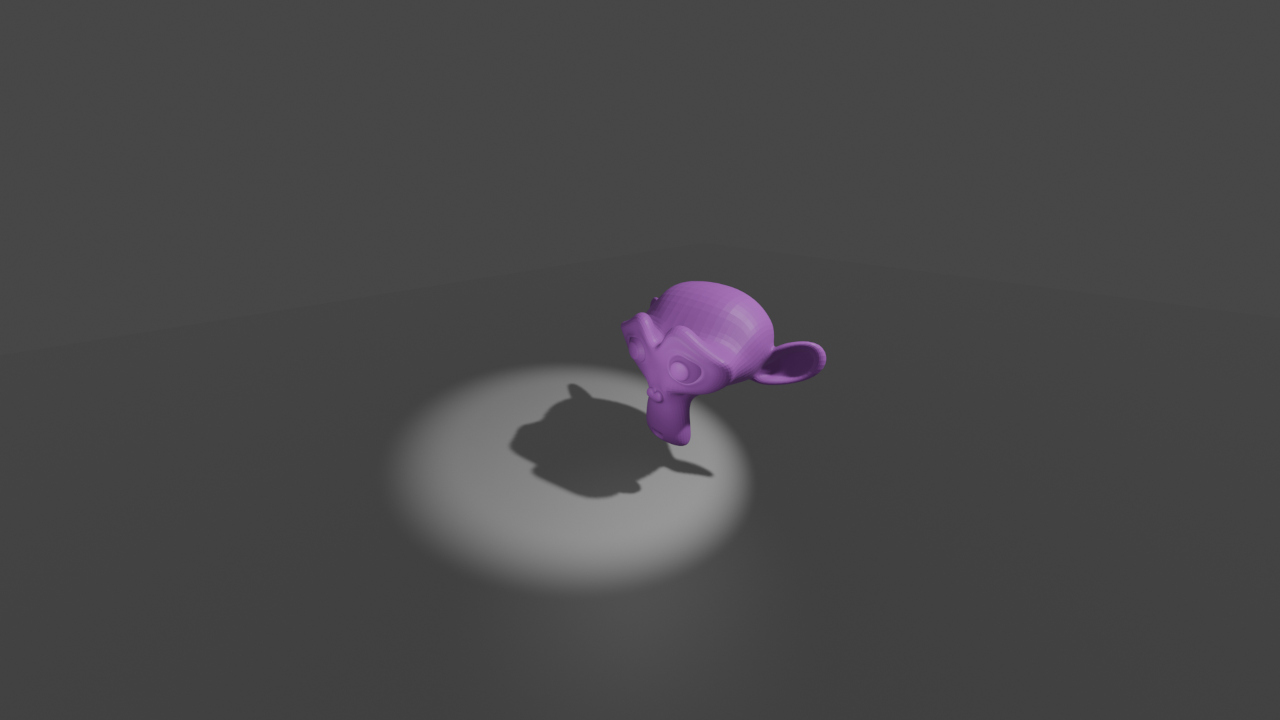
Then i got enough courage to use a file from the thingiverse and change it a bit around to figure out what does what.

Blender
I learned a lot during the classes from Ferdinand but wasn’t able to use it for this assignment, to complicated still for me to use blender for this.
Website from Ferdinand
Some basic info i wrote down:
first thing to remember is that blender knows where you mouse is without clicking so hover on the right places
Zoom: rotate mousewheel
Orbit: press mousewheel and move mouse
Pan: press ⇧ + mousewheel and move mouse
shift S pop up menu
Change views:
1 Front View
3 Right View
7 Top View
5 Toggle Perspective/Orthographic
0 Camera View
functions:
G Grab
R Rotate
S Scale
shift X when scaling restricts to X
shift Y when scaling restricts to Y
shift Z when scaling restricts to Z
ALT + letter take back to the original XYorZ
example:
G + Y + number or drag enter
TAB toggle between edit and object mode
Z toggle wireframe/solid
X delete
A selects all
AA deselects all
H hiding objects
HH unhide objects
C circle selection
B box selection
K cutting
Anyways here is a generated monkey..
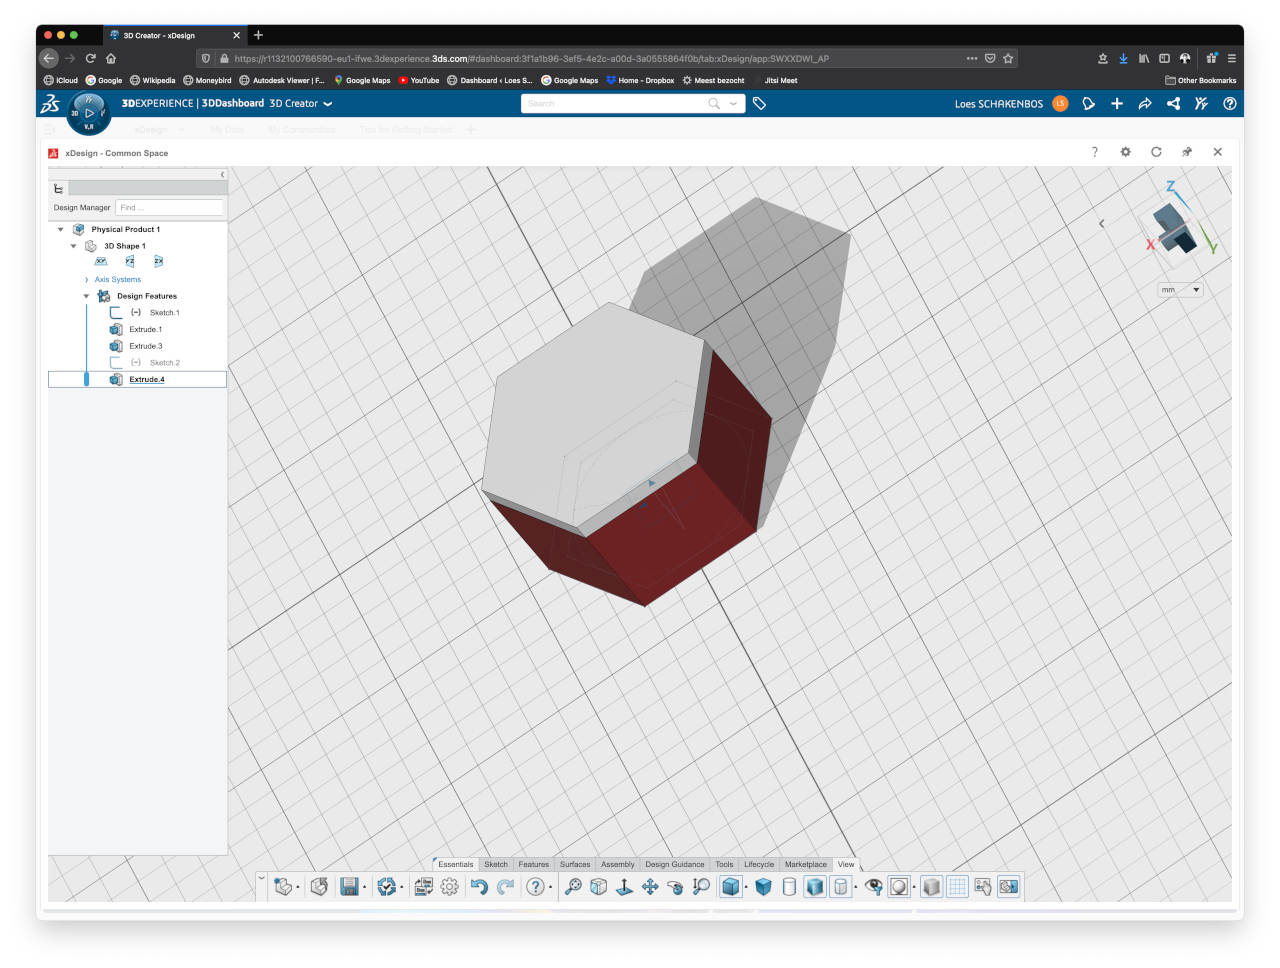
XDesign
a very helpful but extremly boring tutorial list is found here
I realized while trying to create an object that a lot of the shortcuts are different even how to view which is very frustrating, got over that very quickly did some short tutorials and got started, it seems to work very similar to Fushion except that i didn’t find a way to do parametric design yet. Don’t wanna get stuck on this now, time management, would rather spend some more time on Fushion to get that joint going and make some different versions.
Antimony
brew install libpng
brew install python3
brew install boost-python3
brew install qt5
brew install lemon
brew install flex
brew install ninja
brew install cmake
git clone https://github.com/mkeeter/antimony
cd antimony
mkdir build
cd build
cmake -DCMAKE_PREFIX_PATH=/usr/local/Cellar/qt/5.10.1 -GNinja ..
ninja
open app/Antimony.app
i started with trying to install it and got now where excepts that i installed a bunch of new stuff on my computer which maybe i will need in the future ? Of course within minutes i found a DMG which i could install the way i am familiar with so off we go:
- think i achieved my goal this week, have a clearer view of what i want but am not sure on how to do it yet.
 - more tutorials before i start and spread in more trough out the week
- look into diffent version of pill boxes that are already on the market or researched in FAB.