

Moulding and Casting:
In this Eleventh week of Fab Academy, we had room to test our creativity and fabrication skills in making a Moulding and Casting.
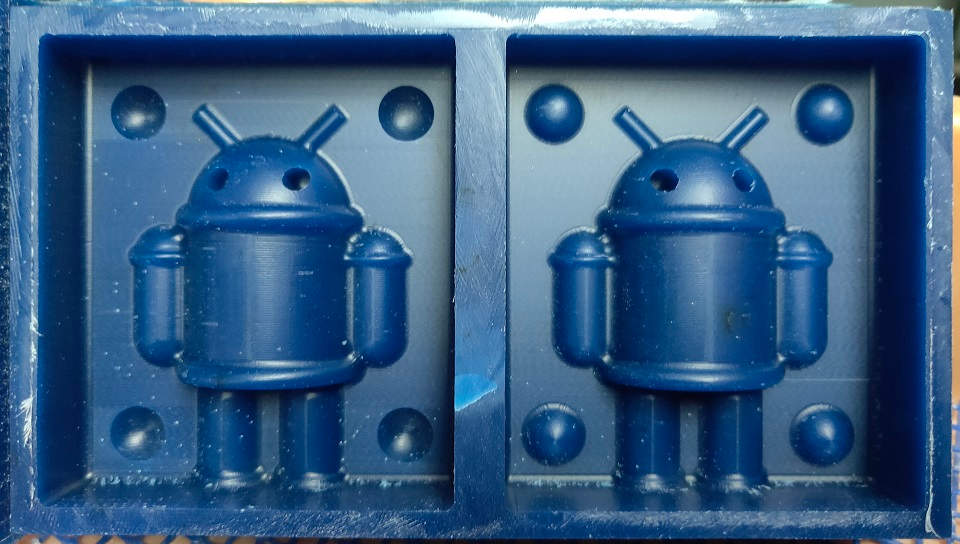
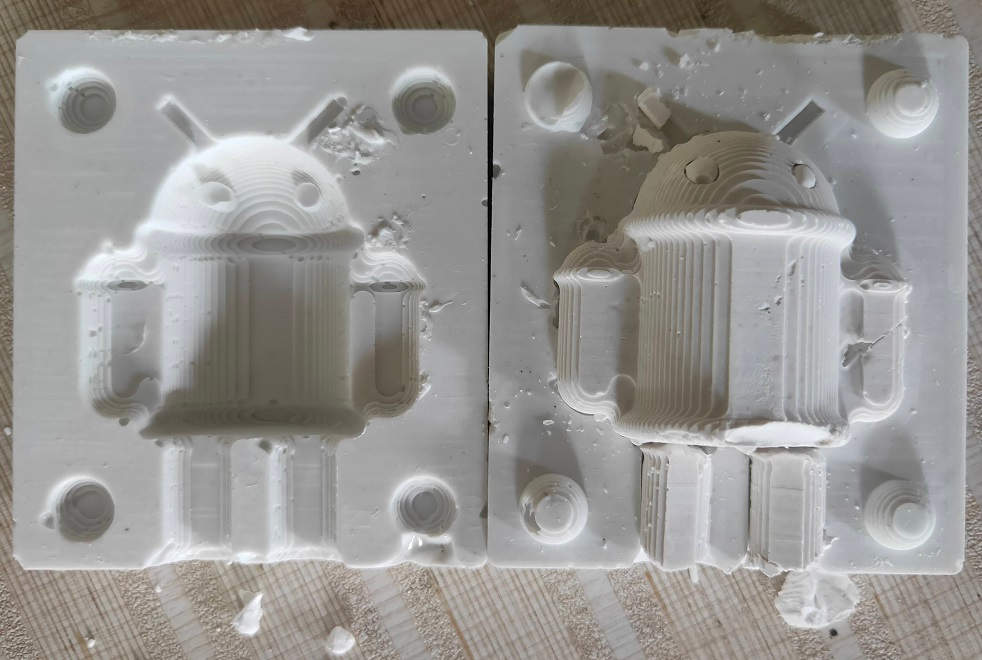
Android Mould after Milling and Finishing
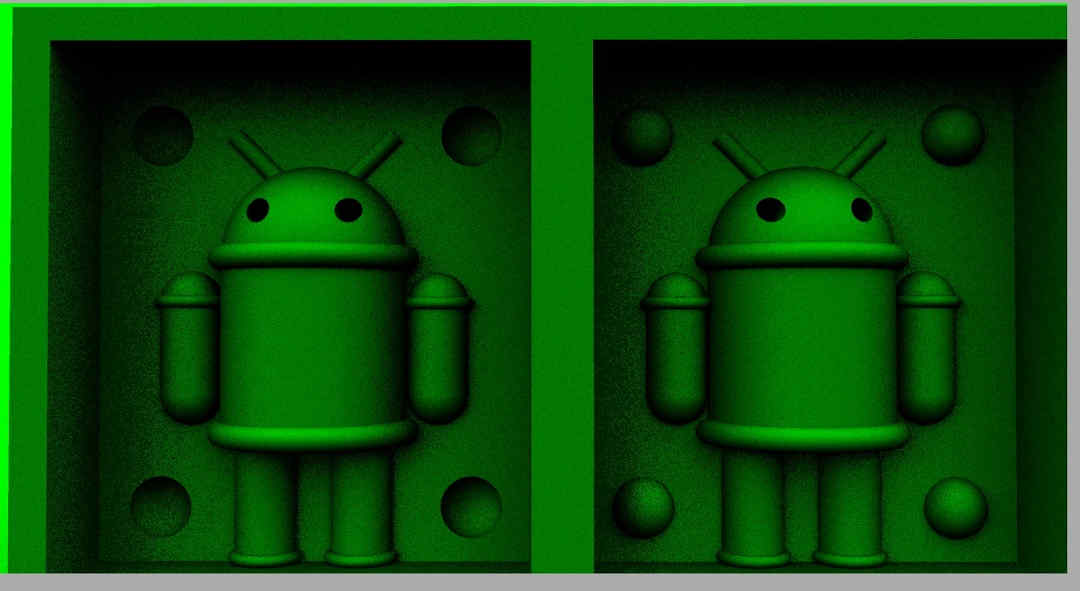 Rendered View of Android Design
Objective:
1. Group assignment:
Details here.This week is having the following Objectives for the Group-
- Review the safety data sheets for each of your molding and casting materials
- Make and compare test casts with each of them
2. Individual assignment:
Design a 3D mould around the stock and tooling that you'll be using, mill it (rough cut + (at least) three-axis finish cut), and use it to cast parts.
Learning Outcomes:
- Design appropriate objects within the limitations of 3 axis machining
- Demonstrate workflows used in mould design, construction and casting
Checklist:
Linked to the group assignment page ✔
Reviewed the safety data sheets for each of your molding and casting materials, then made and compared test casts with each of them ✔
Documented how you designed your 3D mould and created your rough and finish toolpaths for machining, including machine settings ✔
Shown how you made your mould and cast the parts ✔
Described problems and how you fixed them ✔
Included your design files and 'hero shot' of the mould and the final object ✔
Opening Quotes:
- Shall I not have intelligence with the earth? Am I not partly leaves and vegetable mould myself. - Henry David Thoreau
- "If you are cast in a different mould to the majority, it is no merit of yours: Nature did it." - Charlotte Bronte
- "My mind is like clay, but thank goodness God knows how to mold it!" - Mary Kate
- "Normal people believe that if it ain't broke, don't fix it. Engineers believe that if it ain't broke, it doesn't have enough features yet." - Scott Adams
- "The trick to having good ideas is not to sit around in glorious isolation and try to think big thoughts. The trick is to get more parts on the table." - Steven Johnson
- "There's nothing I believe in more strongly than getting young people interested in science and engineering, for a better tomorrow, for all humankind." - Bill Nye
- "I have not failed, but found 1000 ways to not make a light bulb." - Thomas Edison
- "Knowing there is a structure, hidden or felt, to the random gives pleasure." - Cecil Balmond
1. Group assignment: Details here.
The flow of this Group Assignment is as follows:
- Introduction to Moulding and Casting: Insights by the Instructors
- Objective / Modus Operandi
- Steps:
- Read the Datasheets (Safety and Technical) of the Moulding and Casting Materials
- Test the Cast materials to understand their properties, handling precautions
- Discuss in the Group and give details about your test material to others
- Document your Contribution
Mold making and casting are central techniques in the history of art and design. 3200 B.C - The oldest known casting on record is cast in Mesopotamia. The copper frog is still in existence today. Recently, excavations were done in India and a documentary was prepared by Discovery channel over it which states that the unearthed artifacts date back to 4000 years. Secrets of Sinauli.
 Casted Weapons of Warriors of Sinauli
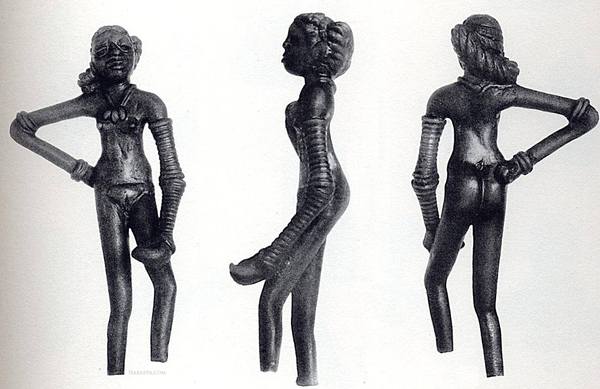 Dancing Girl of Mohenjo Daro
A mold is a block that contains a hollow cavity in a desired shape.
Casting is the process of shaping liquid or a pliable material (this might be plastic, glass, metal, clay, epoxy, concrete, plaster or many other options!) is poured into the mold (or matrix). The liquid hardens or sets inside the mold, adopting its shape. What you end up with is a solidified object also known as the casting. To help remove the casting from the mold, a release agent, or a chemical used to prevent other materials from bonding to surfaces, is usually needed.
The Objective of this Assignment was to understand the various materials used for Molding and Casting. Also, to understand how they are mixed, in what proportions, their physical and chemical properties, caution in their handling, curing time etc.
The various materials available in our FabLab are HydroStone, Silicon Rubber, FlexWax, Machinable Wax, Epoxy Resin, Paraffin Wax etc. Mohit also tried using Medimix soap for trials and testing.
I used Hydrostone for Making and comparing test casts. The datasheets could be found here. Other related documents are HYDROCAL® Brand Gypsum Cements Sealers and Parting Compounds; DRYING PLASTER CASTS USG PLASTERS AND USG HYDROCAL® BRAND GYPSUM CEMENTS and PLASTER MIXING PROCEDURES USG PLASTERS AND USG HYDROCAL® BRAND GYPSUM CEMENTS.
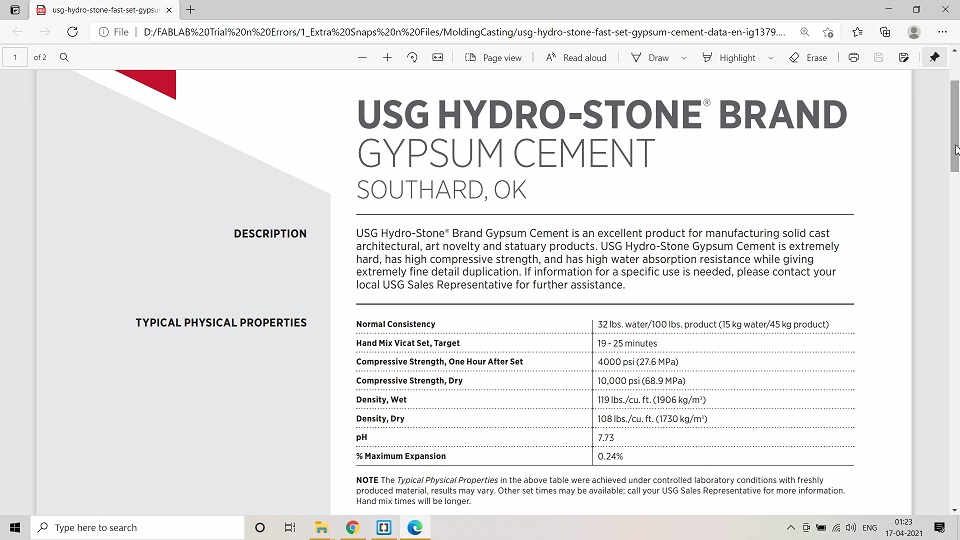 Datasheet of HydroStone - Gypsum Cement
I started with the Group Assignment as directed by the Instructor. All of us were given different materials for making and testing the cast materials.
I selected the HydroStone. We had the HydroStone of USG company.
I read about the HydroStone and its properties. I also read about the Mixing and Pouring Instructions for it. Few Notable Instructions given are:
- 32 lbs. water/100 lbs. product (Hydro-Stone Gypsum Cement)
- Hand Mix Vicat Set, Target is 19 - 25 minutes (But it actually takes longer somewhere from 35 minutes to 45 minutes.)
- Sift or strew USG Hydro-Stone Gypsum Cement into the water slowly and evenly.
- Longer mixing times result in higher mold strength and shorter set times.
- Agitation/vibration of the filled mold is a further step used to prevent air at or near the mold surface.
- All casts should be dried as quickly as is safely possible after manufacture so that maximum physical properties can develop.
- The temperature of the mixing flask increases after adding water and the Hydrostone.
Flow of my Activities as a part of Group Assignment:
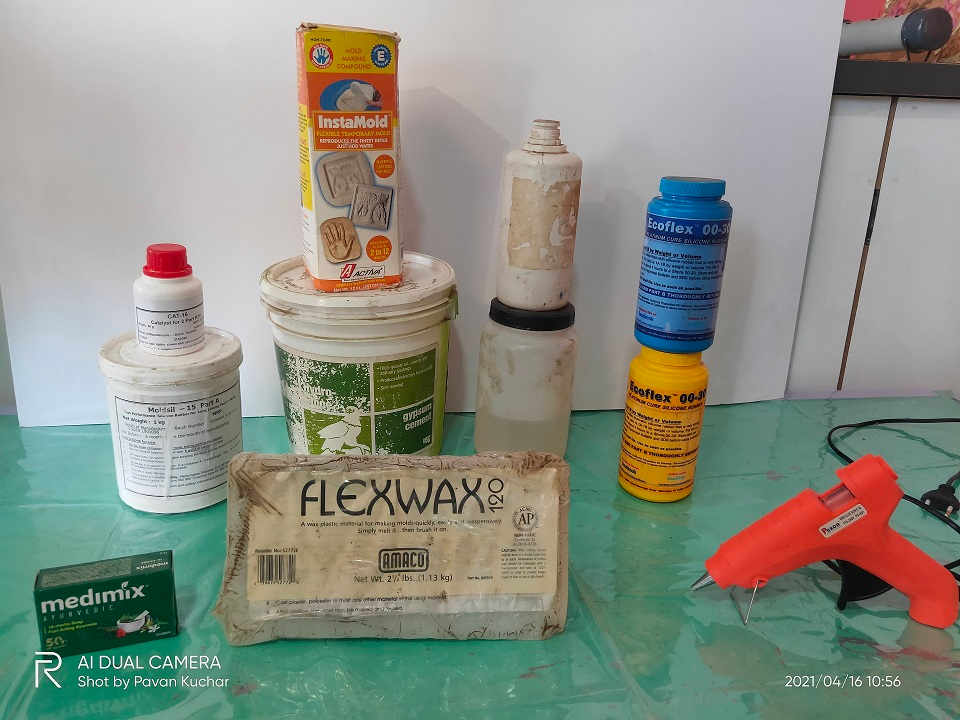
Various Moulding and Casting Materials in our Lab.
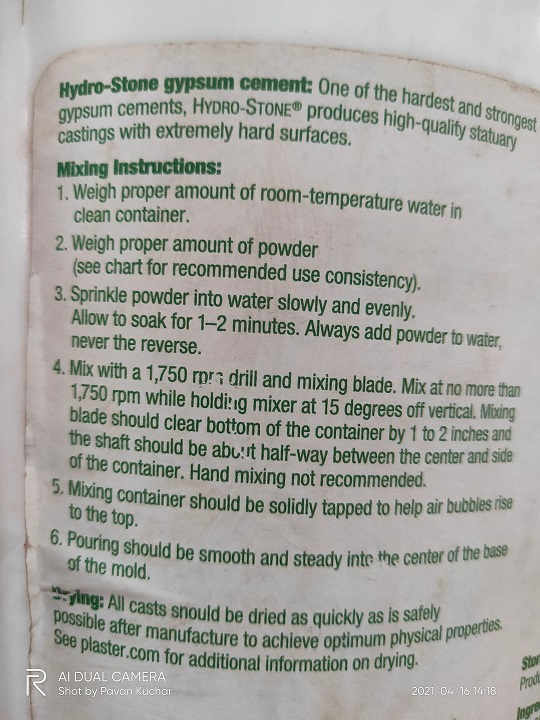 Mixing Instructions on the Container | 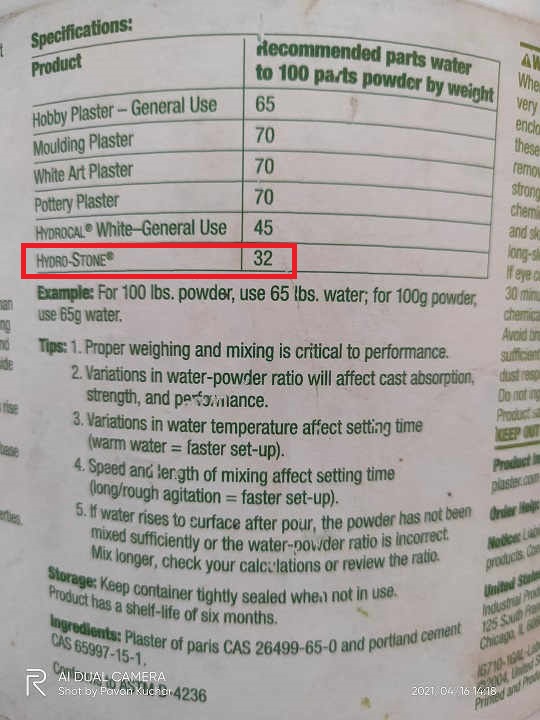 Specifications and Tips on the Container |
|---|
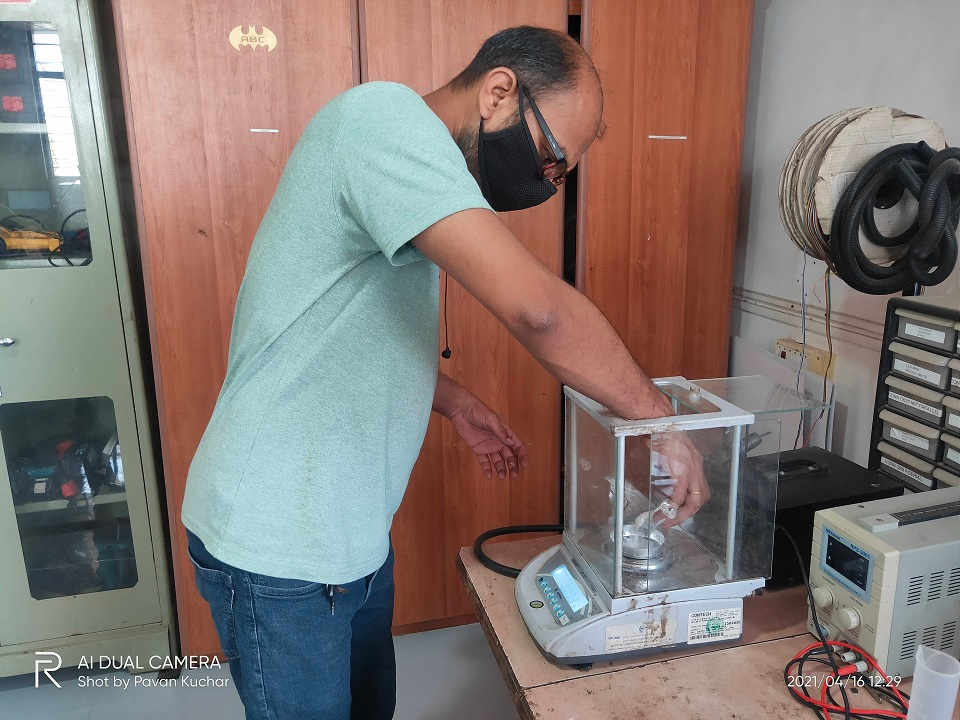
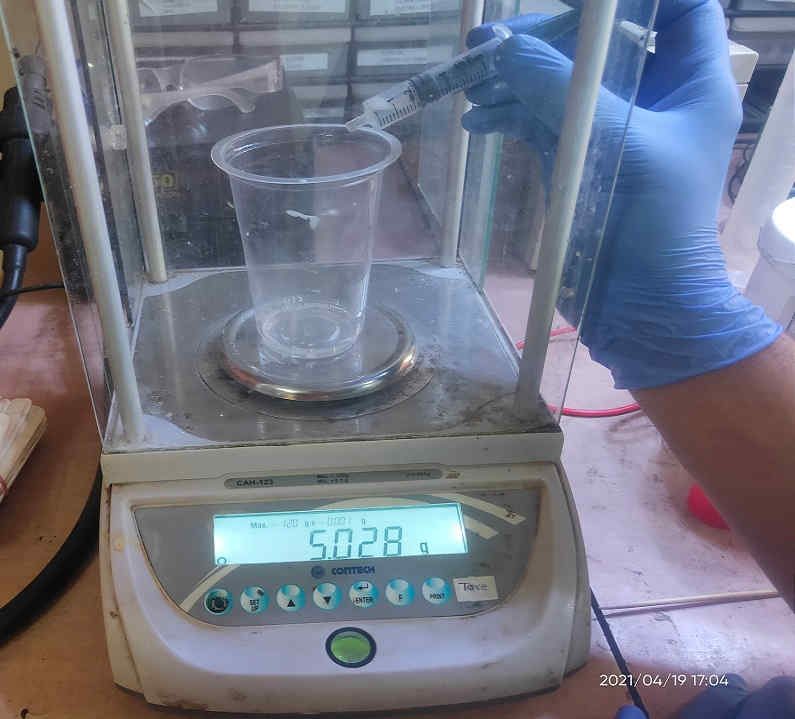
I took HydroStone for Weighing
My Mistakes:
- I didnt noted down the Instructions on the Notebook for Reference.
- I didnt wear Gloves while operating with HydroStone.
It was given in the Instruction to use 32 gms of Water for 100 gms of the HydroStone but while Weighing I forgot and did exactly opposite of the Instructions. I weighed only 32 gms of HydroStone and Mixed 100 ml Water from the beaker to it. It mixture became very thin / runny mixture. I kept on sheering / stirring and waited fir it to become viscous but Alas.
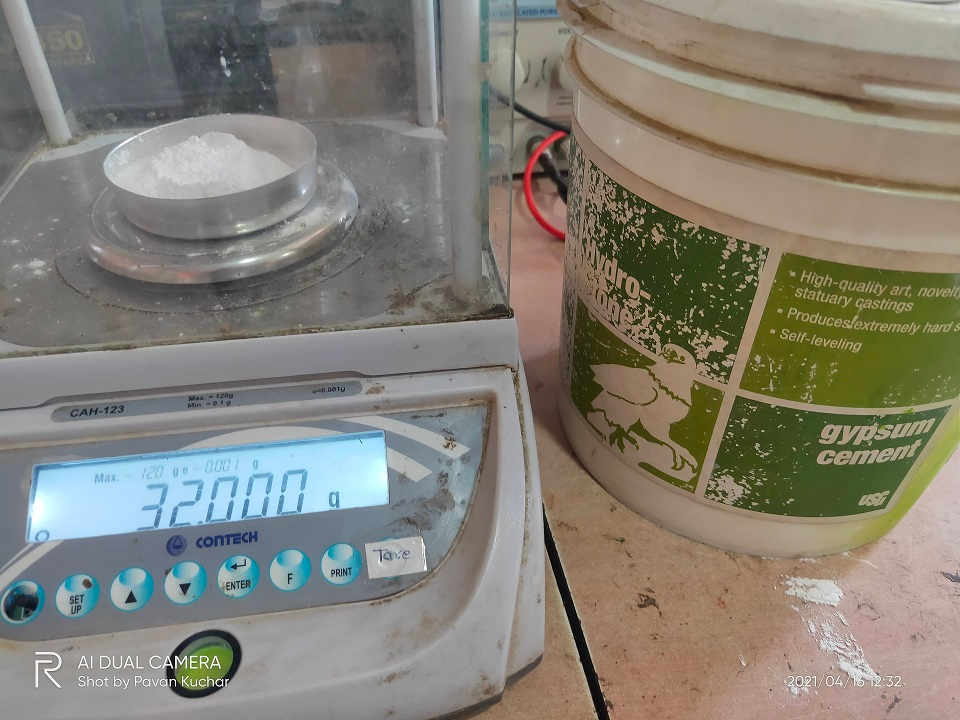
Weighed only 32 gms of HydroStone instead of 100 gms.
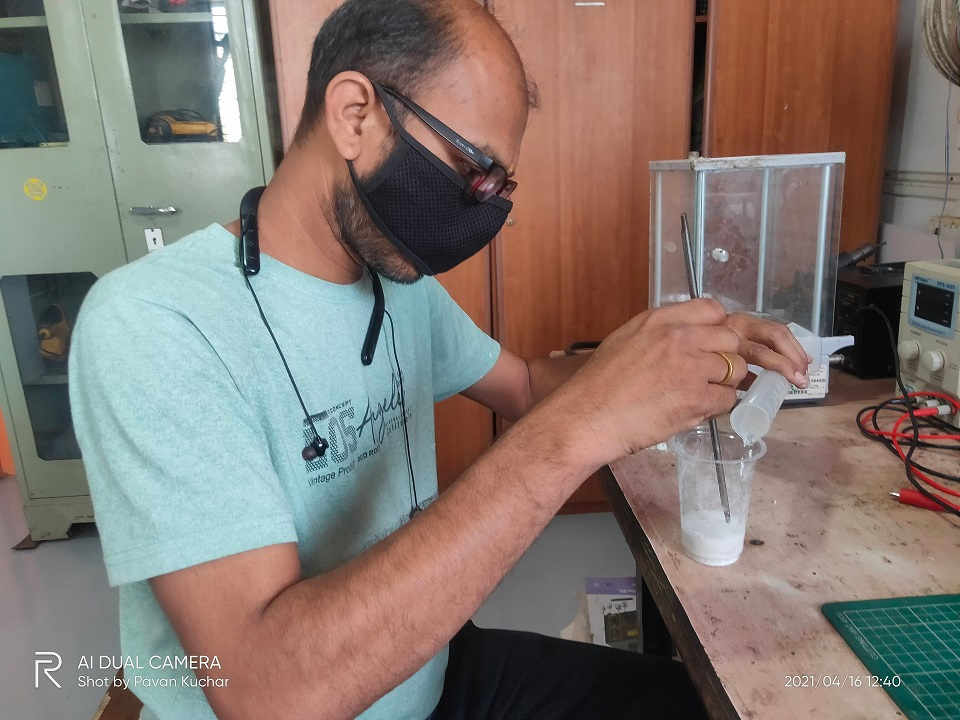
Mixed 100 ml Water instead of only 32 gms to HydroStone
Runny Mixture (Less Viscous)
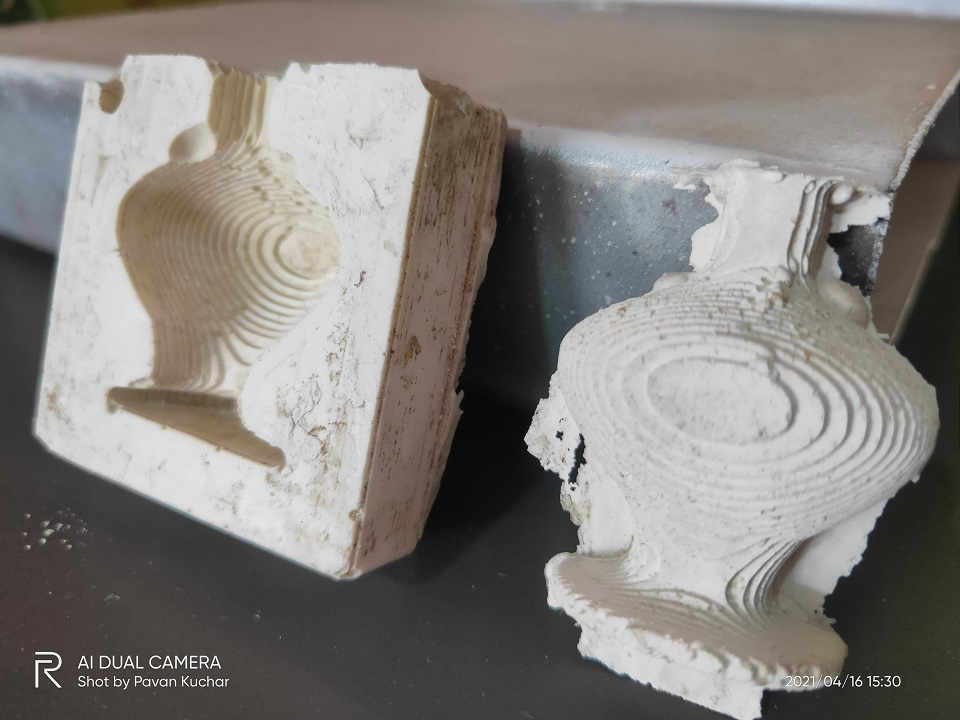
I decided not to waste the Mixture and tried using it for Casting on previous years mould. This way I would be able to compare and contrast the texture and finishing of Mixture in different proportions. So, I poured the Mixture in one of the moulds of Vaibhav Saxena. (FabAcademy 2019 - Vigyan Ashram).
I let the Mixture to settle in the mould and after some time poured out excess Water from the mould, I allowed it to dry later on.

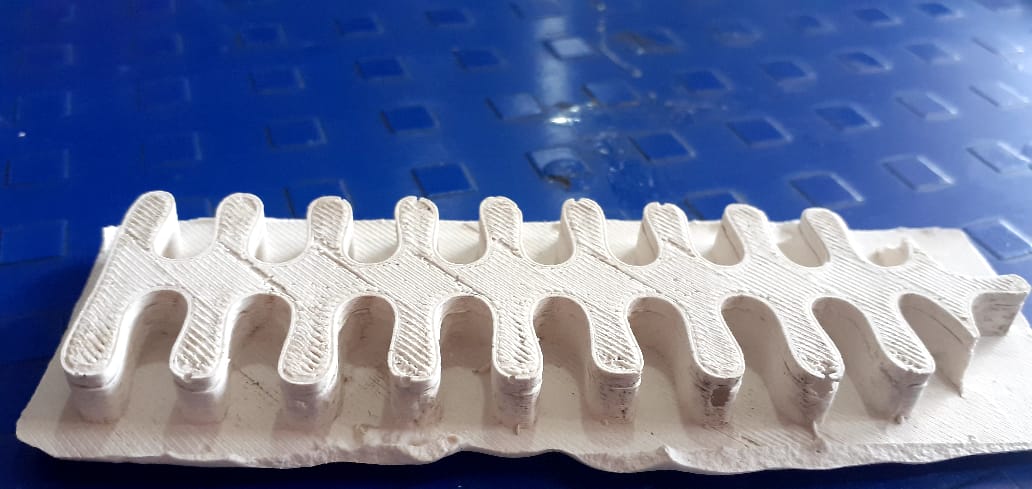
Casting from Addition of Wrong Amounts of Water and HydroStone.

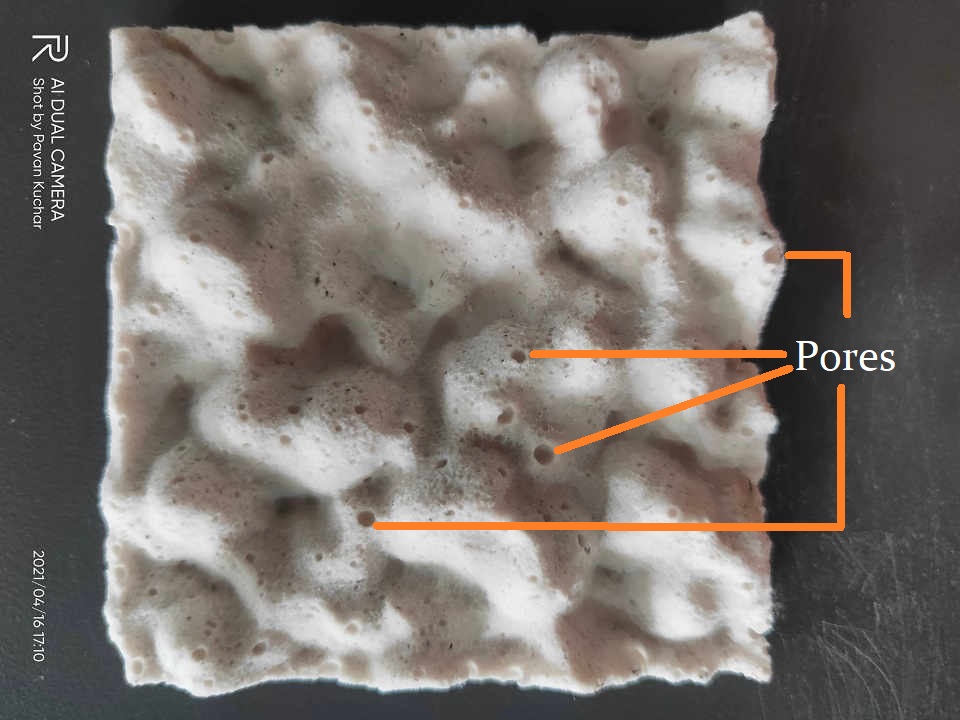
We can easily observe the Air Bubbles and the Finishing is Negligible.
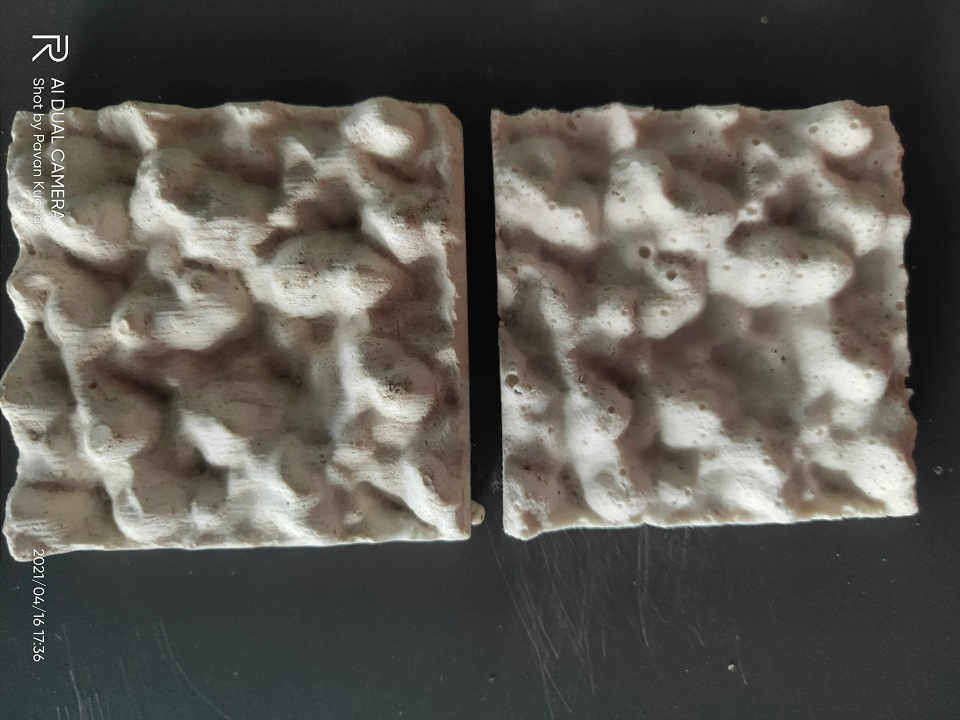
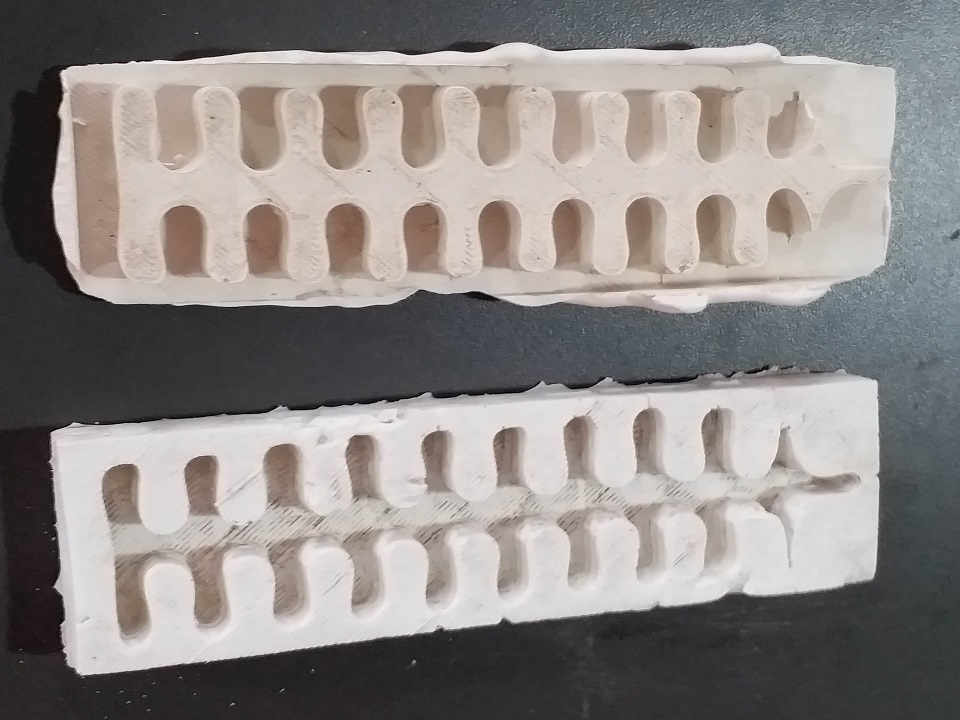
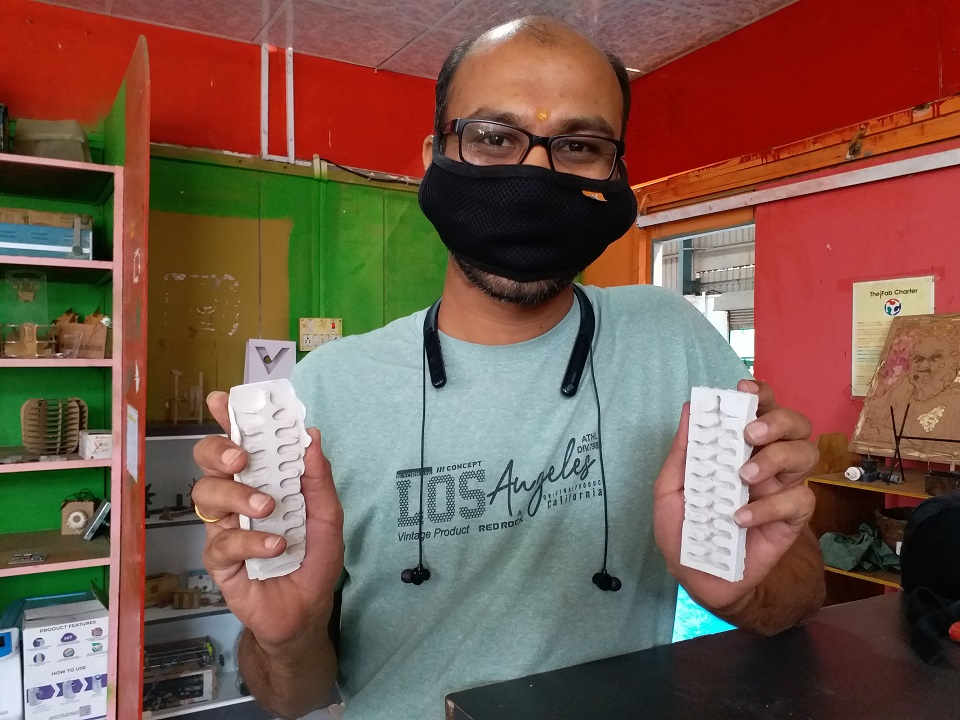
Comparision between Original Casting 2 years Old and my Casting.
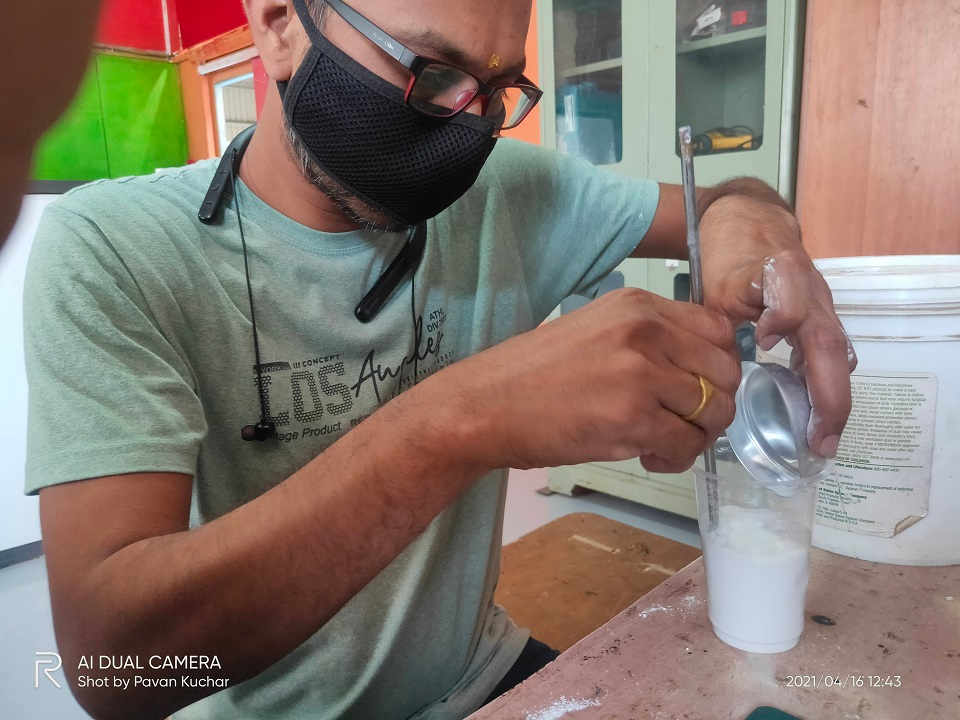
I then weighed the HydroStone again; this time correctly 100 gms and added 32 gms (because 32 gms of Normal Water is 32 ml.) water to it. I took the Water in the Mixing Jar and Slowly added the HydroStone Powder to it while keeping the Stirring ON. This gives nice texture to the mixture and allows the Powder to mix evenly with the water.
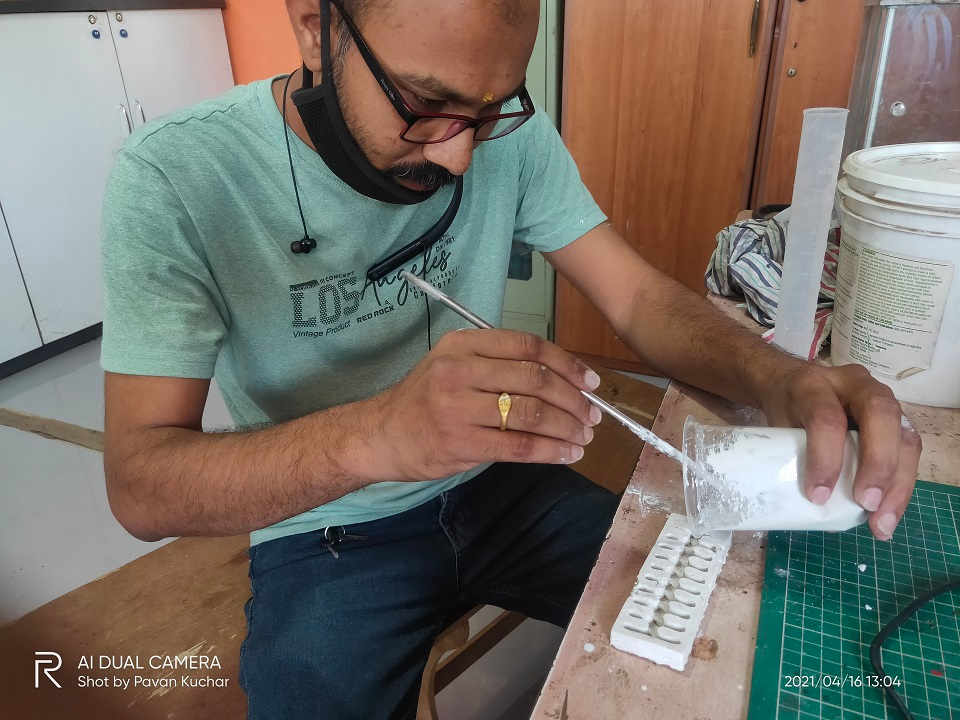
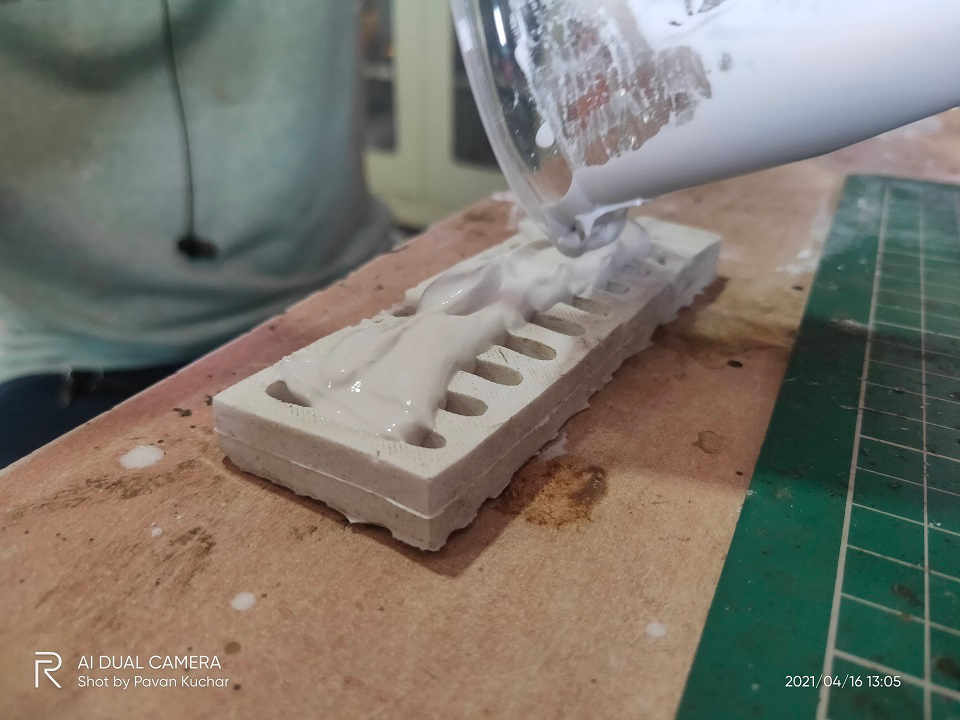
Pouring the Mixture in the Smaller Spaces of Mould
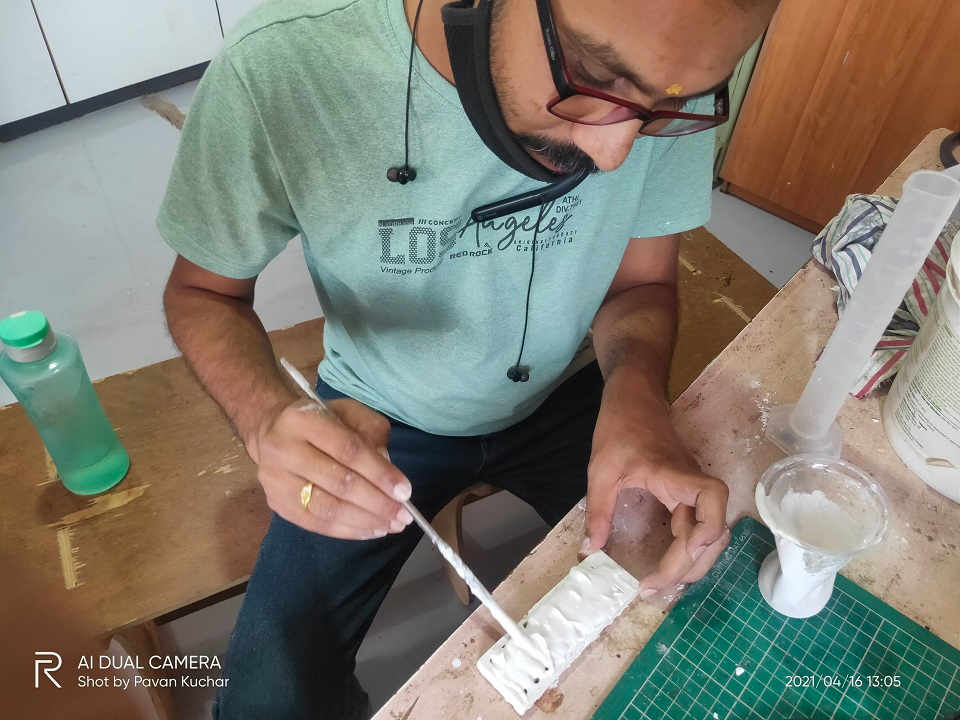
Trying to evenly spread the mixture in the Mould
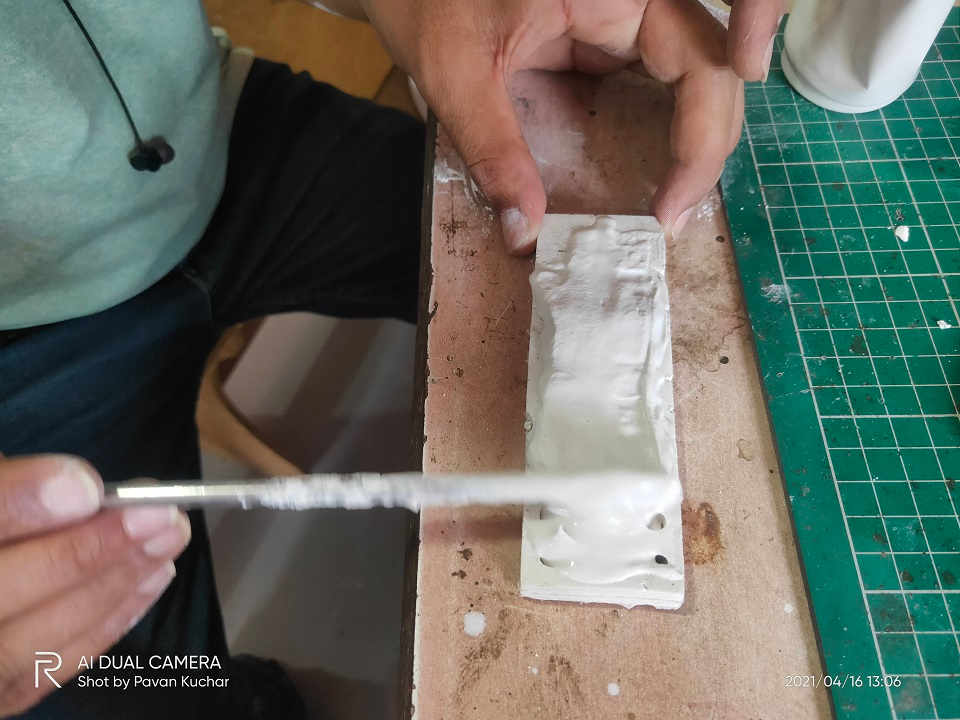
Trying to evenly spread the mixture in the Mould
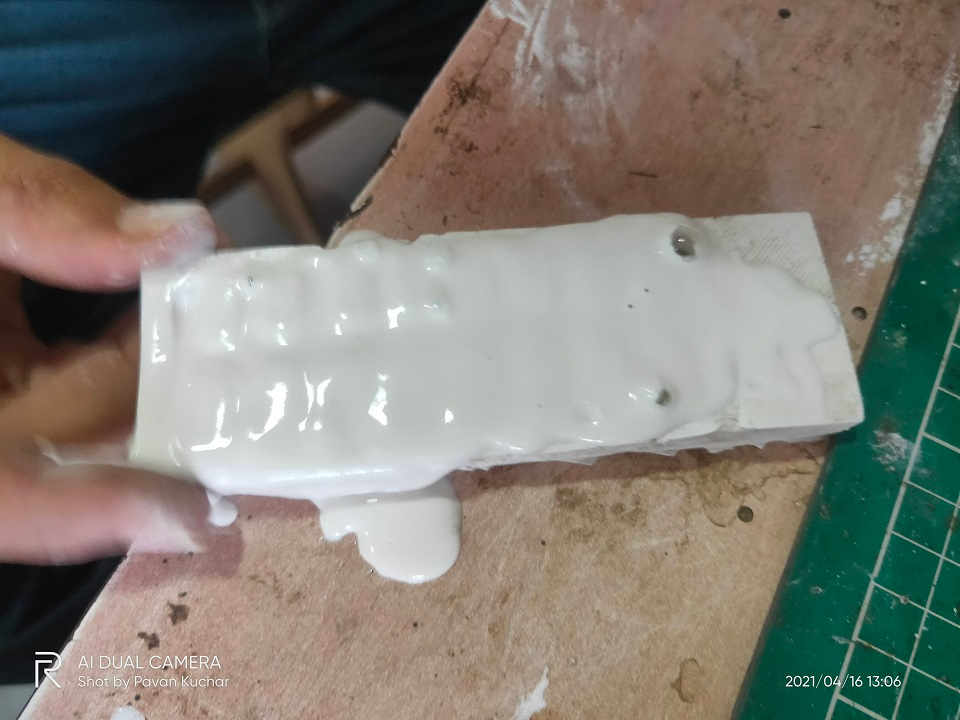
Vibrating and Tapping the Silicone Mould for allowing the Mixture to settle and release trapped Air bubbles if any.
Vibrating and Tapping to release trapped Air if any
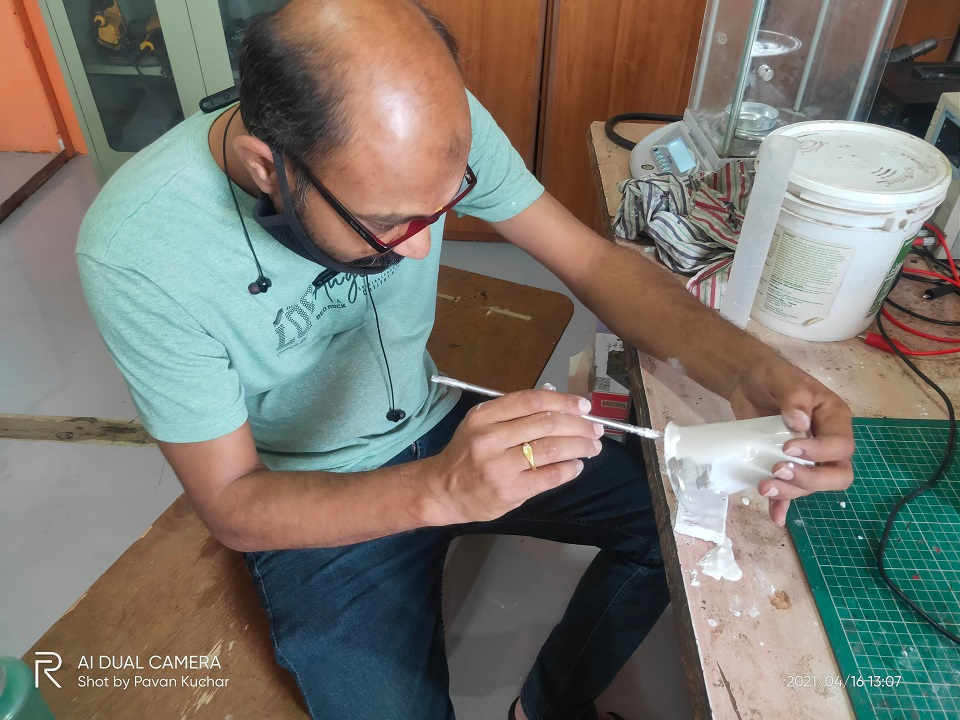
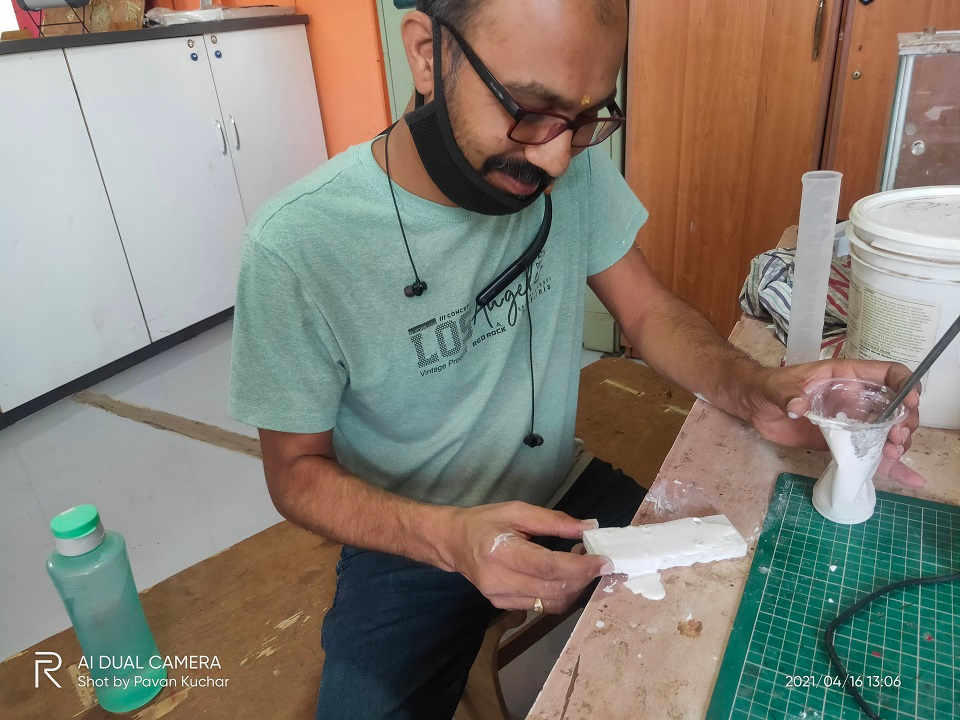
Pouring Mixture to create a Base for the Cast.
Casting of a Vase Pot
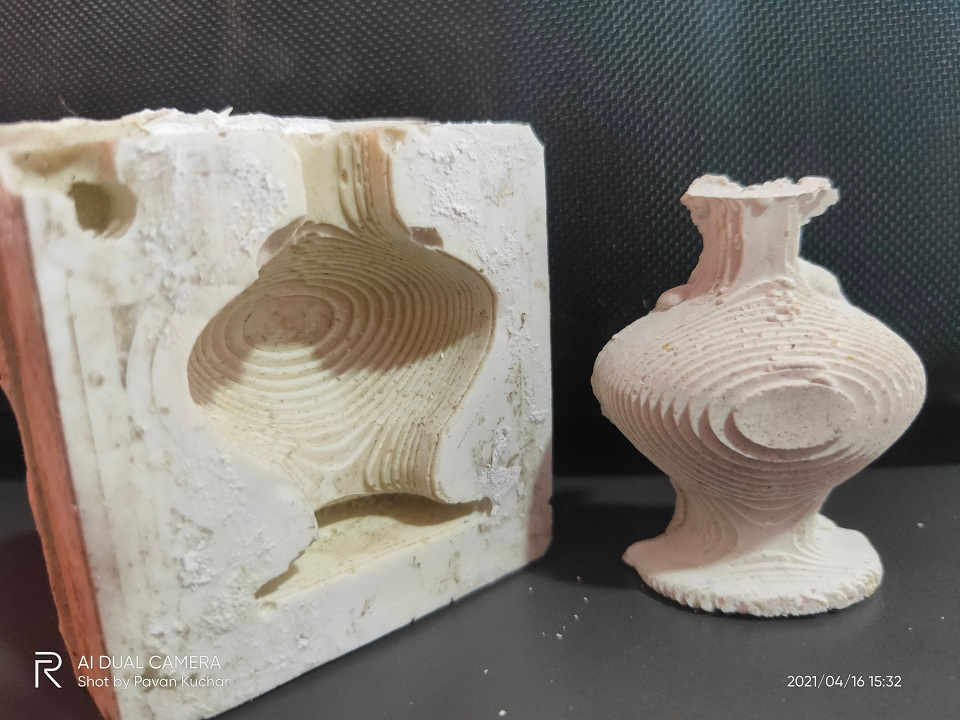
Hero Shot of Casting HydroStone in Vase Pot Mould
Removing Silicone Mould from the HydroStone Cast
Hero Shot of Silicone Test Mould and Cast
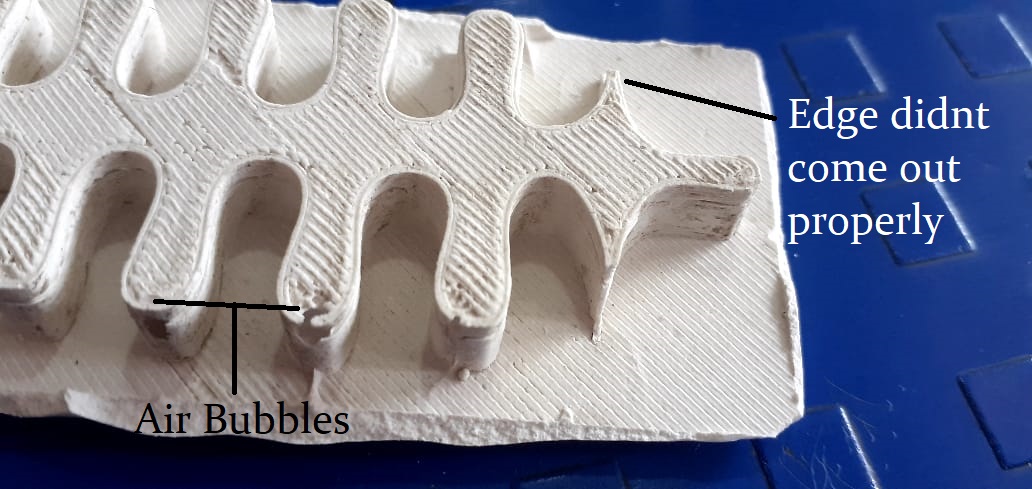
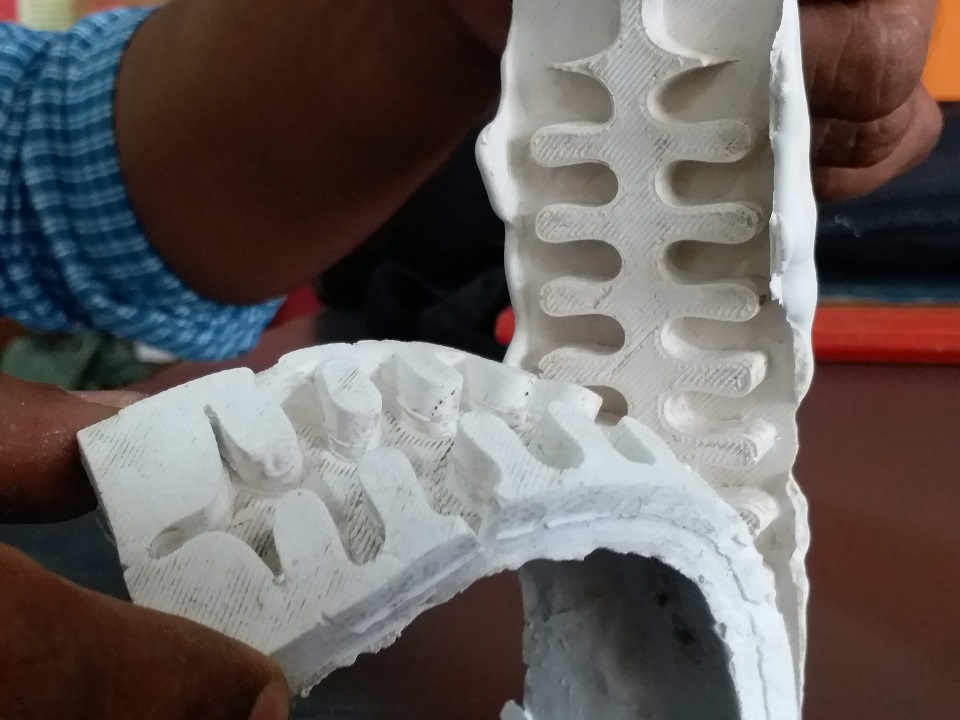
Problems in the Test Cast
My Learnings:
- If you want to Cast a Hard material like HydroStone, Use a Flexible mould like that of Silicone Rubber. This allows the Cast to come out of the mould easily.
- Drying and Curing Time is between 35 to 45 minutes. It is more than stated in the Brochure and Datasheet. It might be because of the the Quality of Water used, Heat/Temperature of the Room, Less Intense and Slow mixing etc.
- Use Handgloves while handling HydroStone as the temperature of the mixture increases. In case of Allergies, it may cause Skin Irritation as well.
- Add the HydroStone Powder Slowly to the Water for maintaining Consistency and proper mixing.
- Note down essential / critical information and keep it handy for reference.
2. Individual assignment:
Casting and molding are fundamental techniques in the metalworking process. Many industries rely on casting and molding to produce their signature products and prototypes or pilot projects.
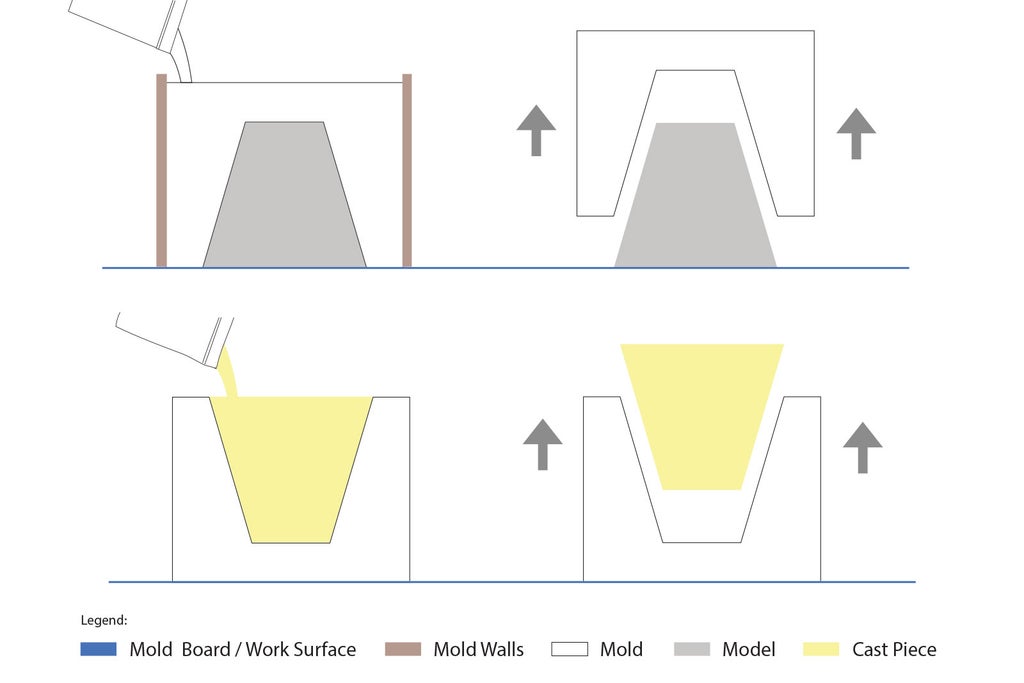
Moulding:
Molding is the process by which we take an object and create an impression of it in some sort of material. Generally, an initially soft material is poured or spread around the object and allowed to harden or set, creating a negative imprint of the object. Moldings can be made in either one piece or multiple pieces. While the type of molding material used depends on the size and shape of that object, some popular options include plaster and silicon.
Casting:
Casting is done once a mold of an object is available. If the mold is made up of multiple pieces, it is put together securely and the casting material is applied. Casting creates an exact replica of the object that was molded, with only some slight sanding needing to be done. Various types of metals are commonly used in the casting process, including aluminum, copper, magnesium, iron, and zinc.
The flow of this Assignment is as follows:
- Preparation of 3D design (as per the Tools available in the Lab.)
- Placing the 3D Design of Object in the Mould Box (as per the Size of the block of Wax)
- Milling (using 1/8 - 3 mm. Drill bit) - Rough Cut (Fast) and Finishing Cut (Slow)
- Preparation of 2 Positive Moulds (Male and Female)
- Curing of Negative Mould
- Casting of (Positive) Object
3D Design Files:
Two Designs that I tried earlier were 2D. They could be made by Single Mould as well.
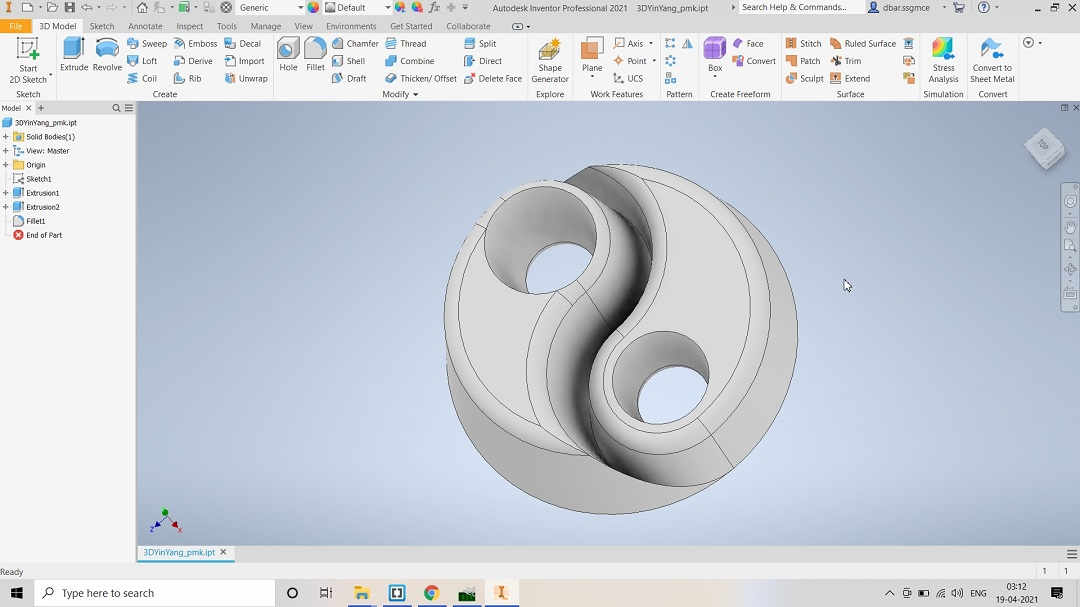
YinYang
I thought of Moulding something that could be used in the Final Project. Goat's face could be attached to the final assembly that I will prepare. So, I designed the face of Goat. But, I was unable to give proper spherical bulge to the face. It was just extruded flat from the surface and it didnt looked 3D. Also, it could be made with single mould.
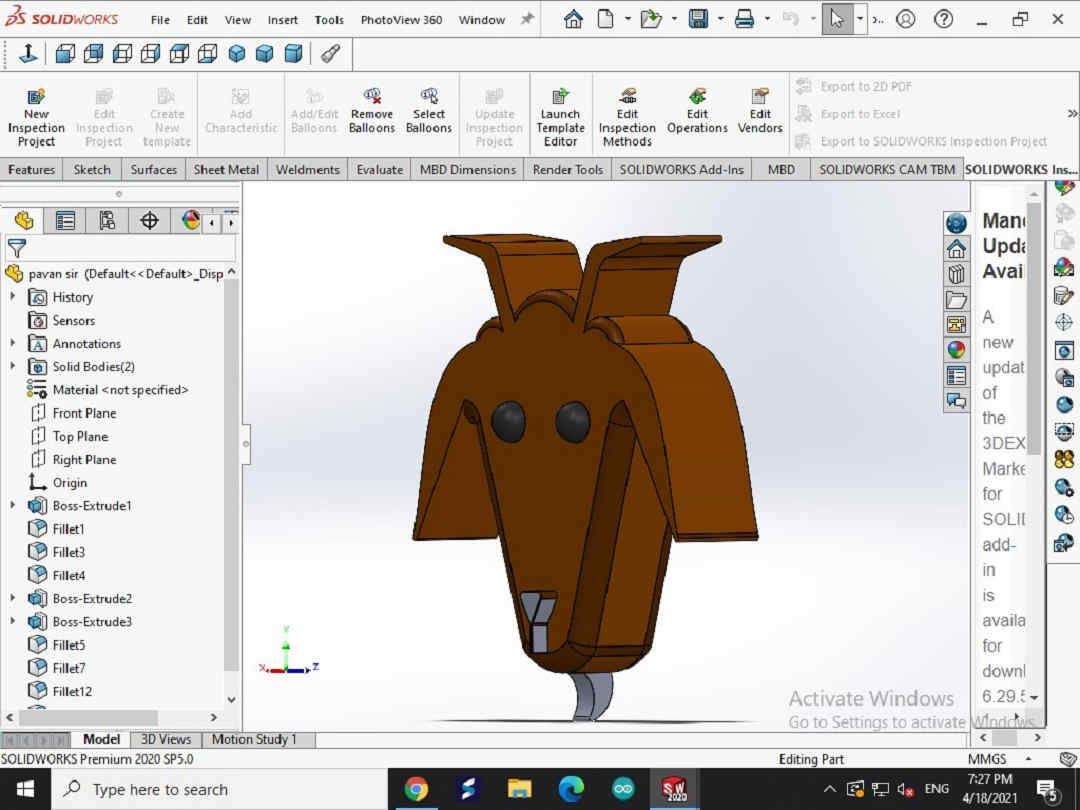
Goat as my Project is Goats Weight Measurement

Goat as my Project is Goats Weight Measurement
Mohit drew Minion, so I also thought of drawing something like that I Logo of Android, Michelin, Pillsbury came to my mind. I settled with the simpler Logo to design of Android.
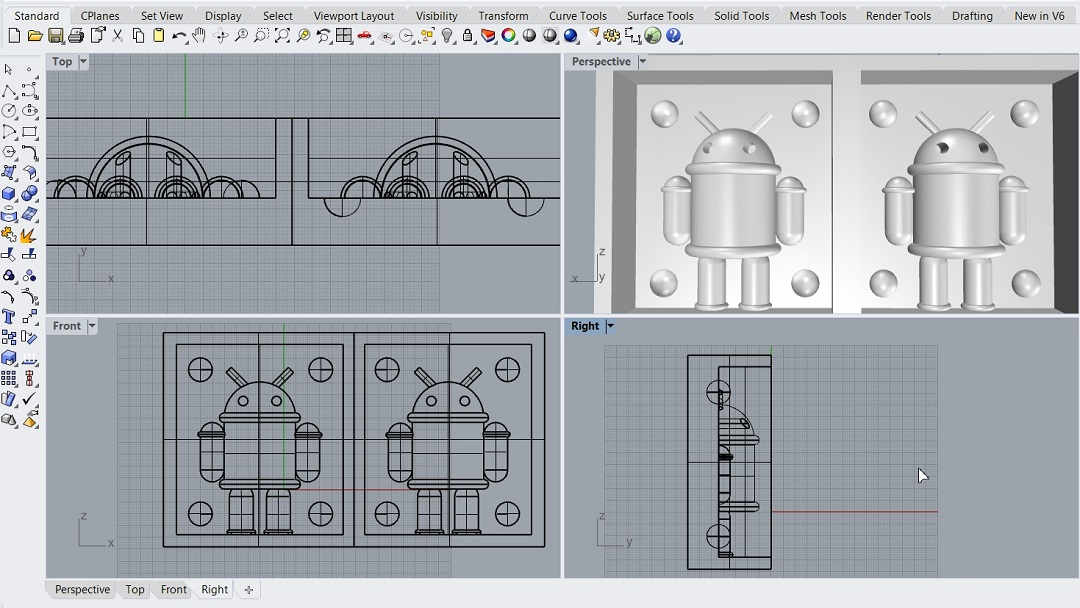
Android Logo Inspired Design in 4 Viewports

Android Logo Inspired Design in Front Shaded Viewports
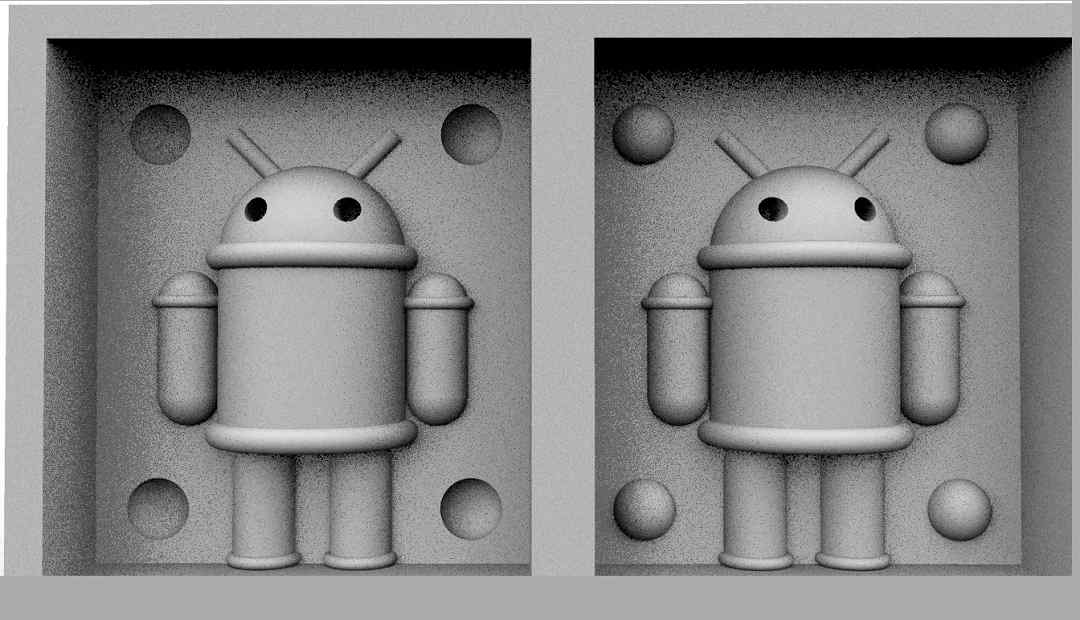
Android Logo Inspired Design in RGB Rendered Viewports
Android Logo Inspired Design in Green Rendered Viewports
Allowances considered while Designing the Object:
It is important to consider certain allowances while designing the Object because if the object is not designed properly, it may not be properly milled by the machine. Also, it may harm the machine components. The machine may spoil your design and its features.
I have considered following things while designing the object-
- The Dimensions/Size (L*B*H) of the Machining Wax block provided as it limits the size of the design
- The height of the Object as per the Wax Block size.
- The height of the Milling Bit because the collet or chuck of the Z axis of machine may rub against the wall of the mould.
- The height of the Base of the Object for the grooves to create the sockets
- The provision for Inlet and AirVent in the design
Milling of Design:
Milling of Design in Mould Block consists of 3 Steps - Surfacing, Roughing, Finishing. I have used three softwares while milling the design. MODELA-4 Player, V-Panel for SRM-20, Virtual PLayer for MODELA.
I made 3D Design in Rhino with the help of my friend Anand and exported it in the .STL format.I then imported the file in the MODELA -4 Player Software.
The Machinable Wax blocks provided to us were of the 20 (Length) x 10 (Height) x 4 (Depth) cubic cm dimensions. We have prepared the designs accordingly. Care was taken to leave enough room / space for Locks and also for Base for the Mould wall.
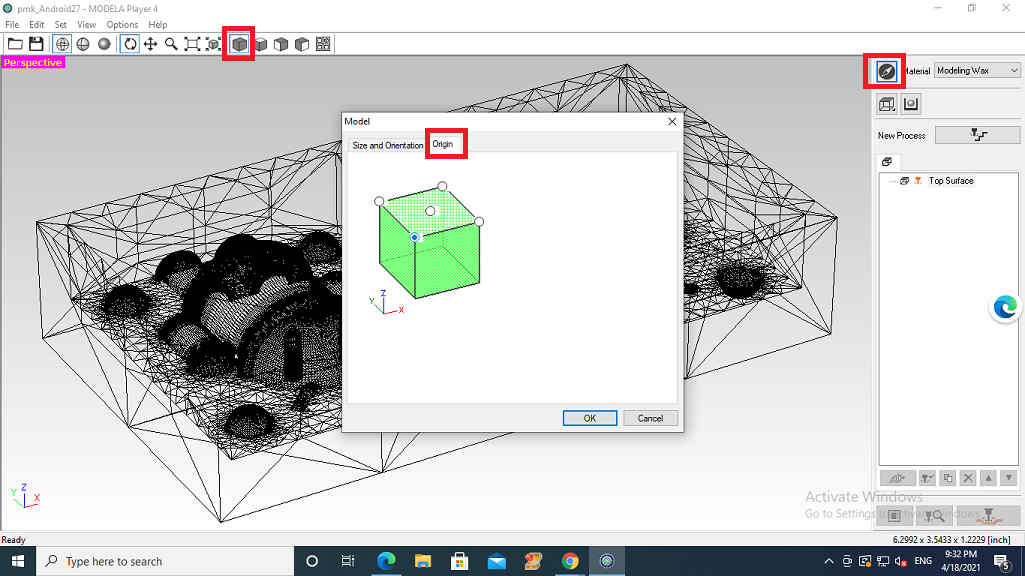
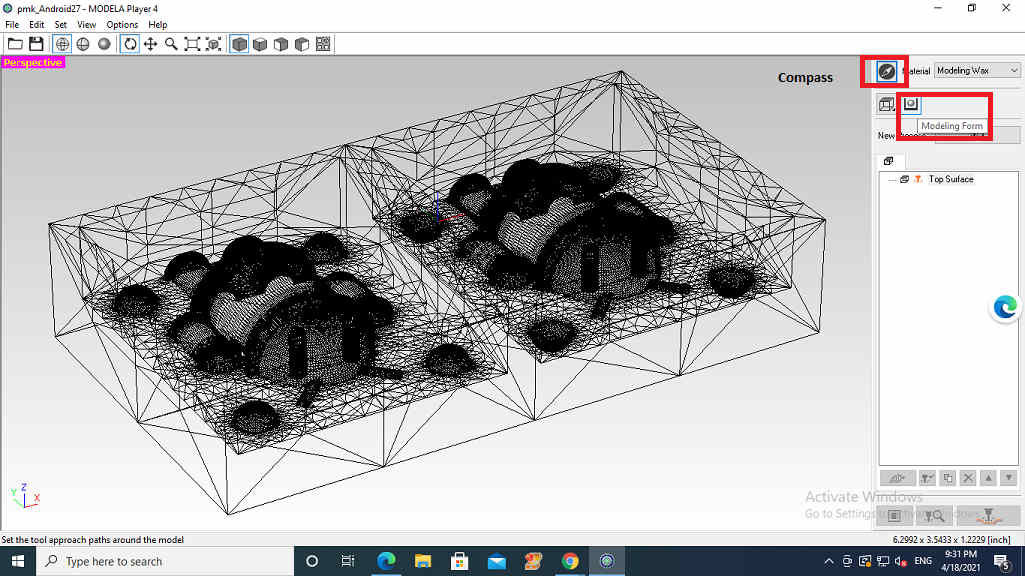
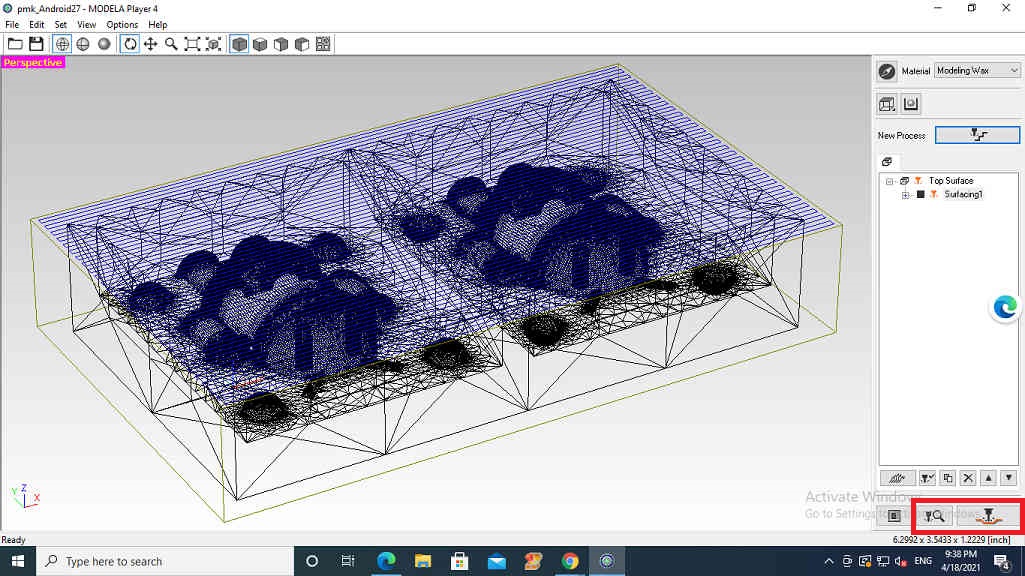
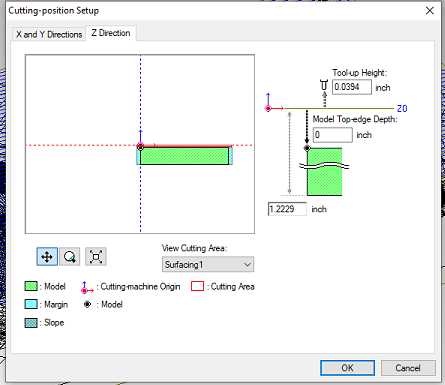
I Imported design in .STL format in Modela Player-4. In Top Right Corner of the Window, selected Compass
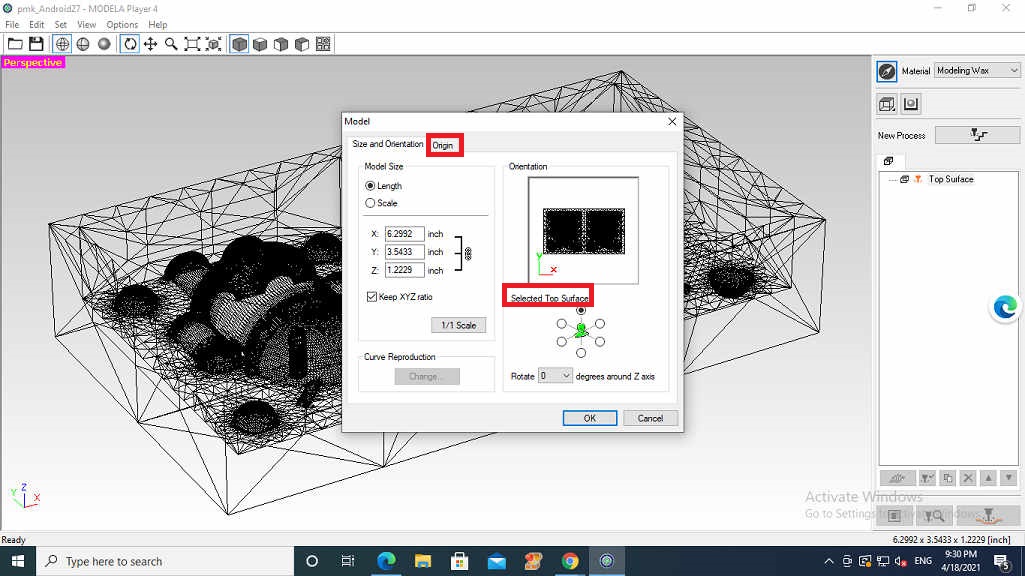
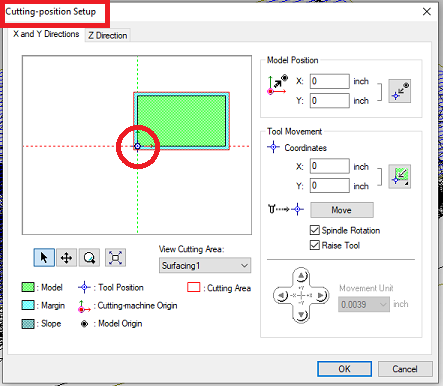
and Selected the Top Surface and set the origin of the Cutting to Front Left of the Block
Set the Origin of the Cutting
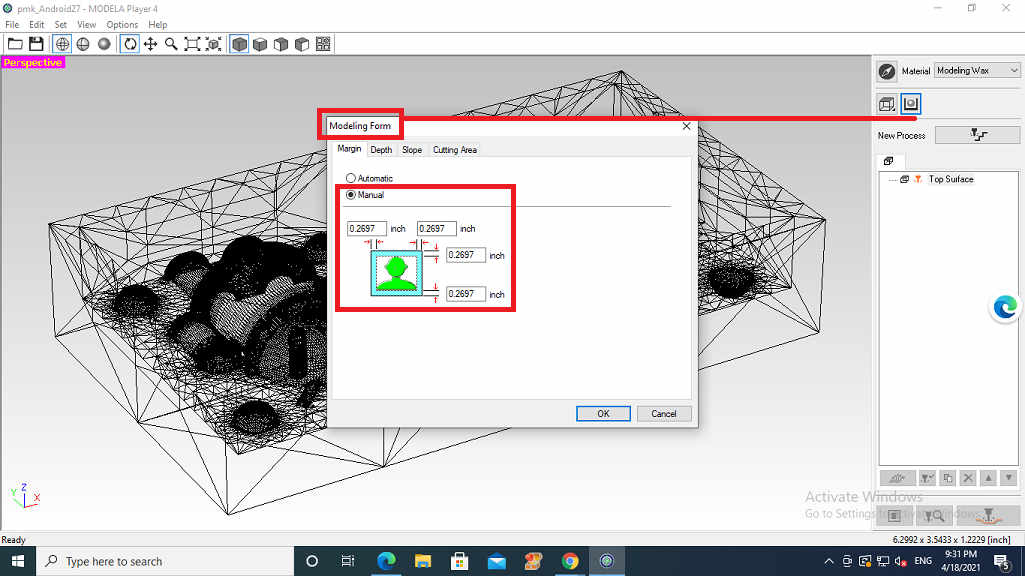
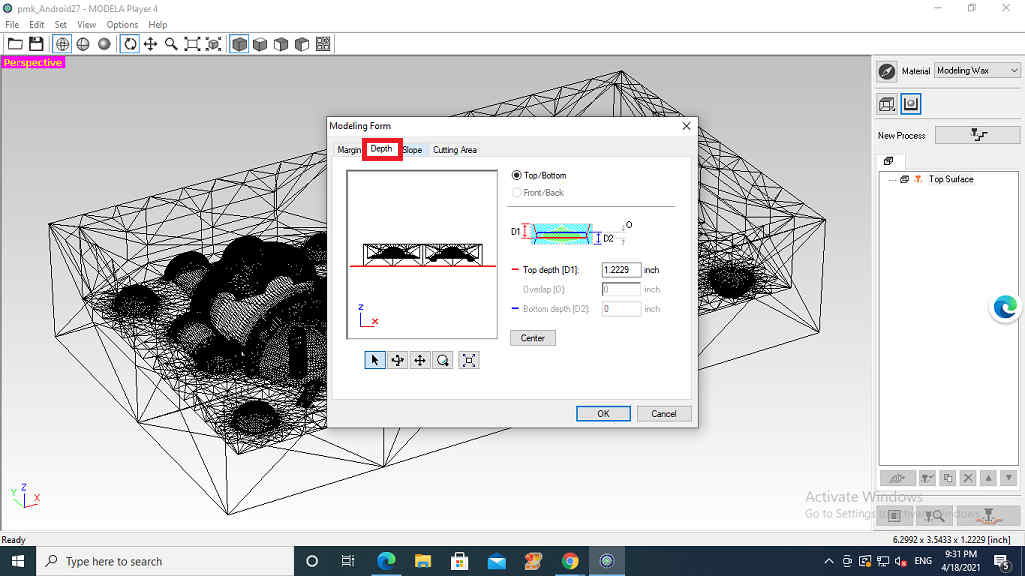
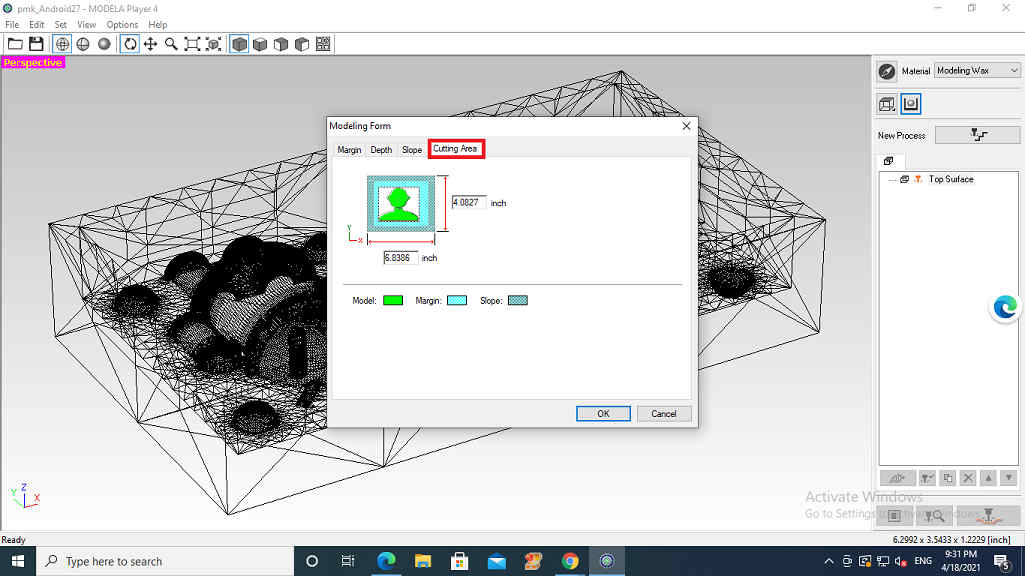
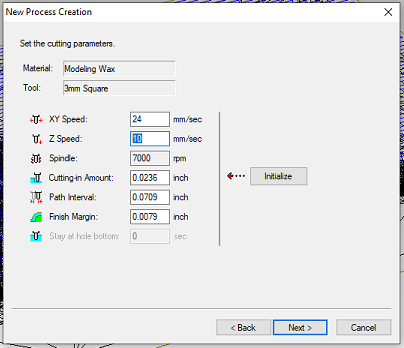
This is how all the parameters in the Modelling Wax were checked

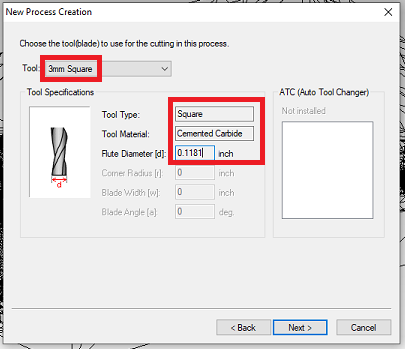
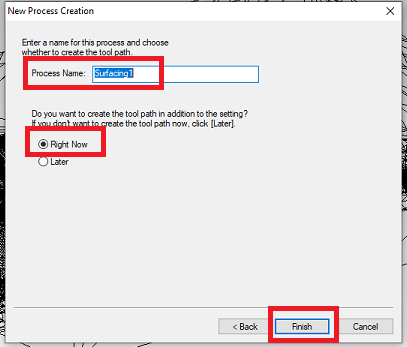
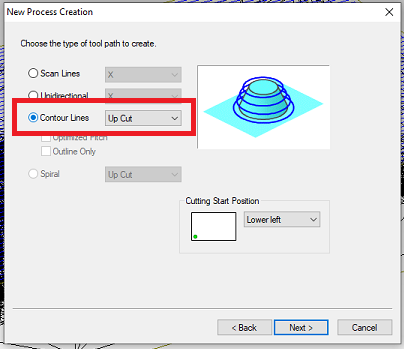
Selected Surfacing from New Process
 Ensured Top Surface | 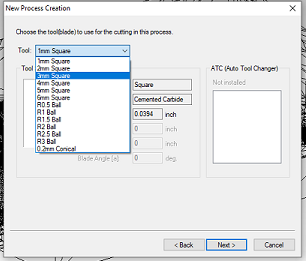 Selected Drill Bit of 1/8 Square(3 mm) |
|---|---|
 | 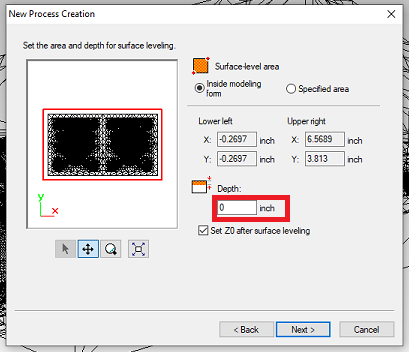 The Wax block was uneven and not properly levelled |
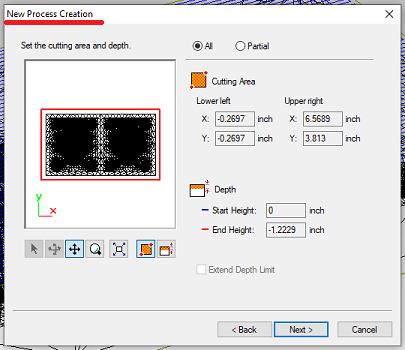
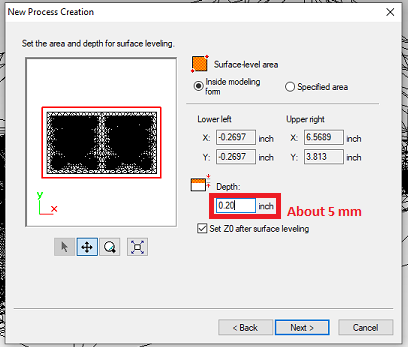 Set depth to 0.2 in or 5 mm | 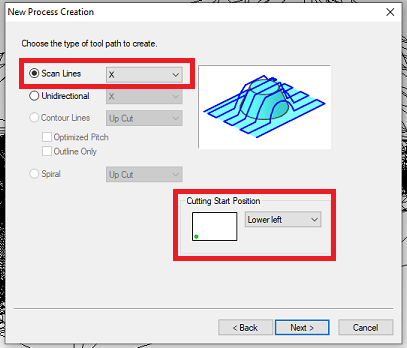 Chose Default valures |
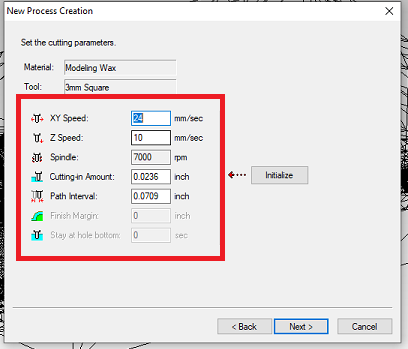 |  |
Preview after Parameter Finalization
 |  Ensured the Cutting Parameters |
|---|
The Wax block that I received was not even and flat. I was 3 cms on one end and 4 cms on the other with a slope.
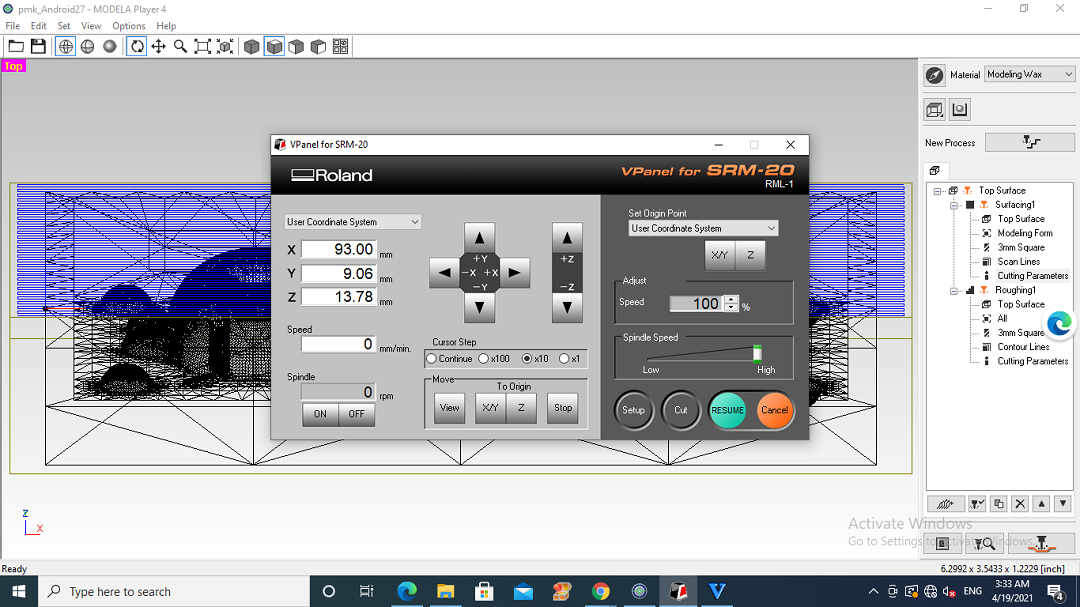
I opened the V-Panel for SRM-20 to set the X, Y, Z axes of the machine as per the Wax Block. After starting the machine, the default Home / Origin Position of the axes is resumed by the machine. I set the axes as per the Wax block for Surfacing.
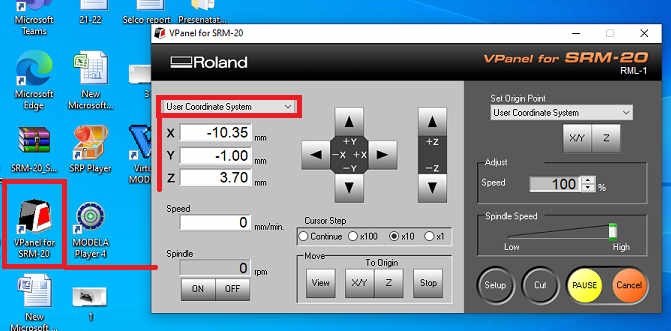
Coordinates of X, Y, Z axes after Setting
Then I clicked on (Yellow Box in image below)the XY and set it as Zero. Did same with Z axis as well.
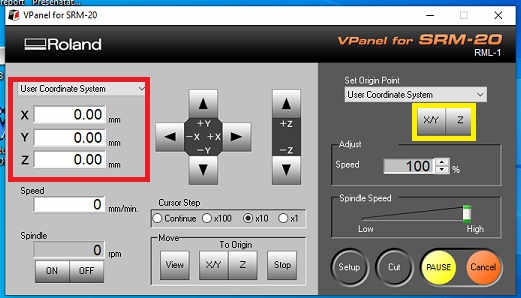
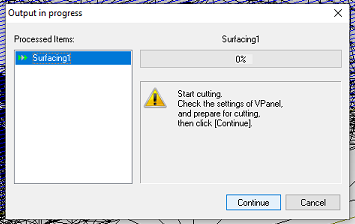
The Surfacing of the Block started.

I then started with the Rough Cut. Selected all the Default values and proceeded ahead.
 |  |
|---|---|
 |  |

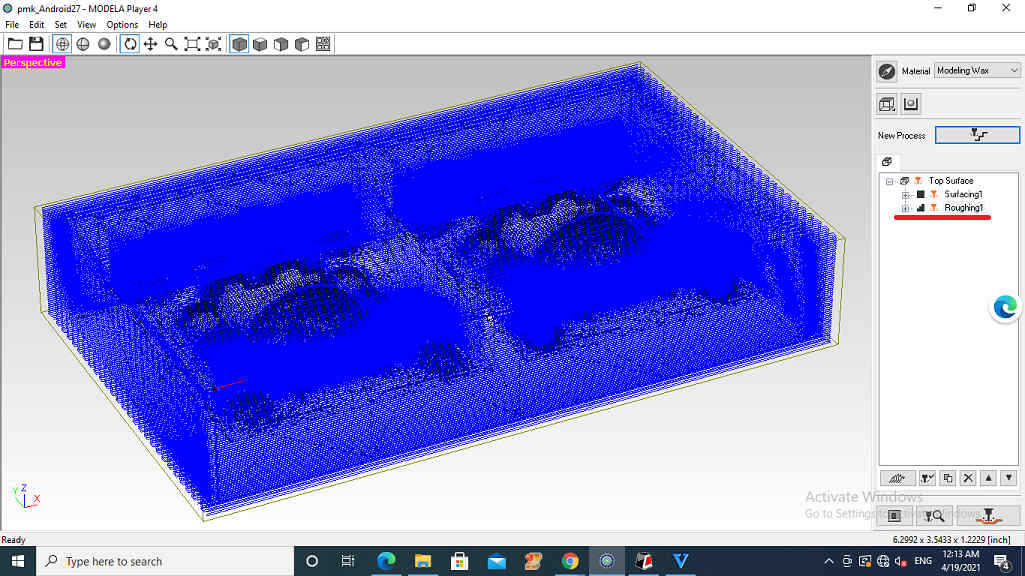
Toolpath for Roughing Process created
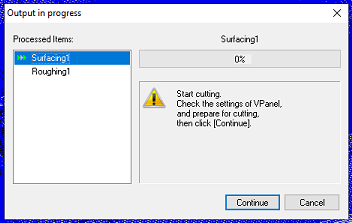 |
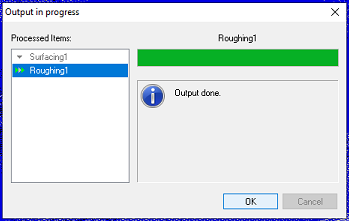 Roughing Process started |
|---|
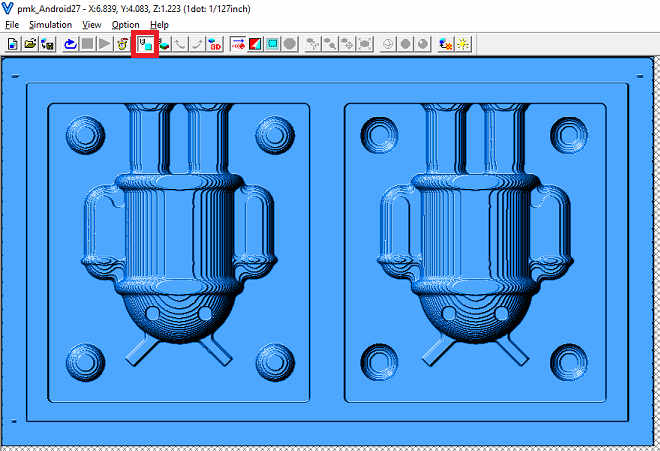
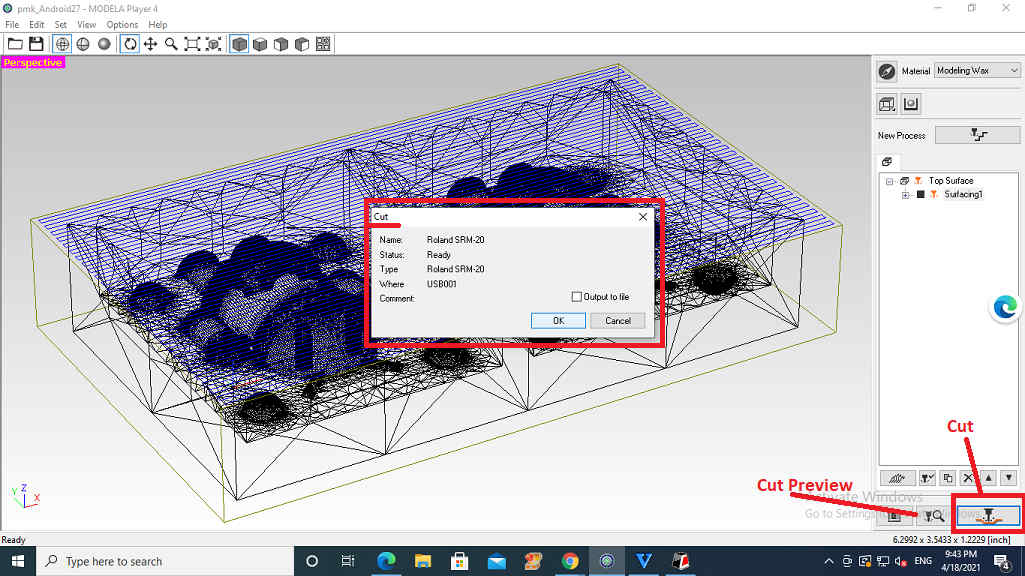
2D Preview of the Roughing in the Virtual Player Modela
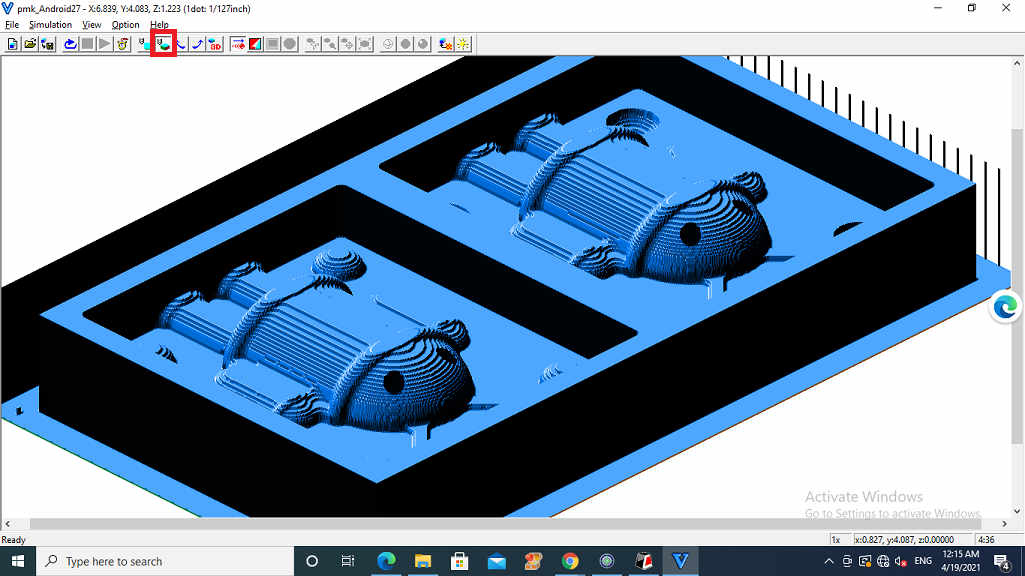
3D Preview of the Roughing in the Virtual Player Modela
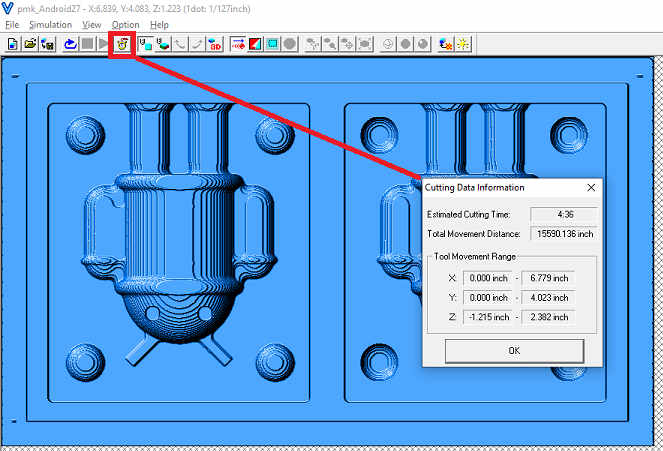
Estimated Cutting Time
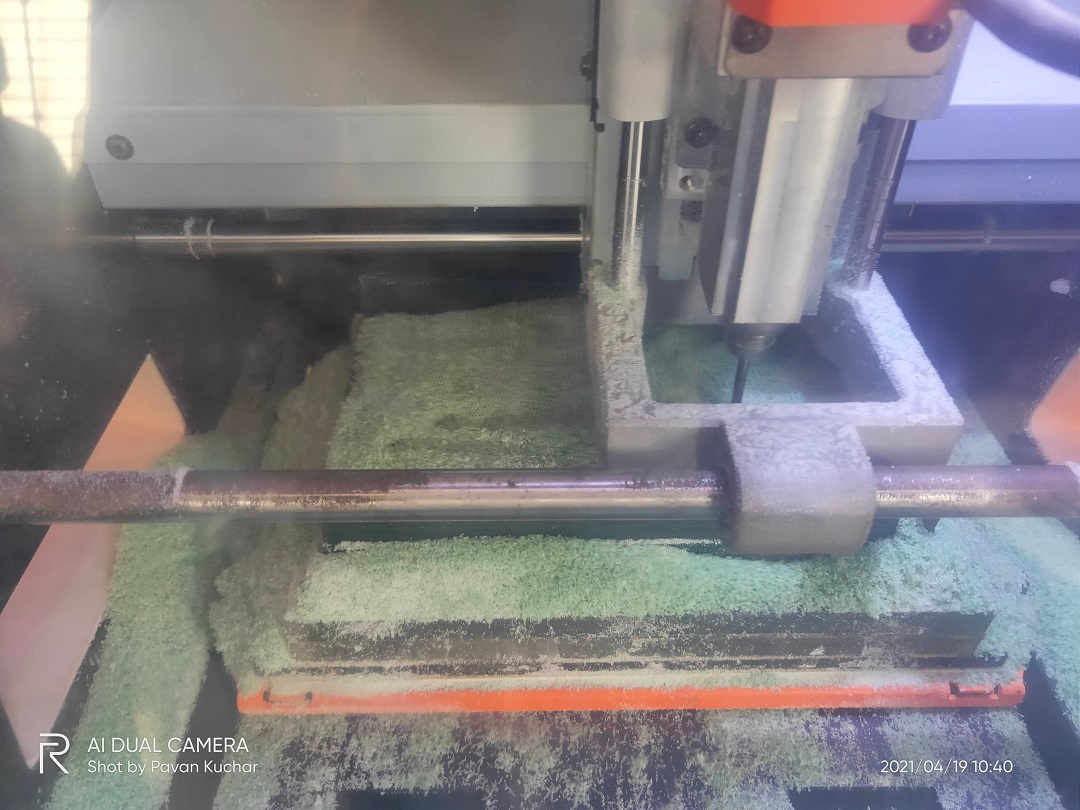
Roughing Process Ongoing
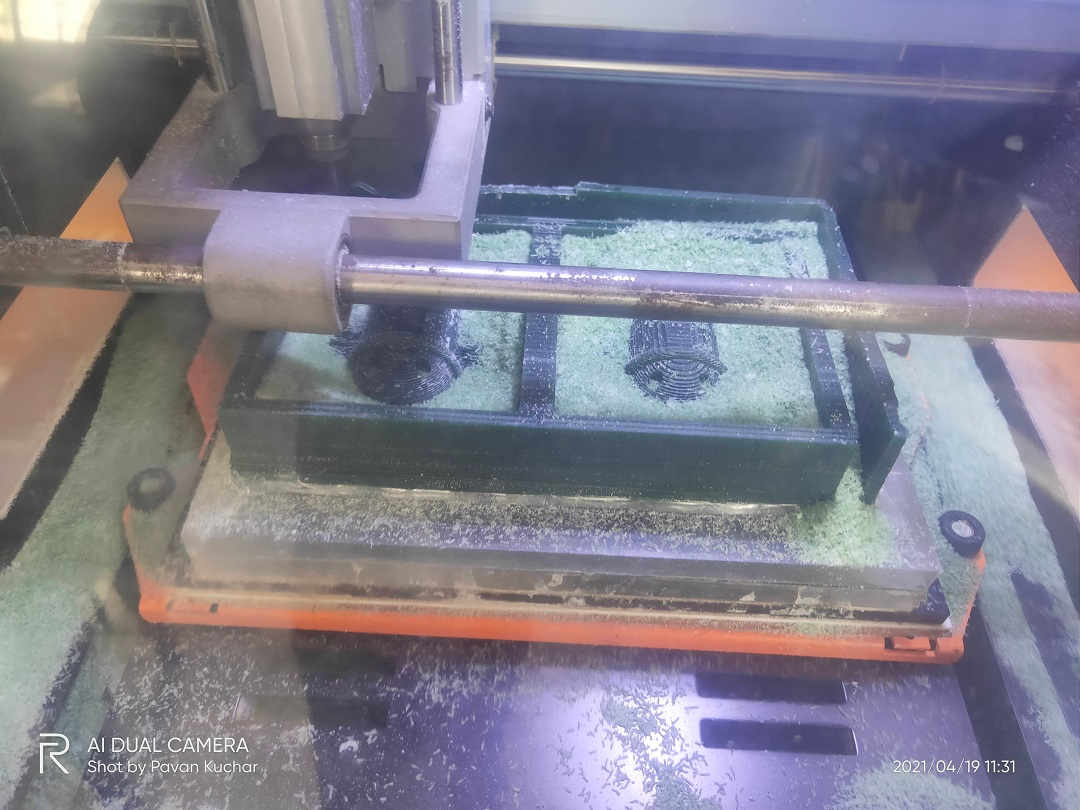
Android in the Making
It took almost two hours for Surfacing 5 mm surface. Then I gave the Roughing pass and it took four more hours for the Roughing.
But when Roughing process was almost at the end, a mishap happened.
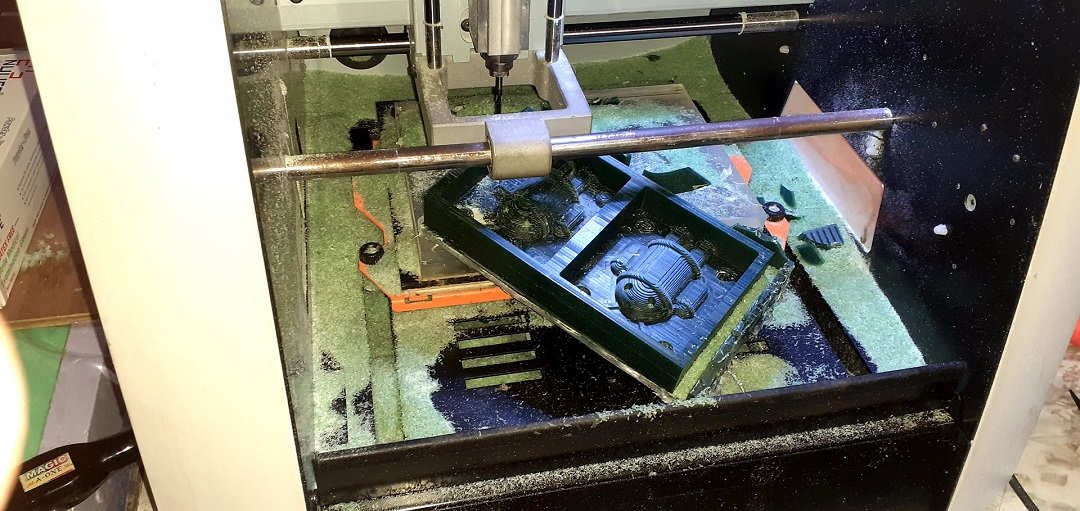
Wax Mould Off the Bed
Wax Mould Off the Bed
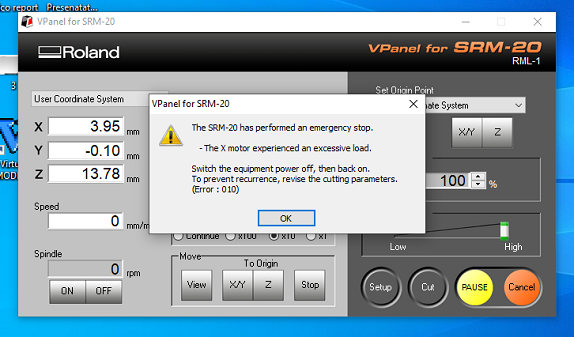
Error Message
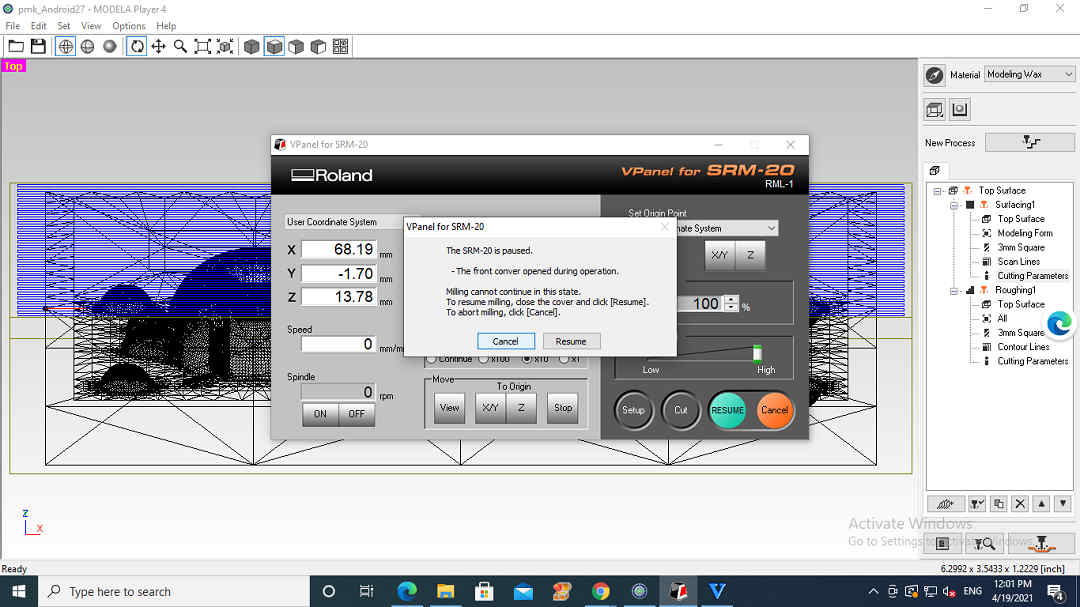
Error Message after Opening the Cover
This could have happened due to:(I am not sure)
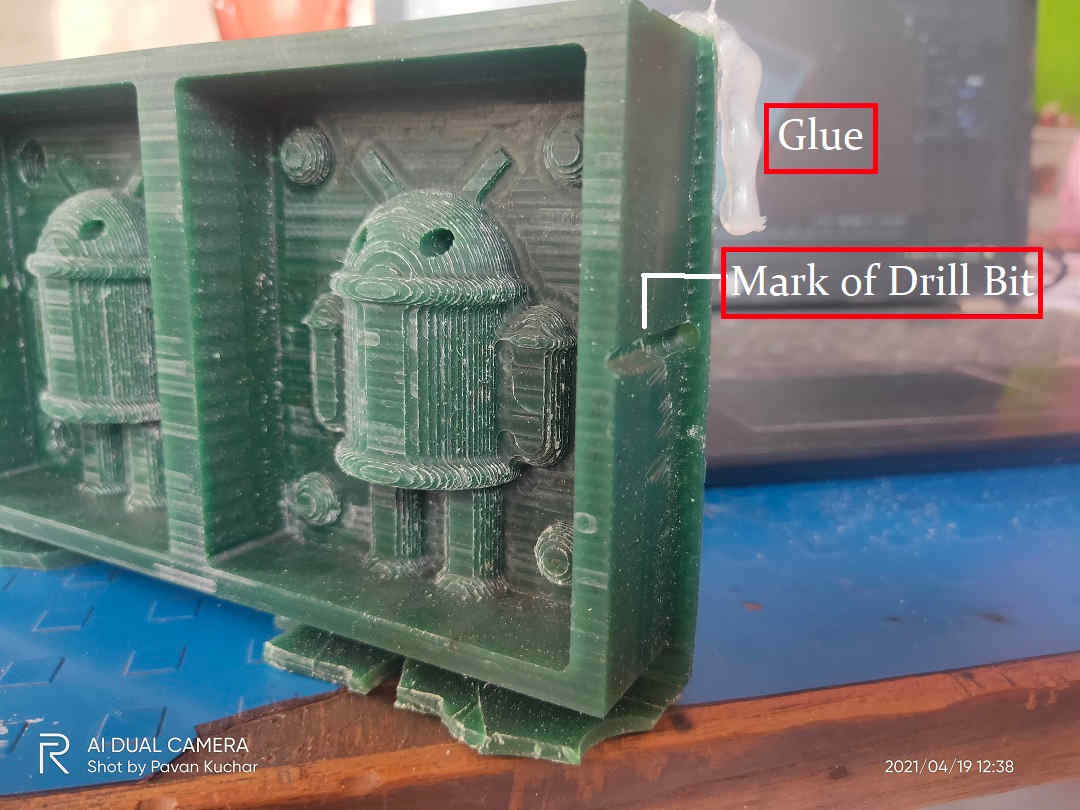
- The collet started touching the wall of the Wax Block.
- The Bit went too deep and slowly and gradually cut the lines out of Glue attached at the bottom of the Wax Block making it to vibrate.
- I paused the Rough Cut. Applied more Glue to the bottom and allowed it to cool. Resumed the remaining Roughing process
- Just after 4 passes, the drill bit threw the Block away and the machine stopped. This happened due to very less adhesion.
- May be the chips from the broken wax mould wall might have trapped in the line of the bit.
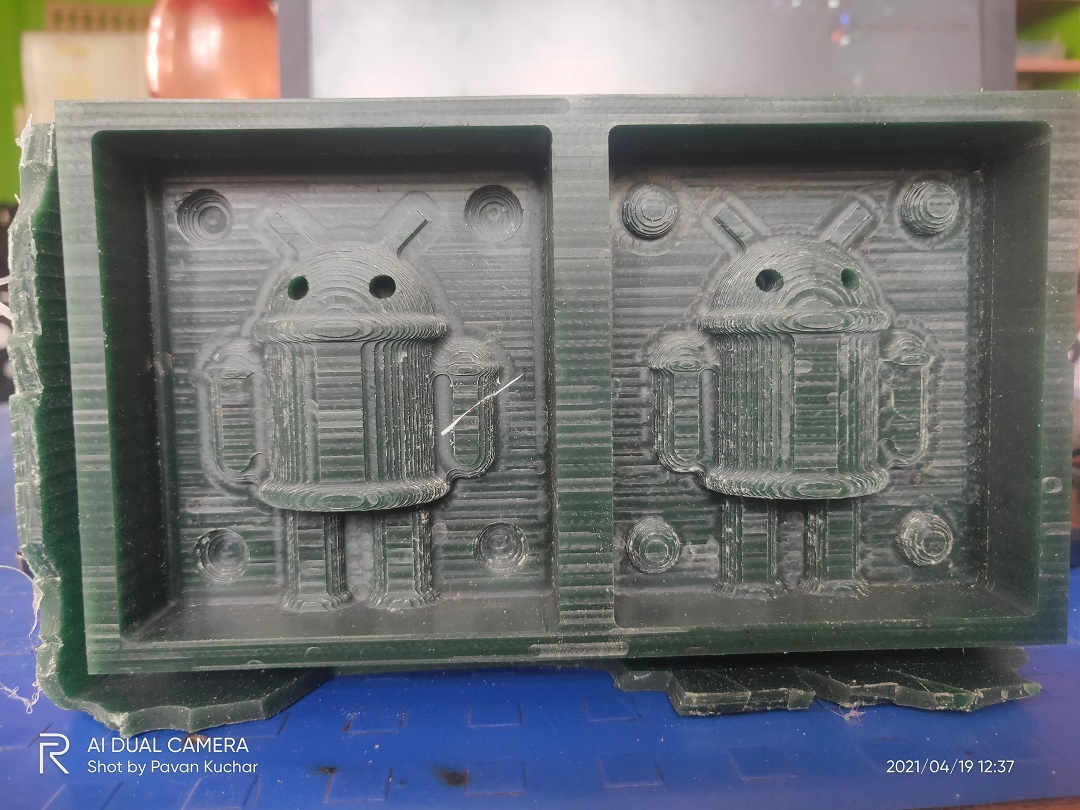
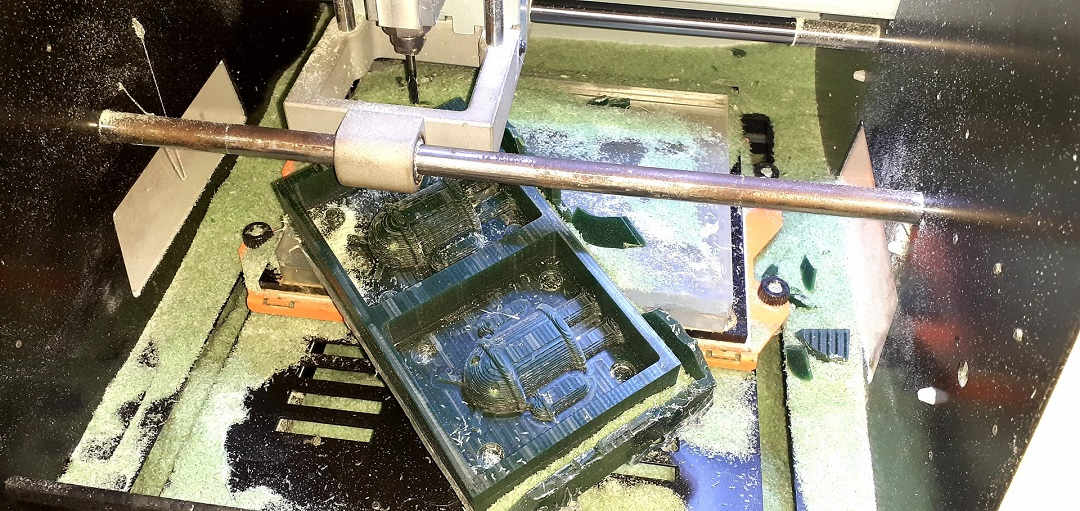
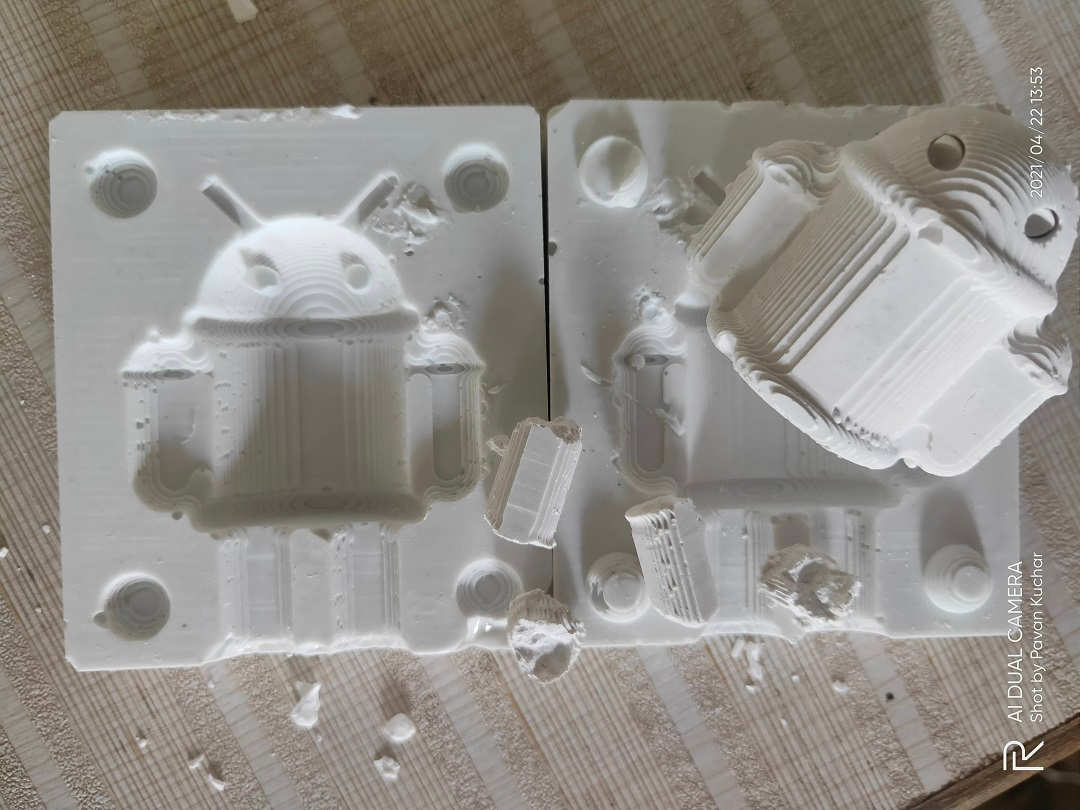
Design after Rough Cut
Problem in the Mould
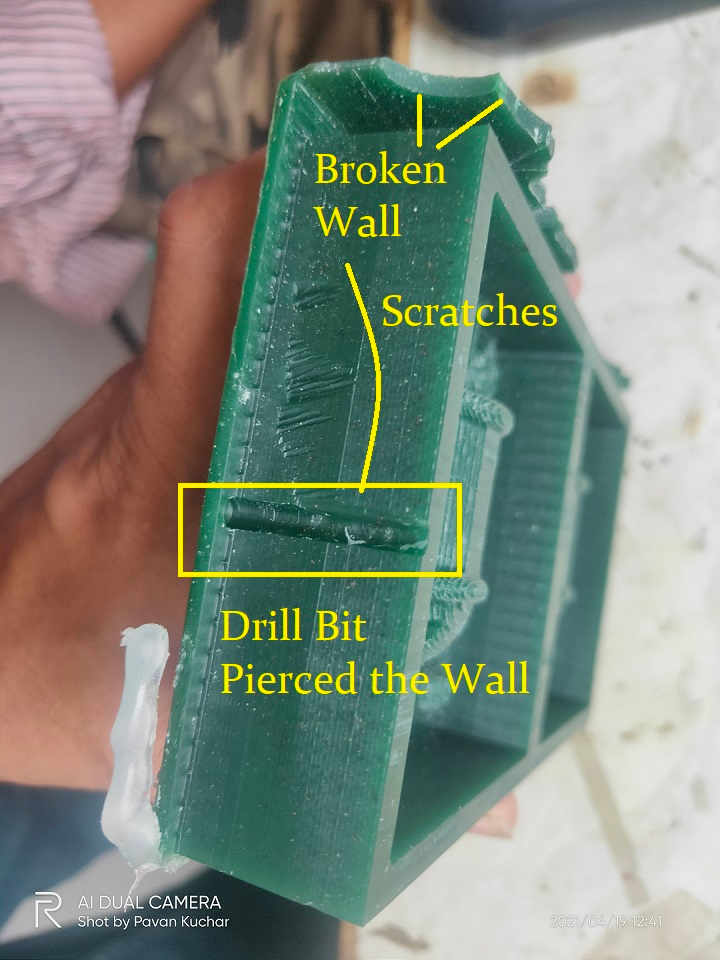
What actually happened to the Wax Mould
Trying to Set the Origin - Trial 1
rying to Set the Origin - Trial 2
I tried to locate the origin position of the drill bit, but Alas! couldn't do it. It was difficult to set the axes to its original position. Continuing with altered settings may spoil the job. So, I decided to proceed with the Rough Cut only. Also, 3 more friends had to mill and the time was limited. So, I will again make the Mould in the Week after the Output Devices' Assignment when the machine will be not in much use.
I was able to finally complete the finishing of my Android design this time. I changed the dimensions of my design by downscaling it. This helped me to have friction less milling, surfacing, roughing and finishing of the Design.
I once again melted the Wax to make a Machinable Wax Block for Milling the Android Design on it. Then I filed it to make it even and plain so that it may not cause any trouble while milling as happened earlier due to uneven levelling.
Process of Surfacing and Roughing passes has already been discussed earlier so I am going to showcase the Finishing Pass given to the mould which was remaining.
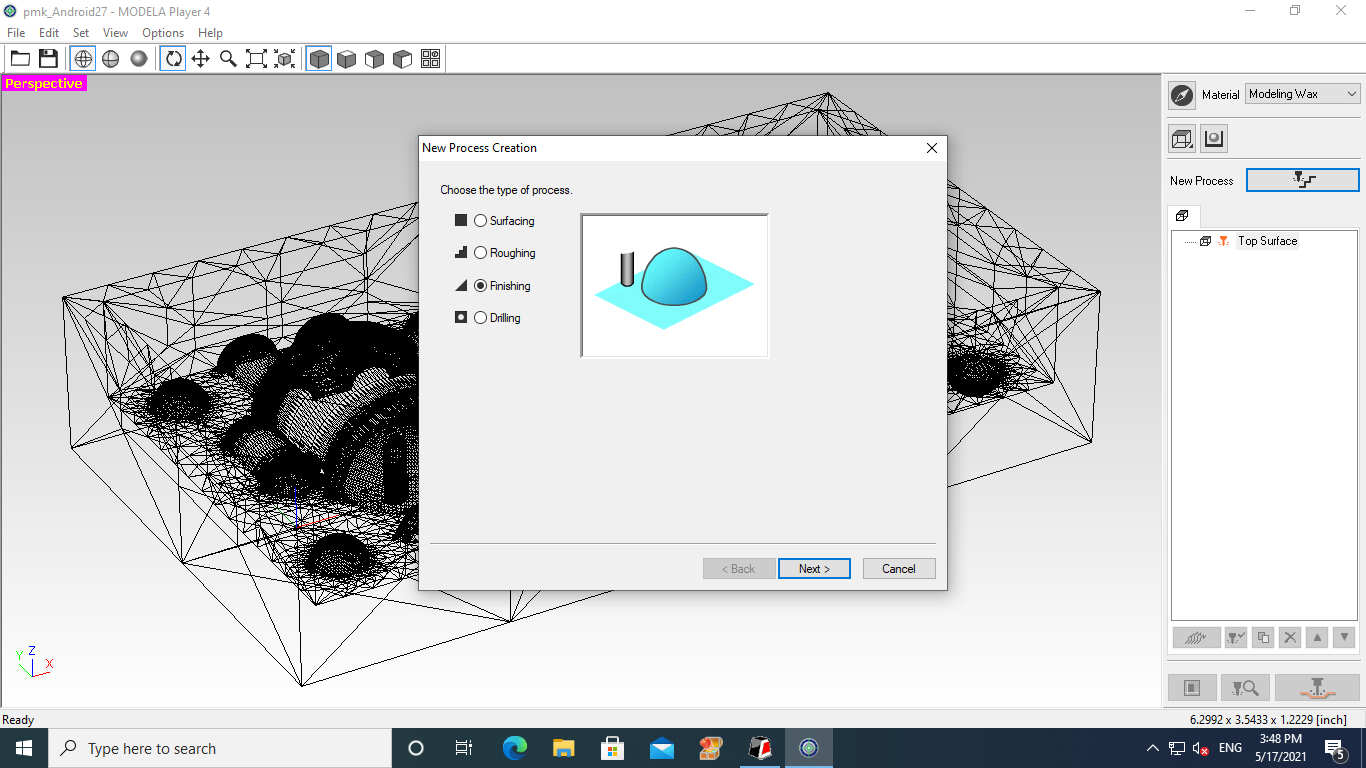
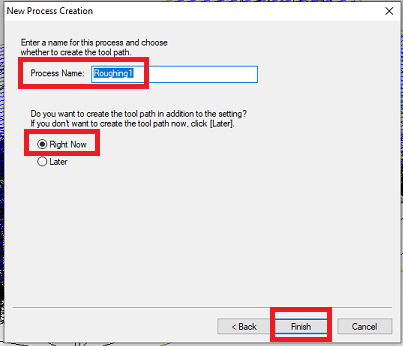
I clicked on the New Process. Deleted the earlier process of Surfacing and Roughing from the Menu (as I think that the Machine might take those commands as well before Finishing). I chose the Finishing Pass as the Process to be done
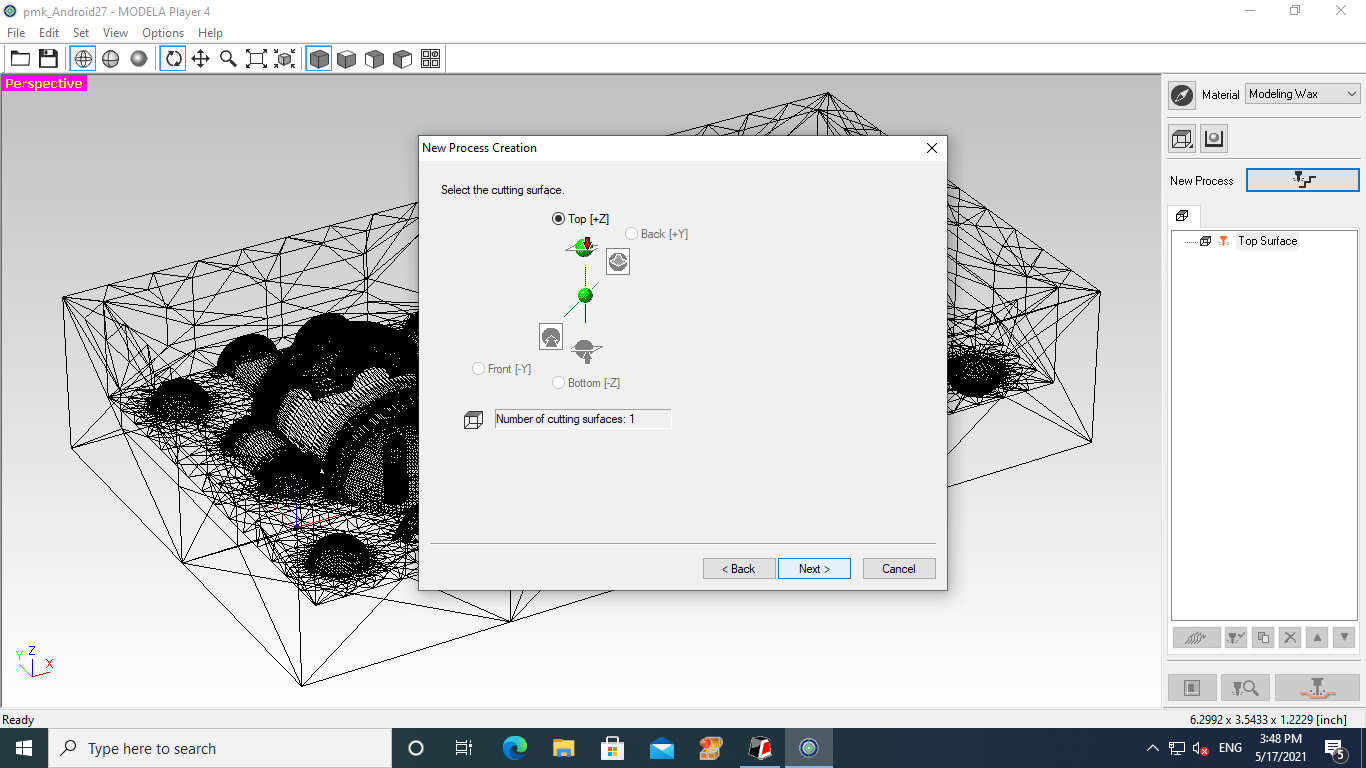
Then I selected and defined the surface to be cut for Finishing.
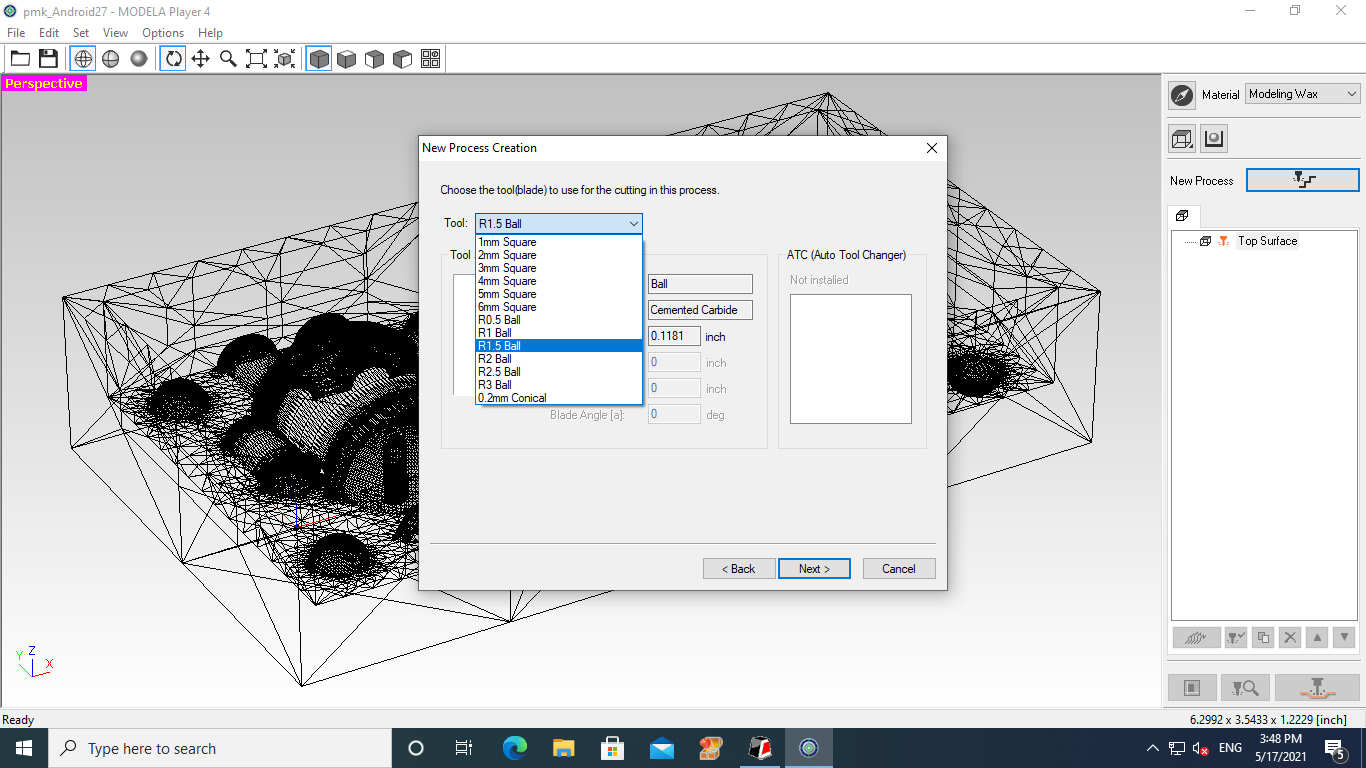
Here I selected the Milling bit of 1/8 inches for the Finishing which is equivalent to R 1.5 Ball in the dropdown list.
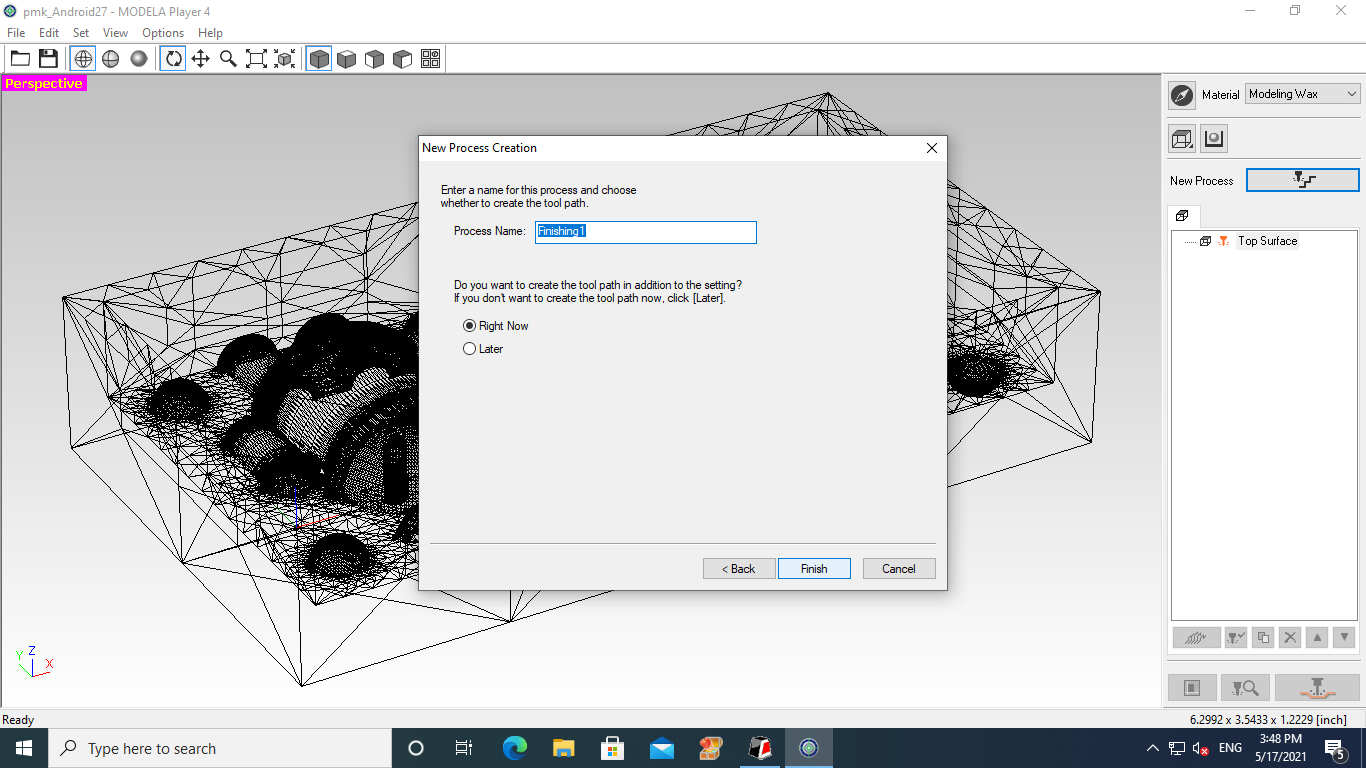
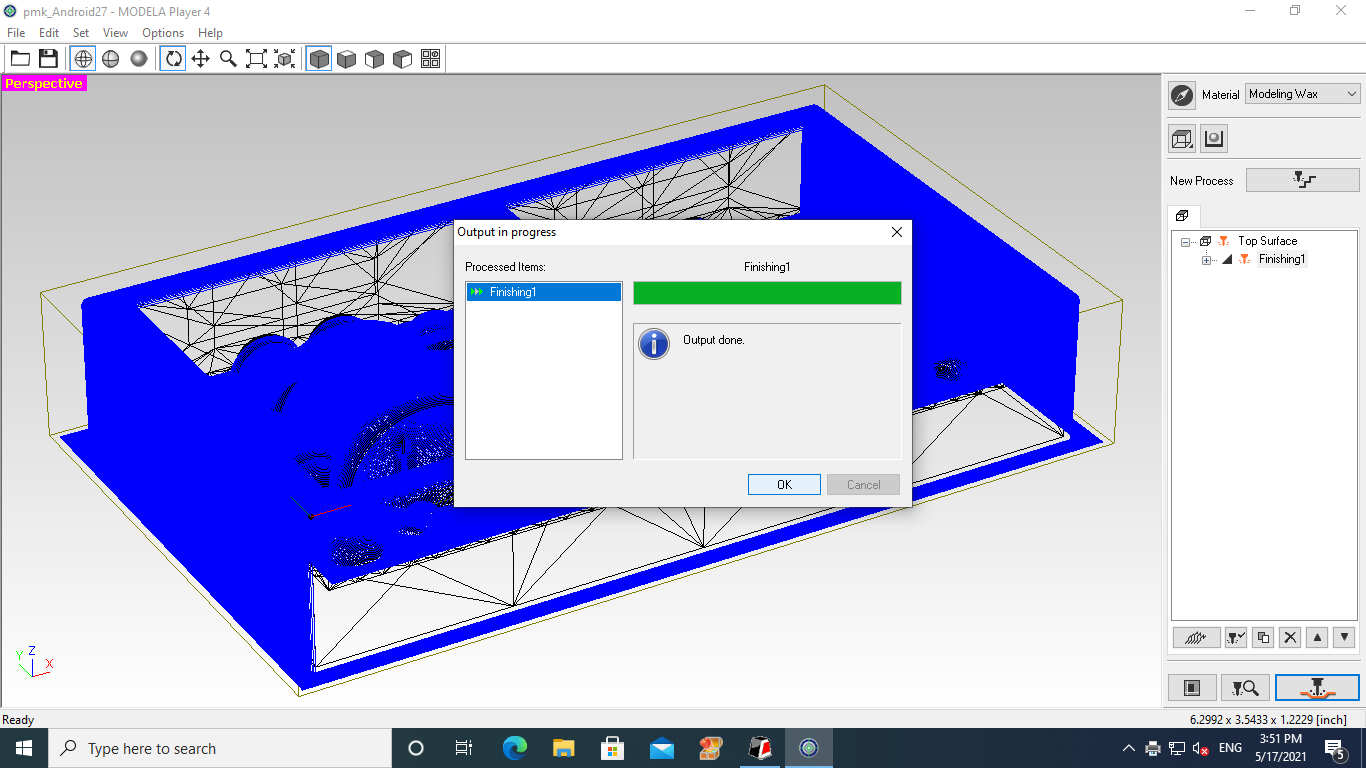
This is how the New Process of Finishing was started to create
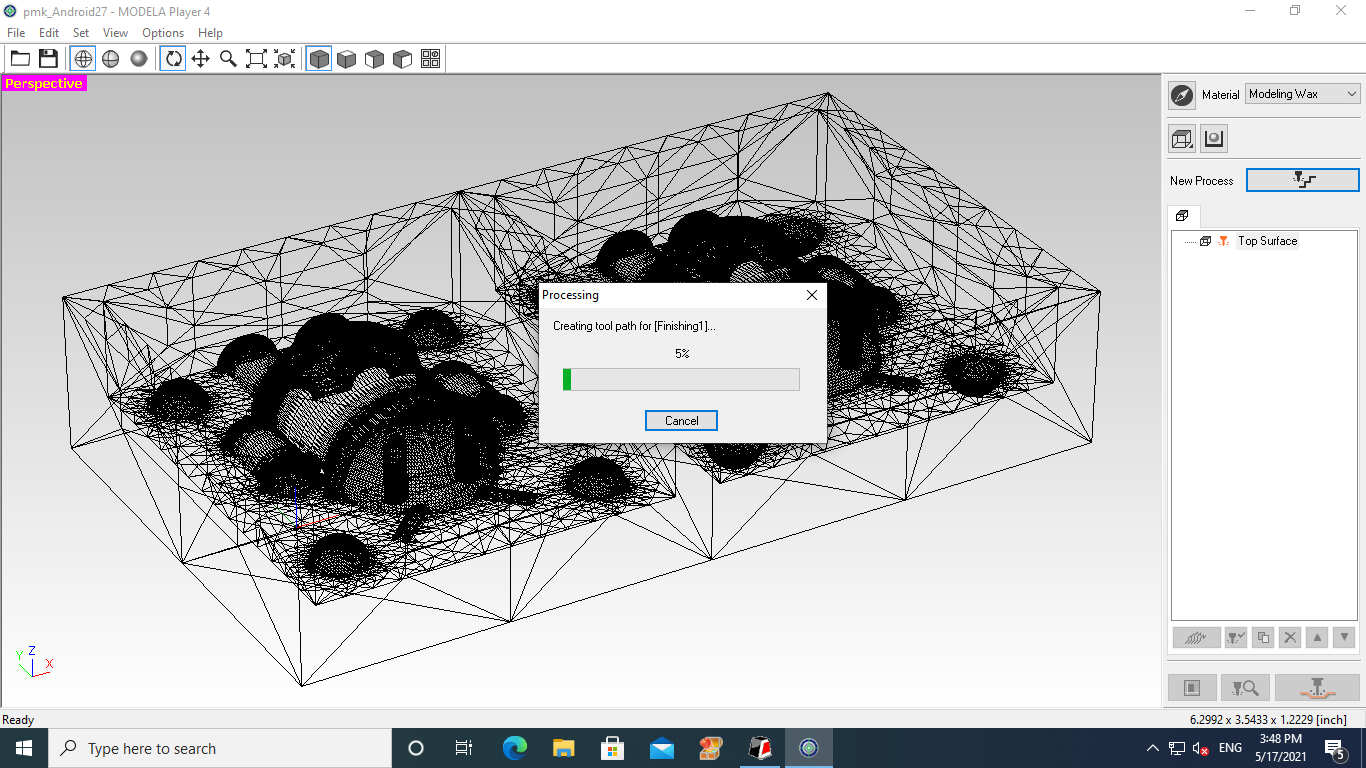
The Toolpath of Finishing was under Process
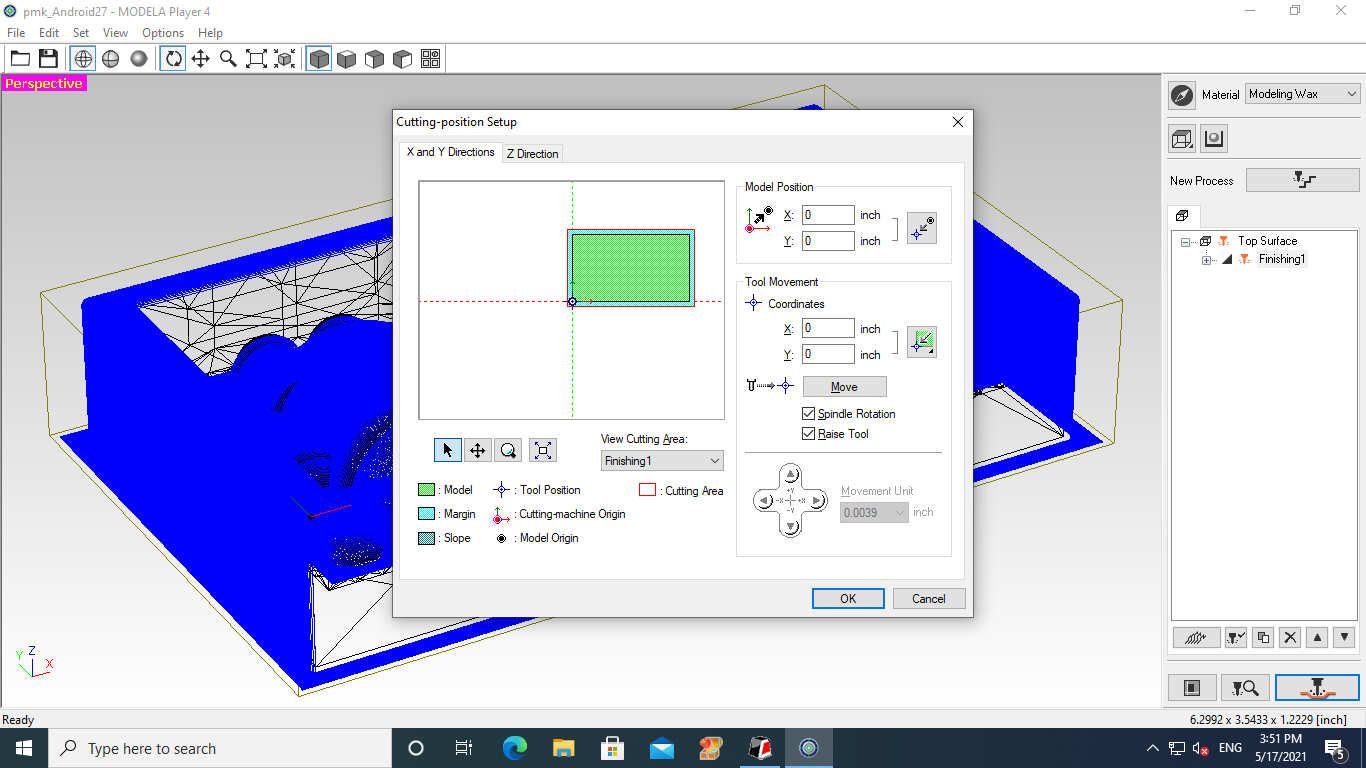
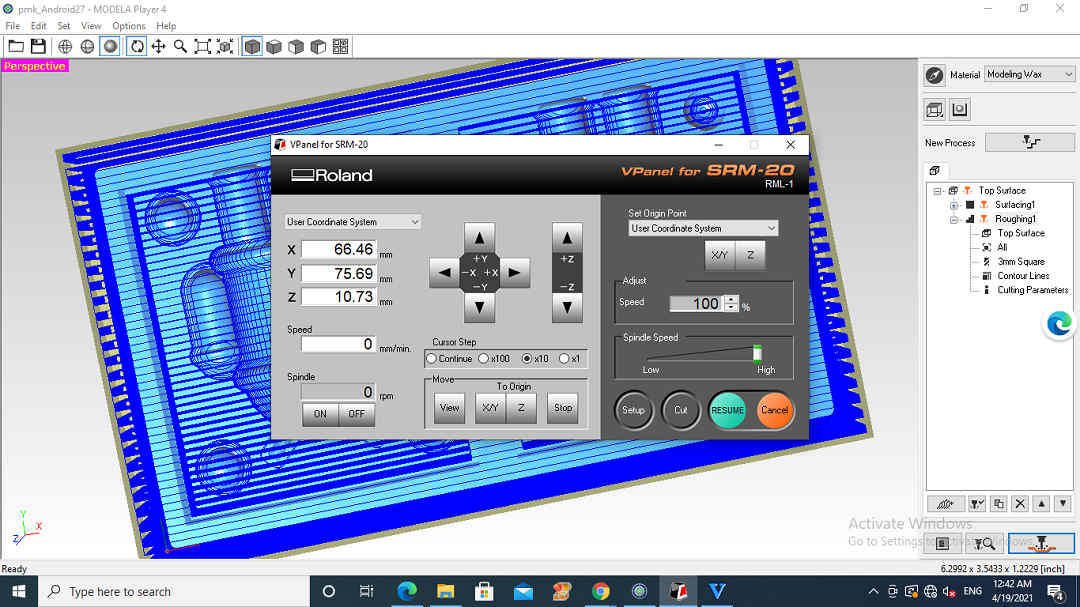
Then I selected the Cutting Position for the X, Y and Z axes
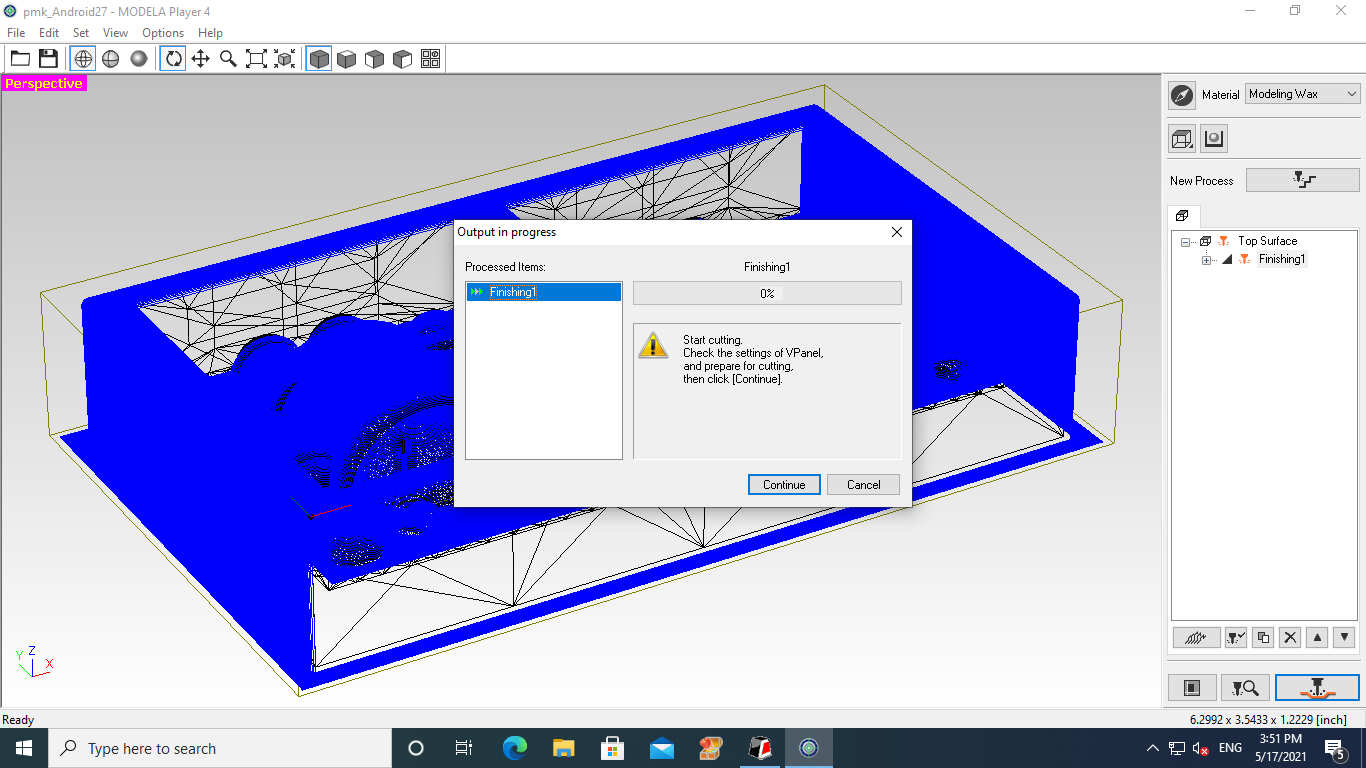
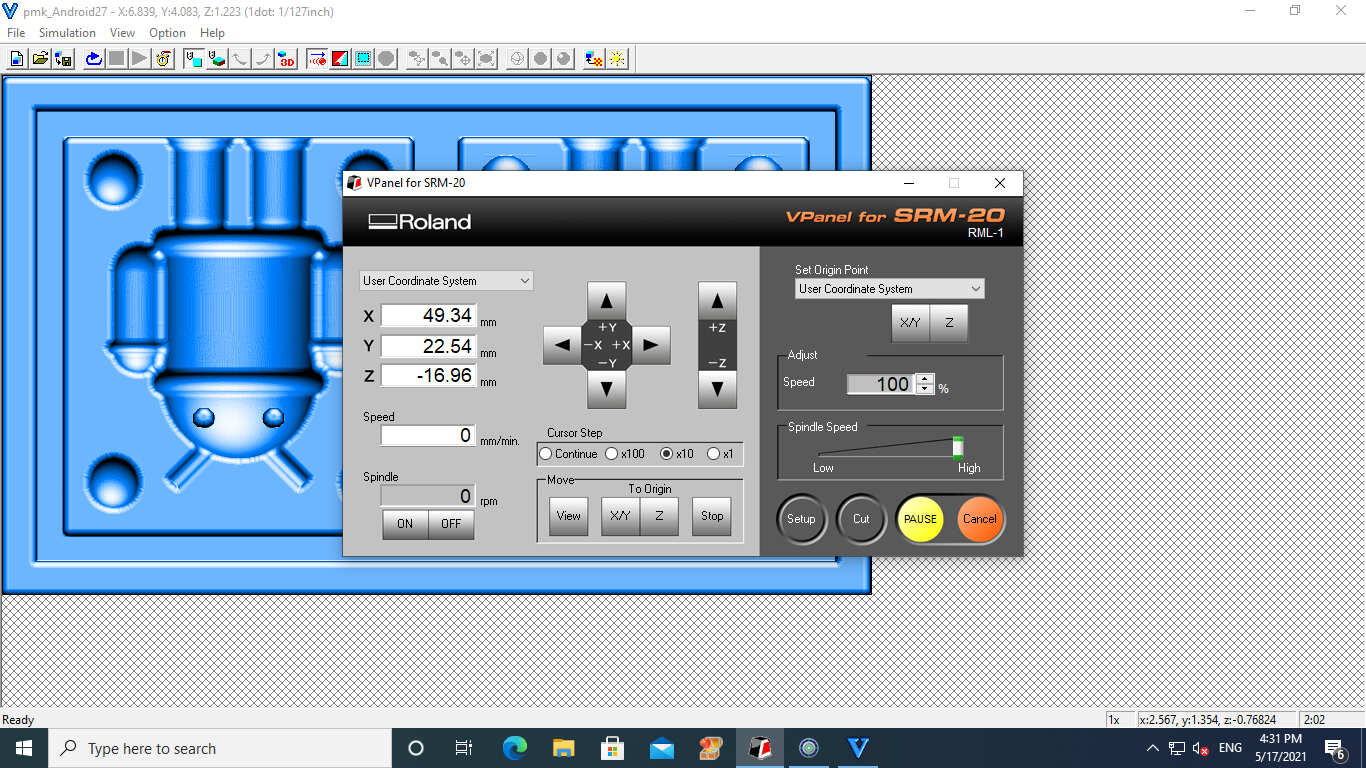
I again checked the settings of V-Panel and then went ahead with the Finishing Pass
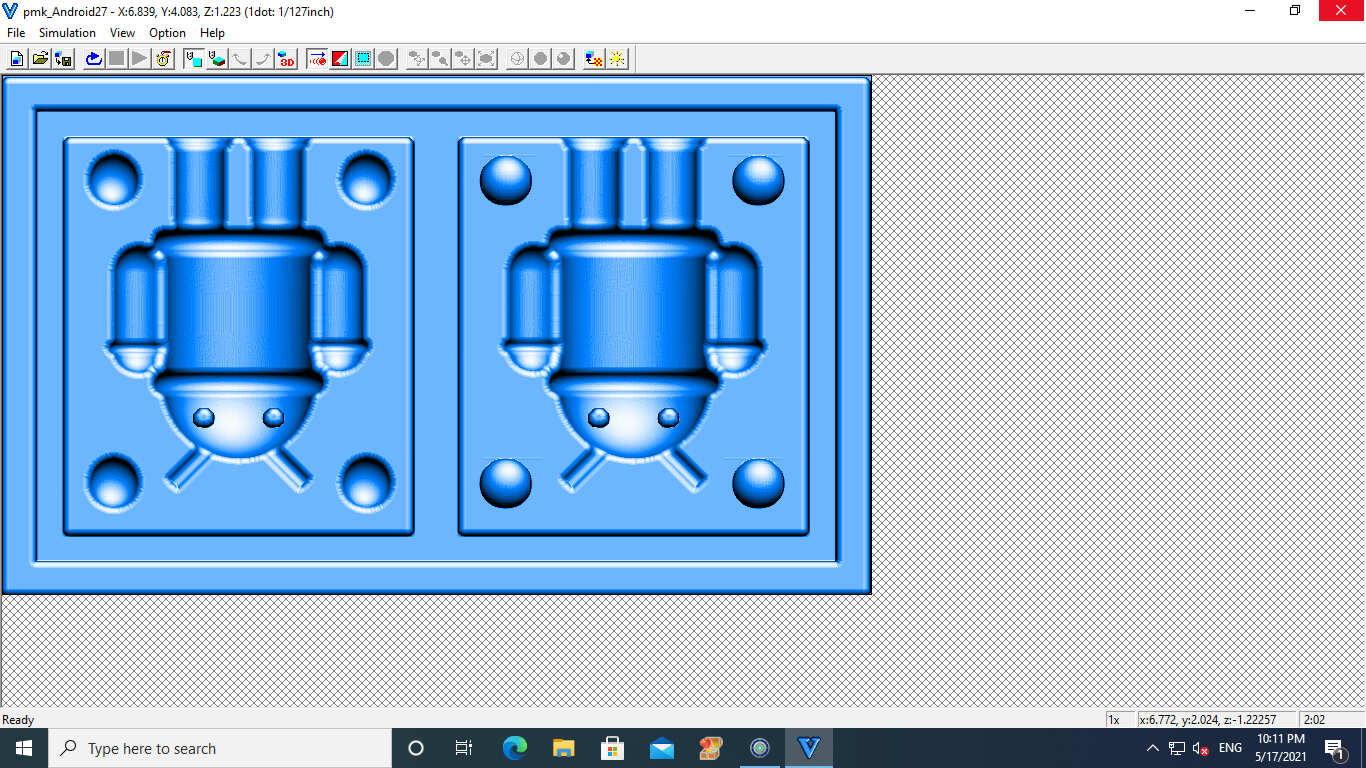
3D View in the Virtual Modela
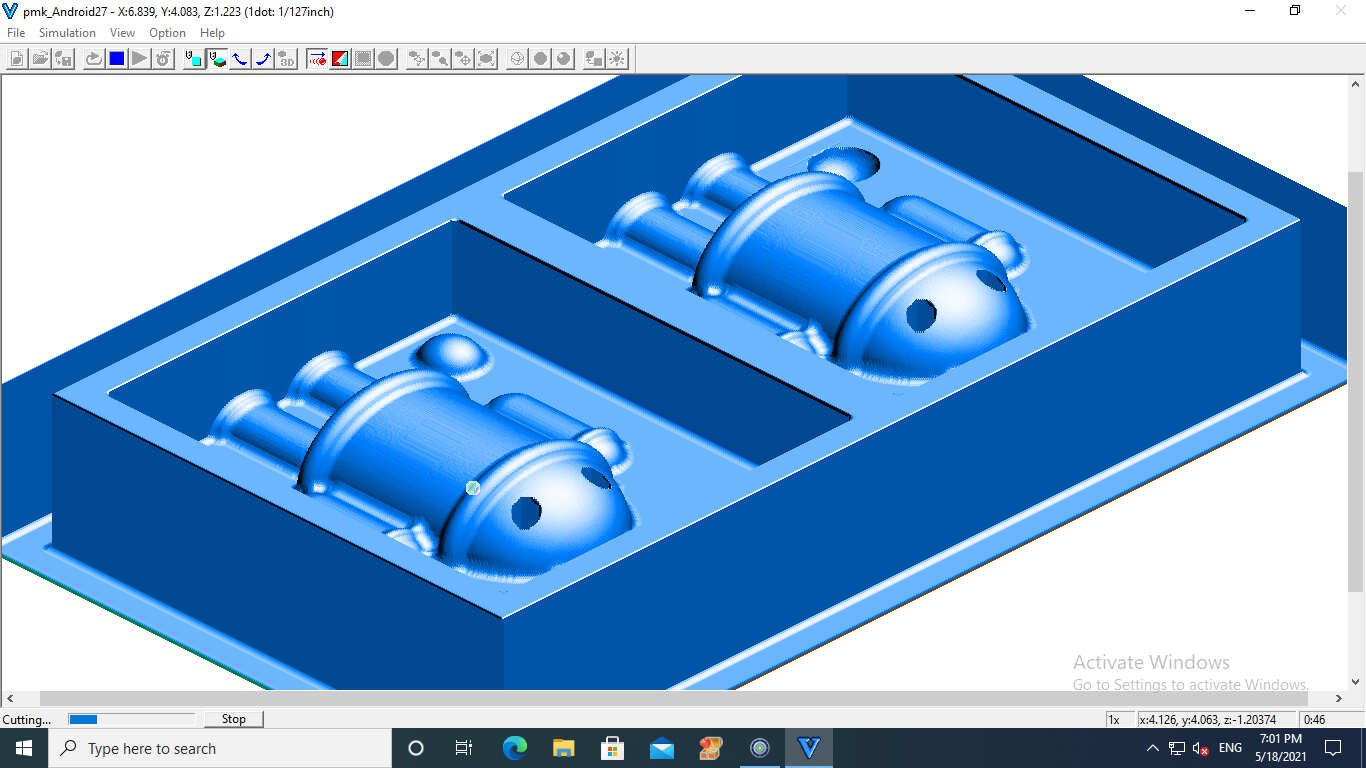
Android after Milling and Finishing
Mould (Negative) Making:
I poured Water in the Wax Mould to know the Amount of Silicon requirement for making the Mould.
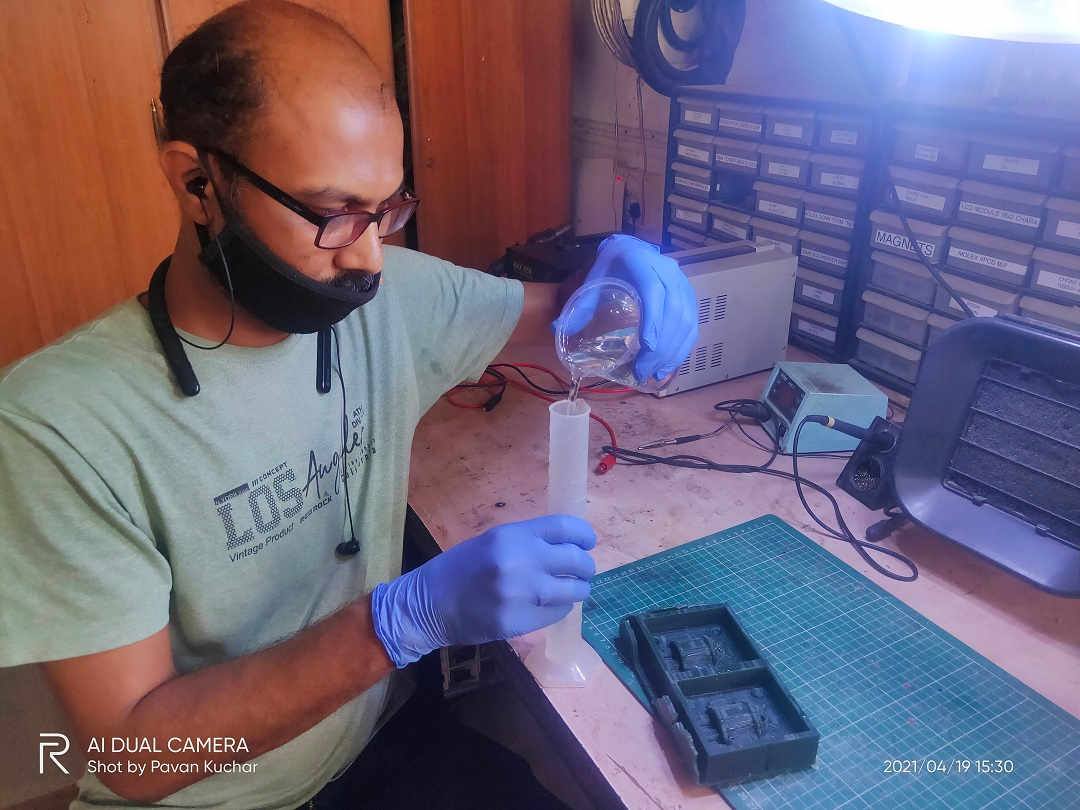
Measuring the Water from Mould by Measuring Cyliner - 190 ml it is
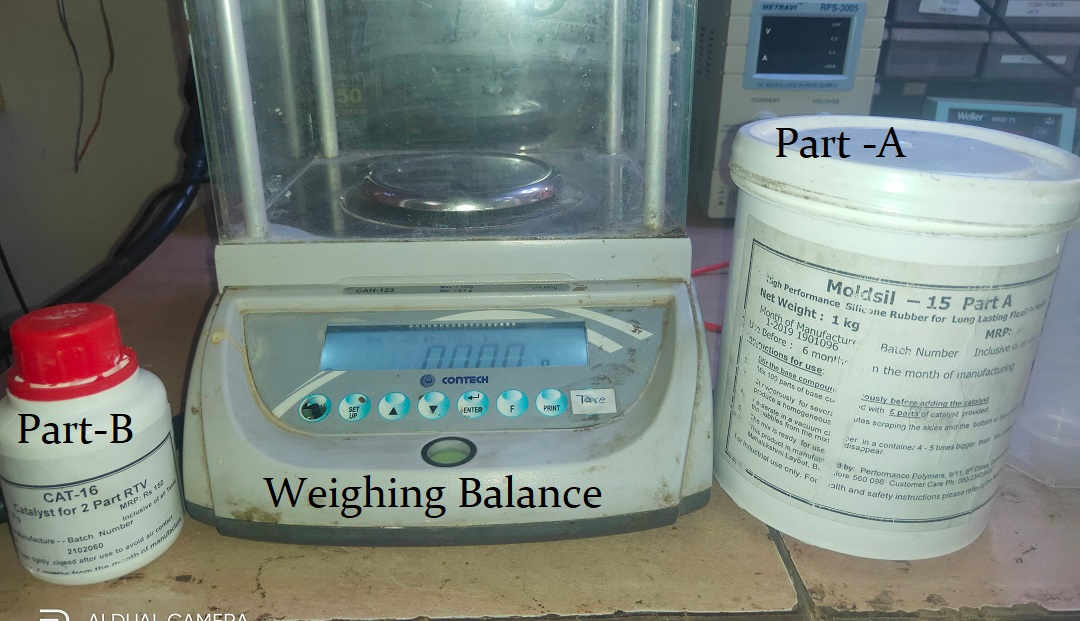
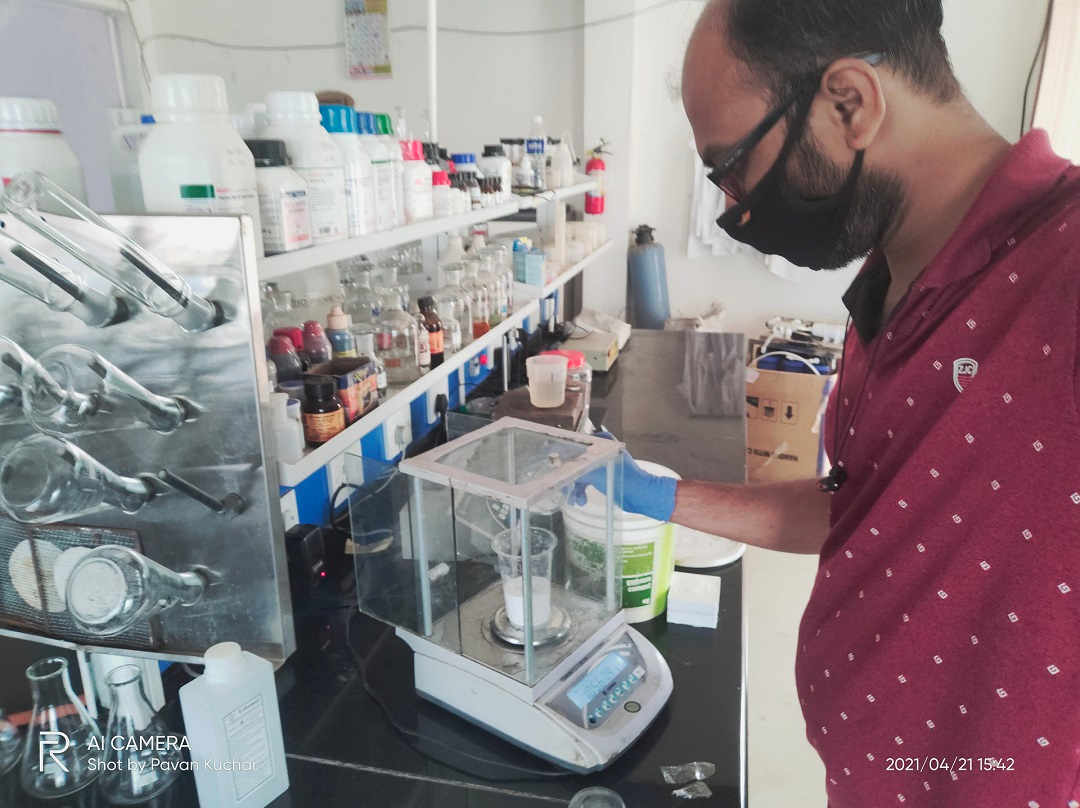
Getting Ready with Equipments and Chemicals
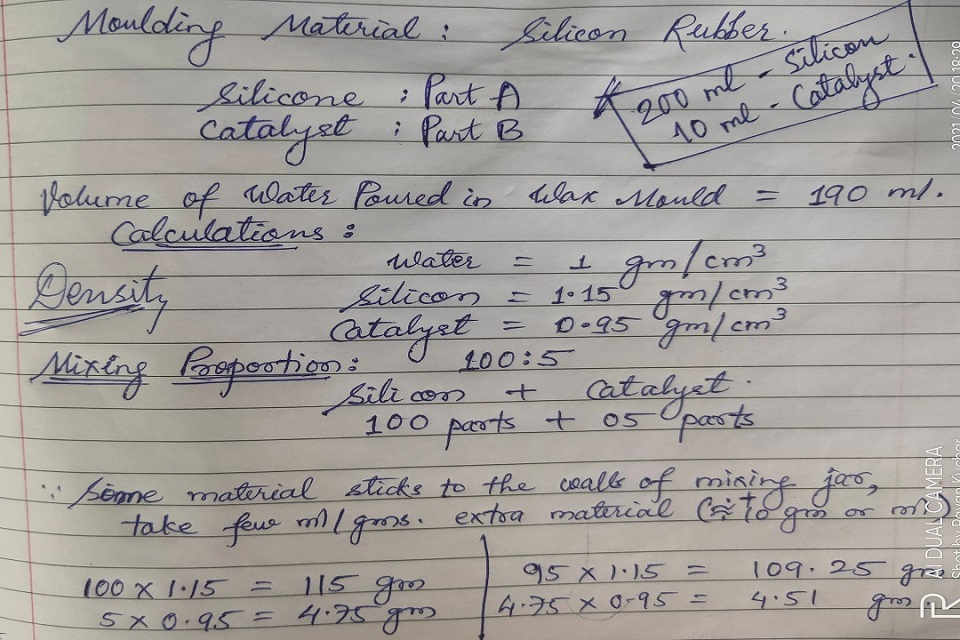
Calculations:
I decided to make the mould by using Silicon Rubber.
Silicon (Part-A) and the Catalyst (Part-B) are to be used in the proportion of 100:5 resp. i.e If you take 100 parts of Silicon, 5 parts of Catalyst are to be added.
I did the calculations as per the density as I will weigh the material on balance and not in the measuring cylinder (volume) because the material is very viscous.
The density of Silicon is 1.15 gm/cu.cm and that of Catalyst is 0.95 gm/cu.cm
I decided to make mixture of 200 ml because some of the material sticks to the walls of the mixing jar.
Taking the Silicon (Part-A)
Taking the Silicon (Part-A)
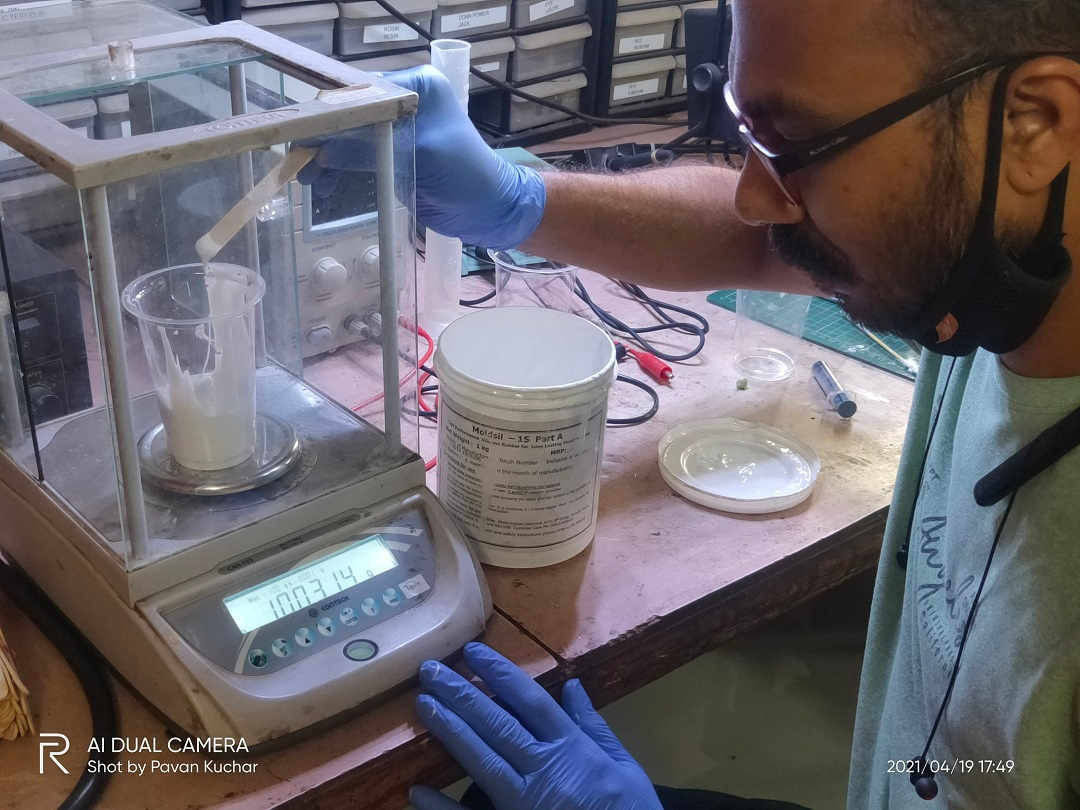
Weighing the Silicon (100 gms)
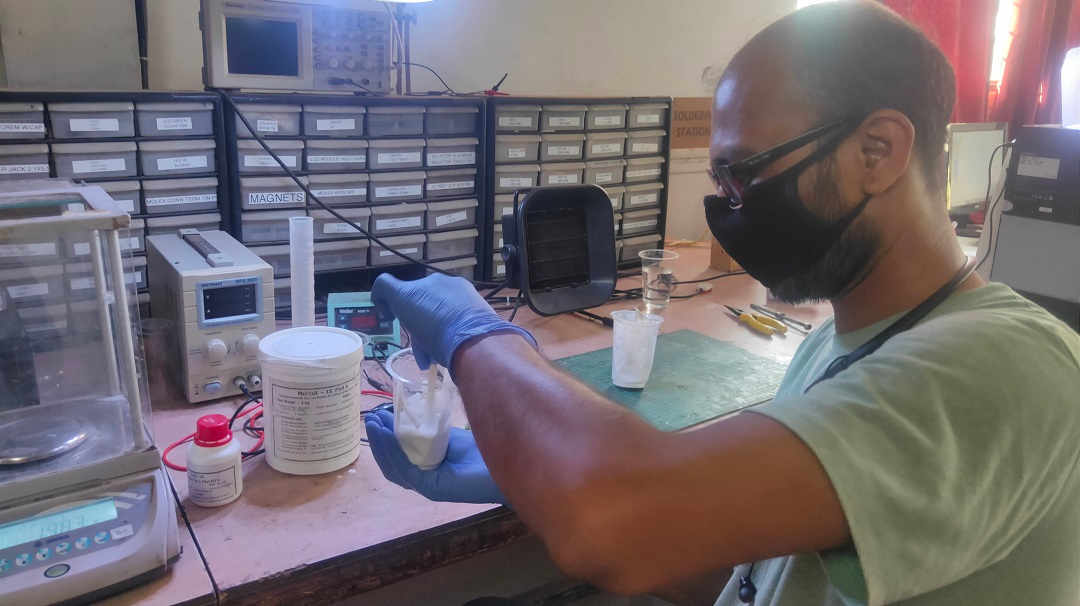
Stirring and Sheering before Mixing the Catalyst
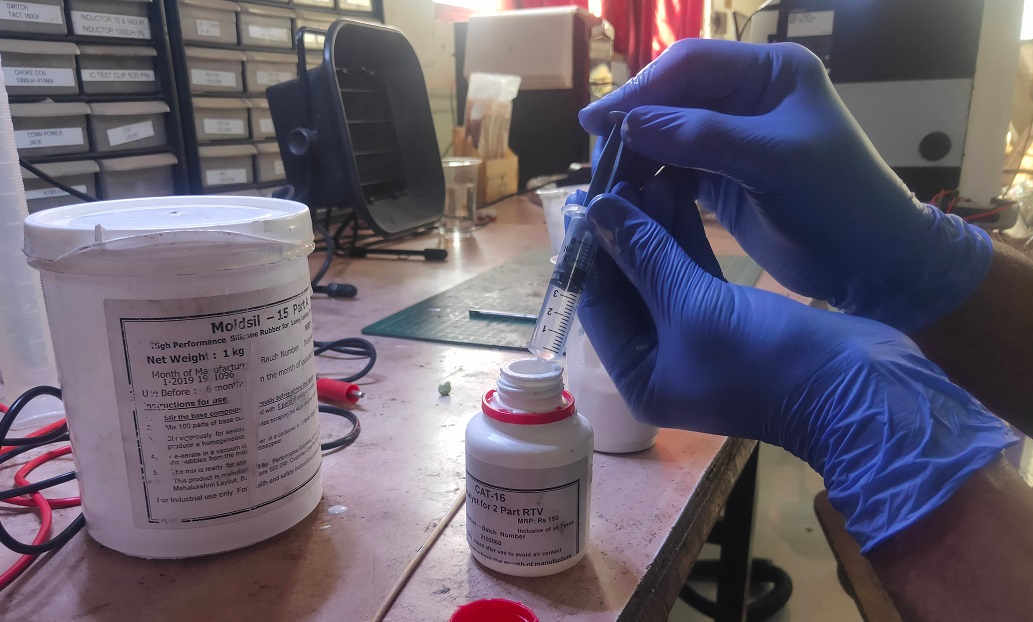
Taking the Catalyst for Measuring
Measuring the Catalyst (Part-B)
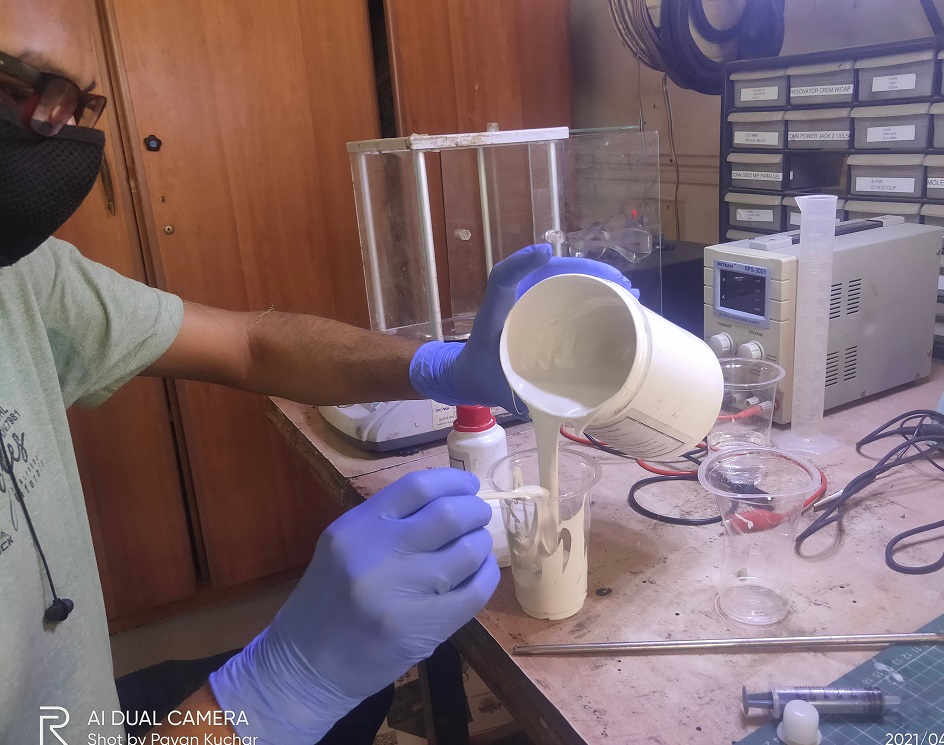
Sheer the mixture to properly mix the silicon and catalyst. Take care to avoid forming air bubbles.
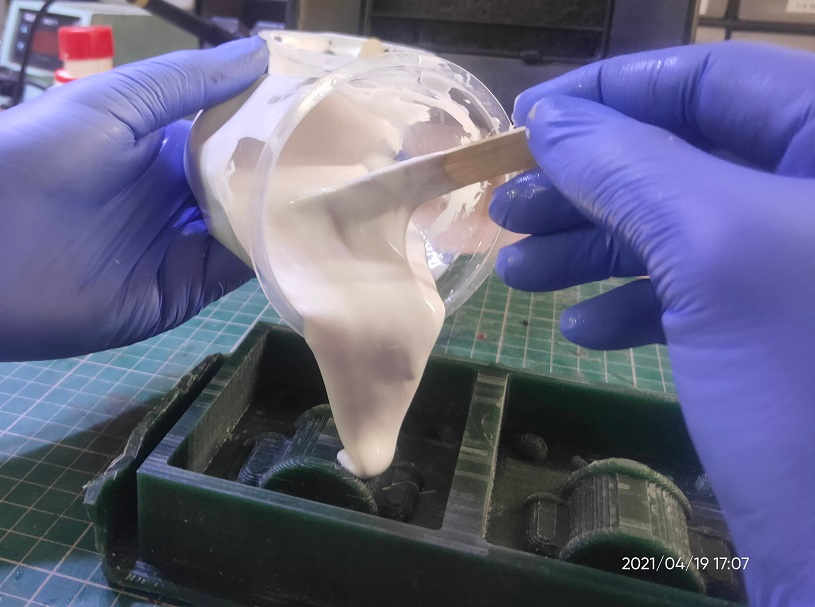
Pouring the Blend to the Mould
Spread the Mixture in the Mould Evenly and Slowly.
Tap and Vibrate the Mould to allow the release of trapped Air bubbles if any.
Set the Mould for Curing undisturbed. The Curing time for Silicon Rubber is approx. 16 hours.(as given in the Datasheet)
I looked at the mould after 16 hours but it was still wet and not properly cured. When I pressed the mould, the air bubble popped up. I left it cure for some more time.
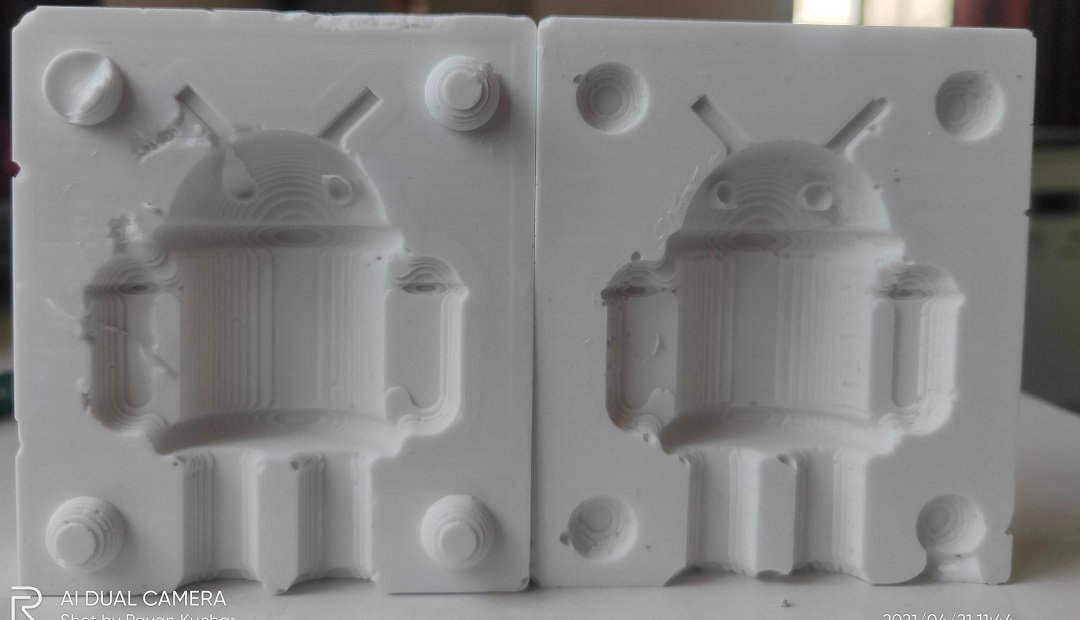
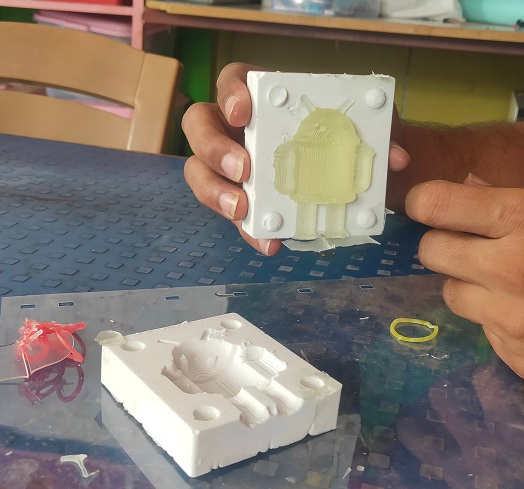
This is how the Silicon Moulds came out
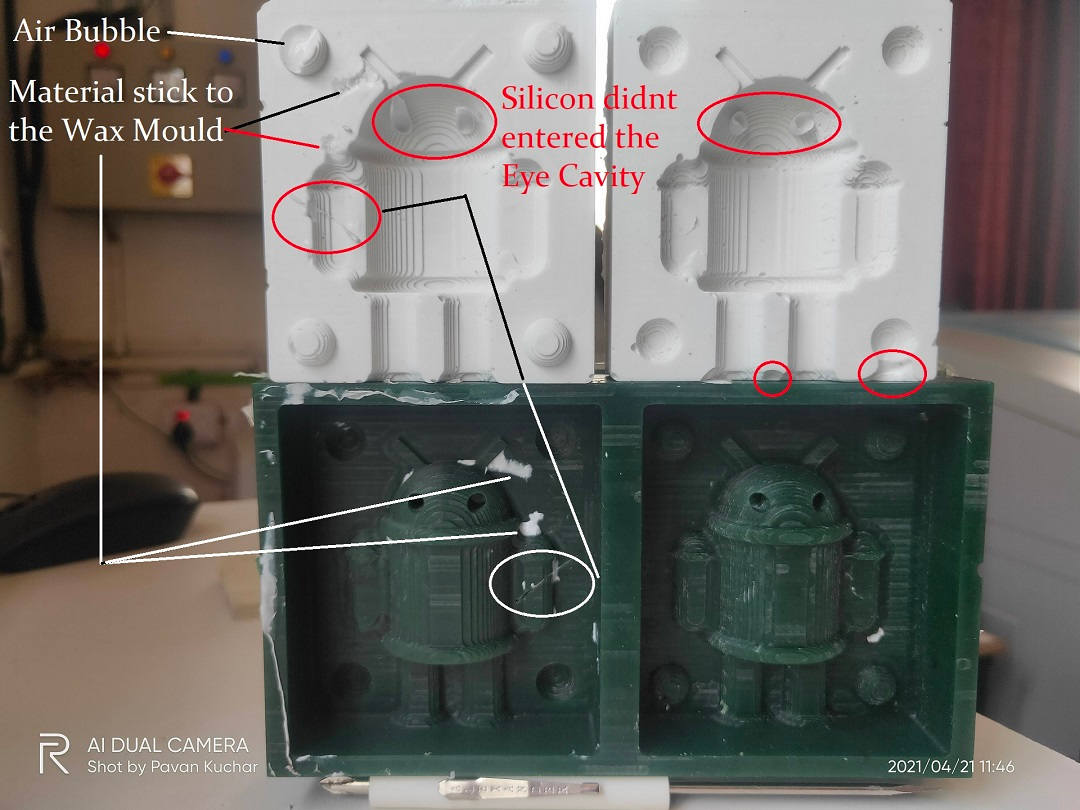
Various Problems in the Mould

Mould as it is
We can see that the Mould has many problems like Air bubbles, Material stick to the walls of the mould, Eye cavity was not formed as the material didnt entered there.
These Problems in the Mould might have been because of:
- Wrong proportion of the components (Silicon and Catalyst)
- Improper mixing / stirring or pouring in the mould
- Air bubbles trapped in the mould while pouring from mixing jar
Casting:
In the earlier phases, we have 3D designed, made Wax Blocks, Milled the design on the Wax block (Positive Mould) then poured the Silicon to make the Positive Mould and we would be Casting using various materials like HydroStone, Epoxy Resin, Paraffin Wax etc.
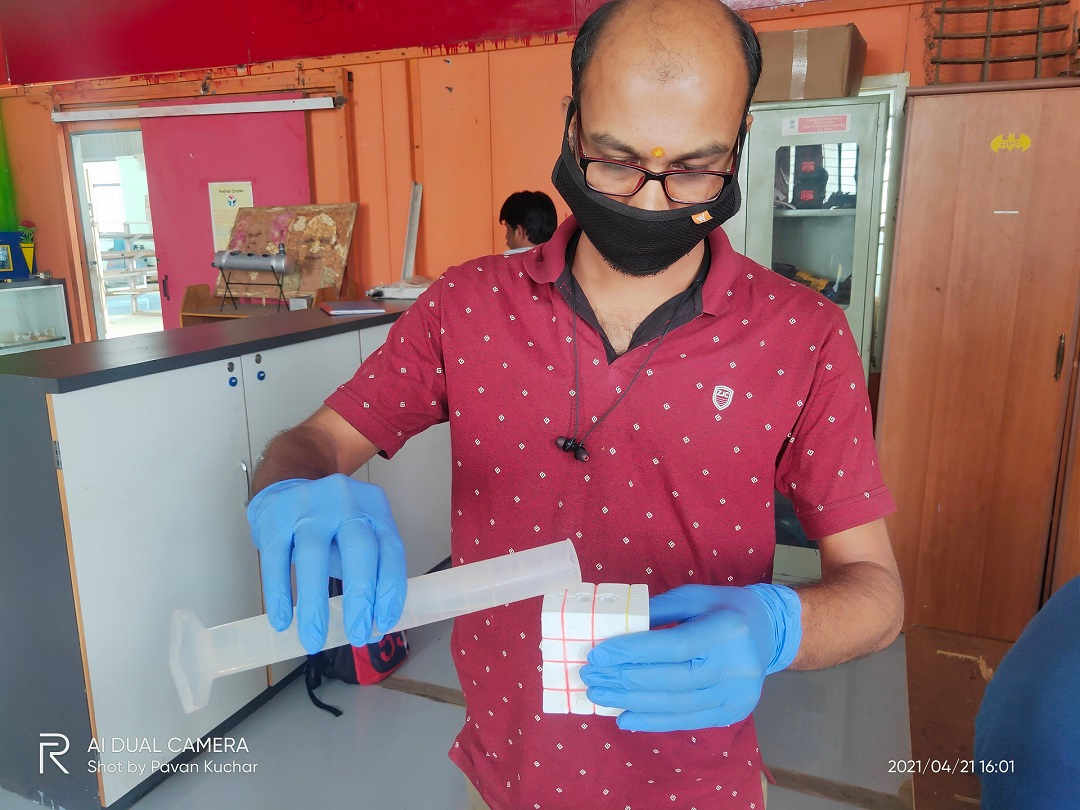
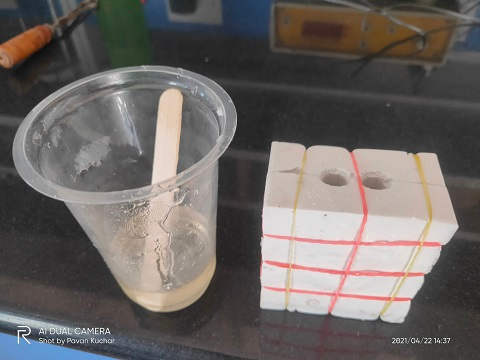
As I have already dealt with HydroStone in the Group Assignment, I first decided to do the Casting with it. I used Rubber Bands to tie up the two pieces of Mould. Then I poured Water in the mould to identify the amount of HydroStone requirement.
Safety Measures for Casting:
The Casting material are chemicals. They may cause irritation and harm the skin or eyes.
- Wear Protective Gear like Gloves, Glasses while mixing the ingredients.
- Use the Apron while performing the actions of pouring and mixing.
- Keep the work area clean and uncluttered.
- Follow the directions given in the Datasheet of the Casting materials.
- Mix the components as directed and carefully.
Pouring Water in Mould to measure the Amount of HydroStone requirement for Casting
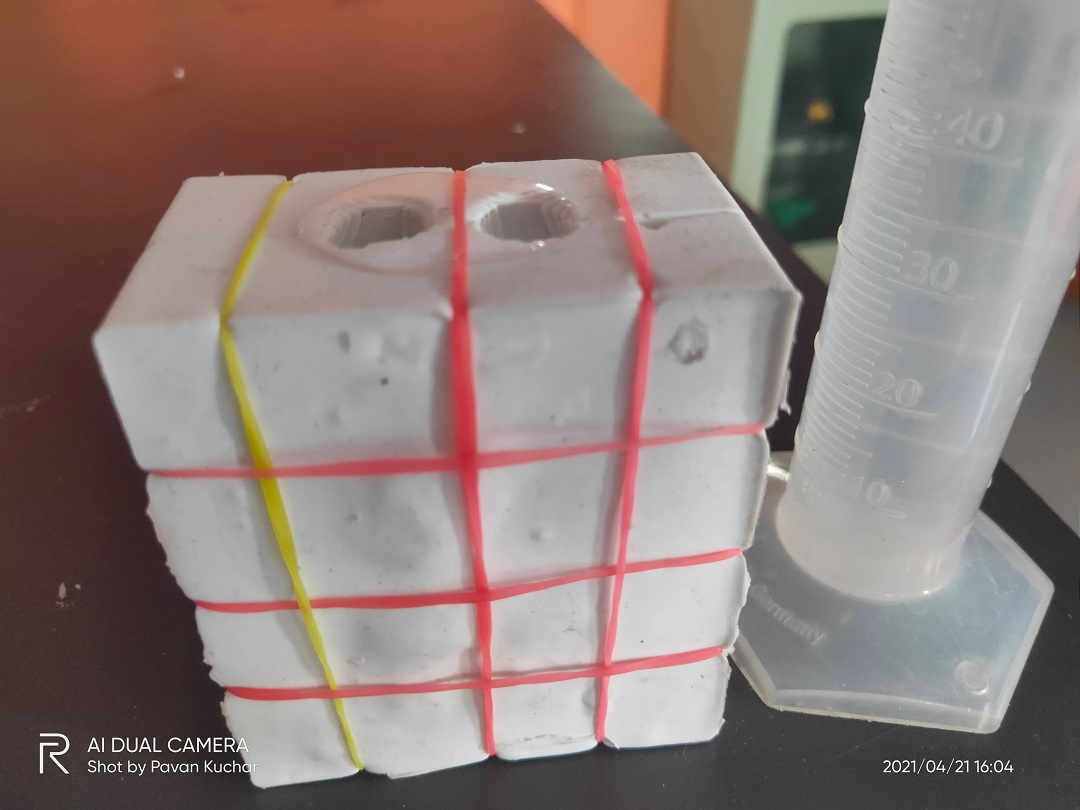
37 ml Water was filled in the Mould. I rounded it up to 40 ml. So, I would require 40 gms of Hydrostone and 13 ml water(According to Mixing Ratio in Datasheet - 100 parts of HydroStone and 32 parts of Water). I weighed 45 gms of HydroStone and took 20 ml Water.(Because the Mixture should flow from the material inlet aperture)

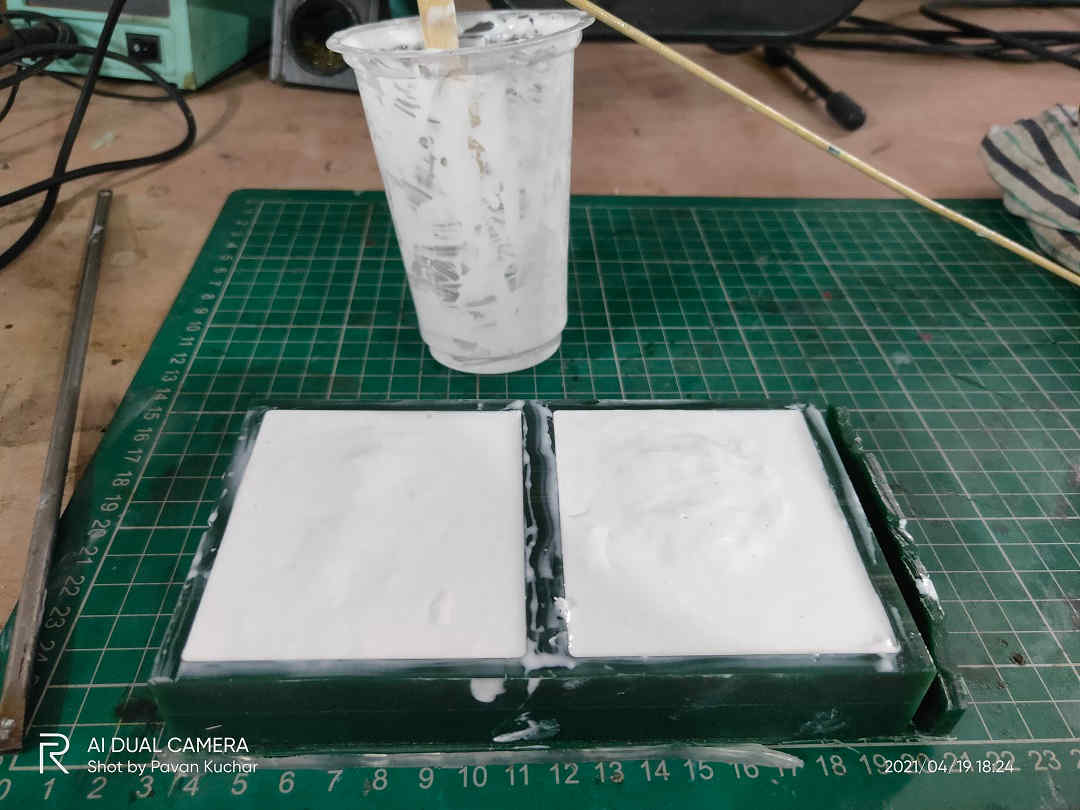
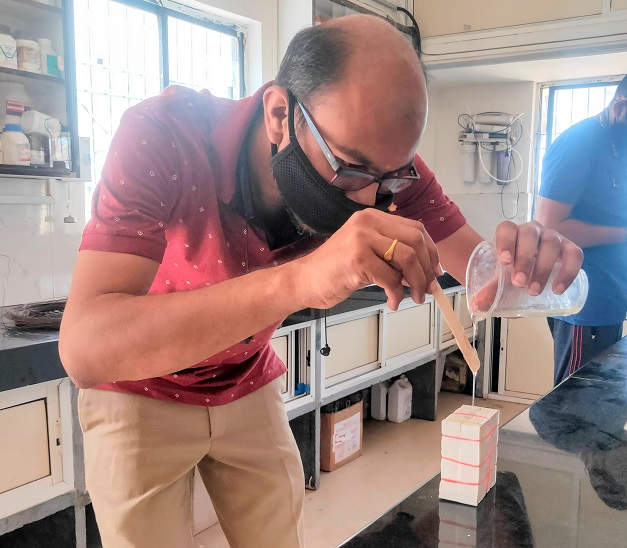
Pouring the HydroStone Casting Mixture in the Mould
Then I set the mould aside for Curing. The Curing time of HydroStone as per Datasheet is 17-20 minutes. But as per my experience in the Group Assignment, it would take 45 min. or even more.
The Final Cast
The Final Cast
The Android didnt came out well as expected. After enough Curing time and proper mixing of components, it broke. The reason being-
- I took exactly the same amount of mixture as the measured water in the mould.
- When I started pouring the mixture in the mould, I realized that it would not be enough to fill the mould. So, I added 10 gms of HydroStone and 5 ml Water to it.
- At the end, the mixture started to dry, so I pushed it inside the mould instead of Tapping. This might have caused the Legs of the Android to break.
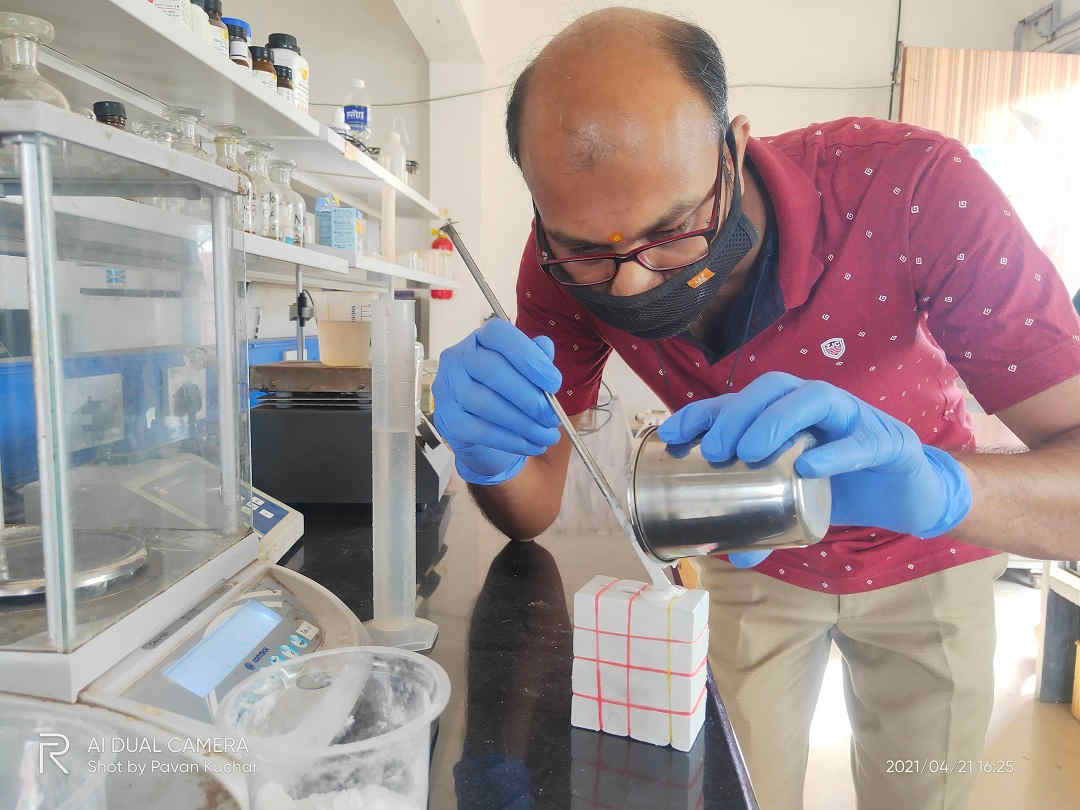
Next Day, I decided to Cast it with Epoxy Resin. This time I took caution to take more material. The Mixing Proportion for Epoxy Resin is 2:1 i.e. 5 ml of Hardener is to be added to 10 ml of Epoxy Resin. I took 36 ml Epoxy Resin and added 17 ml Hardener to it.
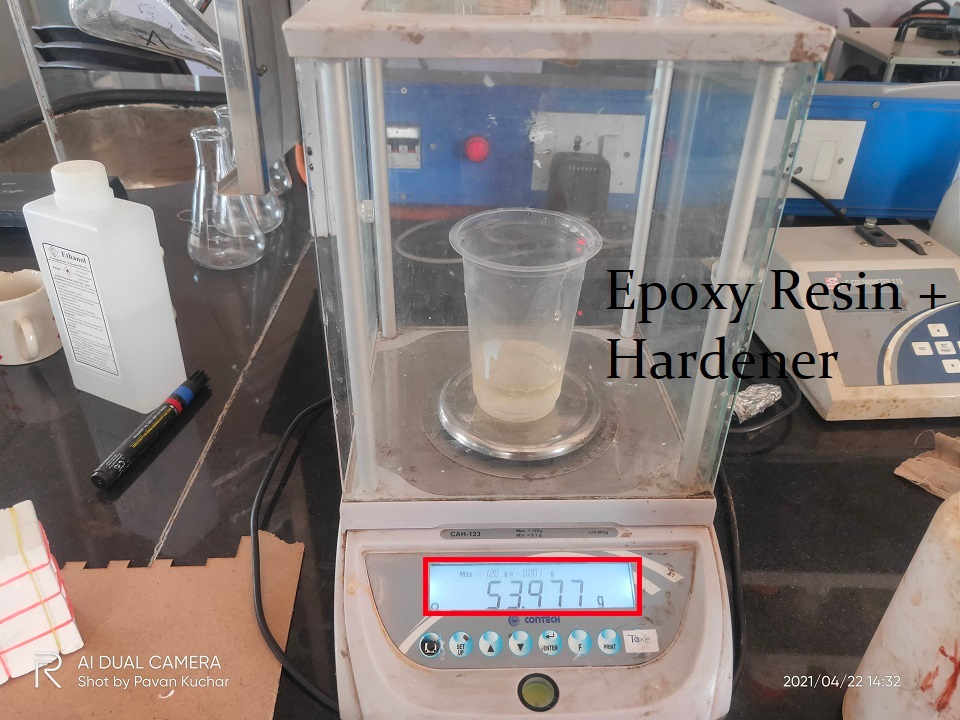
Weighed the Epoxy Resin and Hardener
Ready to pour the Mixture in the Mould
Pouring the Mixture in the Mould. I poured it through the Stick to prevent the Air Bubbles
Cast after 16 hours of Curing time.
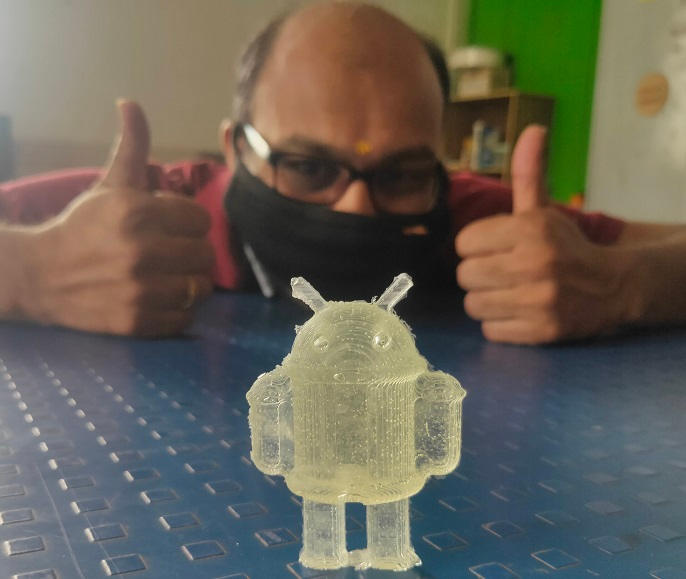
Happy to see the Cast of Android as it came out nicely (Needs little Filing though to smoothen the Edges)
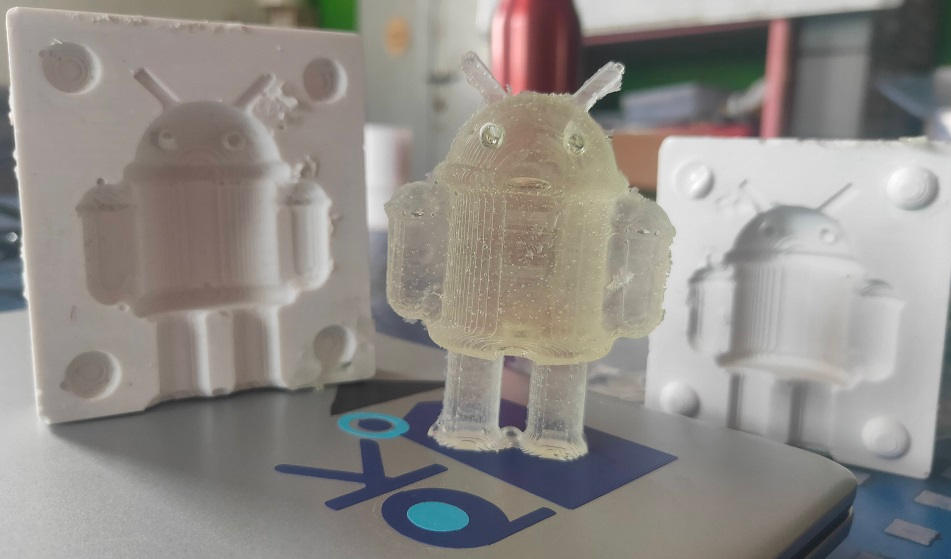
Cast with the Mould
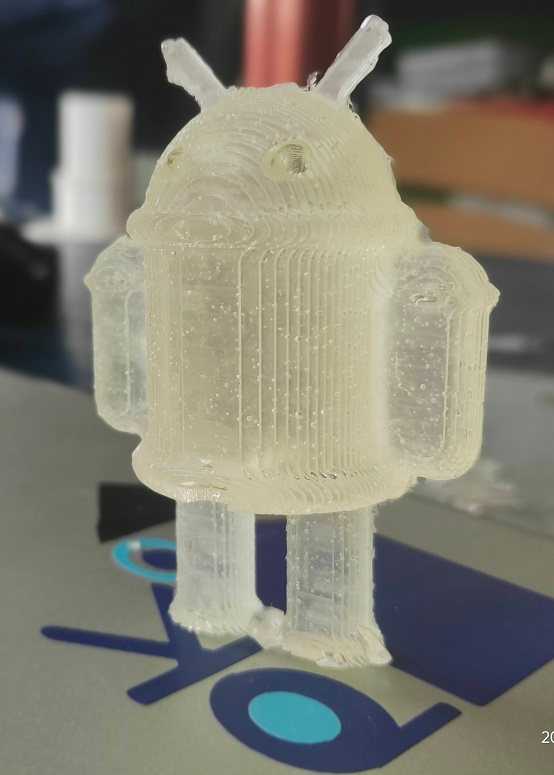
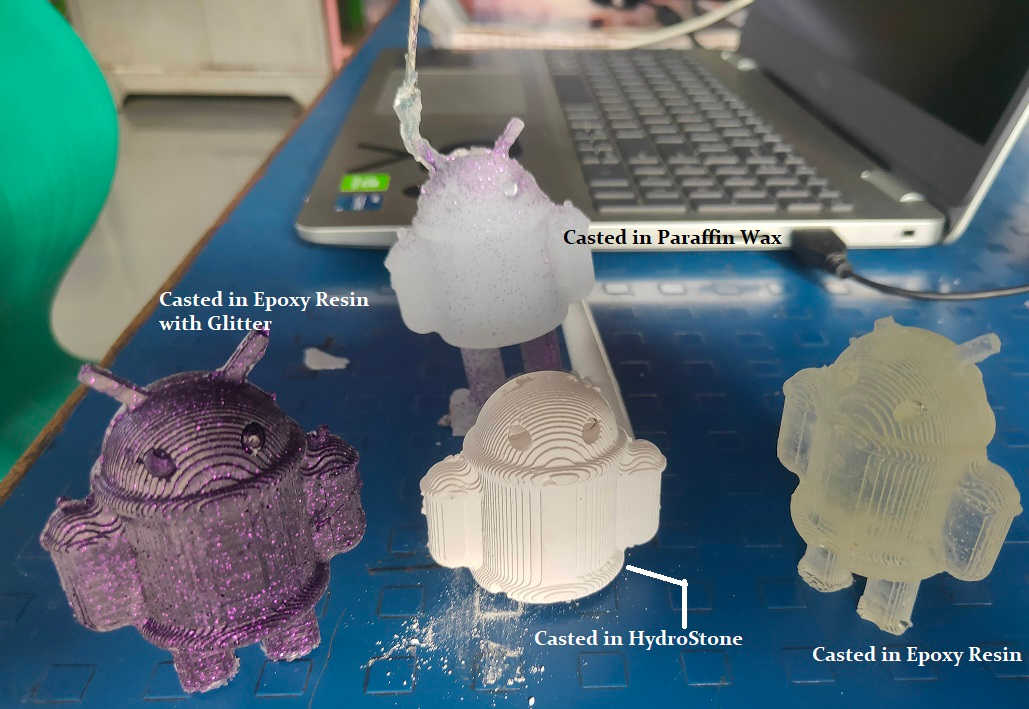
Hero Shot of the Cast
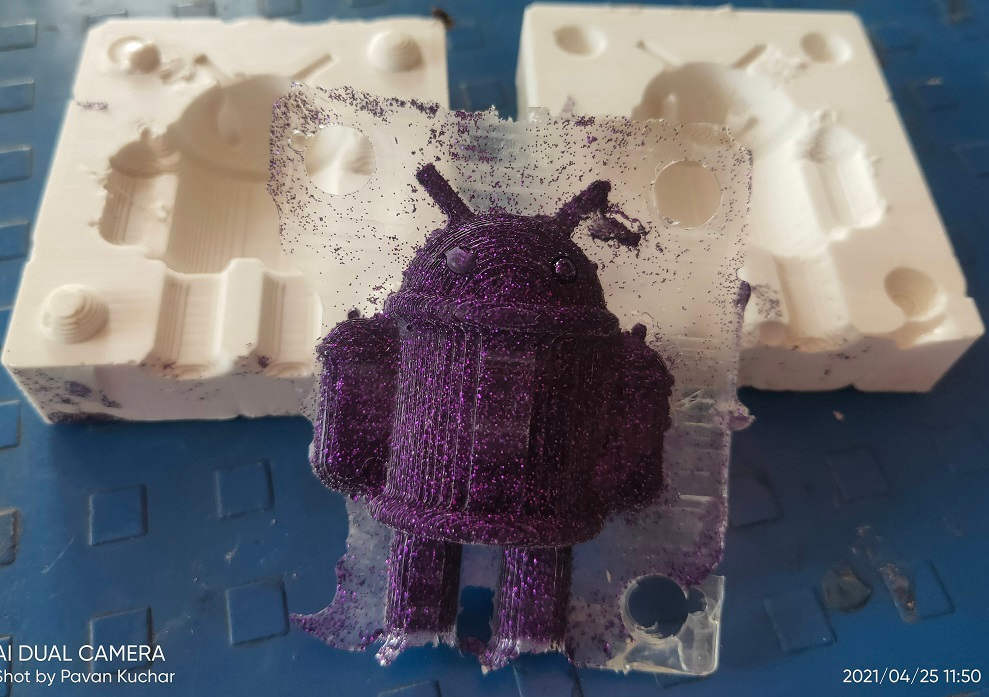
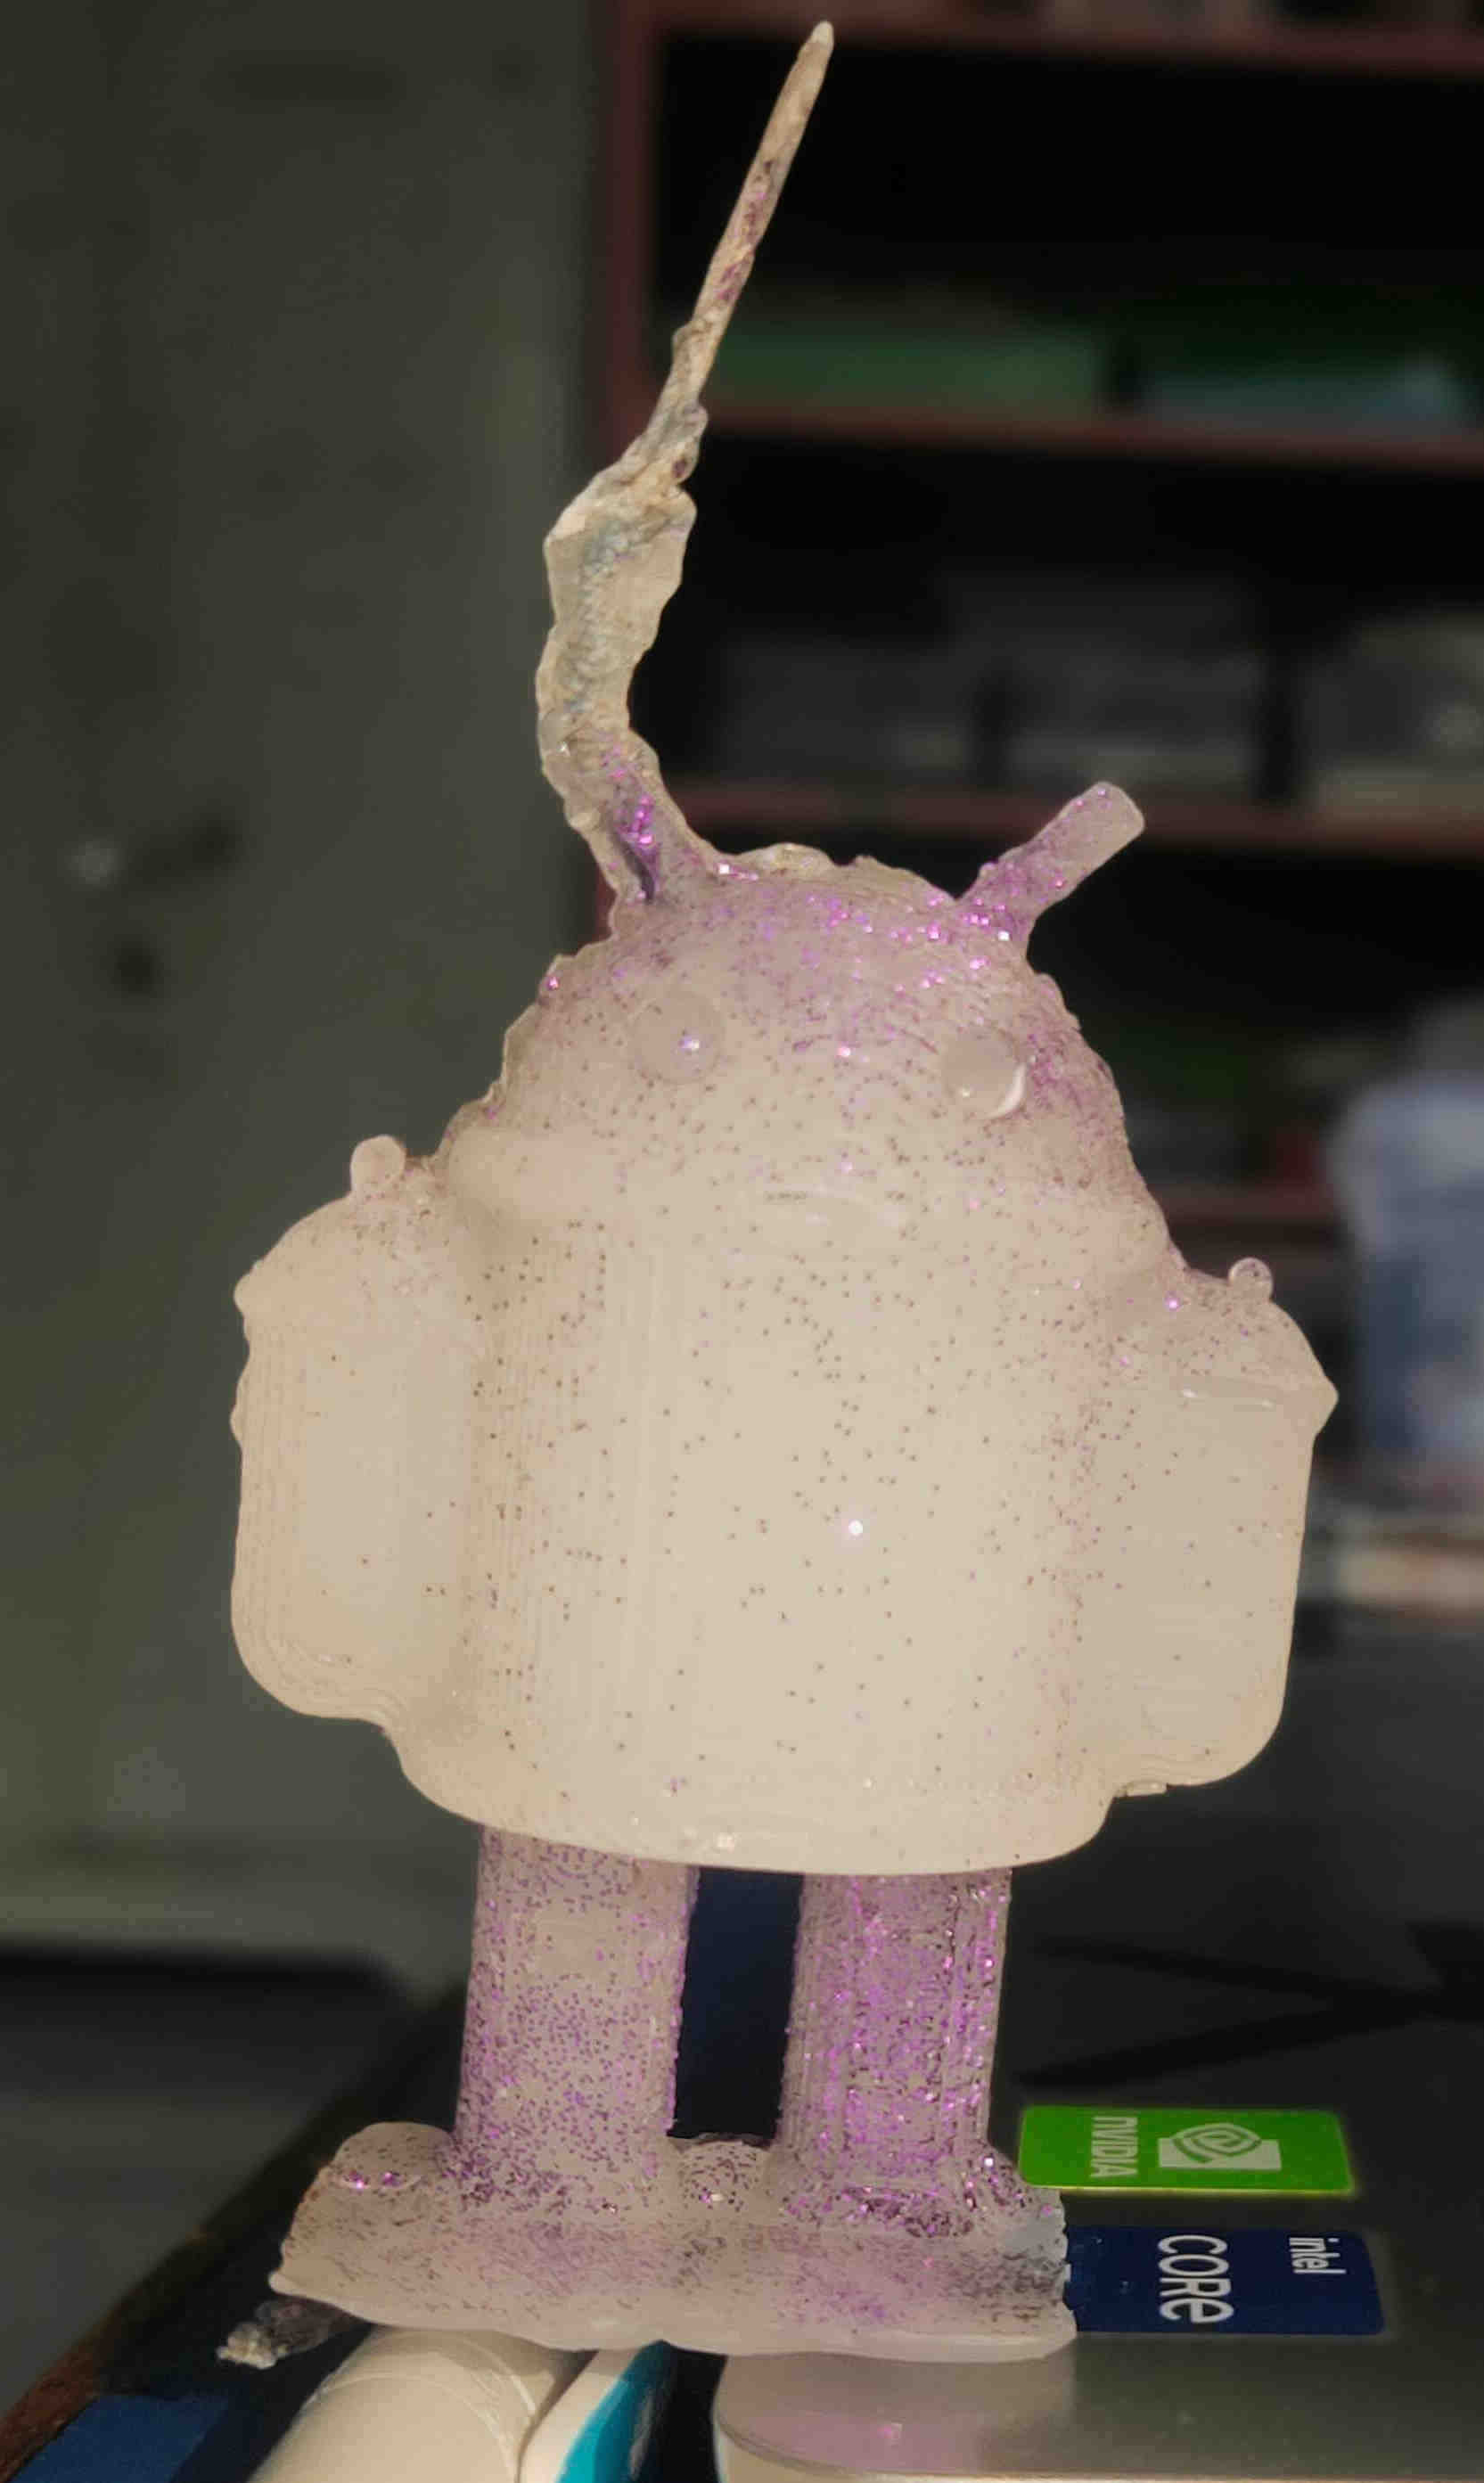
Casting in Epoxy Resin with Violet Glitter

Casting in Parrafin Wax with Wick on the Top
Summary:
This week was really exciting. Experienced similar Lab work after my Graduation (2006)in Pharmacy.
- I was familiarized with the process of Molding and Casting
- Various Materials used for Molding and Casting
- Also Physical and Chemical Properties, Curing Time, Mixing Proportions, Cautions while handling, Strength of Material, Flexibility, Shrinkage, Adhesion etc. of the materials.
- Milling of the Wax - Surfacing, Rough Cut and Finishing
Downloads: Original Files
As the .STL file of the Moulding and Casting was more than 6.6 MB, I have uploaded it on the SketchFab to limit the Size of the Repository.