Mohit Ahuja's Fabacademy 2021
Computer Controlled Machining
Group Project
In this week's group assignment, we had to figure out the workflow of using the machine and how to set it up for Milling different materials. You can read more about it on the group page.
Link to the Group Project Page
Inspiration
For this week's assignment, I explored a bunch of different things. I had recently come across this video on youtube from the MIT Media lab channel:
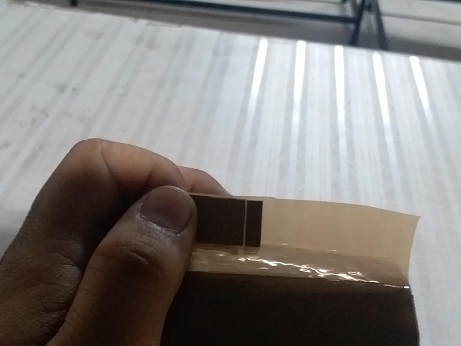
This video was inspiring to me and I wanted to try to come up with an idea that uses some of the mechanisms from the video. I decided to try making the mechanism myself first to understand how it worked. I used simple packaging tape and cardboard to make a model of one of the mechanisms. I unfortunately didn't take any pictures of the mechanism, but the technique of using cardboard and tape to make mechanical prototypes became useful later.
After trying to come up with some application for the kinetix modules, i eventually gave up on the idea due to time restrictions, inability to design something so complex and a lack of motivation. So I moved on to an idea which i was much more inclined towards making. Foldable furniture. I also saw this video which gave me some idea about how i can make furniture using CNC Machining.
I explored a bunch of content on youtube and pinterest, and eventually came up with an idea. I wanted to make a stool that had sliding feed that could be hidden inside the seat of the stool. Initially I wanted it to be a chair, but i downgraded it to a stool to keep the design simple for my first time making something big!
I decided to test my idea by using the technique of making a cardboard and tape prototype.
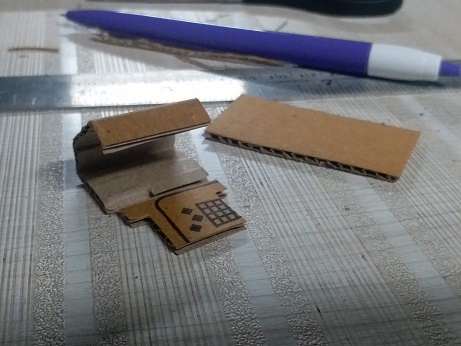
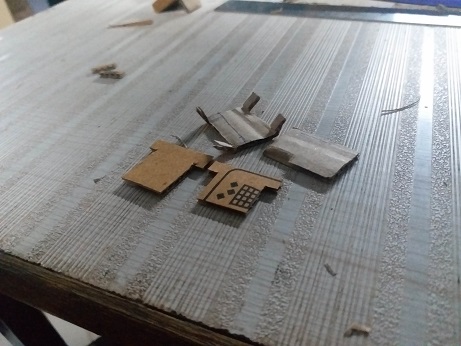
You can see the results below:
After that looked promising, I decided to fire up my Rhino CAD software and started figuring out how everything would work. making the design was not too challenging, and I just wanted to make sure that the stool was at a comfortable height for an average person. For that, I just measured the height of a regular office chair and used that as a basis for my measurements.

This is the mechanism that is the most important to my design:

The feet of the stool would rest in the gap created by a plank just below the seat of the stool and a stopper this is attached to the sides of the stool. I wasn't too sure about this mechanism, because of the nature of plywood and it's layered structure. But I decided that I should give it a shot.
This is what it looked like in Rhino after I assembled the parts together.

After that, I added fillets to the the inside corners of the model. This video helped me in figuring out which fillet I should choose:
I decided to go with the T-bone fillet in some places where the space was tight and the Dogbone Fillet in the rest of the corners. I didn't plan on filling up the gaps created by these fillets because I wanted to retain the "CNC-ness" of the model.

After adding the fillets, this is what the parts looked like

Using Grasshopper to make a Parametric Design
After doing that I decided to make a parametric model in which we could input the parameters for material thickness and some other parameters for making the stool.
I wanted to make a parametric model that will adjust all the parts automatically when the thickness of the material was updated. This proved to be more of a challenge than anticipated. I ended up making a model that could control the number of notches specified by the user and length of notched based on the material thickness entered by the user. The user could also control which side of shape had or didn't have the notches and also the overall dimension of the seat.


After setting the parameters, I bake the result of the model which gives me the 2D cutout file for the cnc machine. I didn't actually use the output of this parametric model, but it was good for experimenting.


CAM Processing
To generate the CAM instructions for the machine, we used Partworks. We had already been trained on using the software by Apeksha ma'am during the group project of this assignment.

I started by first putting the material dimensions into the software.

Then I opened my pdf file for cutting the parts.


After this, I proceeded to select the 2D Toolpath option and set the parameters of the bit and the spindle speed that I was using to cut my plywood.

I referred to this table for selecting the chip load, feed rate, and spindle speed.

Then I proceeded to select the paths that I wanted to cut. My toolpath was split into two parts, one for cutting the inner holes and one for cutting the outer holes. I began with cutting the inner holes out first and I selected Inside/Left option in the Machine Vectors section.


After that I set the parameters to cut the outlines of the parts. I changed the Machine Vectors option to Outside/Right.


CNC Machining
To begin the process, the machine was loaded with the 12mm plywood sheet. And then the 1/4" bit was fitted to the spindle with the appropriately sized collet.


Then the machine's zero position was set by manually controlling the axis using the arrows in the software, and then zeroing the machine from there.

The parts were cut without much issue and lots of noise.


The edges were a bit unclean, probably because the bit was old and wasn't too sharp. So I had to clean up everything afterwards with a sandpaper.

Once that was done, I assembled the model, which was very well fitted, because everything fit quite well without the need for glue or screws.

Suhas sir was brave enough to give this very shaky stool a try while I clicked a picture. It survived for a few seconds before collapsing under the weight without any screws or glue. But hey! IT WORKSS!! (Sorta)

One thing that caught me by suprise was the sheer weight of the model. It was HEAVYY! Now I understand why most patio furniture is made from hollow steel tubed instead of solid wood.
Final Thoughts
I was not really used to making large objects, so this particular assignment was a bit daunting to me personally. Combined with the fact that this was aso the first time I was ever using Grasshopper as well the first time I designed a piece of foldable furniture, as well as the first time doing large scale cnc machining, I'd say I'm pretty pleased with the outcome. However, there are things that need to be improved.

First of all, the mechanism is not perfect. It has serious issues with strength and also consistency in deploying the mechanism is not great. I mean what did i expect, it is a mechanism in which plywood is rubbing against plywood, obviously there is too much friction. Also the area that carries the most weight in the chair is not designed to be very strong. There is also way too much material which has no purpose except making the weight of the chair unnecessarily heavier.
I am however much less afraid of designing furniture now! That's a big plus for me! And I will definitely apply the learnings learnt in this assignment in my future furniture projects.