3D Scanning and Printing


Week Six

Group assignment

  • • Test the design rules for your printer, visit the page for the group assignment.
  • • Document everything and explain the limits of your printer.
  • Individual assignment:

  • • Design by 3D printer an object that could not be easily made subtractively.
  • • 3D scan an object.
  • Learning outcomes:

  • • Identify the limitations of 3D printing.
  • • Try the design methods and production processes that will make you understand 3D printing.
  • • Determine the scanning technology and how can be used to digitize objects.
  • Papering the 3D printer:

    Changing the filaments:

  • For this week assignment we will use PLA filament.
  • filament required changing for the require design.
  • The steps for Ultimaker 3 Extended are the following:

  • 1. Setting materials >> material 1 >> change.
  • 2. Heated the print core to discharge the extra material.
  • 3. The motor pulled back and unloaded the filament.
  • 4. Remove the Filament easily from the spool holder.
  • 5. Insert the new filament and then the feeder grips it.
  • 6. Select the filament type.
  • 7. The filament will be squeezed out of the print head by heating the Print-Core.
  • Leveling the build plate:

    Important Note:

  • To keep the print safe during the process, make sure the filament is securely adhered to the build plate.
  • The space between the build plate and the print core must be exact; else, the print will not adhere correctly if it is too large.
  • The filament will not be squeezed out if the distance is too small.
  • The two types of levelling performed are:

  • Active levelling: is carried out by the printer on its own.
  • Manual levelling: The build plate's distances are manually adjusted by the user.
  • The steps of the manual levelling:

  • 1. setting system >> build plate >> manual levelling.
  • 2. The print-core should be on the central-back and the build plate should be on the homing procedure.
  • 3. The knurled nuts must be rotated and adjusted in a clockwise direction until they are tightened.
  • 4. You must rotate the front button until the plate is roughly 1 mm away from the nozzle.
  • 5. Place the card between the nozzle and the plate and unscrew the nut until you feel resistance.
  • 6. Click confirm.
  • 7. Repeat step 5 for the right and left sides.
  • My first test Steps:

  • By printing a ready 3D design for the first time, I begin to learn how the printer works.
  • I downloaded ready 3D design from this page.
  • I selected to print Cube >> download >> .stl file.
  • I download Ultimaker Cura 4.8.0
  • I used Ultimaker 3 extended printer.
  • I used cura software to prepare files for 3D printing.
  • cura is an open-source sharing application for 3D printers. It is the 3D printing software for Ultimaker 3D printers, but it can be used with other printers as well. Ultimaker Cura works by slicing the user’s model file into layers and generating a printer-specific g-code. Once finished, the g-code can be sent to the printer for the manufacture of the physical object.
  • The open source software supports the most common 3D formats, including STL, OBJ, X3D, and 3MF, as well as picture formats including BMP, GIF, JPG, and PNG.
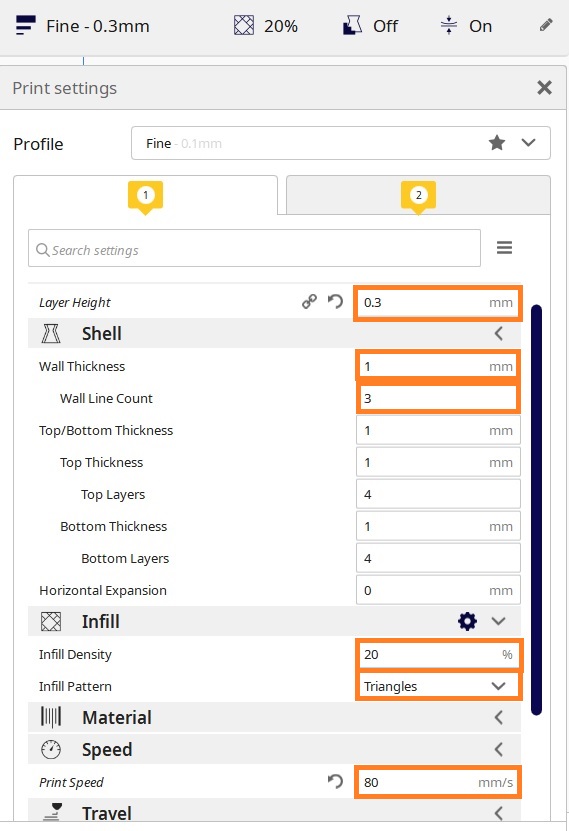
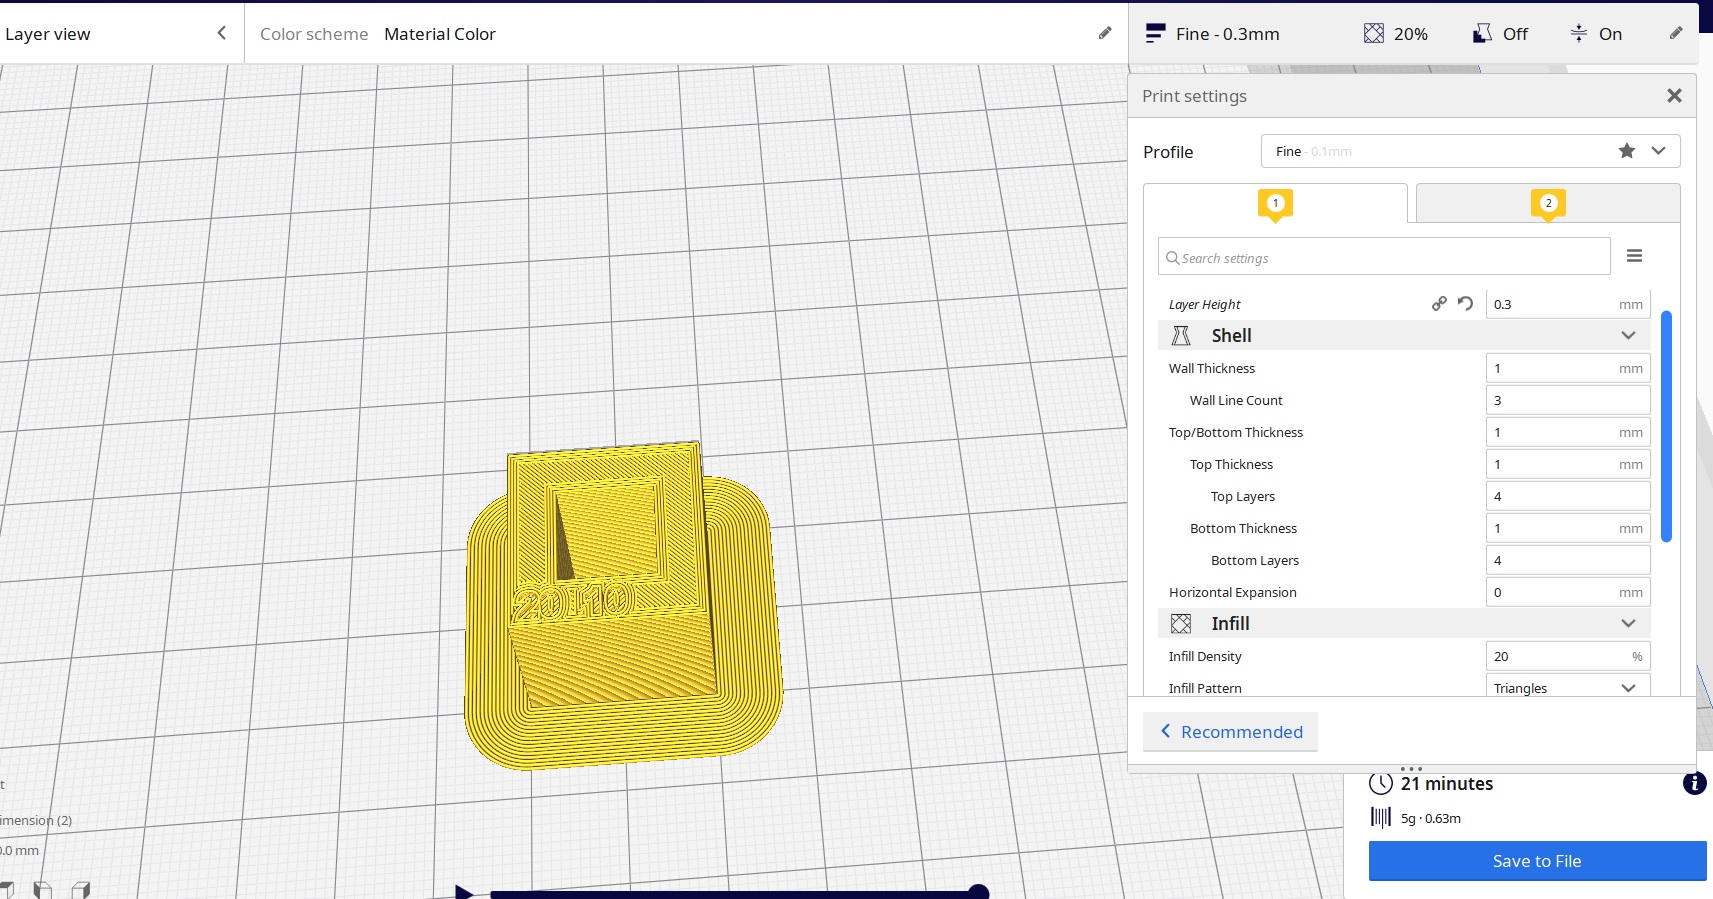
  • Cura - Printing settings:

    I used the following values for the purpose of testing:
  • Layer height: 0.3 mm.
  • Infill density: 20 %
  • Infill pattern: Triangles.
  • Wall thickness : 1 mm
  • Wall line count: 3 walls.
  • Ultimaker 3 extended - Printer Setup:

  • • Select the material in the printer the steps shown below:
  • • Build the plate (levelling of the printer) I followed the steps shown in the images below:

    Click on Print:

  • Insert the USB in 3D printer.
  • Chose the file.
  • Make sure that PLA coming out from the nozzle.
  • Stand and wait for the first layer to be ready.
  • leave the printer for 1 hour and 36 minutes.
  • I will come back when the printing is completed.
  • The individual Assignment [Lampshade]

  • I followed a tutorial to create a lampshade in Fusion 360.
  • The video below shows the steps of creating.
  • The image below shows the design, I used Autodesk fusion 360.

  • Then I save and exported the stl file.
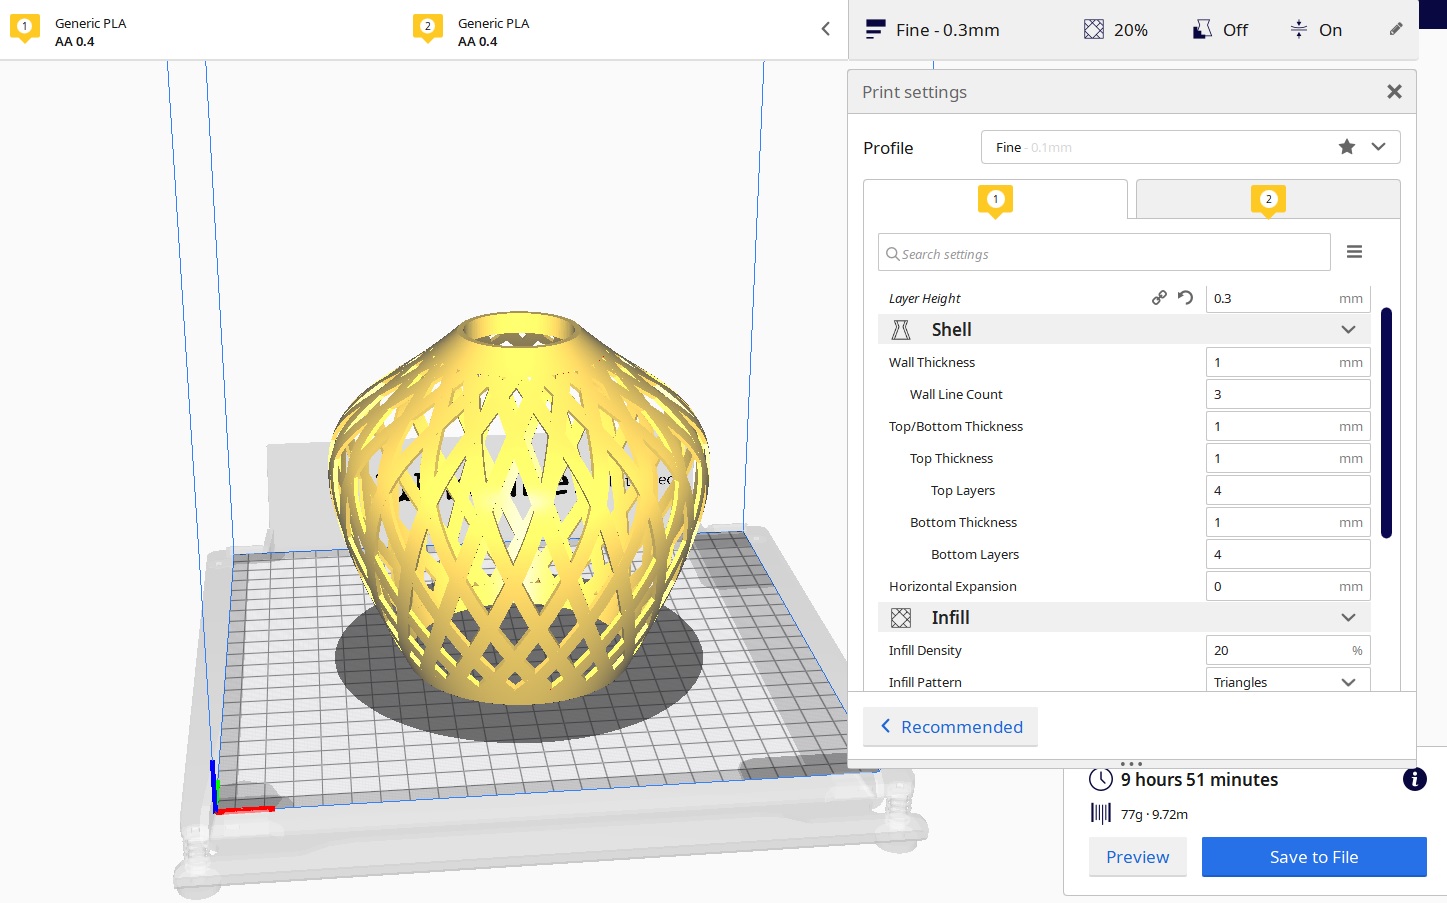
  • Open it in Cura.
  • The values that I have selected for my design are the following:

  • • Layer height: 0.3 mm .
  • • Infill density: 20 %.
  • • Infill pattern: Triangles.
  • • Wall thickness : 1 mm.
  • • Wall line count: 3 walls.
  • Then sliced the design.

    The duration was 9 hours and 51 minutes.

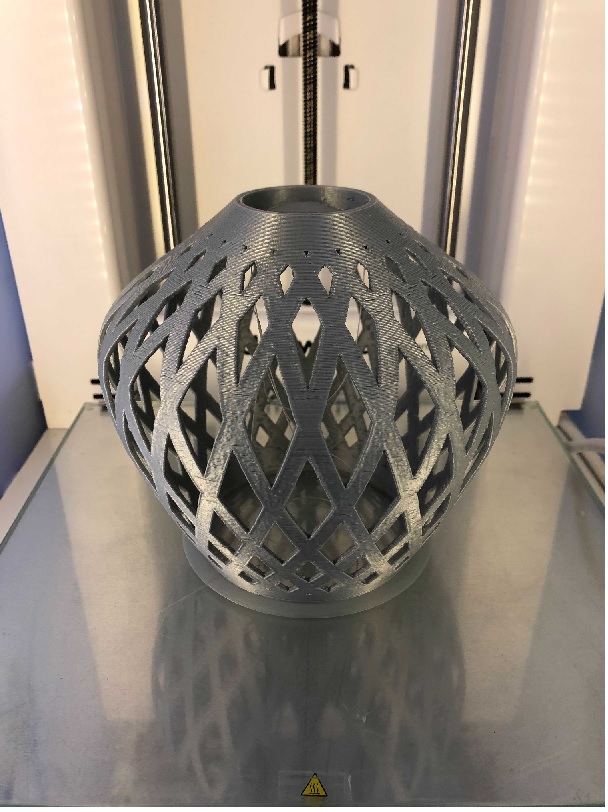
  • Then printed the design using the Ultimaker 3 extended, and a PLA filament.
  • The results were perfect! The finishing was very nice!
  • I use the 3D printing machine in stand of 3-axis CNC machine for many reasons such as:
  • The Quality of the design look polished and perfect.
  • During the production process, the materials are not distorted.
  • 3D-printed parts tend to bend and warp, and layer lines are evident, especially around curves.
  • For the 3-axis CNC machine it this difficult for the drill to reach around curves of the lamb shape.
  • 3D Scanning:

  • The 3D scanning I decide to use iOS application.
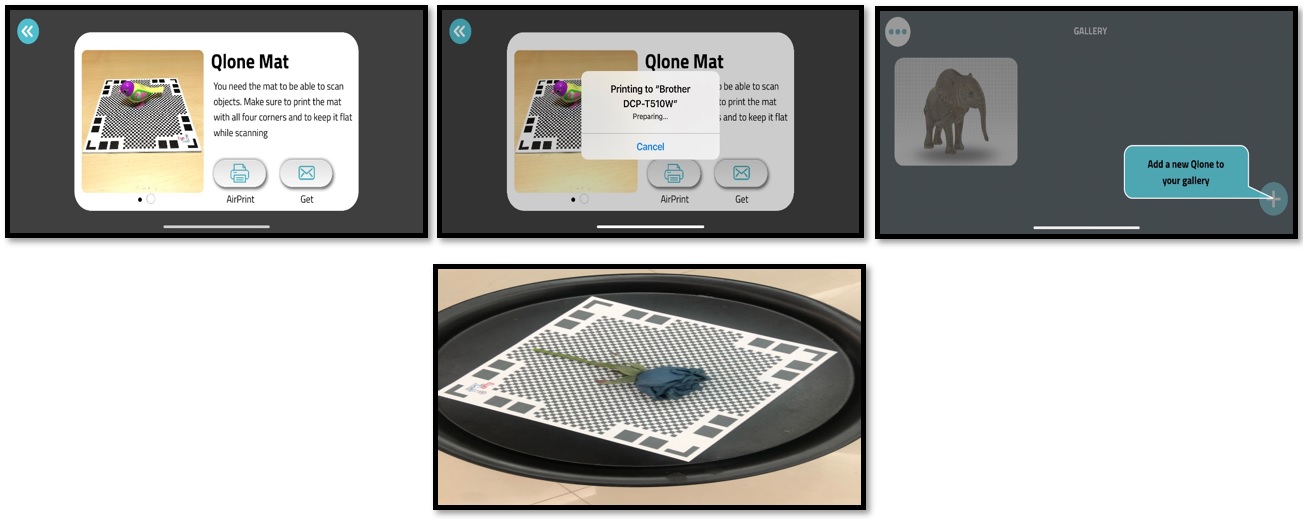
  • I download the App from apple store in my phone it is called Qlone.
  • To download the application click here.
  • I try few other applications but unlikely they were not easy and hard to use.
  • I print the AR mat in the application, without the mat we will not be able to scan.
  • I decided to scan the artificial flower.
  • I place it in a circle table to move around it.
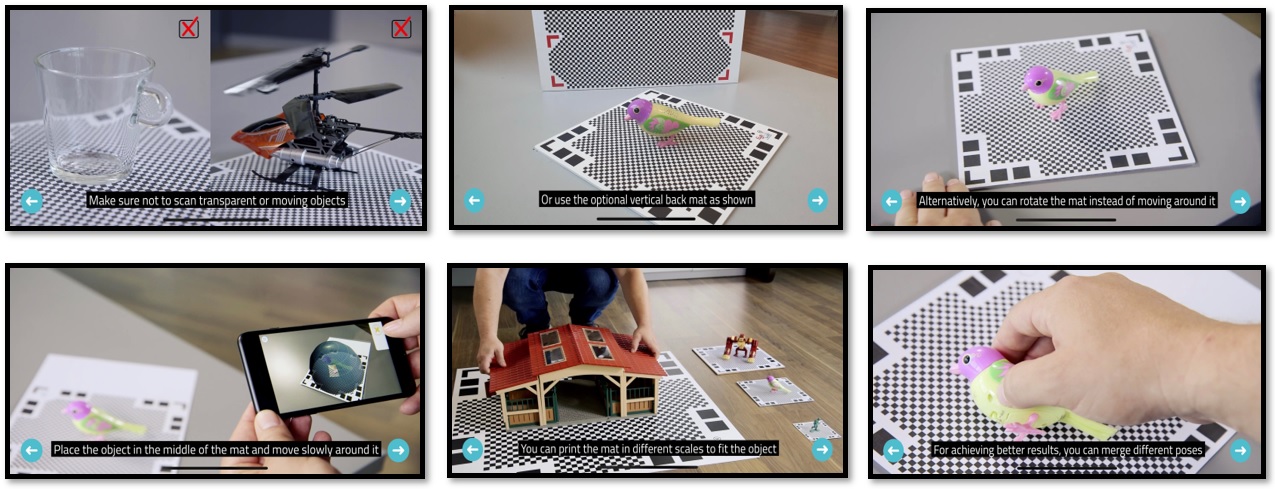
  • Scan the object from all the sides.
  • I placed the artificial flower in the middle of the mat.
  • Then the scanning process which is scan through the augmented reality dome guide me.
  • After the software reorganizes the object then stops scanning automatically.
  • The process is done live in few seconds.
  • The steps of scanning are shown below:

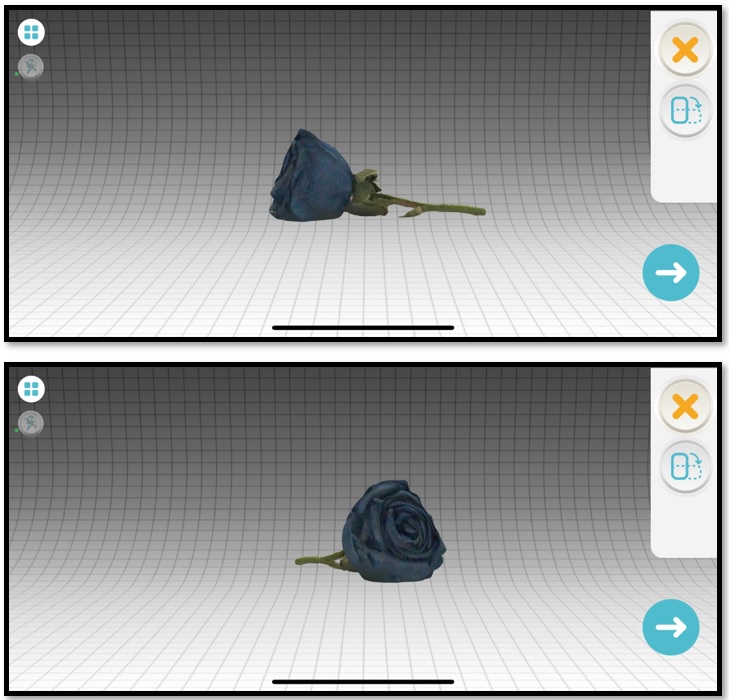
  • I didn’t download a video of the scanned object I only have a picture.
  • The artificial flower 3D scanned shown below:
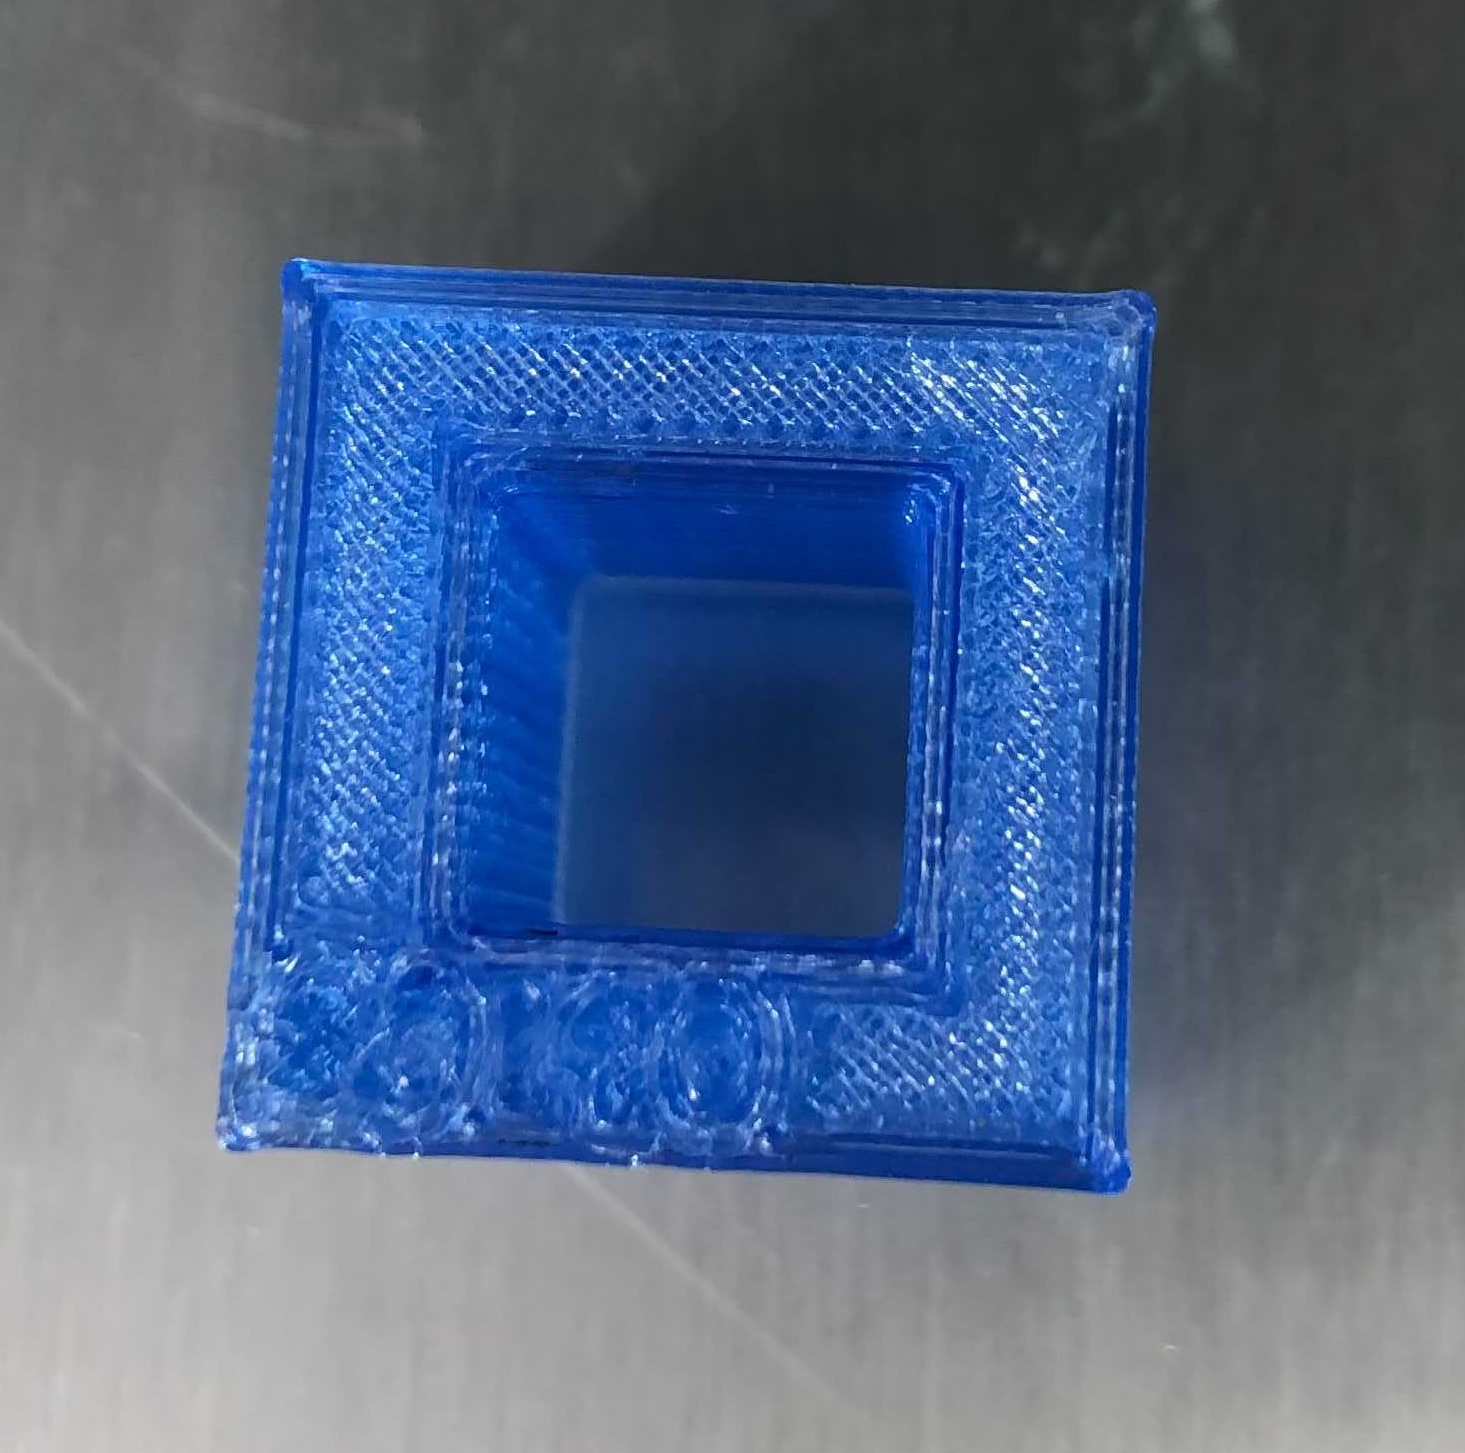
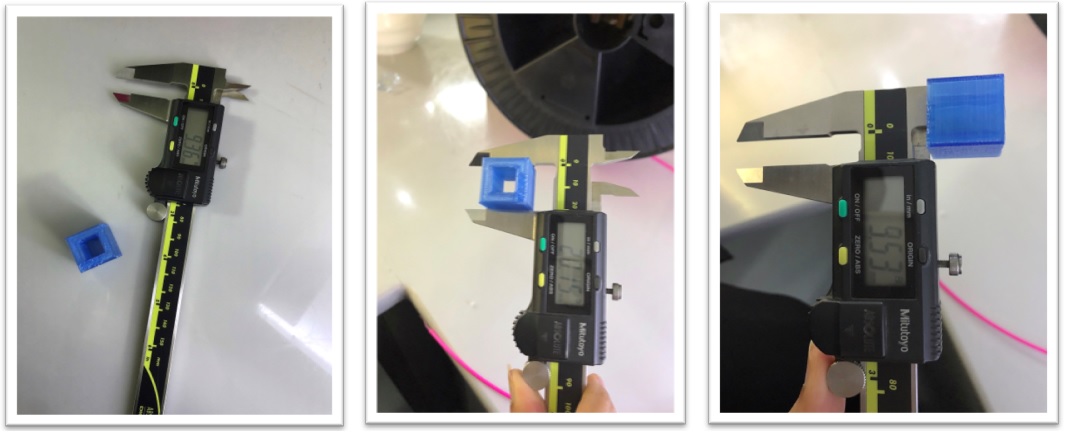
    Dimensions test

  • To know how exactly the printer is printing, I print calibration cubes in 3d printing the printed model dimension may look different from the real design.
  • I downloaded the cube stl file from the fabacademy page
  • I used the slicing software Cura to prepare the file.
  • I didn’t spent a lot of time to print so I adjust the settings as follow:
  • The printing duration took almost 21 minutes
  • The Result between the original and printed model :

  • I use caliper to measurement the cube.
  • The result of print was the external width of the printed model was 20.15mm which is 15mm difference from the original design.
  • The internal width is 9.53mm of the printed model which is -0.47mm difference from the original design.
  • As it shown the quality of the numbers are bad and not obviously visible.
  • _______________________________________________________________________

    Please find the attached files:
    Files Link
    Cube Dimension - Ultimaker Cura
    Lambshade - Fusion 360
    Lampshade - Ultimaker Cura

    Previous Next