Molding and casting
Assignment:
Group assignment:
- Review the safety data sheets for each of your molding and casting materials, then make and compare test casts with each of them.
Individual assignment
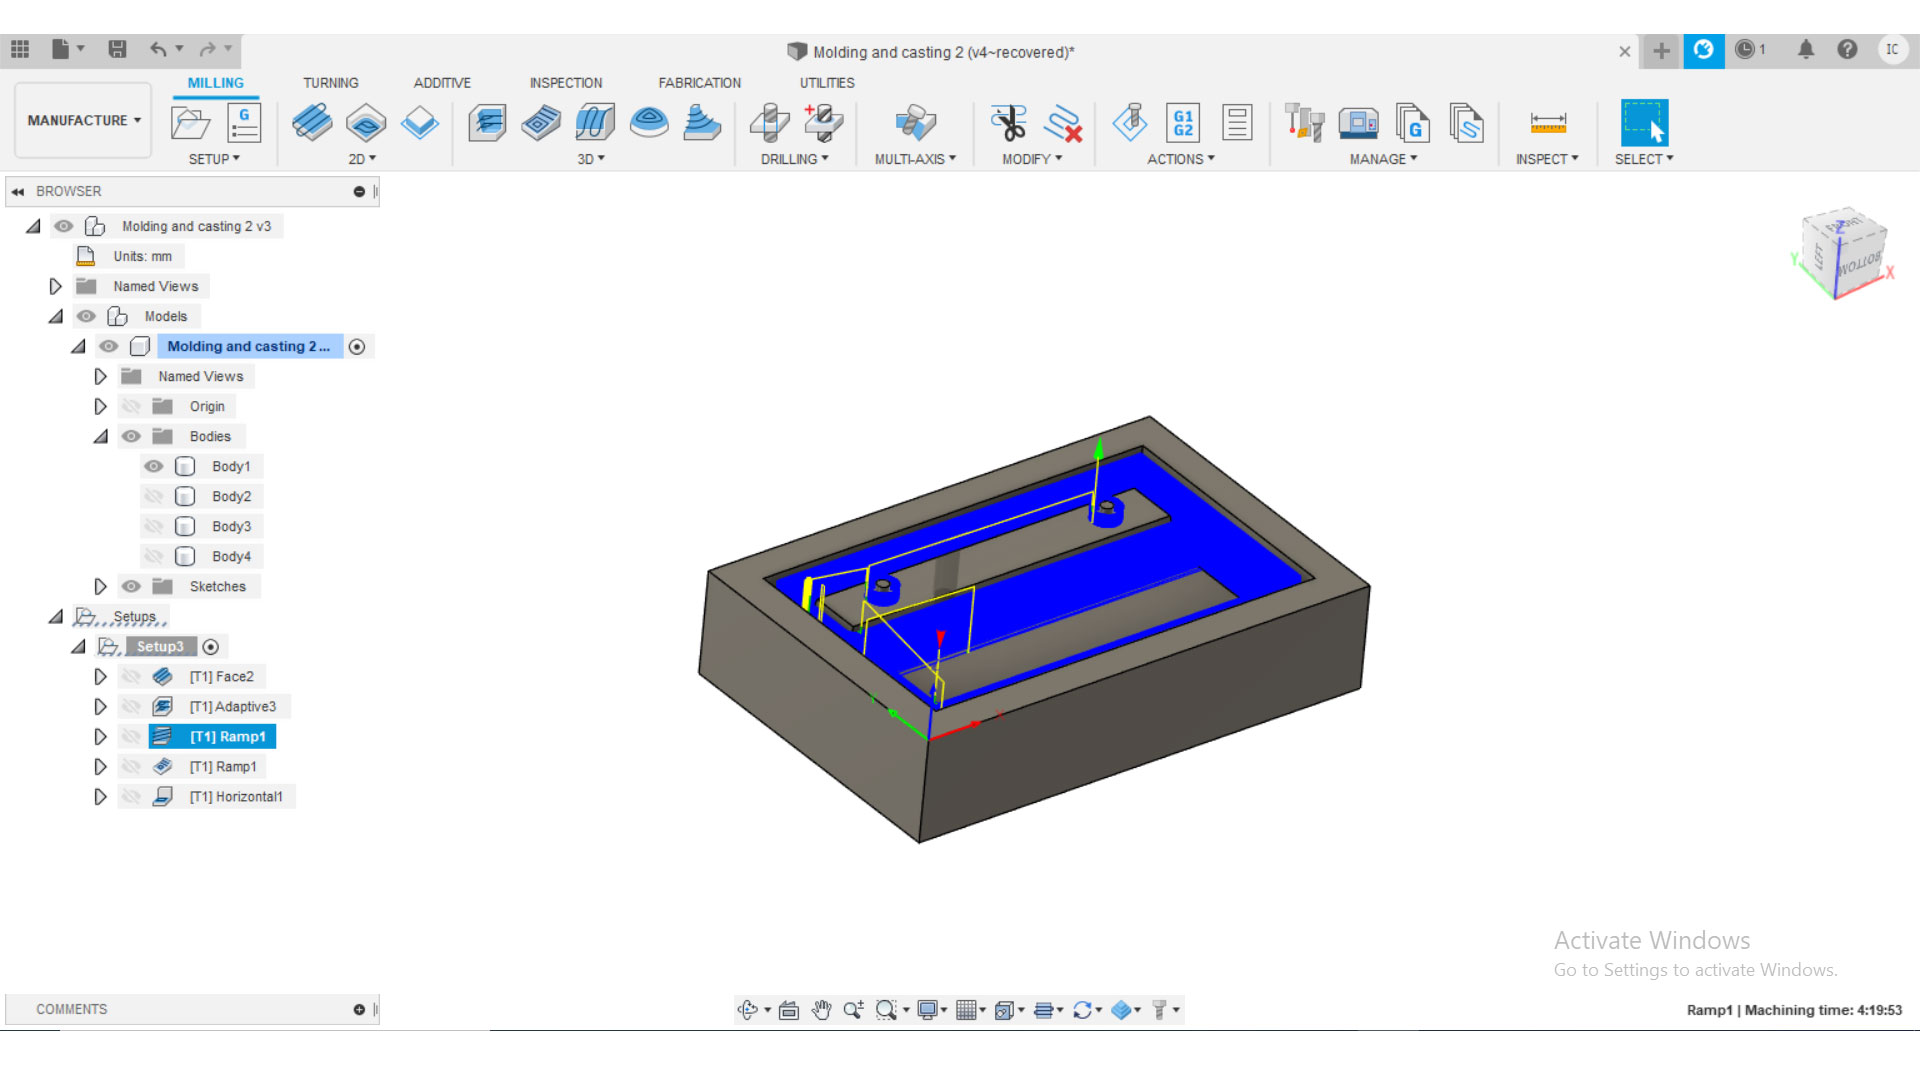
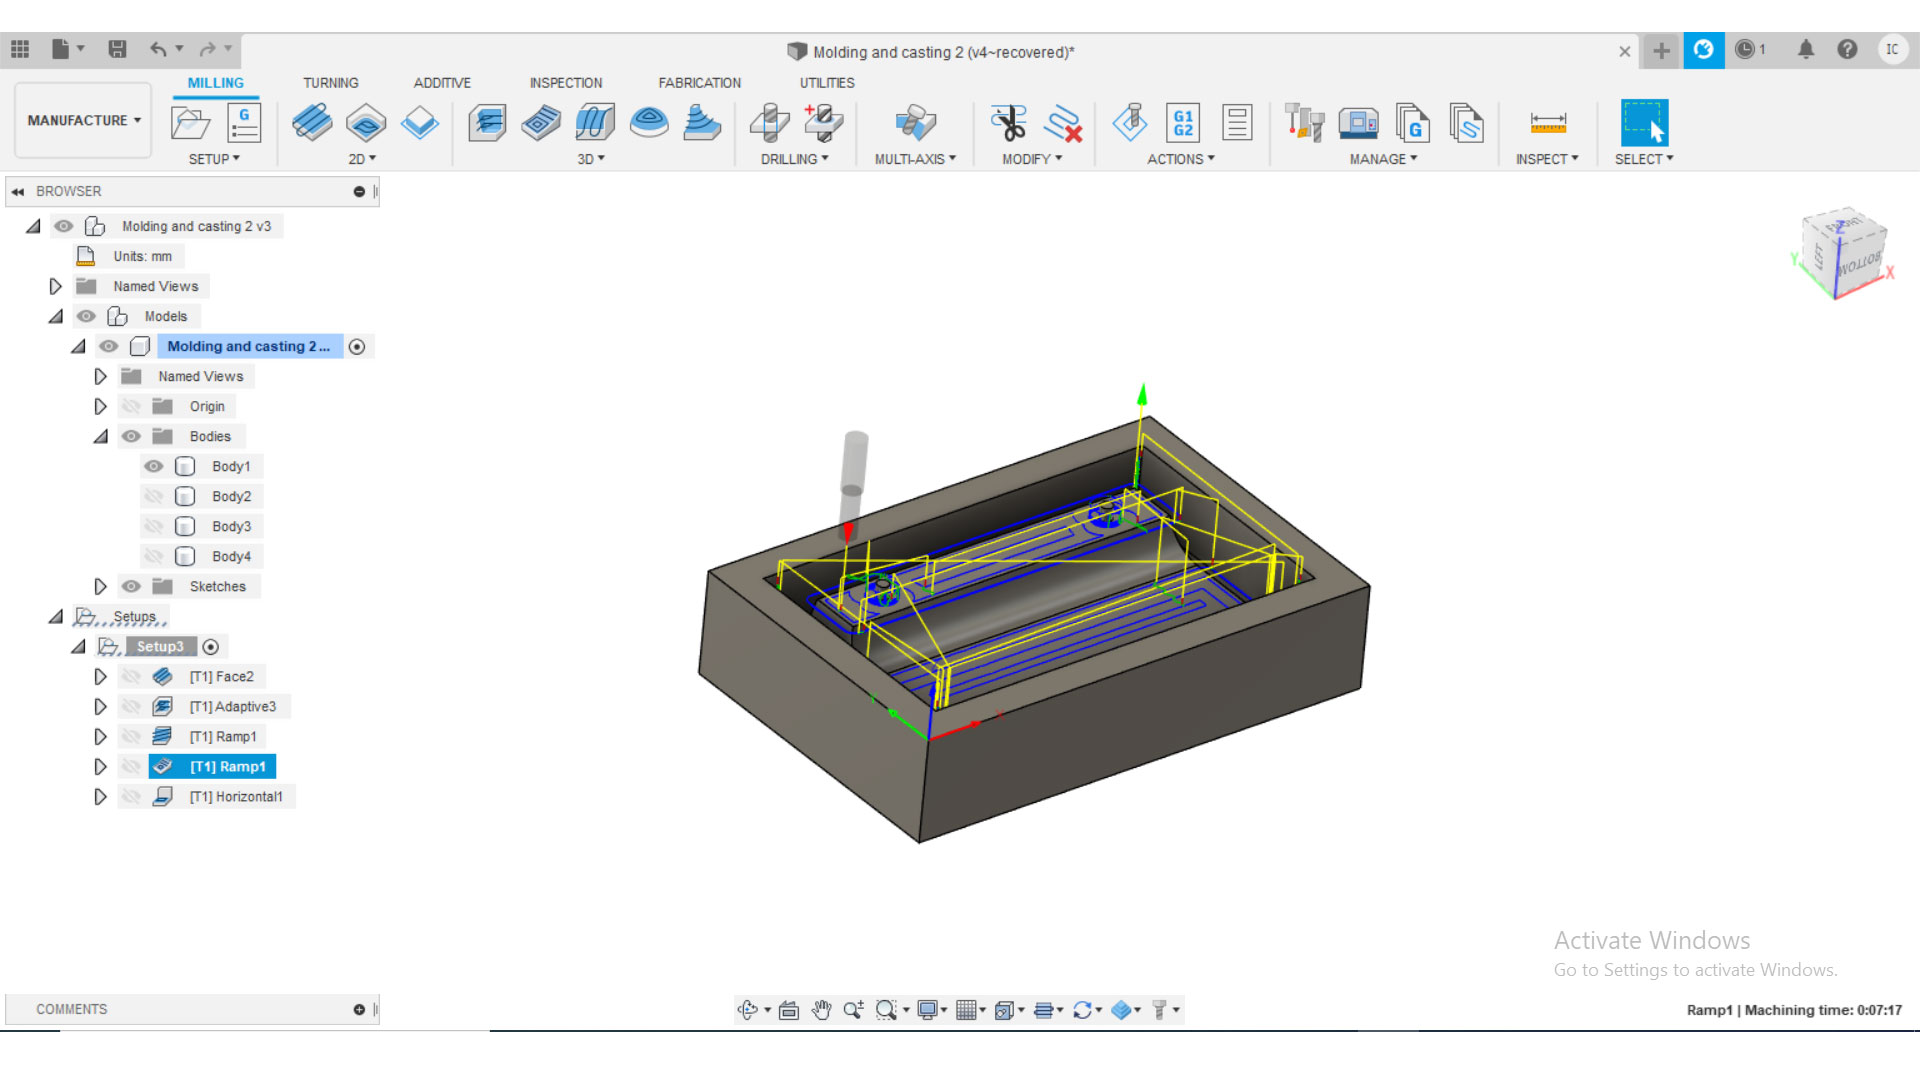
Design a mold around the stock and tooling that you'll be using, mill it (rough cut + (at least) three-axis finish cut), and use it to cast parts.
Assignment:
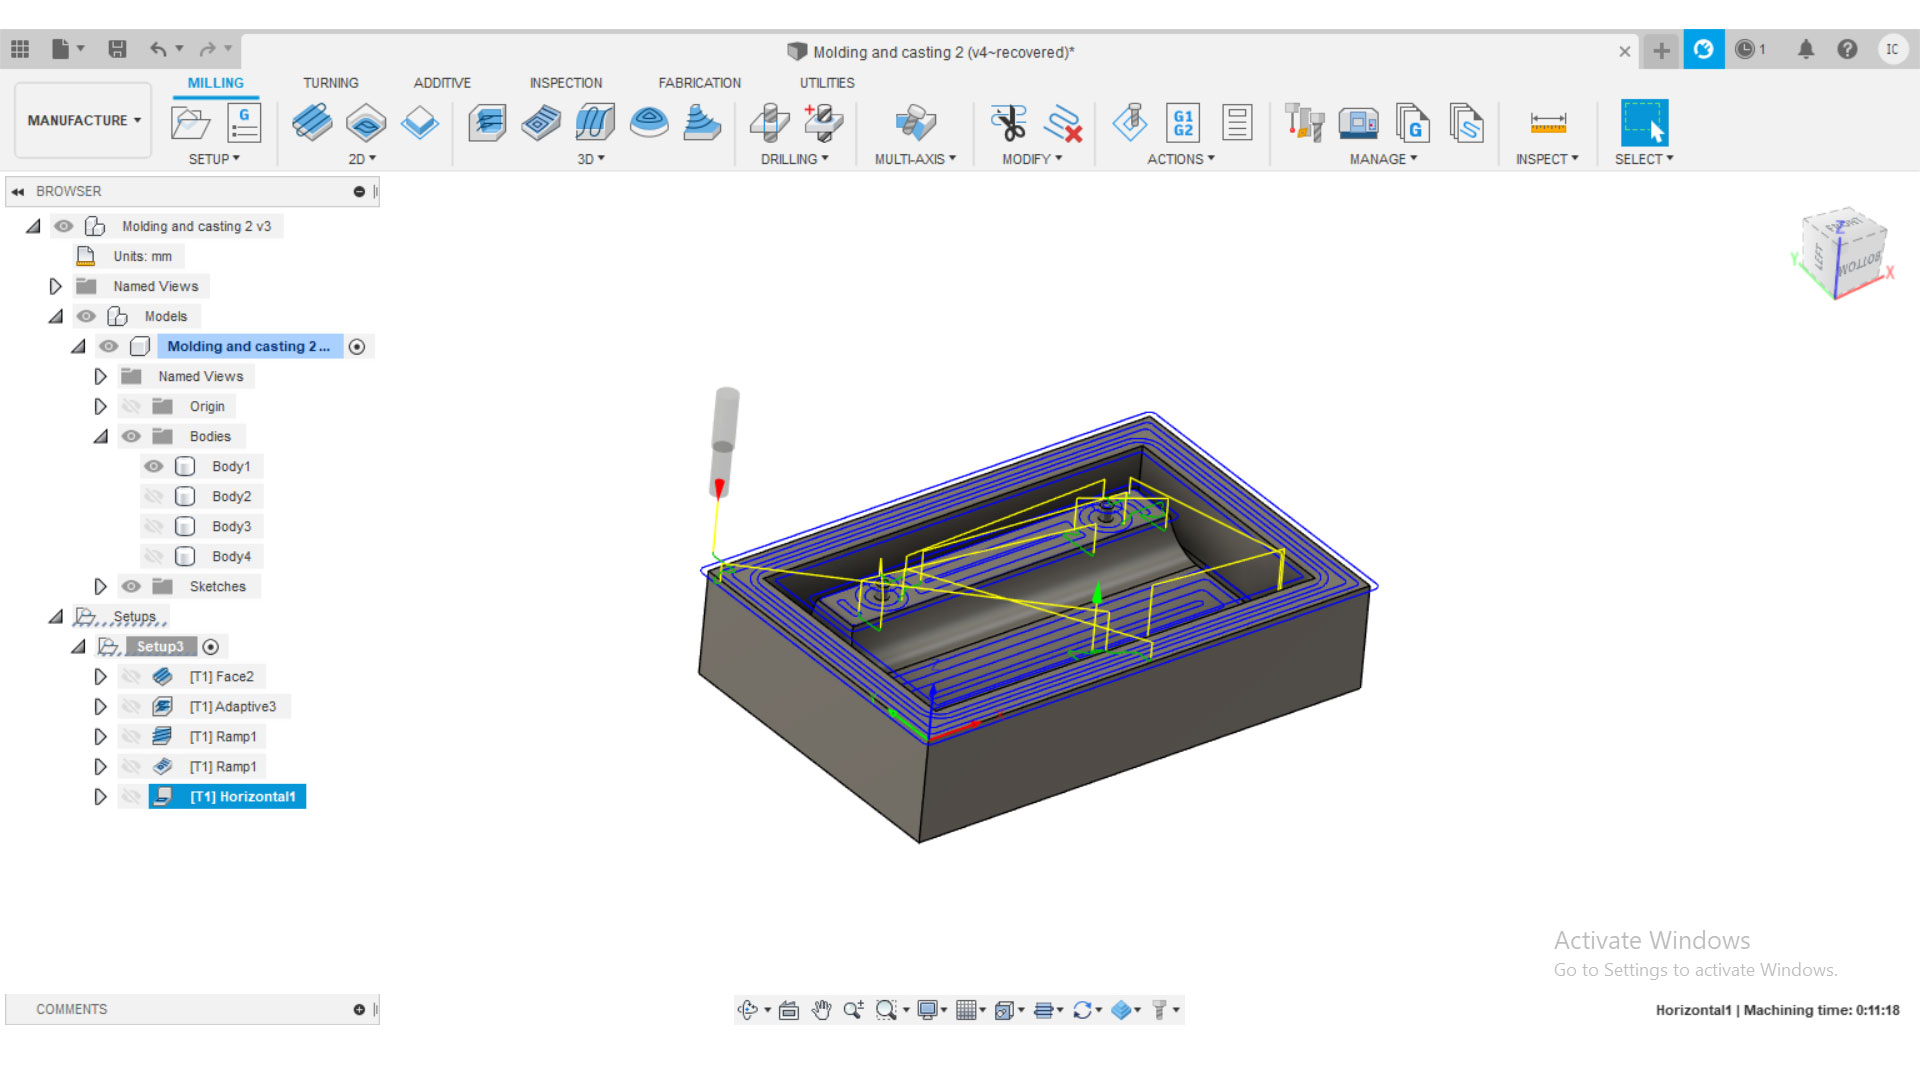
I wanted to design handles for my kicthen cabinet, I used autodesk fusion to design the mold, and to generate the G-code.
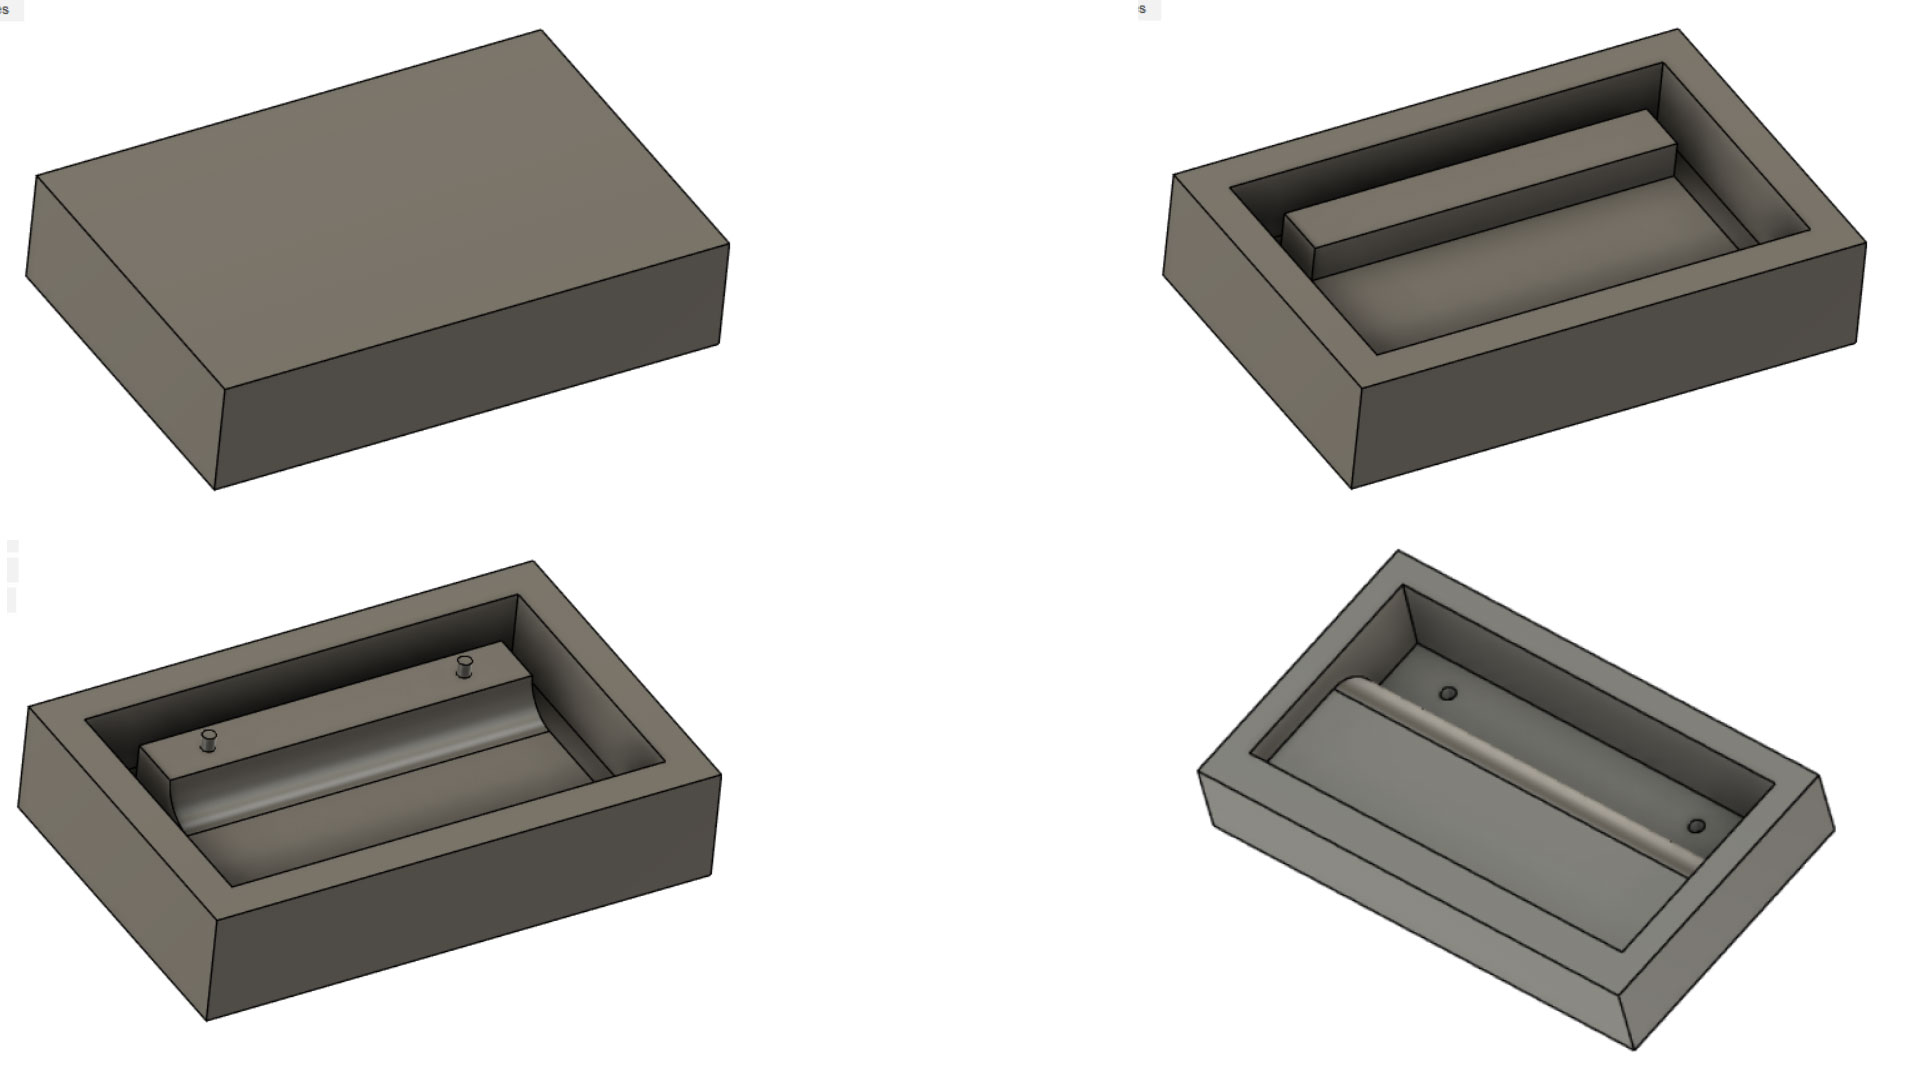
I started first by designing the block, and then making the shape of the handle, I made the sides of the handle chamfered so that the milling bit dosen't hit it's sholder while going down inside the block. I also created two holes to place bolts inside the handle.
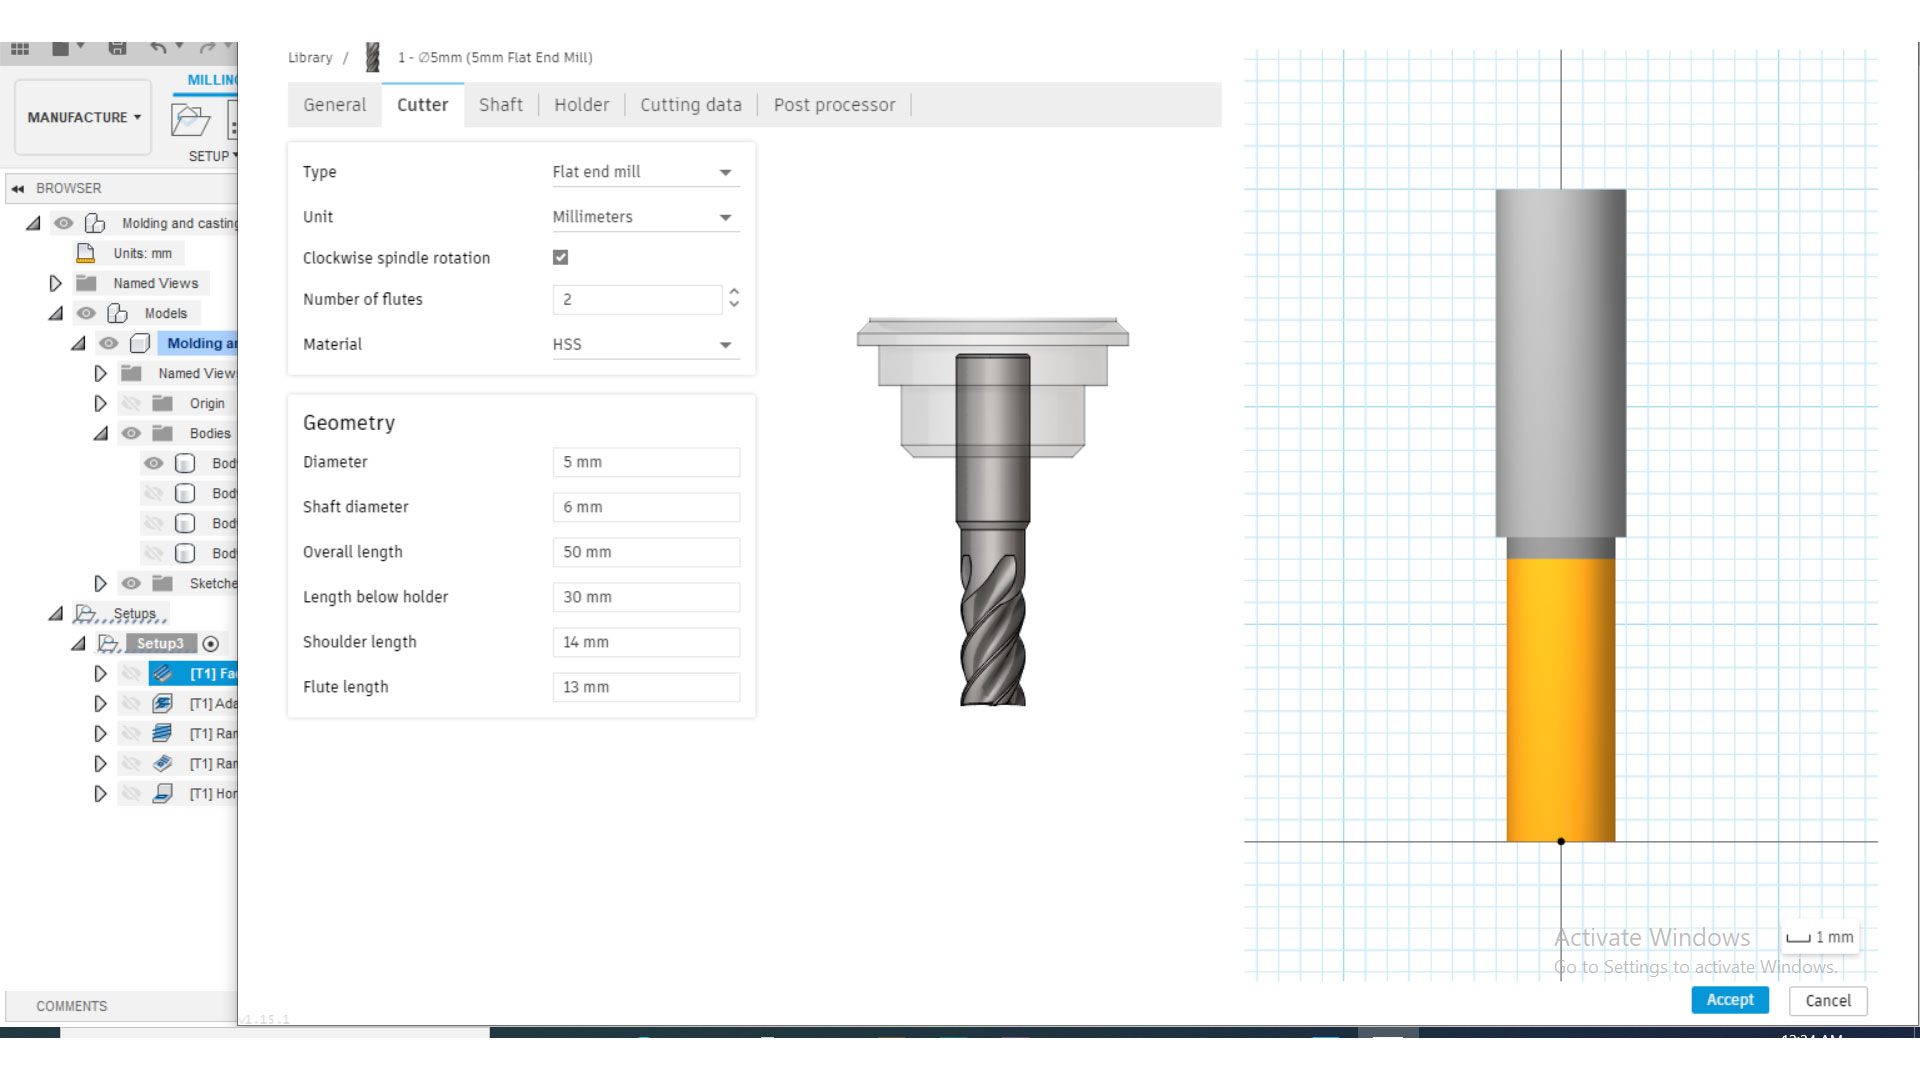
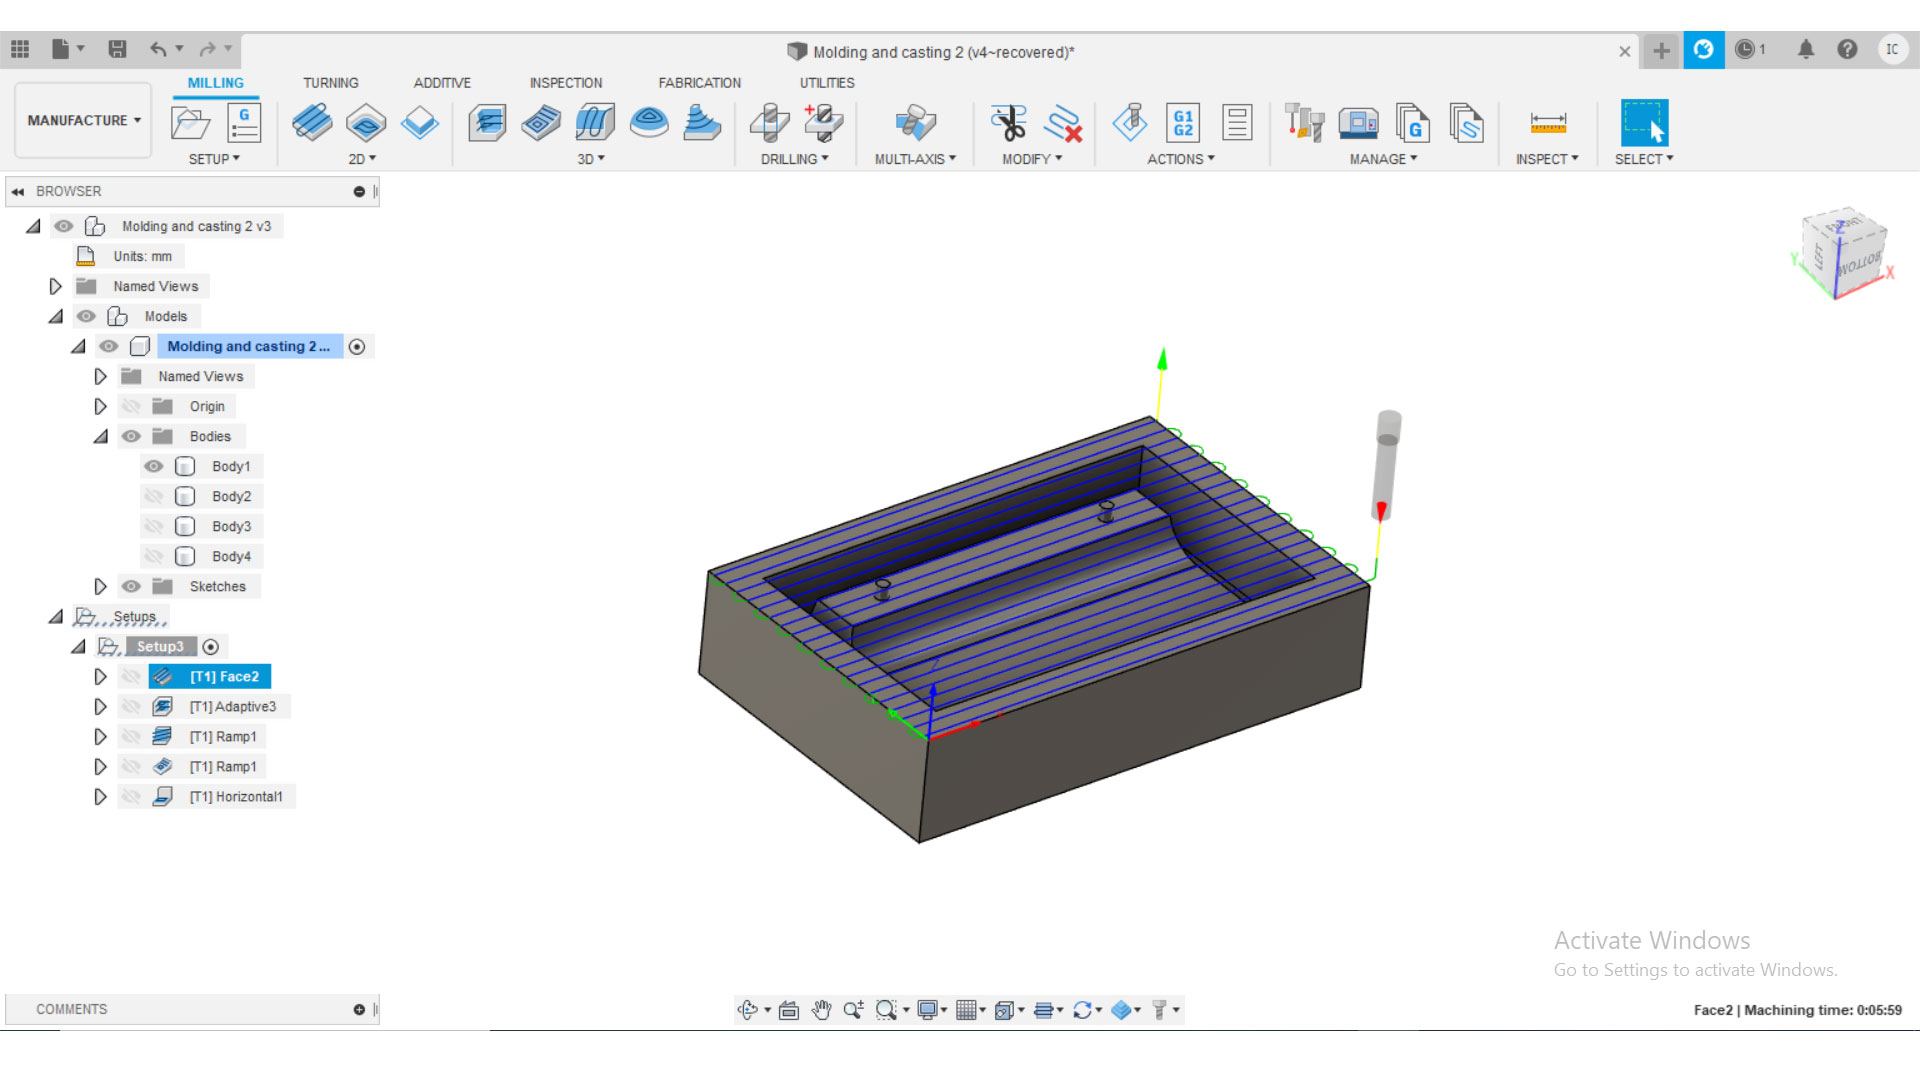
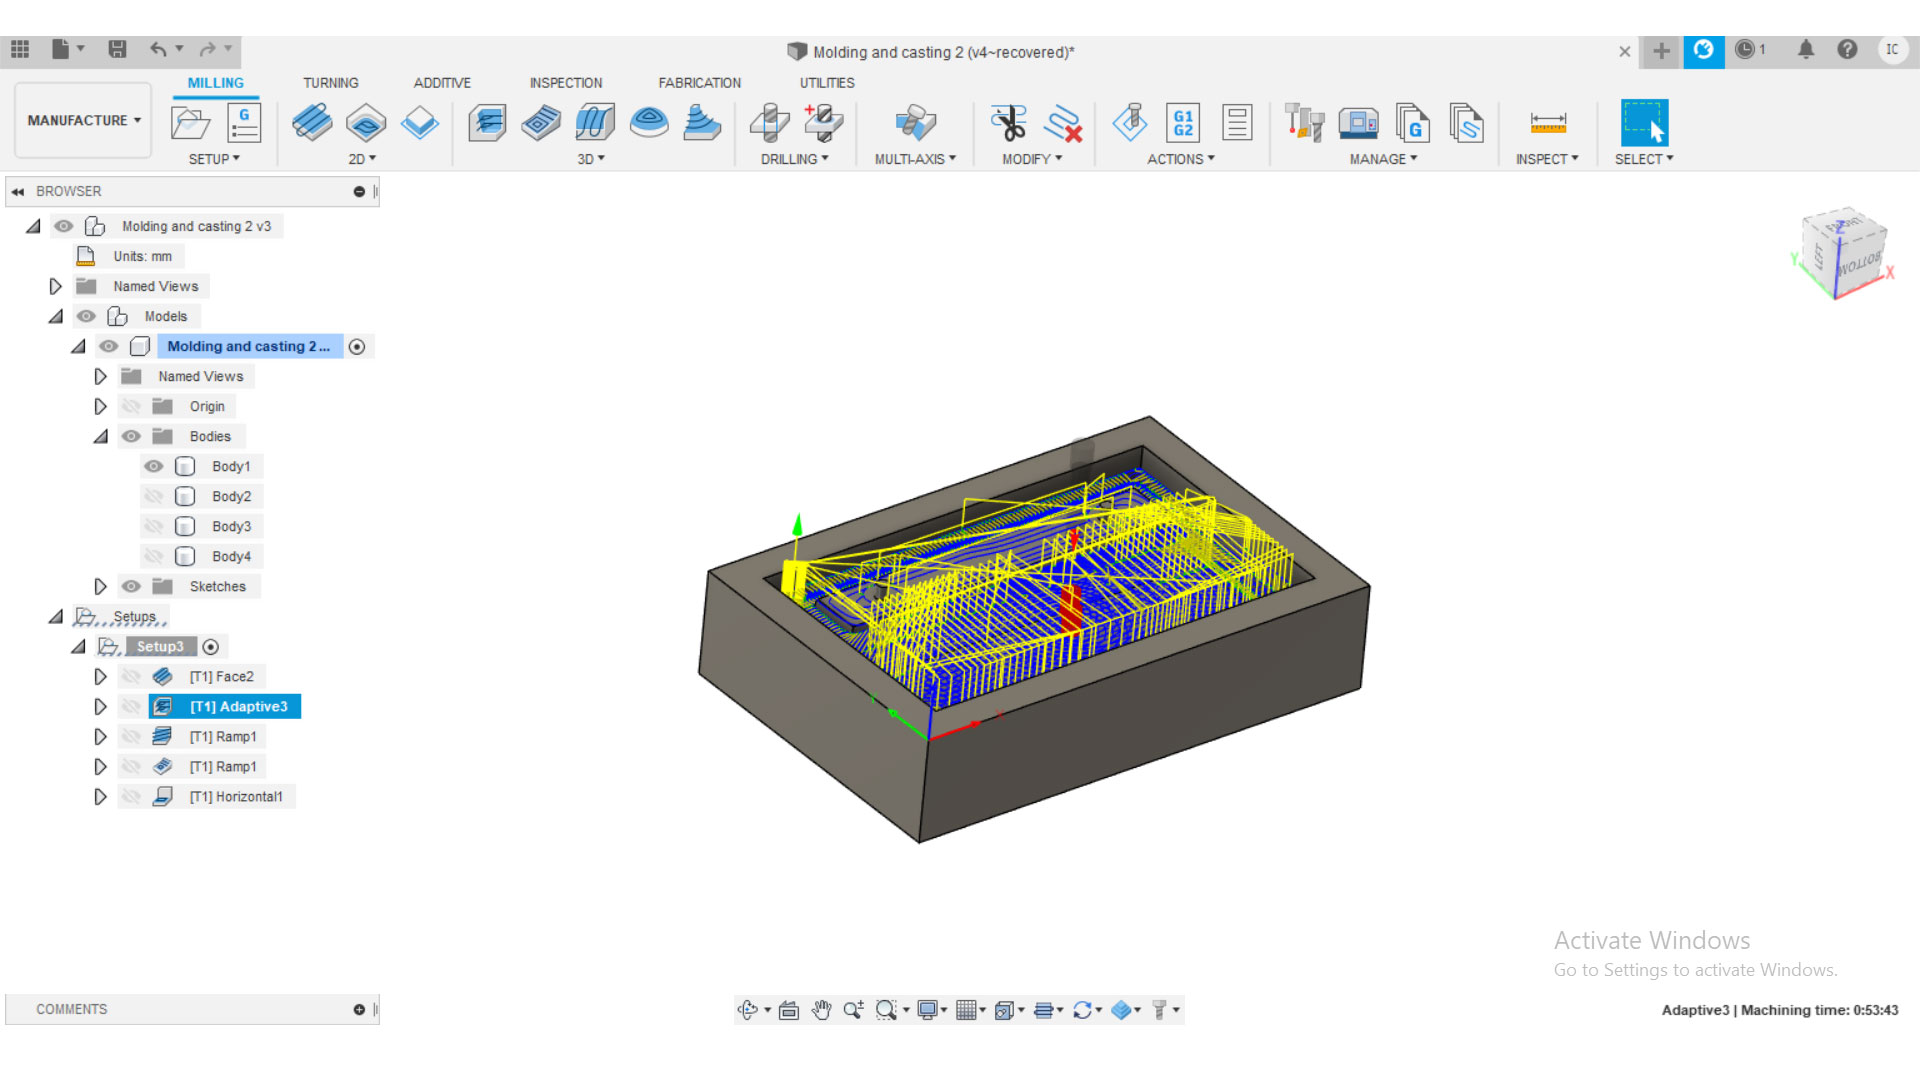
To generate the milling paths, I first had to include in fusion the bits that will be used to mill the wax block, since this design is simple, it could all be millied using a 5mm flat endmill.
To add a new bit to fusion, go to tool library > Local > Add new bit.
I opened the datasheet of the bit, and i measured the dimentions of the bit to add the variables.
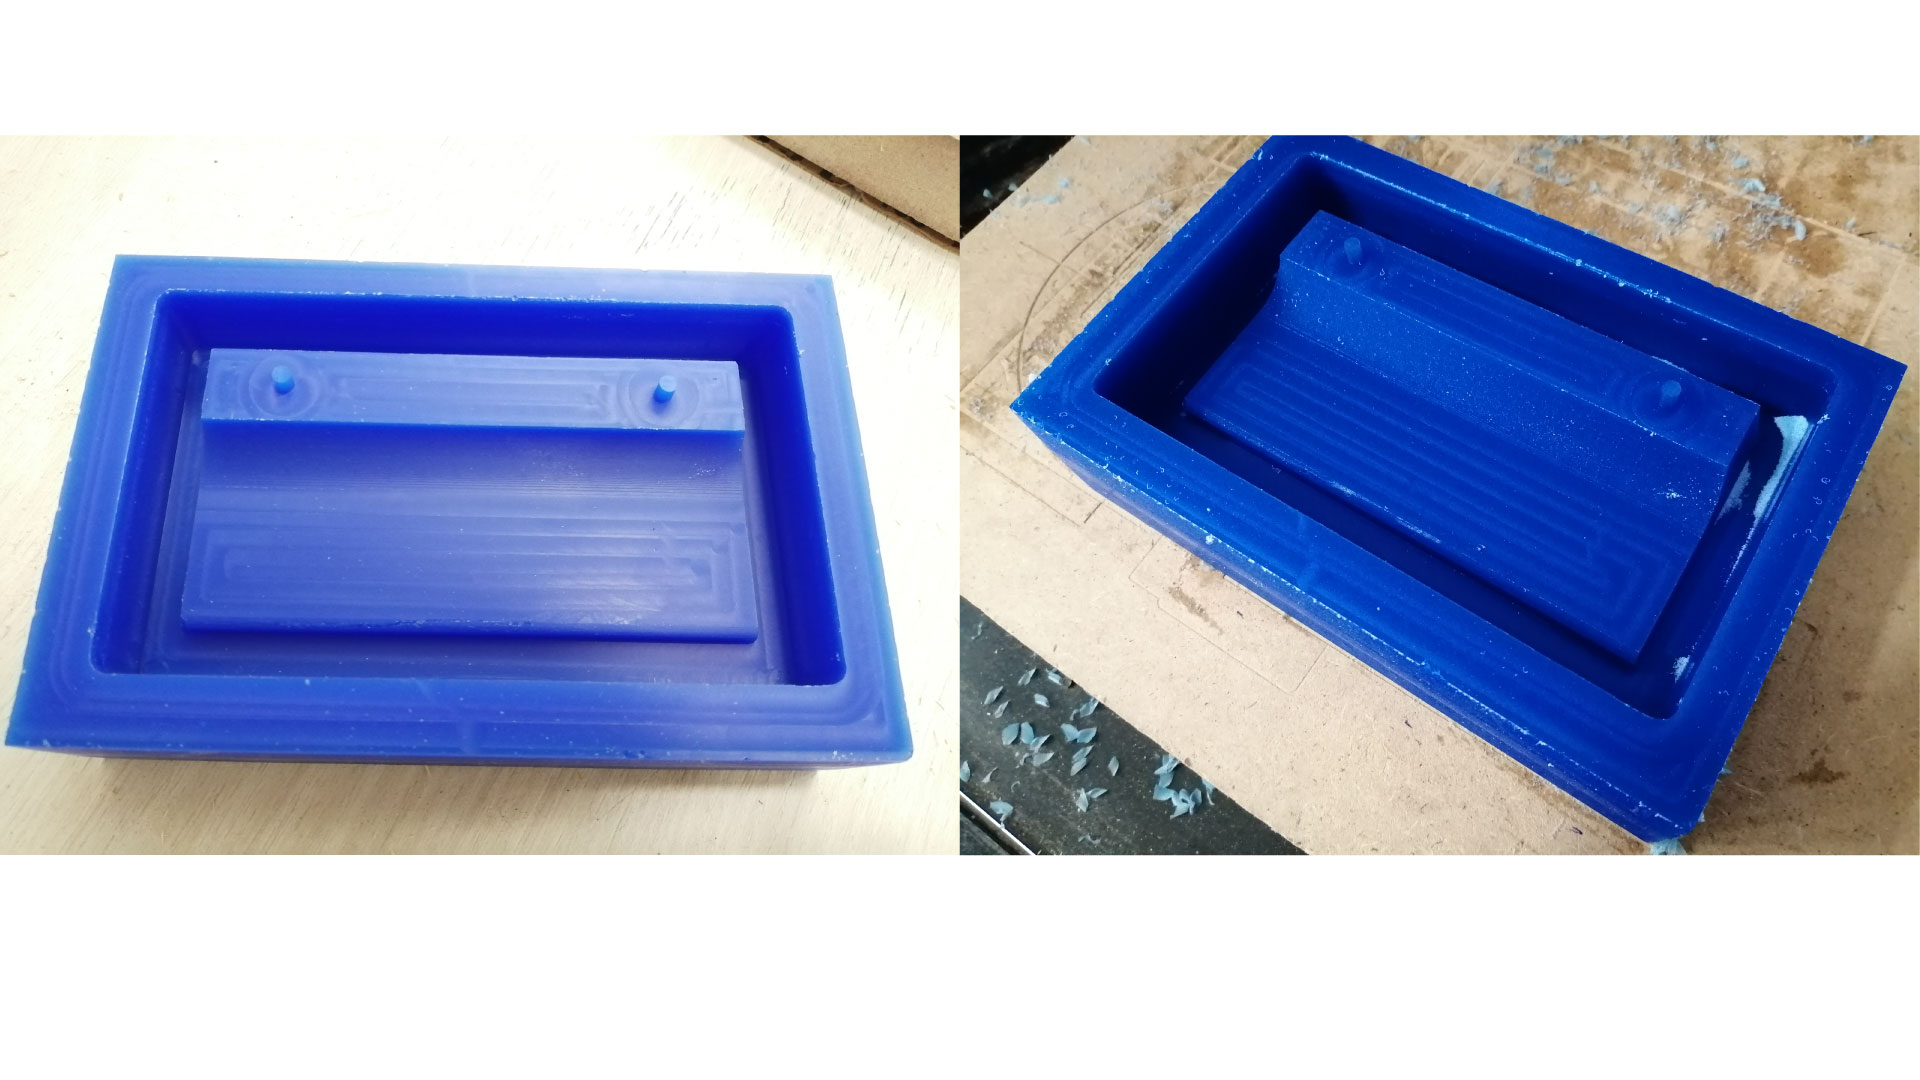
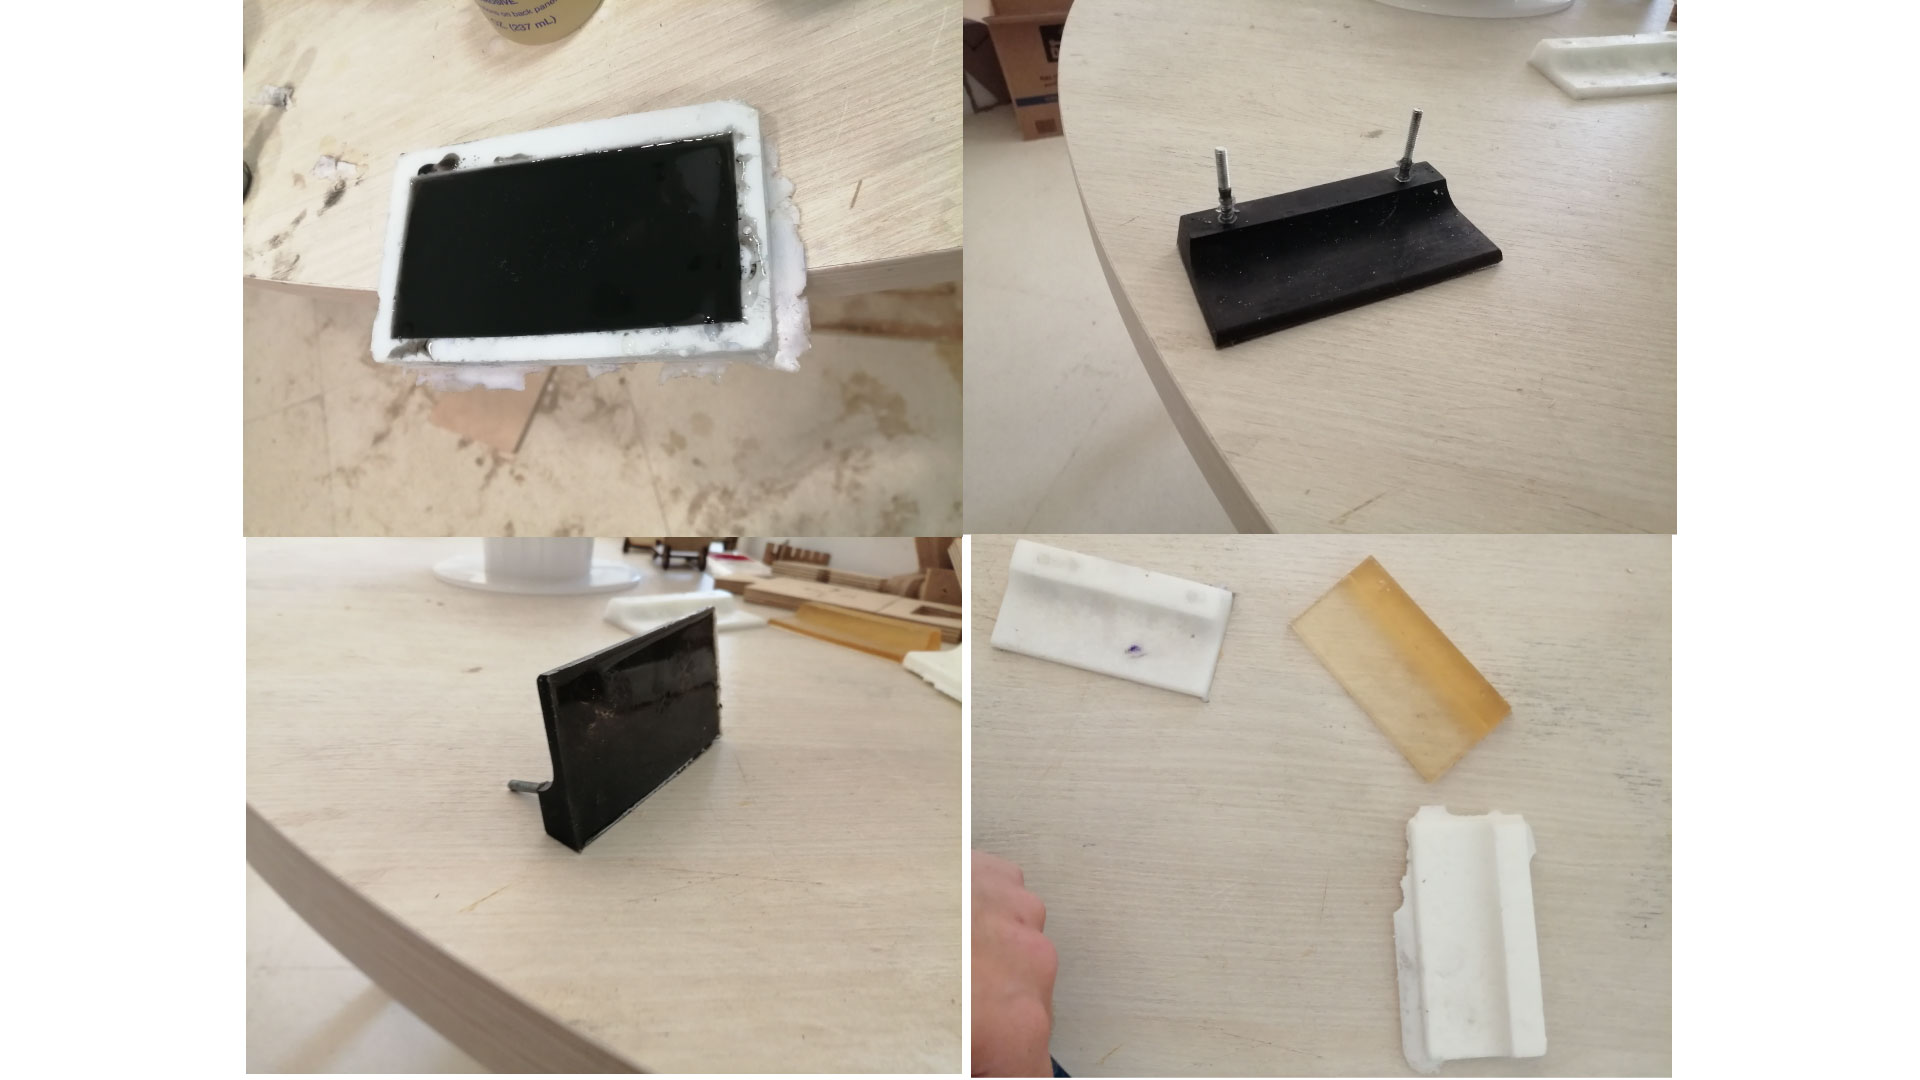
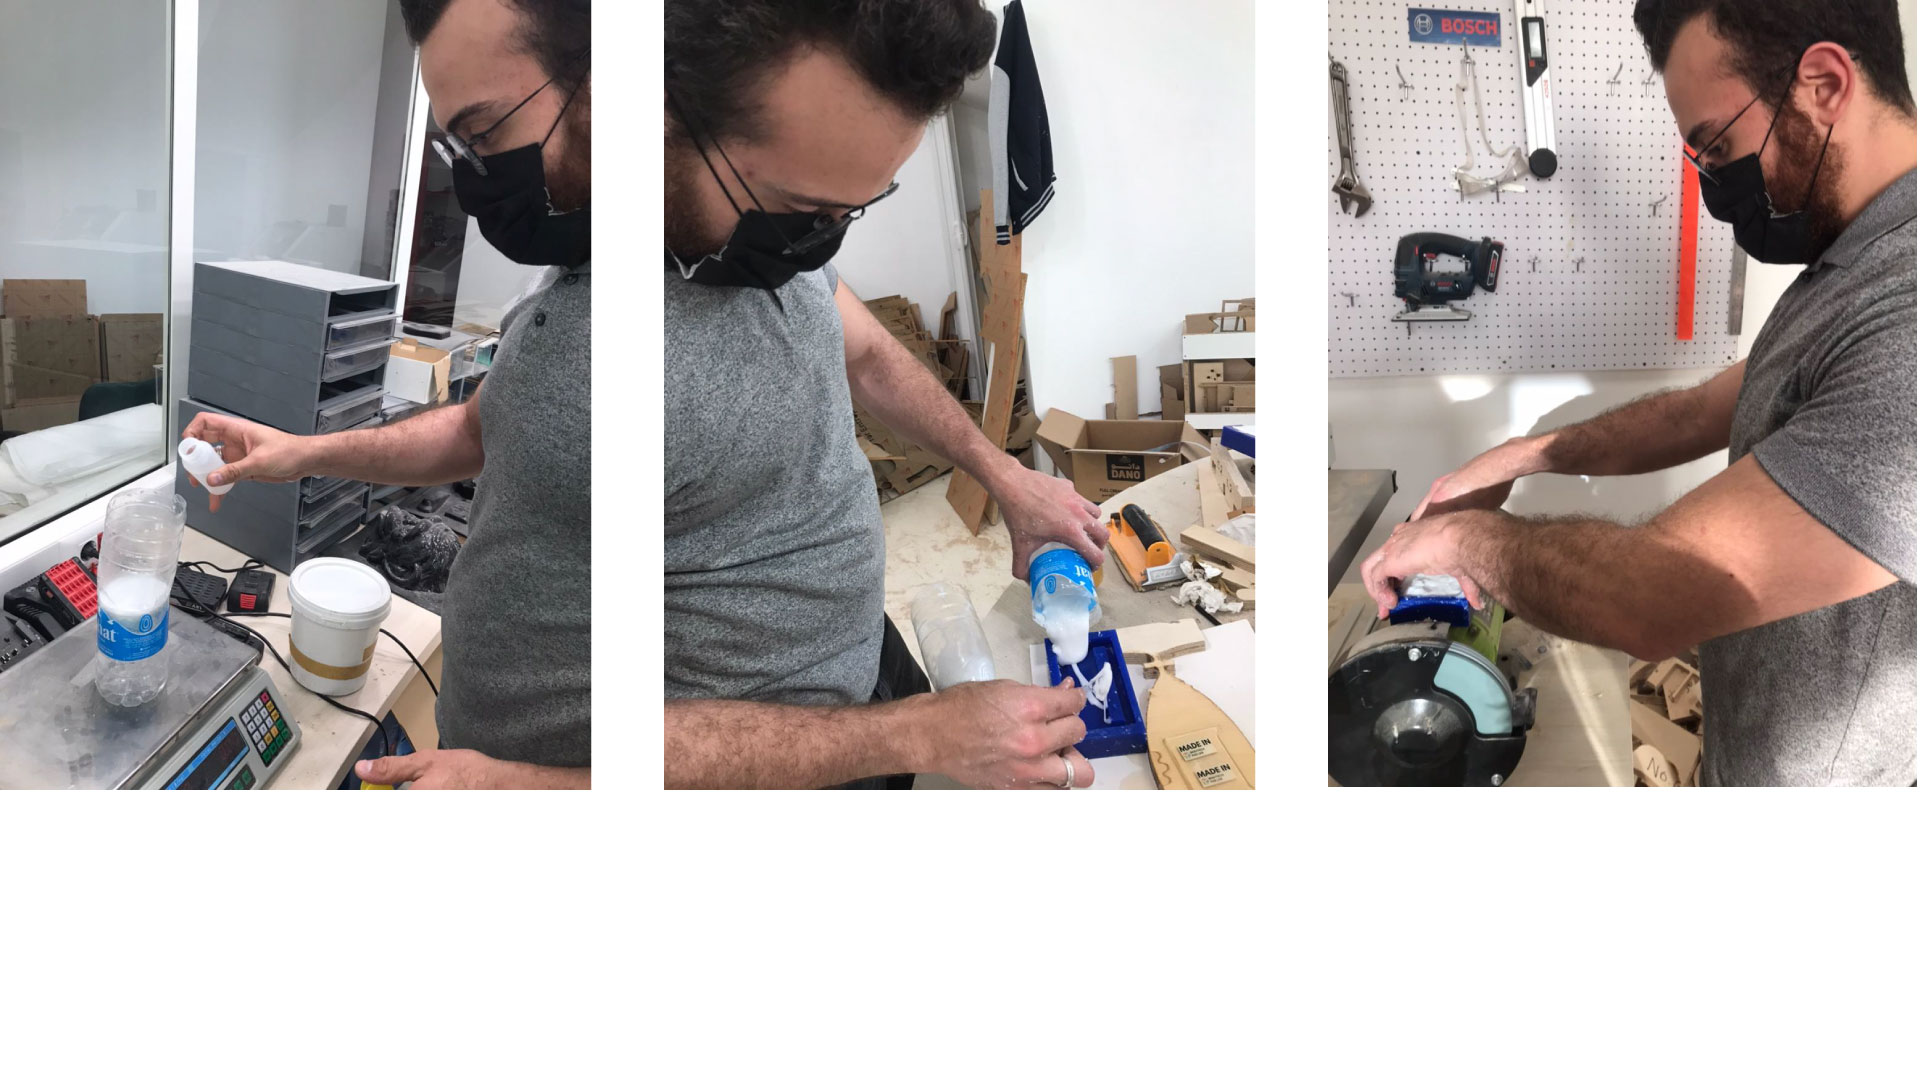
So, after milling the wax block, I poured scilicone in it to make my mold.
I placed my wax mold with the silicone poured in it on top of the sanding machine to remove the air bubbles using vibration.
The scilicone mold turned out very clean and smooth from the inside.

Then, I poured resin with a mixing rate of 1:1 in the scilicone mold, placed two bolts in the mold, and used vibration to remove air bubbles.
I wanted my handle to be black, so I added coloring to the clear resin
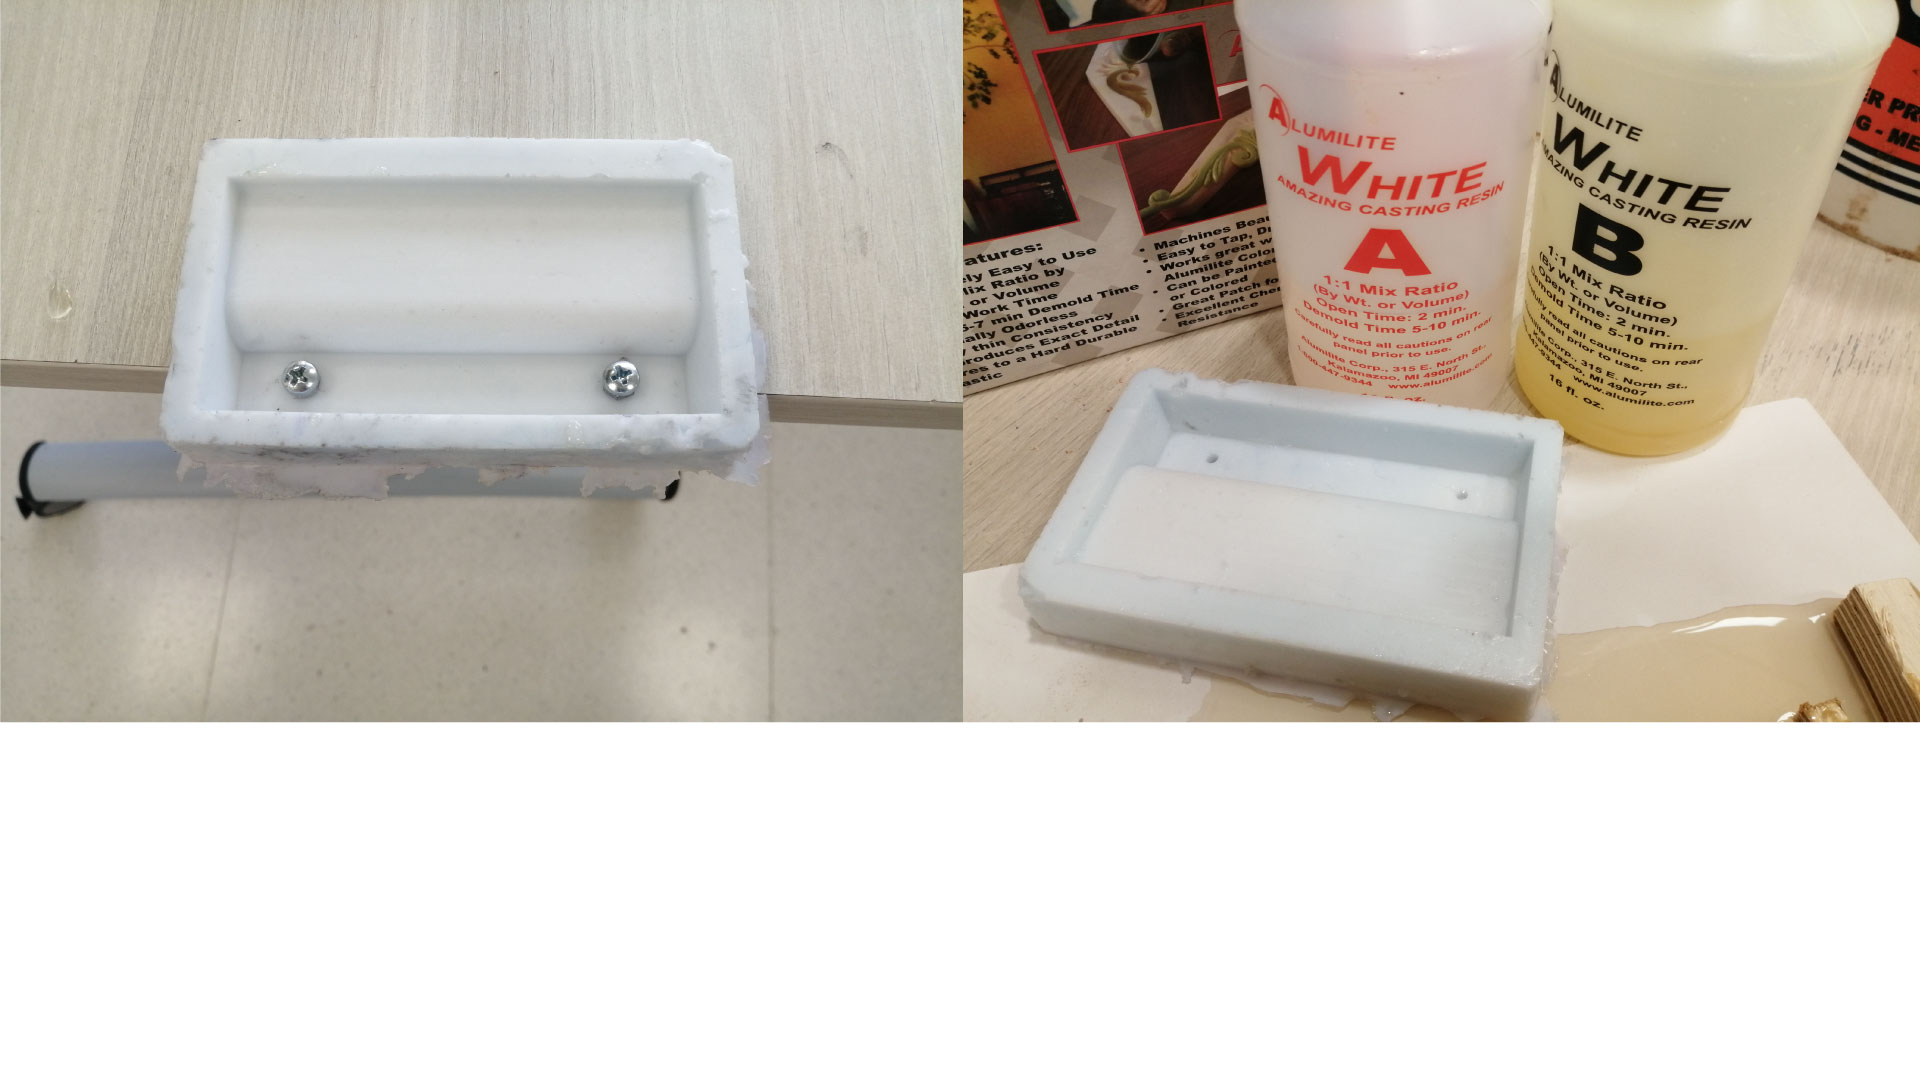
one of my trials failed probably due to wrong mixing rate.