Reading the Attiny 1614 Data Sheet
when I started to read the datasheet, I realized that it has 598 pages... that is vast, OMG.
For sure I was not going to have enough time to read the whole document.
For that reason, I looked for a tutorial that would help me to focus on the main and most important parts of that geeky novel.
1- Define our Microcontroller board: Attiny 1614
2- Look for it in google and open the data sheet.
3- At the early beginining we can see some information
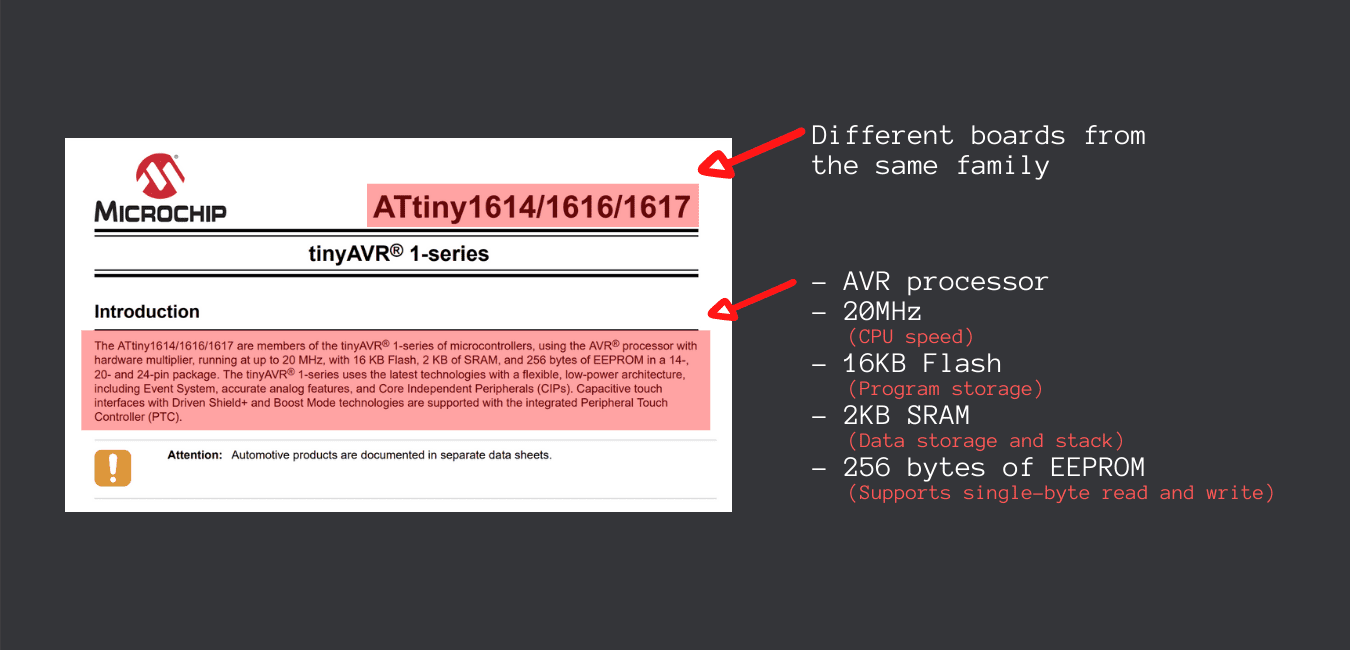
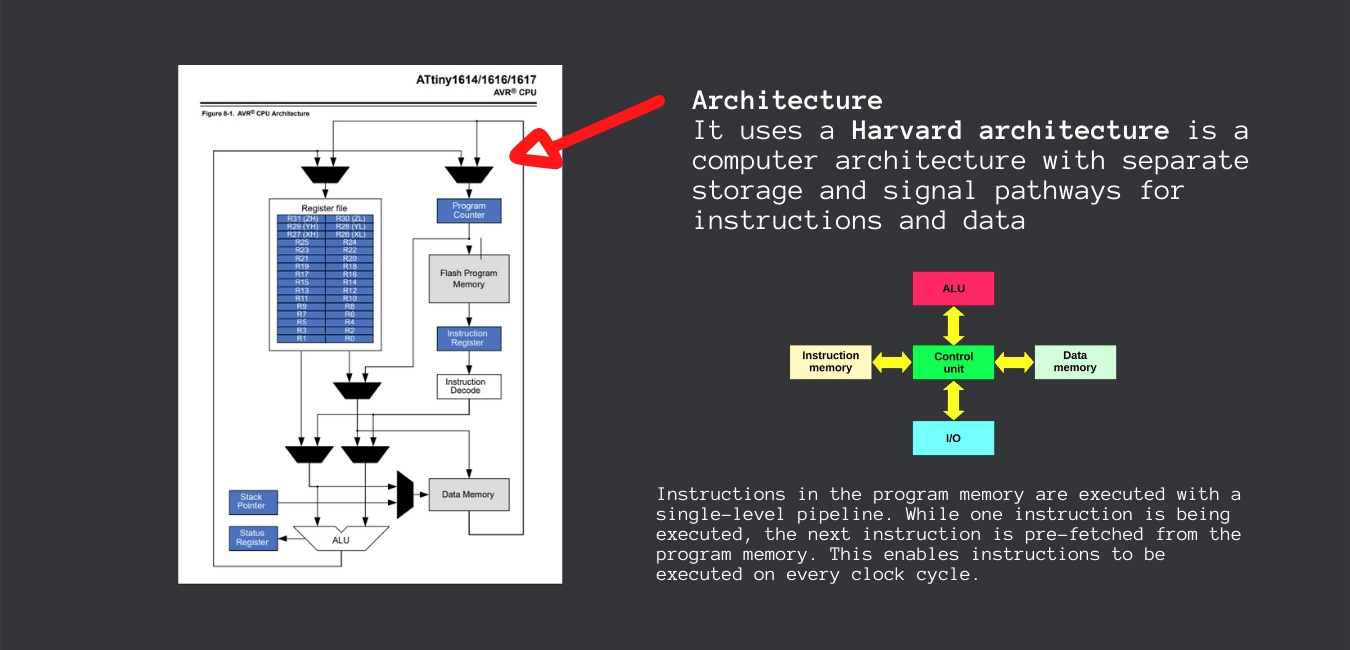
4- Witch architecture does it have?
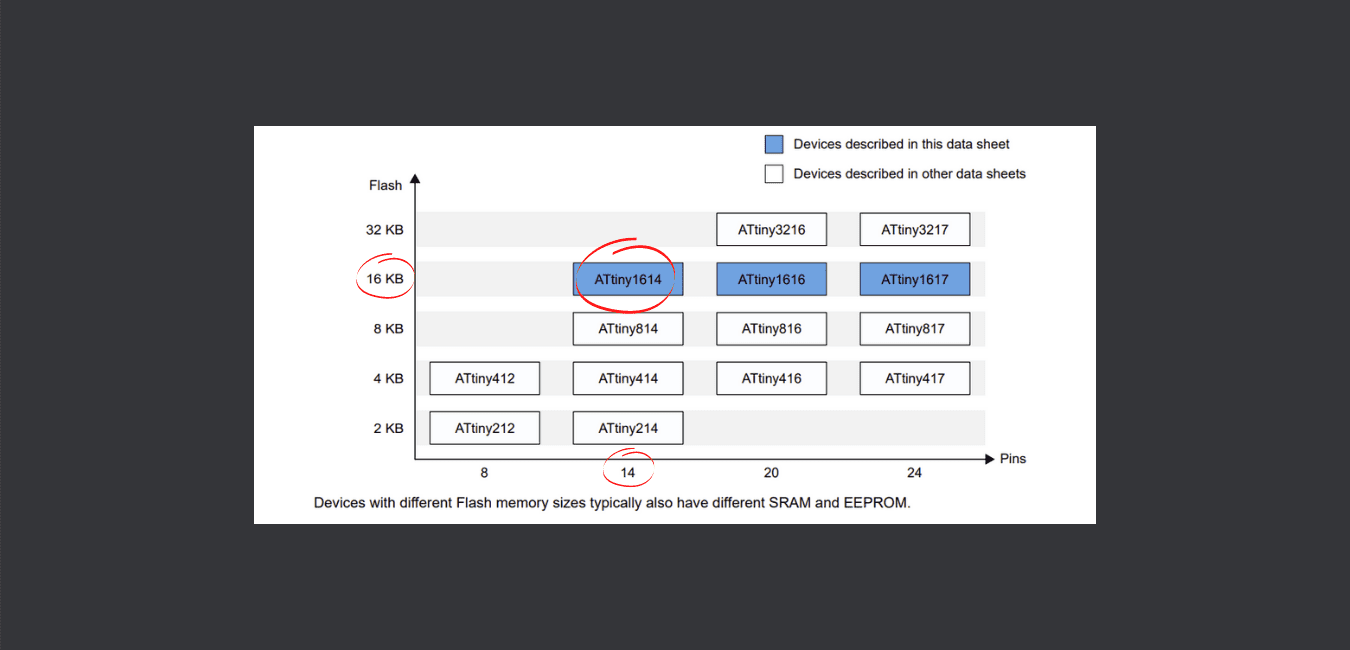
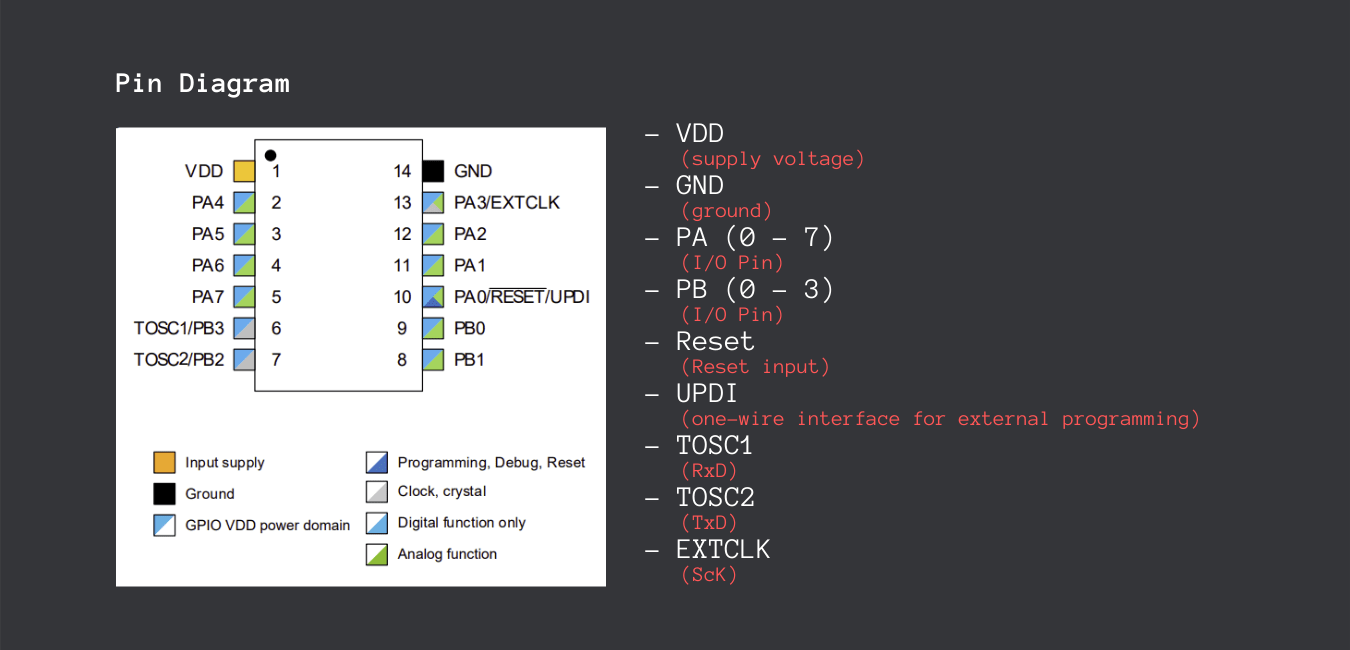
5- Witch pins does it have?
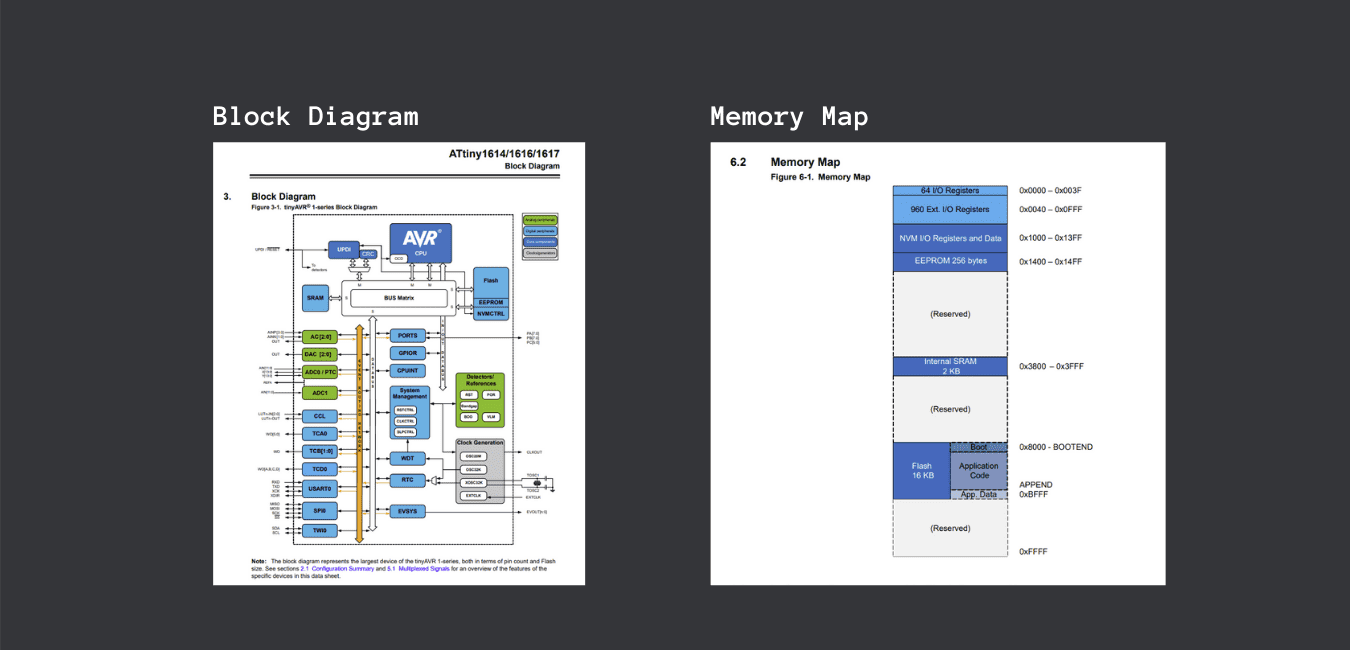
6- Block Diagram and Memory Map
Reviewing all this basic information give me an idea about how the ATTINY 1614 works, was designed and also the limitations that it has.
On the other hand the Data sheet also shows some configuration options and codes that will be very usefull.
embedded Programing
During this week we will had to program in different ways the PCB that we create during th 6th week.
PRE-ASIGNMENT
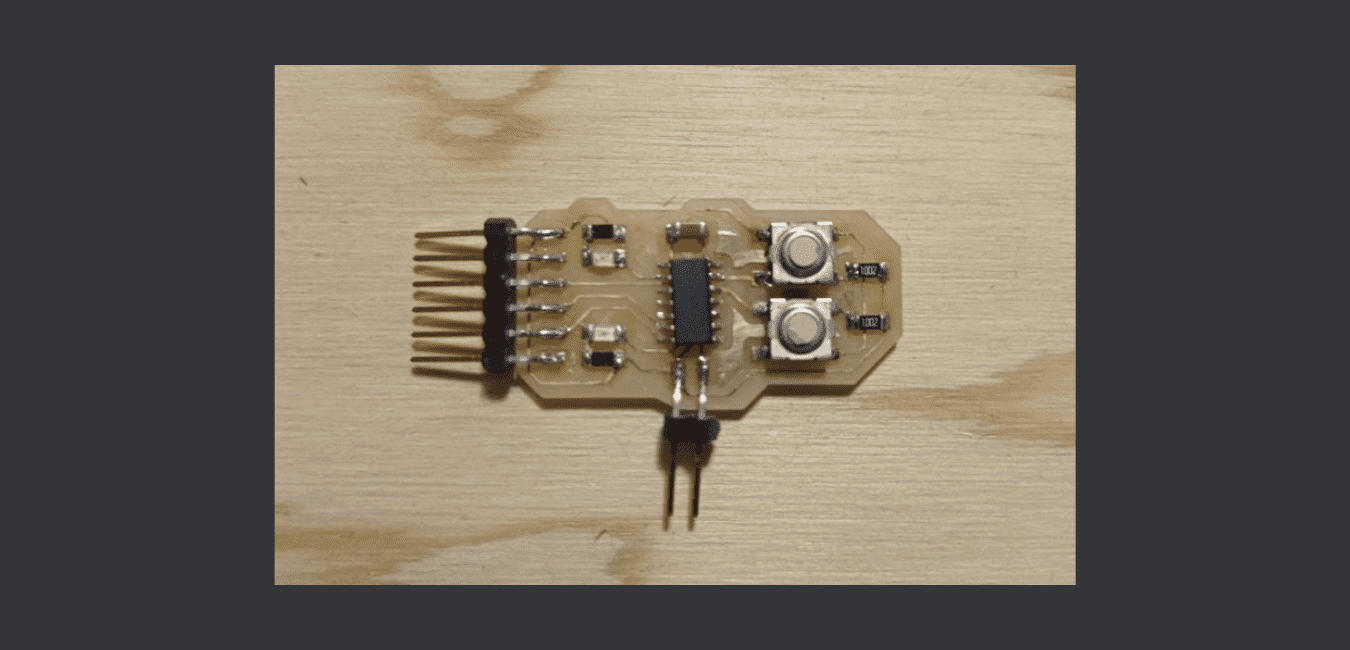
After checking the PCB that I made during the 6th week I realized that it was not well conected, for that reason I neded to Make a new PCB for this assignment.
I'm explaining all the process of the remaking in the 6th week page.
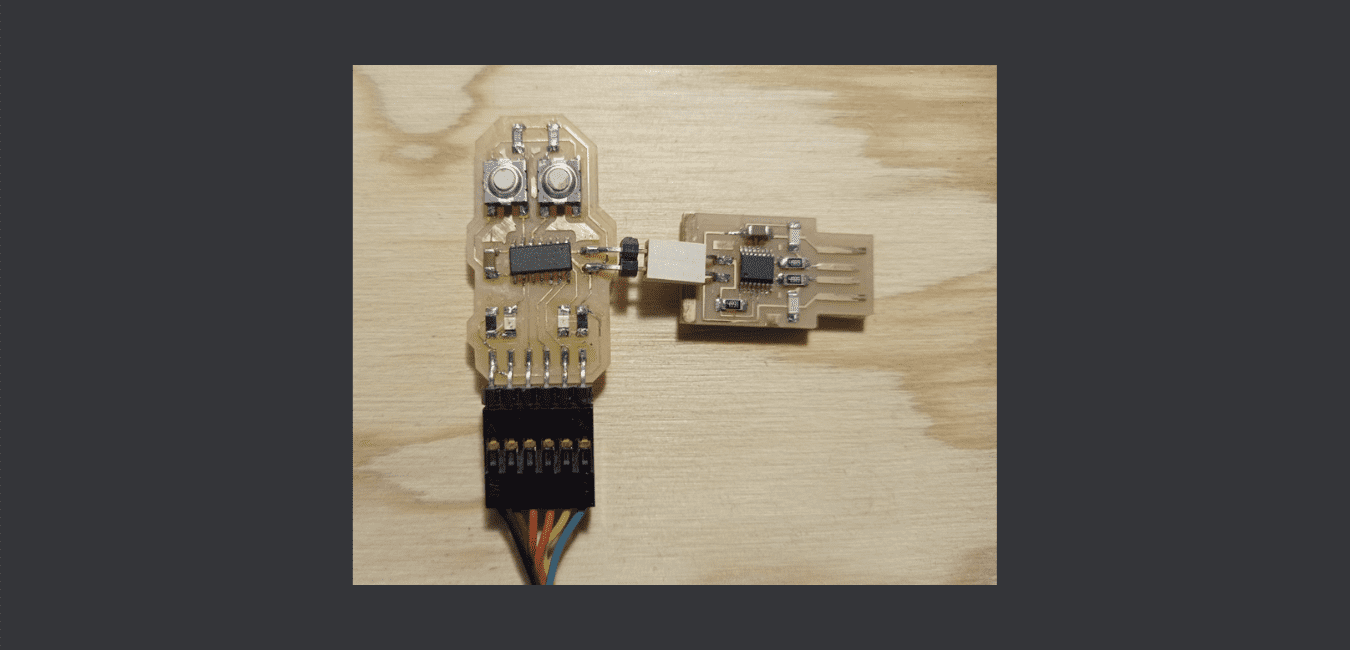
CONNECT THE BOARD TO THE PC
Now, I have my new board ready to bé connected to my PC
To connect it to the PC, I'll use a USB-FTDI cable for ground and power and a USB-FT230XS-UPDI for Programing
For programing the Attiny1614 in windowa with arduino I've took a look at Adrianino page of Adrian torres.
The steps are very well defined:
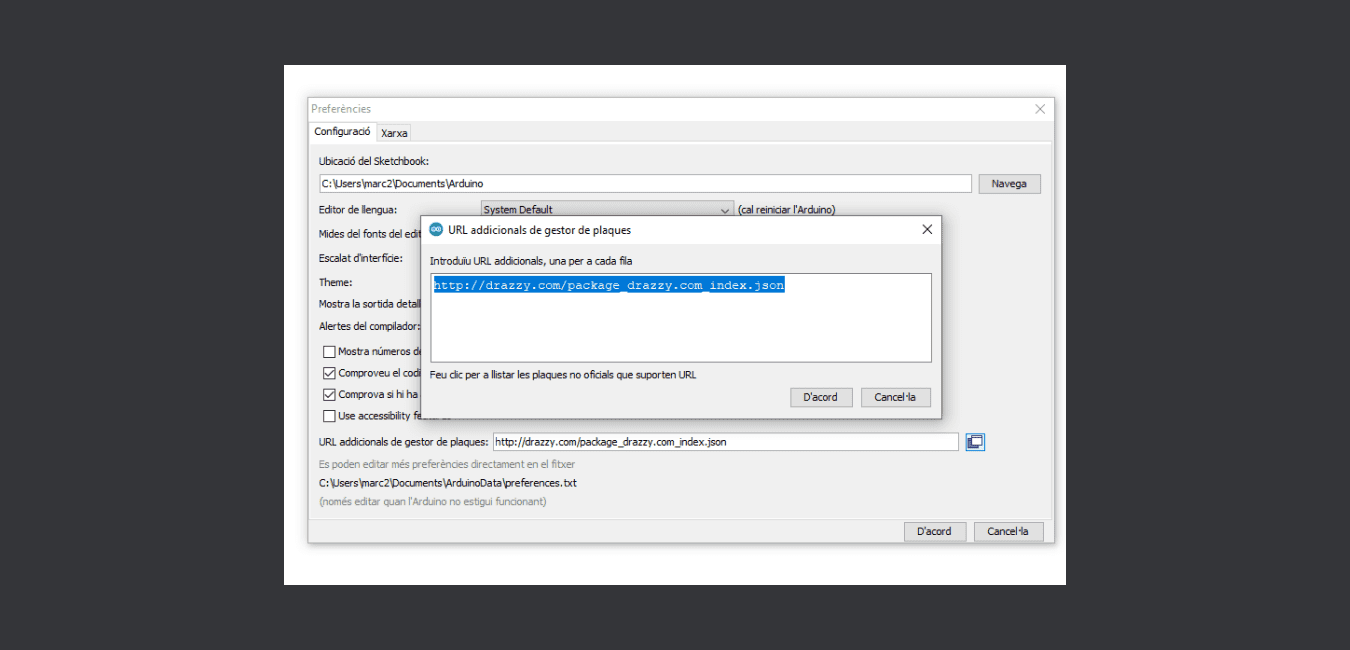
1- Open Arduino Preferences
2- Add the link: http://drazzy.com/package_drazzy.com_index.json in Aditional Board Manager URLs window.
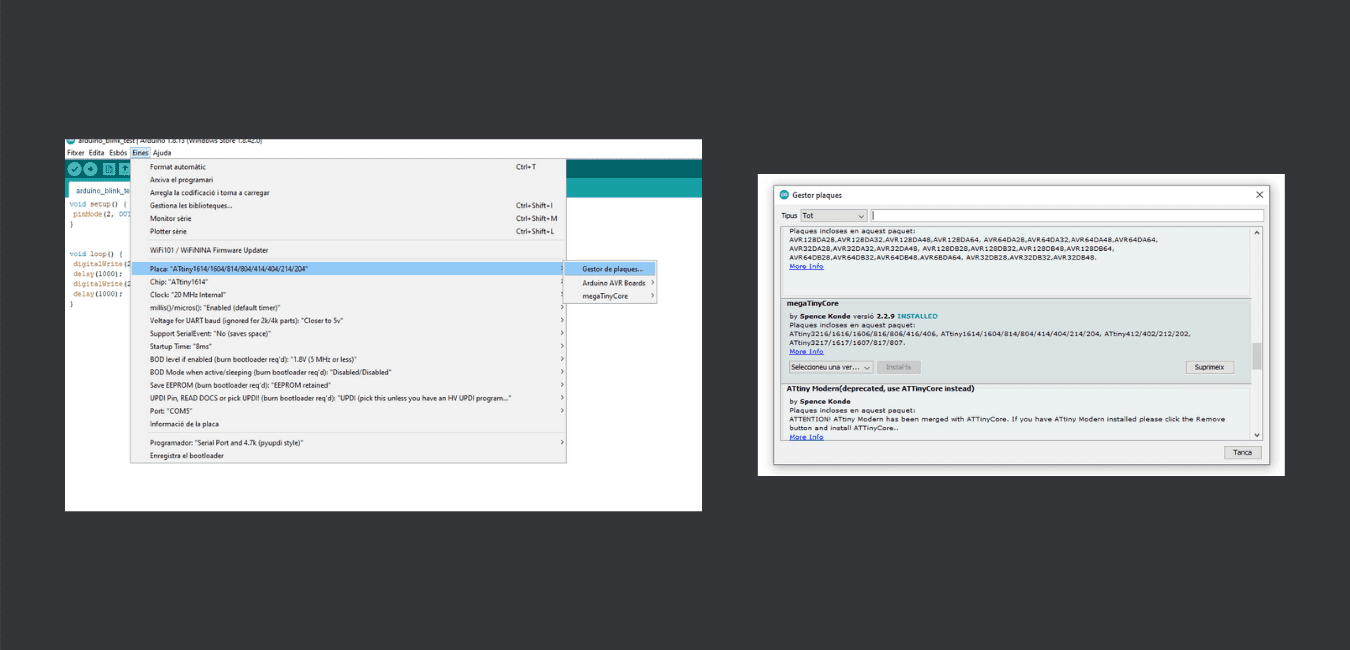
3- Open Arduino Tools and look for Board Manager, and then we have to install megaTinyCore to work with our Attiny1614
4- When it is already installed we have to set other parameters:
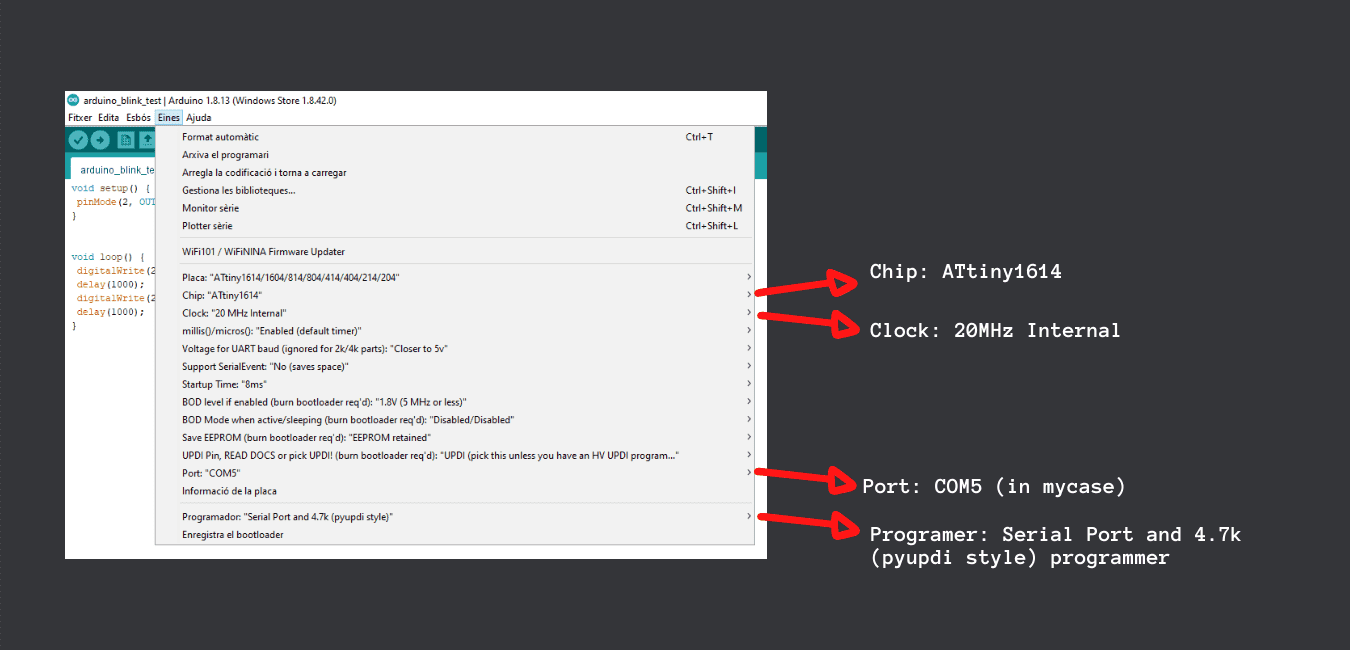
5- But in my case, the conection failed...
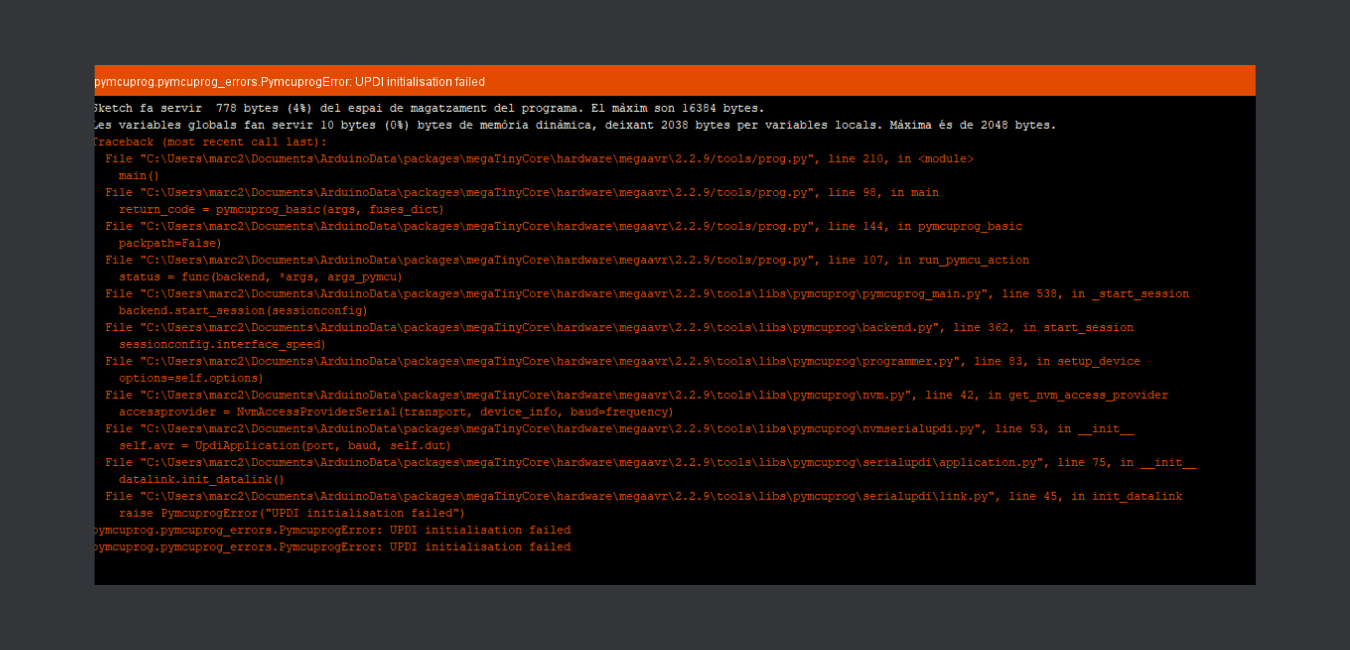
I looked aroun internet for a solution, but I didn't found to much information, then I had to wait untill Tuesday to ask for help to the instructors.
But I kept working on the codes that I wanted to use for the asignment.
The solution:
After taking a look at the PCB the instrutors realized that the Microcontroller was not well solded and also tht the TX and thr RX where not well conected.
After soldering again the ATtiny1614 and remake the RX and TX conections, the communication with Arduino have been established.
To test the good behaviour of the board, I've launched a Blink program and it has run perfectly.
CODING
Before starting to code, I'm going to pose the problem:
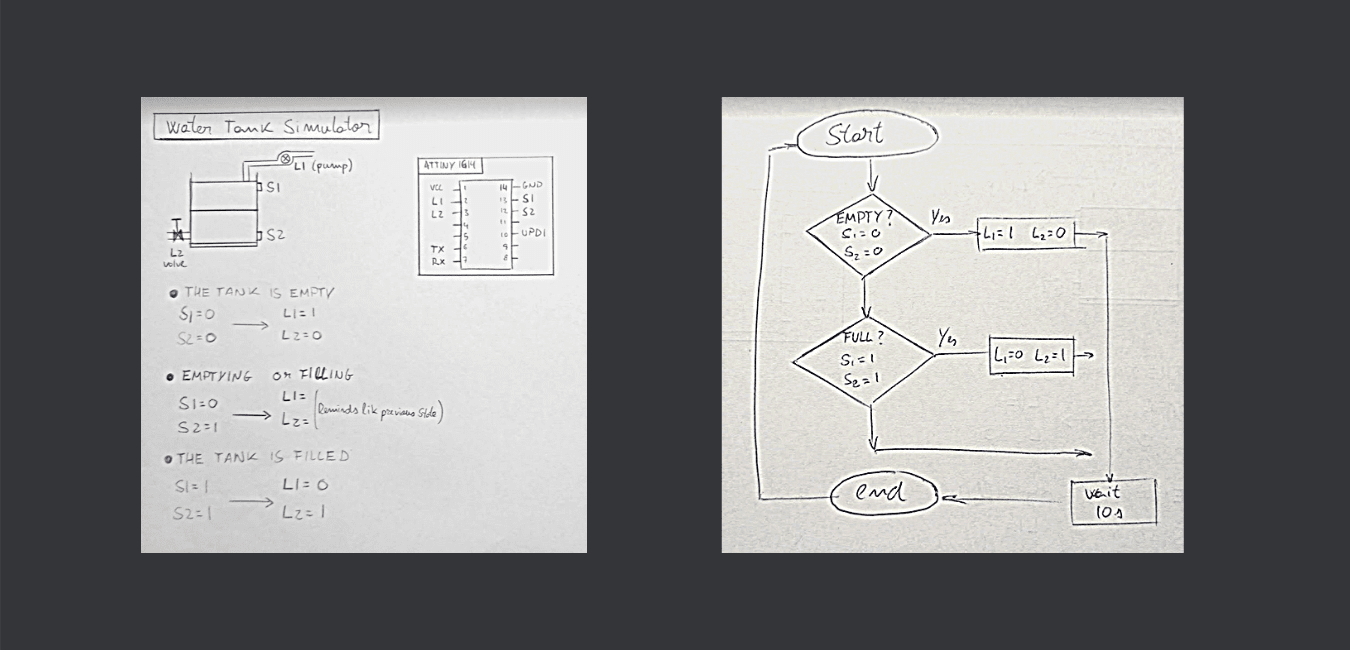
I want to use my board as a Water tank simulator
It has two switches, that will work like sensors, one for the top level and the other for the butt level.
And it has also two LEDs that will simulate actuators, one will represent a pump and the other a valve.
In the following picture, you can see the scheme.
ARDUINO IDE
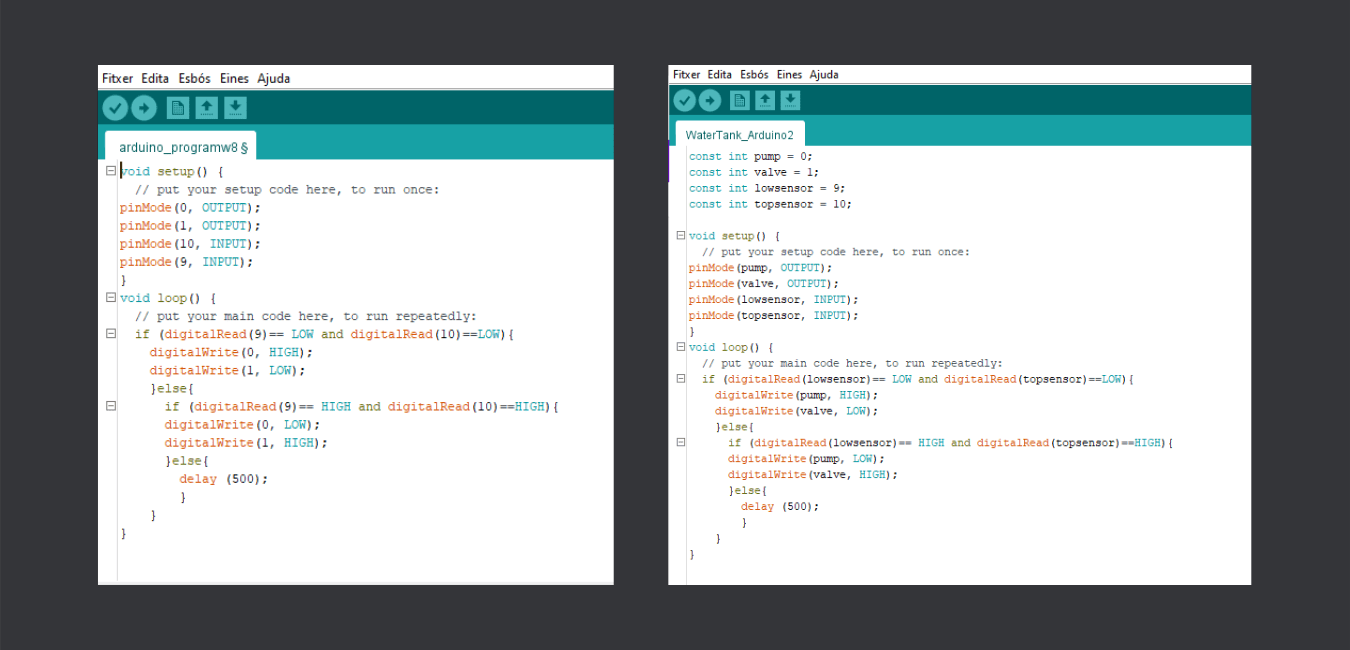
Starting from the easy Blink program as a reference, improve the number of pins and add an if function to make the board work like the simulator that I wanted.
If the Top and butt sensors are low, it will mean that our tank is empty, then, the pump have to start working and the valve must be closed.
else, if the Top and butt sensors are high, it will mean that our tank is full, then, the pump have to stop and we can open the valve.
Elements
- Switches: top and butt sensors.
- Green LED: Pump.
- Red LED: Valve.
                         Water Pump simulator

                            const int pump = 0;
                            const int valve = 1;
                            const int lowsensor = 9;
                            const int topsensor = 10;

                            void setup() {
                              // put your setup code here, to run once:
                            pinMode(pump, OUTPUT);
                            pinMode(valve, OUTPUT);
                            pinMode(lowsensor, INPUT);
                            pinMode(topsensor, INPUT);
                            }
                            void loop() {
                              // put your main code here, to run repeatedly:
                              if (digitalRead(lowsensor)== LOW and digitalRead(topsensor)==LOW){
                                digitalWrite(pump, HIGH);
                                digitalWrite(valve, LOW);
                                }else{
                                  if (digitalRead(lowsensor)== HIGH and digitalRead(topsensor)==HIGH){
                                  digitalWrite(pump, LOW);
                                  digitalWrite(valve, HIGH);
                                  }else{
                                    delay (500);
                                    }
                                }
                            }
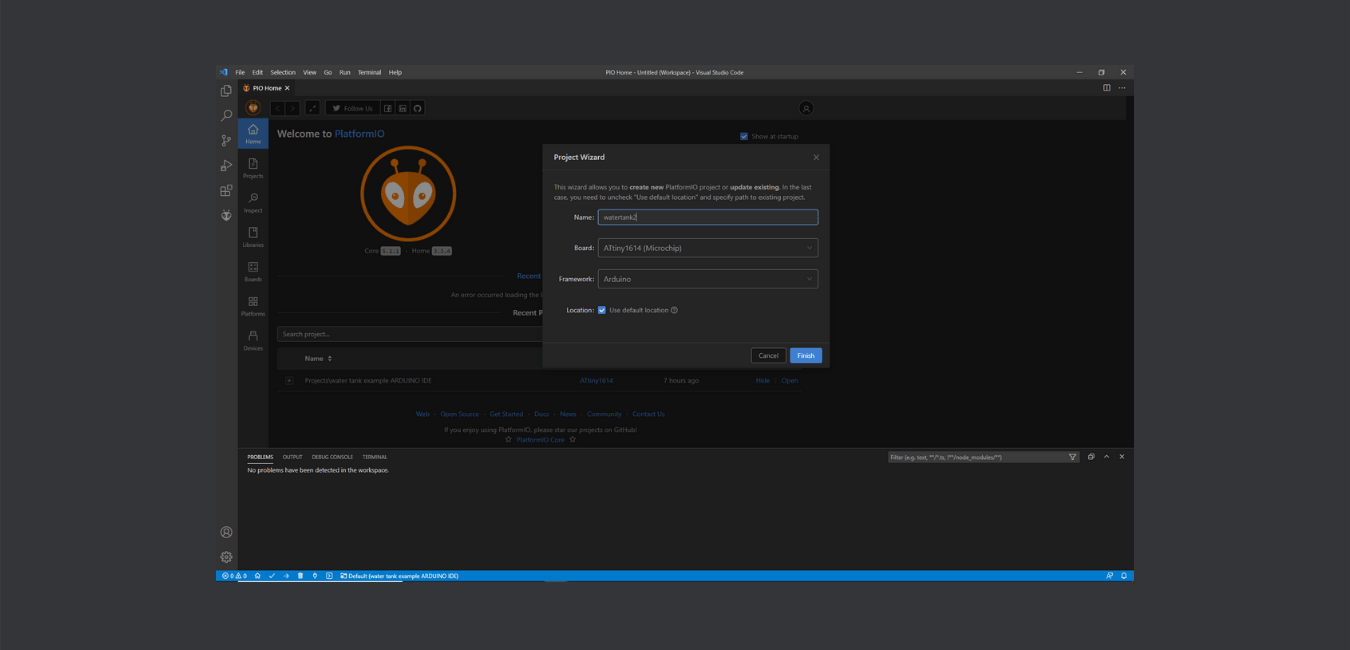
After working with Arduino environment, I wanted to try another one, and I choose Platformio.
During the Local lecture the instructors introduce us this environment, and I thought that it'll be a very useful tool for programing,
because of all the libraries that it have axces and the huge community that it have around.
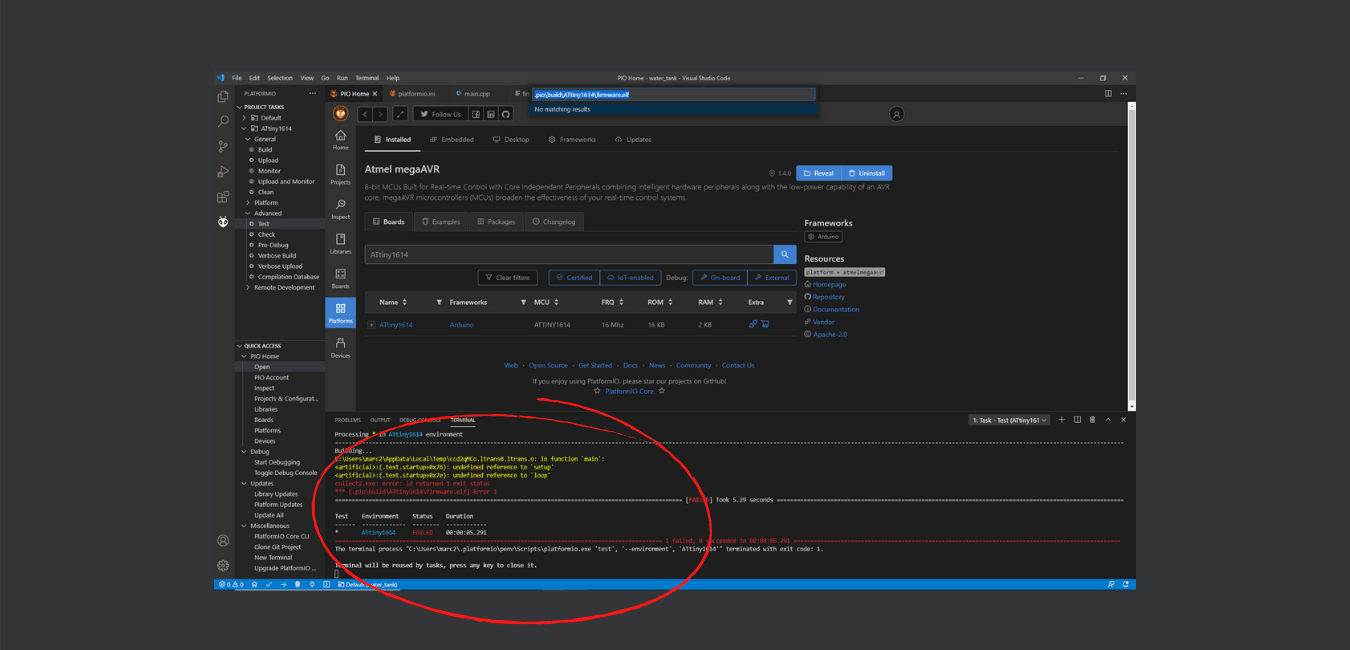
When I tried to send a Blink program to test the conection with the board, the compilation was good, but the conection failed...
I tried to find a solution looking for information around the Platformio website, but unfortunately I haven't found a solution.
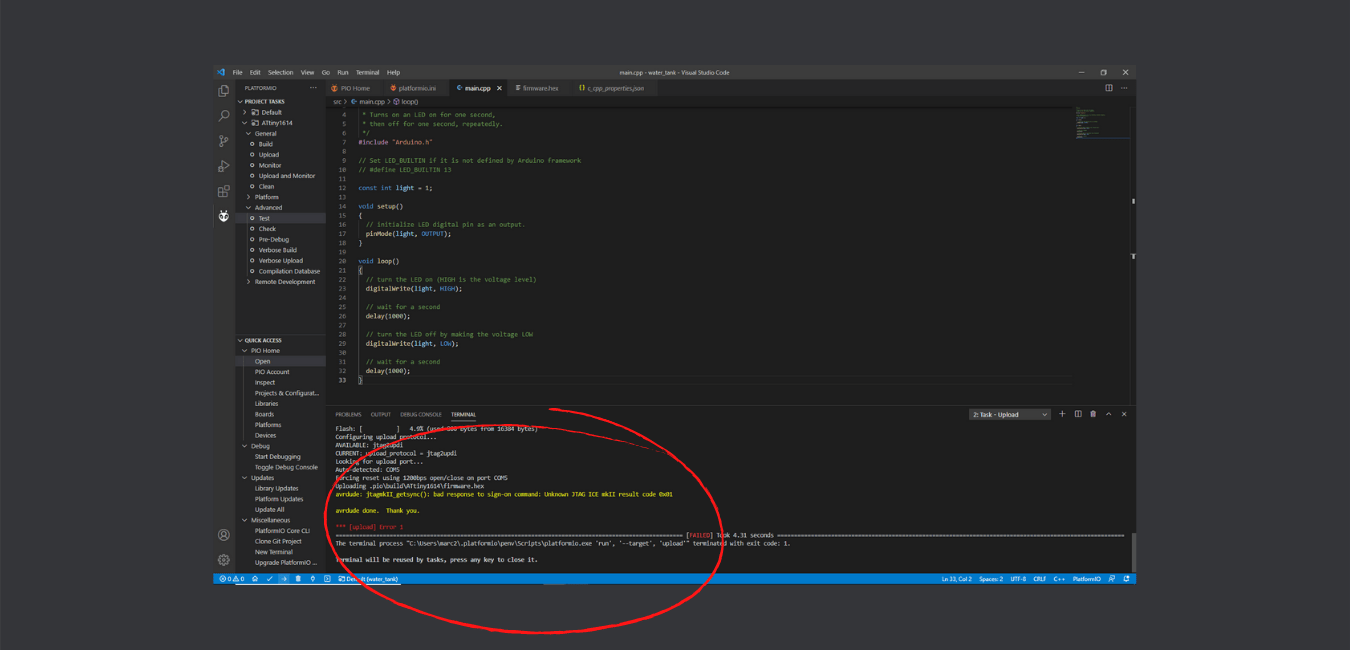
Also I launched a conection test to try to find the problem definition, but I haven't been able to understand the problem, to find a proper solution.
I'll try to ask for help to the instructors.
Files
Find in the link the files of this assignment
FINAL COMENTS
THINGS TO IMPROVE.
At the end of this week I feel like I will liked to try more coding lenguages and interfaces but with all the problems that started to rise arround my board during the week it has been dificult.
For that reason, I want keep improving my coding skills the following weeks, and learn more about Platformio, because I think that it can be a very usefull tool.
On the other hand, this week I haven't been able to colaborate in the group asignment, but I've read my Lab mates work, and they have made an incredible research.
I hope to be more free during the comming weeks to be a present part of the team.