Week 15

Embedded Networking and Communications
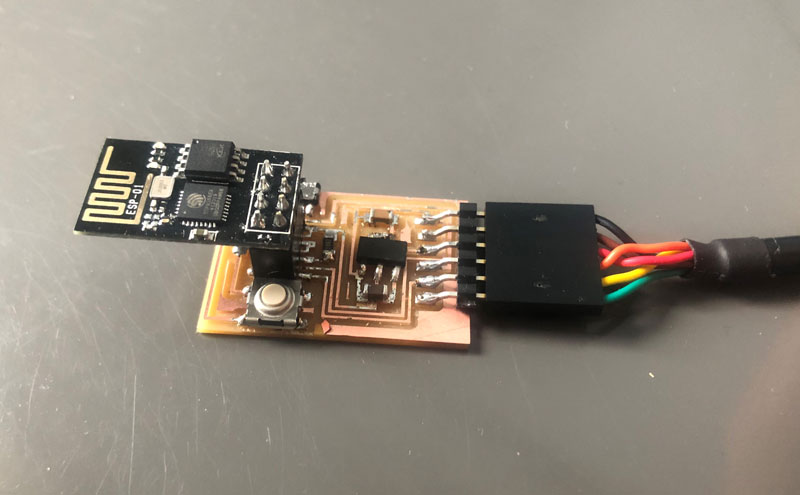
Wifi network board
For this week i was going to connect a bluetooth board and communicate with it. But after looking at the range limitatons that bluetooth has I dicided to use a WiFi module instead. WiFi has more range and that is something I can impliment in my board for the final project.
Tecknical information
- 802.11 b / g / n
- Wi-Fi Direct (P2P), soft-AP
- Built-in TCP / IP protocol stack
- Built-in TR switch, balun, LNA, power amplifier and matching network
- Built-in PLL, voltage regulator and power management components
- 802.11b mode + 19.5dBm output power
- Built-in temperature sensor
- Support antenna diversity
- off leakage current is less than 10uA
- Built-in low-power 32-bit CPU: can double as an application processor
- SDIO 2.0, SPI, UART
- STBC, 1×1 MIMO, 2×1 MIMO
- A-MPDU, A-MSDU aggregation and the 0.4 Within wake
- 2ms, connect and transfer data packets
- standby power consumption of less than 1.0mW (DTIM3)
ESP8266 - ESP-01 WiFi module networking communications Datasheet
http://academy.cba.mit.edu/classes/networking_communications/ESP8266/esp01.pdfNetwork connection board for ESP8266
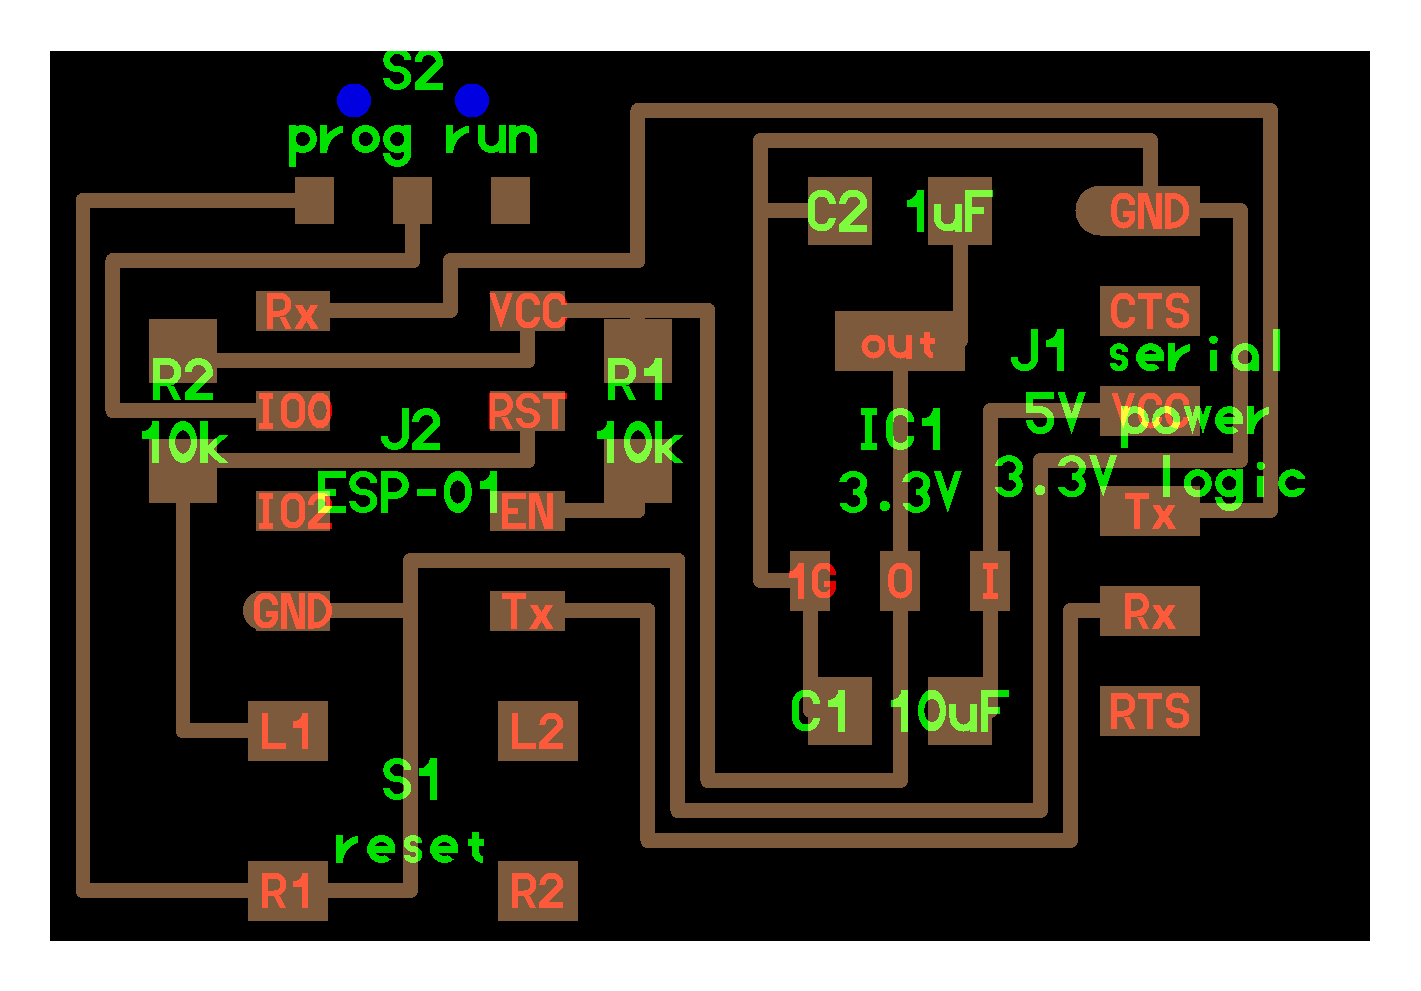
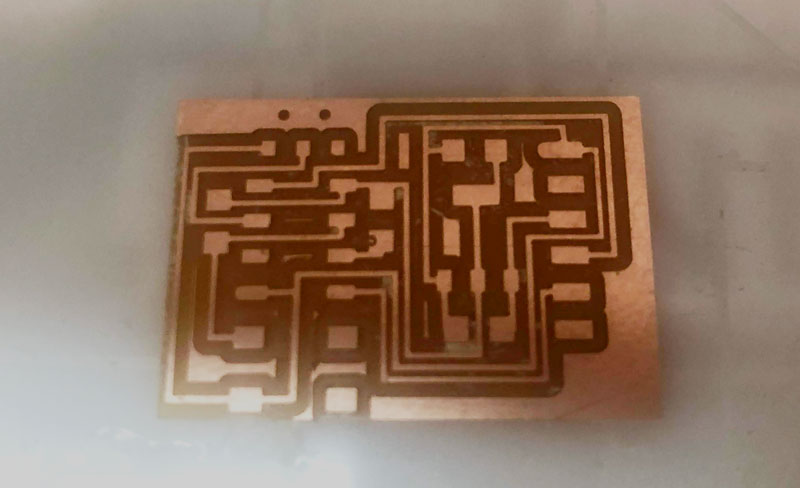
To be able to use the WiFi ESP8266 module we have to make a board that
I found the tutorial that Neil made on the fabacademy site and downloaded all the files from the site and milled the board out.
http://academy.cba.mit.edu/classes/networking_communications/
Files
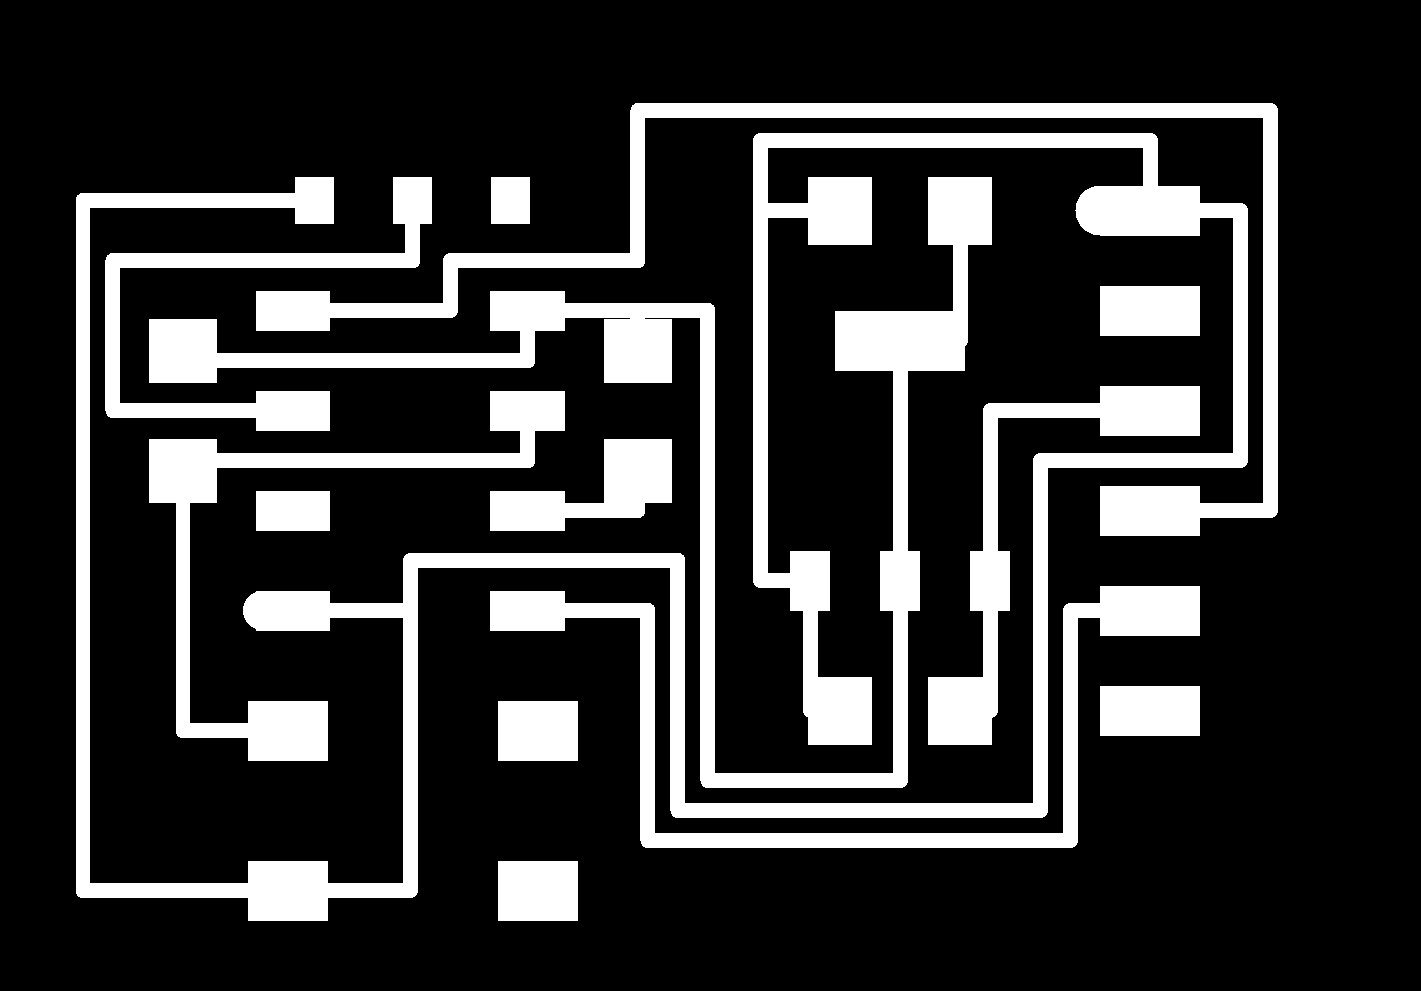
Interior Traces
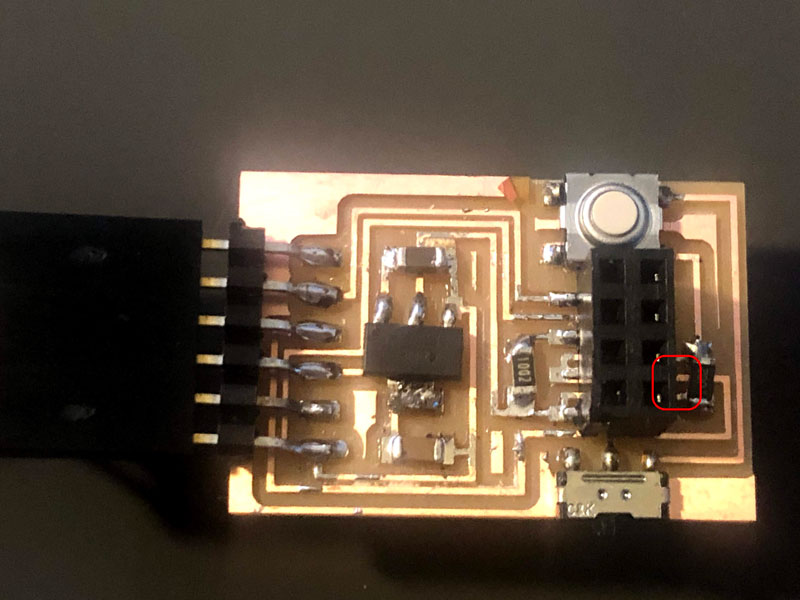
Making the board
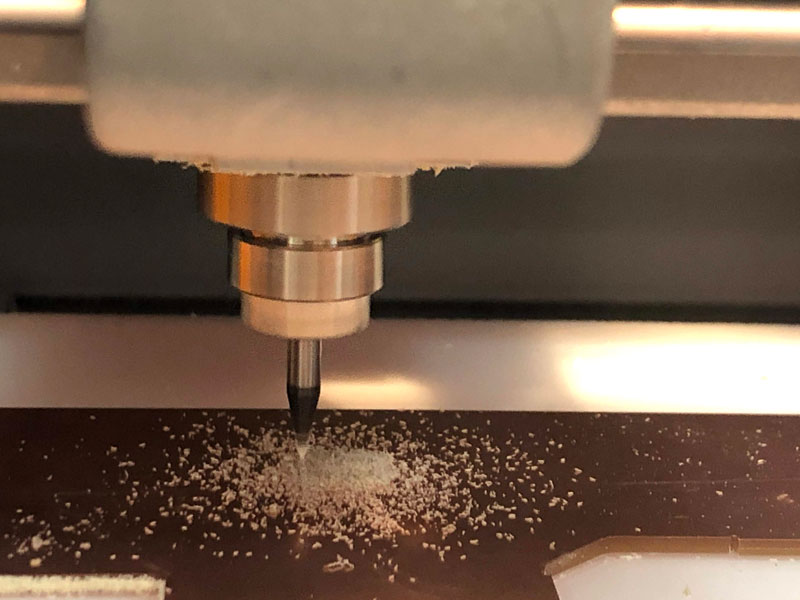
Milling the board out on our Roland SRM-20
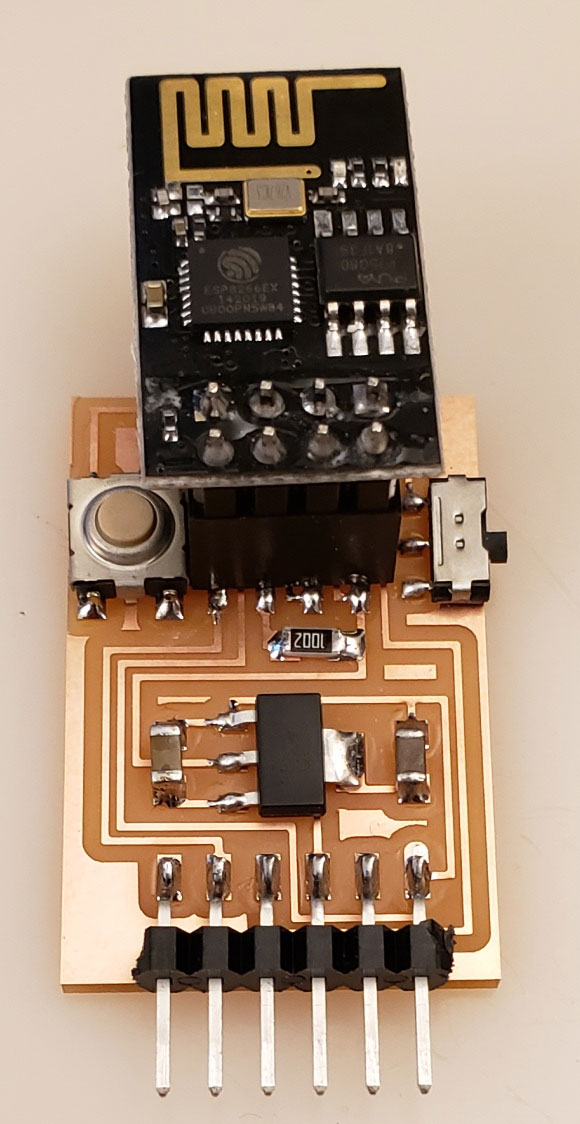
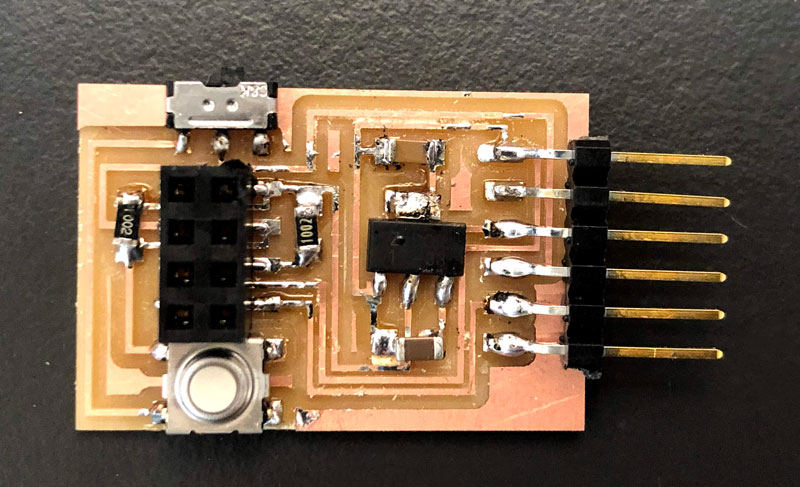
Milling is finished and ready for soldering :-)
Here I have finished soldering the board for ESP8266
Programing
I followed this documentation that i found online on how to installing ESP8266 boards in Arduino
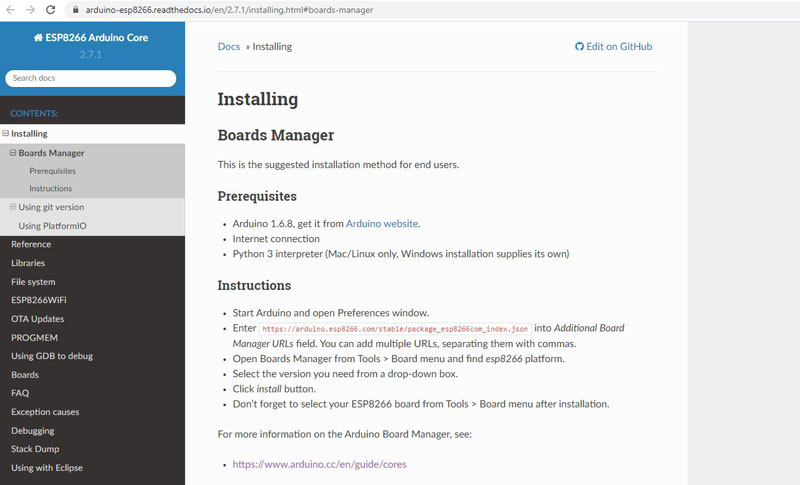 https://arduino-esp8266.readthedocs.io/en/2.7.1/installing.html#boards-manager
Instructions
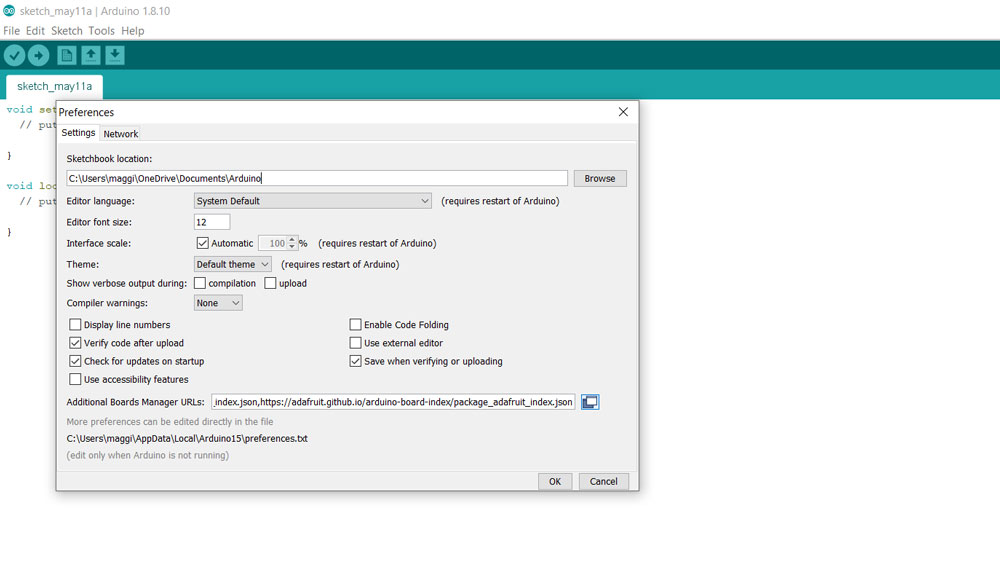
- Start Arduino and open Preferences window.
- Enter
https://arduino.esp8266.com/stable/package_esp8266com_index.jsoninto Additional Board Manager URLs field. You can add multiple URLs, separating them with commas. - Open Boards Manager from Tools > Board menu and find esp8266 platform.
- Select the version you need from a drop-down box.
- Click install button.
- Don’t forget to select your ESP8266 board from Tools > Board menu after installation.
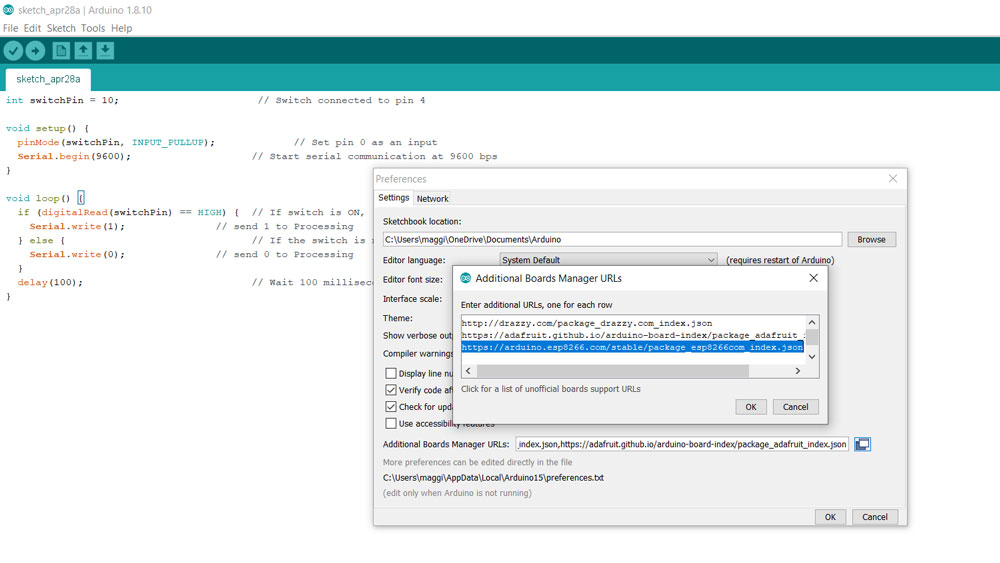
Start Arduino and goto File -> Preferences
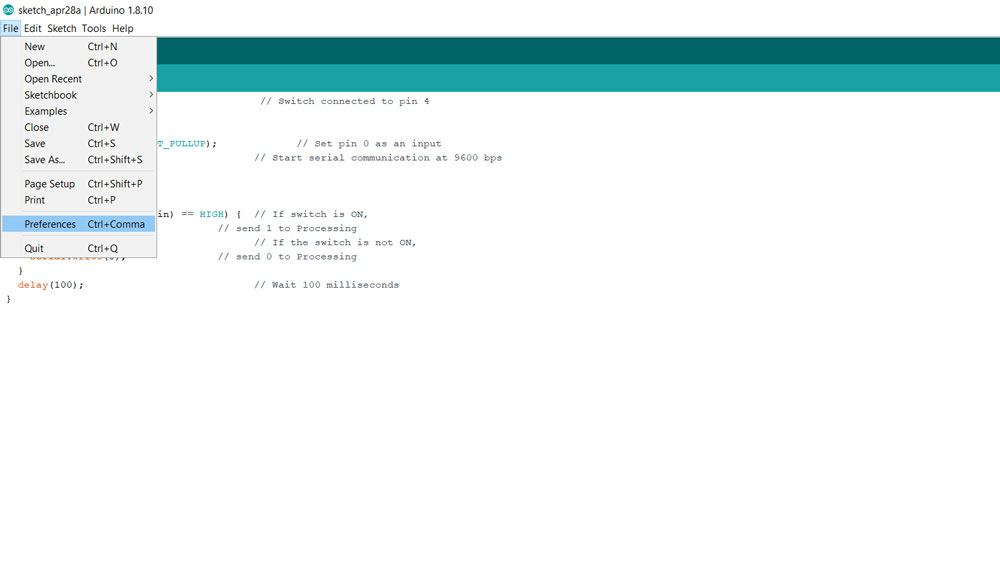
Click on Additional Boards Manager URLs button
Paste the link to the Arduino board manager
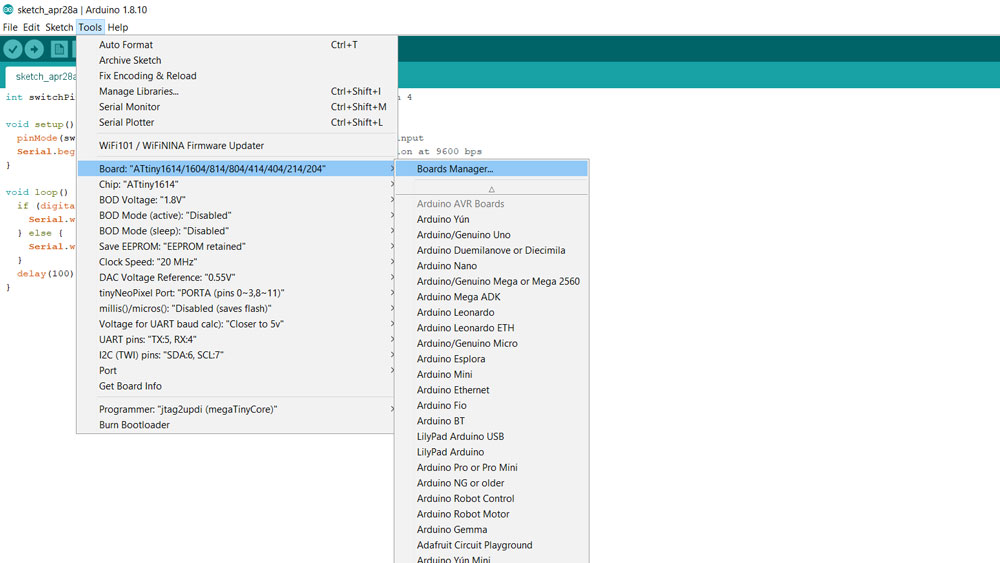
Now we can go to Tools -> Boards -> Boards manager and Install the ESP8266 board
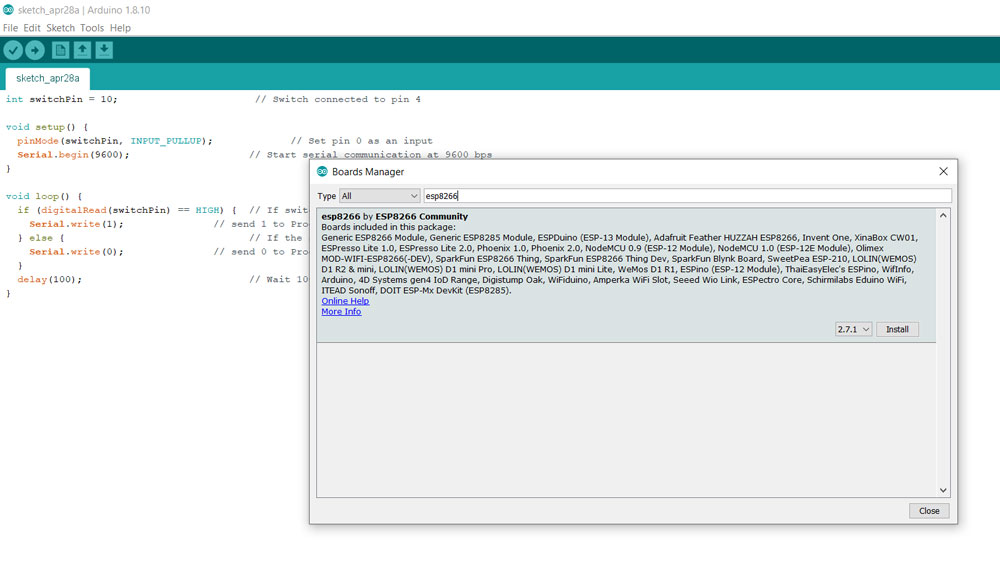
Click on the install button and the board will be installed
For more information on the Arduino Board Manager, see:
Board Programing
I connected my FDTI cable to the board and to the USB port on my computer

And the I connected the WiFi module ESP8266 to the board. Everything ready for programing
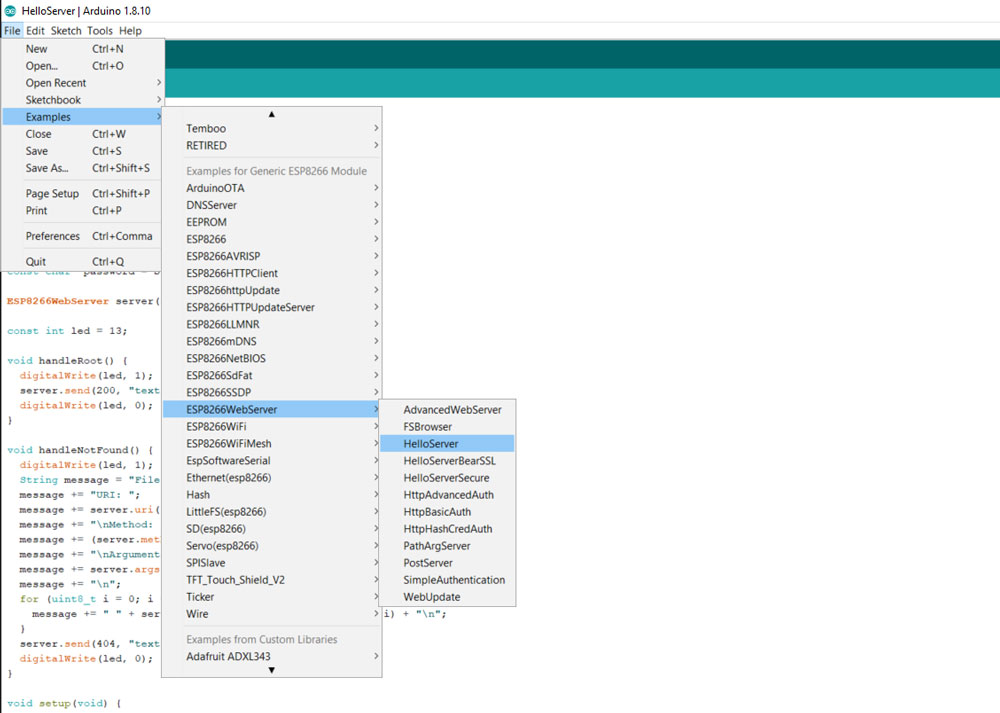
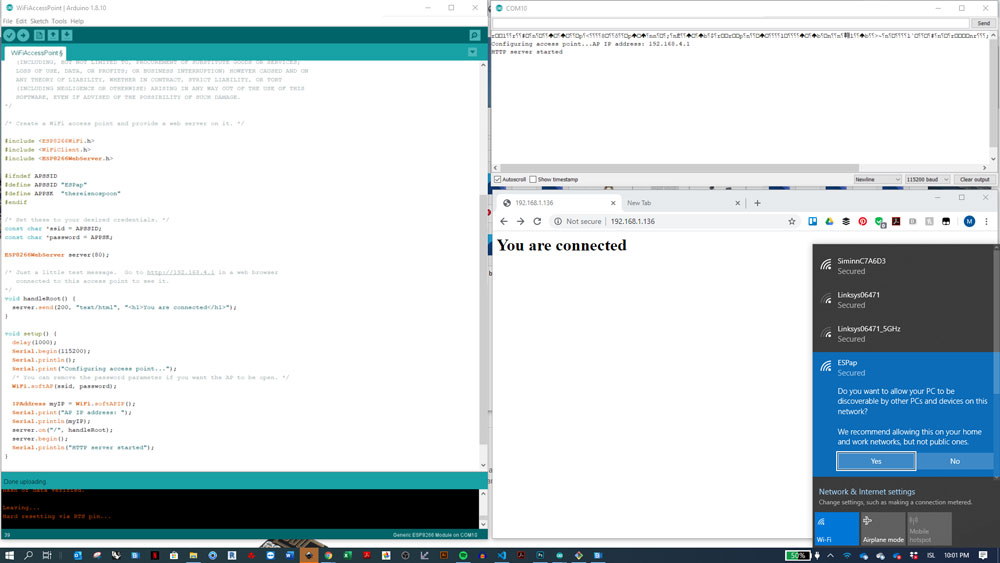
Now we can open a example program to test the board.
File -> Examples -> ESP8266WebServer -> HelloServer
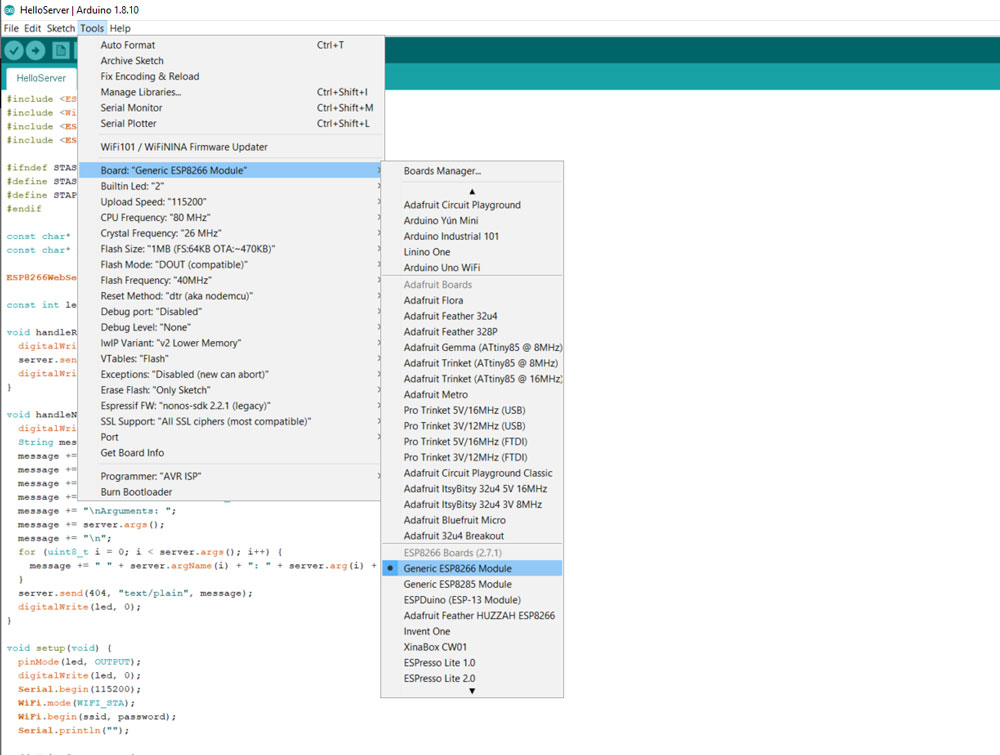
Select the correct board
Tools -> Board: "GenericESP8266 Module" -> GenericESP8266 Module
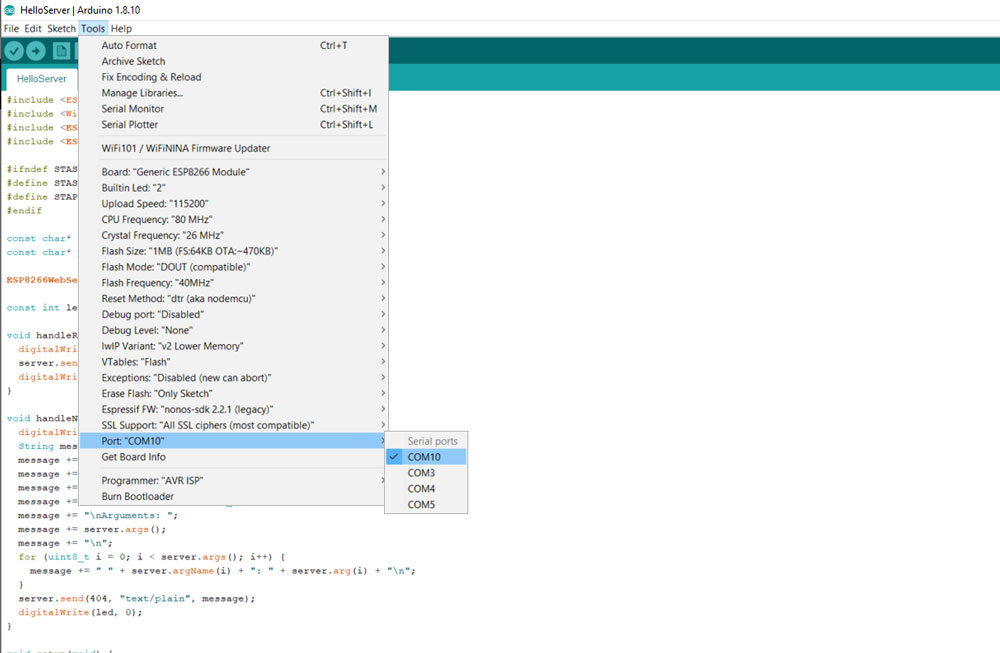
Select the correct usb port
Tools -> Port: -> COM
Problem
When I started uploading the program files to the board from Arduino I always got a USB port error.
I tried many times with various settings and configurations but nothing worked and I did not see any flaws with my board.
After looking over the board many times we finally found the cause of the problem
There was one bad soldering pin on the connector. Causing a short between to lines !!!
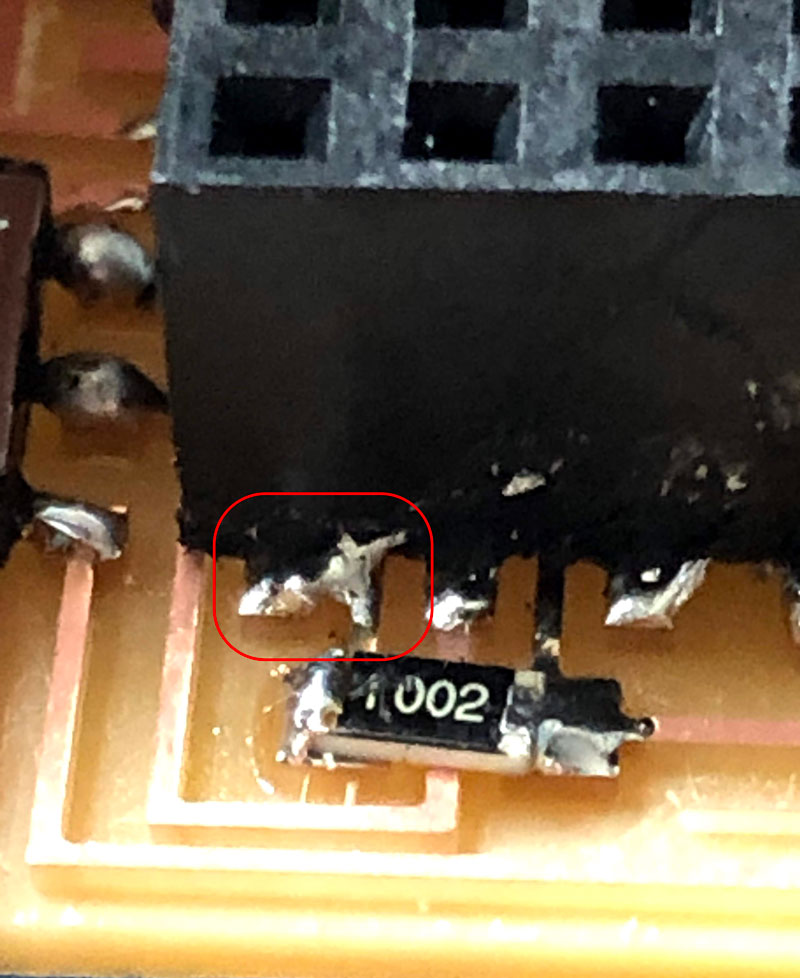
After I fixed this flaw the board worked purfectly !!!
HERO SHOTS
Then I tried out the Advanced Web server with uptime count and a graph
I also made a AssessPoint out of the module to extend my Wifi.. works fine :-)
Magnús St. Magnússon © 2020| v1
Madefor FabAcademy