Assignment:
1) Model (raster, vector, 2D, 3D, render, animate, simulate, ...) a possible final project, compress your images and videos, and post it on your class page
I tried to install Inkscape from Homebrew but it wouldn't work. So I had to download the beta versione of Inkscape. I also downloaded the guide book. I've learned from my instructor that Inkscape is a vector software: it recognizes lines, shapes and entities which are pure formulas as far as it's concerned. I've also learned that a vector image in balck and white does not lose quality if I resize it whereas bitmap images do lose quality when resized.
Unlike Inkscape, Gimp is a raster software. I've been using it to resize and scale images for the moment but I'm èsure it's going to be very usefull during Fab Academy.
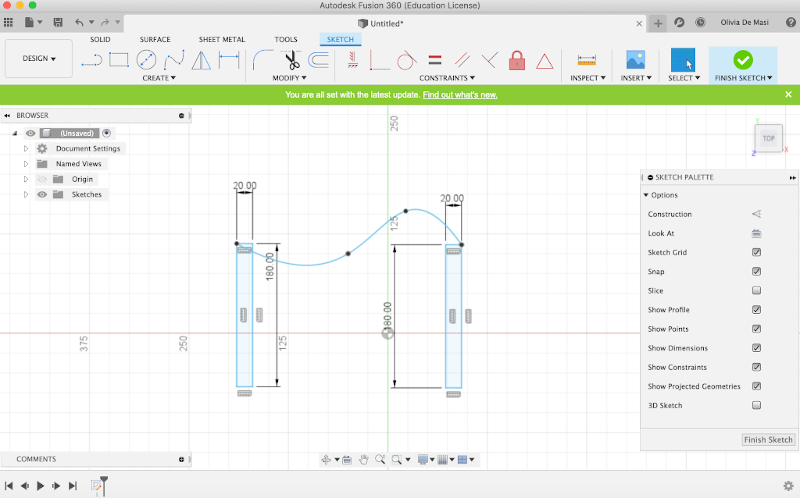
I've downloaded Fusion 360 to try it out but I wasn't very keen on it. I didn't really wrap my head around the interface and couldn't find the main commands easily. I managed to sketch the 2D model of my final project but I couldn't get to the 3D version unfortunatelly. I hope I'll get a chance to learn how to use this sofware which looks awsome.
I have started using xDesign aswell, trying to follow the tutorial that the instructors gave us on Onshape. So I strated drawing a circle and 4 rectangles aroud it. I then extruded the solid.
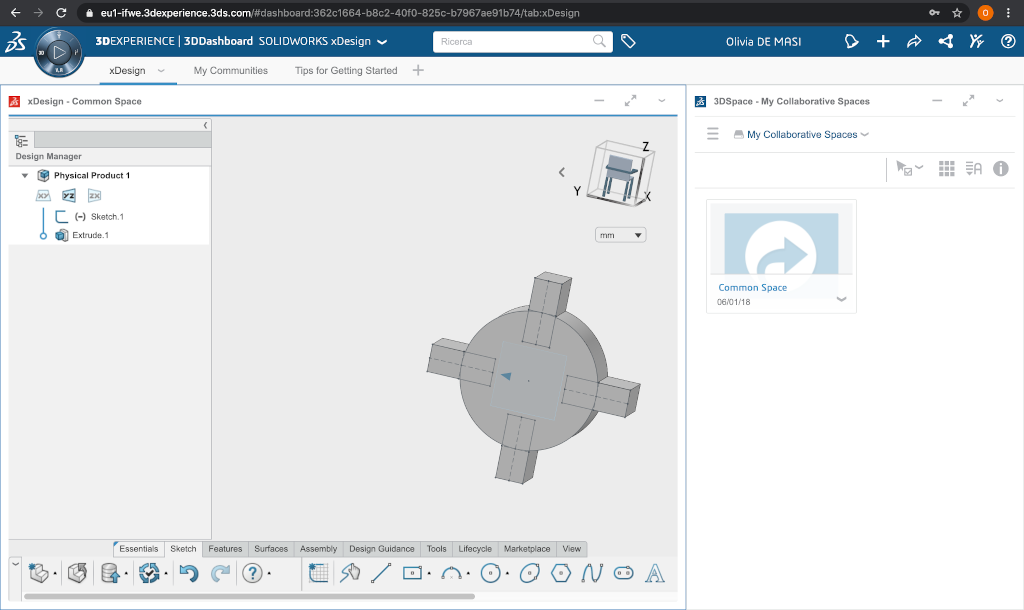
Unfortunatelly I wasn't able to extrude the rectangles removing them to complete the proper shape. In the next section you can see what the goal was. I will certainly try this software other times during Fab Academy to learn how to use it.
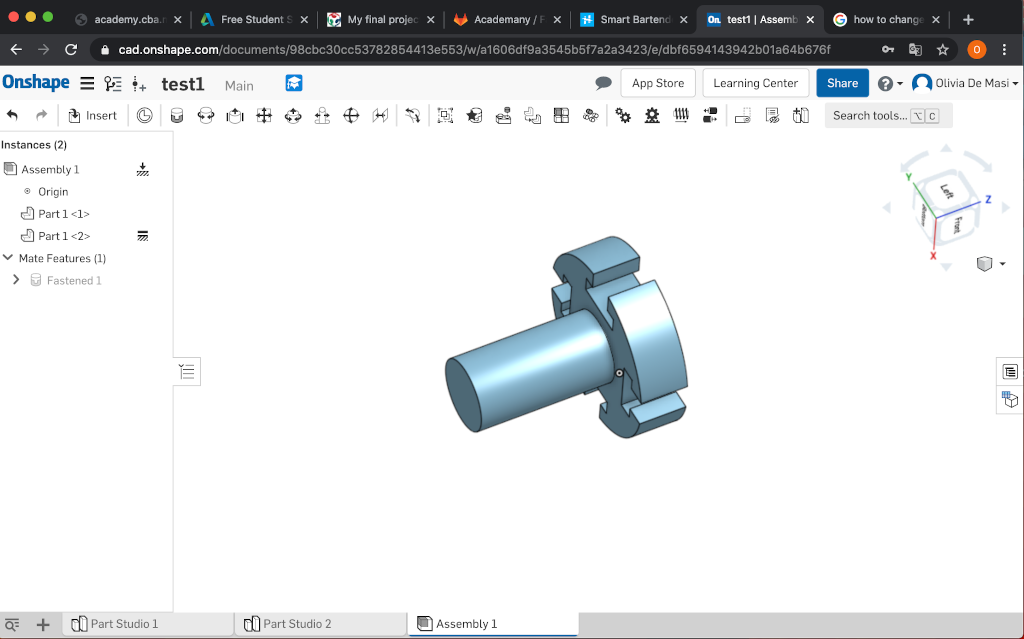
This is the online opensource cad modelling software that I've have used the first time. I've tried to copy this
object that was in the lab.
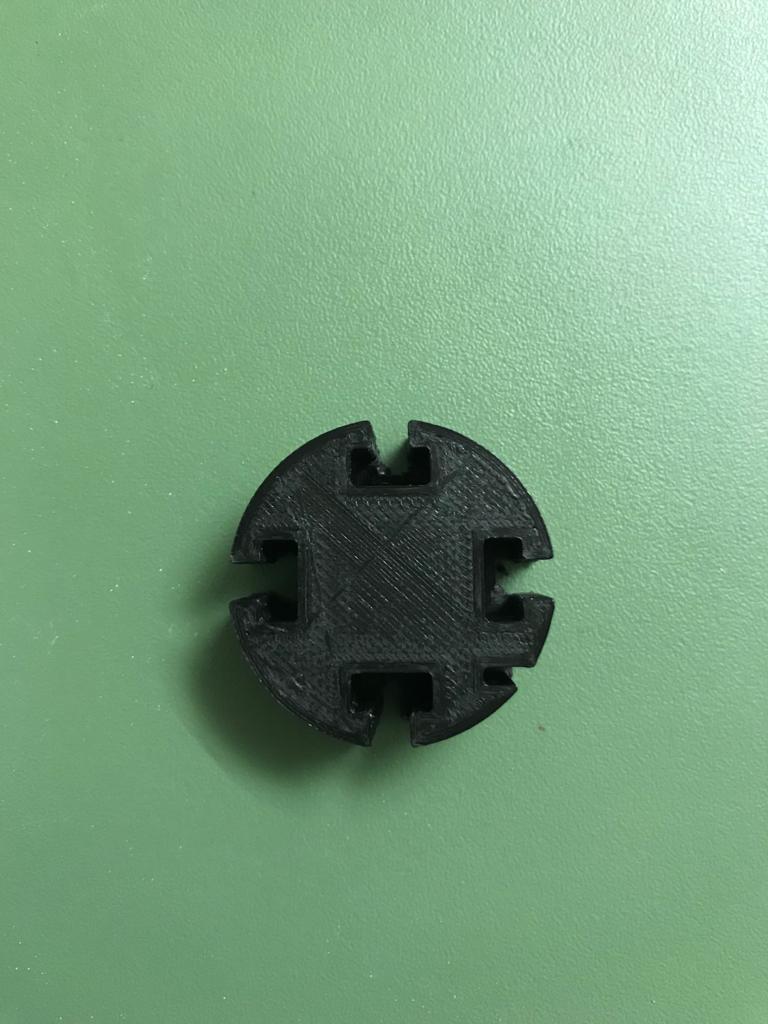
I've created a new Sketch pressing the sketch button and I drew a circle with a 12 mm diameter (dimensions command).
Then I drew a 5 mm x 7 mm rectangle, I gave it a constraint of coincidence whit which I've bounded the center to the
diameter of the circle. I drew another rectangle to form a T under the other rectangle and I gave a adjacency constraint. I've selected
the T section and with the "circular pattern" command I recreated 4 copies of it. I drew another 5 mm circle in the center of the first one. At this point
I've confirmed the sketch and I've extruded removing the T section and the smaller circle.
Now my object looks like this:
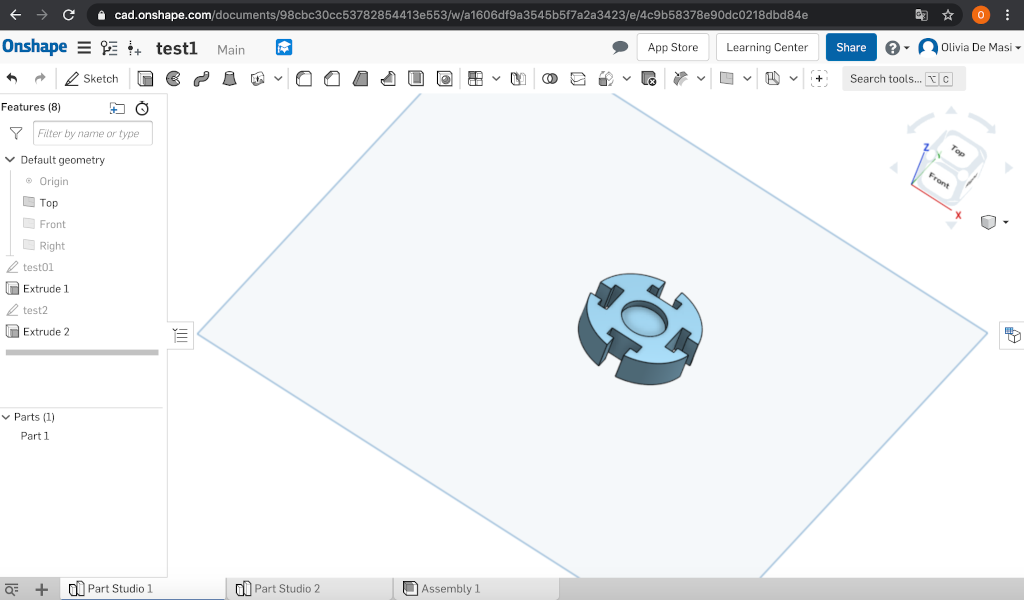
In another work sheet I drew a 5 mm circle and I've extruded it so that it became a 5 mm cilinder.
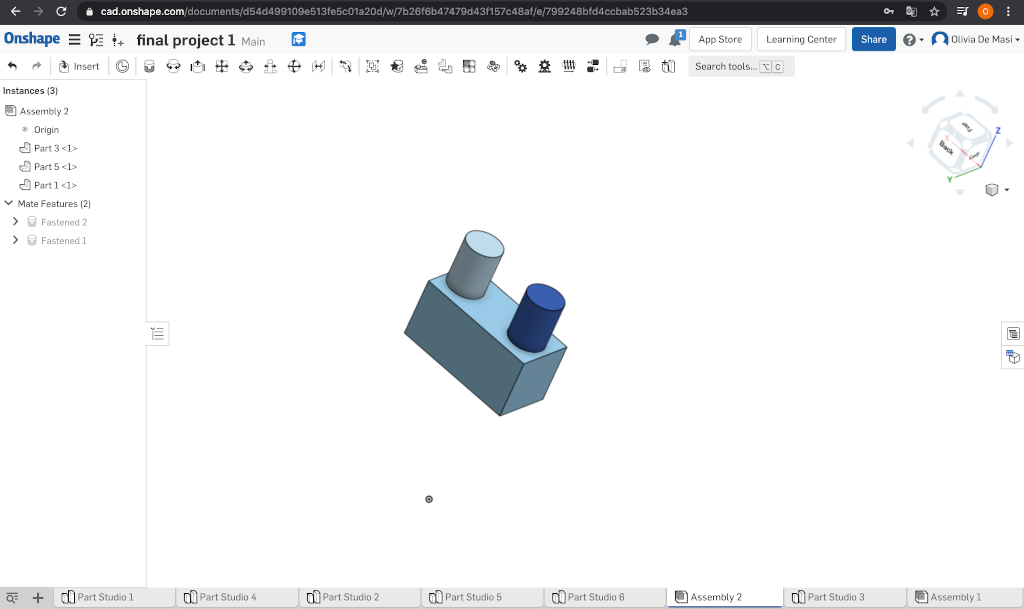
In the "assembly" work sheet I've inserted the two parts and with the "fastened mate" command I've assemblated the object.
The final object is this:
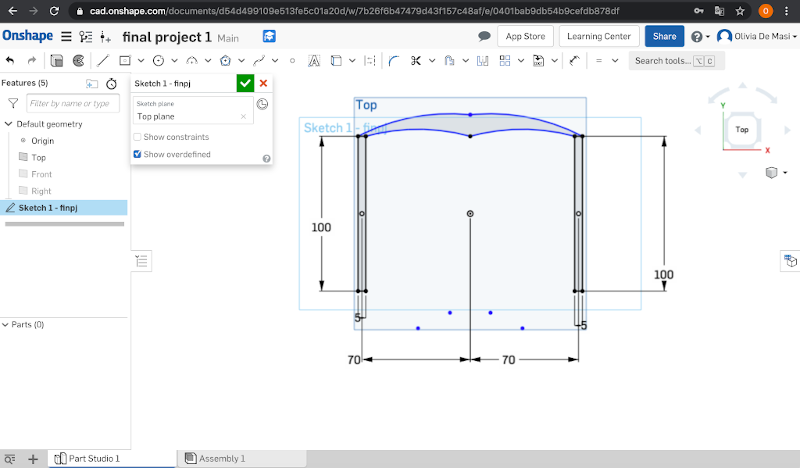
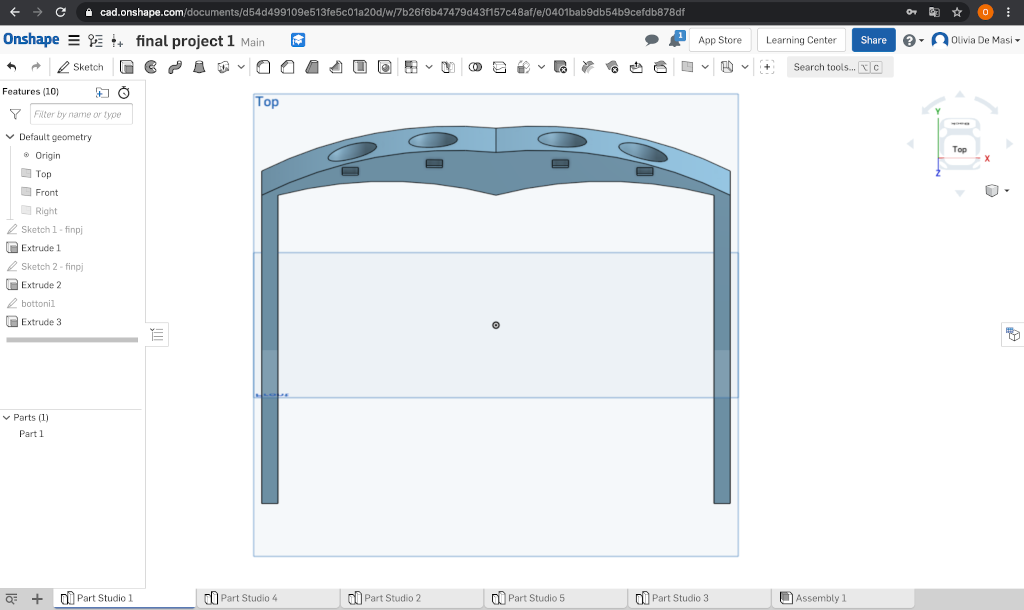
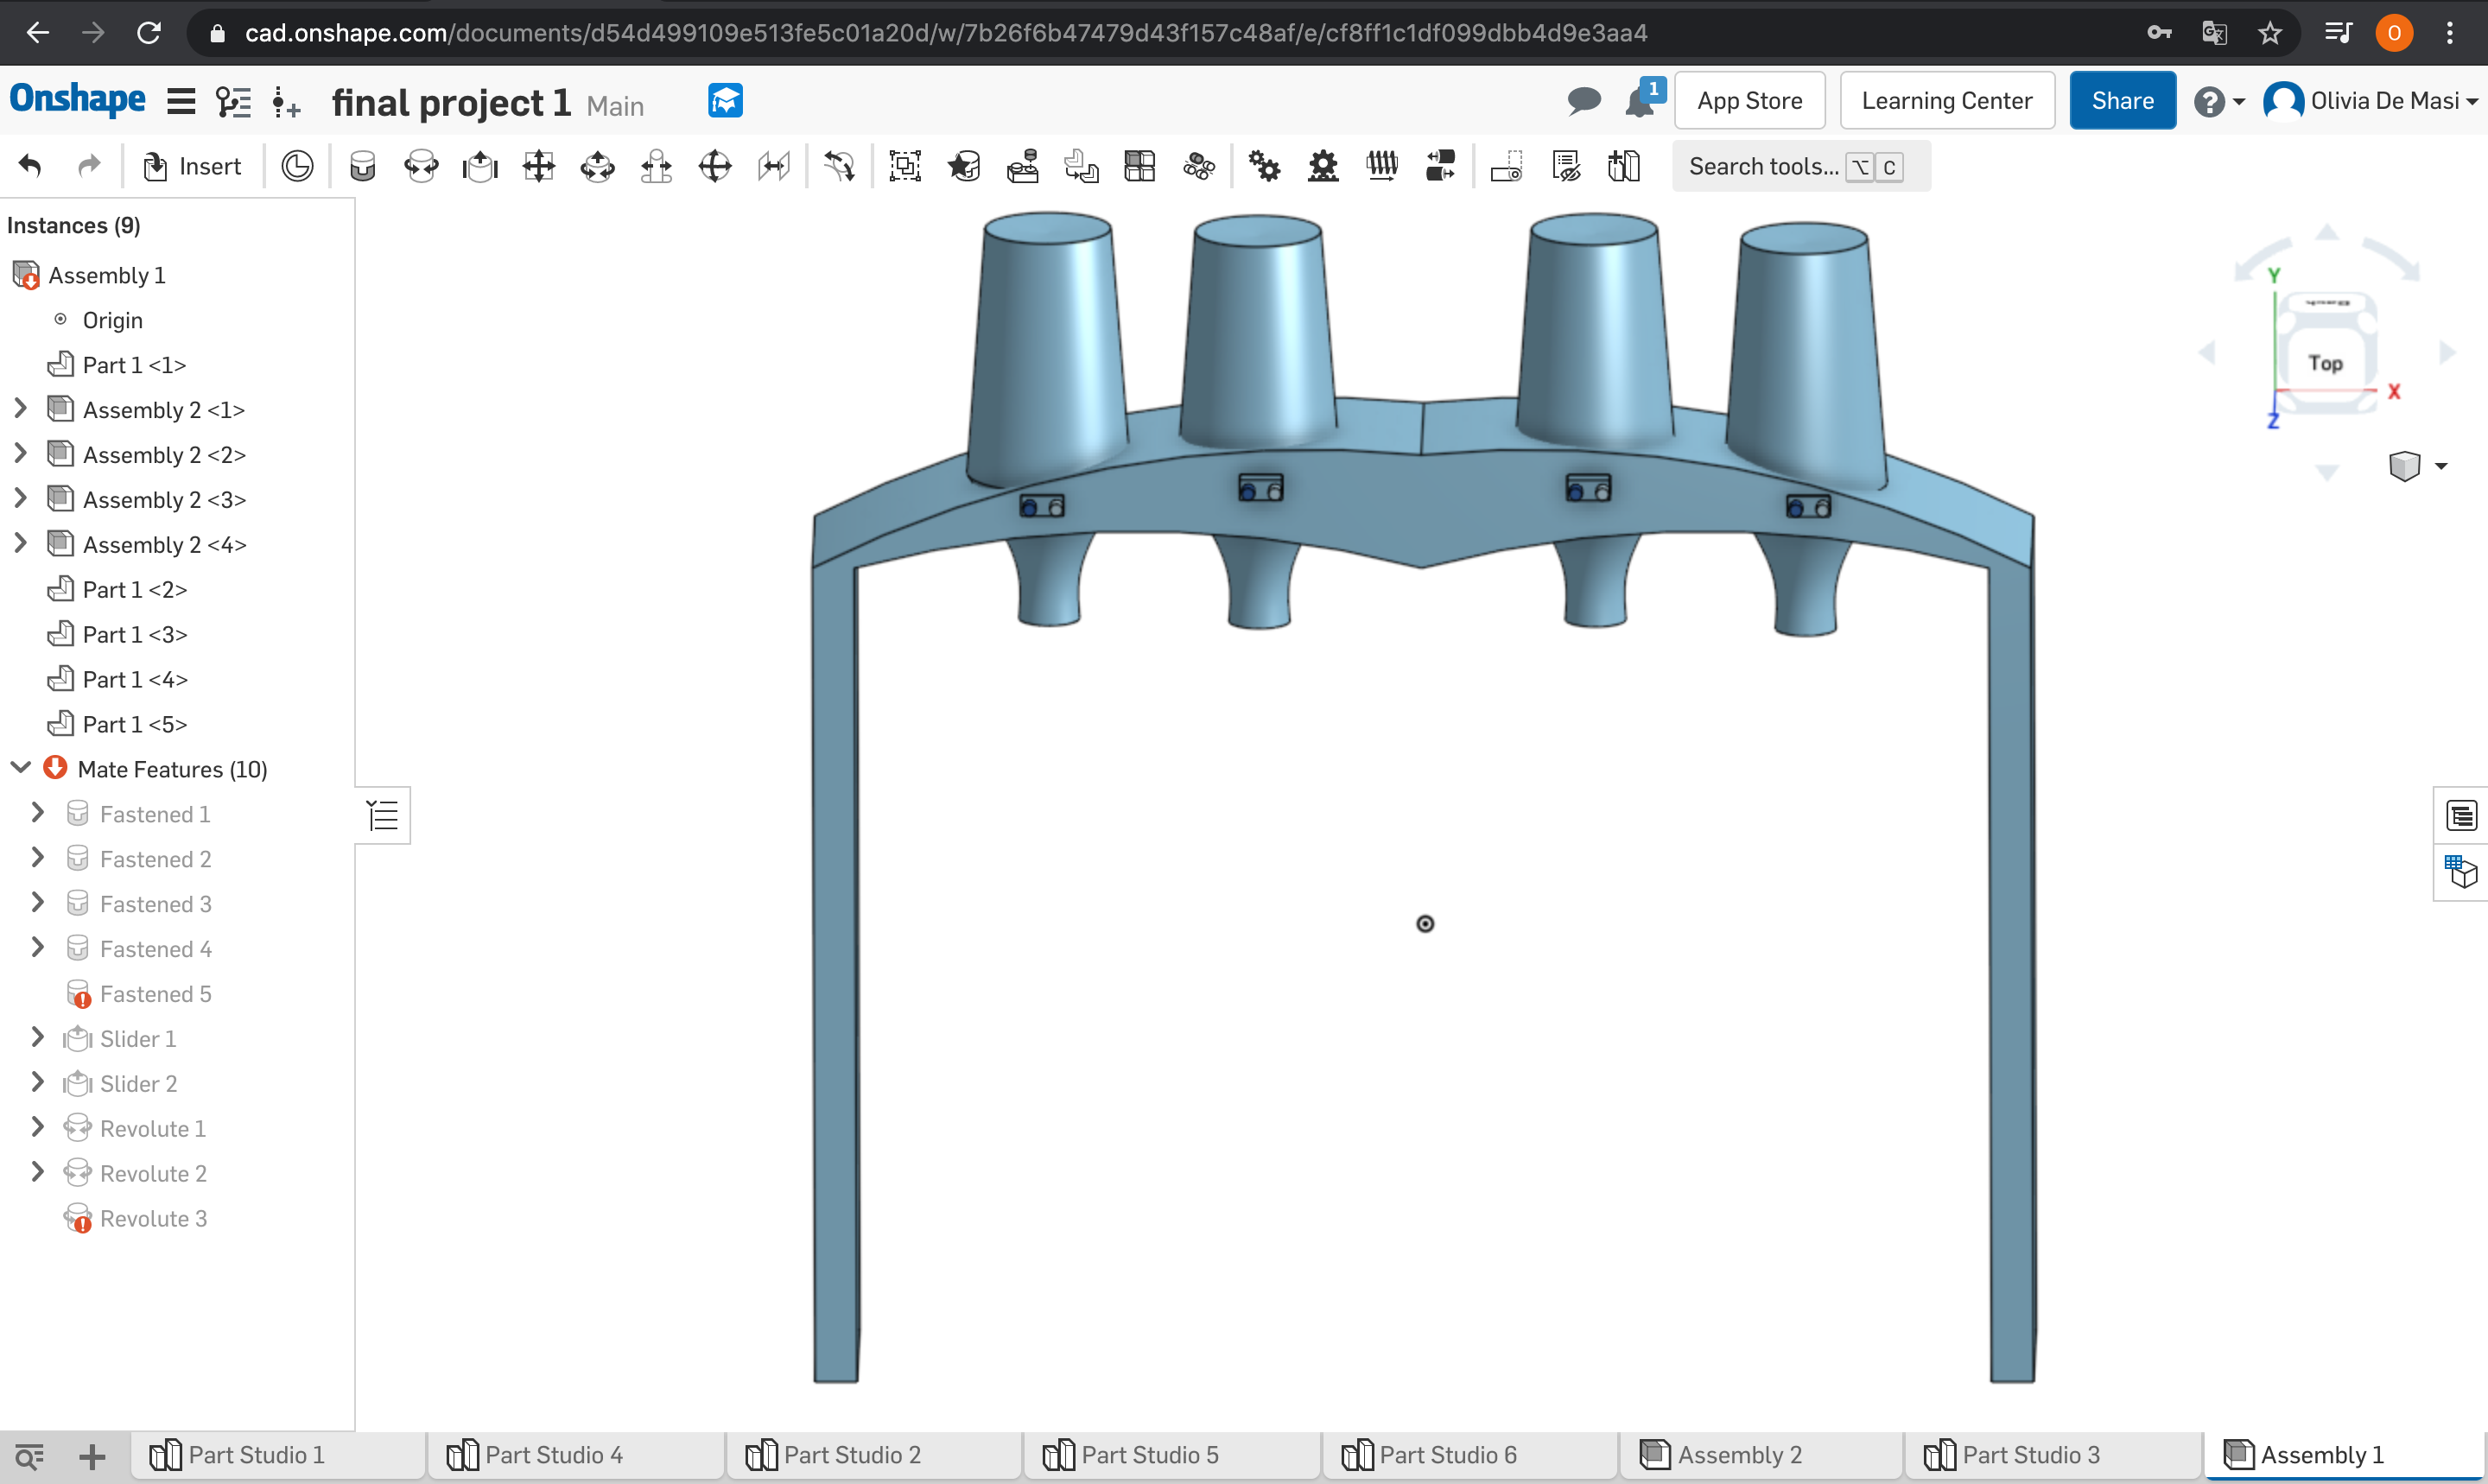
I've tried to draw my final project, starting from the building. So I did the first sketch drawing kind of an M in 2d:
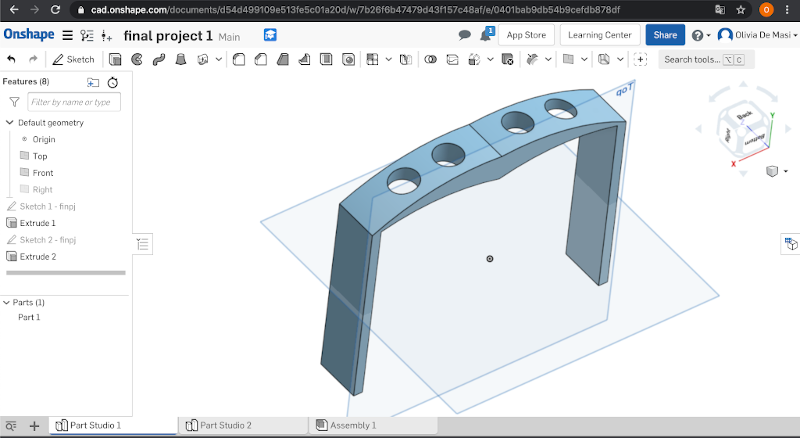
I then extruded the "M" and i got a nice 3D structure. After that I drew once again 4 cirles on the top plane:
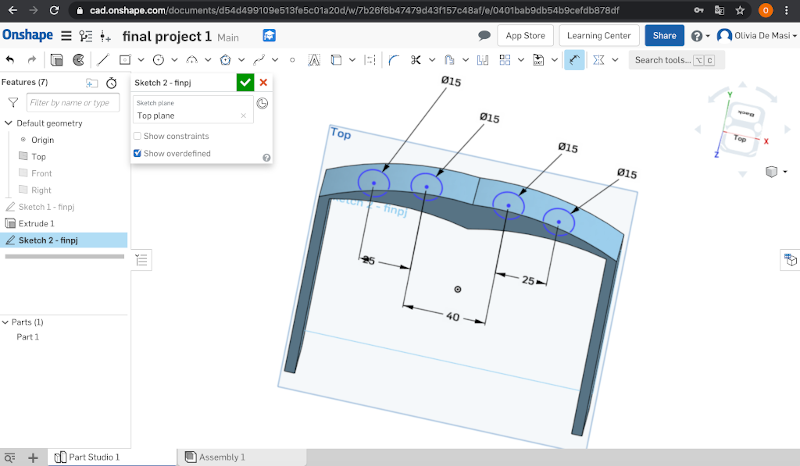
I've extruded the circles removing them to make the holes for the bottles:
In another worksheet I've made a botton board by drawing a rectangle with two circles in the middle and extruding all. I then made the "buttons", which we're just extruded circles and I've assembled it:
To assemble the button board in the bottle rack I had to make four "holes":
Now I can finally assemble all toghther so I insert in the assembly worksheet my two studio parts, use the command fastened mate and select the surfaces to merge.
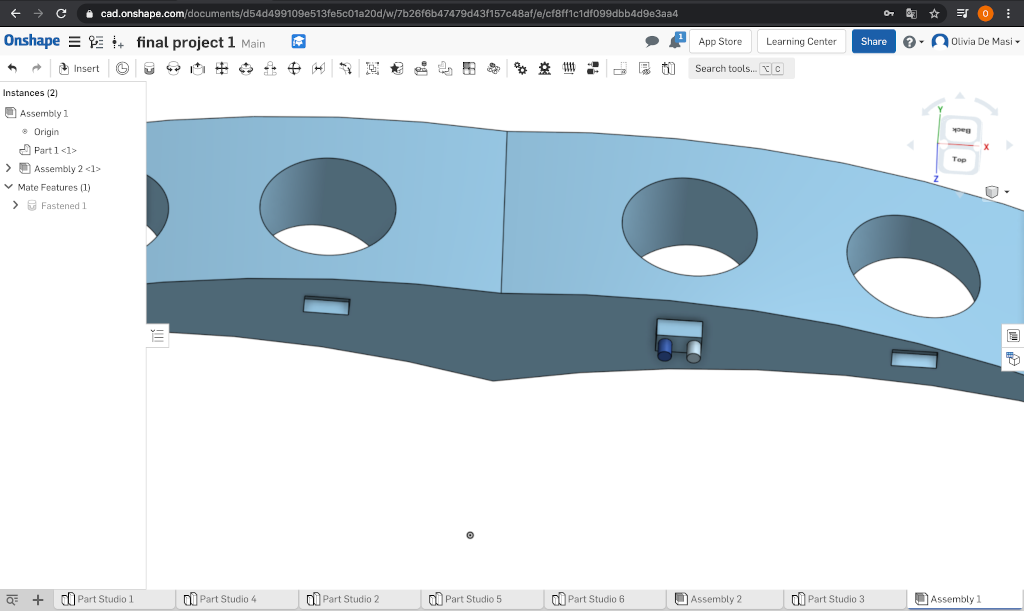
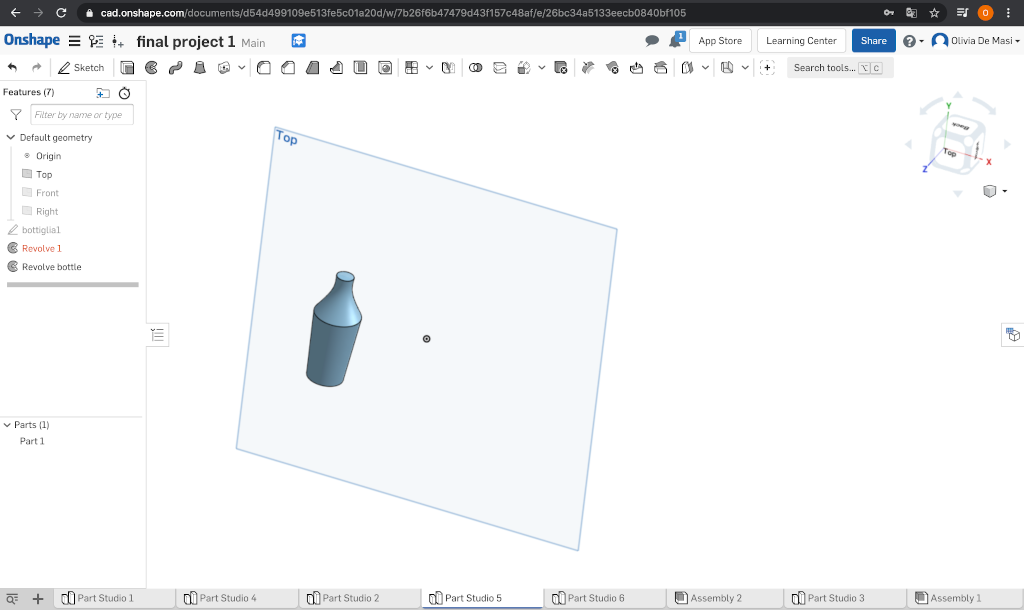
After repeating this procedure for every button board I decide to make the bottles to fit in the upper holes. I tried to do it by extruding a circle but it didn't work so I looked on the Fab Academy archive and I found a former student, Marco Cialone, who did a similar thing last year. I'll try to do what he's done using the command "revolve", so I sketch half of a bottle in a new worksheet and I use the command "revolve":
Now that I have the complete bottle rack and the bottles I can assemble it all in a new assembly sheet. I use the same method that I've used to assemble the button board:
This a small video to show how I used the command "slider mate" to make my bottles move:
- In the next days I'll work out a way to put a theme on my website and improve the text containers, images and colors.
- I will improve my skills on Onshape.
- I will work on Fusion 360 and xDesign.
To make the 3D model downloadable I used Sketchfab. I created a free online account with which I can make my models public and get an embedded code too.