Assignment 7
Computer-Controlled Machining

group assignment
do your lab's safety training
test runout, alignment, fixturing, speeds, feeds, materials, and toolpaths for your machine
https://fabacademy.org/2022/labs/ciudadmexico/cdmx_computer-controlled-machining.html
individual assignment
make (design+mill+assemble) something big (~meter-scale)
extra credit: don't use fasteners or glue
extra credit: include curved surfaces

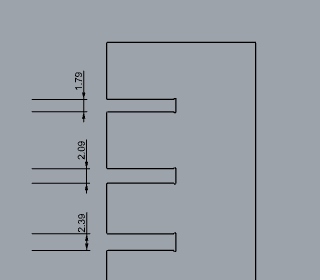
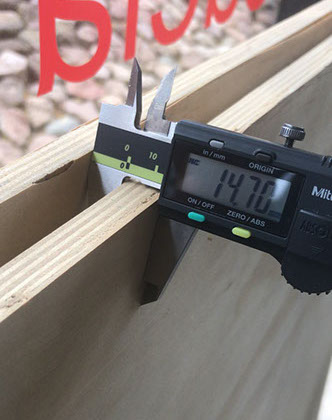
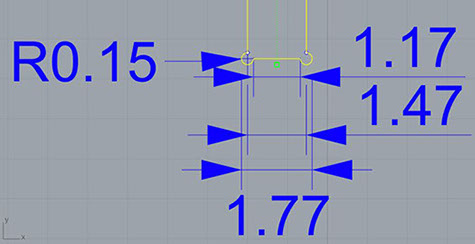
For the group assignment model and cut the test file of internal and external thicknesses.
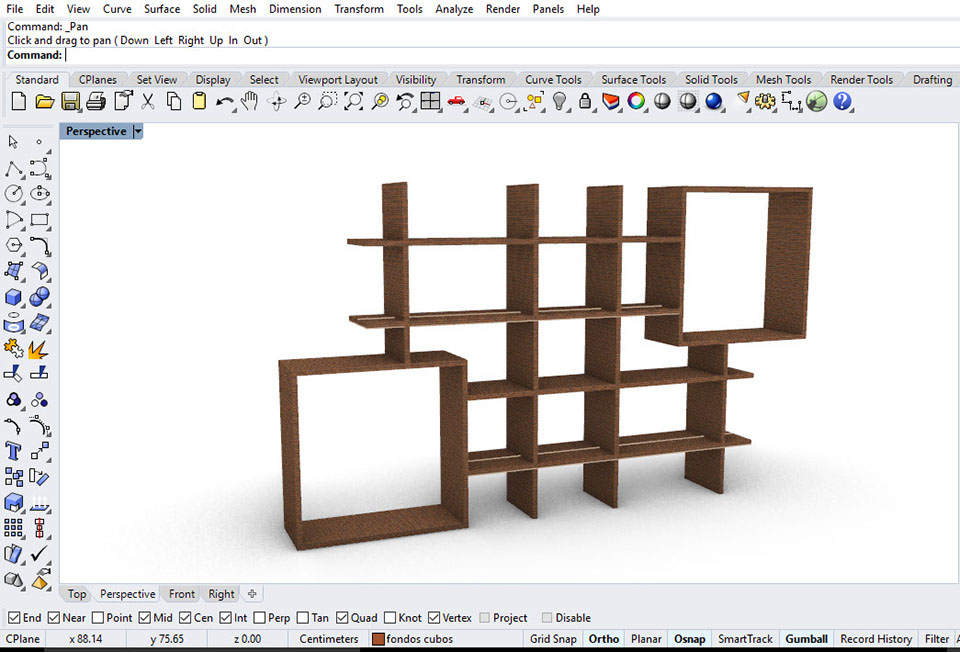
It was modeled in Rhino software


Modeled in Rhino software and saved as 2004 polylines
.jpg?crc=3792691721)
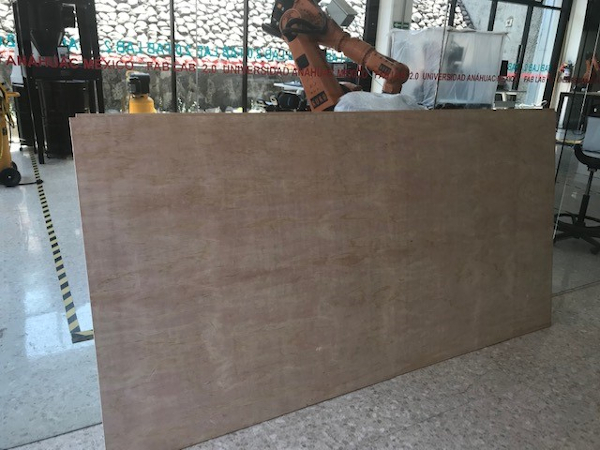
Router CNC AXYZ 4008 work space 1200 mm x 2400 mm
.jpg?crc=112422672)

.jpg?crc=214651657)
.jpg?crc=3854319905)
.jpg?crc=180352231)
As a result of the exercise was:
The original 18mm stroke in rhino creates a gap of 18.06mm and the material that is cut measures 11.4mm
.jpg?crc=4100248060)
For this work it was decided to design a bookcase with assemblies for its assembly. Designed and drawn in Rhino software


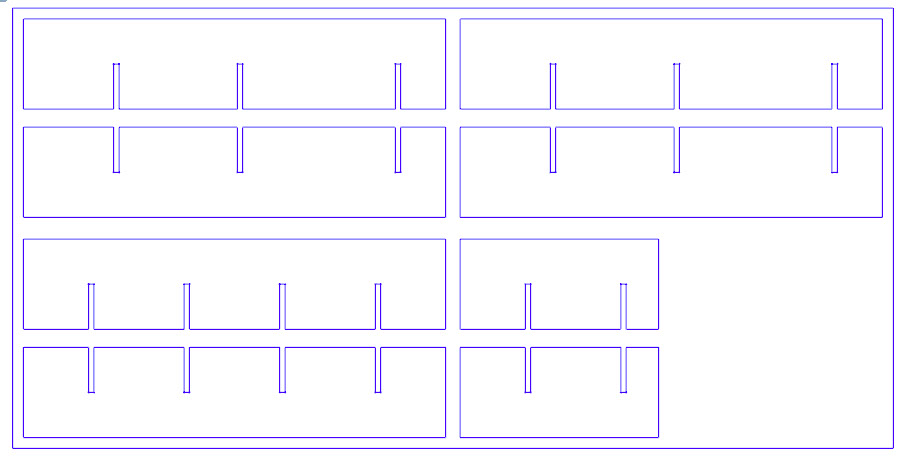
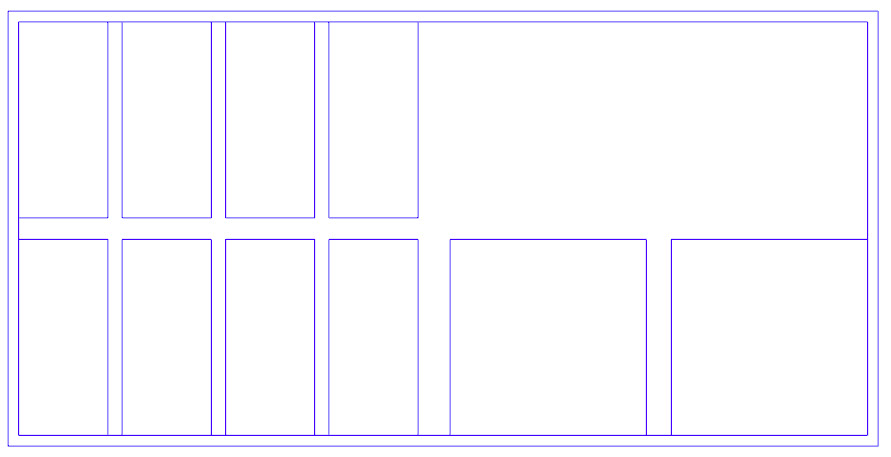
The layout of all the pieces that make up the shelves is made on a sheet and a half of plywood and the dog bone assembly is made on each one.
The cut is made with the 1/4 inch tool so we can see that they generate different internal and total measurements of the assembly.
To send the file to be machined to the Limac3103 Router we must generate a G code for the controller to recognize. Below are the steps in image of what to do to generate that code.
.jpg?crc=487949529)
Selecting the machine from the Universidad Anahuac north campus and the type of operation for 2 and a half axes for profiling to indicate that the cut will be on the outside
-crop-u46298.jpg?crc=47577509)
We are selecting the Drive Region paths to assign the cutting order
-crop-u46305.jpg?crc=4145809916)
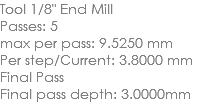
Select flat mill tool3
-crop-u46312.jpg?crc=3777565330)

The type of tool is selected by its shape
.jpg?crc=3807249571)
characteristics of the cut feede & speed feed and speed here we select load from tool so that the values of the selected tool are loaded
.jpg?crc=167541436)
Clearence Plane is the safe height where the tool can move without hitting the material
.jpg?crc=158575879)
cutting parameters the tolerance indicates how smooth the curves are and stock is attached to the curve because it is at zero
Cutting direction and sense to the right or left and whether it is inside or outside the curves or line
Number of passes that the cut gives and the measurement between them for the final finish
.jpg?crc=4255791449)
Cut levels we indicate the thickness of the material and mark how much it is in cut and how much it is in finish finish and rough depth every 5. We indicate the order of depth, cut and type of figure
.jpg?crc=3884908519)
Here we indicate how the tool is going to approach and move away from the piece, this also depends on the hardness of the material, as in this case it is wood, we indicate none
.jpg?crc=236568983)
We select the bridges so that the connectors of the piece to the material remain and do not rise from the material when being cut, in addition to selecting the type of bridge and size
.jpg?crc=98087501)
Here we select the finish of the corners to be dog bone type for the assembly
.jpg?crc=337547867)
Ordering of the pieces to be cut to optimize the time and cutting of the machine
Finally we select generate or save to save the parameters of the work sequence to be carried out
.jpg?crc=452889306)
We verify the file in notepad with the g code that is transmitted to the machine
.jpg?crc=439266260)
Here we select the simulate tab for the cut to be made.
.jpg?crc=284549101)
And we send the simulation with the Play button, having as a result in orange color we see the material and the lines or grooves through which the tool passed
Everything ready and checked in the virtual simulation to try to avoid errors and work as we want.
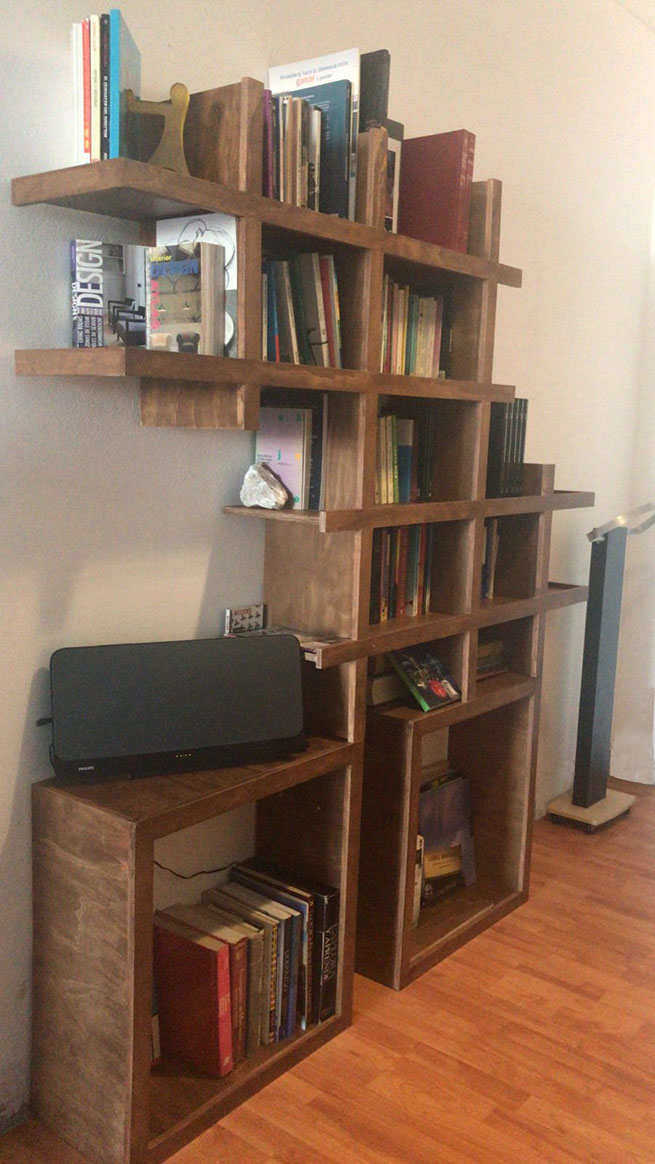
Finally finished and placed in the assigned space already in use, it was decided to modify the original configuration since it was better in the space of the apartment entrance where it was placed.
-crop-u40562.jpg?crc=358971354)

The origin x=0, y=0 is assigned in a corner of the board and also the height in the axis z=5 so that the head lowers and the cutter is only used in our board and does not cut the sacrifice board of the router
For the individual assignment I used the other Limac brand router model R3103 that the university has with a workspace of 1200 x 2400 mm
-crop-u40577.jpg?crc=241013376)
.jpg?crc=412075669)
-crop-u40584.jpg?crc=467763905)
The cut is made with the 1/4 inch
Assemble dog bone to half wood and this generates each shelve
.jpg?crc=4015126996)
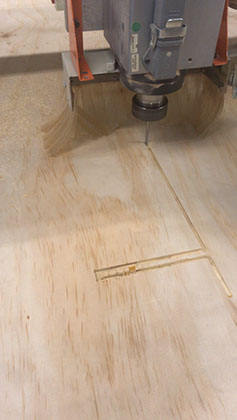
Machine cutting process using the Rhino cam plug-in compatible with the router
Finished cutting job
.jpg?crc=3886120461)
.jpg?crc=4211944092)
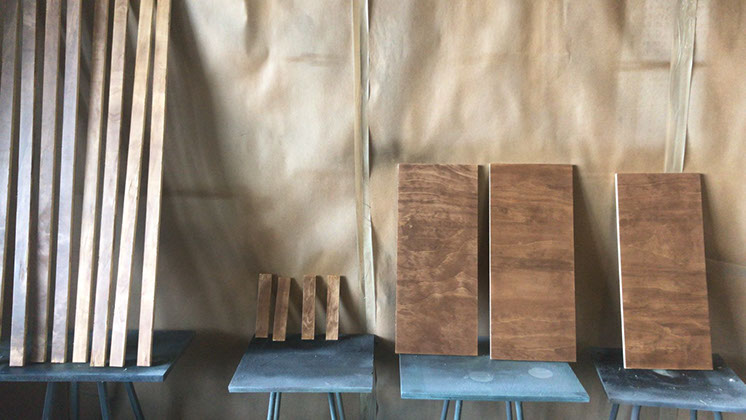
The pieces are carefully removed since the slats will be used to form the fronts as a finishing touch for the bookcase
The pieces are sanded to give it a walnut-colored wood stain finish.
.jpg?crc=287604943)
-crop-u40665.jpg?crc=135495225)
.jpg?crc=4021604044)
The pieces are assembled before measuring the front strips to give it a better finish.
.jpg?crc=35104087)
.jpg?crc=286397448)
The fronts of each piece are placed and joined with the nail gun
Once the pieces are measured and cut, the ink is put on them and a transparent varnish is applied to protect the material and give it a better finish in sight and touch.
-crop-u40673.jpg?crc=29218187)
Already assembled seen from the back
Already assembled seen from the front
.jpg?crc=3784935365)