Computer-Controlled Cutting
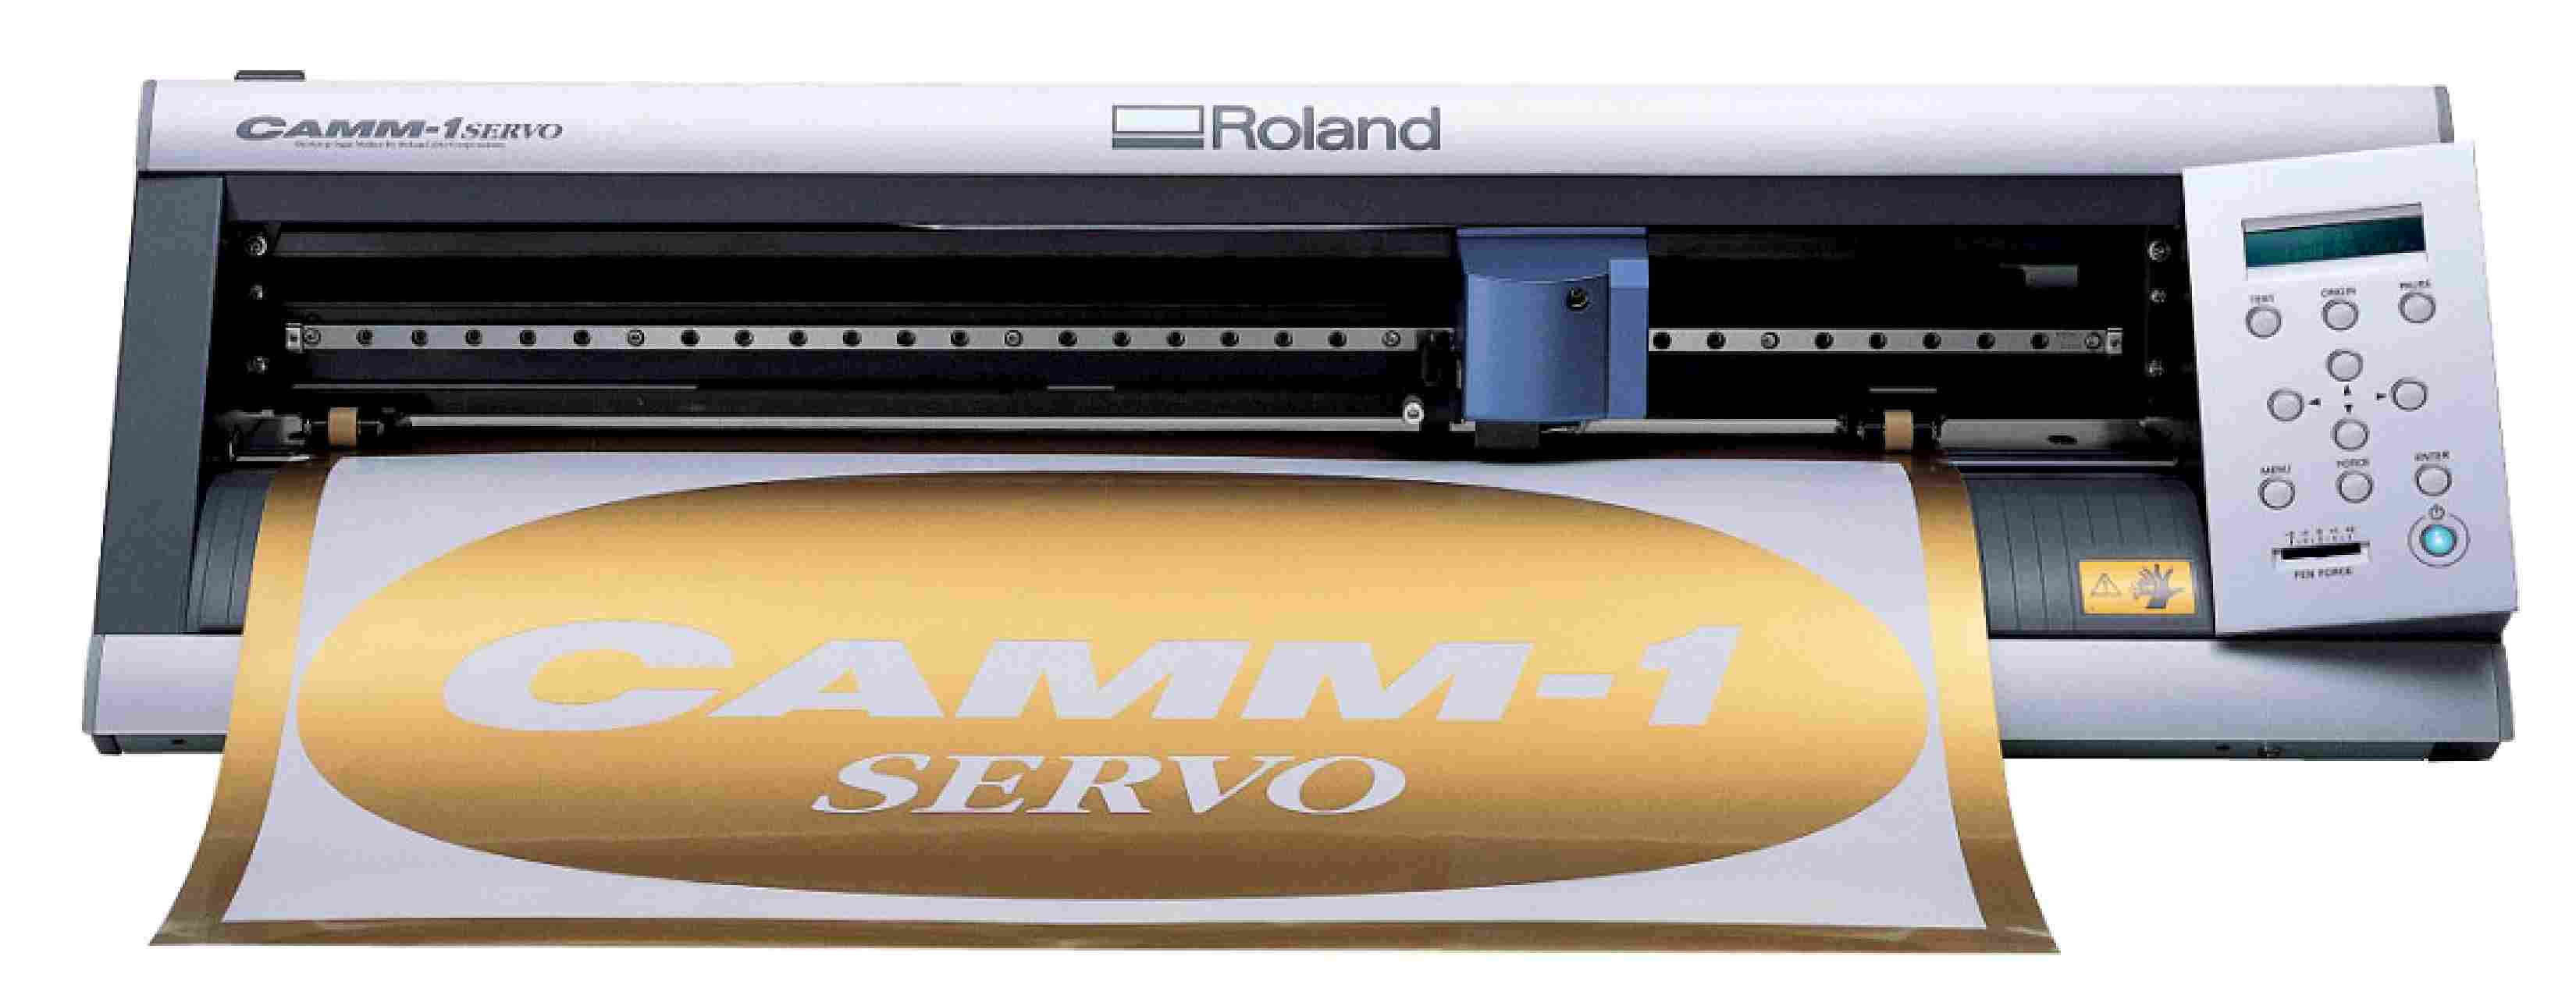
- Roland GX-24.
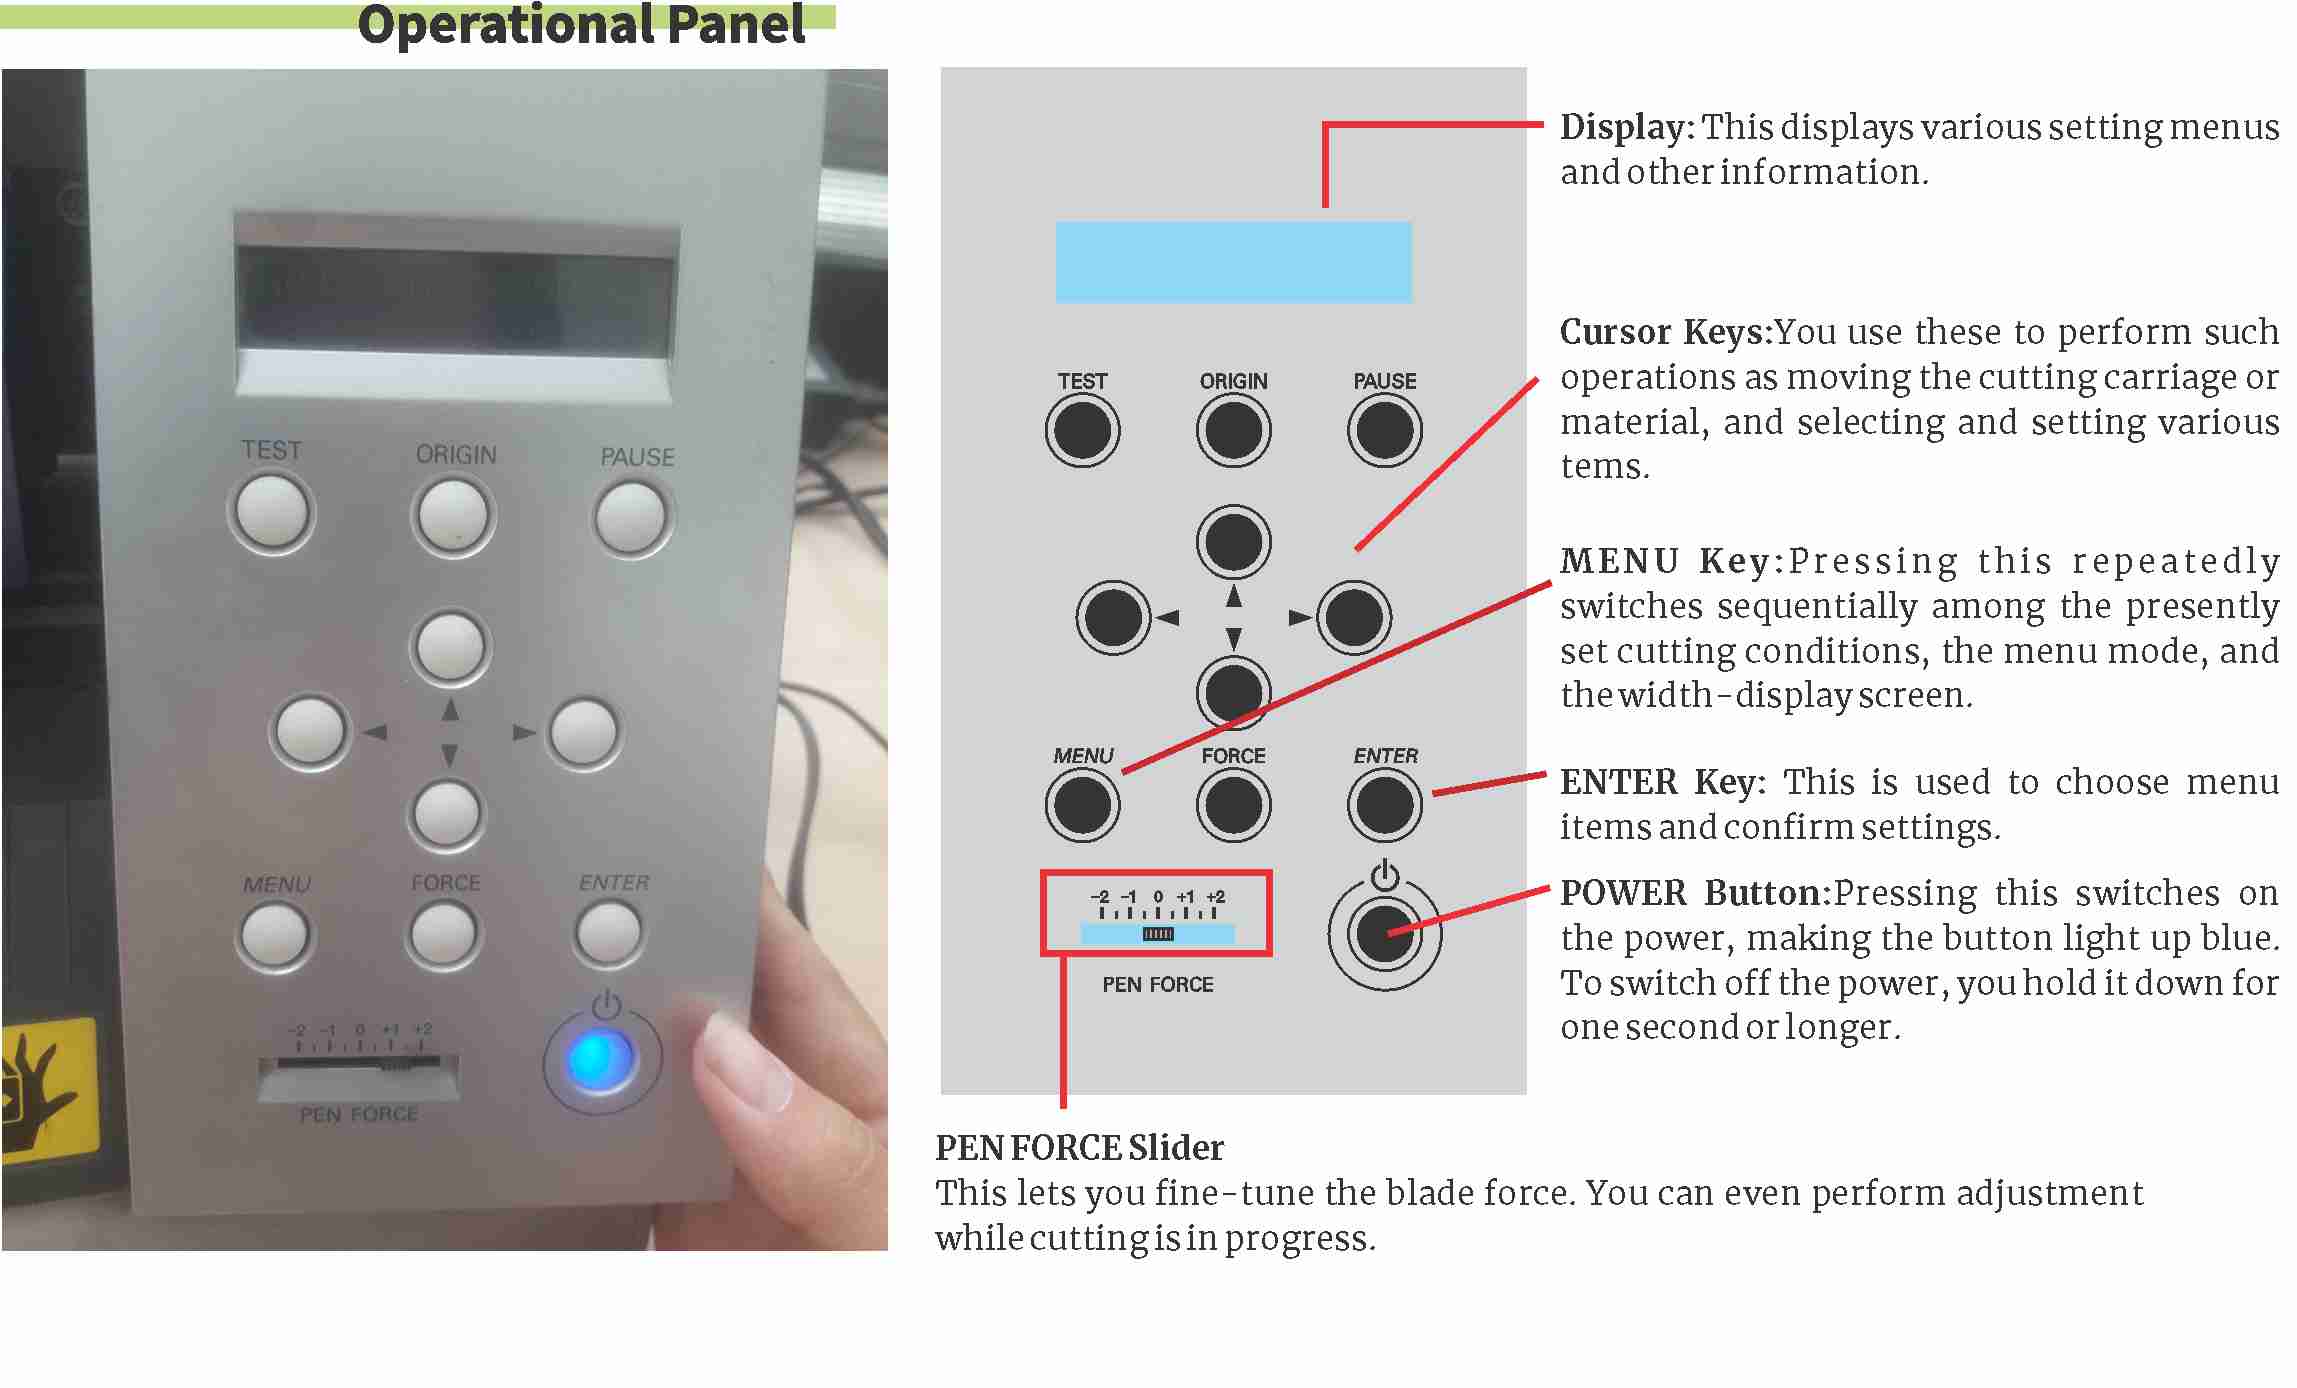
This is the machine that I’ll be working with, it has no many setting options as other machines so I’ll make a resume of the most important parts.
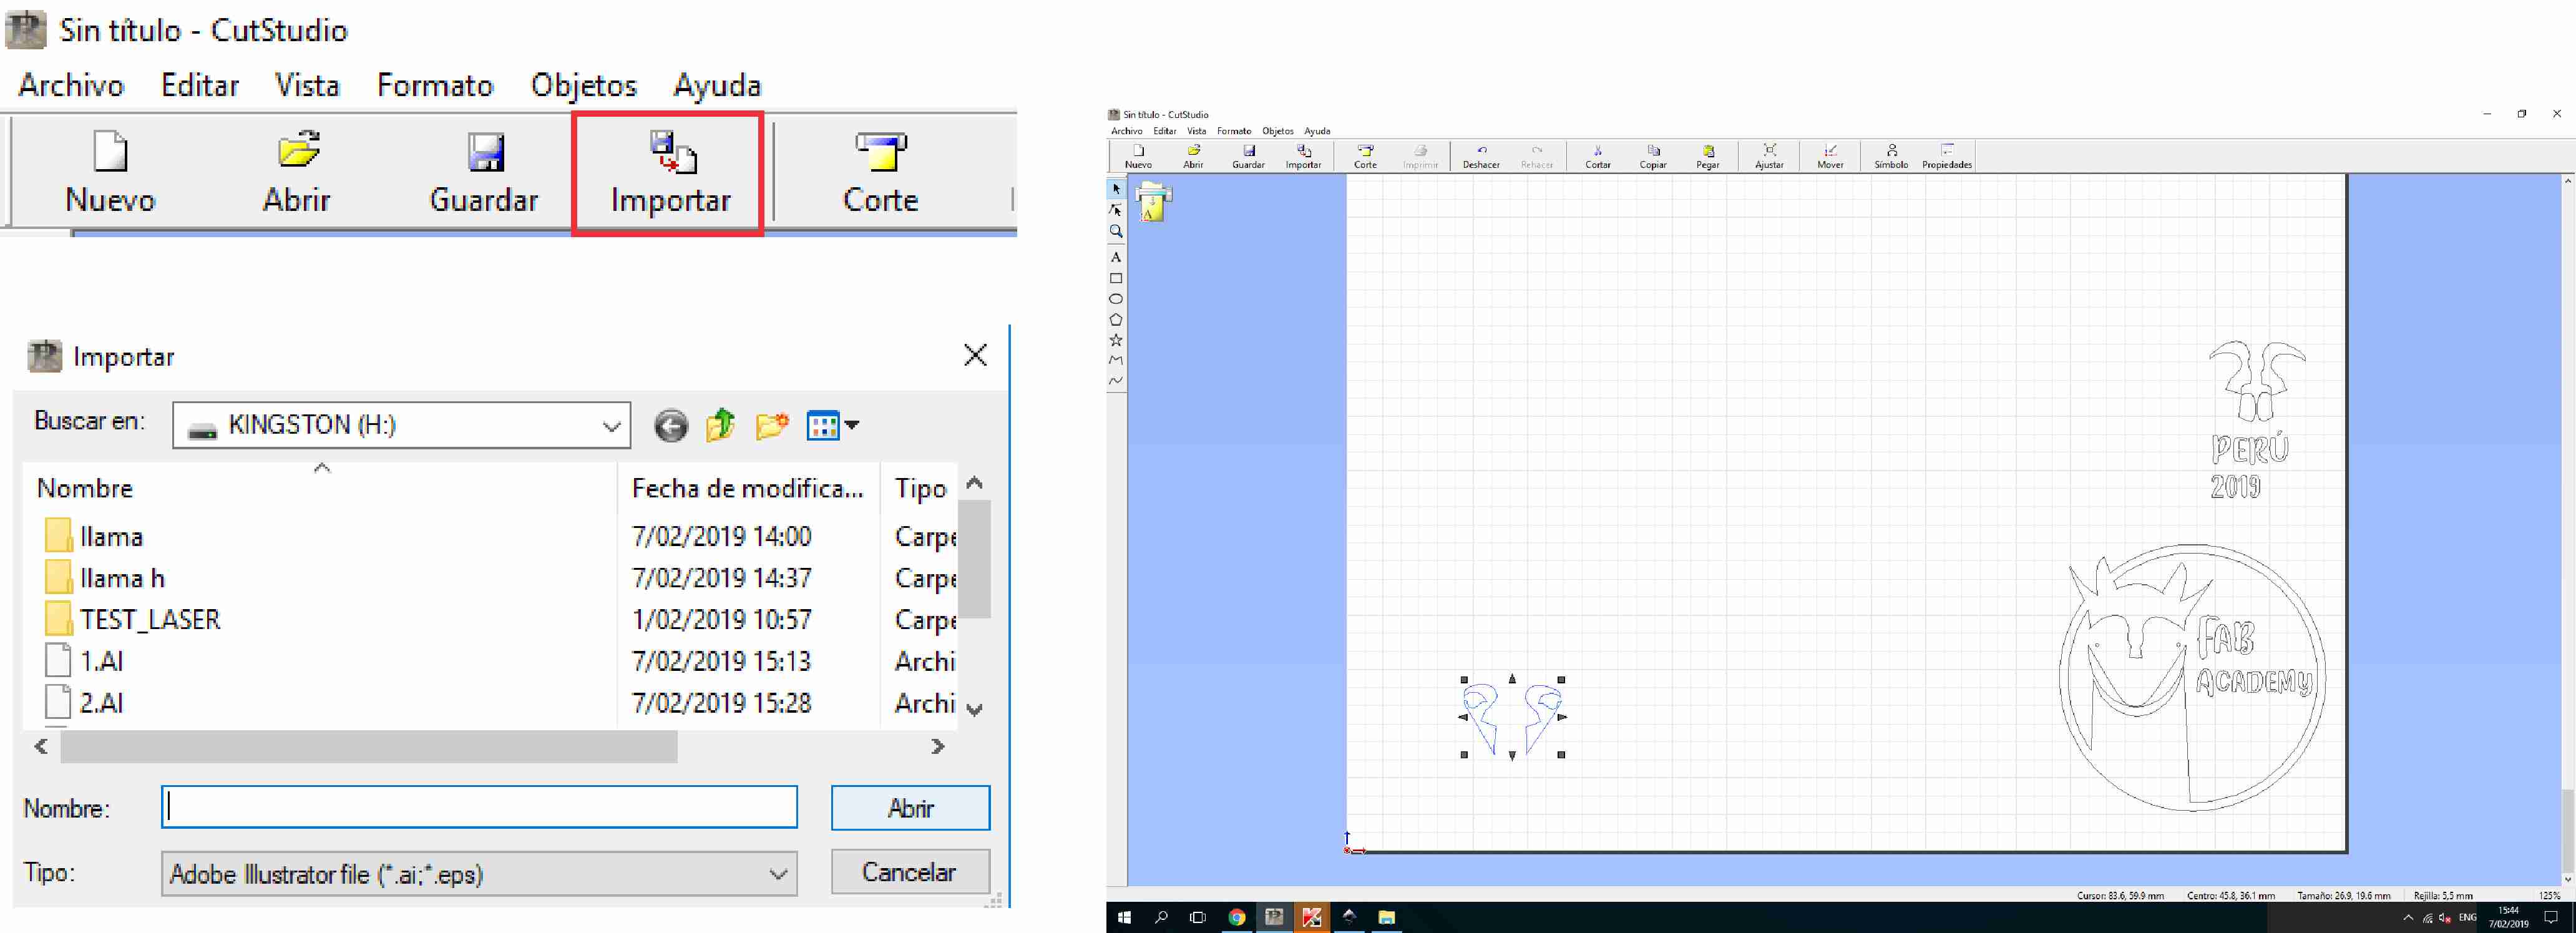
- Cutstudio - Step 1: Import your file.
Open the software CutStudio, on the toolbar next to the option save click Import and select your file, could be AI, EPS or PLT, in this case AI.
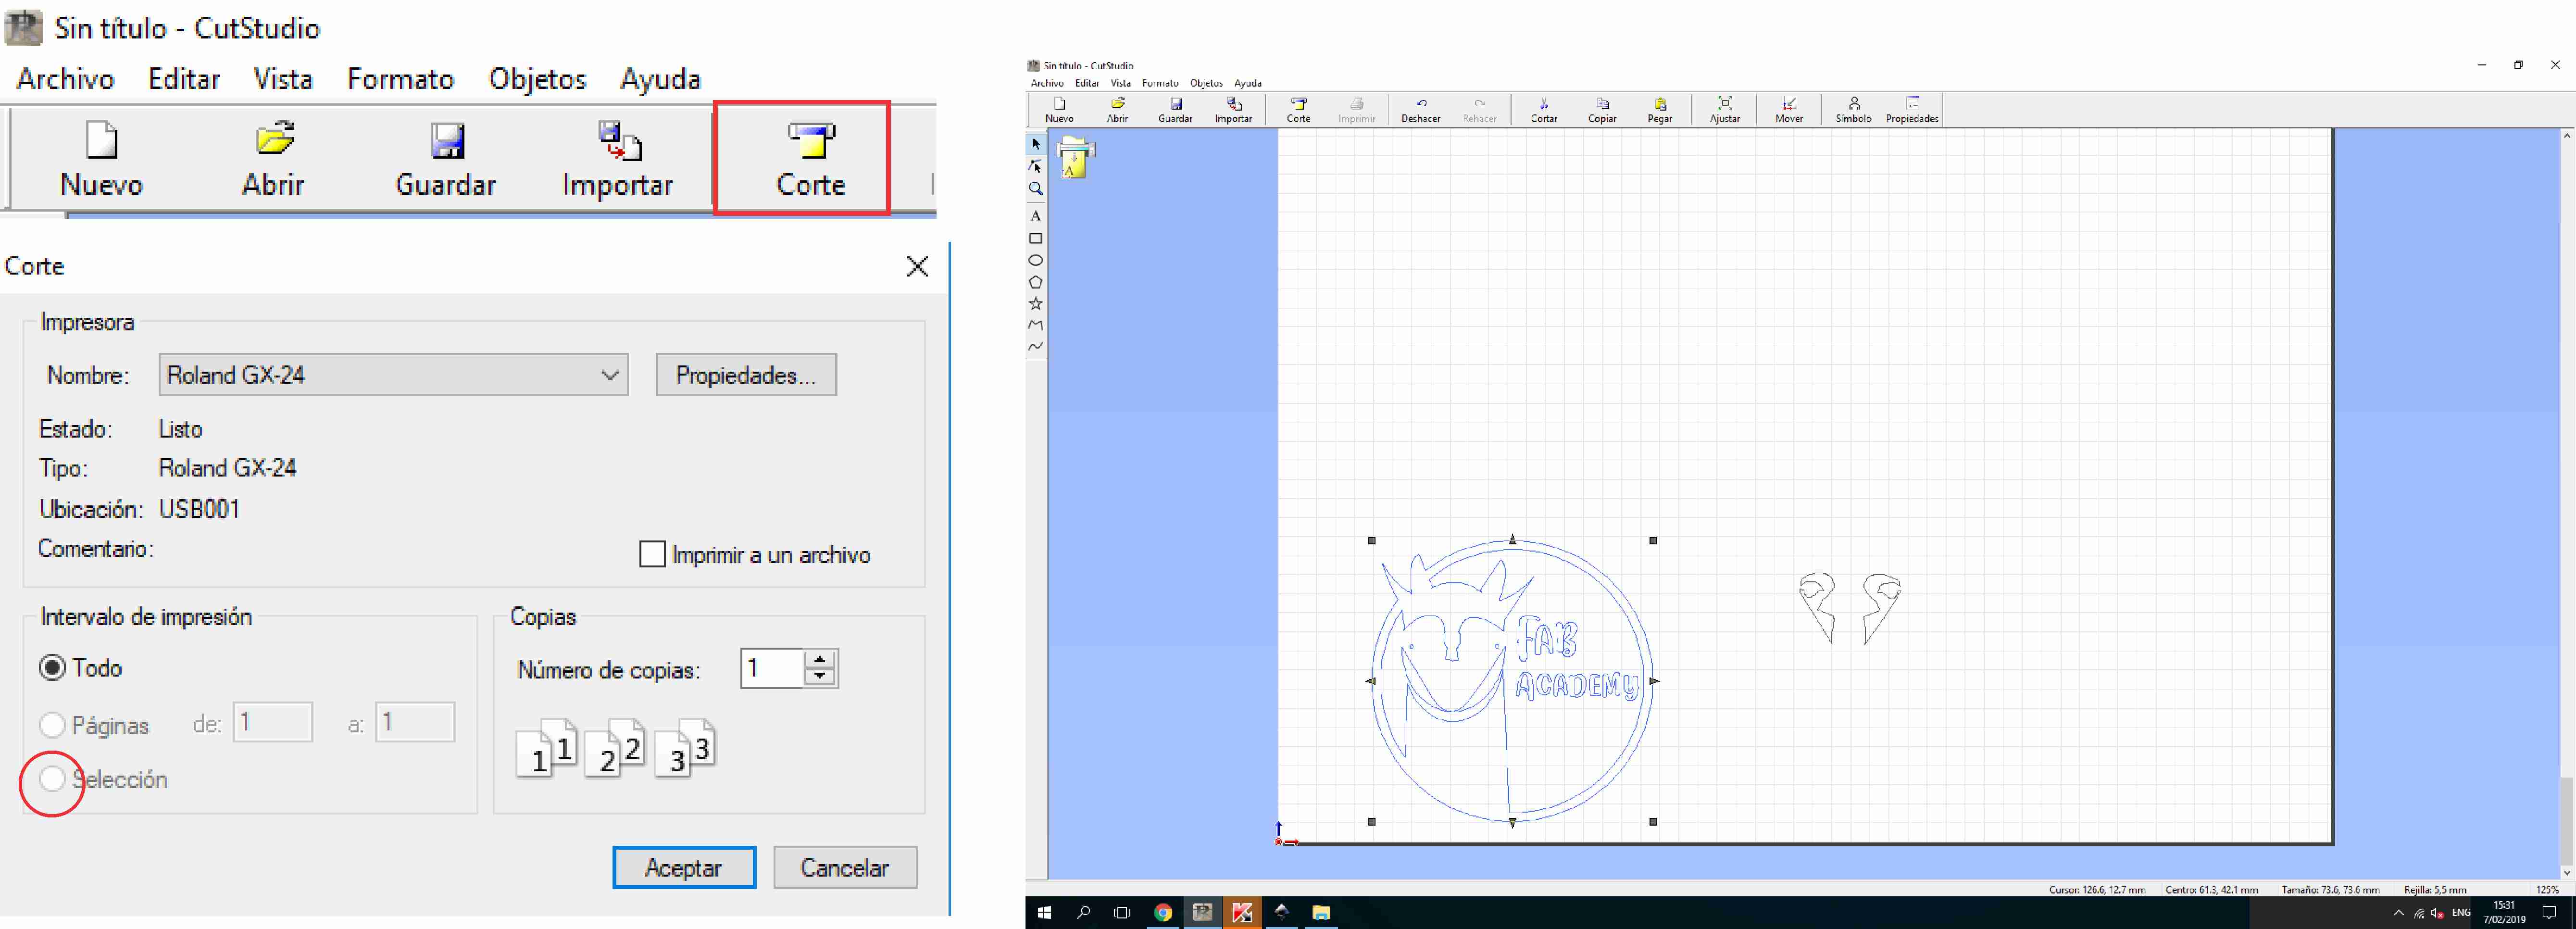
- Step 2: Load Material & properties.
After doing that load material into the vynilcutter then click on Cut > Properties > Get from Machine, that's to put the real dimensions of your work
You can decide to cut all the lines o just some of them by selecting the ones you want to cut and then click on "Selection" in the cut panel
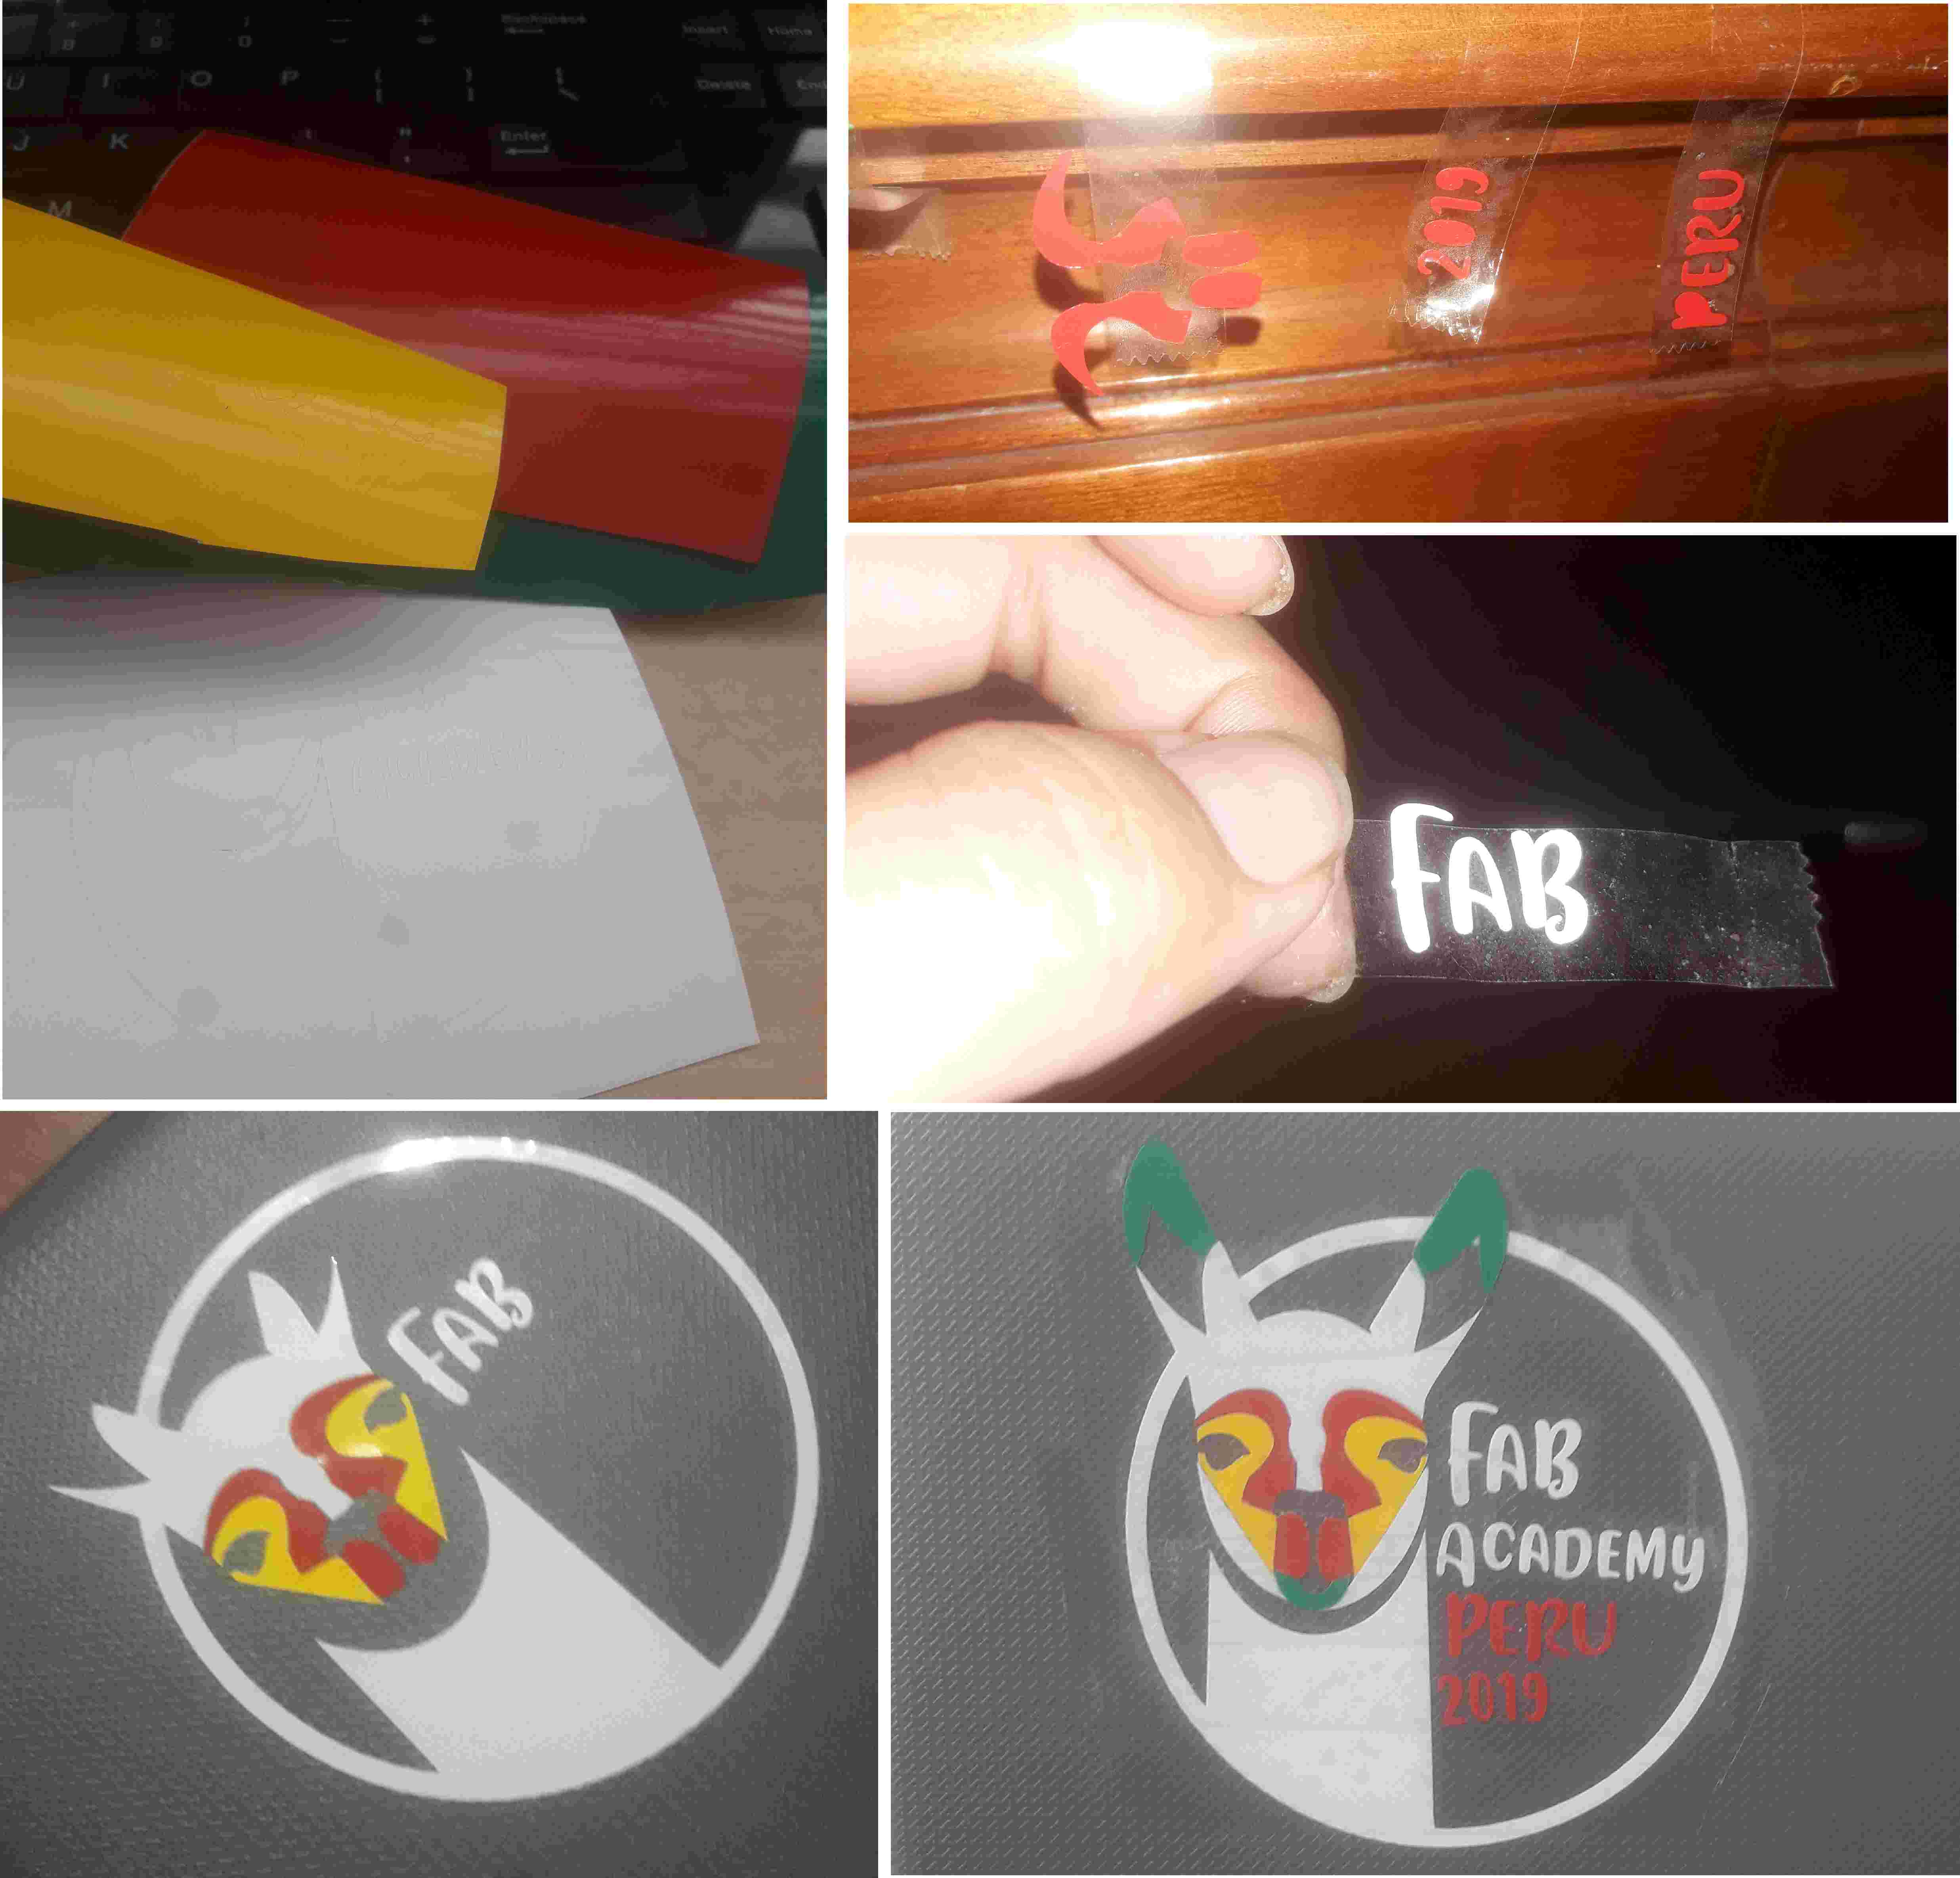
- Step 3: Transfer the sticker.
There are few methods to transfer the sticker but I decided to place duck tape(weak one) over my sticker and pull, then place the design on the item where I wanted to transfer it to(my laptop) and gently pull away the duck tape. DONE.
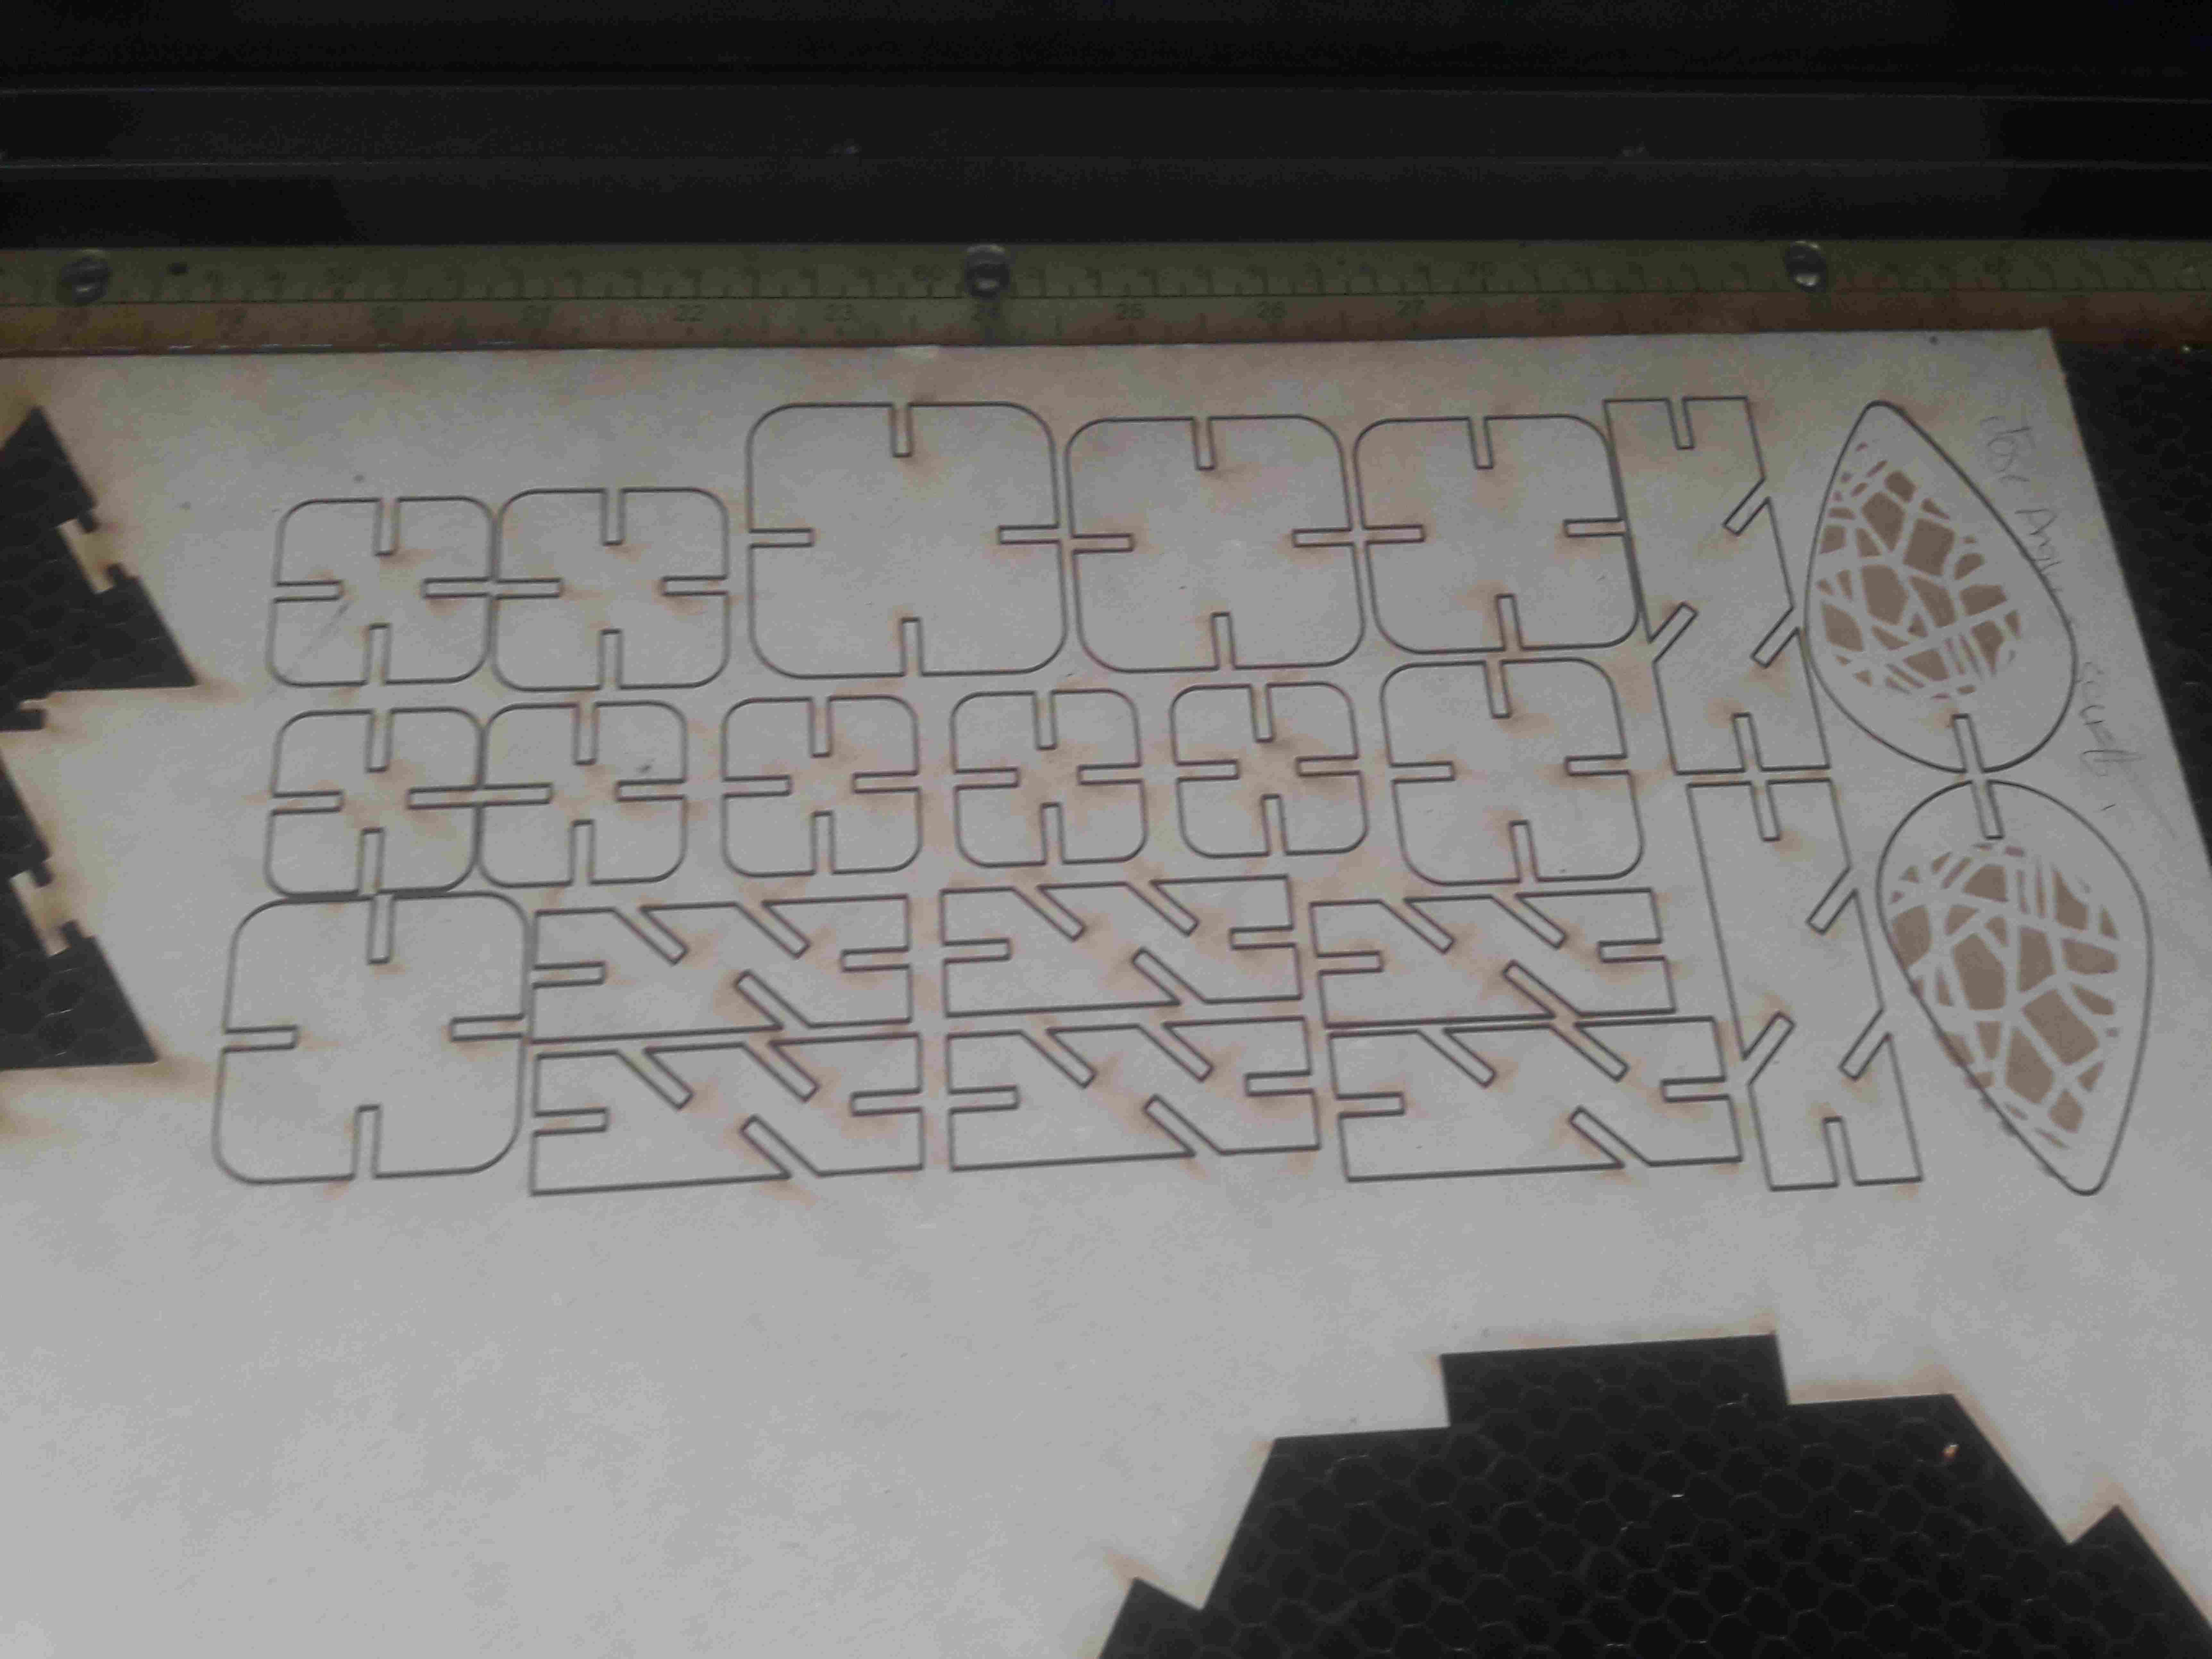
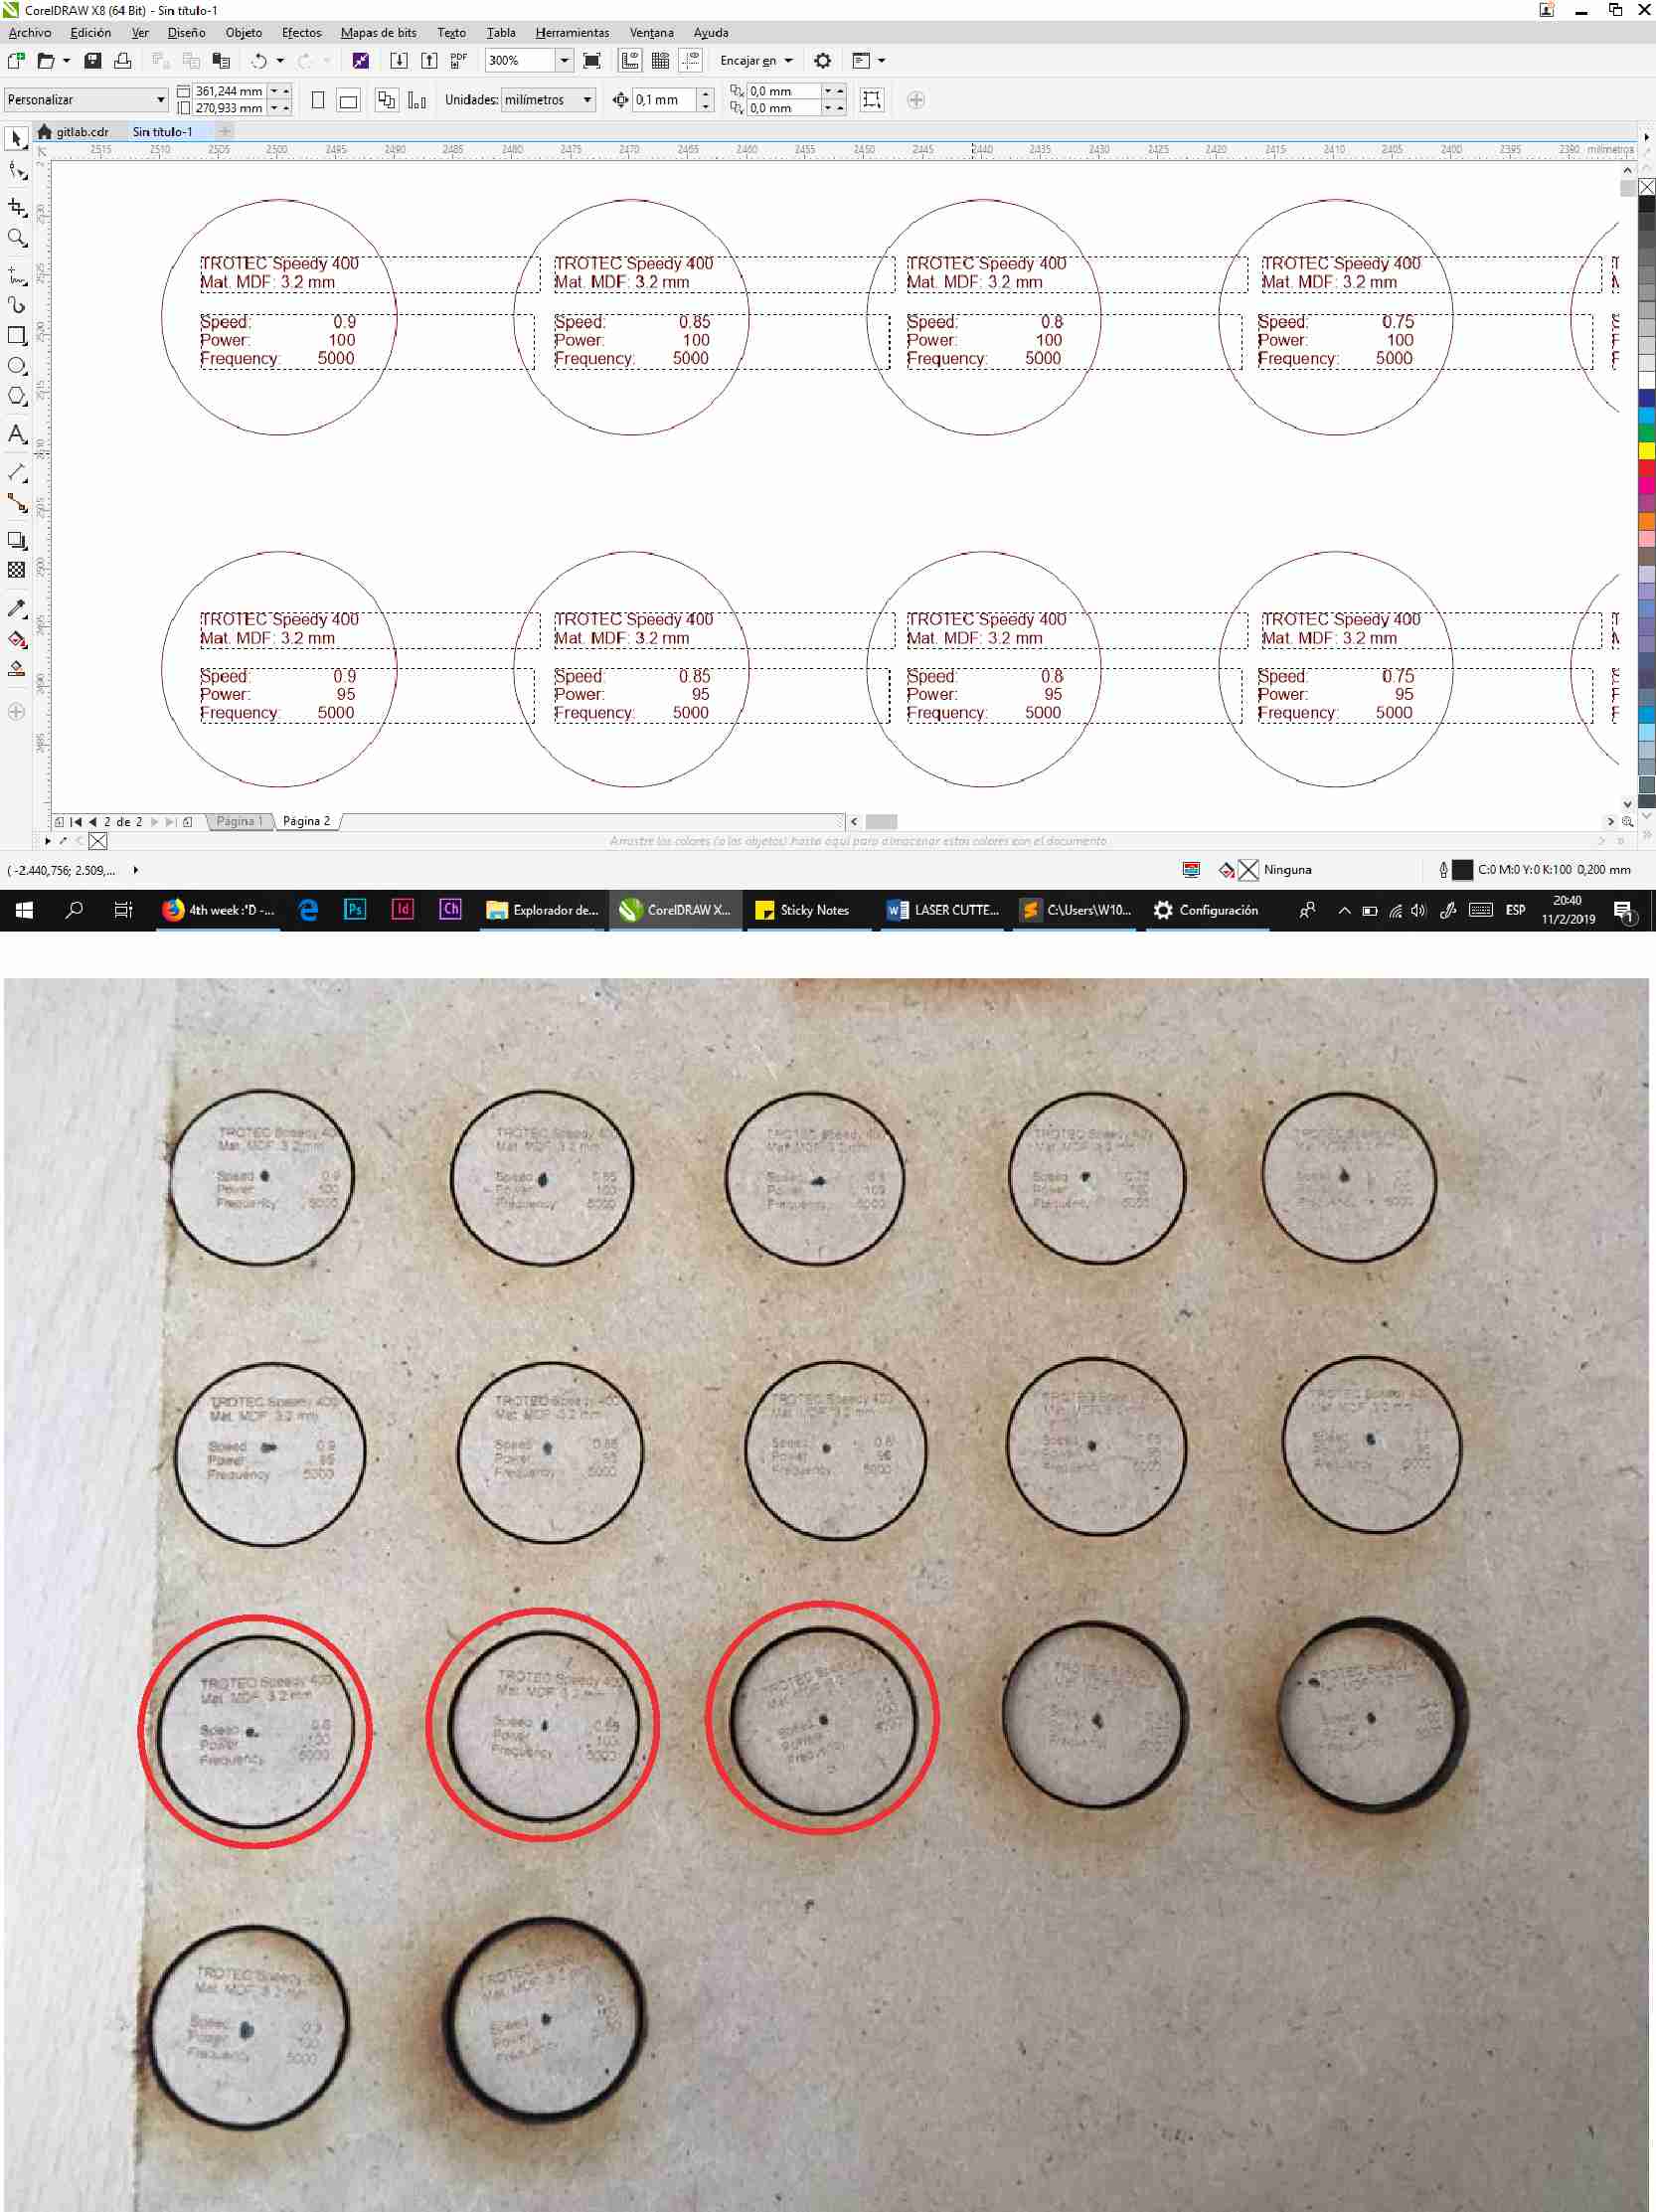
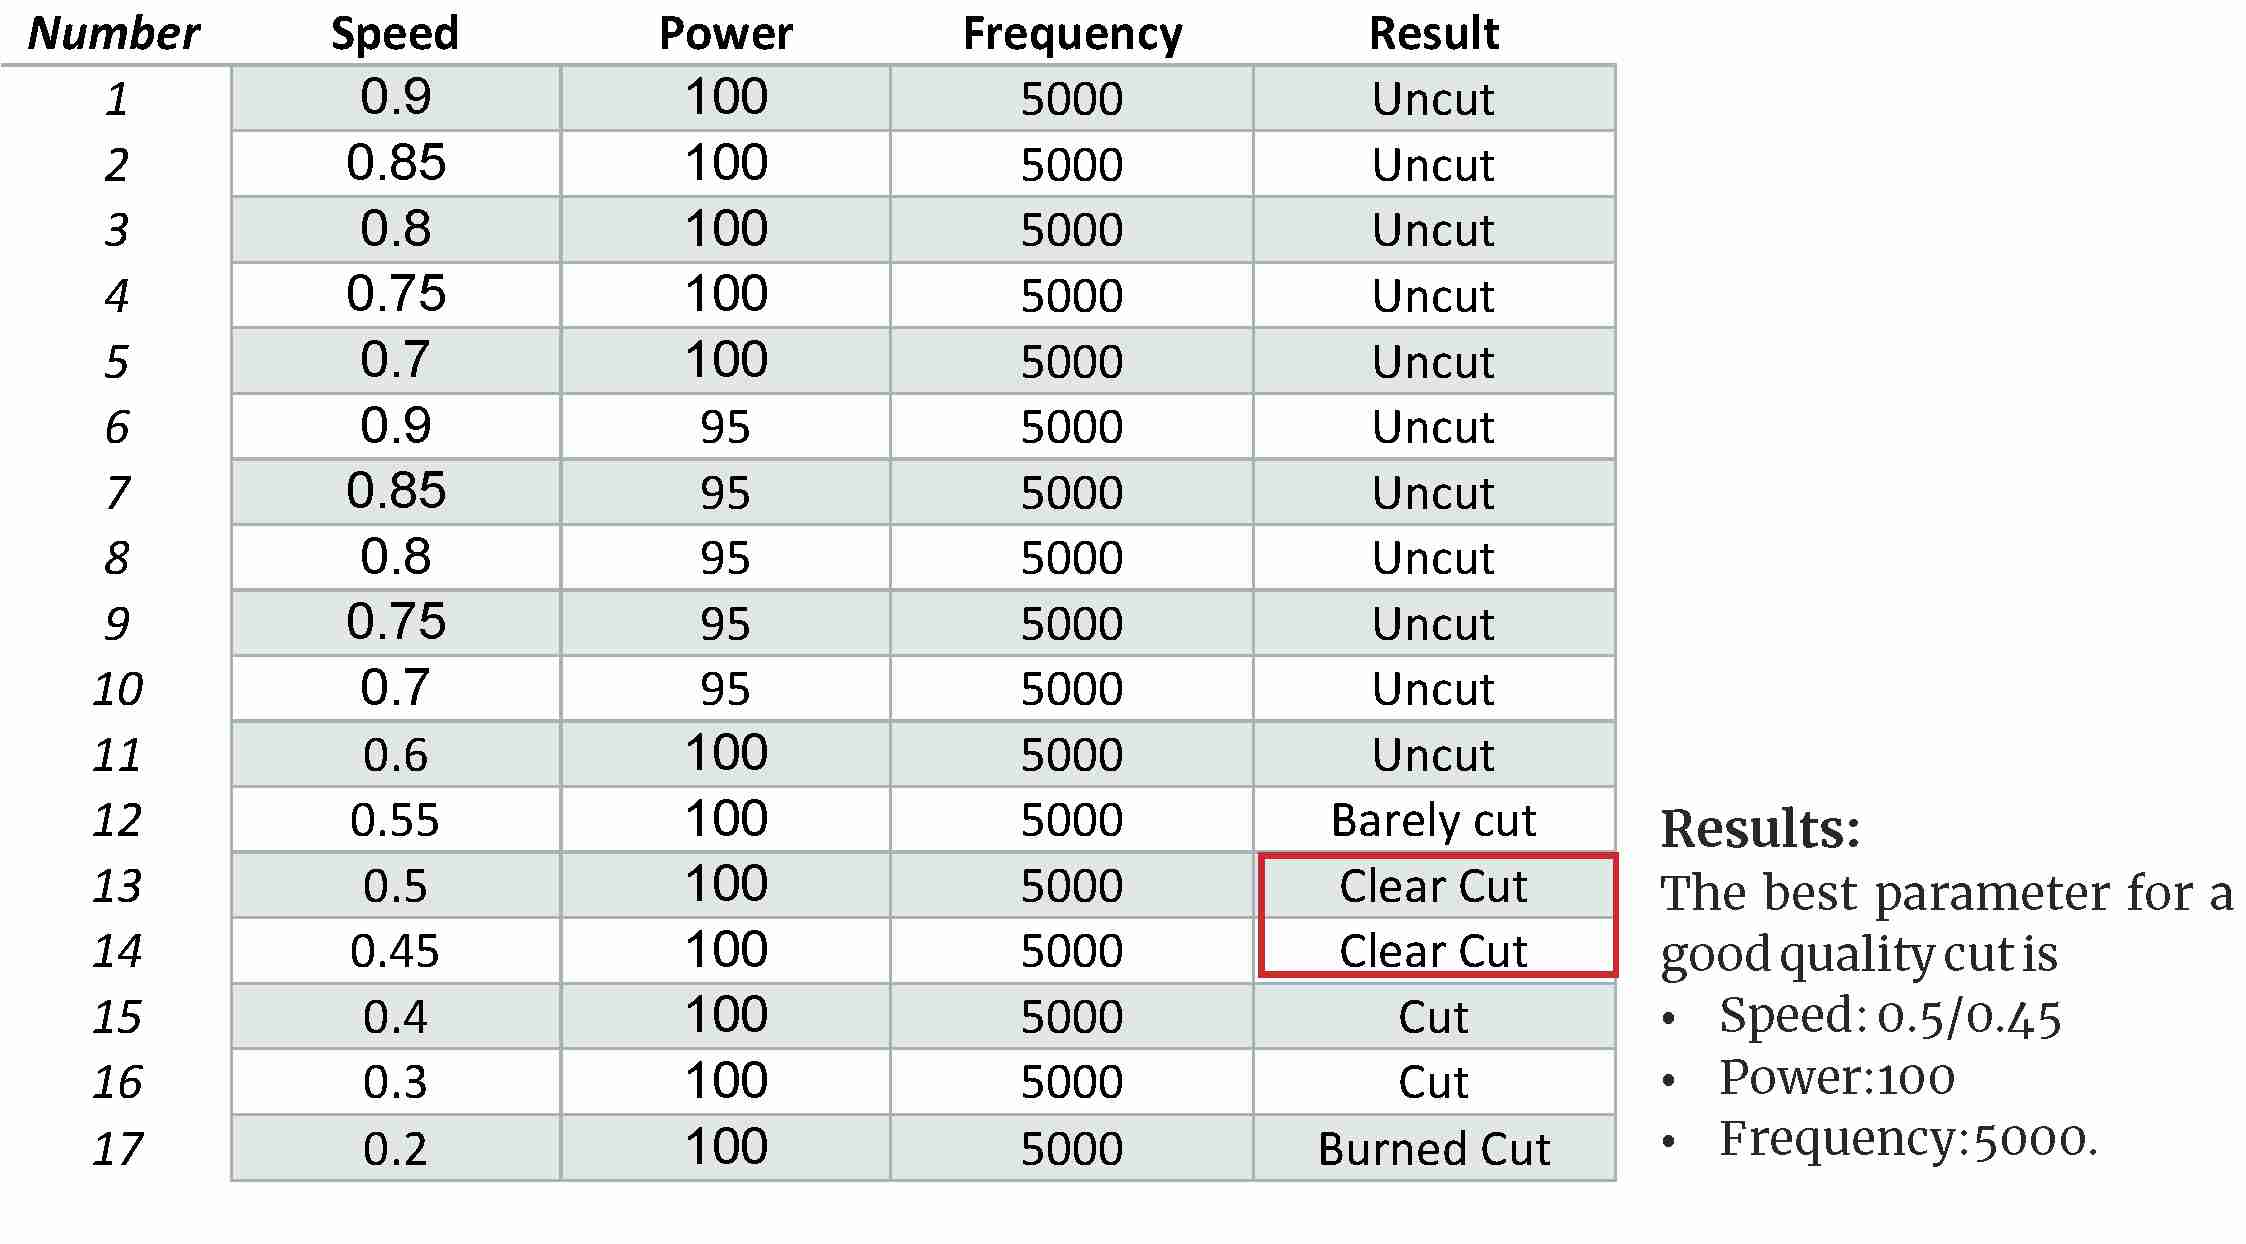
Small circles were design on Rhinoceros, exported to .dxf file extension and opened on CorelDraw (the machine is configured to be used with this software) and cutted with different parameters of power and speed.
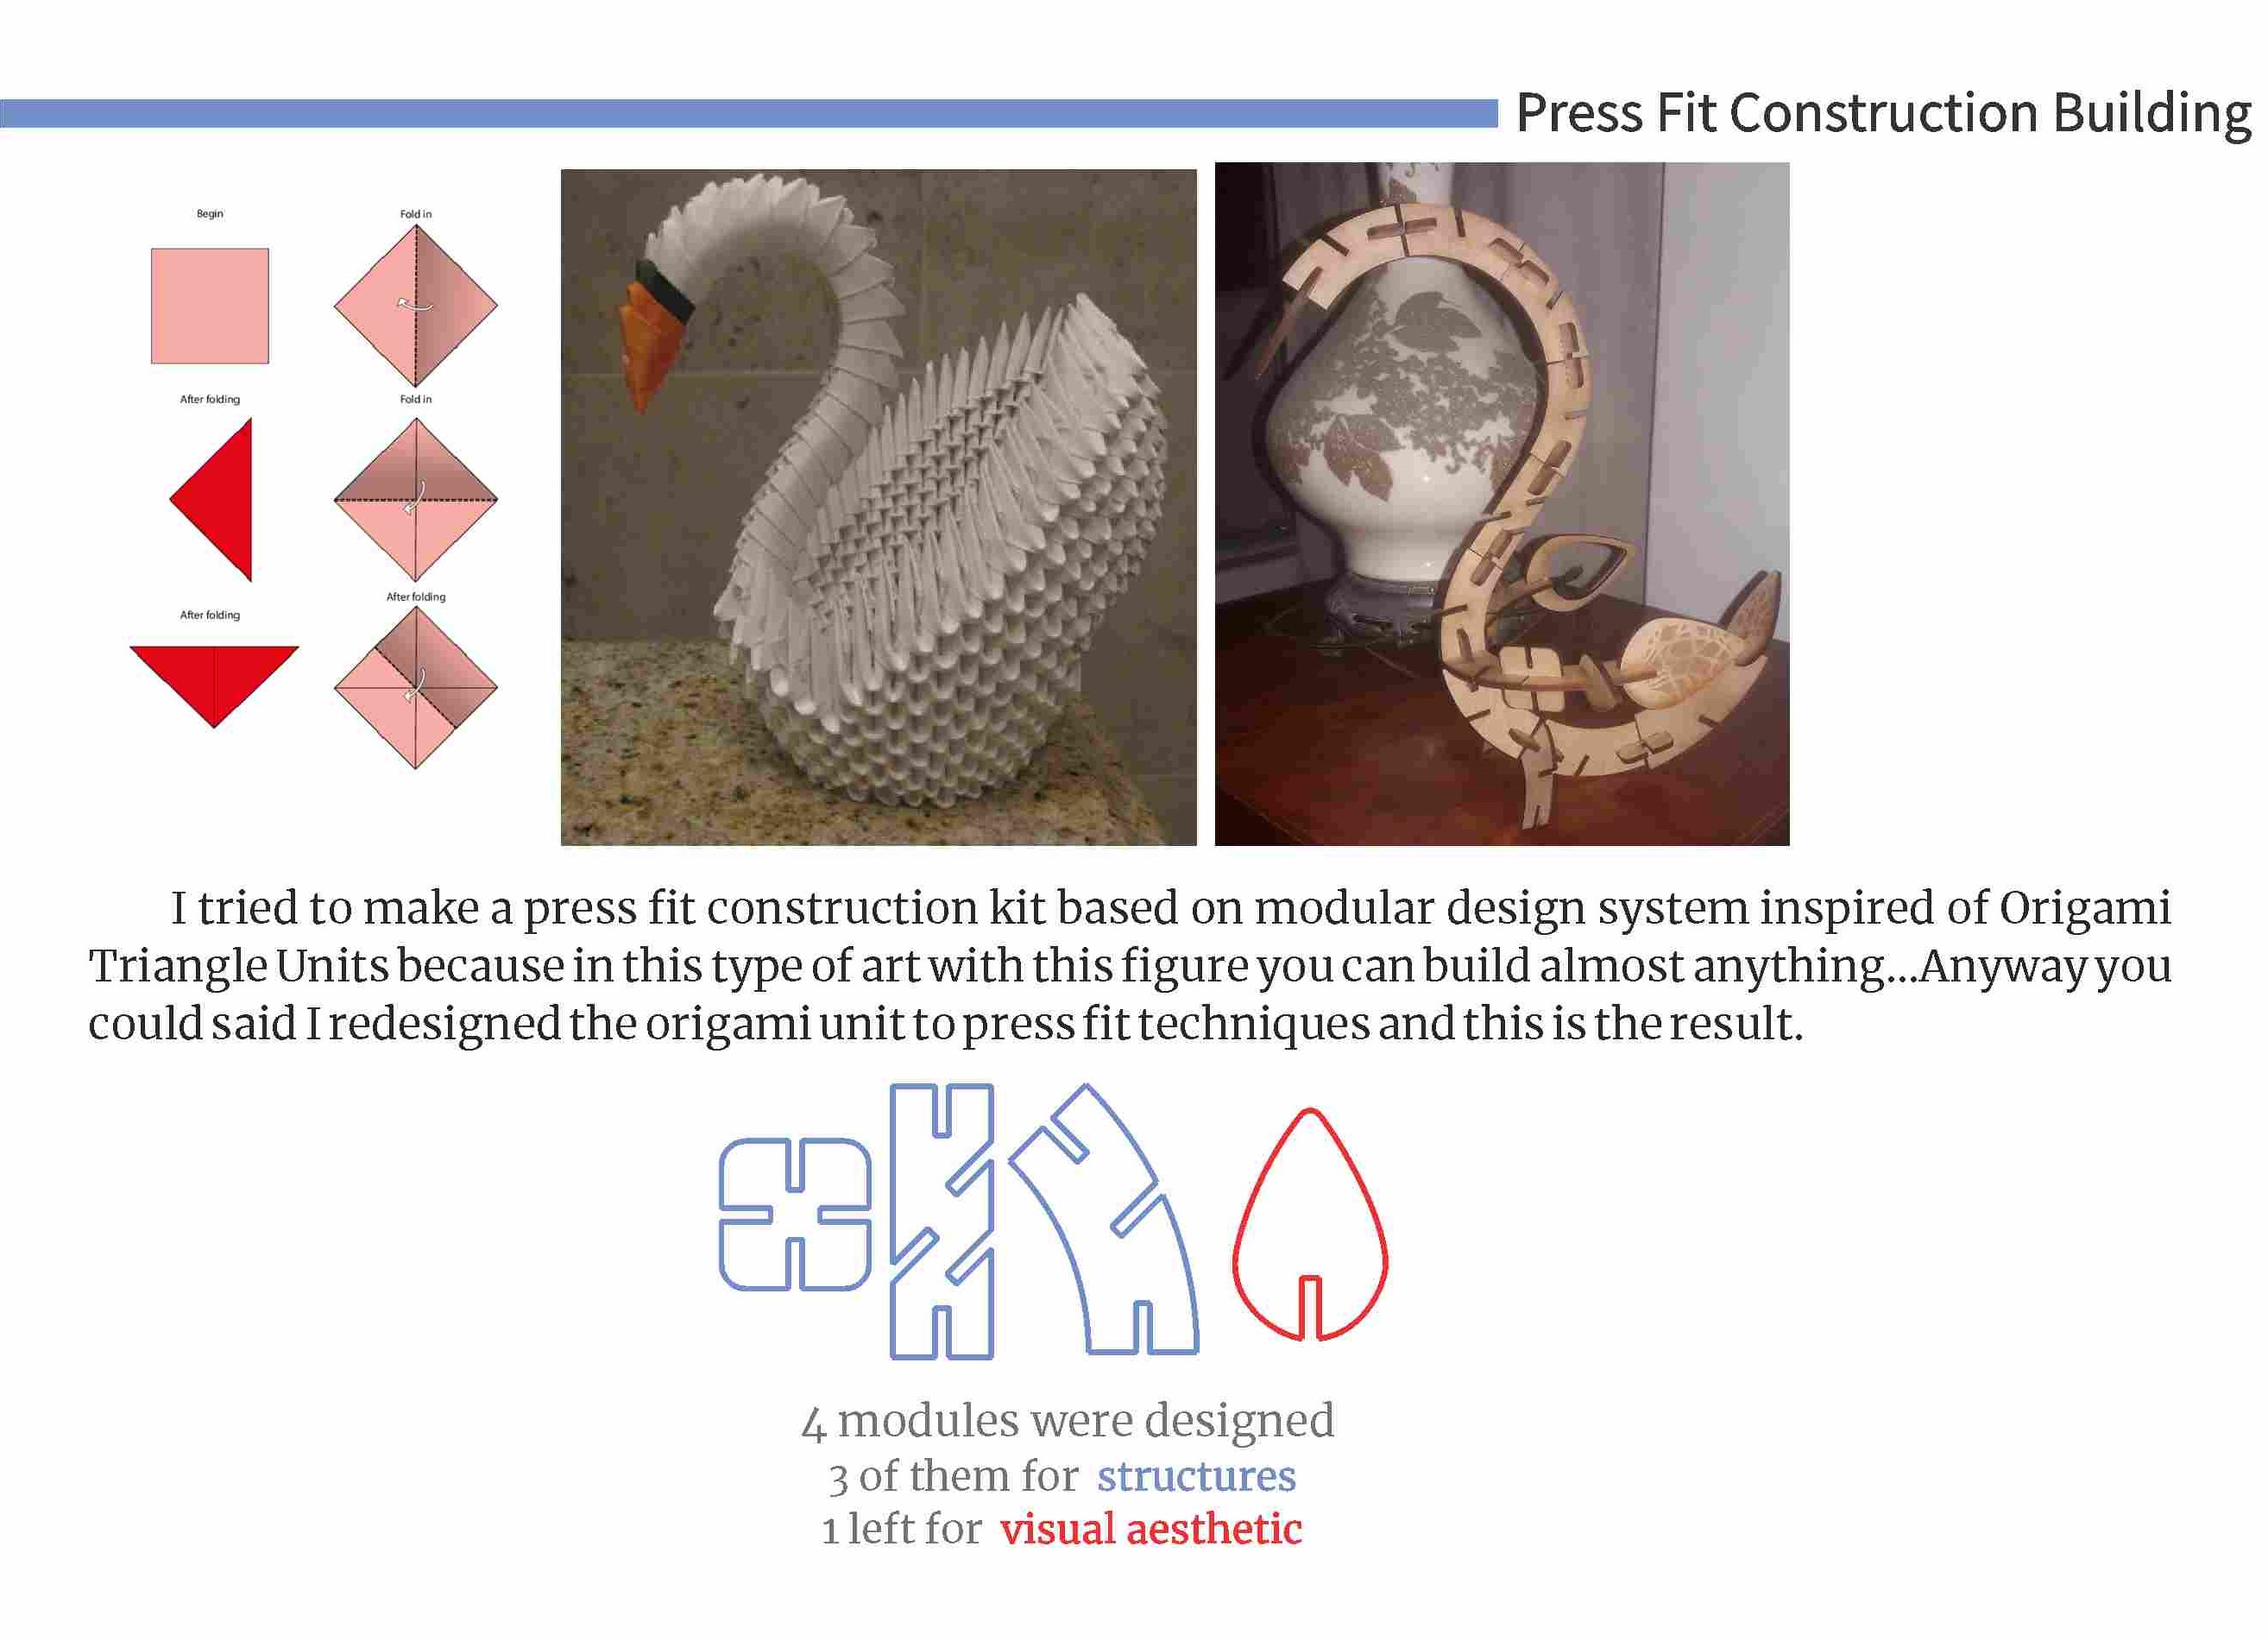
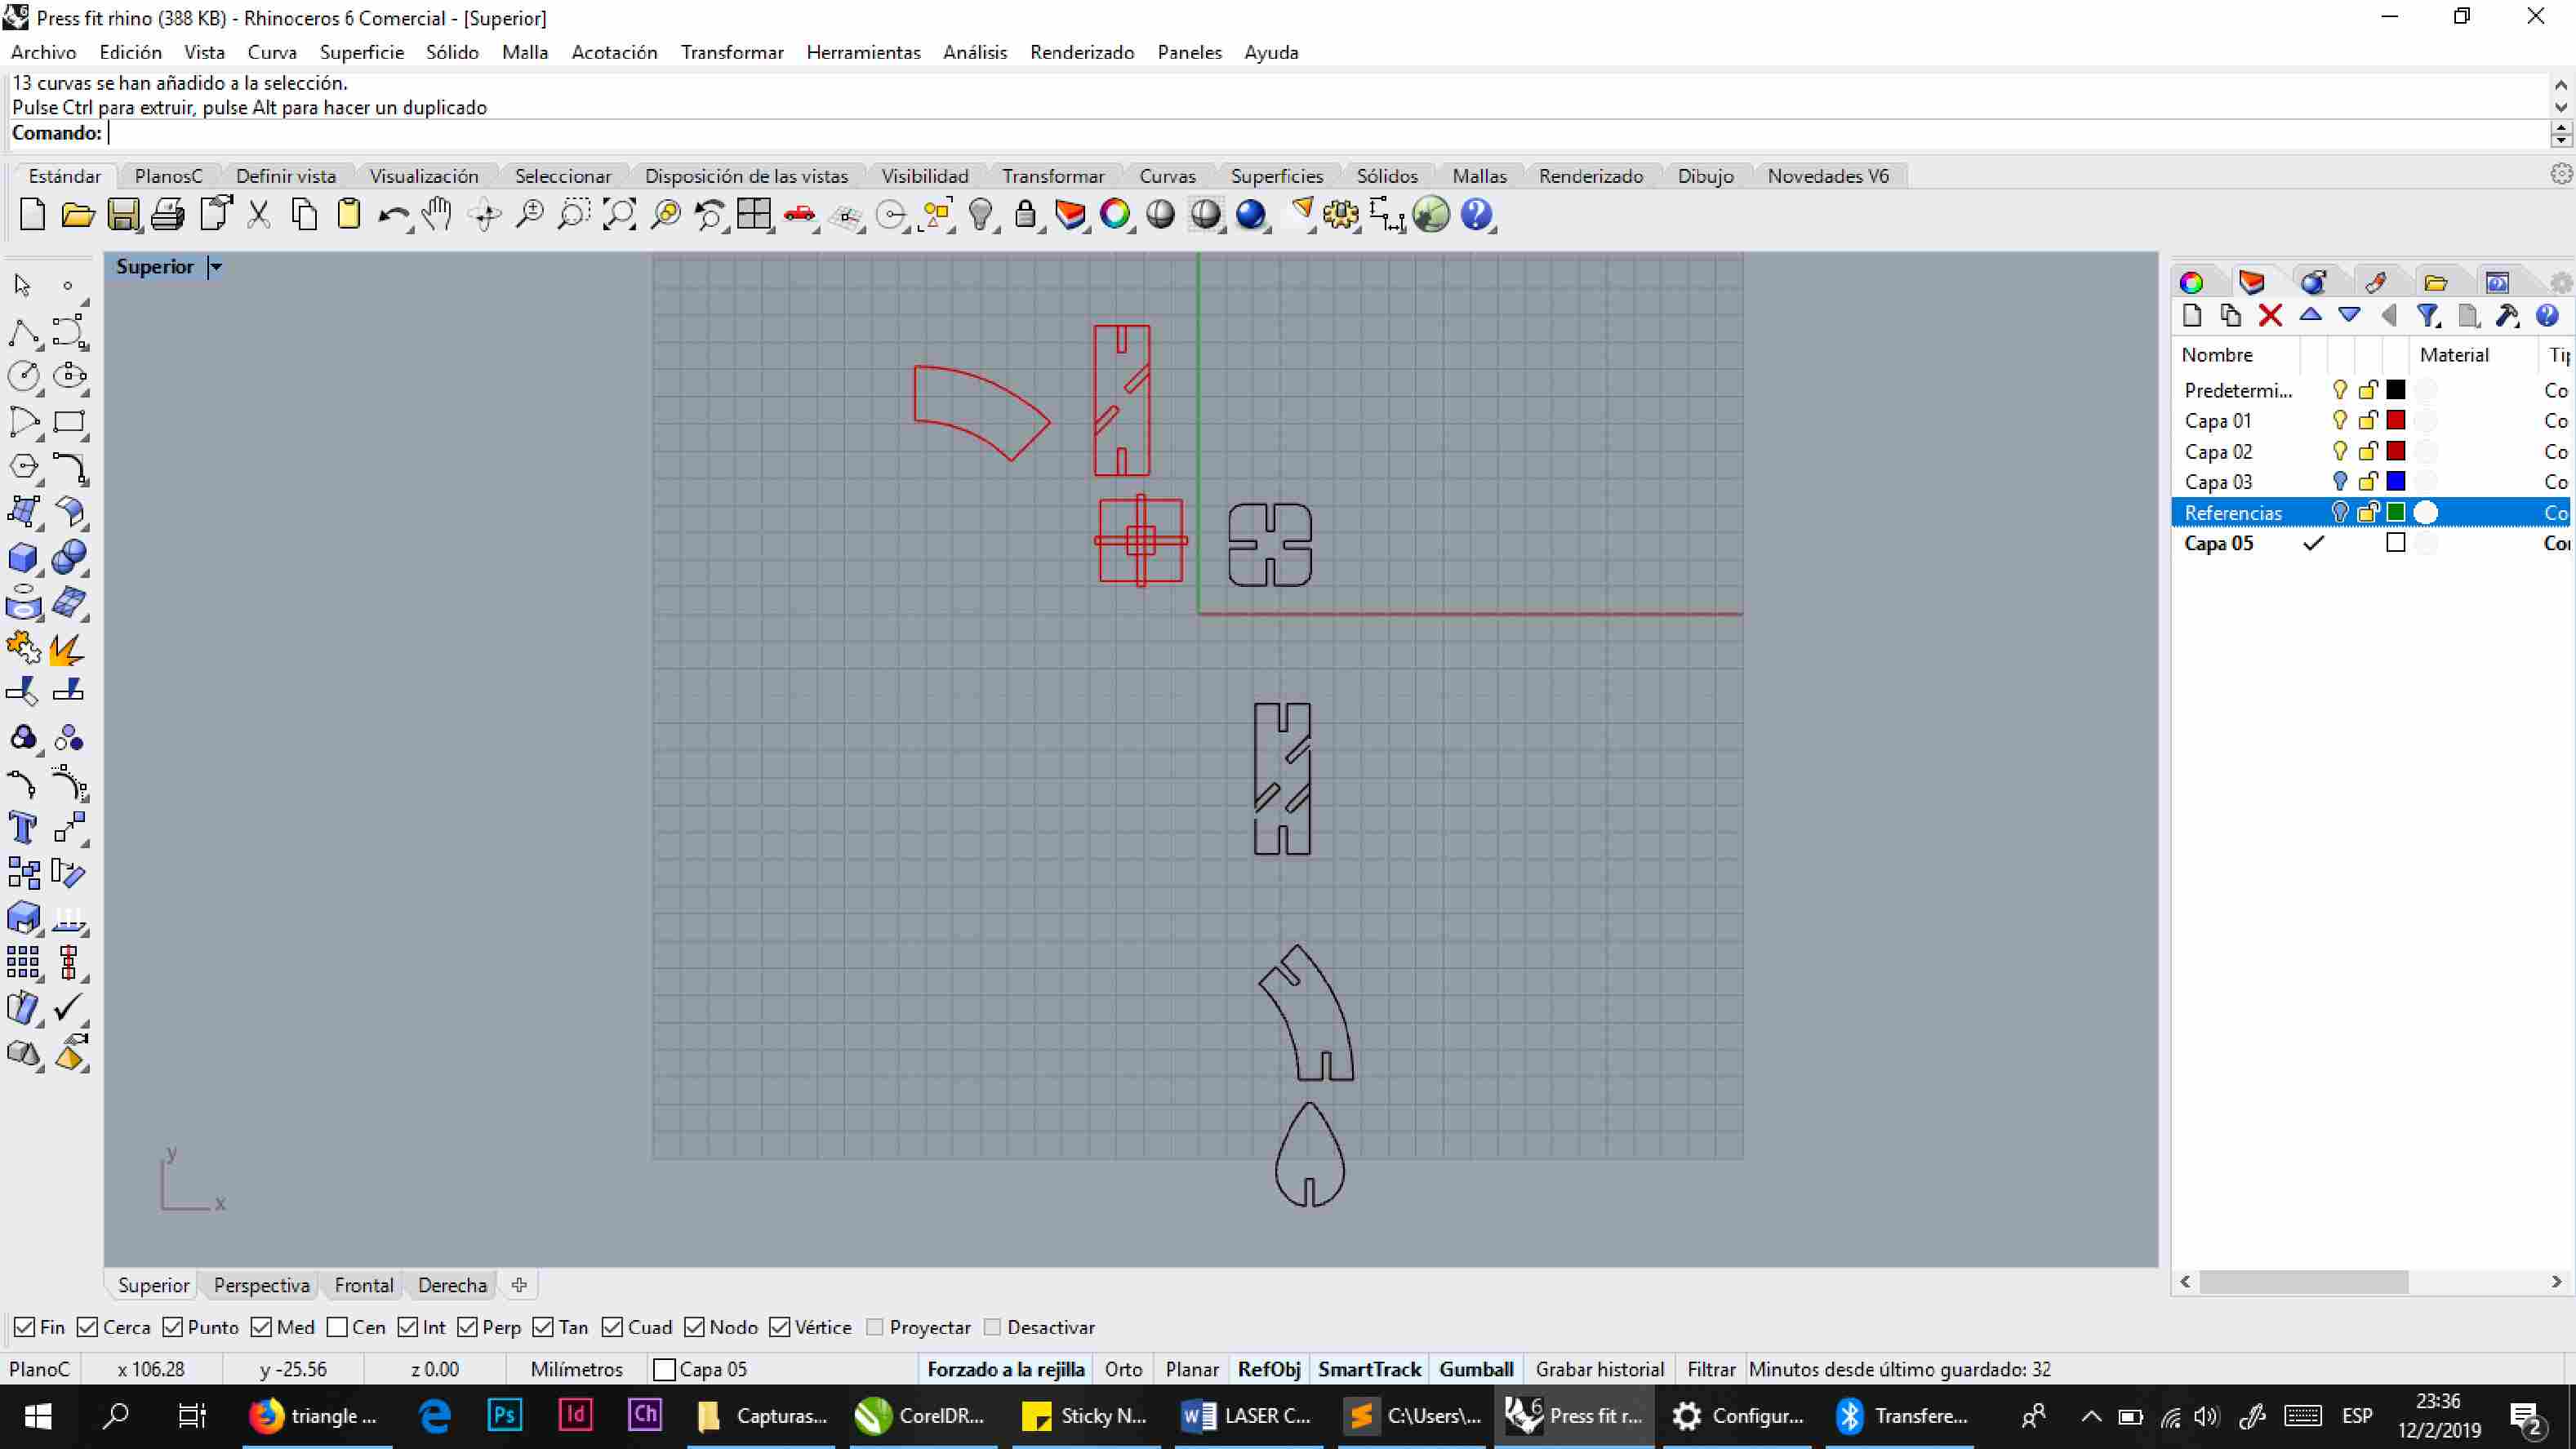
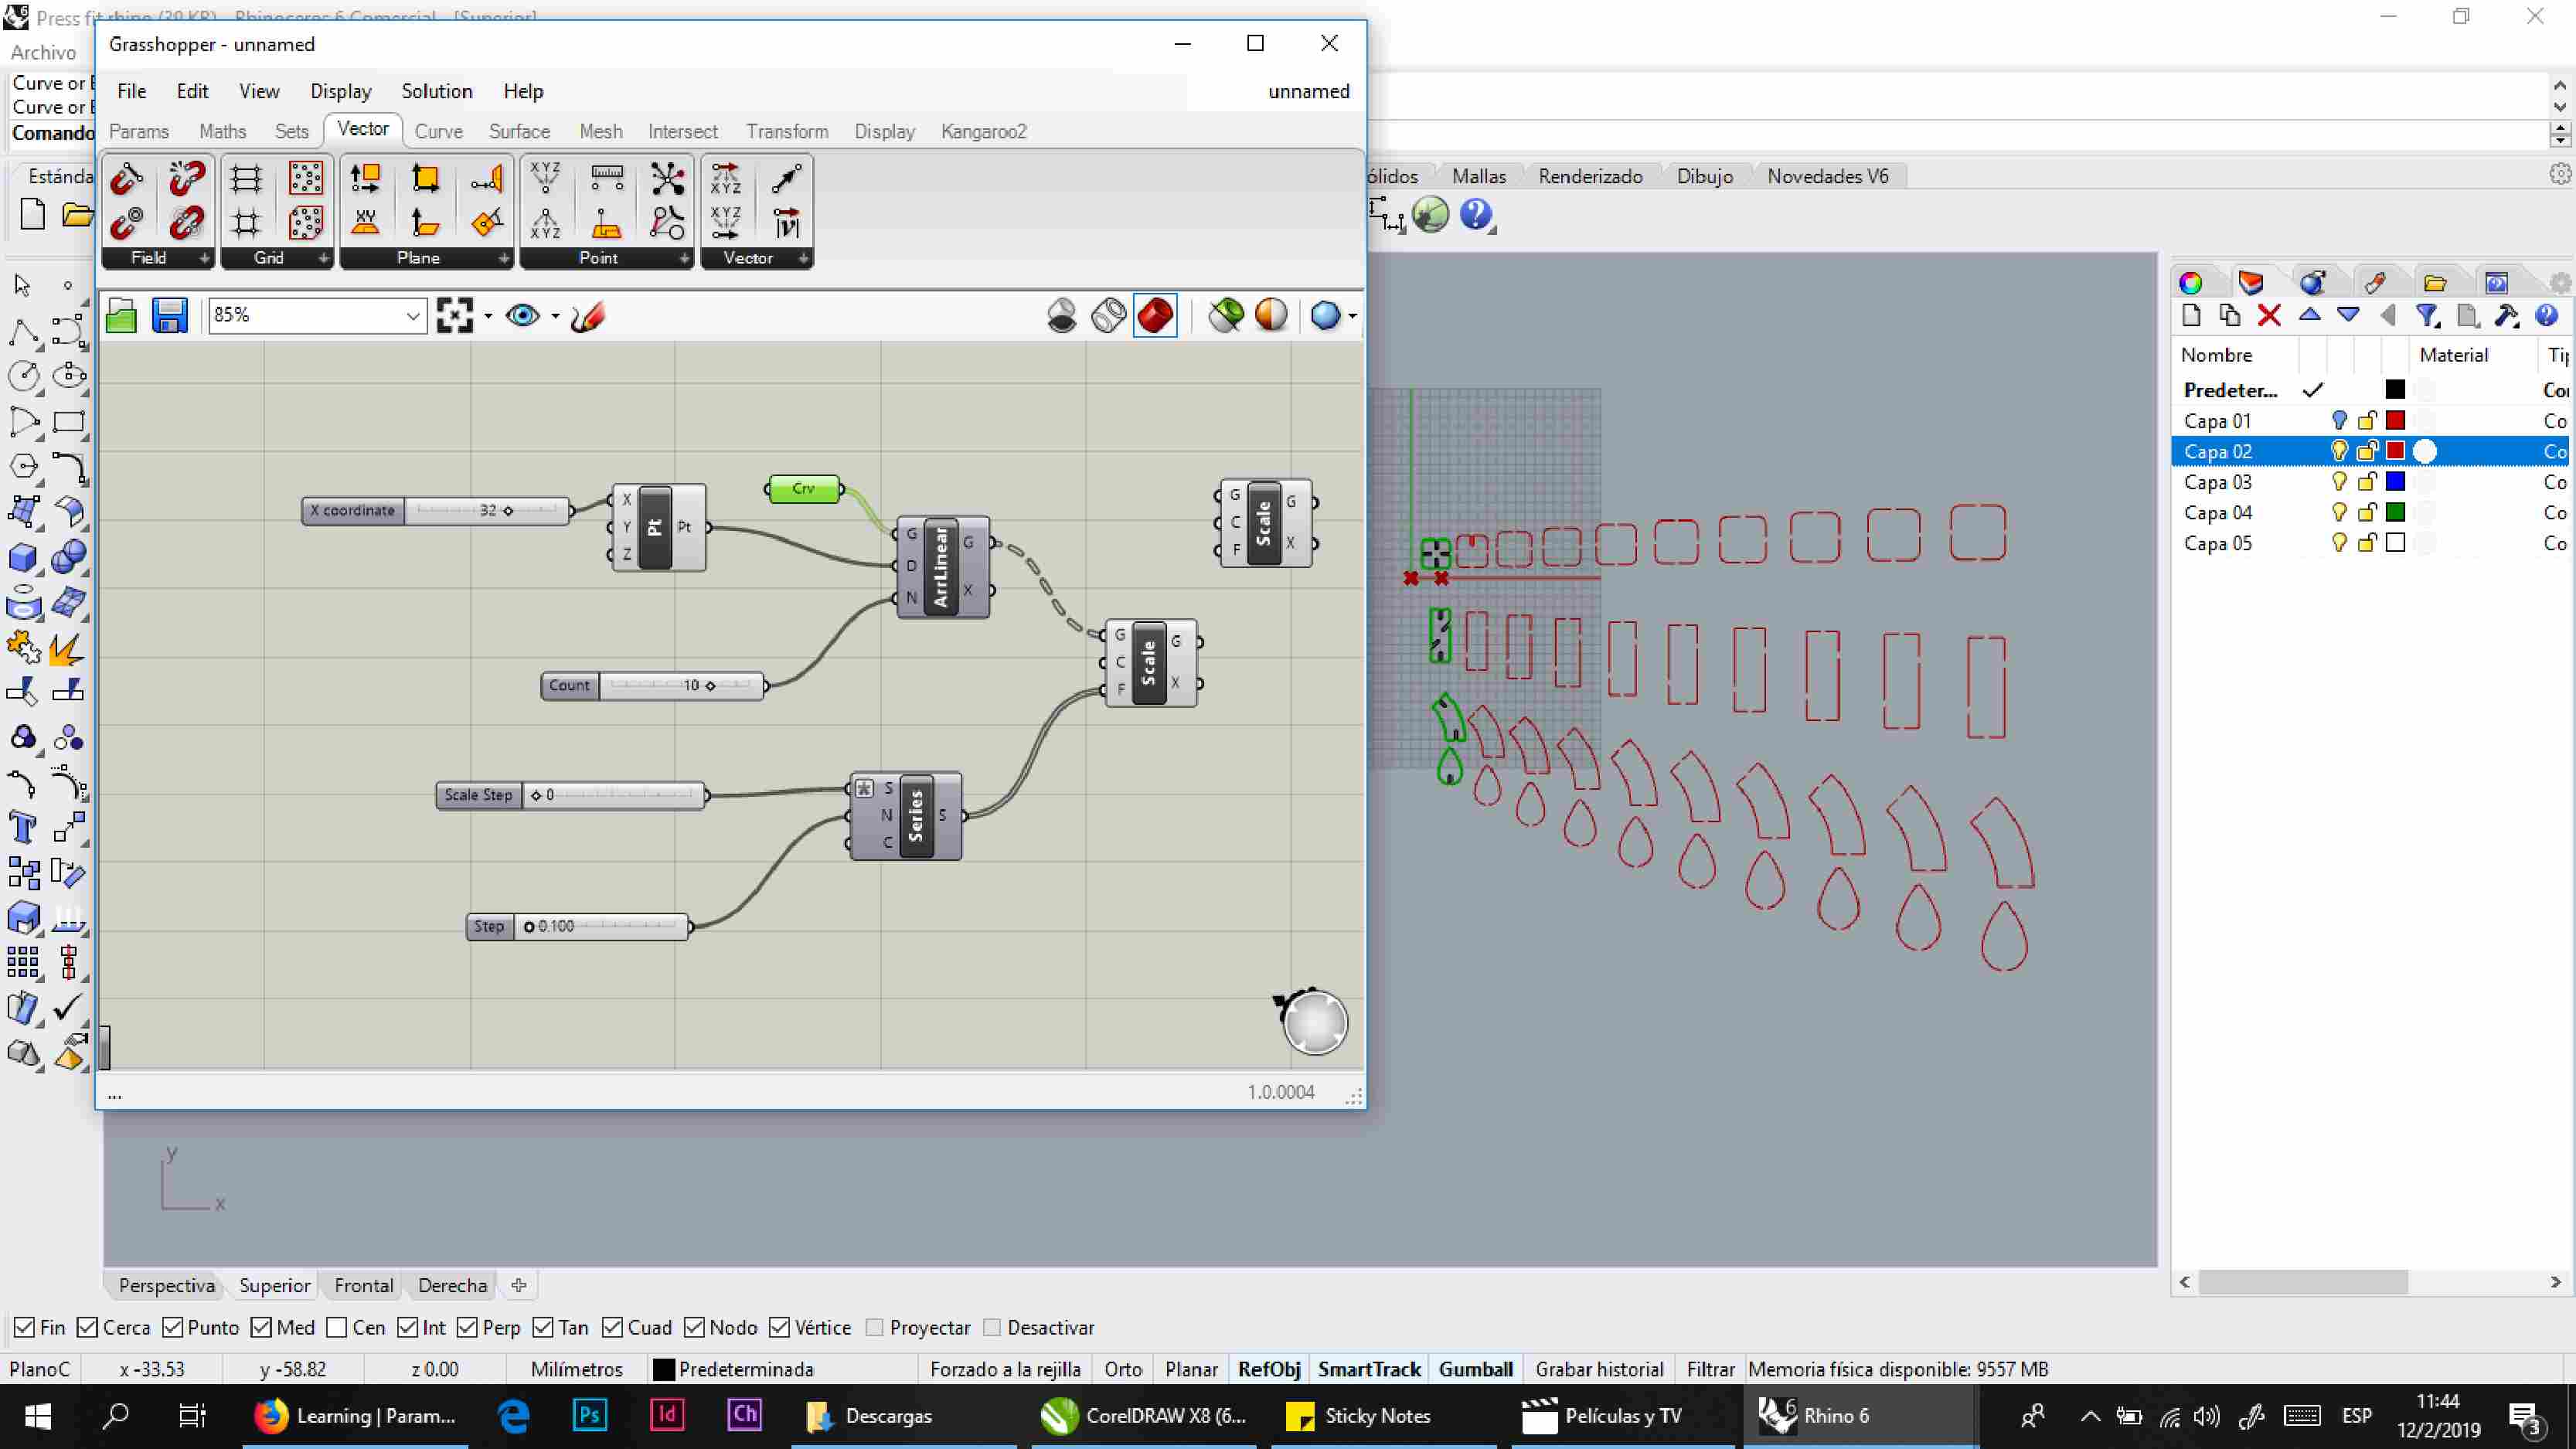
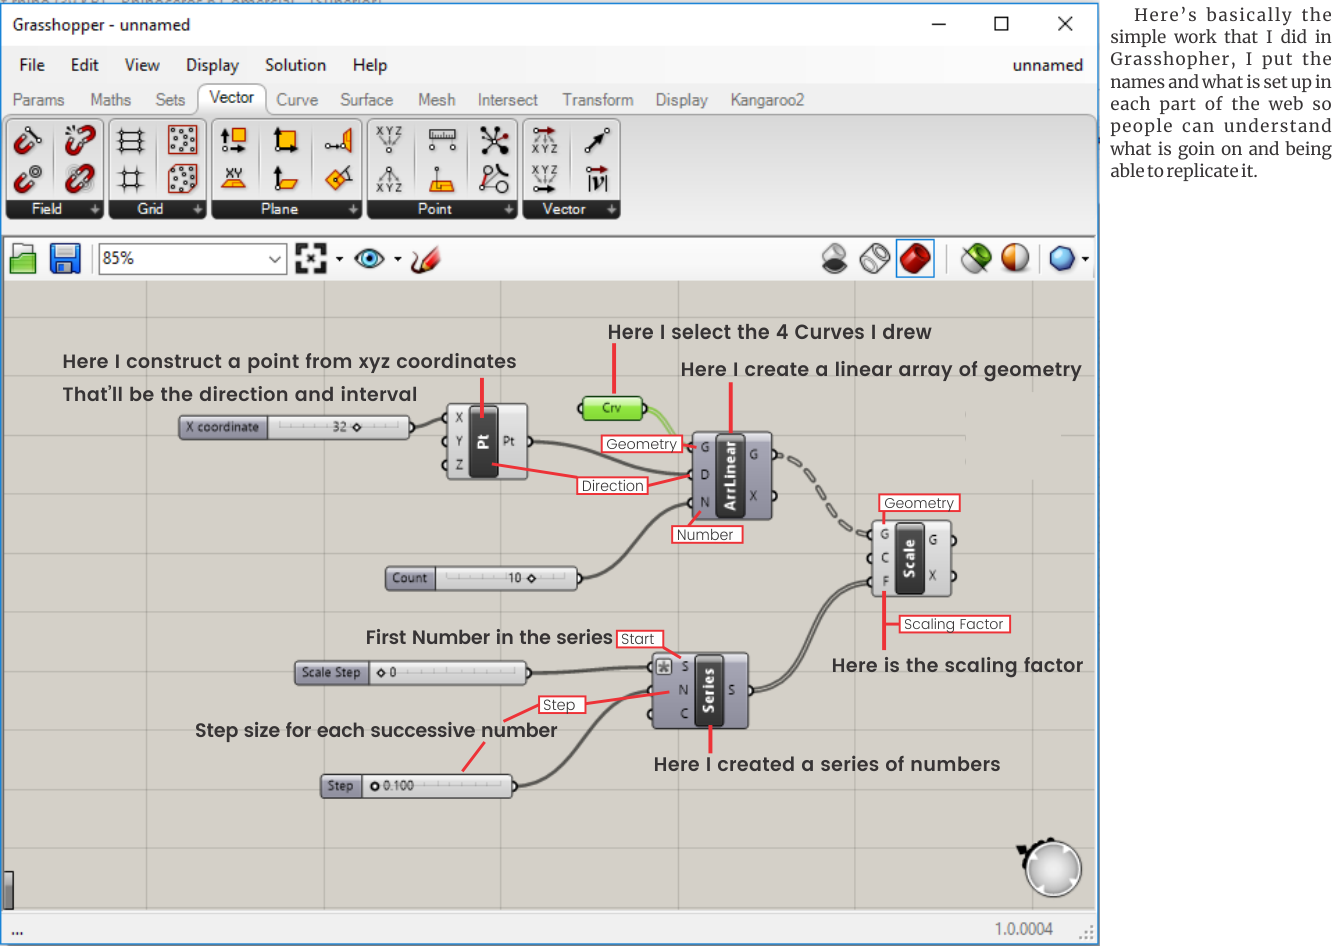
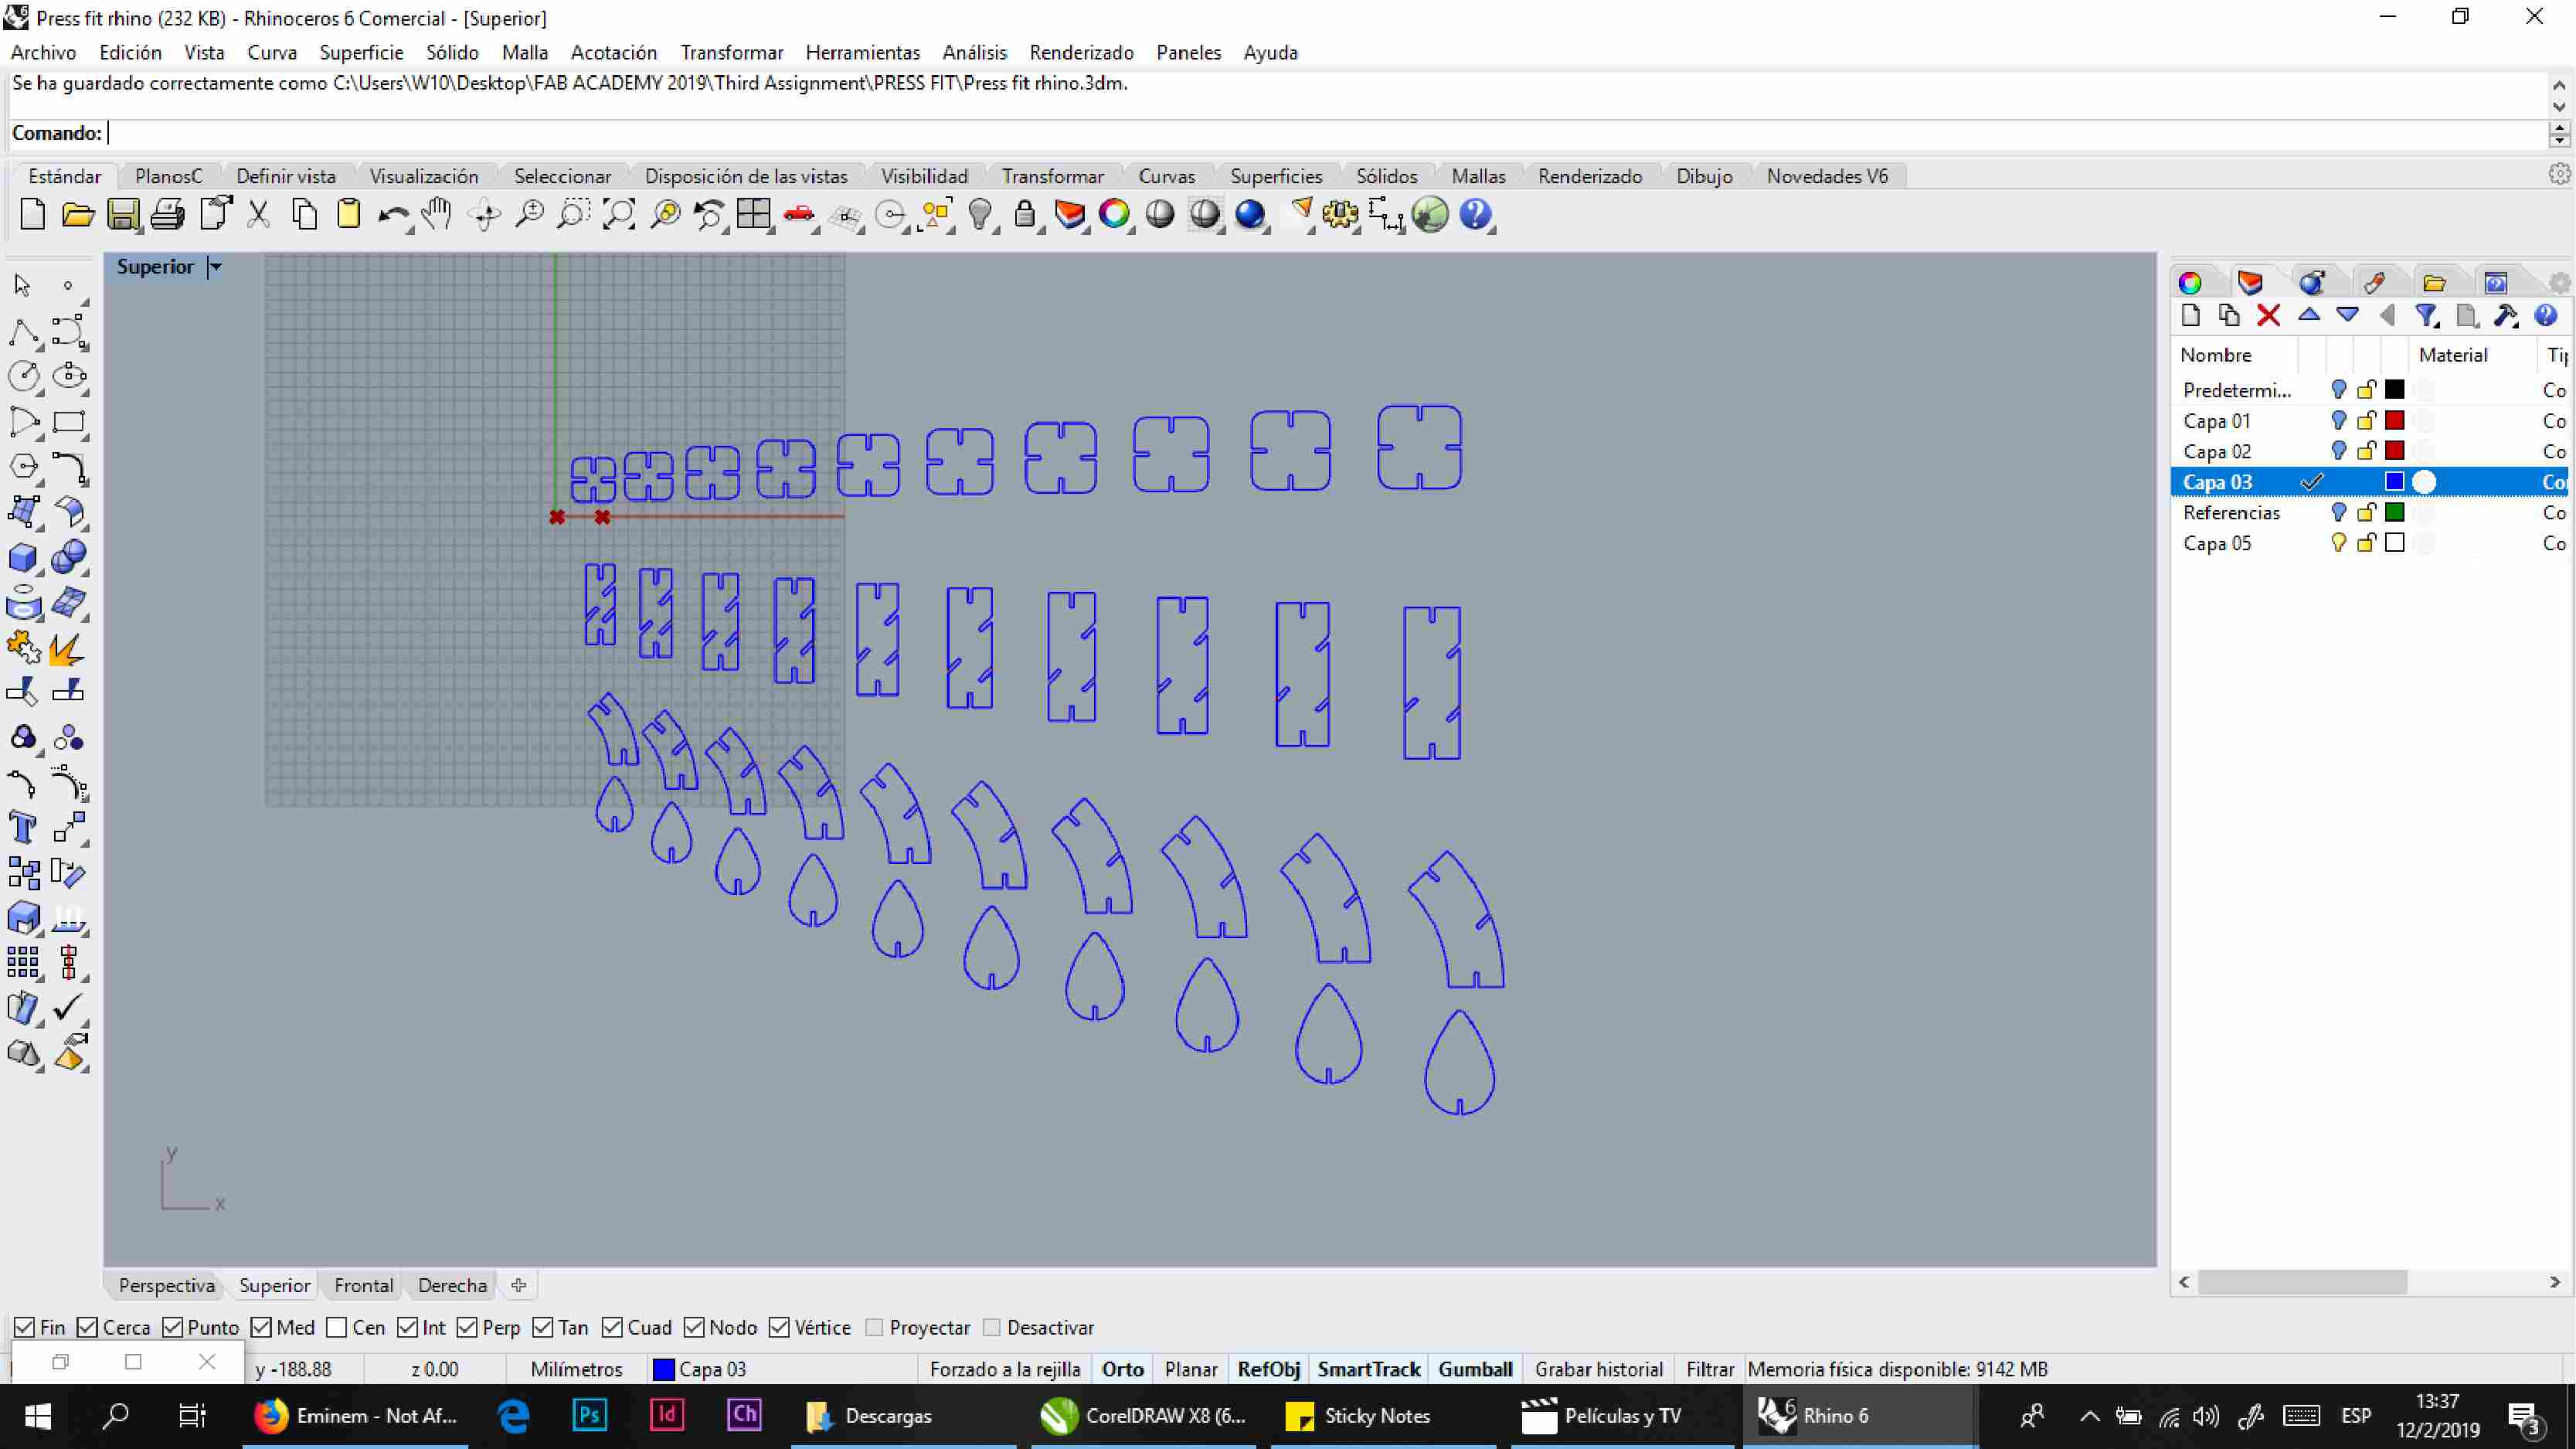
I started modeling the figures on Rhino, Then I used Grasshoppher(a graphical algorithm editor plugin of Rhino) to duplicate and scale the modules.
Before jumping into what I did, I'll leave links with basic but really complete tutorials about Grasshopher for beginners.
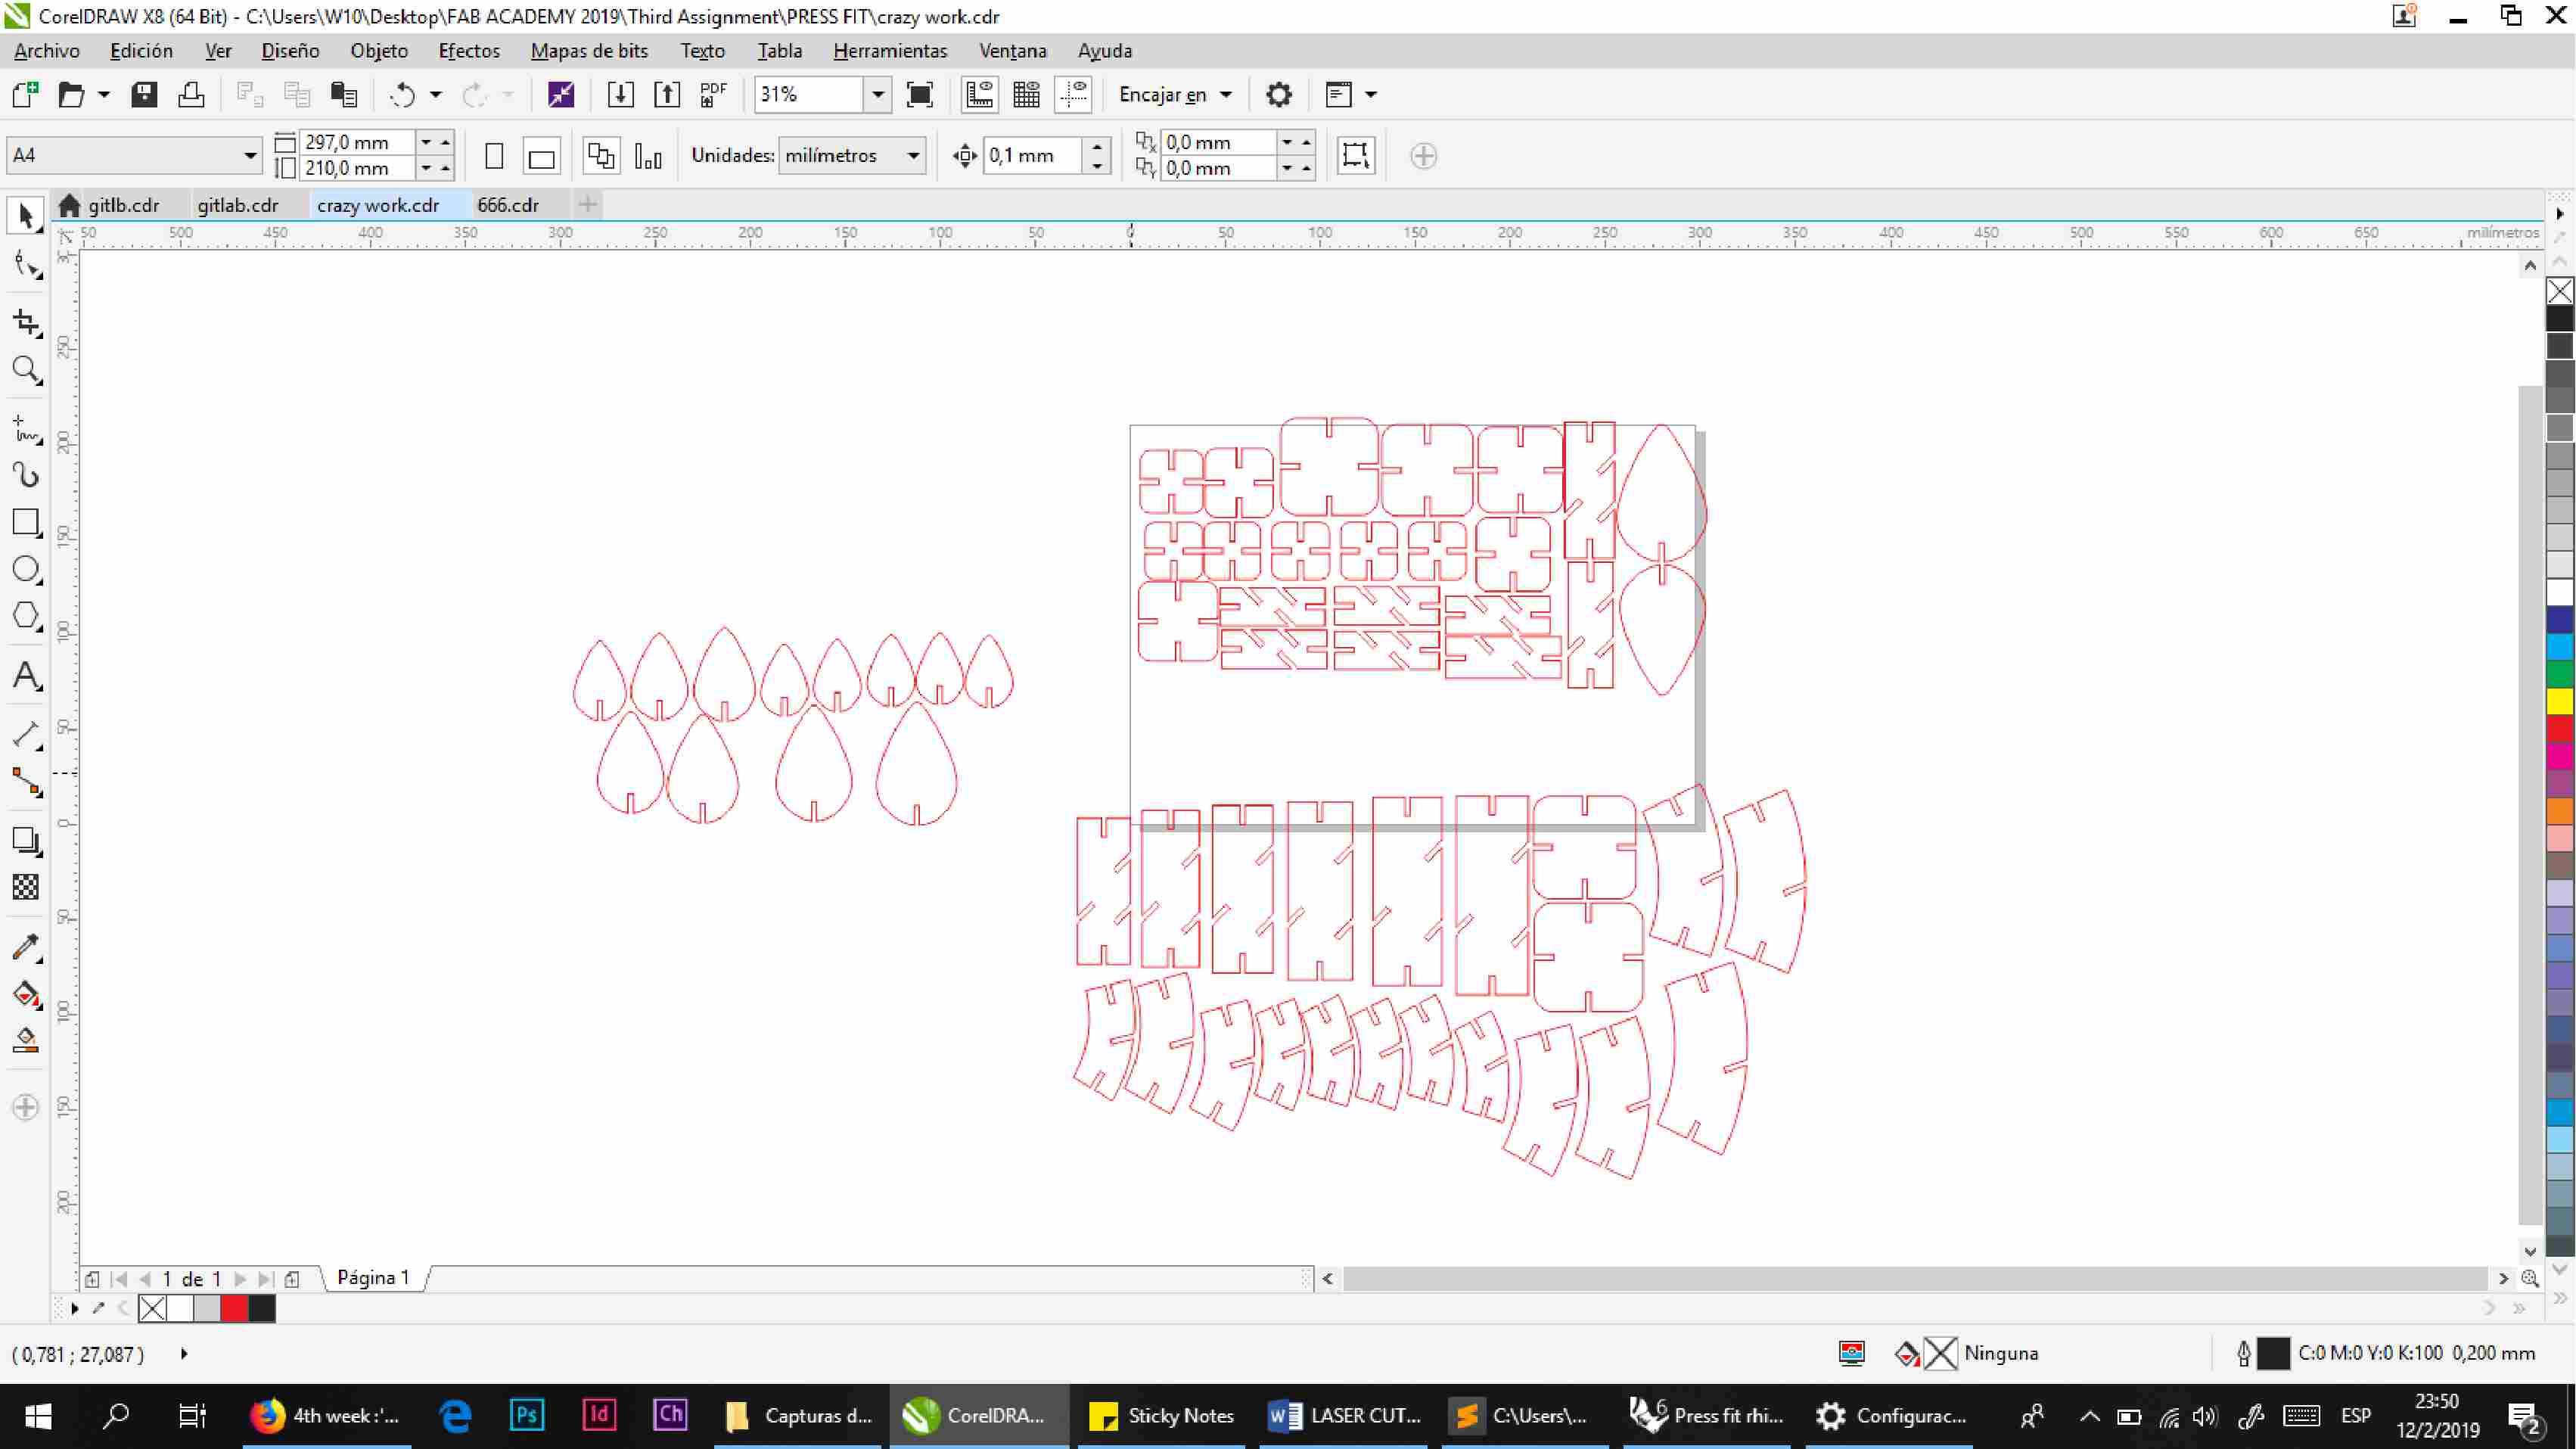
Link 1-Basic Tutorial // Link 2- Full tutorialI exported the curves to .dxf file format to CorelDraw and proceeded to cut
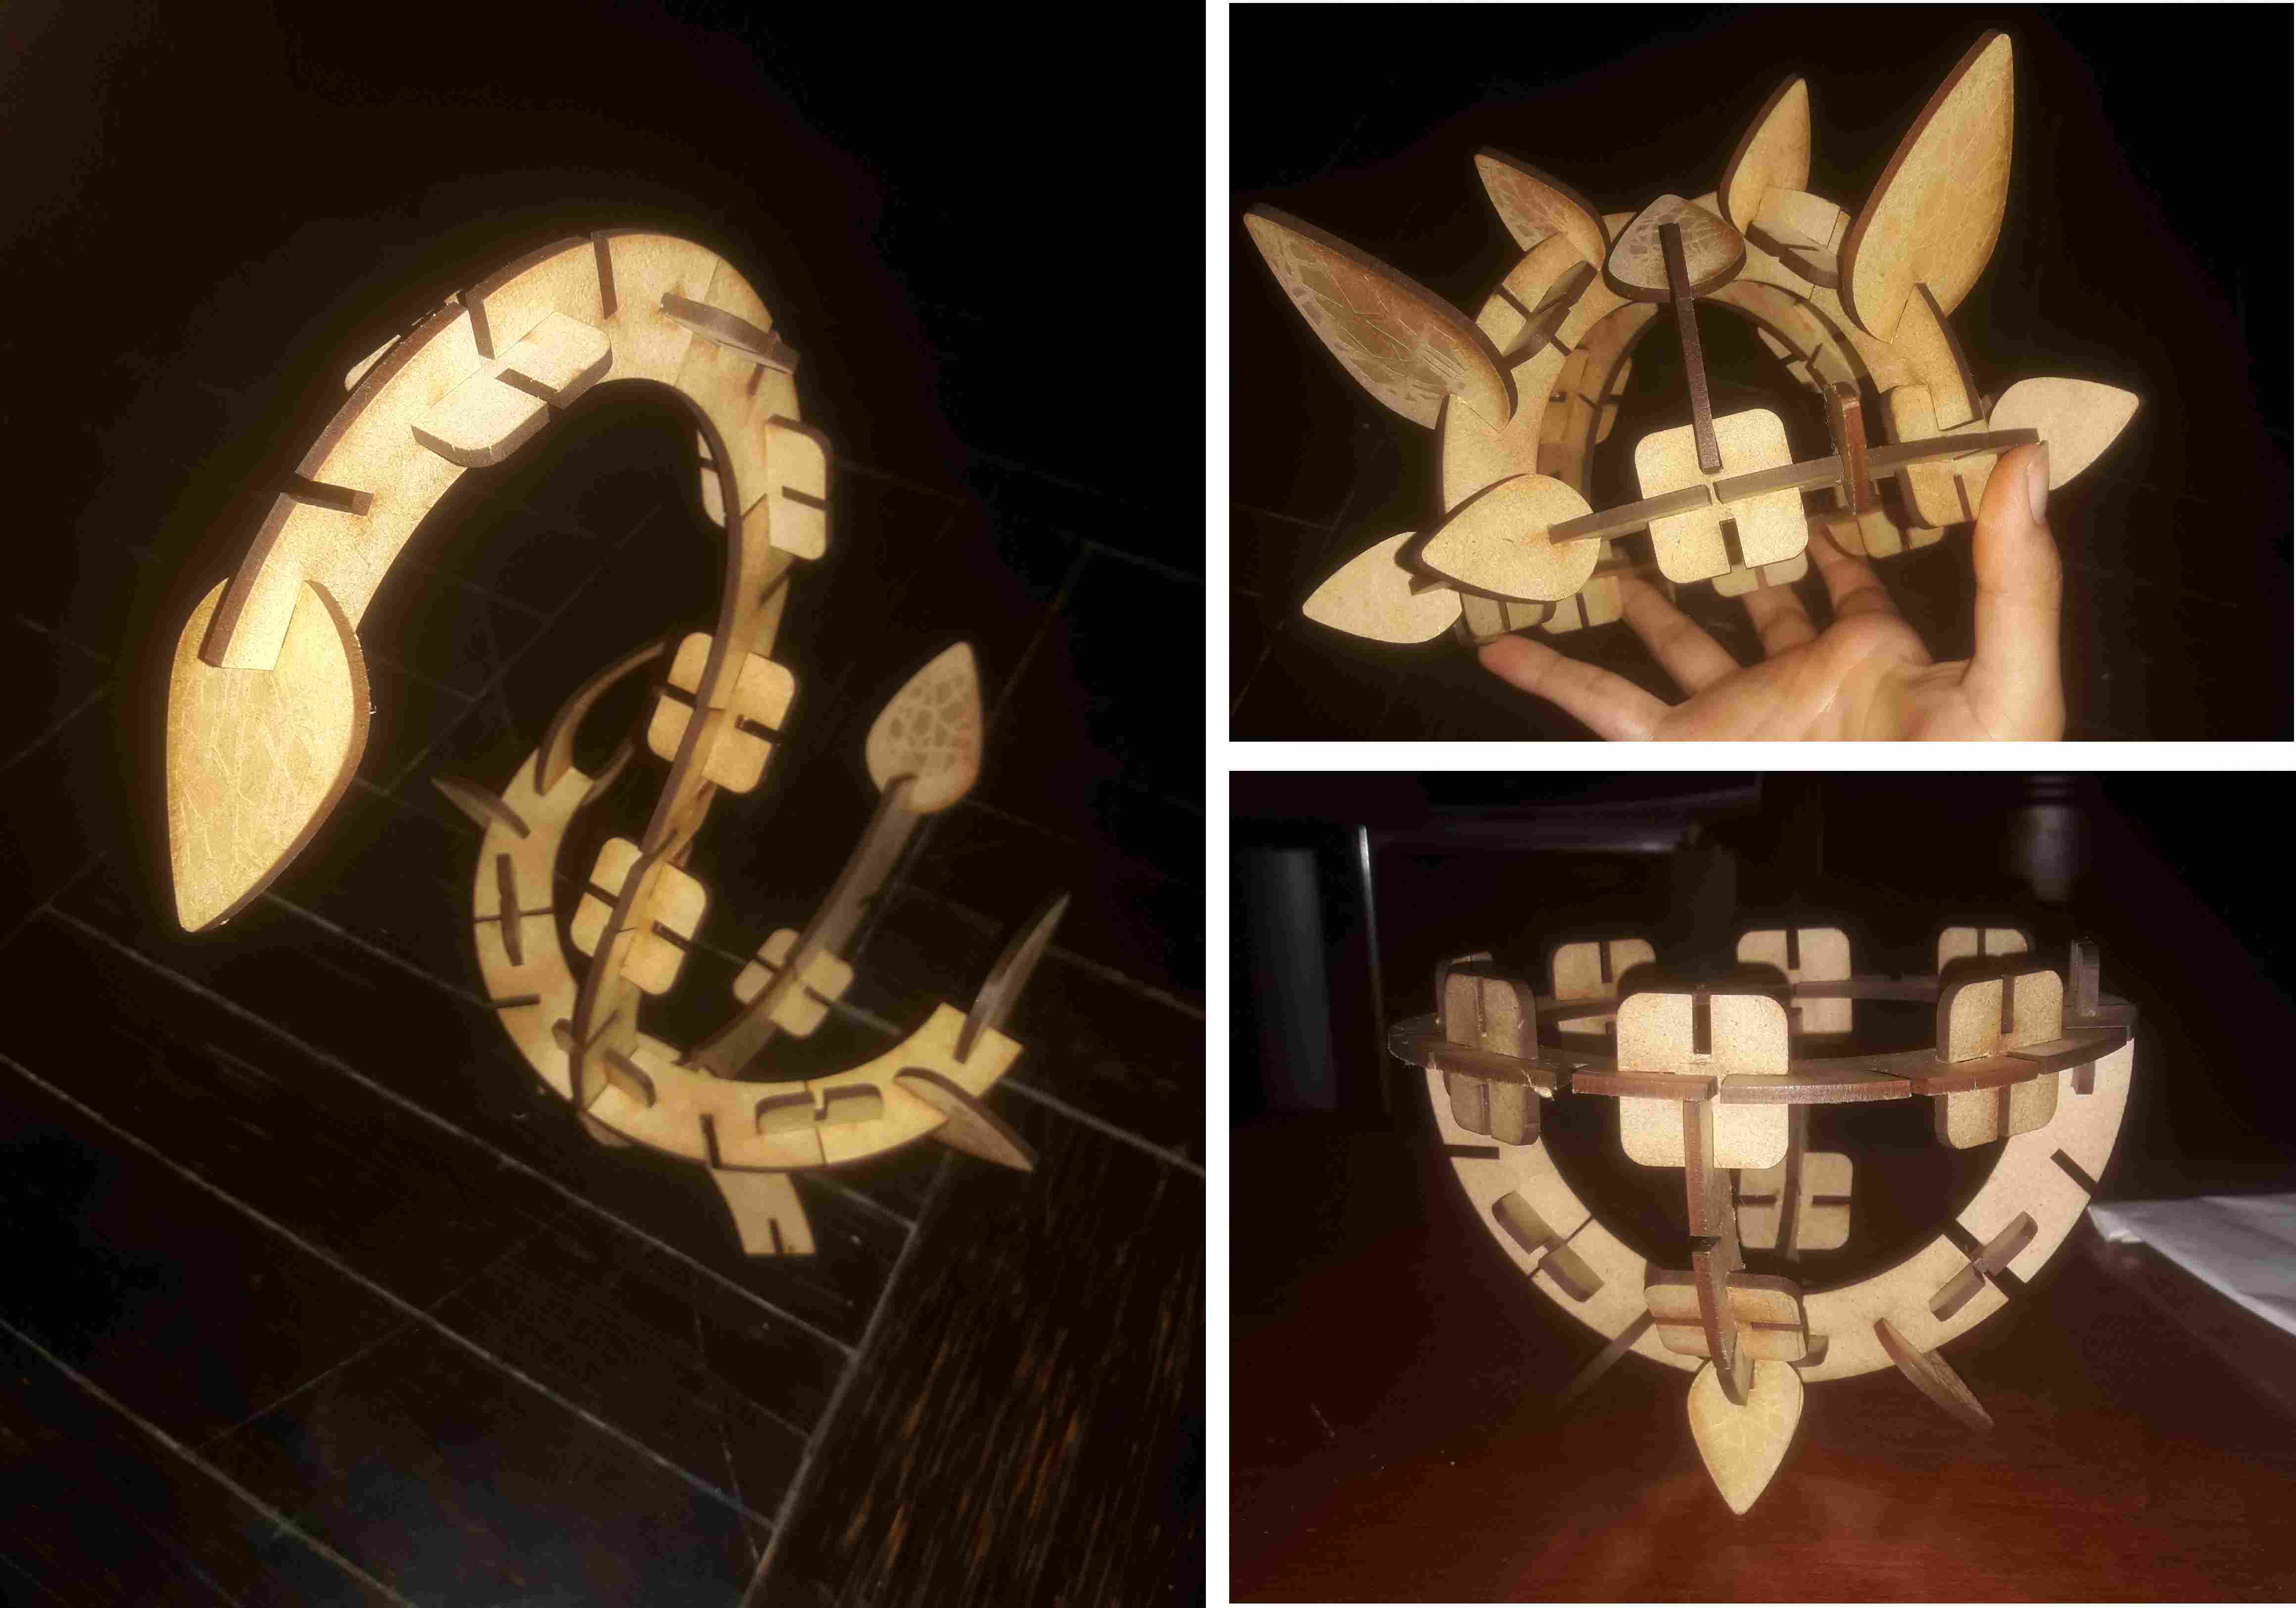
Finally I enjoyed discovering new shapes
Vinylcutter characterization.


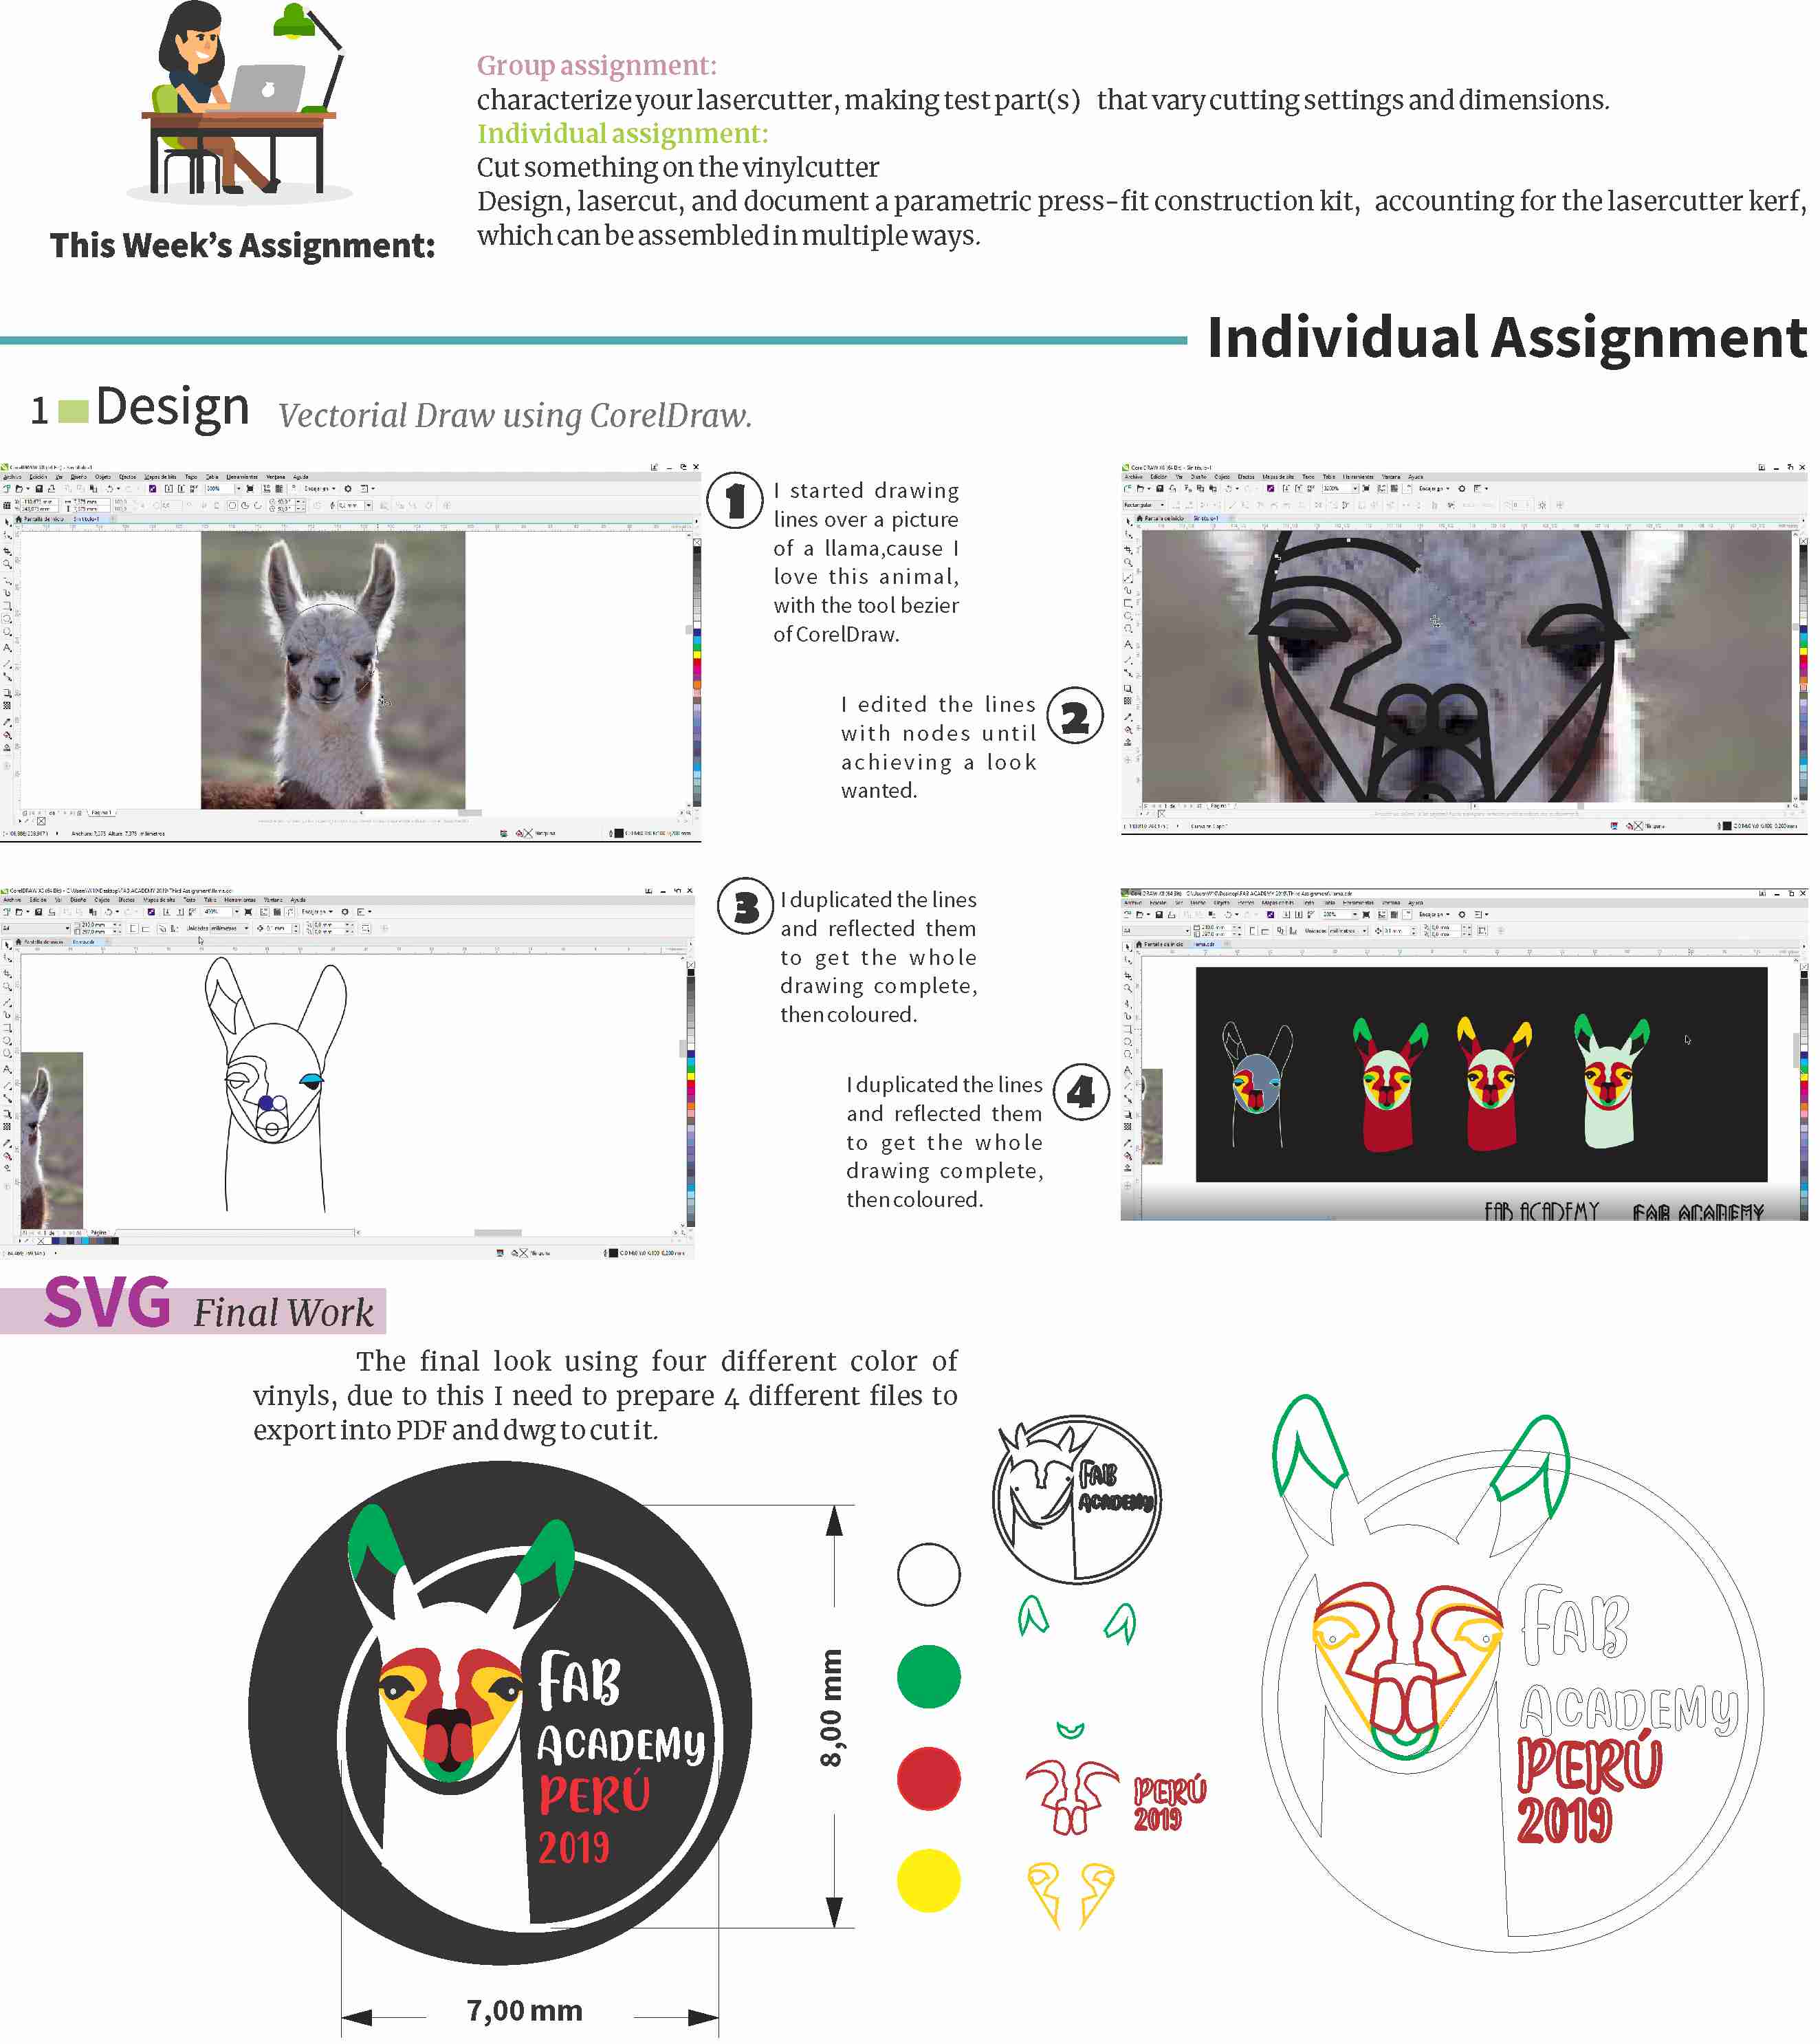
Parametric Design
What is it?