Week 18: Thermoforming
05/29/2019 - Stéphane Muller
Design and produce something with a digital fabrication process (incorporating computer-aided design and manufacturing) not covered in another assignment, documenting the requirements that your assignment meets, and including everything necessary to reproduce it.
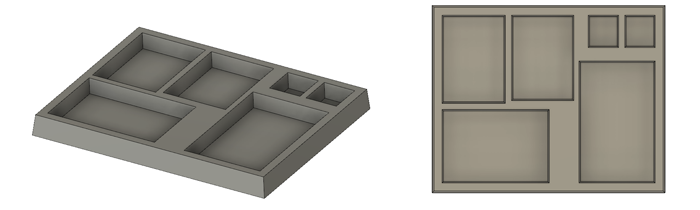
For this week Adel suggested we do thermoforming and when he explained the process and what we could do with it, I immediately got an idea. I'll do a container for a game (Outlive) I bought not long ago and which doesn't have suitable containers for the various pieces.
Research
A little bit of reading was in order to learn this process and its specificities. Here are some interesting links I found.
- The datasheet for our machine: a Formech Compac Mini
- A guide on thermoforming from the manufacturer
- And another guide from the manufacturer
Thermoforming is a process where you heat a sheet of plastic, push a mold from underneath it and then apply a vacuum. The plastic then takes the form of the mold and solidifies when cooling down.
Planning and list of tasks
- Designing the mold in Fusion
- Milling the mold with the Shopbot
- Thermoforming the piece
- Thermoforming hack
Step by step
Designing the mold in Fusion
I measured the space I had in the gamebox as well as the various elements I needed to fit inside and designed a simple multispace container. Initially I wanted to make a 45mm high box, but Adel warned me of heating up the endmill on the Shopbot and of thinned edges (because the plastic is stretched on the mold). So in the end I settled for 15mm deep containers.
One constraint you have to keep in mind is that the plastic sheet might be 250x300mm, but the thermoforming surface is only 230x280mm and you should keep at least a little space around it for the air to be vacuumed.
To be able to take the plastic off the mold, any wall in your design should have at least a 5° angle. To do that with Fusion, use the draft angle function.
I then exported the model in STL to import it in VCarve and mill it with the Shopbot.
Milling the mold with the Shopbot
To mill it I used the same process than during molding and castin week. Here I used MDF wood (which is especially good because it's very porous and will allow air to be sucked more easily), a 12mm endmill and 2 finish pass (one horizontal and one vertical) with a 20% stepover.
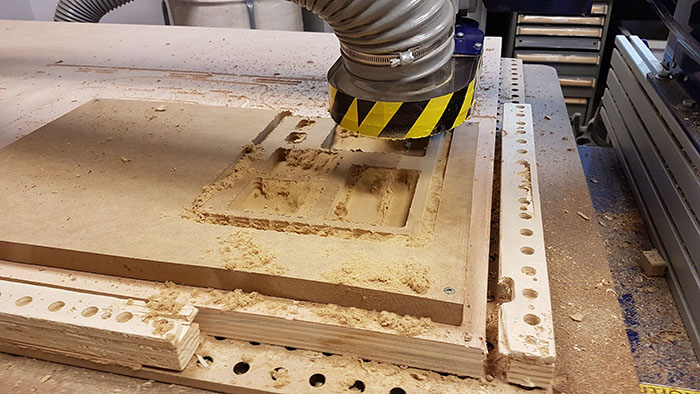
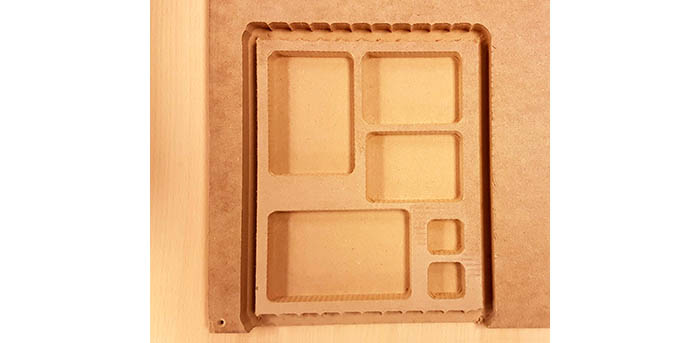
As you can see, the endmill didn't go all the way through, so I had to use a jigsaw and then a sander to clean the edges.
Thermoforming the piece
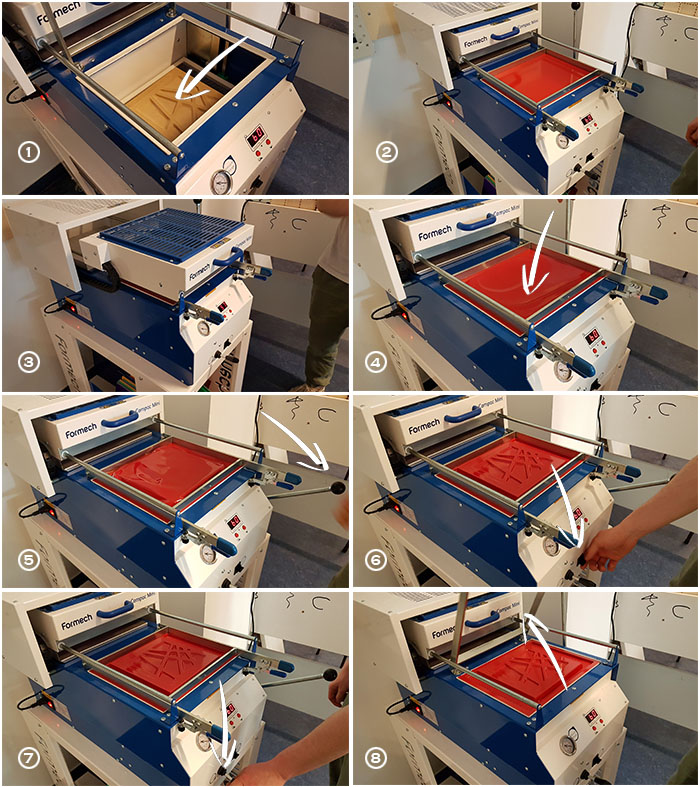
At the lab we have a Formech Compac Mini. It's a simple, yet effective machine. It's basically just a heater and a vacuum rolled into one.
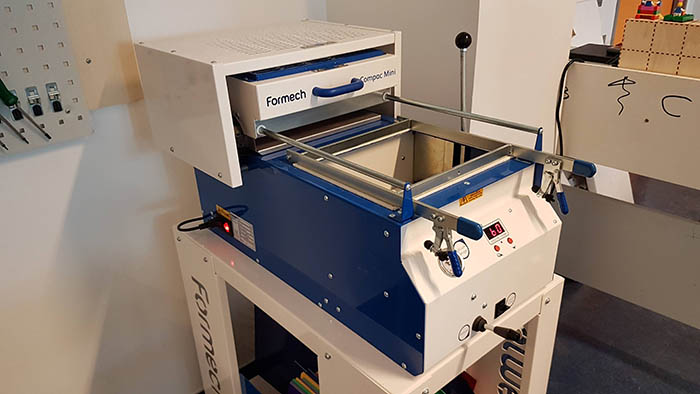
Here is the procedure to use the machine (while Leo was doing his piece) and produce a plastic piece:
- Put the mold in the machine
- Put the plastic sheet above
- Heat the plastic for 60 seconds
- Check that the plastic is bending
- Bring the mold up with the lever
- Vacuum the air out
- Release the pressure
- Release the plastic sheet
Here is my final result. I'm pretty satisfied with it, there are no thinned edges, everything is clean.
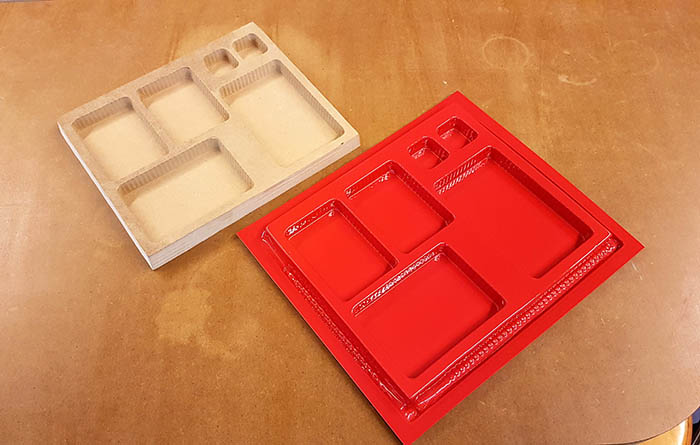
And everything fits!

Thermoforming hack
When presenting the machine, Adel showed us a little hack I thought was very interesting. And something I could use to make little cups to hold resources for the same board game.
Instead of pushing a mold onto the plastic, let it just heat up and drop in a bubble. And to control the shape of the bubbles, use a lasercut mask:
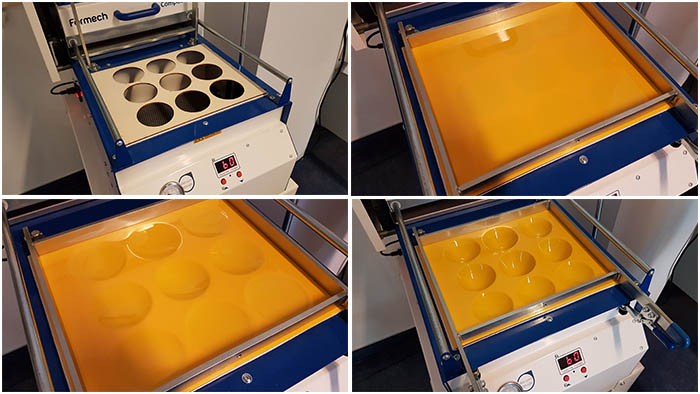
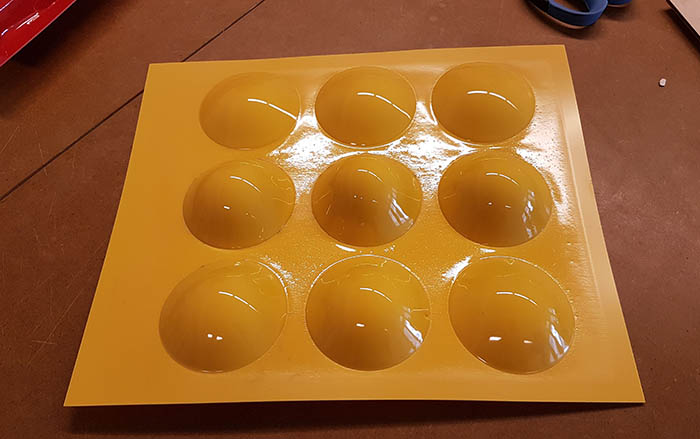
The final result. The bubbles are not all the same size because the heat wasn't uniform. It was warmer in the center and the bubbles here are bigger. Also, I took it out too quickly and it got deformed a little bit. I'll do another one later.
Conclusion
I'm happy to have learned this new technique! I have a ton more ideas for this machine and I think I'll build one for my fablab. It'll make for an interesting workshop.