Embedded Programming: Create a brain to your hardware
In this assignment we are suppose to go back to the PCB we designed and fabricate in Electronics design week and try to program it in many languages as we can. The main purpose of this assignment is to teach us to deal with different microcontroller, and let us work with different enviroments.
Electronics Design Recap
Before starting with the assignement is good to recap the tasks that have been done in Electronics design week. In the electronics design week we worked with the Fab library in Eagle to design a PCB with Attiny 44 microcontroller. Most of the required components to design the PCB was available in Fab eagle library.
Then after designing the PCB we fabricated, solder, and did initial programing for it. However, we did not upload a program that would actually do something for using the microcontroller, so we cannot call it 100% programming.
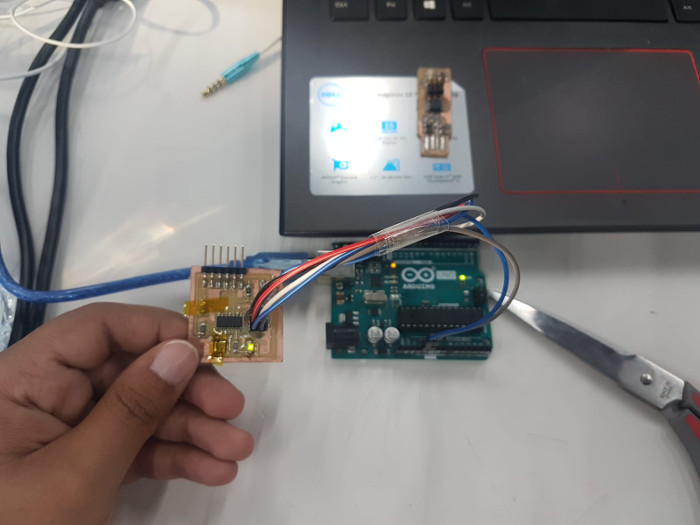
Therefore, what we are suppose to do in this assignment is to get to know and understand the Attiny 44 better, and then program it to do something.
Attiny 44
Before starting the process it is important first to read about and understand the microcontroller we are working with. For this assignment we are going to work with the Attiny 44, which is a low-power CMOS 8-bit microcontroller based on the AVR enhanced RISC architecture.
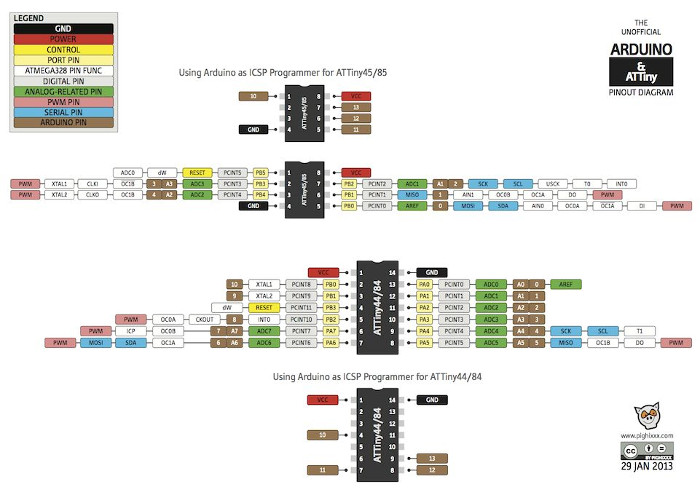
The ATtinies don't have a well-known, ubiquitous development platform like Arduino's Uno or Leonardo. And 8kB of program space doesn't leave much room for a bootloader, so an extra programmer is usually required. On top of that, standard Arduino doesn't support the chip. That doesn't mean programming the ATtiny85 in Arduino isn't possible
After I went through the Attiny 44 datasheet these are the most imortant information about the microcontroller"
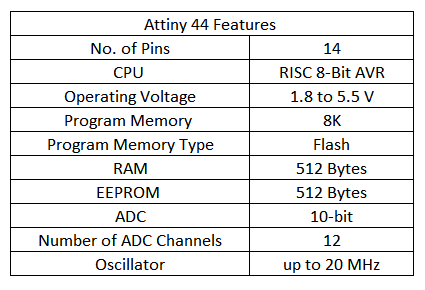
As conclusion from reading the datasheet, the Attiny 44 is a great option for running simple Arduino programs: it’s small, cheap and relatively easy to use. It does, however, have some limitations relative to the ATmega328P on an Arduino Uno. There are fewer pins, meaning you can’t connect as many components. There’s less flash memory (4KB or 8KB instead of 32KB), meaning your programs can’t be as big. There’s less RAM (256 or 512 bytes instead of 2KB), meaning you can’t store as much data. And there’s no hardware serial port or I2C port (Wire library), making communication trickier.
In short, then, if the project requires only a few simple inputs and/or outputs, it is probably fine using an ATtiny. When trying to hook up more components or do more complex communication or data processing, though, you’re probably better off with something like the ATmega328P on an Arduino Uno.
Board Test
In this assignment I want to design something realated to my project. In my project I want to control a motor to move an arm around the scanned object. The motor I want to use in my project is a stepper motor, however, I was not sure whether the attiny 44 will handle to operate the stepper motor. Therefore, I used servo motor with attiny 44 to valdiate the general concept.
Before I jumped into testing my PCB with servo motor, I ran a small test on my PCB to check whether it is working fine or not. The PCB we designed in Electronics design assignment has a LED connected to the attiny 44 pin number 6, so to test whether the PCB is working or not I used the Blink code example in Arduino IDE and upload it in my PCB to check the process.
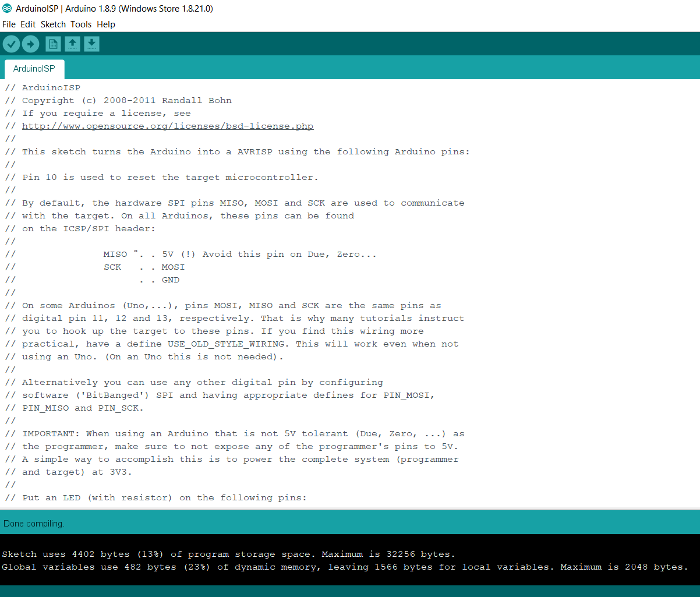
To do that I first programmed my arduino UNO to act as an ISP, by uplading the code ArduinoISP into it.
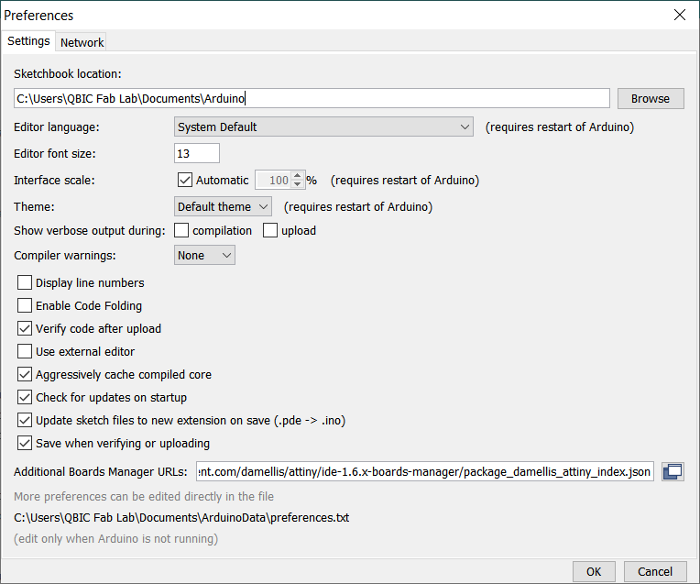
Then to add my board information to adruino IDE I did the following: open File > Preferences. Then, at the bottom of the pop up menu where you see "Additional Boards Manager URLs" I copied and paste "https://raw.githubusercontent.com/damellis/attiny/ide-1.6.x-boards-manager/package_damellis_attiny_index.json".
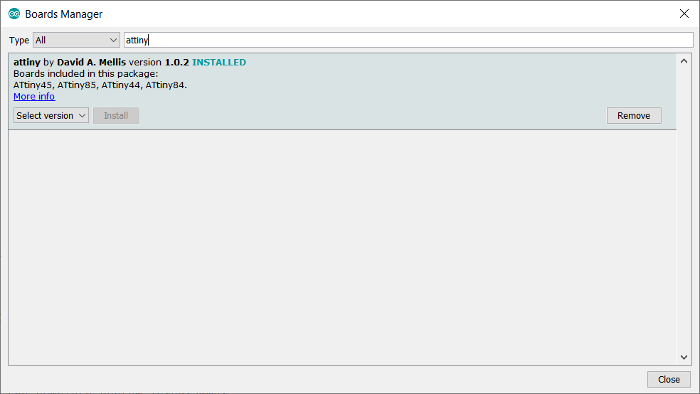
Now from Tools > Board > Board Manager. I installed the information of attiny boards to my arduino IDE.
And by this I got the information of my board in Tools > Board > Attiny44.
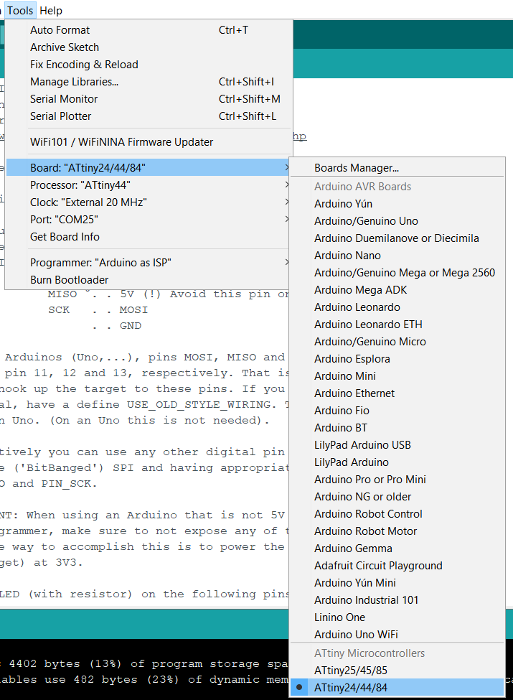
Now to program the Attiny 44 we should first do the setups in Arduino IDE in order to get all the required information. So again from Tools menu I did the following setups:
1. Board > Attiny24/44/84.
2. Processor > Attiny44.
3. Clock > External 20MHz.
4. Programmer > Arduino as ISP.
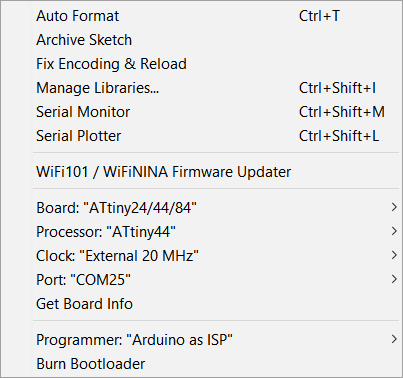
Then I connected my PCB to the arduino with the following schematic.
1. Arduino Pin 13 ---> SCK.
2. Arduino Pin 12 ---> MISO.
3. Arduino Pin 11 ---> MOSI.
4. Arduino Pin 10 ---> RESET.
5. Arduino 5V ---> VCC.
6. Arduino Ground ---> GND.
Then From Example>Basics I choosed the blink code and changed the pin number to 7 which is the pin the LED is connected to and uploaded the code. The code was uploaded sucessufly and here is the video:
void setup() {
  // initialize digital pin LED_BUILTIN as an output.
  pinMode(7, OUTPUT);
}

// the loop function runs over and over again forever
void loop() {
  digitalWrite(7, HIGH);   // turn the LED on (HIGH is the voltage level)
  delay(1000);                       // wait for a second
  digitalWrite(7, LOW);    // turn the LED off by making the voltage LOW
  delay(1000);                       // wait for a second
}
Finally after I made sure that the PCB is working fine, I connected a stepper motor to pin number 5, and uploaded the following code in my Attiny 44:
#include <Servo.h>

Servo myservo;  // create servo object to control a servo
// twelve servo objects can be created on most boards

int pos = 0;    // variable to store the servo position

void setup() {
  myservo.attach(5);  // attaches the servo on pin 9 to the servo object
}

void loop() {
  for (pos = 0; pos >= 180; pos += 1) { // goes from 0 degrees to 180 degrees
    // in steps of 1 degree
    myservo.write(pos);              // tell servo to go to position in variable 'pos'
    delay(15);                       // waits 15ms for the servo to reach the position
  }
  for (pos = 180; pos >= 0; pos -= 1) { // goes from 180 degrees to 0 degrees
    myservo.write(pos);              // tell servo to go to position in variable 'pos'
    delay(15);                       // waits 15ms for the servo to reach the position
  }
}
And the results were the following.
I am so happy that the code worked, and I have never though that in my life I would use something rether than an arduino as a microcontroller, but this experience was really helpful and good.