_week 6
3D Scanning and 3D Printing
Group assignment
During the group assignment we learnt how to set up and use our lab's machines in order to complete this
week's task.
We did the following:
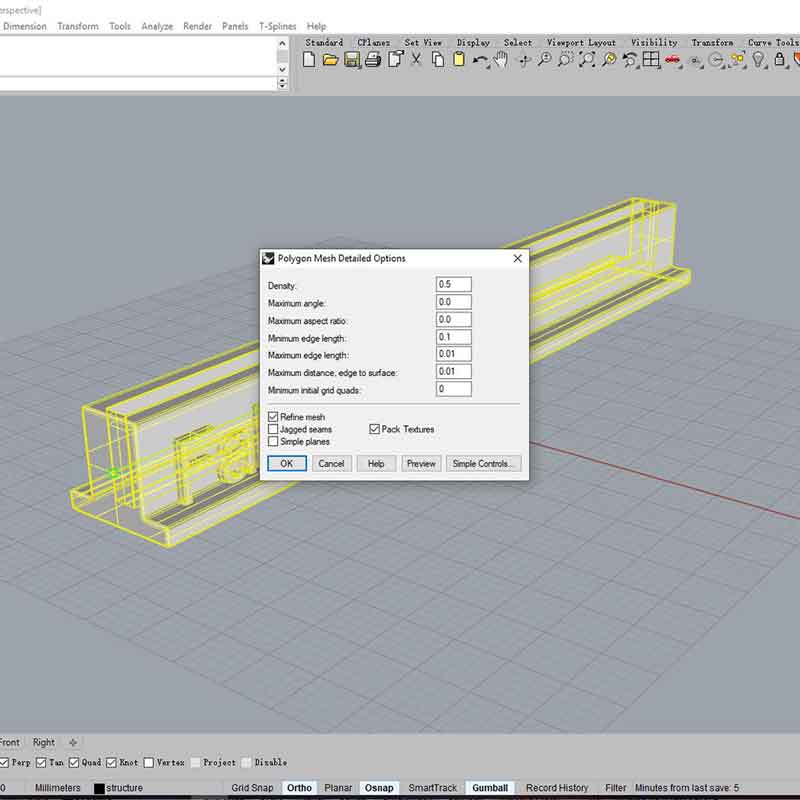
1_How to slice our file using CURA slicer
2_Ultimaker 3 how to load/unload/change the filament
3_We printed a test model in the printers we were using, to understand the precision and margin of error
for the prints.
To know more about our group's assignment check out my classmate Siyu's website.
From now on each week one of us in the class, will write the group's assignment summary and we will be
rotating it weekly.
Individual assignment
What is 3D printing?
The objects around you are produced/manufactured in different techniques.
This manufacturing processes falls into 3 main categories, which are:
_Formative manufacturing, uses molds, the initial costs are
very high but lows when the volume increases.
_Subtractive manufacturing, as the name says it is a process
where the material is being removed, such as the CNC milling machine we used for last weeks assignment.
The material used is for actual functional prototypes (such as wodd, and metal).
_Additive manufacturing, as the name suggests, it adds
material, and the only technology that currently does this is 3D Printing.
3D Printing is a process that builds an object by adding material layer by layer.
These manufacturing process is mostly used for prototyping, it has some limitations when it comes to the
material (although nowadays there have been many advances and there are a number of printers that use
material for actual products, like metal, bio compatible materials, and so on). But a great advantage is
the speed and costs for building a 3D printed prototype.
These is what has made 3D priting so special and accessible, as nowadays you can get a desktop 3D
printer for a very low price.
There are several types of 3D printers, the most common one are the FDM printers, stands for FUSED DEPOSITION MODELING, and it
uses a filament (commonly of PLA a polymer) that travels through a nozzle that heats the material and it
is then placed on the 3D printed bed layer by layer until the model is built .
This and the SLA (Stereolithography) are the ones you
commonly find in FabLabs, being FDM the easiest to use and with the simplest and quickest post
processing cleaning.
But before I jump into my weekly task, I hwould like to add that as a golden rule there are a few important steps you need to cover during the 3D printing process:
And remember when 3D printing it could happen that your model comes out with problems or doesn't come out at all. Condisder that there are many variables that can affect the outcome of your print. So my advice is, always check your model first and make sure it has no issues (like an open surface) then try different settings for the print and do a couple of tests.
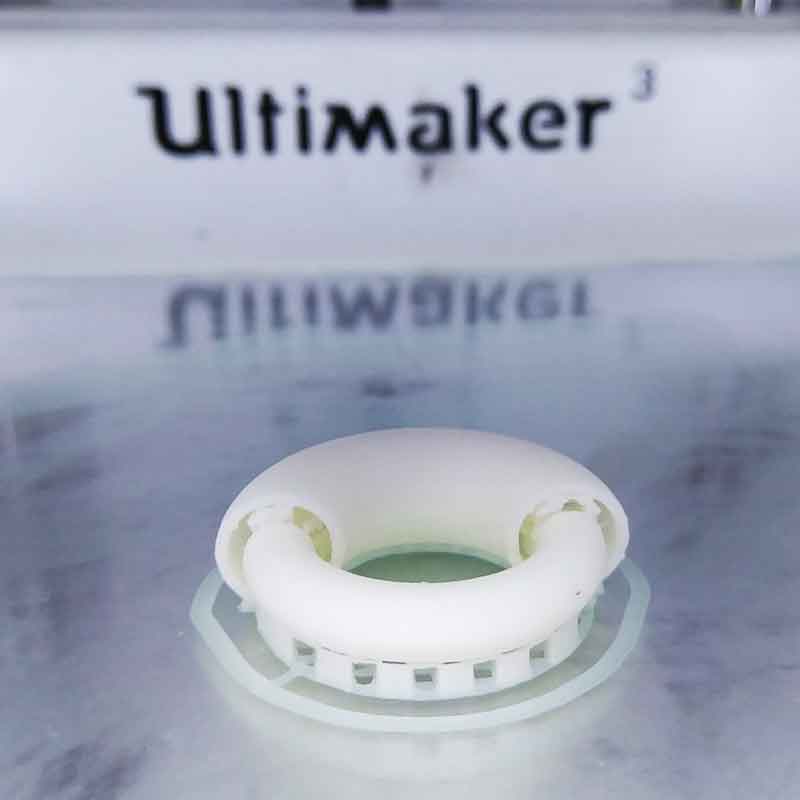
_3D Printing moving parts
For this week's assignment I did a few tests.
One of the tests I did was to try printing an object that has mobility.
I did this as I wanted to understand what is the minimum space needed between each object so that they
can move after being printed.
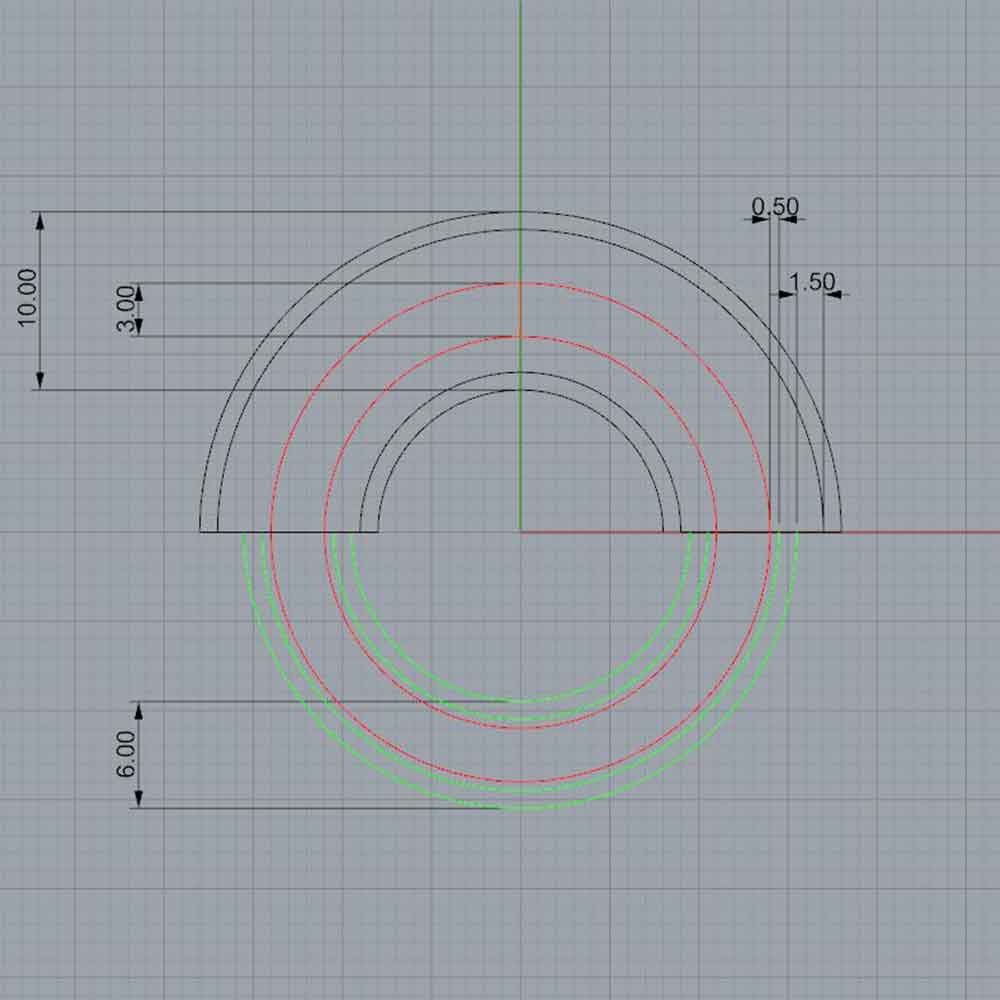
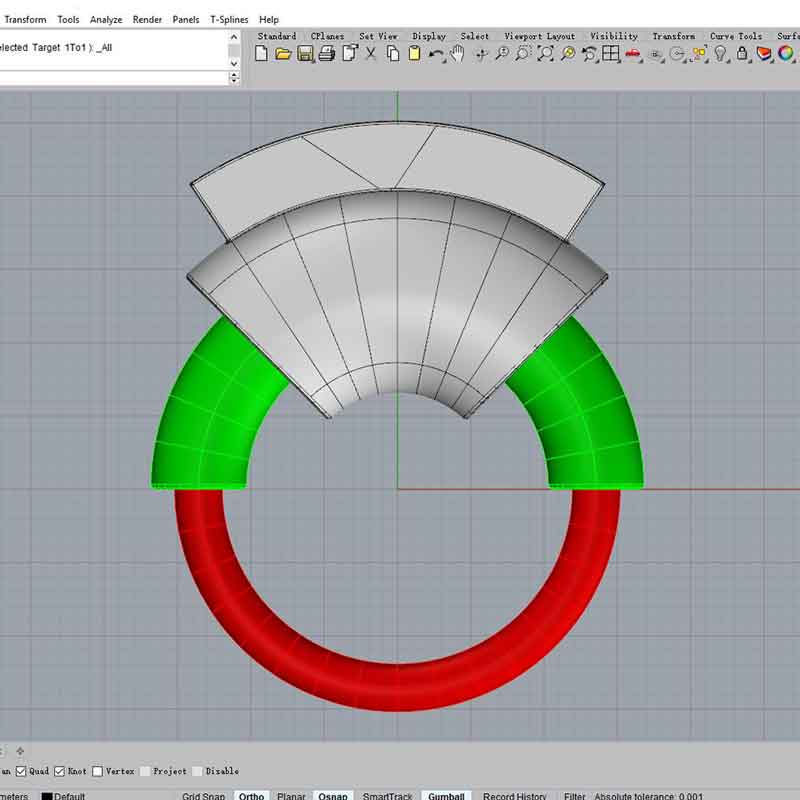
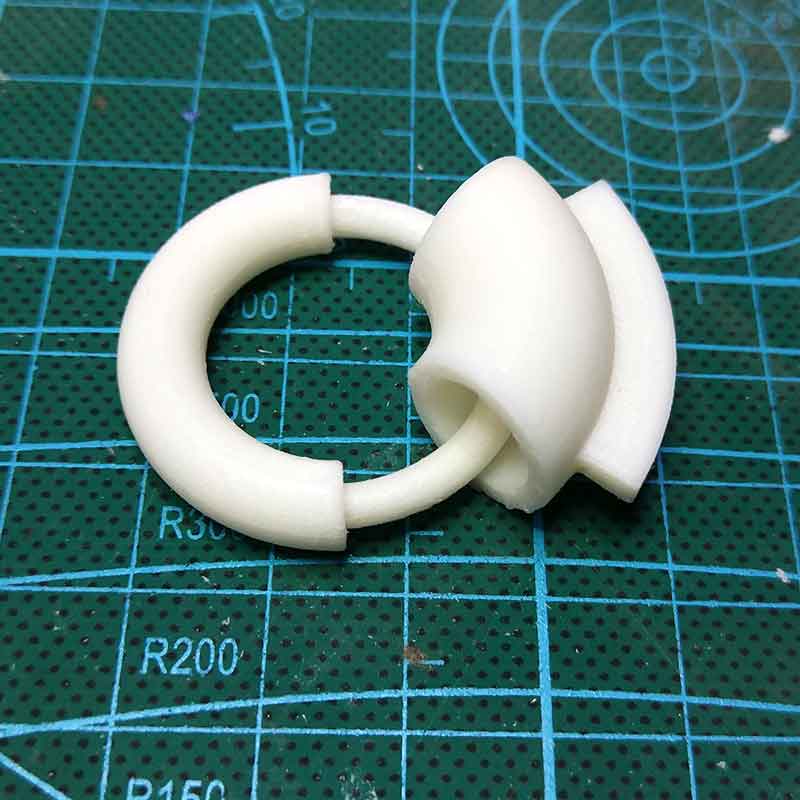
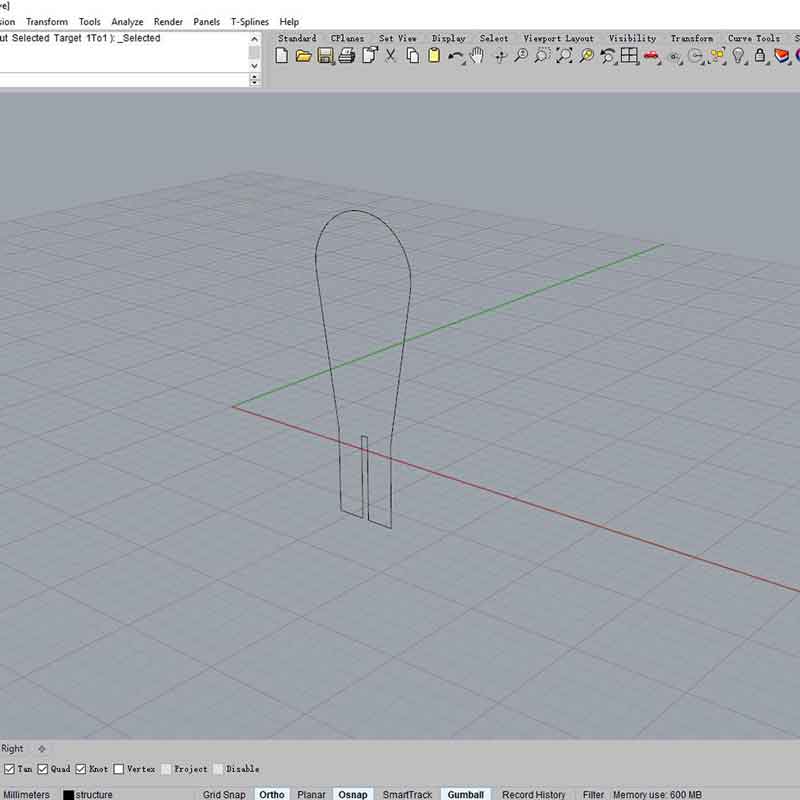
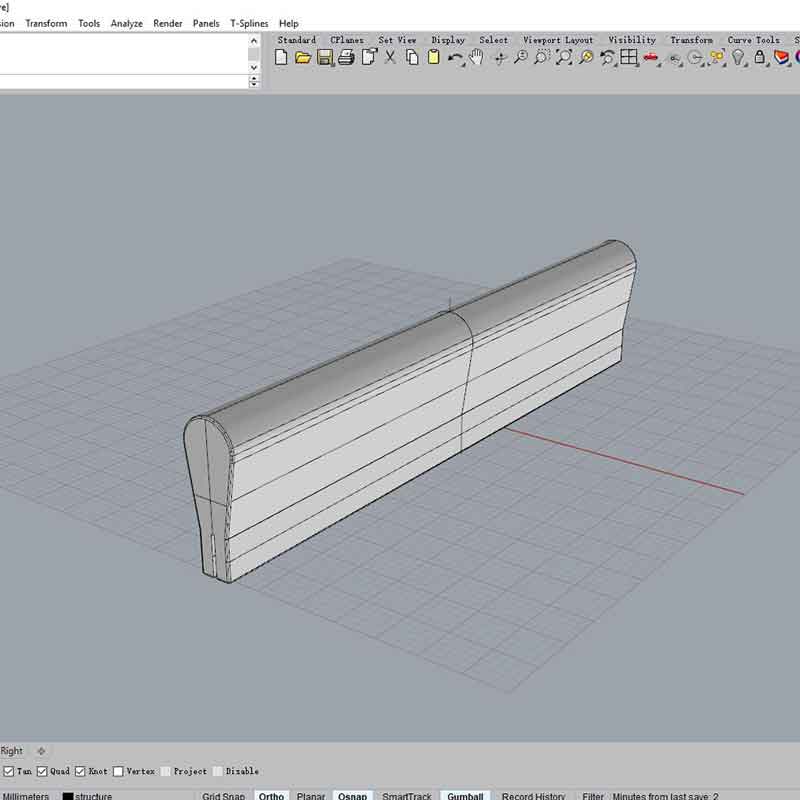
For this test I decided to do a simple shape, which is a ring that has layers 3 layers.
I built my model using Rhinoceros 3D. The minimum space I left between the objects was of 0.5mm and
1.5mm being the maximum space between them.
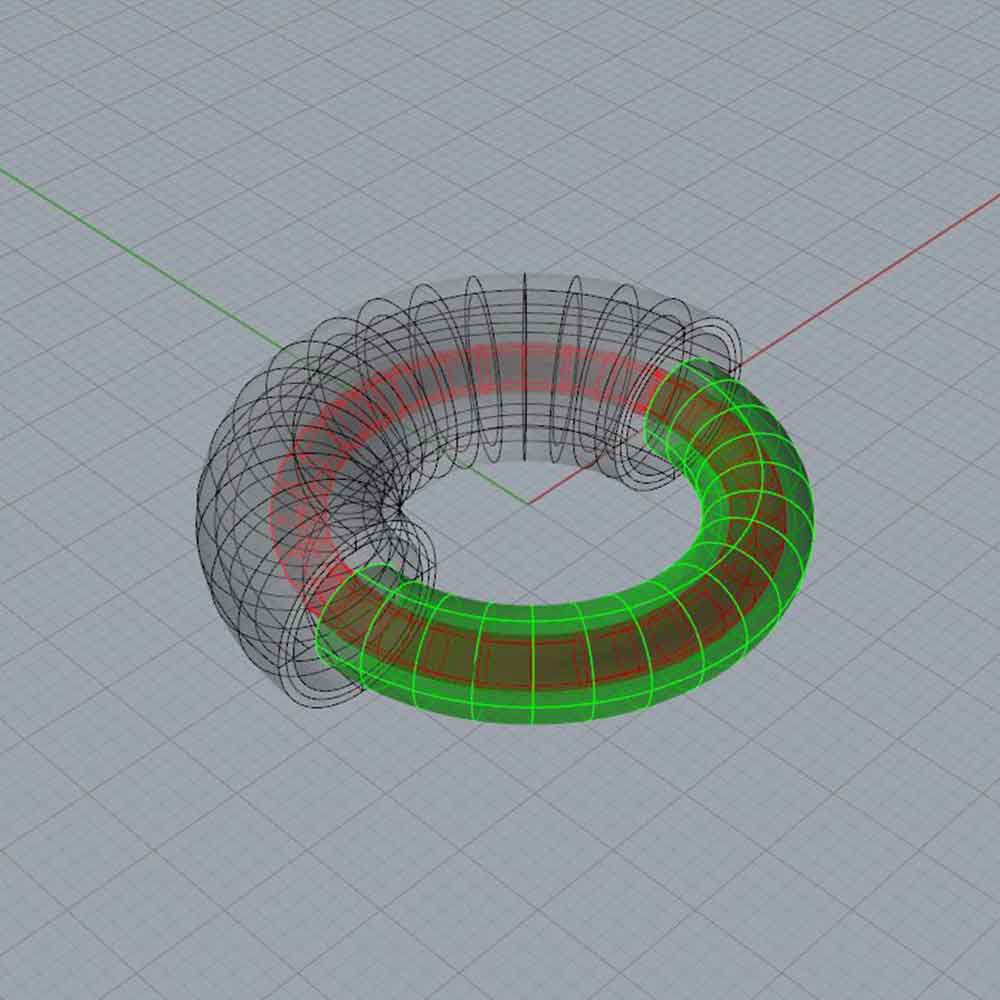
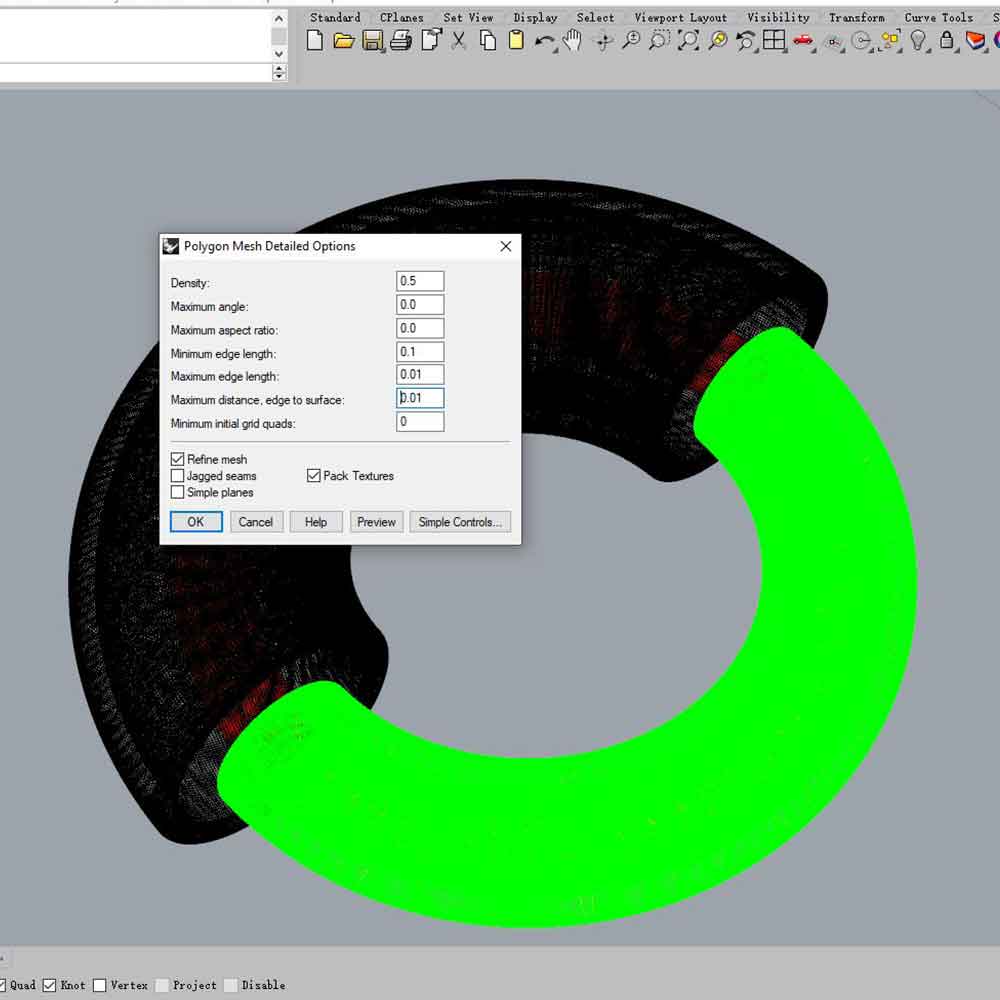
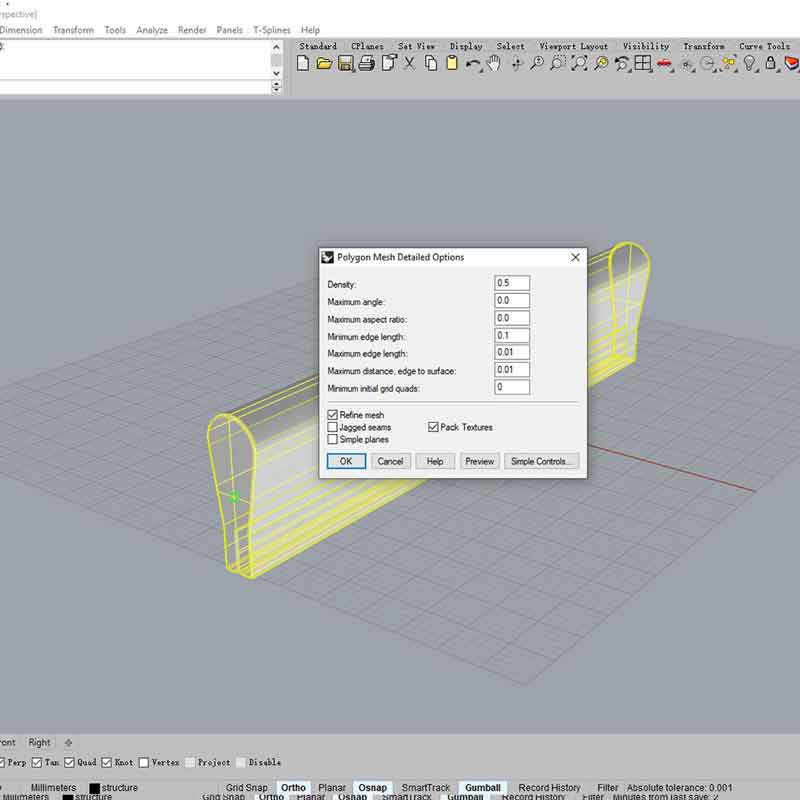
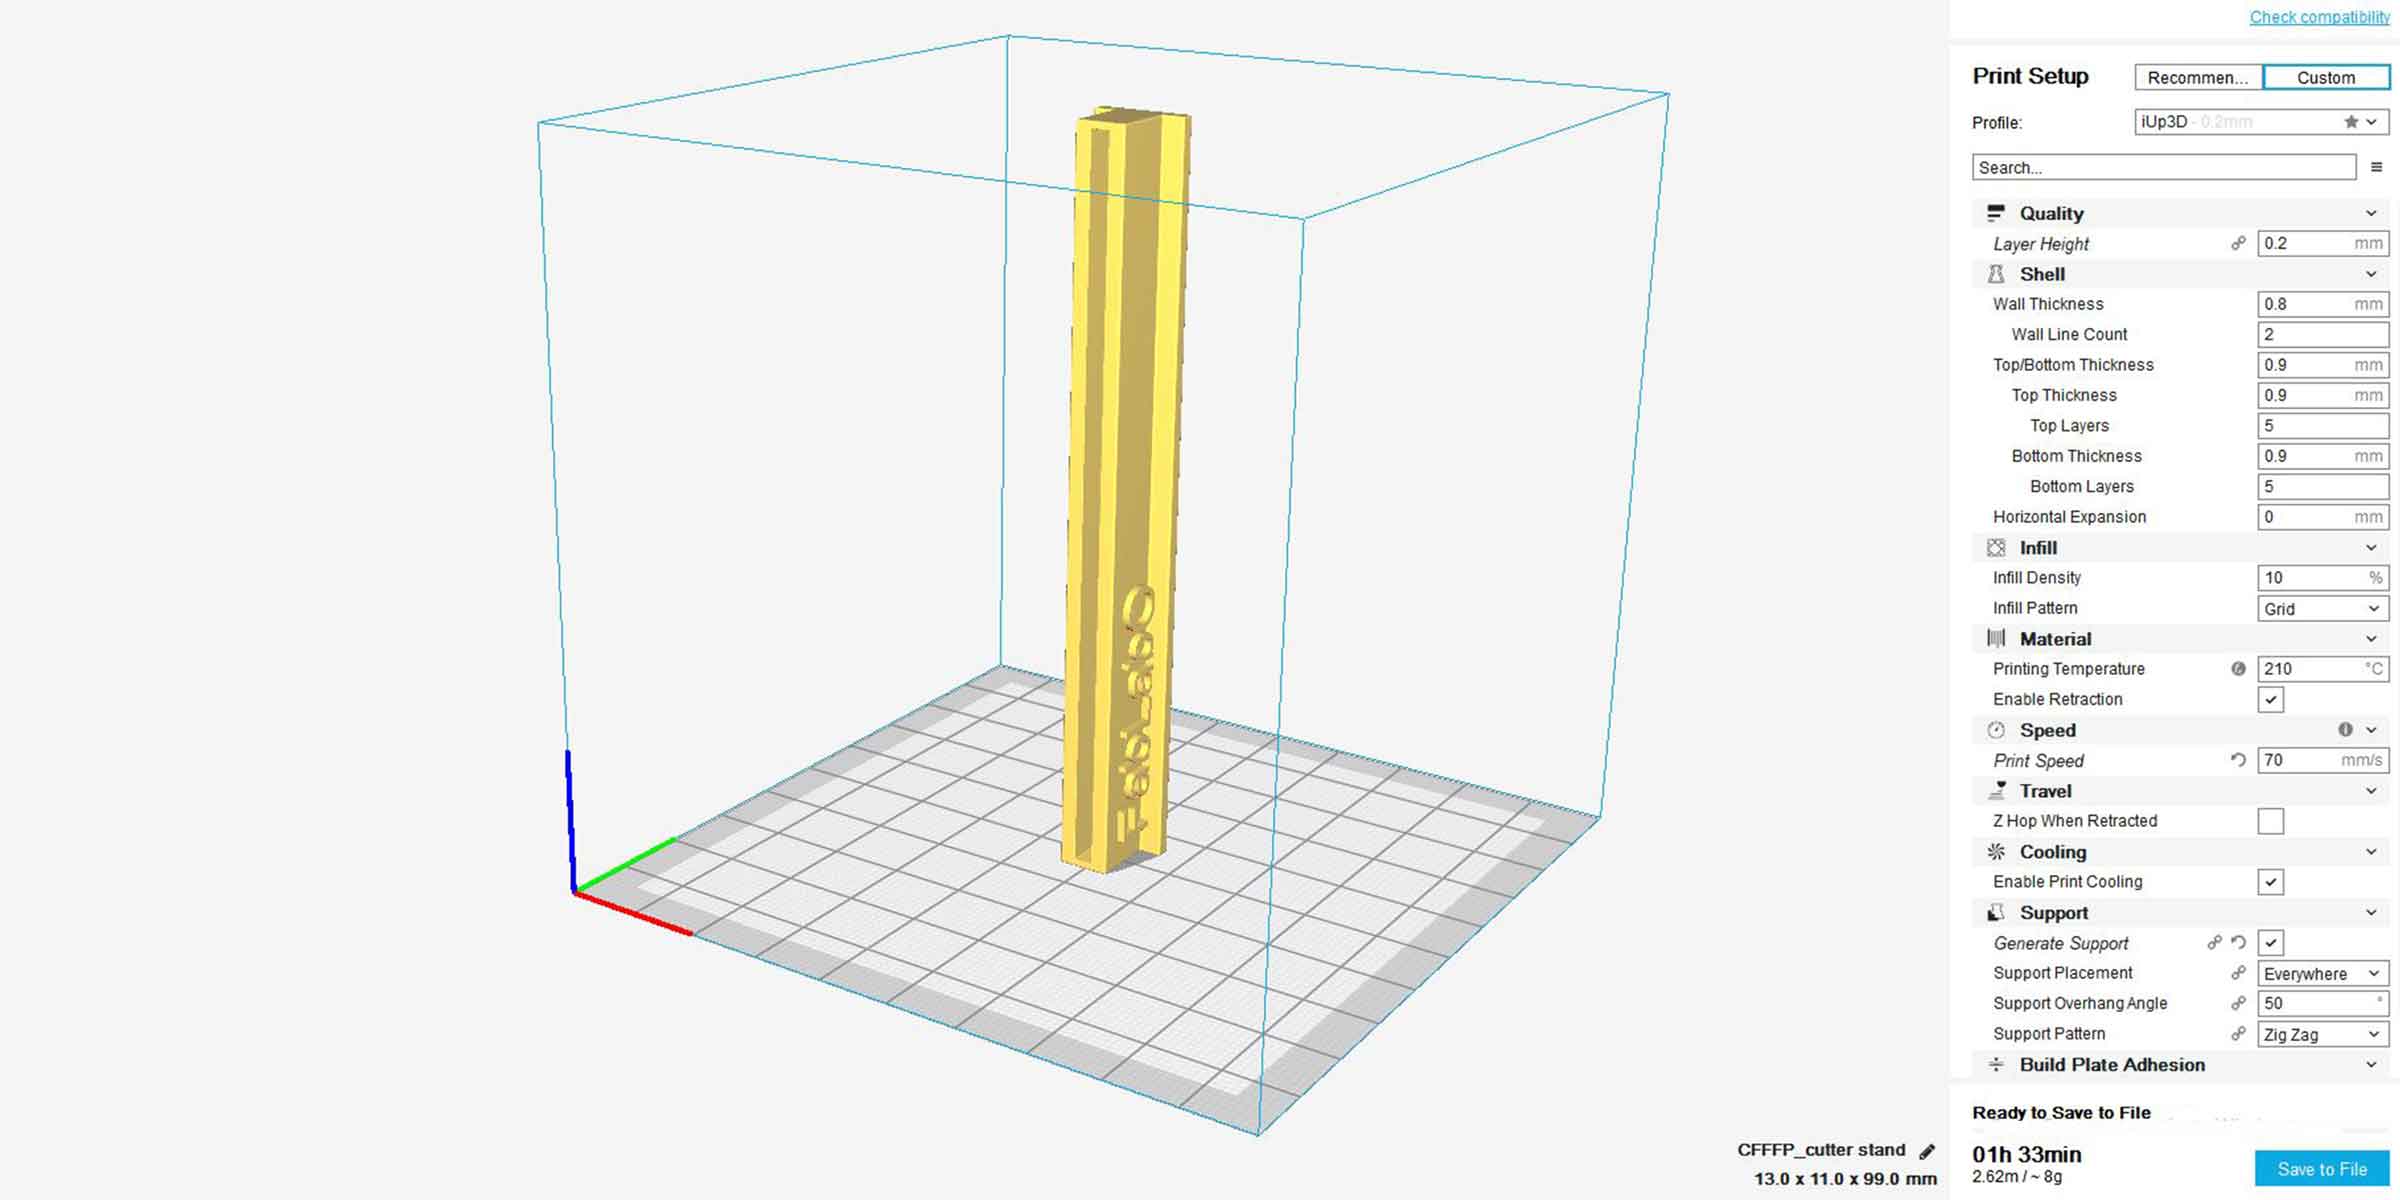
Once I built my model I coverted it into meshes and I exported the model as .STL.
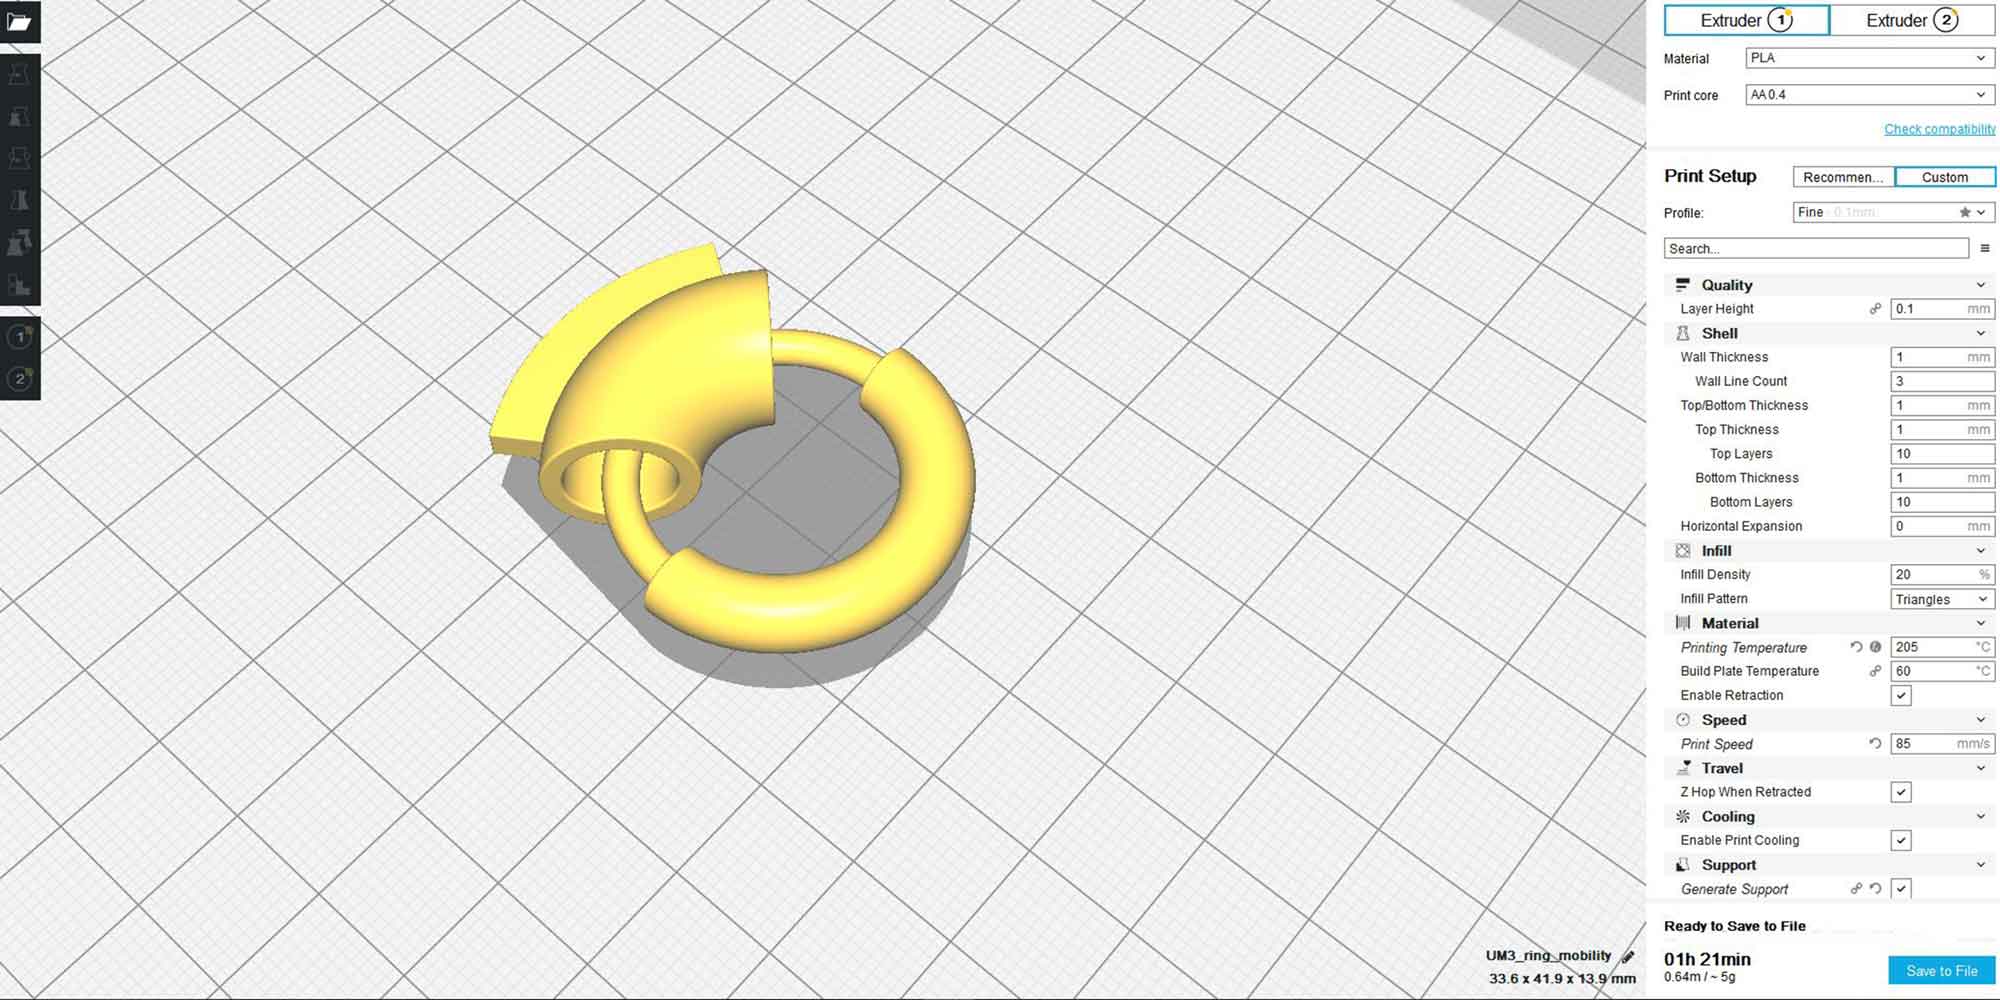
To create the GCODE I used CURA Ultimaker Slicer software.
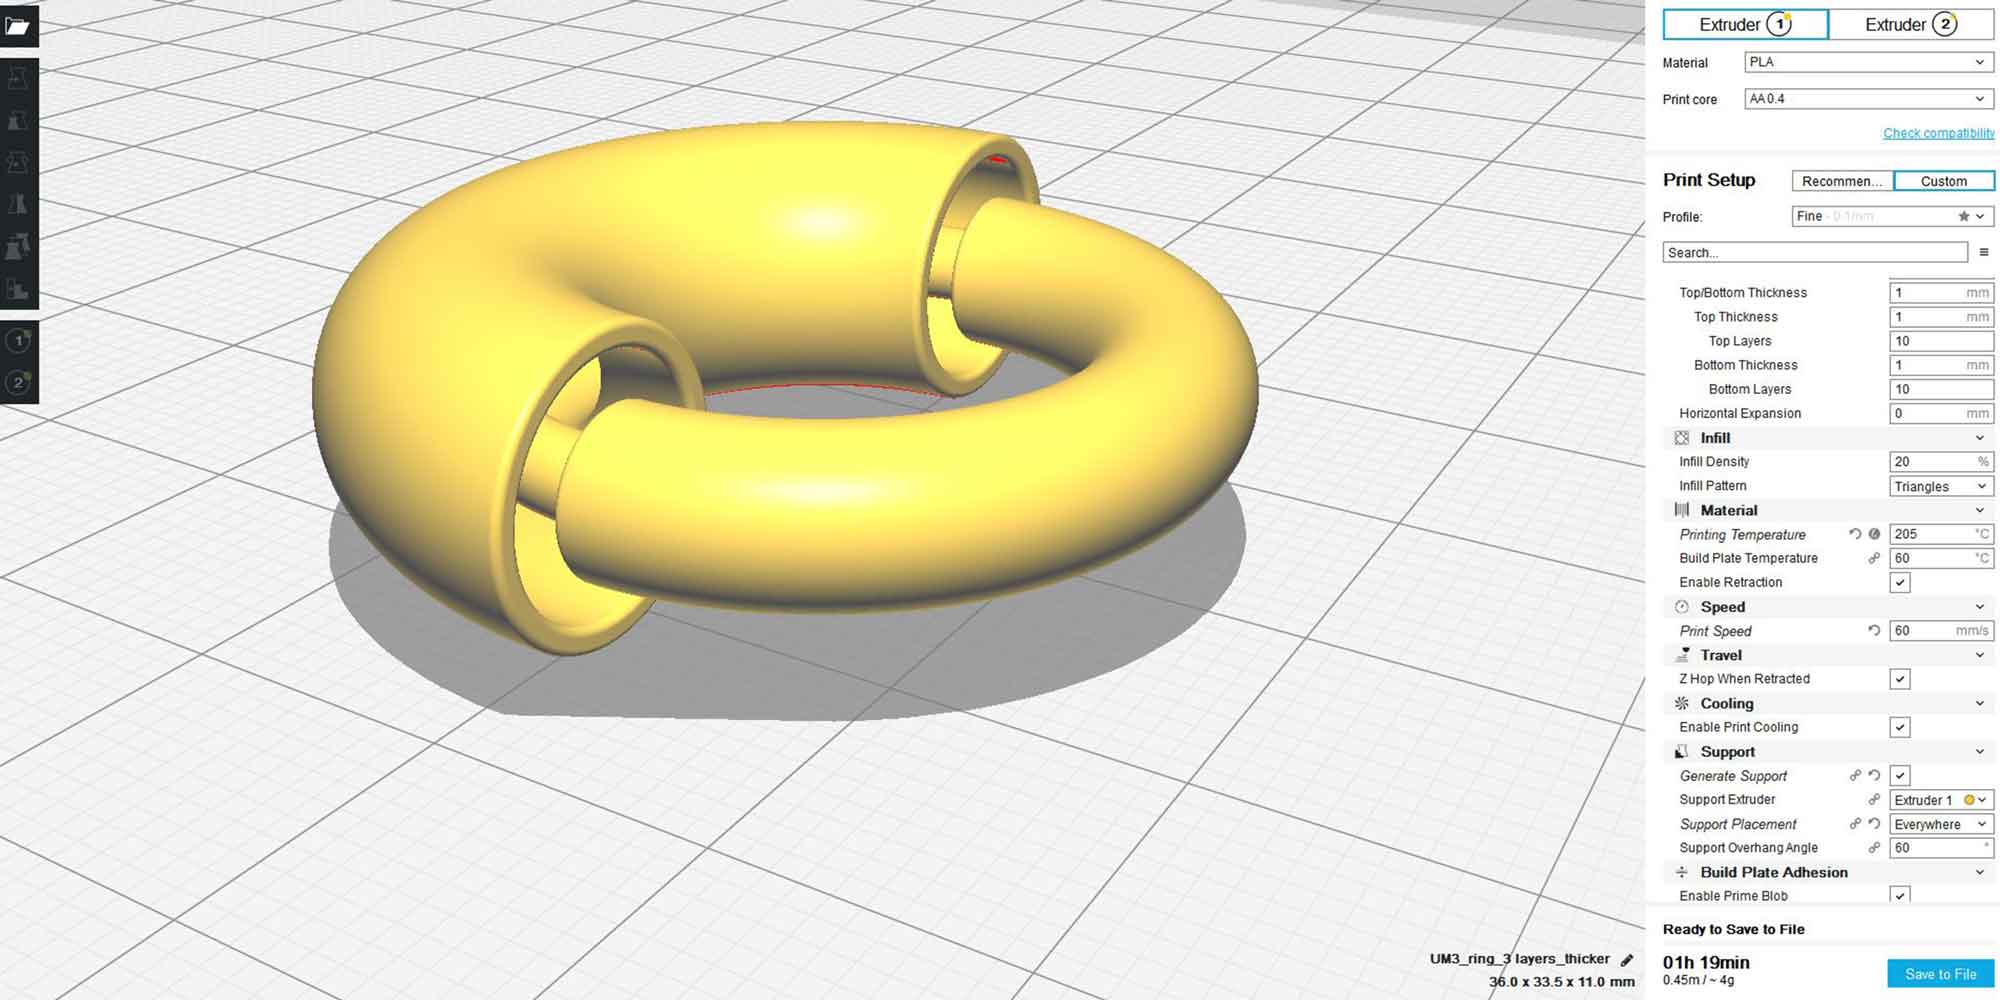
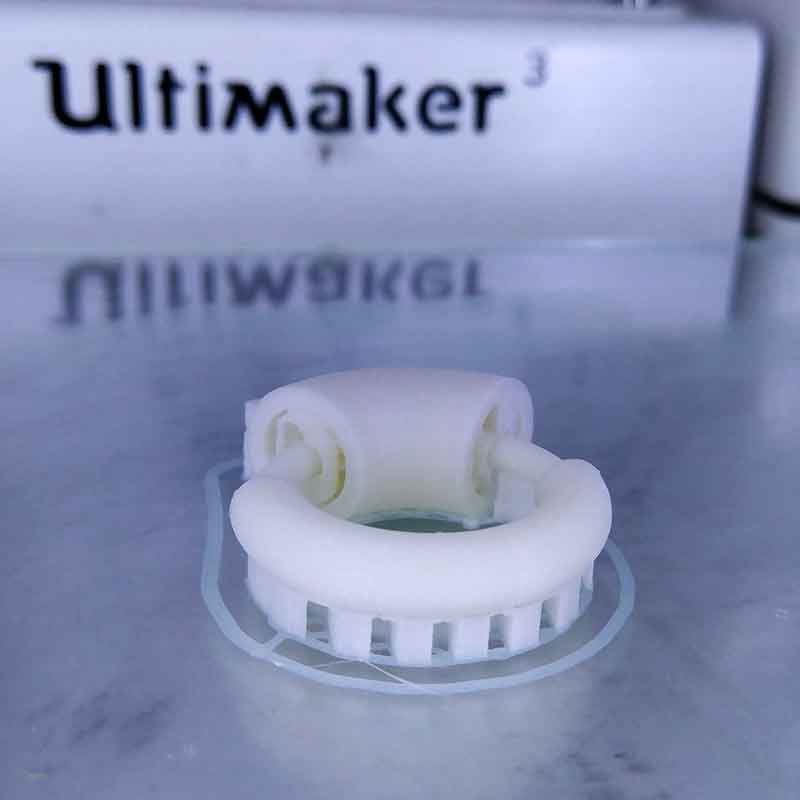
Once I had the settings for my print I did the first test using an ULTIMAKER 3 printer with PLA filament.
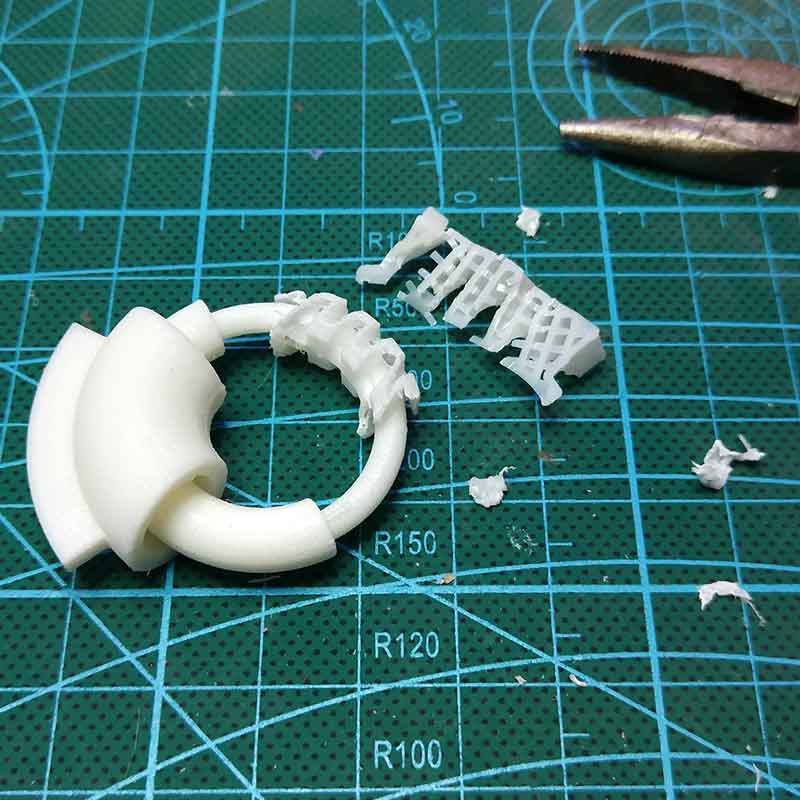
Once the model was printed out I removed manually the support that was built between the overhangs.
I noticed that when the space between the objects is very small (0.5mm) there is a minimum of support
built which is easy to remove, but the support that was built instead between the bigger gaps (1.5mm)
was a bit hard to remove, especially because this was a semi-circular shape and it was hard to reach
with the tweezers the midpoint.
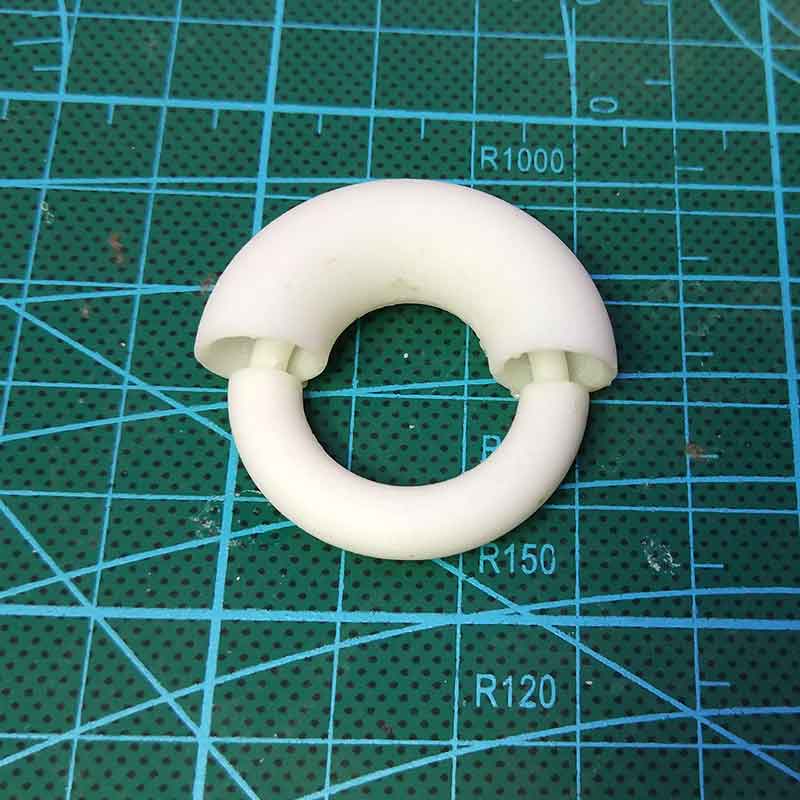
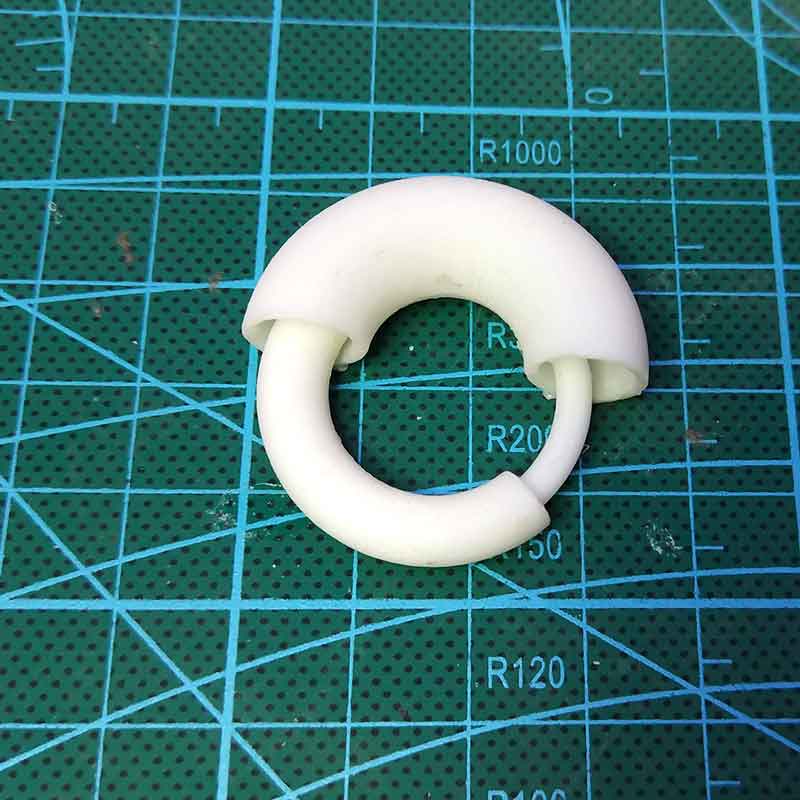
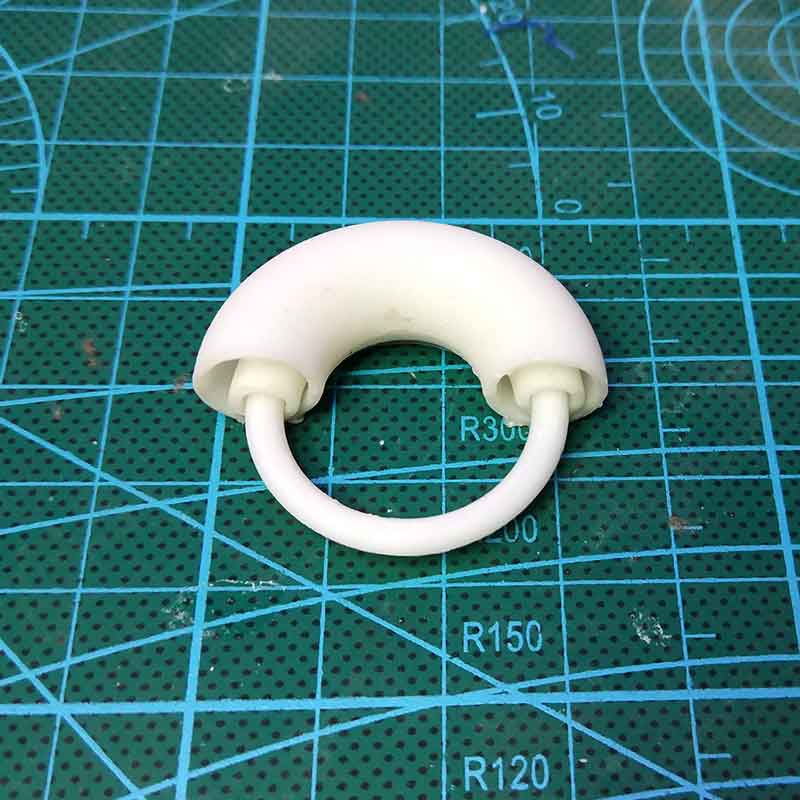
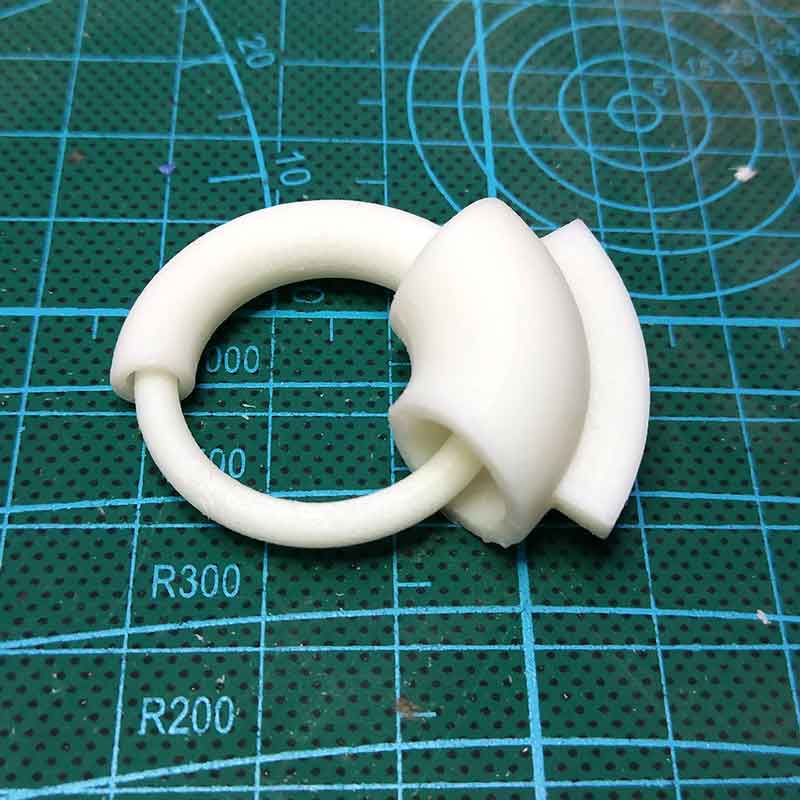
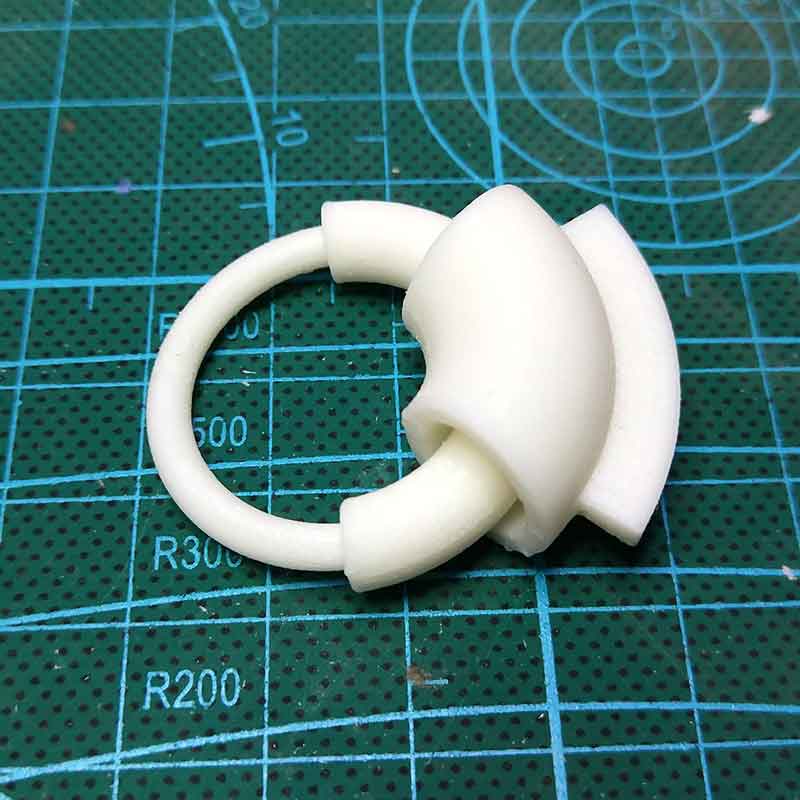
After doing this test I did a second iteration, modifying a little the original model:

_Mobility animation video
Check out how it works so you can get an idea of the parts and how they move:
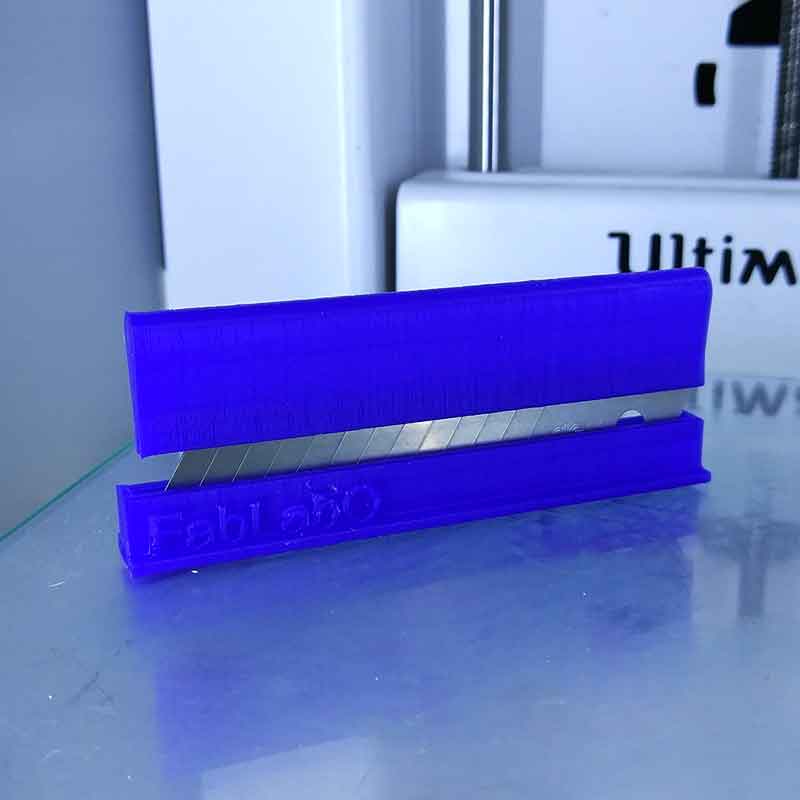
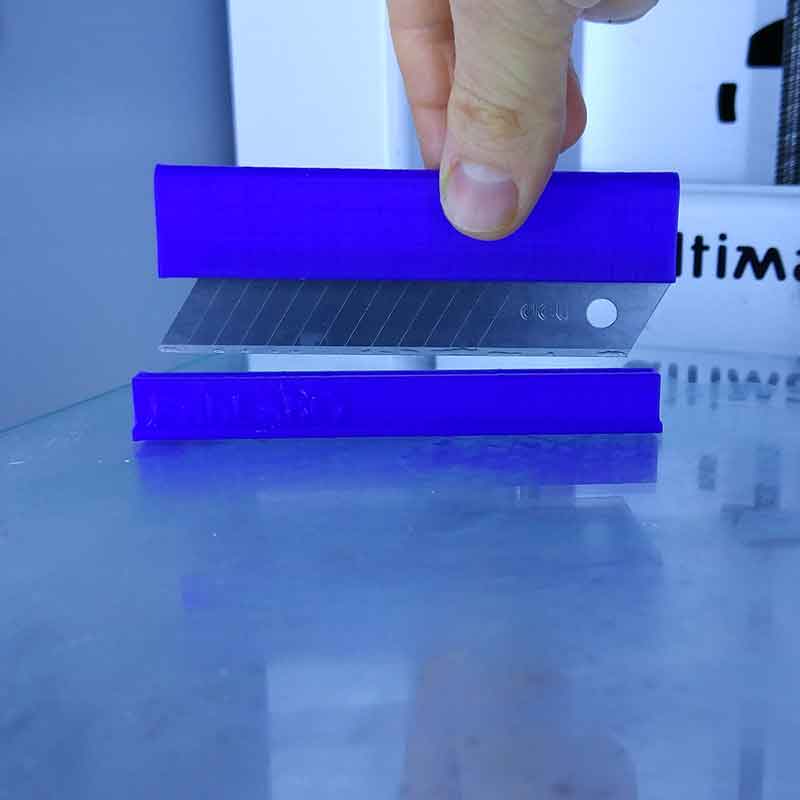
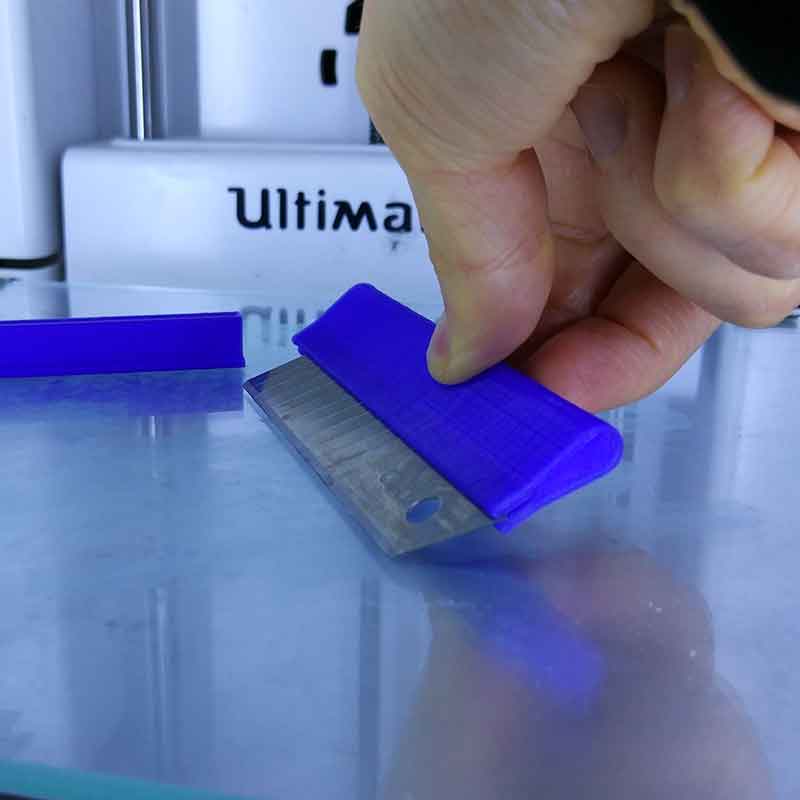
_3D Printing tools for the Lab
To remove the models from the printer bed we use a cutter knife, and I decided to build a handle and a
holder for it.
This time using another 3D printer, a very small desktop 3D printer which surprisingly prints really
good.
Here is the process and outcomes:
3D Scanning
What is 3D scanning?
3D Scanning collects data of a real object and translates it into a virtual 3D model.
There are different types of 3D scanners, the one we used is a KINECT from Windows.
This one works best with big surfaces, ie: a human body, if you are looking to scan smaller objects such
as jewelry, this is not the scanner you would use.
3D scanning is quite fun, but you need to know that after scanning your object, you will have to repair
the mesh.
This is because when we scan, the precision is not perfect and the surface can have "holes".
Among the softwares you could use to repair your mesh once you did the scanning, is MESHMIXER from Autodesk.
Scanning process
You have to download and install SKANECT.It is free, but the free version has a limit
of 5000 polygons, which will result on having a less detailed model, but I used this version and the
outcome was not so bad.
If you want to have unlimited polygons you should get the SKANECT PRO version.
When you are scanning an object, keep in mind the following:
1_You need to prepare the stage, is recommended to have a clear background behind the object to
scan.
2_It works better if the scanner is fixed on a tripod and the object to scan spins on a fixed axis.
3_Think of the best position to begin scanning your object. Remember that this process is like take
thousands of photos that in the end are "stitched" together to build the object.
And the stitch will
be slightly visible, so keep in mind where you want to the stitch to be.
In this case, when scanning a person, is a good idea to start recording from the side, this wat the
stitch will be on the back of your head.
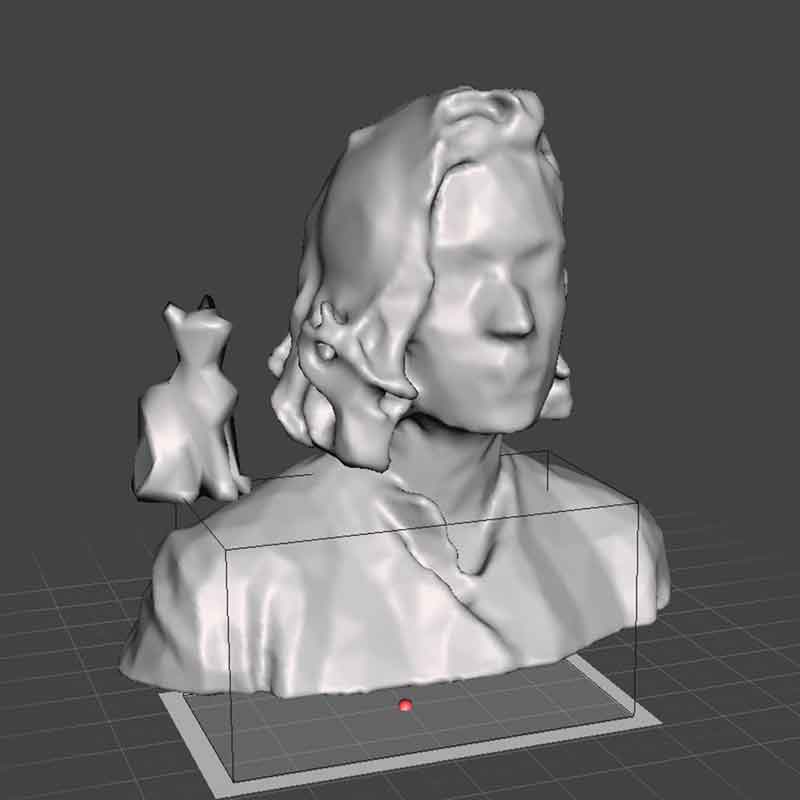
In my case, the scanner was fixed on a tripod and I was seating on a chair with wheels so that I could turn 360 degrees while the scanner recorded me.
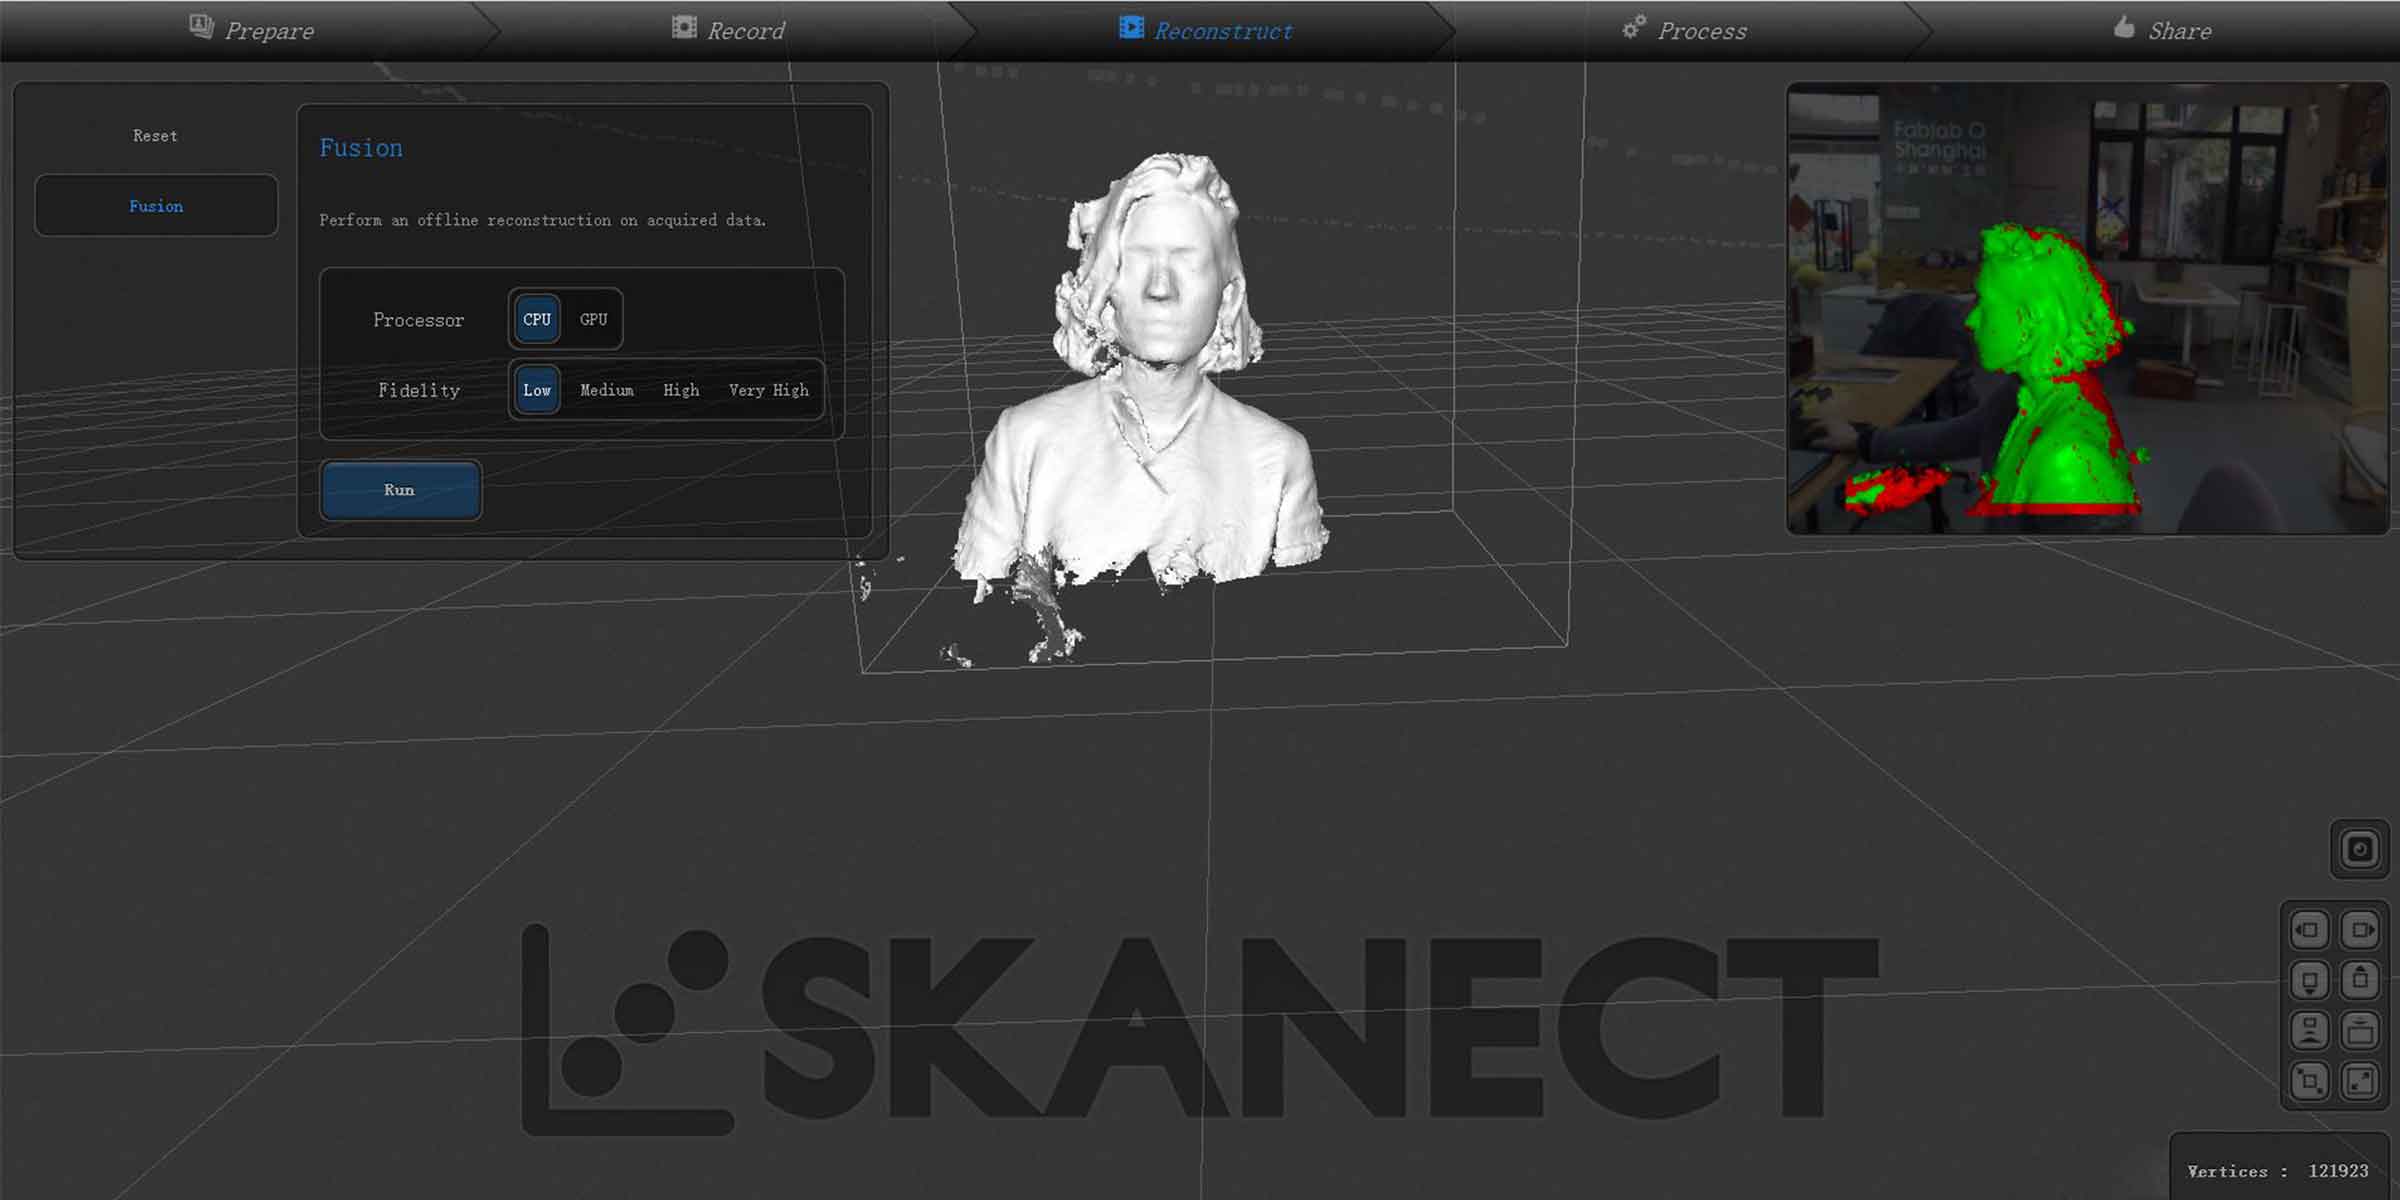
Once you are happy with the scan, go to PROCESS.
_REMOVE PARTS: this will allow you to simplify the shape you
scanned by removing objects from the scene that you don't want/need.
_MOVE & CROP: this will help you to cut the shape and have a
flat base. Is better to do it here that in other softwares.
_COLORIZE: your model will try to match the colors with the
real object you scanned.
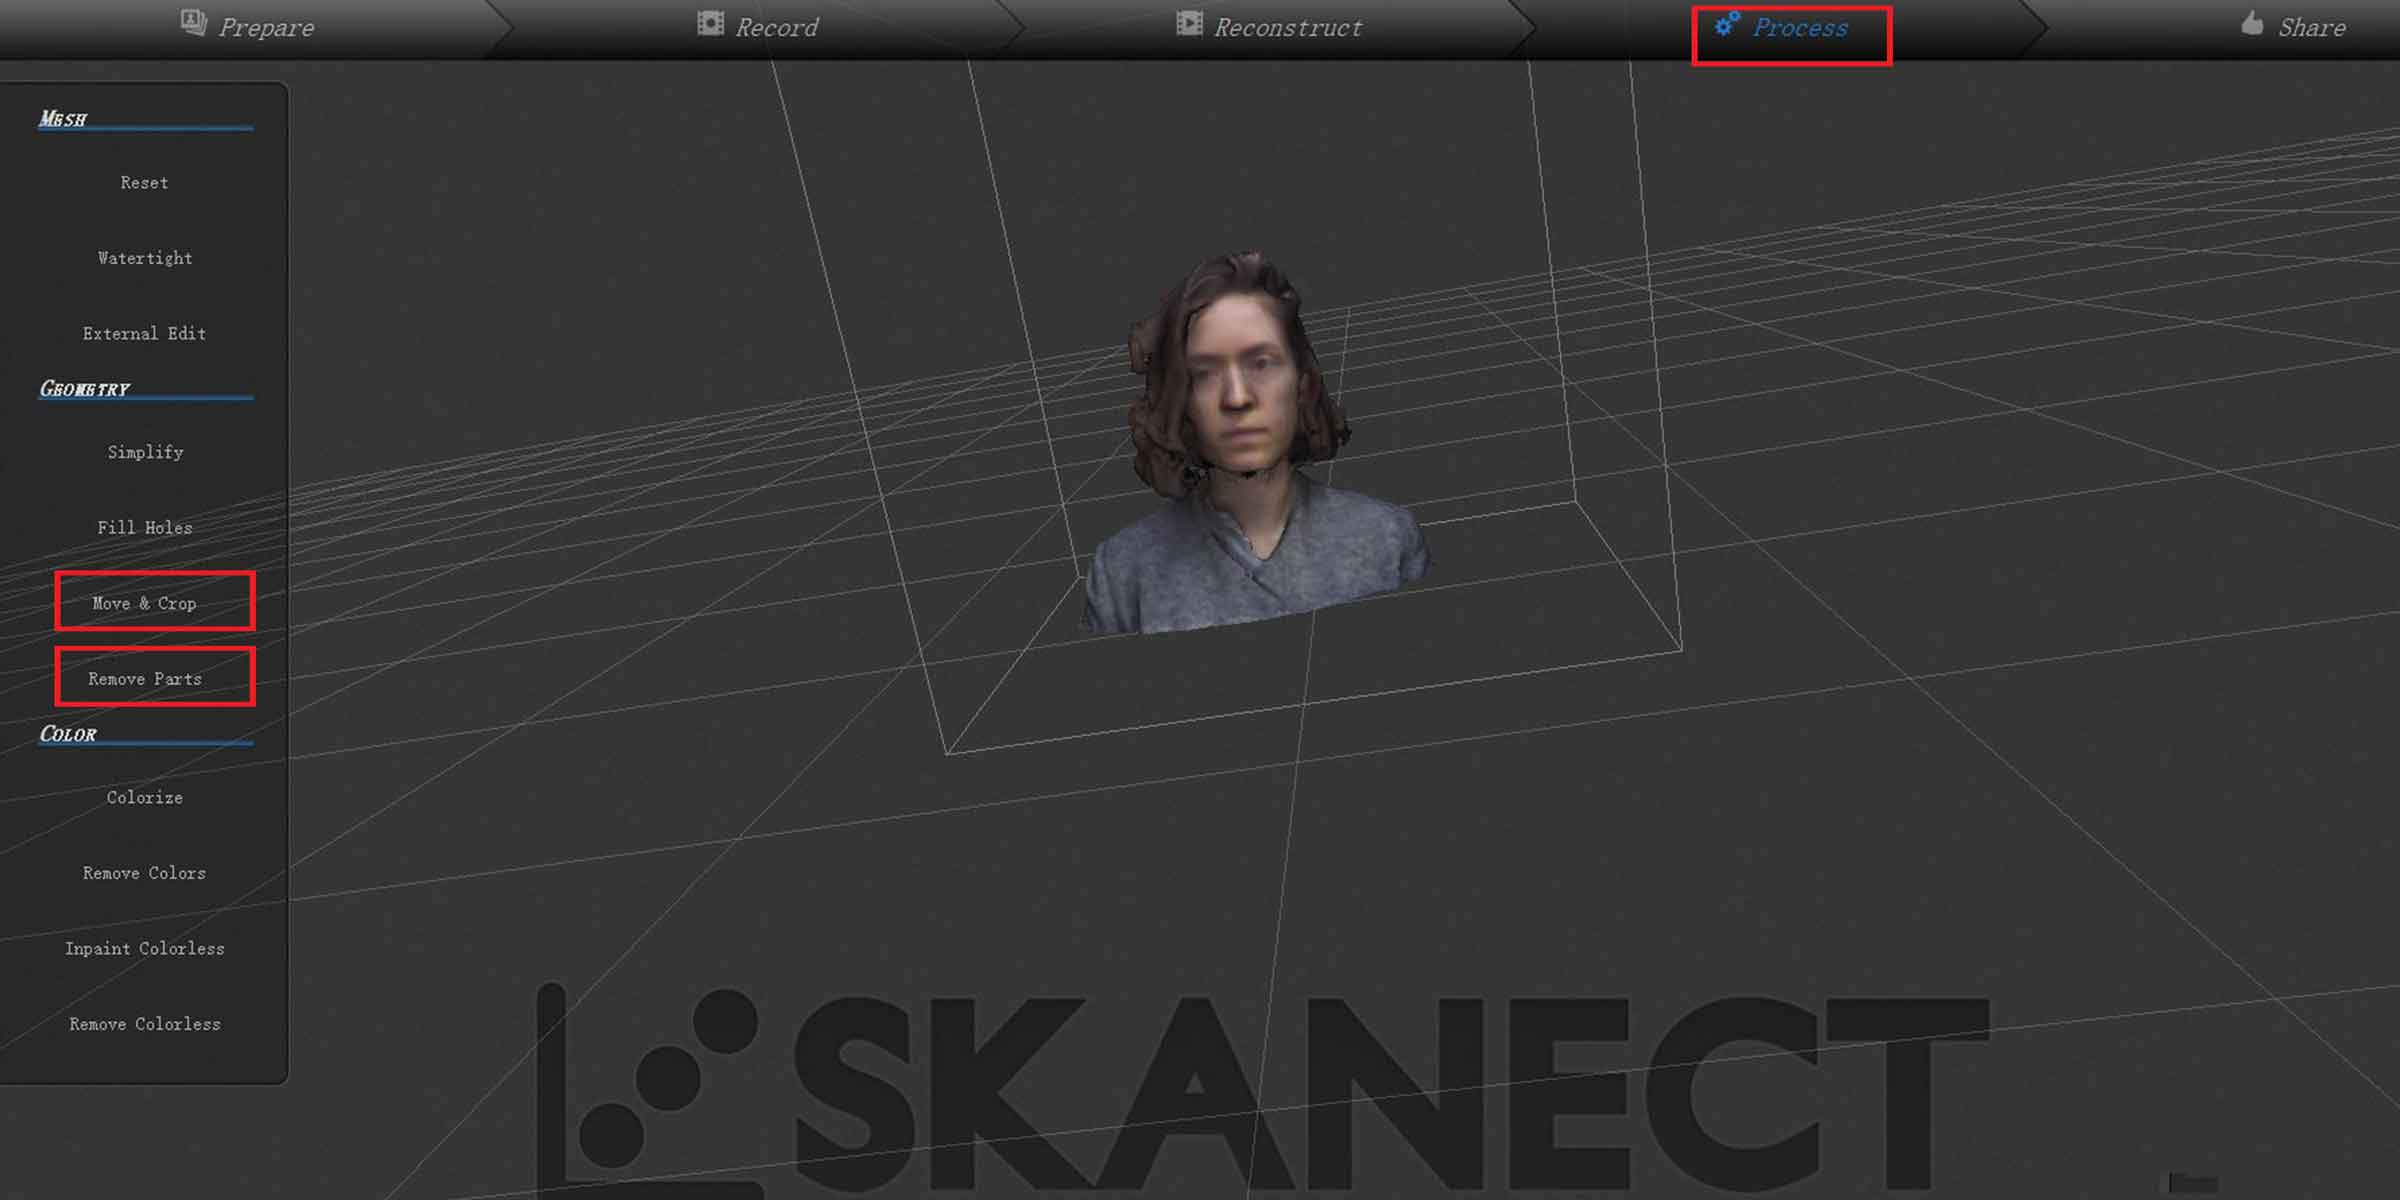
Once you are done, export as .STL and open it on MESHMIXER.
First thing you want to do is go to> EDIT> MAKE SOLID:
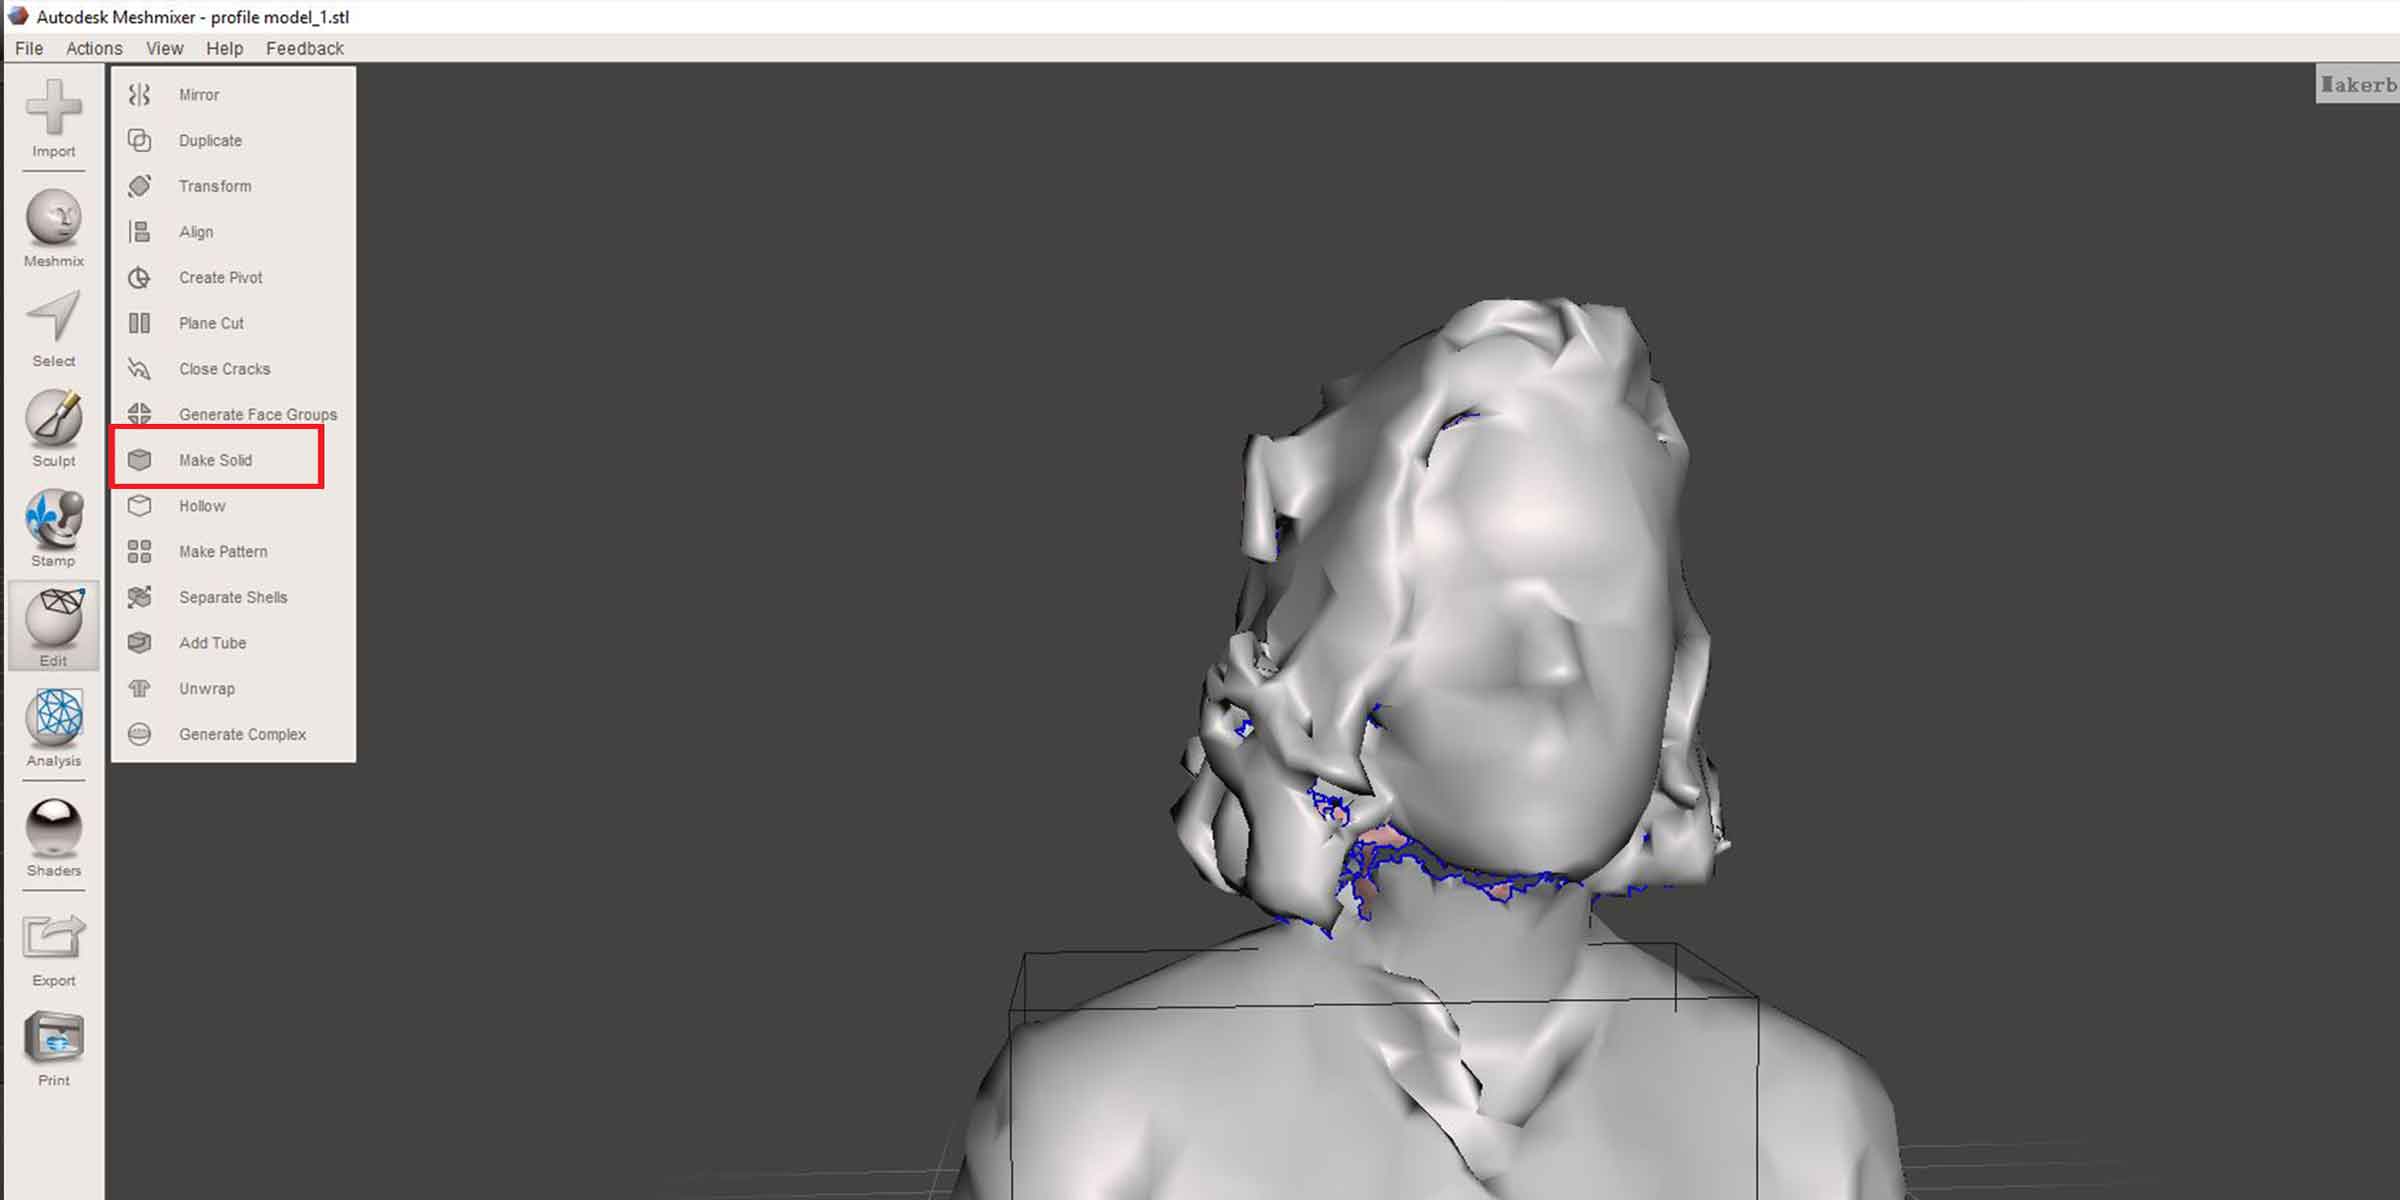
This is a great function of MESHMIXER because it will close all the open gaps your model has.
So as soon as you open it here, make it a solid using this function.
After that a window will prop and here you can decide how many polygons you want the model to have. The
more you add the more detailed it will be, the less you have you will be able to see the polygons
facets.

Once you do this two steps, you can start playing with the model, sculptnig it or adding other elements in your model.
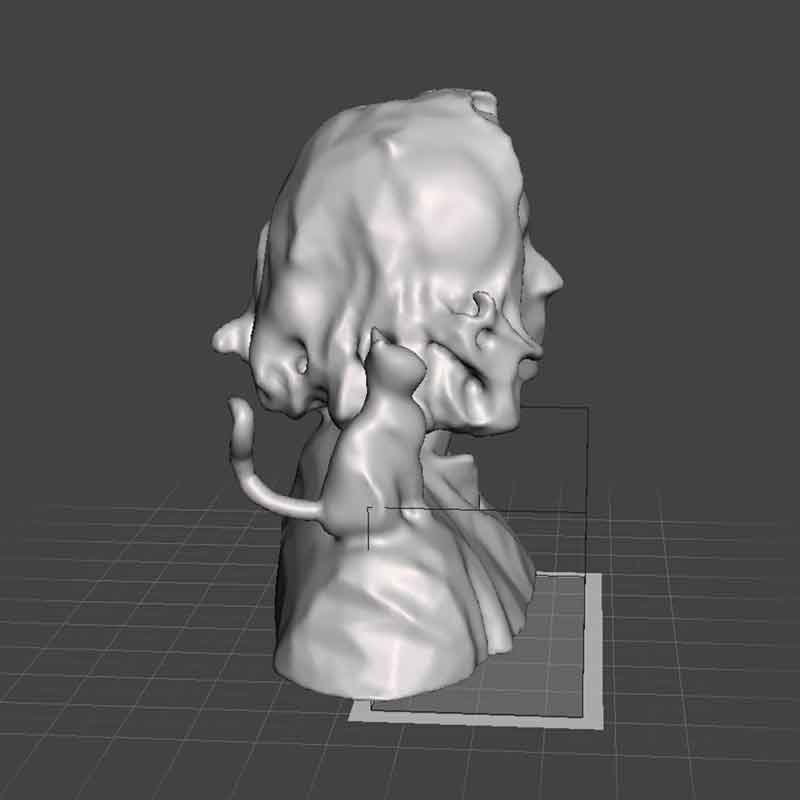
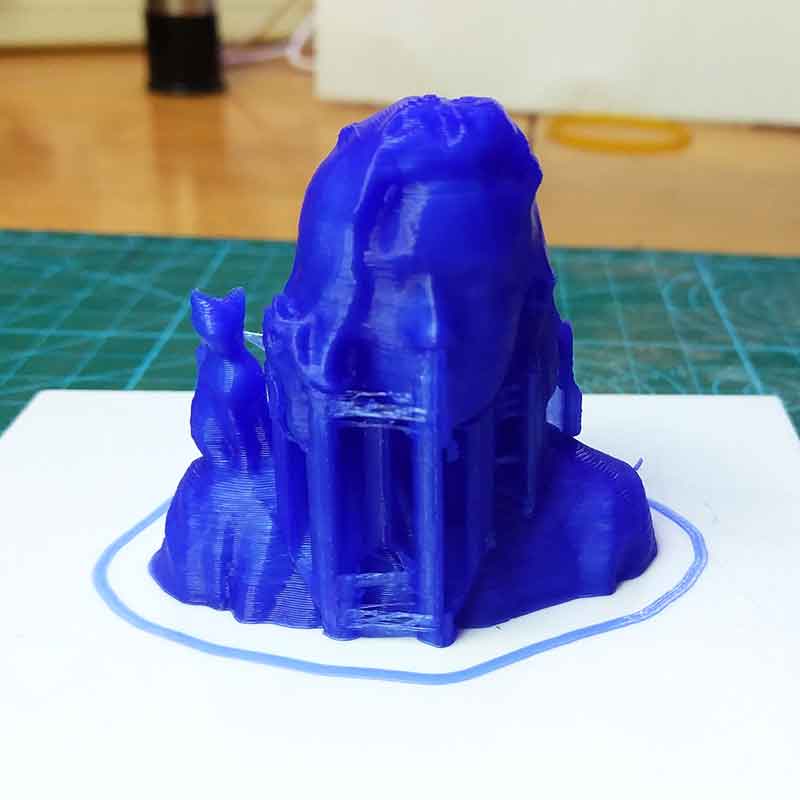
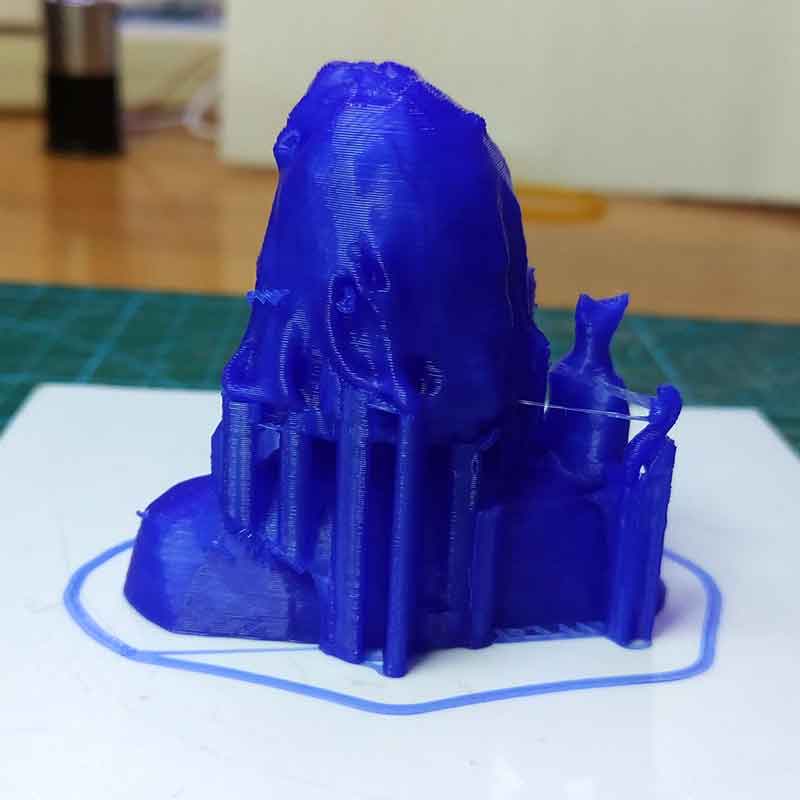
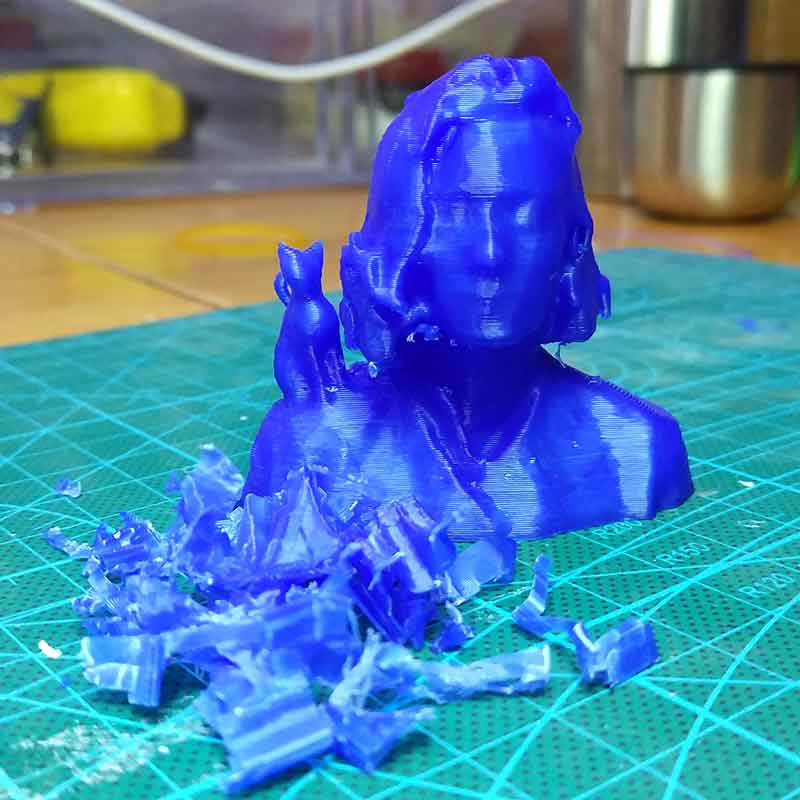
I decided to add a cat on my shoulder, so I went to THINGIVERSE and downloaded this model from xavab29.
I modified the model and added a few more details to the cat.
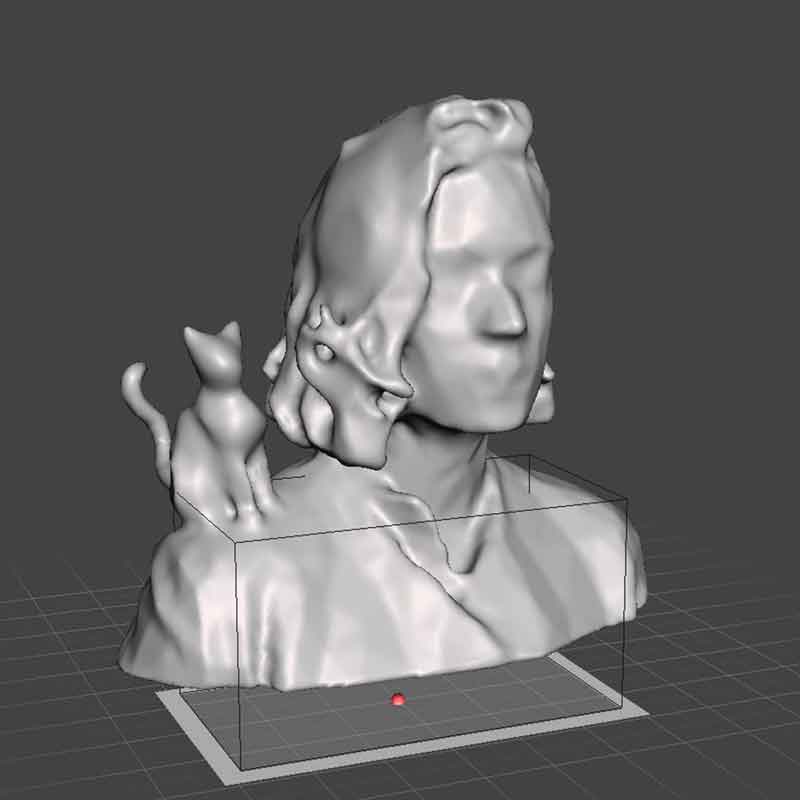
After playing with the shape, I exported as .STL and opened it on CURA.
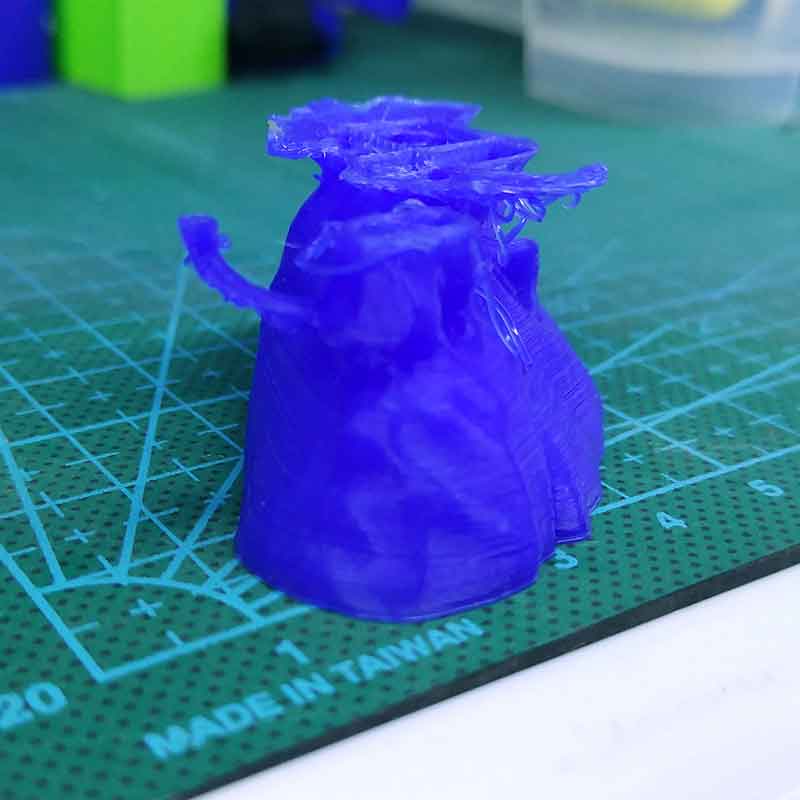
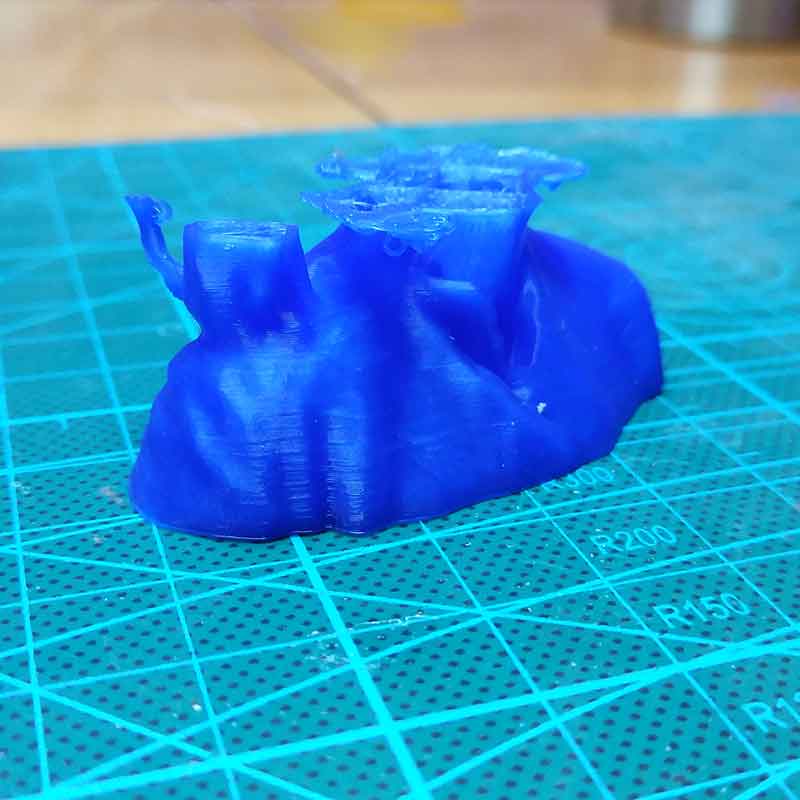
I did a first attempt using no supports, but as I was defying the gravity, I ended up having some
spaghetti issues:
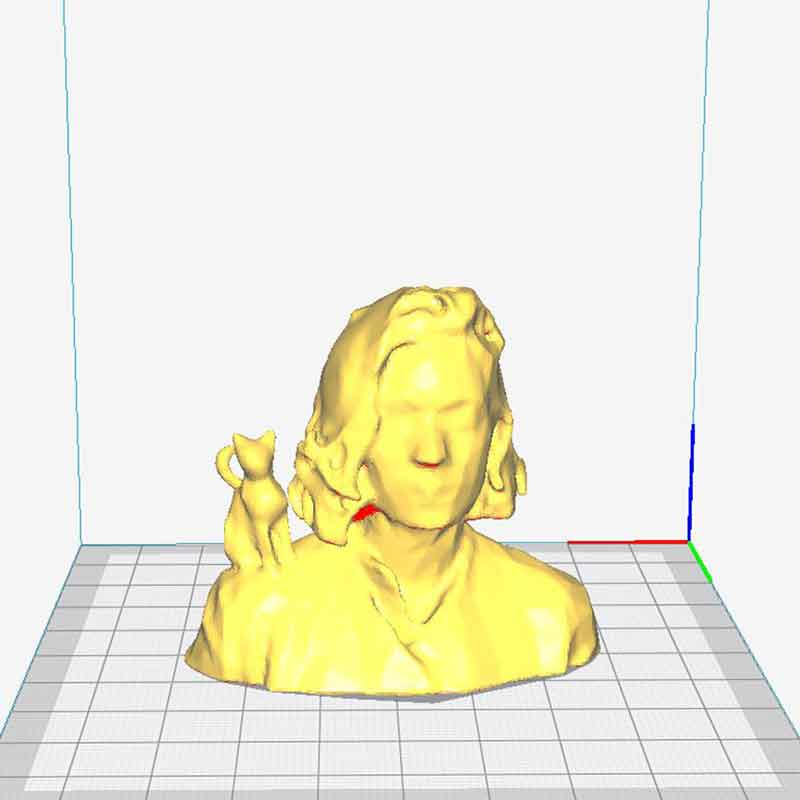
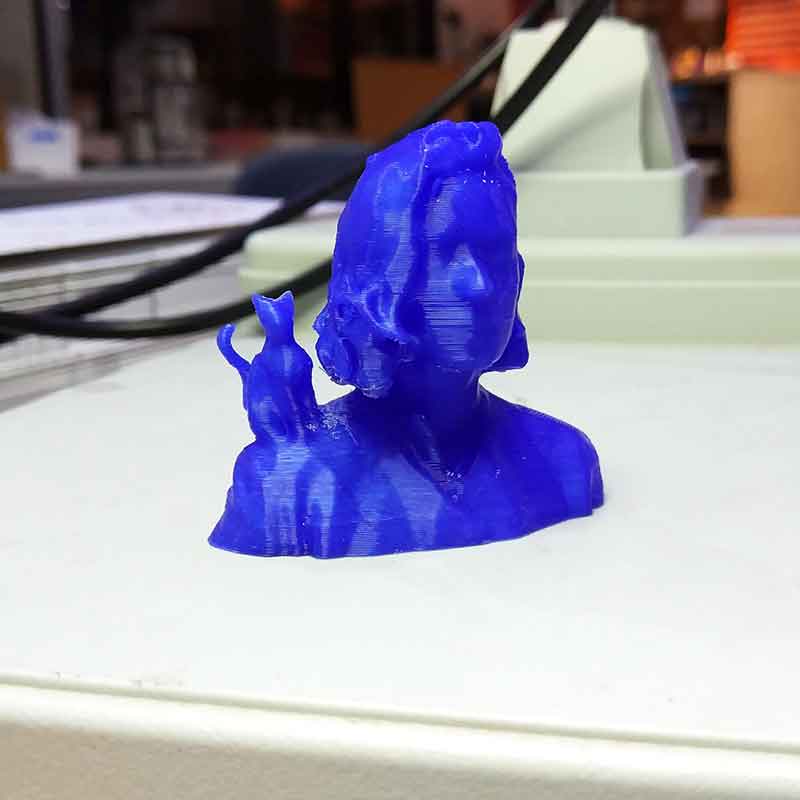
After this first attempt, I modified the CURA file and added supports to the model. And this was the final outcome:


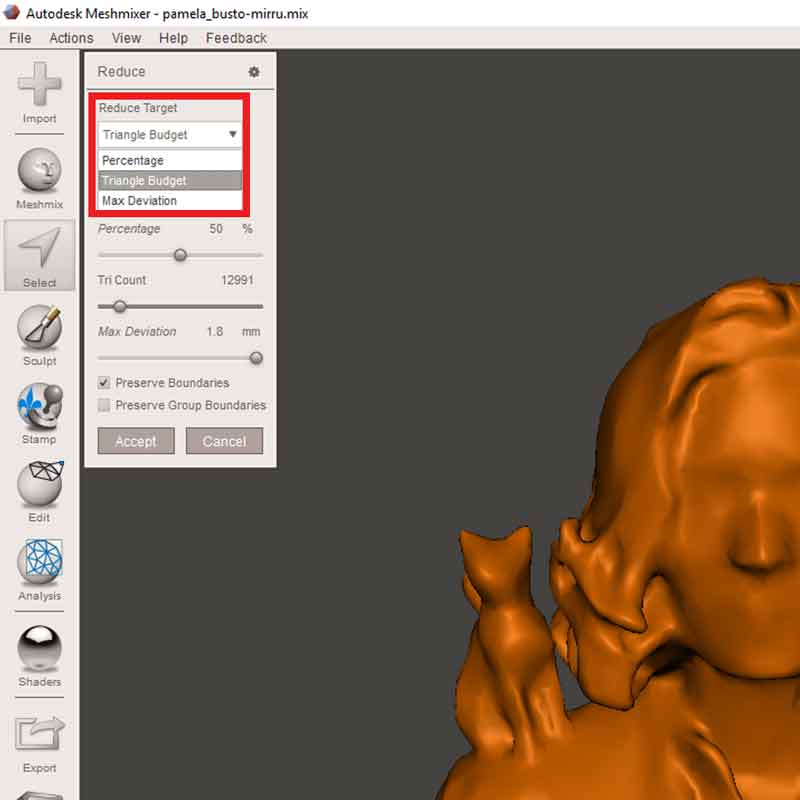
_TIPS! HOW TO REDUCE YOUR POLYGONS ON MESHMIXER:
I had to upload my files but they were too big, so I had to reduce the amount of polygons on the
meshes.
To do that in Meshmixer is super simple, just do the following:
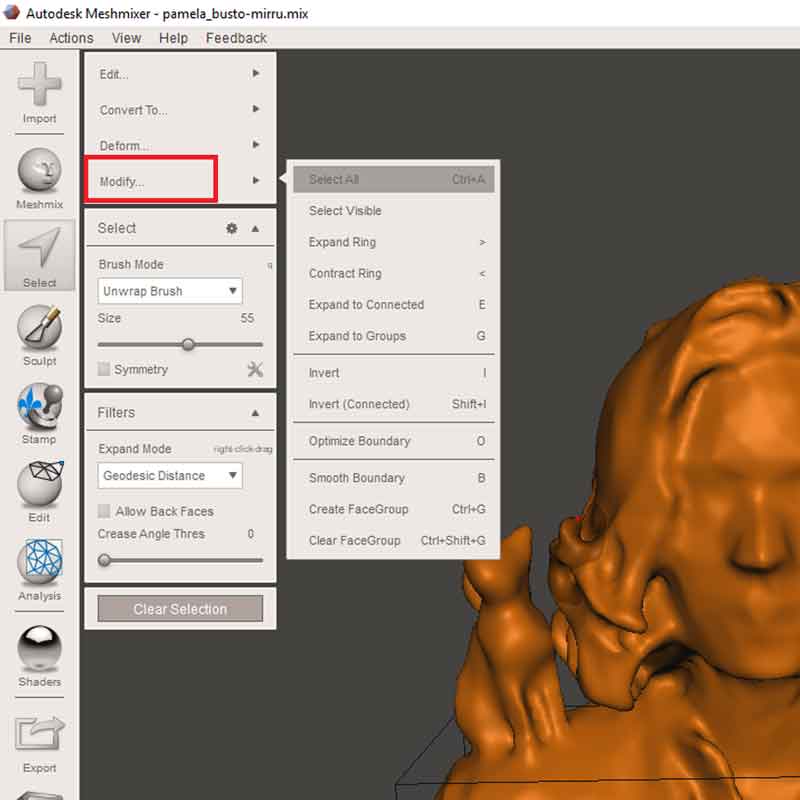
1_Open your model, go to SELECT, click anywhere on your model then go to MODIFY>SELECT ALL
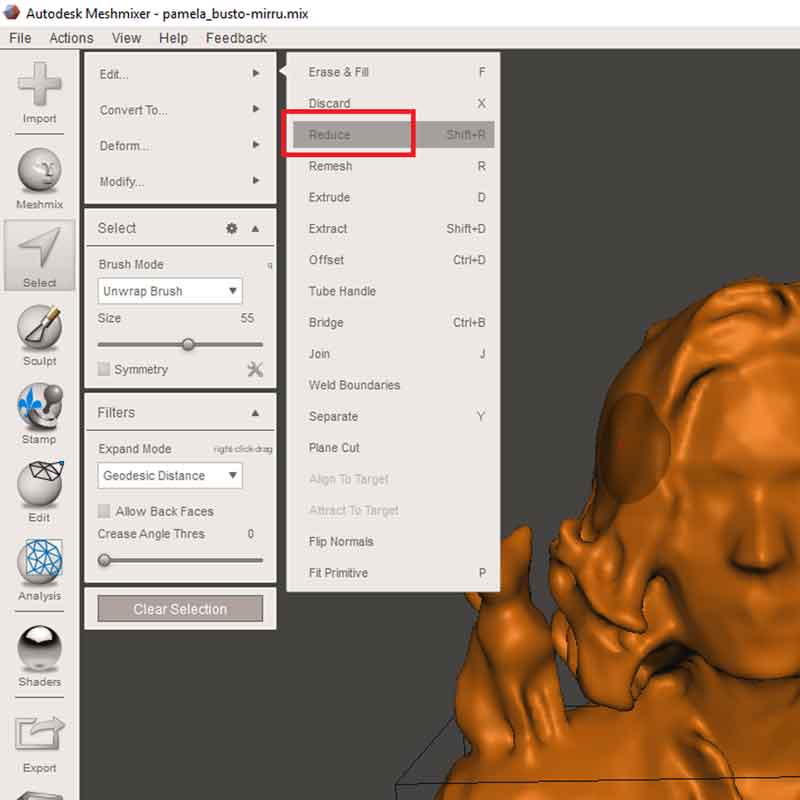
2_Go to EDIT>REDUCE
3_You will be prompted a window, go to REDUCE TARGET.
4_Here you can choose 3 options "percentage","triangle budget" and "max deviation". Selecet TRIANGLE
BUDGET and adjust the "tri count" (the amount of polygons).
5_Once you are done with this select ACCEPT and then proceed to export as .STL
You can find on this LINK the tutorial to reduce the polygons, although the voice over is so boring it's quite useful the info she gives.
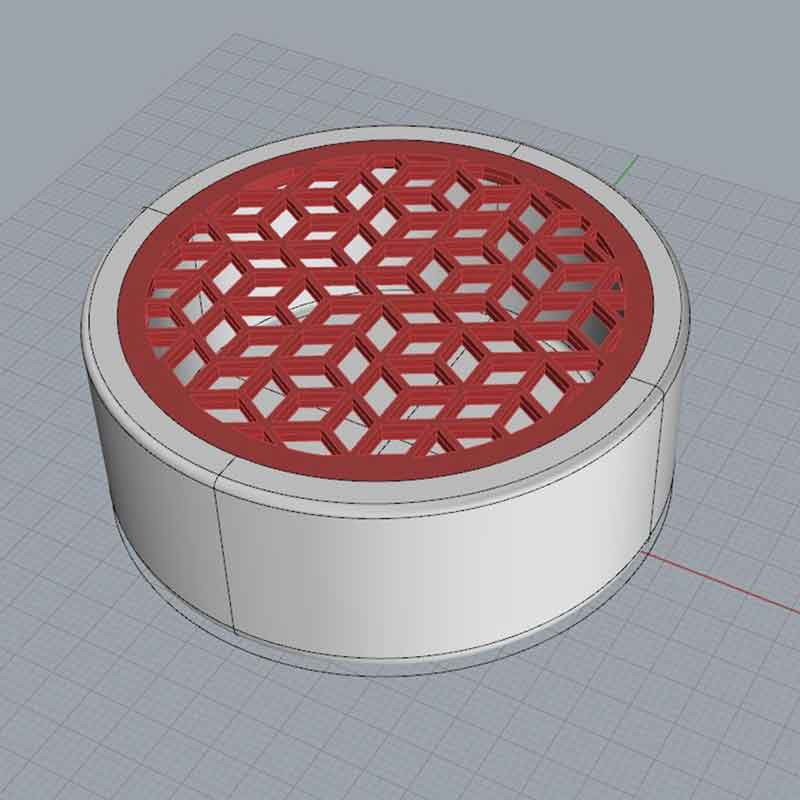
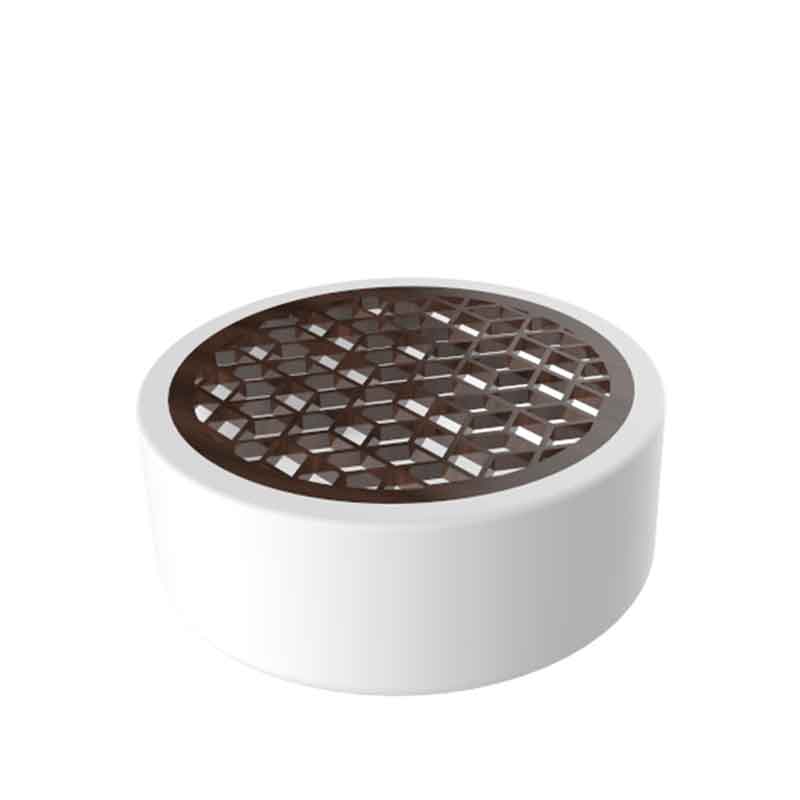
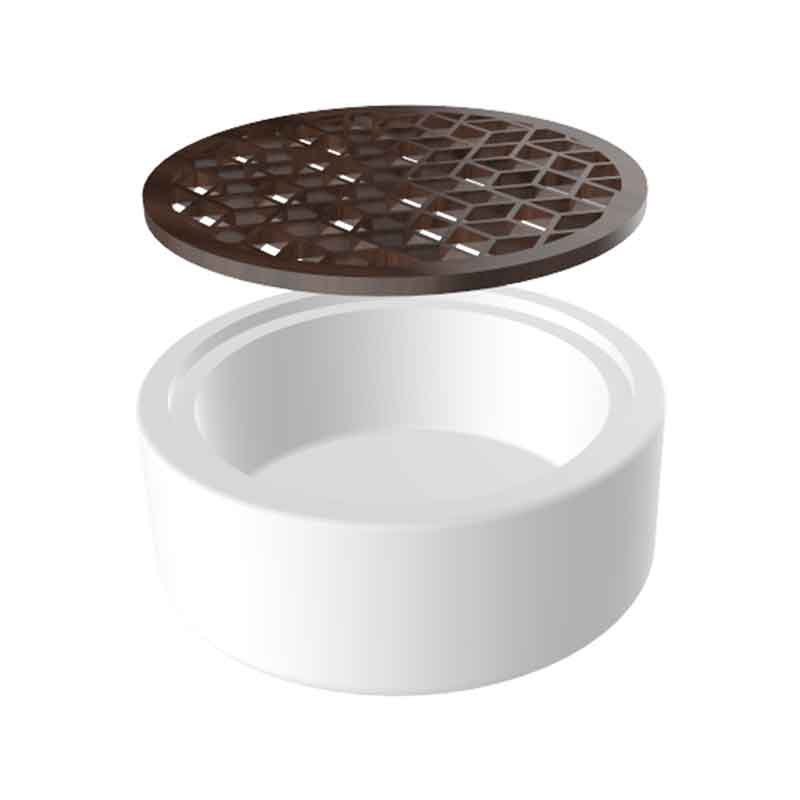
_IDEAS IN PROGRESS
I would like to leave room to experimentation, and some ideas I have is combining 3D printing with laser cutting.
I still have to develop the idea, but I would like to interfere during the 3D printing process and add to the model that is being printed a laser cut part.
Other ideas, not interfering during the printing process, is simply to integrate in the shape two
elements that were done using this two techniques.
I did an example to show this idea:


_DOWNLOAD FILES
Here you can find the files of the week, just click the link that will prompt a window to Sketchfab and proceed to dowload the files:
_Cutter blade holder and stand
STL FILES
_mobility ring
1
_mobility ring
2
_lab cutter
holder
_profile
pamela