Individual assignment
This week I will work on interface using Processing software and communicate between the computer and a HelloBoard (with 2 LEDs and a button). As my knowledge is too little on this field I will start on the field with a simple program to play with my board's LED. I will use Sparkfun's tutorials to create an interface connecting Arduino to Processing, communicating via serial (FTDI).
I want to send a message to the world. During some period of this course, specially facing this assignment I feel a bit lost, so now I guess it is my chance to create a quick tool to speak out.
The S.O.S. (...---...) message is widely known and perceptible since more than one century. I found funny to use this as an example to try on my assignment. So I will create this interactive button to send a blinking message. This message will be read by the Arduino and converted into a blinking sequence between both LEDs that will be output by the HelloBoard.
16.1. Interface in Processing
So first I will start with the Processing code to create the interface. The coding in this software is pretty similar to Arduino's. I need to add the libraries that I need, as well as the font that will appear on the interface.
Then define on the void setup and the size of the display (640x480px), the font and the serial port. Later it comes the void draw which is kind of a void loop, where I define the appearance of my S.O.S. button. In my case, I set a 300x150 px rectangle in safety-orange (255,121,0 in RGB color space), the font, and the size, color and position of the text inside the button.
Now I set a double condition to activate when the mouse is inside the button's area and clicked. The processing will send the SOS message during 3 secs through serial communication to the board.


Now the interface is ready, so it's time for the Arduino code to create the blinking sketch and program the board.
16.2. Programming and comm with Arduino
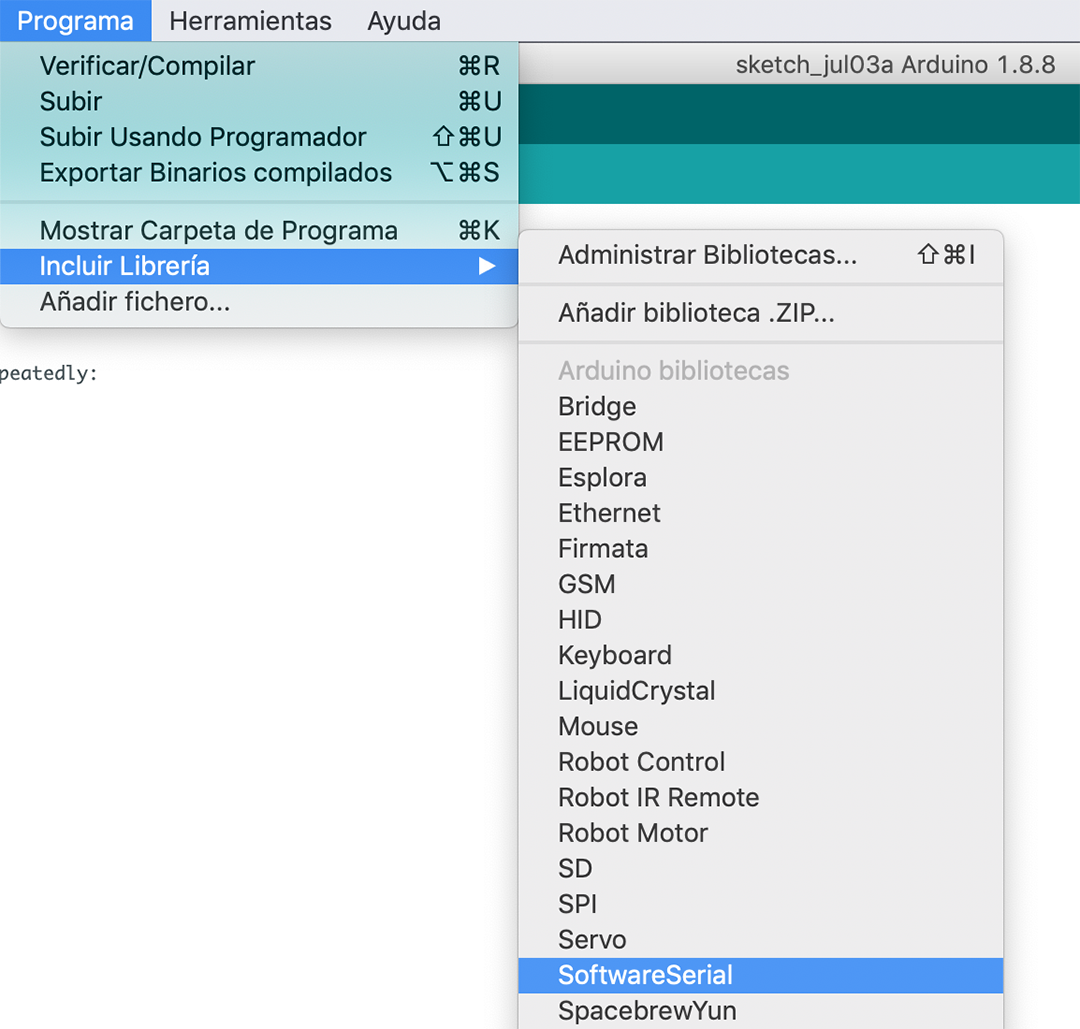
For the serial communication between the interface and the board I will start installing the SoftwareSerial library and including it in the sketch.

Then I define the serial pins for rx tx that are on Attiny's 0 and 1 pins; the string line for the "SOS" message sent by processing, and the 2 LED pins (2 and 3 on HelloBoard).
And for the loop, I am using a ReadStringUntil function to read the string data until the end of the line (\n) (will stop after reading's delay), then the LED program will occur. And this program is set with 2 different blinking speeds: BlinkShort (3 short blinks)and one for BlinkLong (3 long blinks) that will switch on and off each LED 3 times. The sequence for the SOS will be then 3 short 3 long 3 short.

And this would be the blinking program. Then I need to burn the bootloader on the HelloBoard, set the programming parameters on Arduino's menu, and try the interface on Processing.
16.3. Testing
Just keeping the FTDI cable connected to the board, I have to clik on the Play button on Processing, and my new window will pop-out. So I try to click on the button to see what happens:
woo-hoo!
Here you can download the Processing and Arduino files.
