 FABRICIO SANTOS
Week 4 - Electronics Production
Assemble our own fabbable in-system programmer (Fab ISP) for use in the class.
Milling, soldering and programming a Fab ISP board
This week in order to build our PCB we will learn to mill, to solder and to programm a printed circuit board.
|
 |
 |
Milling the FR1 board.
|
Soldering components.
|
Programming USB tiny.
|
To build my own Fab ISP I chose Andy´s model because I like the idea of using the shape of the board as the main USB conector.
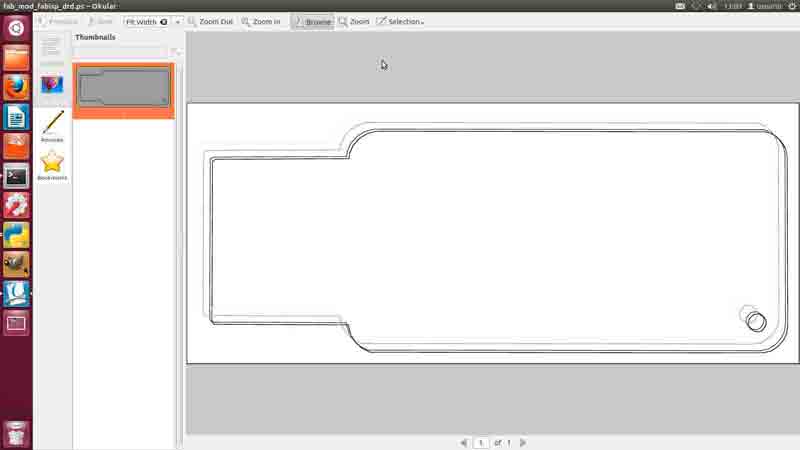
1 Milling the phenolic paper PCB
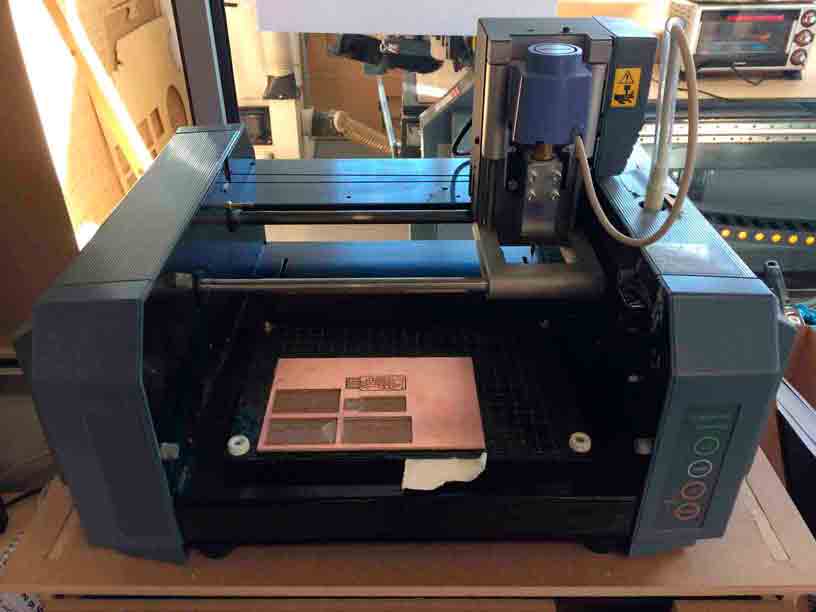
Ussing the Fab Modules with Linux OS and a Rolland Modela MDX-20 Mini Milling Machine.
|
 |
 |
Roland Mini Milling Machine.
|
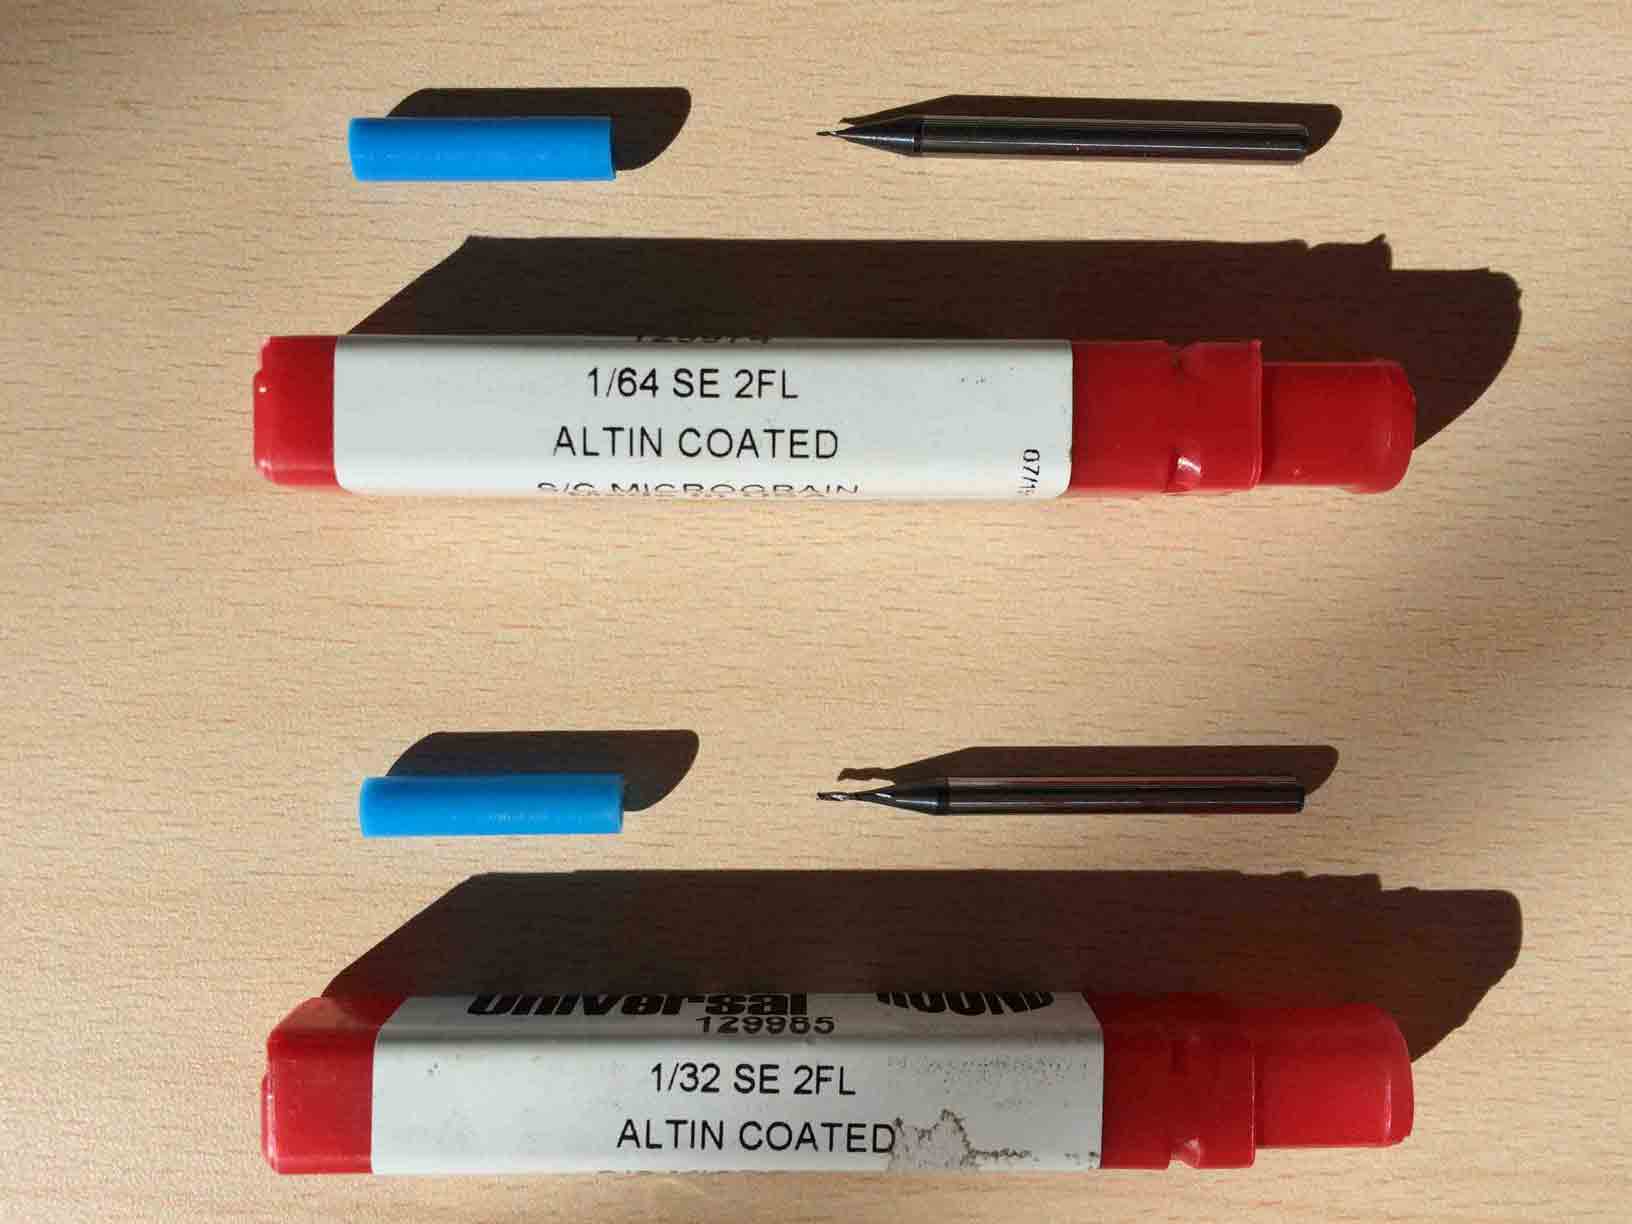
Ø1/64 (0.4mm) and Ø1/32 (0.8mm) milling tools.
|
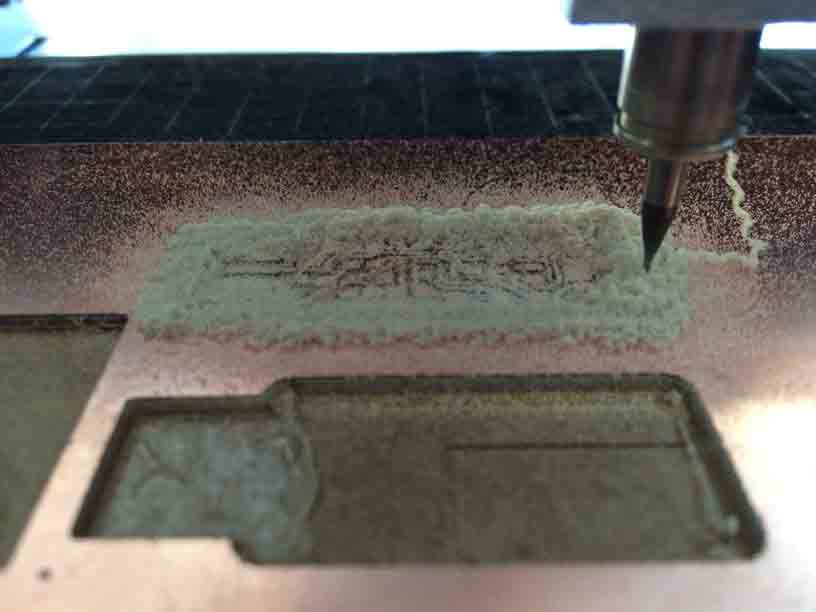
Board milled with a new or an old tool.
|
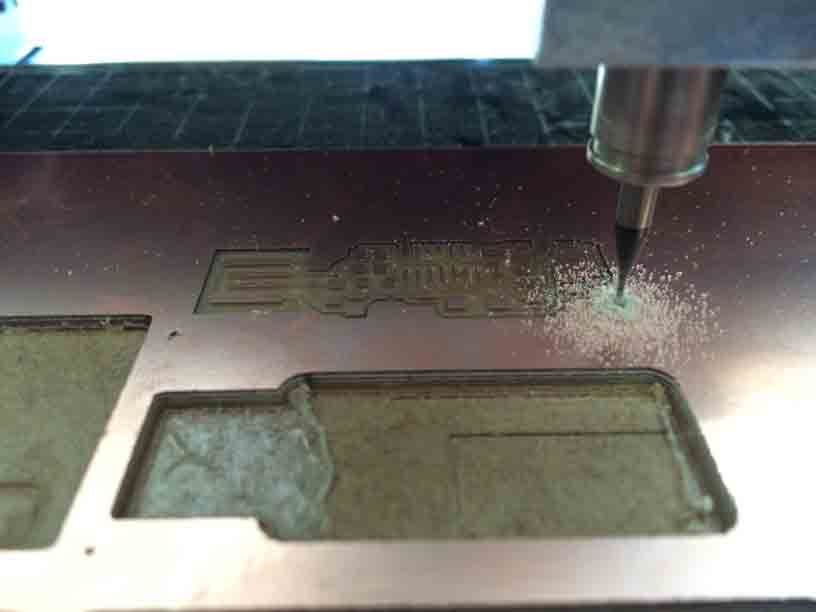
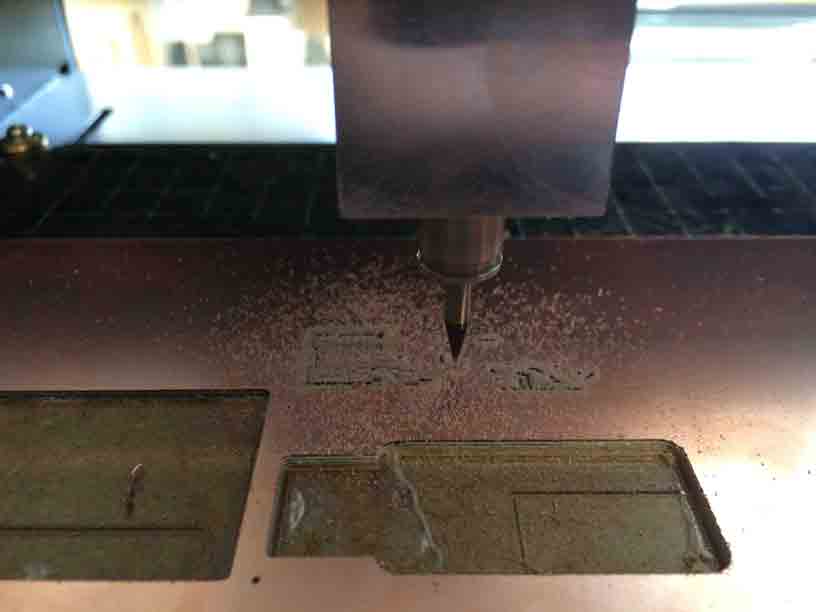
To mill the board we should send two routines to the milling machine: the inner tracks and the outter boundary.
The inner board traces with the 1/64 diameter tool, that goes faster and has to make various paralel paths in order to remove all the cupper to discover the tracks.
|
 |
 |
 |
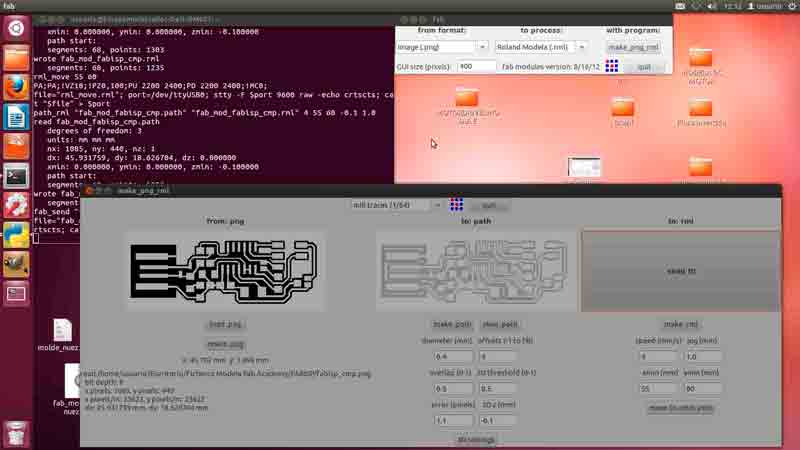
1 PCB traces in .png file. |
2 Presetting with Fab Modules. |
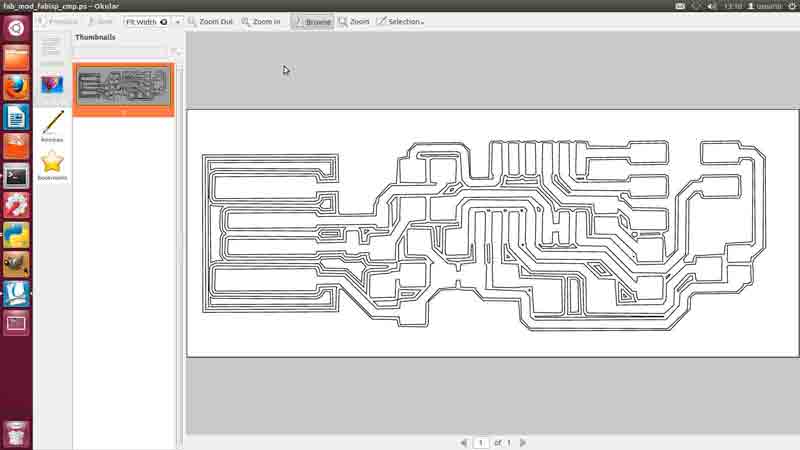
3 Preview of the paths before milling. |
4 Milling with Roland MDX-20. |

The boundary of the board with the 1/32 diameter tool, that goes slower and has to repeat the path with progressive depths in order to cross the entire thickness of the material.
|
 |
 |
 |
1 PCB boundary. |
2 Presetting with Fab Modules. |
3 Preview of the paths before milling. |
4 Milling with Roland Modela. |

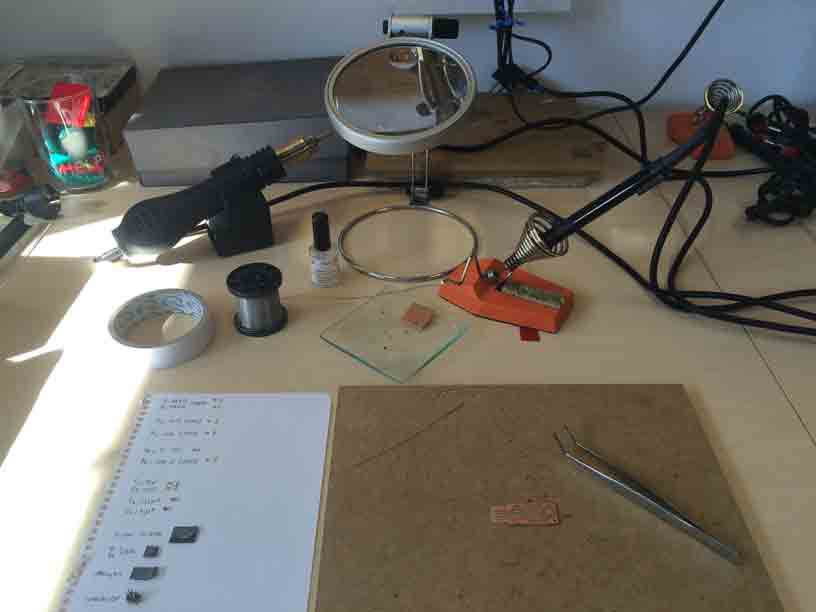
2 Soldering the components to the board
|
 |
 |
Selecting Andy´s FabISP components.
|
Soldering components.
|
Cheking board conections.
|
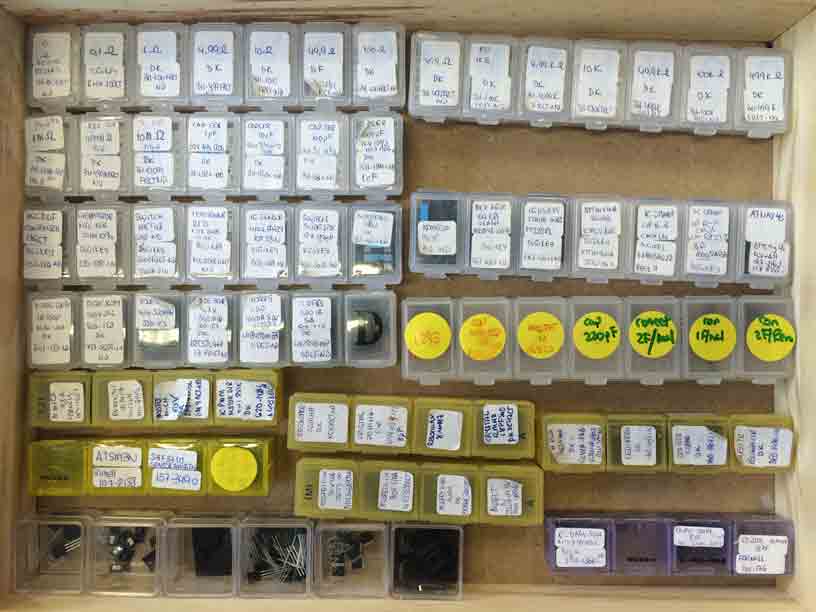
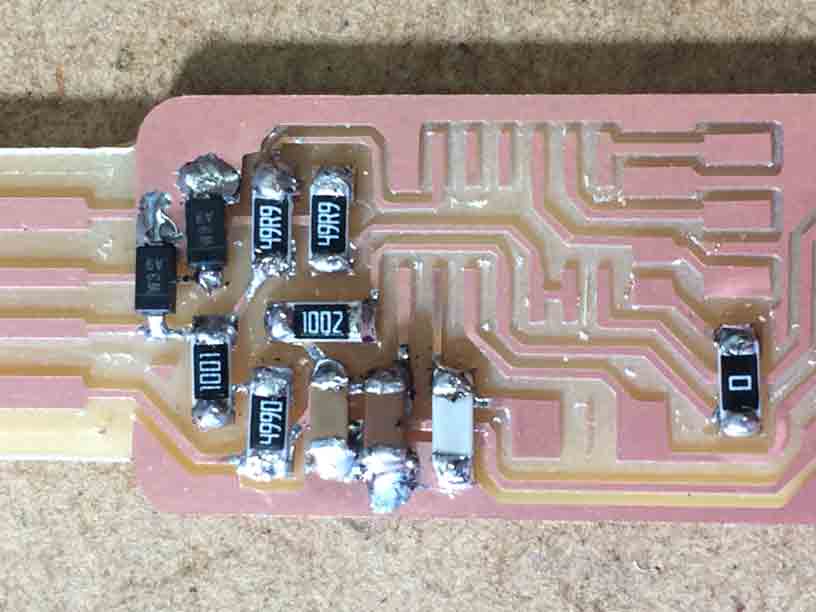
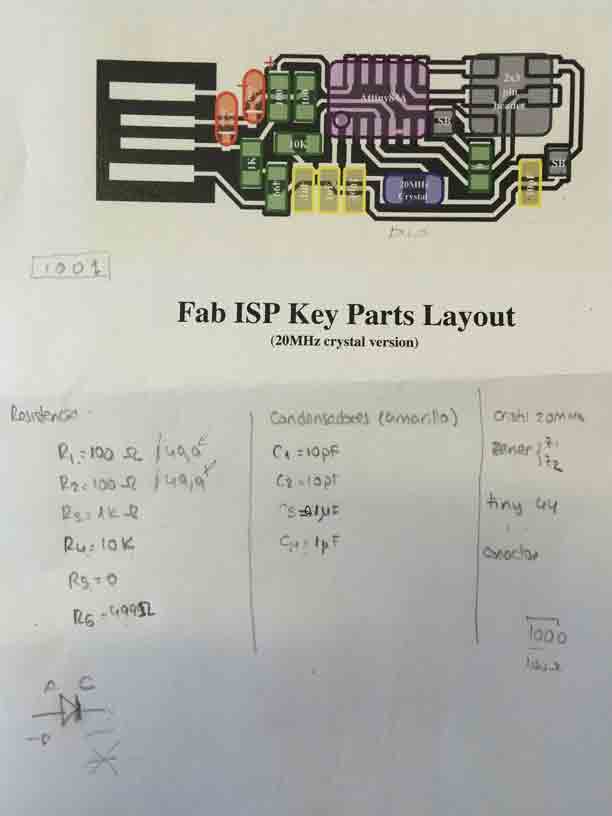
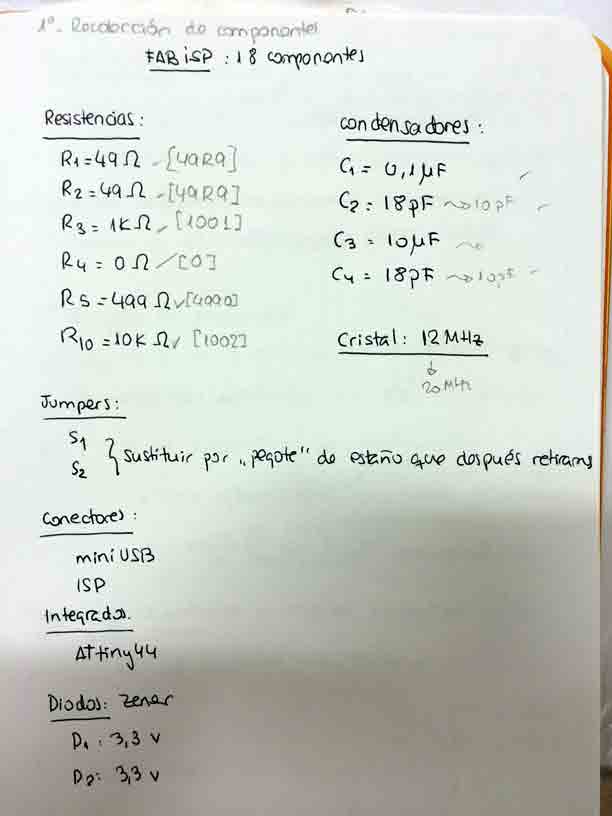
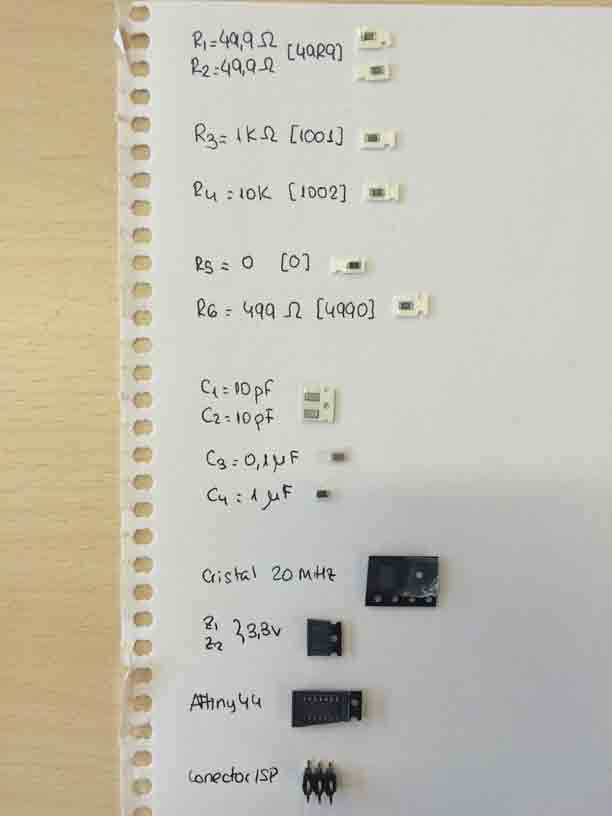
2.1. Selecting board components.
Following Andy´s FabISP key parts layout I chose the components and undestanding what function do everyone.
 |
 |
 |
FabISP Andy key parts layaout. |
FabISP Andy components. |
FabISP Andy components aspect. |
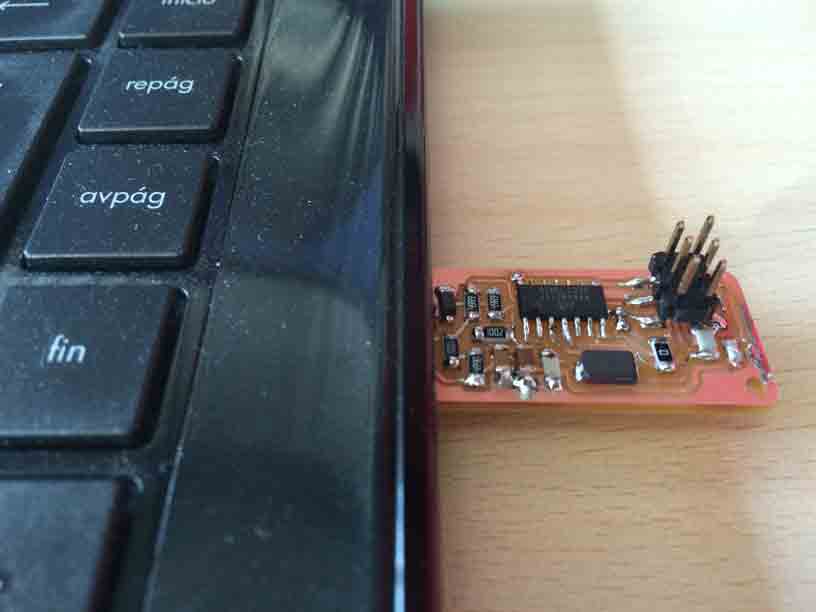
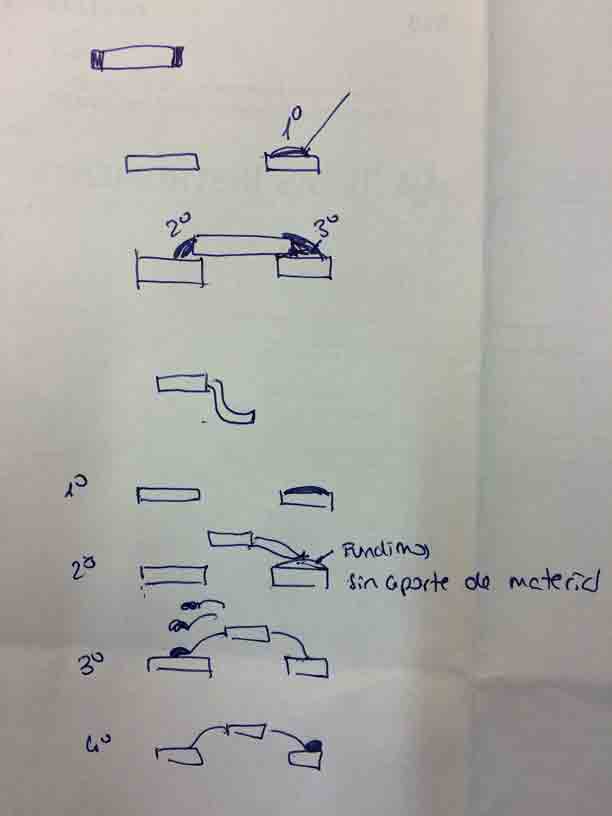
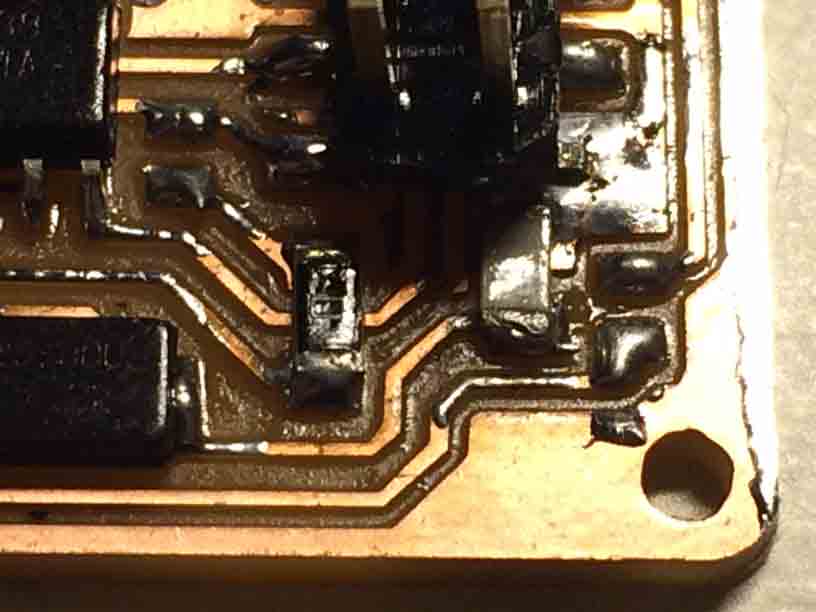
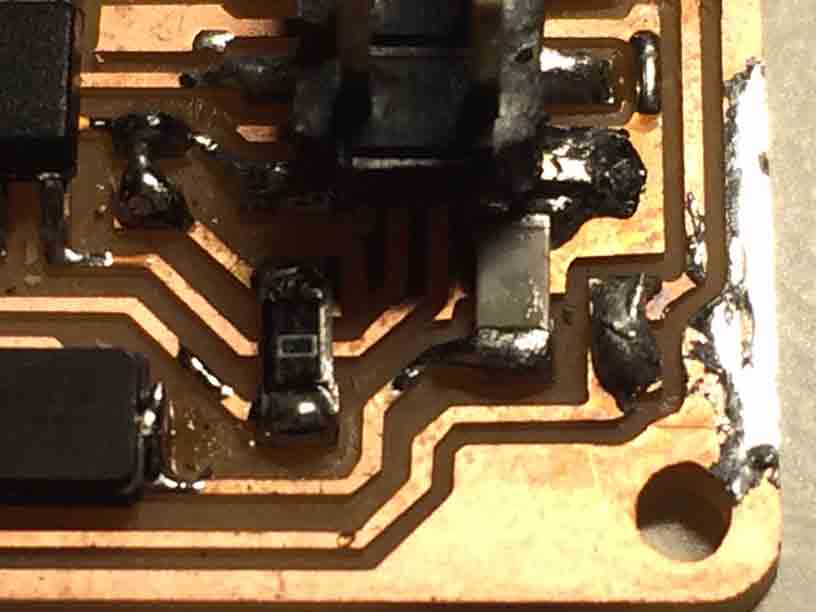
2.2. Soldering components.
Using a Ø1mm diameter welder and tin.
 |
|
 |
How to soldering. |
Firsts soldered components. |
FabISP compleately soldered. |
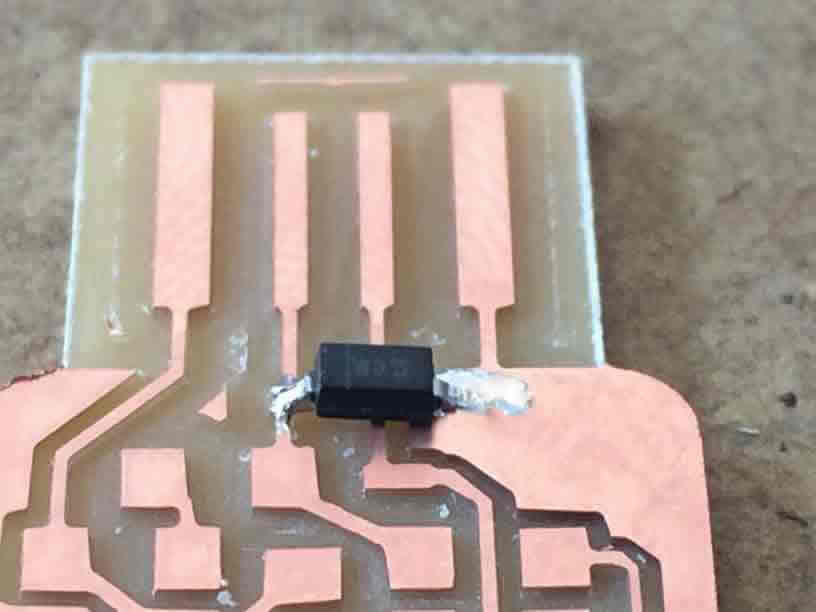
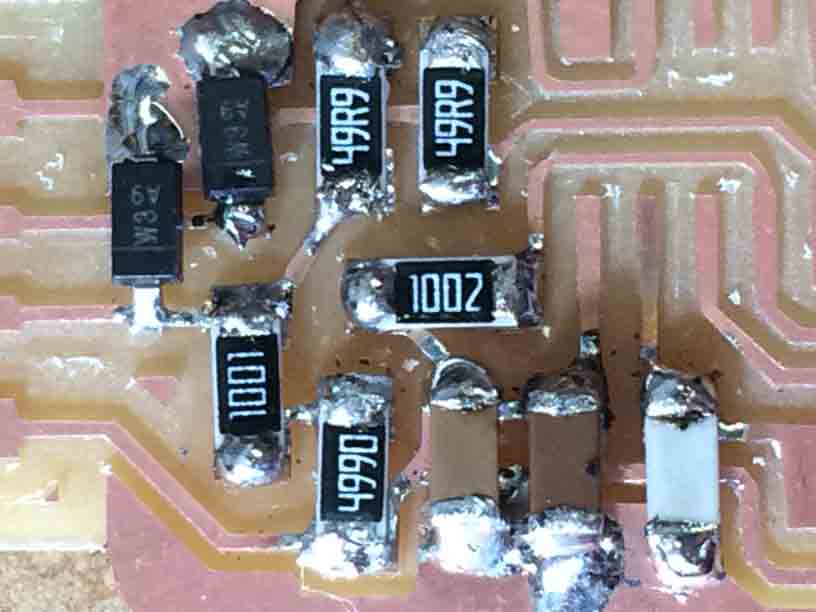
After soldering I checked every conection of the circuit with a multimeter in 200Ω and everithing was well welded because the machine bep in every track test.
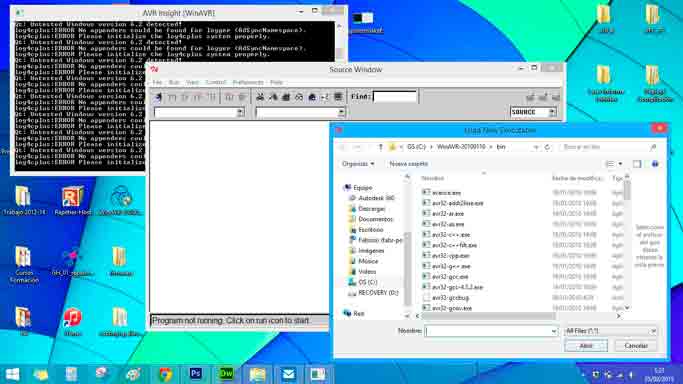
3 Programing the board in Windows 8.1
Although I fallowed the Fab Academy 2015 / Tutorials / Week 4 : FabISP: Programming, I found it very difficult to achieve every step because it was the first time I faced programming a board...
So I decided to make my own tutorial explaining every problem and its solution I found:
 |
|
 |
 |
1 Instal WinAVR. |
2 Select USBtiny firmware for it. |
3 Edit Makefile with Notepad++. |
4 Program USBtiny with Cygwin. |
3.1. Instal WinAVR
 |
|
Advanced Configuration. |
Disabling Secure Boot in BIOS. |
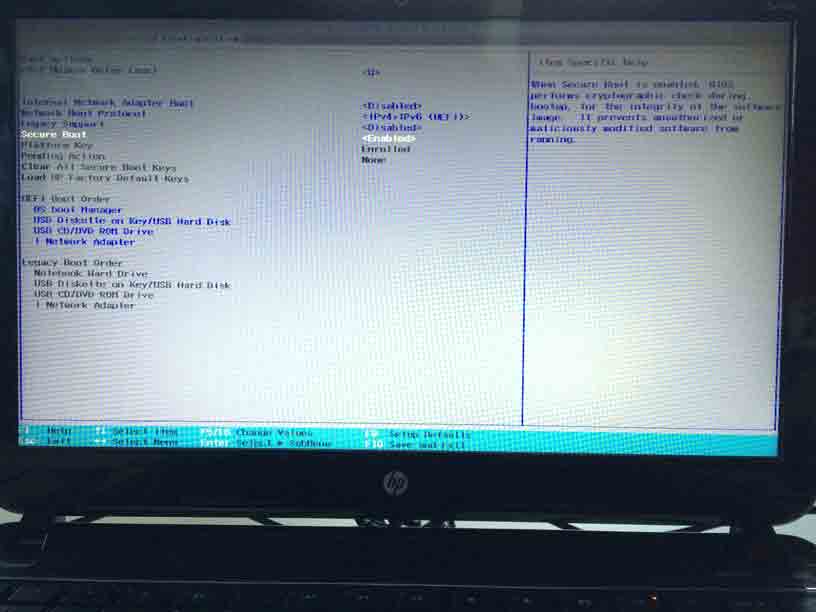
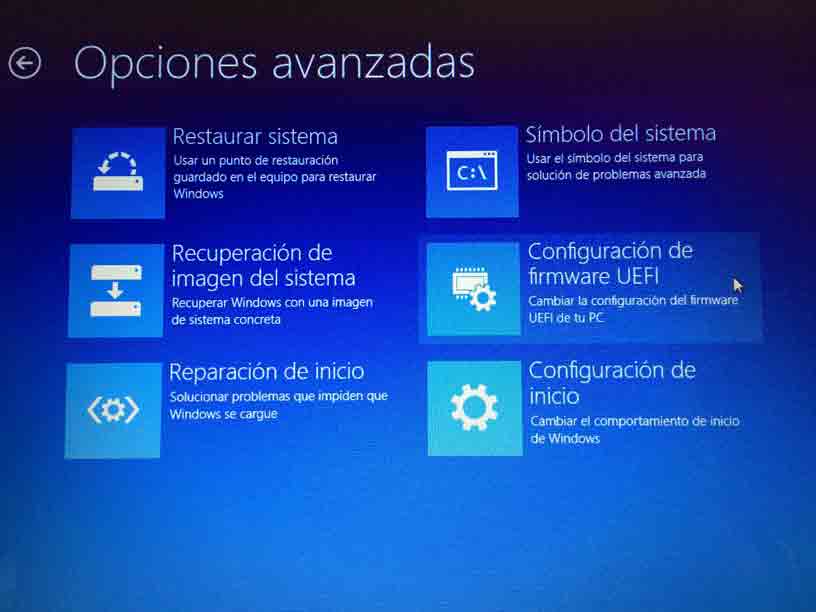
To instal Win RAR I should disabled secure boot in the computer BIOS doing the next steps:
Configuración / Cambiar Configuración de PC / Actualizar y Recuperar / Recuperación / Inicio Avanzado / Reiniciar Ahora...
Solucionar Probleas / Opciones Avanzadas / Configuración de firmware UEFI / Reiniciar...
F10 BIOS Setuo / System Configuration / Boot Options / Secure Boot / F5 (change) > enabled / F10 (save and exit) / YES...
3.2. Select USBtiny firmware for it
 |
|
|
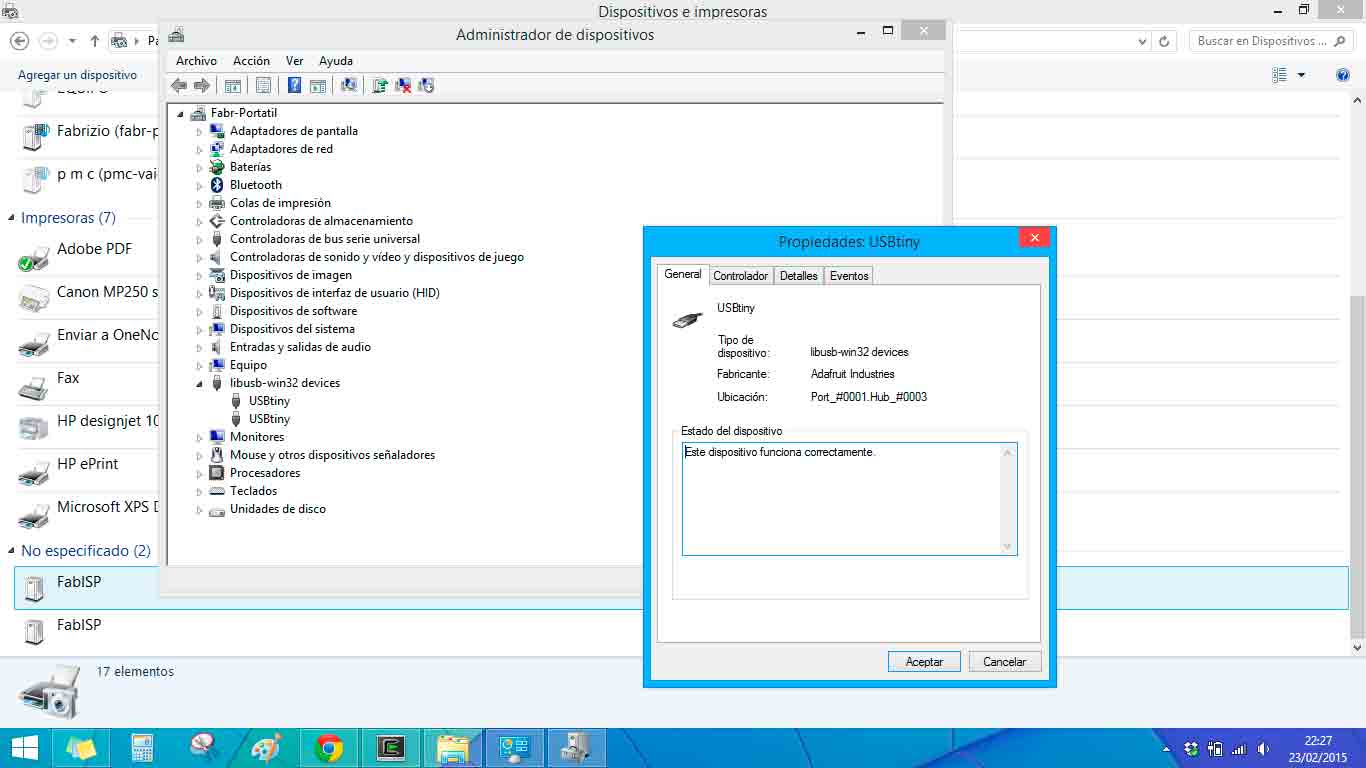
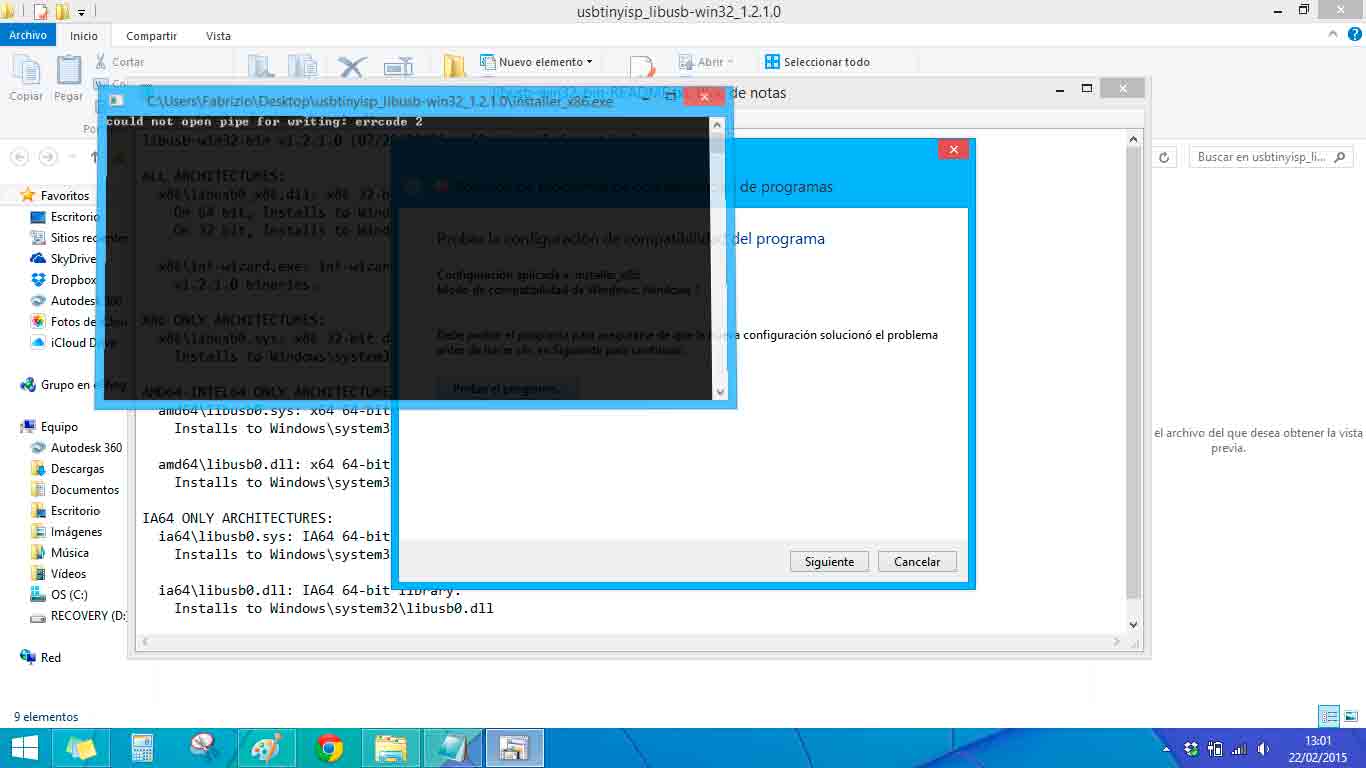
Error message while cliking installer_x64.exe |
FabISP did not recognize its controller. |
FabISP recognized its controller USBtiny.inf |
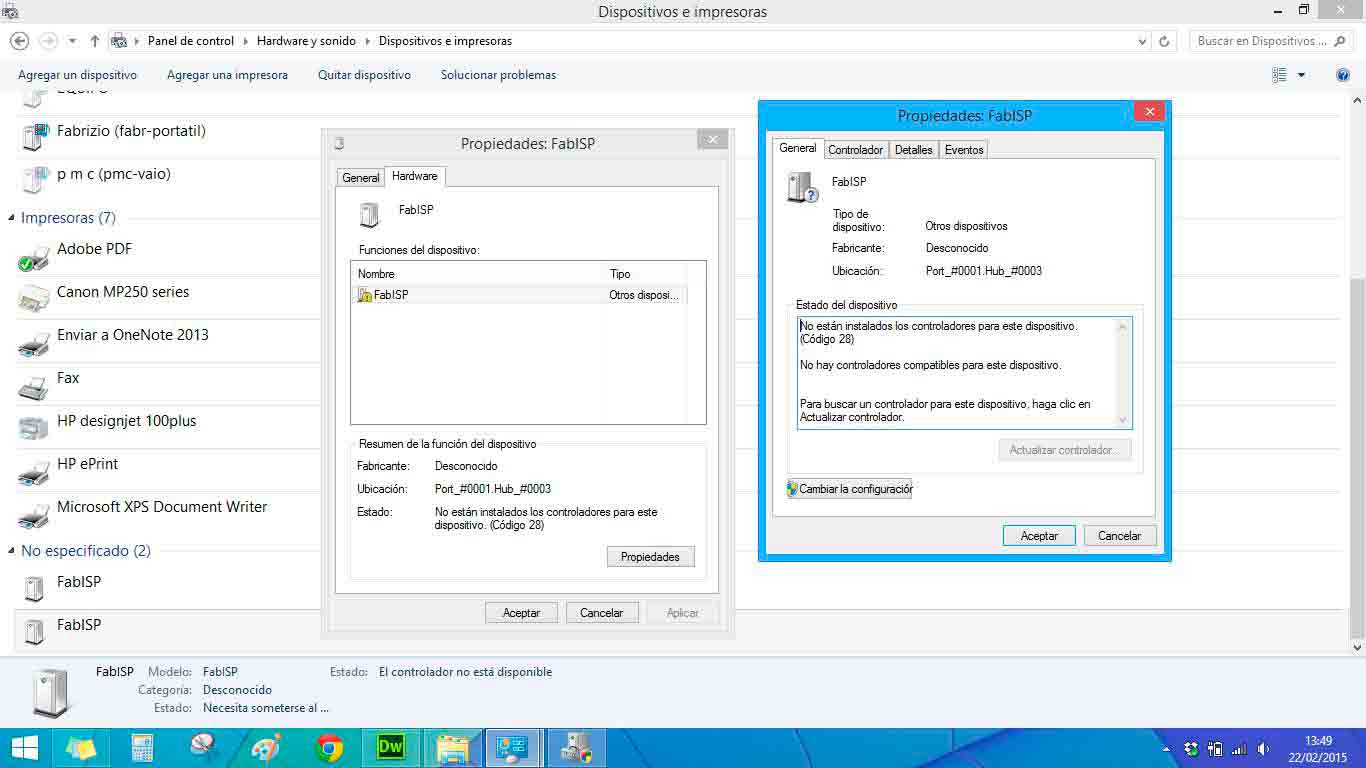
Problem: To select the USBtiny drivers you do not need to instal the executable file for your OS version (installer_x64.exe).
Solution: You should select the information file contained on this folder (USBtiny.inf).
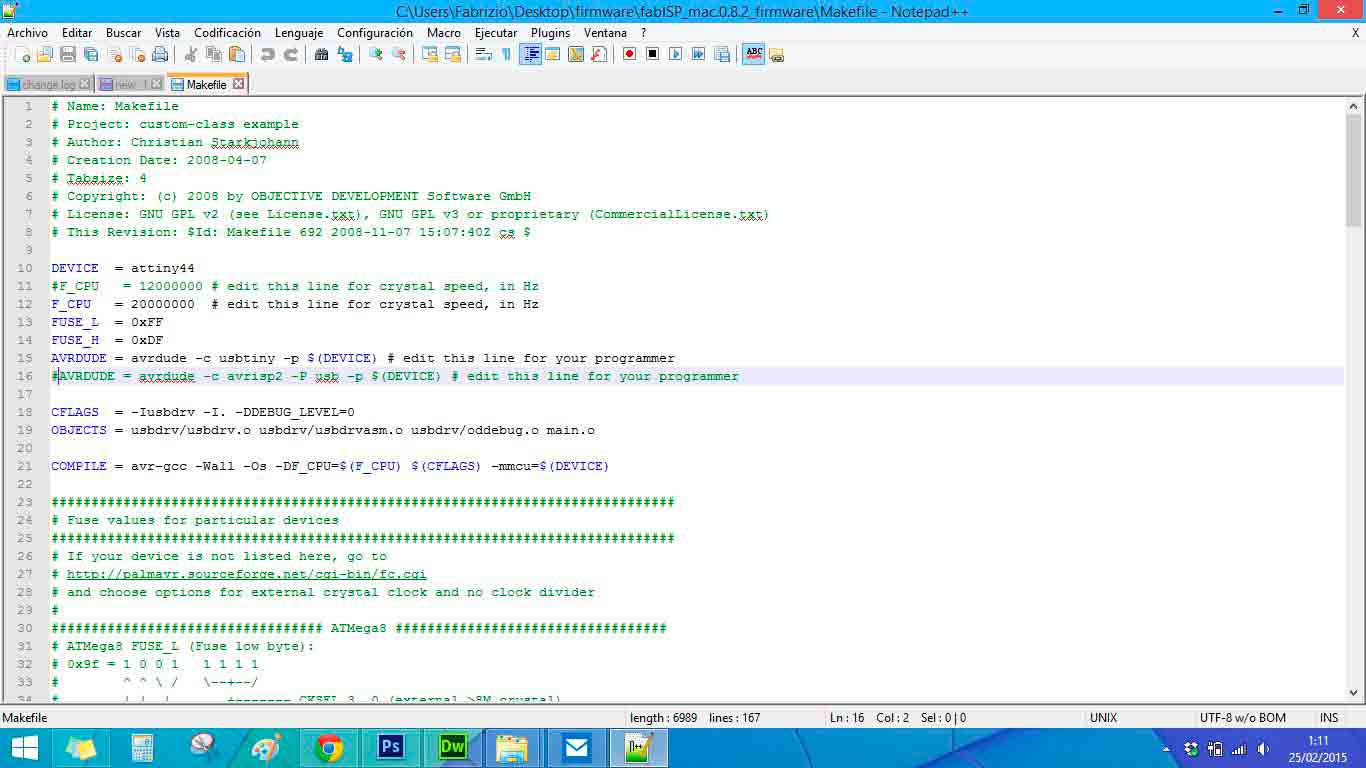
3.3. Edit Makefile with Notepad++
|
|
Editing Makefile with Notepad++ contained on dawnloaded folder firmware. |
Conecting my FabISP with a programmed FabISP. |
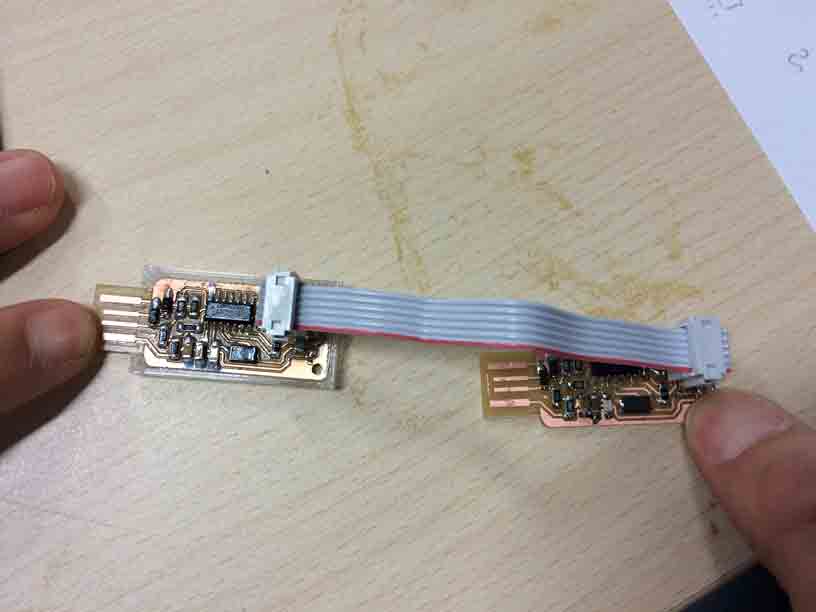
We used a programmed FabISP to program the new one. Make sure to conect the cable in the same direction in both boards fallowing the red line.
3.4. Program USBtiny with Cygwin
 |
|
|
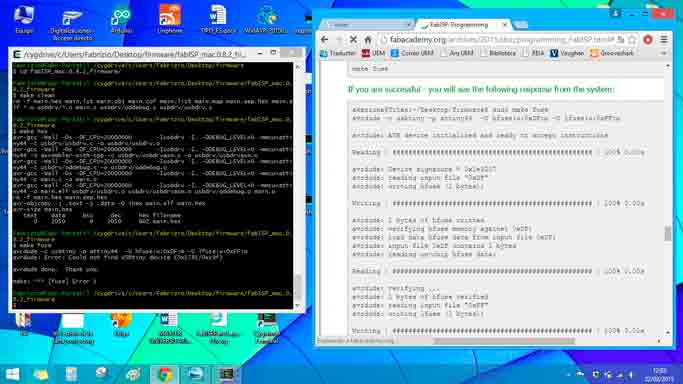
Error message while make fuse. |
FabISP´s conected in two computers. |
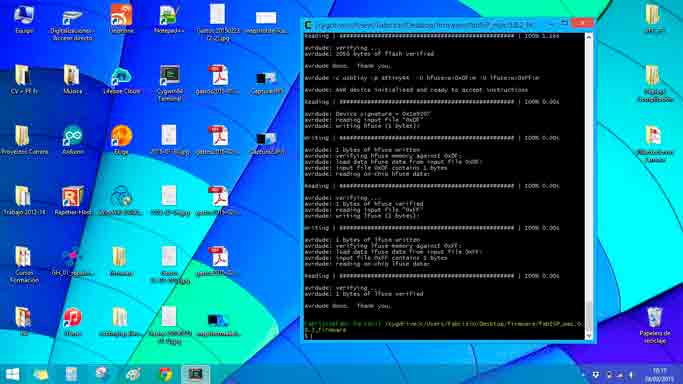
FabISP successfully programmed. |
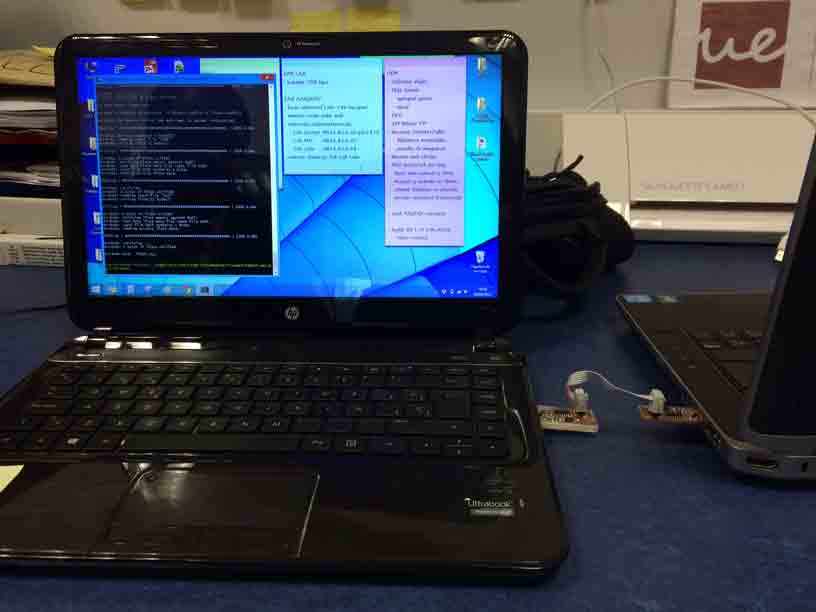
Both FabISP´s need to be electrically feed by conecting its USB to the computer so I put the two boards in two diferrent ports of the same side of my computer and I started with the programming orders:
make clean (OK)
make hex (OK)
make fuse (ERROR)
Problem: When both boards are conected to the same computer did not properly work.
Solution: You should conect each one in different computers, the new one in the computer you are introducing the orders and the programed board only needs power from other USB port from another computer. But they should be still conect between them.
make fuse (OK)
make program (OK)
Now my FabISP is programmed!
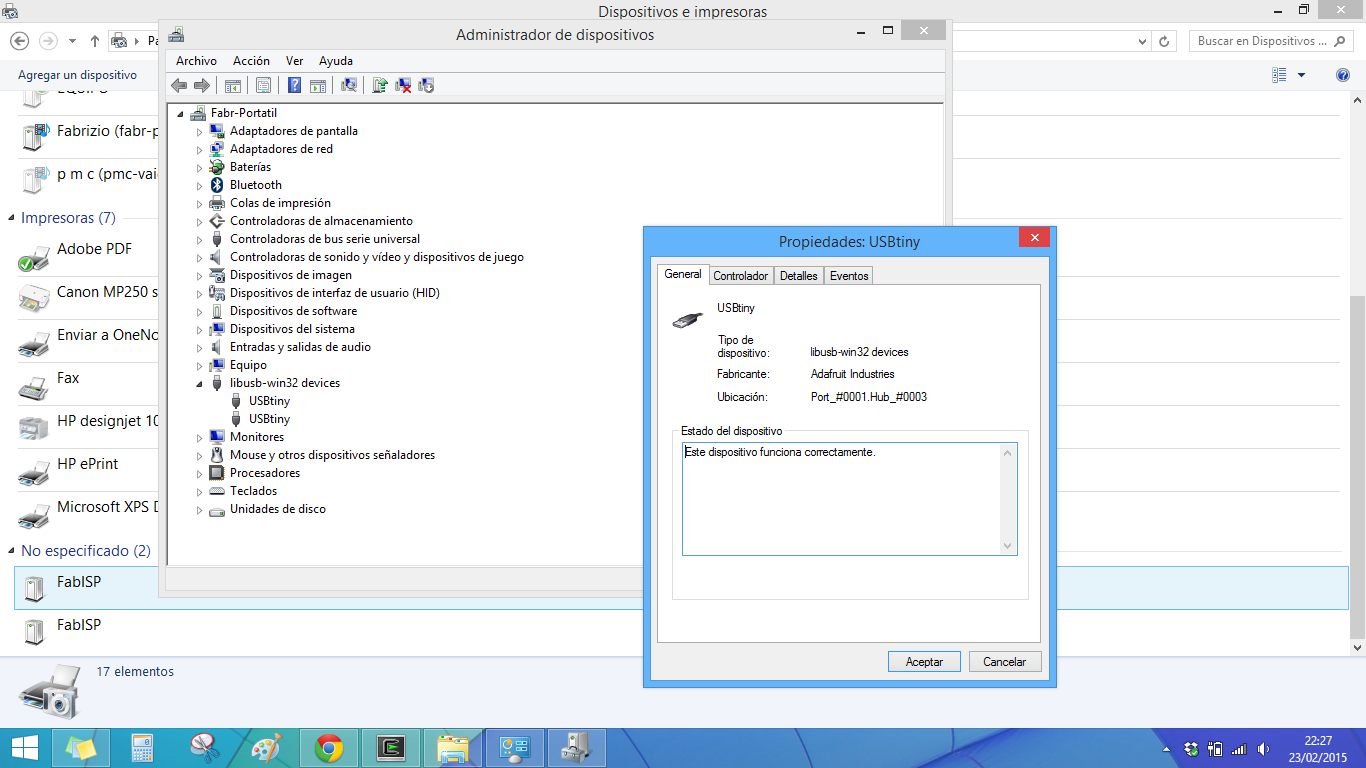 |
Fab ISP recognized device in my laptop! |
3.5. Desolder bridges (SJ1 and SJ2)
 |
|
 |
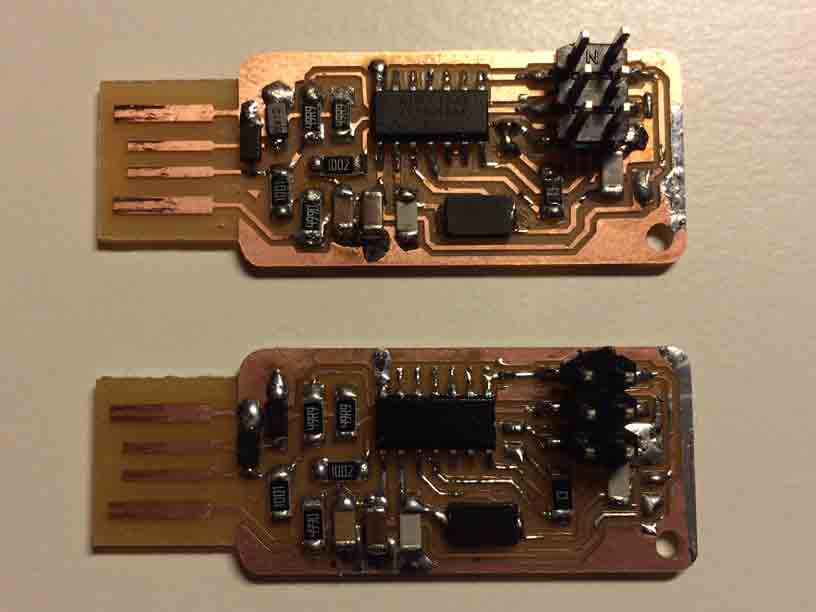
Two programmed FabISP´s. |
Programmed FabISP with soldering bridges. |
Programmed FabISP with desoldering bridges. |
We used the welder to desolder the SJ1 and SJ2 points in order to keep the board programmed forever.

