Week 4
Electronics Production
PCB Fabrication
The assignment for this week was to make the FabISP (In-system programming). The FabISP is an in-system programmer for AVR microcontrollers, that allows you to program the microcontrollers on other boards using a USB cable and 6-pin IDC to 6-pin IDC cable. We will be using these programmers through the semester to program the other boards we create.
Making the FABIsp
It was the first time I "touched" concretely the argument "electronic".I was a bit scared, but it's over when I started to work.
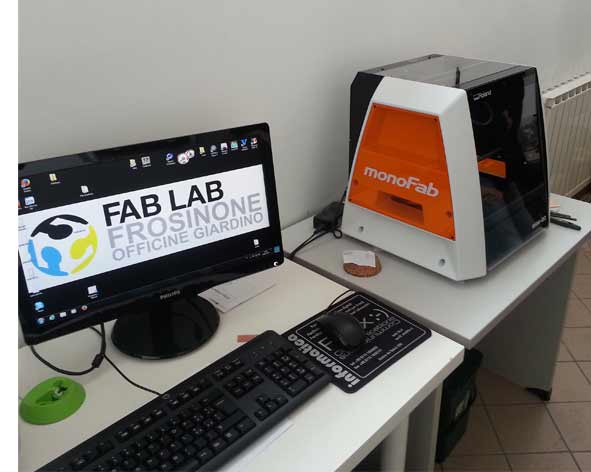
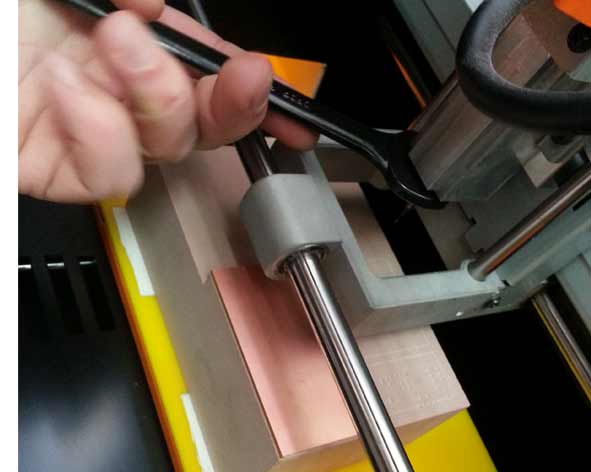
I made the ISP from a copper plate using the Roland monoFab SRM-20 milling machine.
Procedure:
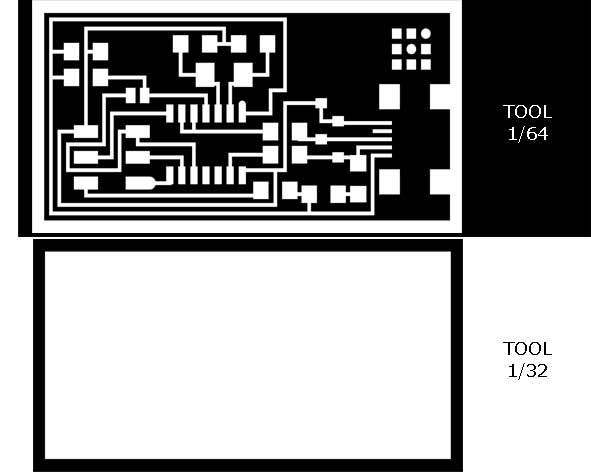
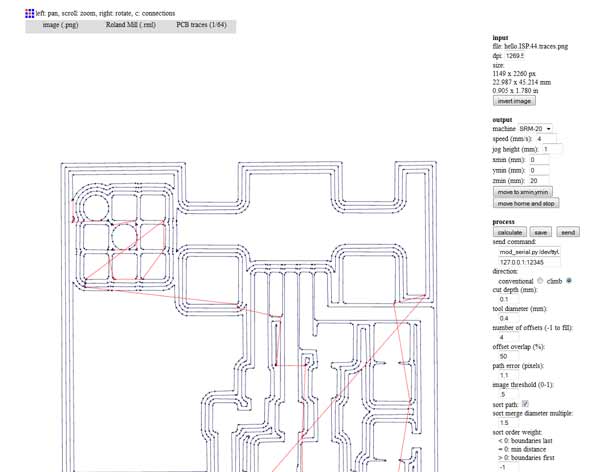
- Download the Board Files; hello.ISP.44.traces.png and hello.ISP.44.interior.png;
- I generated the gcode .rml files (this is the format that Roland monoFab SRM-20 milling machine reads) using the FABModules an online software create by Fiore Basile in Fab Academy 2014;
- Open fabmodules.org;
- Push on Input Format;
- Choose Image(.png) and Upload Image;
- Push on Output Format and choose the machine (Roland Mill (.rml));
- Setting machine: machine SRM-20; Xmin 0; Ymin 0;
- Push on Process and choose (PCB traces(1/64) or (PCB outline(1/32);
- Change offset 5 (the offset is a personal setting);
- Push on Calculate;
- Save;
- If the machine is turn off for a long time, turn on the machine for the heating, at least for 15/20 minutes;
- When the machine is ready, mount the tool on the machine and setting the milling coordinates in the Vpanel software on the terminal: first the XY axes then the Z one.;
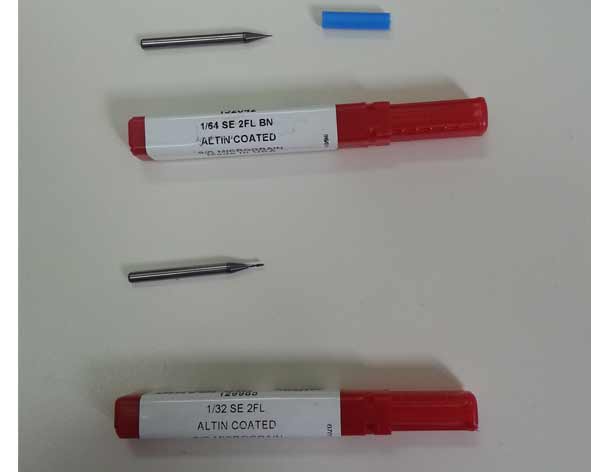
-start to mill the hello.ISP.44.traces.rml file using the tool 1/64 size;
-change the tool with a tool 1/32 size in order to cut the hello.ISP.44.interior.rml;
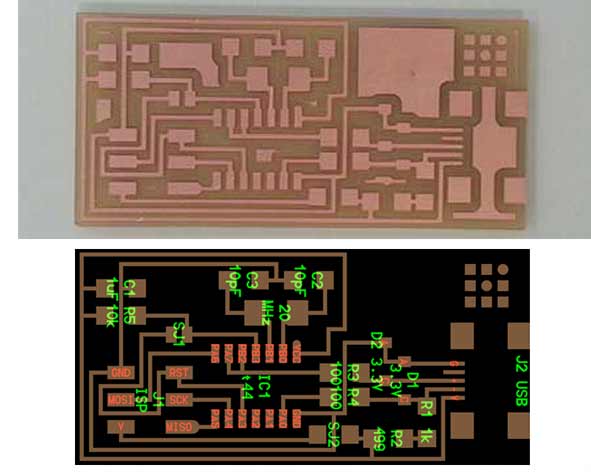
After finishing the milling process I had to solder the components on the board.
Components:
- 1 ATTiny 44 microcontroller
- 1 Capacitor 1uF
- 2 Capacitor 10 pF
- 2 Resistor 100 ohm
- 1 Resistor 499 ohm
- 1 Resistor 1K ohm
- 1 Resistor 10K
- one 6 pin header
- 1 USB connector
- 2 jumpers - 0 ohm resistors
- 1 Cystal 20MHz
- two Zener Diode 3.3 V
- one usb mini cable
- one ribbon cable
- two 6 pin connectors
It was the first time I try to solder. After this experience I realized that I need a lot of training, but in the end I did it: I soldered my first PBC.
Very important thing to do is to always test each component and trace, using the tester to avoid that there are contacts or short circuits.
Before Programming
I used USBasp - USB programmer for Atmel AVR controllers to program the microcontroller ATtiny44A of FabISP.
For this reason I had to change a line in the Makefile to tell to the system to use usbasp: AVRDUDE = avrdude -c usbasp -p $(DEVICE) # edit this line for your programmer.
To start I need to have Softwares dependencies and Firmware installed (in my case I used Operating Sysem Ubuntu):
- Open Terminal and type: sudo apt-get install flex byacc bison gcc libusb-dev avrdude
- Then type: sudo apt-get install gcc-avr
- Type "y" when asked to do so by your system
- Then type: sudo apt-get install avr-libc
-Then type (may already be installed): sudo apt-get install libc6-dev
-Move to the desktop: cd ~/Desktop
-Download the firmware from the Fab Academy Electronics Production page: wget http://academy.cba.mit.edu/classes/embedded_programming/firmware.zip
-Unzip the firmware: unzip firmware.zip
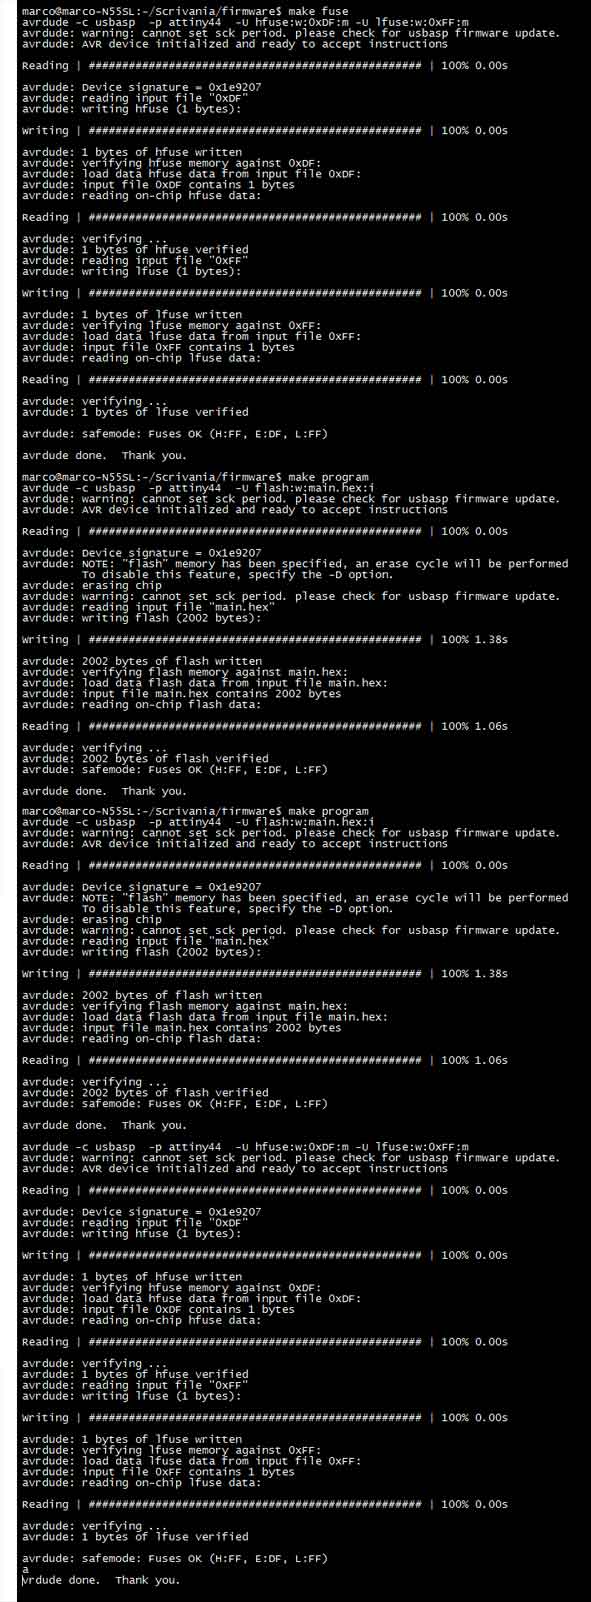
Programming FabISP
To program the ISP I followed this Tutorial
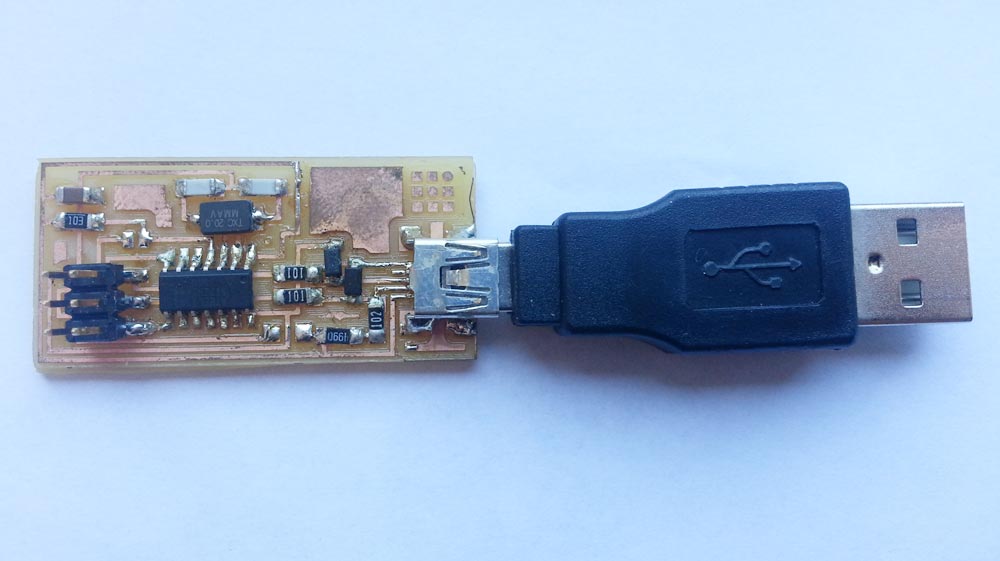
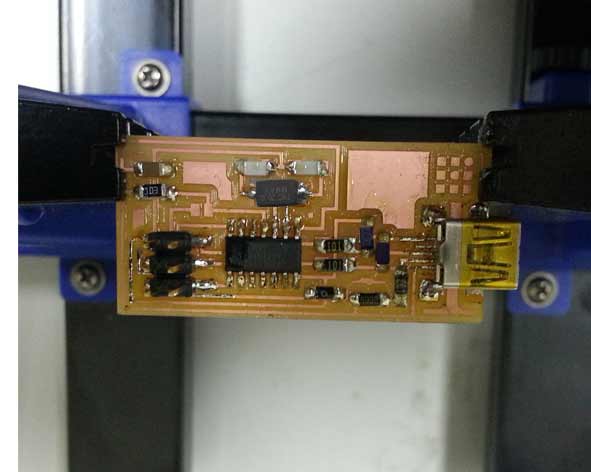
I programmed FabISP as shown in the tutorial, but I had a lot of problems: the computer did not recognize the programmer. I tried again a few times and I realized that the computer occasionally receiving a signal. The usb mini had a problem of contact, could not keep constantly the connection. I stuck the usb mini with a little hot glue and I added a USB adapter. In this way I solved the problem.
Steps to programming the microcontroller of Fab ISP:
- Type: cd Scrivania/firmware;
- Compiling the firmware. Type: make clean ;
- Then type: make hex ;
- Setting the fuses. Type: make fuse ;
- Programming the board. Then type: make program ;
After Programming
Remove the 0 ohm resistor and solder bridge to use the programmer
Download Files
PNG FabISP:
Programs: CS Eagle, Photoshop.
Machinery: Roland SRM-20.